LogoLogo
HomeAPI & SDKsProjectsForumStudio
  • Getting started
    • For beginners
    • For ML practitioners
    • For embedded engineers
  • Frequently asked questions (FAQ)
  • Tutorials
    • End-to-end tutorials
      • Computer vision
        • Image classification
        • Object detection
          • Object detection with bounding boxes
          • Detect objects with centroid (FOMO)
        • Visual anomaly detection
        • Visual regression
      • Audio
        • Sound recognition
        • Keyword spotting
      • Time-series
        • Motion recognition + anomaly detection
        • Regression + anomaly detection
        • HR/HRV
        • Environmental (Sensor fusion)
    • Data
      • Data ingestion
        • Collecting image data from the Studio
        • Collecting image data with your mobile phone
        • Collecting image data with the OpenMV Cam H7 Plus
        • Using the Edge Impulse Python SDK to upload and download data
        • Trigger connected board data sampling
        • Ingest multi-labeled data using the API
      • Synthetic data
        • Generate audio datasets using Eleven Labs
        • Generate image datasets using Dall-E
        • Generate keyword spotting datasets using Google TTS
        • Generate physics simulation datasets using PyBullet
        • Generate timeseries data with MATLAB
      • Labeling
        • Label audio data using your existing models
        • Label image data using GPT-4o
      • Edge Impulse Datasets
    • Feature extraction
      • Building custom processing blocks
      • Sensor fusion using embeddings
    • Machine learning
      • Classification with multiple 2D input features
      • Visualize neural networks decisions with Grad-CAM
      • Sensor fusion using embeddings
      • FOMO self-attention
    • Inferencing & post-processing
      • Count objects using FOMO
      • Continuous audio sampling
      • Multi-impulse (C++)
      • Multi-impulse (Python)
    • Lifecycle management
      • CI/CD with GitHub Actions
      • Data aquisition from S3 object store - Golioth on AI
      • OTA model updates
        • with Arduino IDE (for ESP32)
        • with Arduino IoT Cloud
        • with Blues Wireless
        • with Docker on Allxon
        • with Docker on Balena
        • with Docker on NVIDIA Jetson
        • with Espressif IDF
        • with Nordic Thingy53 and the Edge Impulse app
        • with Particle Workbench
        • with Zephyr on Golioth
    • API examples
      • Customize the EON Tuner
      • Ingest multi-labeled data using the API
      • Python API bindings example
      • Running jobs using the API
      • Trigger connected board data sampling
    • Python SDK examples
      • Using the Edge Impulse Python SDK to run EON Tuner
      • Using the Edge Impulse Python SDK to upload and download data
      • Using the Edge Impulse Python SDK with Hugging Face
      • Using the Edge Impulse Python SDK with SageMaker Studio
      • Using the Edge Impulse Python SDK with TensorFlow and Keras
      • Using the Edge Impulse Python SDK with Weights & Biases
    • Expert network projects
  • Edge Impulse Studio
    • Organization hub
      • Users
      • Data campaigns
      • Data
        • Cloud data storage
      • Data pipelines
      • Data transformation
        • Transformation blocks
      • Upload portals
      • Custom blocks
        • Custom AI labeling blocks
        • Custom deployment blocks
        • Custom learning blocks
        • Custom processing blocks
        • Custom synthetic data blocks
        • Custom transformation blocks
      • Health reference design
        • Synchronizing clinical data with a bucket
        • Validating clinical data
        • Querying clinical data
        • Transforming clinical data
    • Project dashboard
      • Select AI hardware
    • Devices
    • Data acquisition
      • Uploader
      • Data explorer
      • Data sources
      • Synthetic data
      • Labeling queue
      • AI labeling
      • CSV Wizard (time-series)
      • Multi-label (time-series)
      • Tabular data (pre-processed & non-time-series)
      • Metadata
      • Auto-labeler | deprecated
    • Impulses
    • EON Tuner
      • Search space
    • Processing blocks
      • Audio MFCC
      • Audio MFE
      • Audio Syntiant
      • Flatten
      • HR/HRV features
      • Image
      • IMU Syntiant
      • Raw data
      • Spectral features
      • Spectrogram
      • Custom processing blocks
      • Feature explorer
    • Learning blocks
      • Anomaly detection (GMM)
      • Anomaly detection (K-means)
      • Classification
      • Classical ML
      • Object detection
        • MobileNetV2 SSD FPN
        • FOMO: Object detection for constrained devices
      • Object tracking
      • Regression
      • Transfer learning (images)
      • Transfer learning (keyword spotting)
      • Visual anomaly detection (FOMO-AD)
      • Custom learning blocks
      • Expert mode
      • NVIDIA TAO | deprecated
    • Retrain model
    • Live classification
    • Model testing
    • Performance calibration
    • Deployment
      • EON Compiler
      • Custom deployment blocks
    • Versioning
    • Bring your own model (BYOM)
    • File specifications
      • deployment-metadata.json
      • ei-metadata.json
      • ids.json
      • parameters.json
      • sample_id_details.json
      • train_input.json
  • Tools
    • API and SDK references
    • Edge Impulse CLI
      • Installation
      • Serial daemon
      • Uploader
      • Data forwarder
      • Impulse runner
      • Blocks
      • Himax flash tool
    • Edge Impulse for Linux
      • Linux Node.js SDK
      • Linux Go SDK
      • Linux C++ SDK
      • Linux Python SDK
      • Flex delegates
      • Rust Library
    • Rust Library
    • Edge Impulse Python SDK
  • Run inference
    • C++ library
      • As a generic C++ library
      • On Android
      • On your desktop computer
      • On your Alif Ensemble Series Device
      • On your Espressif ESP-EYE (ESP32) development board
      • On your Himax WE-I Plus
      • On your Raspberry Pi Pico (RP2040) development board
      • On your SiLabs Thunderboard Sense 2
      • On your Spresense by Sony development board
      • On your Syntiant TinyML Board
      • On your TI LaunchPad using GCC and the SimpleLink SDK
      • On your Zephyr-based Nordic Semiconductor development board
    • Arm Keil MDK CMSIS-PACK
    • Arduino library
      • Arduino IDE 1.18
    • Cube.MX CMSIS-PACK
    • Docker container
    • DRP-AI library
      • DRP-AI on your Renesas development board
      • DRP-AI TVM i8 on Renesas RZ/V2H
    • IAR library
    • Linux EIM executable
    • OpenMV
    • Particle library
    • Qualcomm IM SDK GStreamer
    • WebAssembly
      • Through WebAssembly (Node.js)
      • Through WebAssembly (browser)
    • Edge Impulse firmwares
    • Hardware specific tutorials
      • Image classification - Sony Spresense
      • Audio event detection with Particle boards
      • Motion recognition - Particle - Photon 2 & Boron
      • Motion recognition - RASynBoard
      • Motion recognition - Syntiant
      • Object detection - SiLabs xG24 Dev Kit
      • Sound recognition - TI LaunchXL
      • Keyword spotting - TI LaunchXL
      • Keyword spotting - Syntiant - RC Commands
      • Running NVIDIA TAO models on the Renesas RA8D1
      • Two cameras, two models - running multiple object detection models on the RZ/V2L
  • Edge AI Hardware
    • Overview
    • Production-ready
      • Advantech ICAM-540
      • Seeed SenseCAP A1101
      • Industry reference design - BrickML
    • MCU
      • Ambiq Apollo4 family of SoCs
      • Ambiq Apollo510
      • Arducam Pico4ML TinyML Dev Kit
      • Arduino Nano 33 BLE Sense
      • Arduino Nicla Sense ME
      • Arduino Nicla Vision
      • Arduino Portenta H7
      • Blues Wireless Swan
      • Espressif ESP-EYE
      • Himax WE-I Plus
      • Infineon CY8CKIT-062-BLE Pioneer Kit
      • Infineon CY8CKIT-062S2 Pioneer Kit
      • Nordic Semi nRF52840 DK
      • Nordic Semi nRF5340 DK
      • Nordic Semi nRF9160 DK
      • Nordic Semi nRF9161 DK
      • Nordic Semi nRF9151 DK
      • Nordic Semi nRF7002 DK
      • Nordic Semi Thingy:53
      • Nordic Semi Thingy:91
      • Open MV Cam H7 Plus
      • Particle Photon 2
      • Particle Boron
      • RAKwireless WisBlock
      • Raspberry Pi RP2040
      • Renesas CK-RA6M5 Cloud Kit
      • Renesas EK-RA8D1
      • Seeed Wio Terminal
      • Seeed XIAO nRF52840 Sense
      • Seeed XIAO ESP32 S3 Sense
      • SiLabs Thunderboard Sense 2
      • Sony's Spresense
      • ST B-L475E-IOT01A
      • TI CC1352P Launchpad
    • MCU + AI accelerators
      • Alif Ensemble
      • Arduino Nicla Voice
      • Avnet RASynBoard
      • Seeed Grove - Vision AI Module
      • Seeed Grove Vision AI Module V2 (WiseEye2)
      • Himax WiseEye2 Module and ISM Devboard
      • SiLabs xG24 Dev Kit
      • STMicroelectronics STM32N6570-DK
      • Synaptics Katana EVK
      • Syntiant Tiny ML Board
    • CPU
      • macOS
      • Linux x86_64
      • Raspberry Pi 4
      • Raspberry Pi 5
      • Texas Instruments SK-AM62
      • Microchip SAMA7G54
      • Renesas RZ/G2L
    • CPU + AI accelerators
      • AVNET RZBoard V2L
      • BrainChip AKD1000
      • i.MX 8M Plus EVK
      • Digi ConnectCore 93 Development Kit
      • MemryX MX3
      • MistyWest MistySOM RZ/V2L
      • Qualcomm Dragonwing RB3 Gen 2 Dev Kit
      • Renesas RZ/V2L
      • Renesas RZ/V2H
      • IMDT RZ/V2H
      • Texas Instruments SK-TDA4VM
      • Texas Instruments SK-AM62A-LP
      • Texas Instruments SK-AM68A
      • Thundercomm Rubik Pi 3
    • GPU
      • Advantech ICAM-540
      • NVIDIA Jetson
      • Seeed reComputer Jetson
    • Mobile phone
    • Porting guide
  • Integrations
    • Arduino Machine Learning Tools
    • AWS IoT Greengrass
    • Embedded IDEs - Open-CMSIS
    • NVIDIA Omniverse
    • Scailable
    • Weights & Biases
  • Tips & Tricks
    • Combining impulses
    • Increasing model performance
    • Optimizing compute time
    • Inference performance metrics
  • Concepts
    • Glossary
    • Course: Edge AI Fundamentals
      • Introduction to edge AI
      • What is edge computing?
      • What is machine learning (ML)?
      • What is edge AI?
      • How to choose an edge AI device
      • Edge AI lifecycle
      • What is edge MLOps?
      • What is Edge Impulse?
      • Case study: Izoelektro smart grid monitoring
      • Test and certification
    • Data engineering
      • Audio feature extraction
      • Motion feature extraction
    • Machine learning
      • Data augmentation
      • Evaluation metrics
      • Neural networks
        • Layers
        • Activation functions
        • Loss functions
        • Optimizers
          • Learned optimizer (VeLO)
        • Epochs
    • What is embedded ML, anyway?
    • What is edge machine learning (edge ML)?
Powered by GitBook
On this page
  • Introduction
  • Prerequisites
  • Preparation
  • On your Edge Impulse project
  • Creating the Intial Impulse Export to Particle Library and Deployment firmware
  • Compiling your project
  • Particle Workbench OTA Update Workflow and example
  • Creating a Webhook for the Edge Impulse ingestion API
  • Closing the Loop to send data to Edge Impulse for Lifecycle Management
  • Conclusion

Was this helpful?

Export as PDF
  1. Tutorials
  2. Lifecycle management
  3. OTA model updates

with Particle Workbench

Previouswith Nordic Thingy53 and the Edge Impulse appNextwith Zephyr on Golioth

Last updated 1 year ago

Was this helpful?

Introduction

This page is part of the tutorial series. If you haven't read the introduction yet, we recommend you to do so .

In this tutorial, we'll guide you through deploying updated impulses over-the-air (OTA) using the Particle Workbench. We'll build on Particle's firmware update workflow, incorporating Edge Impulse's API to check for updates and download the latest build.

We will modify the Edge Impulse Photon 2 example to incorporate the OTA functionality and update the device with the latest build. Based on the particle workbench OTA example.

Prerequisites

  • Edge Impulse Account: If you haven't got one, .

  • Trained Impulse: If you're new, follow one of our

  • Knowledge of the Particle Workbench

  • Installation of required software as detailed in the

Preparation

Begin by setting up your device for OTA updates following the particle documentation. https://docs.particle.io/getting-started/cloud/ota-updates/

Let's get started!

Key Features of Particle Workbench OTA Updates:

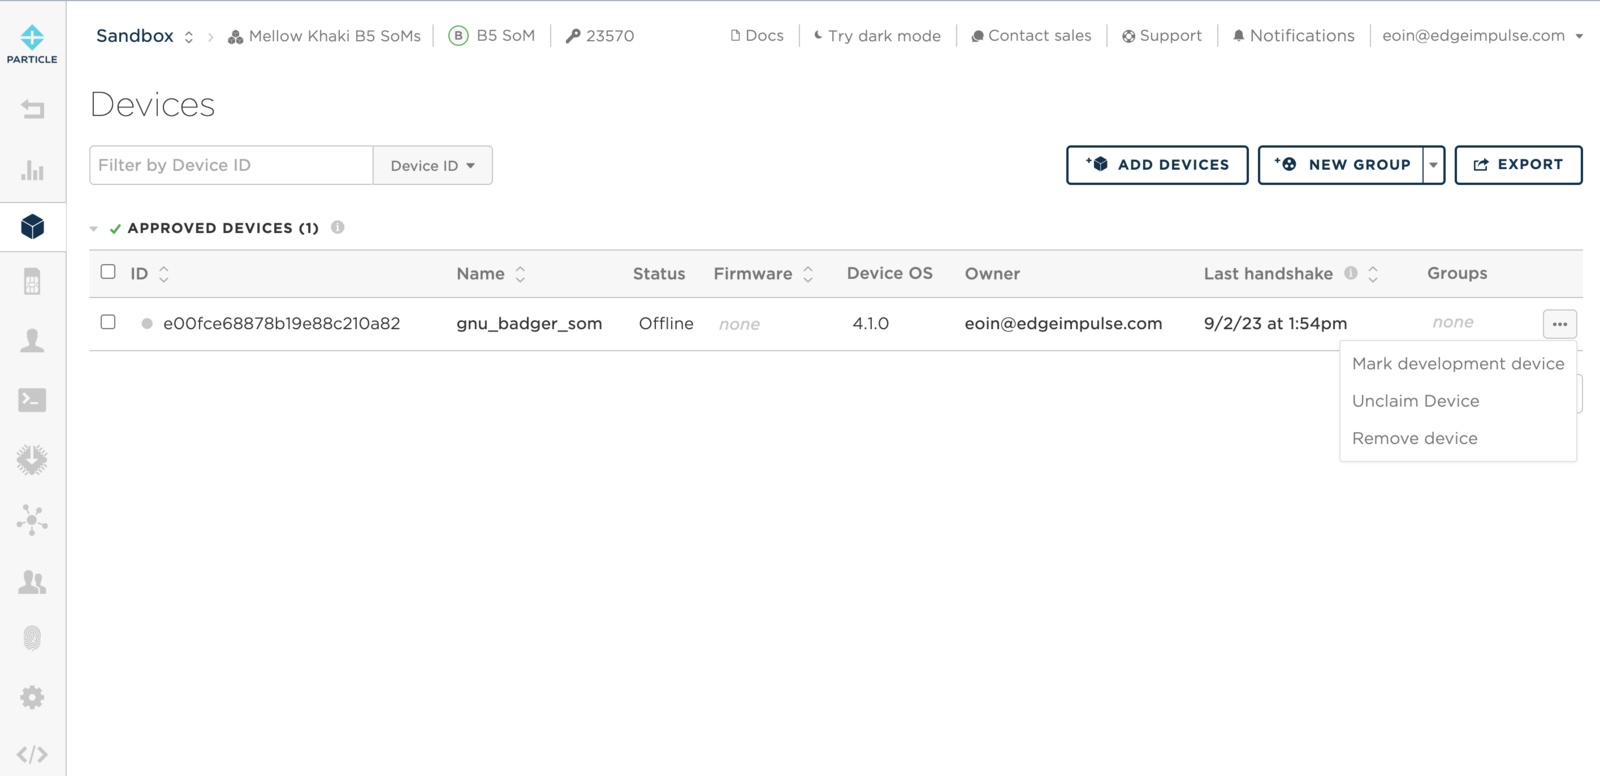
  • Development Devices: Specific devices can be marked for internal testing to validate firmware updates before a broader rollout.

  • Firmware Upload: Developers upload the compiled binary to the console, ensuring the firmware version is included.

  • Firmware Locking: Specific devices can be locked to run certain firmware versions for testing purposes.

  • Release Targets: Firmware can be released to all devices or specific groups to control the rollout process.

  • Intelligent Firmware Releases: Ensures timely delivery of updates without disrupting device operation, taking into account the device’s status and activity.

Particle OTA

Particle OTA is a fully-integrated over-the-air software update system that is built into the Particle IoT PaaS and Device OS. It allows customers to safely and reliably push software updates to single devices or entire fleets of devices directly from Particle’s device management console and developer tools, with no implementation work necessary.

Particle OTA allows you to update your entire IoT device (both the Particle device and any other components) by delivering three kinds of updates:

  • Application OTA allows users to update the firmware application they are running on the Particle device in order to introduce new features, fix bugs, and generally improve the software application over time.

  • Device OS OTA allows users to update Device OS to the latest version alongside an application update so that Device OS can be kept up to date with improvements and bug fixes while properly testing against the user-generated software application.

  • Asset OTA allows users to include bundled assets in an OTA software update that can be delivered to other processors and components in the electronics system so that the Particle device can be responsible not just for updating itself but also the system that surrounds the device.

On your Edge Impulse project

Export your impulse to the Particle Workbench library:

Add the library through the Particle Workbench via:

  1. Extract the .zip library.

  2. Particle: Import Project and select project.properties. Examples can then be found in: yourprojectname/examples/

We created an example repository which contains a small application for your particle device.

git clone https://github.com/edgeimpulse/example-standalone-inferencing-photon2

Creating the Intial Impulse Export to Particle Library and Deployment firmware

Projects with external libraries

Compiling your project

When you're ready to compile your project, make sure you have the correct Particle device target selected and run particle compile <platform> in the CLI or click the Compile button in the Desktop IDE. The following files in your project folder will be sent to the compile service:

  • Everything in the /src folder, including your .ino application file

  • The project.properties file for your project

  • Any libraries stored under lib/<libraryname>/src

You should now have a compiled binary file in your project folder named firmware.bin.

Next lets look at the OTA functionality and how we can incorporate it into our project.

Particle Workbench OTA Update Workflow and example

You will need to have a device deployed with an existing firmware containing an impulse before you can roll out a new version. Then you can use the OTA workflow to update the firmware on your device to a new version. While blocking all other devices from updating to the new version.

Step 1: Testing on Development Devices

Step 2: Locking Firmware for Testing

Lock Devices: Lock specific devices to the new firmware version and monitor their behavior. Unlock Devices: Unlock the devices once testing is complete and you are satisfied with the firmware's performance.

Step 3: Rolling Out the Firmware

Release Targets: Choose to release the firmware to specific groups or the entire fleet of devices. Intelligent Firmware Release: Opt for this to have the Particle Device Cloud intelligently manage the update rollout. Important Tips: Avoid Disruptions: Utilize Device OS APIs to control OTA availability, ensuring devices aren’t disrupted during critical operations. Managing OTA Updates: Use the console or REST API to force enable OTA updates if needed. Monitoring: Keep an eye on the devices' behaviors post-update to quickly identify and address any potential issues. With Particle's OTA capabilities, developers can ensure that their IoT devices are always running the latest, most secure, and most efficient version of their firmware, enhancing the reliability and functionality of their IoT ecosystems.

Creating a Webhook for the Edge Impulse ingestion API

This guide supplements the tutorial on OTA Model Updates with Edge Impulse on Particle Workbench, focusing on configuring a Particle webhook for sending data to the Edge Impulse ingestion API.

Steps for Webhook Configuration:

  1. Access Particle Console:

    • Log in with your Particle account credentials.

  2. Navigate to Integrations:

    • Click on the "Integrations" tab in the left-hand menu.

    • Select "Webhooks" from the available options.

  3. Create a New Webhook:

    • Click "New Integration".

    • Choose "Webhook".

  4. Webhook Configuration:

    • Name: Assign a descriptive name to your webhook.

    • Event Name: Specify the event name that triggers the webhook (e.g., "edge/ingest").

    • URL: Set this to the Edge Impulse ingestion API URL, typically something like https://ingestion.edgeimpulse.com/api/training/data.

    • Request Type: Choose "POST".

    • Request Format: Select "Custom".

  5. Custom Request Body:

    • Input the JSON structure required by Edge Impulse. This will vary based on your project's data schema.

  6. HTTP Headers:

    • Add necessary headers:

      • x-api-key: Your Edge Impulse API key.

      • Content-Type: "application/json".

      • x-file-name: Use a dynamic data field like {{PARTICLE_EVENT_NAME}}.

  7. Advanced Settings:

    • Response Topic: Create a custom topic for webhook responses, e.g., {{PARTICLE_DEVICE_ID}}/hook-response/{{PARTICLE_EVENT_NAME}}.

    • Enforce SSL: Choose "Yes" for secure transmission.

  8. Save the Webhook:

    • After entering all details, click "Save".

  9. Test the Webhook:

    • Use example device firmware to trigger the webhook.

    • Observe the responses in the Particle Console.

  10. Debugging:

  • If errors occur, review the logs for detailed information.

  • Ensure payload format aligns with Edge Impulse requirements.

  • Verify the accuracy of your API key and other details.

Custom Template Example:

Copy and paste the following into the Custom Template section of the webhook:

{
    "name": "edgeimpulse.com",
    "event": "edge/ingest",
    "responseTopic": "",
    "disabled": true,
    "url": "http://ingestion.edgeimpulse.com/api/training/data",
    "requestType": "POST",
    "noDefaults": true,
    "rejectUnauthorized": false,
    "headers": {
        "x-api-key": "ei_1855db...",
        "x-file-name": "{{PARTICLE_EVENT_NAME}}",
        "x-label": "coffee"
    },
    "json": "{\n  \"payload\": {\n    \"device_name\": \"0a10a...\",\n    \"device_type\": \"photon2\",\n    \"interval_ms\": 20,\n    \"sensors\": [\n      {\n        \"name\": \"volt\",\n        \"units\": \"V\"\n      },\n      {\n        \"name\": \"curr\",\n        \"units\": \"A\"\n      }\n    ],\n    \"values\": [\n{{{PARTICLE_EVENT_VALUE}}}\n    ]\n  },\n  \"protected\": {\n    \"alg\": \"none\",\n    \"ver\": \"v1\"\n  },\n  \"signature\": \"00\"\n}"
}

Closing the Loop to send data to Edge Impulse for Lifecycle Management

Below we will do a basic example of sending data to Edge Impulse for Lifecycle Management. We could further extend this example to include more advanced checking, utilizing more of Particle OTA functionality, and add checks for model performance and versioning. The code gathers data from analog sensors, processes it, and sends it to Edge Impulse for Lifecycle Management. The webhook is triggered with the event name edge/ingest/sample.

#include "Particle.h"

// Sample data array
int sampleData[2][10] = {
    {100, 110, 120, 130, 140, 150, 160, 170, 180, 190}, // Sample voltage data
    {200, 210, 220, 230, 240, 250, 260, 270, 280, 290}  // Sample current data
};

void setup() {
    Serial.begin(9600);
    Particle.connect();
}

void loop() {
    char dataBuf[512];
    JSONBufferWriter writer(dataBuf, sizeof(dataBuf) - 1);

    writer.beginArray();
    for(int i = 0; i < 10; i++) {
        writer.beginArray();
        writer.value(sampleData[0][i]);
        writer.value(sampleData[1][i]);
        writer.endArray();
    }
    writer.endArray();

    Particle.publish("edge/ingest/sample", dataBuf, PRIVATE);
    delay(10000); // Send data every 10 seconds
}

Conclusion

This tutorial provides a basic guide for implementing OTA updates on your Particle Workbench connected device (Photon 2). It can be extended to include more advanced checking, utilizing more of espressif OTA functionality, and extending the python server to check for model performance and versioning. Happy coding!

You will need to treat this as a new project and follow the instructions in the to set up your environment for local development.

If your project includes a library that has not been registered in the Particle libraries system, you should create a new folder named /lib/<libraryname>/src under /<project dir> and add the .h, .cpp & library.properties files for your library there. Read the for more details on how to develop libraries. Note that all contents of the /lib folder and subfolders will also be sent to the Cloud for compilation.

Mark Devices for Testing: In the Particle console, mark specific devices for internal testing to validate firmware updates. Upload Firmware: Compile and upload the firmware binary, ensuring to include the product ID and version.

Visit .

This code continuously samples voltage and current, calculates RMS current, and then sends a JSON array of the sampled data to the Edge Impulse ingestion API. The publishData function uses Particle's Particle.publish method to send the data to the specified event. This triggers the webhook configured to send data to Edge Impulse. See the for more information.

Lifecycle Management with Edge Impulse
here
sign up here
end-to-end tutorials
Photon 2 example
Particle Workbench
Firmware Libraries guide
Particle Console
Particle energy monitor code from our Imagine 2023 demo for a full example