Getting Started
First, create a new project in Edge Impulse. Also make sure you have your own pretrained model available locally on your computer, in one of the following formats: TensorFlow SavedModel (saved_model.zip), ONNX model (.onnx) or LiteRT (previously Tensorflow Lite) model (.tflite)
For this guide, we will be uploading a pretrained image classification TFLite model for plant disease classification.
Then, from the Dashboard, of your Edge Impulse project under “Getting started”, select Upload your model:

Edge Impulse project dashboard, showing the project overview and getting started options.
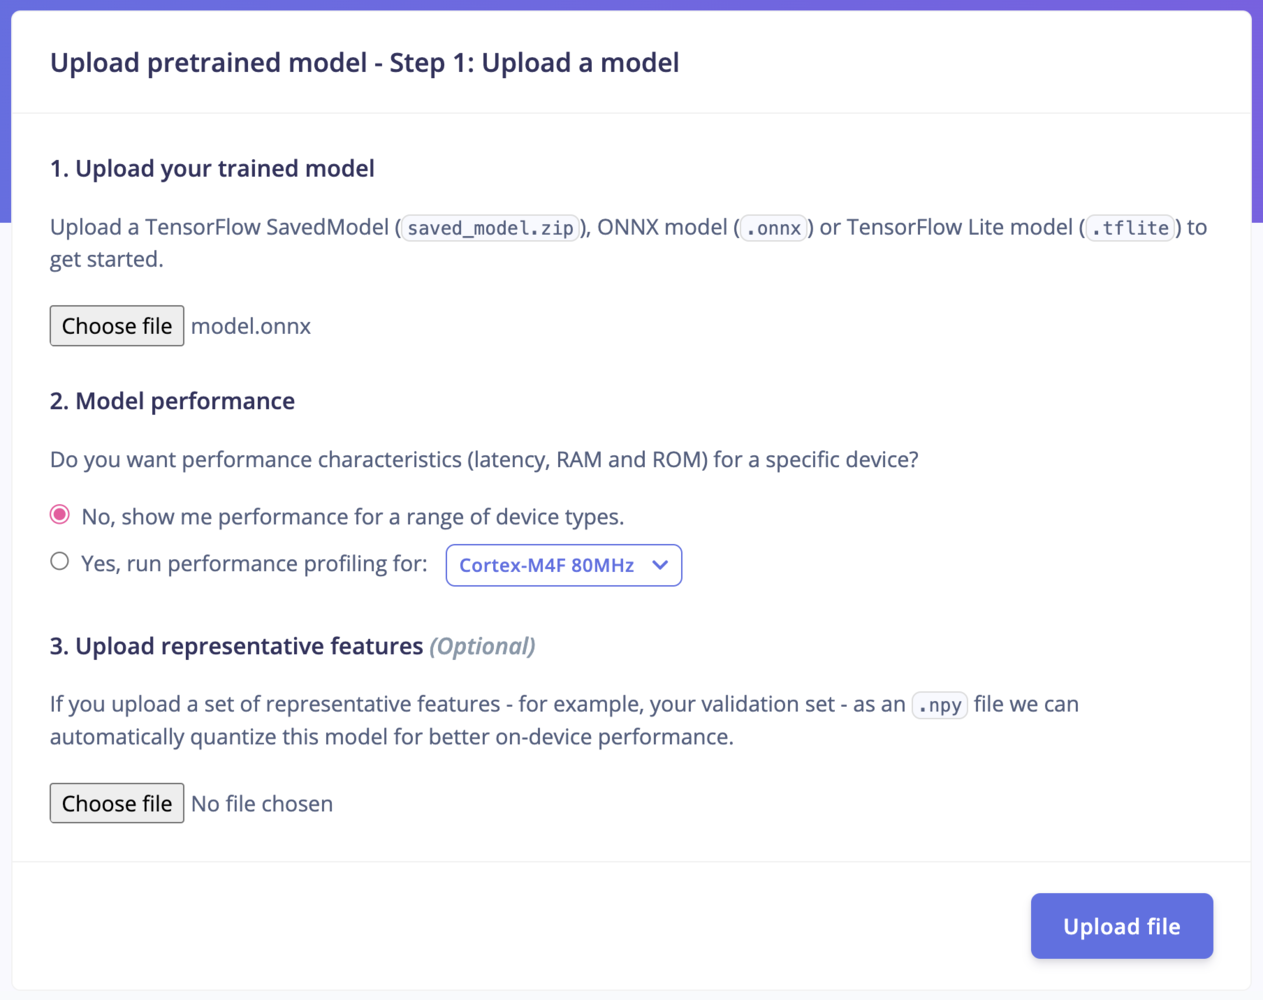
Step 1: Upload your model
- Upload your trained model: Upload a TensorFlow SavedModel (
saved_model.zip), ONNX model (.onnx) or LiteRT (previously Tensorflow Lite) model (.tflite) to get started. - Model performance: Do you want performance characteristics (latency, RAM and ROM) for a specific device? Select “No” to show the performance for a range of device types, or “Yes” to run performance profiling for any of our available officially supported Edge Impulse development platforms.
- If your model is not already quantized, you can also upload a
.npyfile to Upload representative features (Optional) - for example, your validation set - as an.npyfile. This way, we can automatically quantize this model for better on-device performance. See the quantization info callout below.
Uploading a pretrained .onnx model
Quantization is only supported for SavedModel or ONNX uploadsQuantization requires a sample of data that is representative of the range (maximum and minimum) of values in your training data. In the Studio, we require a numpy file (
.npy). Each element of the array must have the same shape as your model’s input.Note that quantization is a form of lossy compression and may result in a reduction in model performance. It’s important to evaluate your model after quantization to ensure it still performs well enough for your use case.Step 2: Process your model
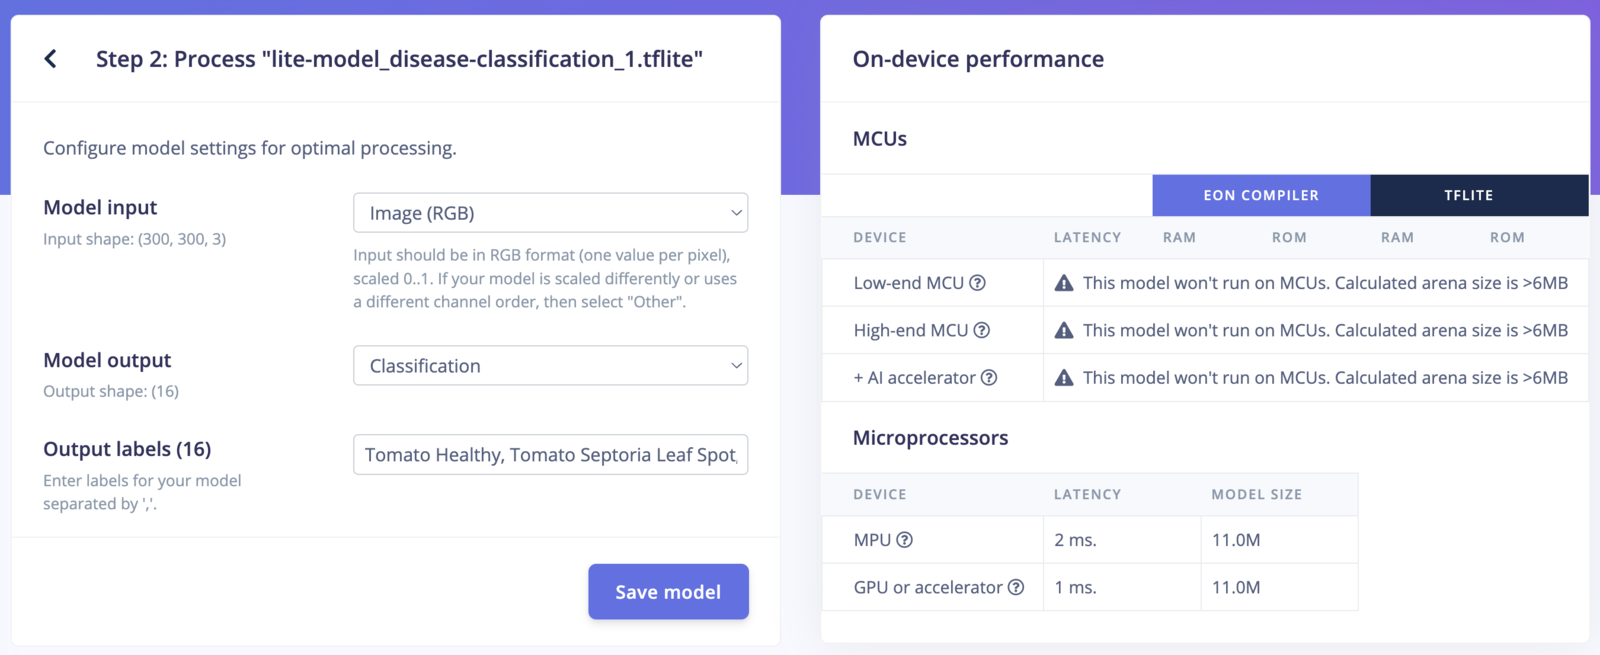
Depending on the model you have uploaded in Step 1, the configuration settings available for Step 2 will change. The settings in this step determine what type of inputs and outputs your model expects. For input types, you can choose from:- Image
- Audio
- Other (for example, if your model takes accelerometer data as input)
- Classification (for example, if your model classifies images into different categories)
- Regression (for example, if your model predicts a continuous numerical value)
- Object detection (for example, if your model detects and localizes objects within an image)
- Freeform (for example, if your model produces outputs that do not fit into the other categories, such as image denoising, super-resolution, or pose estimation)
- Anomaly detection (for example, if your model predicts a numerical score indicating how anomalous the data is)
- Visual anomaly detection (for example, if your model predicts a 2D grid indicating how anomalous each cell of the image is)
(300, 300, 3) in RGB format, Classification model output and 16 output labels: Tomato Healthy, Tomato Septoria Leaf Spot, Tomato Bacterial Spot, Tomato Blight, Cabbage Healthy, Tomato Spider Mite, Tomato Leaf Mold, Tomato_Yellow Leaf Curl Virus, Soy_Frogeye_Leaf_Spot, Soy_Downy_Mildew, Maize_Ravi_Corn_Rust, Maize_Healthy, Maize_Grey_Leaf_Spot, Maize_Lethal_Necrosis, Soy_Healthy, Cabbage Black Rot
After configuring your model settings, select Save model to view your model’s on-device performance information for both MCUs and microprocessors (if applicable, depending on your model’s arena size).
Step 2: Process your model
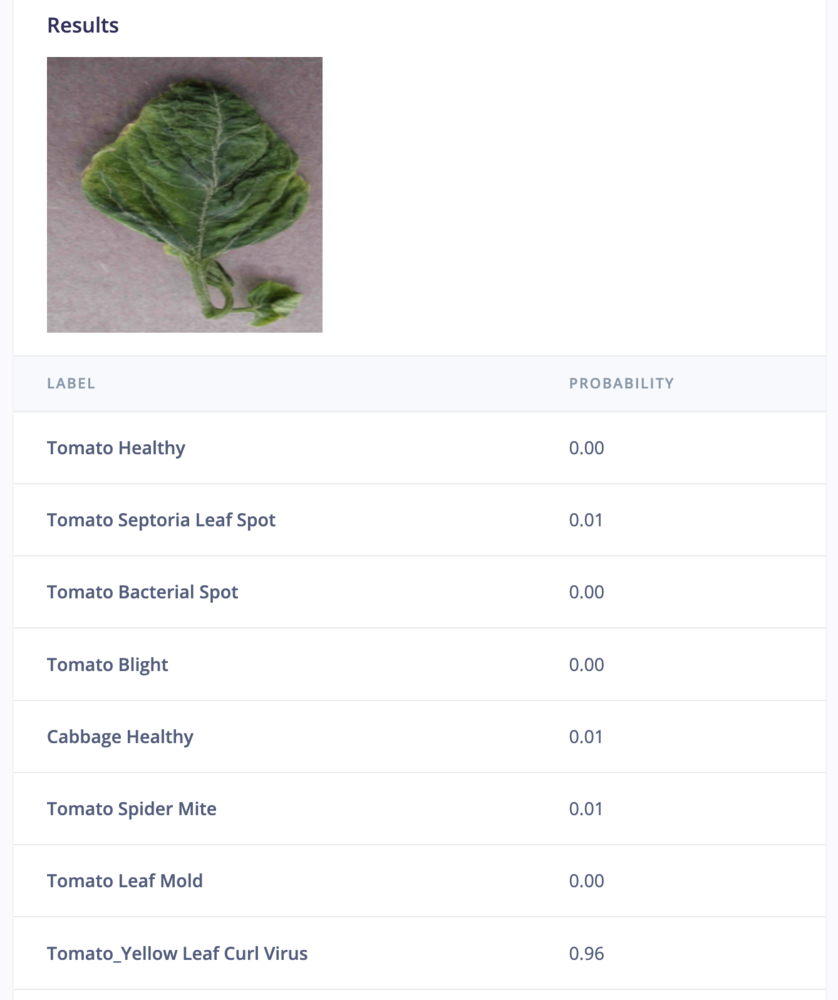
Check model behavior
Optionally upload test data to ensure correct model settings and proper model processing: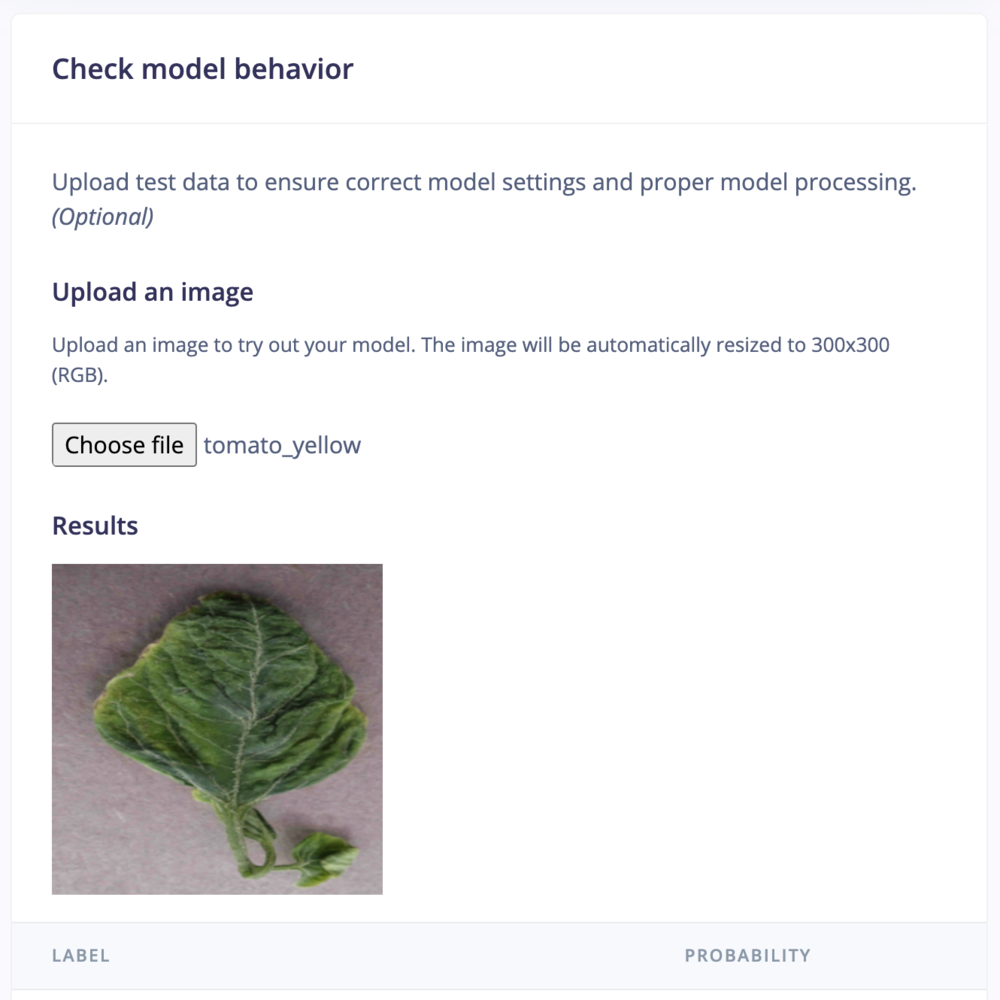
Step 2: Check model behavior
Step 2: Check model behavior results
Preprocessing your data using Edge Impulse DSP blocks
If you want to use our built-in processing blocks to preprocess your data, for example to turn your audio files into spectrograms before training your network, then you should:- Use the code in the edgeimpulse/processing-blocks repo to preprocess your data before training your model. This contains the Python version of the processing blocks.
- Then, on the embedded side, call
extract_XXXX_featuresto preprocess your sensor data, and pass the resulting features into theei_run_classifierfunction.
Limitations
There are a couple of restrictions to converting models with our tooling. For Object Detection, Classification and Regression models, the following restrictions apply:- The model must have 1 input tensor.
- You need to have a batch dimension (e.g. if your input is an image of 320x320x3 then your input shape should be
(1,320,320,3)), and the batch size must be equal to 1. For ONNX models you can use a variable batch size (we’ll set it to 1). - For classification and regression models: The model must have 1 output tensor, and the output tensor should have a batch dimension as well. E.g. a classification model with 3 classes should have output shape
(1,3). - Regression models must have an output shape of
(1,1). - For “Freeform models” (see below) you can have multiple output tensors.
- Some operations are not supported some devices, such as MCUs. If your model contains unsupported operations you will see an error during the build step.
Troubleshooting
--saved-model /tmp/saved_model does not exist
--saved-model /tmp/saved_model does not exist
If you encountered the following error:Make sure to upload a
.zip archive containing at minimum a saved_model directory that contains your saved_model.pb.Could not profile: No uploaded model yet
Could not profile: No uploaded model yet
If you encounter the following error:This often means that the model you are attempting to upload is unsupported. Only the following model formats are supported:
- TensorFlow SavedModel (in .zip archive)
- ONNX (.onnx)
- LiteRT (previously Tensorflow Lite) (.tflite or .lite)
This model won’t run on MCUs
This model won’t run on MCUs
If you see a message along these lines:Then that means that part of your network is not supported by EON Compiler, and cannot run as-is on MCUs. A list of all supported ops can be found in our SDK; but there might be certain input/output types that are not supported even if the op is in this list (you’ll get a proper error code if this is the case). If you’re an enterprise customer please contact your solutions engineer, most of the times we can add the missing op within a few days.