Skip to main contentAfter extracting meaningful features from the raw signal using signal processing, you can now train your model using a learning block. We provide several pre-defined learning blocks:
Miss an architecture? You can create a custom learning block, with PyTorch, Keras or scikit-learn to bring your custom architecture and train it with Edge Impulse.
If you already have a trained model, you can also Bring Your Own Model (BYOM) to directly profile it and deploy it on your edge devices.
If you are familiar with TensorFlow and Keras, in most blocks, you can use the Switch to Expert mode button to access the full Keras API for custom architectures, rebalance your weights, change the optimizer, and more.
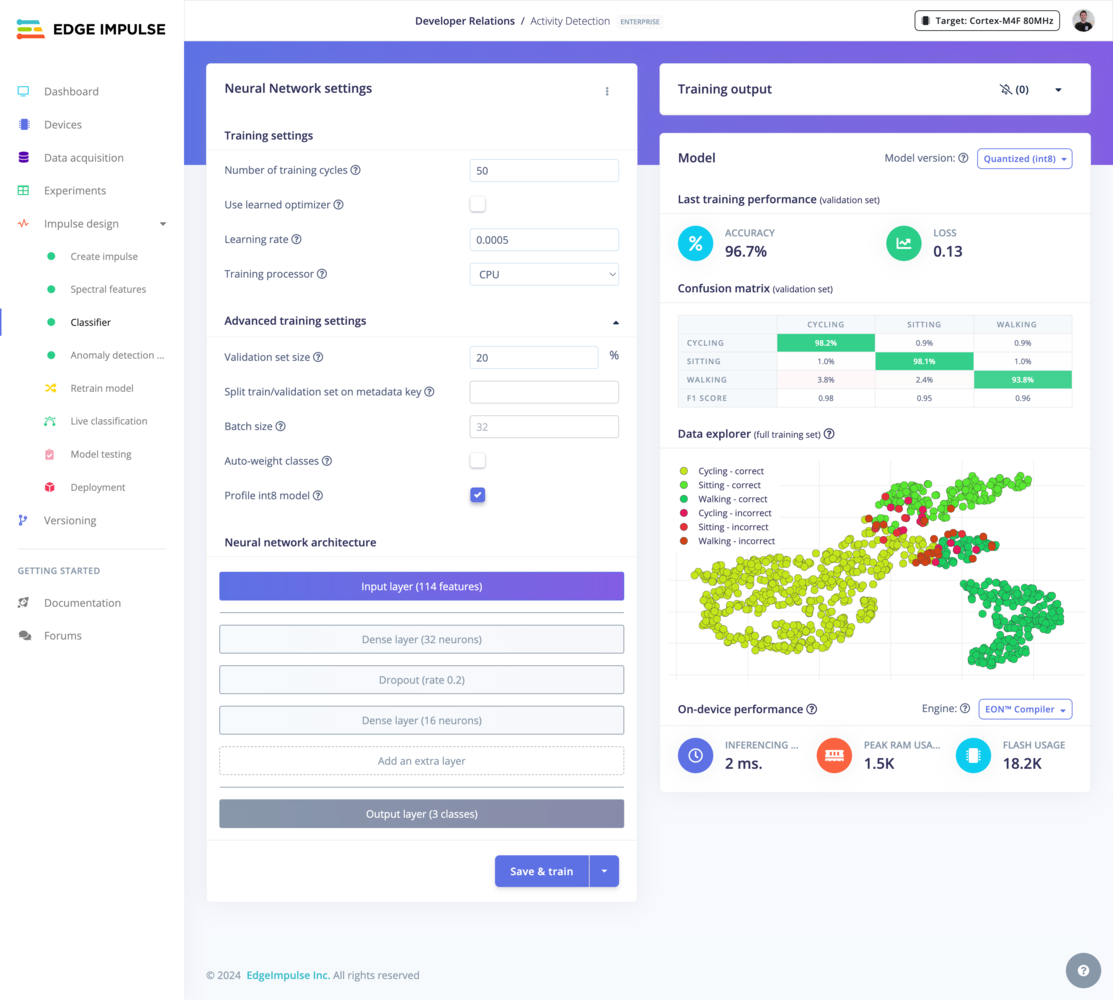
For most of the learning blocks provided by Edge Impulse (Keras and Transfer Learning-based blocks), a view similar to the one below is available. See the dedicated learning block page for specific details when it differs.
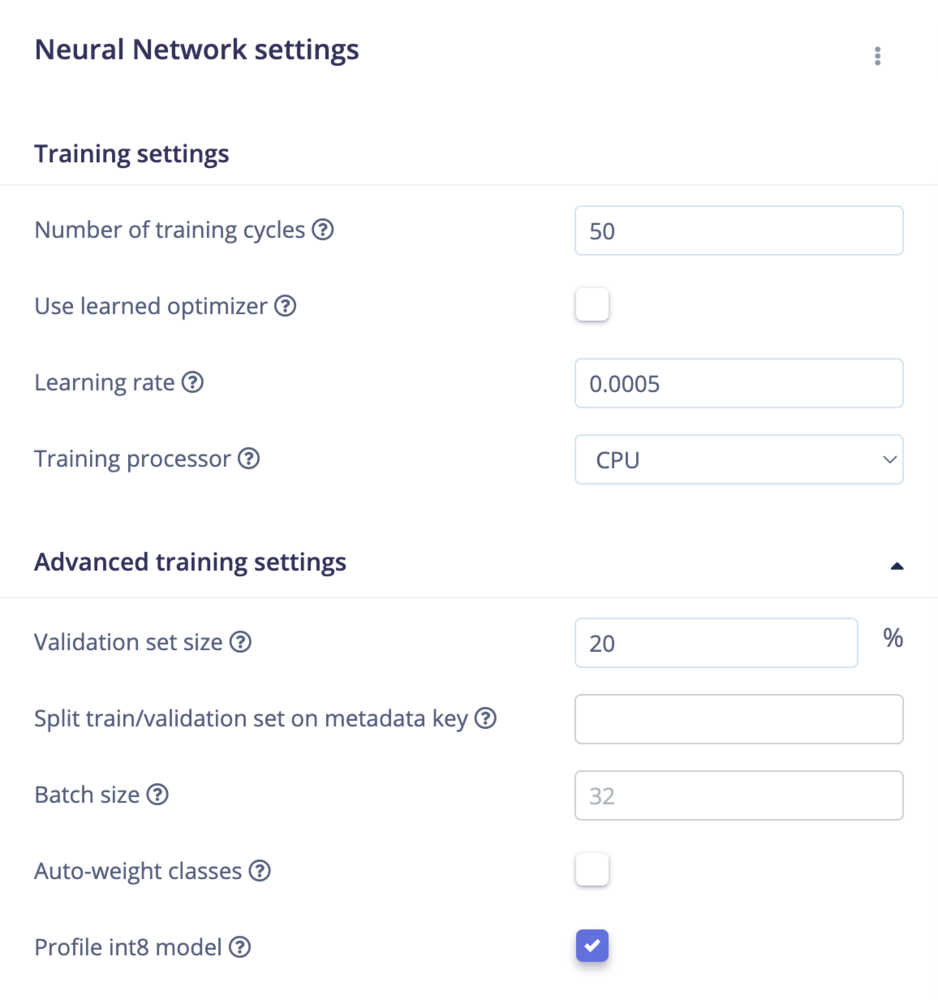
Neural Network settings
- Number of training cycles: Each time the training algorithm makes one complete pass through all of the training data with back-propagation and updates the model’s parameters as it goes, it is known as an epoch or training cycle.
- Use Learned Optimizer (VeLO): Use a neural network as an optimizer to calculate gradients and learning rates. For optimal results with VeLO, it is recommended to use as large a batch size as possible, potentially equal to the dataset’s size. See Learned Optimizer (VeLO)
- Learning rate: The learning rate controls how much the model’s internal parameters are updated during each step of the training process. Or, you can also see it as how fast the neural network will learn. If the network overfits quickly, you can reduce the learning rate.
- Training processor: We recommend to choose the CPU training processor for projects with small datasets. GPU training processors are available as well for larger training jobs.
- Validation set size: The percentage of your training set held apart for validation, a good default is 20%.
- Split train/validation set on metadata key: Prevent group data leakage between train and validation datasets using sample metadata. Given a metadata key, samples with the same value for that key will always be on the same side of the validation split. Leave empty to disable. Also, see metadata.
- Batch size: The batch size used during training. If not set, we’ll use the default value. Training may fail if the batch size is too high.
- Auto-weight classes While training, pay more attention to samples from under-represented classes. Might help make the model more robust against overfitting if you have little data for some classes.
- Profile int8 model: Profiling the quantized model might take a long time on large datasets. Disable this option to skip profiling.
Data augmentation settings
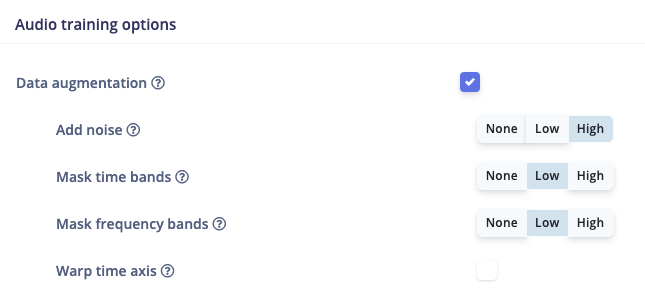
Edge Impulse provides easy to use data augmentation options for several combinations of data and model types. If available, these settings will appear within the Neural Network settings. Augmentation can be applied by enabling the corresponding checkbox and entering associated parameters if applicable.
Audio classification
Augmentation is applied to spectrograms, such as those generated by the MFCC and MFE processing blocks, rather than the raw audio signal. The augmentation options include masking time bands, masking frequency bands, and warping the time axis using the SpecAugment method, in addition to adding Gaussian noise.
Image classification
When using a transfer learning block in your impulse for image classification tasks, augmentation can be enabled through a single checkbox. When enabled, random transformations are applied to your original images that include flipping (horizontally), zooming, cropping, and varying brightness.
Object detection
The choice of augmentation options will depend on the object detection model that has been selected. For example, a FOMO model will offer a single checkbox that enables flipping (horizontally), zooming, cropping, rotating, varying brightness, and varying contrast; other models will offer different parameters based on the model head selected; and some other model types may not offer augmentation.
Neural Network architecture
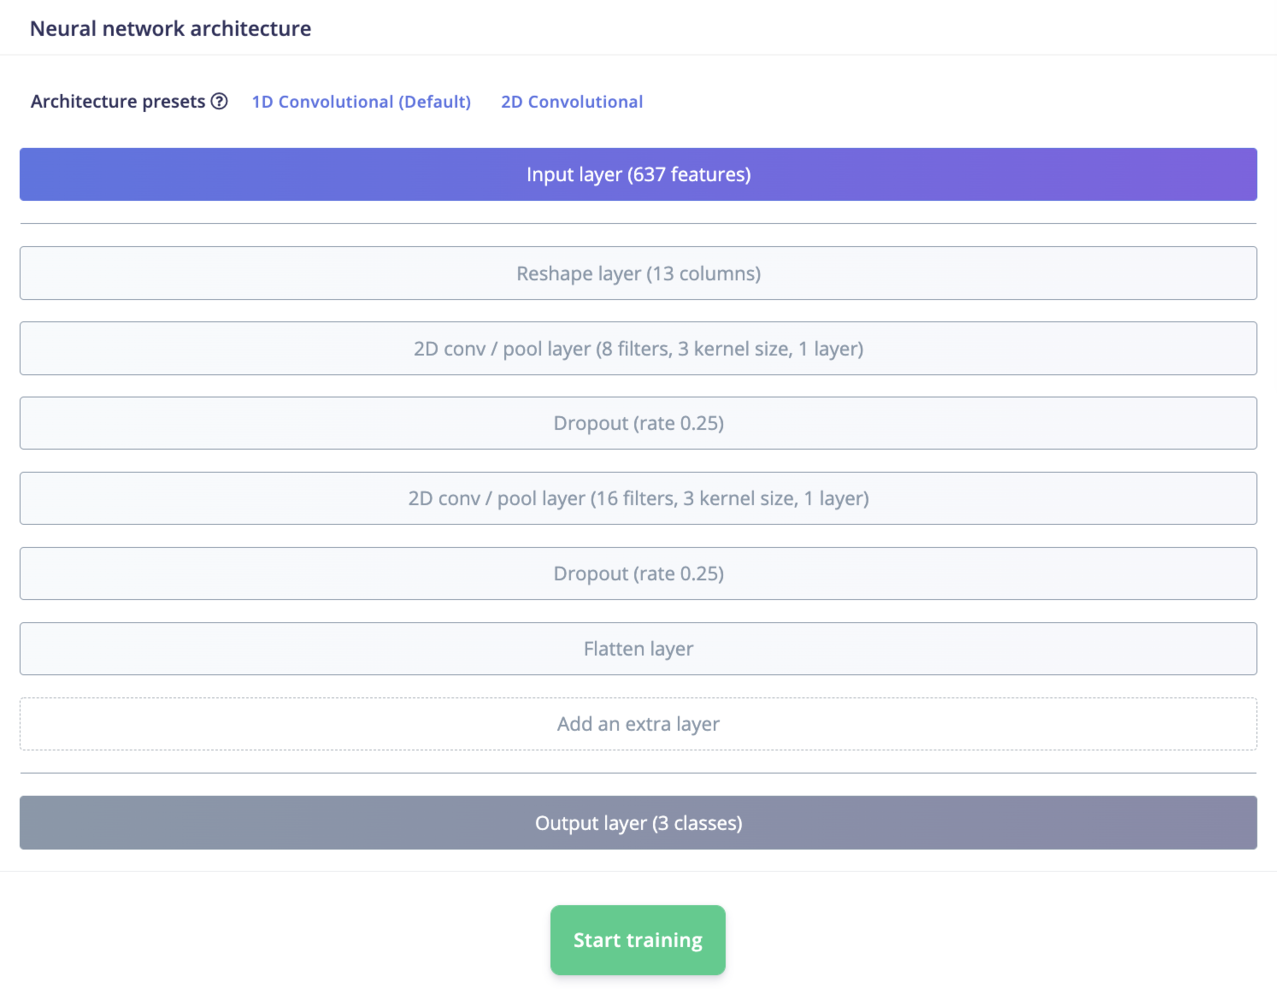
For classification and regression tasks, you can edit the layers directly from the web interface. Depending on your project type, we may offer to choose between different architecture presets to help you get started.
The neural network architecture takes as inputs your extracted features, and pass the features to each layer of your architecture. In the classification case, the last used layer is a softmax layer. It is this last layer that gives the probability of belonging to one of the classes.
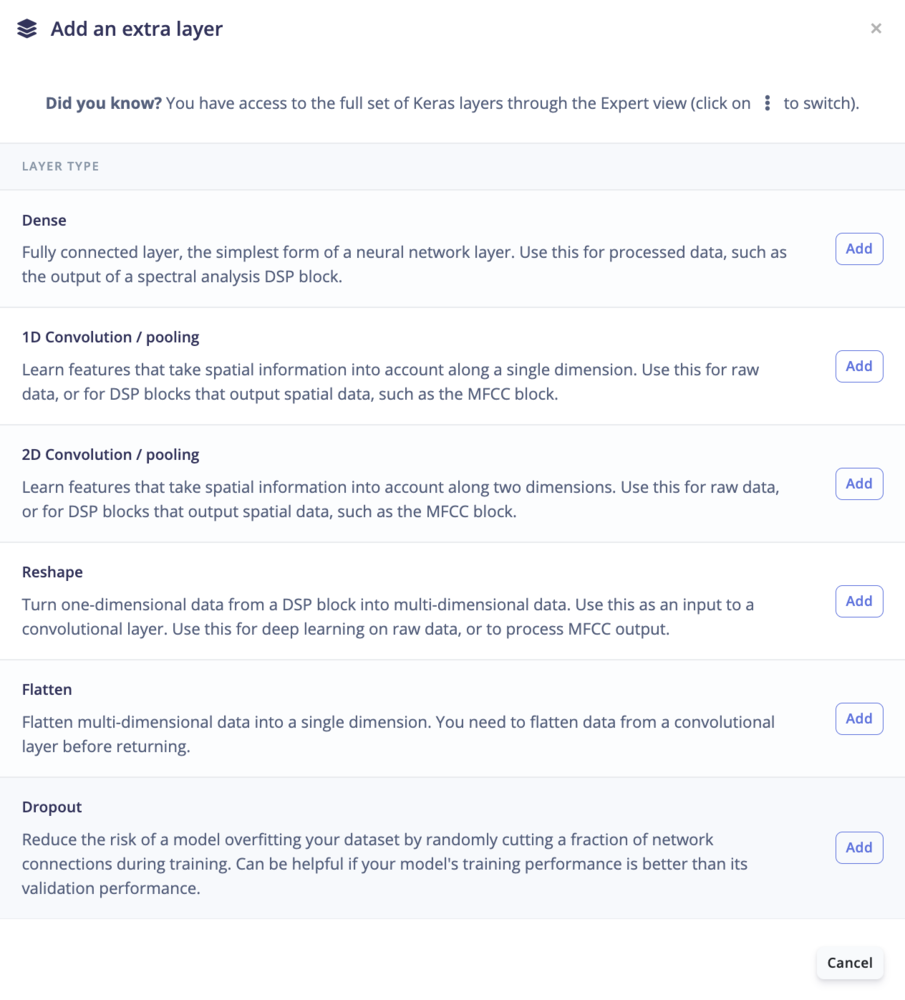
From the visual (simple) mode, you can add the following layers:
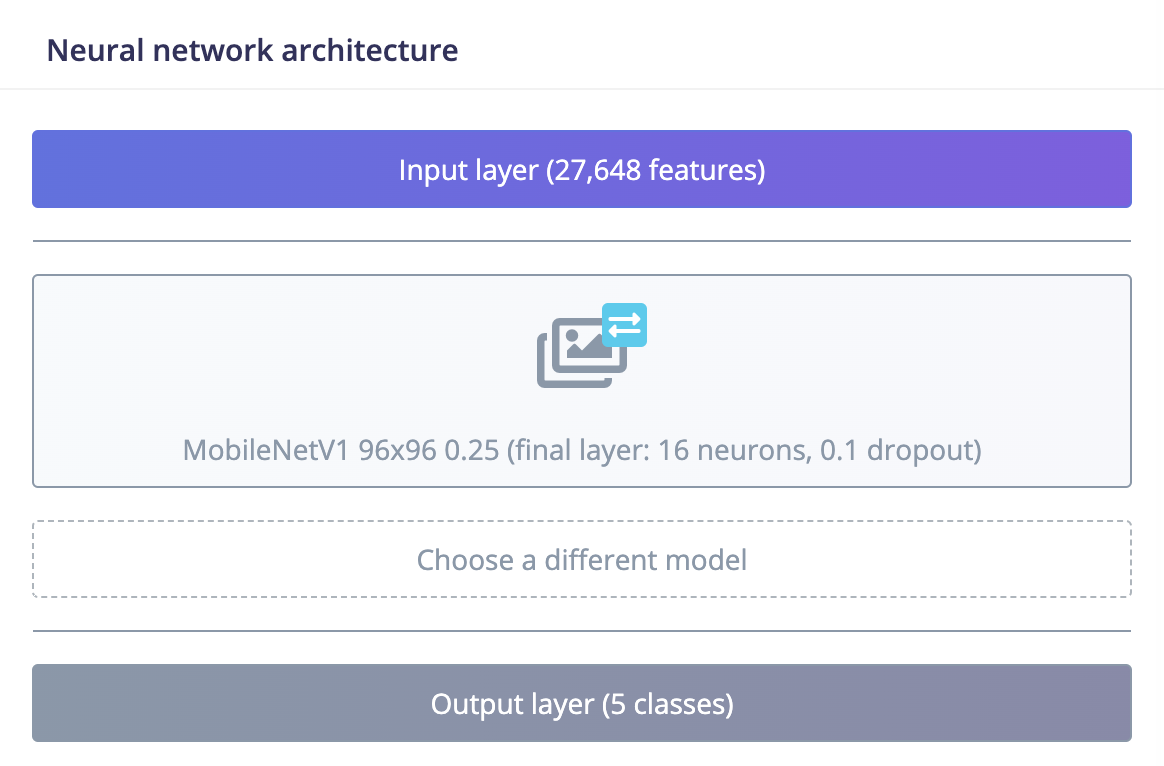
For Transfer Learning tasks like Audio or Image Transfer learning and Object Detection, you can select which pre-trained model is more suited for your use case and edit the last layers parameters to be trained:
Expert mode
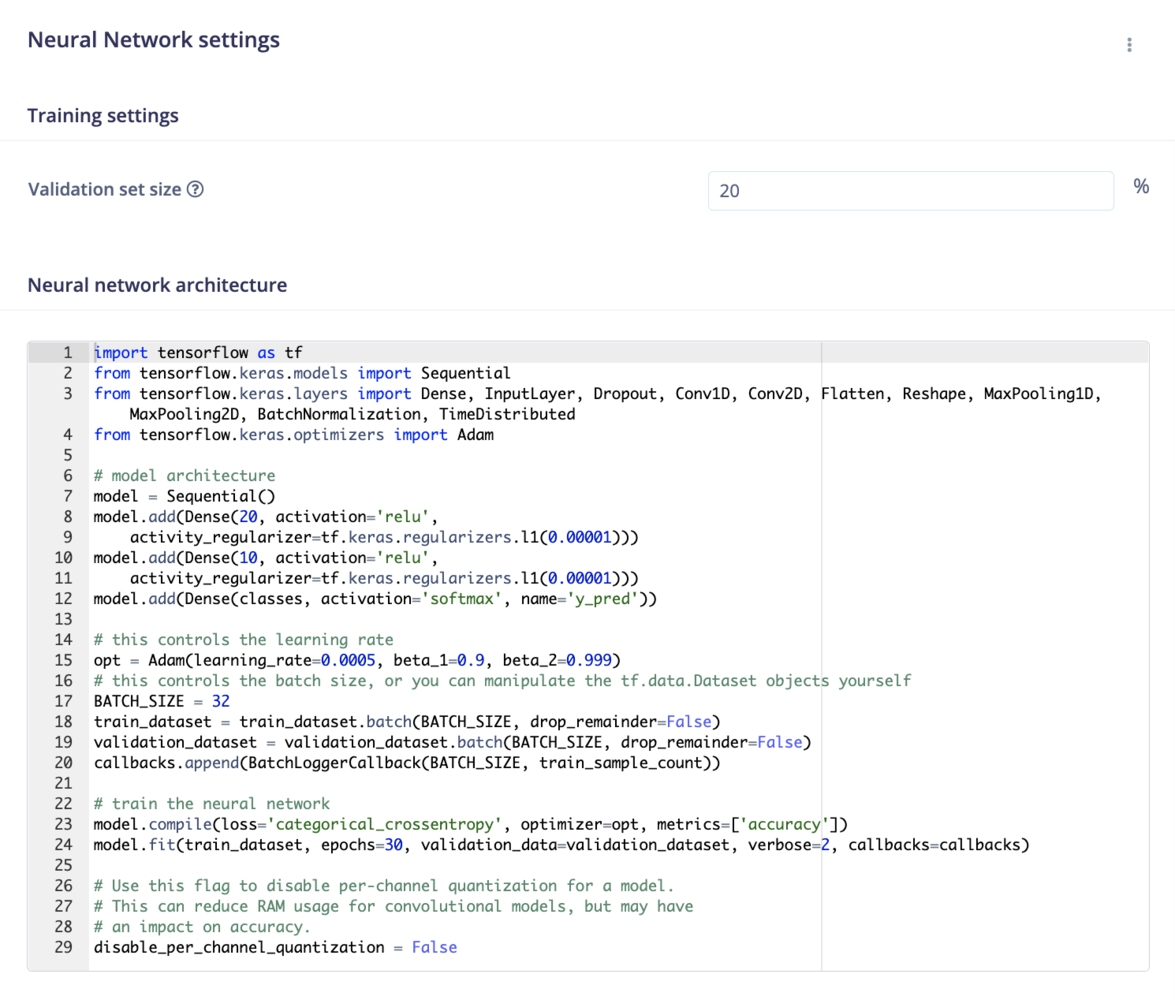
If have advanced knowledge in machine learning and Keras, you can switch to the Expert Mode and access the full Keras API to use custom architectures:
You can use the expert mode to change your loss function, optimizer, print your model architecture and even set an early stopping callback to prevent overfitting your model.
Also see the dedicated page about the expert mode 