- Prevent leaking data between your train and validation set. See: Using metadata to control your train/validation split below.
- Synchronisation actions in data pipelines, for example to remove data in a project if the source data was deleted in the cloud.
- Get a better understanding of real-world accuracy by seeing how well your model performs when grouped by a metadata key. E.g. whether data on site A performs better than site B.
Viewing and editing metadata in the Studio
Metadata is shown on Data acquisition when you click on a data item. From here you can add, edit and remove metadata keys.
Metadata shown on Data acquisition
Metadata analytics
Once your data items have metadata attached, you can get a high-level picture of the composition of your dataset at a glance using the Data distribution panel. Click the chart icon next to the Data Collected stat on the Data acquisition page to open it.
Data distribution panel — single metadata key view
accent, site, subject). Use the controls at the top right to:
- All samples / Training / Test — scope the view to your full dataset or just one split.
- Overall / Compare — switch between the single-key bar chart and a cross-tabulation of two metadata keys (see below).
- Count / % — toggle between absolute sample counts and relative percentages.
- Metadata key selector — pick which metadata key(s) to visualise.
Comparing two metadata keys
Switch to Compare mode to cross-tabulate two metadata keys at once. The result is a heatmap table where rows represent values of the first key and columns represent values of the second key, with cell shading proportional to the amount of data.
Data distribution panel — Compare mode cross-tabulating two metadata keys
Coverage: 92.5% (32m 57s / 35m 37s) • accent: 12 unique • gender: 2 unique) telling you what proportion of your dataset has both of the selected metadata keys defined and how many unique values each key has.
Adding metadata when adding data
It’s pretty unpractical to manually add metadata to each data item, so the easiest way is to add metadata when you upload data. You can do this either by:- Providing an info file file when uploading data (this works both in the CLI and in the Studio).
- Setting the
x-metadataheader to a JSON string when calling the ingestion service:
Reading and writing metadata through the API
You can read samples, including their metadata via the List samples API call, and then use the Set sample metadata API to update the metadata. For example, this is how you add a metadata field to the first data sample in your project using the Python API Bindings:Using metadata to control your train validation split
When training an ML model we split your data into a train and a validation set. This is done so that during training you can evaluate whether your model works on data that it has seen before (train set) and on data that it has never seen before (validation set) - ideally your model performs similarly well on both data sets: a sign that your model will perform well in the field on completely novel data. However, this can give a false sense of security if data that is very similar ends up in both your train and validation set (“data leakage”). For example:- You split a video into individual frames. These images don’t differ much from frame to frame; and you don’t want some frames in the train, and some in the validation set.
- You’re building a sleep staging algorithm, and look at 30 second windows. From window to window the data for one person will look similar, so you don’t want one window in the train, another in the validation set for the same person in the same night.
- Tag all your data items with metadata.
-
Go to any ML block and under Advanced training settings set ‘Split train/validation set on metadata key’ to a metadata key (f.e.
video_file).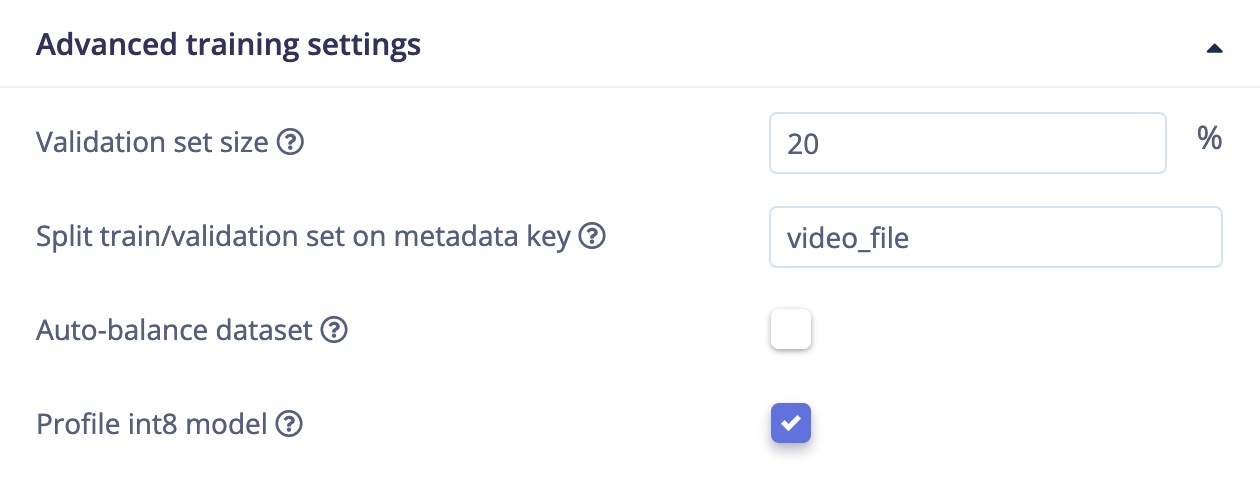
Controlling the train/validation split with a metadata key
video_file will always be grouped together in either the train or the validation set; so no more data leakage.