Run transformation jobs directly from your projects
You can also trigger cloud jobs, known as transformation blocks, these are particularly useful if you want to generate synthetic datasets or automate tasks using the Edge Impulse API. We provide several pre-built transformation blocks available for organizations’ projects: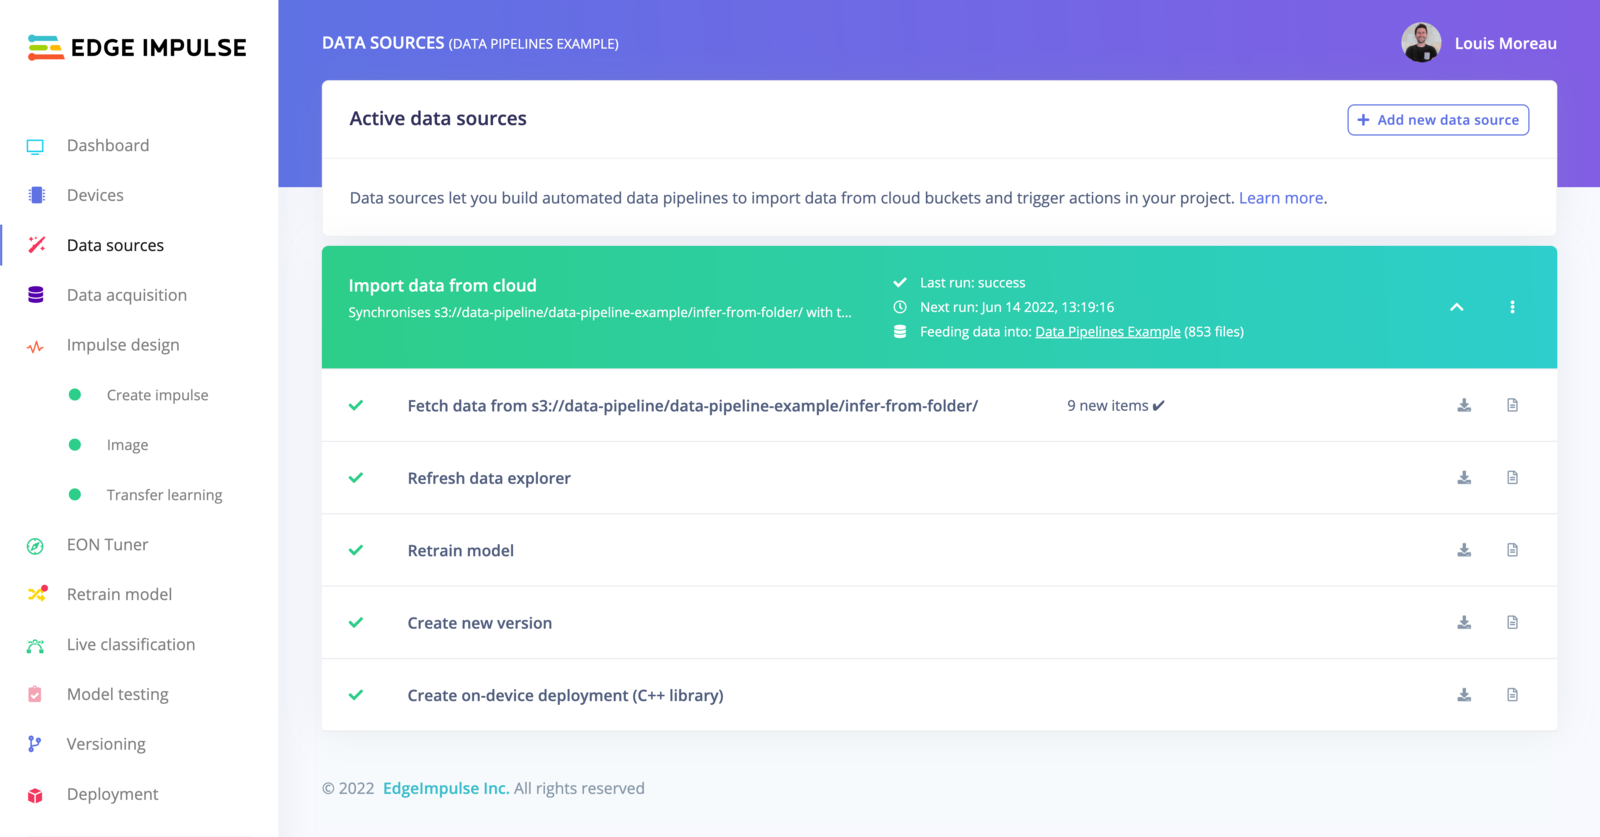
Data sources
This view, originally accessible from the main left menu, has been moved to the Data acquisition tab for better clarity. The screenshots have not yet been updated.
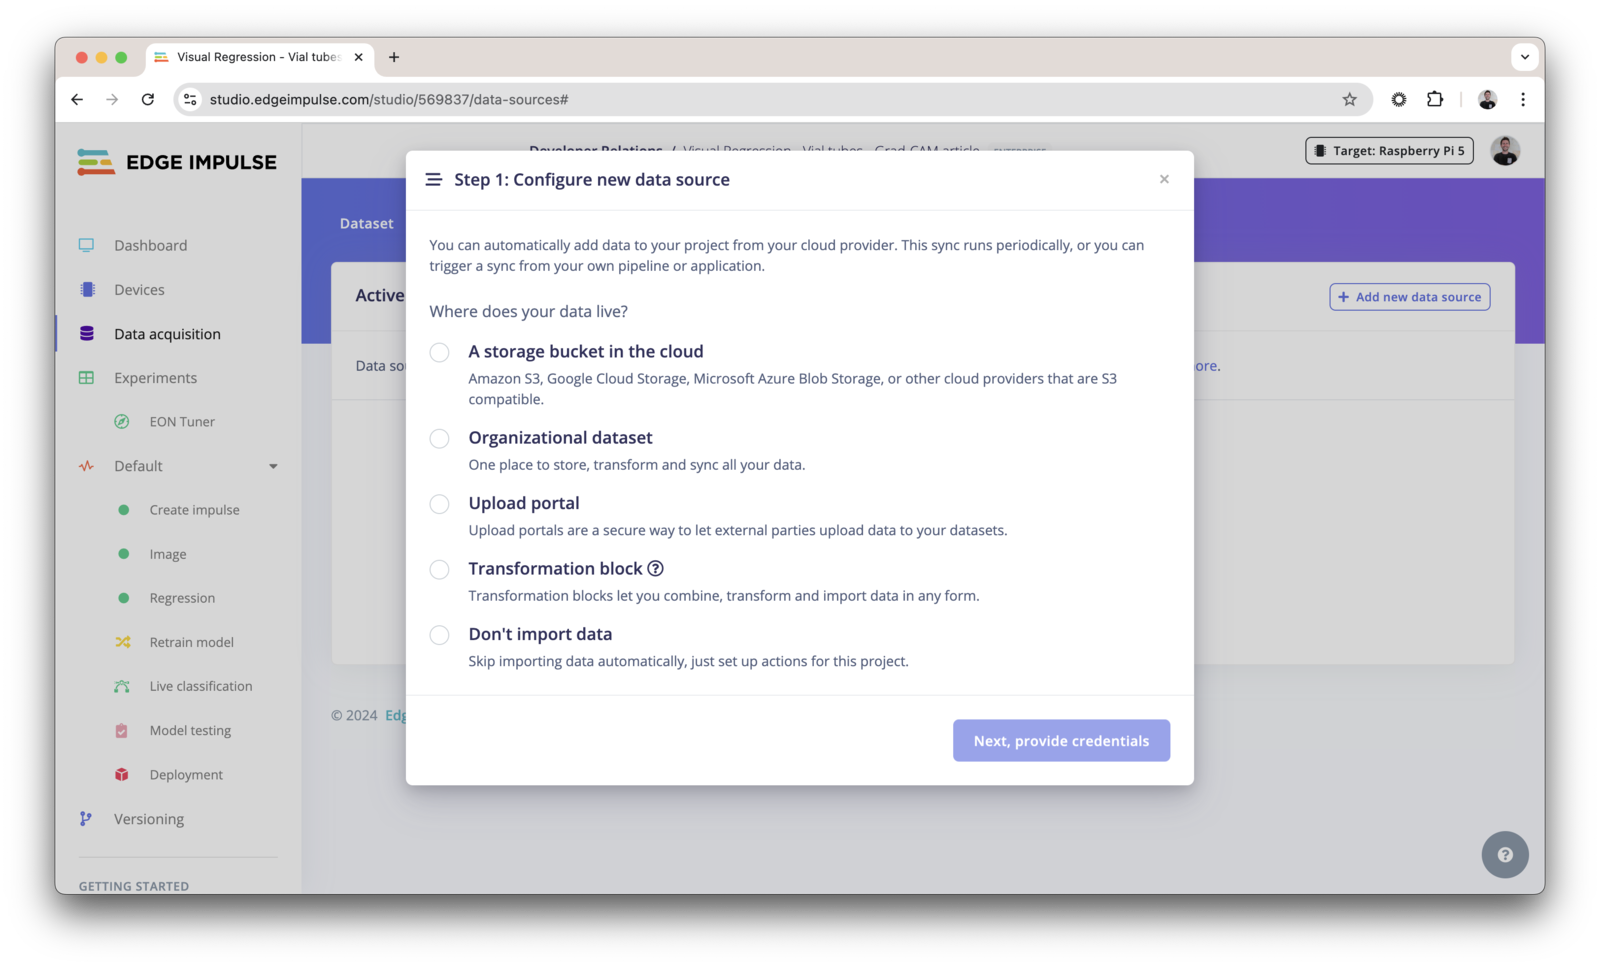
Add a data source
Click in + Add new data source and select where your data lives: You can either use:- Cloud data storage
- Organizational datasets (enterprise feature)
- Upload portals (enterprise feature)
- Transformation blocks (enterprise feature)
- Don’t import data (if you just need to create a pipeline)
Add new data source
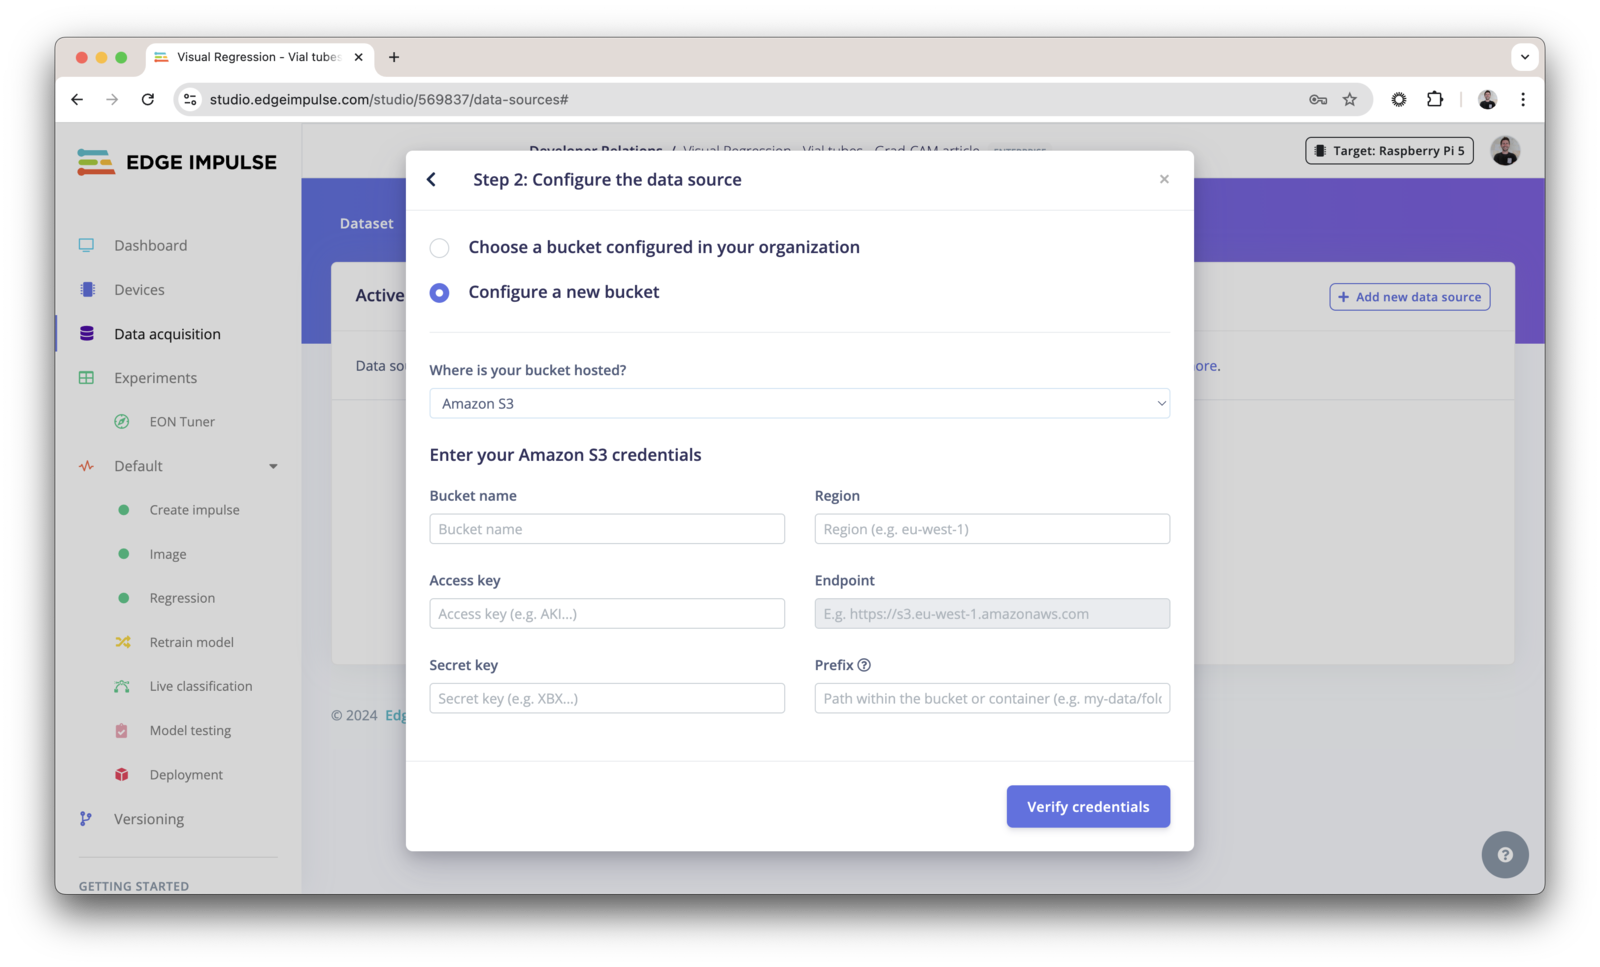
Provide your credentials
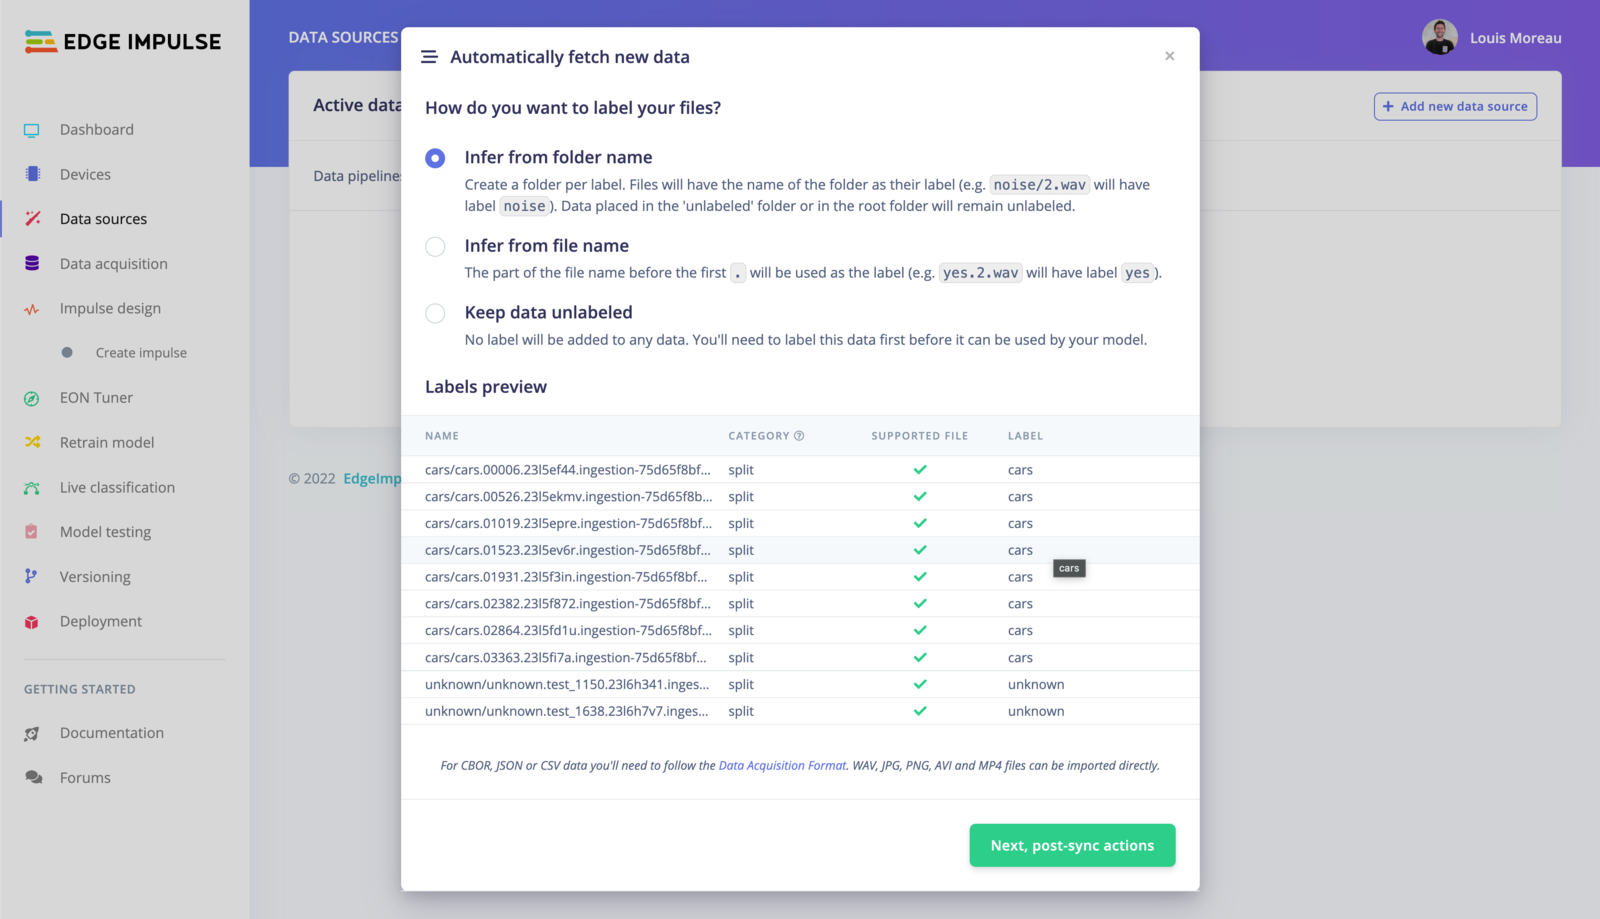
Automatically label your data
Infer from folder name
In the example above, the structure of the folder is the following:80/20.
The samples present in an
unlabeled/ folder will be kept unlabeled in Edge Impulse Studio.Infer from file name
When using this option, only the file name is taken into account. The part before the first. will be used to set the label. E.g. cars.01741.jpg will set the label to cars.
Keep the data unlabeled
All the data samples will be unlabeled, you will need to label them manually before using them. Finally, click on Next, post-sync actions.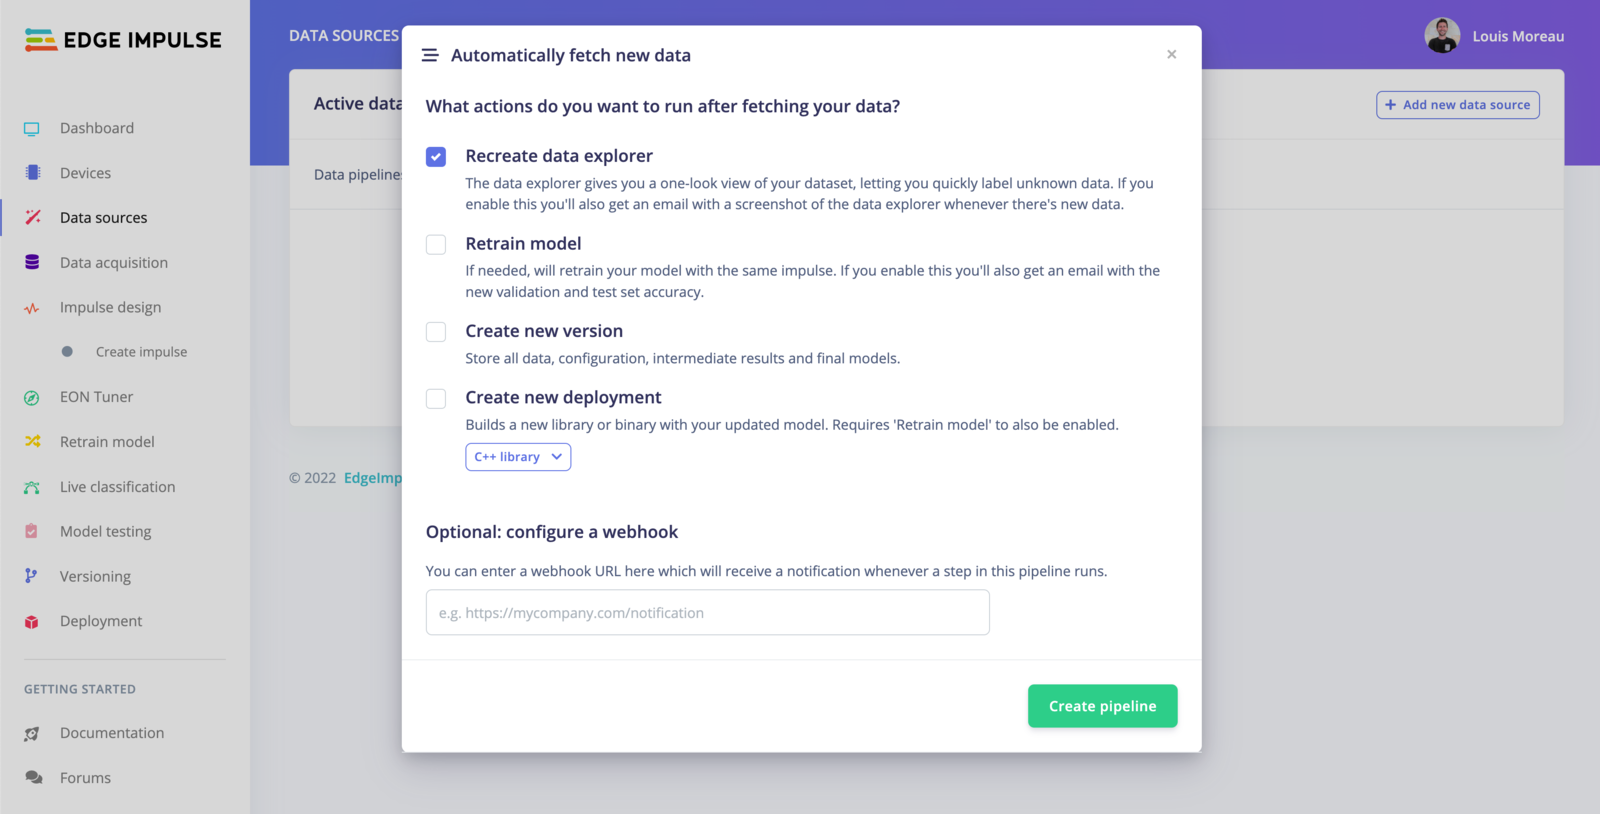
Trigger actions
- Recreate data explorer The data explorer gives you a one-look view of your dataset, letting you quickly label unknown data. If you enable this you’ll also get an email with a screenshot of the data explorer whenever there’s new data.
- Retrain model If needed, will retrain your model with the same impulse. If you enable this you’ll also get an email with the new validation and test set accuracy. Note: You will need to have trained your project at least once.
- Create new version Store all data, configuration, intermediate results and final models.
- Create new deployment Builds a new library or binary with your updated model. Requires ‘Retrain model’ to also be enabled.
Run the pipeline
Once your pipeline is set, you can run it directly from the UI, from external sources or by scheduling the task.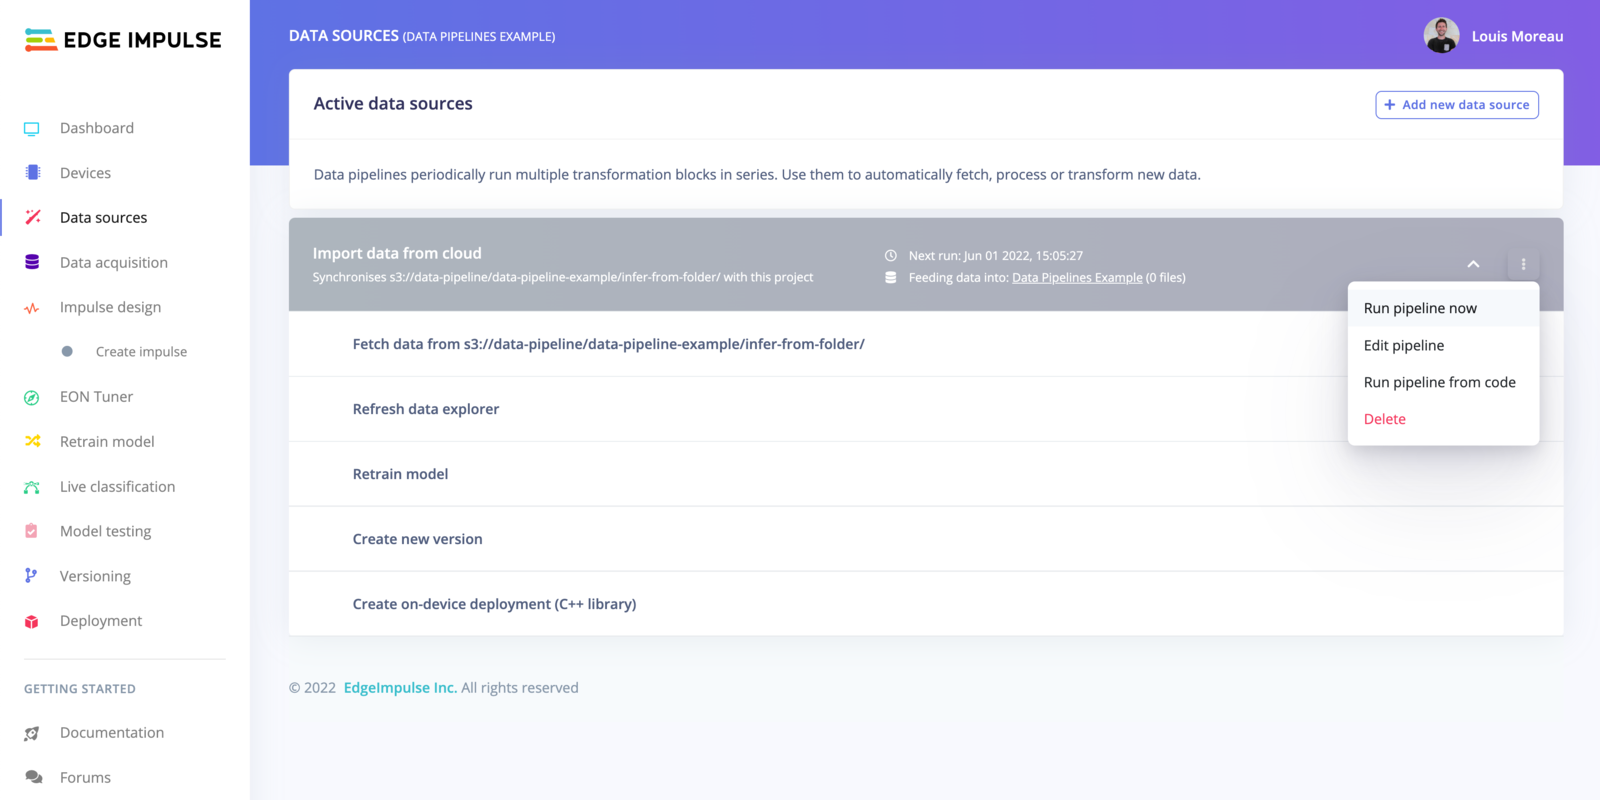
Run your pipeline
Run the pipeline from the UI
To run your pipeline from Edge Impulse studio, click on the⋮ button and select Run pipeline now.
Run the pipeline from code
To run your pipeline from Edge Impulse studio, click on the⋮ button and select Run pipeline from code. This will display an overlay with curl, Node.js and Python code samples.
You will need to create an API key to run the pipeline from code.
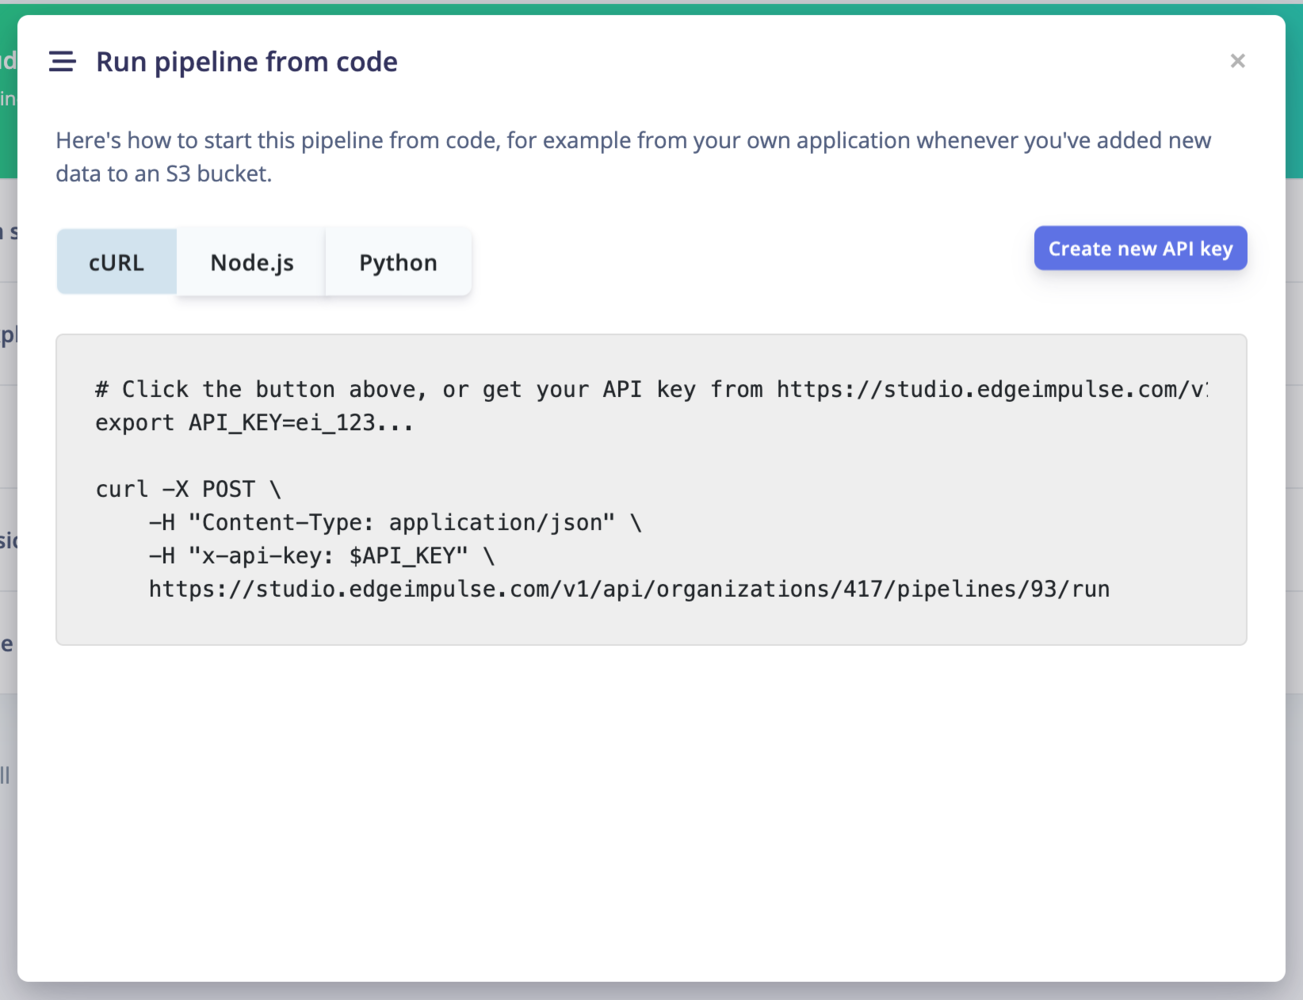
Run the pipeline from code
Schedule your pipeline jobs
By default, your pipeline will run every day. To schedule your pipeline jobs, click on the⋮ button and select Edit pipeline.
Free users can only run the pipeline every 4 hours. If you are an enterprise customer, you can run this pipeline up to every minute.
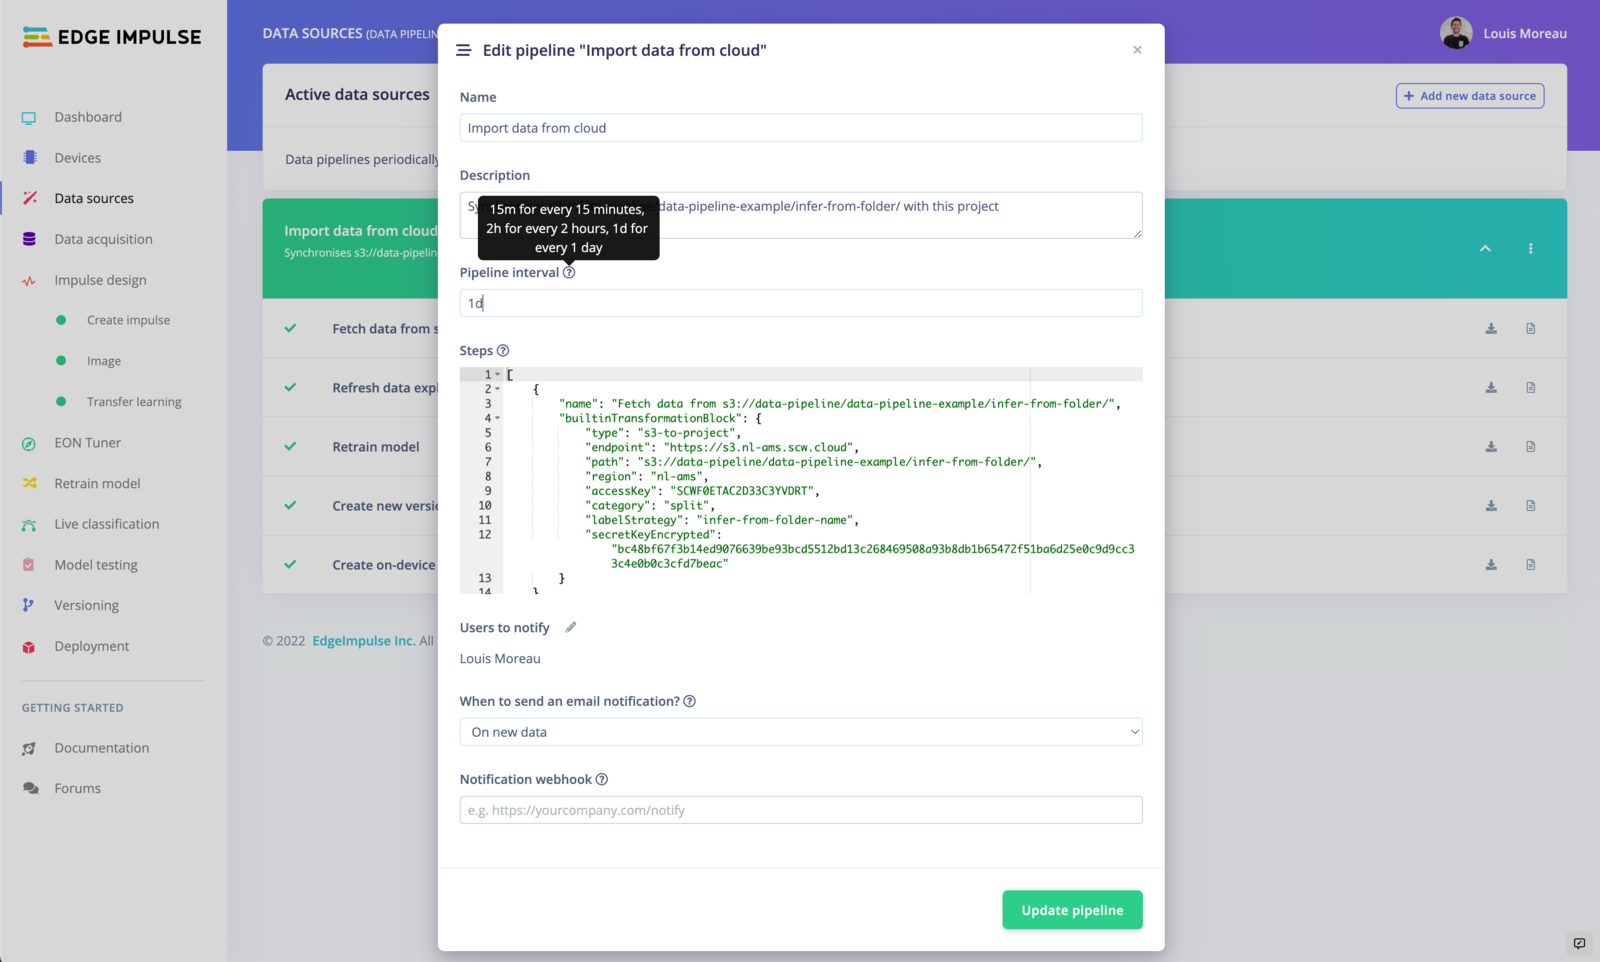
Edit pipeline
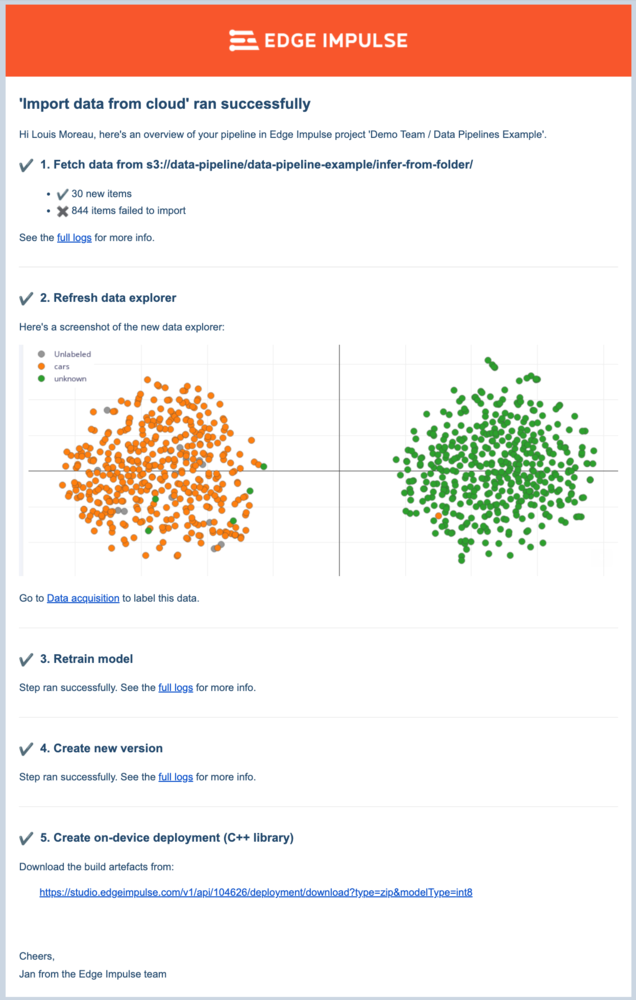
Email example containing the full results
You can also define who can receive the email. The users have to be part of your project. See: Dashboard -> Collaboration.
Webhooks
You can also create a webhook to call a URL when the pipeline has run. It will run a POST request containing the following information: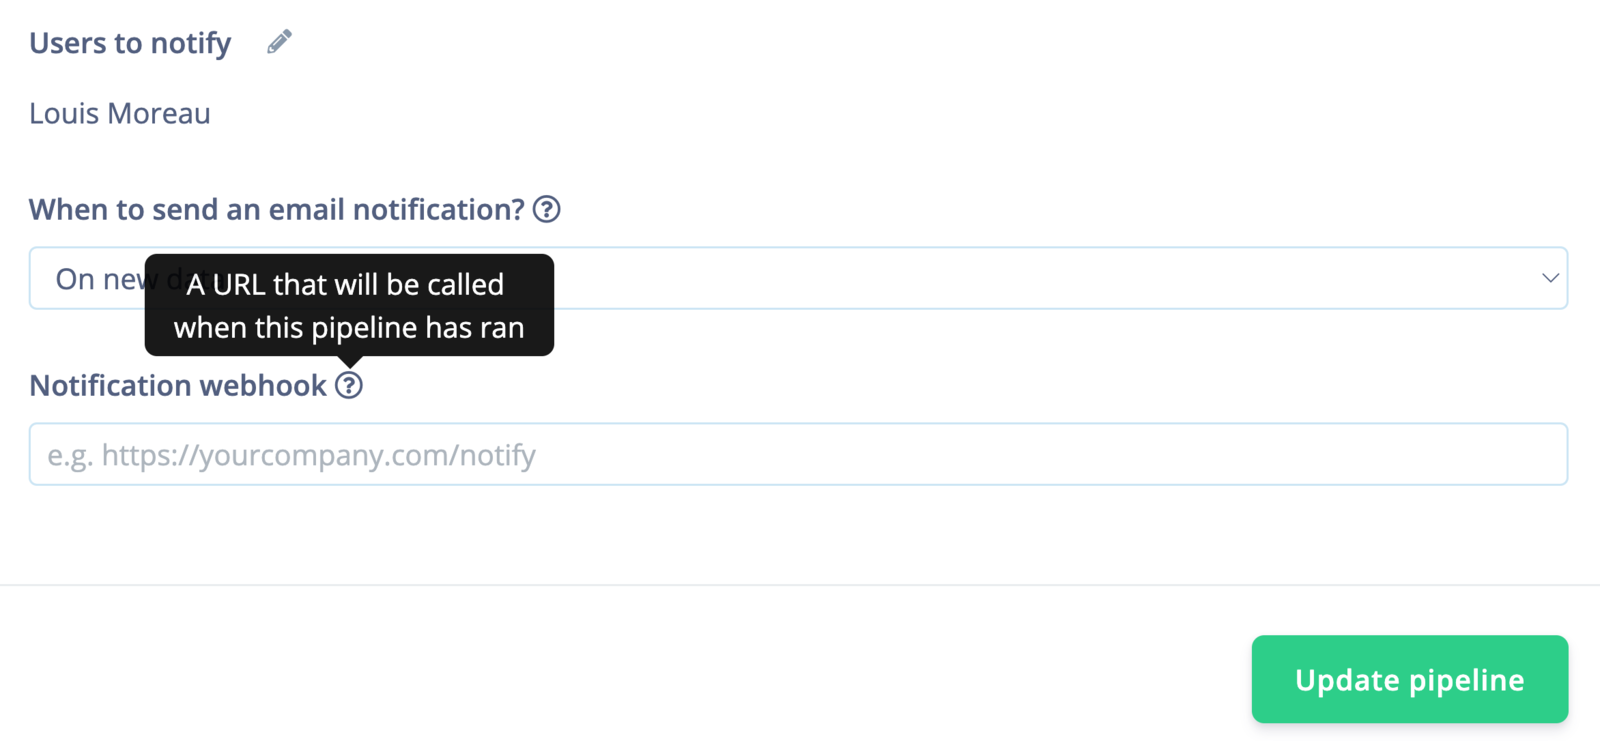
Data sources webhooks
Edit your pipeline
To update your pipeline, edit the configuration JSON available in⋮ -> Run pipeline from code.
Here is an example of what you can get if all the actions have been selected:
builtinTransformationBlock.
If you are part of an organization, you can use your custom transformation jobs in the pipeline. In your organization workspace, go to Custom blocks -> Transformation and select Run job on the job you want to add.
Transformation blocks
Copy