Detect non-voice audio?We have a tutorial for that too! See Sound recognition.
1. Prerequisites
For this tutorial, you’ll need a supported device. If your device is connected under Devices in the studio you can proceed: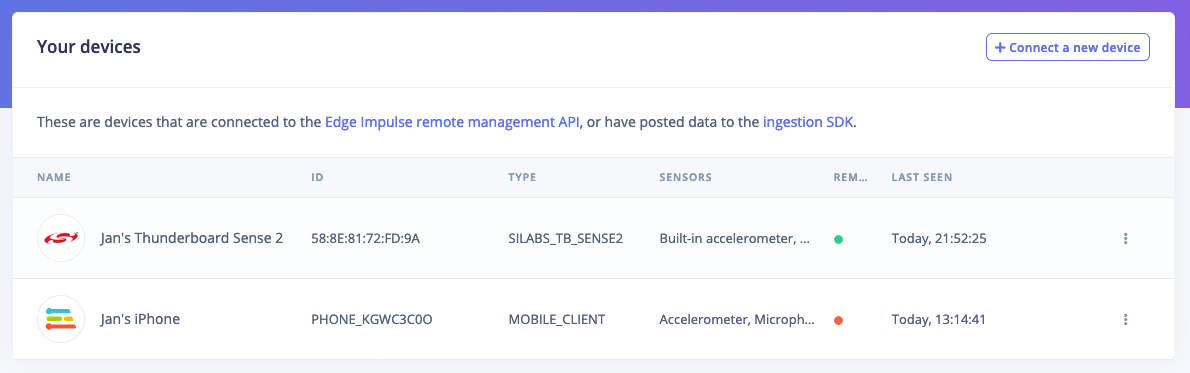
Device compatibilityEdge Impulse can ingest data from any device - including embedded devices that you already have in production. See the documentation for the Ingestion API for more information.
2. Collecting your first data
In this tutorial we want to build a system that recognizes keywords, so your first job is to think of a great one. It can be your name, an action, or even a growl - it’s your party. Do keep in mind that some keywords are harder to distinguish from others, and especially keywords with only one syllable (like ‘One’) might lead to false-positives (e.g. when you say ‘Gone’). This is the reason that Apple, Google and Amazon all use at least three-syllable keywords (‘Hey Siri’, ‘OK, Google’, ‘Alexa’). A good one would be “Hello world”. To collect your first data, go to Data acquisition, set your keyword as the label, set your sample length to 10s., your sensor to ‘microphone’ and your frequency to 16KHz. Then click Start sampling and start saying your keyword over and over again (with some pause in between).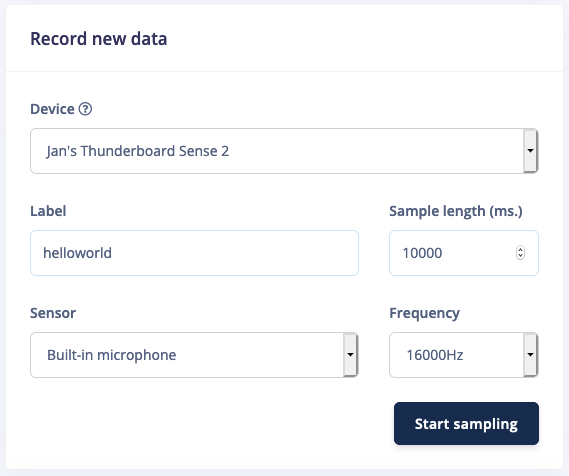
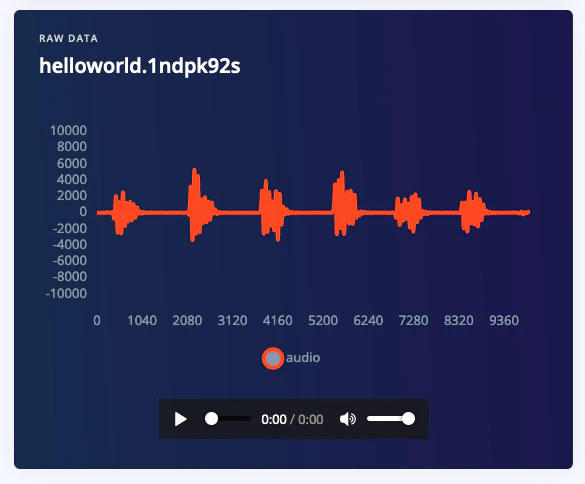
Note: Data collection from a development board might be slow, you can use your Mobile phone as a sensor to make this much faster.Afterwards you have a file like this, clearly showing your keywords, separated by some noise.
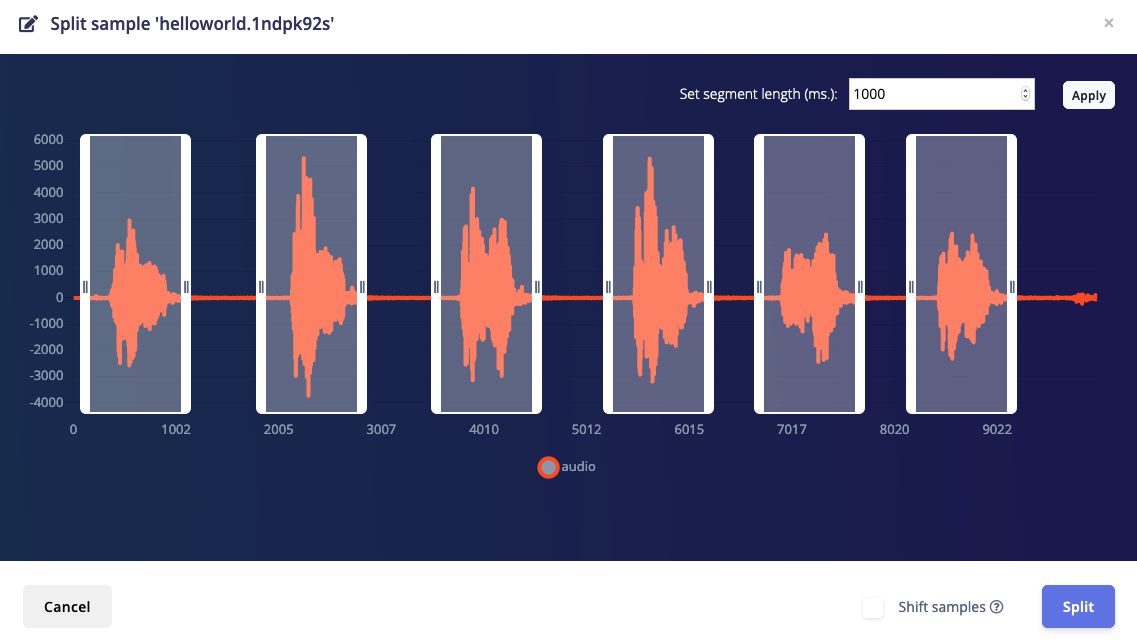
⋮ next to your sample, and select Split sample.
3. Building your dataset
Now that you know how to collect data we can consider other data we need to collect. In addition to your keyword we’ll also need audio that is not your keyword. Like background noise, the TV playing (‘noise’ class), and humans saying other words (‘unknown’ class). This is required because a machine learning model has no idea about right and wrong (unless those are your keywords), but only learns from the data you feed into it. The more varied your data is, the better your model will work. For each of these three classes (‘your keyword’, ‘noise’, and ‘unknown’) you want to capture an even amount of data (balanced datasets work better) - and for a decent keyword spotting model you’ll want at least 10 minutes in each class (but, the more the better). Thus, collect 10 minutes of samples for your keyword - do this in the same manner as above. The fastest way is probably through your mobile phone, collecting 1 minute clips, then automatically splitting this data. Make sure to capture wide variations of the keyword: leverage your family and your colleagues to help you collect the data, make sure you cover high and low pitches, and slow and fast speakers. For the noise and unknown datasets you can either collect this yourself, or make your life a bit easier by using dataset of both ‘noise’ (all kinds of background noise) and ‘unknown’ (random words) data that we built for you here: Keyword Spotting Dataset. To import this data, go to Data acquisition, click the Upload icon, and select a number of ‘noise’ or ‘unknown’ samples (there’s 25 minutes of each class, but you can select less files if you want), and clicking Begin upload. The data is automatically labeled and added to your project.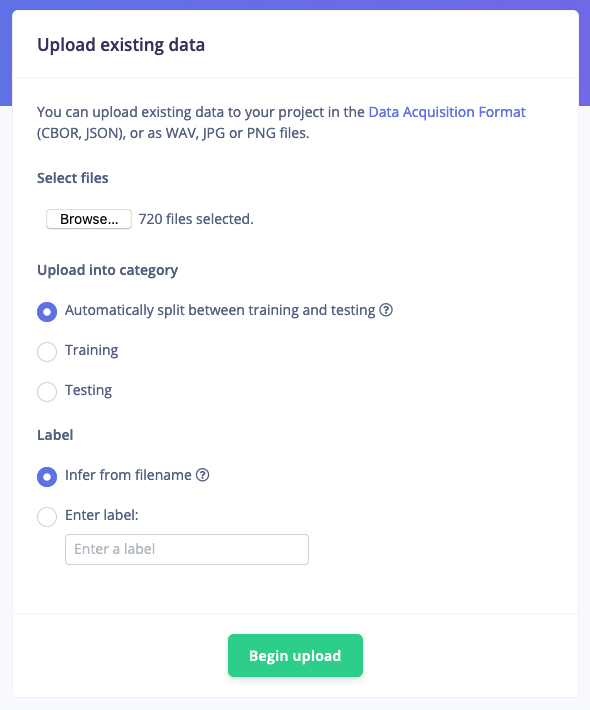
Rebalancing your dataset
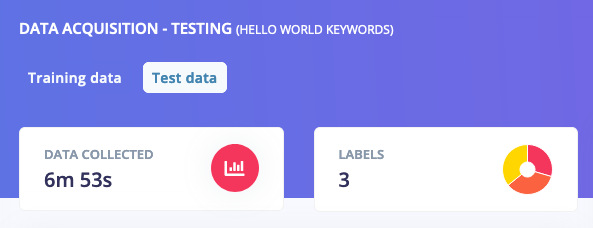
If you’ve collected all your training data through the ‘Record new data’ widget you’ll have all your keywords in the ‘Training’ dataset. This is not great, because you want to keep 20% of your data separate to validate the machine learning model. To mitigate this you can go to Dashboard and select Perform train/test split. This will automatically split your data between a training class (80%) and a testing class (20%). Afterwards you should see something like this: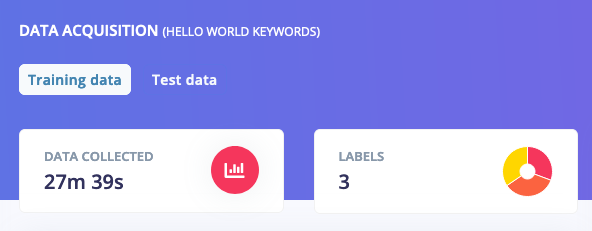
4. Designing your impulse
With the data set in place you can design an impulse. An impulse takes the raw data, slices it up in smaller windows, uses signal processing blocks to extract features, and then uses a learning block to classify new data. Signal processing blocks always return the same values for the same input and are used to make raw data easier to process, while learning blocks learn from past experiences. For this tutorial we’ll use the “MFCC” signal processing block. MFCC stands for Mel Frequency Cepstral Coefficients. This sounds scary, but it’s basically just a way of turning raw audio—which contains a large amount of redundant information—into simplified form. Edge Impulse has many other processing blocks for audio, including “MFE” and the “Spectrogram” blocks for non-voice audio, but the “MFCC” block is great for dealing with human speech. We’ll then pass this simplified audio data into a Neural Network block, which will learn to distinguish between the three classes of audio. In the Studio, go to the Create impulse tab, add a Time series data, an Audio (MFCC) and a Classification (Keras) block. Leave the window size to 1 second (as that’s the length of our audio samples in the dataset) and click Save Impulse.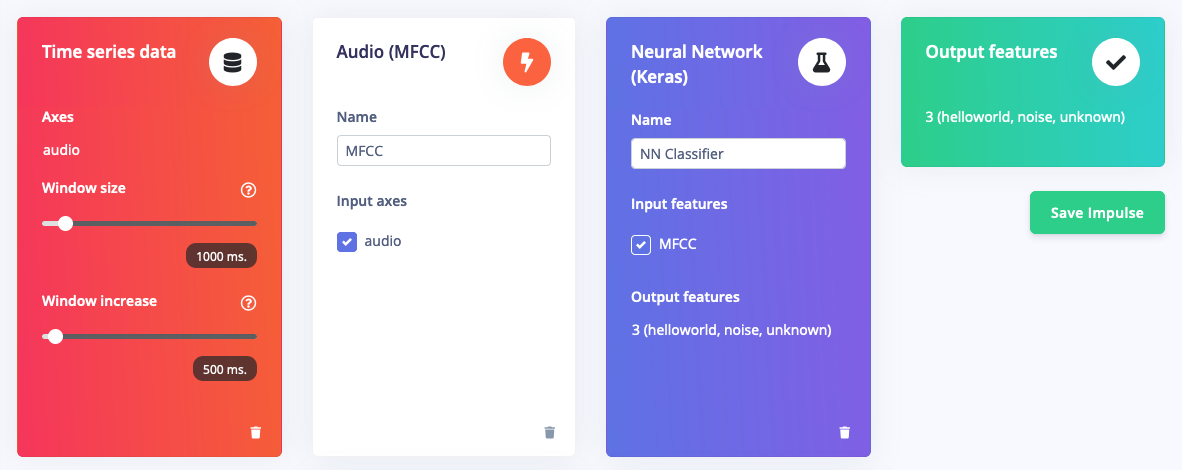
5. Configure the MFCC block
Now that we’ve assembled the building blocks of our Impulse, we can configure each individual part. Click on the MFCC tab in the left hand navigation menu. You’ll see a page that looks like this: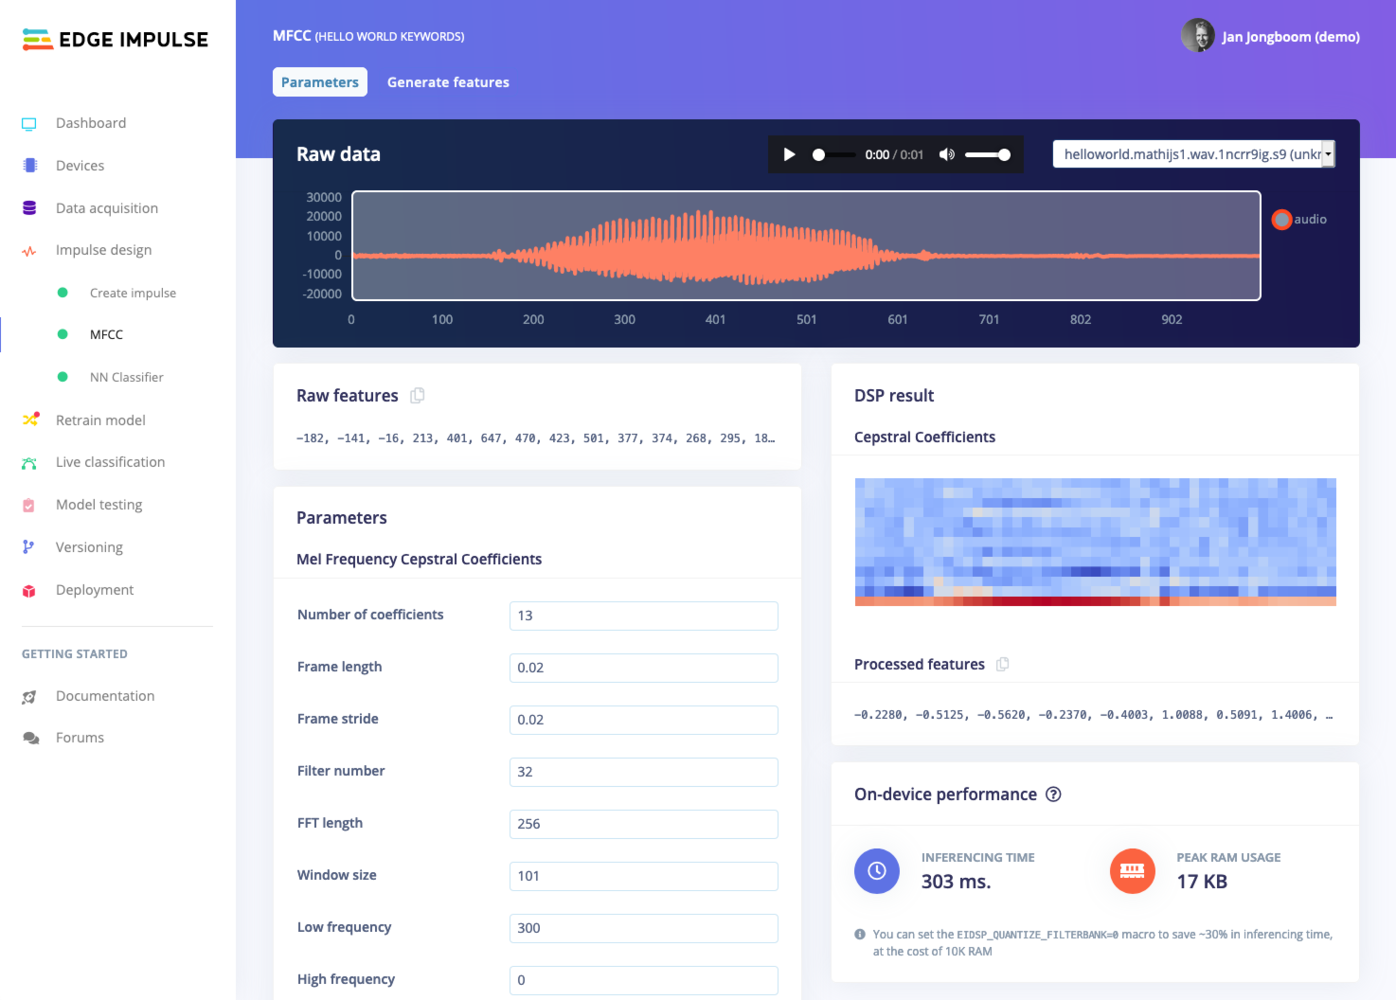


Feature explorer
The spectrograms generated by the MFCC block will be passed into a neural network architecture that is particularly good at learning to recognize patterns in this type of tabular data. Before training our neural network, we’ll need to generate MFCC blocks for all of our windows of audio. To do this, click the Generate features button at the top of the page, then click the green Generate features button. This will take a minute or so to complete. Afterwards you’re presented with one of the most useful features in Edge Impulse: the feature explorer. This is a 3D representation showing your complete dataset, with each data-item color-coded to its respective label. You can zoom in to every item, find anomalies (an item that’s in a wrong cluster), and click on items to listen to the sample. This is a great way to check whether your dataset contains wrong items, and to validate whether your dataset is suitable for ML (it should separate nicely).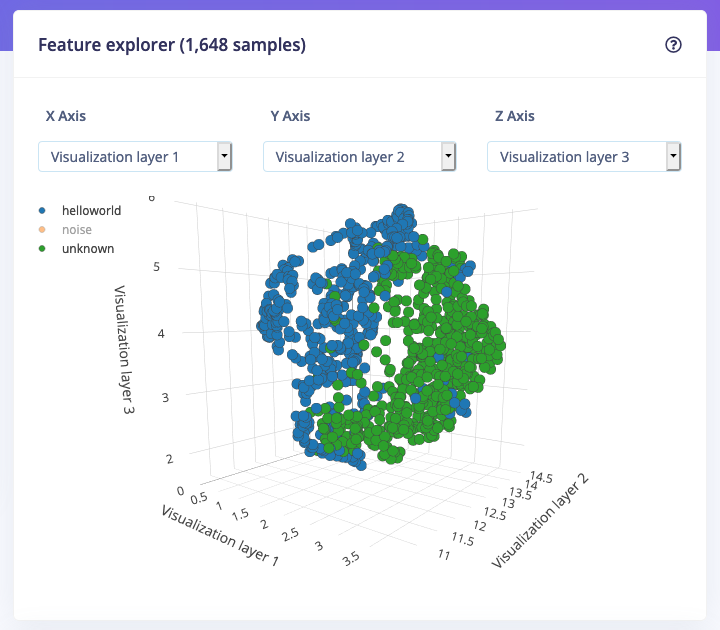
6. Configure the neural network
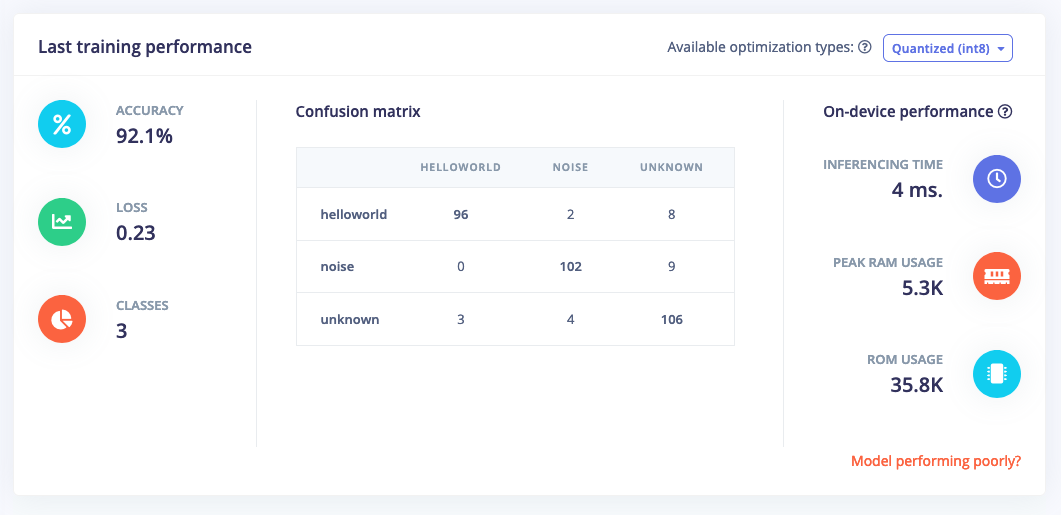
With all data processed it’s time to start training a neural network. Neural networks are algorithms, modeled loosely after the human brain, that can learn to recognize patterns that appear in their training data. The network that we’re training here will take the MFCC as an input, and try to map this to one of three classes—your keyword, noise or unknown. Click on NN Classifier in the left hand menu. You’ll see the following page: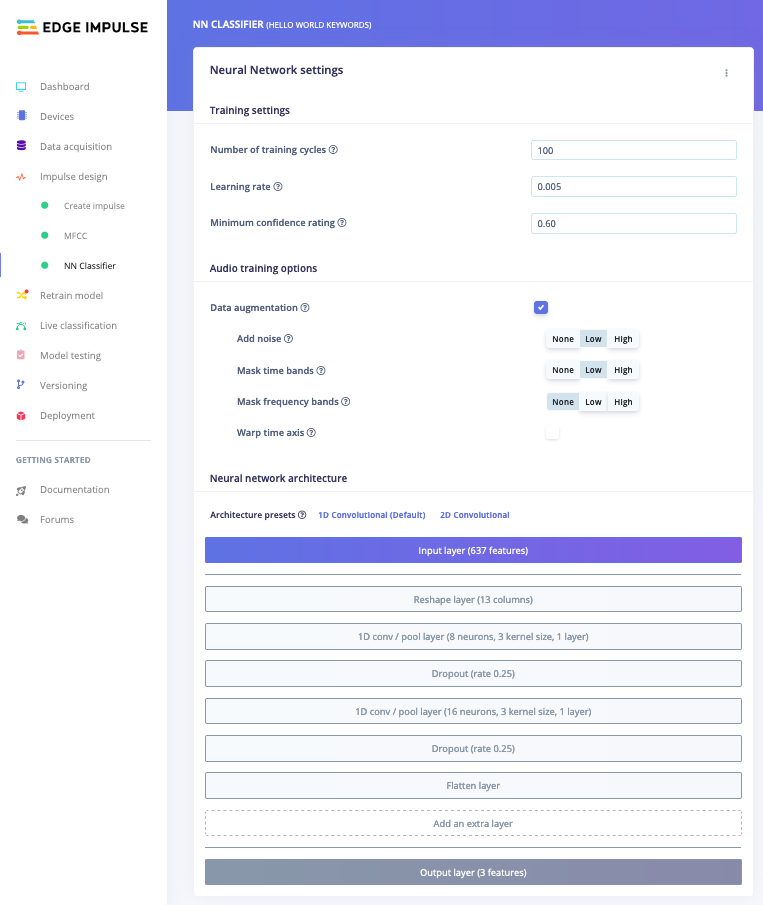
7. Classifying new data
The performance numbers in the previous step show that our model is working well on its training data, but it’s extremely important that we test the model on new, unseen data before deploying it in the real world. This will help us ensure the model has not learned to overfit the training data, which is a common occurrence. Fortunately we’ve put aside 20% of our data already in the ‘Test set’ (see Data acquisition). This is data that the model has never seen before, and we can use this to validate whether our model actually works on unseen data. To run your model against the test set, head to Model testing, select all items and click Classify selected.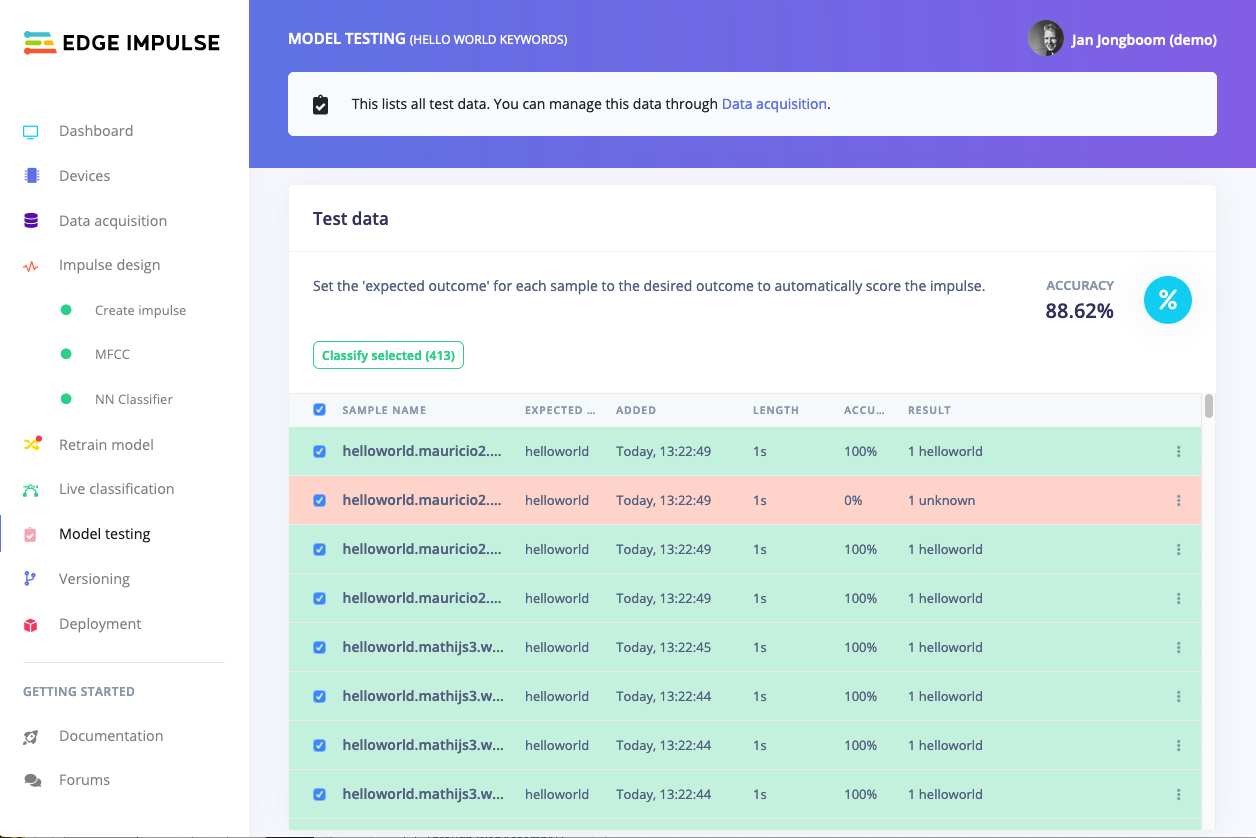
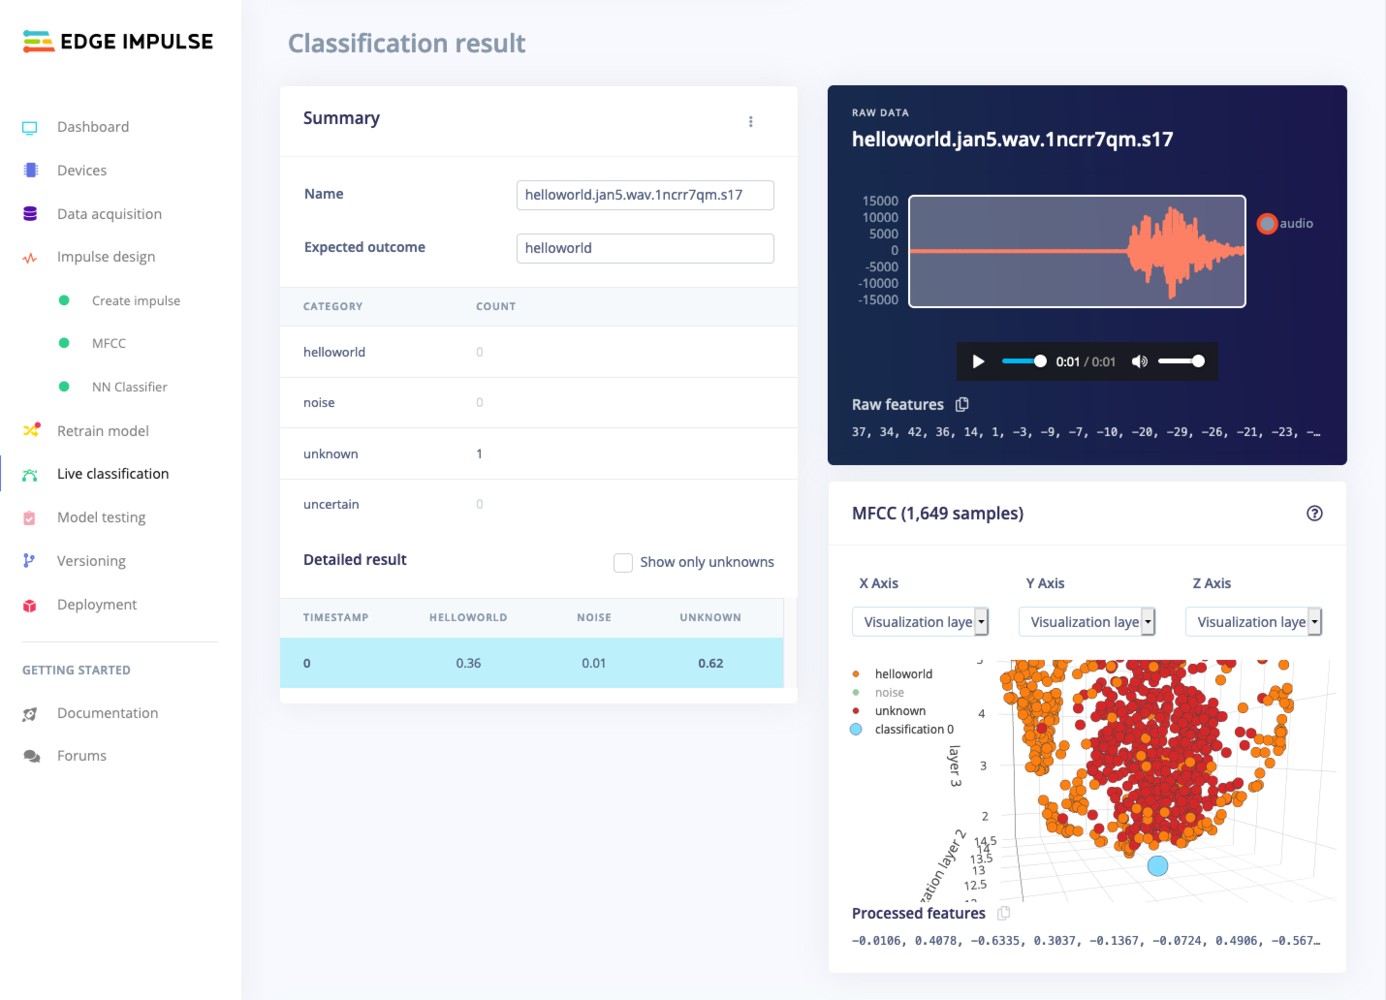
⋮) next to a sample and select Show classification. You’re then transported to the classification view, which lets you inspect the sample, and compare the sample to your training data. This way you can inspect whether this was actually a classification failure, or whether your data was incorrectly labeled. From here you can either update the label (when the label was wrong), or move the item to the training set to refine your model.
8. Deploying to your device
With the impulse designed, trained and verified you can deploy this model back to your device. This makes the model run without an internet connection, minimizes latency, and runs with minimum power consumption. Edge Impulse can package up the complete impulse - including the MFCC algorithm, neural network weights, and classification code - in a single C++ library that you can include in your embedded software.Mobile phoneYour mobile phone can build and download the compiled impulse directly from the mobile client. See ‘Deploying back to device’ on the Using your mobile phone page.
Flashing the device
When you click the Build button, you’ll see a pop-up with text and video instructions on how to deploy the binary to your particular device. Follow these instructions. Once you are done, we are ready to test your impulse out.Running the model on the device
We can connect to the board’s newly flashed firmware over serial. Open a terminal and run:Poor performance due to unbalanced dataset?
Is your model working properly in the Studio, but does not recognize your keyword when running in continuous mode on your device? Then this is probably due to dataset imbalance (a lot more unknown / noise data compared to your keyword) in combination with our moving average code to reduce false positives. When running in continuous mode we run a moving average over the predictions to prevent false positives. E.g. if we do 3 classifications per second you’ll see your keyword potentially classified three times (once at the start of the audio file, once in the middle, once at the end). However, if your dataset is unbalanced (there’s a lot more noise / unknown than in your dataset) the ML model typically manages to only find your keyword in the ‘center’ window, and thus we filter it out as a false positive. You can fix this by either:- Adding more data :-)
-
Or, by disabling the moving average filter by going into ei_run_classifier.h (in the edge-impulse-sdk directory) and removing: