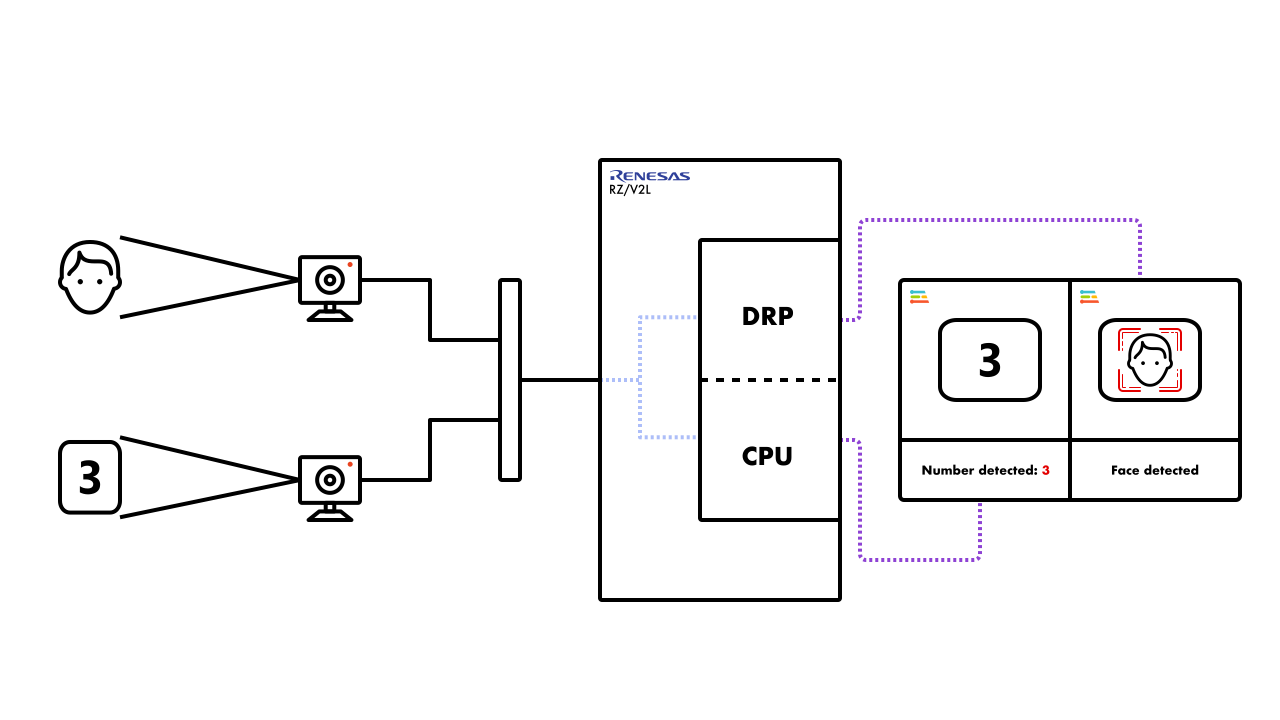
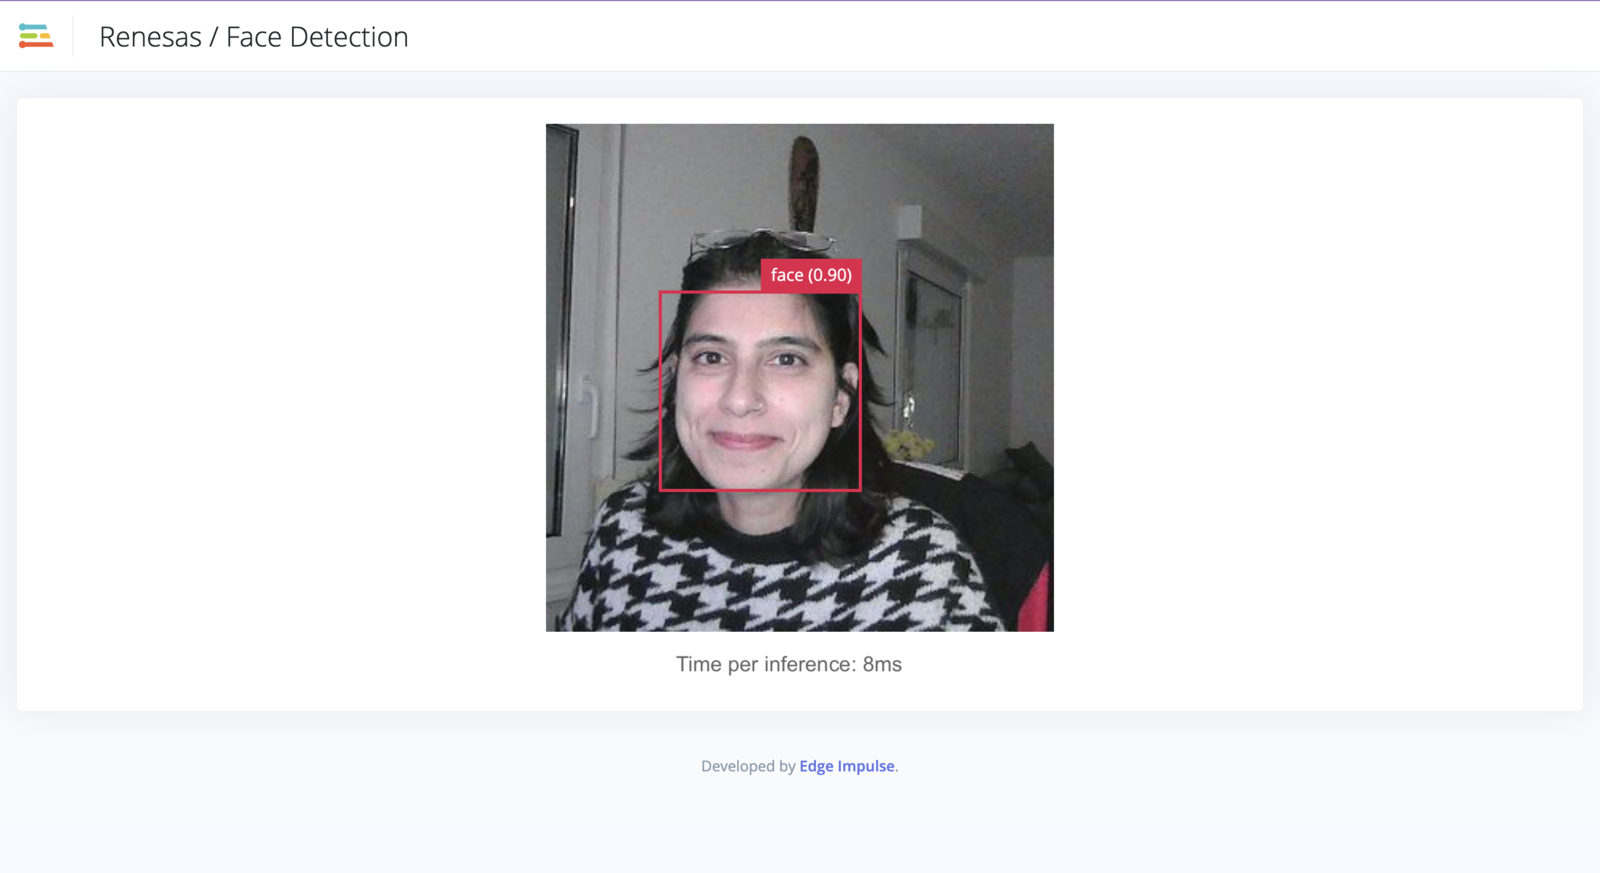
- YOLOv5 - Face detection using DRPAI acceleration
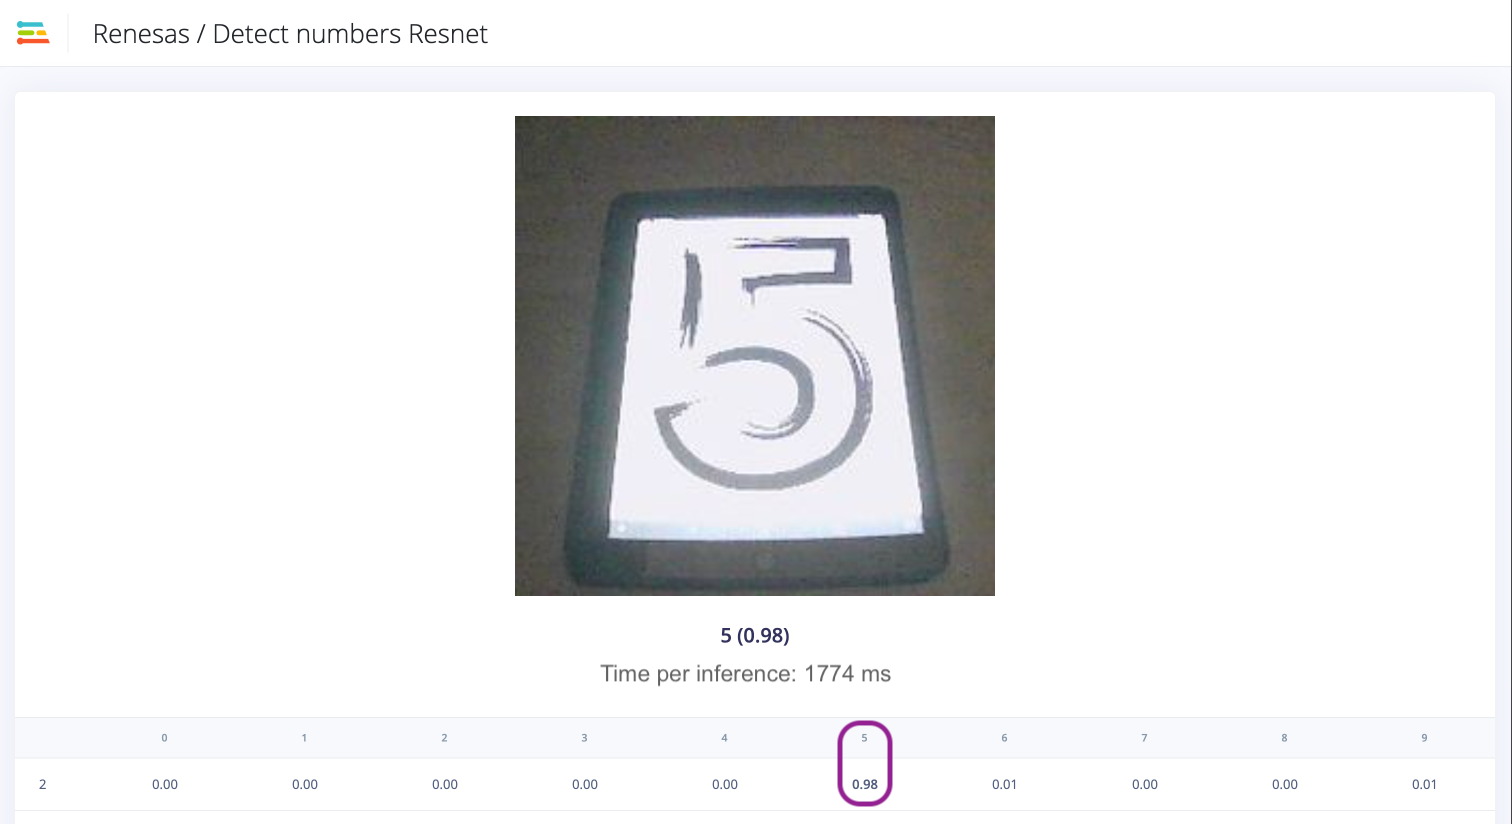
- ResNet - Number recognition on AARCH64 (no acceleration)
Prerequisites
To follow this tutorial, you will need a combination of hardware and software tools. You will need an Edge Impulse compatible Renesas RZ board, either the Renesas RZ/V2L smarc board or the Avnet RZBoard. In addition to the board, the following additional items are needed:- Two webcams - the webcams used for this tutorial are:
- Logitech C920 HD Pro Webcam
- Logitech C922 Pro Stream 1080p Webcam
- USB hub (to connect the cameras to the Renesas RZ/V2L board)
- Ethernet cable or USB serial cable
Example models
The models used for this tutorial can be downloaded as a zip file from this link. The file (models-20230921T125858Z-001.zip) that you download, may be named differently for you. Once the file has been downloaded, go ahead and unzip the files either in the GUI or as follows:
The node.js application
Setup and installation
The application required to run the two models simultaneously must be downloaded from the Edge Impulse CLI repository. The simplest way to do this is to run the following command in your terminal/command line application:1fc1639acdfb9e7af3fc8794619334b28dffac00. Once the application has been downloaded, unzip the contents, navigate to the directory and list the contents to ensure the operation was successful. This can be done as follows:
edge-impulse-linux-cli-classify-camera-finer-control when installing and running the application.
Running the application
Before we can run the application, please ensure that the directory structure is as follows:- model - name of the model to executed in the current instance (required)
- camera - the name of the camera to be used for the instance as detected by the system (required)
- fps - frames per second of the input stream. This will affect the speed of the app (default: 5)
- width - the width of the input image directed to the respective model (default: 640)
- height - the height of the input image directed to the respective model (default: 480)
edge-impulse-linux-cli-classify-camera-finer-control folder. In this case, the cd commands from the following instructions can be omitted.
You will need to open two terminal instances.
In terminal 1 run the following command:
Running the application with WebServer
The above steps are enough to execute both models and see their outputs in the terminal. However, it is always better to see a visual output of the image detection models that are being executing. With a slight modification of the execution commands, it is possible to run the application using WebServer and see the visual output. The arguments to run the application using WebServer are as follows:- model - name of the model to executed in the current instance (required)
- camera - the name of the camera to be used for the instance as detected by the system (required)
- fps - frames per second of the input stream. This will affect the speed of the app (default: 5)
- width - the width of the input image directed to the respective model (default: 640)
- height - the height of the input image directed to the respective model (default: 480)
- port - this is the port to which the output from the cameras and application is directed (default: 4912)
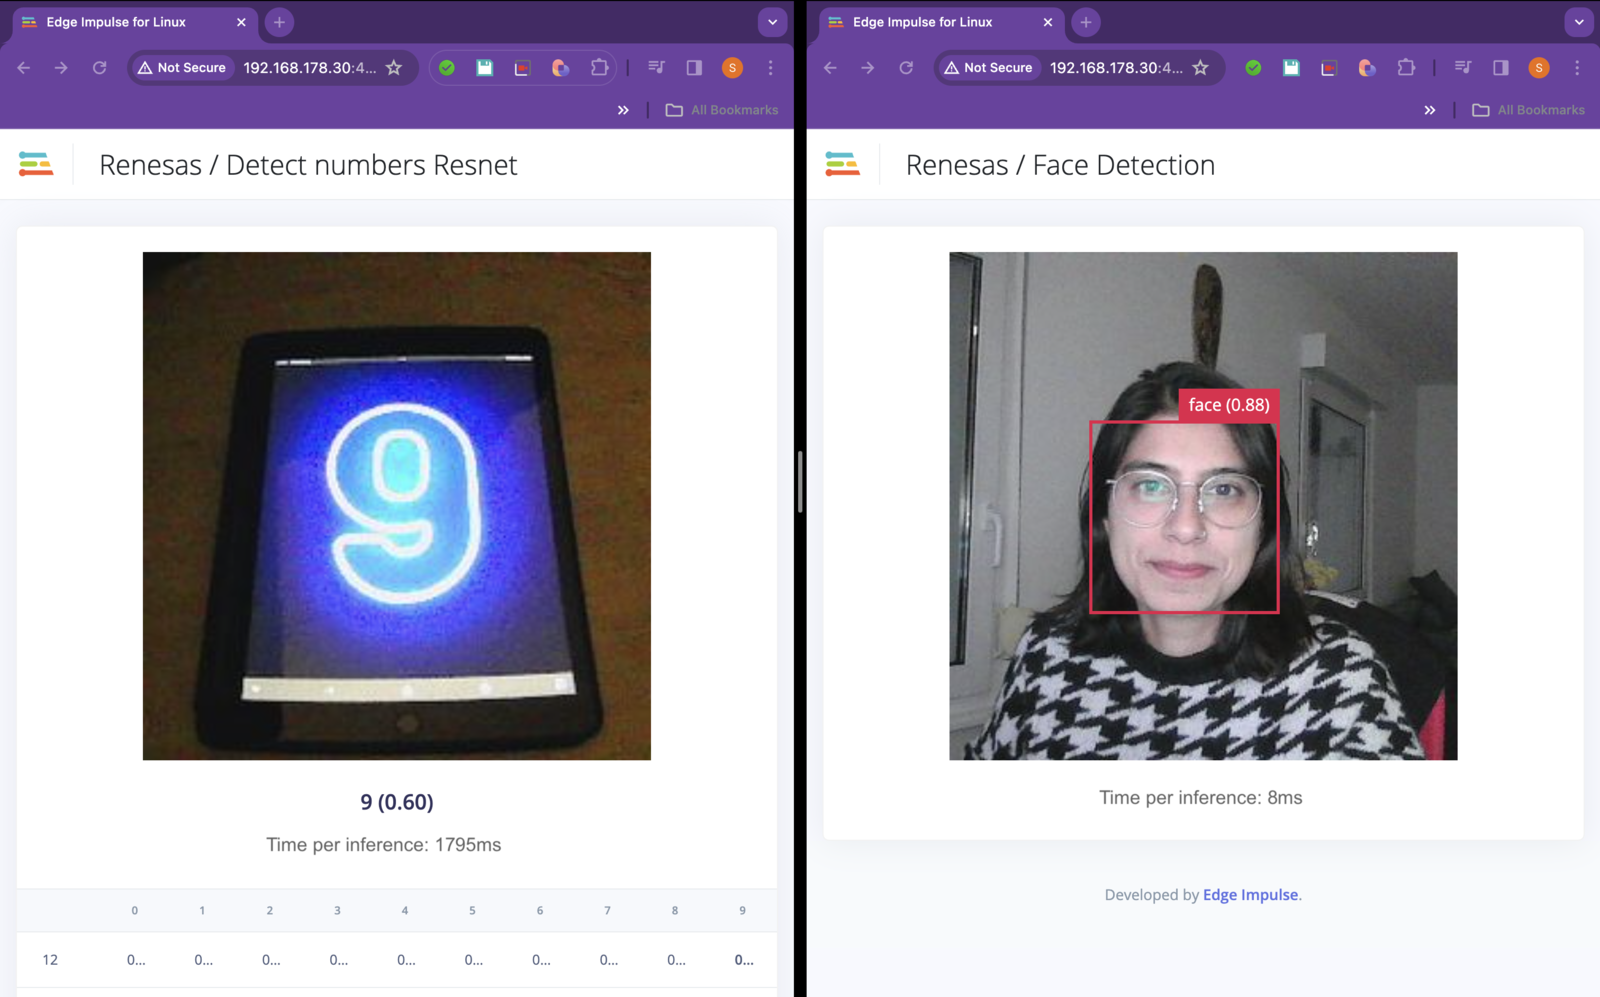
http://192.168.178.30:4912 in this case), you will see an output similar to this:
Note that the port numbers passed as arguments must be different. This allows for the streams to be directed to different ports to be viewed in the browser.Navigating to the address mentioned in the output (
http://192.168.178.30:4912 in this case), you will see an output similar to this: