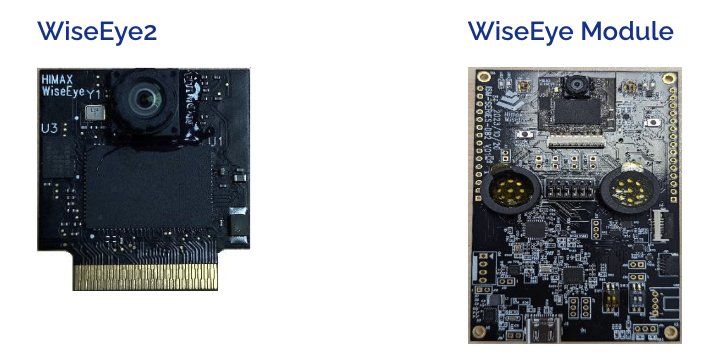
- Information about Himax WiseEye2 module and ISM board
- Himax Github SDK Repo for WiseEye
Installing dependencies
Preparing your Windows environment for the Himax WiseEye2 ISM Devboard
To set this board up in Edge Impulse, you will need to install the following software:- Start with an x64-based Windows image and install git
-
Clone the Himax WiseEye-Module-G1 SDK:
- Follow the SDK setup instructions to setup and prepare the Himax WiseEye-Module-G1 SDK for use.
- Follow the setup instructions EVK and PC Tool User Guide to setup and prepare the WE2_DEMO_TOOL for flashing.
- Now that your Himax WiseEye2 ISM Devboard is ready and you’ve configured the WE2_DEMO_TOOL, lets proceed to install the Edge Impulse dependencies (you will typically do this on a Linux or MacOS platform). This will be to RUN the Edge Impulse model once its flashed using the Windows platform.
Installing Edge Impulse dependencies (MacOS/Linux)
To set this board up in Edge Impulse, you will need to install the following software - typically on a linux or macos based system. Please install the “edge-impulse-cli” package. Full documentation on installing the edge impulse CLI can be found here: Edge Impulse CLI Note: Make sure that you have the CLI tools version at least 1.27.1. You can check it with: edge-impulse-daemon —version Next, we head to the Edge Impulse Studio to build our ML “impulse”.Next steps: building a machine learning model
First, lets build and run our first machine learning model with these tutorials:Image models
For the Himax WiseEye2 ISM Devboard, you will choose “Himax ISM” for the Target type in Edge Impulse. When performing the “Deployment” step, please also select and choose the “Himax ISM” platform as the deployment platform target. You will also need to ensure that you create your impulse/model with “Int8 Profiling” enabled. You will need to select the “Quantized int8” checkbox when you perform the model deployment.Utilizing the ISM Devboard for data capture
You can utilize the Himax WiseEye2 ISM Devboard itself to help with image capturing/data collection for your project by connecting your ISM Devboard to your development platform and then run the “edge-impulse-daemon” as follows (this can be done on Linux/MacOS or Windows if you have the “edge-impulse-cli” package installed): edge-impulse-daemon —clean When launched, you will be prompted to log into your Edge Impulse account, select a project, select the associated USB port that the ISM Devboard is connected to, and finally give the device a name. You can then look in your Edge Impulse “Devices” tab to see the device by going to your Edge Impulse project, and click Devices. The device will be listed here:
Deploying back to device
When the deployment is complete, you will receive a zip file that will contain two files:- firmware.img - the OTA image you will use to publish to your ISM Devboard via the “ota.exe” tool you reviewed above.
- readme.txt - text file will a link to this page to to review the steps if needed.
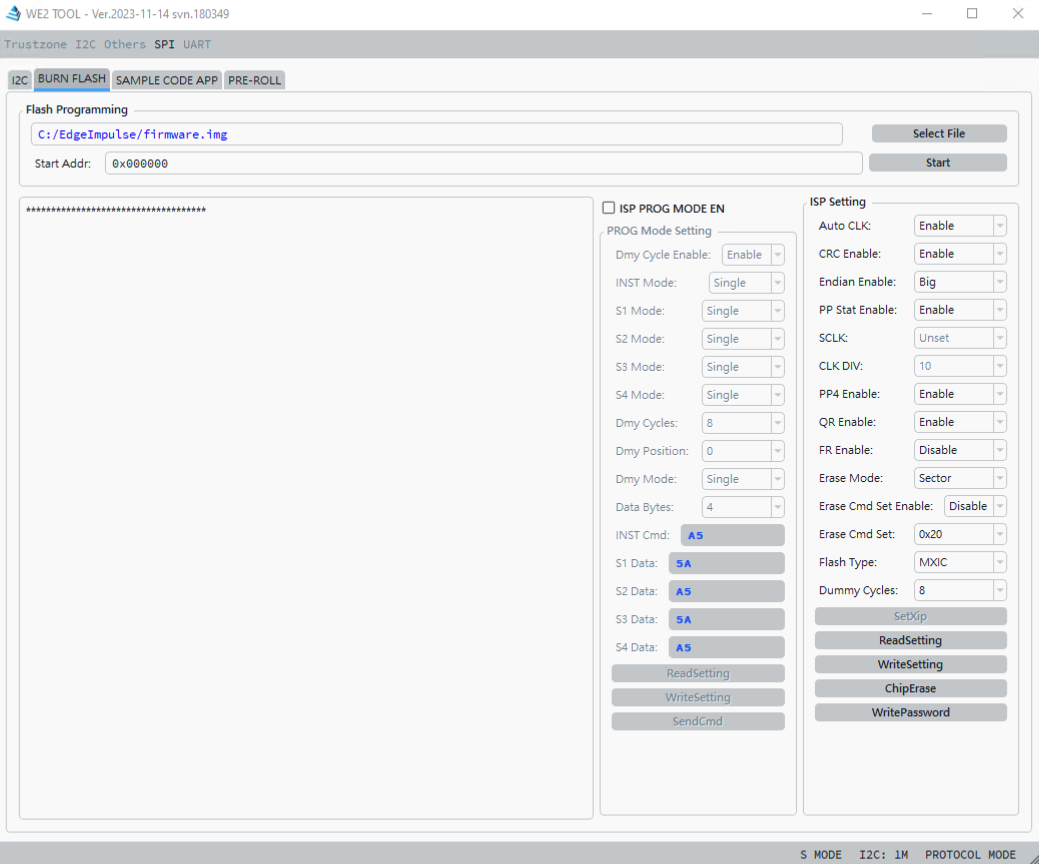
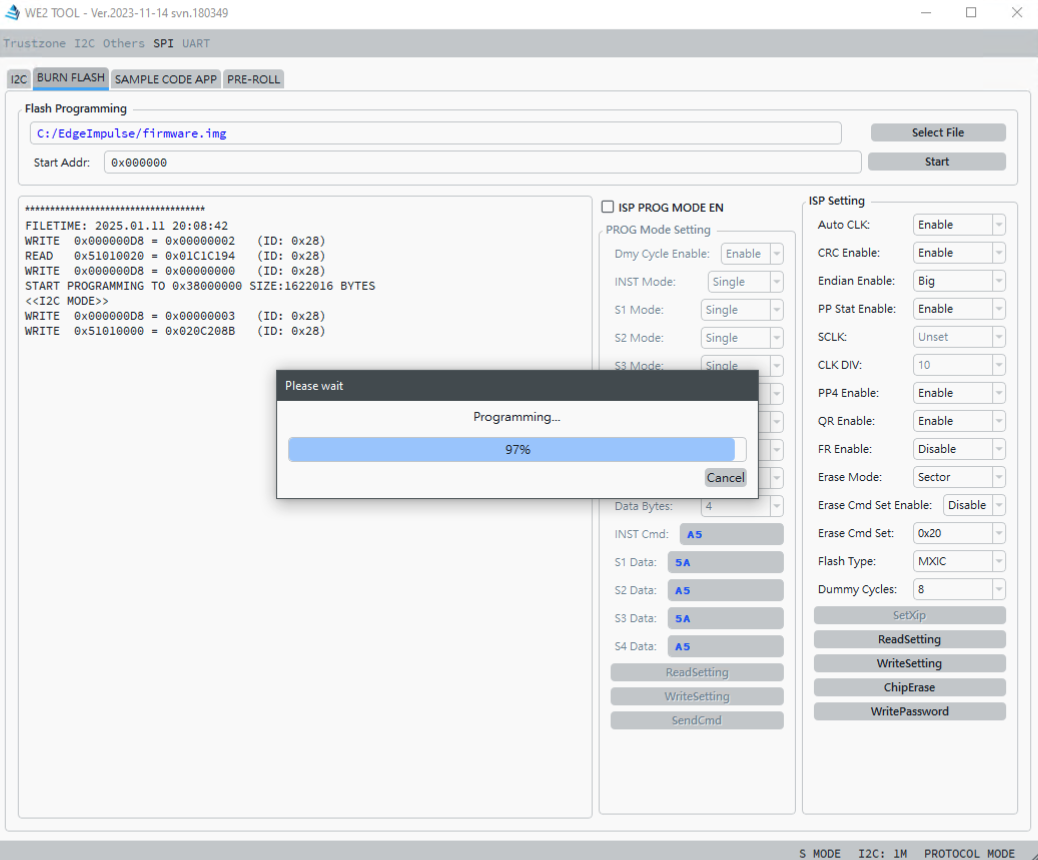
Flash the ISM Devboard to install the Edge Impulse model and its runtime
You will next run the WE_DEMO_TOOL on Windows:
Running the Model on the ISM Devboard (MacOS/Linux)
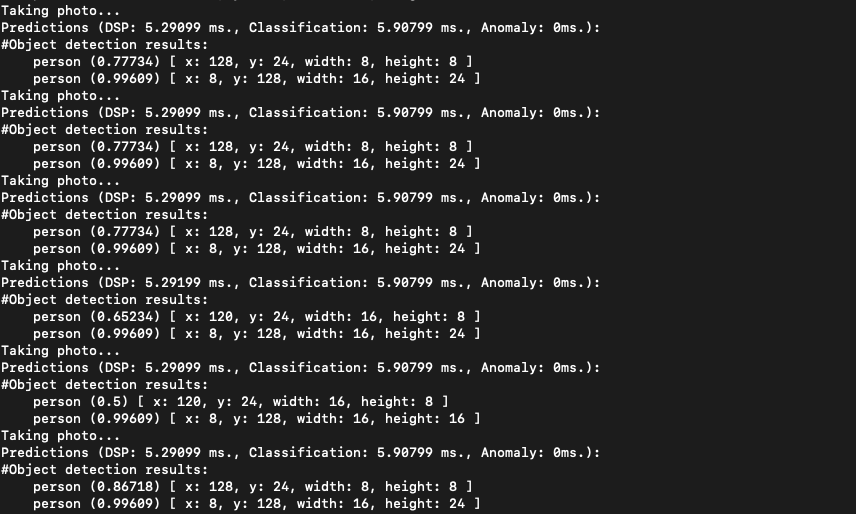
To run the model on your ISM Devboard now that the flashing has finished, you plug in the board via USB and then run the following in a bash shell: edge-impulse-run-impulse —clean After logging in and selecting the appropriate USB port that represents your board, You will now see your model’s inference output displayed as data is entered (images captured/etc…)