LogoLogo
HomeAPI & SDKsProjectsForumStudio
  • Getting started
    • For beginners
    • For ML practitioners
    • For embedded engineers
  • Frequently asked questions (FAQ)
  • Tutorials
    • End-to-end tutorials
      • Computer vision
        • Image classification
        • Object detection
          • Object detection with bounding boxes
          • Detect objects with centroid (FOMO)
        • Visual anomaly detection
        • Visual regression
      • Audio
        • Sound recognition
        • Keyword spotting
      • Time-series
        • Motion recognition + anomaly detection
        • Regression + anomaly detection
        • HR/HRV
        • Environmental (Sensor fusion)
    • Data
      • Data ingestion
        • Collecting image data from the Studio
        • Collecting image data with your mobile phone
        • Collecting image data with the OpenMV Cam H7 Plus
        • Using the Edge Impulse Python SDK to upload and download data
        • Trigger connected board data sampling
        • Ingest multi-labeled data using the API
      • Synthetic data
        • Generate audio datasets using Eleven Labs
        • Generate image datasets using Dall-E
        • Generate keyword spotting datasets using Google TTS
        • Generate physics simulation datasets using PyBullet
        • Generate timeseries data with MATLAB
      • Labeling
        • Label audio data using your existing models
        • Label image data using GPT-4o
      • Edge Impulse Datasets
    • Feature extraction
      • Building custom processing blocks
      • Sensor fusion using embeddings
    • Machine learning
      • Classification with multiple 2D input features
      • Visualize neural networks decisions with Grad-CAM
      • Sensor fusion using embeddings
      • FOMO self-attention
    • Inferencing & post-processing
      • Count objects using FOMO
      • Continuous audio sampling
      • Multi-impulse (C++)
      • Multi-impulse (Python)
    • Lifecycle management
      • CI/CD with GitHub Actions
      • Data aquisition from S3 object store - Golioth on AI
      • OTA model updates
        • with Arduino IDE (for ESP32)
        • with Arduino IoT Cloud
        • with Blues Wireless
        • with Docker on Allxon
        • with Docker on Balena
        • with Docker on NVIDIA Jetson
        • with Espressif IDF
        • with Nordic Thingy53 and the Edge Impulse app
        • with Particle Workbench
        • with Zephyr on Golioth
    • API examples
      • Customize the EON Tuner
      • Ingest multi-labeled data using the API
      • Python API bindings example
      • Running jobs using the API
      • Trigger connected board data sampling
    • Python SDK examples
      • Using the Edge Impulse Python SDK to run EON Tuner
      • Using the Edge Impulse Python SDK to upload and download data
      • Using the Edge Impulse Python SDK with Hugging Face
      • Using the Edge Impulse Python SDK with SageMaker Studio
      • Using the Edge Impulse Python SDK with TensorFlow and Keras
      • Using the Edge Impulse Python SDK with Weights & Biases
    • Expert network projects
  • Edge Impulse Studio
    • Organization hub
      • Users
      • Data campaigns
      • Data
        • Cloud data storage
      • Data pipelines
      • Data transformation
        • Transformation blocks
      • Upload portals
      • Custom blocks
        • Custom AI labeling blocks
        • Custom deployment blocks
        • Custom learning blocks
        • Custom processing blocks
        • Custom synthetic data blocks
        • Custom transformation blocks
      • Health reference design
        • Synchronizing clinical data with a bucket
        • Validating clinical data
        • Querying clinical data
        • Transforming clinical data
    • Project dashboard
      • Select AI hardware
    • Devices
    • Data acquisition
      • Uploader
      • Data explorer
      • Data sources
      • Synthetic data
      • Labeling queue
      • AI labeling
      • CSV Wizard (time-series)
      • Multi-label (time-series)
      • Tabular data (pre-processed & non-time-series)
      • Metadata
      • Auto-labeler | deprecated
    • Impulses
    • EON Tuner
      • Search space
    • Processing blocks
      • Audio MFCC
      • Audio MFE
      • Audio Syntiant
      • Flatten
      • HR/HRV features
      • Image
      • IMU Syntiant
      • Raw data
      • Spectral features
      • Spectrogram
      • Custom processing blocks
      • Feature explorer
    • Learning blocks
      • Anomaly detection (GMM)
      • Anomaly detection (K-means)
      • Classification
      • Classical ML
      • Object detection
        • MobileNetV2 SSD FPN
        • FOMO: Object detection for constrained devices
      • Object tracking
      • Regression
      • Transfer learning (images)
      • Transfer learning (keyword spotting)
      • Visual anomaly detection (FOMO-AD)
      • Custom learning blocks
      • Expert mode
      • NVIDIA TAO | deprecated
    • Retrain model
    • Live classification
    • Model testing
    • Performance calibration
    • Deployment
      • EON Compiler
      • Custom deployment blocks
    • Versioning
    • Bring your own model (BYOM)
    • File specifications
      • deployment-metadata.json
      • ei-metadata.json
      • ids.json
      • parameters.json
      • sample_id_details.json
      • train_input.json
  • Tools
    • API and SDK references
    • Edge Impulse CLI
      • Installation
      • Serial daemon
      • Uploader
      • Data forwarder
      • Impulse runner
      • Blocks
      • Himax flash tool
    • Edge Impulse for Linux
      • Linux Node.js SDK
      • Linux Go SDK
      • Linux C++ SDK
      • Linux Python SDK
      • Flex delegates
      • Rust Library
    • Rust Library
    • Edge Impulse Python SDK
  • Run inference
    • C++ library
      • As a generic C++ library
      • On Android
      • On your desktop computer
      • On your Alif Ensemble Series Device
      • On your Espressif ESP-EYE (ESP32) development board
      • On your Himax WE-I Plus
      • On your Raspberry Pi Pico (RP2040) development board
      • On your SiLabs Thunderboard Sense 2
      • On your Spresense by Sony development board
      • On your Syntiant TinyML Board
      • On your TI LaunchPad using GCC and the SimpleLink SDK
      • On your Zephyr-based Nordic Semiconductor development board
    • Arm Keil MDK CMSIS-PACK
    • Arduino library
      • Arduino IDE 1.18
    • Cube.MX CMSIS-PACK
    • Docker container
    • DRP-AI library
      • DRP-AI on your Renesas development board
      • DRP-AI TVM i8 on Renesas RZ/V2H
    • IAR library
    • Linux EIM executable
    • OpenMV
    • Particle library
    • Qualcomm IM SDK GStreamer
    • WebAssembly
      • Through WebAssembly (Node.js)
      • Through WebAssembly (browser)
    • Edge Impulse firmwares
    • Hardware specific tutorials
      • Image classification - Sony Spresense
      • Audio event detection with Particle boards
      • Motion recognition - Particle - Photon 2 & Boron
      • Motion recognition - RASynBoard
      • Motion recognition - Syntiant
      • Object detection - SiLabs xG24 Dev Kit
      • Sound recognition - TI LaunchXL
      • Keyword spotting - TI LaunchXL
      • Keyword spotting - Syntiant - RC Commands
      • Running NVIDIA TAO models on the Renesas RA8D1
      • Two cameras, two models - running multiple object detection models on the RZ/V2L
  • Edge AI Hardware
    • Overview
    • Production-ready
      • Advantech ICAM-540
      • Seeed SenseCAP A1101
      • Industry reference design - BrickML
    • MCU
      • Ambiq Apollo4 family of SoCs
      • Ambiq Apollo510
      • Arducam Pico4ML TinyML Dev Kit
      • Arduino Nano 33 BLE Sense
      • Arduino Nicla Sense ME
      • Arduino Nicla Vision
      • Arduino Portenta H7
      • Blues Wireless Swan
      • Espressif ESP-EYE
      • Himax WE-I Plus
      • Infineon CY8CKIT-062-BLE Pioneer Kit
      • Infineon CY8CKIT-062S2 Pioneer Kit
      • Nordic Semi nRF52840 DK
      • Nordic Semi nRF5340 DK
      • Nordic Semi nRF9160 DK
      • Nordic Semi nRF9161 DK
      • Nordic Semi nRF9151 DK
      • Nordic Semi nRF7002 DK
      • Nordic Semi Thingy:53
      • Nordic Semi Thingy:91
      • Open MV Cam H7 Plus
      • Particle Photon 2
      • Particle Boron
      • RAKwireless WisBlock
      • Raspberry Pi RP2040
      • Renesas CK-RA6M5 Cloud Kit
      • Renesas EK-RA8D1
      • Seeed Wio Terminal
      • Seeed XIAO nRF52840 Sense
      • Seeed XIAO ESP32 S3 Sense
      • SiLabs Thunderboard Sense 2
      • Sony's Spresense
      • ST B-L475E-IOT01A
      • TI CC1352P Launchpad
    • MCU + AI accelerators
      • Alif Ensemble
      • Arduino Nicla Voice
      • Avnet RASynBoard
      • Seeed Grove - Vision AI Module
      • Seeed Grove Vision AI Module V2 (WiseEye2)
      • Himax WiseEye2 Module and ISM Devboard
      • SiLabs xG24 Dev Kit
      • STMicroelectronics STM32N6570-DK
      • Synaptics Katana EVK
      • Syntiant Tiny ML Board
    • CPU
      • macOS
      • Linux x86_64
      • Raspberry Pi 4
      • Raspberry Pi 5
      • Texas Instruments SK-AM62
      • Microchip SAMA7G54
      • Renesas RZ/G2L
    • CPU + AI accelerators
      • AVNET RZBoard V2L
      • BrainChip AKD1000
      • i.MX 8M Plus EVK
      • Digi ConnectCore 93 Development Kit
      • MemryX MX3
      • MistyWest MistySOM RZ/V2L
      • Qualcomm Dragonwing RB3 Gen 2 Dev Kit
      • Renesas RZ/V2L
      • Renesas RZ/V2H
      • IMDT RZ/V2H
      • Texas Instruments SK-TDA4VM
      • Texas Instruments SK-AM62A-LP
      • Texas Instruments SK-AM68A
      • Thundercomm Rubik Pi 3
    • GPU
      • Advantech ICAM-540
      • NVIDIA Jetson
      • Seeed reComputer Jetson
    • Mobile phone
    • Porting guide
  • Integrations
    • Arduino Machine Learning Tools
    • AWS IoT Greengrass
    • Embedded IDEs - Open-CMSIS
    • NVIDIA Omniverse
    • Scailable
    • Weights & Biases
  • Tips & Tricks
    • Combining impulses
    • Increasing model performance
    • Optimizing compute time
    • Inference performance metrics
  • Concepts
    • Glossary
    • Course: Edge AI Fundamentals
      • Introduction to edge AI
      • What is edge computing?
      • What is machine learning (ML)?
      • What is edge AI?
      • How to choose an edge AI device
      • Edge AI lifecycle
      • What is edge MLOps?
      • What is Edge Impulse?
      • Case study: Izoelektro smart grid monitoring
      • Test and certification
    • Data engineering
      • Audio feature extraction
      • Motion feature extraction
    • Machine learning
      • Data augmentation
      • Evaluation metrics
      • Neural networks
        • Layers
        • Activation functions
        • Loss functions
        • Optimizers
          • Learned optimizer (VeLO)
        • Epochs
    • What is embedded ML, anyway?
    • What is edge machine learning (edge ML)?
Powered by GitBook
On this page
  • Block structure
  • Scripts
  • Dockerfile
  • Parameters
  • Developing a custom block
  • Initializing the block
  • Testing the block locally
  • Pushing the block to Edge Impulse
  • Resetting the block configuration
  • Importing existing Docker images
  • Editing a custom block in Studio
  • Setting compute requests and limits
  • Additional resources

Was this helpful?

Export as PDF
  1. Edge Impulse Studio
  2. Organization hub

Custom blocks

PreviousUpload portalsNextCustom AI labeling blocks

Last updated 4 months ago

Was this helpful?

Much functionality in Edge Impulse is based on the concept of blocks. There are existing blocks built into the platform to achieve dedicated tasks. If these pre-built blocks do not fit your needs, you can edit existing blocks or develop from scratch to create custom blocks that extend the capabilities of Edge Impulse. These include:

The sections below provide an overview of custom blocks. The details for each specific type of block can be found on its own documentation page linked above.

Block structure

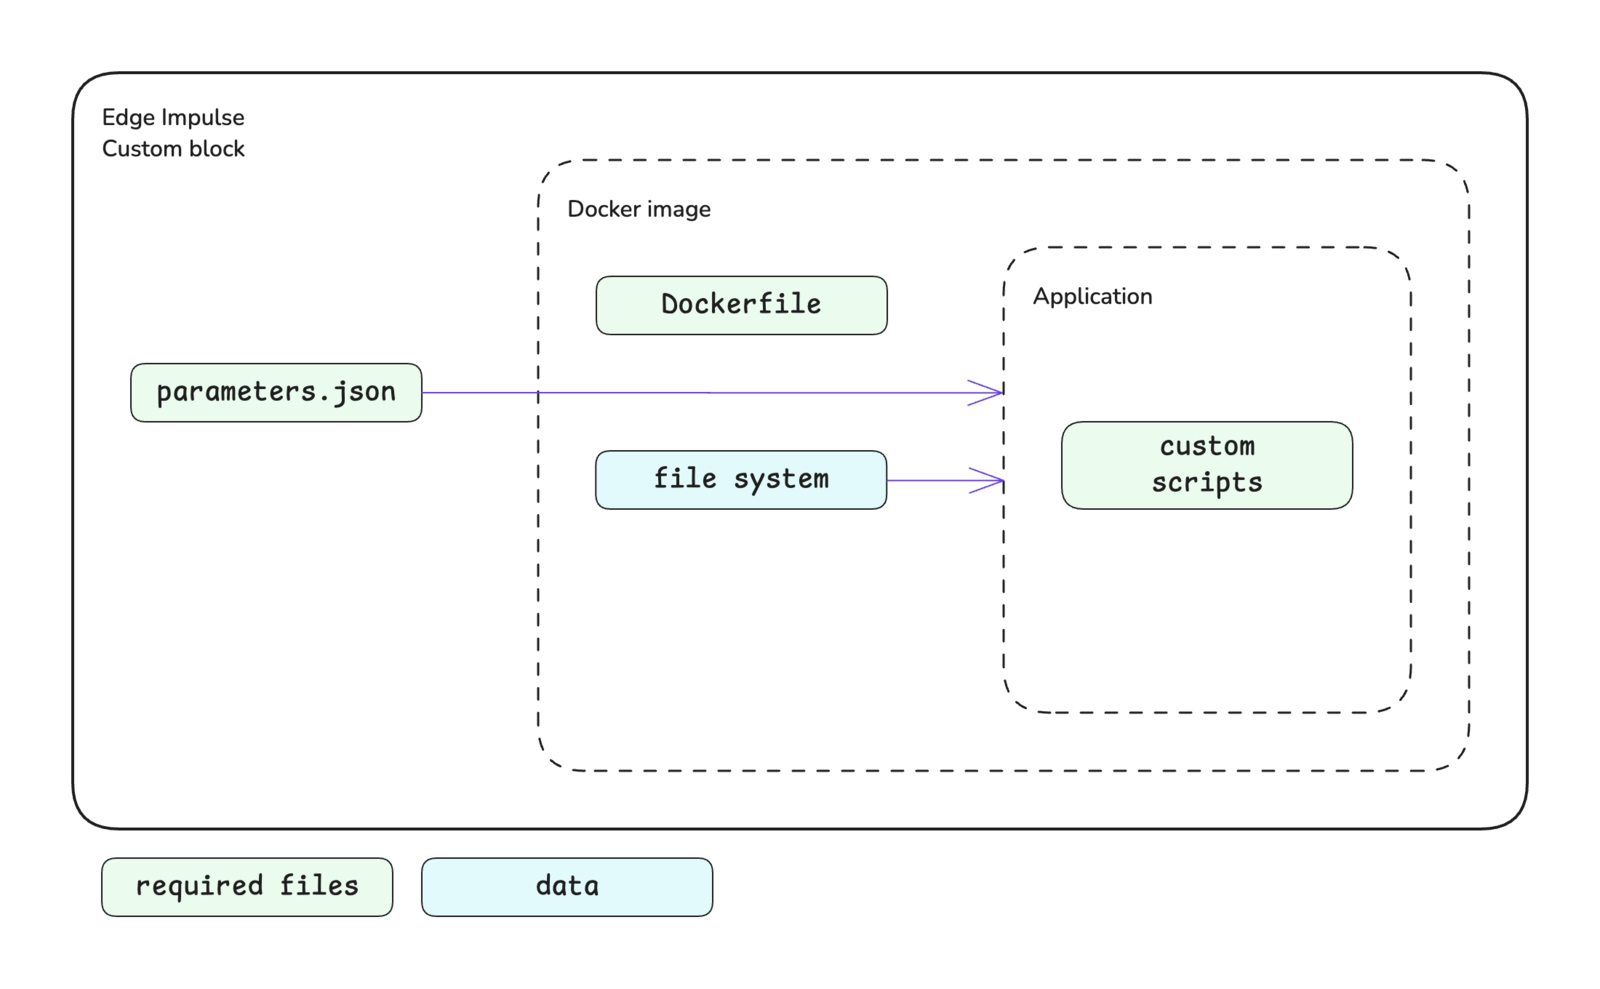
A block in Edge Impulse encapsulates a Docker image and provides information to the container when it is run. Different parameters, environment variables, and data will be passed in and different volumes will be mounted depending on the type of block.

The basic structure of a block is shown below. At a minimum, a custom block consists of a directory containing your scripts, a Dockerfile, and a parameters.json file. Block specific structures are shown in their respective documentation.

Scripts

The Docker container executes the scripts that you have written for your custom block. At Edge Impulse, block scripts are mostly written in Python, Javascript/Typescript, or Bash. However, these scripts can be written in any language that you are comfortable with.

The initial script that you would like to be executed is defined in the Dockerfile as the ENTRYPOINT for the image.

Dockerfile

Do not set the WORKDIR argument to /home or /data

The /home and /data directory paths are used by Edge Impulse. Therefore, if you set the working directory for your container to this path, your files will be overwritten and rendered inaccessible. You will notice in most examples from Edge Impulse, the argument for the WORKDIR instruction is set to /app.

Use the ENTRYPOINT instruction

It is important to set the ENTRYPOINT instruction at the end of your Dockerfile to specify the default executable for the container. This instruction is used to turn a container into a standalone executable and blocks in Edge Impulse have been designed with this in mind.

Do not use the RUN or CMD instructions to set the default executable. The RUN instruction is not meant for this purpose (it's meant for building layers of an image) and the CMD instruction is not what Edge Impulse expects.

The Dockerfile is the instruction set for building the Docker image that will be run as a container in your custom block. The documentation for each type of custom block contains links to GitHub repositories for block examples, which each contain a Dockerfile. Referencing these is a great starting point when developing your own Dockerfile.

In general, the argument you define as the ENTRYPOINT in your Dockerfile will be your custom script. For processing blocks, however, this will be an HTTP server. In this case, you will also need to expose the port for your server using the EXPOSE instruction.

When running in Edge Impulse, processing and learning block containers do not have network access. Make sure you don't download dependencies while running these containers, only when building the images.

Parameters

In most cases, the parameter items defined in your parameters.json file are passed to your script as command line arguments. For example, a parameter named custom-param-one with an associated value will be passed to your script as --custom-param-one <value>.

Processing blocks are handled differently. In the case of processing blocks, parameter items are passed as properties in the body of an HTTP request. In this case, a parameter named custom-param-one with an associated value will be passed to the function generating features in your script as an argument named custom_param_one. Notice the dashes have been converted to underscores.

One additional note in regards to how parameter items are passed is that items of the type secret will be passed as environment variables instead of command line arguments.

Parameter types are enforced and validation is performed automatically when values are being entered in Studio.

Developing a custom block

Initializing the block

From within your custom block directory, run the edge-impulse-blocks init command and follow the prompts to initialize your block. This will do two things:

  1. Create an .ei-block-config file that associates the block with your organization

  2. Create a parameters.json file (if one does not already exist in your custom block directory)

After the parameters.json file is created, you will want to take a look at it and make modifications as necessary. The CLI creates a basic file for you and you may want to include additional metadata and parameter items.

Testing the block locally

There are several levels of testing locally that you can do while developing your custom block:

  1. Calling your script directly, passing it any required environment variables and arguments

  2. Building the Docker image and running the container directly, passing it any required environment variables and arguments

  3. Using the blocks runner tool in the Edge Impulse CLI to test the complete block

Refer to the documentation for your type of custom block for additional details about testing locally.

Pushing the block to Edge Impulse

Custom learning blocks can be pushed to a developer profile

Unlike all other types of custom blocks, a custom learning block can be pushed to a developer profile (non-Enterprise plan account).

After initializing and testing your custom block, you can push it to Edge Impulse to make it available for use by everyone in your organization.

From within your custom block directory, run the edge-impulse-blocks push command and follow the prompts to push your block to Edge Impulse.

Resetting the block configuration

If at some point you need to change configuration settings for your block that aren't being shown when you run the edge-impulse-blocks commands, say to download data from a different project with the runner, you can execute any of the respective commands with the --clean flag.

Importing existing Docker images

If you have previously created a Docker image for a custom block and are hosting it on Docker Hub, you can create a custom block that uses this image.

To do so, go to your organization and select the item in the left sidebar menu for the type of custom block you would like to create. On that custom block page, select the + Add new <block-type> block button (or select an existing block to edit). In the modal that pops up, configure your block as desired and in the Docker container field enter the details for your image in the username/image:tag format.

Editing a custom block in Studio

After successfully pushing your custom block to Edge Impulse you can edit it from within Studio.

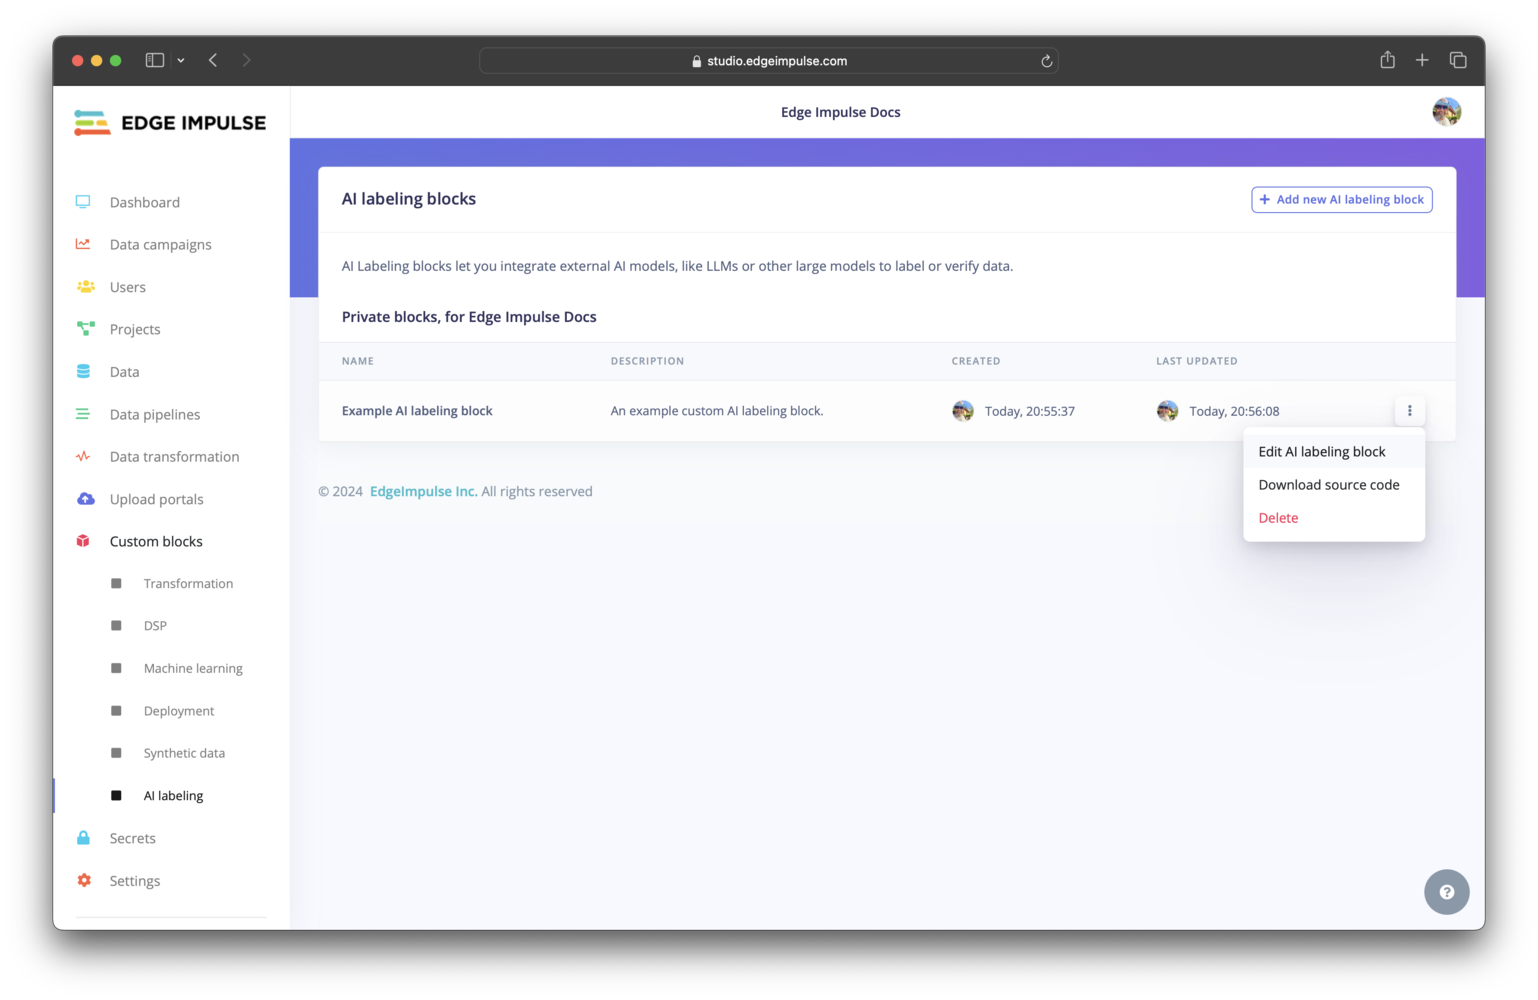
Click on AI labeling under Custom blocks. You should find your custom AI labeling block listed here. To view the configuration settings for your block and edit them, you can click on the three dots and select Edit AI labeling block.

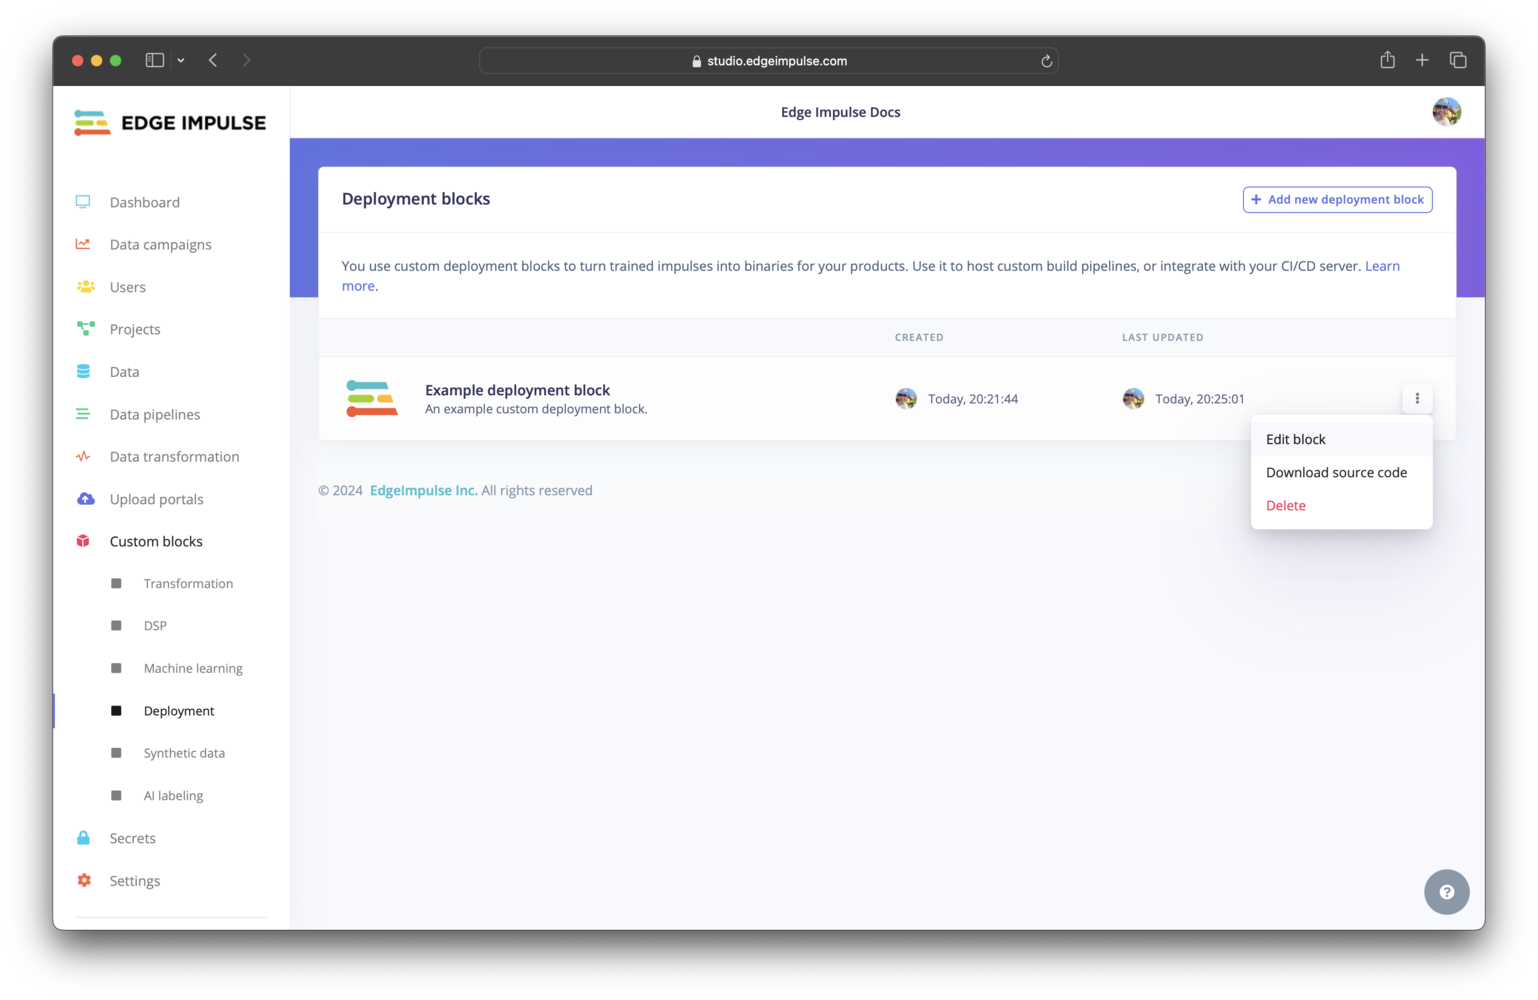
Click on Deployment under Custom blocks. You should find your custom deployment block listed here. To view the configuration settings for your block and edit them, you can click on the three dots and select Edit block.

Organization (Enterprise plan)

Click on Machine learning under Custom blocks. You should find your custom learning block listed here. To view the configuration settings for your block and edit them, you can click on the three dots and select Edit block.

Developer profile (all other plans)

Click on your photo in the top right corner of your developer profile, select Custom ML blocks. To view the configuration settings for your block and edit them, you can click on the three dots and select Edit block.

Click on DSP under Custom blocks. You should find your custom processing block listed here. To view the configuration settings for your block and edit them, you can click on the three dots and select Edit DSP block.

Click on Synthetic data under Custom blocks. You should find your custom synthetic data block listed here. To view the configuration settings for your block and edit them, you can click on the three dots and select Edit synthetic data block.

Click on Transformation under Custom blocks. You should find your custom transformation block listed here. To view the configuration settings for your block and edit them, you can click on the three dots and select Edit transformation block.

Setting compute requests and limits

Most blocks have the option to set the compute requests and limits (number of CPUs and memory) and some have the option to set the maximum running time duration. These items cannot, however, be configured from the parameters.json file; they must be configured when editing the block after it has been pushed to Edge Impulse.

Additional resources

If you want to leverage GPU compute for your custom learning blocks, you will need to make sure to install the CUDA packages. You can refer to the repository to see an example Dockerfile that installs these packages.

A parameters.json file is to be included at the root of your custom block directory. This file describes the block itself and identifies the parameter items that will be exposed for configuration in Studio and, in turn, passed to the script you defined in your Dockerfile as the ENTRYPOINT. See for more details.

The first steps to developing a custom block are to write your scripts and Dockerfile. Once those are completed, you can initialize the block, test it locally, and push it to Edge Impulse using the tool in the Edge Impulse CLI.

To use the blocks runner tool in the Edge Impulse CLI, run the edge-impulse-blocks runner command from within your custom block directory and follow the prompts to test your block locally. See .

Once pushed successfully, your block will appear in your organization or, if it is a custom learning block and you are not on the Enterprise plan, in your developer profile. See for images showing each block type after being pushed to Edge Impulse.

example-custom-ml-keras
parameters.json
edge-impulse-blocks
edge-impulse-blocks
parameters.json
Editing a custom block in Studio
Custom AI labeling blocks
Custom deployment blocks
Custom learning blocks
Custom processing blocks
Custom synthetic data blocks
Custom transformation blocks
Block runner
Custom block structure
Custom AI labeling block pushed to an organization
Custom deployment block pushed to an organization
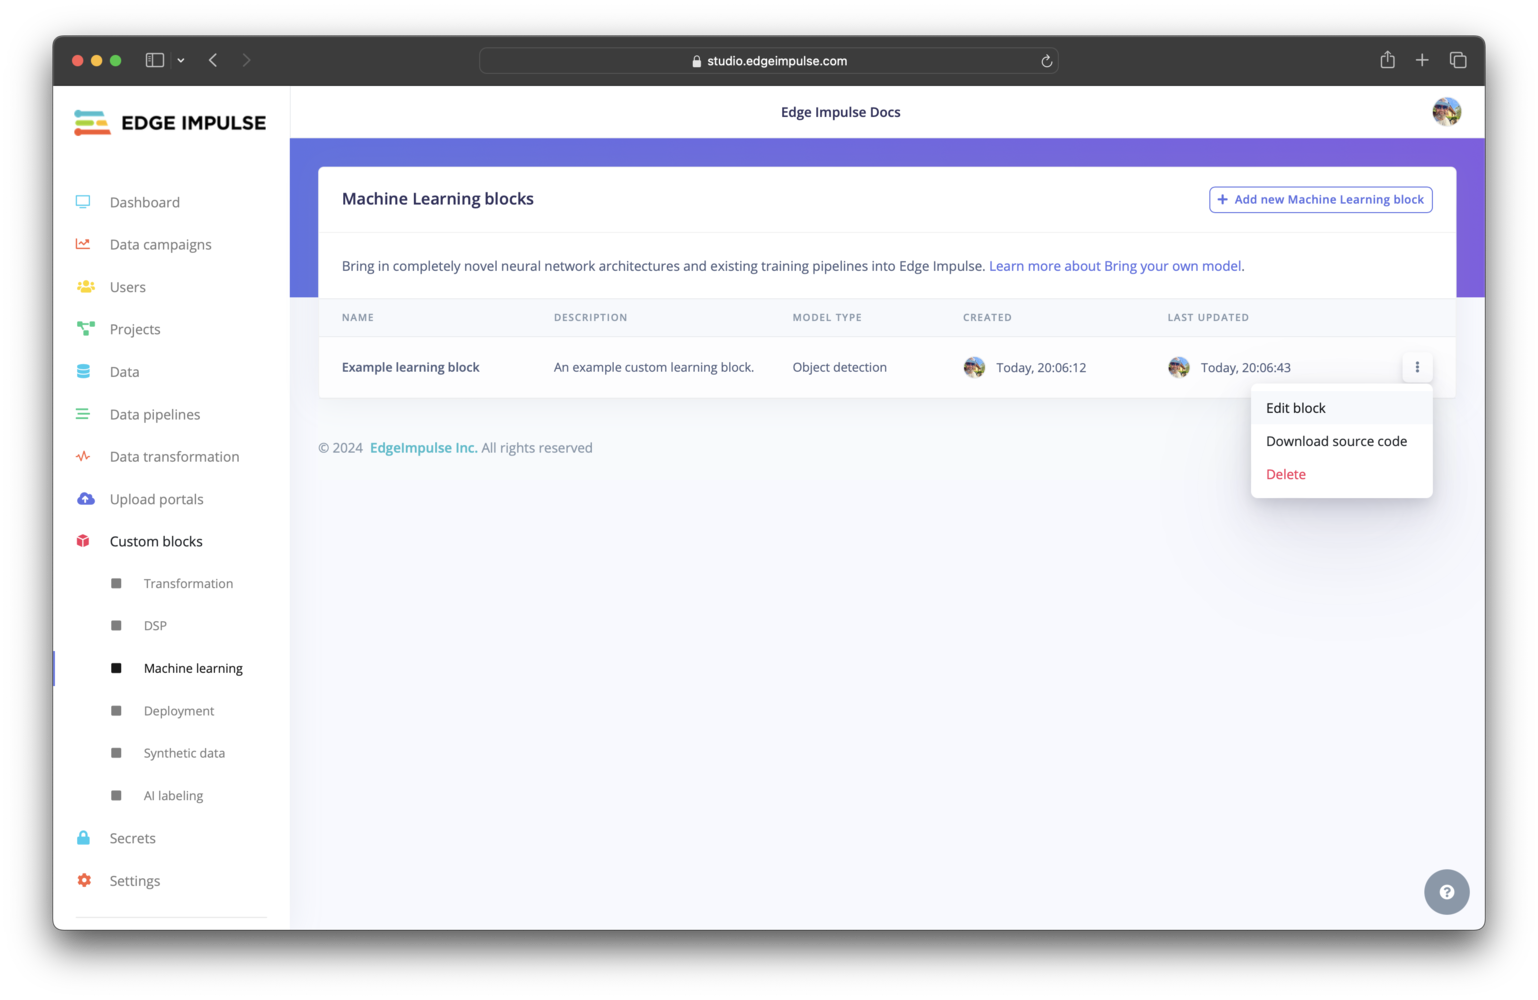
Custom learning block pushed to an organization
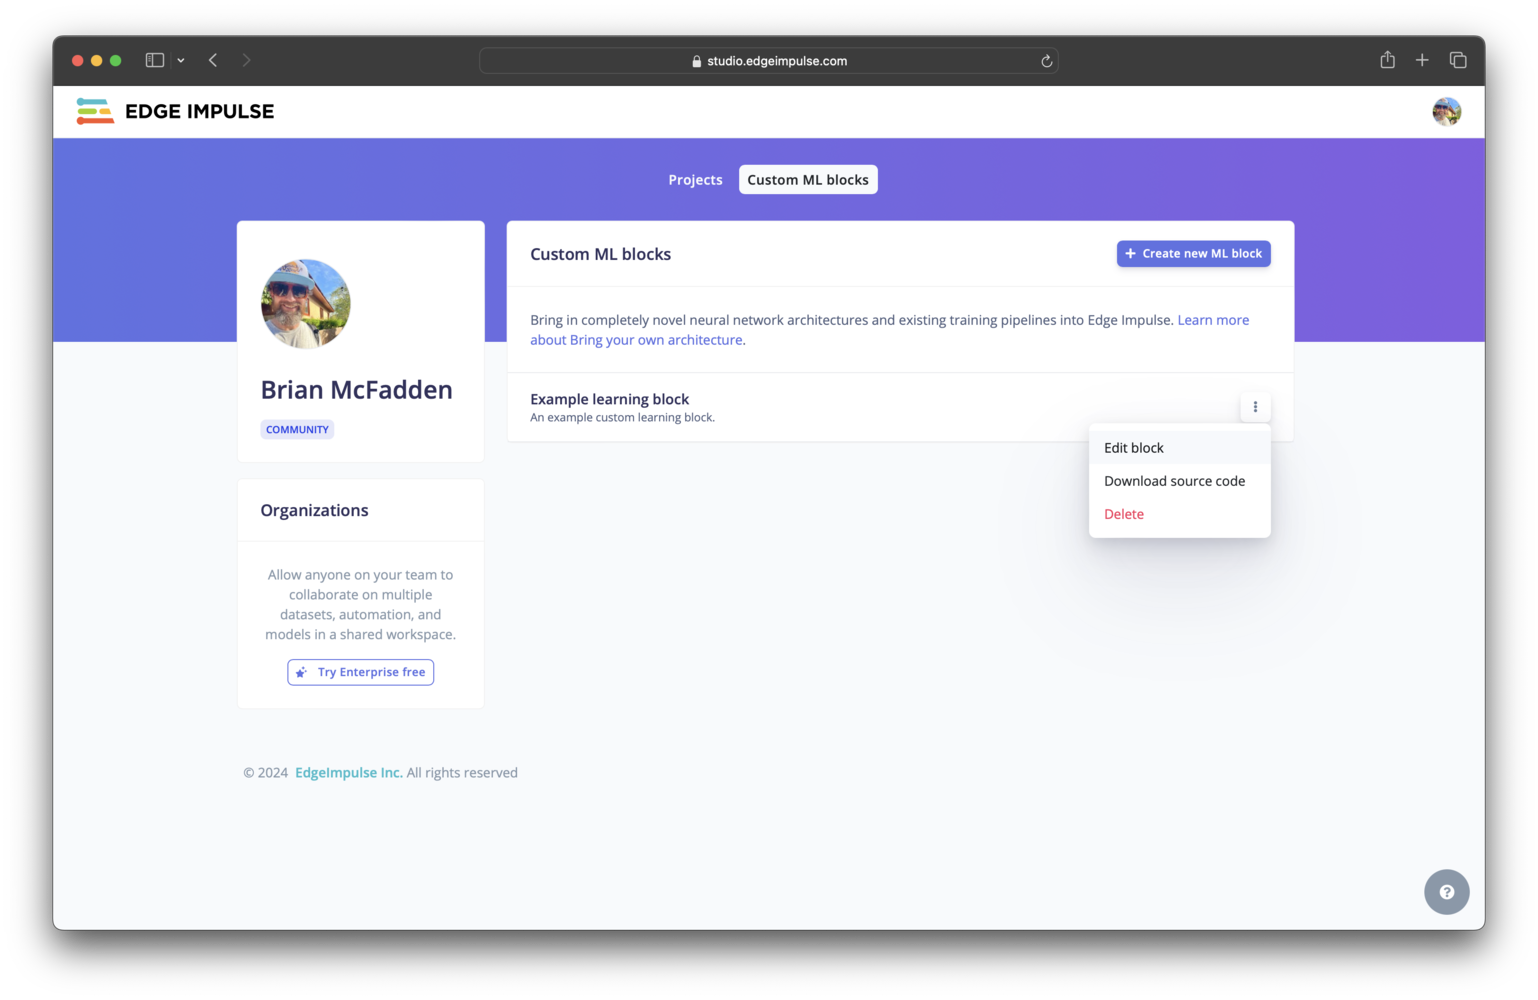
Custom learning block pushed to a developer profile
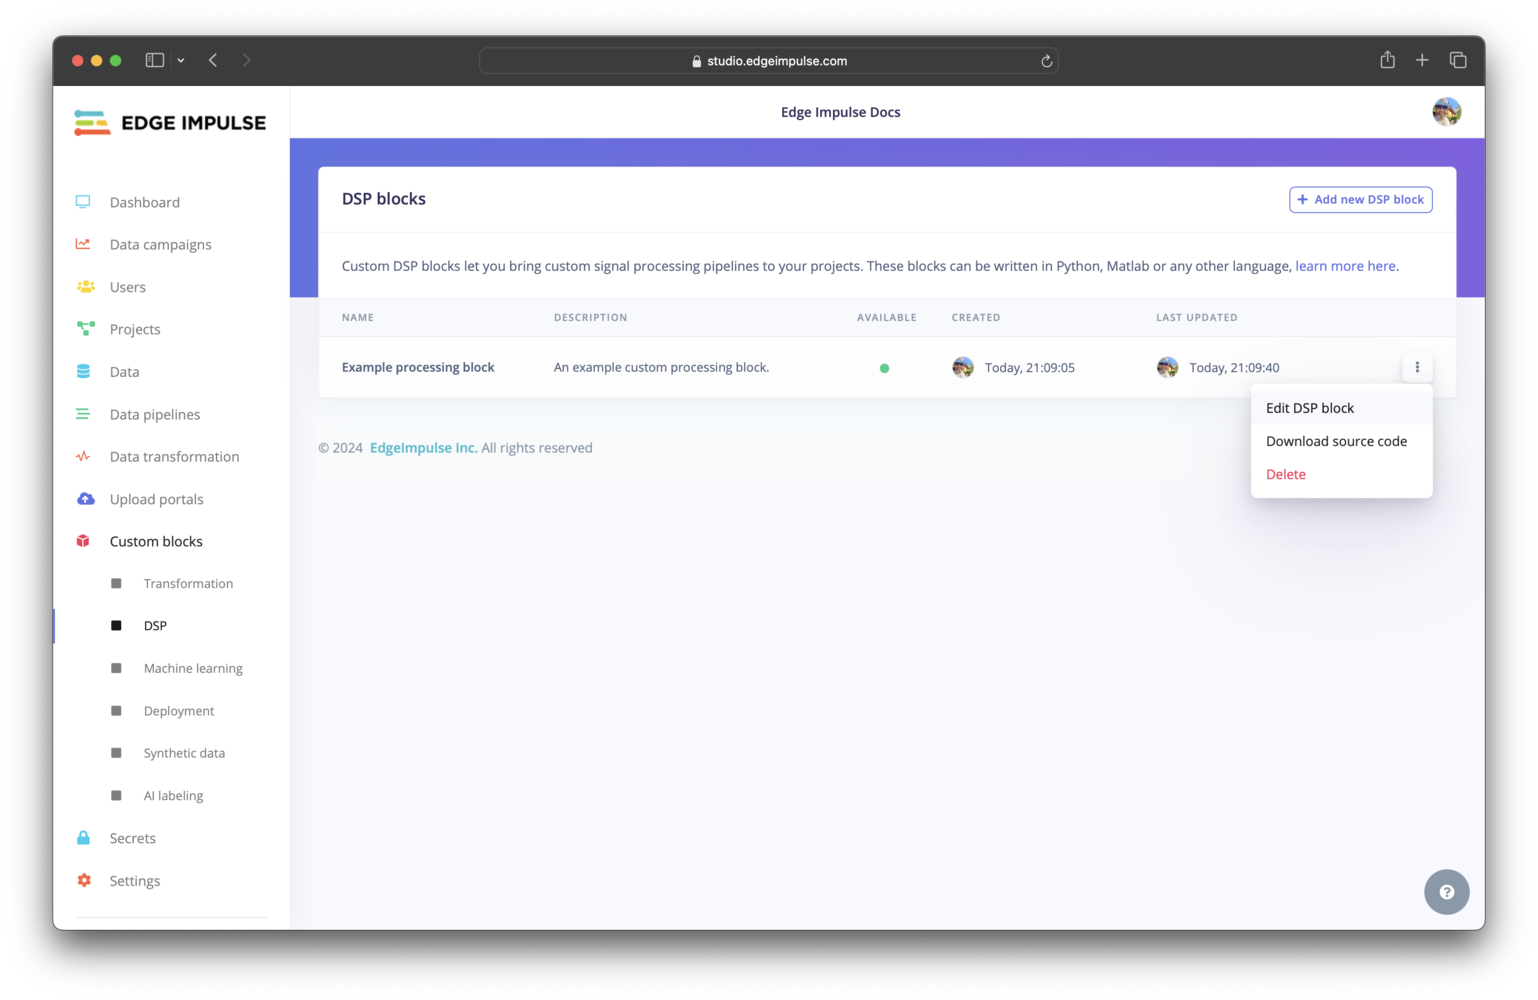
Custom processing block pushed to an organization
Custom synthetic data block pushed to an organization
Custom transformation block pushed to an organization