Prerequisites
Make sure you followed the Continuous motion recognition tutorial, and have a trained impulse. Also install the following software: Make sure you have a C++ project configured that compiles for your target. You can convert an existing project to C++ by right-clicking on your project and selecting Convert to C++.Enabling the CRC
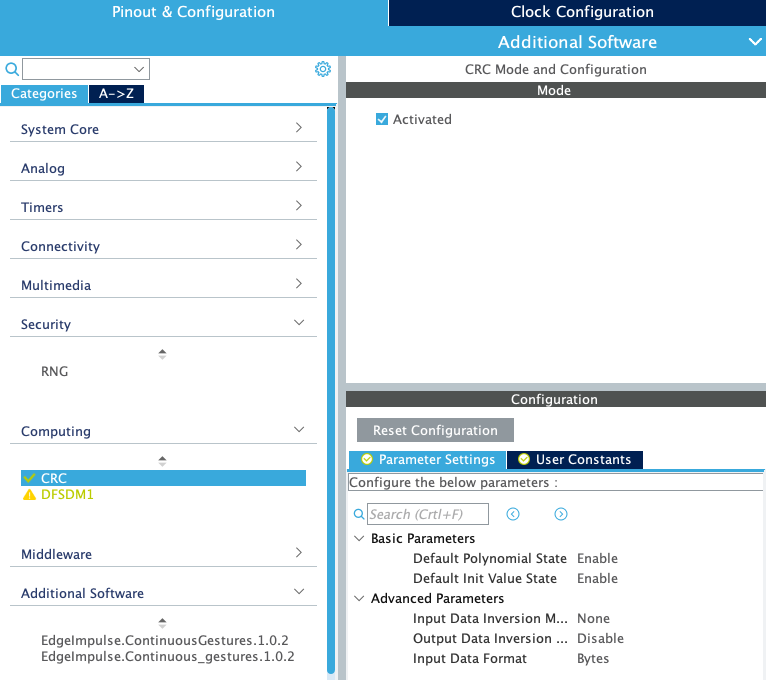
The CRC needs to be enabled for your target. Open your.ioc file, then:
- Go to Pinout & Configuration.
- Select Computing > CRC.
- Enable the Activated checkbox.
Adding the CMSIS-PACK
Head over to your Edge Impulse project, and go to Deployment. From here you can create the full library which contains the impulse and all external required libraries. Select Cube.MX CMSIS-PACK and click Build to create the library. To add the CMSIS-PACK library to your project, open your.ioc file, then:
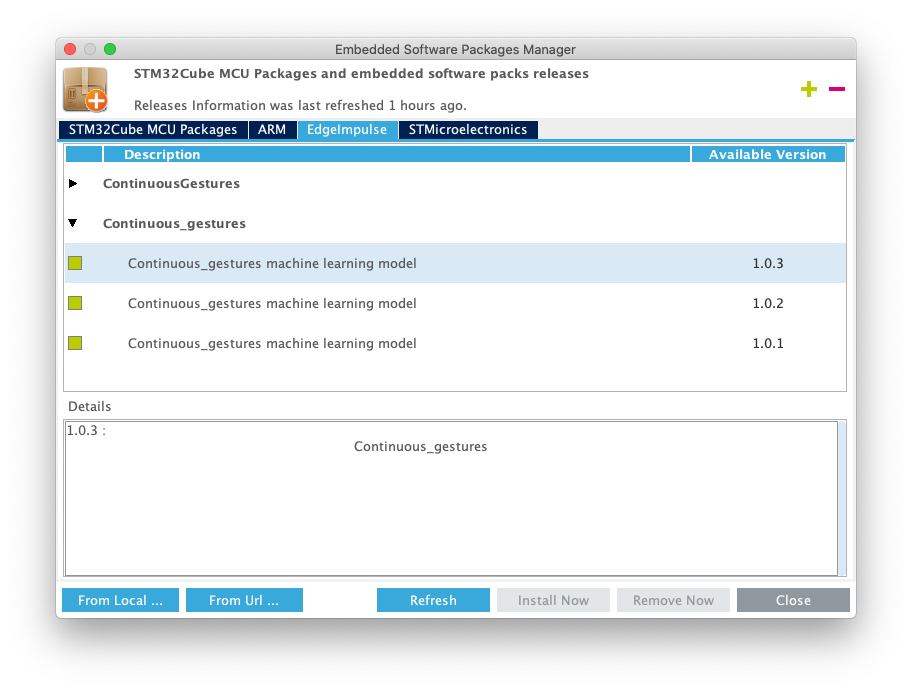
- Go to Help > Manage embedded software packages.
- Select From Local … and select the
.packfile you just downloaded. - Accept the license agreement, and the pack will be installed. The version number is automatically updated whenever you export the pack.
- Go back to your
.iocfile, and go to Pinout & Configuration. - Click Software packs > Select components.
- Select your project, expand the pack, and add a checkbox under ‘Selection’.
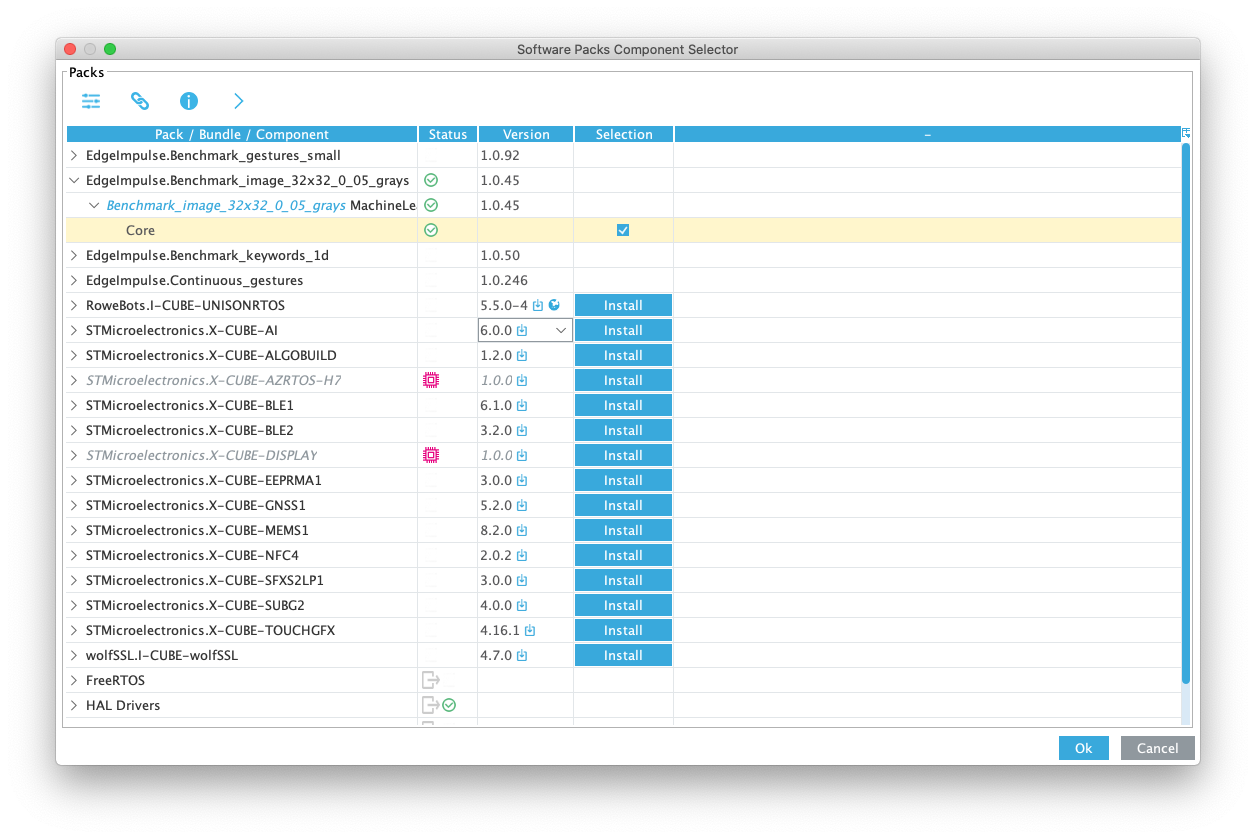
- Click OK to close the window.
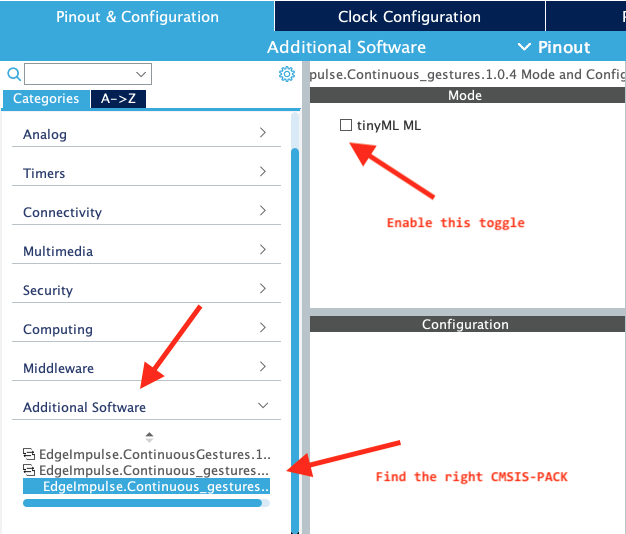
- Under Pinout & Configuration, select ‘Additional software’, and click on your project name. Place a checkbox next under ‘Mode’.
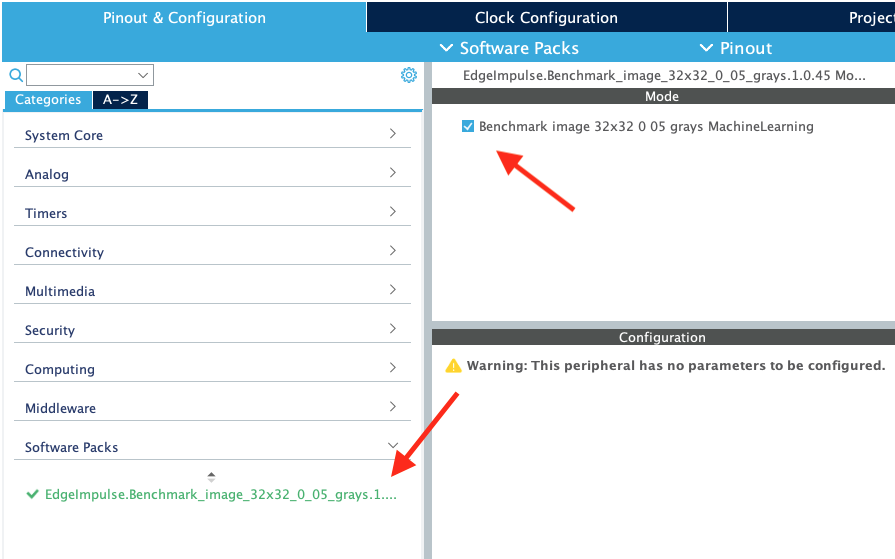
- Click in the ‘Project explorer’ so the
.iocfile loses focus. - Click
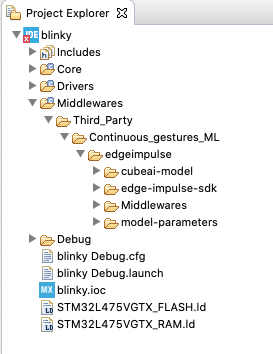
CTRL+SorCMD+Sto save the workspace. This will regenerate the code. Afterward you should have a ‘Middleware’ folder in your project with your impulse and all required libraries.
- The code generator always generates a new
main.cfile, even for C++ projects. If you have both amain.cand amain.cppfile now, remove themain.cfile.
Configuring printf
To log debug information the CMSIS-PACK uses the (weak defined) ei_printf function. You need to override this function in your main.cpp (if you only have a main.c rename it) to log to your UART port. E.g. this is how you set this up on the ST B-L475E-IOT01A. Under USER CODE BEGIN 0 add:
Running the impulse
With the CMSIS-PACK included, and the UART set up, it’s time to verify that the application works. Head back to the studio and click on Live classification. Then load a validation sample, and click on a row under ‘Detailed result’.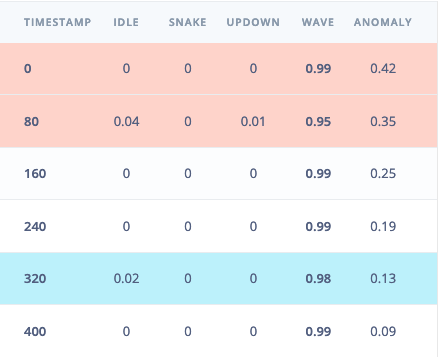
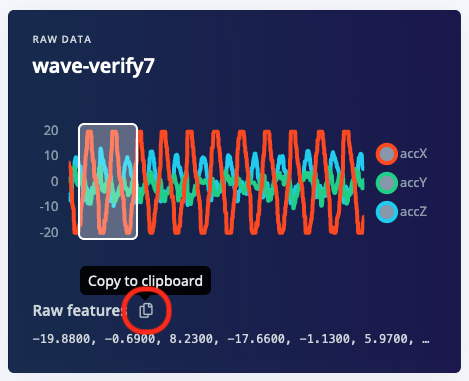
main.cpp (if you only have a main.c rename it) and add the following code under USER CODE BEGIN Includes (replace the features array with the data you just copied):
USER CODE BEGIN Init, add:
USER CODE BEGIN WHILE, add:
Debug and/or a Release folder with the built binaries (end with .bin). Many ST boards mount as a mass-storage device (e.g. the ST IoT Discovery Kit and virtually all NUCLEO boards), and you can also flash by dragging the binary file to this mass storage device.
Seeing the output
To see the output of the impulse, connect to the development board over a serial port on baud rate 115,200 and reset the board (e.g. by pressing the black button on the ST B-L475E-IOT01A. You can do this with your favourite serial monitor or with the Edge Impulse CLI:Upgrading the CMSIS-PACK
To upgrade your CMSIS-PACK do this:- Download the new version of the CMSIS-PACK from Edge Impulse.
- Open your
.iocfile, go to Pinout & Configuration > Additional software and select the CMSIS-PACK. - De-select the checkbox under ‘Mode’.

- Click in the ‘Project explorer’ so the
.iocfile loses focus, and pressCTRL+SorCMD+S. This will generate some new code. - Remove the ‘Middlewares/Third_party’ folder.
- Go back to the
.iocfile, select Help > Manage embedded software packages and add the new CMSIS-PACK. - On the
.iocpage, click Software Packs > Select Components. - Find your CMSIS-PACK, and expand the line. If the ‘Selection’ checkbox is selected, uncheck this first.
- Change the Version dropdown to the new CMSIS-PACK version.
- Expand the item again, and enable the ‘Selection’ toggle. Press OK to exit the modal.

- Find the new CMSIS-PACK version under ‘Additional software’ in the item list, click on it (there are now probably multiple CMSIS-PACKs listed here for some reason), and set a new checkbox under ‘Mode’.
- Click in the ‘Project explorer’ so the
.iocfile loses focus, and pressCTRL+SorCMD+S. This will generate some new code. - Remove
main.cas it will be generated again. - You now have a new CMSIS-PACK version!