Keyword spottingThis tutorial is for the Syntiant TinyML, Arduino Nicla Voice, and the Avnet RASynBoard (Renesas RA6 and Syntiant NDP 120). For other development boards, you can follow the standard Keyword spotting tutorial
Before starting the tutorialAfter signing up for a free Edge Impulse account, clone the finished project, including all training data, signal processing and machine learning blocks here: Tutorial: Syntiant-RC. At the end of the process you will have the full project that comes pre-loaded with approx. 2.5 hours of training data.The features have been generated for the Syntiant TinyML board. To use it for the Arduino Nicla Voice, just set the
Features extractor to log-bin in the Syntiant DSP block and retrain your impulse.1. Prerequisites
For this tutorial you’ll one of the following boards The Syntiant TinyML Board shows up as USB microphone once plugged in, and Edge Impulse can use this interface to record audio directly. For the Arduino Nicla Voice, run theedge-impulse-daemon CLI command to start collecting data.
Device compatibilityEdge Impulse can ingest data from any device - including embedded devices that you already have in production. See the documentation for the Ingestion API for more information.
2. Collecting your own voice samples
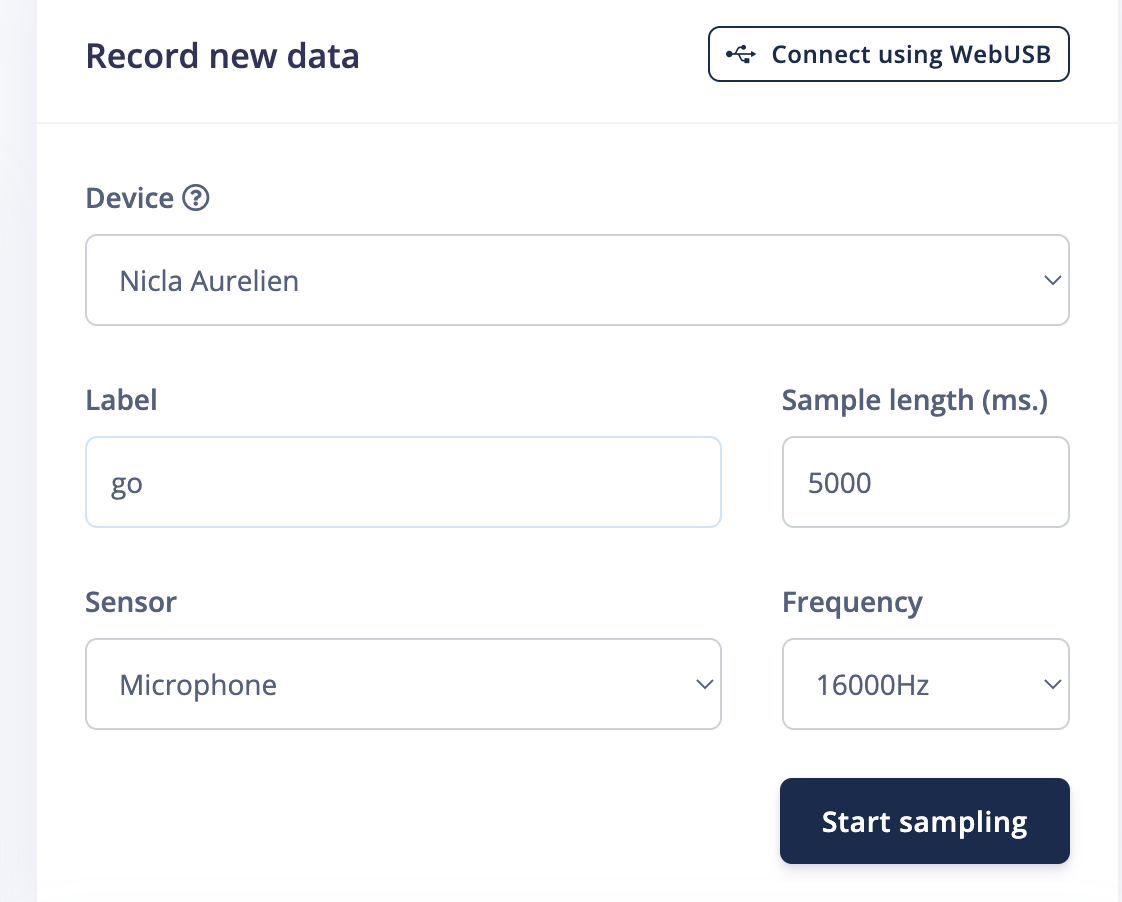
In this tutorial we want to build a system that recognizes keywords that resemble giving commands to a remote control car such as ‘go’ and ‘stop’. Although the aforementioned public project comes pre-loaded with approx. 2.5 hours of training data, in order to add additional audio samples including your own, we’ll show you how you can record audio samples directly from the board.2.1 For the Syntiant TinyML
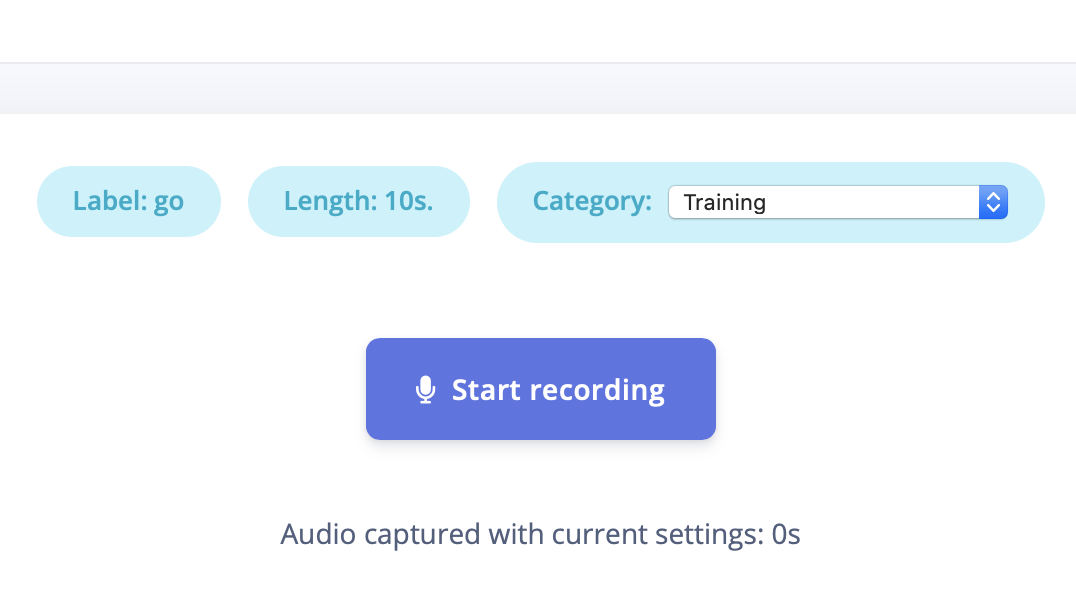
To collect your own voice samples, ensure you have selected your system’s microphone interface as the “Arduino MKRZero”. Then, go to Devices -> Connect a new device, and choose the option of “Use Your Computer” and allow access to your microphone.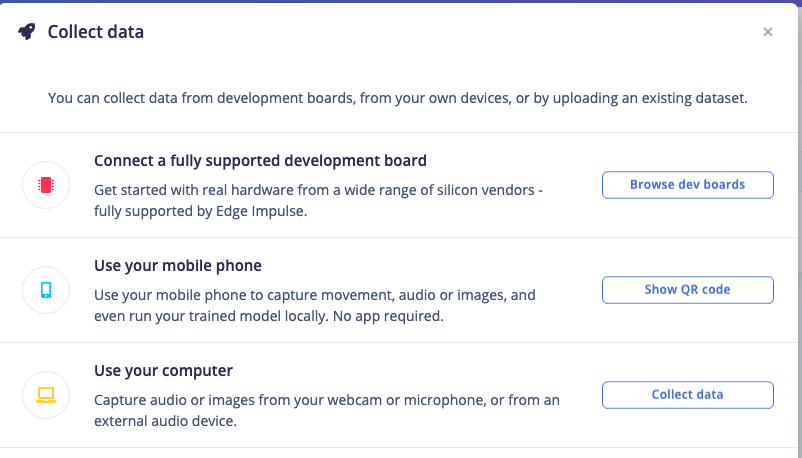
Note: You can use your Mobile phone as a sensor as well.Afterwards you have a file like this, clearly showing your keywords, separated by some noise. The new data sample will show up in the appropriate Training or Test data bucket.
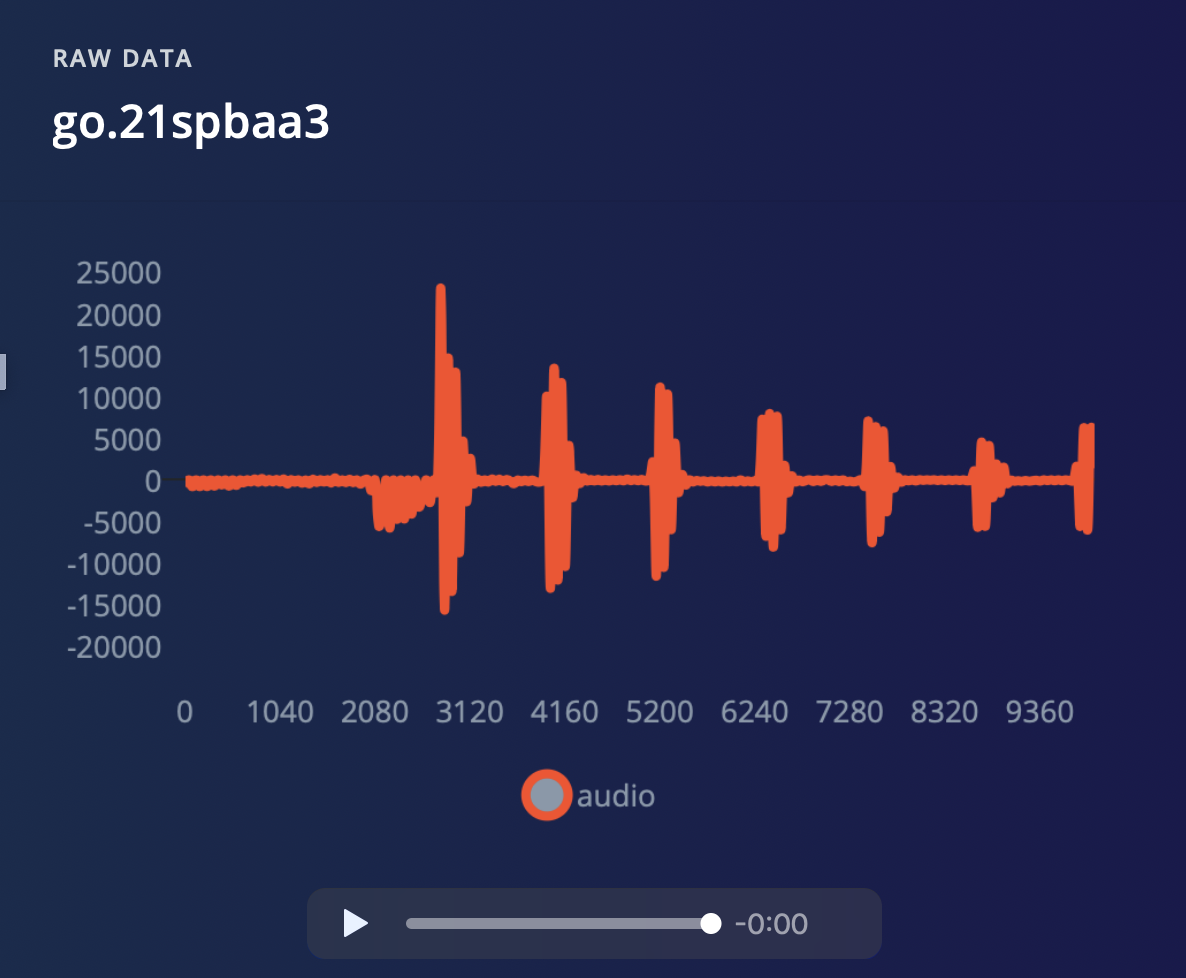
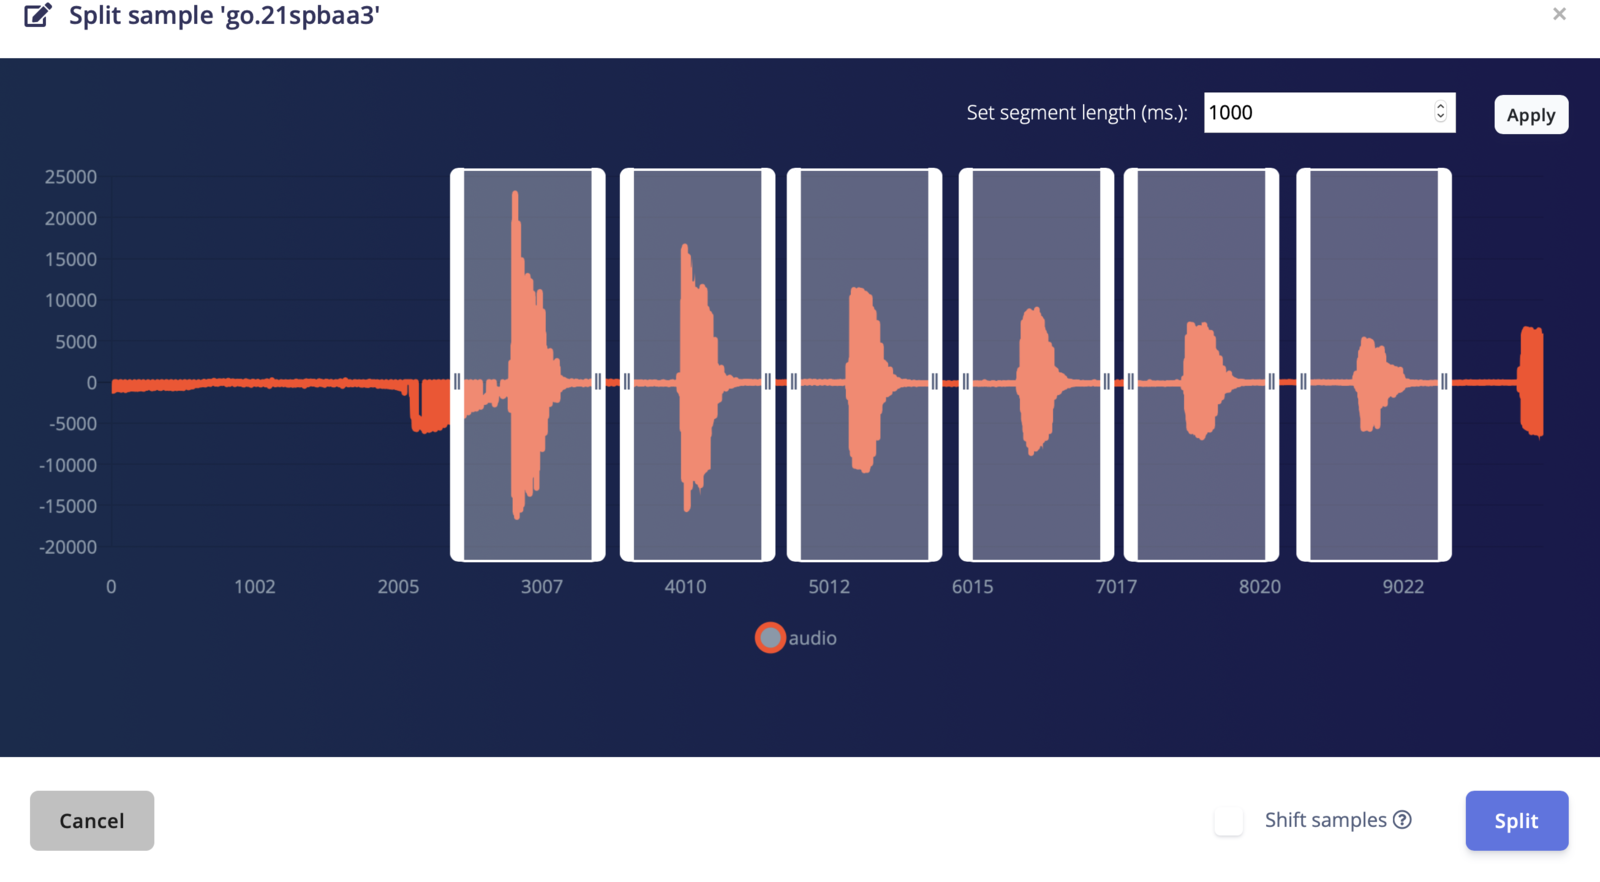
⋮ next to your sample, and select Split sample.
2.2 For the Arduino Nicla Voice
Run theedge-impulse-daemon CLI command and select the project to connect to. Once your board is connected, you can start collecting data from the Data Acquisition page:
3. Understanding how to construct your dataset
About this sectionThis section goes through general guidance for collecting your audio data from scratch and not all steps are required for the out-of-box experience workflow, other than adding your own voice samples. Read on to understand more detail about how the dataset was constructed.
Rebalancing your dataset
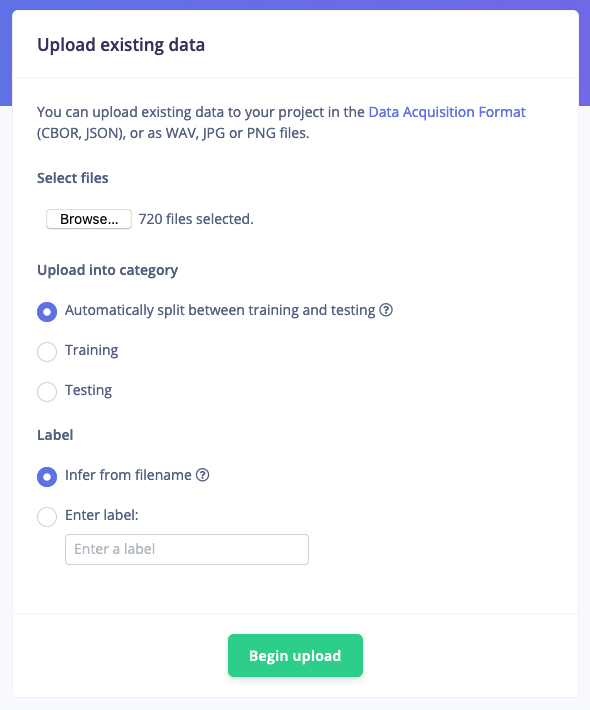
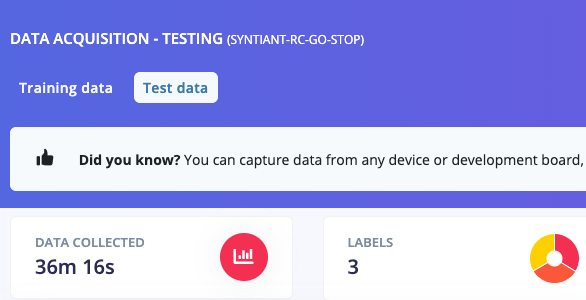
If you’ve collected all your training data through the ‘Record new data’ widget you’ll have all your keywords in the ‘Training’ dataset. This is not great, because you want to keep 20% of your data separate to validate the machine learning model. To mitigate this you can go to Dashboard and select Rebalance dataset. This will automatically split your data between a training class (80%) and a testing class (20%). Afterwards you should see something like this: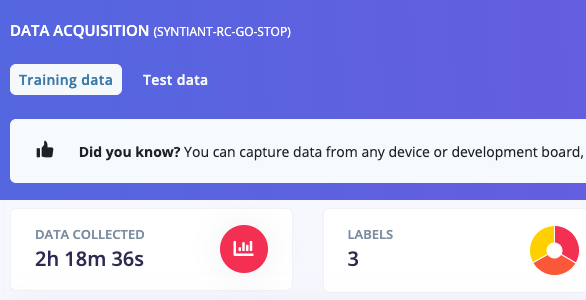
Next stepsIn the next steps we walk you through in detail how the Syntiant signal processing and neural network blocks were configured. If you imported the project, these are already pre-configured for you so you can just read on to understand more details.
4. Designing your impulse
With the data set in place you can design an impulse. An impulse takes the raw data, slices it up in smaller windows, uses signal processing blocks to extract features, and then uses a learning block to classify new data. Signal processing blocks always return the same values for the same input and are used to make raw data easier to process, while learning blocks learn from past experiences. For this tutorial we’ll use the “Syntiant” signal processing block. The Syntiant processing block is similar to the Audio MFE block, but using a log-MEL scale plus other transformations specific to the Syntiant audio front-end. We’ll then pass this simplified audio data into a Neural Network block, which will learn to distinguish between the three classes of audio. In the Studio, go to the Create impulse tab, add a Time series data, an Audio (Syntiant) and a Neural Network (Keras) block. Set the window size to 968 ms and the window increase to 484 ms (we’ll explain why later), verify that sampling frequency is set to 16000 Hz and click Save Impulse.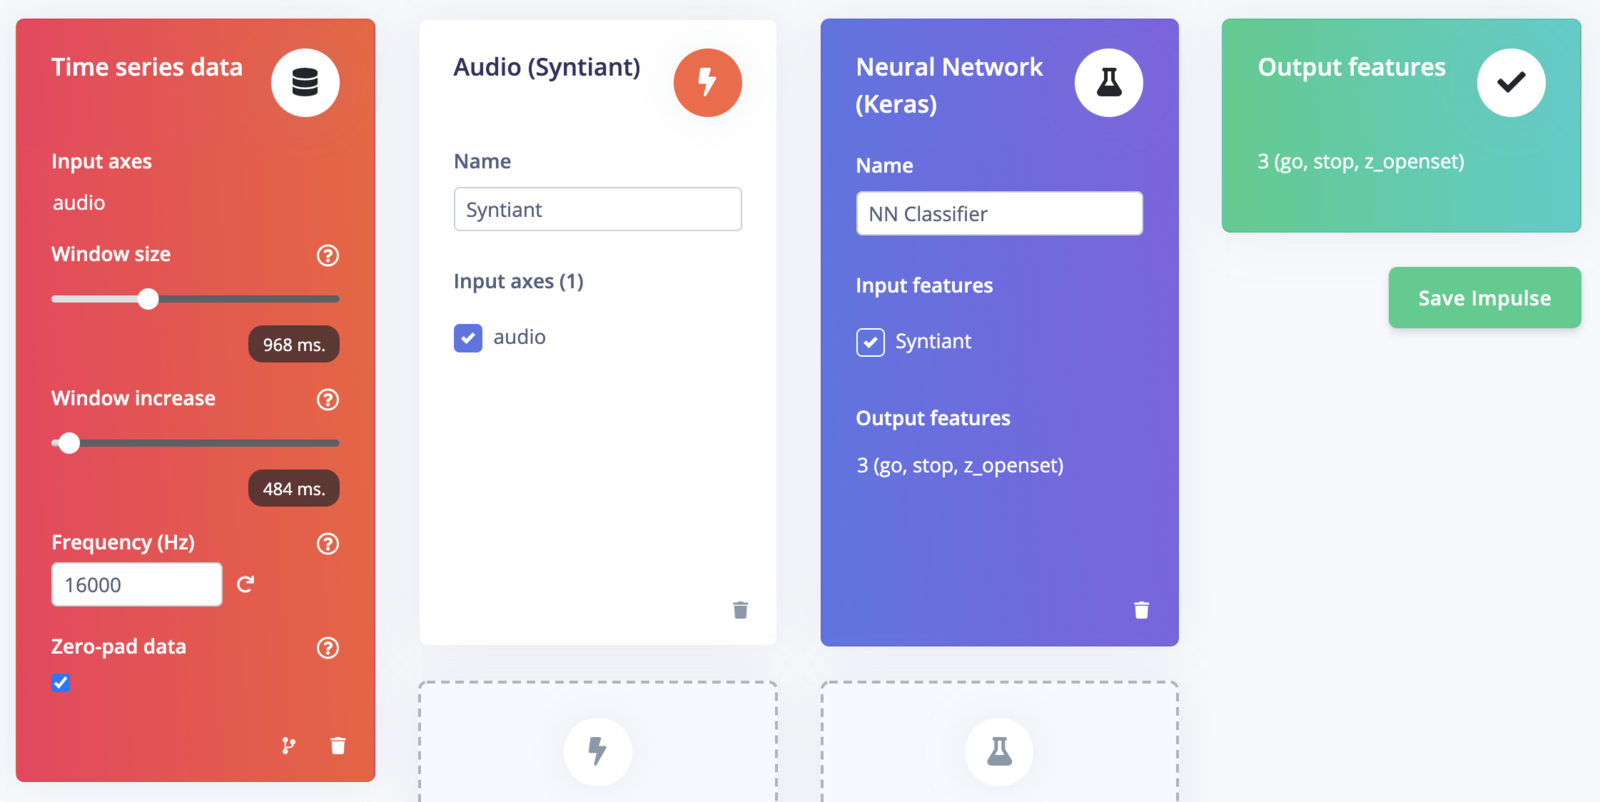
5. Configure the Syntiant block
Now that we’ve assembled the building blocks of our Impulse, we can configure each individual part. Click on the Syntiant tab in the left hand navigation menu. You’ll see a page that looks like this: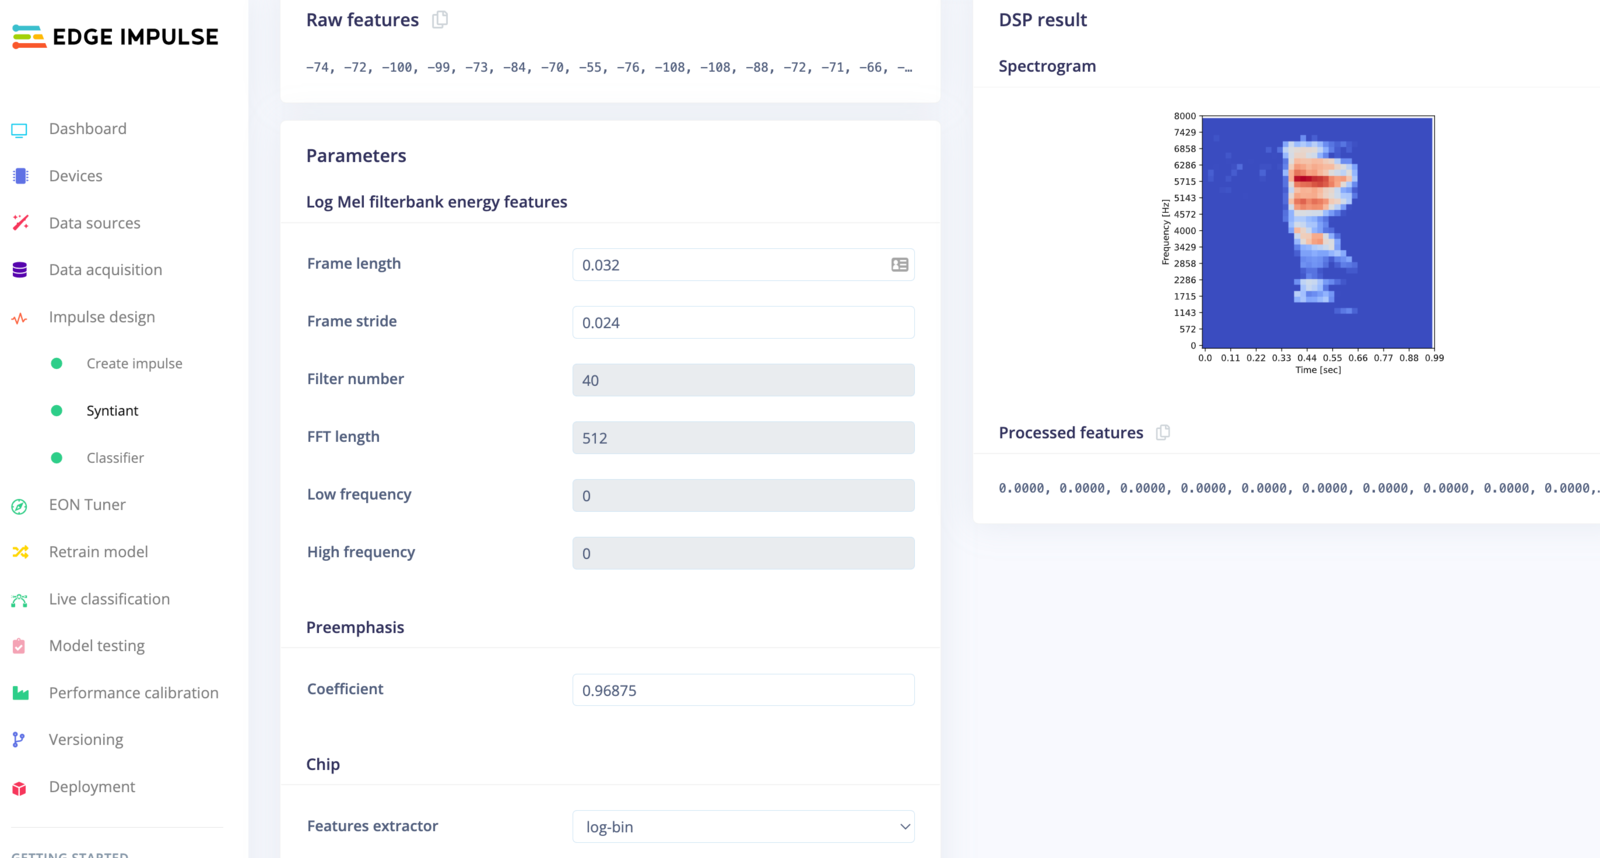
features extractor to:
- gpu/NDP101 for Syntiant TinyML
- log-bin/NDP120 for Nicla Voice
Syntiant block parametersThe number of generated features has to be 1,600, which corresponds to the Syntiant Neural Network input layer. To generate 1,600 features, you have to verify the following equation: window size = 1000 x (39 x frame stride + frame length). For our example: window size = 968 ms = 1000 x (39 x 0.024 + 0.032).
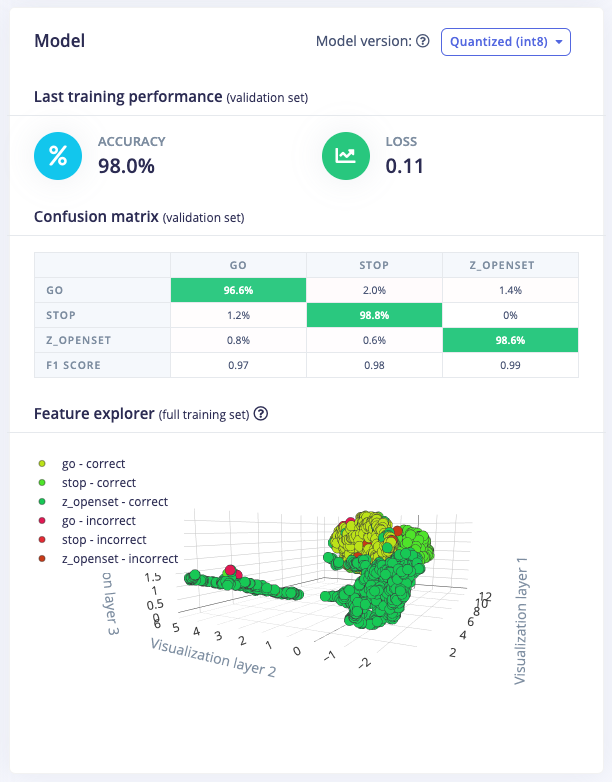
Feature explorer
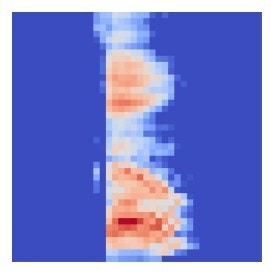
The spectrograms generated by the Syntiant block will be passed into a neural network architecture that is particularly good at learning to recognize patterns in this type of tabular data. Before training our neural network, we’ll need to generate Syntiant blocks for all of our windows of audio. To do this, click the Generate features button at the top of the page, then click the green Generate features button. This will take a minute or so to complete. Afterwards you’re presented with one of the most useful features in Edge Impulse: the feature explorer. This is a 3D representation showing your complete dataset, with each data-item color-coded to its respective label. You can zoom in to every item, find anomalies (an item that’s in a wrong cluster), and click on items to listen to the sample. This is a great way to check whether your dataset contains wrong items, and to validate whether your dataset is suitable for ML (it should separate nicely).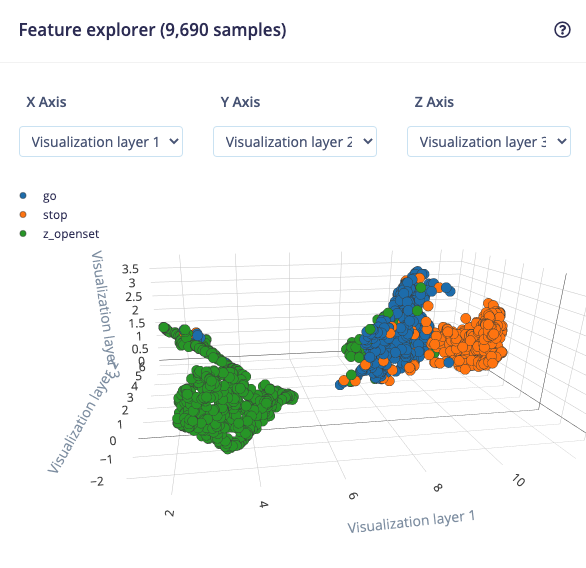
6. Configure the neural network
With all data processed it’s time to start training a neural network. Neural networks are algorithms, modeled loosely after the human brain, that can learn to recognize patterns that appear in their training data. The network that we’re training here will take the processing block features as an input, and try to map this to one of the three classes — ‘go’, ‘stop’, or ‘z_openset’. Click on NN Classifier in the left hand menu. You’ll see the following page: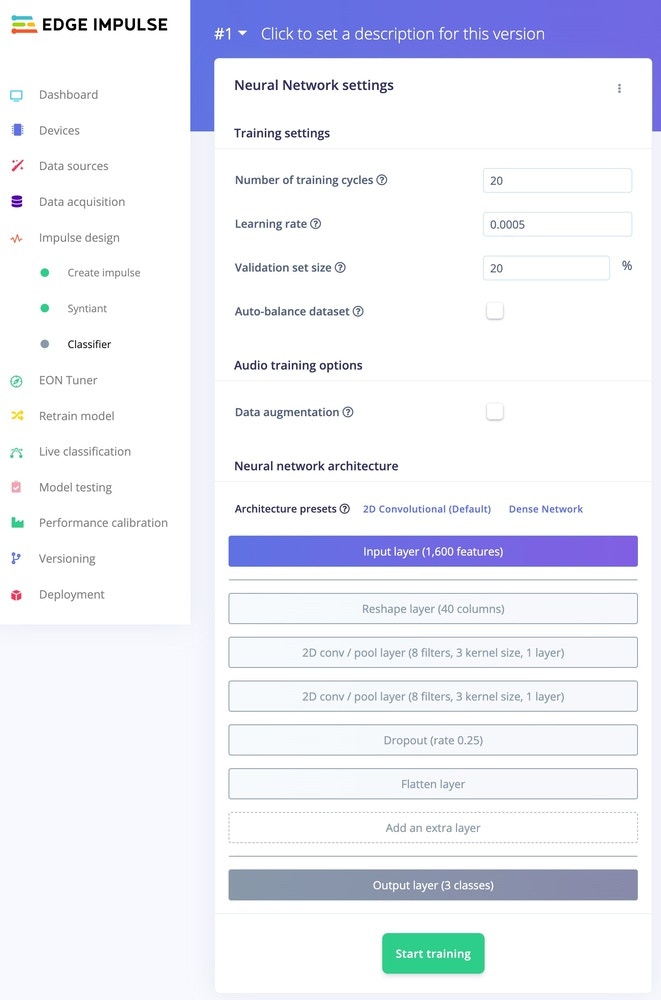
Neural Network architecturesSyntiant TinyML only supports a Dense architecture. The Arduino Nicla Voice also supports Convolutional models and it is selected by default.
7. Classifying new data
The performance numbers in the previous step show that our model is working well on its training data, but it’s extremely important that we test the model on new, unseen data before deploying it in the real world. This will help us ensure the model has not learned to overfit the training data, which is a common occurrence. Fortunately we’ve put aside 20% of our data already in the ‘Test set’ (see Data acquisition). This is data that the model has never seen before, and we can use this to validate whether our model actually works on unseen data. To run your model against the test set, head to Model testing, and click Classify all.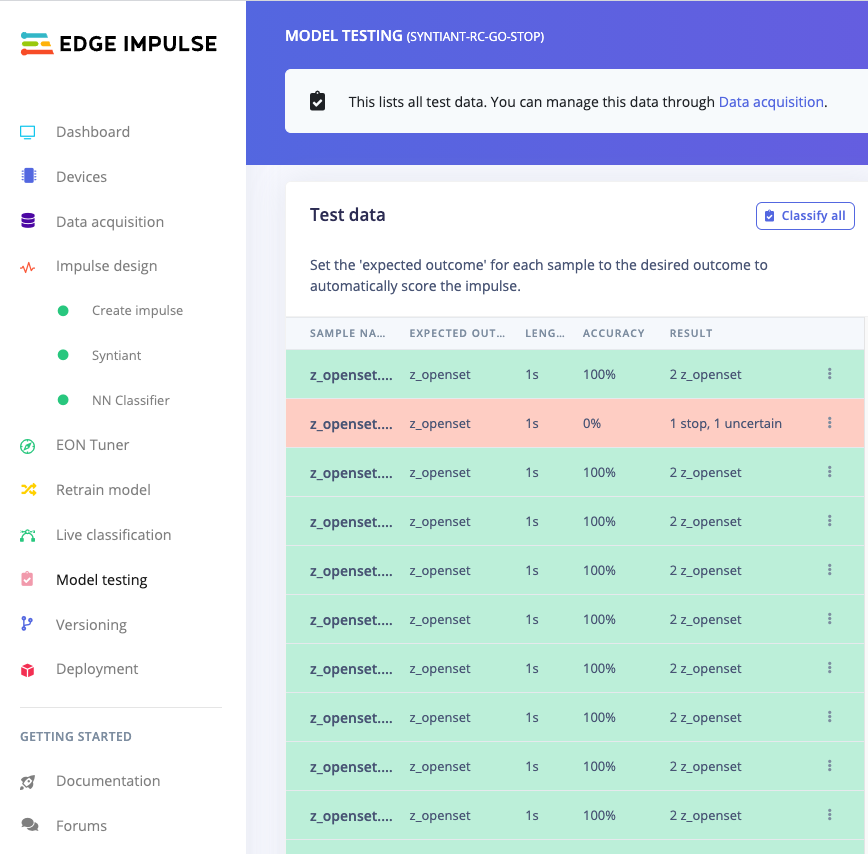
⋮) next to a sample and select Show classification. You’re then transported to the classification view, which lets you inspect the sample, and compare the sample to your training data. This way you can inspect whether this was actually a classification failure, or whether your data was incorrectly labeled. From here you can either update the label (when the label was wrong), or move the item to the training set to refine your model.
8. Deploying to your device
With the impulse designed, trained and verified you can deploy this model back to your device. This makes the model run without an internet connection, minimizes latency, and runs with minimum power consumption. To export your model, click on Deployment in the menu. Then under ‘Build firmware’ select the Syntiant TinyML or Arduino Nicla Voice. The final step before building the firmware is to configure the posterior handler parameters of the Syntiant chip.Pre-configured posterior parametersFor the Syntiant-RC project, we’ve already pre-configured the posterior parameters so you can just go to the ‘Build’ output step. We recommend skipping to Step 9, but read on for more details about the process of posterior search.
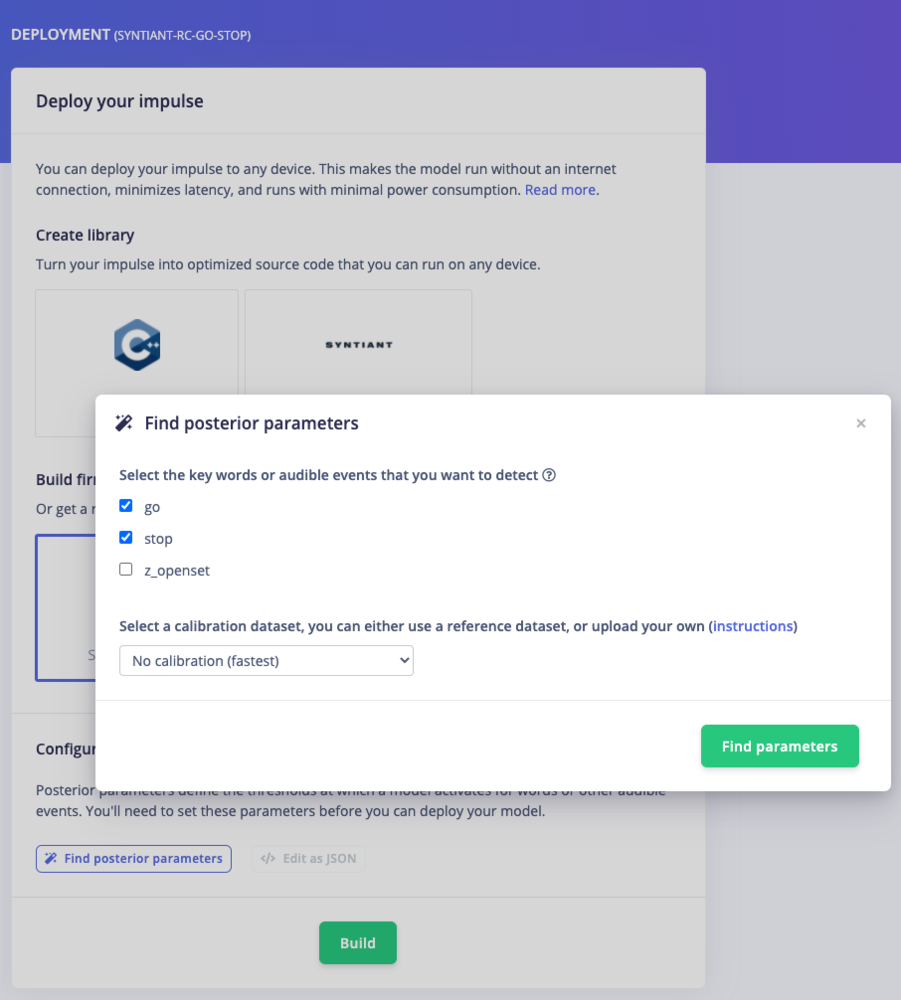
- Select the classes you want to detect (the z_openset class should be omitted except for testing purpose)
- Select a calibration dataset: either no calibration (recommended for TinyML/NDP101), the reference dataset with common english words from a radio program, or your own calibration dataset.
go,stop,this,is,an,example,transcript,for,optimizing,the,posterior,parameters,,,it,will,optimize,activations,for,the,go,stop,keywords,
You can also simplify the csv file and include only the keywords/classes you are interested in optimizing. For instance, if your audio wav files contains only 2 occurrences of ‘go’ and ‘stop’: go,stop,go,stop,
Tuning the audio gain for the Syntiant TinyMLAfter generating the posterior parameters, you can change the Syntiant TinyML audio gain by editing the “audio_pdm_gain” value at the end of the JSON file. Default value is set to 12 dB.
9. Flashing the device
Once optimized parameters have been found, you can click Build. This will build a Syntiant package that will run on your development board. After building is completed you’ll get prompted to download a zipfile. Save this on your computer. A pop-up video will show how the download process works. After unzipping the downloaded file, run the appropriate flashing script for your operating system, to flash the Syntiant TinyML Board with the Syntiant-RC model and associated firmware. You might see a Microsoft Defender screen pop up when the script is run on Windows 10. It’s safe to proceed so select ‘More info’ and continue.10. Running the model on the device
Run theedge-impulse-run-impulse CLI command in your terminal: