AI labeling actions
To exit an AI labeling action configuration and return to the overview page, you can click on the < button found to the left of the block configuration title (AI Labeling - Step 1) or click the AI labeling tab.

AI labeling blocks
There are several AI labeling blocks that have been developed by Edge Impulse and are available for your use. These are listed below with links to their associated code in public GitHub repositories:- Bounding Box Labeling with OWL-ViT
- Bounding Box Re-Labeling with GPT-4o
- Bounding Box Validation with GPT-4o
- Image Labeling with GPT-4o
- Image Labeling with Pretrained Models
- Audio Labeling with AudioSet
Custom AI labeling blocks
If none of the blocks from Edge Impulse fit your needs, you can modify them or develop from scratch to create a custom AI labeling block. This allows you to integrate your own models or prompts for unique project requirements. See the Custom AI labeling blocks page for more information.Configuration
To begin, proceed to the Data acquisition view and ensure you have data samples in the Dataset tab. Then, continue to the AI labeling tab. Click on an existing AI labeling action to enter the configuration view for that action. If you do not yet have an AI labeling action, you can create one using the+ Add new label action button.
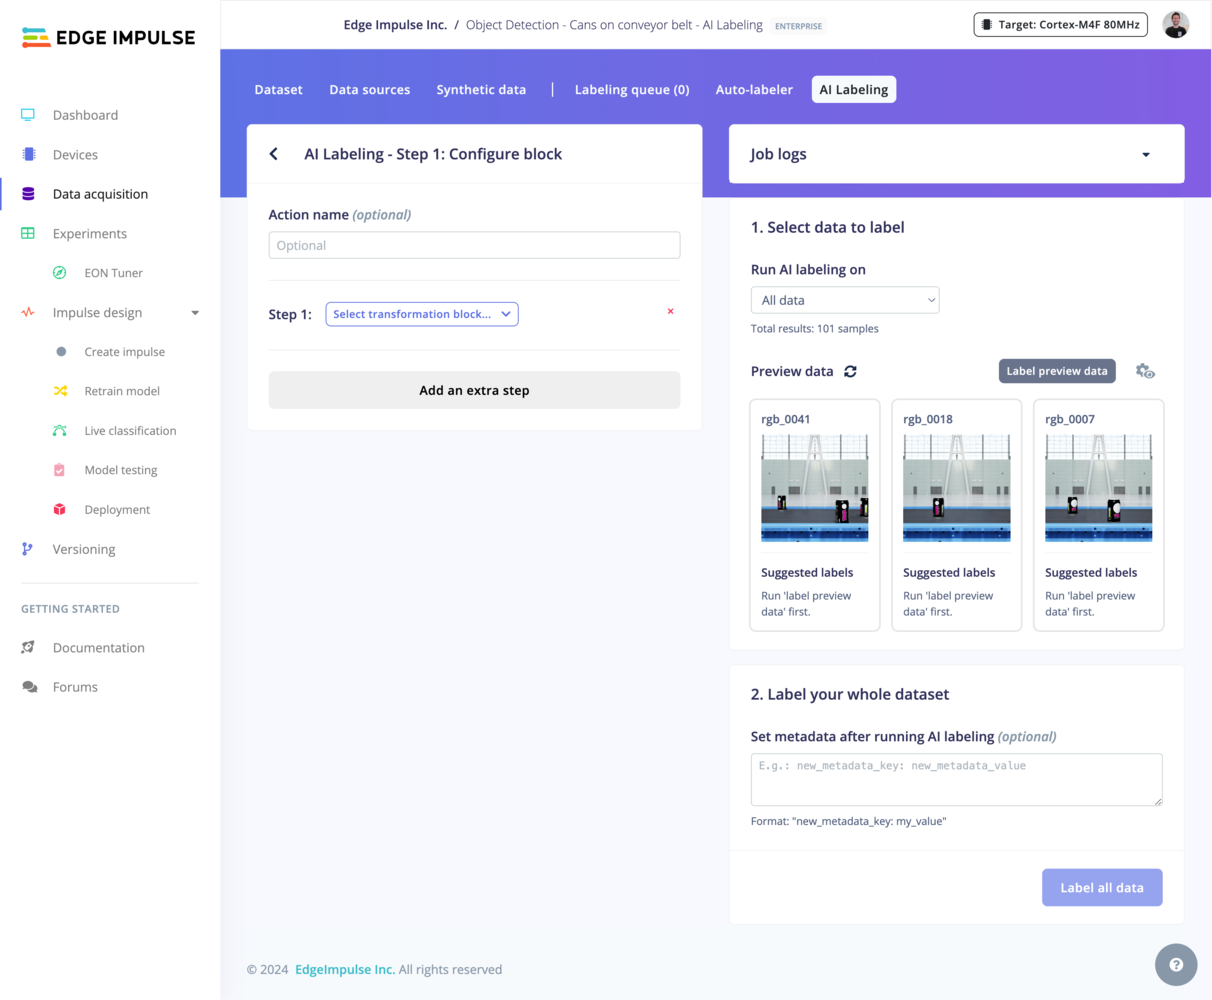
Select an AI labeling block
The first step is to select an AI labeling block that you would like to use. By default, blocks that are not compatible with your data modality or labeling objective are greyed out. Once you have selected an AI labeling block, the parameters specific to that block are presented.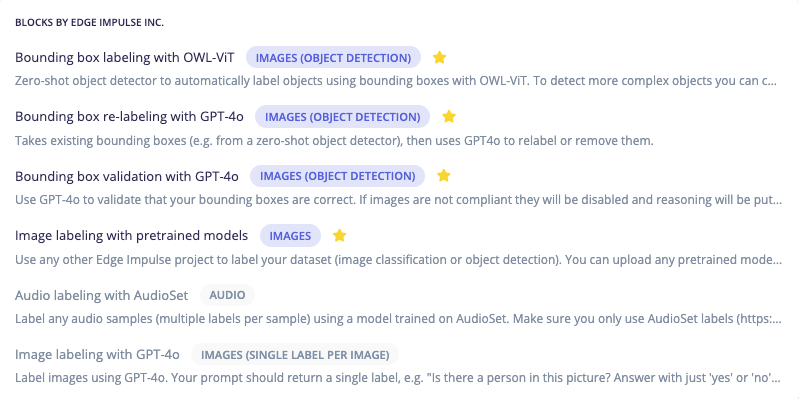
Add multiple AI labeling blocks
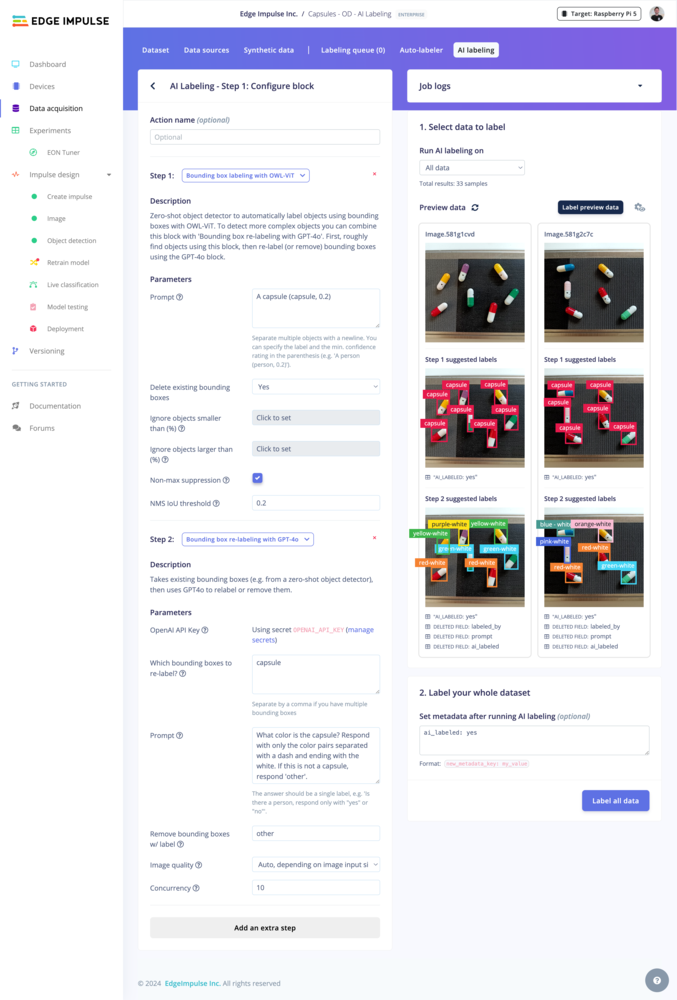
You can chain several AI labeling blocks together to create an AI labeling action with multiple steps. For example, you can first use a zero-shot object detector to automatically detect high-level objects within an image then follow this with a step to re-label the bounding boxes with more precise labels or remove them entirely. To add multiple AI labeling blocks, click on the button at the bottom of the block configuration panel to add an extra step.Filter which data to label
Select which data items in your dataset you want to label. You can use the metadata attached to your data samples to define your own labeling strategy.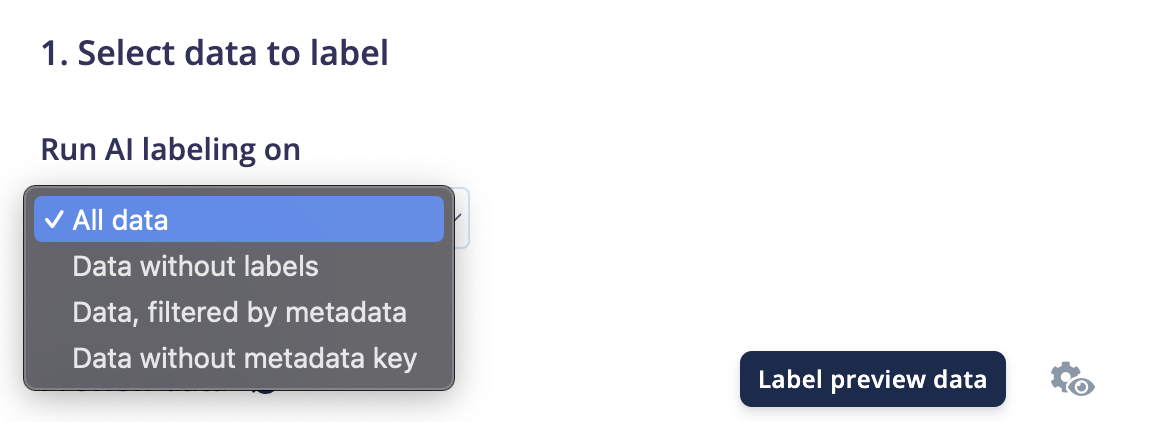
Preview
Tip: If you want to change the number of data samples or the number of columns shown in the preview, click on the view settings icon. Changing the number of columns can be useful for object detection use cases where your objects are small and you want to see larger images.

Label preview data button, the changes are staged but not directly applied.
Set metadata (optional)
You can add metadata such asai-labeled: true, labeling-source: GPT-4o or labeled-on: Nov 2024 that will be set after running the AI labeling action. This is particularly useful if you plan to add more data samples over time and need to filter out your already-labeled samples.
Run the labeling process
Once you are satisfied with your configuration, click on theLabel all data button. This will run the AI labeling action and apply the labeling updates to your dataset.
Examples
Bounding box labeling with OWL-ViT
A zero-shot object detector that uses OWL-ViT to label objects with bounding boxes. For complex objects, pair with “Bounding box re-labeling with GPT-4o” to refine labels.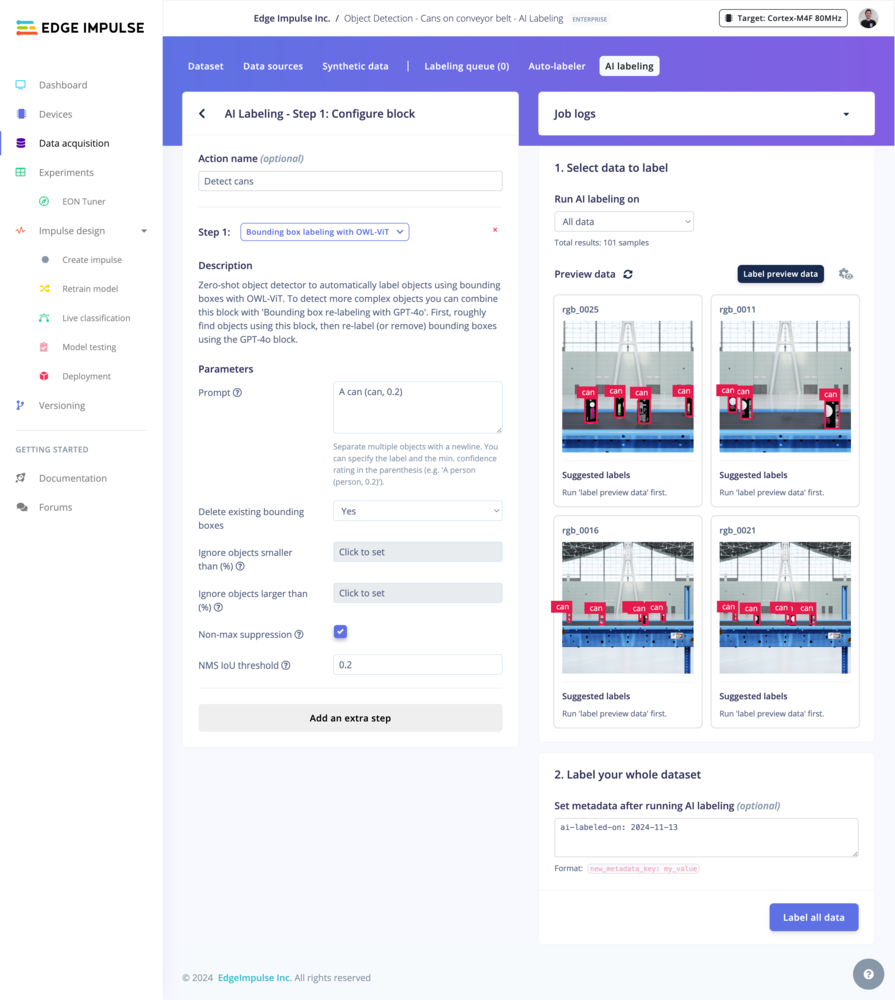
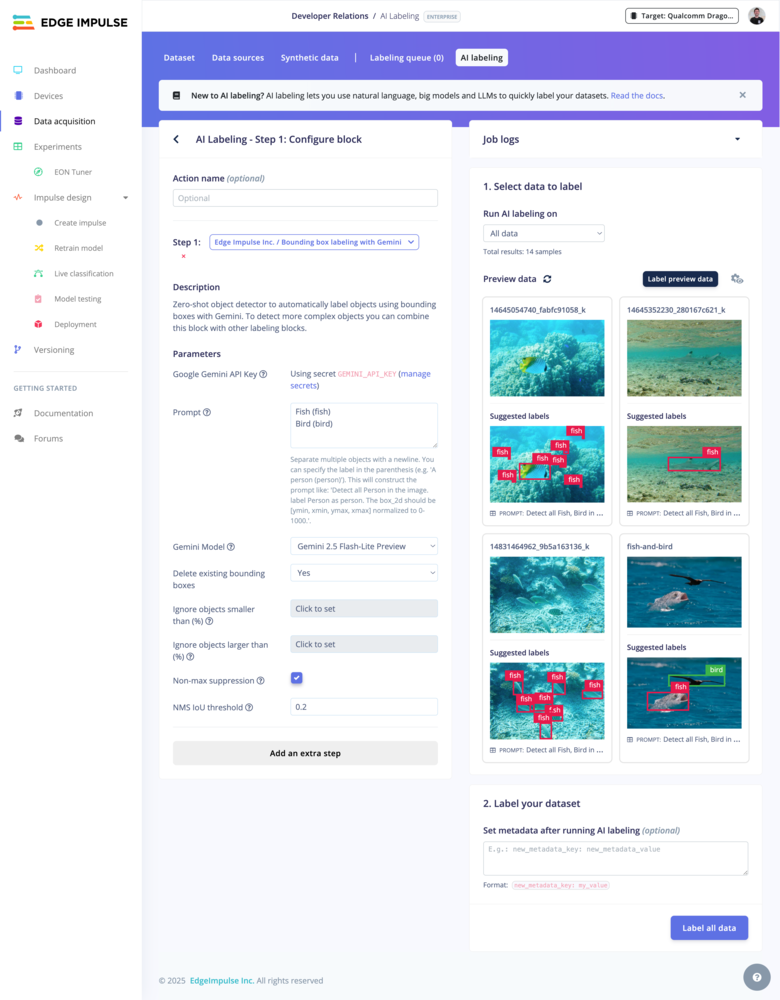
Bounding box labeling with Google Gemini
A zero-shot object detector that uses Google Gemini to label objects with bounding boxes. For complex objects, pair with “Bounding box re-labeling with GPT-4o” to refine labels. Here is a list of available models that you can use with this AI labeling block:| Model | Tag |
|---|---|
| Gemini 2.5 Pro | gemini-2.5-pro |
| Gemini 2.5 Flash | gemini-2.5-flash |
| Gemini 2.5 Flash-Lite Preview | gemini-2.5-flash-lite-preview-06-17 |
| Gemini 2.0 Flash | gemini-2.0-flash |
| Gemini 2.0 Flash-Lite | gemini-2.0-flash-lite |
| Gemini 1.5 Flash | gemini-1.5-flash |
| Gemini 1.5 Flash-8B | gemini-1.5-flash-8b |
| Gemini 1.5 Pro | gemini-1.5-pro |
Bounding box re-labeling with GPT-4o
OpenAI API key needed
Bounding box validation with GPT-4o
OpenAI API key needed
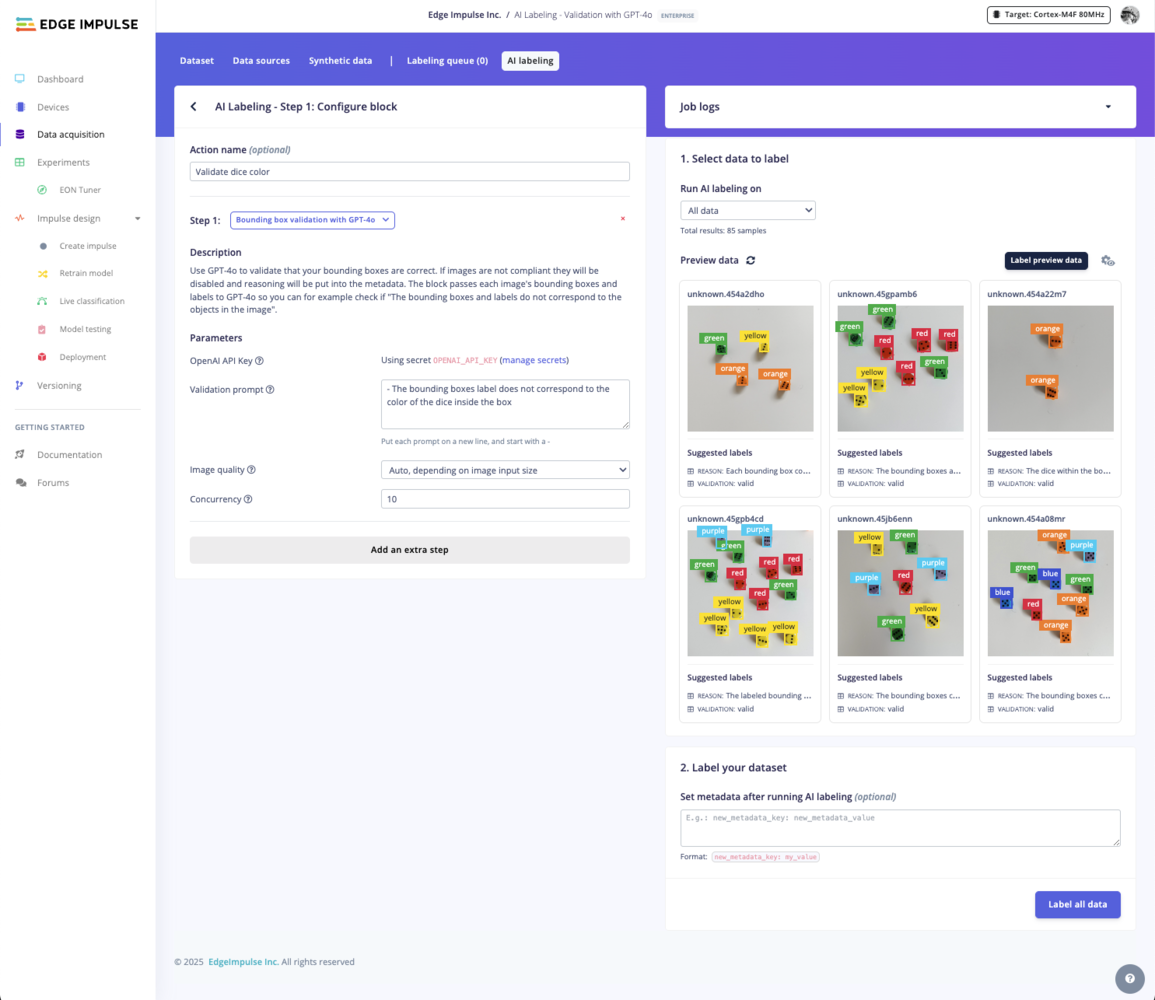
Image labeling with GPT-4o
OpenAI API key needed
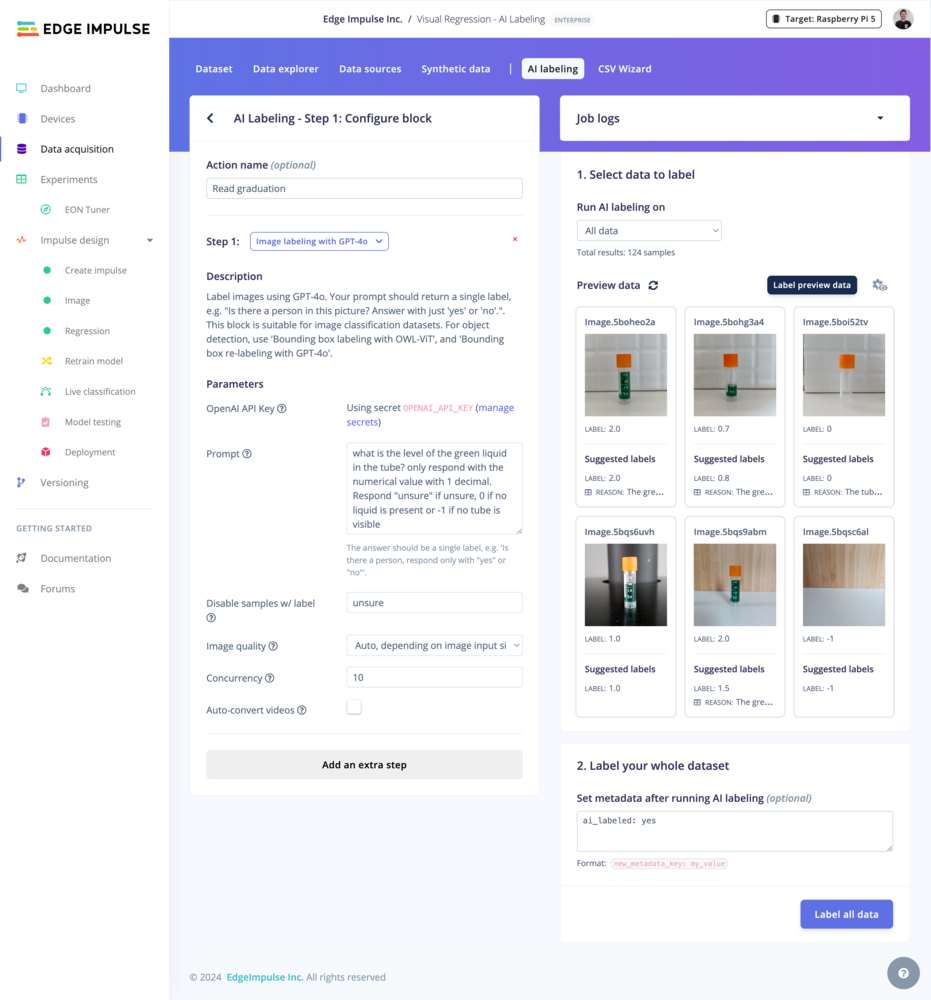
Image labeling with pretrained models
Use a model from an existing Edge Impulse project to label images (classification or object detection). You can also upload your pretrained models to Edge Impulse using the BYOM (Bring Your Own Model) feature.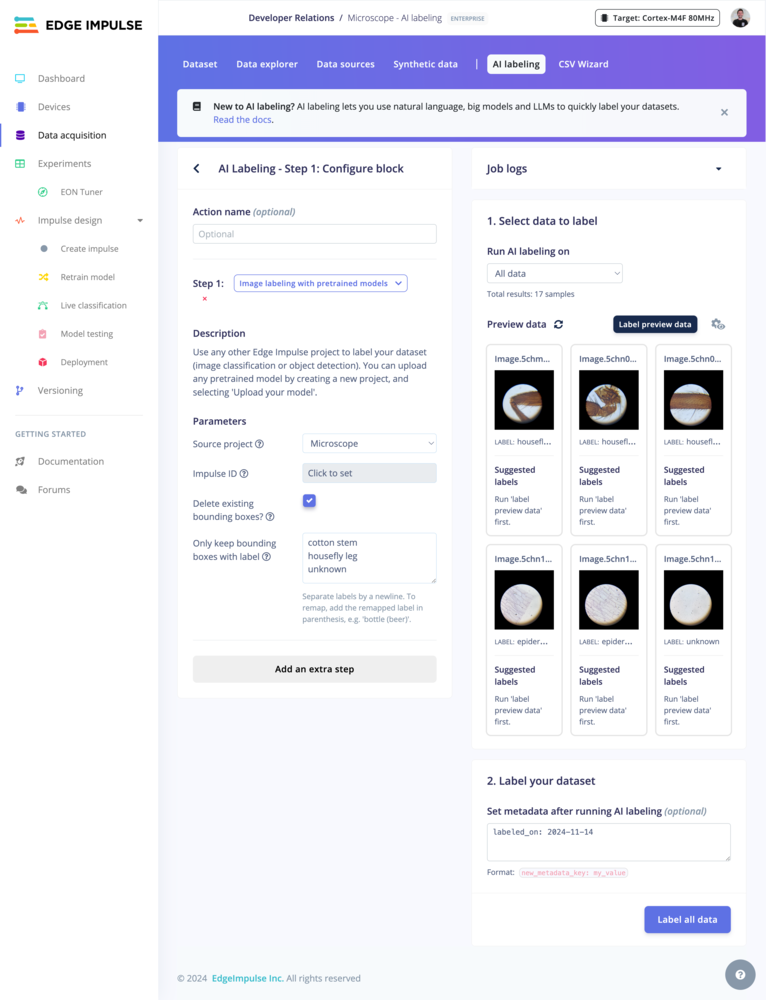
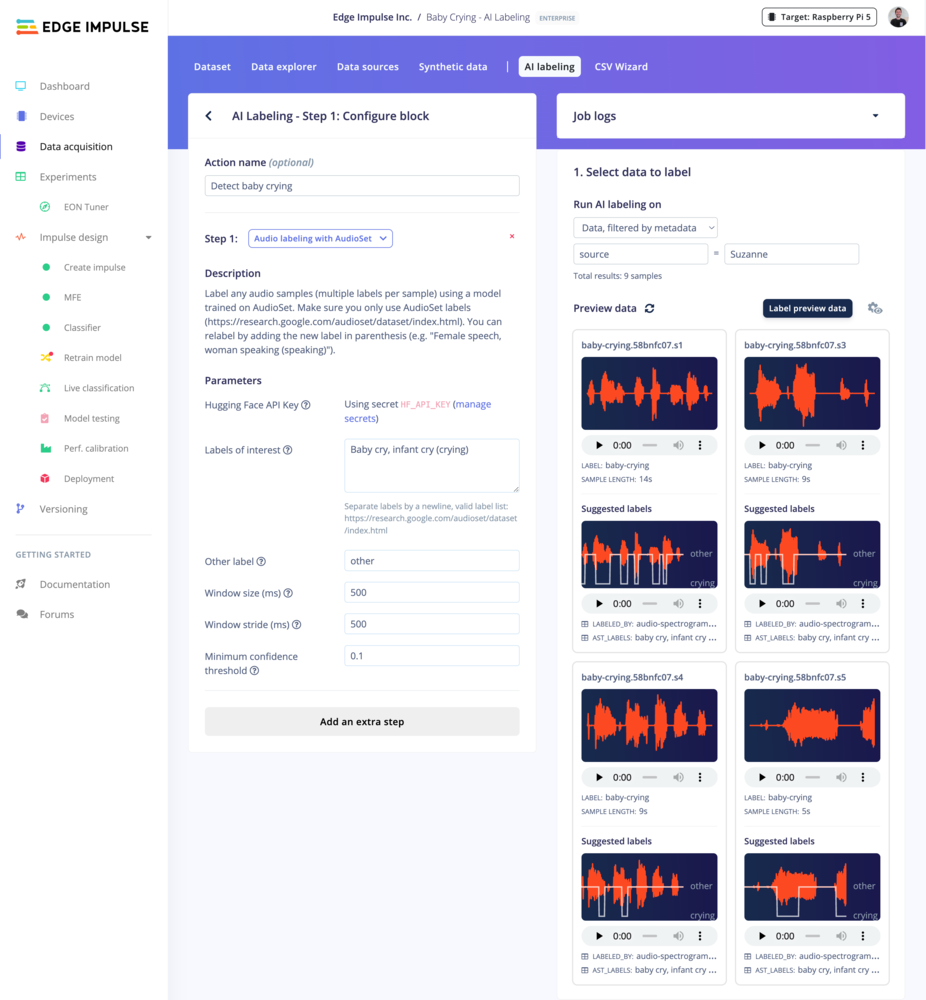
Audio labeling with AudioSet
Hugging Face API key needed
Troubleshooting
No common issues have been identified thus far. If you encounter an issue, please reach out on the forum or, if you are an Enterprise customer, to your Solutions engineer.