Nordic Semi Thingy:91

The Nordic Semiconductor Thingy:91 is an easy-to-use battery-operated prototyping platform for cellular IoT using LTE-M, NB-IoT and GPS. It is ideal for creating Proof-of-Concept (PoC), demos and initial prototypes in your cIoT development phase. Thingy:91 is built around the nRF9160 SiP and is certified for a broad range of LTE bands globally, meaning the Nordic Thingy:91 can be used just about anywhere in the world. There is an nRF52840 multiprotocol SoC on the Thingy:91. This offers the option of adding Bluetooth Low Energy connectivity to your project.

Nordic's Thingy:91 is fully supported by Edge Impulse. You'll be able to sample raw data, build models, and deploy trained machine learning models directly from the studio.

The Edge Impulse firmware for this development board is open source and hosted on GitHub: edgeimpulse/firmware-nordic-thingy91.

Installing dependencies

To set this device up in Edge Impulse, you will need to install the following software:

  1. On Linux:

    • GNU Screen: install for example via sudo apt install screen.

Problems installing the CLI?

See the Installation and troubleshooting guide.

Updating the firmware

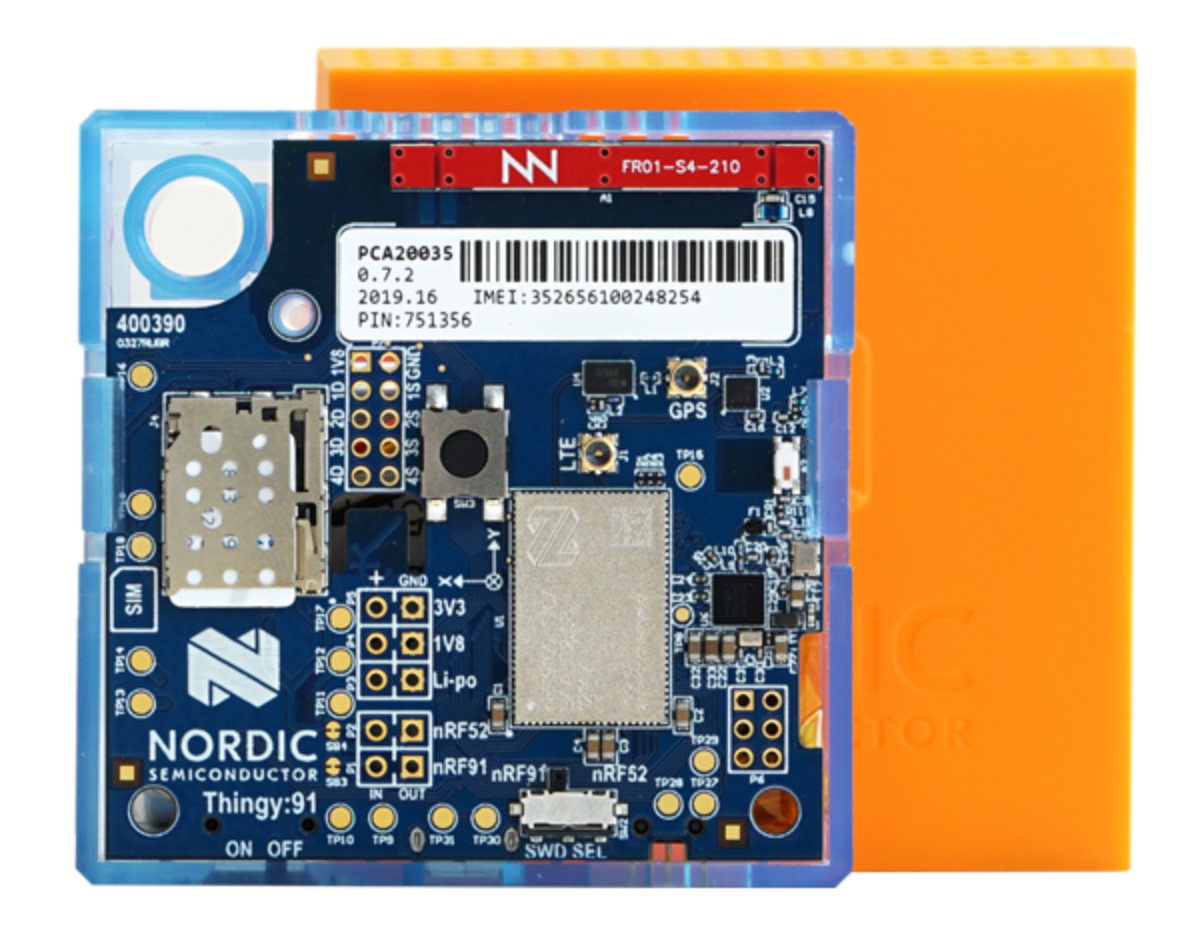
Before you start a new project, you need to update the Thingy:91 firmware to our latest build.

1. Connect the development board to your computer

Use a micro-USB cable to connect the development board to your computer. Then, set the power switch to 'on'.

2. Download the firmware

Download the latest Edge Impulse firmware. The extracted archive contains the following files:

  1. firmware.hex: the Edge Impulse firmware image for the nRF9160 SoC, and

  2. connectivity-bridge.hex: a connectivity application for the nRF52840 that you only need on older boards (hardware version < 1.4)

3. Update the firmware

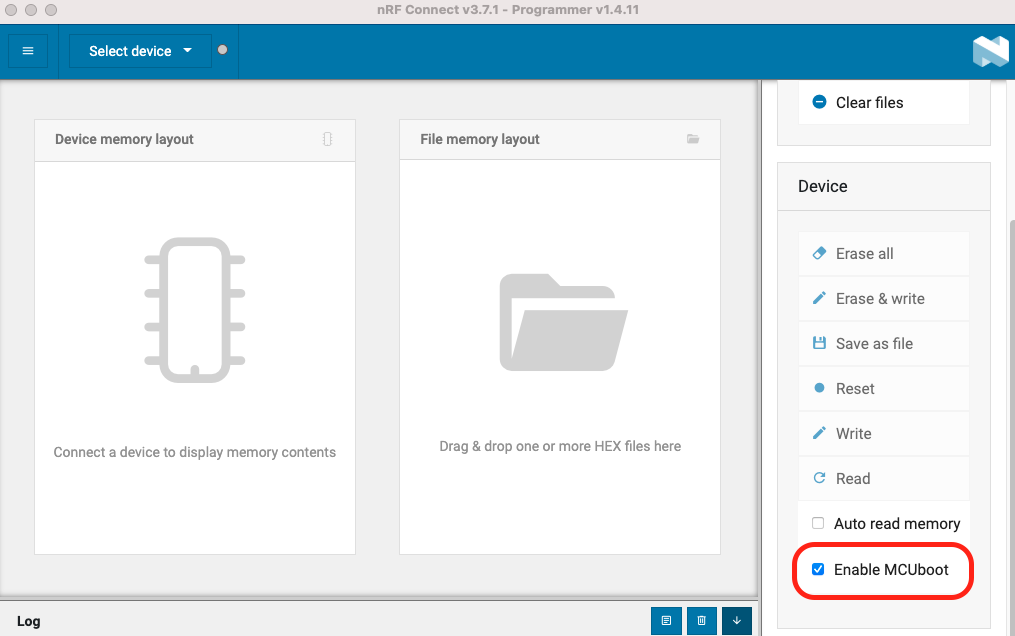
  1. Open nRF Connect for Desktop and launch the Programmer application.

  2. Scroll down in the menu on the right and make sure Enable MCUboot is selected.

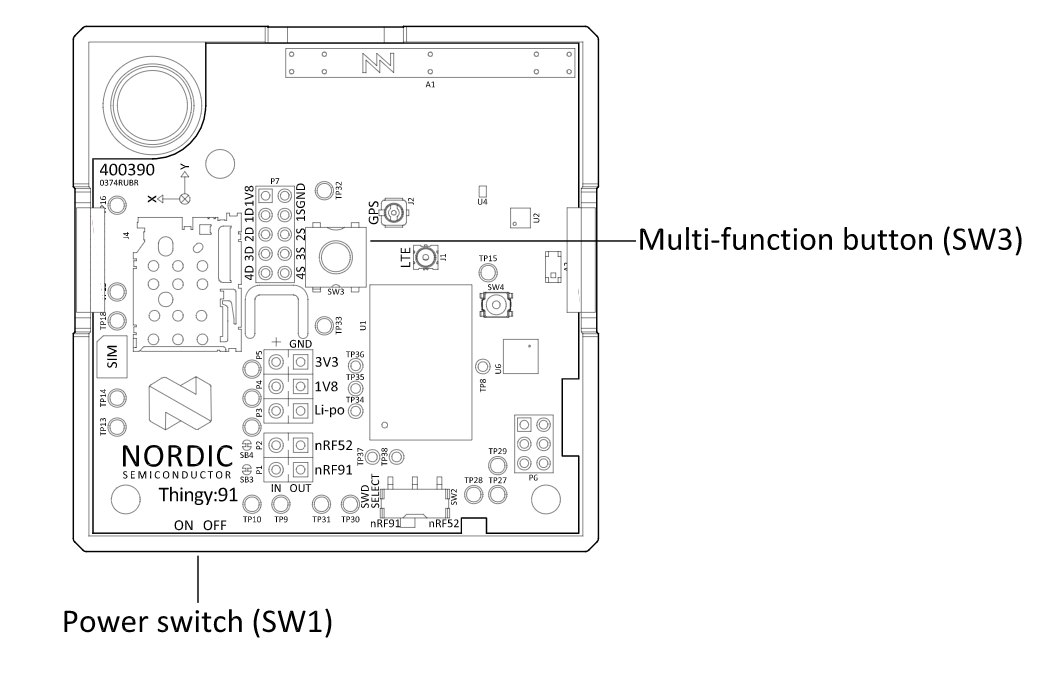
  1. Switch off the Nordic Thingy:91.

  2. Press the multi-function button (SW3) while switching SW1 to the ON position.

  1. In the Programmer navigation bar, click Select device.

  2. In the menu on the right, click Add HEX file > Browse, and select the firmware.hex file from the firmware previously downloaded.

  3. Scroll down in the menu on the right to Device and click Write:

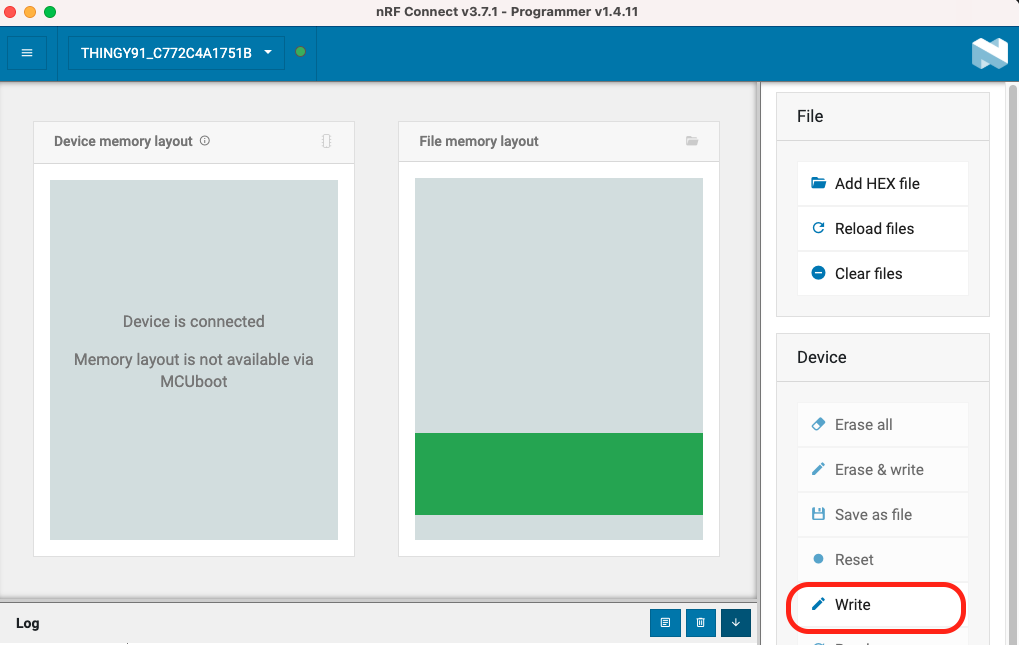
  1. In the MCUboot DFU window, click Write. When the update is complete, a Completed successfully message appears.

  2. You can now disconnect the board.

Thingy:91 hardware version < 1.4.0

Updating the firmware with older hardware versions may fail. Moreover, even if the update works, the device may later fail to connect to Edge Impulse Studio:

[SER] Serial is connected, trying to read config...
[SER] Failed to get info off device Timeout when waiting for >  (timeout: 5000) onConnected

In these cases, you will also need to flash the connectivity-bridge.hex onto the nRF52840 in the Thingy:91. Follow the steps here to update the nRF52840 SOC application with the connectivity-bridge.hex file through USB.

If this method doesn't work, you will need to flash both hex files using an external probe."

Connecting to Edge Impulse

With all the software in place it's time to connect the development board to Edge Impulse. From a command prompt or terminal, run:

edge-impulse-daemon

This starts a wizard which asks you to log in and choose an Edge Impulse project. If you want to switch projects run the command with --clean.

The Thingy:91 exposes multiple UARTs. If prompted, choose the first one:

? Which device do you want to connect to? (Use arrow keys)
❯ /dev/tty.usbmodem14401 (Nordic Semiconductor)
  /dev/tty.usbmodem14403 (Nordic Semiconductor)

Alternatively, recent versions of Google Chrome and Microsoft Edge can collect data directly from your development board, without the need for the Edge Impulse CLI. See this blog post for more information.

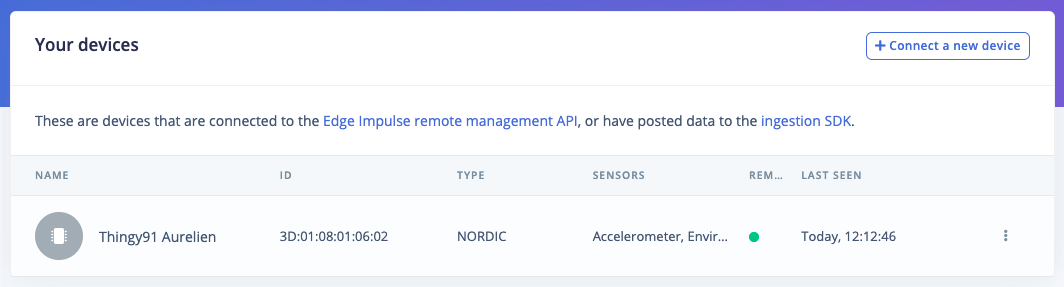
4. Verifying that the device is connected

That's all! Your device is now connected to Edge Impulse. To verify this, go to your Edge Impulse project, and click Devices. The device will be listed here.

Next steps: building a machine learning model

With everything set up you can now build your first machine learning model with this tutorial:

Looking to connect different sensors? The Data forwarder lets you easily send data from any sensor into Edge Impulse.

Last updated