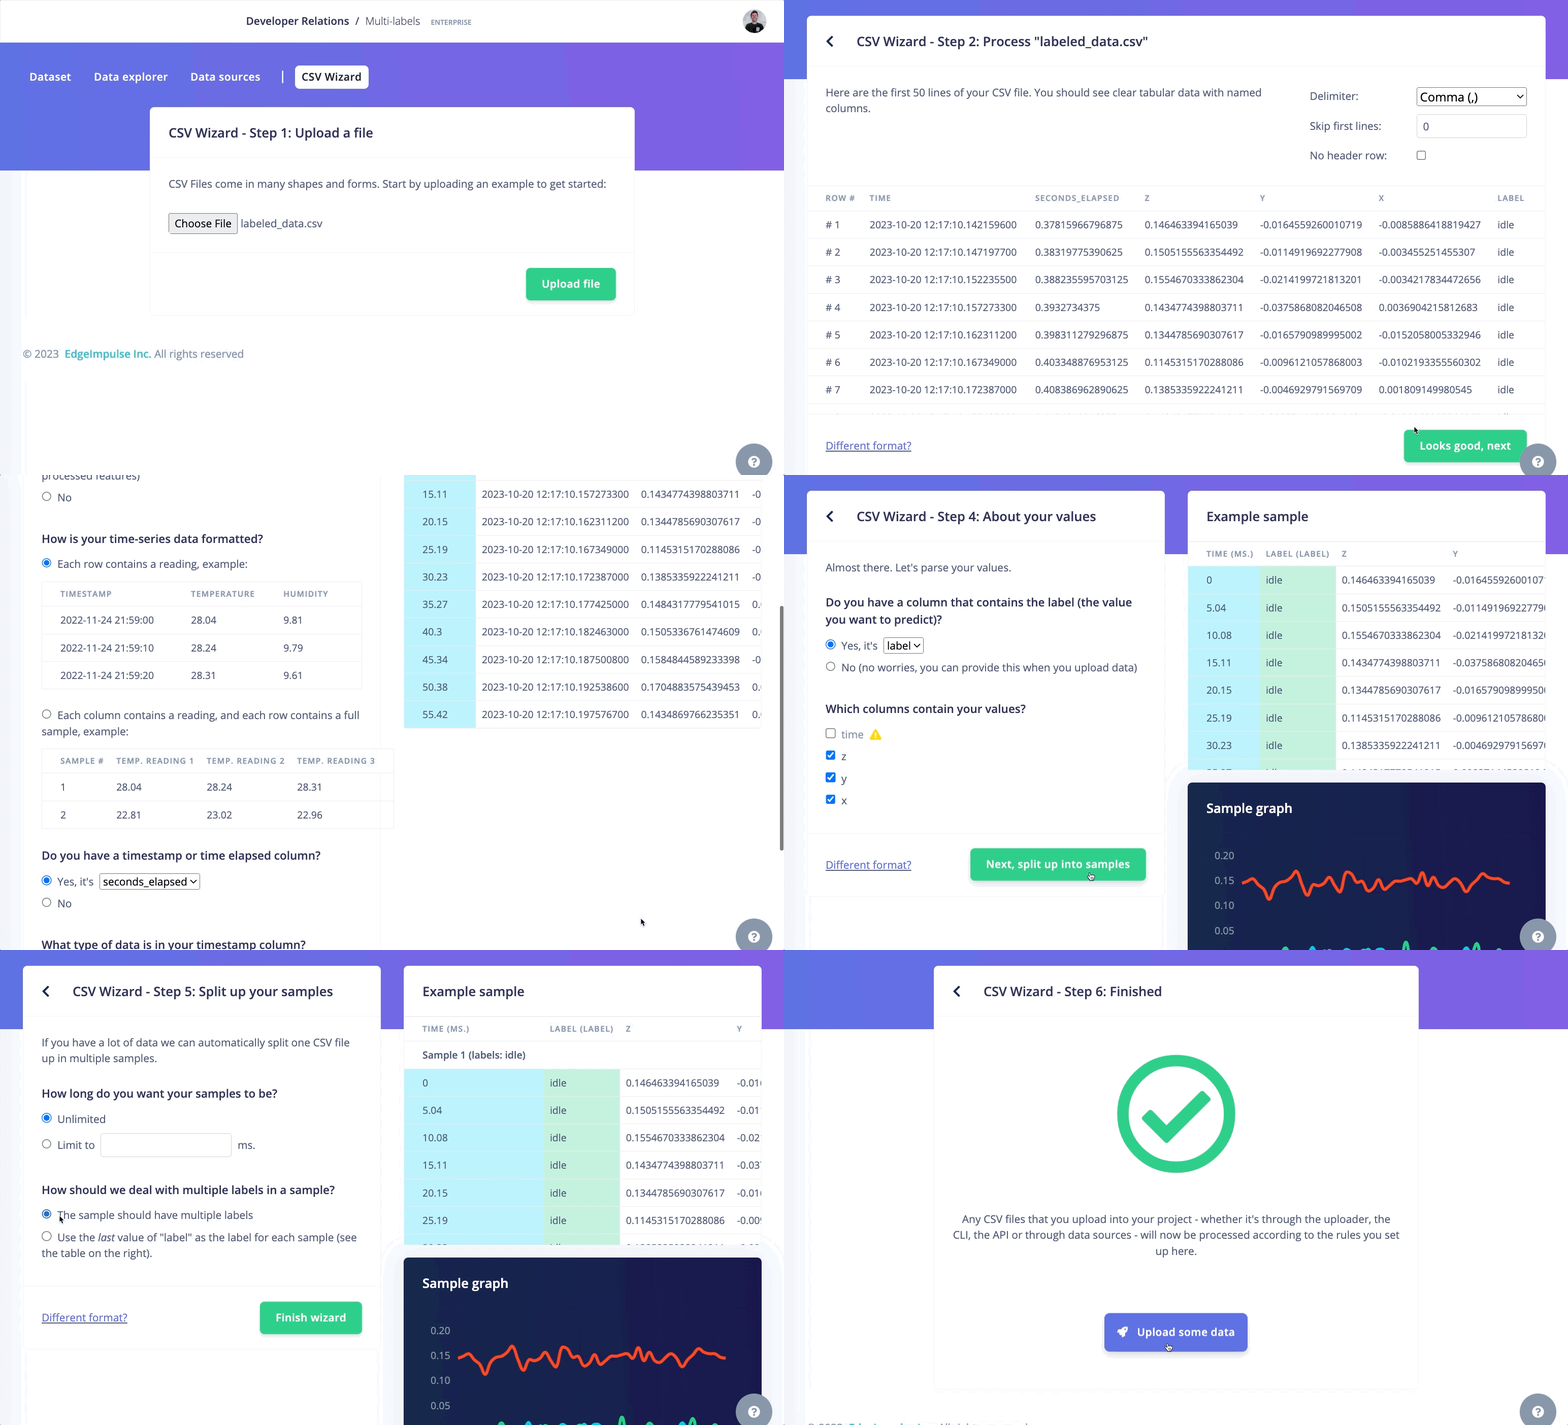
The CSV Wizard allows users with larger or more complex datasets to easily upload their data without having to worry about converting it to the data acquisition format.
To access the CSV Wizard, navigate to the Data Acquisition tab of your Edge Impulse project and click on the CSV Wizard button:
The CSV Wizard supports .csv and .parquet filesAlthough the name of the wizard implies only supporting CSV files, Parquet files are also supported.
How to use the CSV Wizard
We can take a look at some sample data from a Heart Rate Monitor (Polar H10). We can see there is a lot of extra information we don’t need:
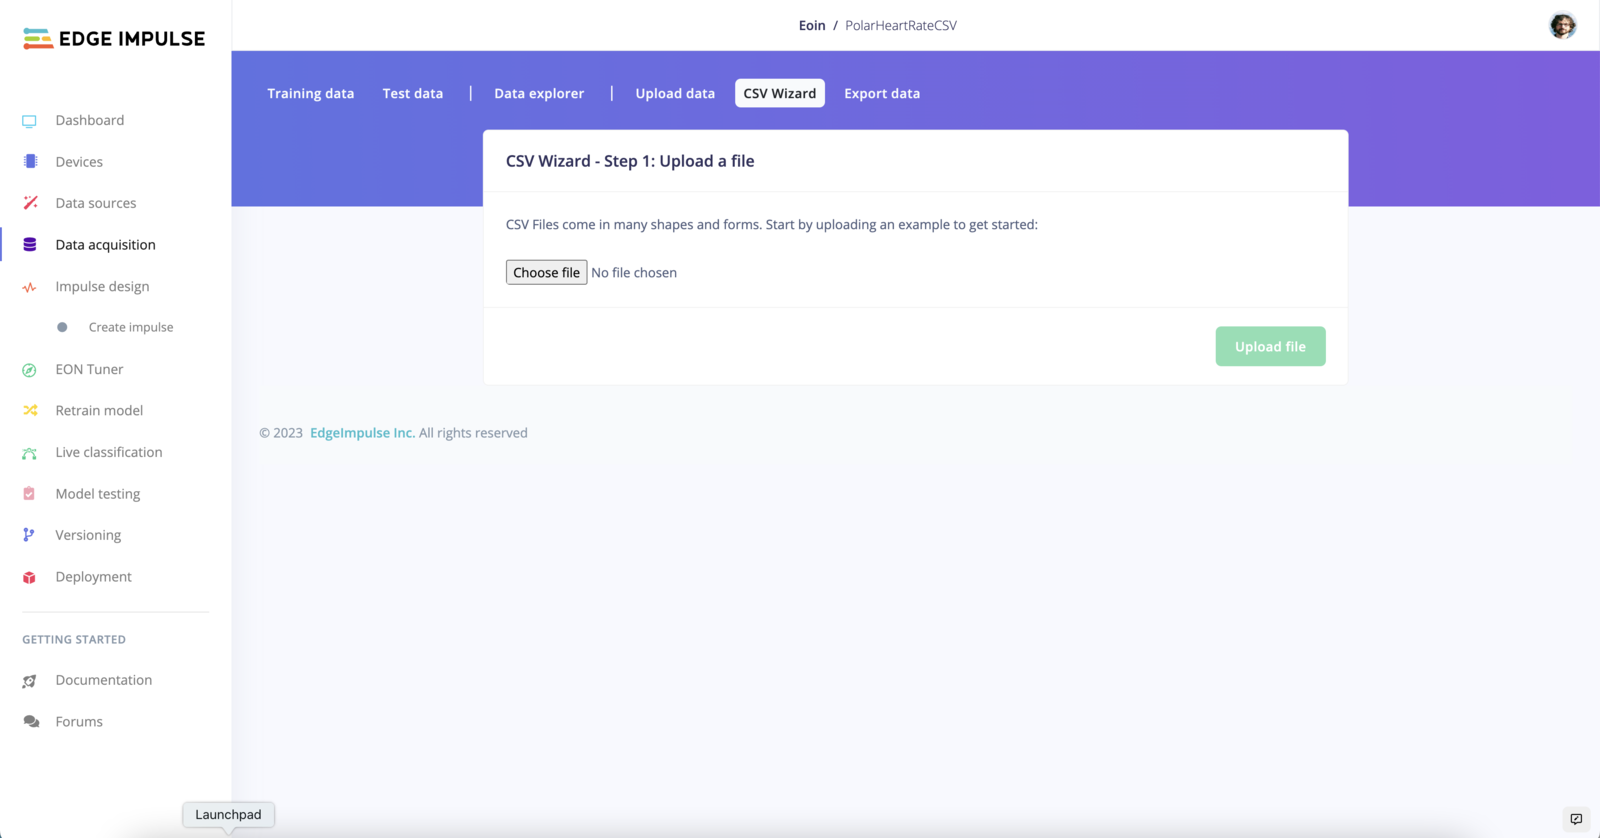
Step 1: Upload a file
Choose a CSV file to upload and select “Upload File”. The file will be automatically analyzed and the results will be displayed in the next step. Here I have selected an export from a HR monitor. You can try it out yourself by downloading this file:
Download polar_hr.csv
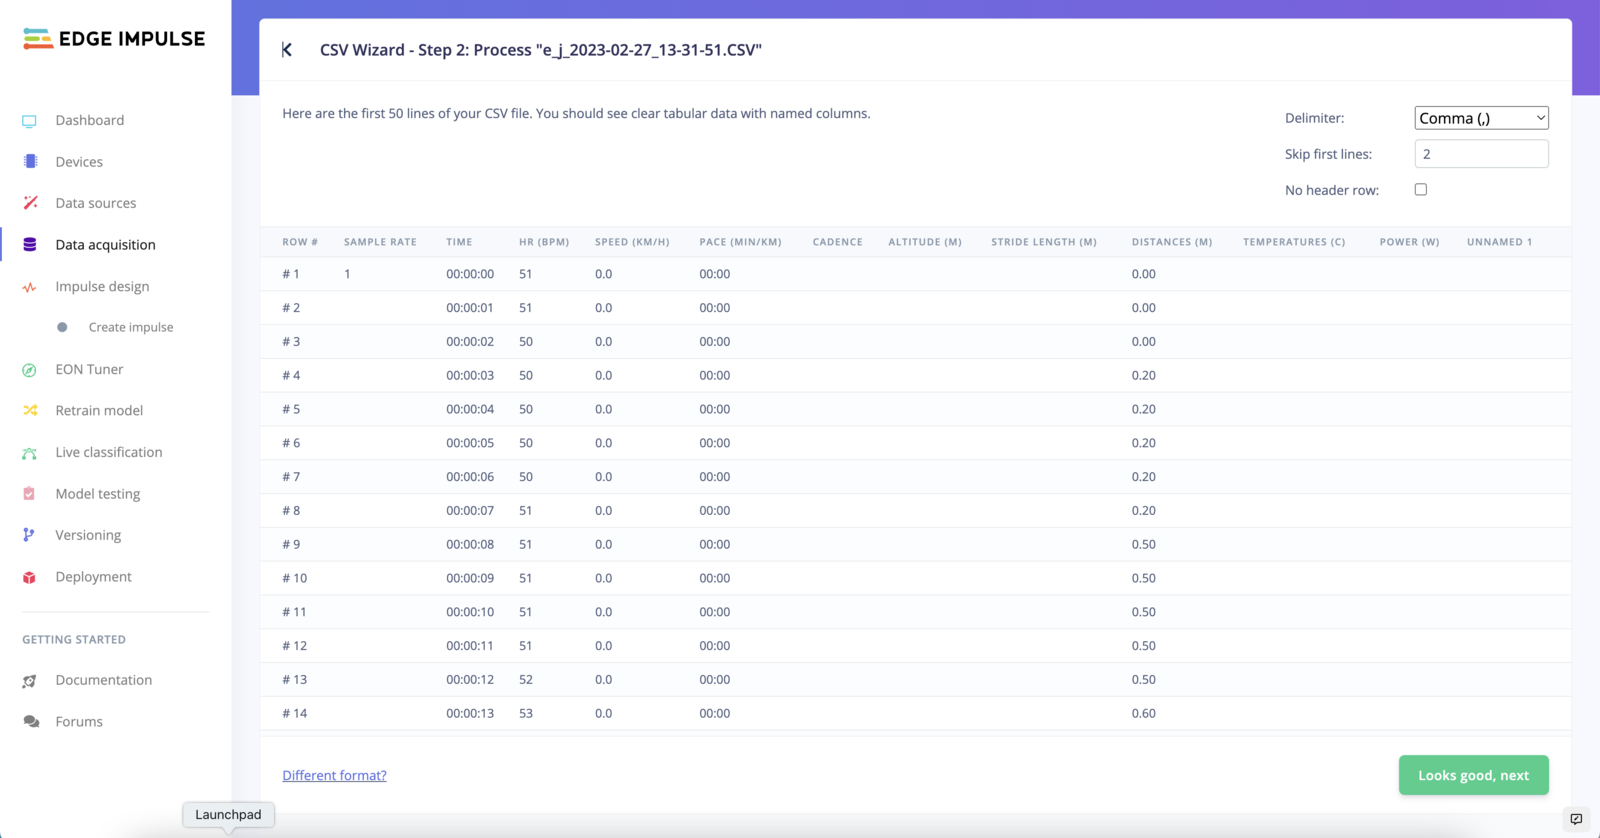
Step 2: Analyze your data
When processing your data, we will check for the following:
- Does this data contain a label?
- Is this data time series data?
- Is this data raw sensor data or processed features?
- Is this data separated by a standard delimiter?
- Is this data separated by a non-standard delimiter?
If there are settings that need to be adjusted, (for the start of your data you can select skip first x lines or no header, and adjust the delimiter) you can do so before selecting looks good, next”**.
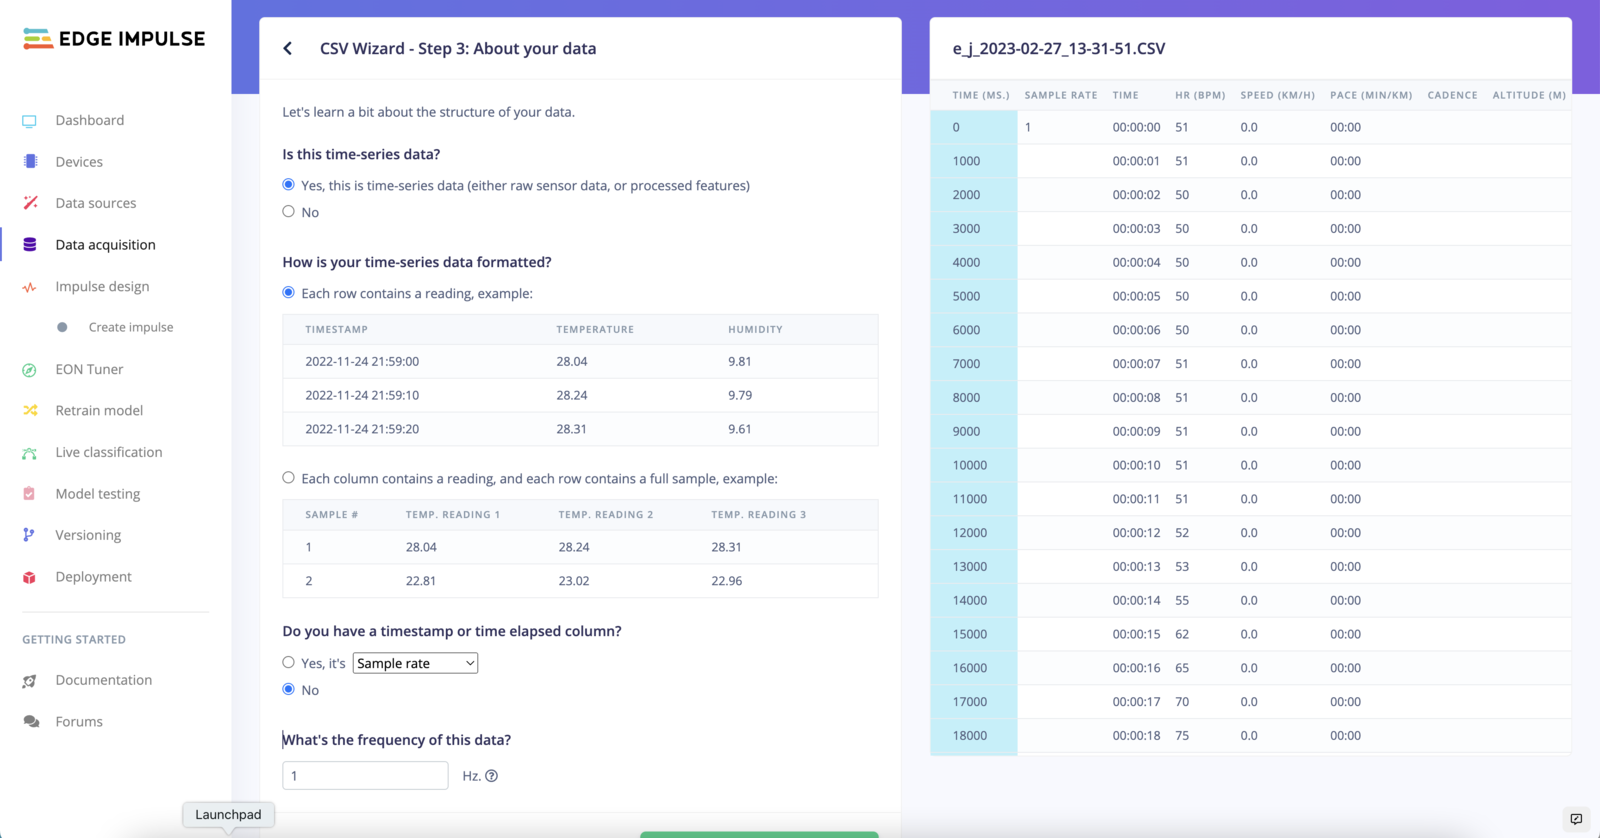
Step 3: About your data
Here you can select the timestamp column, or row and the frequency of the timestamps. If you do not have a timestamp column, you can select No timestamp column and add a timestamp later. If you do have a timestamp column you can select: the timestamp format, e.g. full timestamp, and the frequency of the timestamps, overriding is also possible via Override timestamp difference. For example Selecting 20000 will give you the detected frequency of: 0.05 Hz.
Step 4: CSV Wizard: About your values
Here you can select the label column, or row. If you do not have a label column, you can select No (no worries, you can provide this when you upload data) and add a label later. If you do have a label column you can select: Yes it’s “Value” The CSV Wizard allows users with larger or more complex datasets to easily upload their data without having to worry about converting it to CBOR format. You can also select the columns that contain your values.
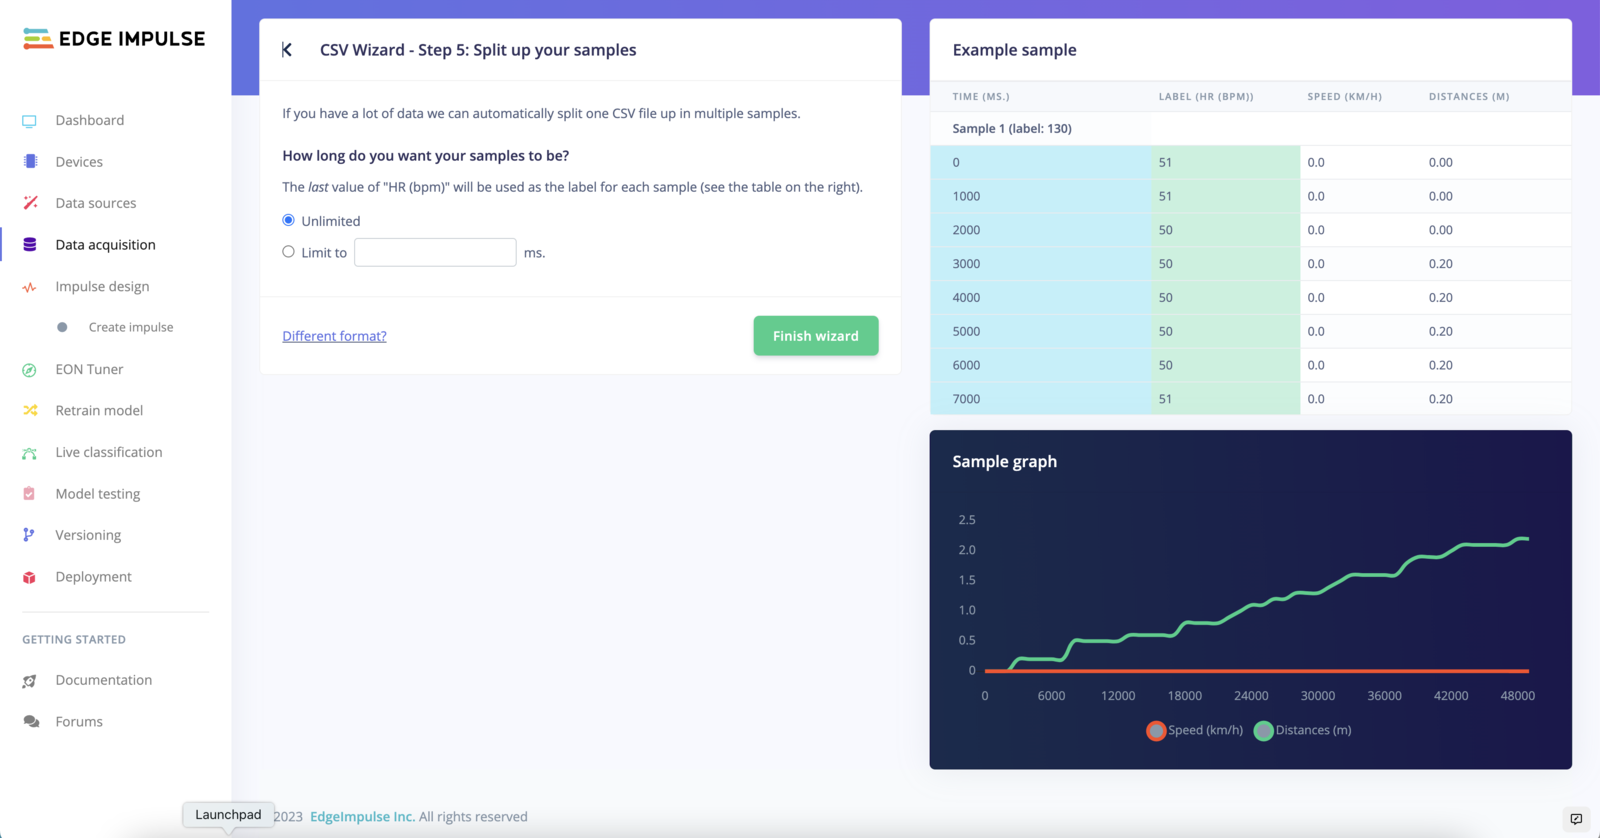
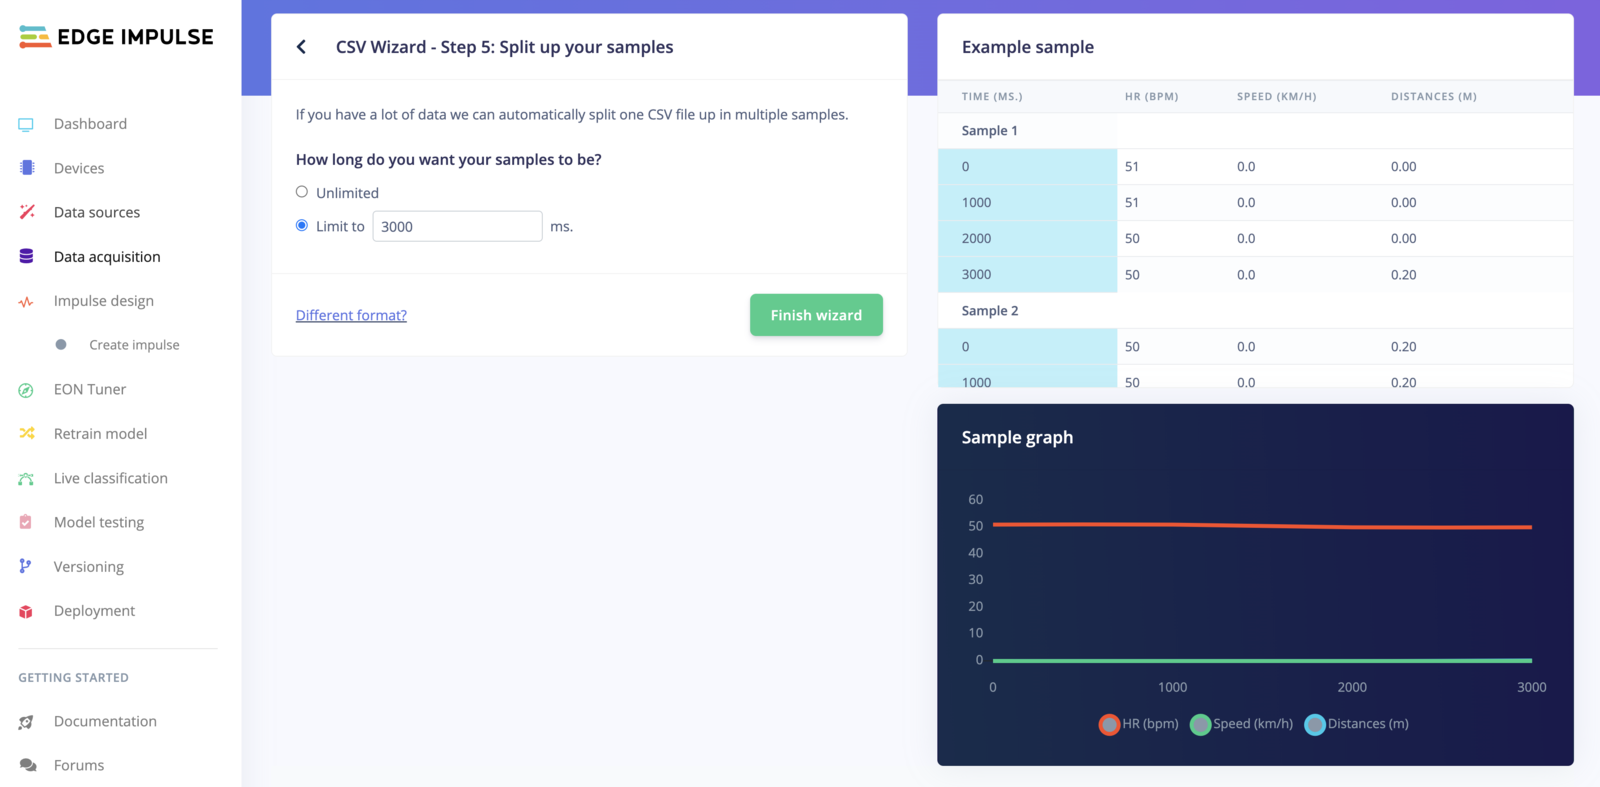
Step 5: Split up your samples
How long do you want your samples to be?
In this section, you can set a length limit to your sample size. For example, if your CSV contains 30 seconds of data, when setting a limit of 3000ms, it will create 10 distinct data samples of 3 seconds.
How should we deal with multiple labels in a sample?
See Multi-label below.
Congratulations! 🚀 You have successfully created a CSV transform with the CSV Wizard. You can now save this transform and use it to process your data.
Multi-label
If your CSV contains multiple labels, like in this coffee machine stages dataset, in the final step, select:
How should we deal with multiple labels in a sample?
◉ The sample should have multiple labels
◯ Use the last value of “label as the label for each sample (see the table on the right)
Read on See the dedicated multi-label documentation page. What happens next?
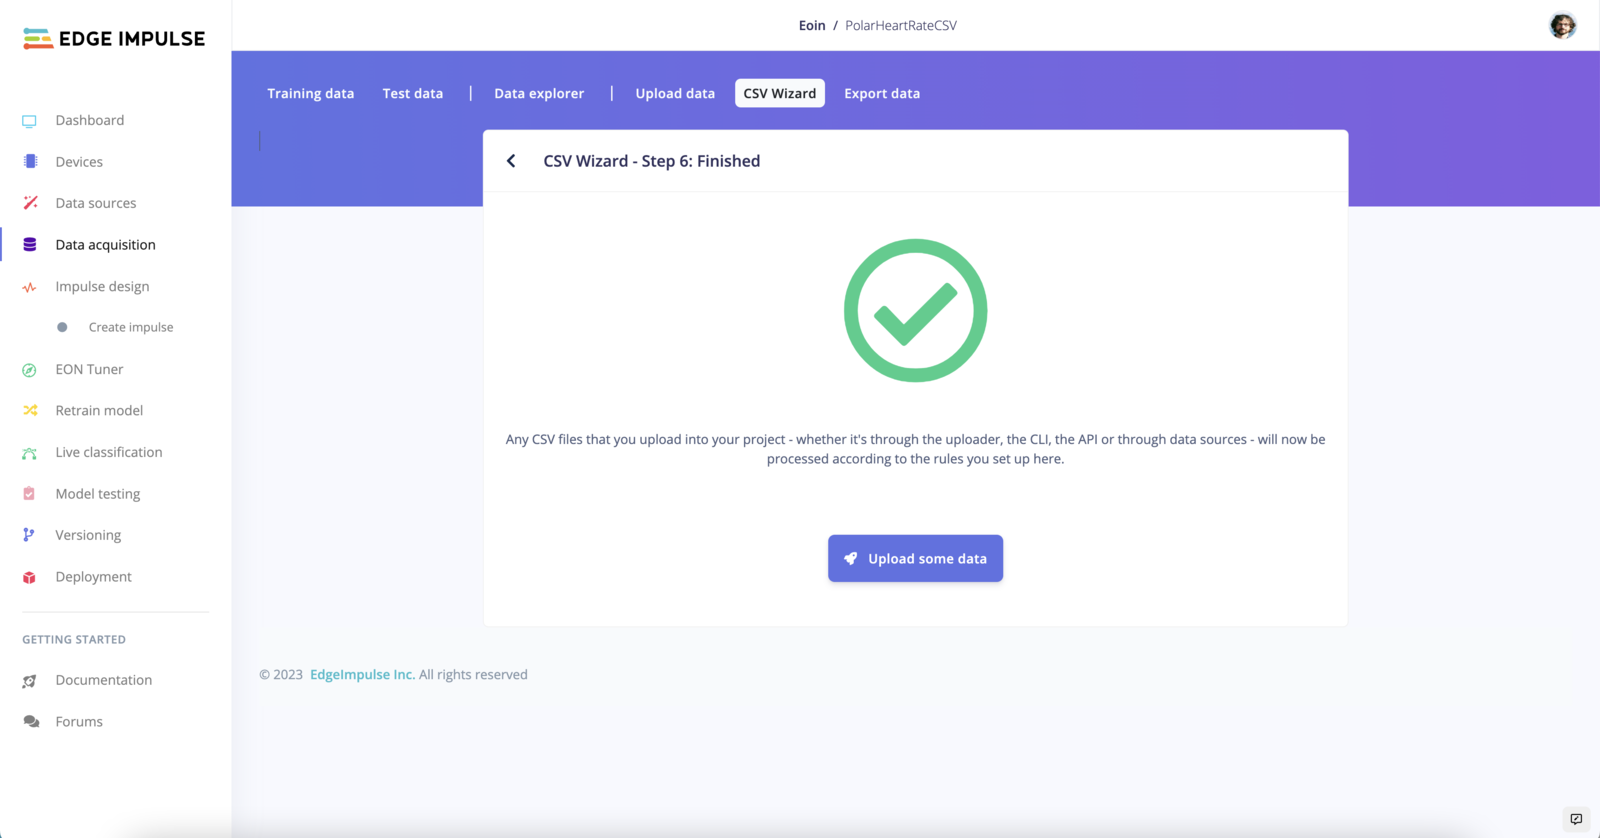
Any CSV files that you upload into your project - whether it’s through the uploader, the CLI, the API or through data sources - will now be processed according to the rules you set up with the CSV Wizard!
Troubleshooting
Large CSV files
If you’re working with large CSV files (over 25,000 rows), you may need to split them into smaller batches before uploading:
Splitting large CSV files:
For Windows users, you can use batch scripts or GUI tools to split large CSV files:
For command-line users, standard shell scripts can be used to split CSV files into manageable chunks before uploading to Edge Impulse.
Azure CSV exports
When exporting CSV files from Azure services, be aware of the following:
Azure limitations: Azure Resource Graph has a limitation of 25,000 rows for CSV exports. If you’re exporting data from Azure services, you may need to limit your output by selecting a smaller set of subscriptions or time ranges. Read on 

