Before starting the tutorialAfter signing up for a free Edge Impulse account, clone the finished project, including all training data, signal processing and machine learning blocks here: Tutorial: Continuous Motion Recognition - Boron. At the end of the process you will have the full project that comes pre-loaded with training and test datasets.
1. Prerequisites
For this tutorial you’ll need: OR Each device page above includes instructions for collecting data using the appropriate path, since Photon 2 can be flashed with a binary and directly connect to Studio while the Boron device cannot and needs to use the Edge Impulse Data Forwarder.2. Collecting your first data
Photon 2
To collect data from the Photon 2 please follow these steps:- Create a new Edge Impulse Studio project, remember the name you create for it.
- Connect your device to the Edge Impulse studio by running following command in a terminal:
- After connecting, the Edge Impulse Daemon will ask to login to your account and select the project. Alternatively, you can copy the API Key from the Keys section of your project and use the —api-key flag instead of —clean.
- Open your Edge Impulse Studio Project and click on Devices. Verify that your device is listed here.

- Start gathering data by clicking on Data acquisition
Boron
- Navigate to the Particle Data Ingestion project on Github and clone the repo and follow the Readme.
- Connect your Boron device with ADXL345 connected and start the Edge Impulse Data Forwarder being sure to follow the instructions for the forwarder to connect it to your Studio project.
- Start gathering data by clicking on Data acquisition and click Start sampling
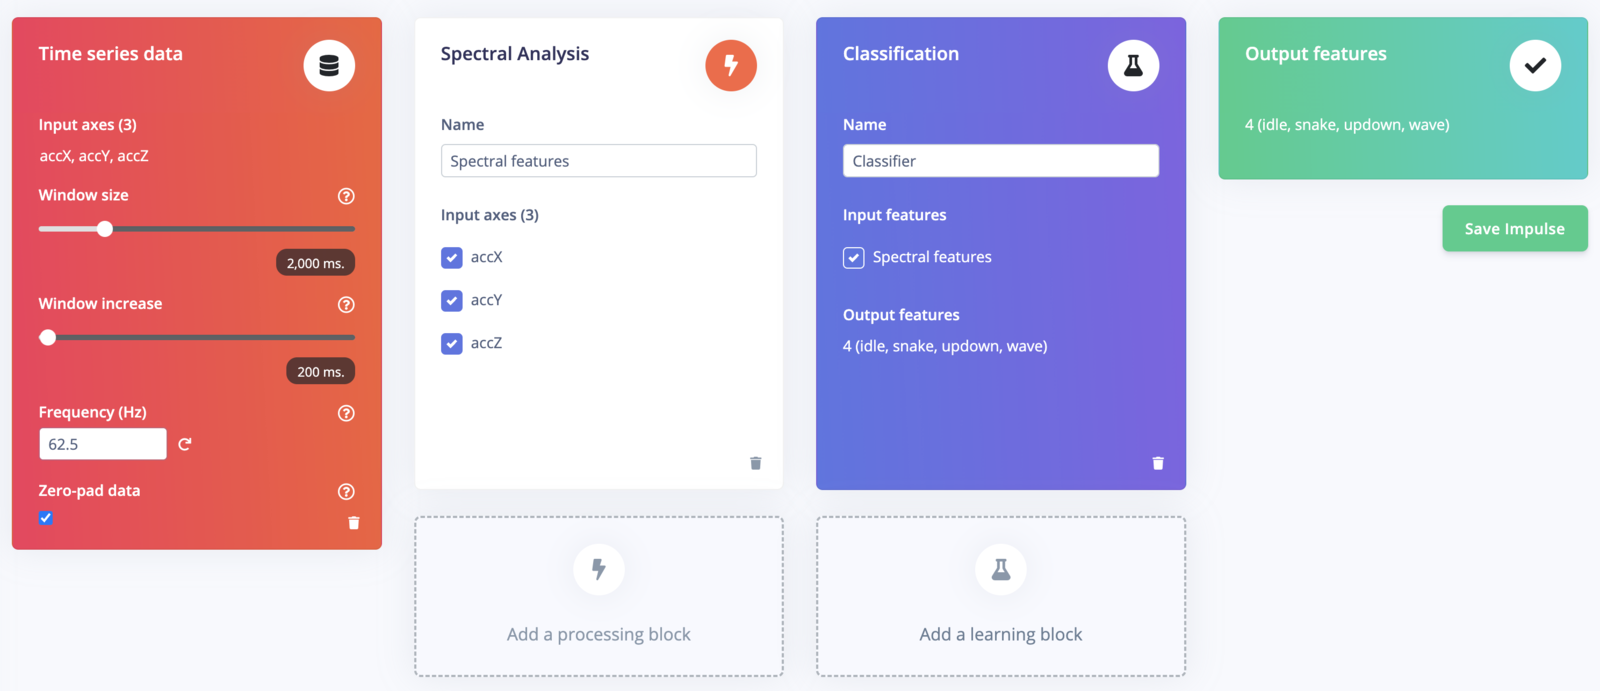
3. Designing an impulse
With the training set in place you can design an impulse. An impulse takes the raw data, slices it up in smaller windows, uses signal processing blocks to extract features, and then uses a learning block to classify new data. Signal processing blocks always return the same values for the same input and are used to make raw data easier to process, while learning blocks learn from past experiences. For this tutorial we’ll use the ‘Spectral Analysis’ signal processing block which turns raw data into a set of important features. Then we’ll use a ‘Neural Network’ learning block, that takes these generated features and learns to distinguish between our different classes of motion. In Studio go to Create impulse, then click on Add a processing block and choose Spectral Analysis. Next click on Add a learning block and choose Classification and then finally click Save impulse.