- Up to 250 MHz Arm Cortex-M55 application processor with turboSPOT® and Helium™ technology
- Enhanced memory performance with 64KB I-Cache and 64KB D-Cache, 3.75MB of system RAM, and 4MB of embedded non-volatile memory for code/data
- Ultra-low power ADC and stereo digital microphone PDM interfaces for truly always-on voice
- High-fidelity telco-quality audio
- High-speed USB 2.0
- Wide range of integrated sensor interfaces including ADC, SPI, I²C, and UART
Deployment options
Ambiq Apollo510 EVB firmware
Ambiq Apollo510 EVB firmware
A binary containing both the Edge Impulse data acquisition client and your full impulse.
Installing dependencies
To set this device up in Edge Impulse, you will need to install the following software:Connecting the Apollo 5 Audio Add-on Board (Models with Audio Input Only)
This step is only needed when using models requiring microphone input, such as the example below. Skip this section if you are testing other models that do not need audio input. Connect the microphone board to the Apollo510-EVB as shown below.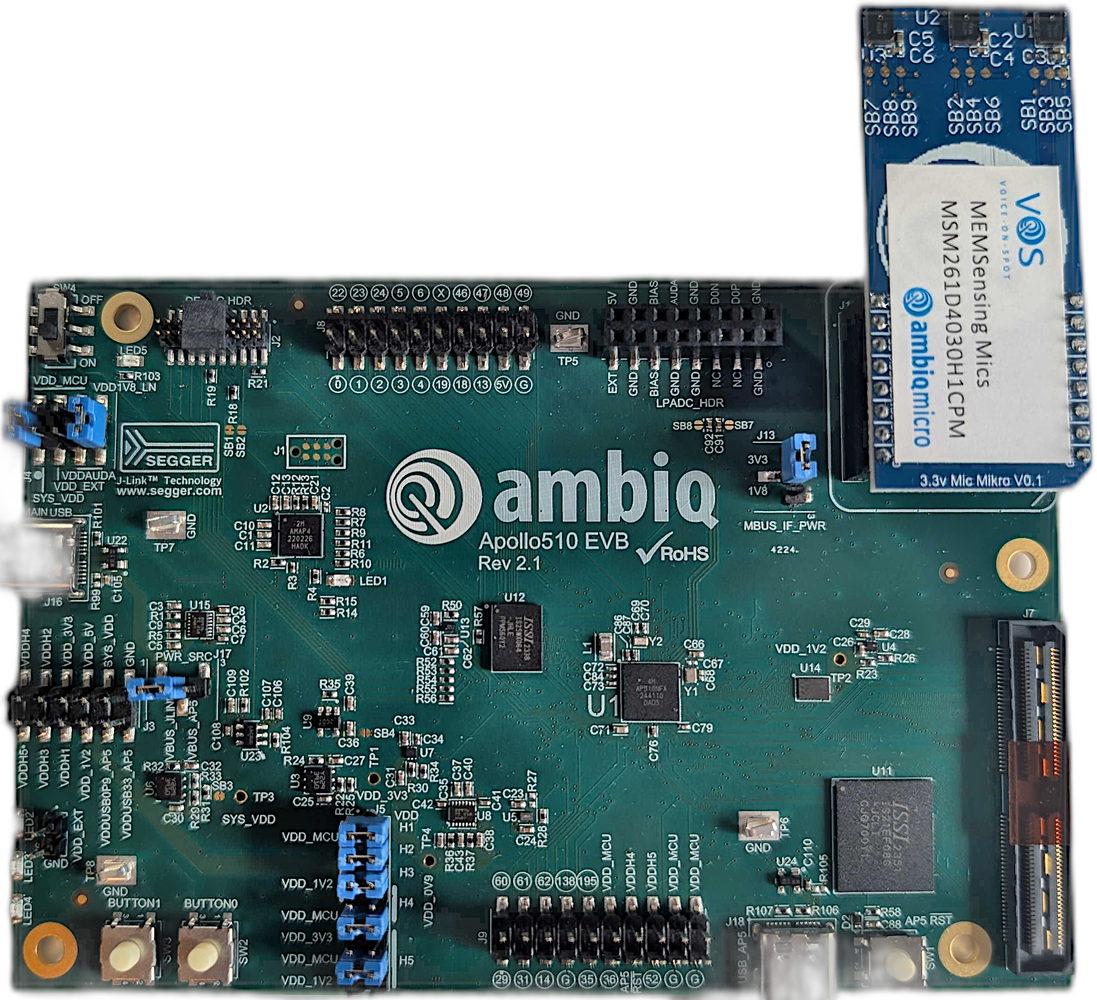
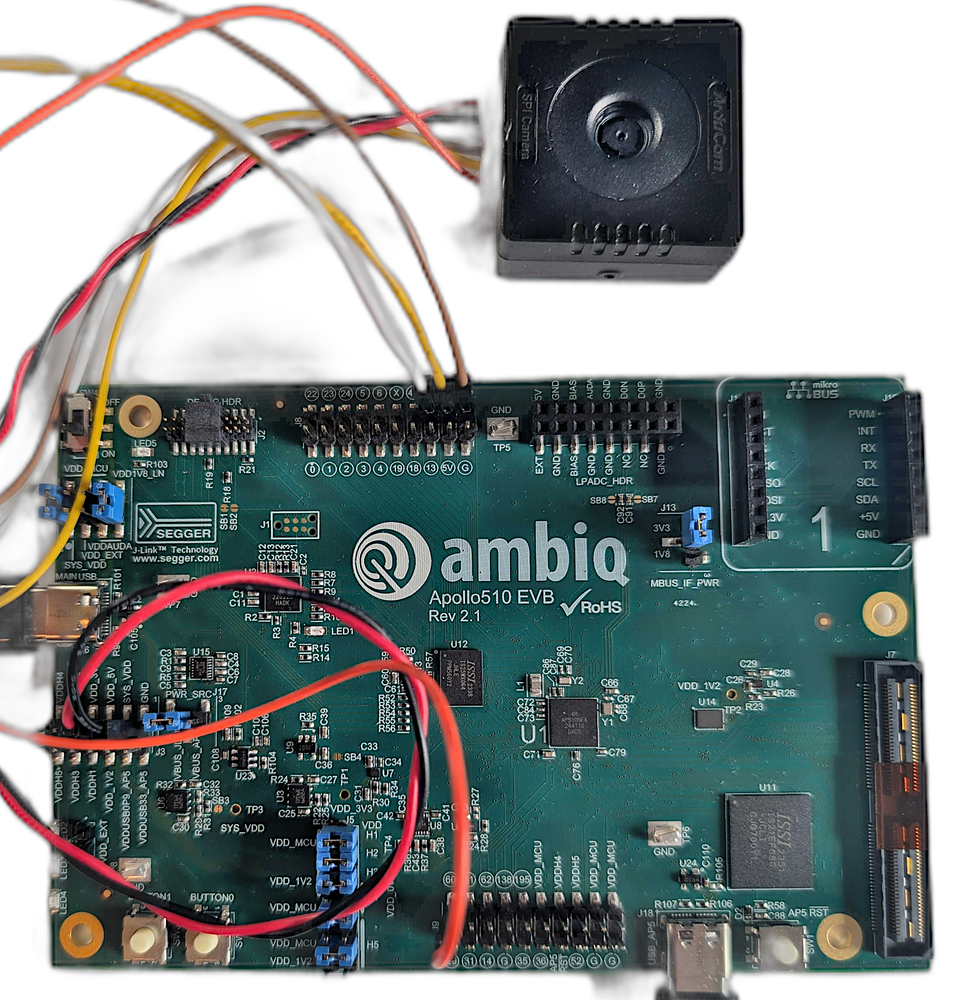
Connecting an ArduCam Mega 5MP SPI
This step is only needed when using models requiring camera input. Skip this section if you are testing other models that do not need camera input. The ArduCam Mega 5MP SPI connects to the Apollo510-EVB pins as shown in the table below:| Camera Pin | EVB Pin |
|---|---|
| GND | Any EVB GND |
| 5V/VDD | Any EVB 5V |
| SCK | Pin 47 |
| MISO | Pin 49 |
| MOSI | Pin 48 |
| CS | Pin 60 |
Flashing pre-built firmware
Pre-built image with only audio support and “Hello World” detector example here Get started by extracting the archive and choose the appropriate script for your system architecture to flash the firmware: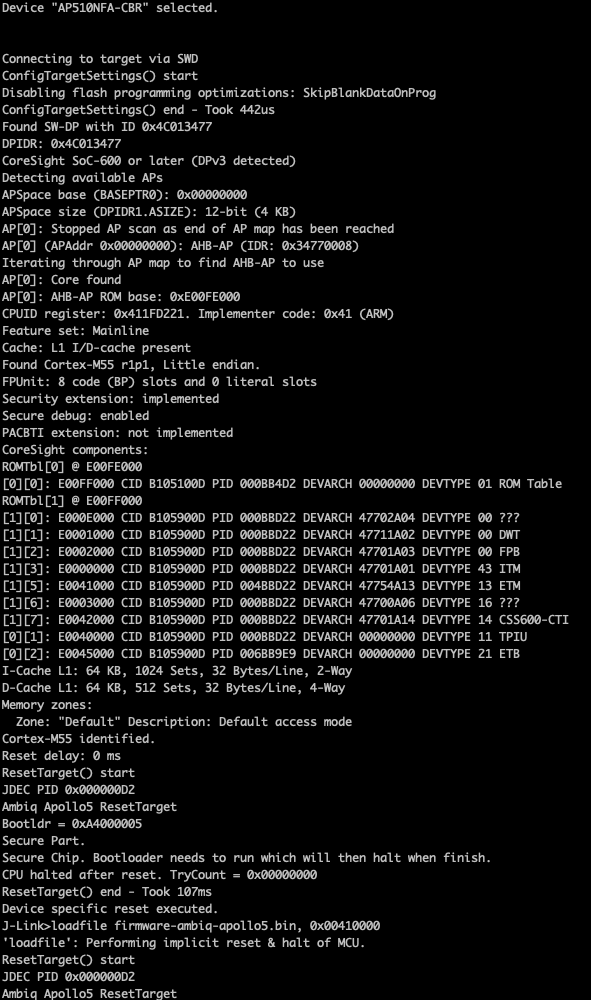
Connecting to Edge Impulse
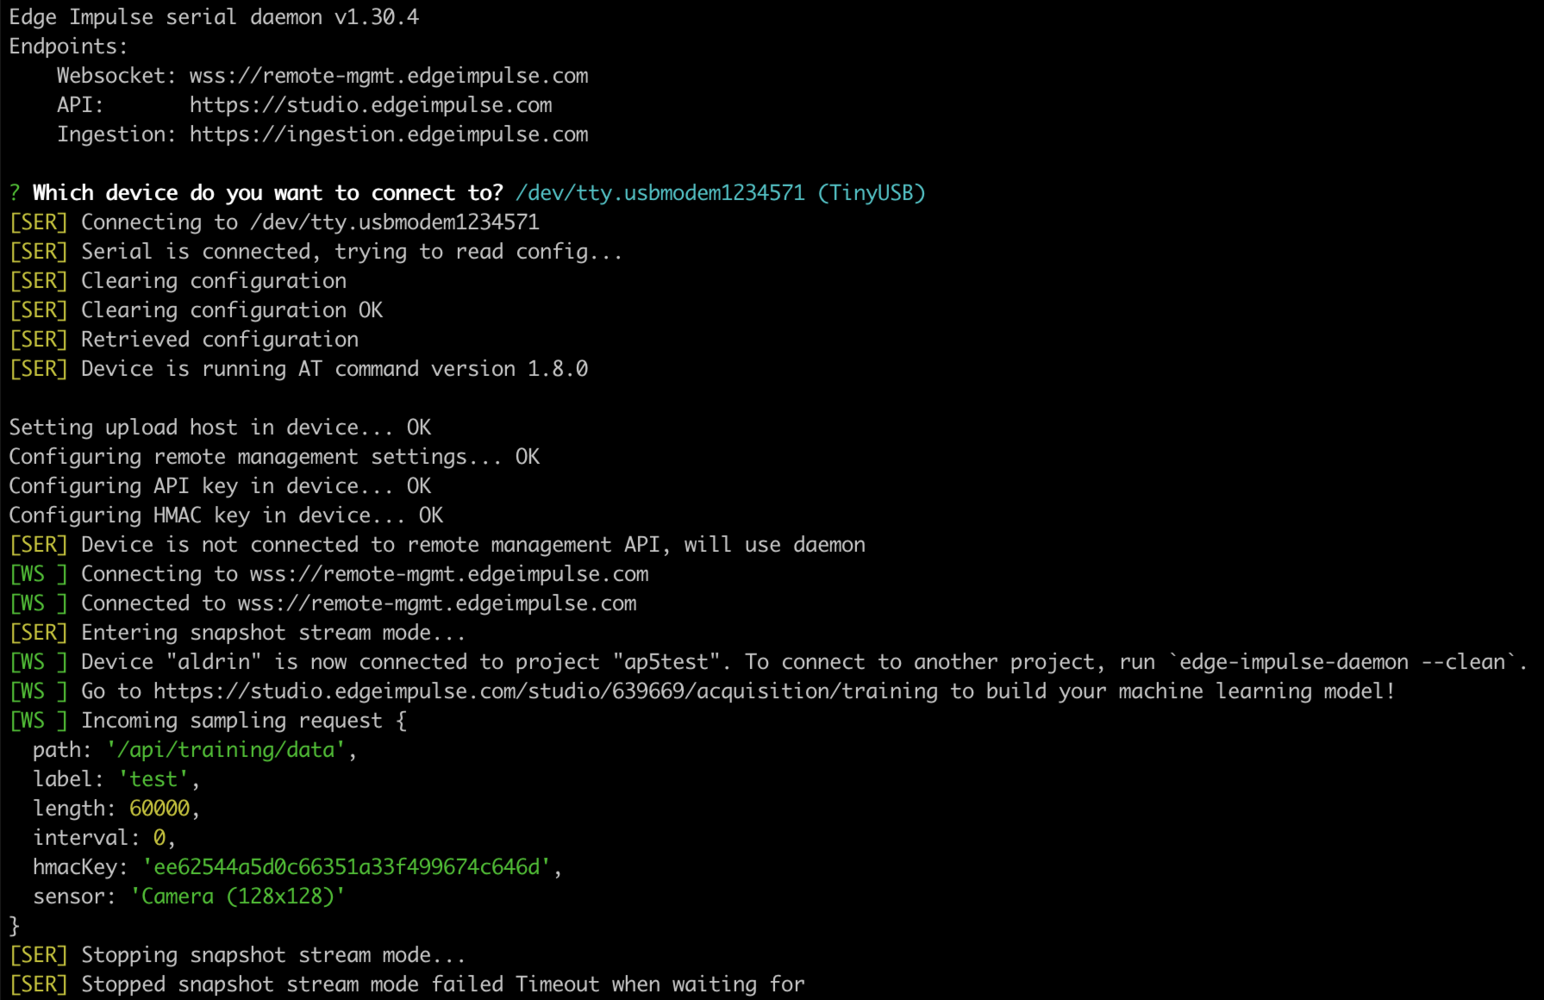
Using the daemon
From a command prompt or terminal, run:--clean.
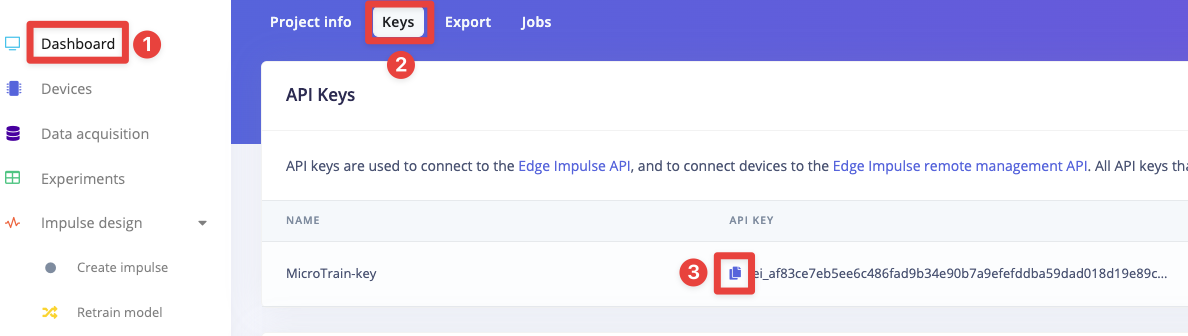
Alternatively, you can access the project API Key as shown below by navigating to the Dashboard section on the left pane of your Studio project and select the Keys tab, then click the copy/paste icon next to the API Key to copy the entire text to your clipboard, then run:
Connecting to Studio
Run theedge-impulse-daemon and connect to your project, you will be prompted to name your device:

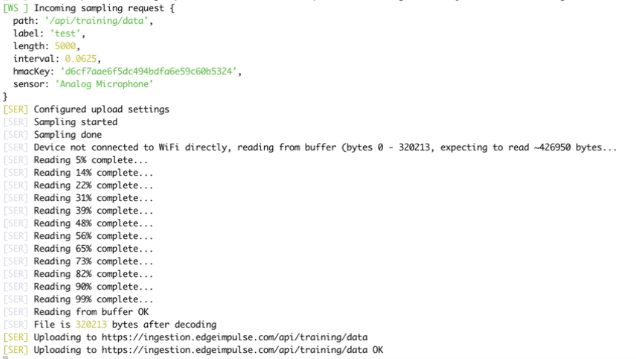
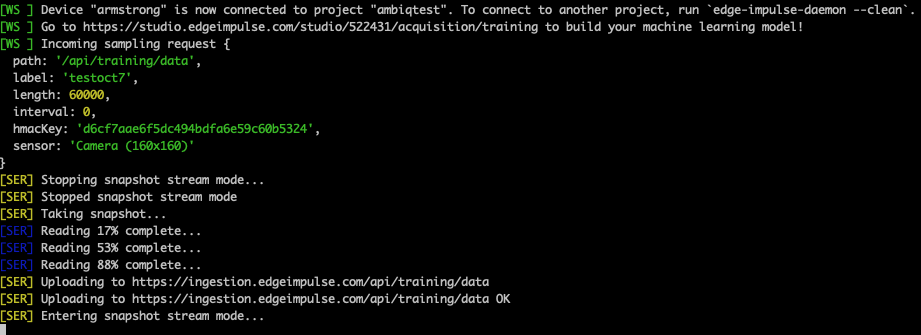
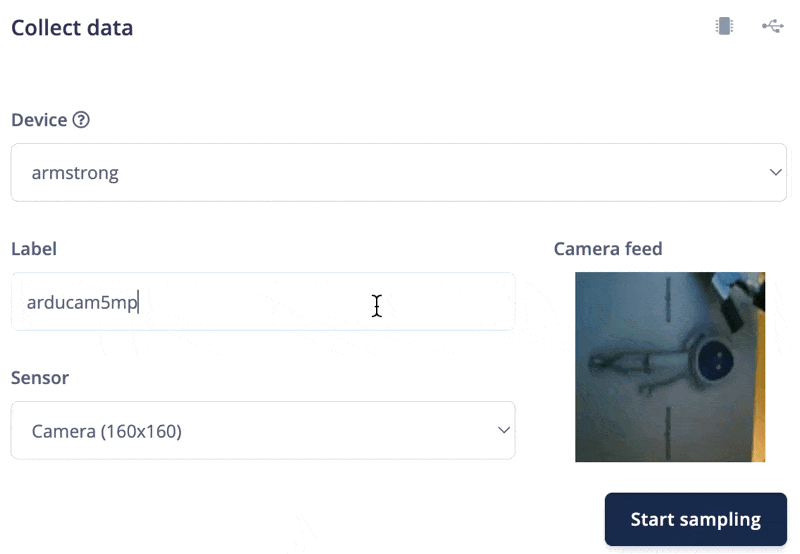
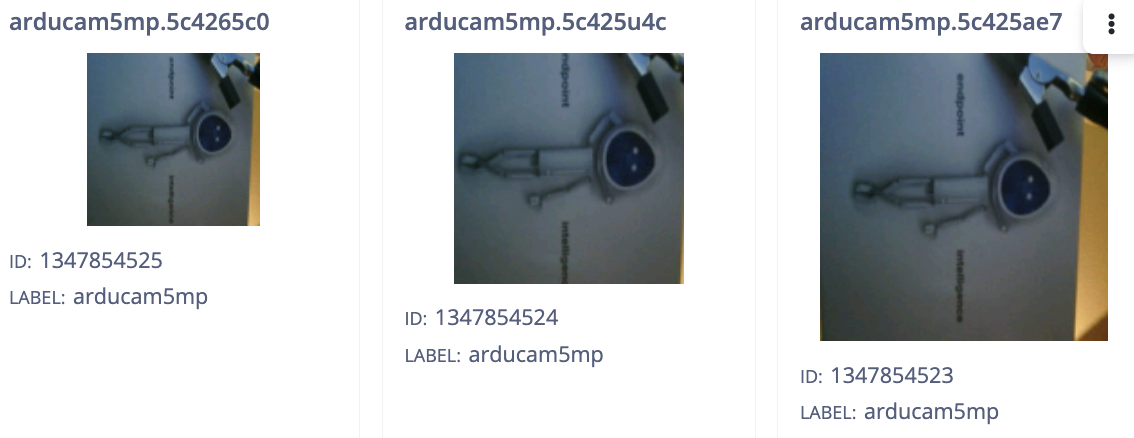
Collecting data
Audio
With the device connected to Studio, you can use it to collect audio data up to 5 seconds in length for training and testing your model. Navigate to the Data acquisition tab and start collecting samples: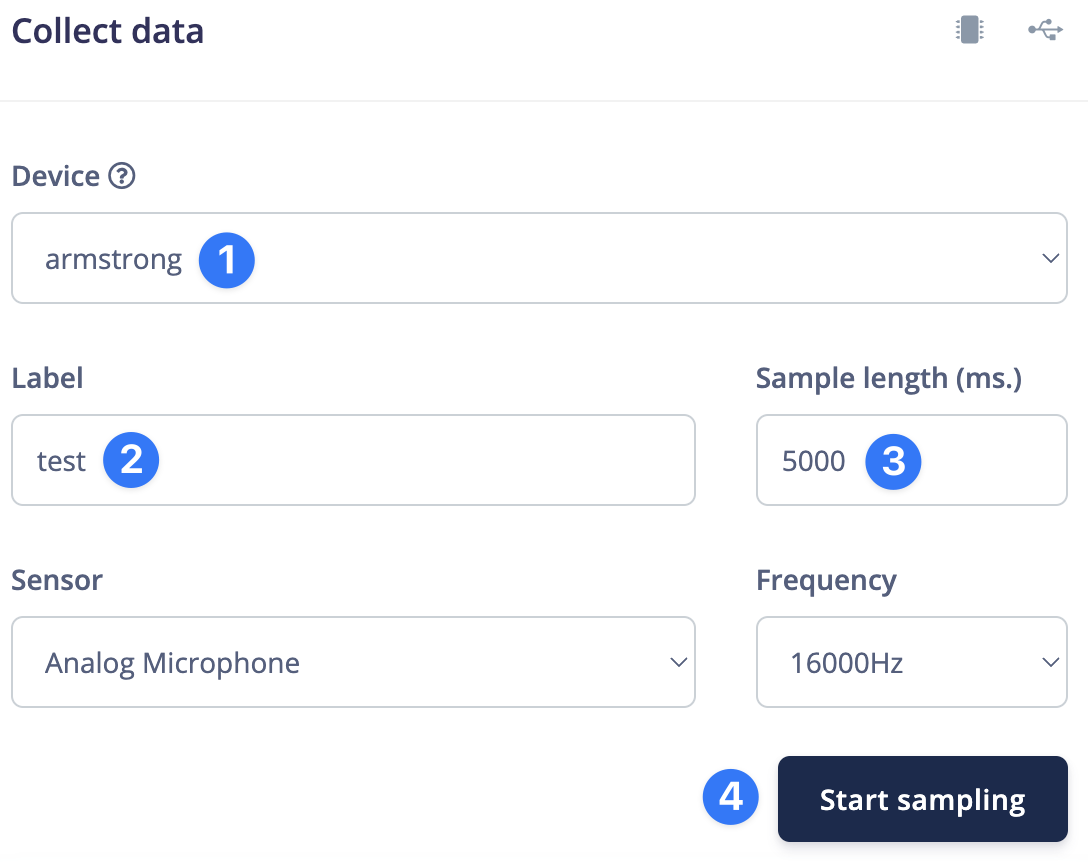

Video
Next steps: building a machine learning model
With everything set up you can now build your first machine learning model with these tutorials:Example project
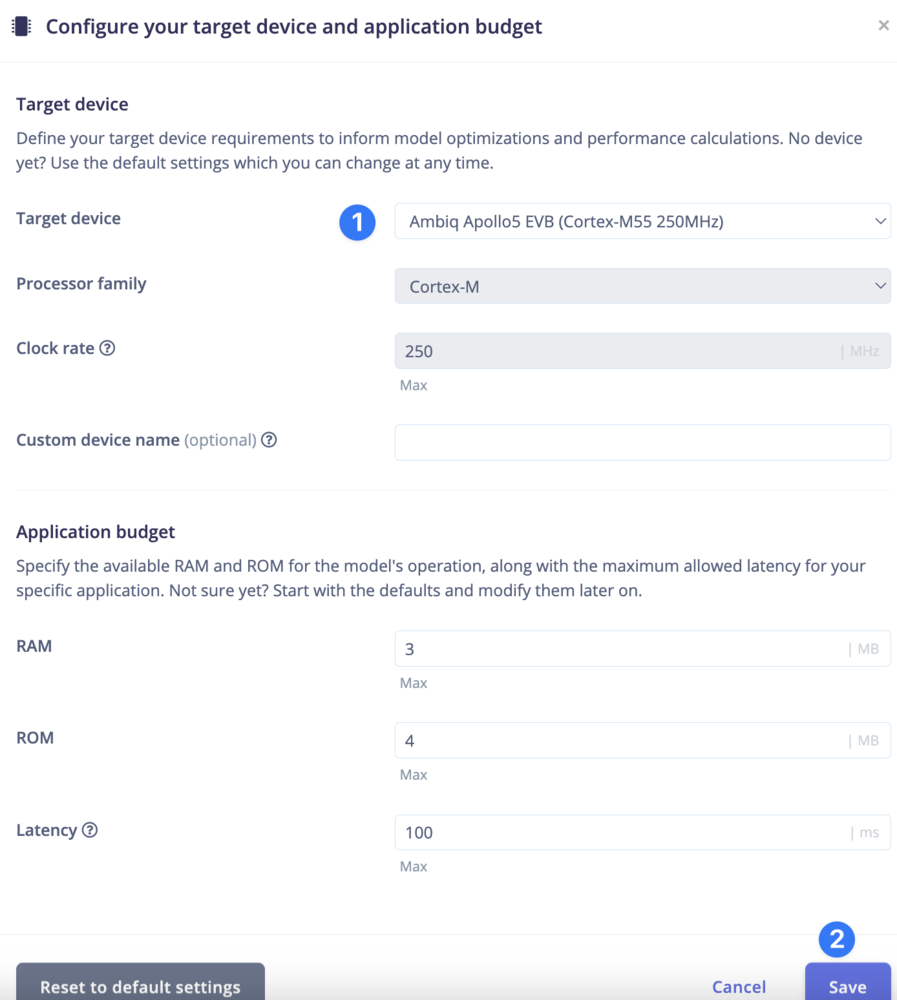
Start by going to your Studio projects then create a new project and navigate to theCreate impulse section of Impulse design, at which point you will be prompted to select your target, choose the Apollo5:
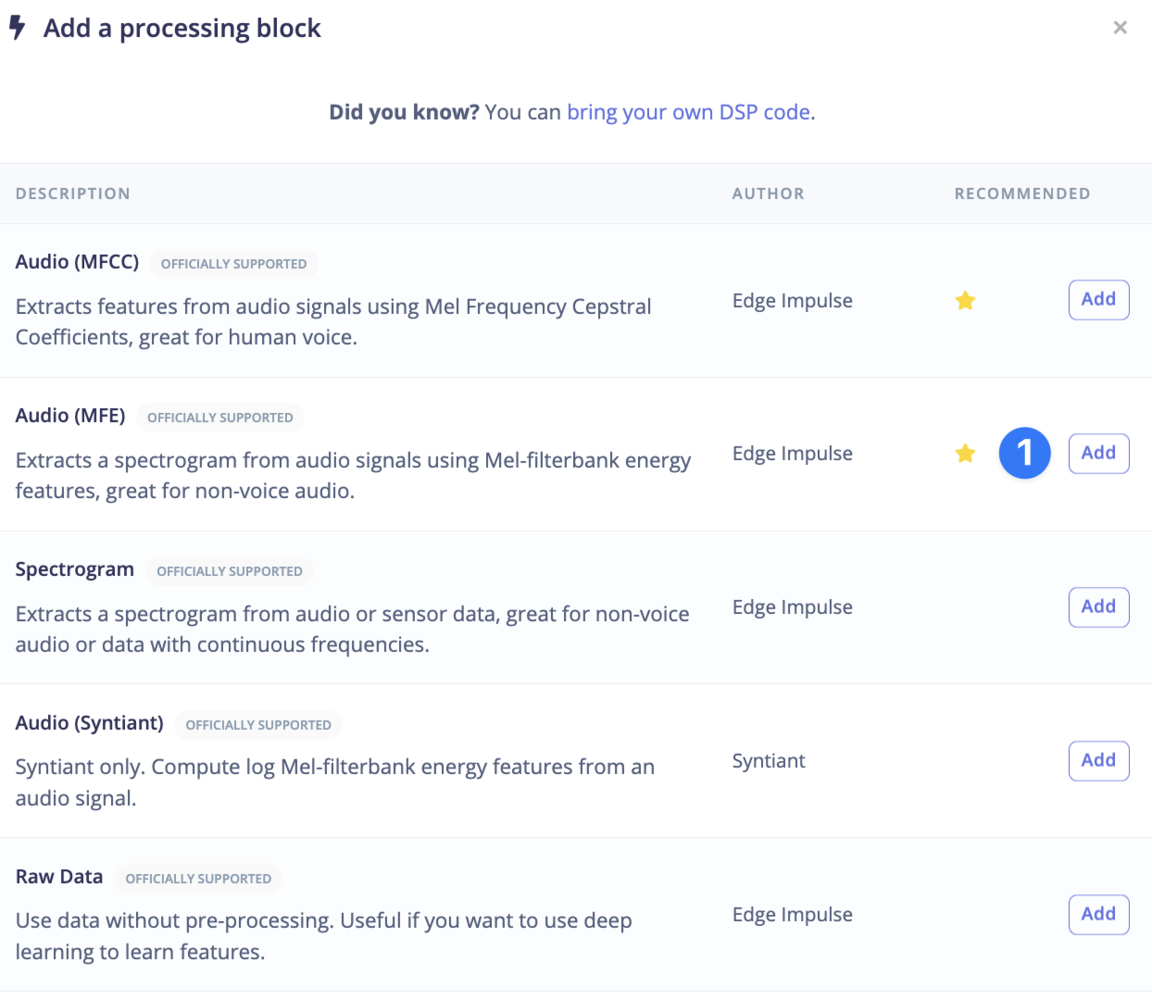
Processing
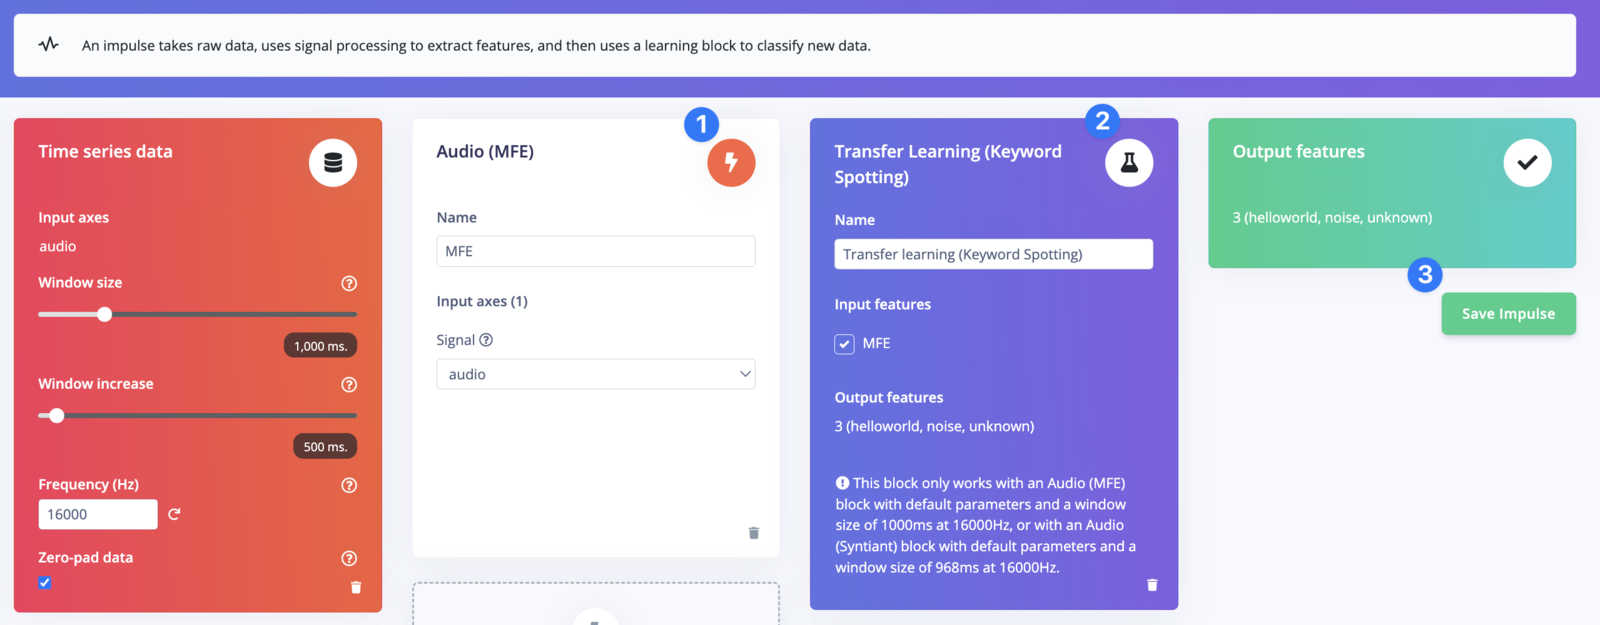
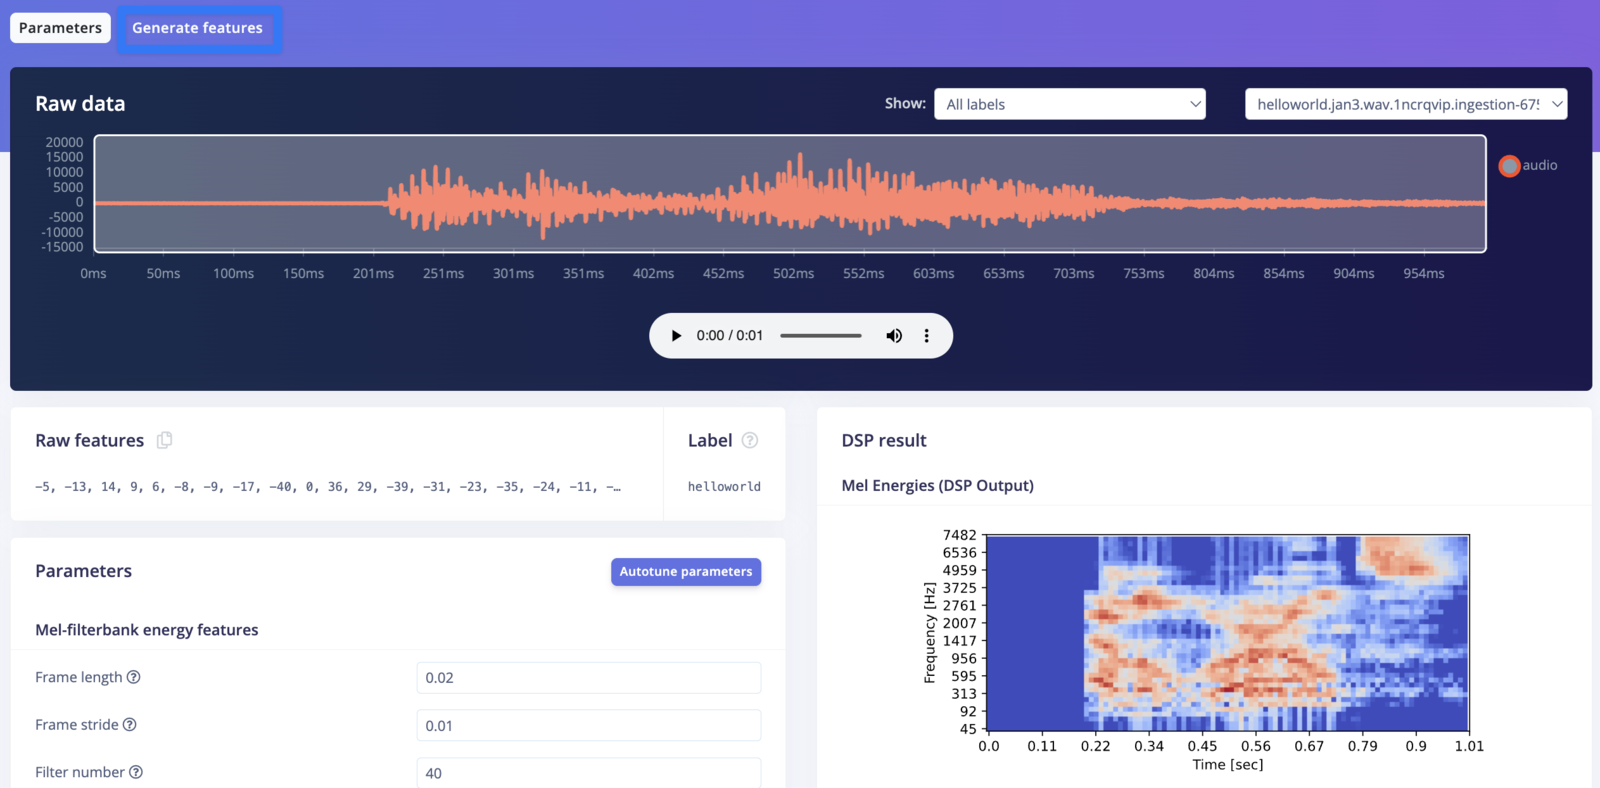
Now select the DSP block: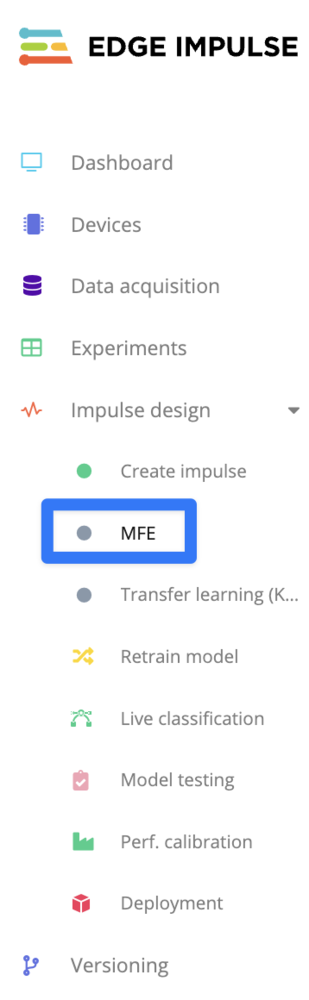
Generate features:

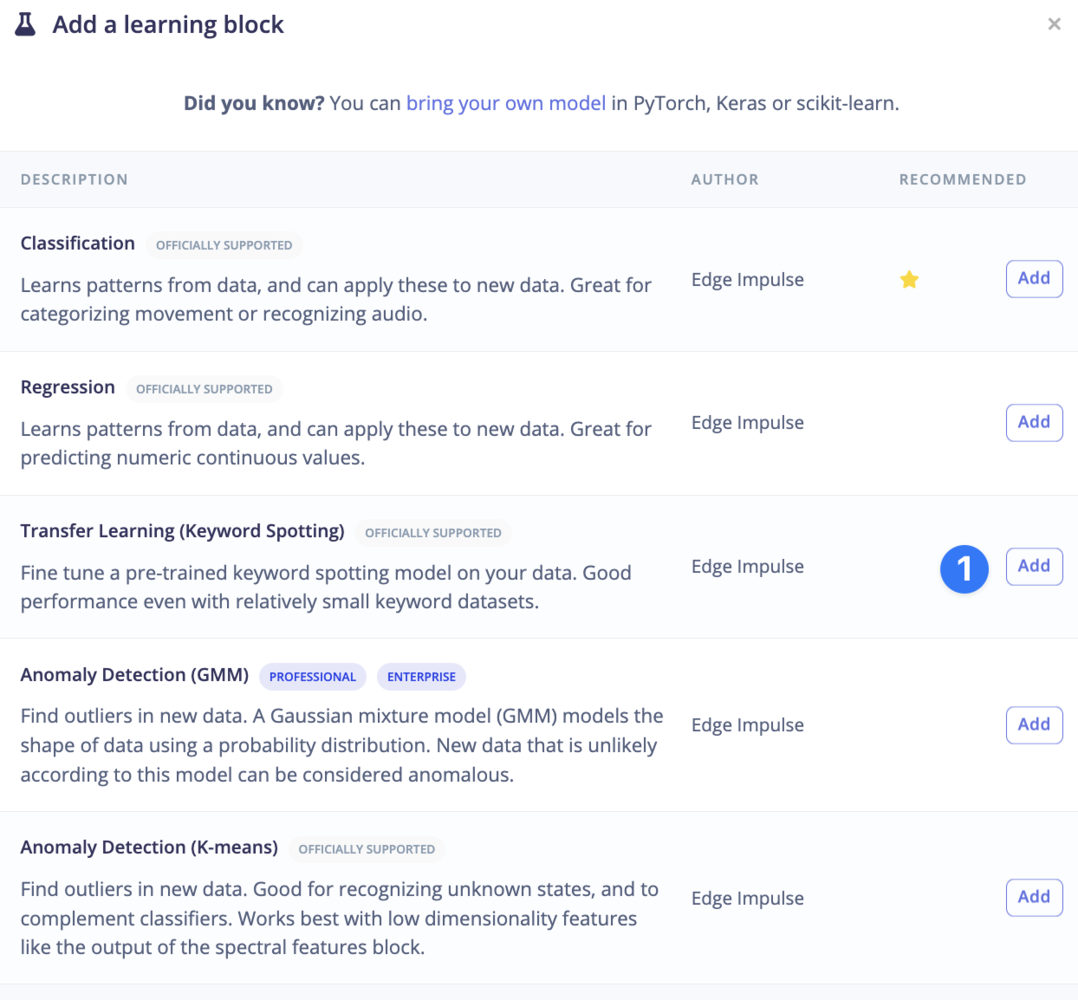
Training
Select the learning block: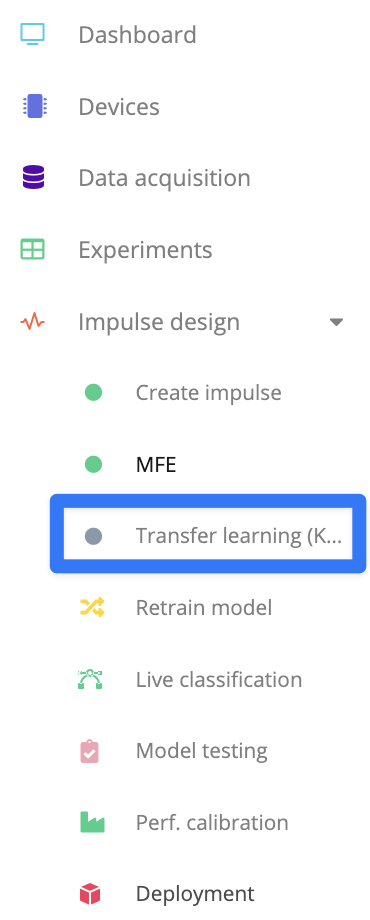
Save & train and you’ll eventually see an output like this:

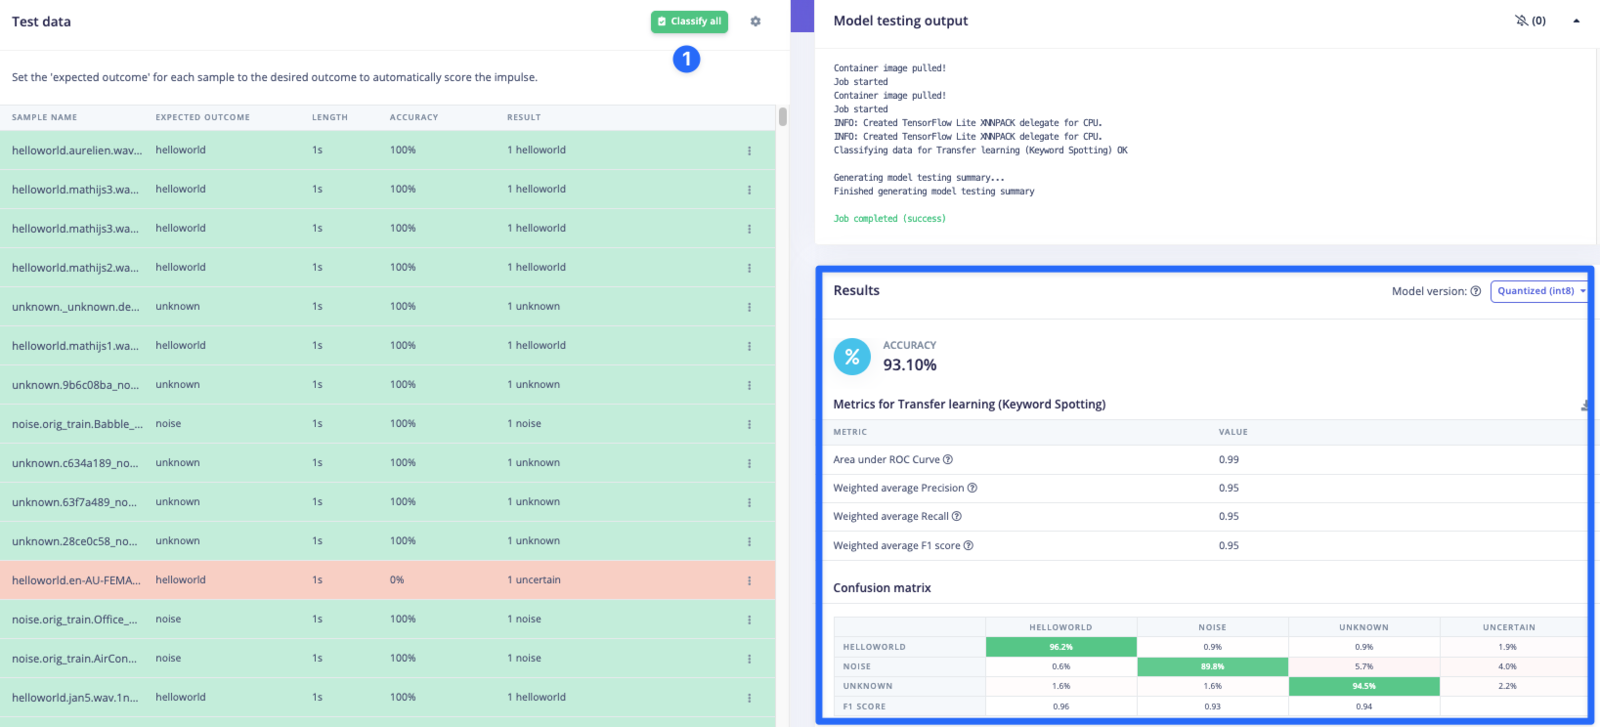
Testing
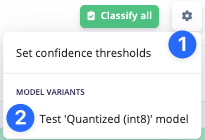
Go to theModel testing section and enable int8 testing:
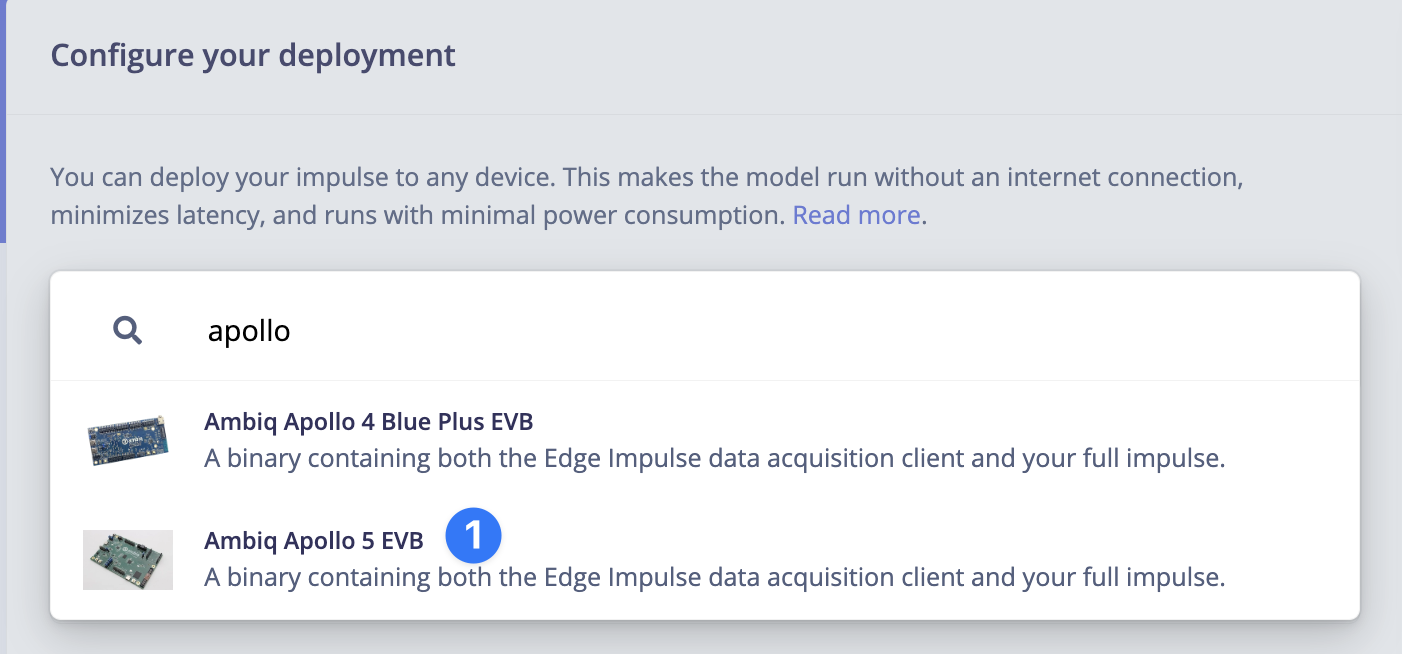
Deploying
Navigate to theDeployment section and choose the Apollo 5:
Build and wait for the job to finish, when it does a zip archive will be downloaded to your computer.
Flashing
See the previous section on flashing the board.Running the impulse
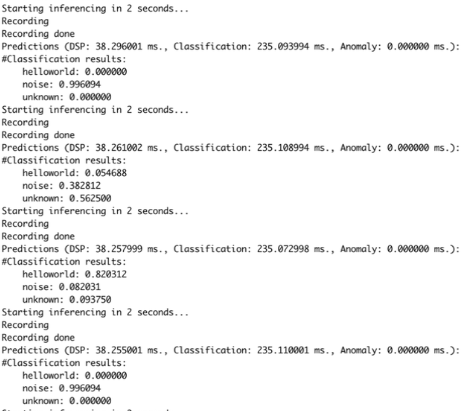
You can run your impulse by usingedge-impulse-run-impulse: