Documentation Index
Fetch the complete documentation index at: https://docs.edgeimpulse.com/llms.txt
Use this file to discover all available pages before exploring further.
Introduction
This page is part of the Lifecycle management with Edge Impulse tutorial series. If you haven’t read the introduction yet, we recommend you to do so here. Balena can serve as the platform for deploying OTA updates to edge devices, including new models trained with Edge Impulse.Prerequisites
- An active Edge Impulse account with a project and trained impulse. See the Edge Impulse - Object Detection Tutorials for more information on how to create a project and train an impulse.
- Follow the Edge Impulse Docker documentation.
- Balena Example Repo - A sample balena project to deploy your impulse as on balena. It exposes an API which the “cam” service uses to get repeated inferences from the images captured by the webcam. See the README
Overview
Balena offers a comprehensive platform for building, deploying and managing large fleets of IoT devices. It simplifies fleet management, enhances security, and streamlines the deployment of software and hostOS updates. This tutorial will guide you through using balena to deploy Edge Impulse model updates across your device fleet efficiently. This can be particularly useful for managing multiple devices in the field, ensuring they are always running the latest model. Devices like the NVIDIA Jetson Nano, NVIDIA Jetson Orin, Raspberry Pi, and other single-board computers are supported by balena and can be used to deploy Edge Impulse models. For this example, we will deploy an Edge Impulse model as a Docker container on a Raspberry Pi using balenaOS. The model will run an HTTP inference server, allowing you to send data to the device for processing and receive predictions in real-time.Prerequisites
- An active Edge Impulse account with a trained model.
- Follow the Edge Impulse Docker documentation.
Introduction to balena
Balena is a platform that provides tools for building, deploying, and managing large fleets of IoT devices. It simplifies the process of managing fleets of devices, offering a robust framework for deploying software and hostOS updates, monitoring device health, and ensuring security. Balena could serve as the fleet management and device management platform for deploying OTA updates, including new models trained with Edge Impulse.Step 1: Exporting Your Model as a Docker Container
Go to your Edge Impulse project, navigate to the Deployment section and select Docker container as the deployment option. Follow the instructions to generate the Docker container command. It will look something like this: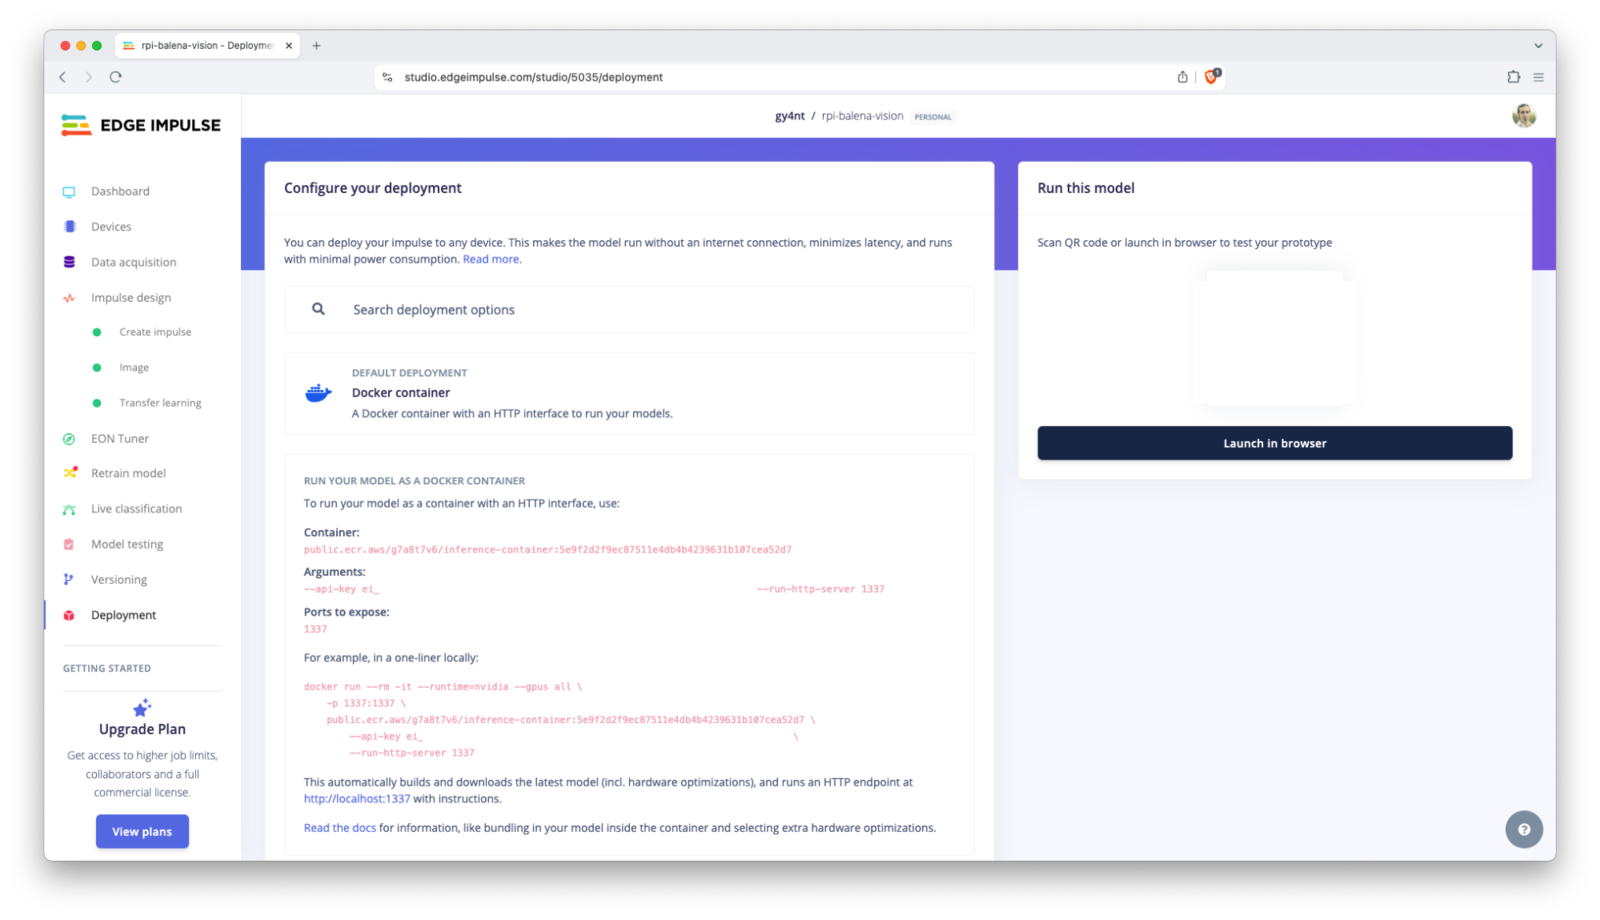
Step 2: Preparing Your Balena Fleet
Log in to your balenaCloud dashboard and create a new fleet.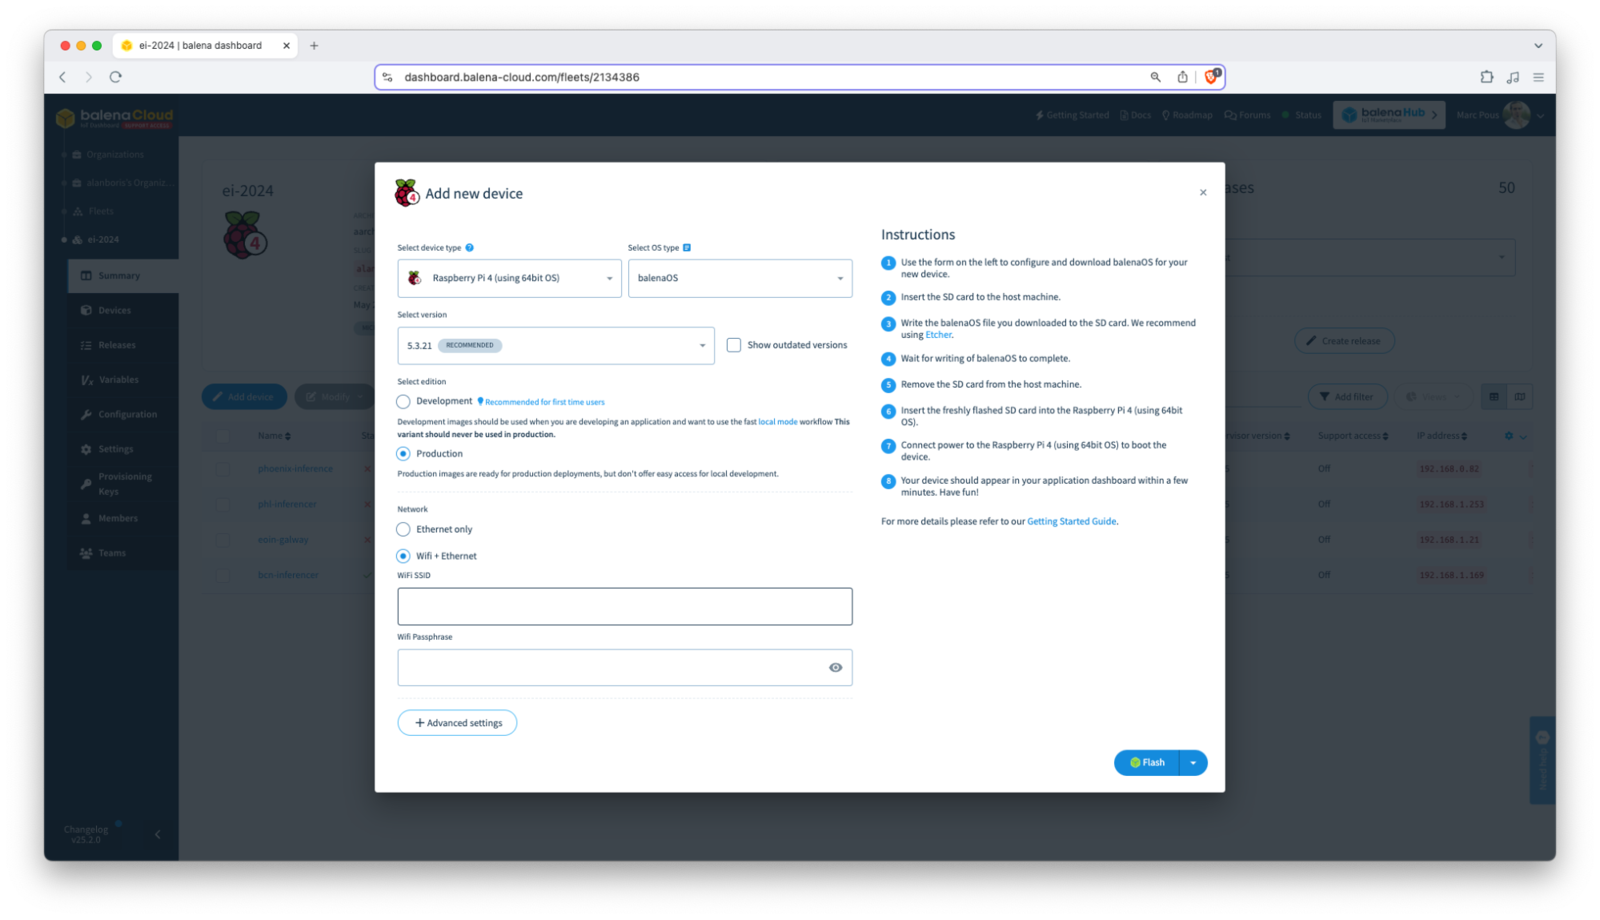
Step 3: Deploying Your Docker Container to Your balena Fleet
Clone the balena boilerplate Edge Impulse project from Github or start with a Dockerfile.template in a new directory on your local machine. Modify the Dockerfile.template to use your container address and api-key as mentioned earlier. Since balena uses Docker containers, you will simply use the container generated by the deployment screen of your Edge Impulse model.Step 4: Build Your Application
Use the balena CLI to build, and scan for your local device and push your application to balenaCloud: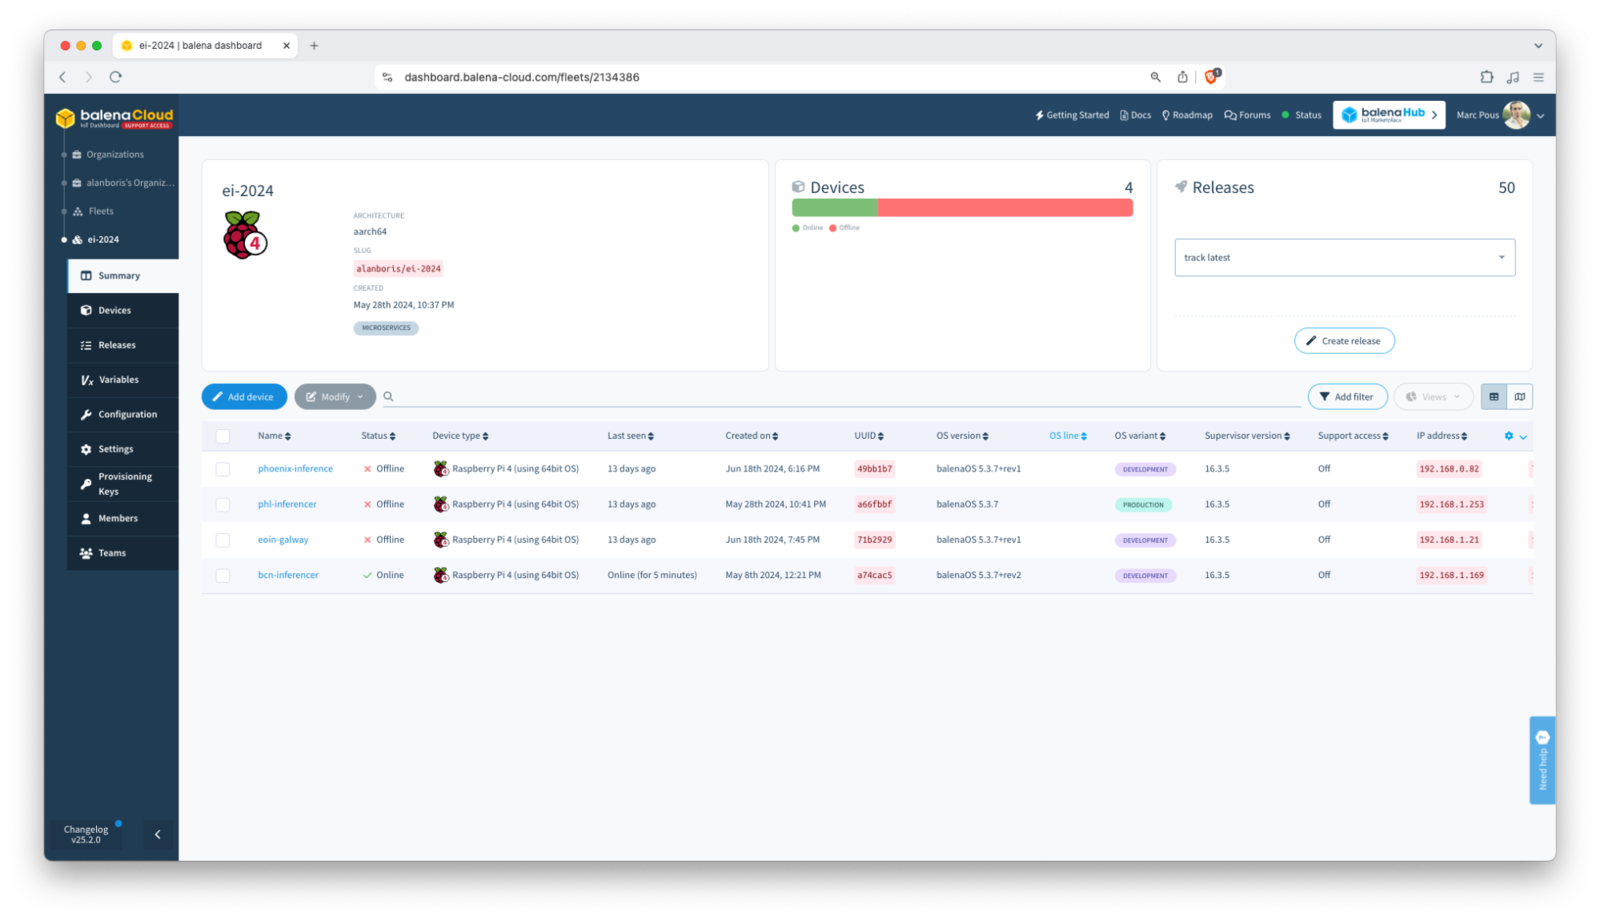
Step 5: Accessing Your Inference Server
Once deployed, your device will start the Docker container and run the HTTP inference server.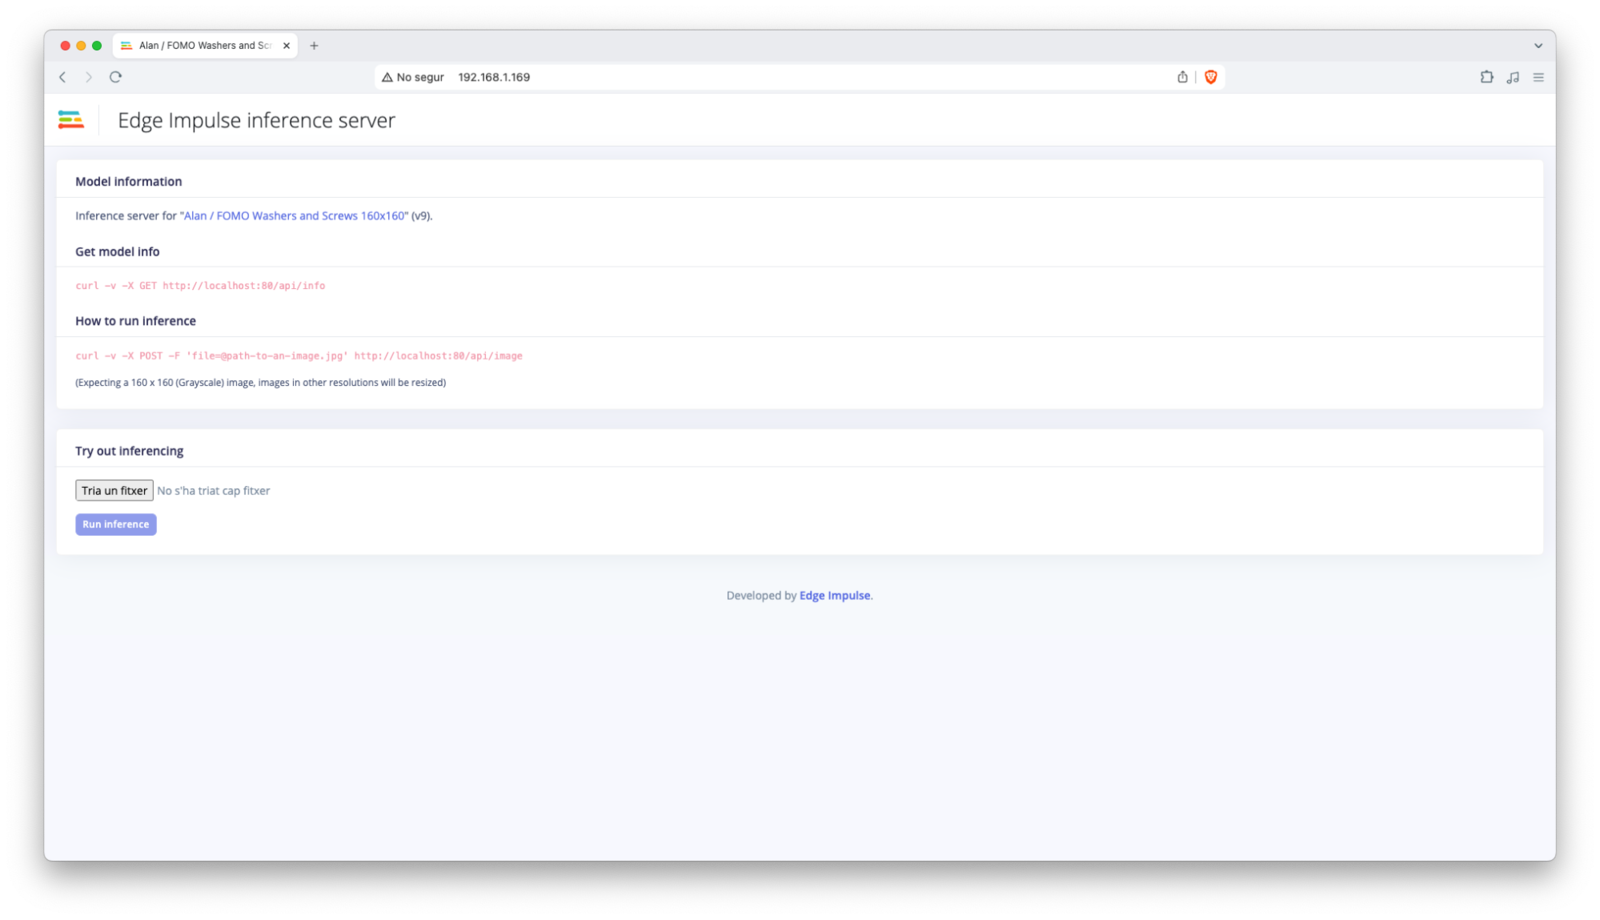
Step 6: Monitoring and Managing Your Fleet
With your Edge Impulse inference server running on balena, now you can monitor and manage the other services running on your device fleet using balenaCloud’s dashboard and tools. This includes monitoring device health, deploying updates, and rolling back changes if needed.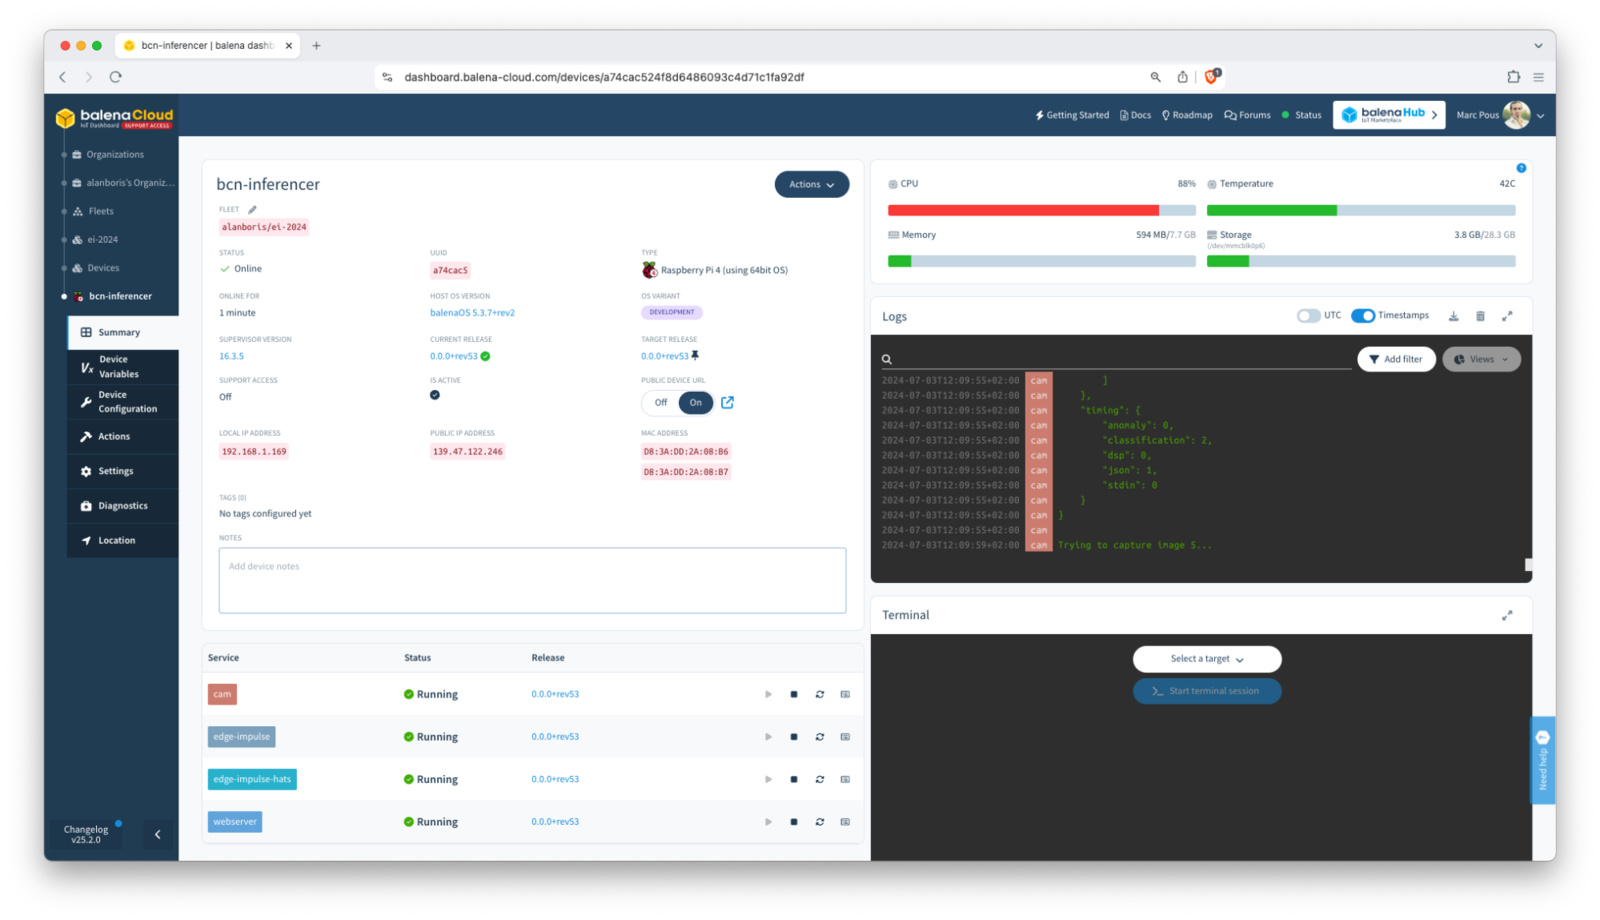

Conclusion
By following these steps, you should have a functional Edge Impulse inference server running on your balena devices, ready to process data and make predictions. This setup can be integrated into a robust OTA model update process, enabling Lifecycle management and improvement of your Edge AI enabled devices. Additional Resources- Webinar - Edge Impulse and Balena webinar exploring this topic in more detail.