Installing dependencies
To set this device up in Edge Impulse via USB serial or external debug probe, you will need to install the following software:- nRF Connect for Desktop v3.11.1 (only needed to update device firmware through USB or external debug probe).
- Edge Impulse CLI.
- On Linux:
- GNU Screen: install for example via
sudo apt install screen.
- GNU Screen: install for example via
Updating the firmware
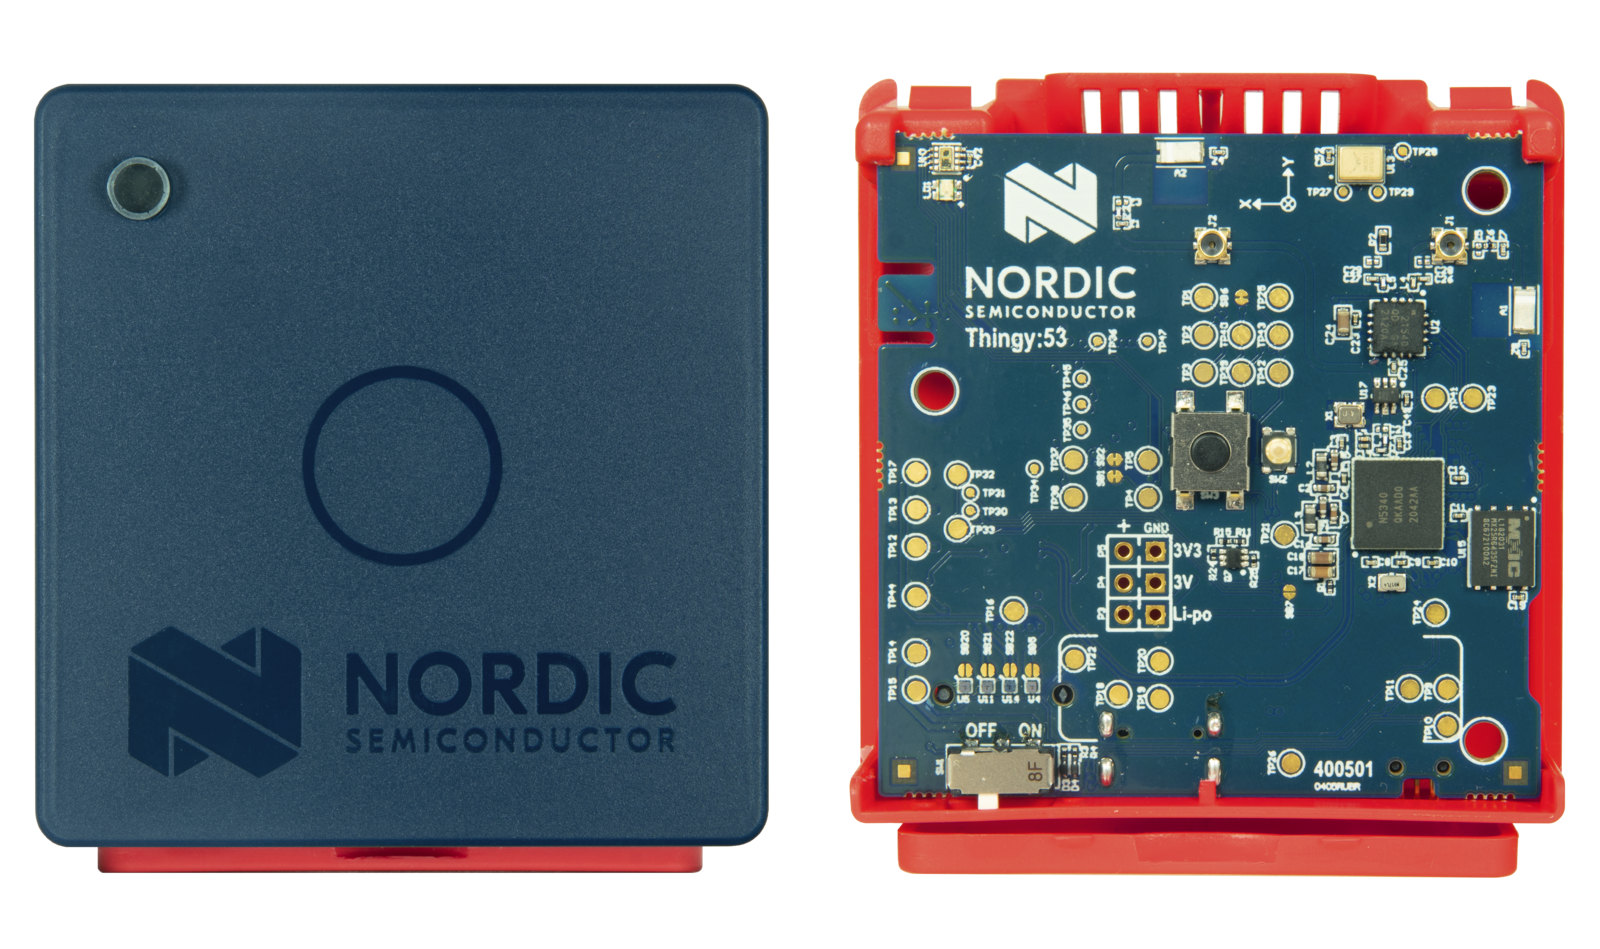
A brand new Thingy:53 devices will work out-of-the-box with the Edge Impulse Studio and the Nordic nRF Edge Impulse iPhone and Android apps. However, if your device has been flashed with some other firmware, then follow the steps below to update your device to the latest Edge Impulse firmware.1. Connect the development board to your computer
Use a USB cable to connect the development board to your computer. Then, set the power switch to ‘on’.2. Download the firmware
Download the latest Edge Impulse firmware:- Edge Impulse firmware: nordic-thingy53-full.zip
*-full.zipcontains HEX files to upgrade the device through the external probe.
- Edge Impulse firmware: nordic-thingy53-dfu.zip
*-dfu.zipcontainsdfu_application.zippackage to upgrade the already flashed device through the Serial/USB bootloader.
3. Update the firmware
Follow Nordic’s instructions to update the firmware on the Thingy:53 through your choice of debugging connection:- nRF Programmer (Bluetooth LE)
- Programmer app (USB)
- Programmer app (external debug probe)
- nRF Util
Connecting to Edge Impulse
Through nRF Edge Impulse mobile app
See the section below on Connecting to the nRF Edge Impulse mobile application.Through serial connection
With all the software in place it’s time to connect the development board to Edge Impulse. From a command prompt or terminal, run:--clean.
If prompted to select a device, choose ZEPHYR:
Verifying connection of device
That’s all! Your device is now connected to Edge Impulse. To verify this, go to your Edge Impulse project, and click Devices. The device will be listed here.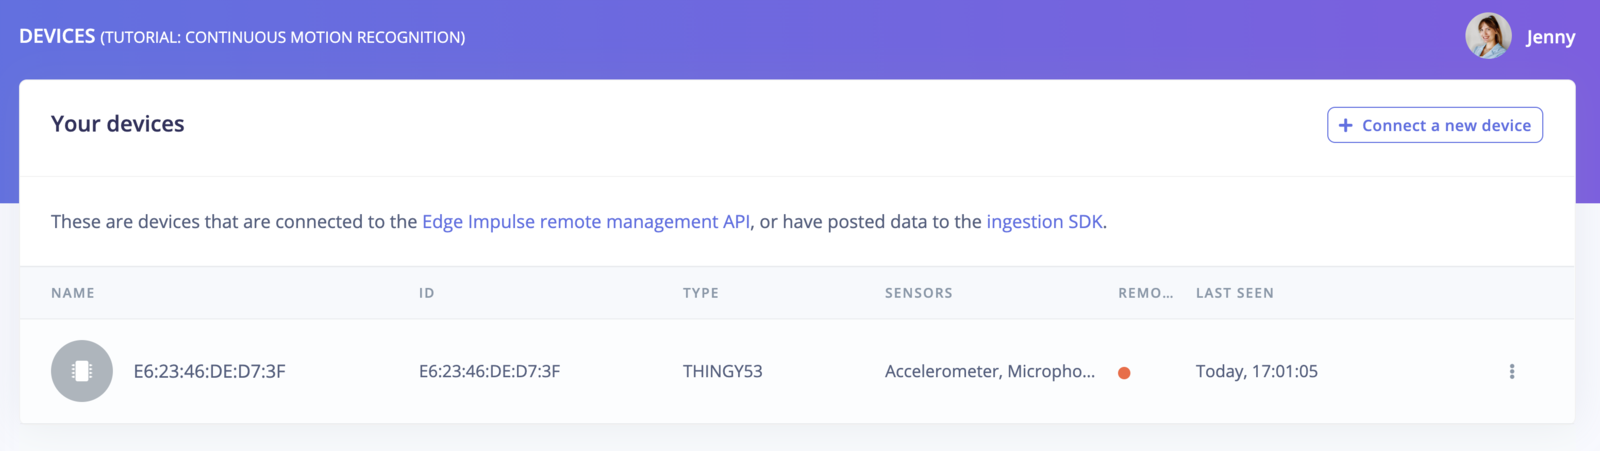
Next steps: building a machine learning model
With everything set up you can now build your first machine learning model with this tutorial: Looking to connect different sensors? The Data forwarder lets you easily send data from any sensor into Edge Impulse.Connecting to the nRF Edge Impulse mobile application
Now that you have created an Edge Impulse account and trained your first Edge Impulse machine learning model, using the Nordic nRF Edge Impulse app you can deploy your impulse to your Nordic Thingy:53 and acquire/upload new sensor data into your Edge Impulse projects.Installation & Login
- Download and install the Nordic nRF Edge Impulse app for your iPhone or Android phone.
- Open the app and login with your edgeimpulse.com credentials:

- Select your Thingy:53 project from the drop-down menu at the top:

Connect or remove a device
Select the Devices tab to connect to your Thingy:53 device to your mobile phone:


Data Acquisition
To view existing data samples in your Edge Impulse project, select the Data Acquisition tab. To record and upload a new data sample into your project, click on the ”+” button at the top right of the app. Select your sensor, type in the sample label, and choose a sample length and frequency, then select Start Sampling.


Deployment
Build and deploy your Edge Impulse model to your Thingy:53 via the Deployment tab. Select your project from the top drop-down, select your connected Thingy:53 device, and click Build:


Inferencing
Every Thingy:53 is shipped with a default Edge Impulse model. This model is created from the Tutorial: Continuous motion recognition and it’s corresponding Edge Impulse project. Select the Inferencing tab to view the inference results of the model flashed to the connected Thingy:53:
Using the Thingy53 with WiFi
The Nordic Thingy53 can also be using with the nRF7002eb expansion board as shown below.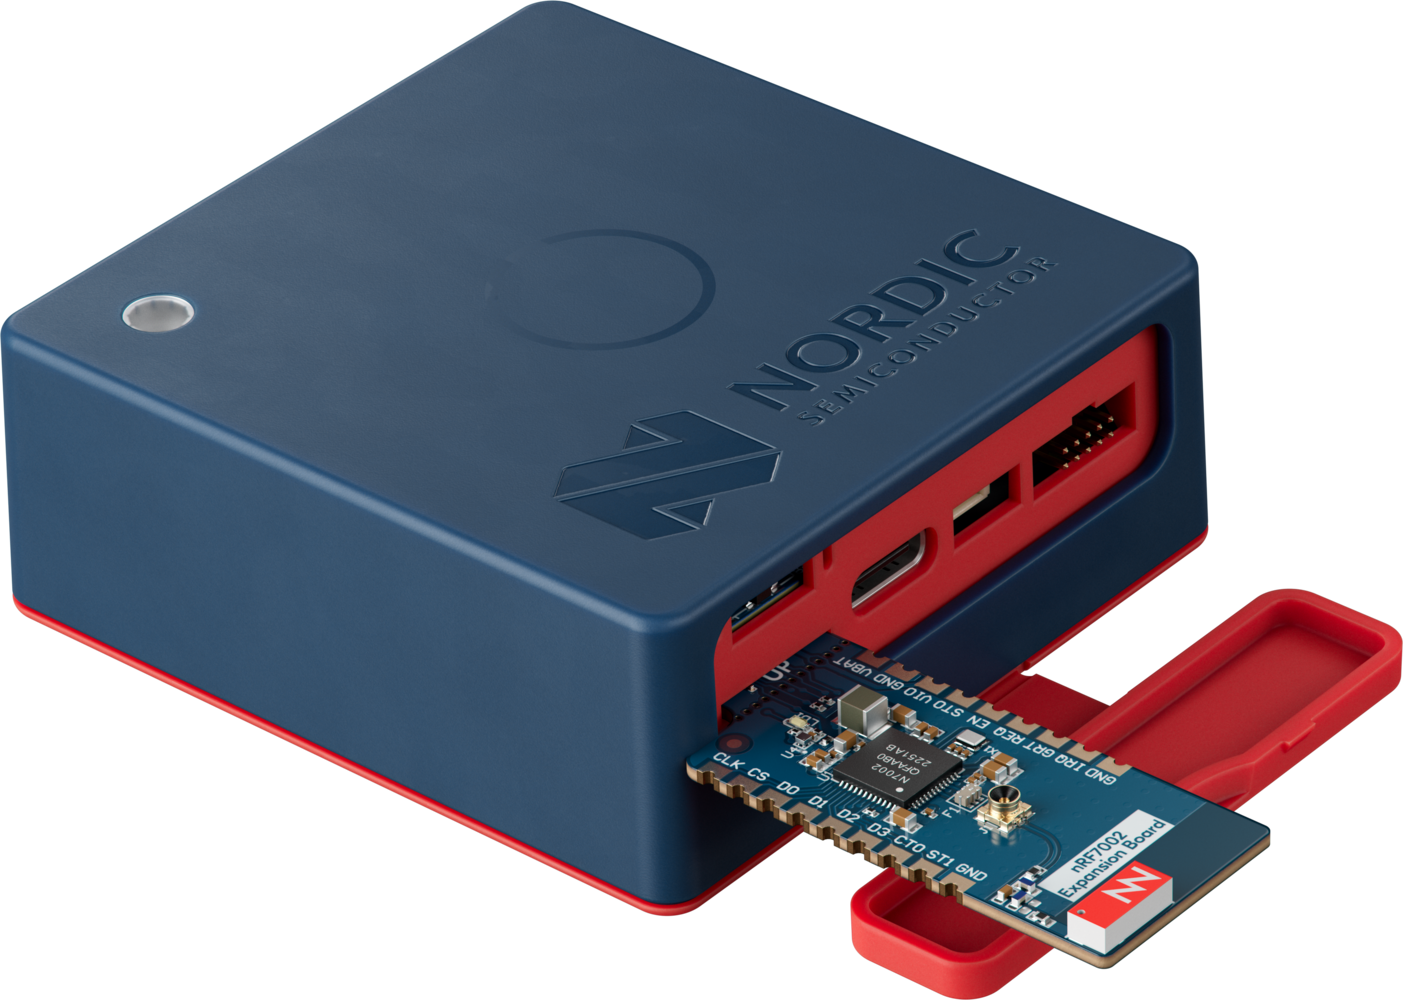
Update the firmware
The WiFi capabilities of the Thingy53 are sandboxed in a different firmware. This helps users to choose whether they want to use the WiFi module or not and prevents consumption of extra memory if they choose not to. Therefore, to enable the WiFi capabilities of Thingy53, download the following Edge Impulse firmware:- Edge Impulse firmware: nordic-thingy53-WiFi-full.zip
*-full.zipcontains HEX files to upgrade the device through the external probe.
- Edge Impulse firmware: nordic-thingy53-WiFi-dfu.zip
*-dfu.zipcontainsdfu_application.zippackage to upgrade the already flashed device through the Serial/USB.
Connect the Thingy53 to WiFi
Once the firmware has been updated, you will need to set up the WiFi connection between the Thingy53 and your WiFi. Make sure that the nRF7002eb WiFi module is plugged into the Thingy53 as shown in the image above. To setup the WiFi connection, simply run:
Note: If you want to switch accounts, projects or WiFi network, run the command with --clean
When prompted to select a device, choose the option with the higher USB modem number:
Yes, it will proceed to scan for available WiFi networks:
Verifying connection of device
Now your device should be connected to the project you chose during the initial setup. To verify that the device is connected, navigate to the Devices tab of your project. The connected device should be listed here: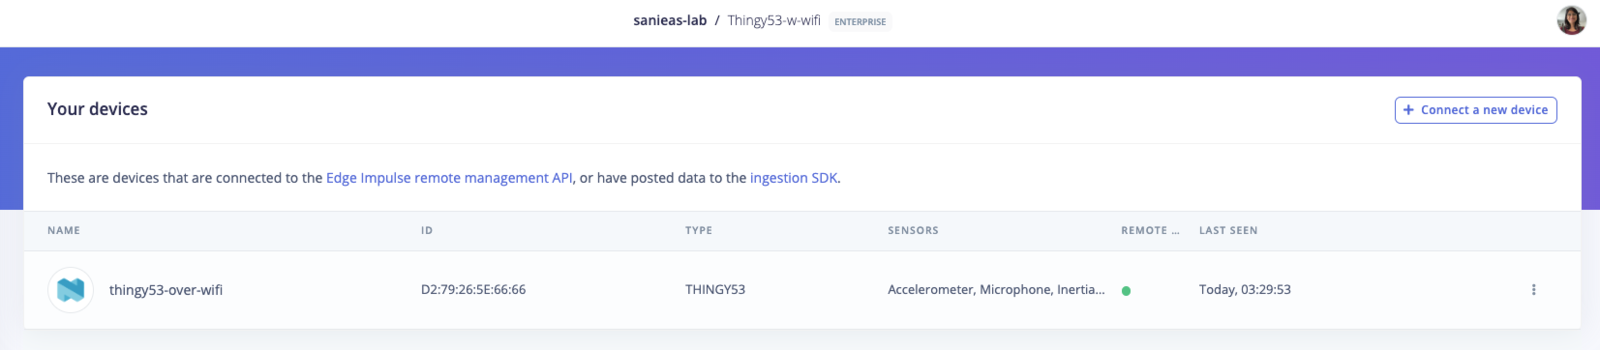
Flashing your model
When using the nRF7002eb expansion board, you will not be able to connect to the Nordic nRF Edge Impulse app on your phone. The best way to flash your model is by navigating to the Deployment tab of your project and downloading the built firmware from there. You can follow the instructions in section 3 of updating the firmware to flash your model onto your device.Inferencing
The firmware for the Thingy53 provided above, ships with a default motion detection model. This model is created from the Tutorial: Continuous motion recognition and it’s corresponding Edge Impulse project. To see the inferencing results of this model, reconnect the the device to your computer with a USB-C cable and run:Settings
Select the Settings tab to view your logged-in account information, BLE scanner settings, and application version. Click on your account name to view your Edge Impulse projects and logout of your account.

Troubleshooting
Lost BLE connection to device- Reconnect your device by selecting your device name on the Devices tab and click “Reconnect”.
- Make sure power cables are plugged in properly.
- Do not use iPhone/Android app multitasking during data acquisition, firmware deployment, or inferencing tasks, as the BLE streaming connection will be closed.
- Reconnect your device to your computer using a USB-C cable.
- Run
edge-impulse-daemon --clean. End the process by pressingCTRL+con your keyboard, do not login at this step. - Disconnect the Thingy53 and restart using the switch on the side.
- Reconnect to your computer and run
edge-impulse-daemon. Follow instructions above to choose a different project of WiFi network.