
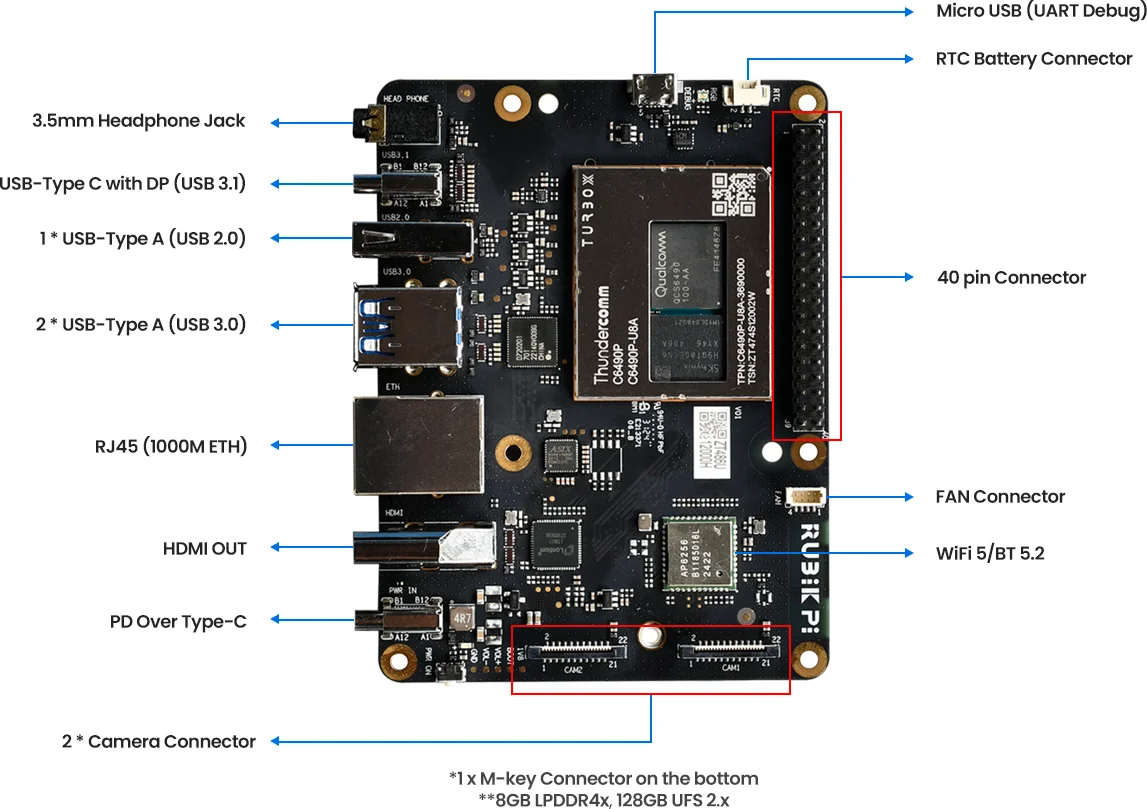
Thundercomm Rubik Pi 3
Setting Up Your Thundercomm Rubik Pi 3 - Ubuntu 24.04
1. Setup and connecting to the internet
- Attach a USB keyboard and mouse, as well as an HDMI monitor. For computer vision projects, also attach a USB camera.
- Connect power to the USB-C port on the right hand side of the board.
-
Press the power button, which is the front button (nearer the ports):
-
Once the board has booted up, you are brought to the console login. Login with the username
ubuntuand the passwordubuntu. (You might be required to change the password if this is the first boot. -
Run the command
sudo nmtui, and and navigate through the menu to add your WiFi. Alternatively, you can simply plug in an ethernet cable if available.
After connecting the board to the internet, reboot it. This will refresh the system clock (through the NTP), resolving an issue with invalid certificates when installing the Edge Impulse CLI.
2. Installing the Edge Impulse Linux CLI
Once rebooted, open up the terminal once again, and install the Edge Impulse CLI and other dependencies via:3. Connecting to Edge Impulse
With all dependencies set up, run:--clean argument.
4. Verifying that your device is connected
That’s all! Your device is now connected to Edge Impulse. To verify this, go to your Edge Impulse project, and click Devices. The device will be listed here.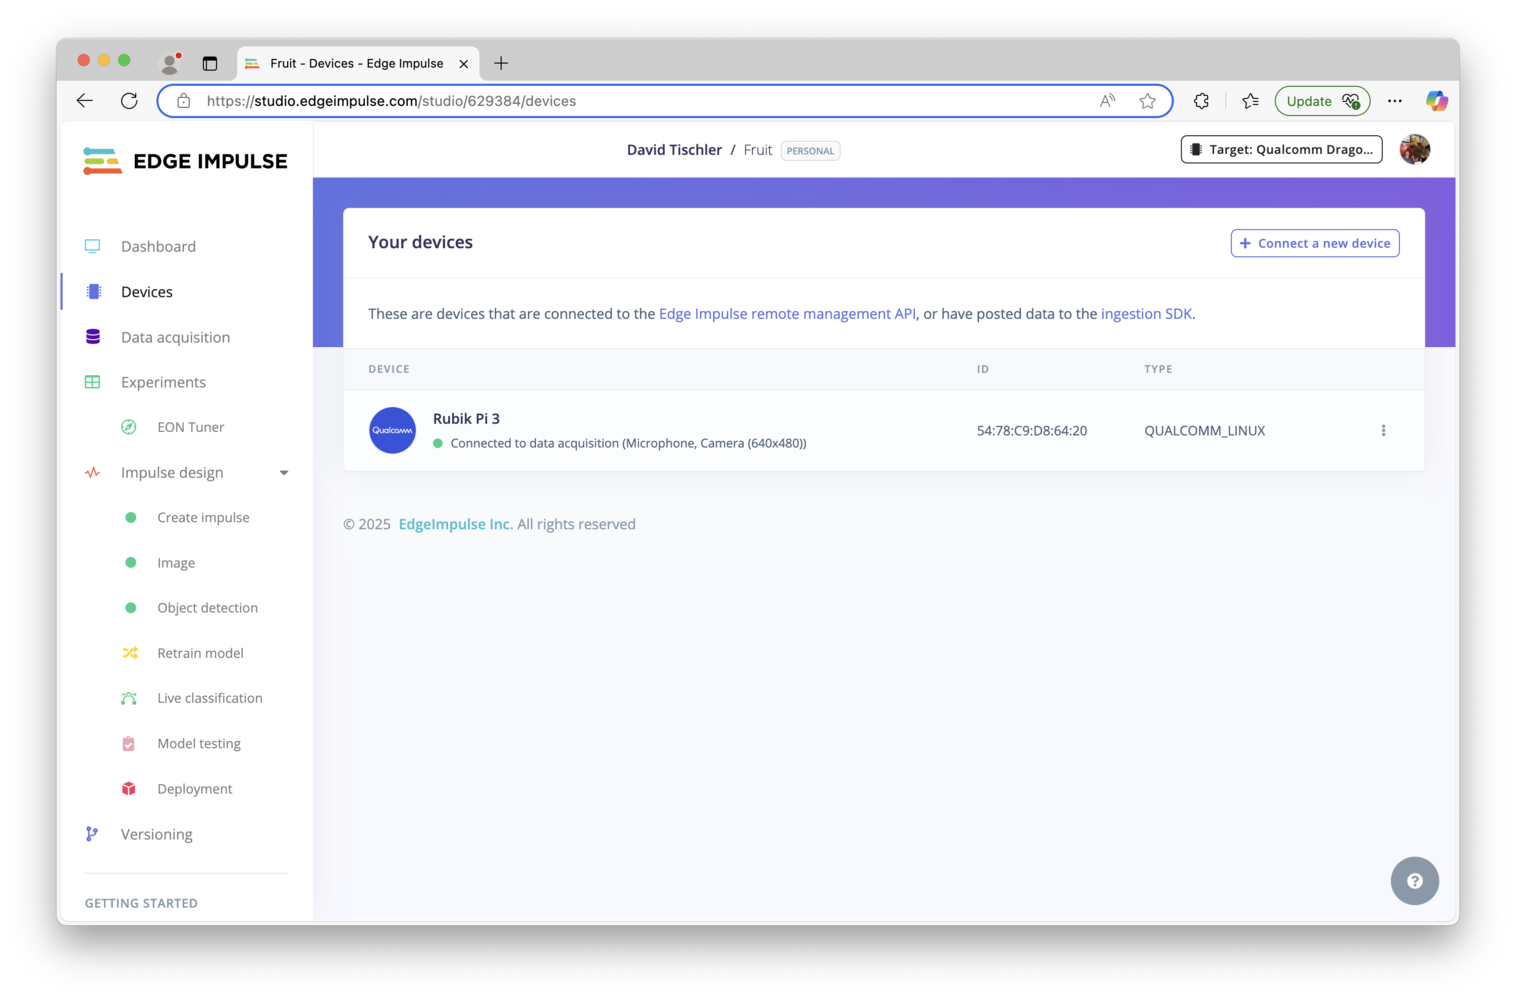
Rubik Pi 3 connected to Edge Impulse
Setting Up Your Thundercomm Rubik Pi 3 - Qualcomm Linux
1. Setup and connecting to the internet
- Attach a USB keyboard and mouse, as well as an HDMI monitor. For computer vision projects, also attach a USB camera.
- Connect power to the USB-C port on the right hand side of the board.
-
Press the power button, which is the front button (nearer the ports):
- Once the board has booted up, open a terminal by clicking on the icon at the top-left of the screen.
-
Change to the ‘root’ user with
su root -
Run the command
rubikpi_config, and navigate through the menu to add your WiFi. Alternatively, you can simply plug in an ethernet cable if available.
After connecting the board to the internet, reboot it. This will refresh the system clock (through the NTP), resolving an issue with invalid certificates when installing the Edge Impulse CLI.
2. Installing the Edge Impulse Linux CLI
Once rebooted, open up the terminal once again, and install the Edge Impulse CLI and other dependencies via:Make note of the additional commands shown at the end of the installation process; the
source ~/.profile command will be needed prior to running Edge Impulse in subsequent sessions.3. Connecting to Edge Impulse
With all dependencies set up, run:--clean argument.
4. Verifying that your device is connected
That’s all! Your device is now connected to Edge Impulse. To verify this, go to your Edge Impulse project, and click Devices. The device will be listed here.Rubik Pi 3 connected to Edge Impulse
Next steps: building a machine learning model
With everything set up you can now build your first machine learning model with these tutorials:- Responding to your voice
- Recognize sounds from audio
- Adding sight to your sensors
- Object detection
- Visual anomaly detection with FOMO-AD
Deploying back to device
Using the Edge Impulse Linux CLI
To run your Impulse locally on the Rubik Pi 3, open a terminal and run:--clean to switch projects).
Alternatively, you can select the Linux (AARCH64 with Qualcomm QNN) option in the Deployment page.
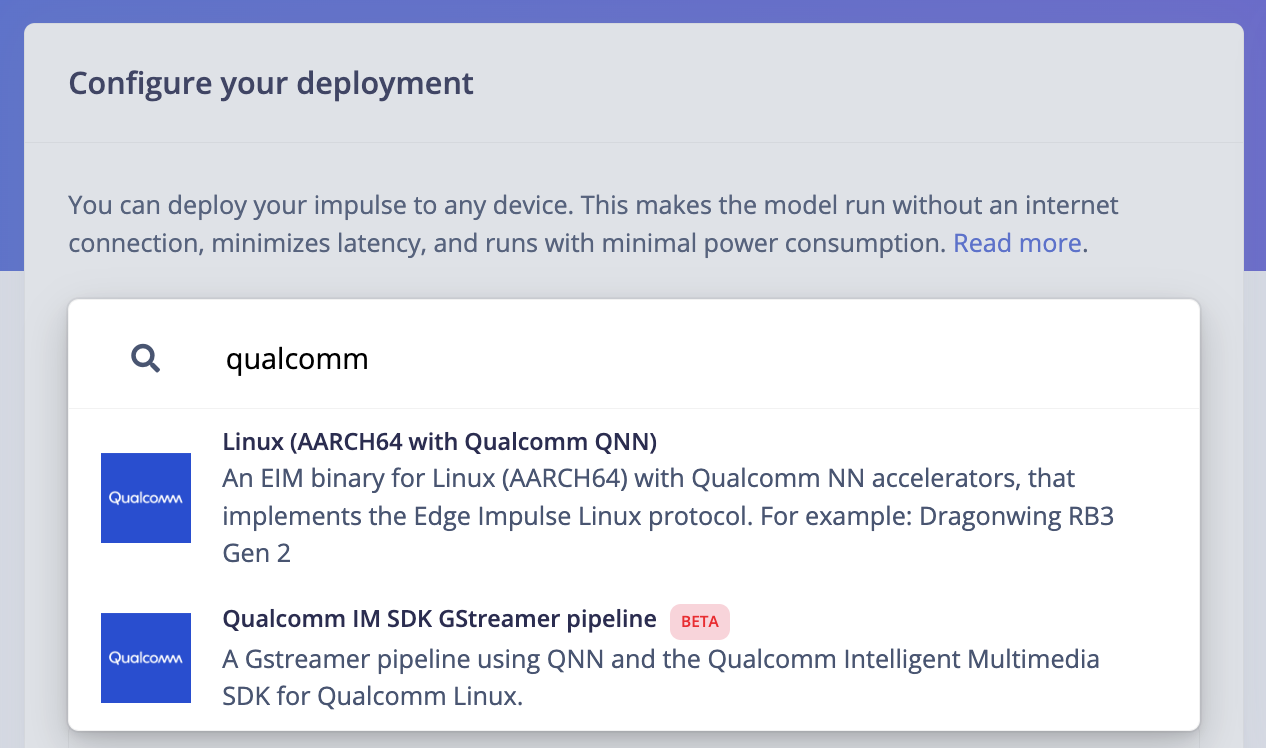
Qualcomm deployment options
.eim model that you can run on your board with the following command:
Using the Edge Impulse Linux Inferencing SDKs
Our Linux SDK has examples on how to integrate the.eim model with your favorite programming language.
You can download either the quantized version and the float32 versions of your model, but the Qualcomm NN accelerator only supports quantized models. If you select the float32 version, the model will run on CPU.
Using the IM SDK GStreamer option
When selecting this option, you will obtain a.zip folder. We provide instructions in the README.md file included in the compressed folder.
See more information on Qualcomm IM SDK GStreamer pipeline.
Image model?
If you have an image model then you can get a peek of what your device sees by being on the same network as your device, and finding the ‘Want to see a feed of the camera and live classification in your browser’ message in the console. Open the URL in a browser and both the camera feed and the classification are shown: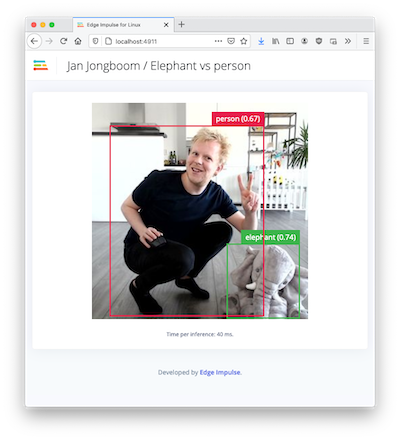
Live feed with classification results