Documentation Index
Fetch the complete documentation index at: https://docs.edgeimpulse.com/llms.txt
Use this file to discover all available pages before exploring further.
Keyword spottingThis tutorial is for the Syntiant hardware only (Syntiant TinyML, Arduino Nicla Voice), and the Avnet RASynBoard (Renesas RA6 and Syntiant NDP 120). For other development boards, you can follow the standard Continuous Motion Recognition tutorial
Before starting the tutorialAfter signing up for a free Edge Impulse account, clone the finished project, including all training data, signal processing and machine learning blocks here: Syntiant - Circular Motion. At the end of the process you will have the full project that comes pre-loaded with training and test datasets.
1. Prerequisites
For this tutorial you’ll need the:- Syntiant TinyML Board
- An SD Card to perform IMU data acquisition
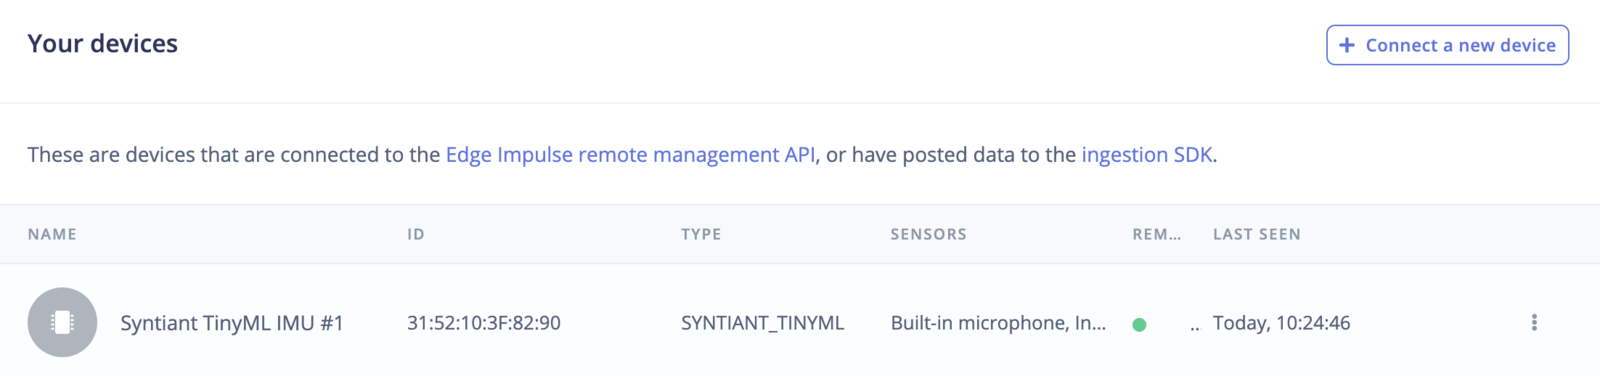
Device compatibilityEdge Impulse can ingest data from any device - including embedded devices that you already have in production. See the documentation for the Ingestion API for more information.
2. Collecting your first data
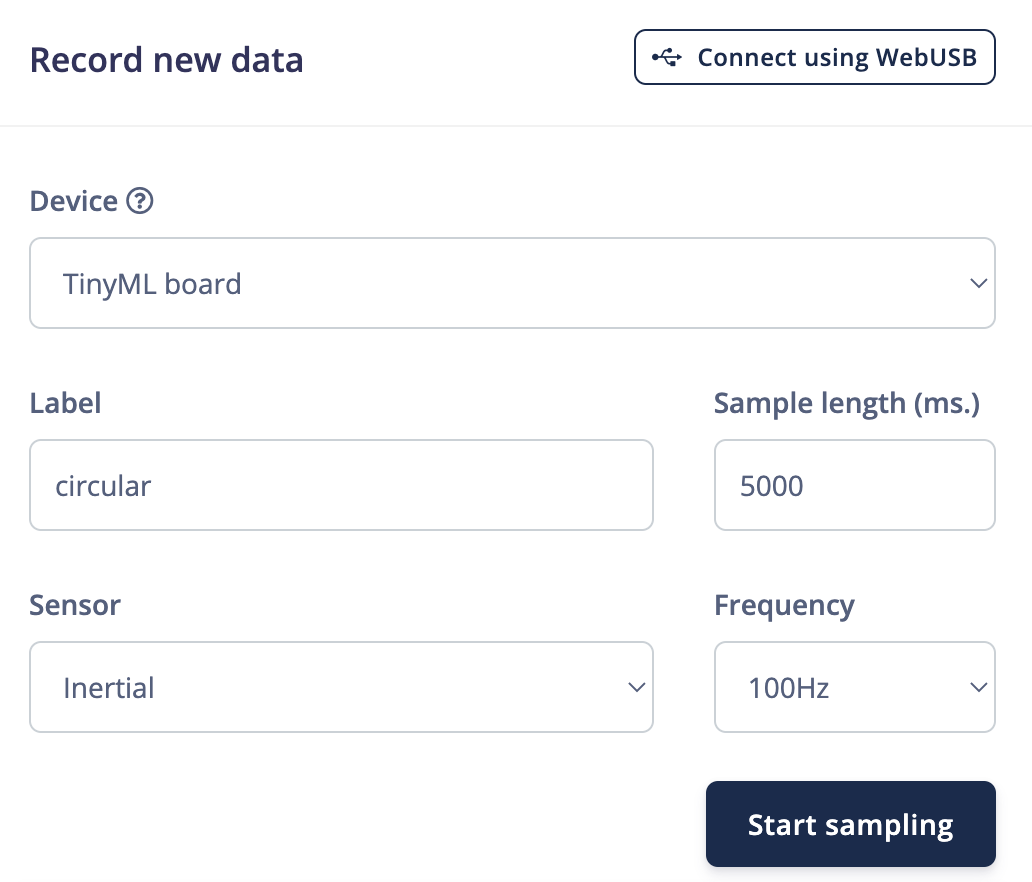
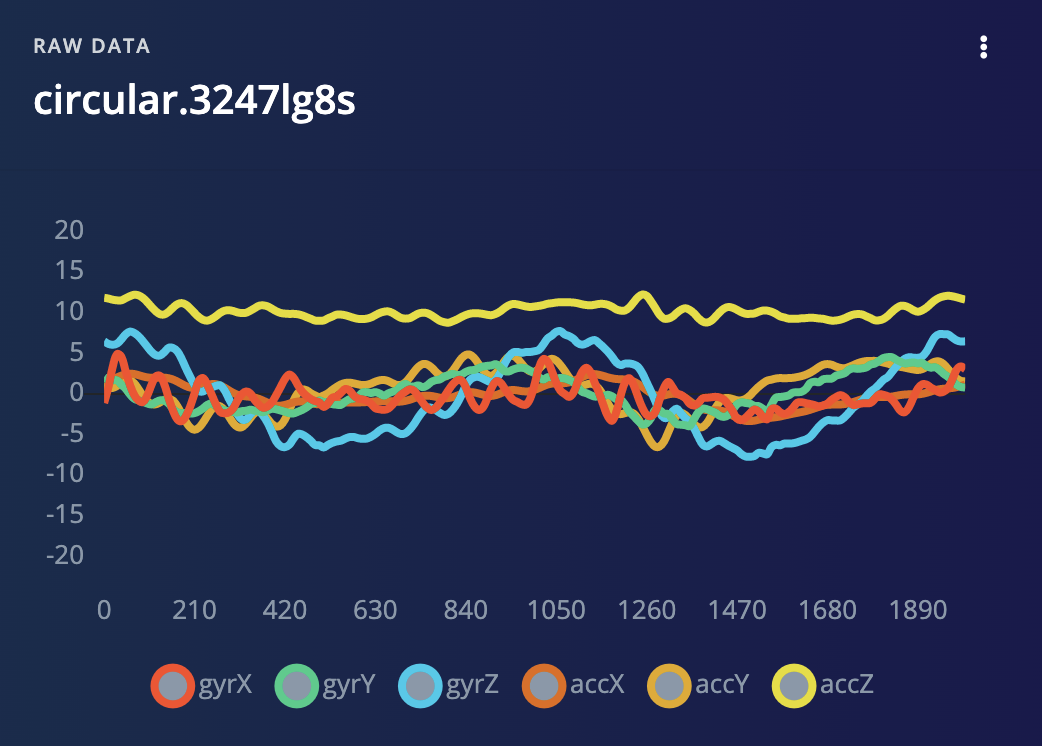
With your device connected, we can collect some data. In the studio go to the Data acquisition tab. This is the place where all your raw data is stored, and - if your device is connected to the remote management API - where you can start sampling new data. Under Record new data, select your Syntiant device, set the label tocircular, the sample length to 2000, the sensor to Inertial and the frequency to 100 Hz. This indicates that you want to record data for 2 seconds, and label the recorded data as circular. You can later edit these labels if needed.
- Circular - circular movements
- Z_Openset - random movements that are not circular
Negative ClassThe Syntiant NDP chips require a negative class on which no predictions will occur, in our example this is the Z_Openset class. Make sure the class name is last in alphabetical order.
3. Designing an impulse
With the training set in place you can design an impulse. An impulse takes the raw data, slices it up in smaller windows, uses signal processing blocks to extract features, and then uses a learning block to classify new data. Signal processing blocks always return the same values for the same input and are used to make raw data easier to process, while learning blocks learn from past experiences. For this tutorial we’ll use the ‘IMU Syntiant’ signal processing block. This block rescales raw data to 8 bits values to match the NDP chip input requirements. Then we’ll use a ‘Neural Network’ learning block, that takes these generated features and learns to distinguish between our different classes (circular or not). In the studio go to Create impulse, set the window size to1800 (you can click on the 1800 ms. text to enter an exact value), the window increase to 80, and add the ‘IMU Syntiant’ and ‘Classification (Keras)’ blocks. Then click Save impulse.
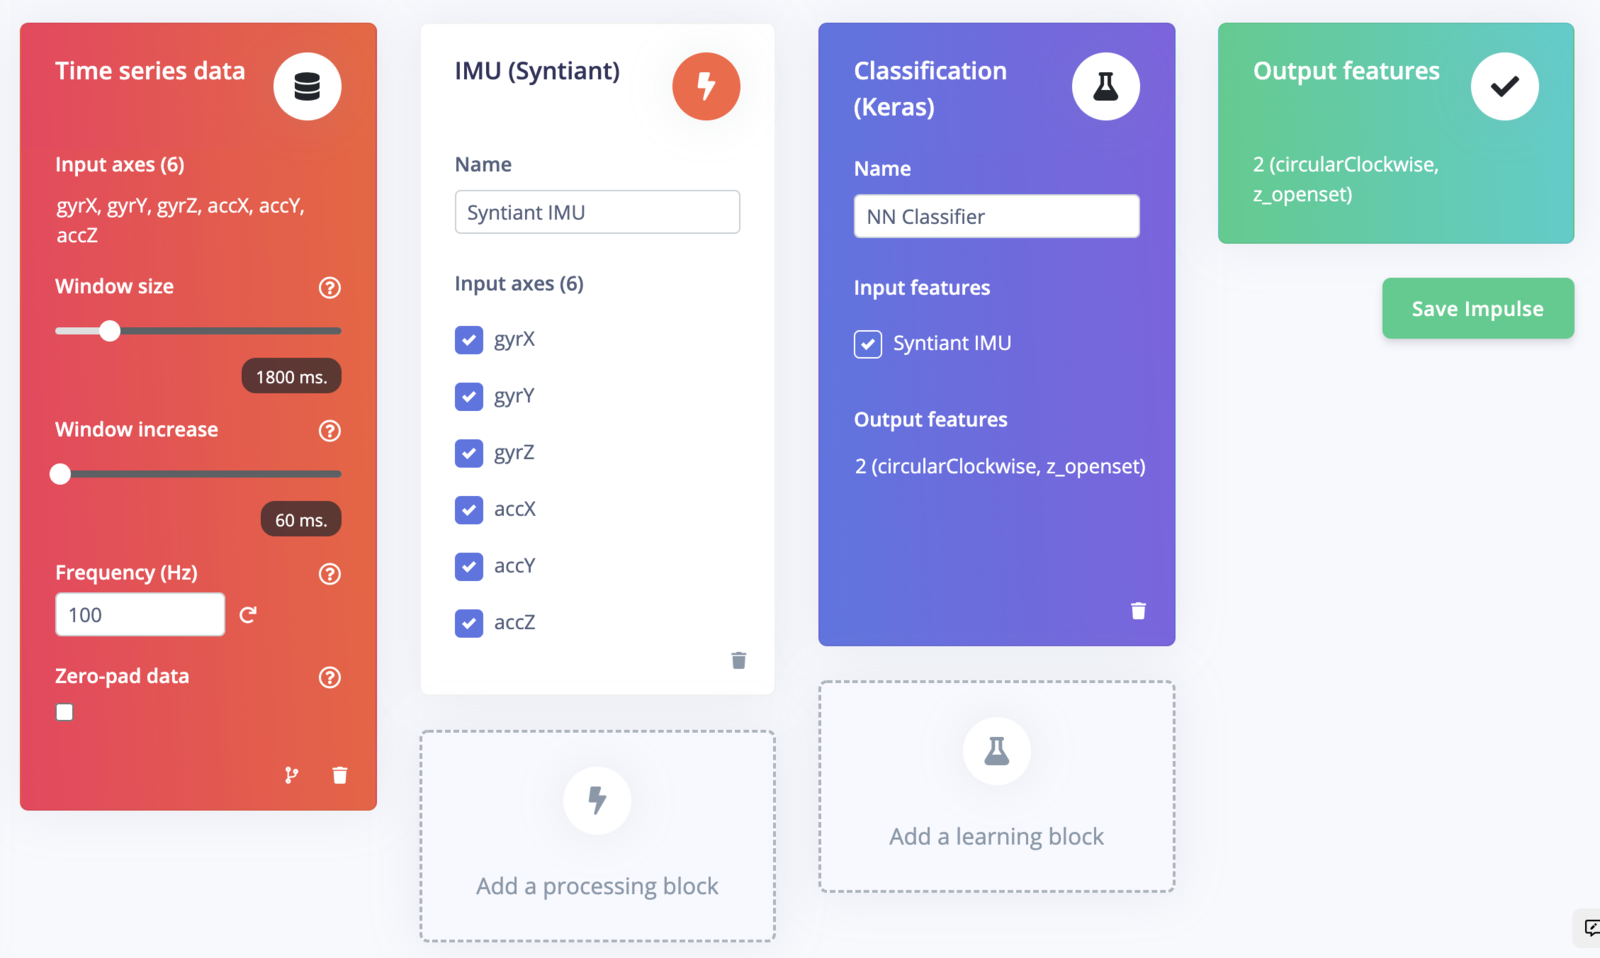
Window sizeThe Syntiant NDP101 chip requires the number of generated features to be divisible by 4. In our example, we have 6 axis sampled at 100 Hz with a window of 1800ms, leading to 1080 (180x6) features which is divisible by 4.
Configuring the IMU Syntiant block
To configure your signal processing block, click Syntiant IMU in the menu on the left. This will show you the raw data on top of the screen (you can select other files via the drop down menu), and the processed features on the right. TheScale 16 bits to 8 bits converts your raw data to 8 bits and normalize it to the range [-1, 1]. The circular motion public project’s dataset is already rescaled so you need to disable the option in this case.
Click Save parameters. This will send you to the ‘Feature generation’ screen.
Click Generate features to start the process.
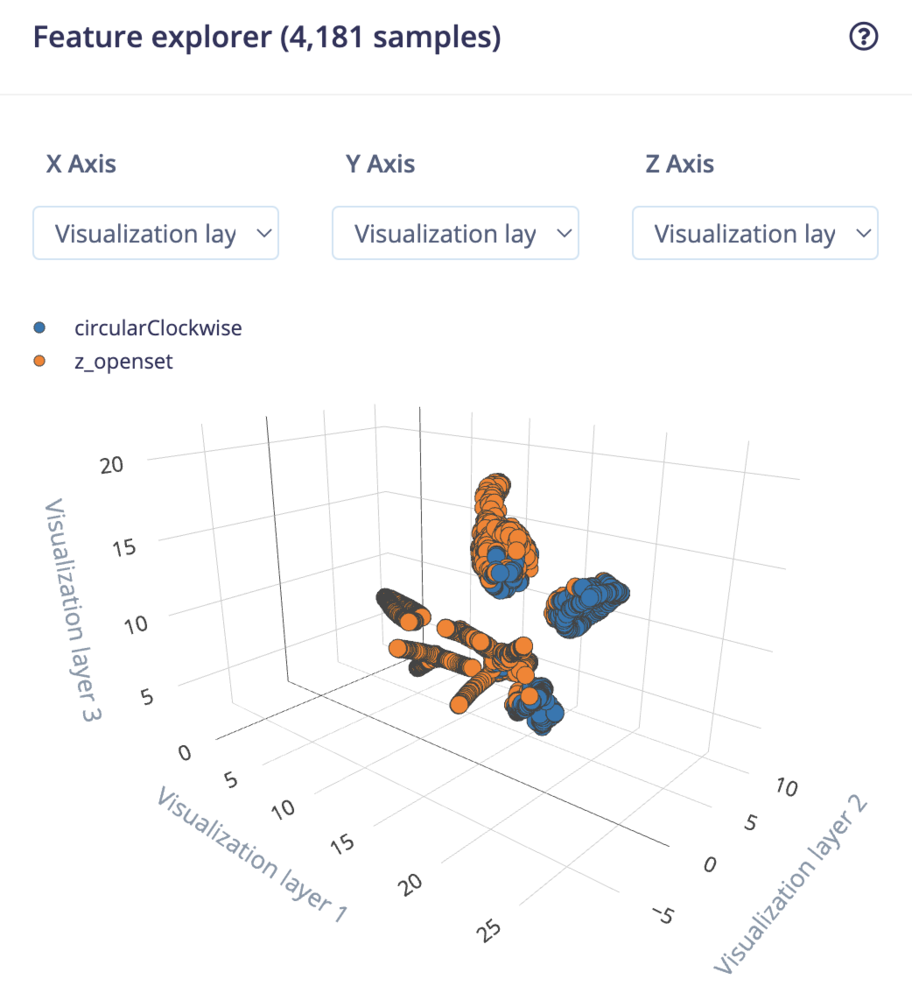
Afterwards the ‘Feature explorer’ will load. This is a plot of all the extracted features against all the generated windows. You can use this graph to compare your complete data set. A good rule of thumb is that if you can visually separate the data on a number of axes, then the machine learning model will be able to do so as well.
Configuring the neural network
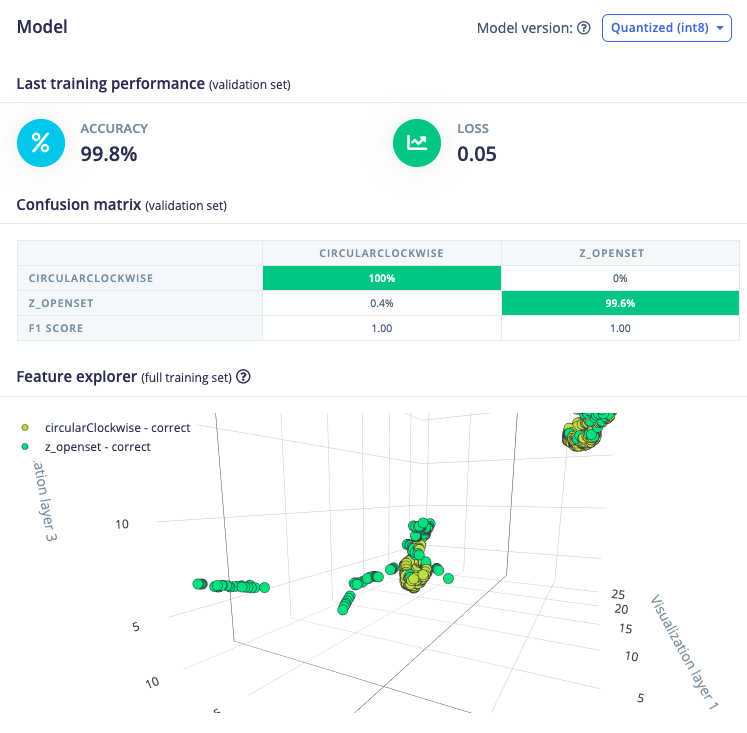
With all data processed it’s time to start training a neural network. Neural networks are algorithms, modeled loosely after the human brain, that can learn to recognize patterns that appear in their training data. The network that we’re training here will take the processing block features as an input, and try to map this to one of the two classes — ‘circular’ or ‘z_openset’. Click on NN Classifier in the left hand menu. You’ll see the following page: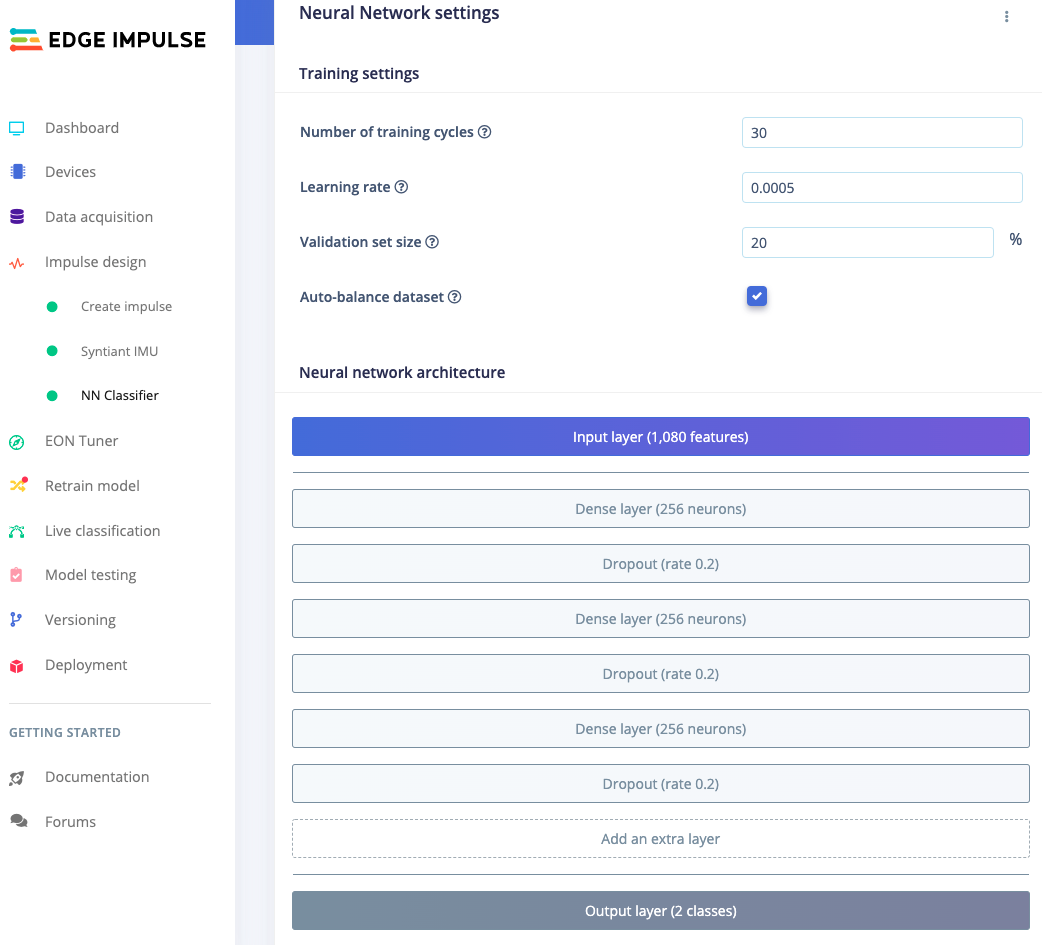
4. Classifying new data
From the statistics in the previous step we know that the model works against our training data, but how well would the network perform on new data? Click on Live classification in the menu to find out. Your device should (just like in step 2) show as online under ‘Classify new data’. Set the ‘Sample length’ to2000 (5 seconds), click Start sampling and start doing movements. Afterward, you’ll get a full report on what the network thought that you did.
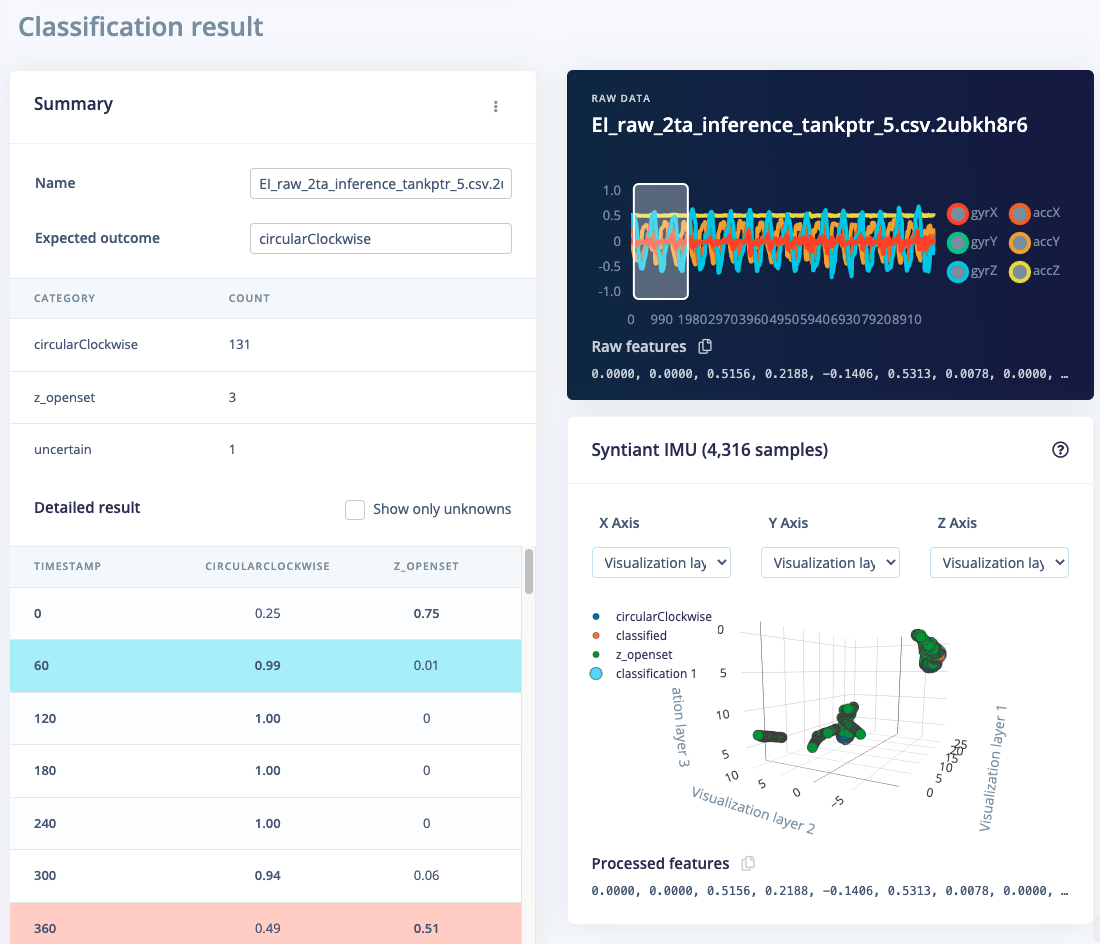
- There is not enough data. Neural networks need to learn patterns in data sets, and the more data the better.
- The data does not look like other data the network has seen before. This is common when someone uses the device in a way that you didn’t add to the test set. You can add the current file to the test set by clicking
⋮, then selecting Move to training set. Make sure to update the label under ‘Data acquisition’ before training. - The model has not been trained enough. Up the number of epochs to
50and see if performance increases (the classified file is stored, and you can load it through ‘Classify existing validation sample’).
5. Deploying to your device
With the impulse designed, trained and verified you can deploy this model back to your device. This makes the model run without an internet connection, minimizes latency, and runs with minimum power consumption. To export your model, click on Deployment in the menu. Then under ‘Build firmware’ select the Syntiant development board, The final step before building the firmware is to configure the posterior handler parameters of the Syntiant chip.Pre-configured posterior parametersFor the Syntiant Circular Motion project, we’ve already pre-configured the posterior parameters so you can just go to the ‘Build’ output step.
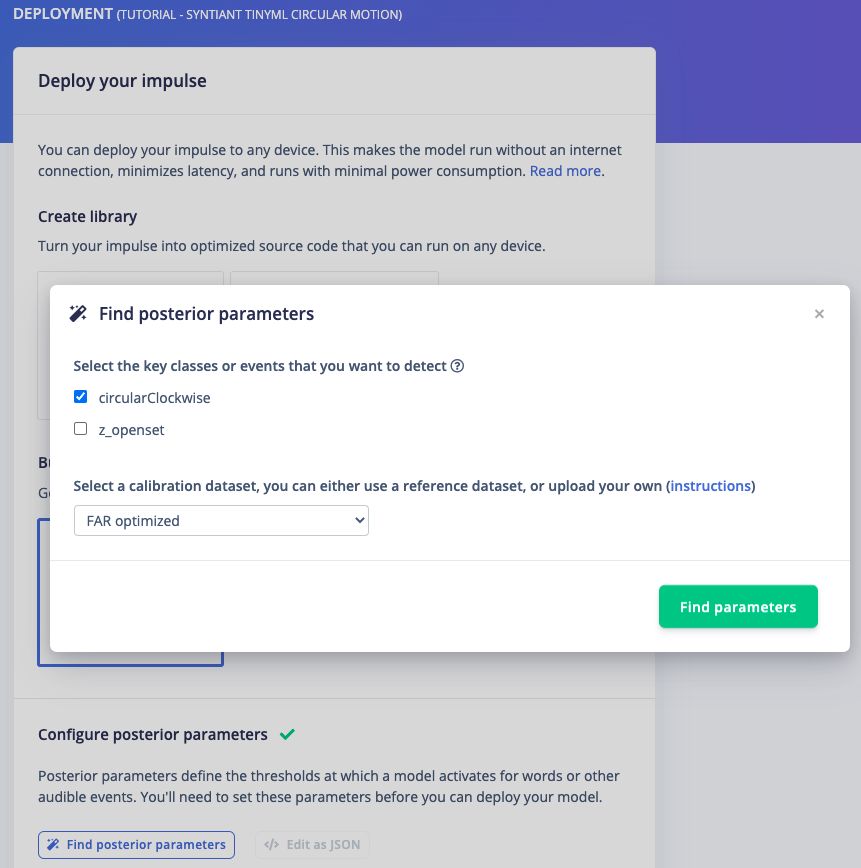
- Select the classes you want to detect and make sure to uncheck the last class (Z_Openset in our example)
- Select a calibration method: either no calibration (fastest recommended for Syntiant TinyML board), or FAR optimized (FAR is optimized for an FRR target < 0.2).
6. Flashing the device
Once optimized parameters have been found, you can click Build. This will build a Syntiant package that will run on your development board. After building is completed you’ll get prompted to download a zipfile. Save this on your computer. A pop-up video will show how the download process works. After unzipping the downloaded file, run the appropriate flashing script for your platform (Linux, Mac, or Win 10) to flash the board with the Syntiant Circular Motion model and associated firmware. You might see a Microsoft Defender screen pop up when the script is run on Windows 10. It’s safe to proceed so select ‘More info’ and continue.Running the model on the device
We can connect to the board’s newly flashed firmware over serial. Open a terminal and run: