Can’t see the labeling queue?To use the Labeling queue, you will need to set your project to an “object detection” project. Go to the project Dashboard and under “Project info > Labeling method” select
Bounding boxes (object detection).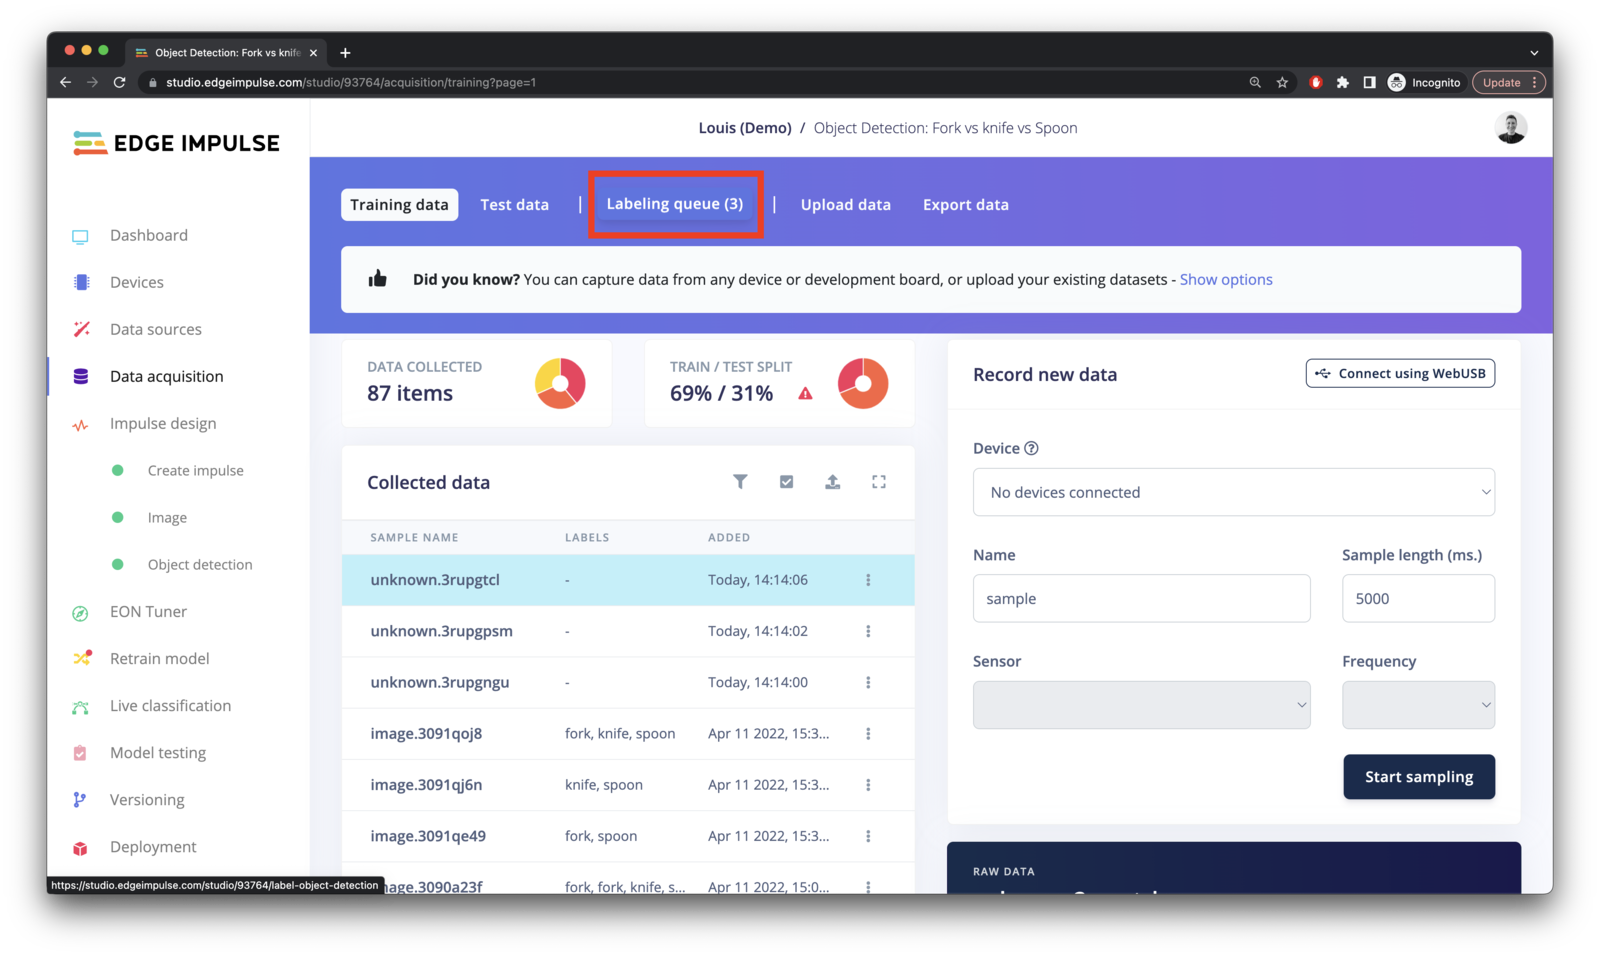
AI-assisted labeling
Already have a labeled dataset?If you already have a labeled dataset containing bounding boxes, you can use the uploader to import your data.
- Track objects between frames
- Classify using YOLOv5
- Classify using YOLO-Pro
- Classify using your current impulse
- Classify using any pretrained object detection model
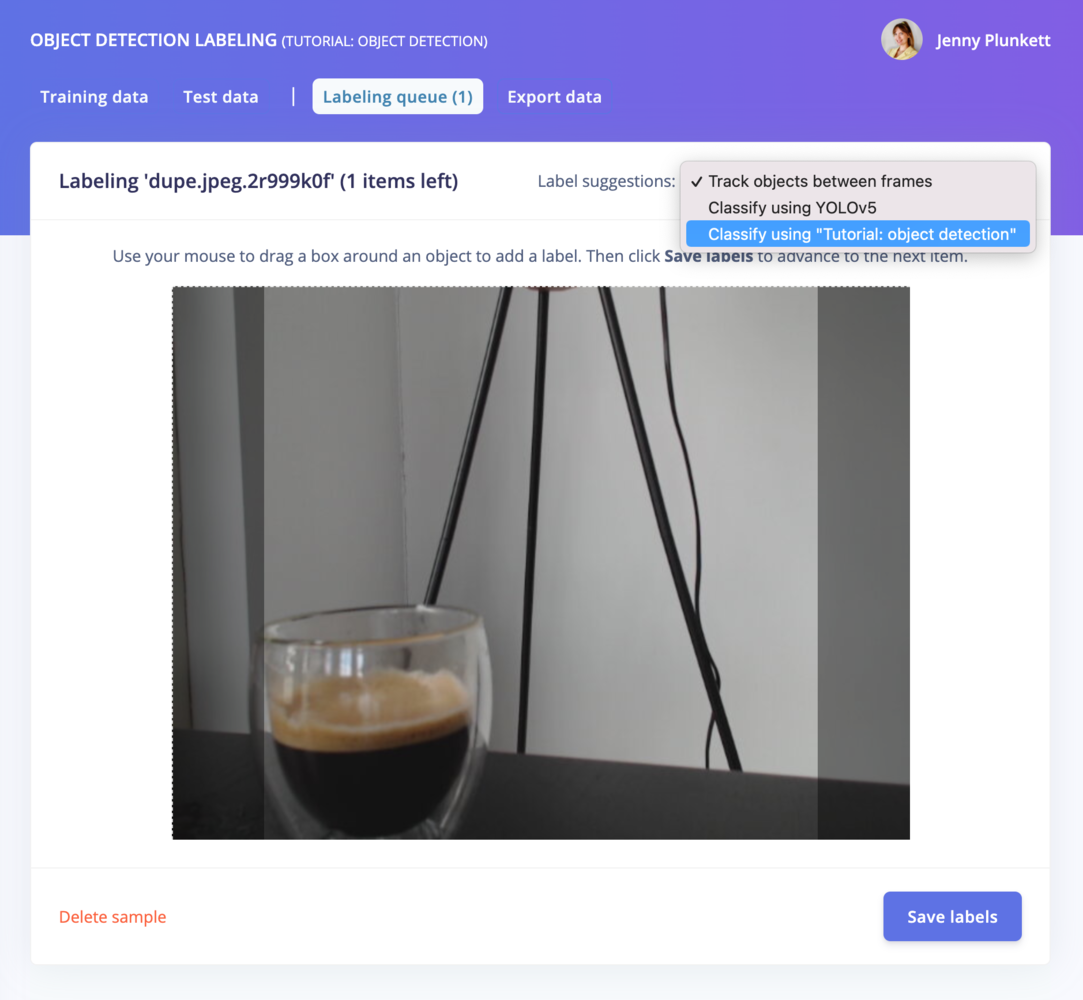
Track objects between frames
If you have objects that are a similar size or common between images, you can also track your objects between frames within the Edge Impulse Labeling Queue, reducing the amount of time needed to re-label and re-draw bounding boxes over your entire dataset. Draw your bounding boxes and label your images, then, after clicking Save labels, the objects will be tracked from frame to frame:Classify using YOLOv5
Common objects in your images can quickly be identified and labeled in seconds without needing to write any code by using a pre-trained YOLOv5 object detection model, trained on 80 classes from the COCO dataset. To label your objects with YOLOv5, click the Label suggestions dropdown and select “Classify using YOLOv5.” If your object is more specific than what is auto-labeled by YOLOv5, e.g. “coffee” instead of the generic “cup” class, you can modify the auto-generated labels.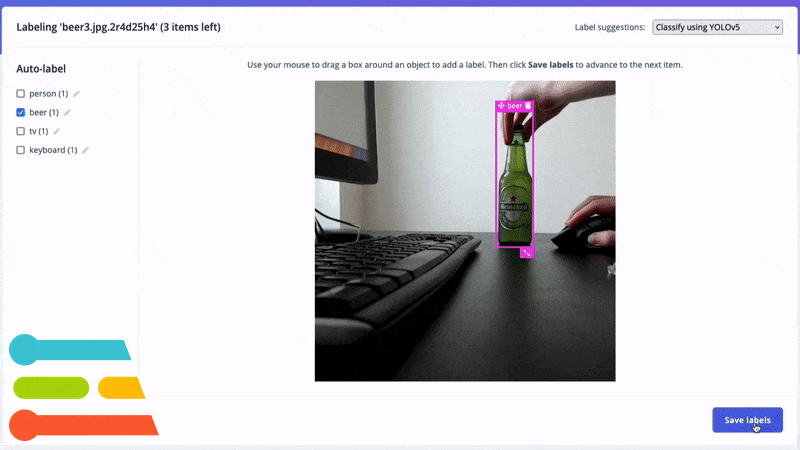
Classify using YOLO-Pro
To identify a greater number of objects than YOLOv5, a pre-trained YOLO-Pro object detection model has been made available in the labeling queue. This YOLO-Pro model was trained on 589 classes from the Open Images Dataset (11 of the 600 classes were left out due to having too few images). To use YOLO-Pro for labeling, click the Label suggestions dropdown and select “Classify using YOLO-Pro.” The model will automatically suggest bounding boxes and class labels for objects in your images, leveraging its extensive class library. If your object is more specific than what is auto-labeled by YOLO-Pro, e.g. “coffee” instead of the generic “cup” class, you can modify the auto-generated labels.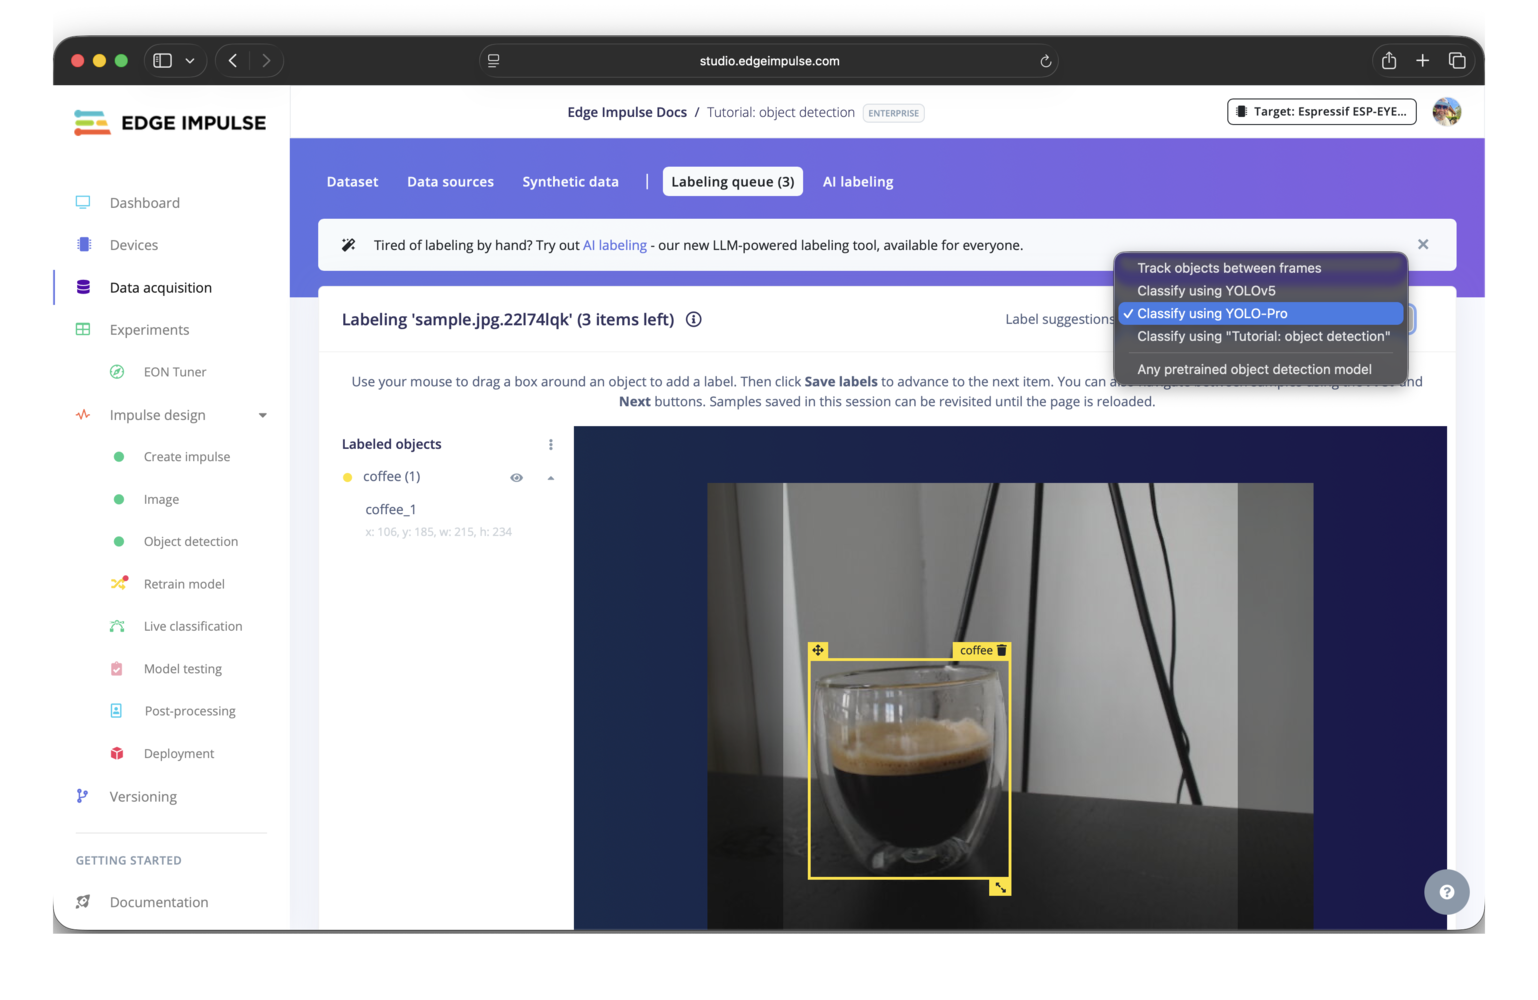
Classify using your current impulse
You can also use your own trained model to predict and label your new images. From an existing (trained) Edge Impulse object detection project, upload new unlabeled images from the Data Acquisition tab.This only works with models trained with MobileNet SSD transfer learning.
Classify using any pretrained object detection model
This only works with object detection models outputting bounding boxes. Centroid-based models (such as FOMO) won’t work. To label using a pretrained objection model:- Create a new (second) Edge Impulse project.
- Choose Upload your model.
- Select your model file (e.g. in ONNX or TFLite format), tell a bit about your model, and verify that the model gives correct suggestions via “Check model behavior”.
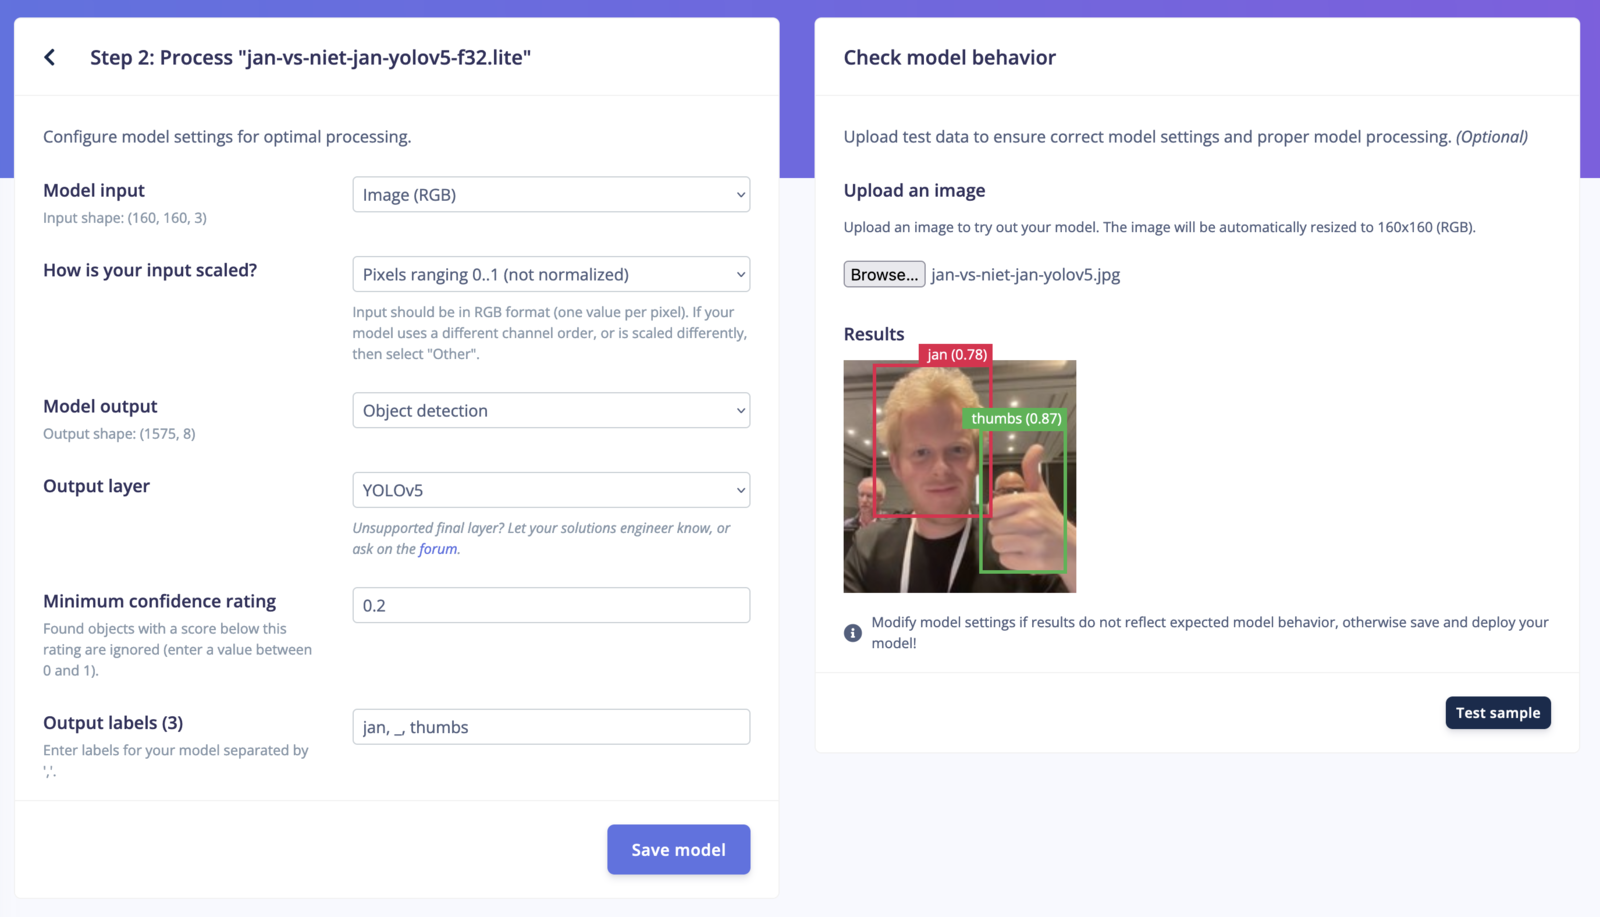
- Click Save model.
- Go to Data acquisition and upload your unlabeled dataset.
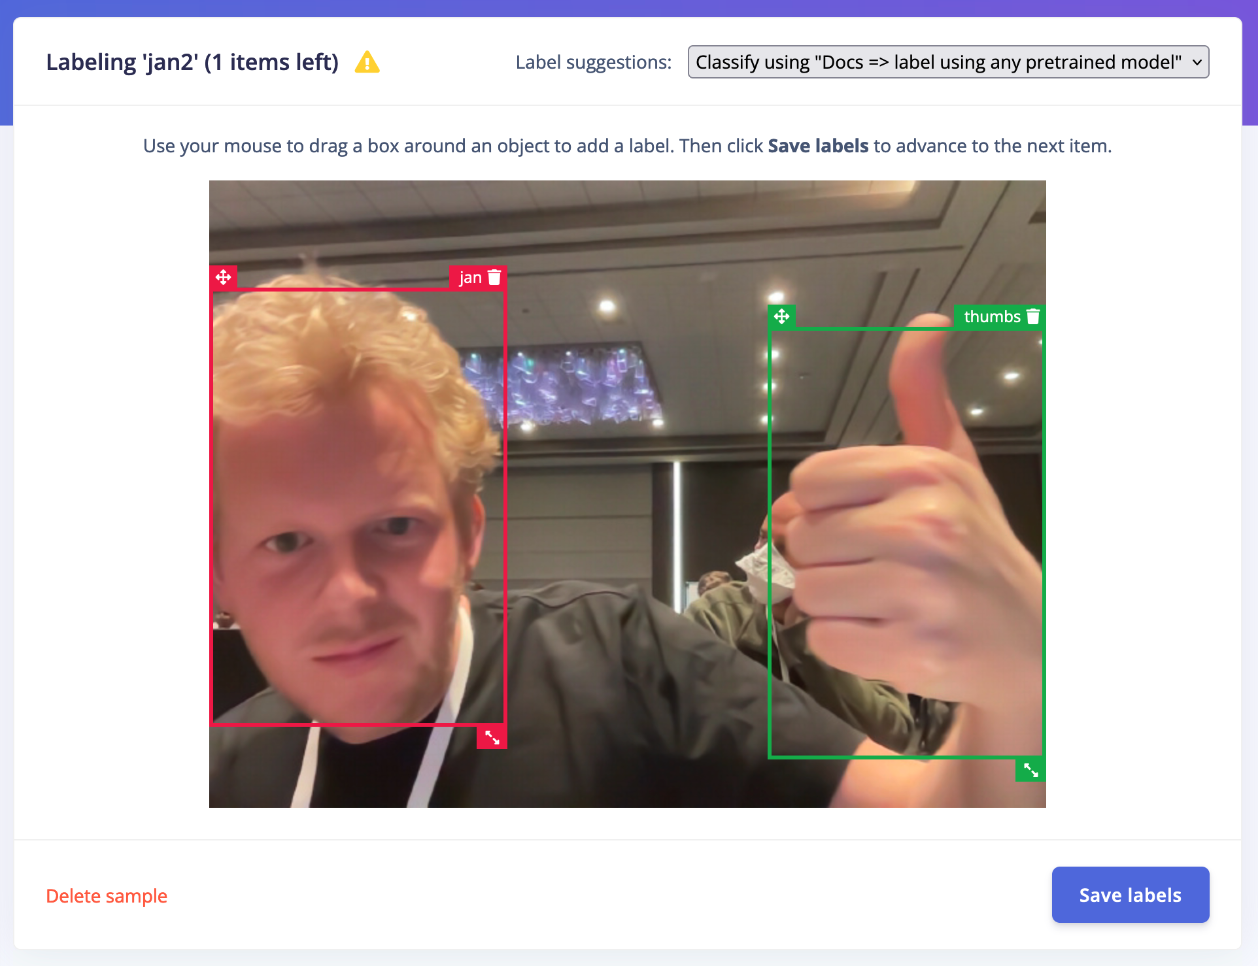
- Click Labeling queue, and under ‘Label suggestions’ choose “Classify using ‘your project name’”. You now get suggestions based on your uploaded model:
- When you’re done labeling, go to Data acquisition > Export data and export your (now labeled) dataset.
- Import the labeled dataset into your original project.