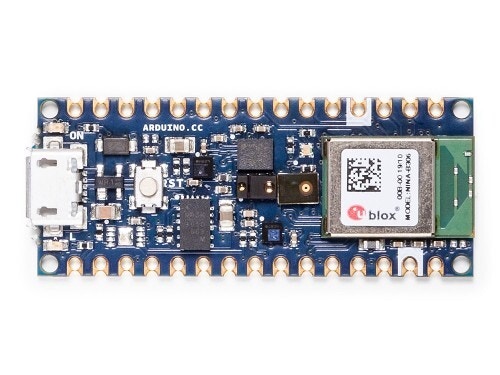
Arduino Nano 33 BLE Sense
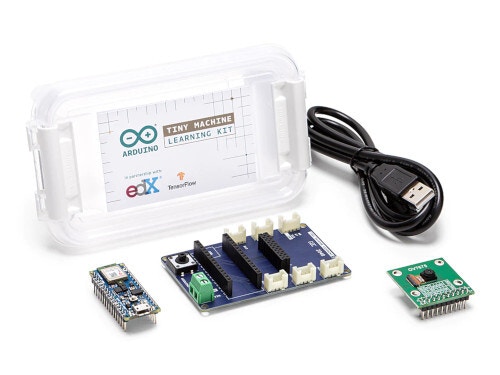
Arduino Tiny ML kit
Different Arduino Nano 33 BLE Sense VersionsArduino has two different versions (known as “revisions”) of the Arduino Nano 33 BLE Sense. Both use the nRF52840 as the processor, but the sensors are different. While the Edge Impulse firmware works with both versions, you need to be careful about choosing the correct version when working with the Arduino IDE.
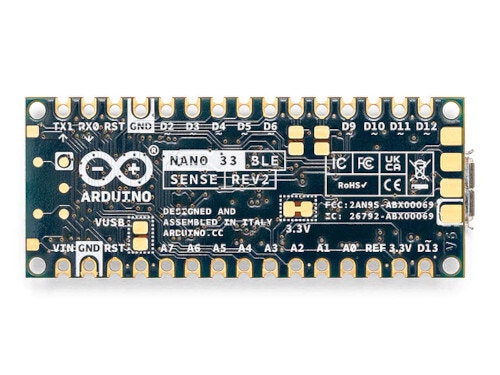
Arduino Nano 33 BLE Sense Rev2
Installing dependencies
To set this device up in Edge Impulse, you will need to install the following software:- Edge Impulse CLI.
- Arduino CLI.
- Here’s an instruction video for Windows.
- The Arduino website has instructions for macOS and Linux.
- On Linux:
- GNU Screen: install for example via
sudo apt install screen.
- GNU Screen: install for example via
Connecting to Edge Impulse
With all the software in place it’s time to connect the development board to Edge Impulse.1. Connect the development board to your computer
Use a micro-USB cable to connect the development board to your computer. Then press RESET twice to launch into the bootloader. The on-board LED should start pulsating to indicate this.
Press RESET twice quickly to launch the bootloader on the Arduino Nano 33 BLE Sense.
2. Update the firmware
The development board does not come with the right firmware yet. To update the firmware:- Download the latest Edge Impulse firmware, and unzip the file.
- Open the flash script for your operating system (
flash_windows.bat,flash_mac.commandorflash_linux.sh) to flash the firmware. - Wait until flashing is complete, and press the RESET button once to launch the new firmware.
3. Setting keys
From a command prompt or terminal, run:--clean.
Alternatively, recent versions of Google Chrome and Microsoft Edge can collect data directly from your development board, without the need for the Edge Impulse CLI. See this blog post for more information.
4. Verifying that the device is connected
That’s all! Your device is now connected to Edge Impulse. To verify this, go to your Edge Impulse project, and click Devices. The device will be listed here.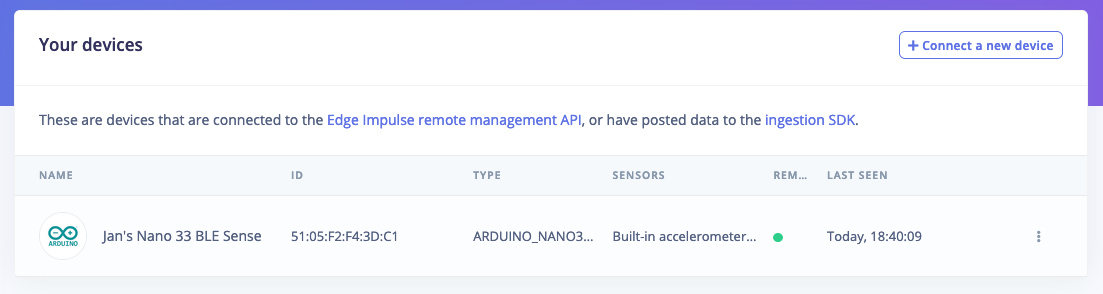
Device connected to Edge Impulse.
Next steps: building a machine learning model
With everything set up you can now build your first machine learning model with these tutorials:- Keyword spotting
- Sound recognition
- Image classification
- Object detection
- Object detection with centroids (FOMO)
Deploying back to device
One option to deploy your model is to use the Arduino library option on the Deployment page in your Edge Impulse Studio project. This will combine your model with your chosen processing block and automatically download an Arduino in a .zip file. In the Arduino IDE, select Sketch > Include Library > Add .ZIP Library… and select your downloaded .zip file. Once the library finishes installing, you can select File > Examples > _inferencing to see a list of available Arduino examples for the various supported boards. Notice that you have both Nano 33 Sense and Nano 33 Sense Rev2 options available. The examples for camera, microphone, and microphone_fusion under nano_ble33_sense will work for both boards. You must choose the correct board revision (nano_ble33_sense or nano_ble33_sense_rev2) for the accelerometer, accelerometer_continuous, or fusion examples, as the accelerometer and environmental sensors are different between the board revisions.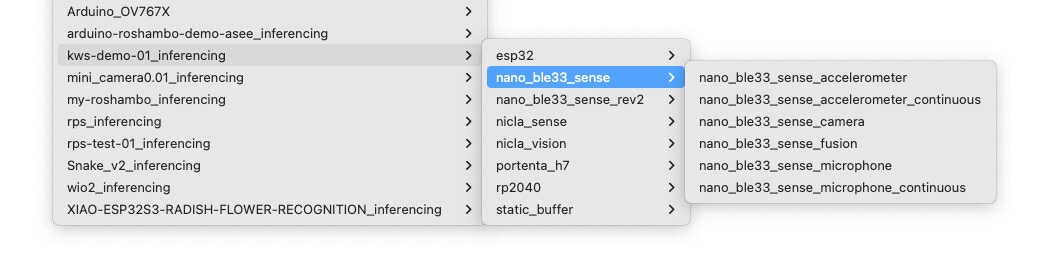
Edge Impulse inferencing examples in the Arduino IDE
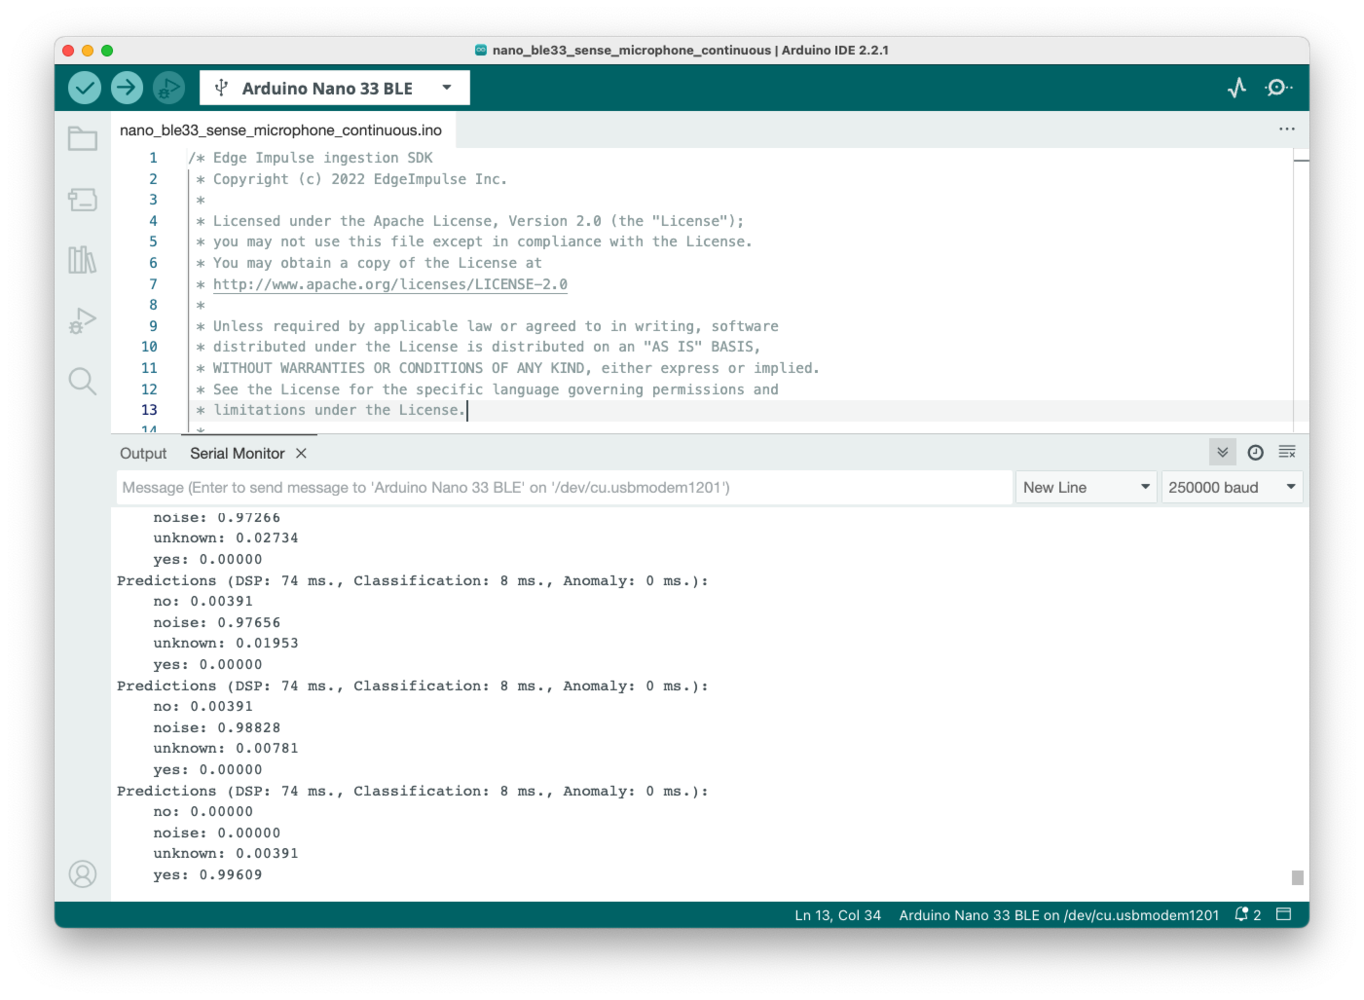
Inference results in Arduino IDE from Edge Impulse model
Troubleshooting
Bad CPU type in executable (Macbook M1)
It probably means you don’t have Rosetta 2 installed yet (which allows Intel-based apps to run on M1 chips). The error looks like the following:Connecting an off-the-shelf OV7675 camera module
You will need the following hardware:- Arduino Nano 33 BLE Sense board with headers.
- OV7675 camera module.
- Micro-USB cable.
- Solderless breadboard and female-to-male jumper wires.
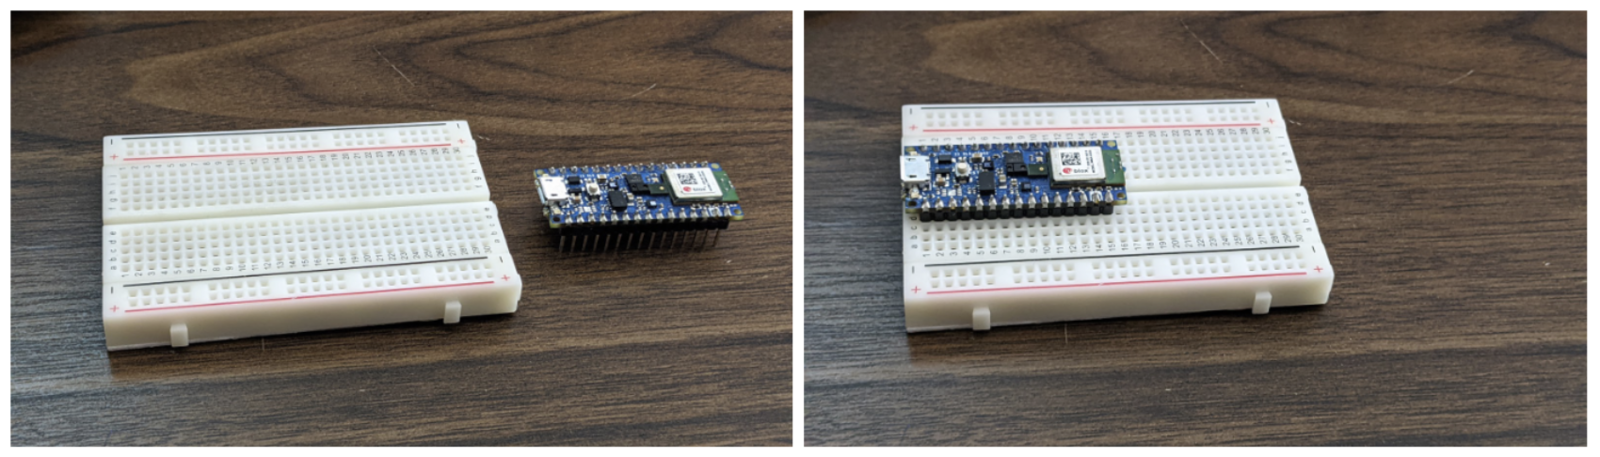
Arduino Nano 33 BLE Sense board with headers inserted into a solderless breadboard.
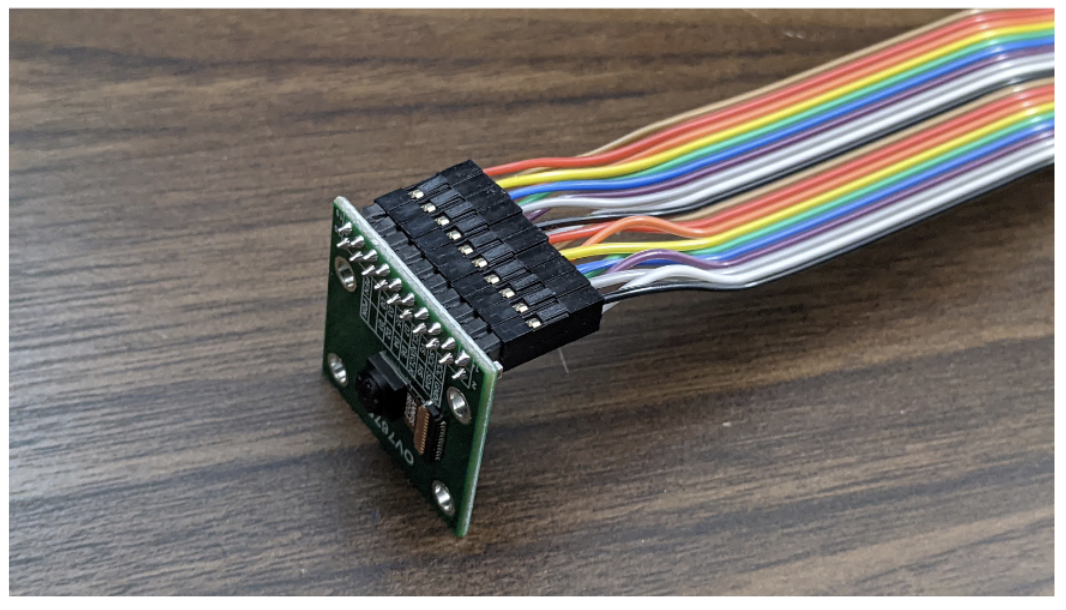
OV7675 camera module with female headers connected.
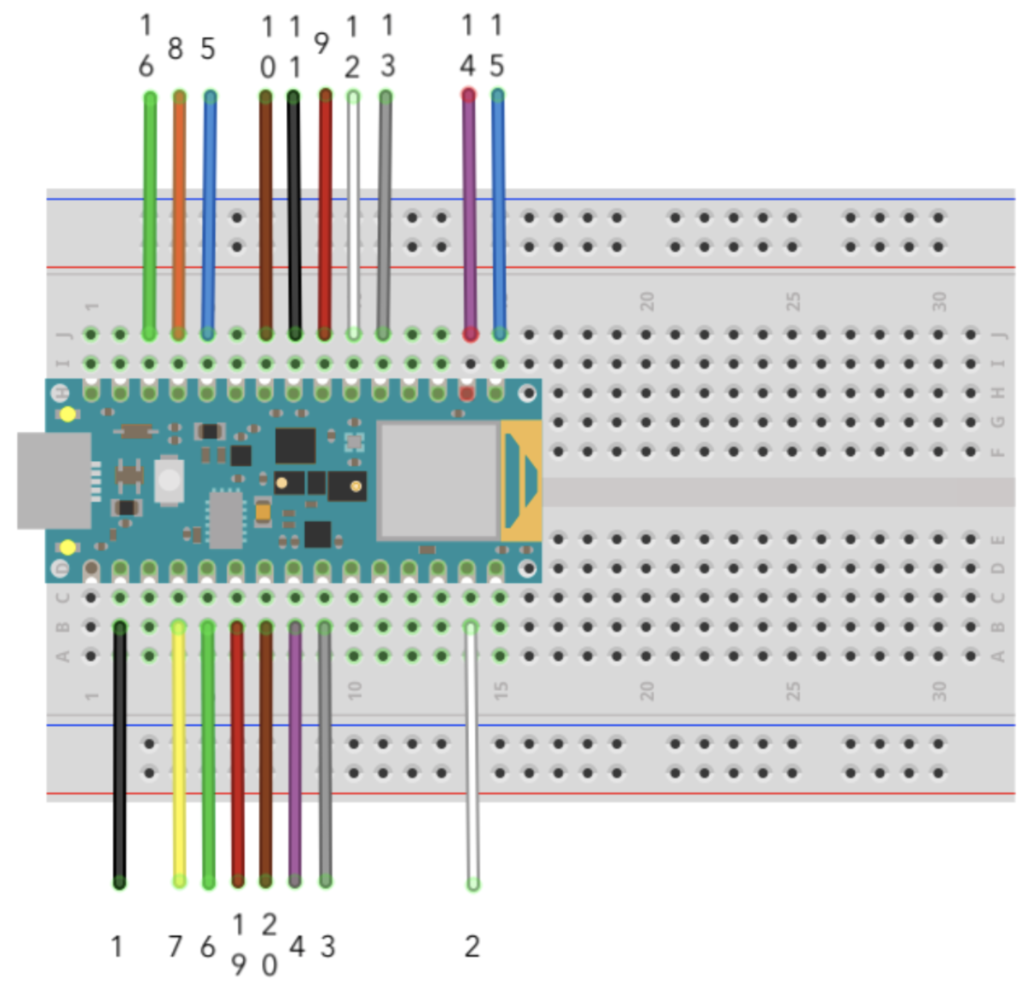
Wiring diagram showing the OV7675 connections to Arduino Nano 33 BLE Sense.
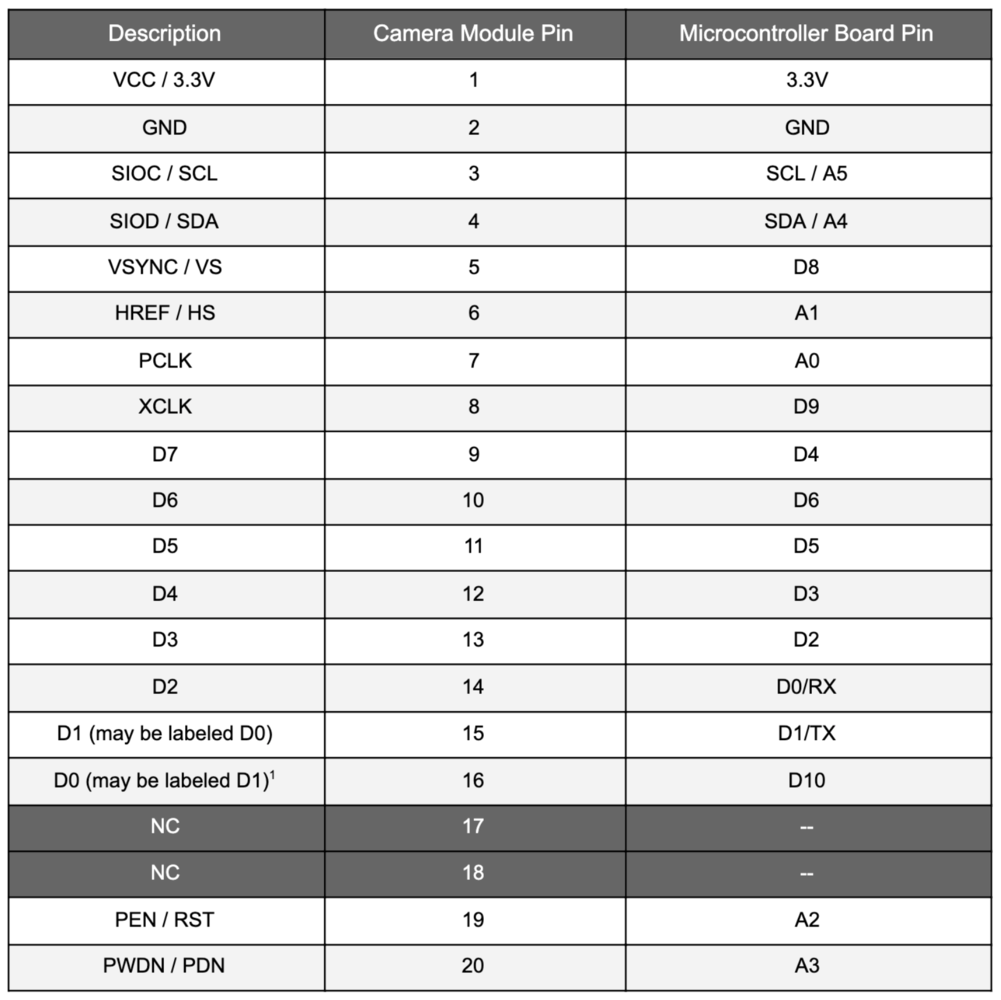
Table with connections between the OV7675 camera module pins and the Arduino Nano 33 BLE Sense.
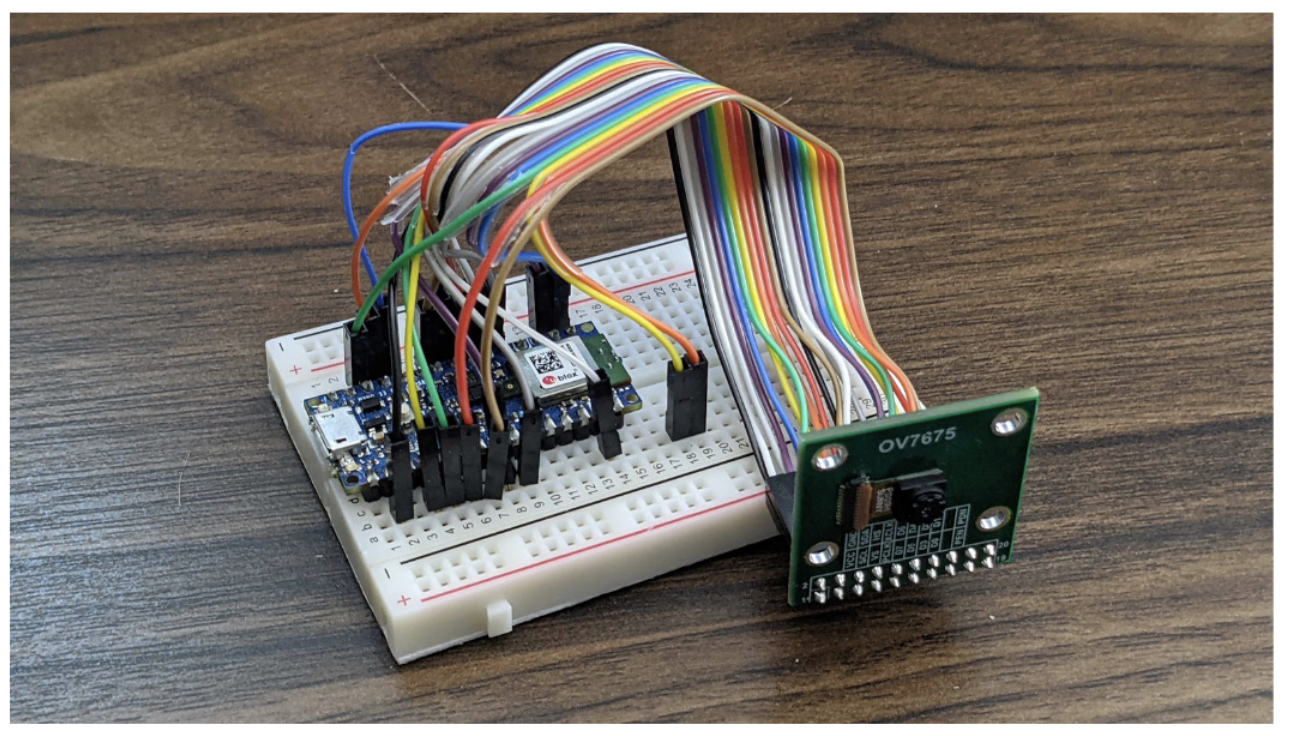
Showing all connections between the OV7675 camera module and the Arduino Nano 33 BLE Sense.