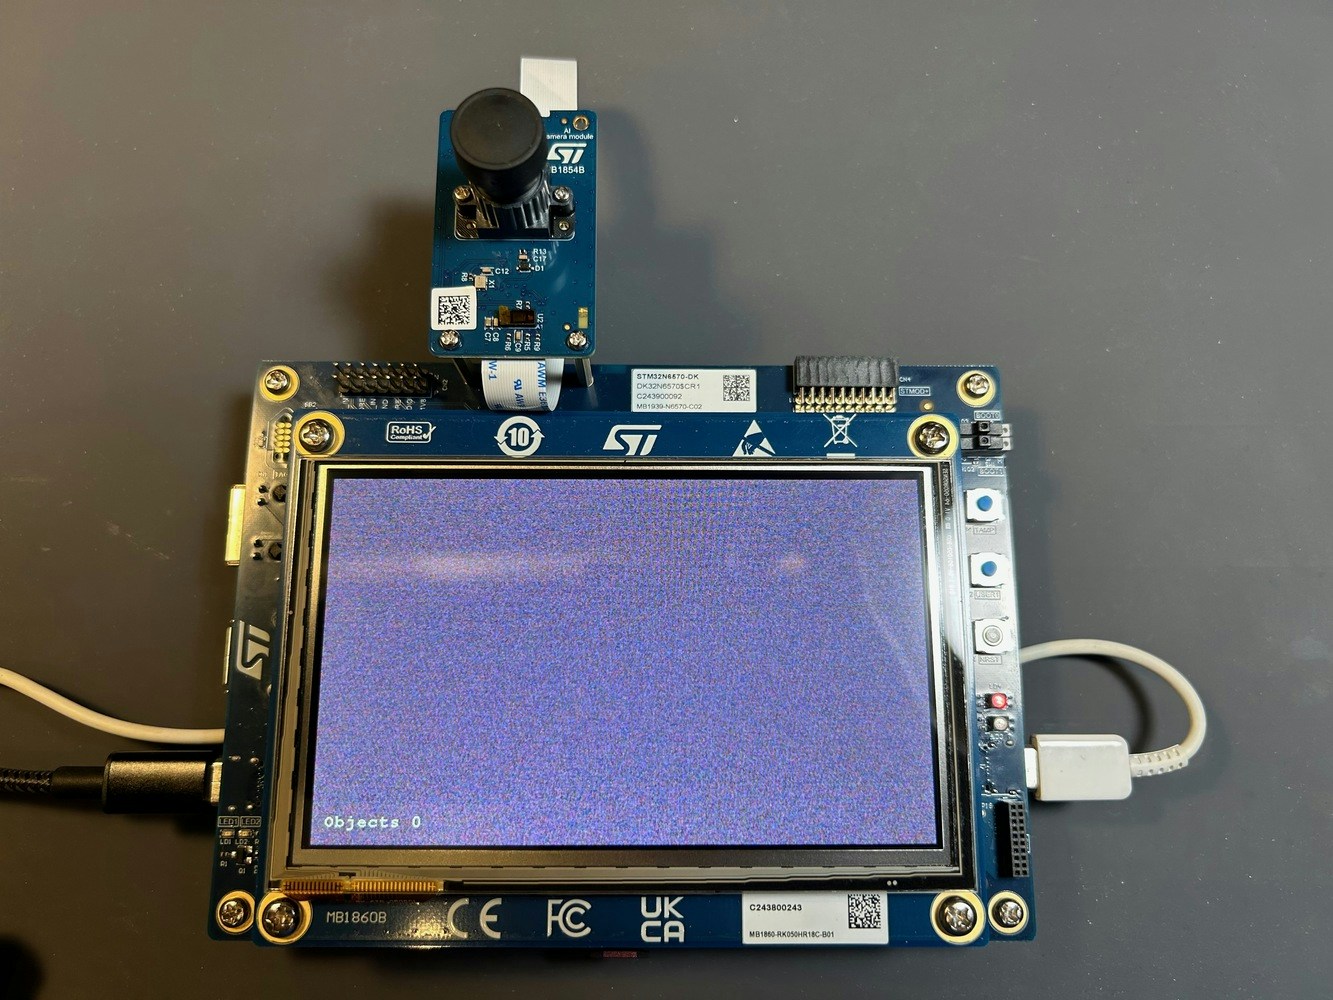
STM32N6570-DK
Installing dependencies
To set this device up in Edge Impulse, you will need to install the following software:- Edge Impulse CLI.
- STM32 Cube Programmer. The firmware provided by Edge Impulse uses the CLI abilities of this program. Please add the program’s location to your PATH using your operating system instructions.
1. Connect the development board to your computer
Use a USB-C cable to connect the development board to your computer to the USB-C connectorCN6 marked with STLINK-V3EC. Depending on your connection you may need additional power which can be added via the USB-C connection CN8 marked USB1.
- If you are powering the board with just
CN6then place jumperJP2on the 2 pins on the top (1-2:5V_STLK). - If you are powering the board with
CN6andCN8then place jumperJP2on the 2 pins in the middle (3-4:5V_USB_STLK).

STM32N6570-DK Connection for Programming using CN6 and CN8 with JP2 on pins 3-4.
2. Update ST-LINK firmware
If you have a new kit you may need to update the firmware of the onboard ST-LINK. Open the STM32 Cube Programmer application and follow the instructions found here on the ST website. Typically, you only need to click a few buttons to easily update the firmware on the ST-LINK device.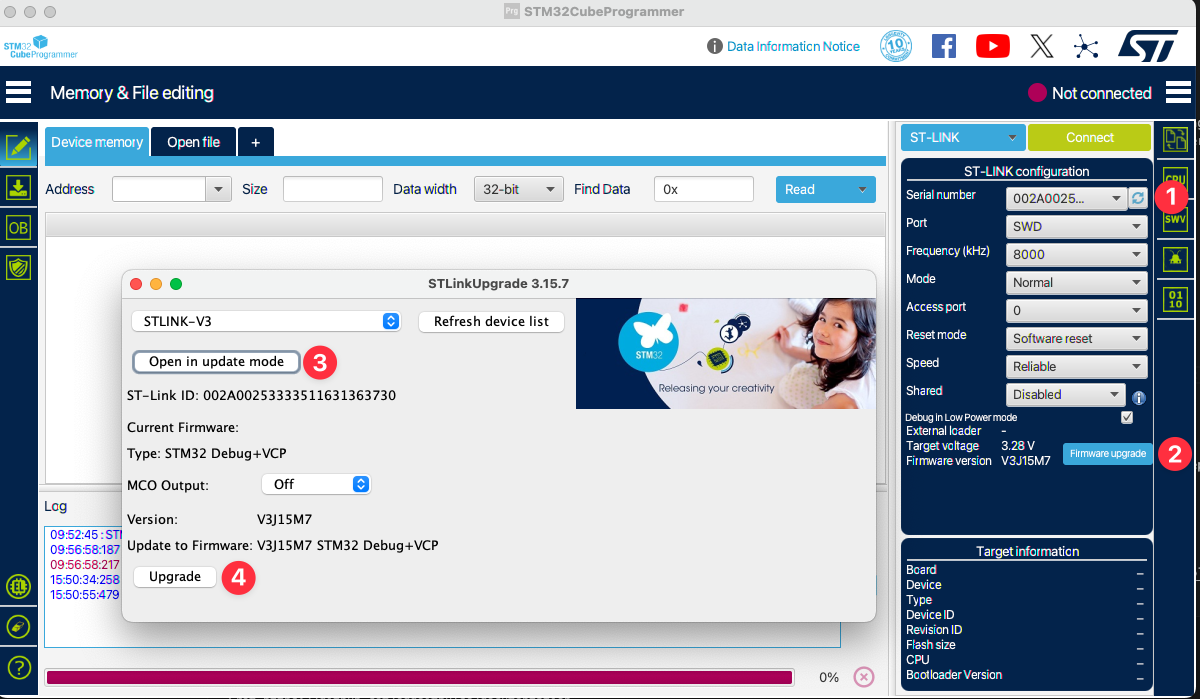
ST-LINK Firmware Update
3. Update the prebuilt firmware binaries
Three binaries must be programmed in the board external flash using the following procedure:- Download the default Edge Impulse firmware, model, and bootloader here. See the Readme and the scripts for the appropriate commands to flash the three files.
- Switch
BOOT1on the board switch to right position and reset the board using buttonB1labeledNRST - Program
ai_fsbl_cut_2_0.hex(First stage bootloader)
- Program
network_data.hex(params of the networks; To be changed only when the network is changed)
- Program
firmware-st-stm32n6.bin(firmware application)
- Switch
BOOT1on the board to left position and reset the board using buttonB1labeledNRST
network_data.hex and the firmware-st-stm32n6.bin need to be flashed. The bootloader only needs to be programmed once.
Please visit the STM32N6 Series site for further programming information
4. Connecting CLI to Development Kit
To start acquiring data from the device open a command prompt or terminal, run:--clean.
Only Object Detection projects using FOMO or YOLOV5 are supported with the N6 on Edge Impulse.
5. Verifying that the device is connected
That’s all! Your device is now connected to Edge Impulse. To verify this, go to your Edge Impulse project, and click Devices. The device will be listed here.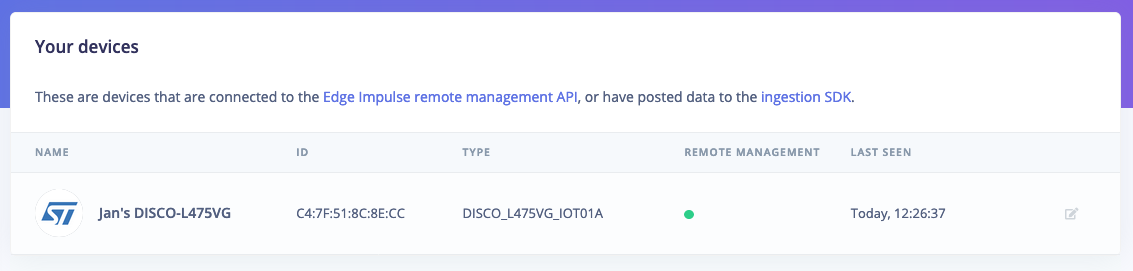
Device connected to Edge Impulse.
Next steps: building a machine learning model
With everything set up you can now build your first machine learning model with these tutorials:Deploying back to device
There are two deployment options available for the STM32N6. If you are using the dev kit with the default connections you may get a fully built binary for your kit using theST STM32N6 option. If you are wanting to work with source code and use on your own device please select the ST Neural-ART library deployment option. The ST Neural-ART option will generate source code that will use the ST accelerator found on the N6 series.
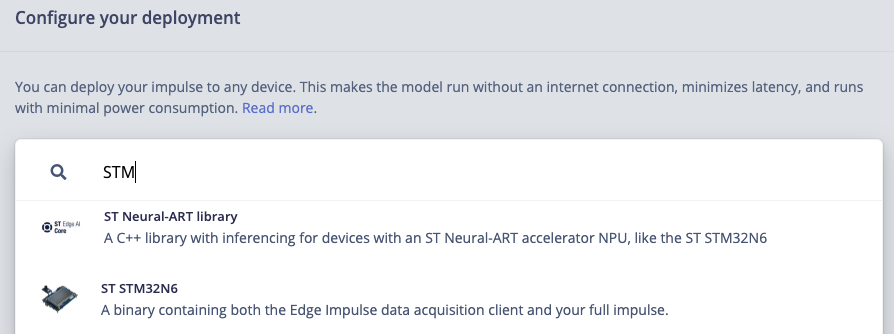
STM32N6 Deployment Options
Troubleshooting
Common Error Codes and Resolution Steps
Errors during flashing:- Fully remove power from the board and then reconnect power to the board. Do not rely on the reset button to clear this error.
- USB C Cables: Inspect USB cables and swap with ones that have both power and data lines. Attempt again with certified USB cables.