
Multi-label
Detecting key events in multi-label samples
When working with time-series data labeled using the multi-label format, detecting short-duration or critical events (e.g. tamper detection, fall detection or short noises among others) is possible. Edge Impulse provides flexible strategies for assigning labels to windows of data during training and inference to ensure the events represented. During the data acquisition process, it’s important to understand the available labeling strategies. Choosing the right approach for handling multi-label events ensure accurate detections. The labeling strategies are selected when designing your impulse in the Create Impulse screen. You need to define your appropriate strategy to detect multi-label events in your data.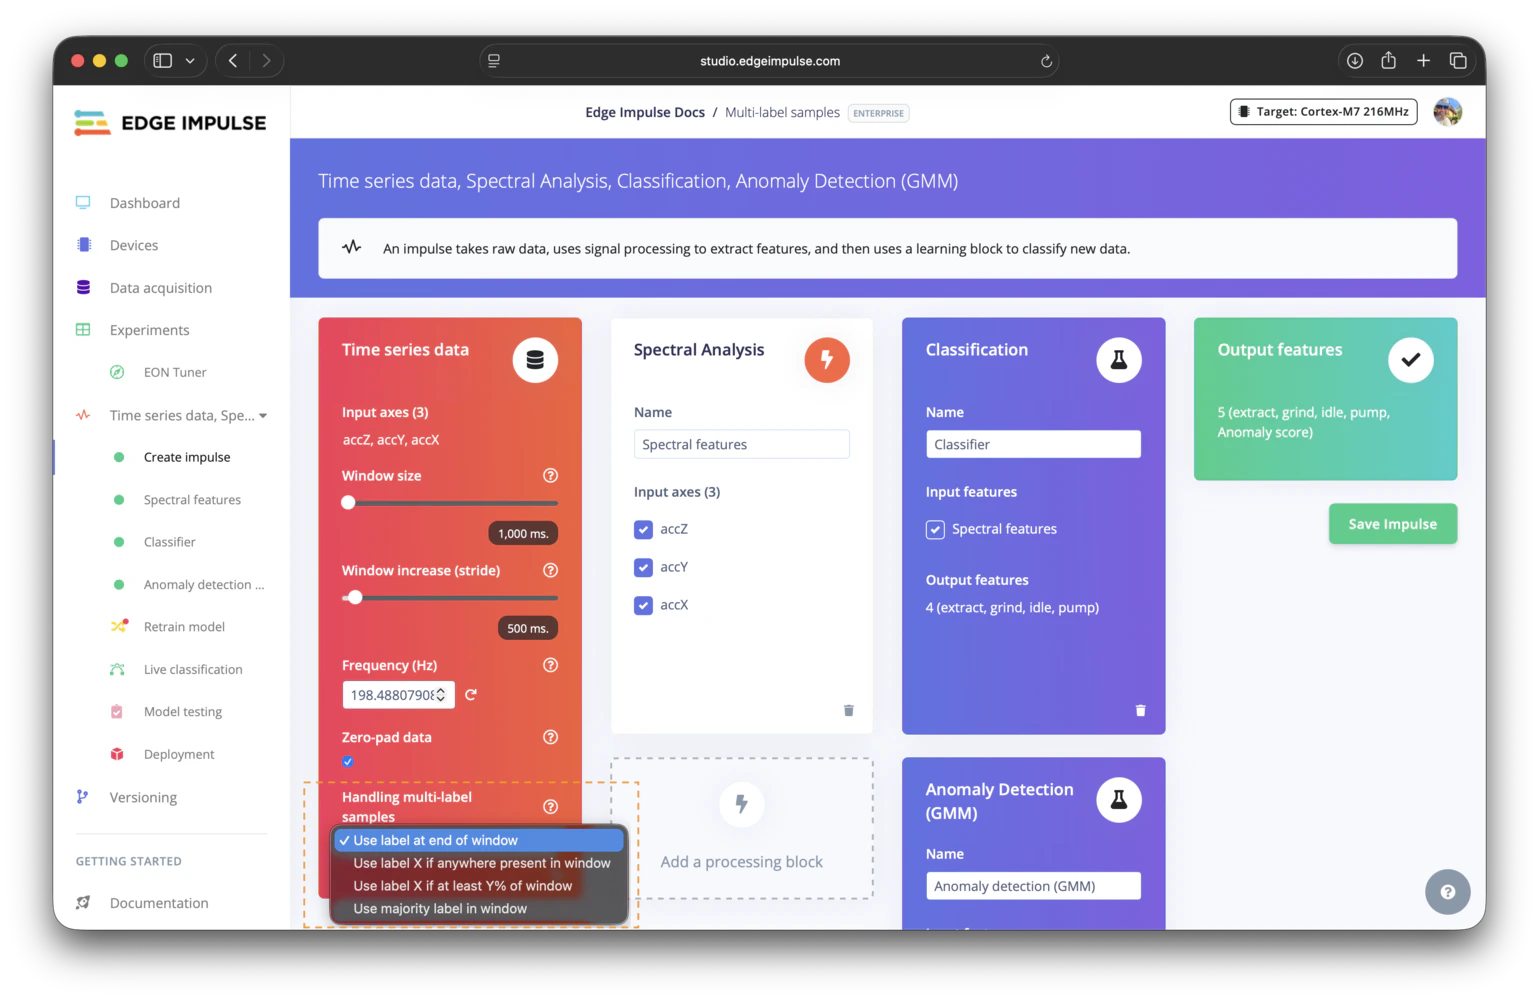
Handling multi-label samples option
Choosing your window labeling strategy
- Use label at the end of the window for transitions and state-based classification.
- Use label X if anywhere present in the window for rare, short, or safety-critical events.
- Use label X if at least Y% of window when an event should be present for a minimum duration before it wins the label.
- Use majority label in window when the dominant activity inside the window is the best training target.
Use label at the end of the window
This strategy assigns the label that is active at the end of each window as the label for the entire window. It works well for scenarios where the primary interest lies in the resulting state or activity of the window such as recognizing sustained motions or transitions. If a sample transitions fromidle to running within a window, and the last timestamp in the window corresponds to running, the window will be labeled as running.
Use label X if anywhere present in the window
This strategy assigns a label to the window if a specific event label is present anywhere within the windows’ duration (e.g.tamper, fall, etc). It is particularly useful for detecting short or sparse events that may not occupy the full window but are critical to capture when they occur.
With this option, you can configure which label(s) to prioritize. If the selected label is found within any part of the window, the window will be assigned to that label, even if the short event occurs alongside other labels.
Use label X if anywhere present in the window
Use label X if at least Y% of window
This strategy is useful when an event should occupy a meaningful portion of the window before it overrides the surrounding context. You choose the label or labels to monitor, then set a minimum percentage threshold for how much of the window one of those labels must cover. For example, if you monitorfall with a threshold of 30%, a window is only labeled as fall if at least 30% of the window duration is labeled fall. This helps avoid assigning the event label to windows where it only appears as a very short blip.
Use this mode when short label flickers are common, or when a rare event should be present long enough to be considered meaningful for training.
Use majority label in window
This strategy assigns the label that occupies the largest portion of the window. It is useful when you want each window to represent the dominant activity rather than the final state or a prioritized short event. For example, if most of a window is labeledwalking and the final part is labeled standing, the window is labeled walking as long as walking covers the largest share of the samples in that window.
Use this mode when labels can change within a window but the dominant label is the most meaningful training target.
Uploading multi-label samples
With the CSV Wizard
If your dataset is in the CSV format and contains a label column, the CSV Wizard is probably the easiest method to import your multi-label data. For example:
Multi-label workflow
With the Edge Impulse info.labels description file
The other way is to create an info.labels file for your dataset. Edge Impulse will automatically detect this file when you upload your dataset and will use it to set the labels.
The info.labels file is a JSON file that contains the metadata of your dataset, including the labels. See the File example section in the Edge Impulse labels documentation for more details on the file structure. Ensure you click on the “multi-label” tab when viewing the file examples.
Tip: you can export a public project dataset that uses the multi-label feature to understand how the
info.labels is structured.Check the Additional resources section for an example multi-label public project.info.labels file available, to upload it, you can either use the Studio uploader or the CLI uploader.
Using the Studio uploader
The Studio Uploader will automatically detect theinfo.labels file:
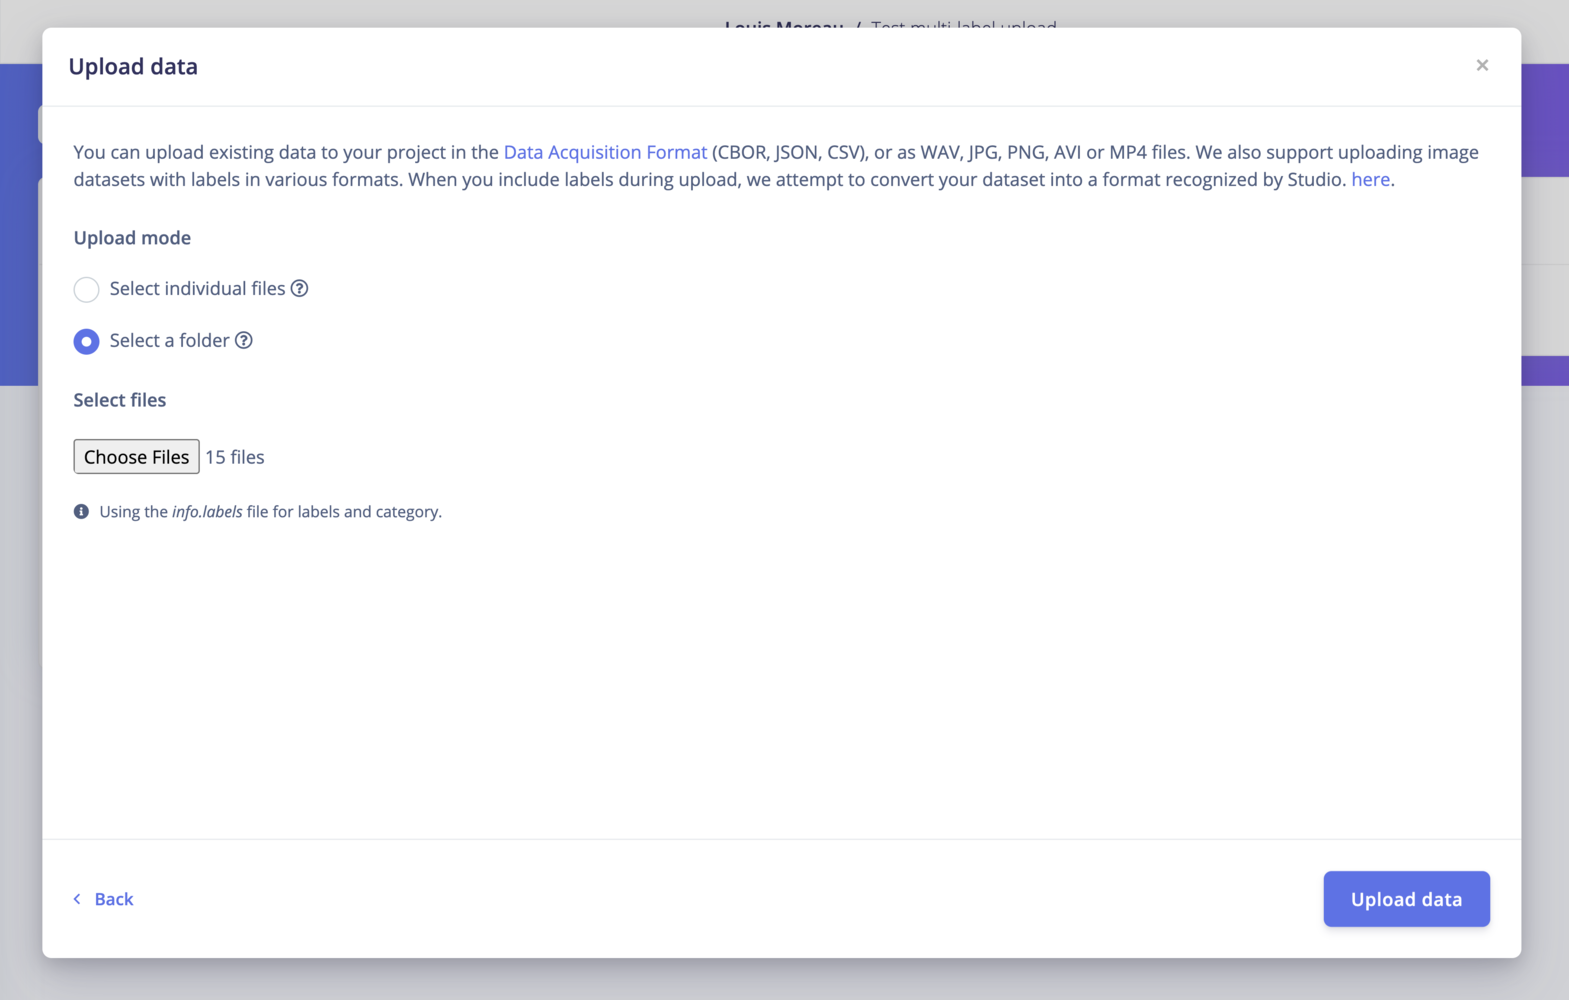
Studio Uploader multi-label dataset
Using the CLI Uploader
With the Edge Impulse structured_labels.labels description file
If you want to use the Ingestion API, you will need to use the structured_labels.labels format.
The structured_labels.labels file is a JSON file that contains the metadata of your dataset, including the labels. See the File example section in the Edge Impulse structured labels documentation for more details on the file structure.
After creating a structured labels file, you can run the following command:
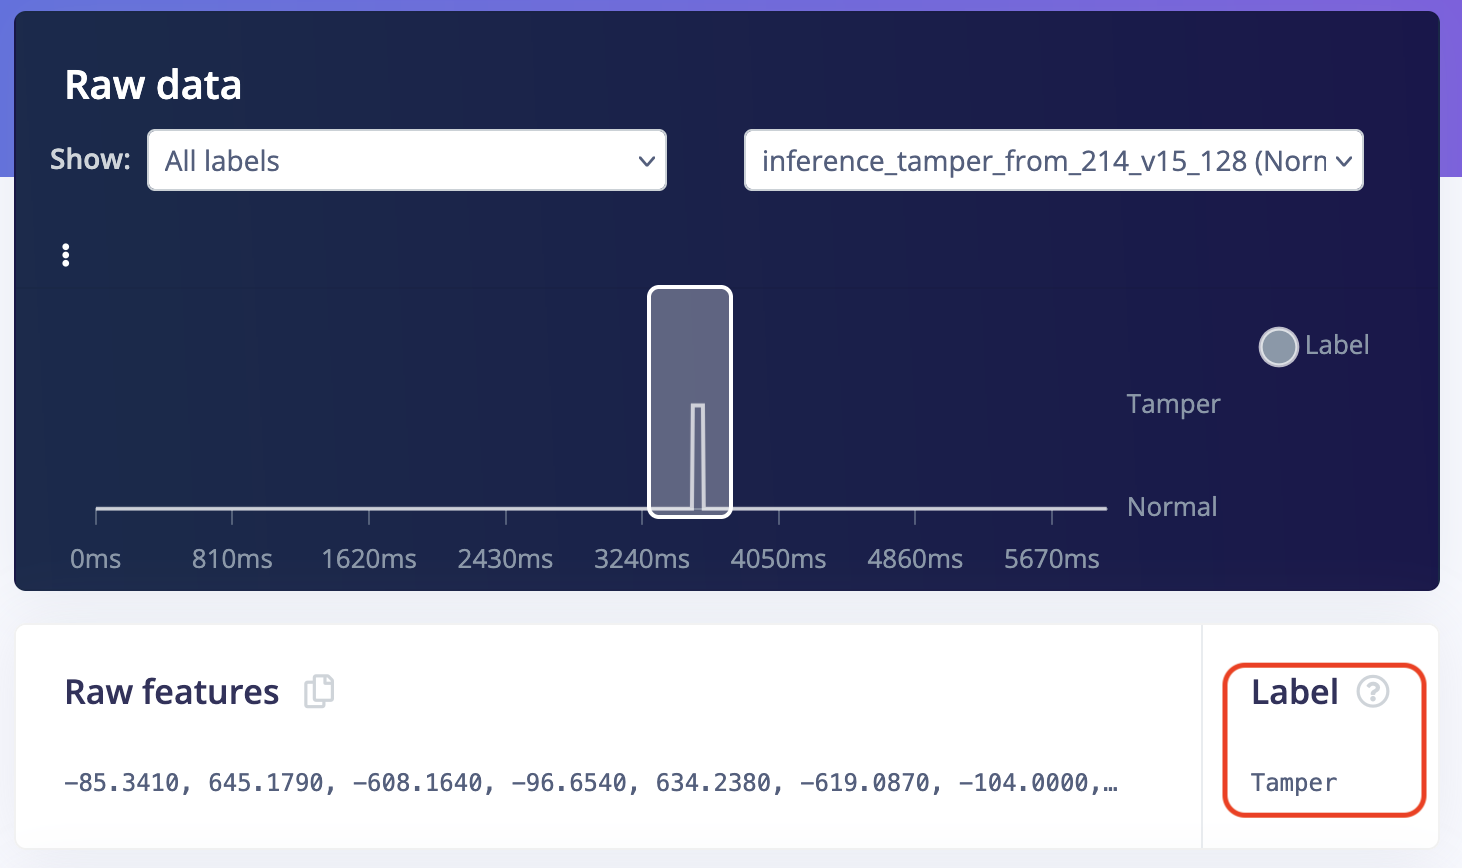
Visualizing multi-label samples
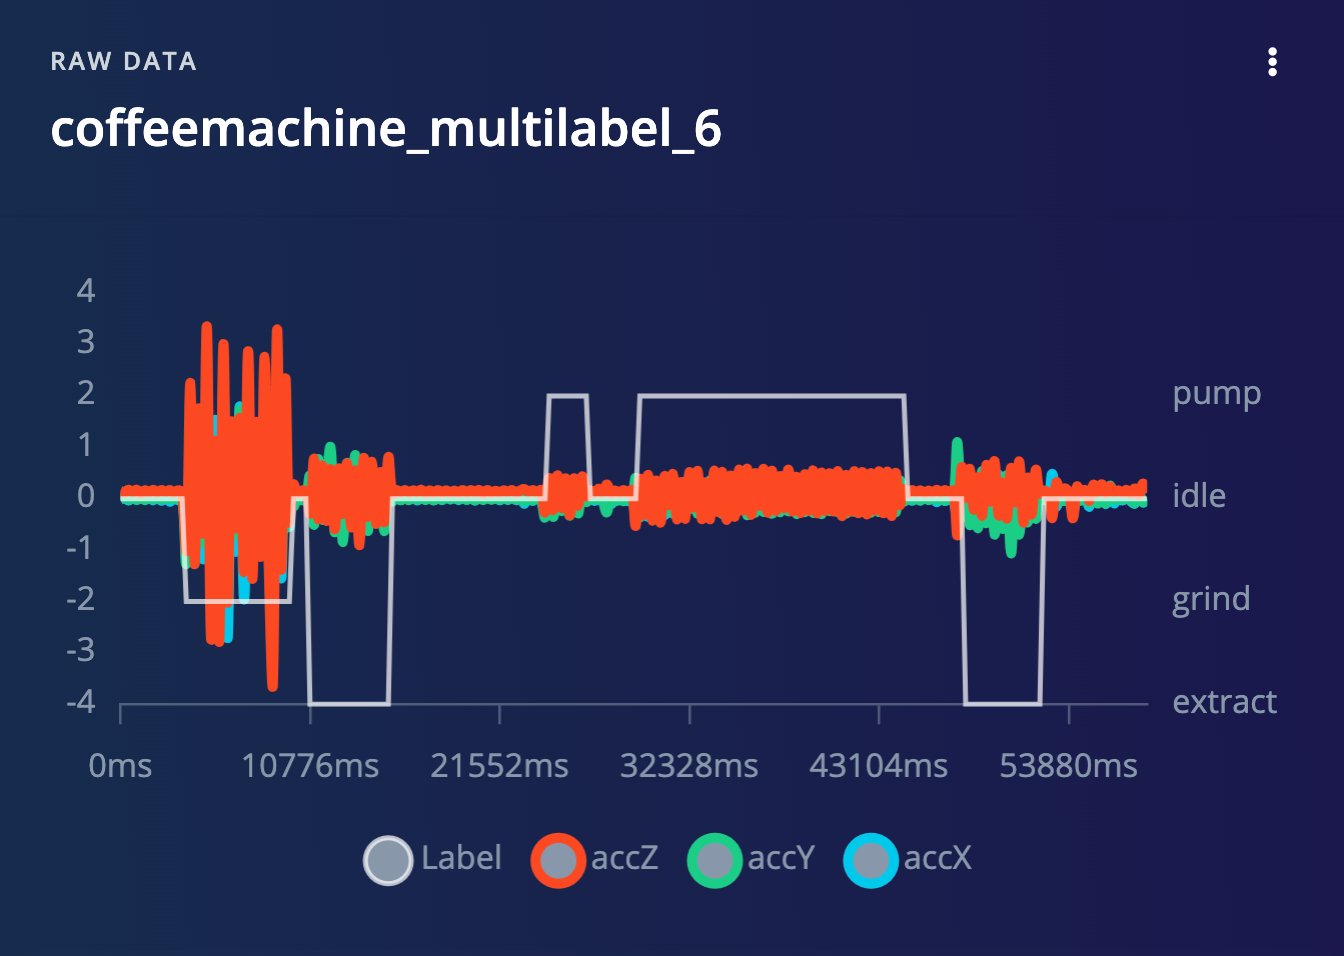
Multi-label sample preview
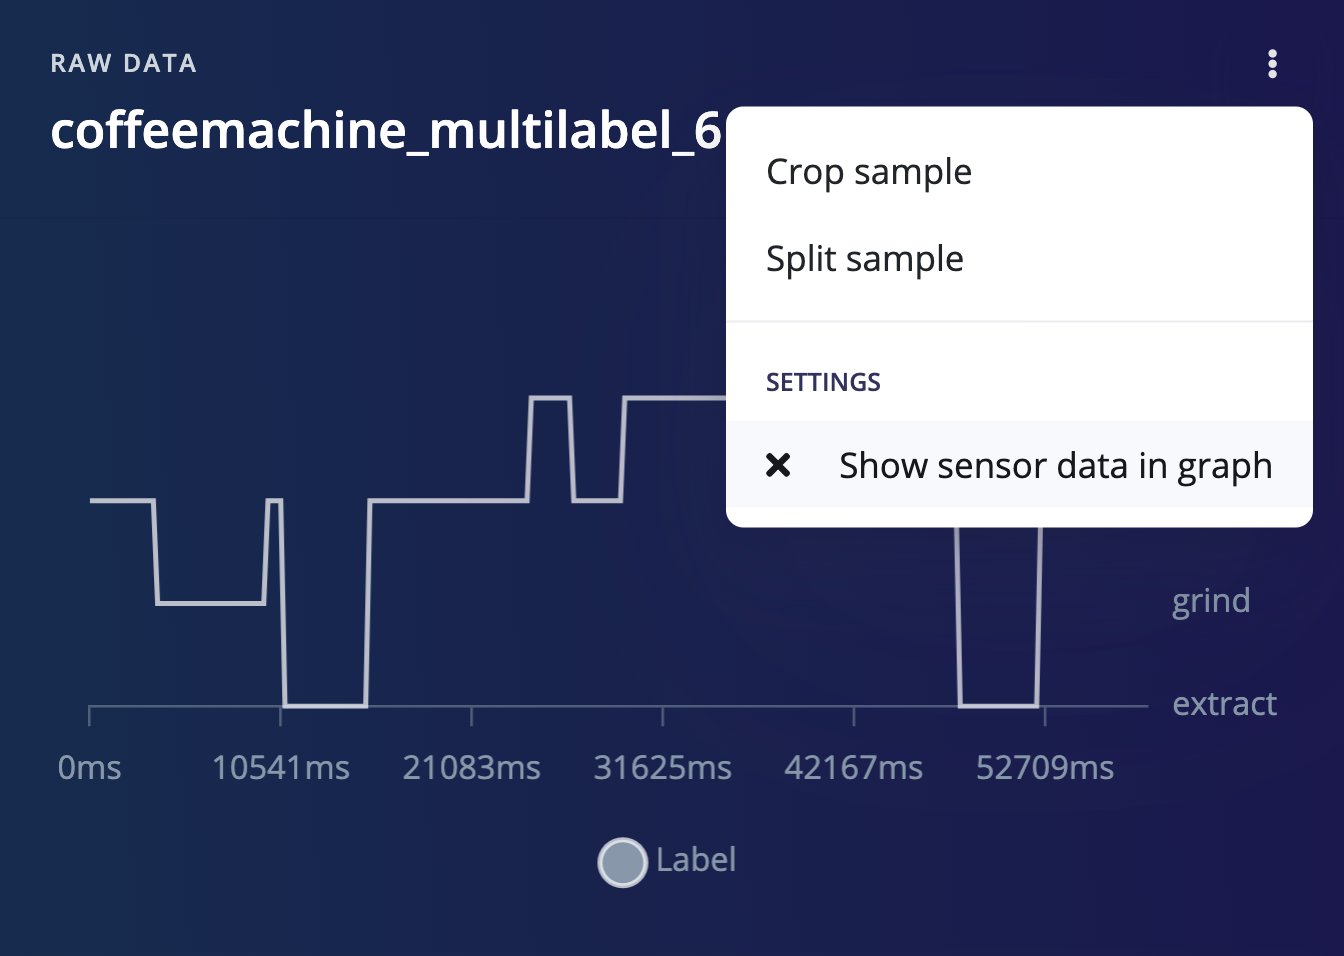
Multi-label sample preview - Hide sensors
Editing multi-label samples
To edit the labels using the UI, click ⋮ -> Edit labels. The following model will appear: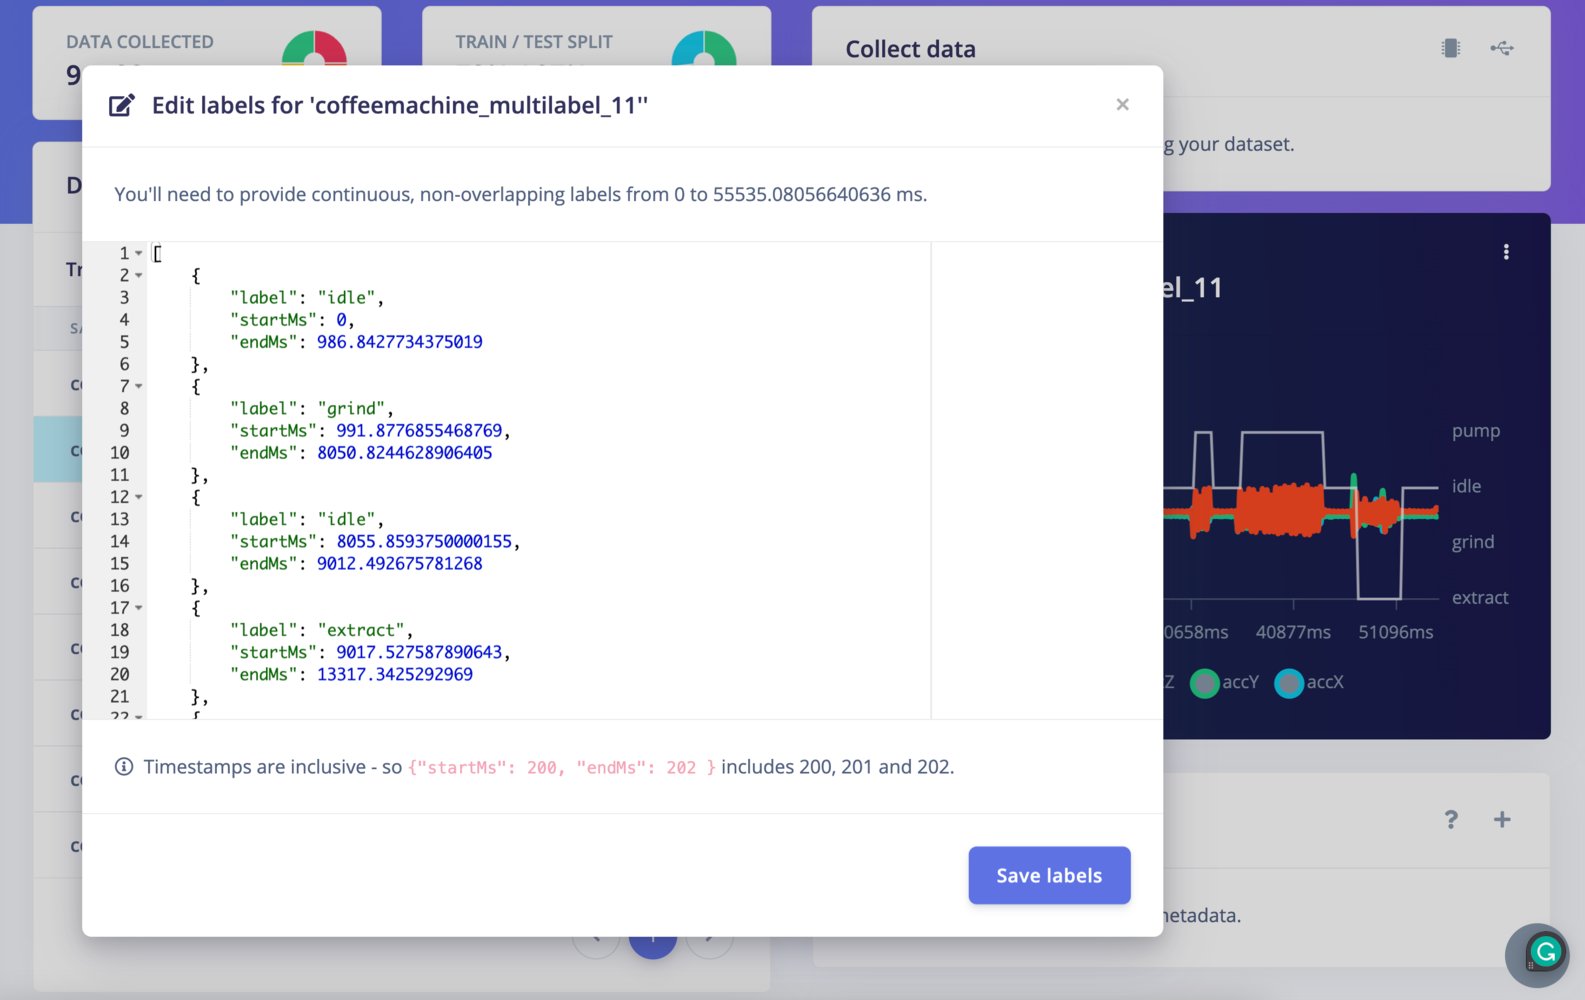
Edit labels
Classifying multi-label data
In the Live classification tab, you can classify your multi-label test samples:
Test multi-label sampled
Limitations
- Labeling UI is available but is only text-based.
- Overlapping labels are not supported
- The entire data sample needs to have a label, you cannot leave parts unlabeled.