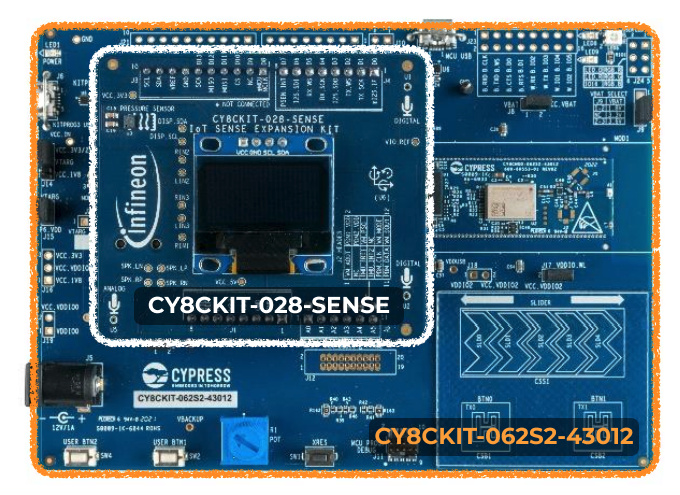
Infineon IoT sense expansion kit (CY8CKIT-028-SENSE) attached to Infineon CY8CKIT-062S2 Pioneer Kit
Installing dependencies
To set this device up with Edge Impulse, you will need to install the following software:- Infineon CyProgrammer. A utility program we will use to flash firmware images onto the target.
- The Edge Impulse CLI which will enable you to connect your CY8CKIT-062S2 Pioneer Kit directly to Edge Impulse Studio, so that you can collect raw data and trigger in-system inferences.
Updating the firmware
Edge Impulse Studio can collect data directly from your CY8CKIT-062S2 Pioneer Kit and also help you trigger in-system inferences to debug your model, but in order to allow Edge Impulse Studio to interact with your CY8CKIT-062S2 Pioneer Kit you first need to flash it with our base firmware image.1. Download the base firmware image
Download the latest Edge Impulse firmware, and unzip the file. Once downloaded, unzip it to obtain thefirmware-infineon-cy8ckit-062s2.hex file, which we will be using in the following steps.
2. Connect the CY8CKIT-062S2 Pioneer Kit to your computer
Use a micro-USB cable to connect the CY8CKIT-062S2 Pioneer Kit to your development computer (where you downloaded and installed Infineon CyProgrammer).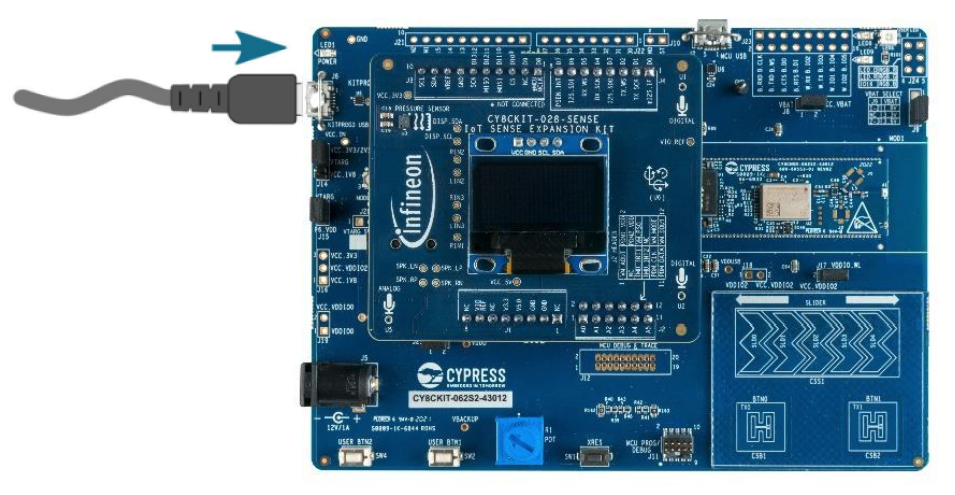
Connecting the CY8CKIT-062S2 Pioneer Kit to your computer
3. Load the base firmware image with Infineon CyProgrammer
You can use Infineon CyProgrammer to flash your CY8CKIT-062S2 Pioneer Kit with our base firmware image. To do this, first select your board from the dropdown list on the top left corner. Make sure to select the item that starts withCY8CKIT-062S2-43012:

Connecting the CY8CKIT-062S2 Pioneer Kit to Infineon CyProgrammer
firmware-infineon-cy8ckit-062s2.hex). You can now press the Connect button to connect to the board, and finally the Program button to load the base firmware image onto the CY8CKIT-062S2 Pioneer Kit.
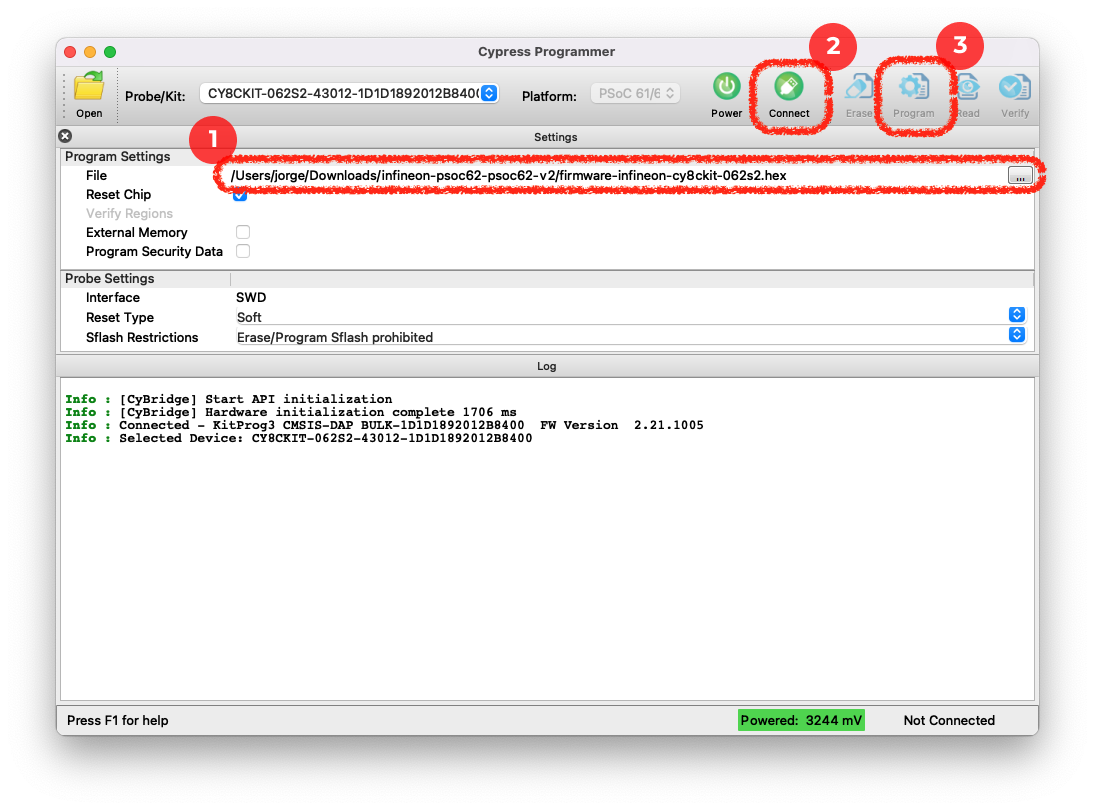
Flashing the CY8CKIT-062S2 Pioneer Kit base image
Connecting to Edge Impulse
With all the software in place, it’s time to connect the CY8CKIT-062S2 Pioneer Kit to Edge Impulse.1. Connect the development board to your computer
Use a micro-USB cable to connect the development board to your computer.2. Setting keys
From a command prompt or terminal, run:--clean.
Alternatively, recent versions of Google Chrome and Microsoft Edge can collect data directly from your development board, without the need for the Edge Impulse CLI. See this blog post for more information.
3. Verifying that the device is connected
That’s all! Your device is now connected to Edge Impulse. To verify this, go to your Edge Impulse project, and click Devices on the left sidebar. The device will be listed there:
Device connected to Edge Impulse.