1. Prerequisites
For this tutorial you’ll need a Sony’s Spresense with camera add-on. If you don’t have a device yet, you can also upload an existing dataset through the Uploader. After this tutorial you can then deploy your trained machine learning model as a C++ library and run it on your device by following the Run on Sony Spresense tutorial. You also may want to create a new Edge Impulse project for this tutorial, or use an existing one. You can create a new project on your project dashboard2. Building a dataset
In this tutorial we’ll build a model that can distinguish between two objects in your house - we’ve used a plant and a lamp, but feel free to pick two other objects. To make your machine learning model see it’s important that you capture a lot of example images of these objects. When training the model these example images are used to let the model distinguish between them. Because there are (hopefully) a lot more objects in your house than just lamps or plants, you also need to capture images that are neither a lamp or a plant to make the model work well. Capture the following amount of data - make sure you capture a wide variety of angles and zoom levels:- 50 images of a lamp.
- 50 images of a plant.
- 50 images of neither a plant nor a lamp - make sure to capture a wide variation of random objects in the same room as your lamp or plant.
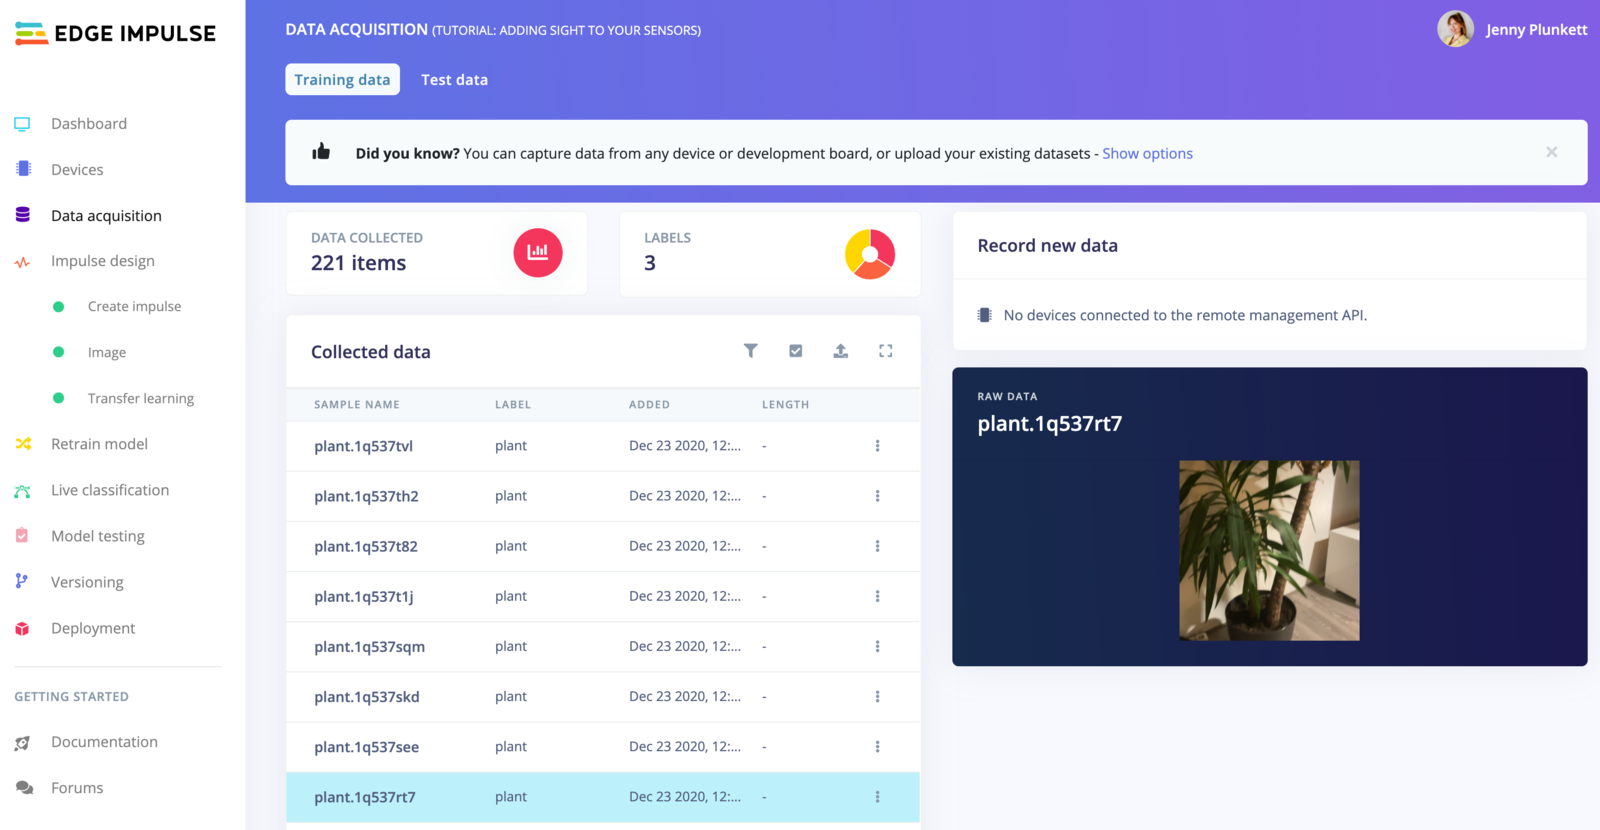
Data acquisition showing images of a plant. Data is automatically split in a training and a test set when collecting, thus showing the 221 items in the training set here.
3. Designing an impulse
With the training set in place you can design an impulse. An impulse takes the raw data, adjusts the image size, uses a preprocessing block to manipulate the image, and then uses a learning block to classify new data. Preprocessing blocks always return the same values for the same input (e.g. convert a color image into a grayscale one), while learning blocks learn from past experiences. For this tutorial we’ll use the ‘Images’ preprocessing block. This block takes in the color image, optionally makes the image grayscale, and then turns the data into a features array. If you want to do more interesting preprocessing steps - like finding faces in a photo before feeding the image into the network -, see the Building custom processing blocks tutorial. Then we’ll use a ‘Transfer Learning’ learning block, which takes all the images in and learns to distinguish between the three (‘plant’, ‘lamp’, ‘unknown’) classes. In the studio go to Create impulse, set the image width and image height to96, and add the ‘Images’ and ‘Transfer Learning (Images)’ blocks. Then click Save impulse.
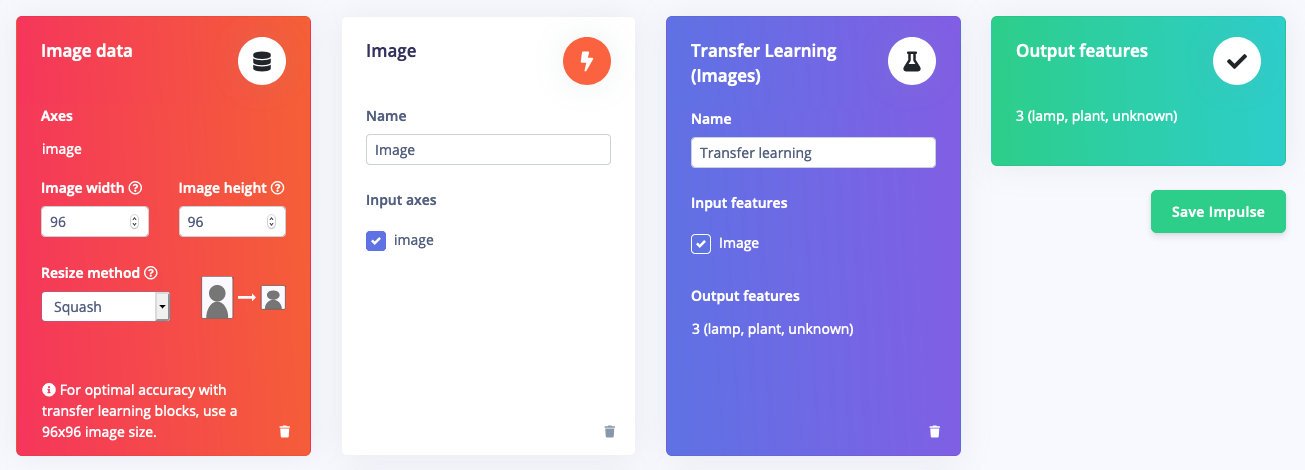
Designing an impulse
Configuring the processing block
To configure your processing block, click Images in the menu on the left. This will show you the raw data on top of the screen (you can select other files via the drop down menu), and the results of the processing step on the right. You can use the options to switch between ‘RGB’ and ‘Grayscale’ mode, but for now leave the color depth on ‘RGB’ and click Save parameters.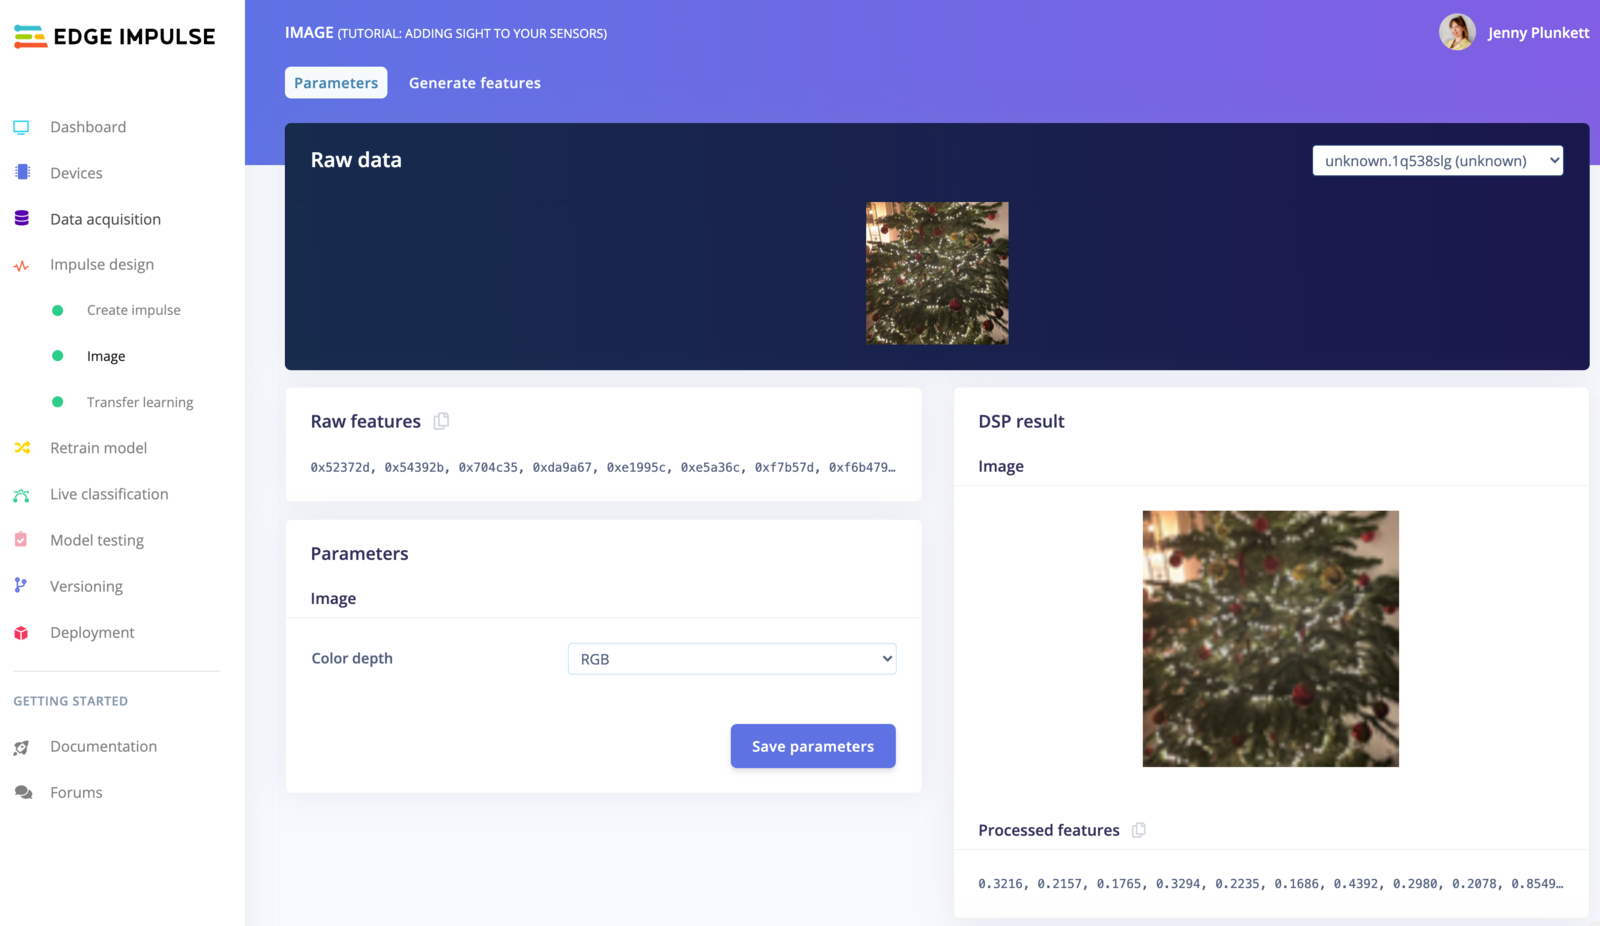
Configuring the processing block.
- Resize all the data.
- Apply the processing block on all this data.
- Create a 3D visualization of your complete dataset.

The feature explorer visualizing the data in the dataset. Clusters that separate well in the feature explorer will be easier to learn for the machine learning model.
Configuring the transfer learning model
With all data processed it’s time to start training a neural network. Neural networks are a set of algorithms, modeled loosely after the human brain, that are designed to recognize patterns. The network that we’re training here will take the image data as an input, and try to map this to one of the three classes. It’s very hard to build a good working computer vision model from scratch, as you need a wide variety of input data to make the model generalize well, and training such models can take days on a GPU. To make this easier and faster we are using transfer learning. This lets you piggyback on a well-trained model, only retraining the upper layers of a neural network, leading to much more reliable models that train in a fraction of the time and work with substantially smaller datasets. To configure the transfer learning model, click Transfer learning in the menu on the left. Here you can select the base model (the one selected by default will work, but you can change this based on your size requirements), optionally enable data augmentation (images are randomly manipulated to make the model perform better in the real world), and the rate at which the network learns. Set:- Transfer learning model to
MobileNetV1 96x96 0.25 - Number of training cycles to
20. - Learning rate to
0.0005. - Data augmentation: enabled.
- Minimum confidence rating: 0.7.
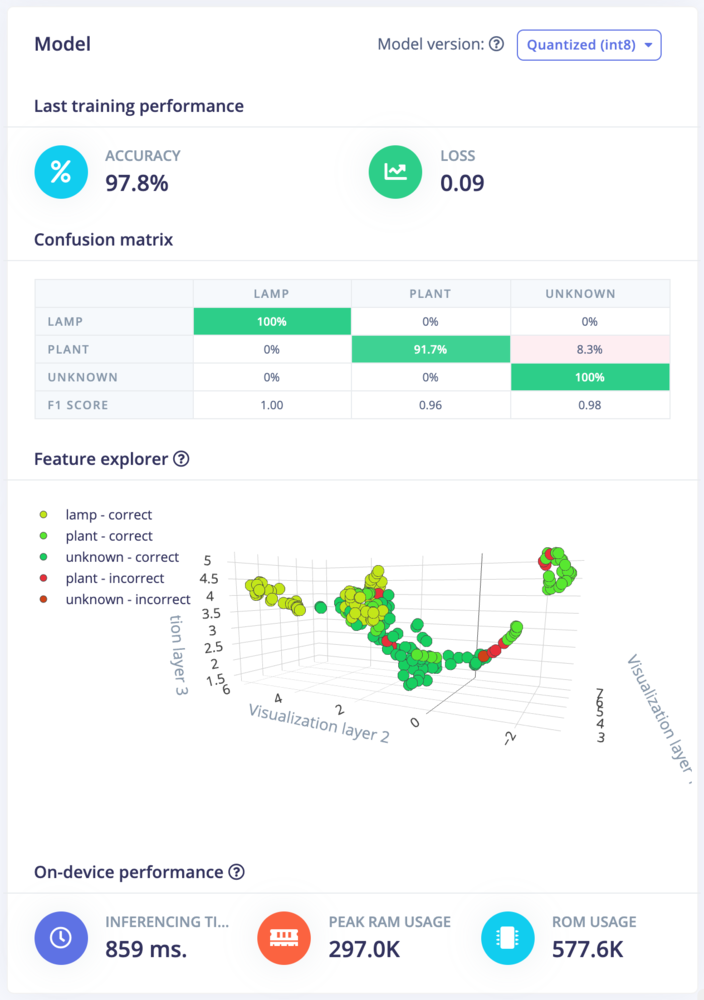
A trained model showing on-device performance estimations.
4. Validating your model
With the model trained let’s try it out on some test data. When collecting the data we split the data up between a training and a testing dataset. The model was trained only on the training data, and thus we can use the data in the testing dataset to validate how well the model will work in the real world. This will help us ensure the model has not learned to overfit the training data, which is a common occurrence. To validate your model, go to Model testing, select the checkbox next to ‘Sample name’ and click Classify selected. Here we hit 89% accuracy, which is great for a model with so little data.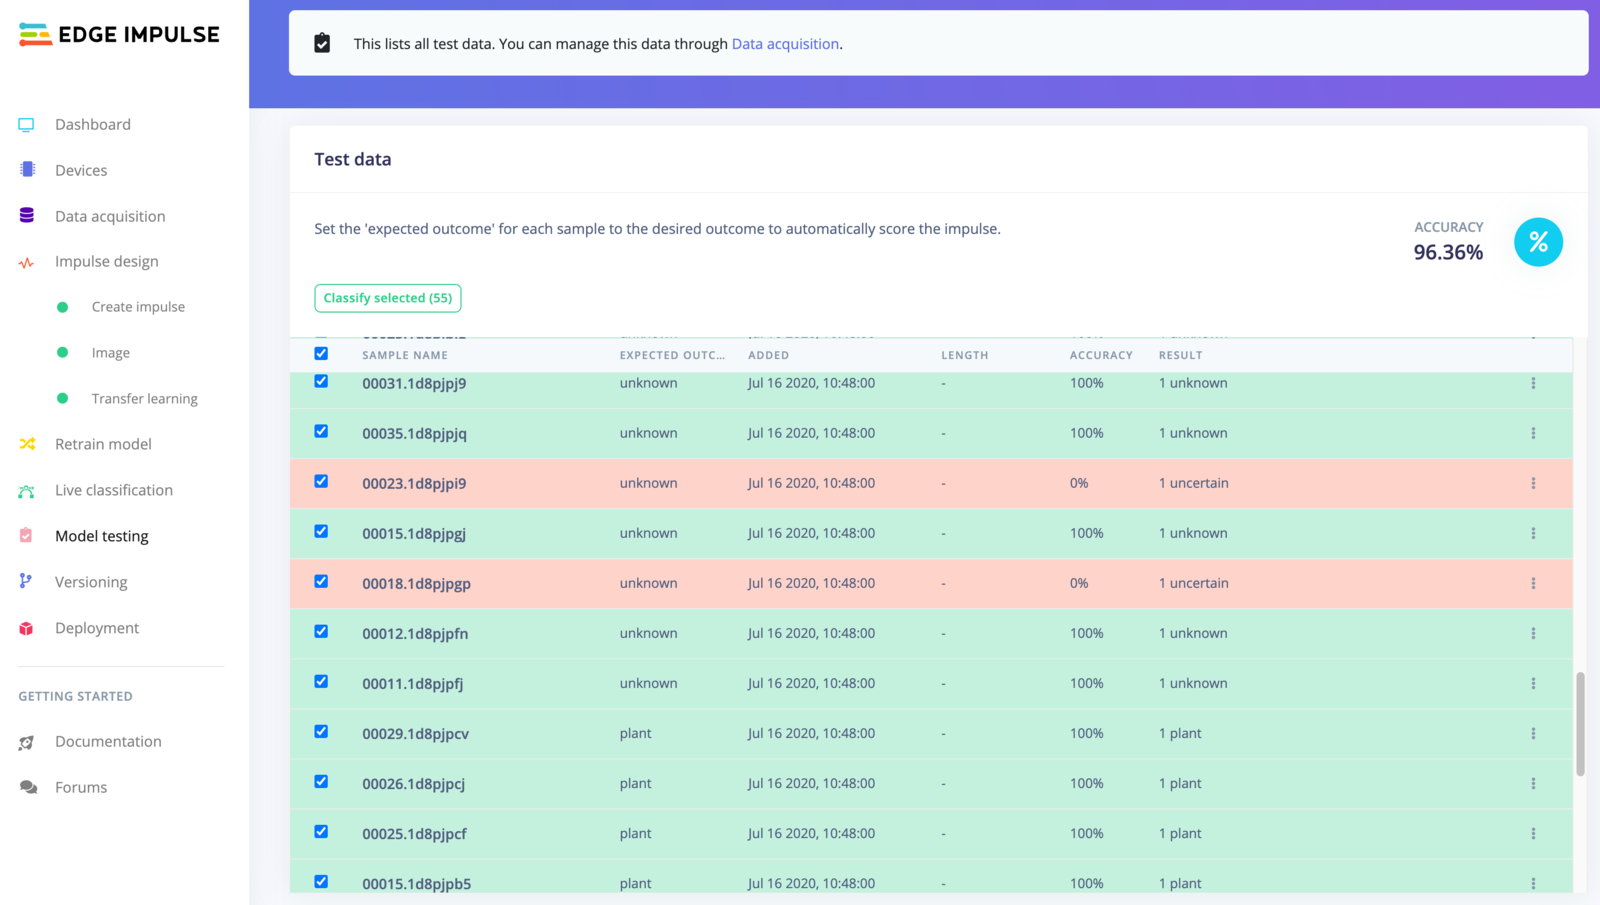
Verifying our model on real world data
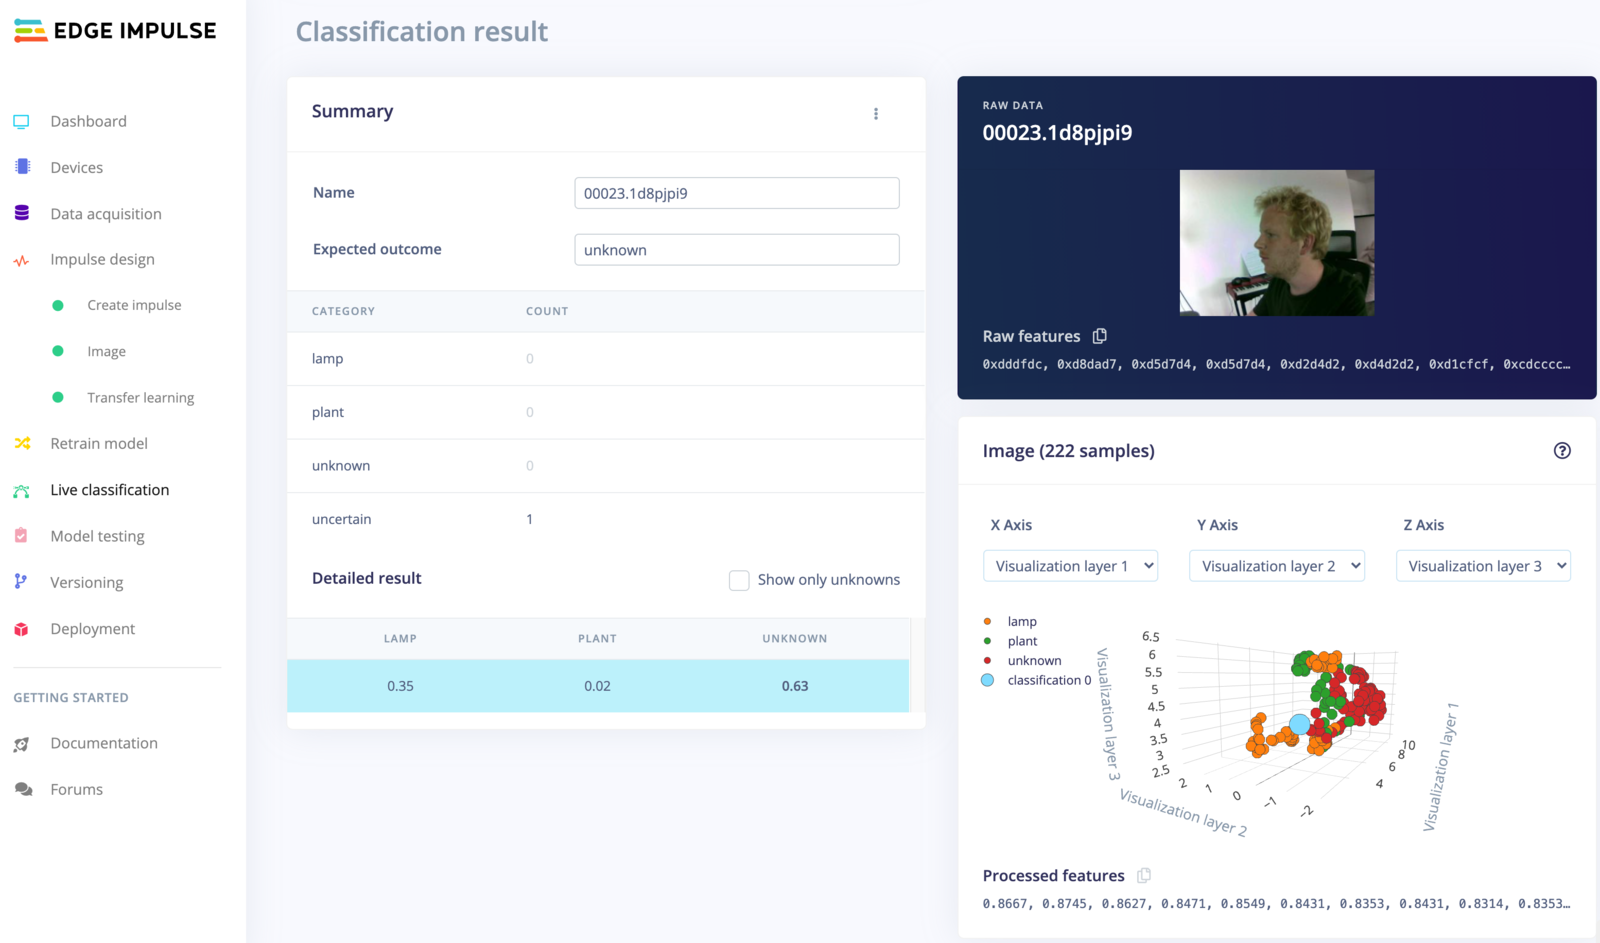
An item that could not be classified (as the highest score was under the 0.7 threshold). As the data is very far outside of any known cluster this is likely data that was unlike anything seen before - perhaps due to part of the window being present. It'd be good to add additional images to the training set.
5. Running the model on your device
With the impulse designed, trained and verified you can deploy this model back to your device. This makes the model run without an internet connection, minimizes latency, and runs with minimum power consumption. Edge Impulse can package up the complete impulse - including the preprocessing steps, neural network weights, and classification code - in a single C++ library that you can include in your embedded software. To run your impulse click on Deployment in the menu. Then under ‘Build firmware’ select the Spresense development board, and click Build. This will export the impulse, and build a binary that will run on your development board in a single step. After building is completed you’ll get prompted to download a binary. Save this on your computer.Flashing the device
When you click the Build button, you’ll see a pop-up with text and video instructions on how to deploy the binary to your particular device. Follow these instructions. Once you are done, we are ready to test your impulse out. If you run into issues flashing your device, follow the steps and troubleshooting information in the Getting Started guide.Running the model on the device
We can connect to the board’s newly flashed firmware over serial. Open a terminal and run: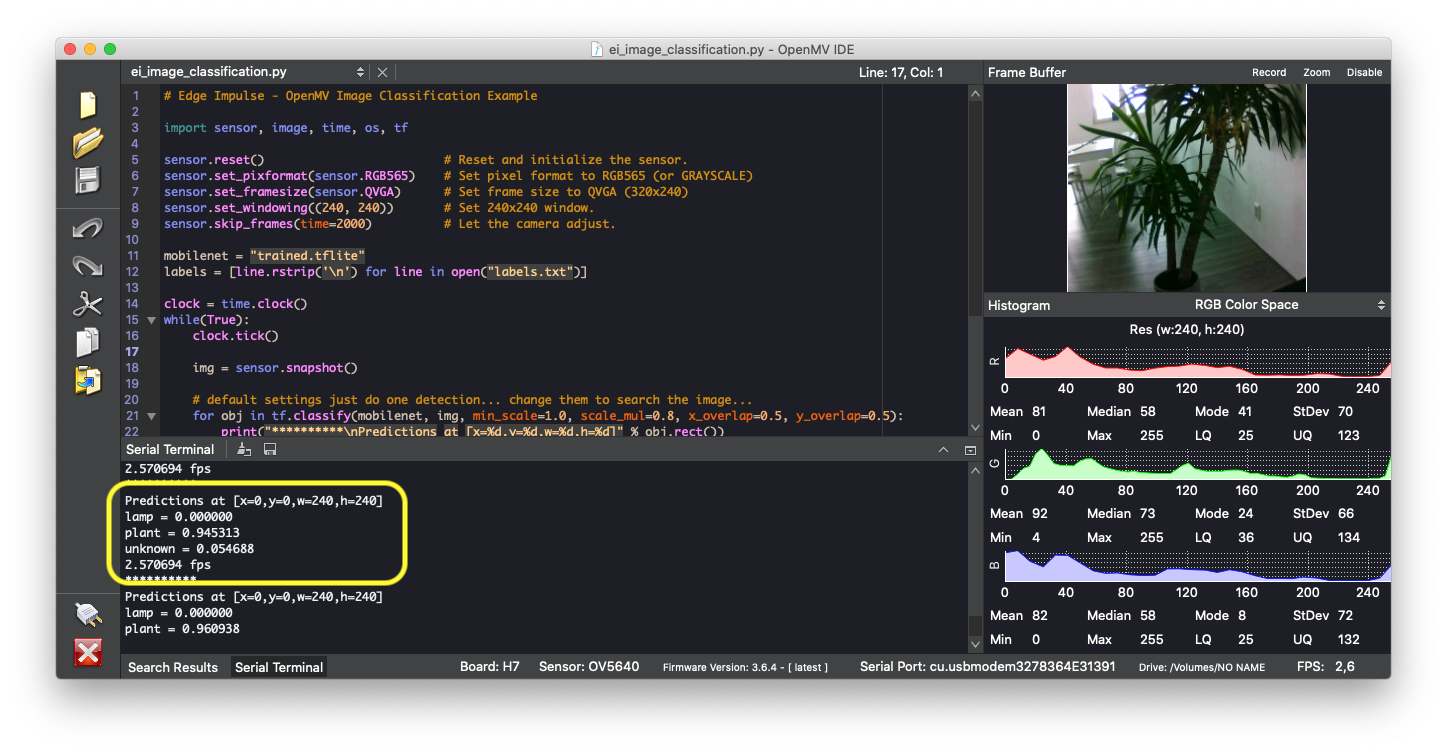
The machine learning model running in real-time on device, classifying a plant.