Limitations of FOMO
- FOMO does not output bounding boxes but will give you the object’s location using centroids. Hence the size of the object is not available.
- FOMO works better if the objects have a similar size.
- Objects shouldn’t be too close to each other, although this can be optimized when increasing the image input resolution.
1. Prerequisites
For this tutorial, you’ll need a supported device. If you don’t have any of these devices, you can also upload an existing dataset through the Uploader or use your mobile phone to connect your device to Edge Impulse. After this tutorial, you can then deploy your trained machine learning model as a C++ library or as a WebAssembly package and run it on your device.2. Building a dataset
Capturing data
You can collect data from the following devices:- Collecting image data from the Studio - for the Raspberry Pi 4 and the Jetson Nano.
- Collecting image data with your mobile phone
- Collecting image data from any of the fully-supported development boards that have a camera.
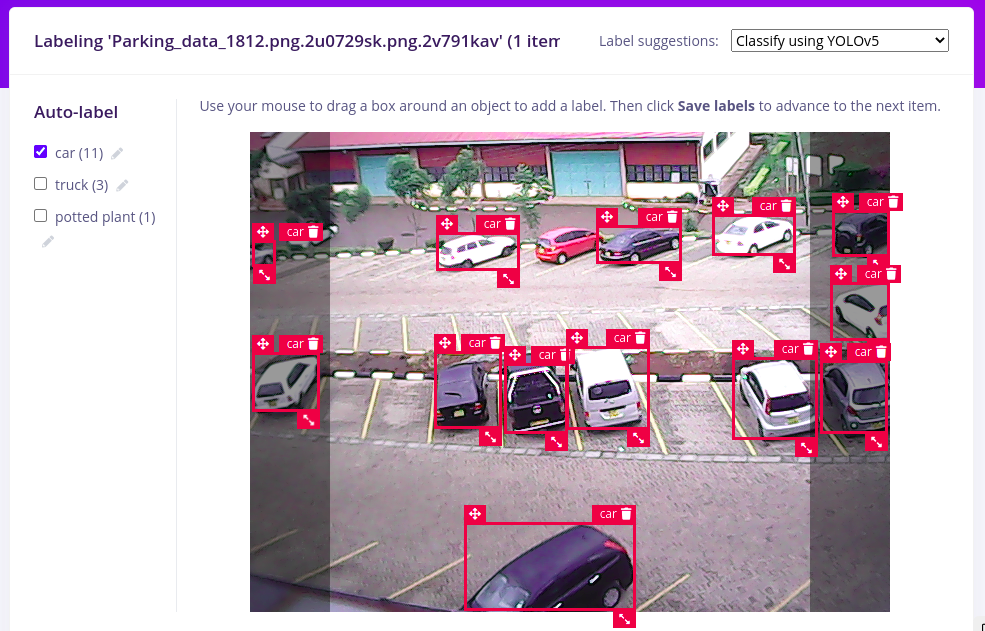
Labeling data
Why use bounding box inputs?To keep the interoperability with other models, your training image input will use bounding boxes although we will output centroids in the inference process. As such FOMO will use in the background translation between bounding boxes and segmentation maps in various parts of the end-to-end flow. This includes comparing sets between the bounding boxes and the segmentation maps to run profiling and scoring.
- Using YoloV5 - Useful when your objects are part of the common objects in the COCO dataset.
- Using your own trained model - Useful when you already have a trained model with classes similar to your new task.
- Using Object tracking - Useful when you have objects that are similar in size and common between images/frames.
Rebalancing your dataset
To validate whether a model works well you want to keep some data (typically 20%) aside, and don’t use it to build your model, but only to validate the model. This is called the ‘test set’. You can switch between your training and test sets with the two buttons above the ‘Data collected’ widget. If you’ve collected data on your development board there might be no data in the testing set yet. You can fix this by going to Dashboard > Perform train/test split.3. Designing an impulse
One of the beauties of FOMO is its fully convolutional nature, which means that just the ratio is set. Thus, it gives you more flexibility in its usage compared to the classical object detection. method. For this tutorial, we have been using 96x96 images but it will accept other resolutions as long as the images are square. To configure this, go to Create impulse, set the image width and image height to 96, the ‘resize mode’ to Fit shortest axis and add the ‘Images’ and ‘Object Detection (Images)’ blocks. Then click Save Impulse.
Configuring the processing block
To configure your processing block, click Images in the menu on the left. This will show you the raw data on top of the screen (you can select other files via the drop-down menu), and the results of the processing step on the right. You can use the options to switch betweenRGB and Grayscale modes. Finally, click on Save parameters.

- Resize all the data.
- Apply the processing block on all this data.
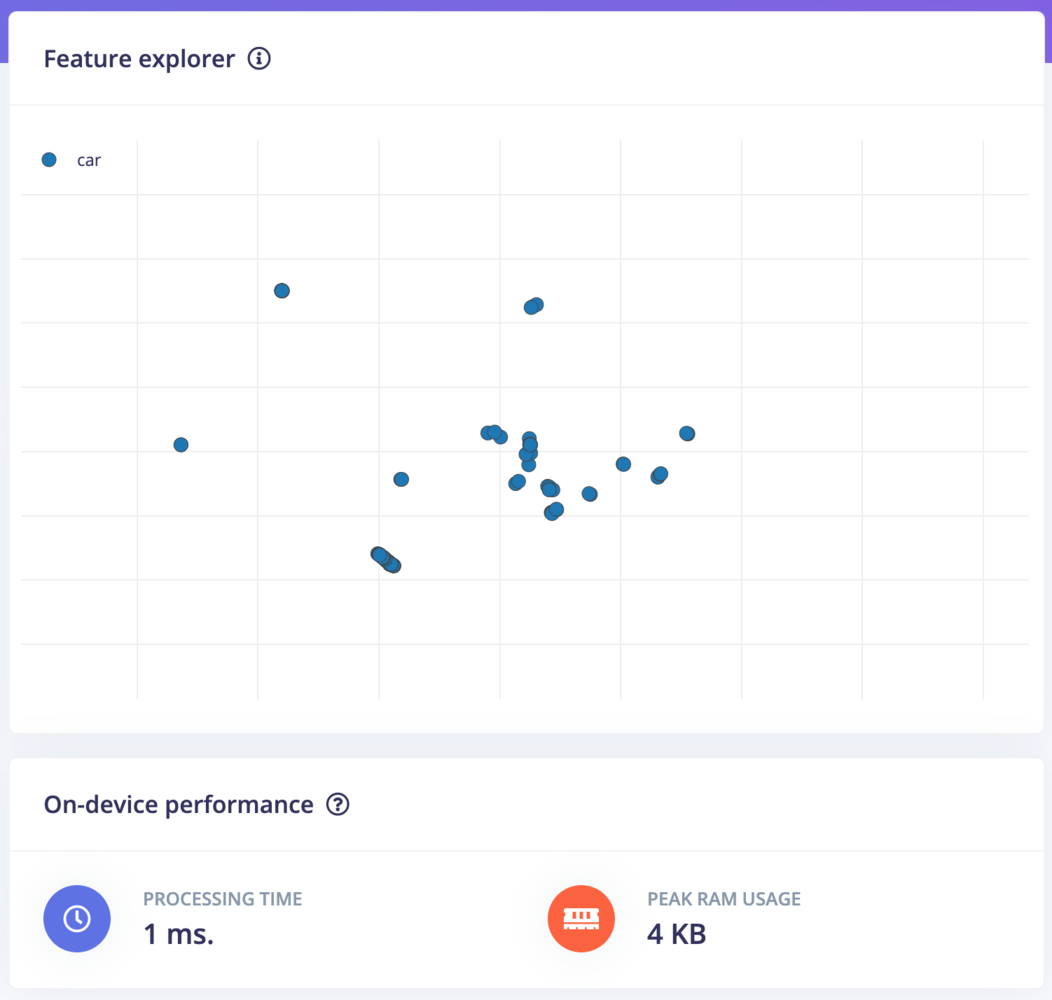
- Create a 3D visualization of your complete dataset.
- Click Generate features to start the process.
Configuring the object detection model with FOMO
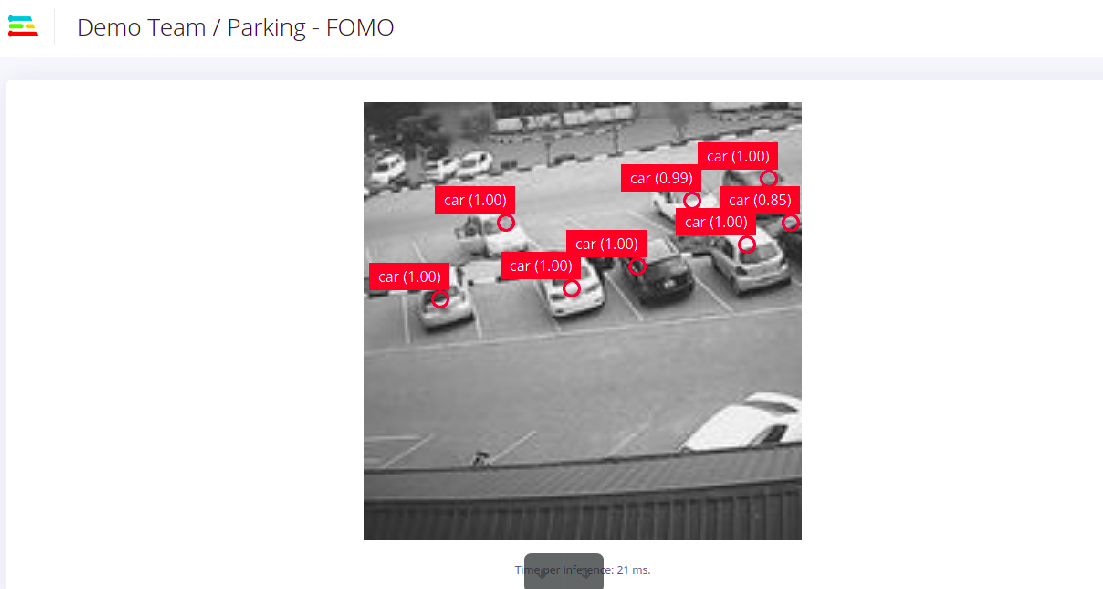
With all data processed it’s time to start training our FOMO model. The model will take an image as input and output objects detected using centroids. For our case, it will show centroids of cars detected on the images. FOMO is fully compatible with any MobileNetV2 model, and depending on where the model needs to run you can pick a model with a higher or lower alpha. Transfer learning also works (although you need to train your base models specifically with FOMO in mind). Another advantage of FOMO is that it has very few parameters to learn from compared to normal SSD networks making the network even much smaller and faster to train. Together this gives FOMO the capabilities to scale from the smallest microcontrollers to full gateways or GPUs. To configure FOMO, head over to the ‘Object detection’ section, and select ‘Choose a different model’ then select one of the FOMO models as shown in the image below.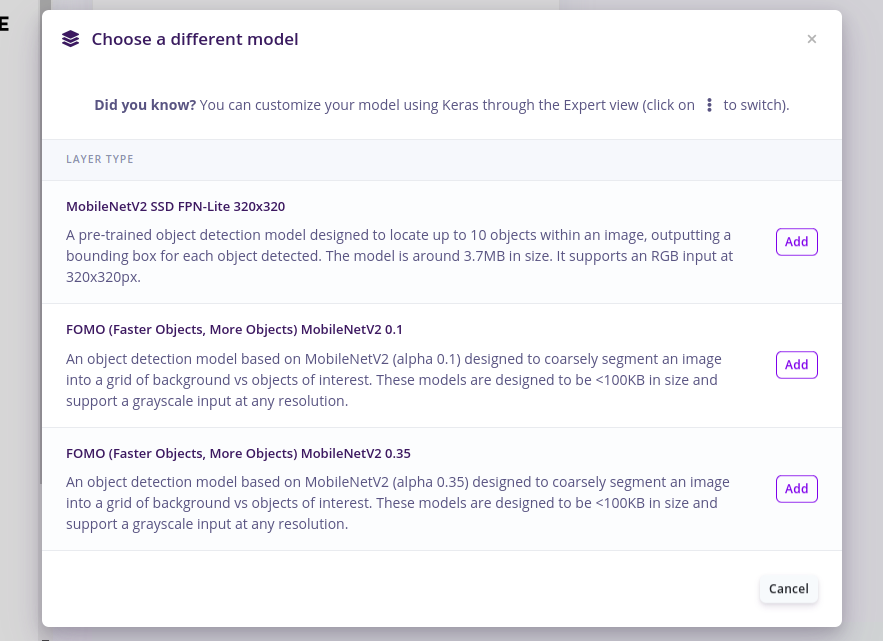
4. Validating your model
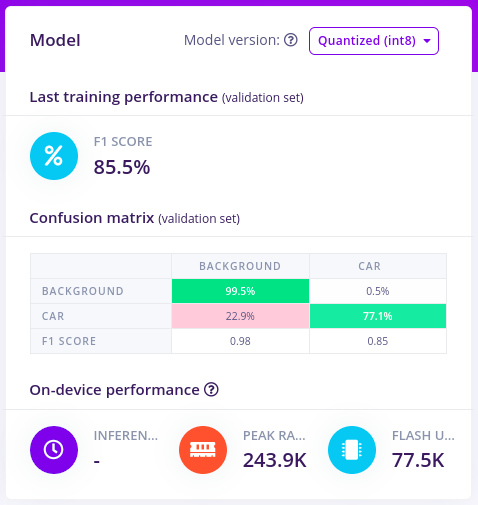
With the model trained let’s try it out on some test data. When collecting the data we split the data up between a training and a testing dataset. The model was trained only on the training data, and thus we can use the data in the testing dataset to validate how well the model will work in the real world. This will help us ensure the model has not learned to overfit the training data, which is a common occurrence. To validate our model, we will go to Model Testing and select Classify all.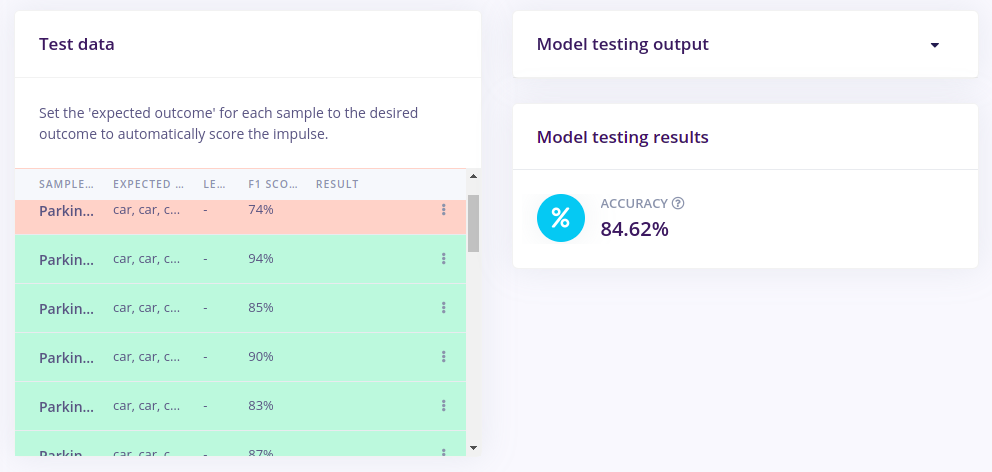
Live Classification Result
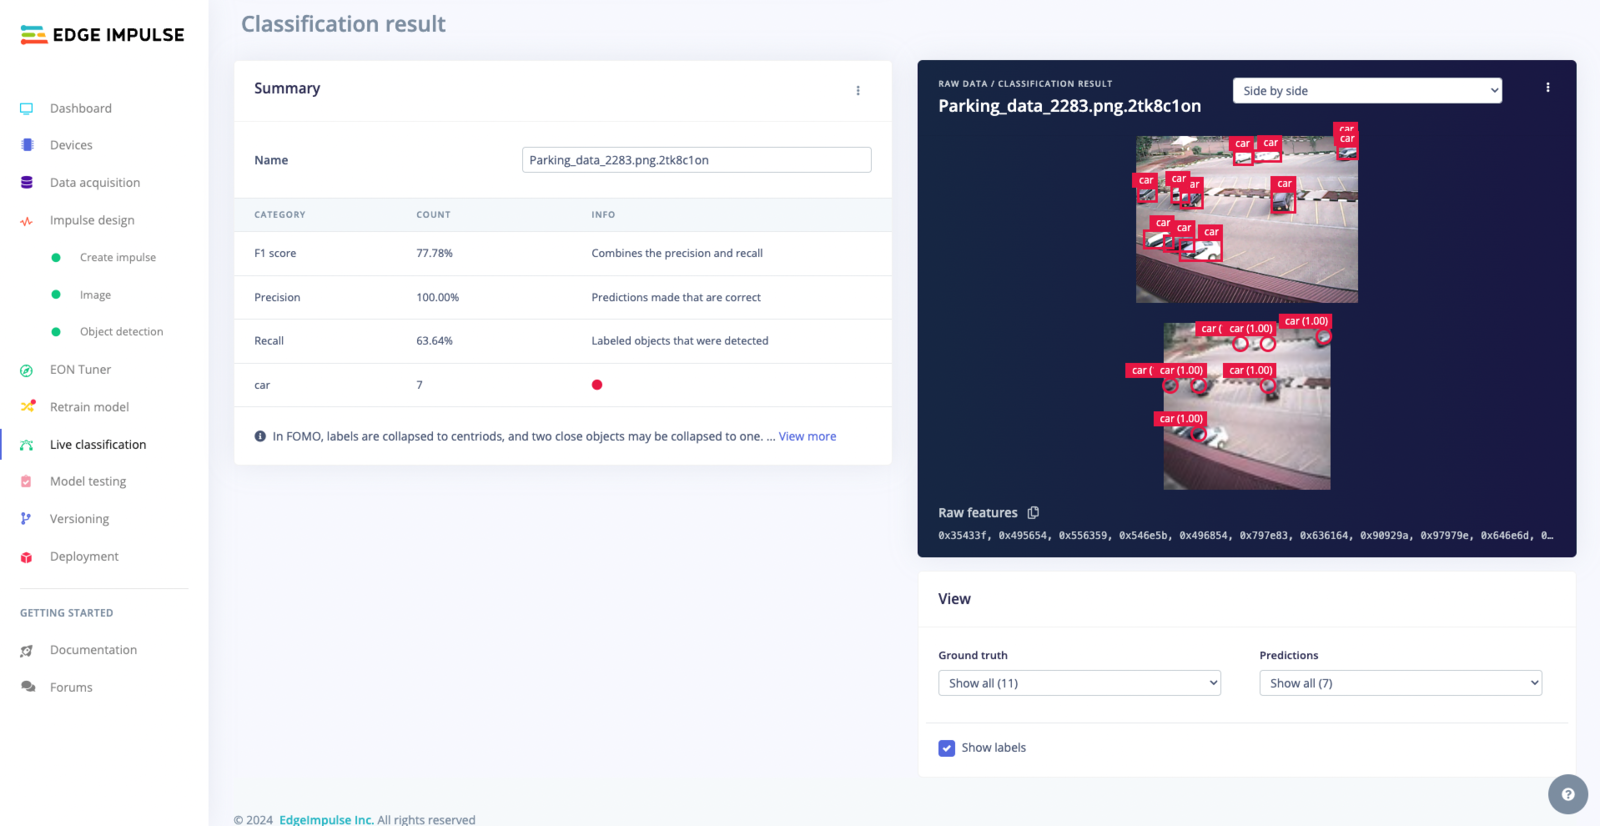
Overlay Mode for the Live Classification Result
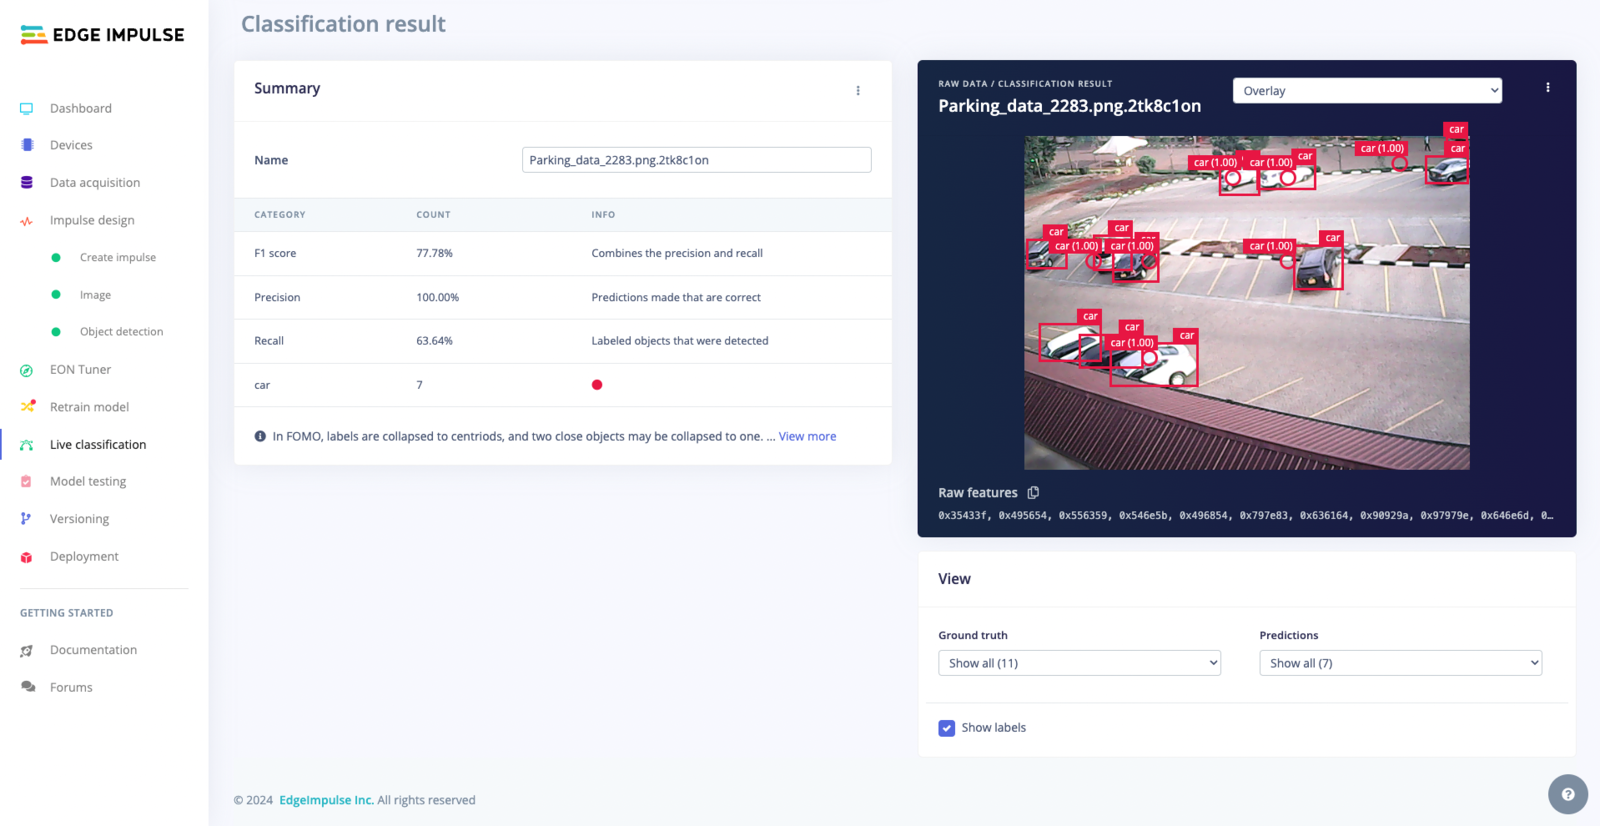
Summary Table
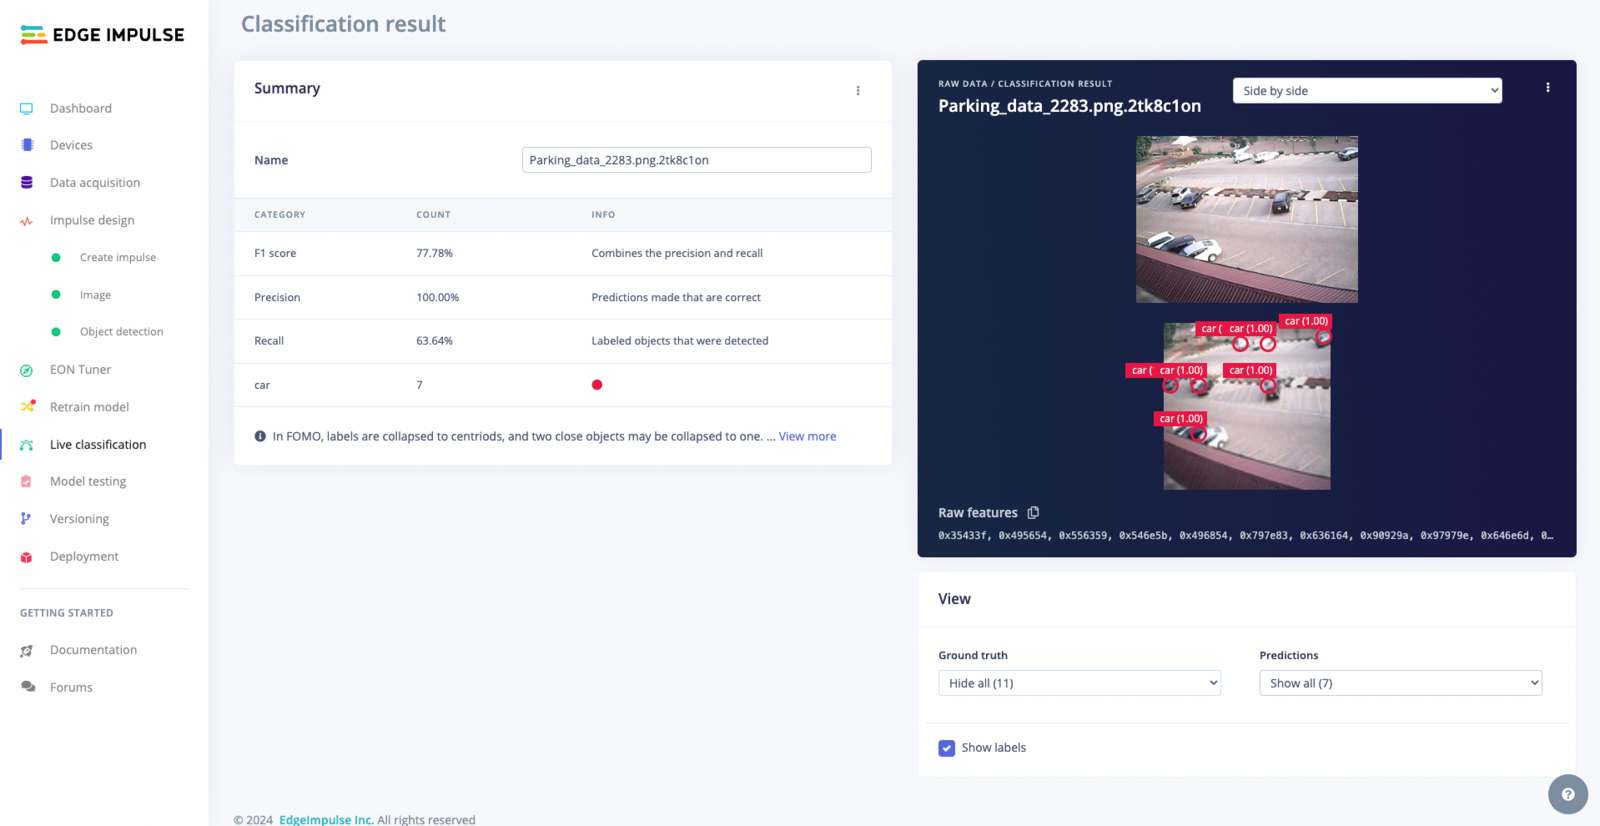
Viewing Options
Bottom-right controls adjust the visibility of ground truth labels and model predictions, enhancing the analysis of the model’s performance: Prediction Controls: Customize the display of model predictions, including:- Show All: Show all detections and confidence scores.
- Show Correct Only: Focus on accurate model predictions.
- Show incorrect only: Pinpoint undetected objects in the ground truth.
- Show All: Display all ground truth labels.
- Hide All: Conceal all ground truth labels.
- Show detected only: Highlight ground truth labels detected by the model.
- Show undetected only: Identify ground truth labels missed by the model.
5. Running the model on your device
With the impulse designed, trained and verified you can deploy this model back to your device. This makes the model run without an internet connection, minimizes latency, and runs with minimum power consumption. Edge Impulse can package up the complete impulse - including the preprocessing steps, neural network weights, and classification code - in a single C++ library or model file that you can include in your embedded software.Running the impulse on a Linux-based device
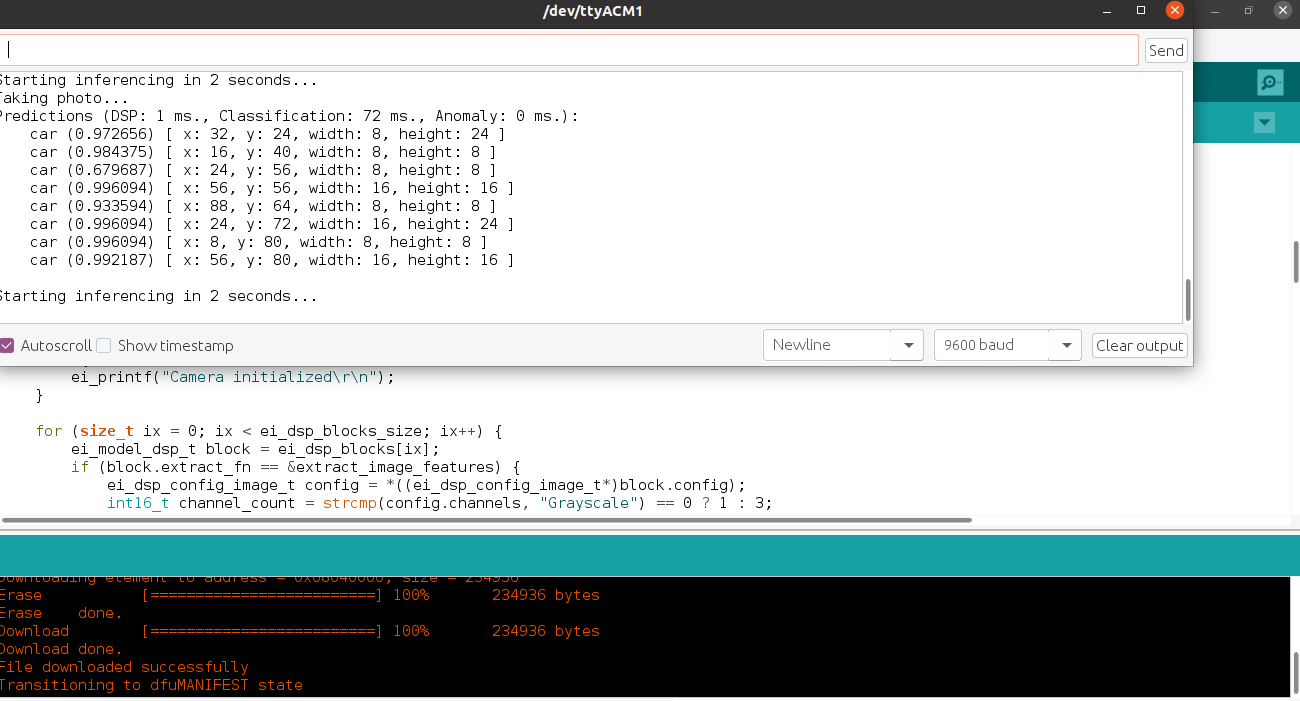
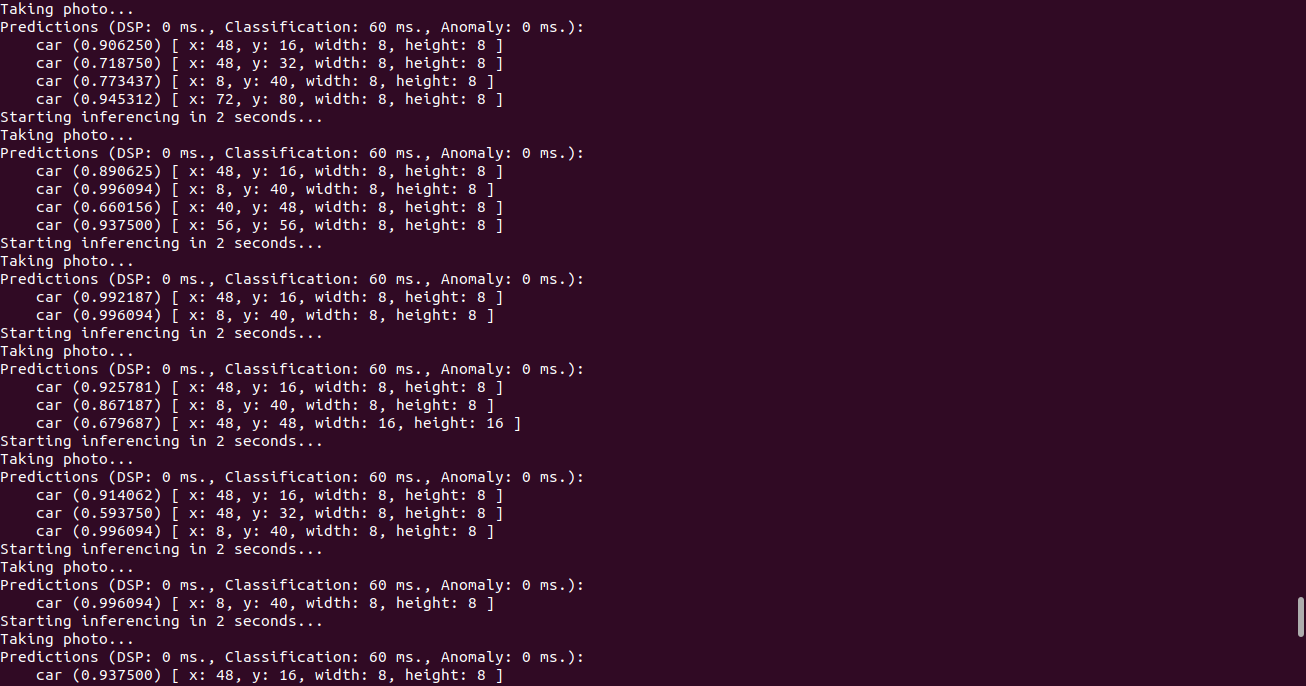
From the terminal just runedge-impulse-linux-runner. This will build and download your model, and then run it on your development board. If you’re on the same network you can get a view of the camera, and the classification results directly from your dev board. You’ll see a line like:
Running the impulse on a fully supported MCU
Go to the Deployment tab, on Build firmware section and select the board-compatible firmware to download it.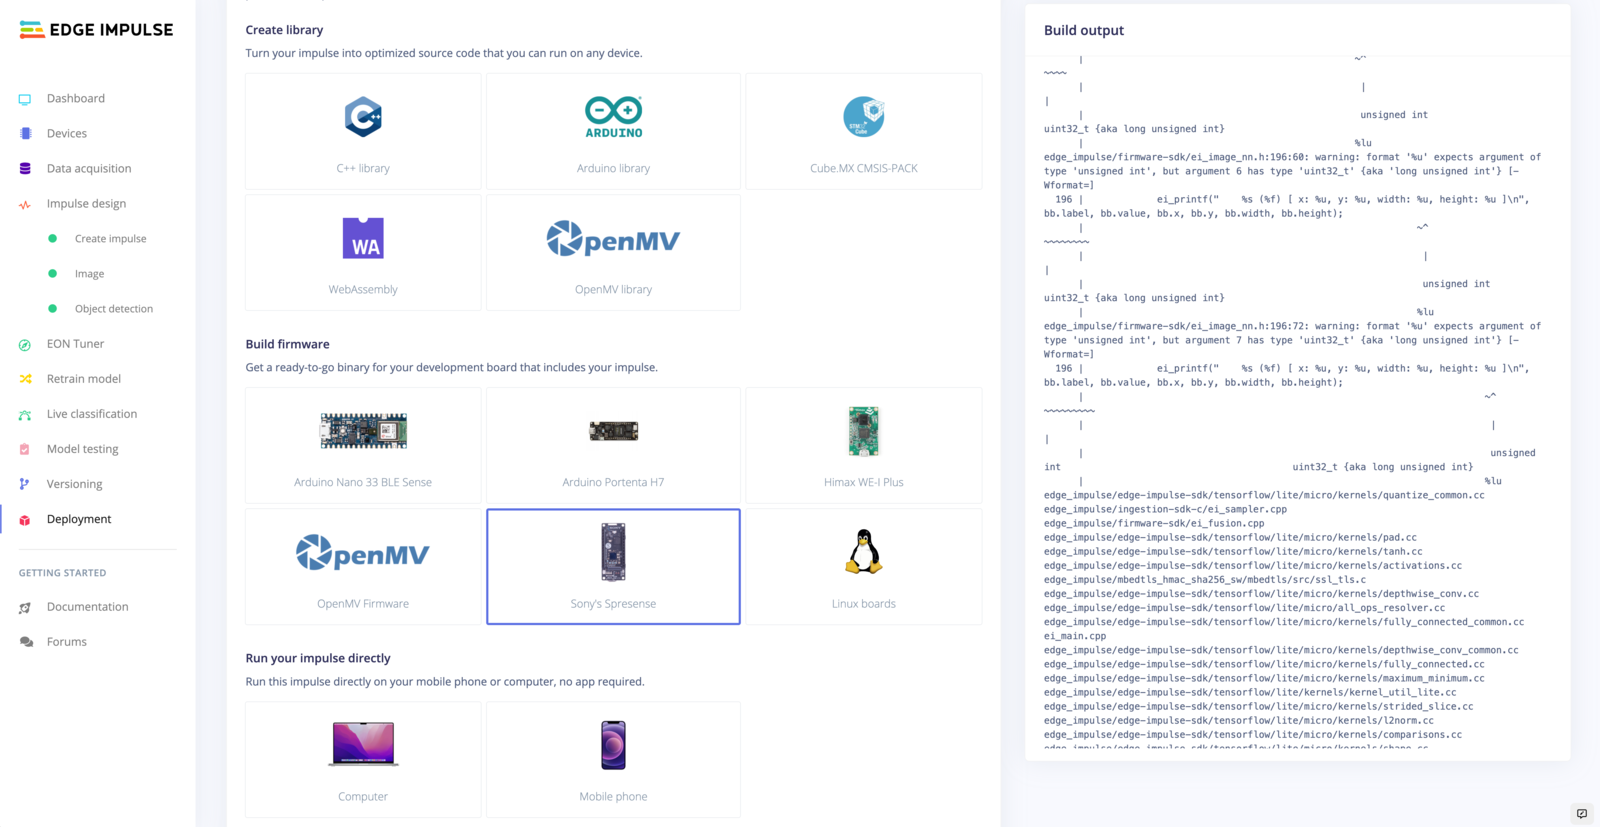
edge-impulse-run-impulse --debug command:
Running the impulse using a generated Arduino Library
To run using an Arduino library, go to the studio Deployment tab on Create Library section and select Arduino Library to download your custom Arduino library. Go to your Arduino IDE, then click on Sketch >> Include Library >> Add .Zip ( Your downloaded Arduino library). Make sure to follow the instruction provided on Arduino’s Library usage. Open Examples >> Examples from custom library and select your library. Upload the ”Portenta_H7_camera” sketch to your Portenta then open your serial monitor to view results.