Prerequisites
Make sure you followed the Continuous motion recognition tutorial, and have a trained impulse. Also, make sure you have a working Zephyr build environment, including the following tools:- Either the nRF Connect SDK which includes Zephyr and all its dependencies (v1.6.0 or higher), or a manual installation of the Zephyr build environment.
- The GNU ARM Embedded Toolchain (version 9-2019-q4-major).
- Optional: The nRF command line tools and Segger J-Link tools. These command line tools are required if you use the
westcommand line interface to upload firmware to your target board.
Cloning the base repository
We created an example repository which contains a small application that compliments the Continuous motion recognition tutorial. This application can take raw, hard-coded inputs as an argument, and print out the final classification to the serial port so it can be read from your development computer. You can either download the application or import the repository using Git:Fully featured open source repos are also availableIf you are looking for sample projects showcasing all sensors and features supported by Edge Impulse out of the box, we have public firmware repos available for the Nordic Semiconductor nRF52840, nRF5340 and nRF9160 development kits as well as for the Thingy:91 and Thingy:53. See
Deploying your impulse
Head over to your Edge Impulse project, and go to the Deployment page. From here you can obtain a packaged library containing the Edge Impulse C++ SDK, your impulse, and all required external dependencies. Select C++ library and click Build to create the library. Download the.zip file and extract the contents. Now copy the following directories to the ‘example-standalone-inferencing-zephyr’ folder (which you downloaded above).
edge-impulse-sdkmodel-parameterstflite-model
Running the impulse
With the project ready it’s time to verify that the application works. Head back to the studio and click on Live classification in the project you created for the continuous motion recognition tutorial, then load a testing sample, and click on a row under ‘Detailed result’.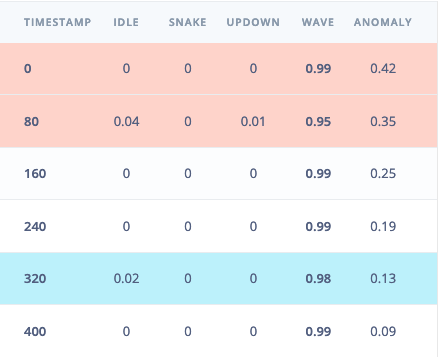
Selecting the row with timestamp '320' under 'Detailed result'.
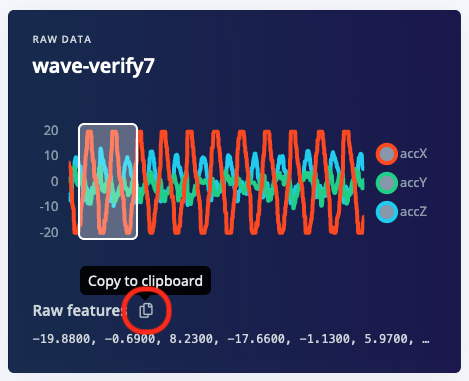
Copying the raw features.
src/main.cpp in the example directory and paste the raw features inside the static const float features[] definition. For example:
build/zephyr/zephyr.bin file and drag it to the JLINK USB mass-storage device in the same way you do with a USB flash drive.
For the nRF9160DK, you also have to make sure the board controller has been flashed at least once.
Seeing the output
To see the output of the impulse, connect to the development board over a serial port on baud rate 115,200 and reset the board. You can do this with your favourite serial monitor or with the Edge Impulse CLI:Connecting live sensors?Now that you have verified that the impulse works with hard-coded inputs, you should be ready to plug live sensors from your board. A demonstration on how to plug sensor values into the classifier can be found here: Data forwarder - classifying data (Zephyr).