Project Demo
Story
Problem
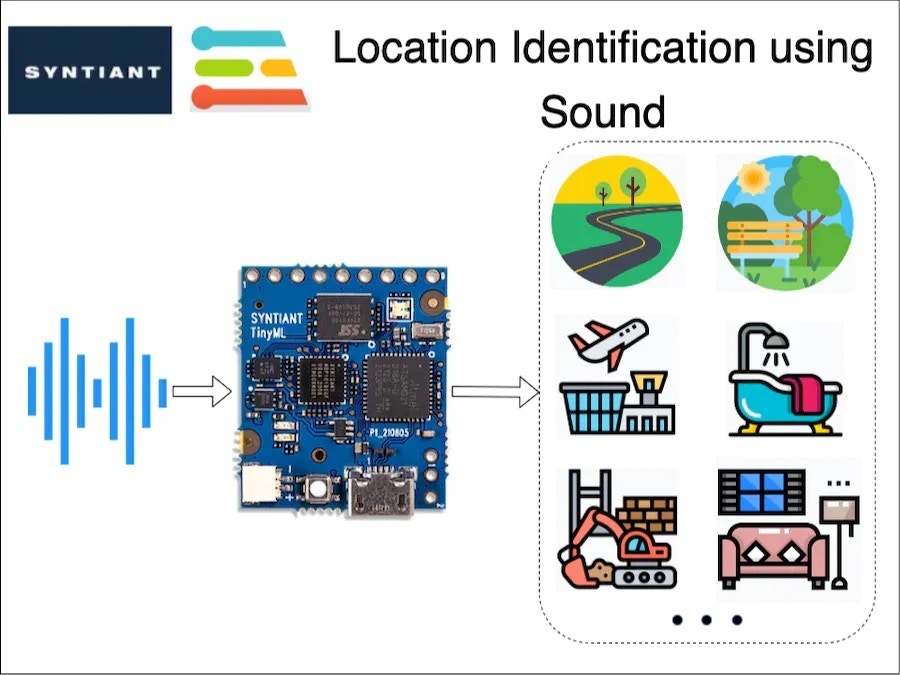
Many times in an application, we want to identify the environment of a user, in order to automatically carry out certain tasks. For example, automatically switching on/off ANC (Automatic Noise Cancellation) in a headphone based on the user’s environment. Or, in some applications leaving GPS turned on might be overkill and drain a battery’s charge. In situation’s like this, can we detect a user’s local environment without the use of GPS?A Solution
We, humans, are good at understanding our environment just by using auditory sensory skills. I can identify a multitude of sound sources and also guess an environment just by listening. In this project, I am trying to replicate the same behaviour using a TinyML board with a microphone, running a machine-learning model.Hardware
This is an interesting problem and I decided to use equally interesting hardware in this project: The Syntiant TinyML Board. This board is designed for voice, acoustic event detection, and sensor machine learning application. It is equipped with an ultra-low-power Syntiant NDP101 Neural Decision Processor, a SAMD21 Cortex-M0+ host processor, an onboard microphone and a 6-axis motion sensor on an SD-card size package. This board is extremely small and perfect for my application. The cherry on top is that Edge Impulse officially supports this board.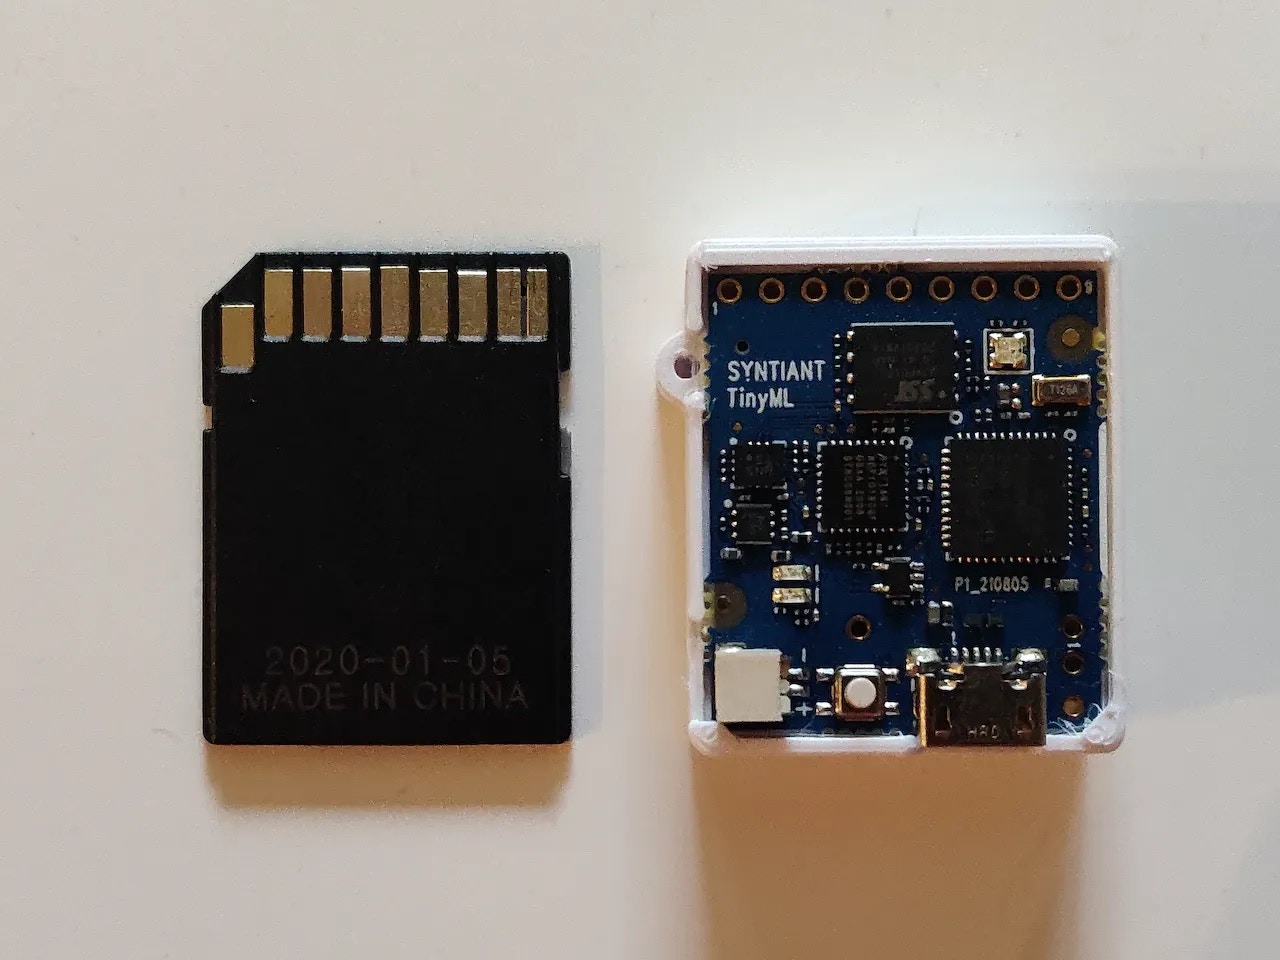
Training Pipeline
As you might have guessed already, I am using Edge Impulse for building a TinyML model. Let’s explore our training pipeline.1. Data Collection
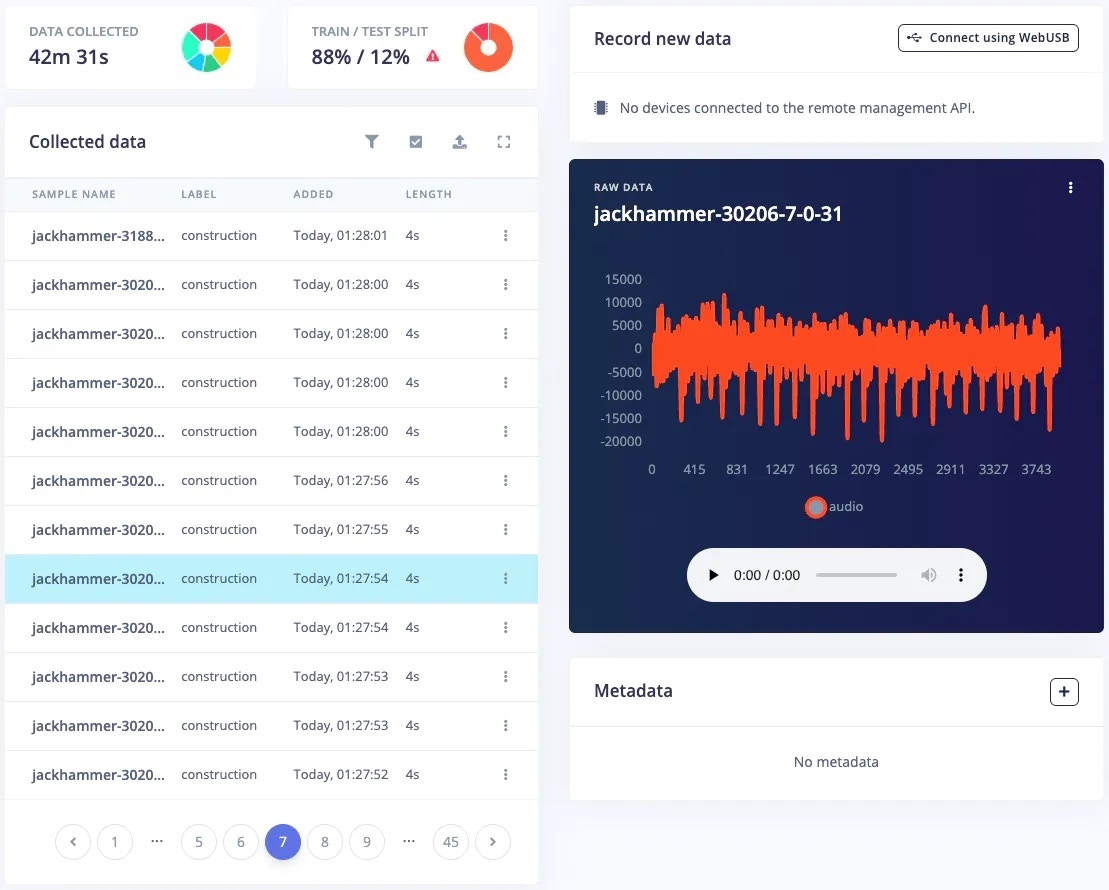
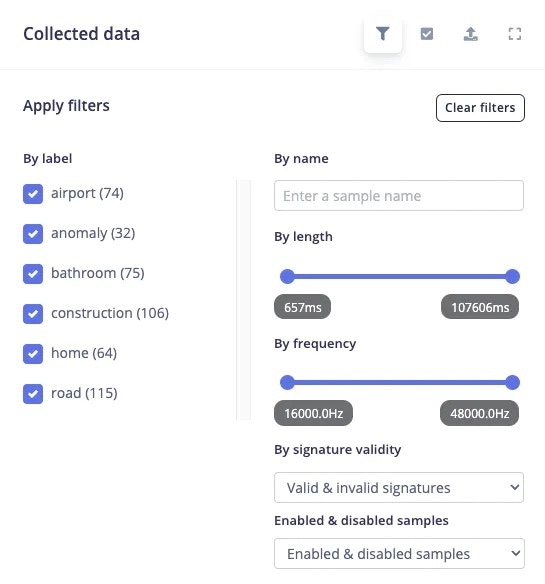
A good machine learning model starts with a high-quality dataset. I am using the [ESC-50] public dataset, to prepare my own dataset. I have prepared a total of 7 classes denoting various locations, by combining some of the classes from the ESC-50 dataset. The classes I have prepared are:- Airport (aeroplane and helicopter sound)
- Bathroom (brushing and toilet flush sound)
- Construction (jackhammer sound)
- Home (washing machine and vacuum cleaner sound)
- Road (siren, car horn and engine sound)
- Work (mouse click and keyboard typing sound)
- Anomaly (quiet environment sound)
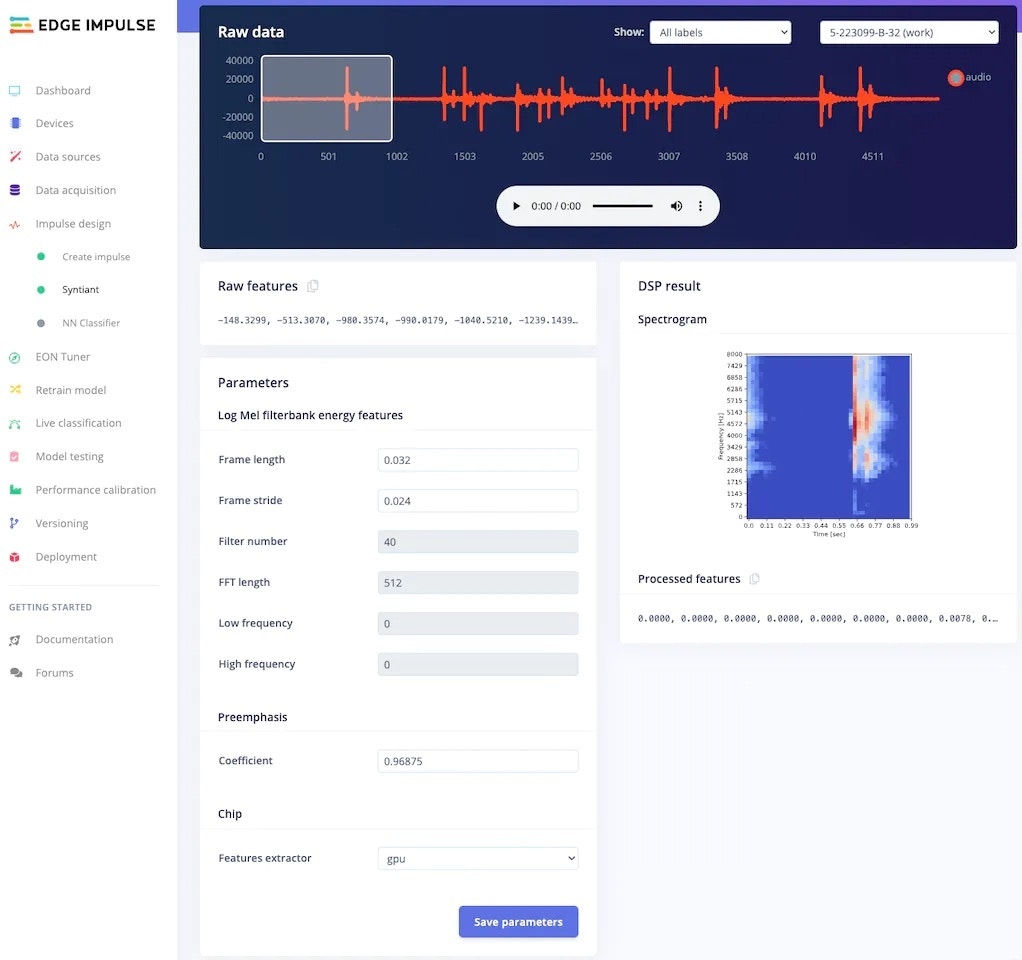
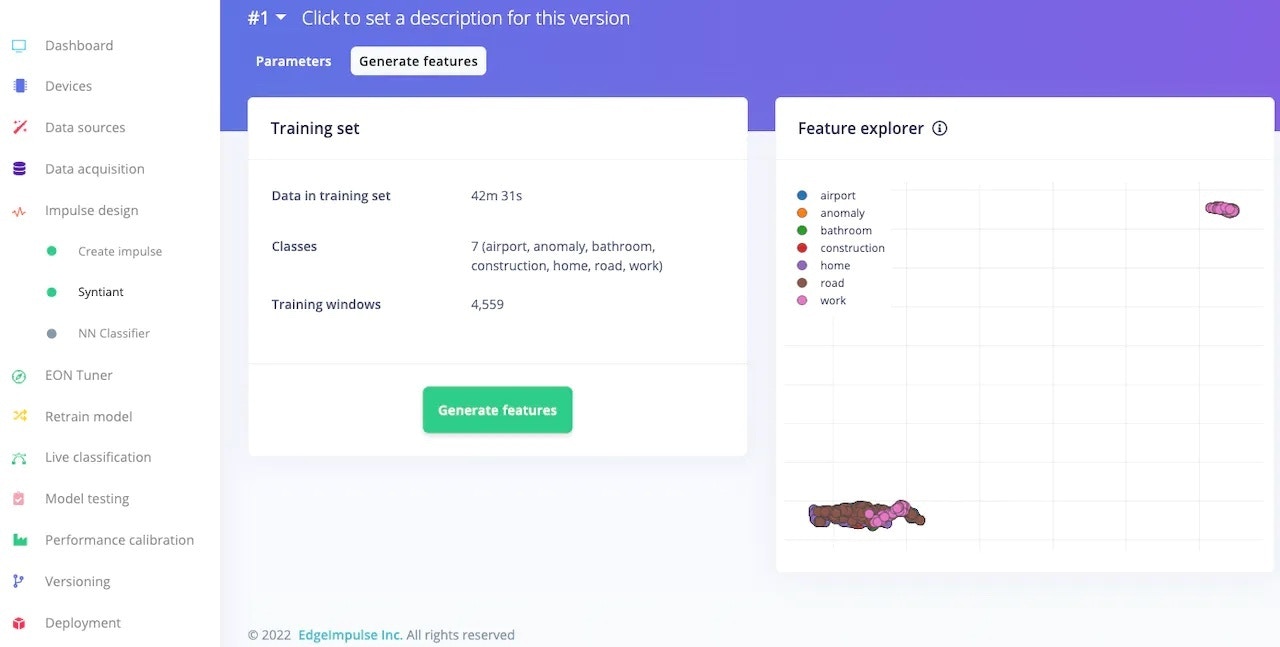
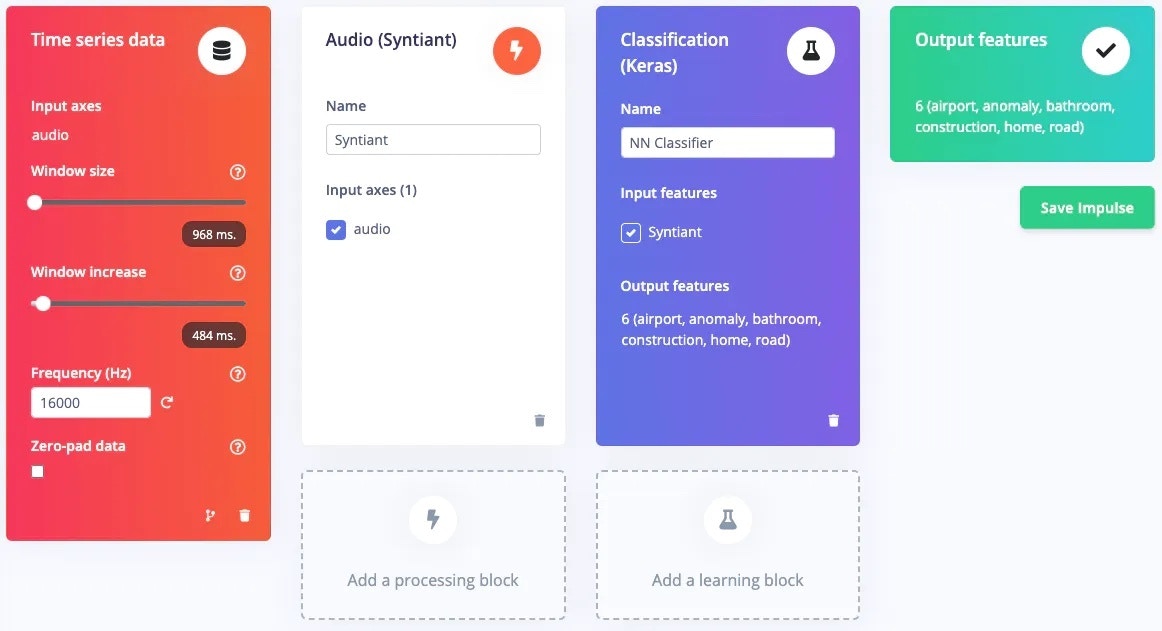
2. Impulse Design and Preprocessing
The first thing to do for training an ML model is Impulse design. It can also be thought of as a pipeline design from preprocessing to training.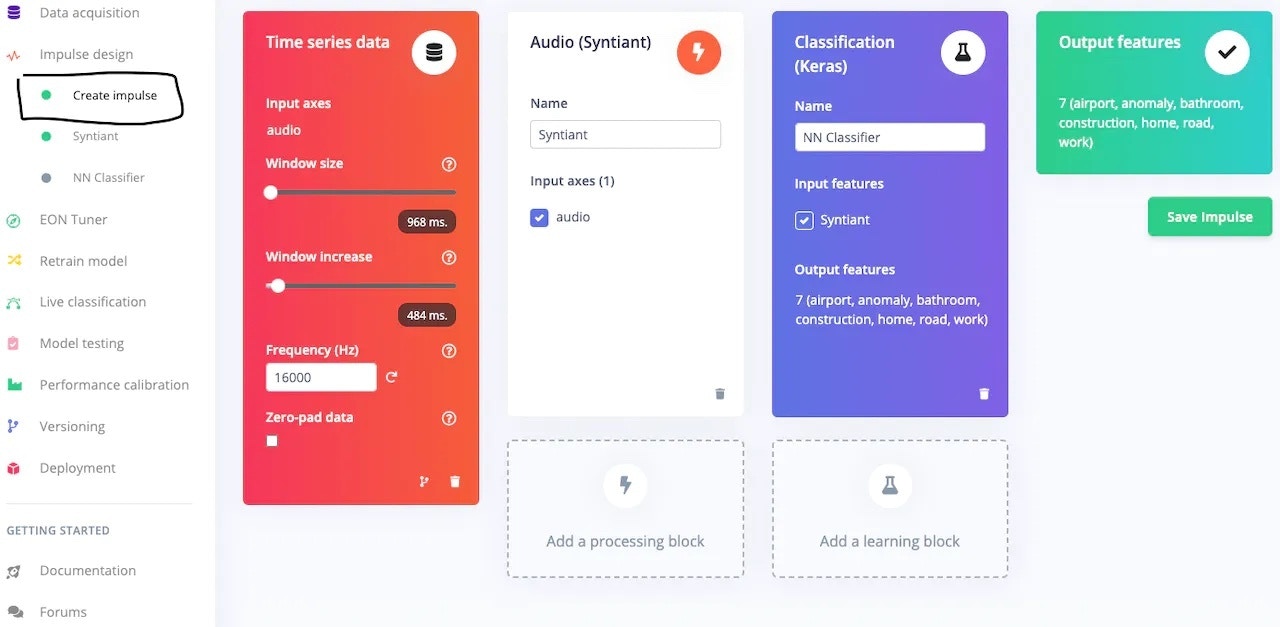
3. Model Training
After pre-processing the dataset, it’s time to train a model. In the NN Classifier tab, adjust the training cycles, learning rate, etc. For the Syntiant TinyML board, the neural network architecture is fixed. I usually start with the default parameters, and based on the performance of the network I adjust the parameter.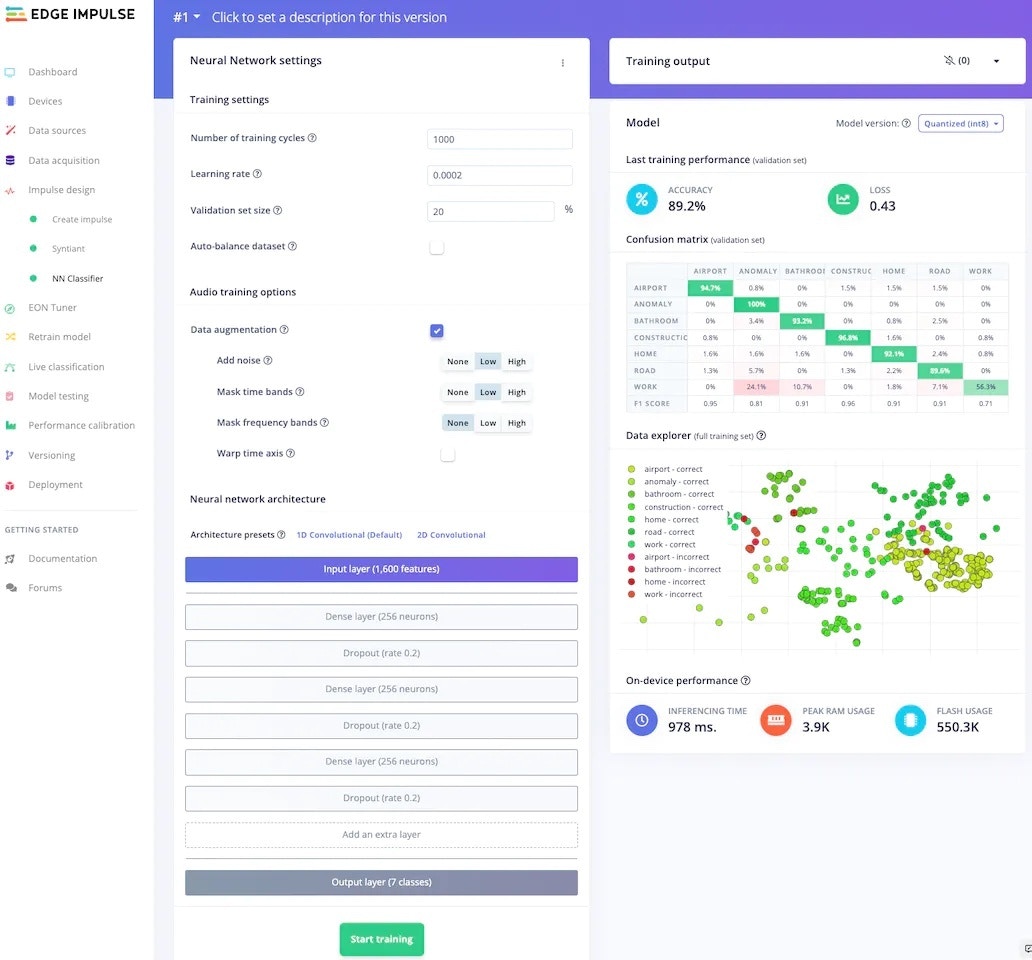
4. Model Retraining
After updating the dataset, go to the Retrain model tab and click on the “Train model” button.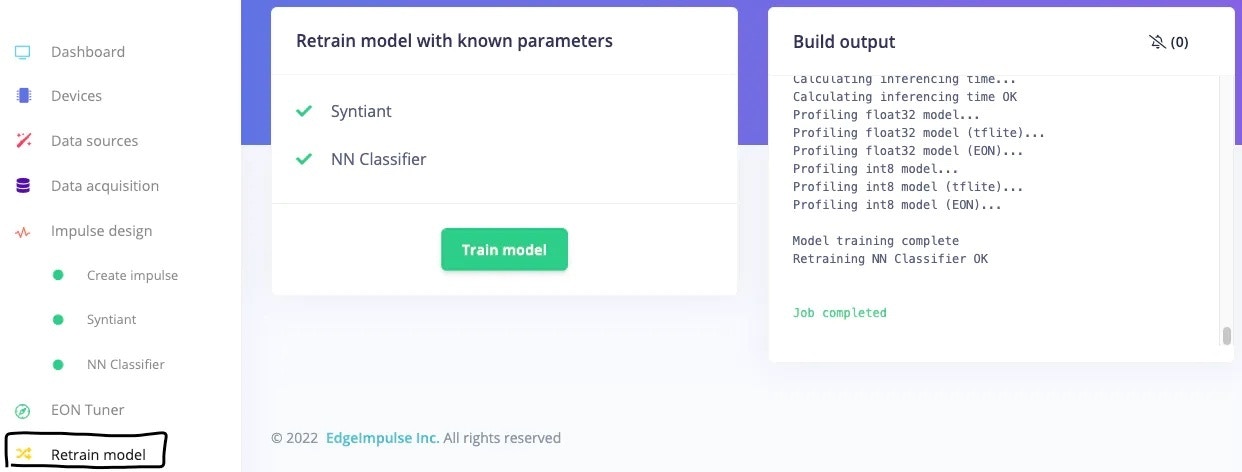
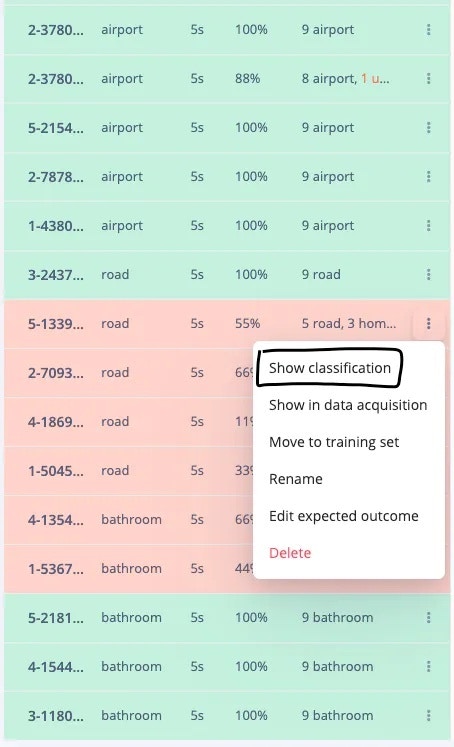
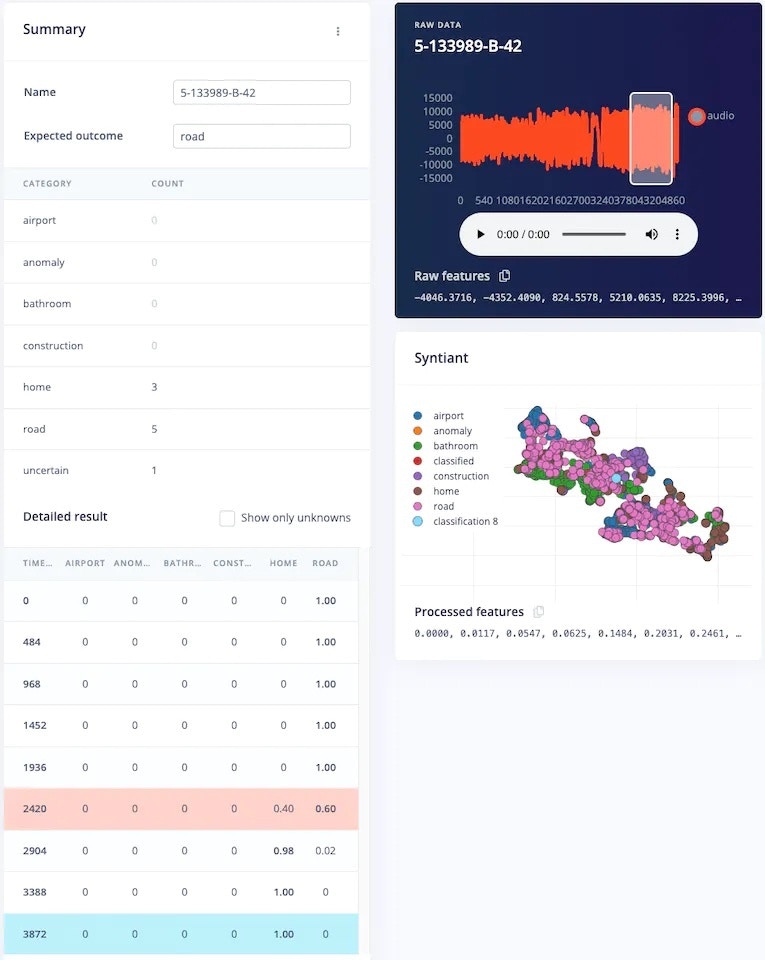
5. Model Testing
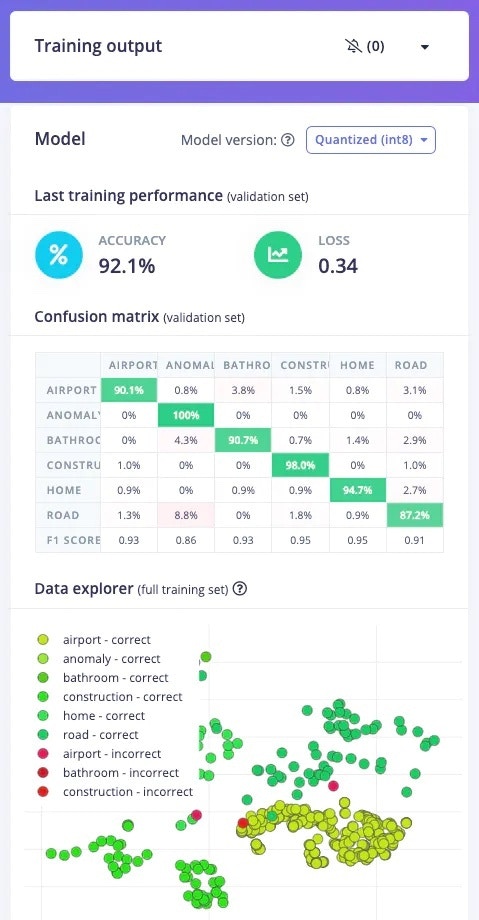
To test the model, jump over to the Model testing tab and click on Classify all. It will automatically pre-process and perform inferencing on the set-aside data, using the last trained model. The testing performance of the model in my case is 84.91%.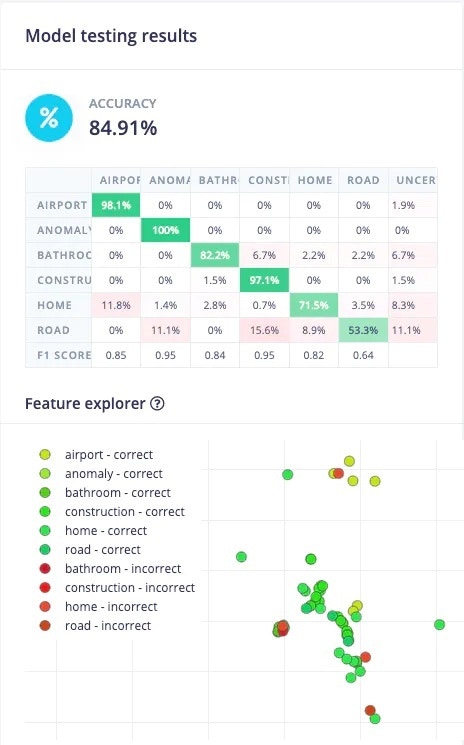
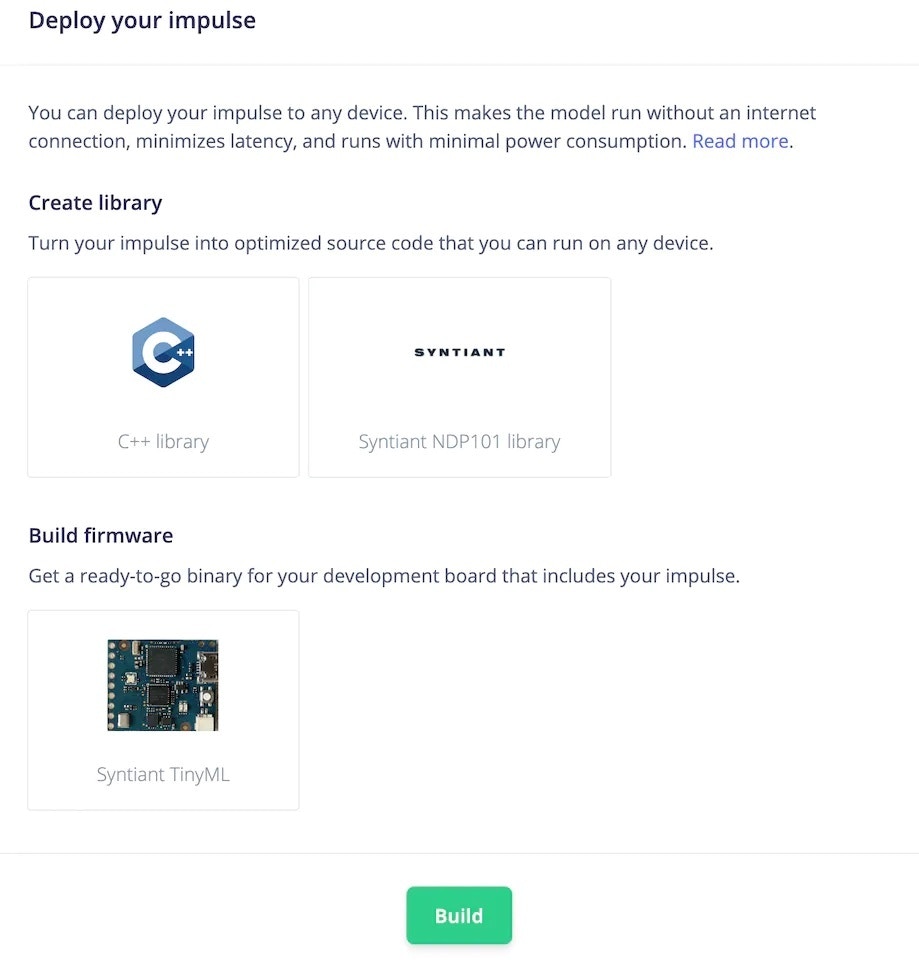
6. Deployment
To deploy the model to the target hardware (Syntiant TinyML in this case), go to the Deployment tab. The Syntiant TinyML board requires finding posterior parameters before building firmware. For other hardware, it is not required. Select the deployment option (library or firmware) and click Build to generate output. The firmware is built, downloaded to your computer, then you can flash it to the board.