Project Demo
Intro
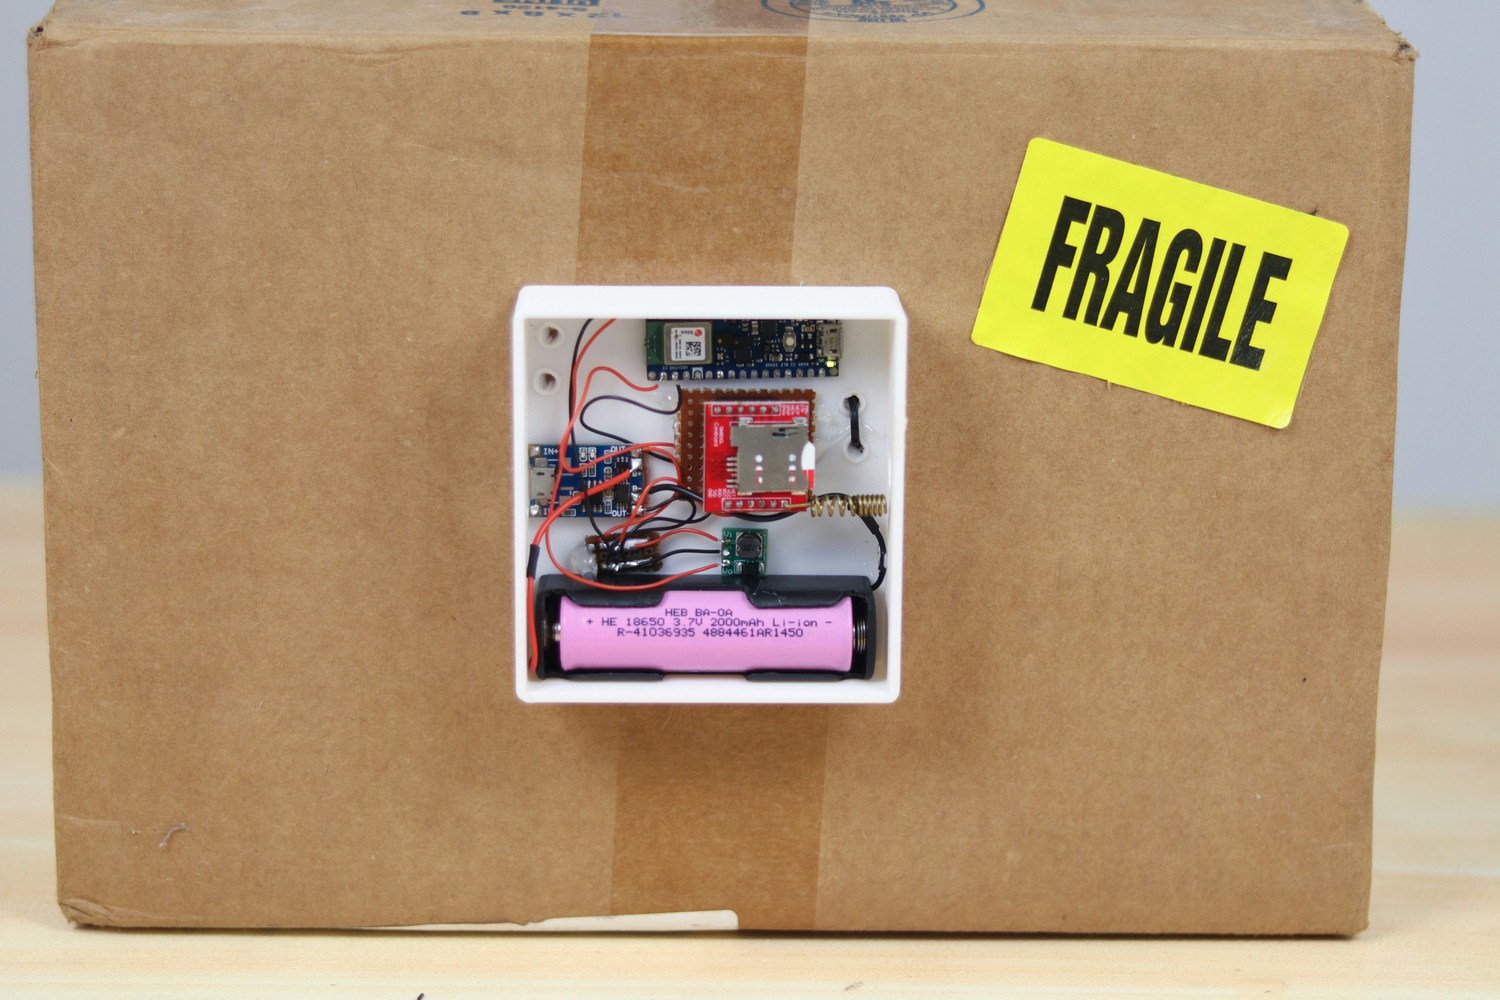
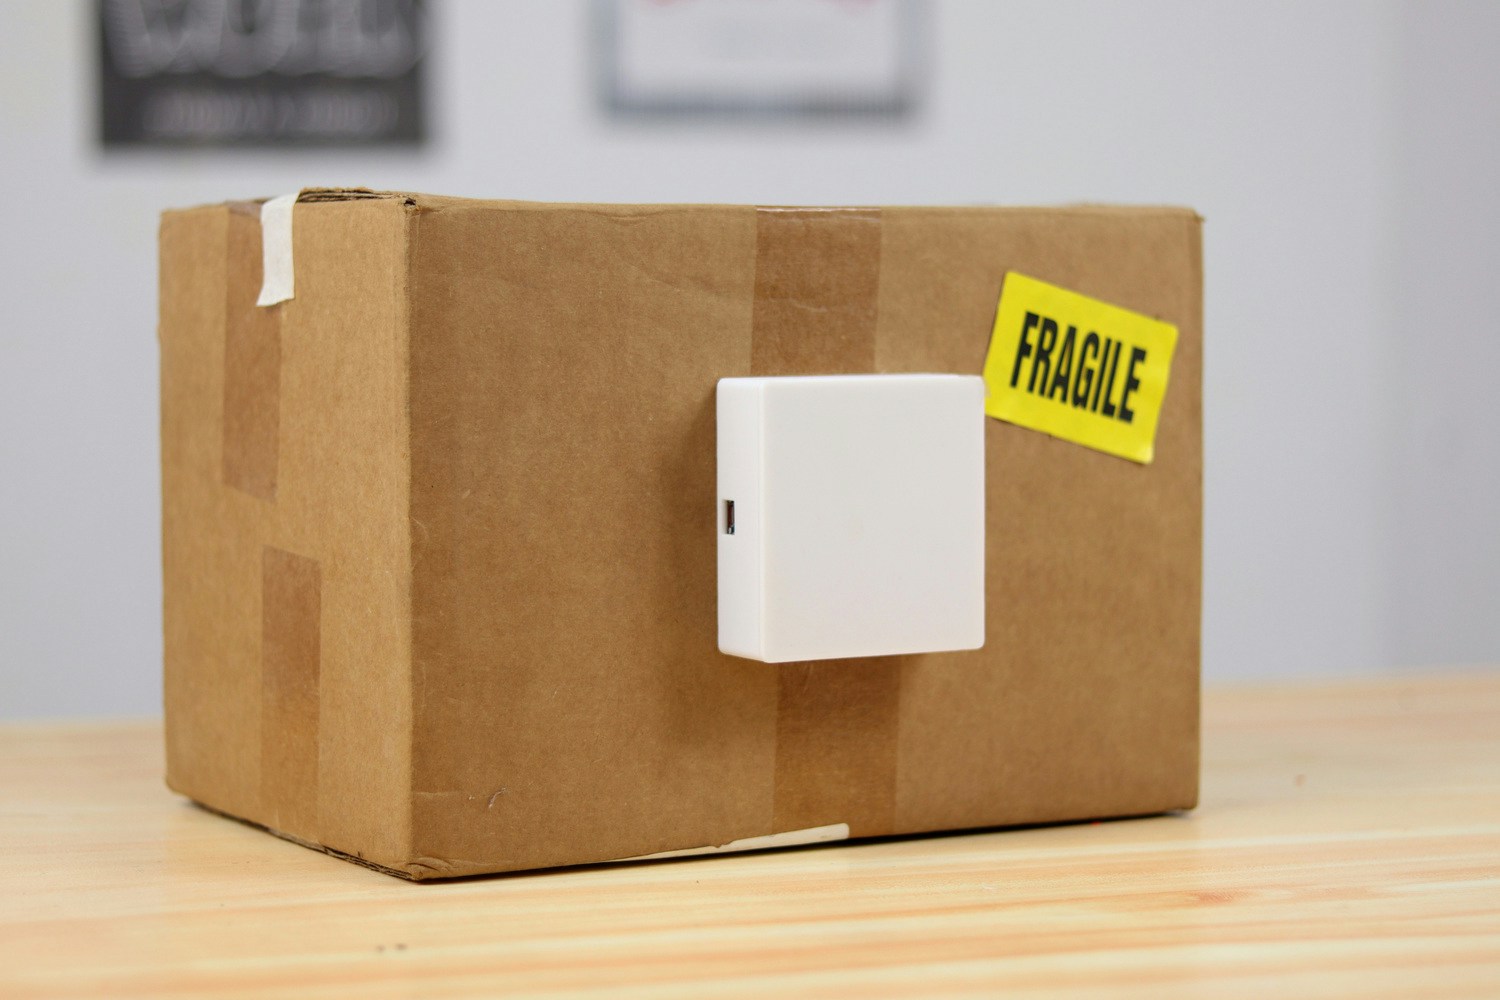
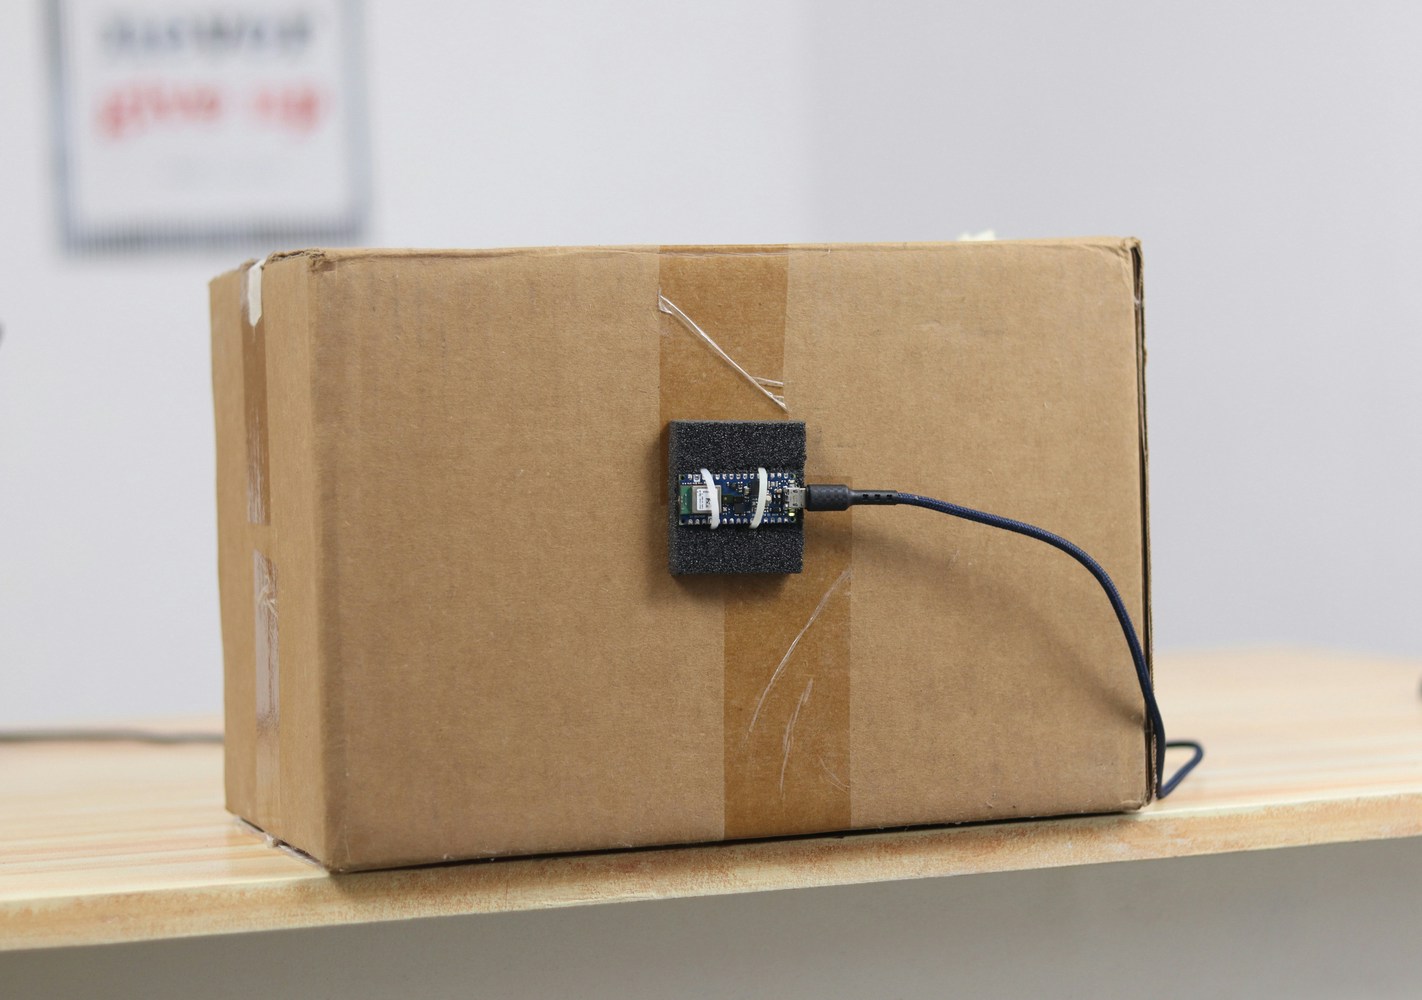
Safe transit of packages is a headache for many online retailers since damage can occur during transit. Damaged shipments lead to a greater number of product returns, a poor customer experience, and negative reputation of the retailers. Since we have no knowledge of what happens during delivery, it might be difficult to prove that a package’s contents were destroyed during travel, as opposed to before or after transfer to a carrier. Due to this lack of transparency, both unfair accusations or deliberate fraud are possible. As a solution, we are designing a device that can monitor the safe handling of packages during transit. This device uses an Arduino Nano 33 BLE Sense and a GSM module, along with Edge Impulse to identify the locations where impetuous handling of the package occurs. Using the accelerometer data, the device can identify possible insecure handling that occurred during the transit. When insecure handling is detected by the device, an alert is generated in our system which logs the current time of the incident. The log can be analyzed by the retailer as part of an internal audit to analyze the performance of the courier services. The user can also track the handling of the package using the web interface provided. This device is extremely useful in transporting Handle With Care packages that should be handled very carefully.How Does It Work?
The Arduino Nano 33 BLE Sense has a 9-axis IMU (3-axis accelerometer + 3-axis gyroscope + 3-axis magnetometer), which makes it ideal for recognizing gestures. The movements are classified by an AI model into five classes - Hard Fall, Vigorous Shaking, Throwing, Normal Carrying, and Idle - after ingesting the data from the IMU. Hard Fall, Vigorous Shaking, and Throwing are categorized as “insecure handling” and the rest are categorized as “secure handling”. Once an insecure handling event is detected by the AI model, the GSM module is activated and it logs the insecure handling event in Firebase. The events can be tracked by the user or an internal audit team to analyse the performance of carriers.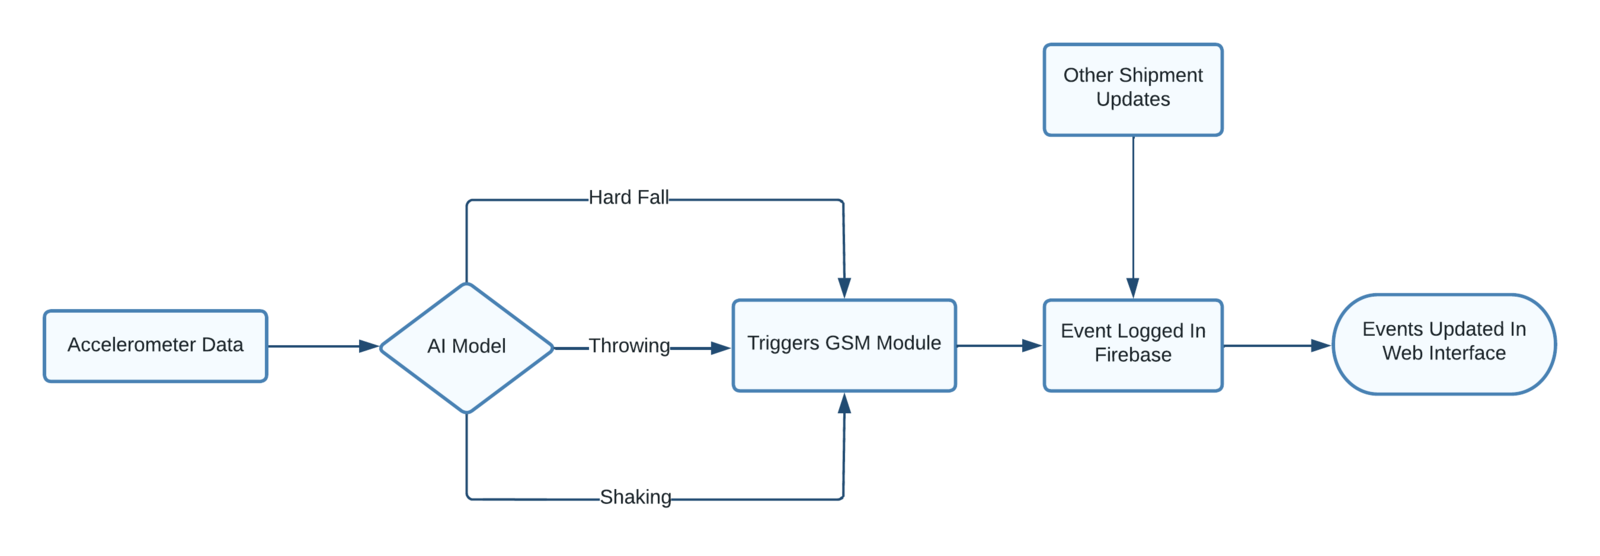
Hardware Requirements
- Arduino Nano 33 BLE Sense
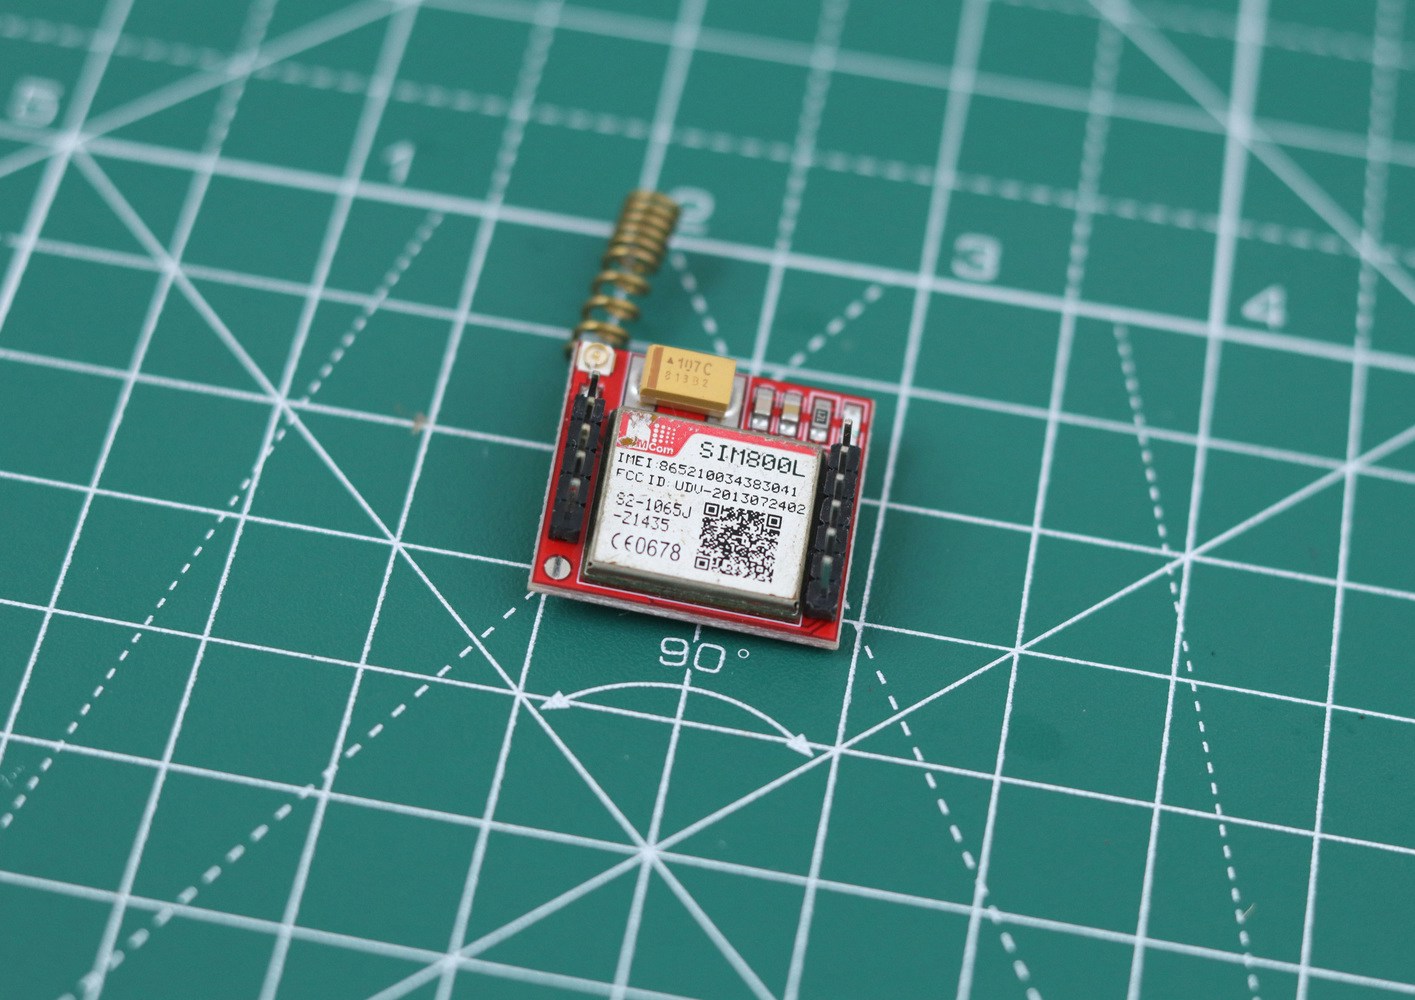
- SIM 800L GSM Module
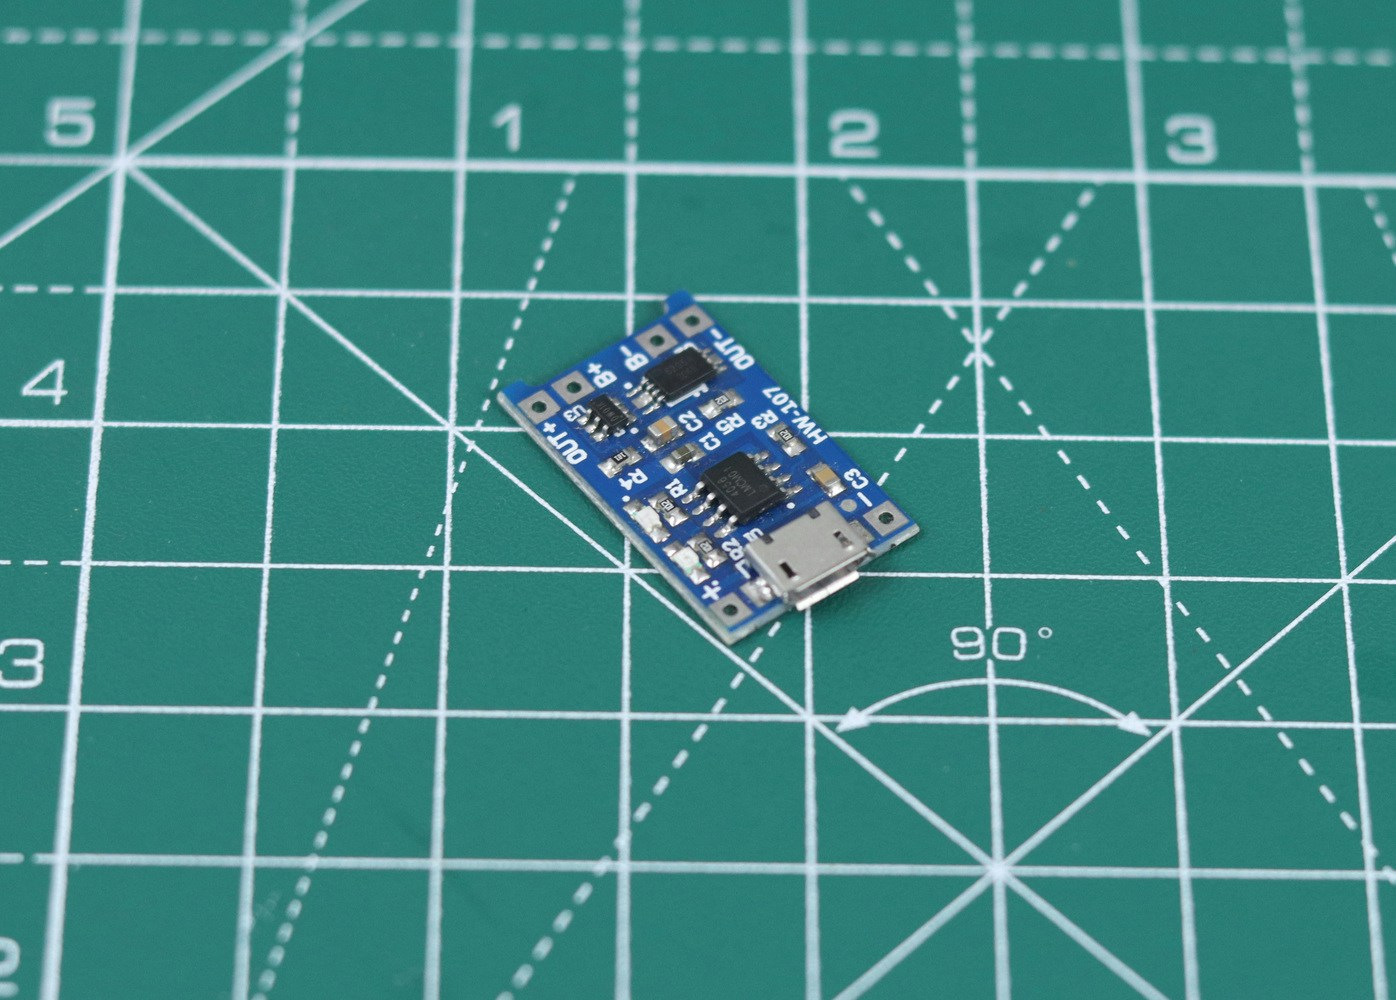
- TP4056 Module
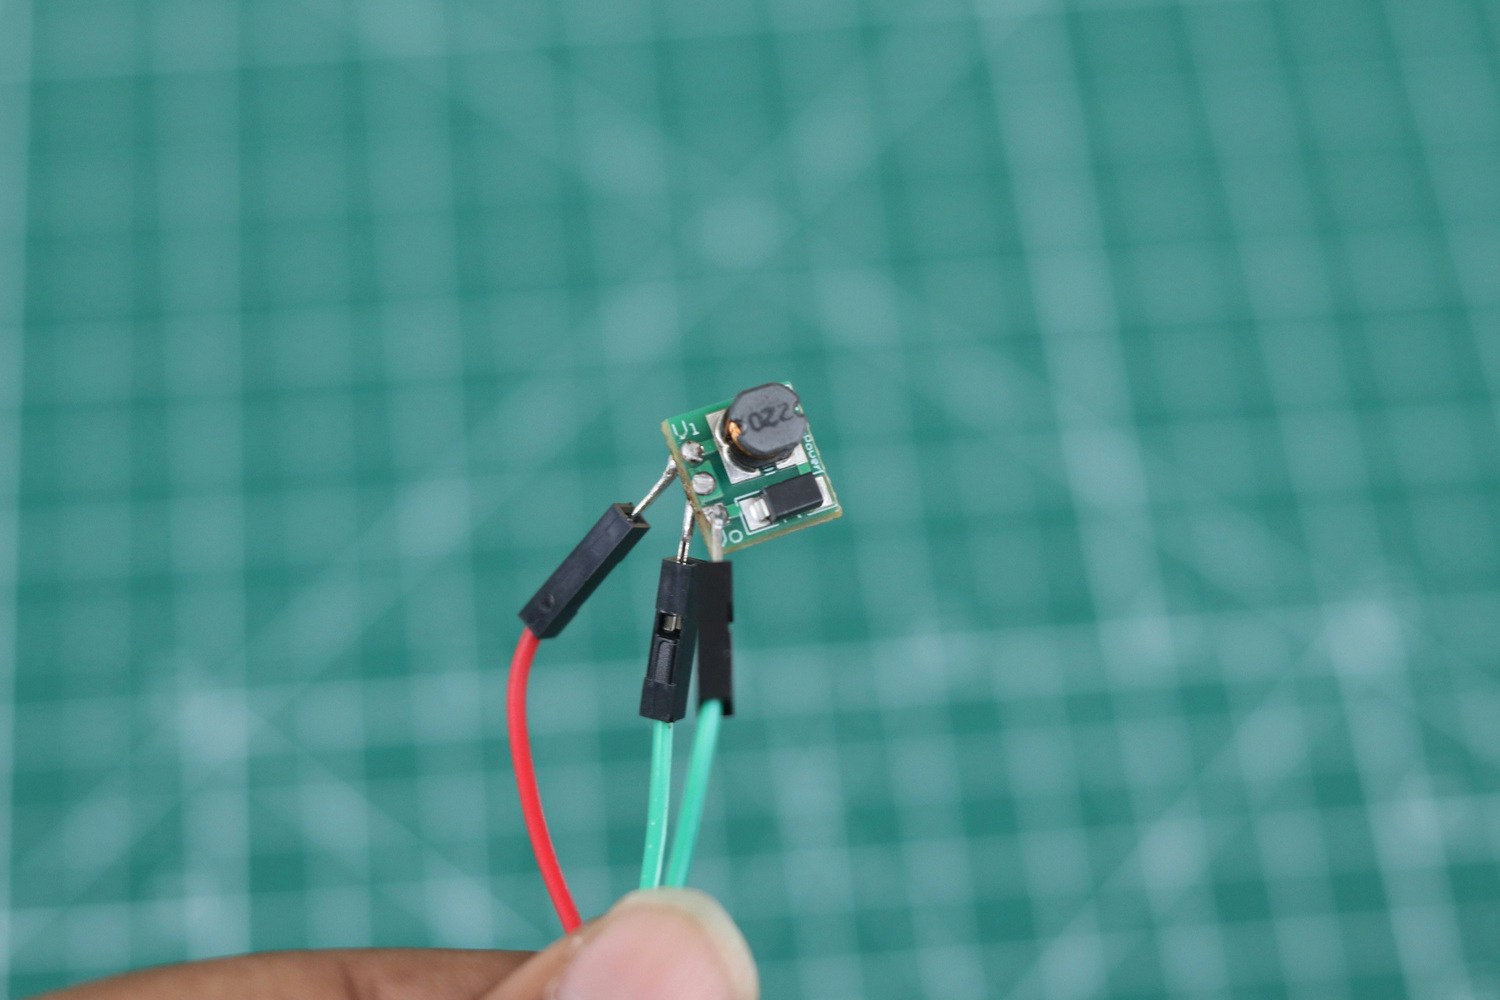
- Boost Converter
- Li-ion Battery
Software Requirements
- Edge Impulse
- Arduino IDE
Software Setup
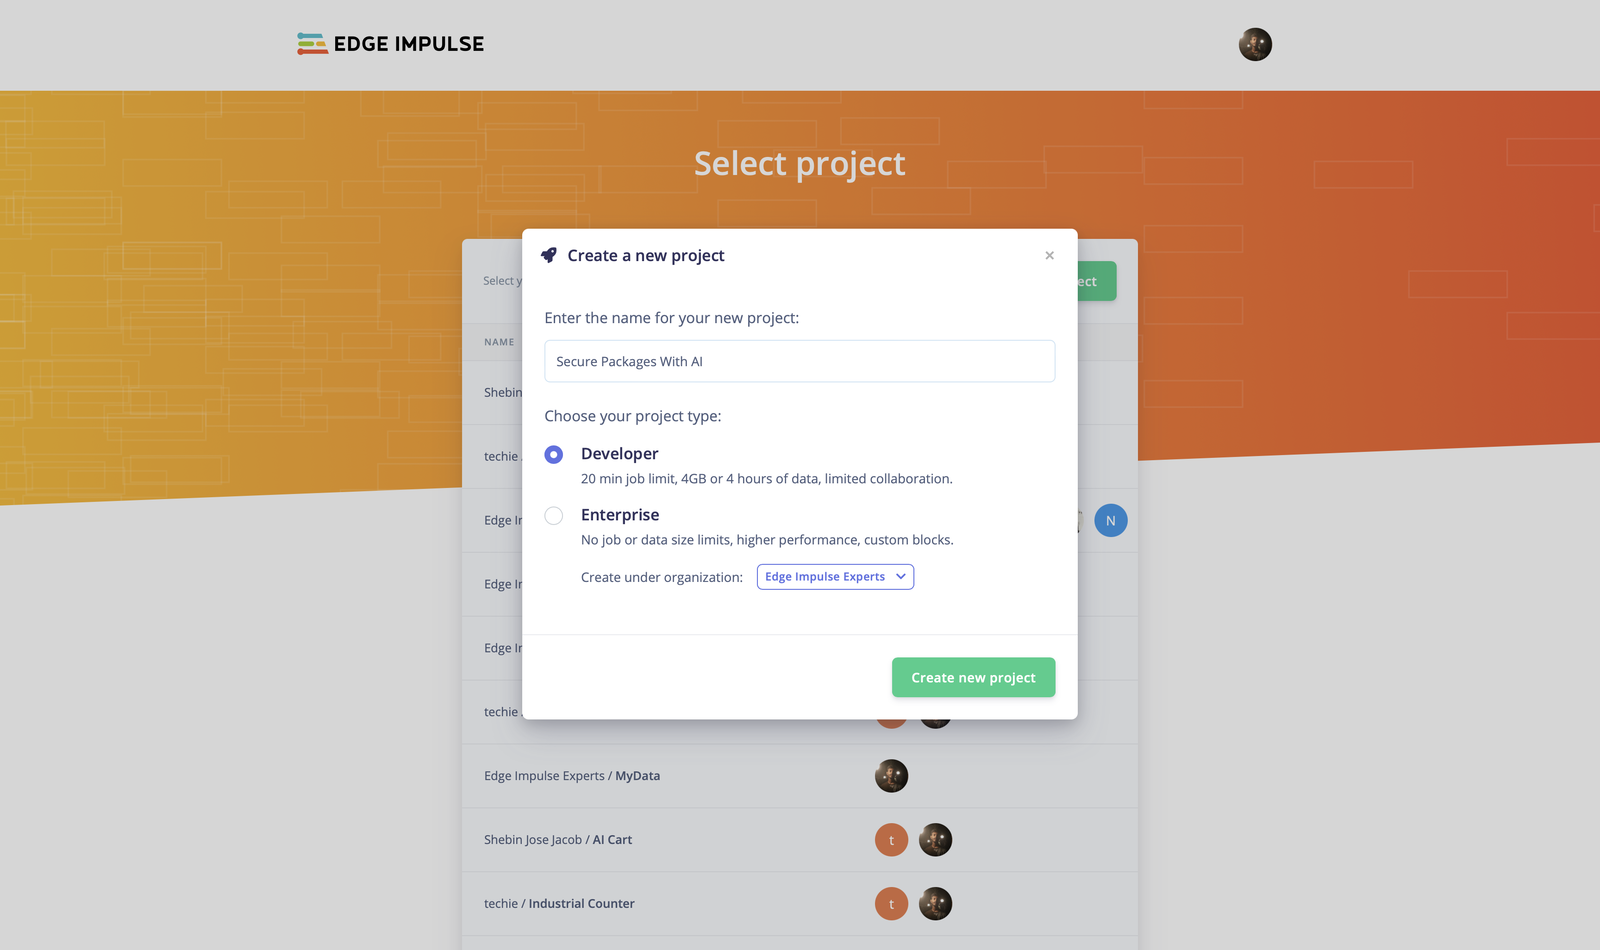
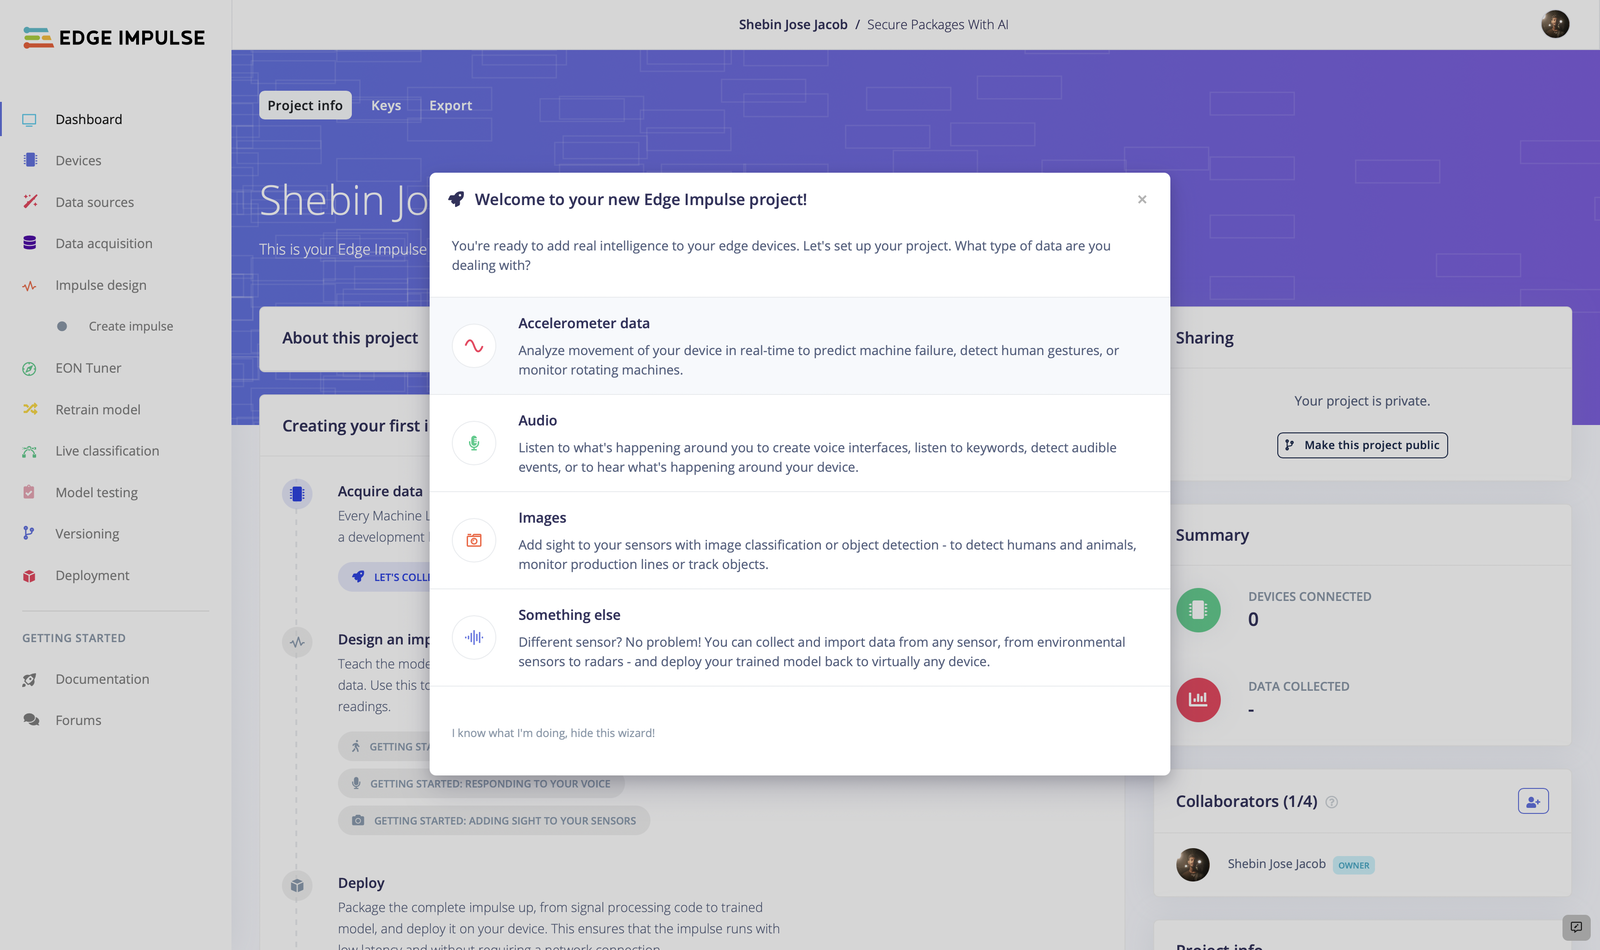
1. Create a new project
The first step is to create a new Edge Impulse project. If you already have an account, you can create a new project by following the steps shown below. If you don’t have an Edge Impulse account, sign up for a new account and follow the steps.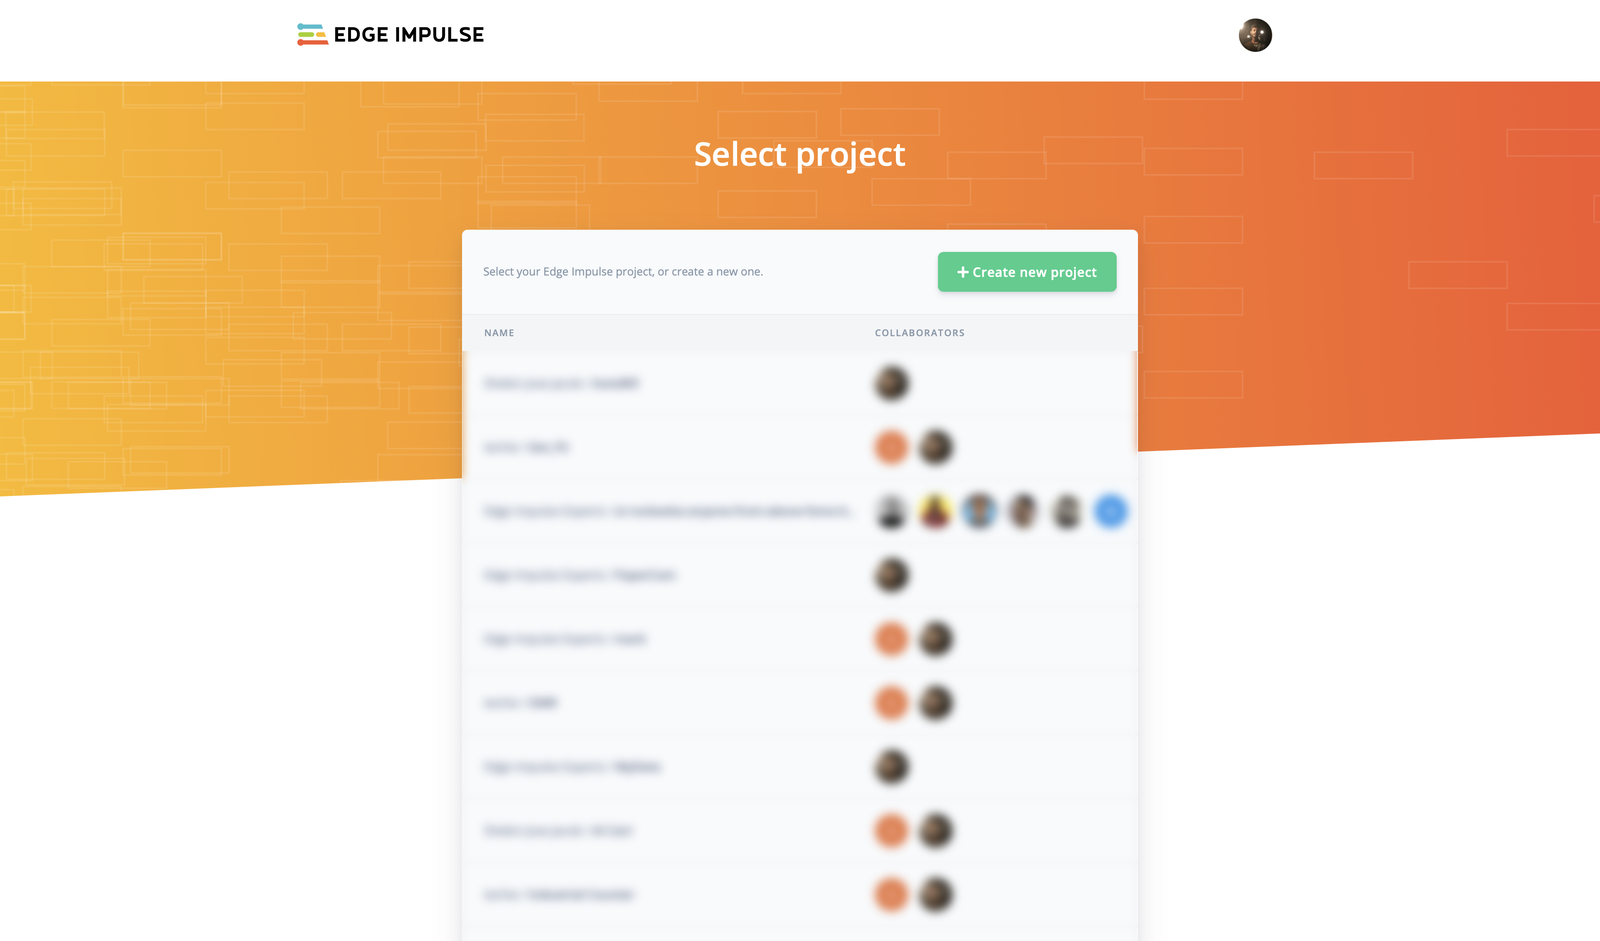
2. Connect the Device
In order to collect accelerometer data directly from the Arduino Nano 33 BLE Sense, we should connect the device to the Edge Impulse Studio first. Follow the steps given here to connect the device with the Studio. After you have completed all the above steps, make sure you see your device in the Devices tab.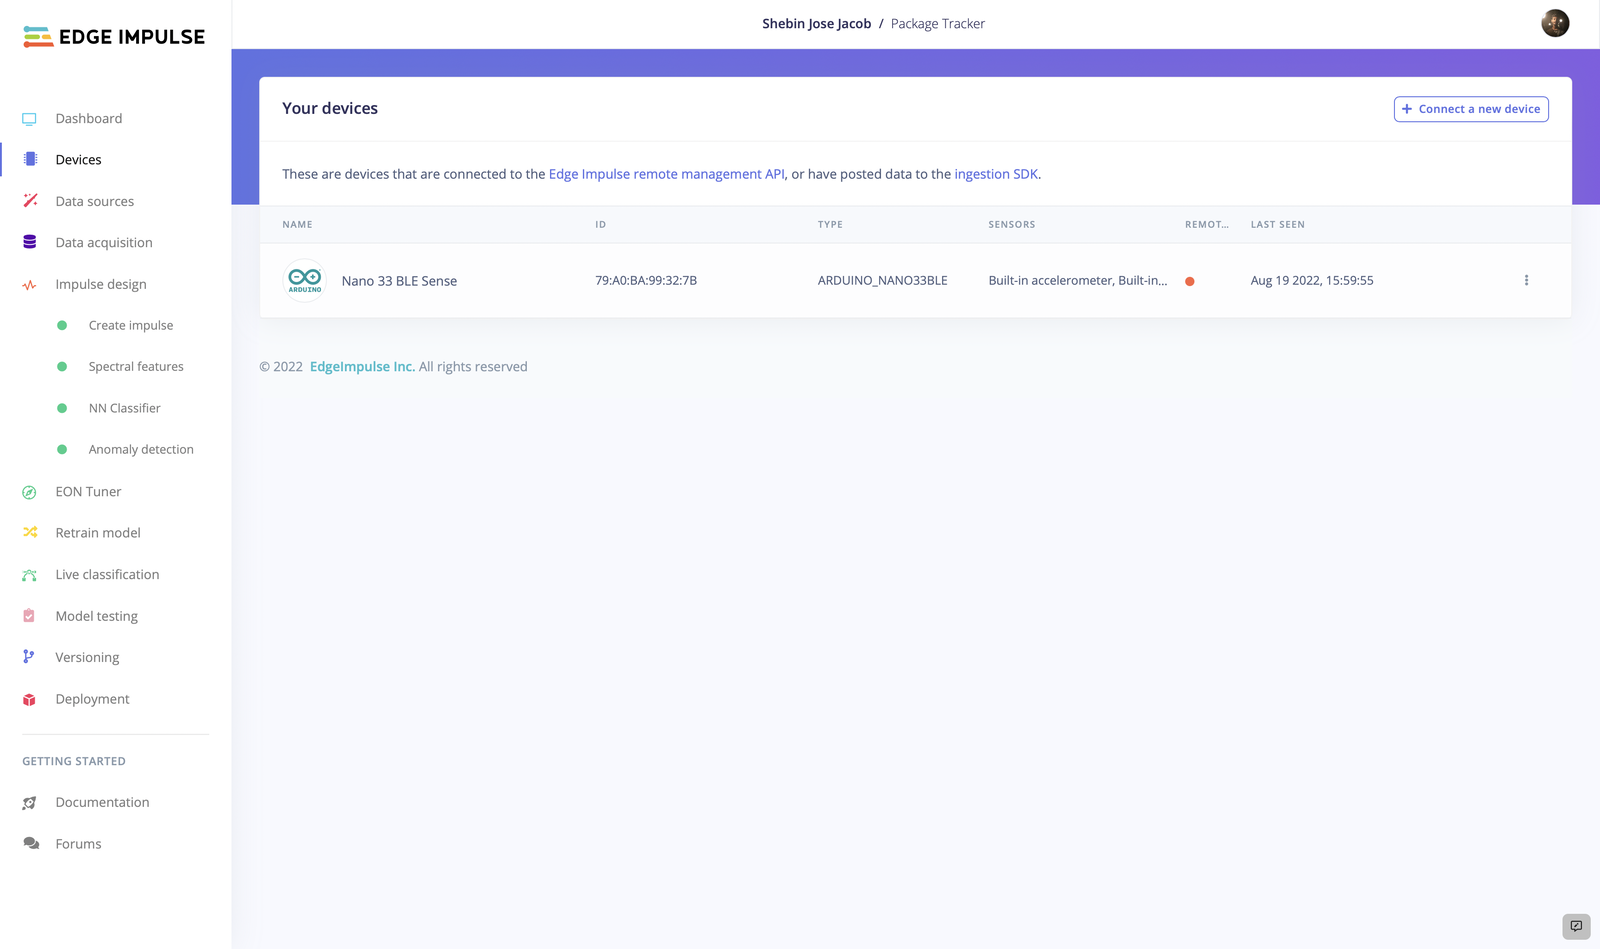
3. Data Collection
Machine learning begins with the data you provide. It is crucial to gather clean data so that your machine learning model can identify the proper patterns. How accurate your model is, will depend on the quality of the data you provide the computer. Inaccurate or out-of-date data will result in inaccurate results or predictions that are irrelevant. As it will directly impact the result of your model, be sure to obtain data from a reputable source. Good data is pertinent, has few duplicated and missing information, and accurately represents all of the classifications and subcategories that are there. As we are building a motion recognition model, we are collecting the accelerometer data from the IMU. To collect the data, navigate to the Data Acquisition tab.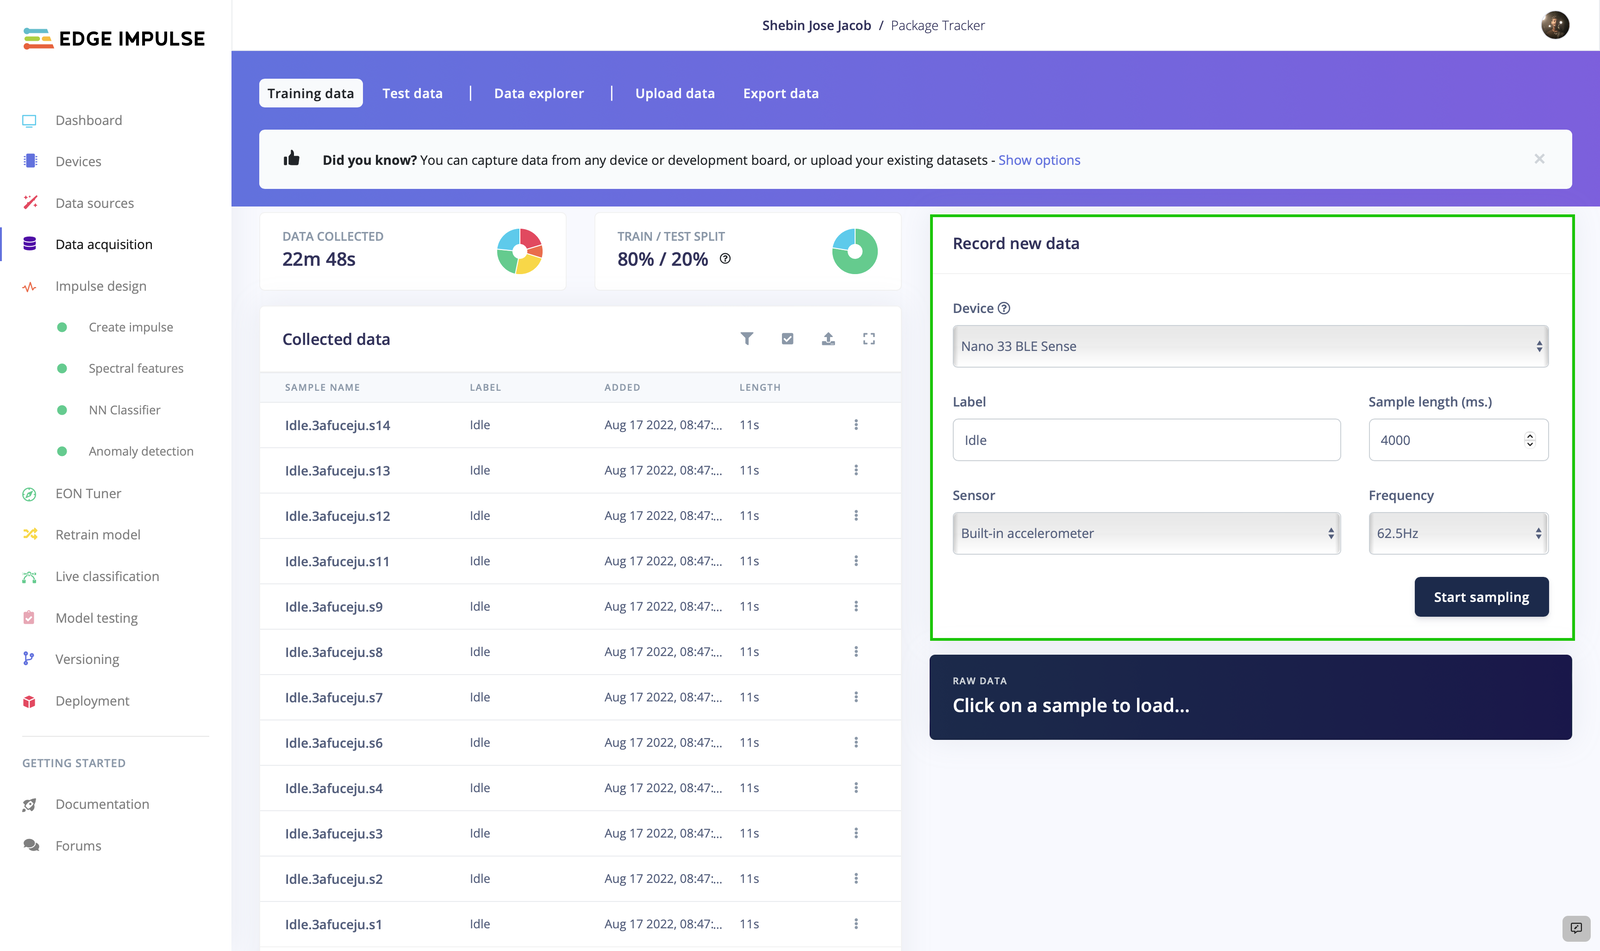
4. Data Preparation
Finally, we have 28 minutes of accelerometer data. The data is collected under 5 different classes - Hard Fall, Vigorous Shaking, Throwing, Normal Carrying, Idle. After we have our data, we have to prepare it. For this we can do the following.1. Visualise The Data
Visualize the data to understand how it is structured and understand the relationship between various variables that may help us in designing the impulse.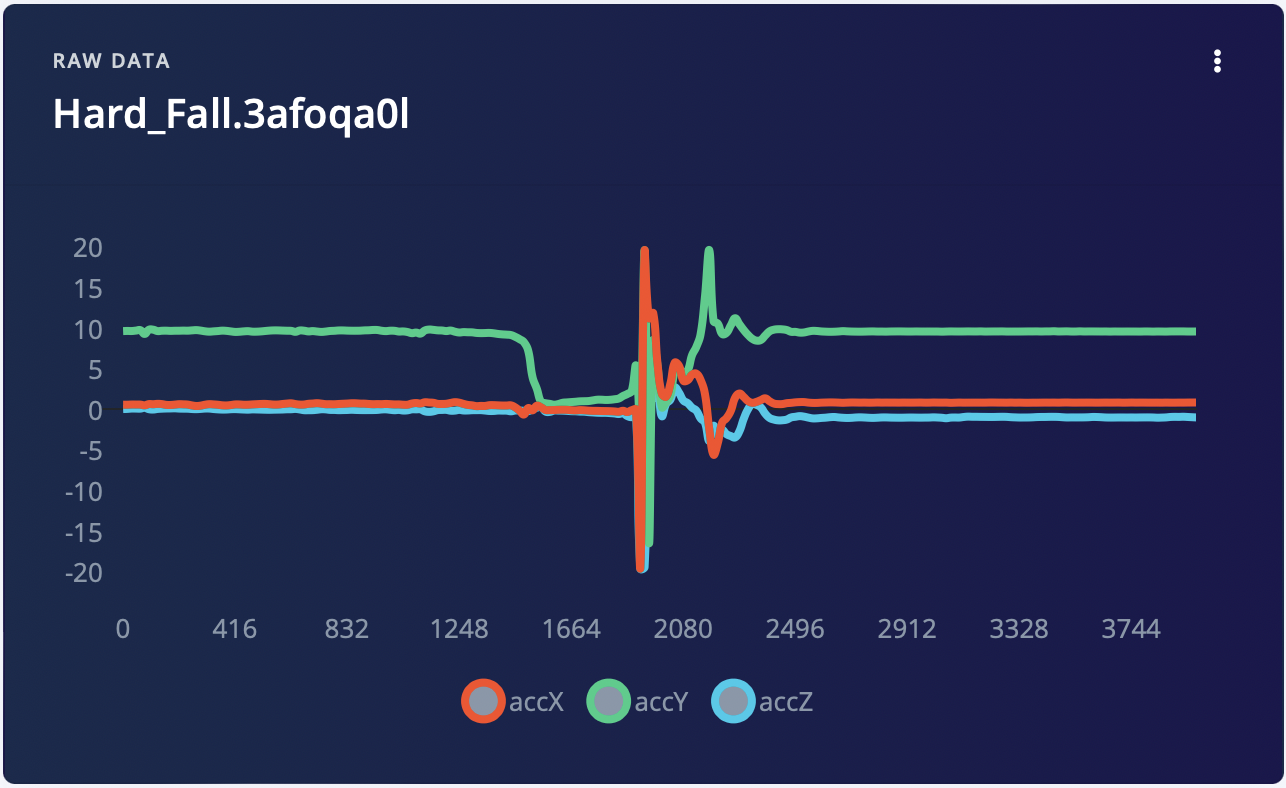
2. Clean The Unwanted Data
After we visualise the data we can determine whether the data is useful for model training. Remove unwanted data to create a clean dataset.3. Split The Data
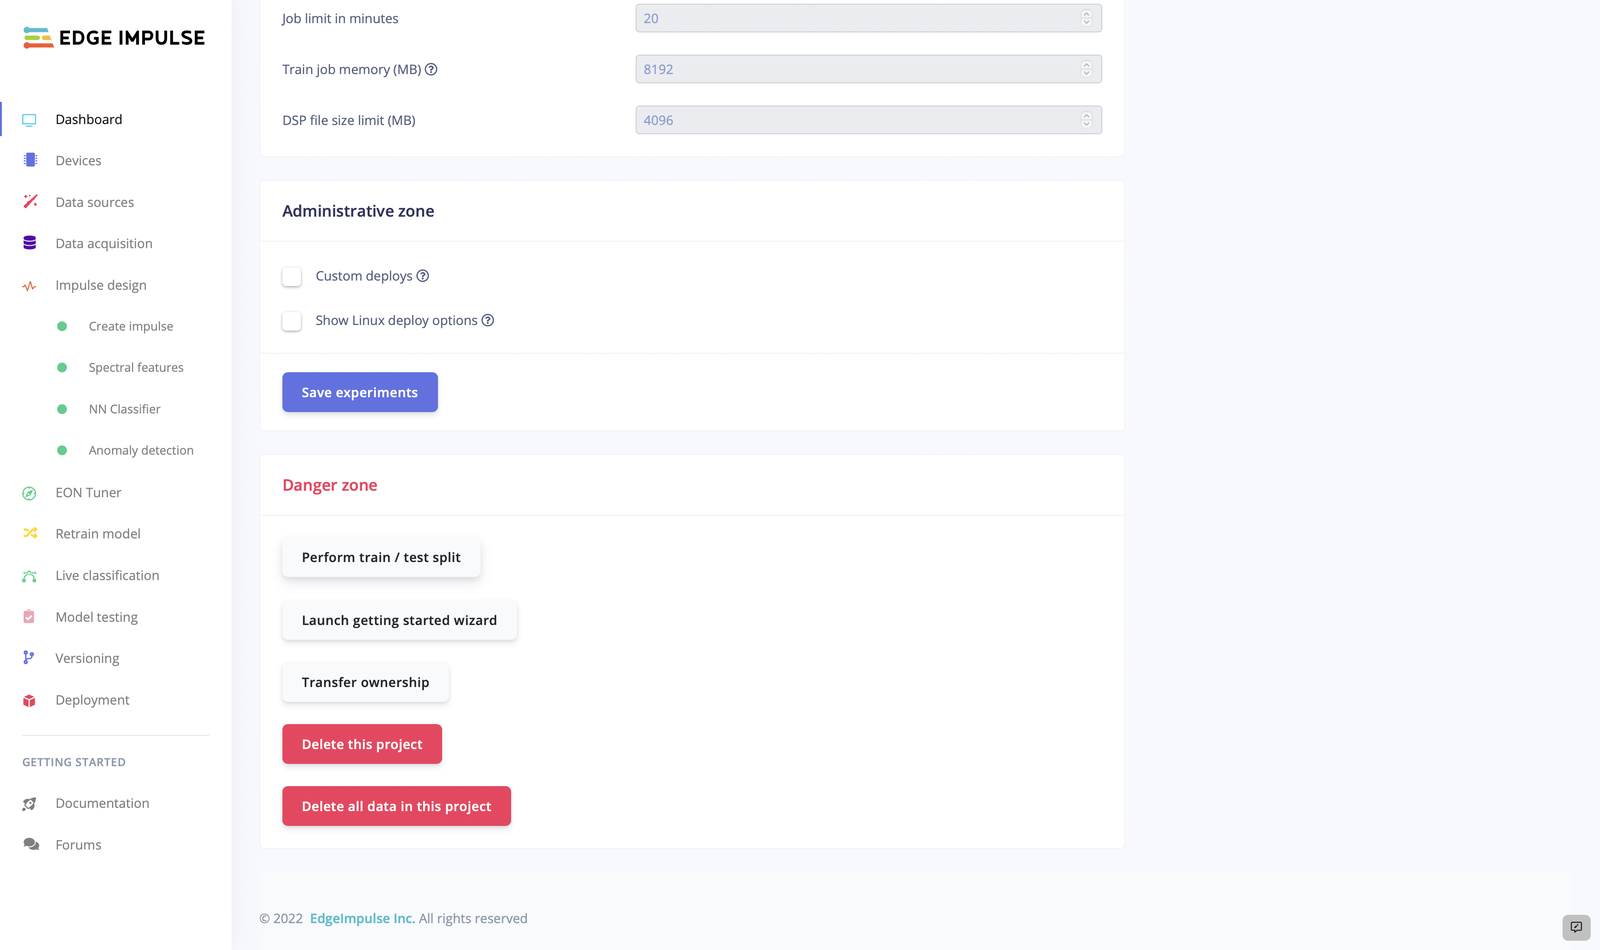
Once we have a clean dataset, split it into training and testing datasets. Here we split them up into two groups, in the ratio 80:20. If your data is not split, perform a test/train split either from Data Acquisition Tab or from Dashboard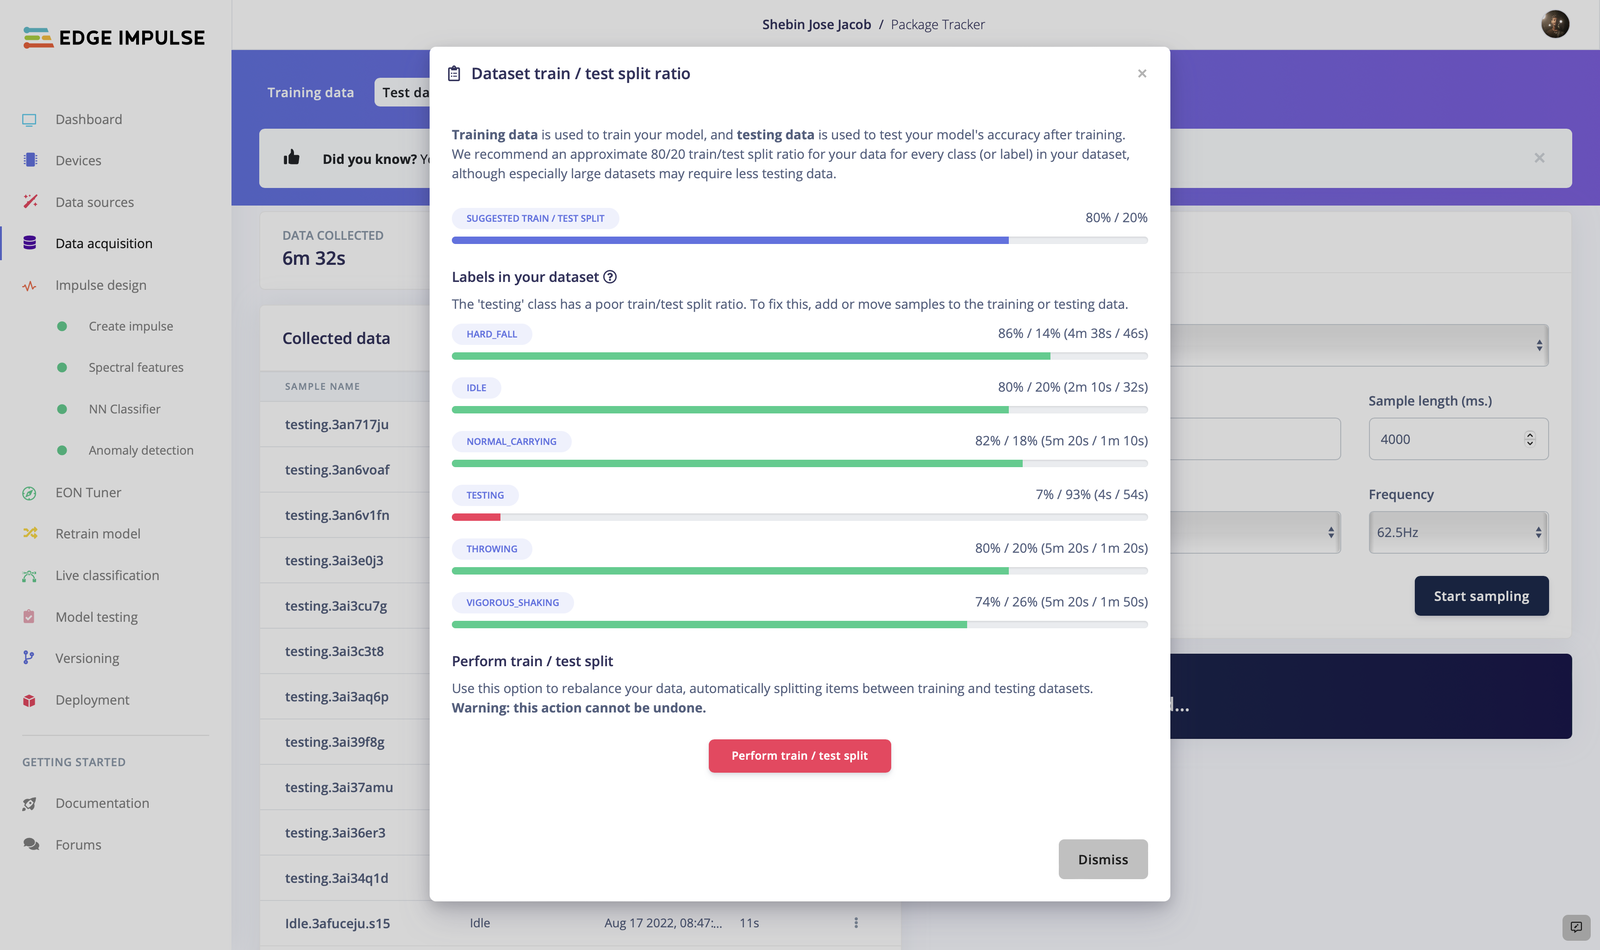
5. Impulse Design
By creating an Impulse in Edge Impulse, you’re creating your own machine learning pipeline. Navigate to Impulse design > Create Impulse An impulse contain 3 blocks : input block, processing block and a learning block. I have chosen Time series data as my input block, Spectral Analysis as the processing block, and Classification (Keras) as the learning block. You can add an anomaly block if you’re interested in detecting anomalous motions, I’m just omitting it for now.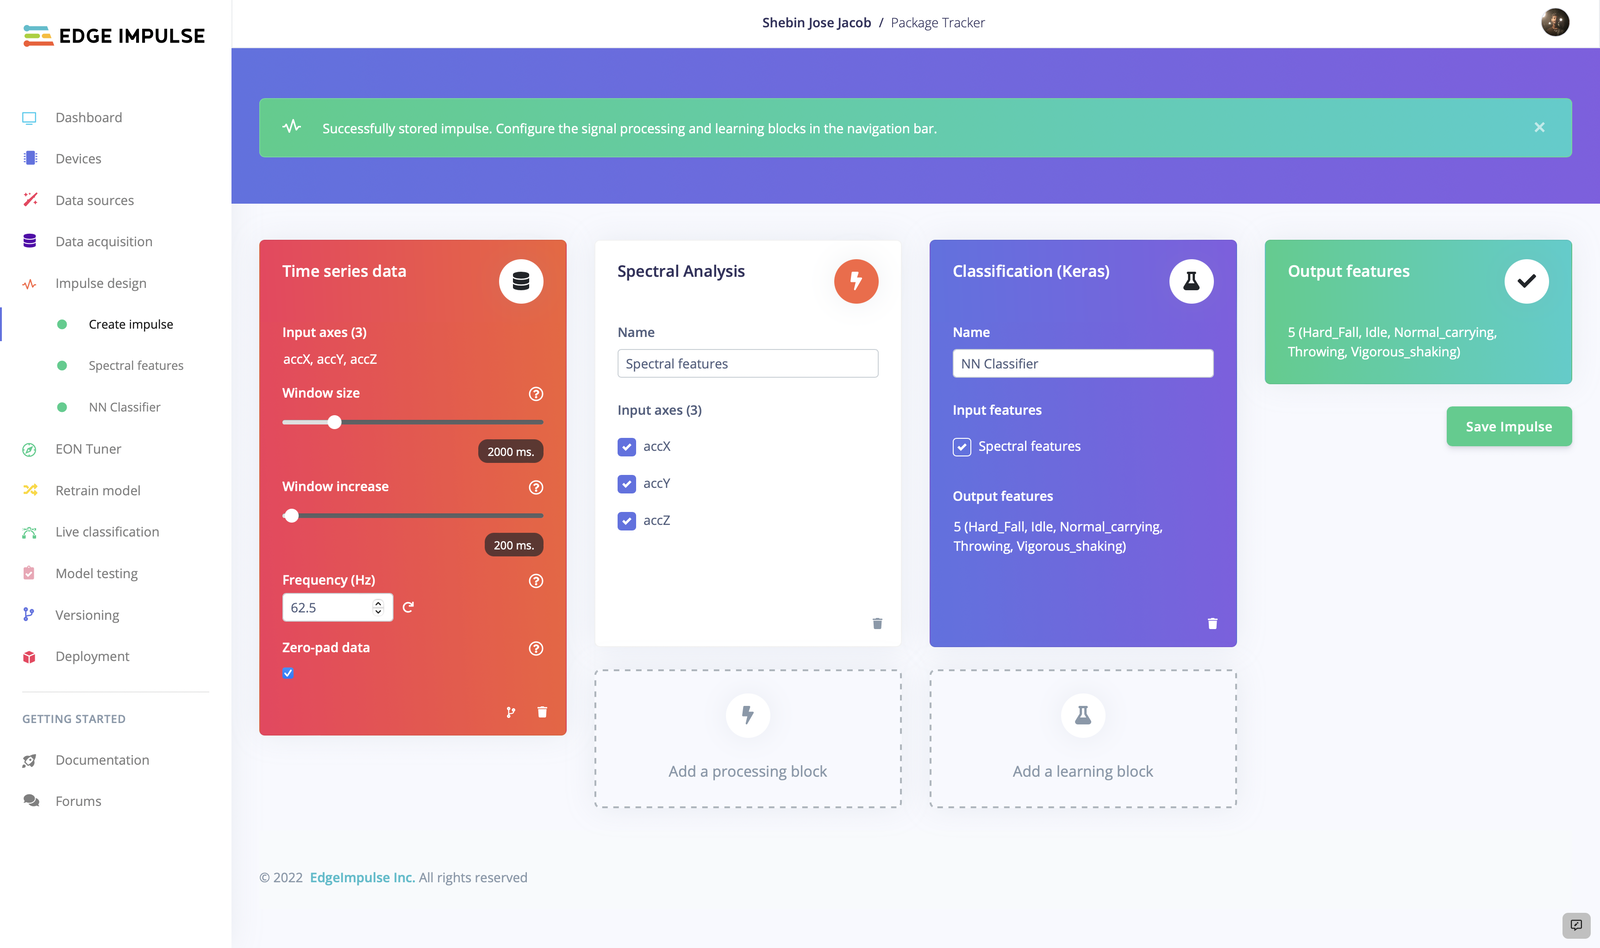
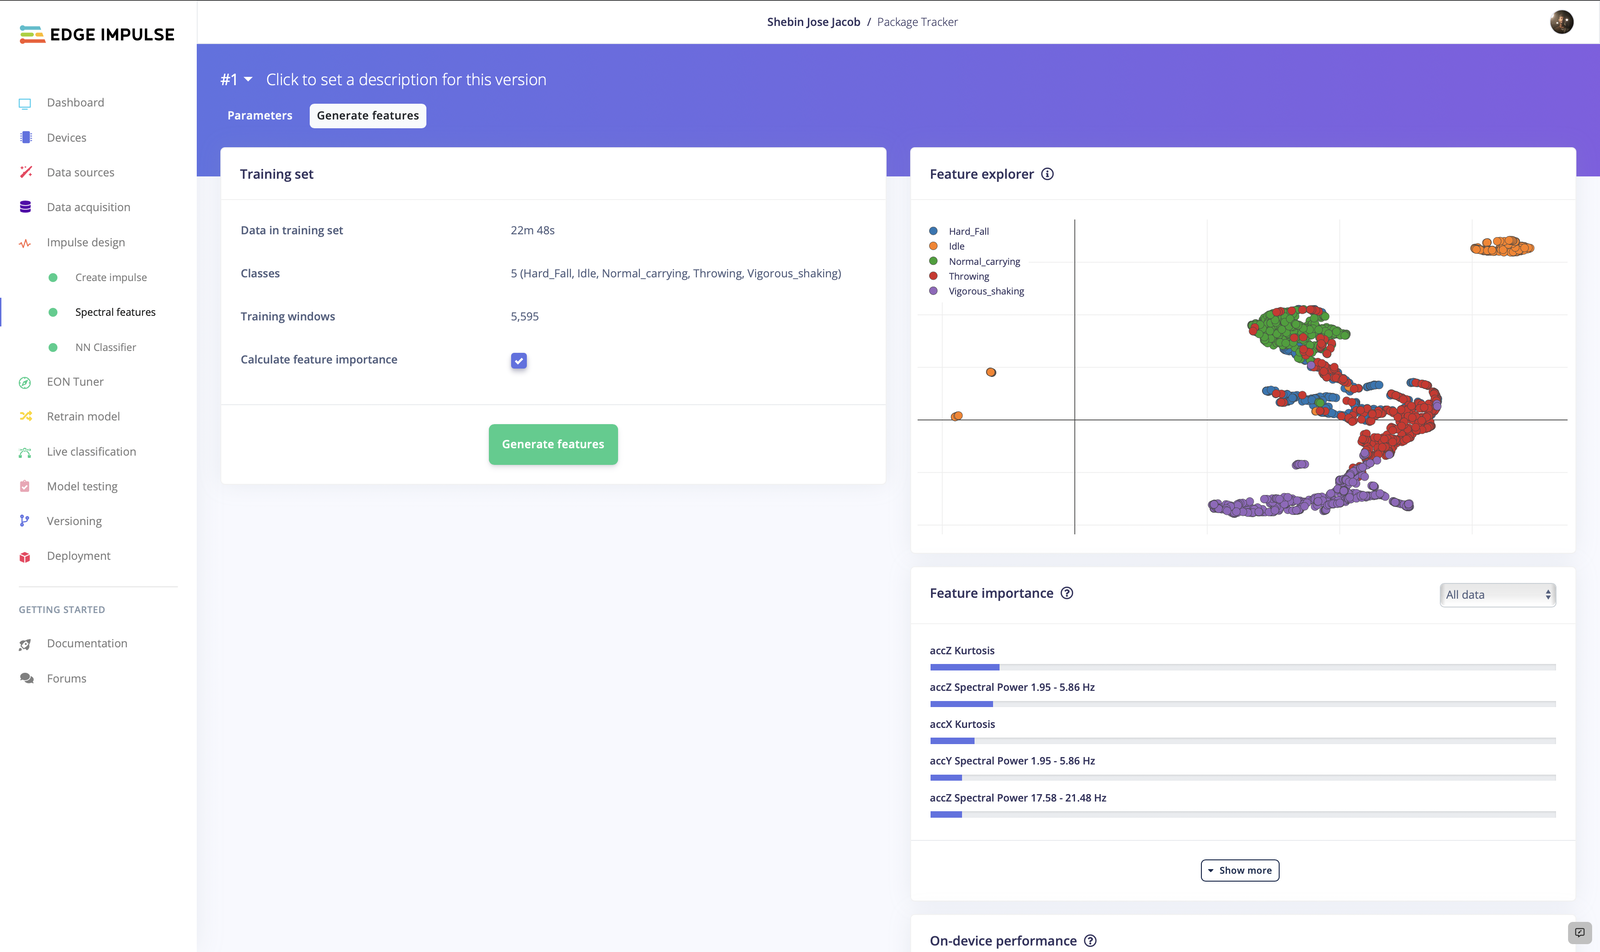
6. Feature Generation
Next, select Save Impulse, then navigate to the Spectral Features in the Impulse design panel by clicking on it. Once the parameters have been generated, wait a moment and then click Save parameters.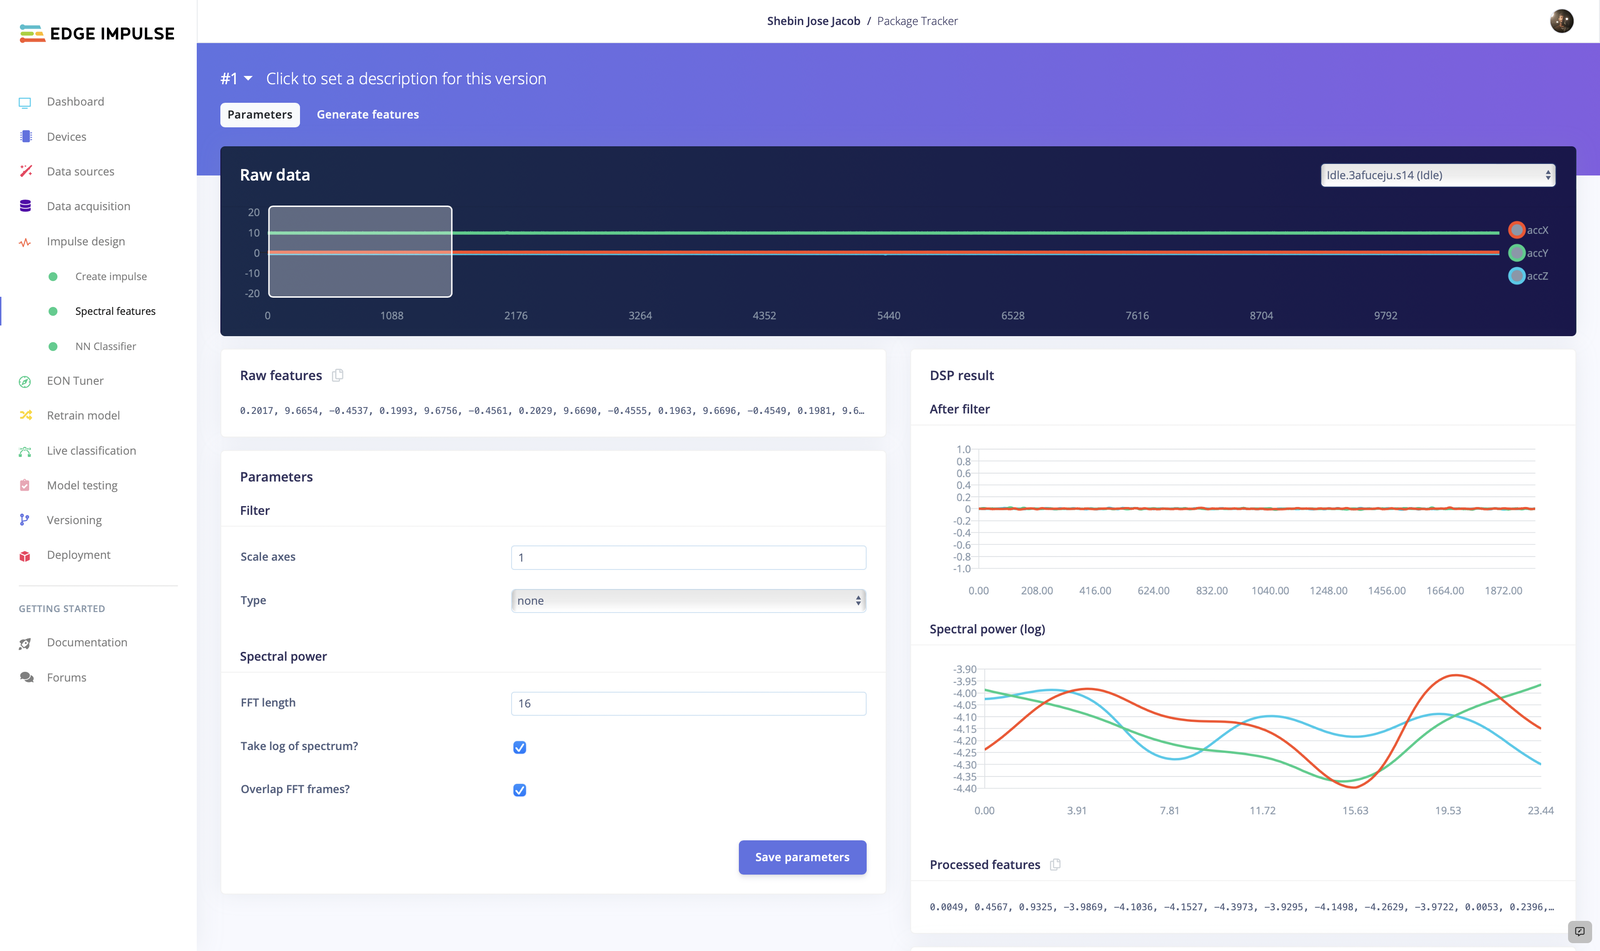
7. Model Training
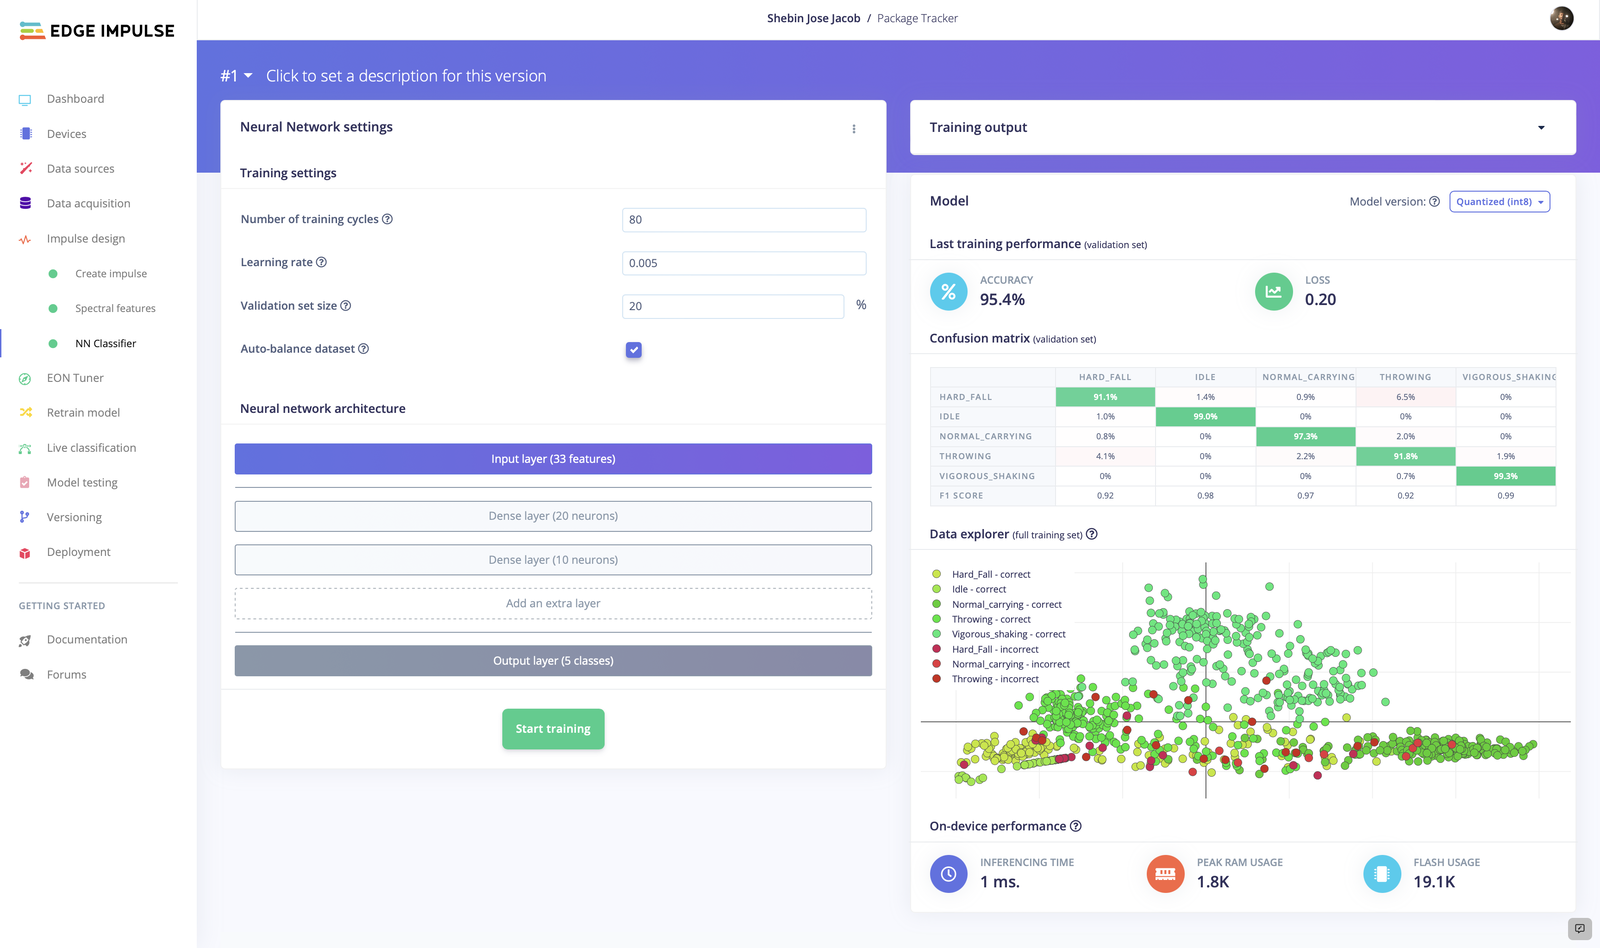
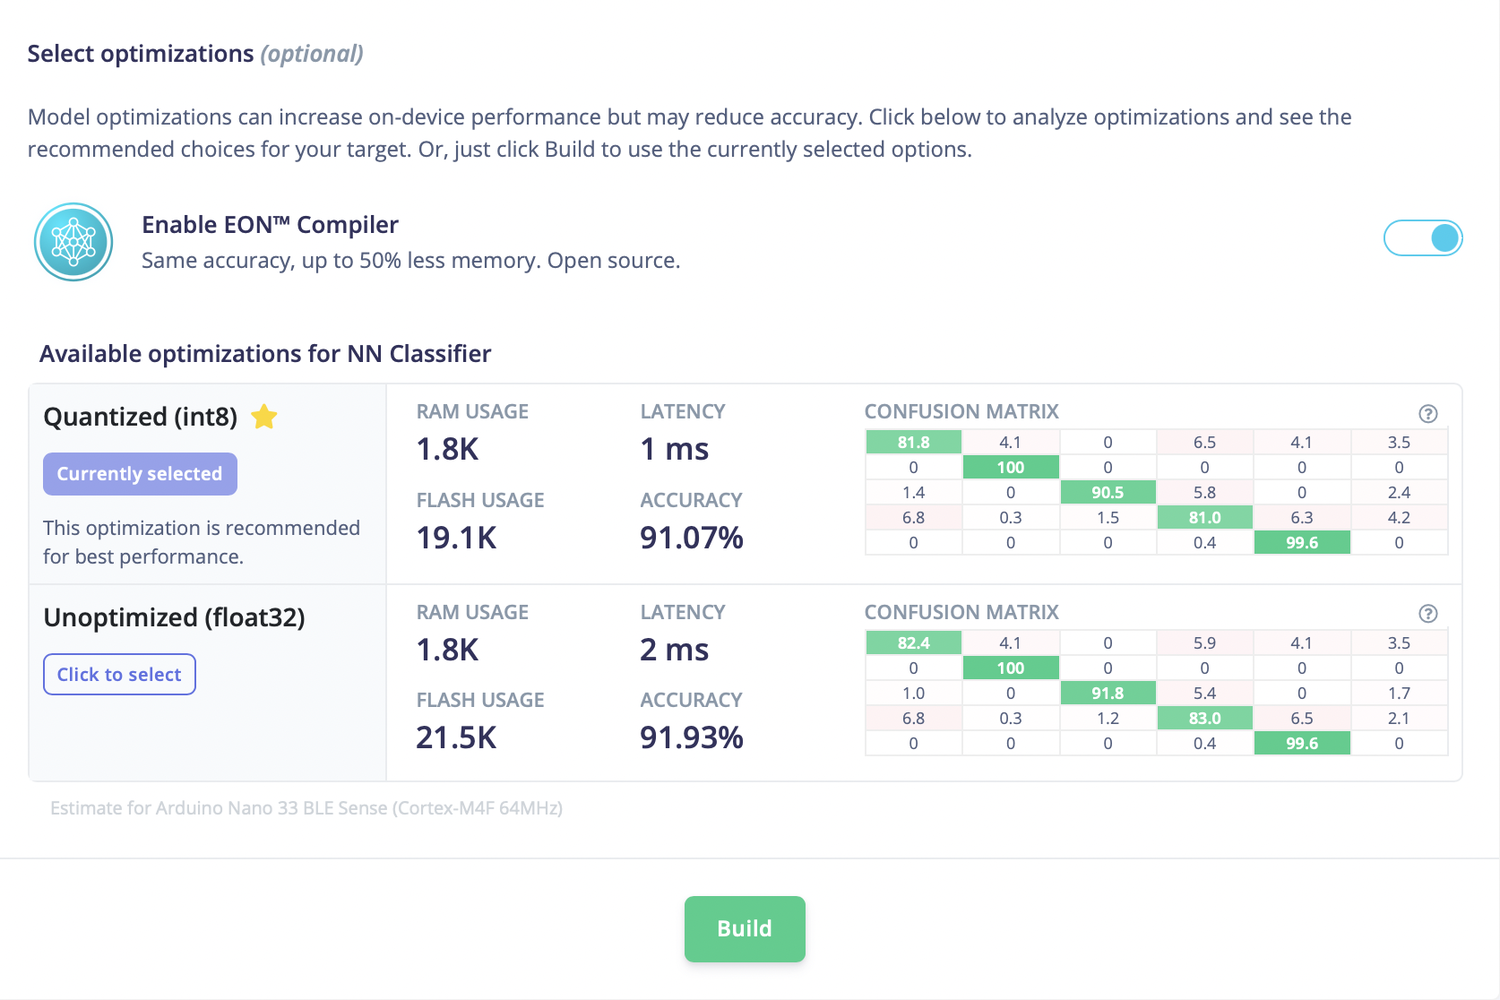
Model training is the phase in which the neural network tries to fit the best combination of weights and biases to a machine learning algorithm to minimize a loss function. In the NN Classifier tab, under the Impulse Design menu, we can configure various parameters that influence the training process of the neural network. I have changed the default values as shown in the image to attain better accuracy.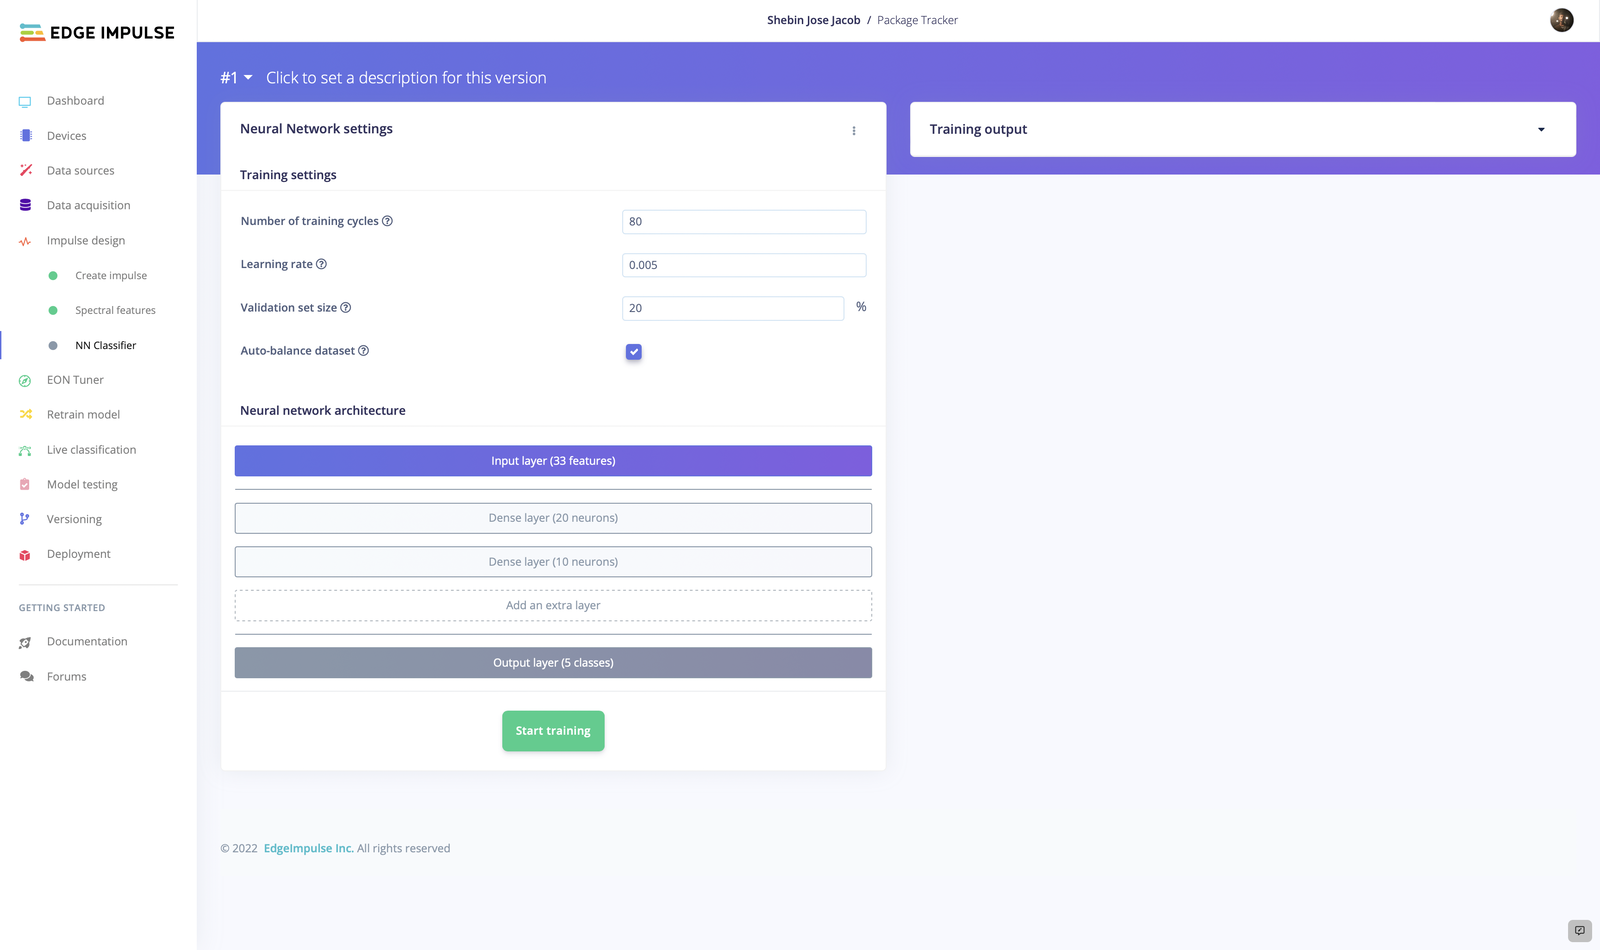
8. Model Testing
Once the model is trained, we can now test it to see how it performs with new data. Select Classify All under Model Testing. The model’s performance on our testing data is displayed in the Model testing results tab. Our accuracy is 91.3%, which is still quite good. You can also look at the Confusion matrix to determine which labels are most susceptible to error. On the basis of this, you can expand the training dataset for these classes with additional items.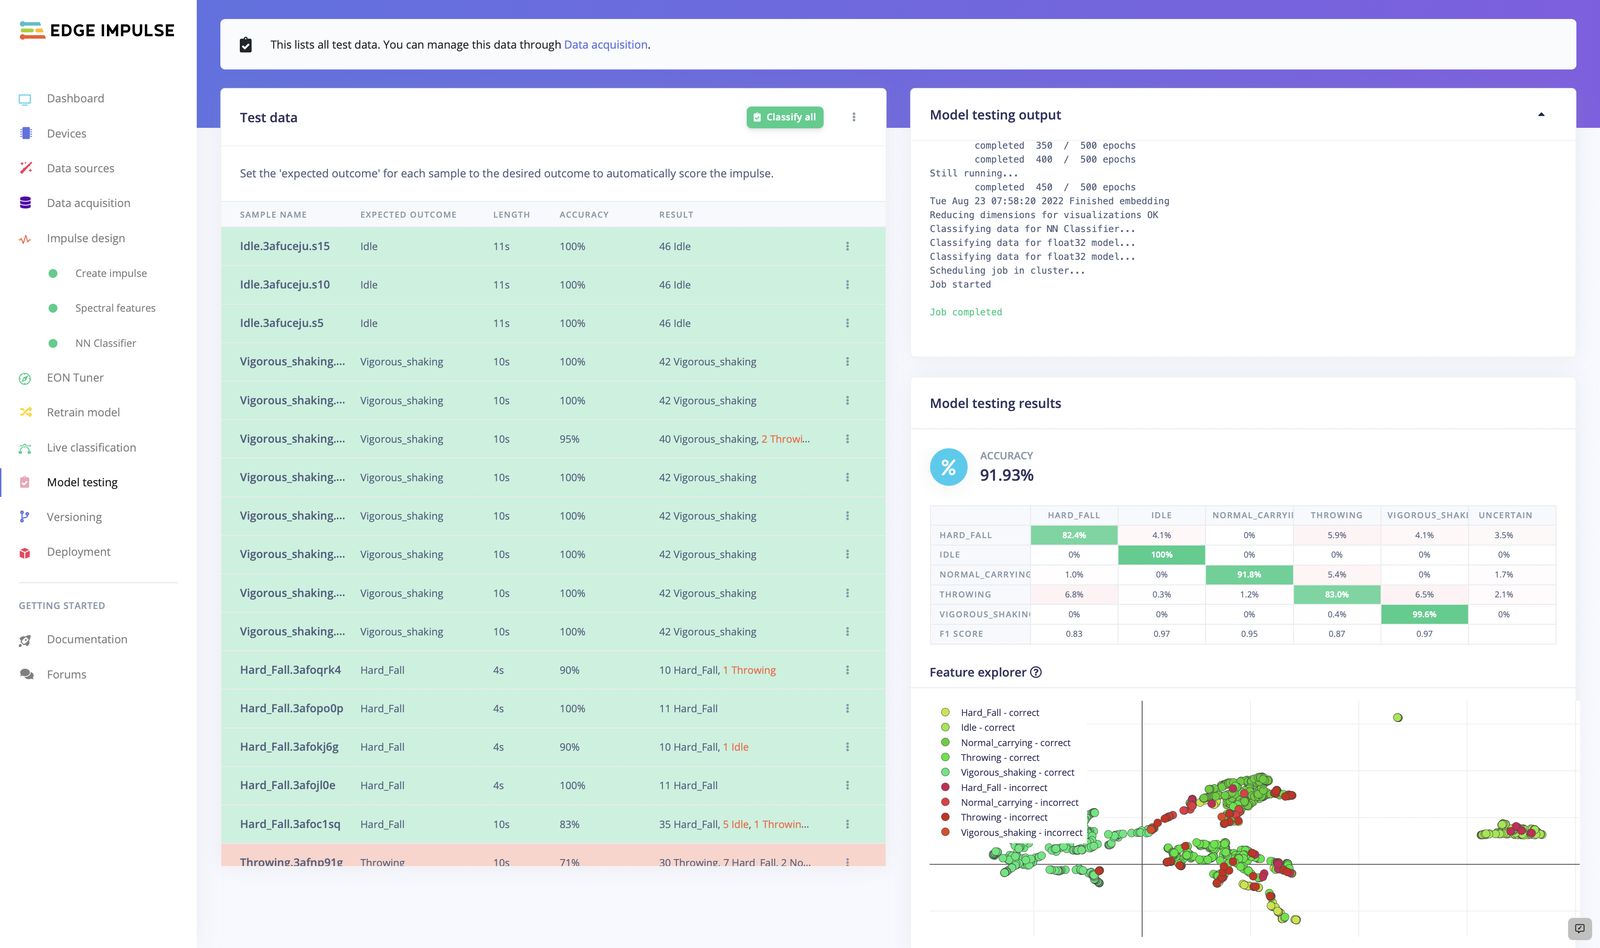
9. Deploying Model to the Device
Once the model is trained and tested, it’s time to deploy it back to the device. For this, navigate to Deployment > Build Firmware. Select Arduino Nano 33 BLE Sense and Build. It will generate the model and download it to your computer as a Zip file. Add the downloaded Zip file in the Arduino libraries, and you are good to go.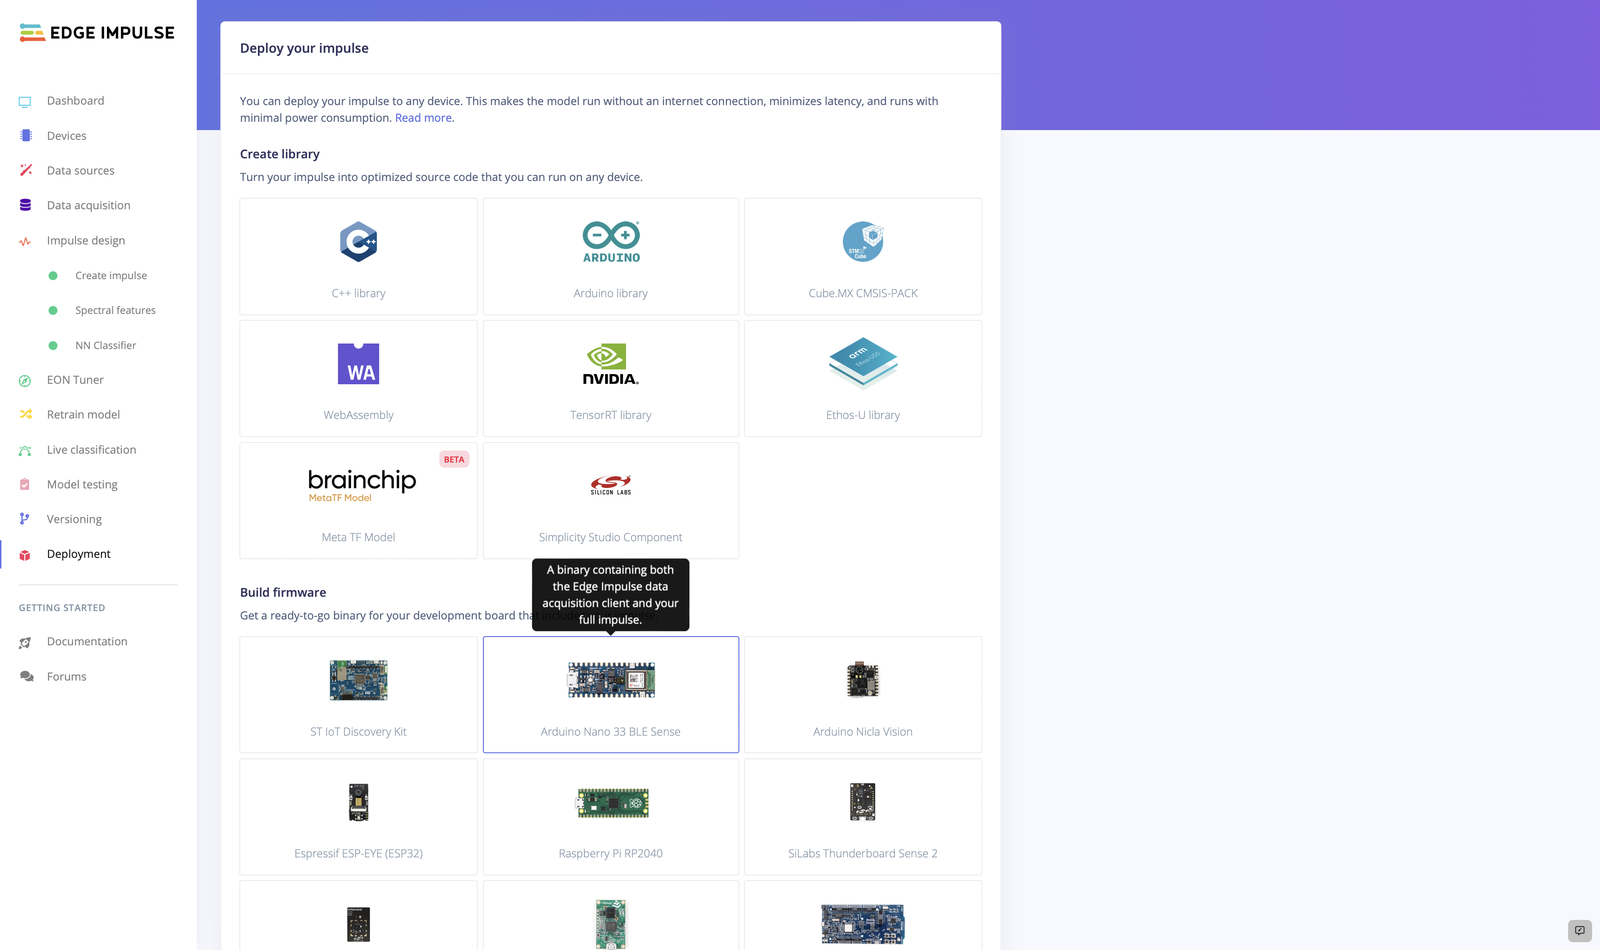
10. Firebase Realtime Database
Firebase is a platform for creating both mobile and online applications. Thanks to Firebase, developers may now concentrate on creating amazing user experiences. No Server management is necessary, no need to create APIs. Firebase is your server, API, and data storage, all of which are constructed in such a generic way that you can adapt them to the majority of demands. In our project, we are using Firebase real-time database to instantly post and retrieve data. To find your Firebase Config:- Go to Firebase
- Then go to Settings > Project Settings
- Under Your Apps > SDK Setup and Configuration > Config (Sample given below)
11. Web Interface
The web interface is designed in such a way that it can reflect all the events updated in the Firebase database. The insecure handling events are updated in the Firebase directly from the Nano 33 BLE Sense and other shipping updates can be updated using an API.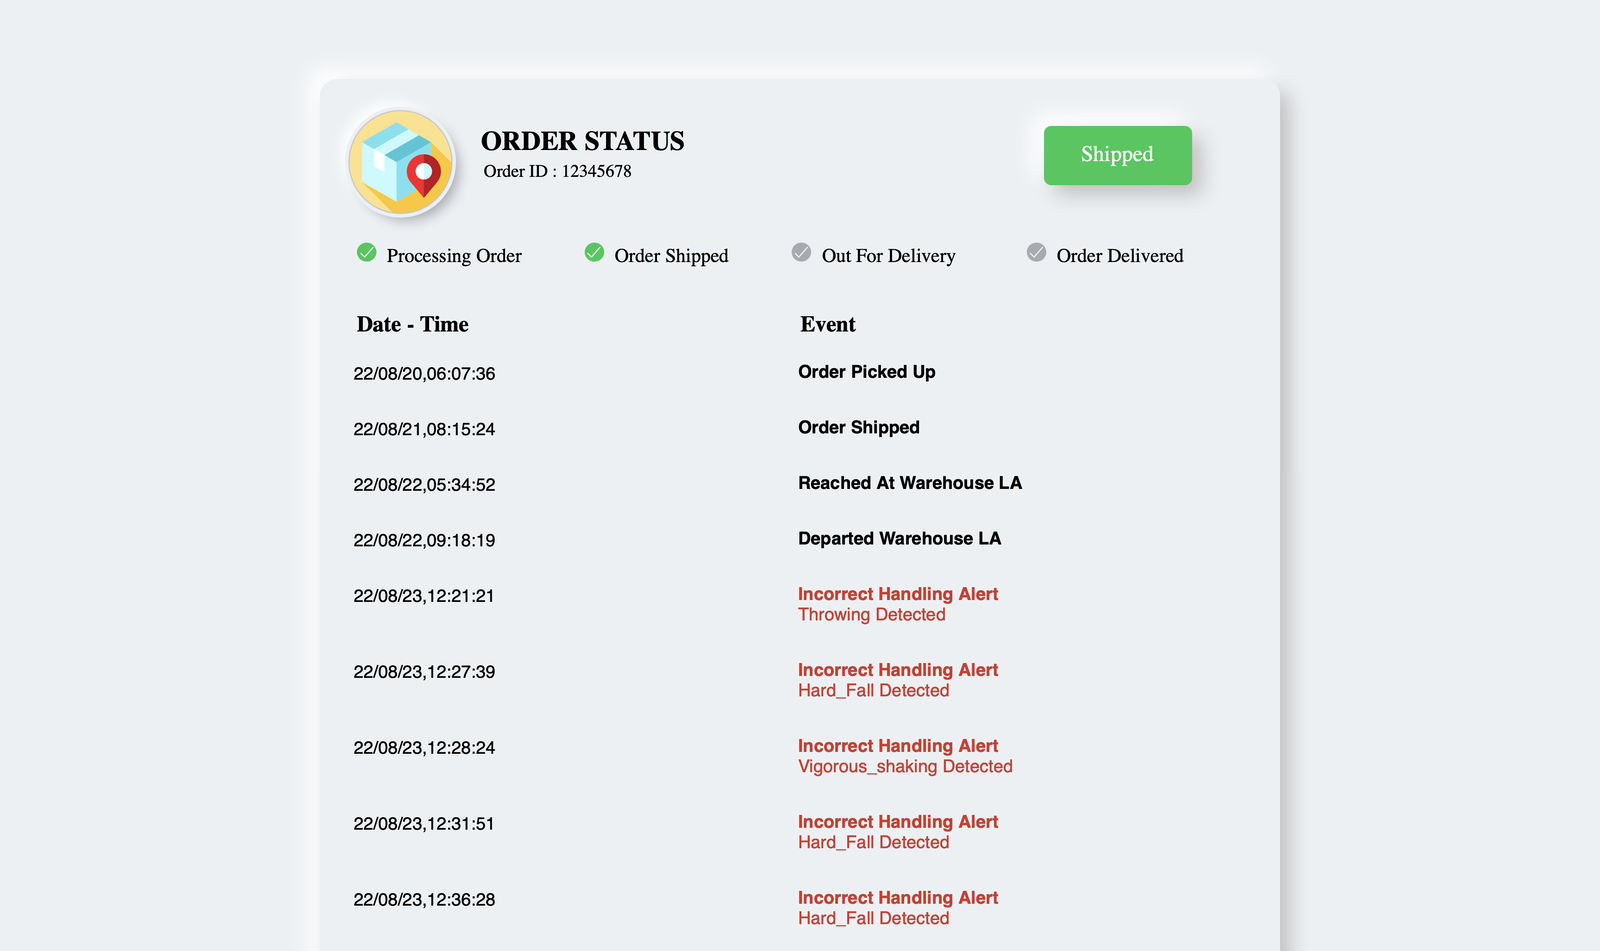
Hardware
The heart of the Package Tracker is an Arduino Nano 33 BLE Sense. We opted for this board due to its tiny form factor and its high capability. It comes with a series of embedded sensors and here we use the LSM9DS1 sensor which is a 9-axis inertial module. It comes with one extra hardware serial port which benefits here, to connect with the GSM module.