Project Demo
Intro
Hiking is a great way to get outdoors and enjoy some fresh air. However, keeping track of your progress can be challenging, and that’s where an outdoor activity tracker comes in handy. A hiking wearable device provides some valuable functions that can make your hike more enjoyable and safe. It can track things like how many steps you’ve taken, your walking speed, and even the weather conditions.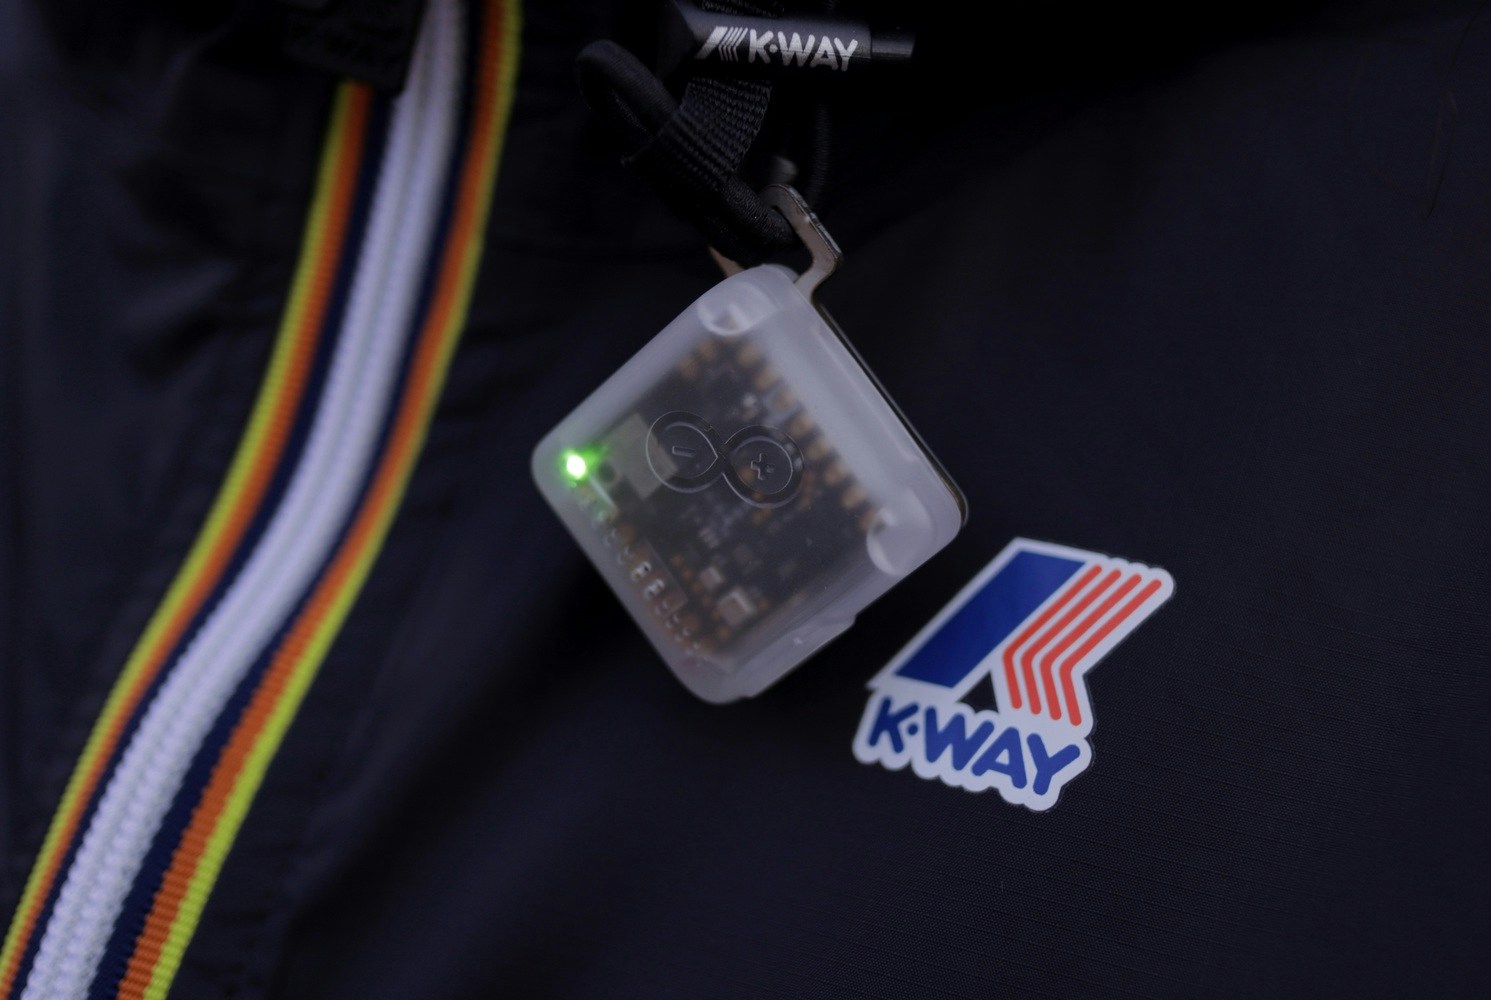
- Weather prediction - The wearable will be able to predict weather changes using the onboard pressure sensor and AI. By monitoring the atmospheric pressure, the tracker can notify you when a storm is approaching or when conditions are ripe for favorable weather. This information can be helpful in deciding whether to push on with your hike or turn back.
- Activity tracking - The wearable will be able to track your steps and identify walking, climbing, or breaks taken during the hike.
- Data gathering for ML - The Arduino Nicla Sense ME will send motion and environmental data to another device over a Bluetooth connection and the data will be stored in the Arduino IoT Cloud for future processing.
Hardware requirements
- Arduino Nicla Sense ME
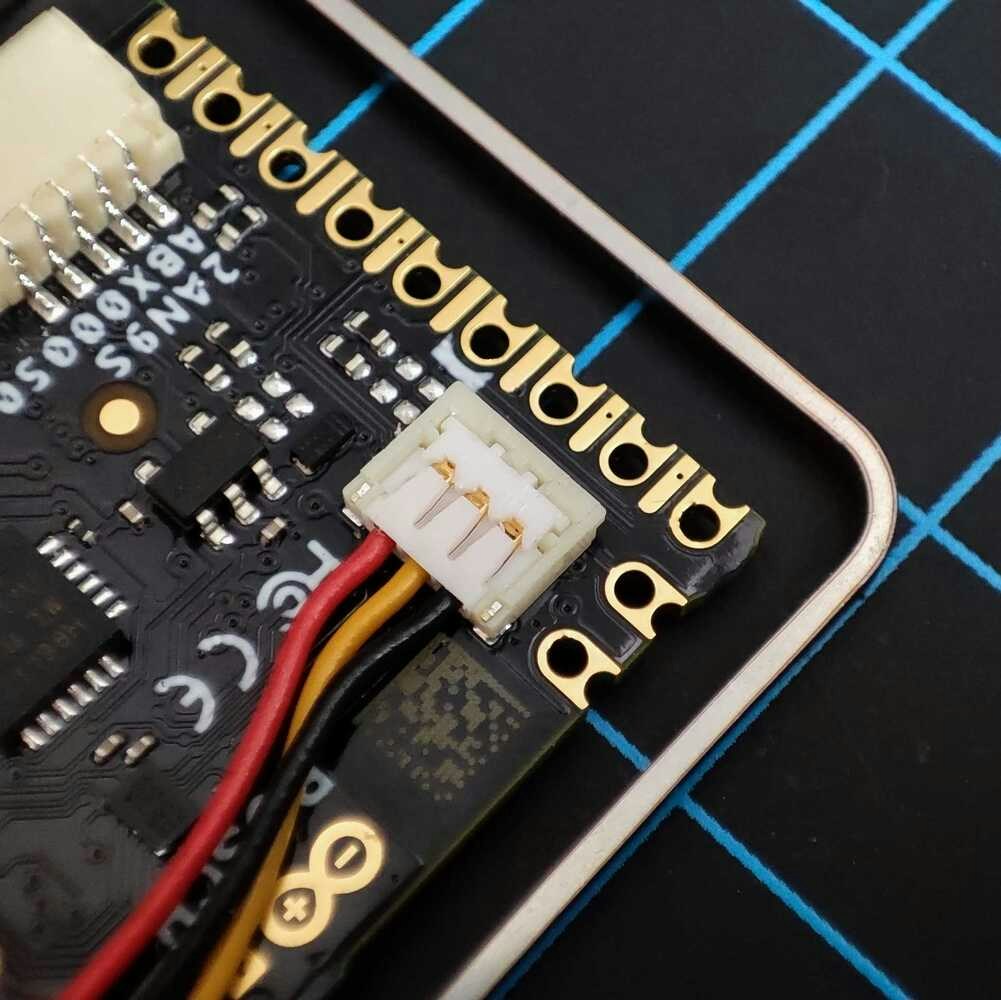
- LiPo battery (3.7V, 200mA)
- Micro USB cable
- Enclosure
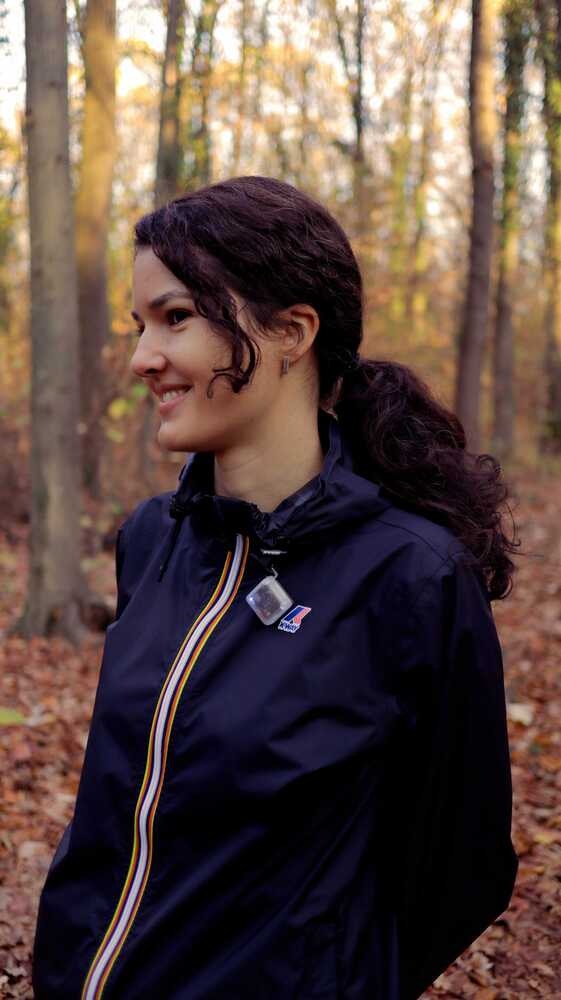
- K-Way jacket
Software requirements
- Edge Impulse account
- Edge Impulse CLI
- Arduino IDE
- Arduino IoT Cloud account
Hardware Setup
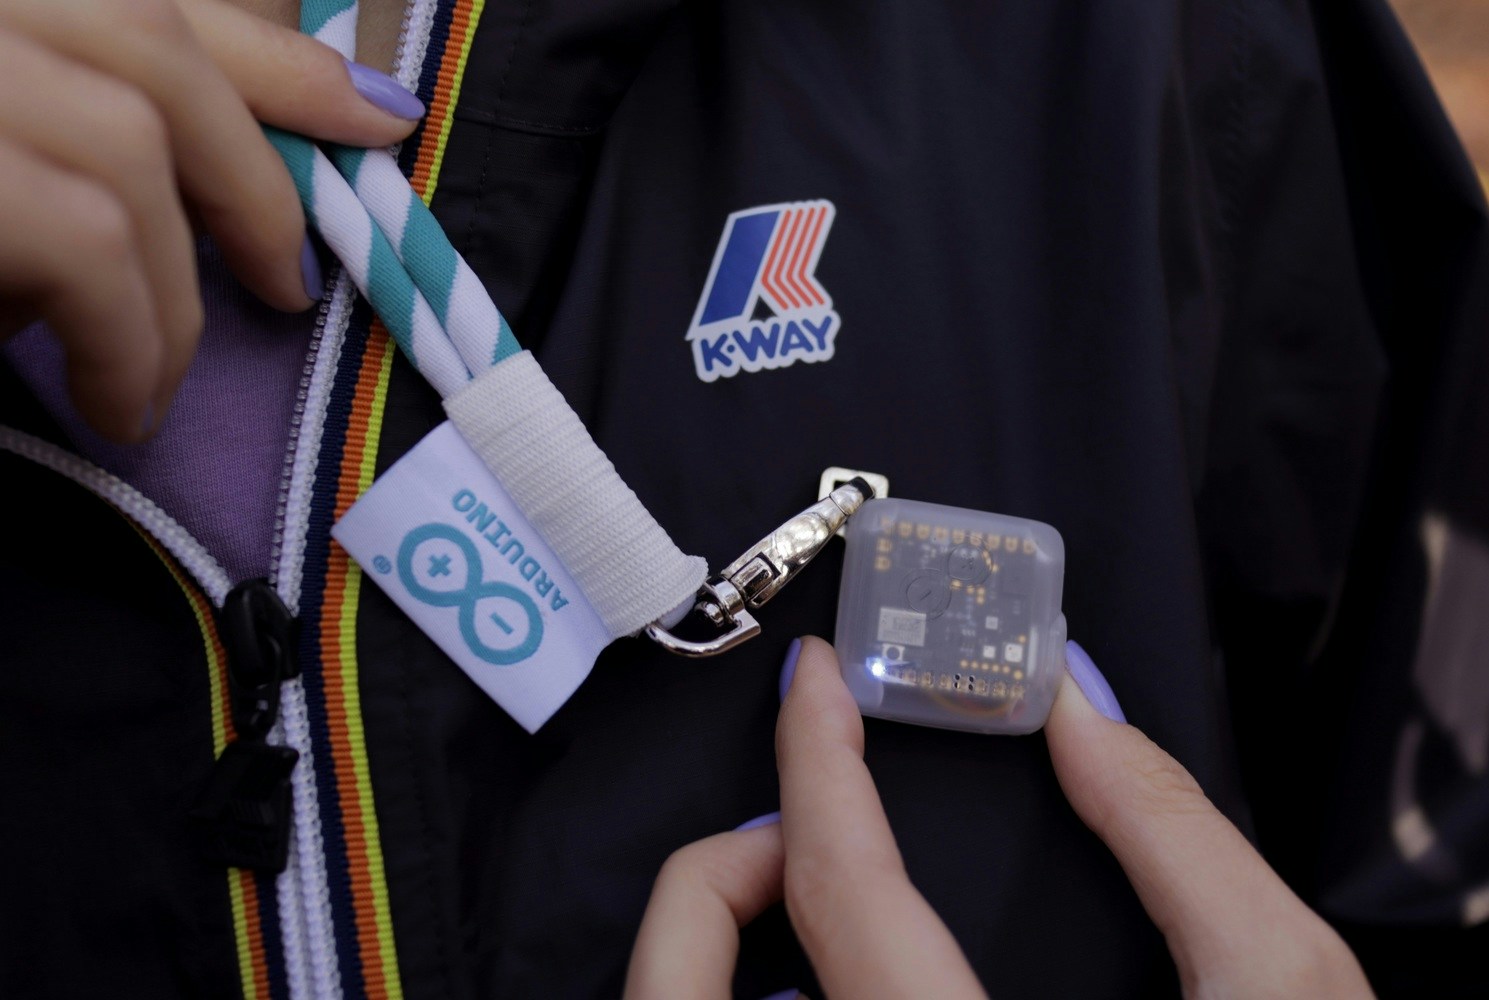
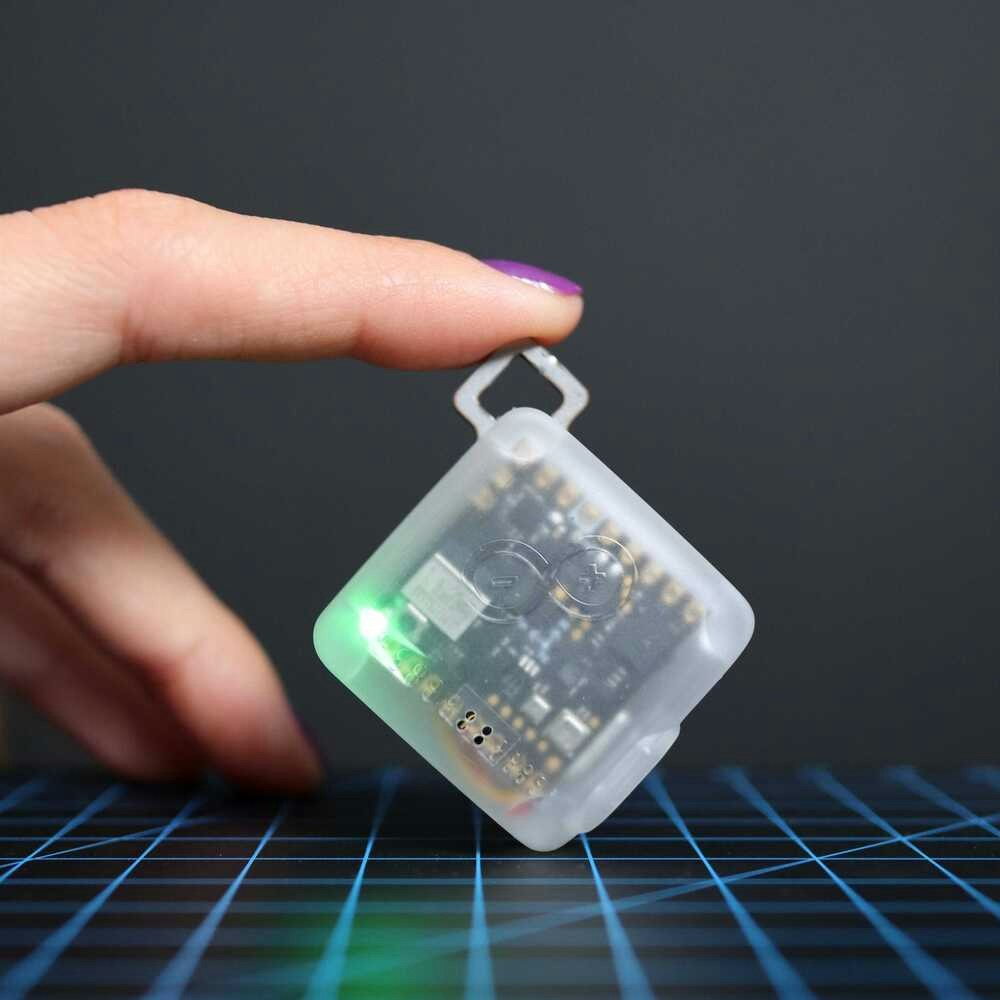
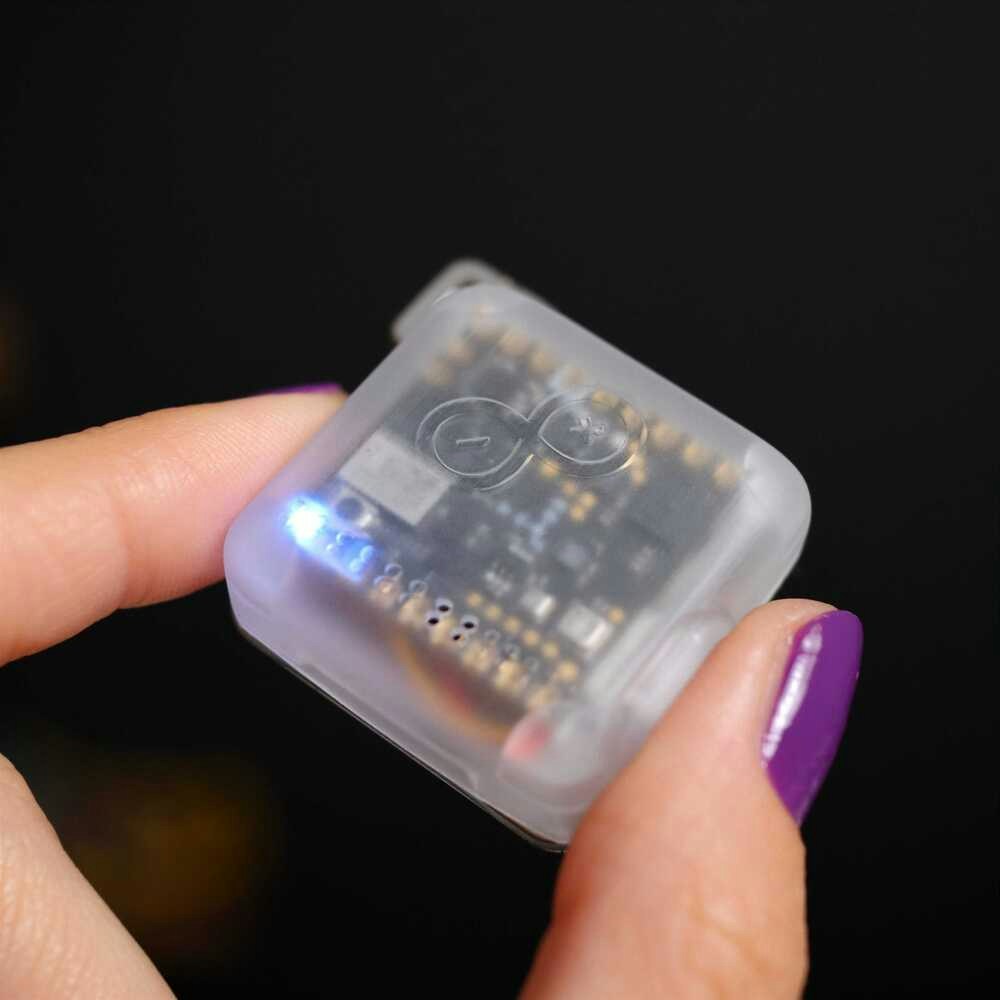
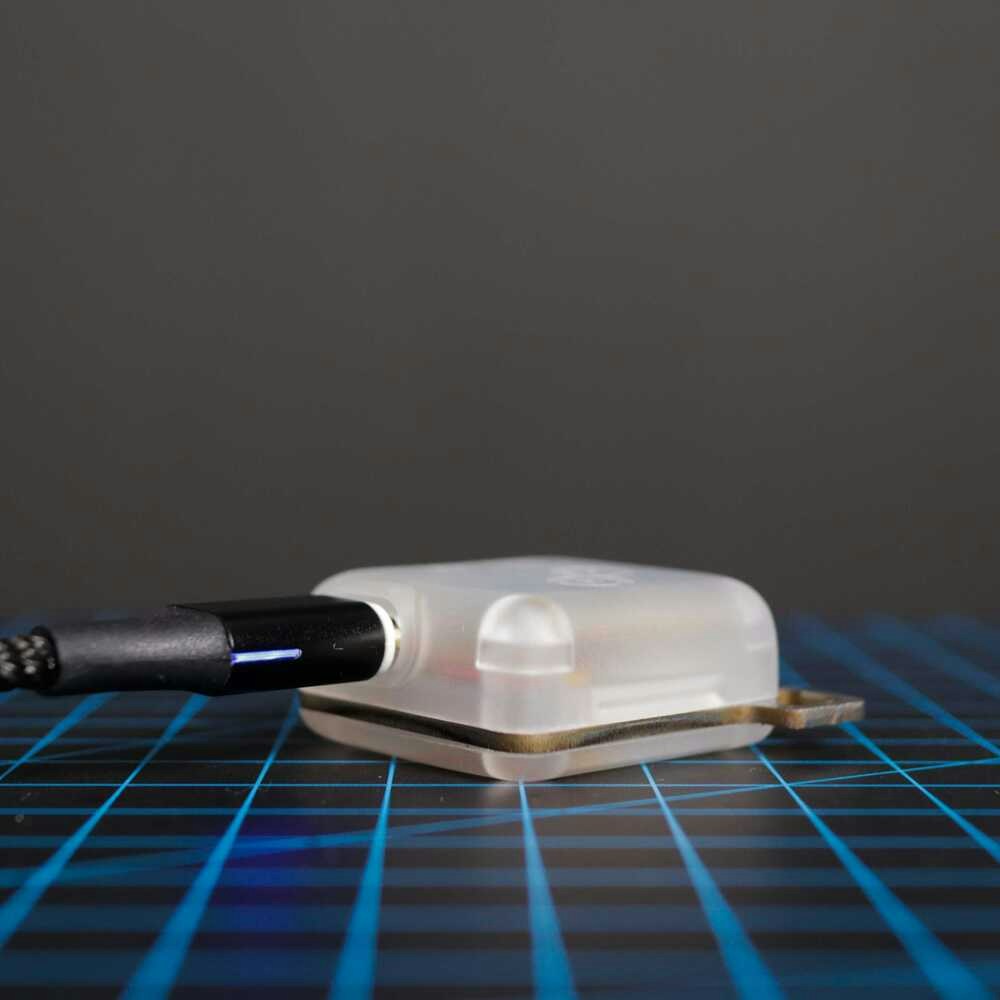
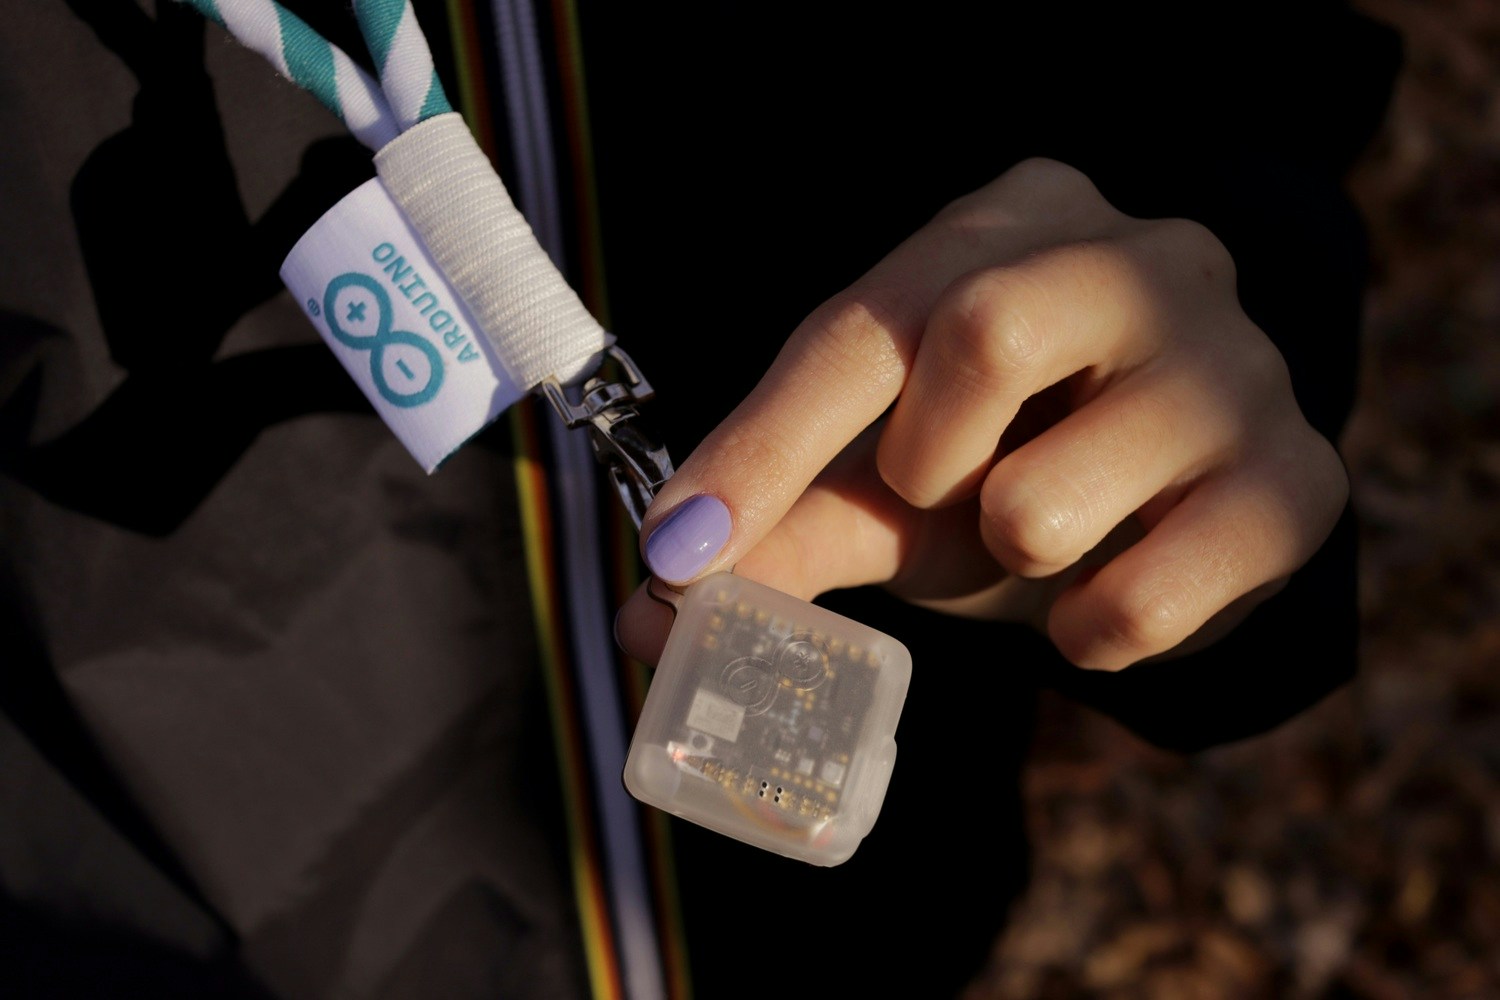
The Arduino Nicla Sense ME is a tiny and robust development board that is specifically designed for wearable applications. It has several Bosch Sensortec’s cutting-edge sensors on board, including an accelerometer, gyroscope, magnetometer, and environmental monitoring sensors. In addition, the board has an RGB LED that can be used for visual feedback and it can be powered by a LiPo battery. Furthermore, its compact form factor, high computing power, and low power consumption make it an ideal choice for edge Machine Learning applications.
Software Setup
In order to use the Edge Impulse platform, you will need to create an account. Once you have done so, log in and click on the “New Project” button. Enter a name for it, then select “Create Project”. You should now be redirected to the project main page. Here, you will be able to configure the settings for your project, as well as add and train machine learning models. The first step when designing a Machine Learning model is data collection, and Edge Impulse provides a straightforward method of doing this through their Data Forwarder, which can collect data from the device over a serial connection and send it to the Edge Impulse platform through their ingestion service. To use the Data Forwarder, install the Edge Impulse CLI following the steps from here. To get started, you’ll need to connect the Nicla Sense ME to your computer using a micro USB cable. Once it’s connected, open up the Arduino IDE and go to the Board Manager (under Tools > Board) to install the board support package (Arduino Mbed OS Nicla Boards).
Training the weather prediction model
Data collection
Download the Edge Impulse ingestion sketch from here and upload it to your board. We will collect data for three classes:- Drop - This class will be used to detect bad weather conditions. A quick drop in air pressure indicates the arrival of a low-pressure system, in which there is an insufficient force to push clouds or storms away. Cloudy, wet, or windy weather is connected with low-pressure systems, as explained here.
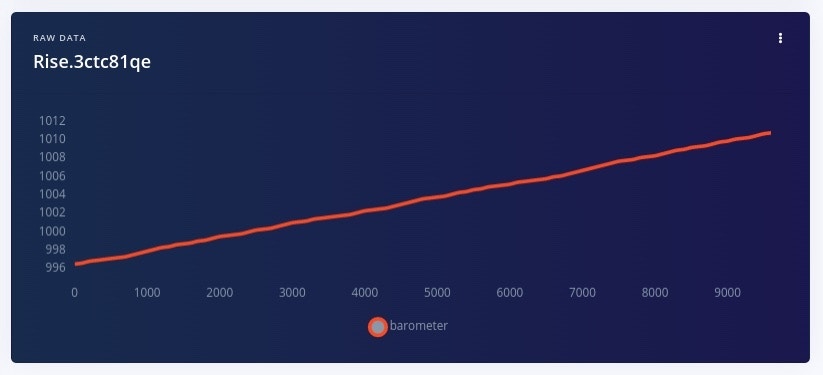
- Rise - This class will be used to detect good weather conditions. A sharp rise in atmospheric pressure drives the rainy weather away, clearing the sky and bringing in cold, dry air, as explained here.
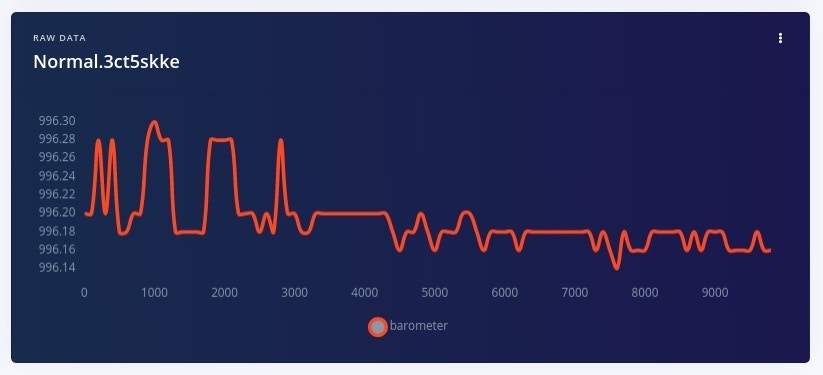
- Normal - This class will be used to detect stable weather conditions.
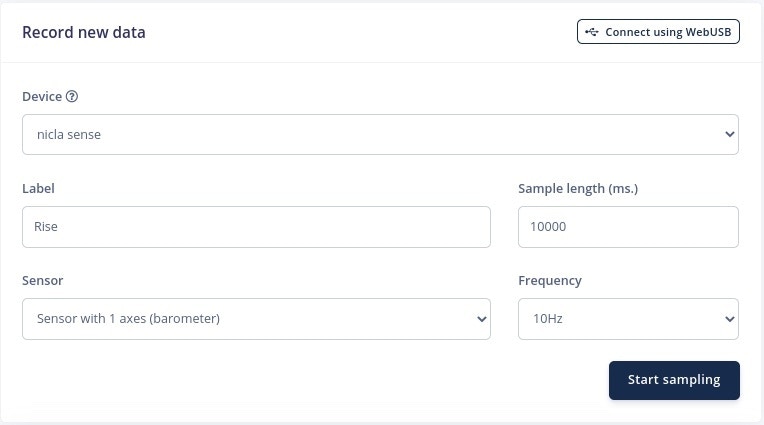
ei_printf function which sends data through a serial connection to your computer, which then forwards it to Edge Impulse. Depending on which class you want to collect data for, you’ll have to uncomment the corresponding line of code from the code snippet below. Since collecting enough real weather data for training the model would take a lot of time and is weather-dependent, for the purpose of this tutorial we will simulate the Rise and Drop classes using the barometerValueHigh() and the barometerValueLow() functions which generate arbitrary data based on an initial reading of the real measured pressure. To collect data for the Normal class, uncomment the barometer.value() function.
edge-impulse-data-forwarder
This will launch a wizard that will prompt you to log in and select an Edge Impulse project. You will also have to name the device and the axes of your sensor (in this case our only axis is barometer). You should now see Nicla Sense in the Devices menu on Edge Impulse.


Designing the Impulse
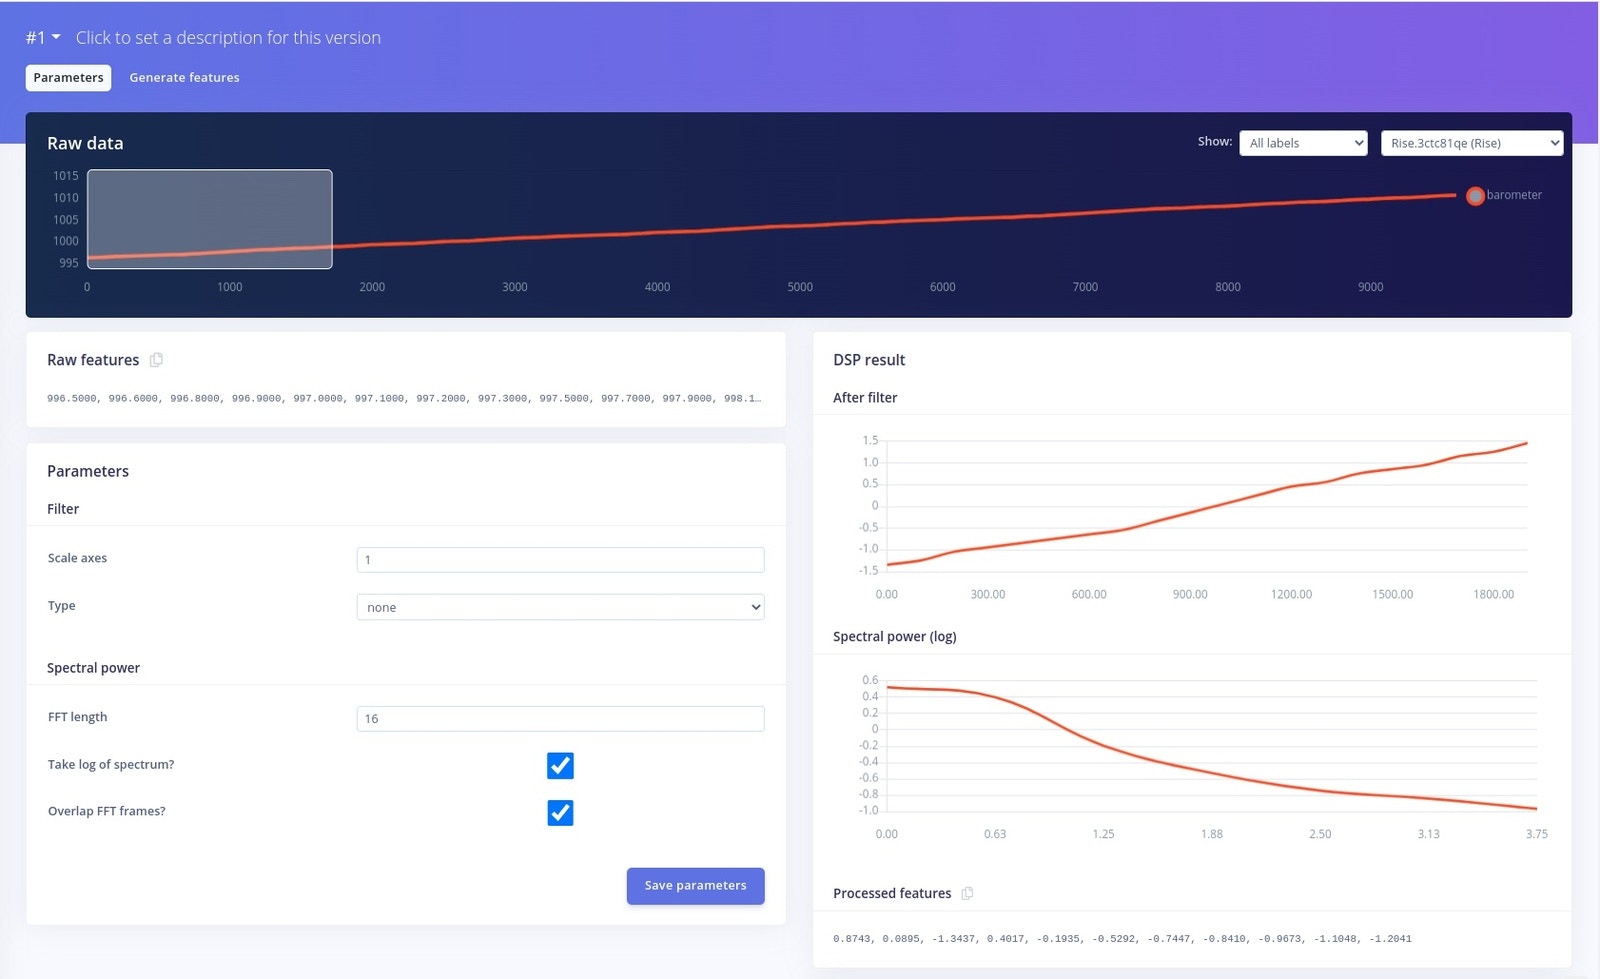
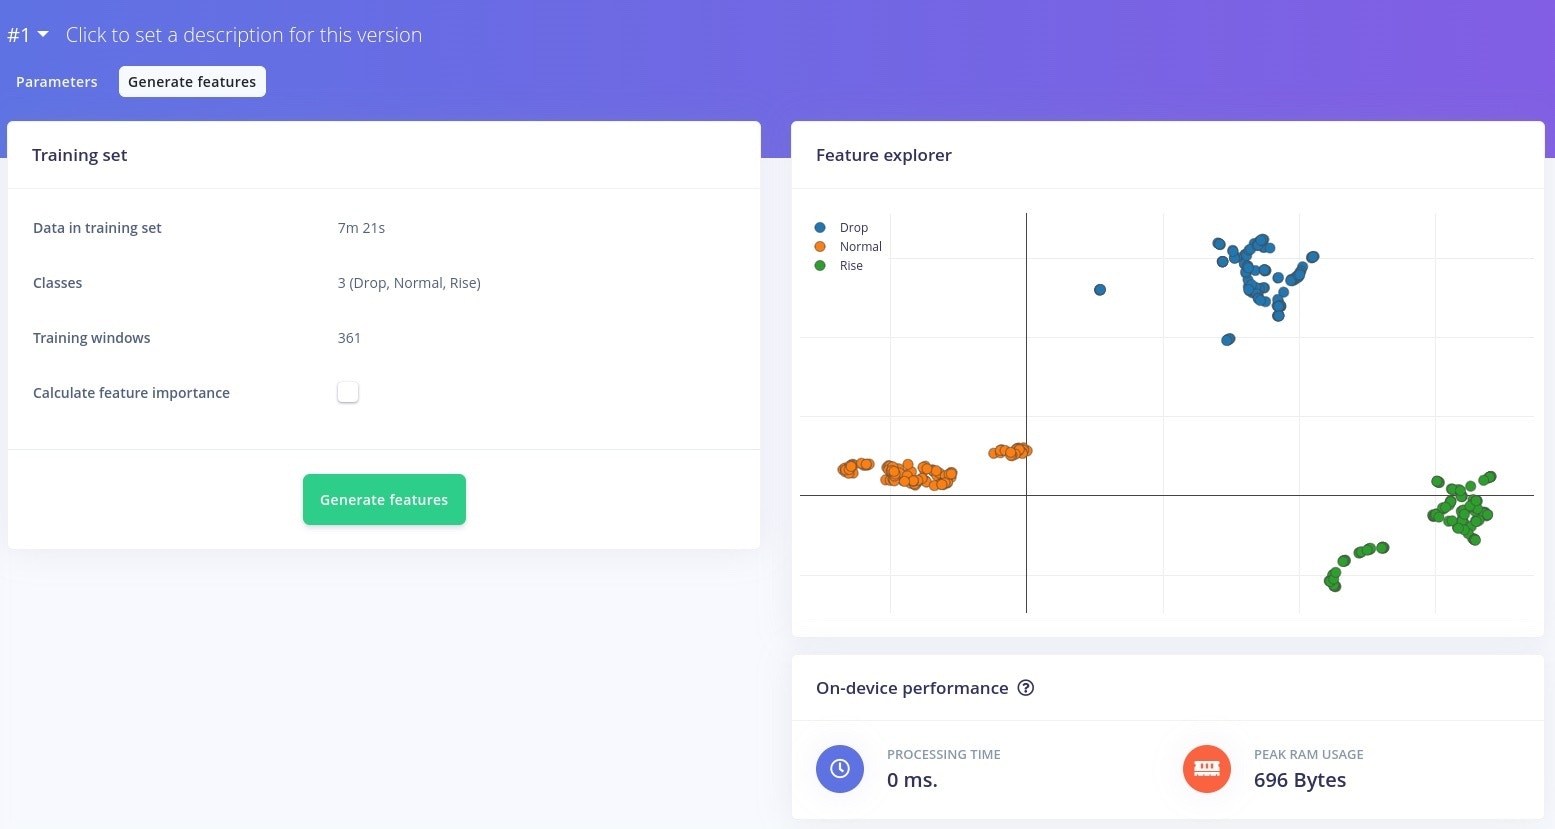
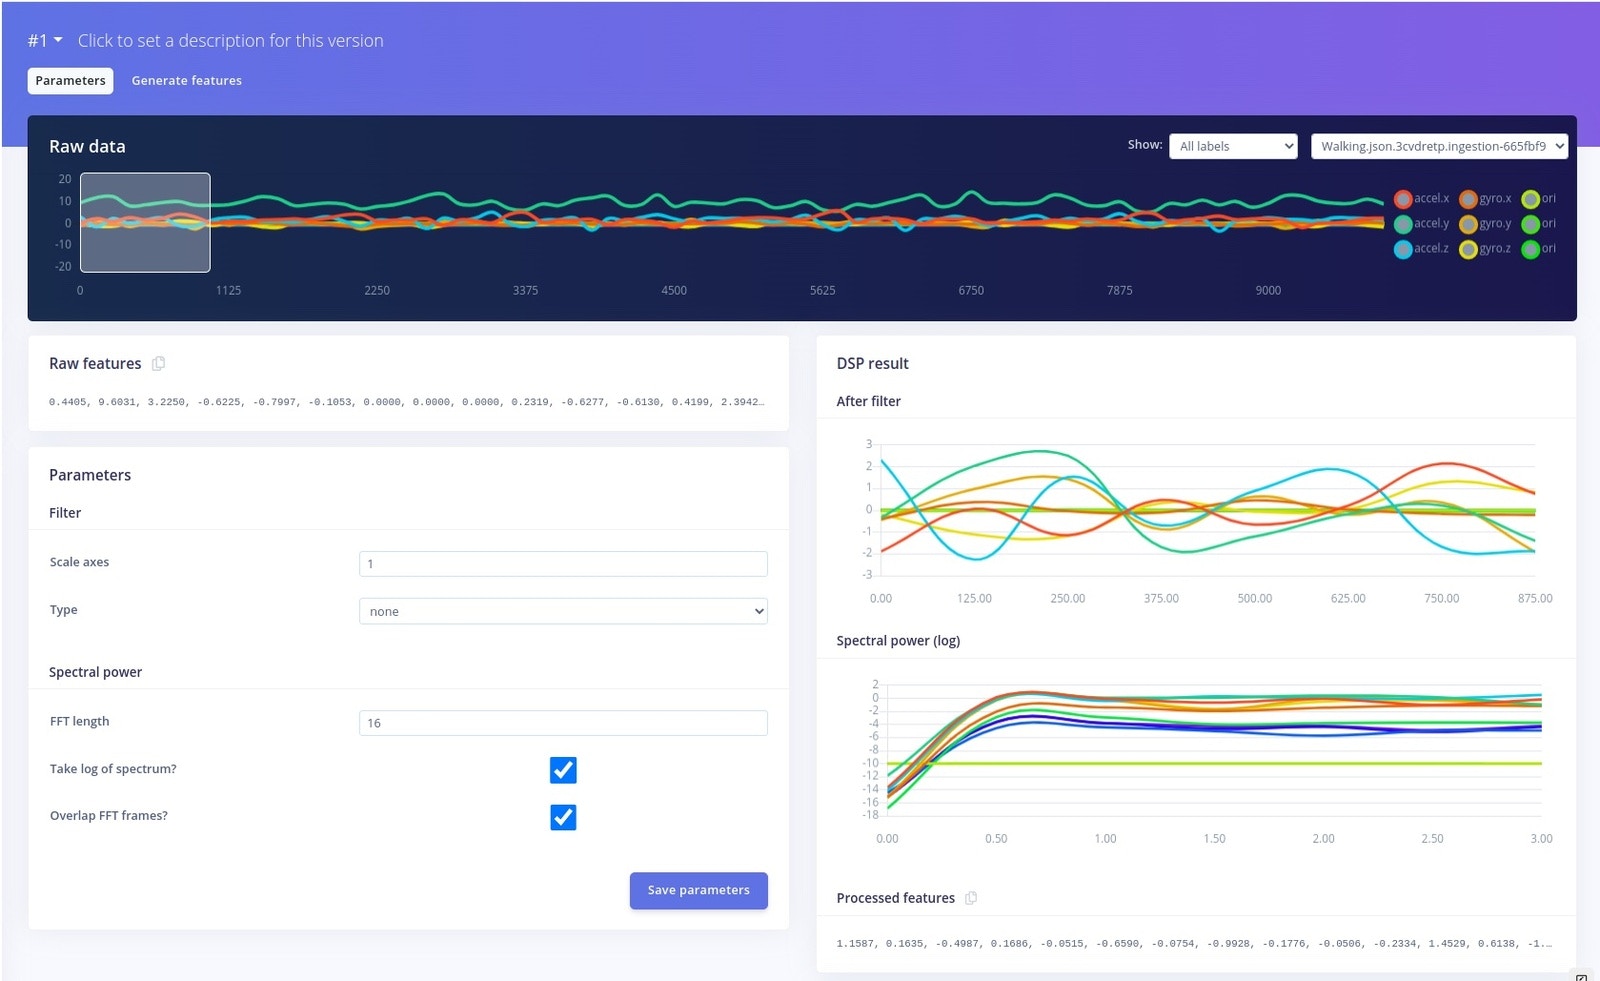
Now that you have enough training data, you can design the impulse. Go to Impulse design > Create impulse on Edge Impulse and add a Spectral Analysis processing block and a Classification (Keras) learning block. An impulse consists of a signal processing block used to extract features from the raw input data, and a learning block which uses these features to classify new data. The Spectral Analysis signal processing block applies a filter to remove noise, performs spectral analysis on the input signal, and extracts frequency and spectral power data. The Classification (Keras) learning block is trained on these spectral features and learns to identify patterns in the data that indicate which class a new data point should belong to.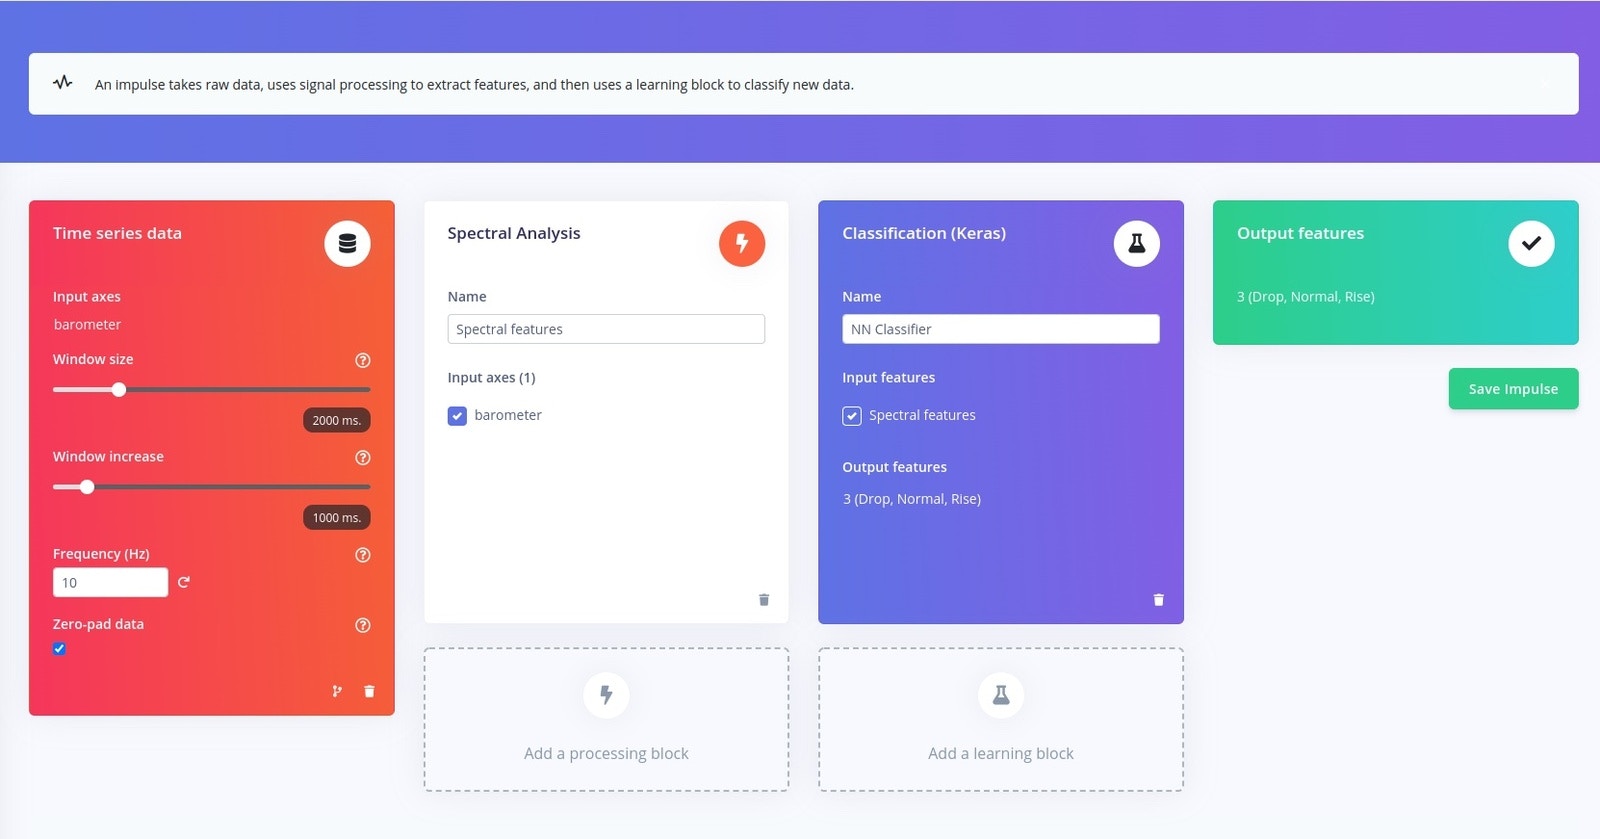
Training the model
Now go to NN Classifier and start training the model. At the end of the training you’ll see the accuracy and the loss of the model. A good performing model will have a high accuracy and a low loss. In the beginning, you can use the default training settings and adjust them later if you are not satisfied with the performance results.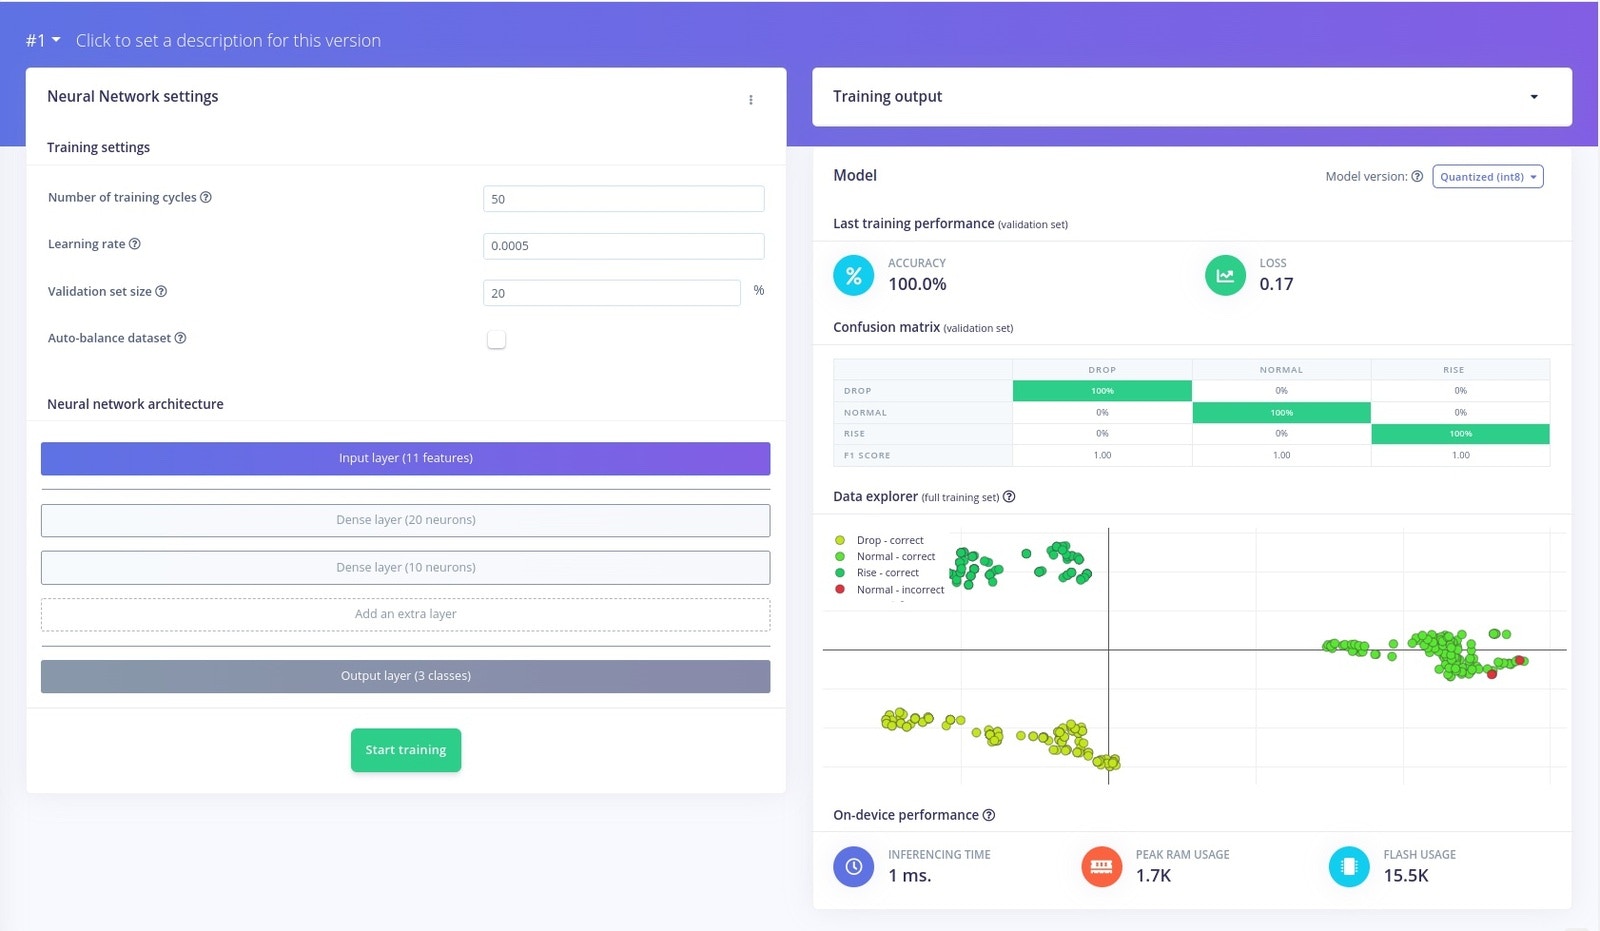
Testing the model
Go to Model testing and click on Classify All to see how your model performs on new data.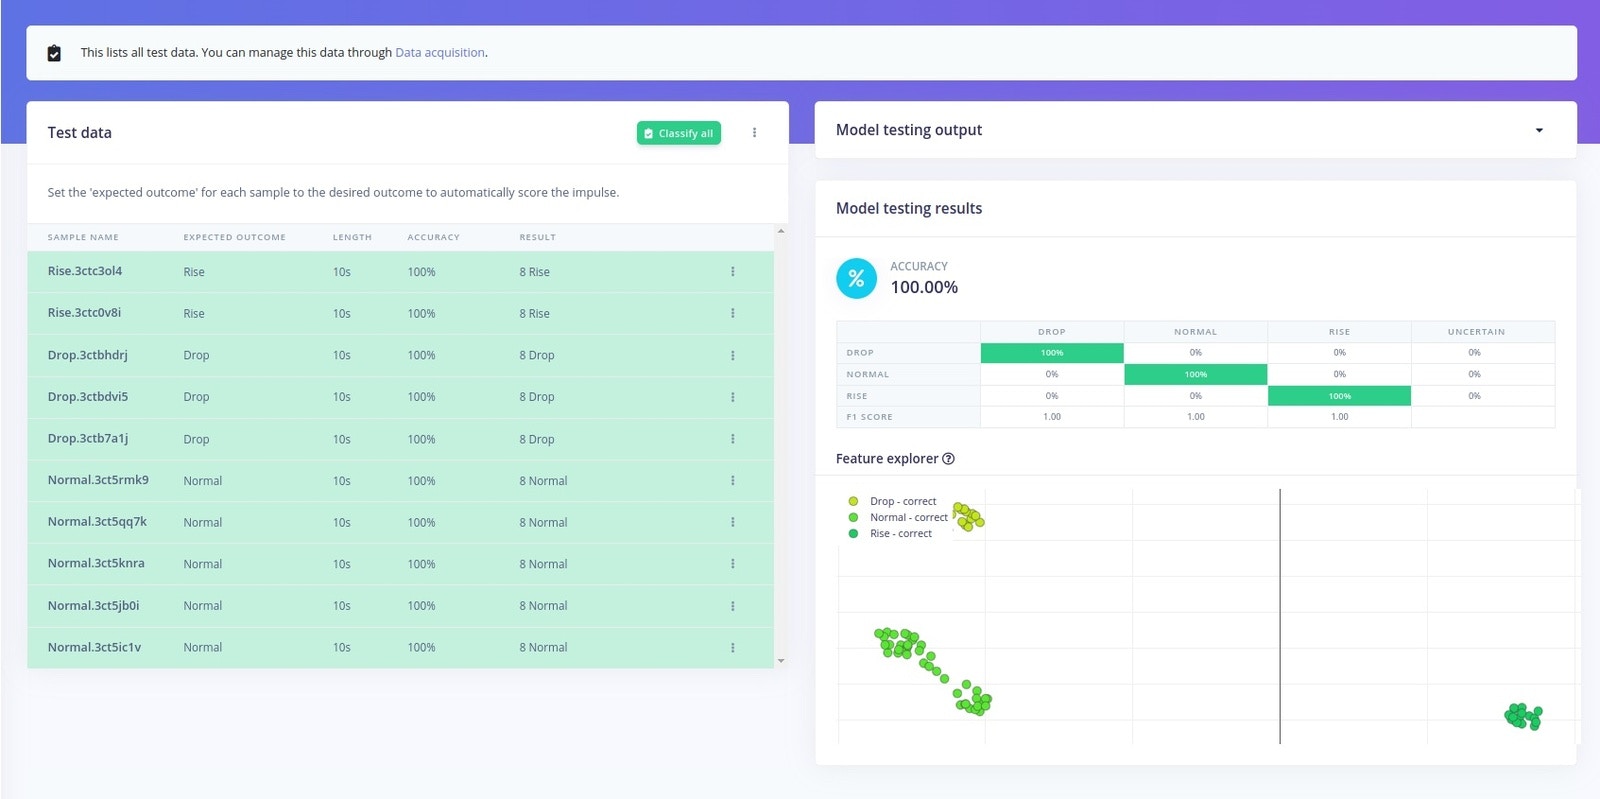
Deploying the model
Finally, go to Deployment and export the trained model as an Arduino library.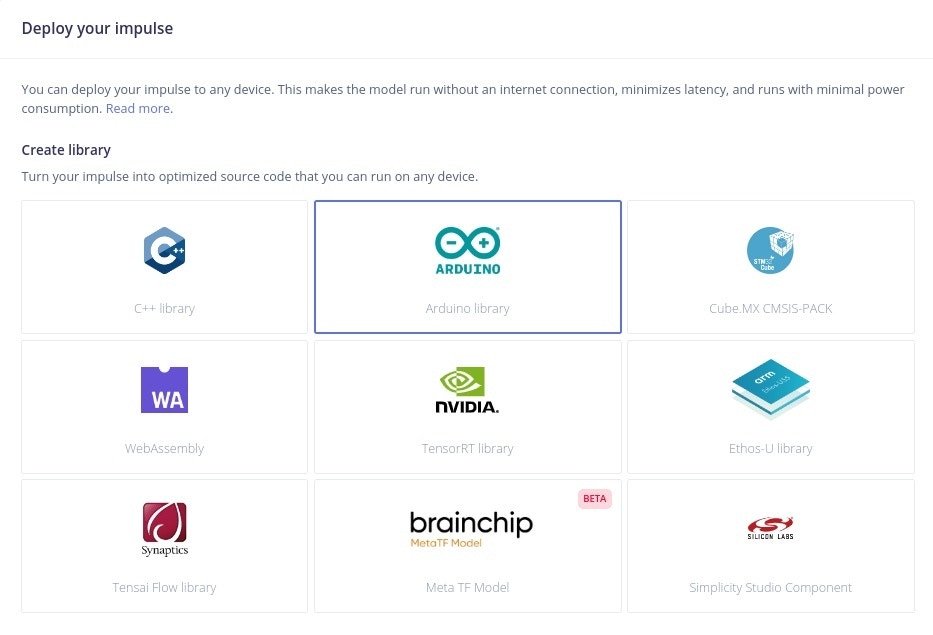
- Red - pressure drop;
- Green - pressure rise;
- Blue - normal pressure.
Training the activity tracking model
Data collection
Create a separate project on Edge Impulse and give it a name. Download the Edge Impulse ingestion sketch from here and upload it to your board. Again, we will use the Data Forwarder to collect data, so run the following command from a terminal:edge-impulse-data-forwarder --clean
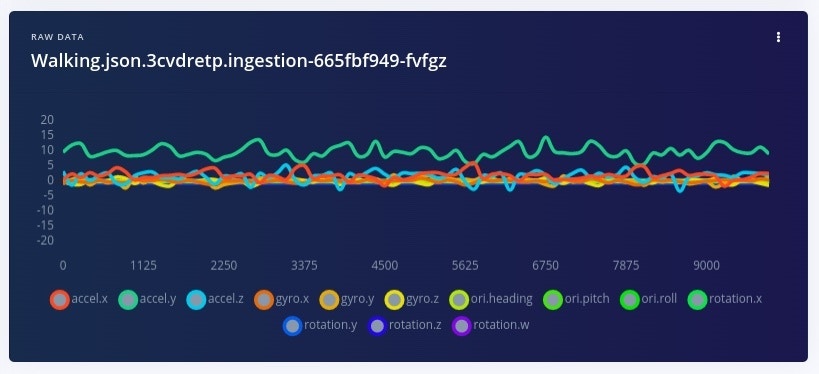
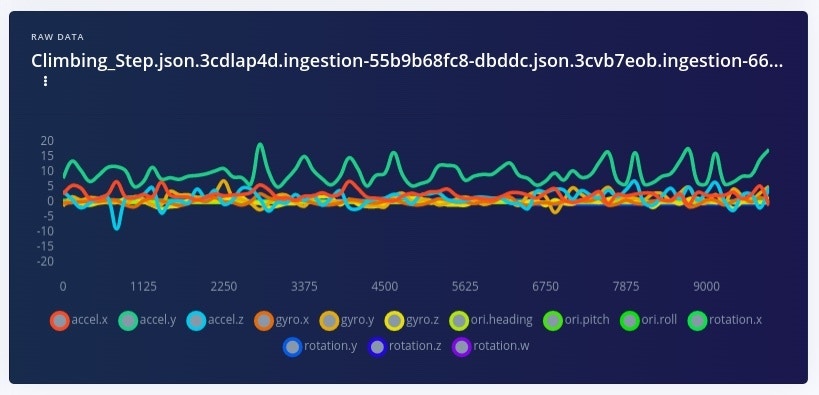
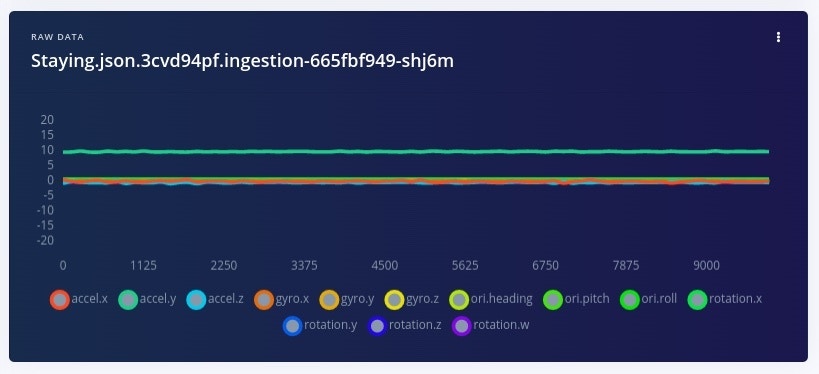
This will launch a wizard that will prompt you to log in and select the Edge Impulse project. The --clean tag is used when you want to switch to a new project in case you’ve previously connected a project to the Data Forwarder. You will also have to name the device and the axes of your sensor (in this case the axes are in the following order: accel.x, accel.y, accel.z, gyro.x, gyro.y, gyro.z, ori.heading, ori.pitch, ori.roll, rotation.x, rotation.y, rotation.z, rotation.w). You should now see Nicla Sense in the Devices menu on Edge Impulse.
We will collect data for three classes, as described in the previous section:
- Walking
- Climbing
- Staying
Designing the Impulse
The Spectral Analysis signal processing block can identify periodicities in data, which is helpful in this case since the motion and orientation data will have a predictable pattern when the user is sitting, walking, or climbing.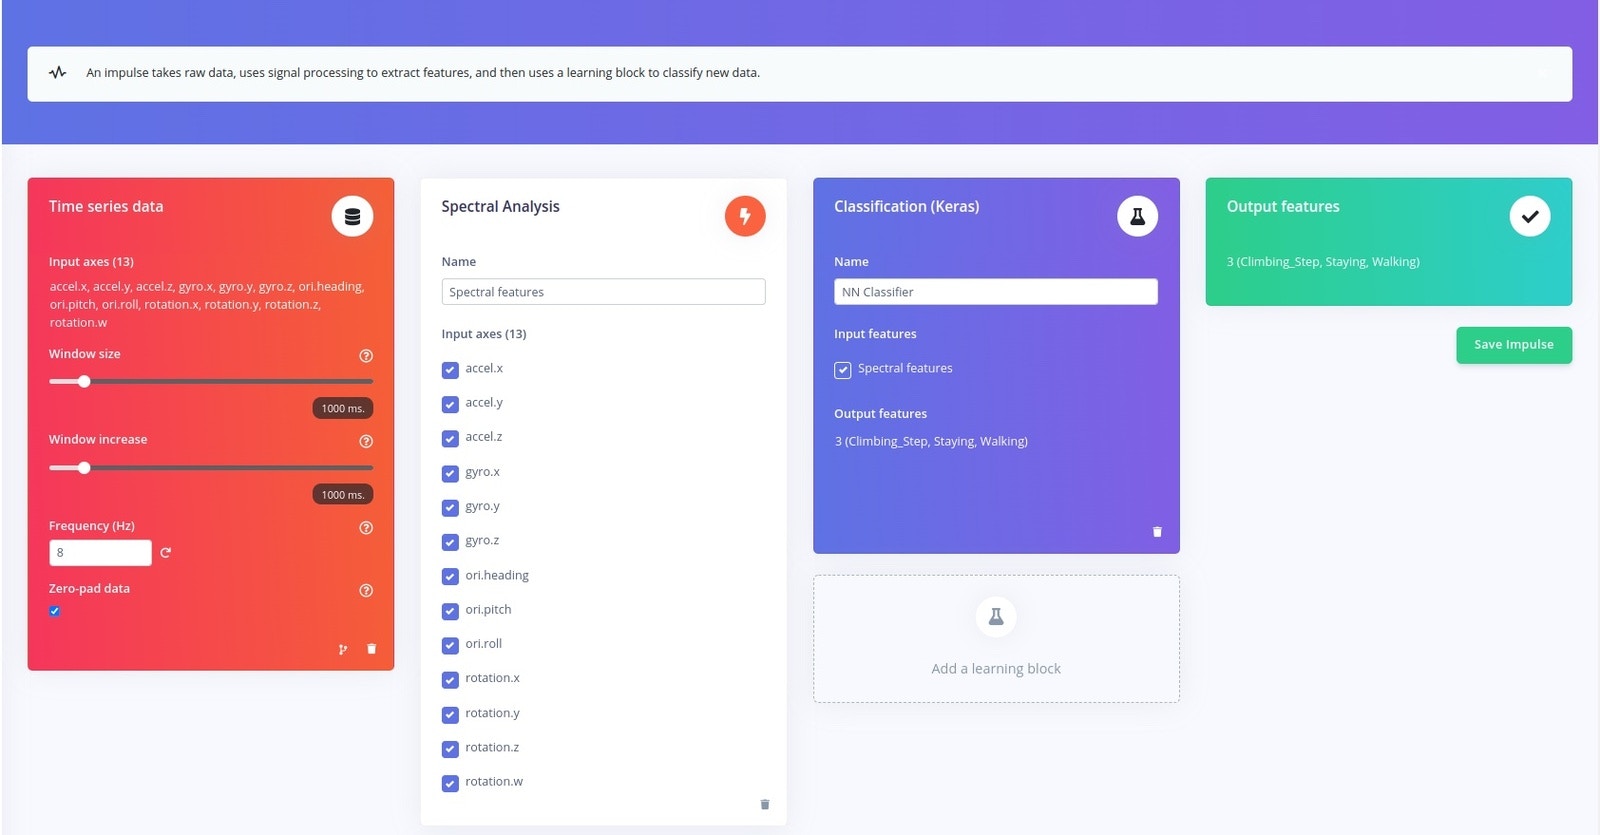
Training the model
Navigate to NN Classifier and begin training the model. Adjust the default training parameters if needed, in order to obtain a better training performance.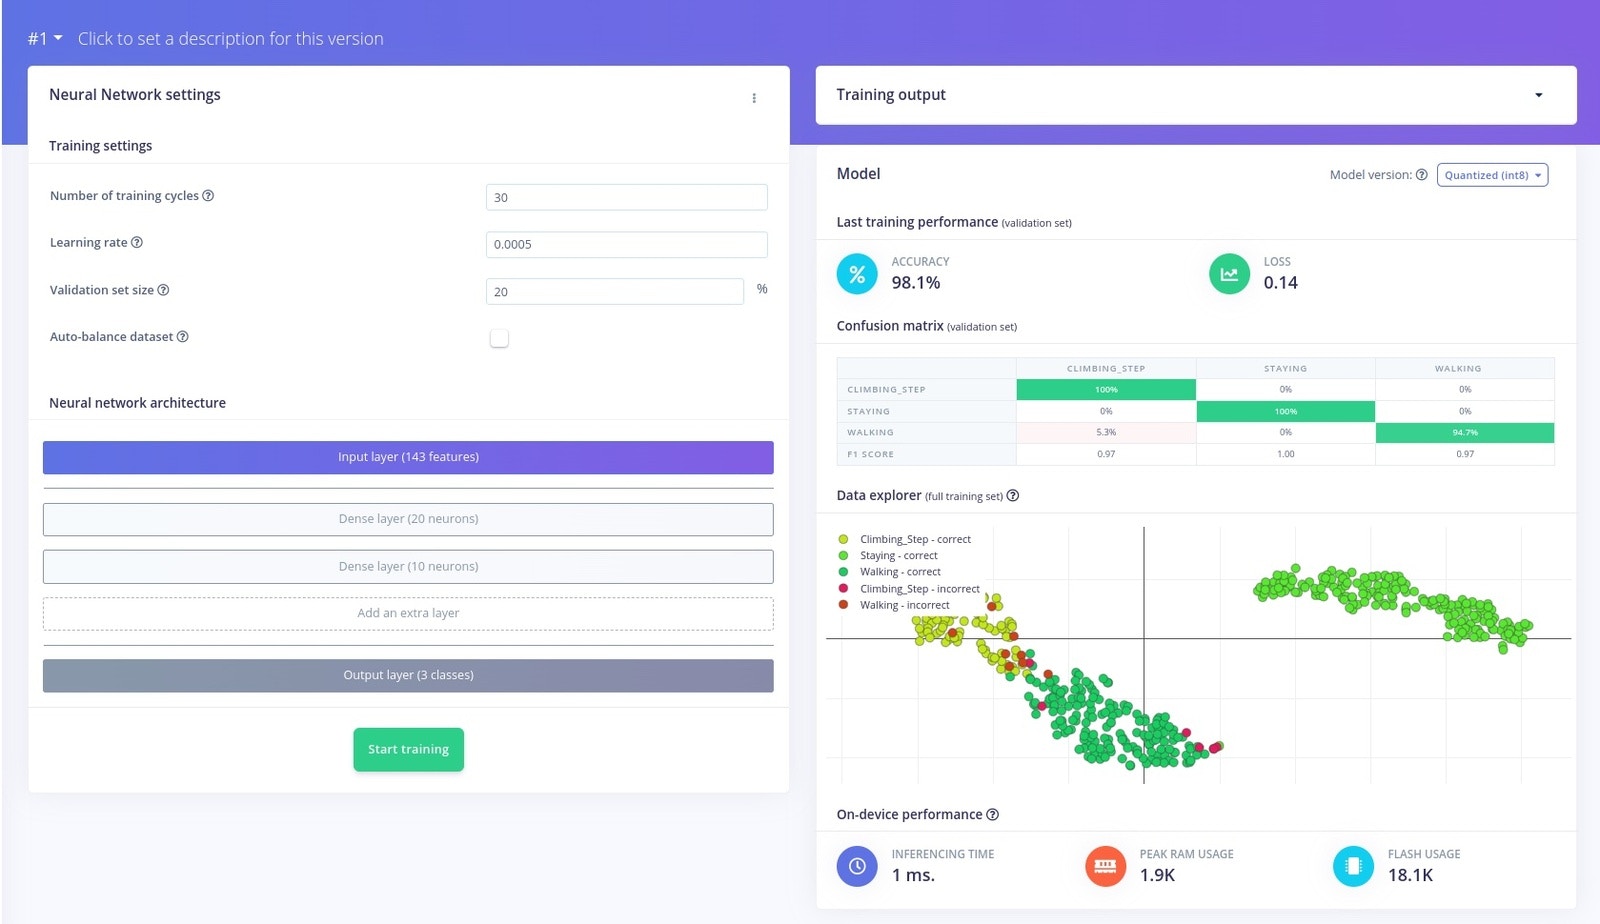
Testing the model
Finally, go to Model testing and click on Classify All to check how your model performs on new data.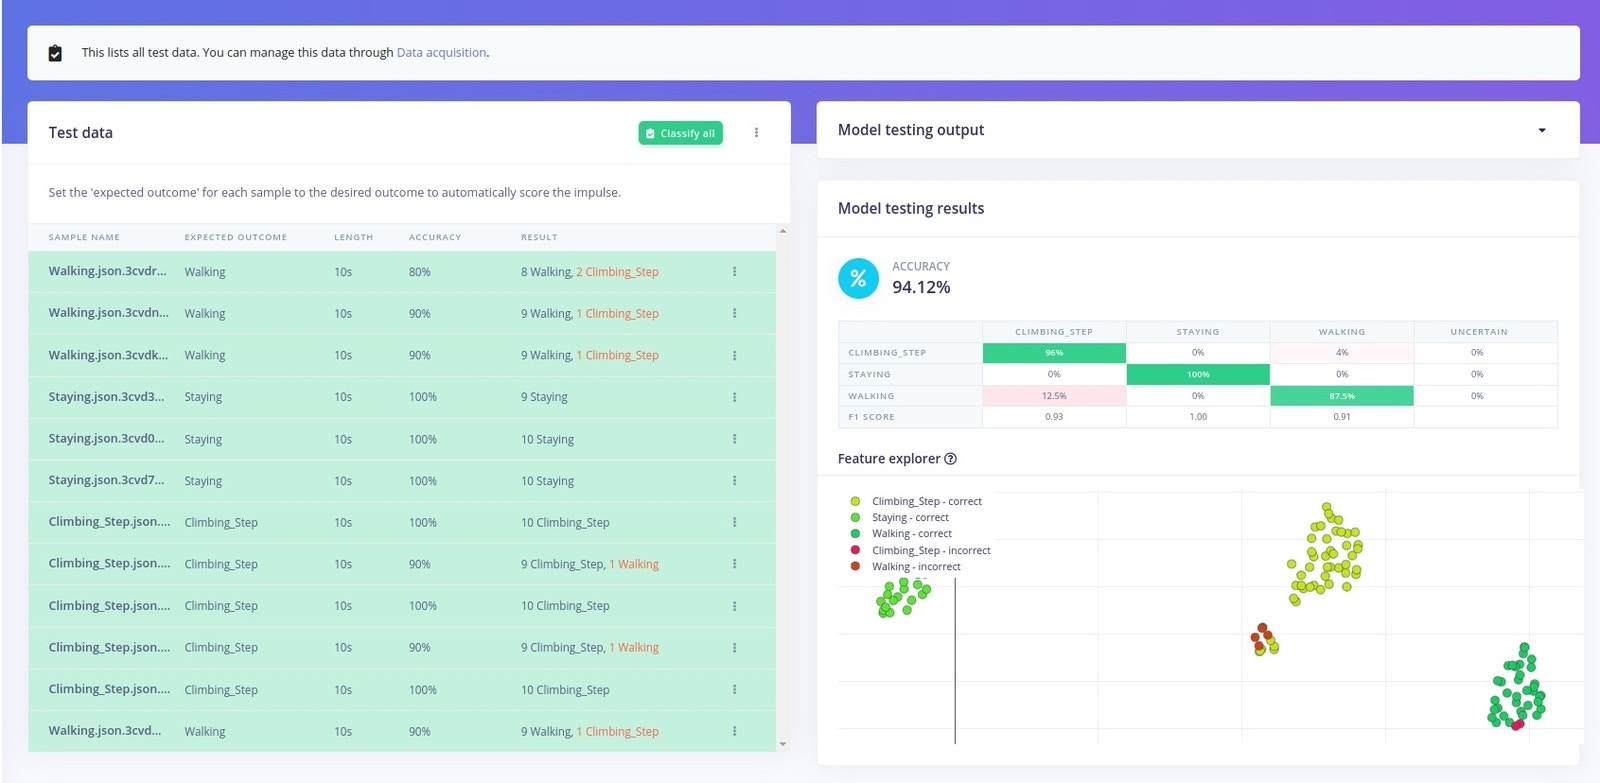
Deploying the model
Now you can deploy your model as an Arduino library by going to Deployment > Create library > Arduino library. You can also enable the EON Compiler to optimize the model.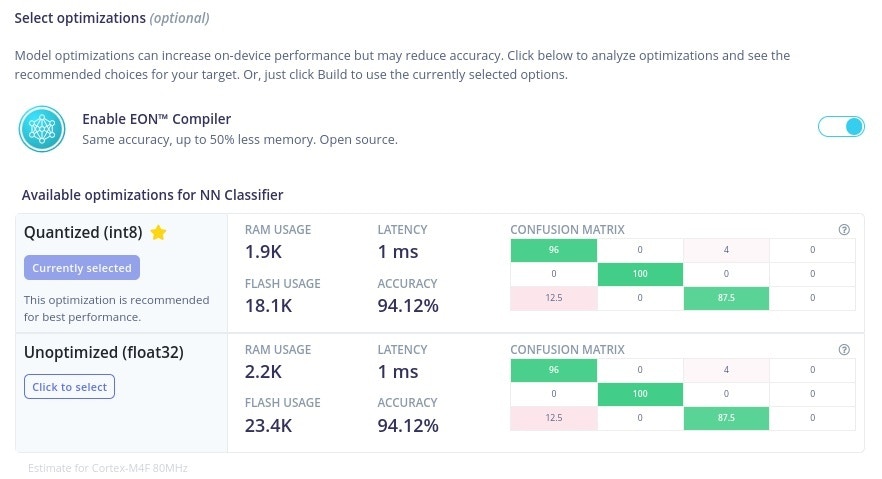
Data gathering for ML
We will be using the Arduino IoT Cloud to store the data from the Nicla Sense ME board and visualize the metrics. The platform provides an easy-to-use interface for managing devices, sending data to the cloud, and creating dashboards. In order to use the Arduino IoT Cloud, you will need to create an Entry, Maker, or Maker plus account that allows you to create an API key for sending data online. To generate your API credentials, follow the steps below:- Access your Arduino account.
- Go to the Arduino Cloud main page.
- In the bottom left corner, click API keys, and then CREATE API KEY. Give it a name and save it somewhere safe. After this, you will no longer be able to see the client secret.

go run bhy.go webserver
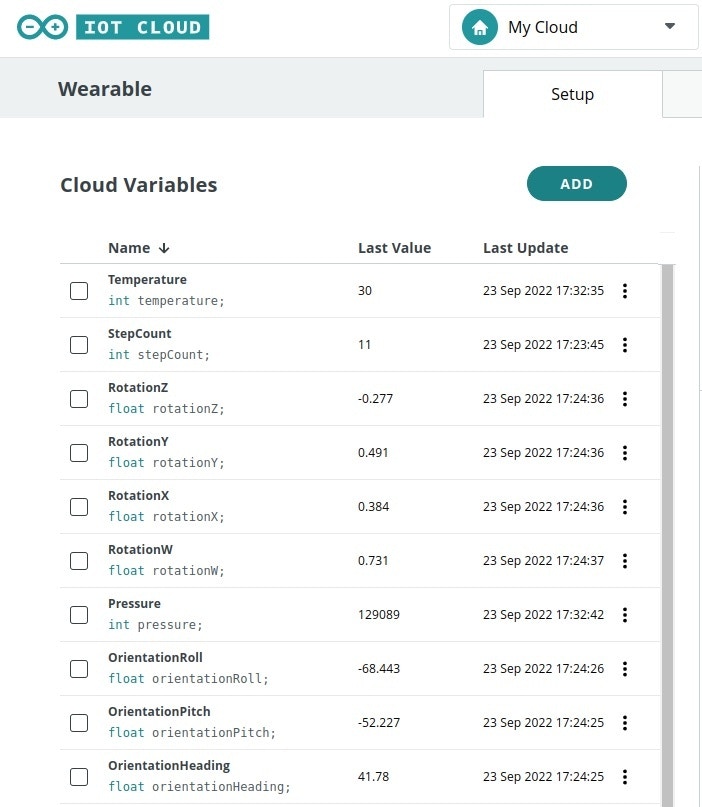
A webpage will pop up and you’ll have to select Sensors. Turn on Bluetooth on your computer, then click Connect and select your Nicla board. After the devices are paired, enable the sensors you want to monitor and the webpage will start making requests to post data to Arduino IoT Cloud.
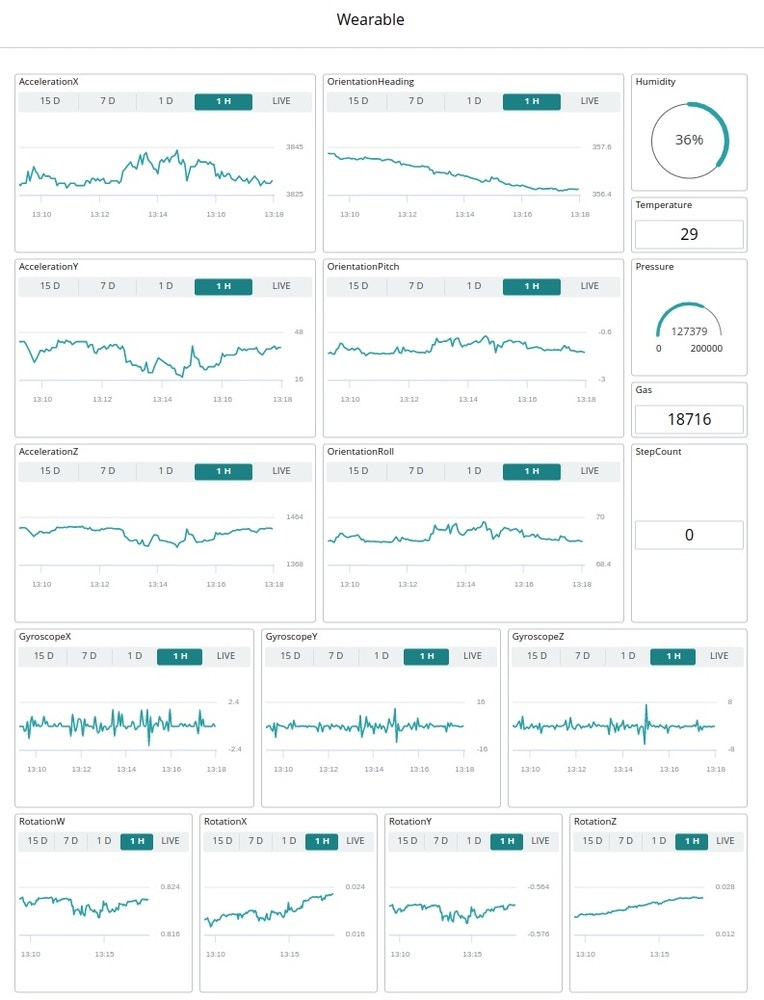
You can also configure a Dashboard to visualize your sensor data:
Conclusion
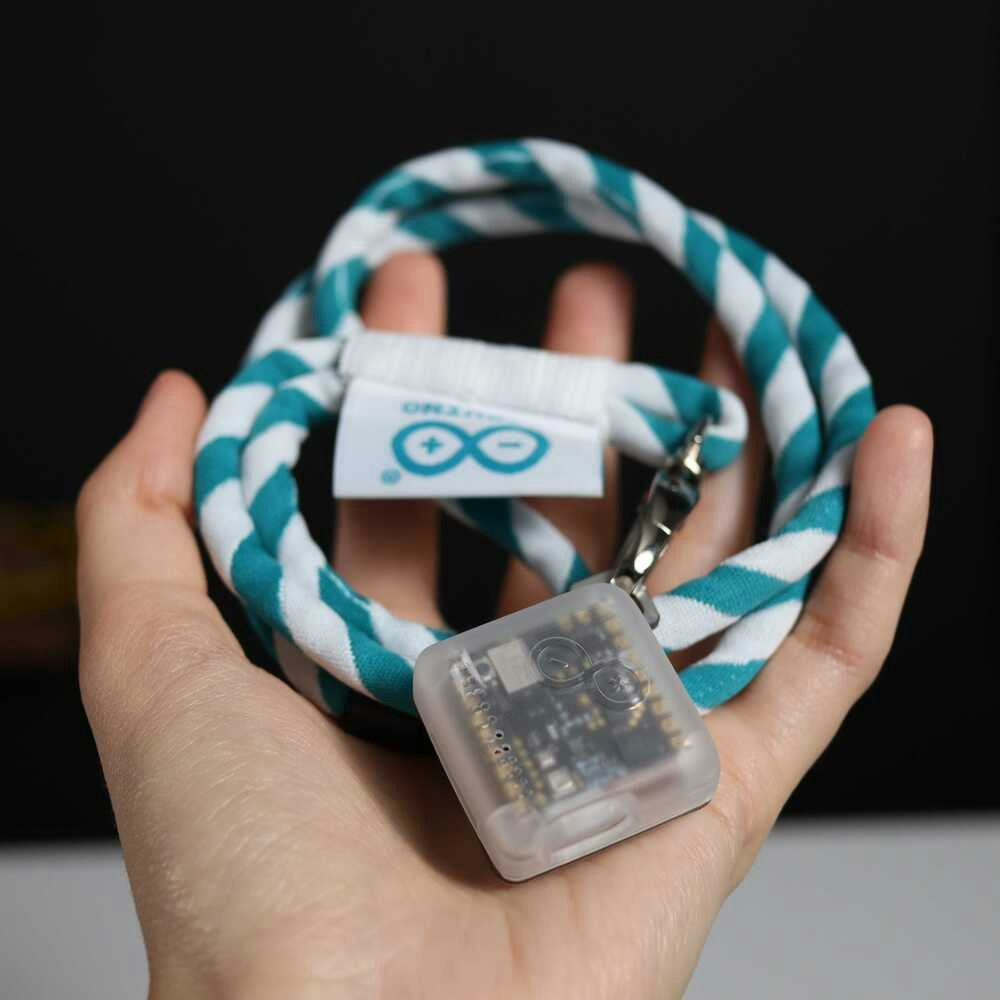
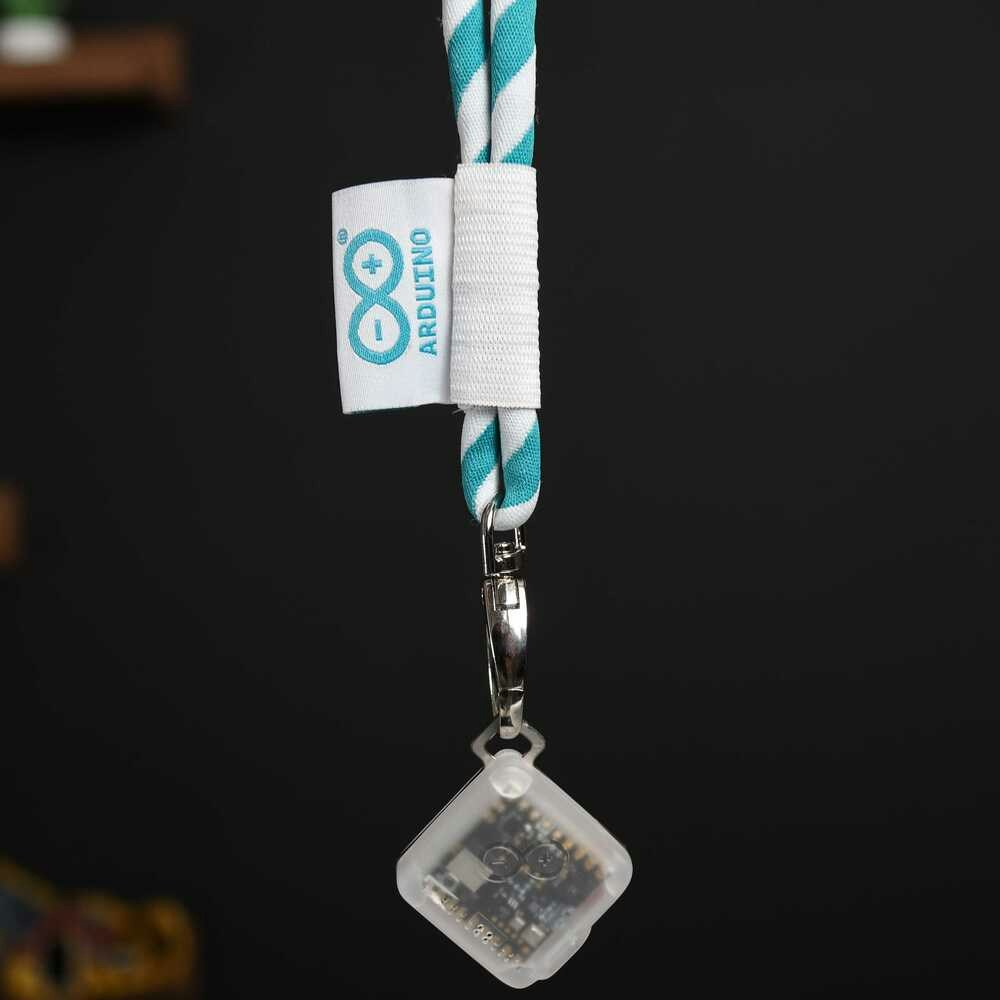
The Arduino Nicla Sense ME is a great board for building an outdoor activity tracker that has the ability to monitor your progress on hikes, predict weather changes before they happen and log data for training Machine Learning models. With the Edge Impulse platform, you can effortlessly train Machine Learning models to run on edge devices, and with the Arduino IoT Cloud, you can easily store data for future machine learning processing. Paired with the weather resistant K-Way jacket, you’ll be able take this device along any time you head outdoors making sure you’ll be ready for any adventure ahead of you!