Intro
Edge ML enables developers to run Machine Learning (ML) on Internet of Things (IoT) and Edge devices. This offers many advantages, such as reduced power consumption, low latency, reduced bandwidth, and increased privacy. On the other hand, Edge ML can also be limited in functionality, given the reduced hardware capability of the edge devices. In these cases, it can be a good idea to combine Edge ML with Cloud ML functionality. This is usually done by running an ML model on the Edge device continuously, combined with a Cloud endpoint which is only called by the edge device when advanced functionality is needed. In this project, I will demonstrate how to create a solution using Edge ML functionality provided by Edge Impulse, in combination with a Cloud ML endpoint implemented with Azure ML. In this project we will implement a Voice-to-Text solution running on a low power edge device like the Raspberry Pi.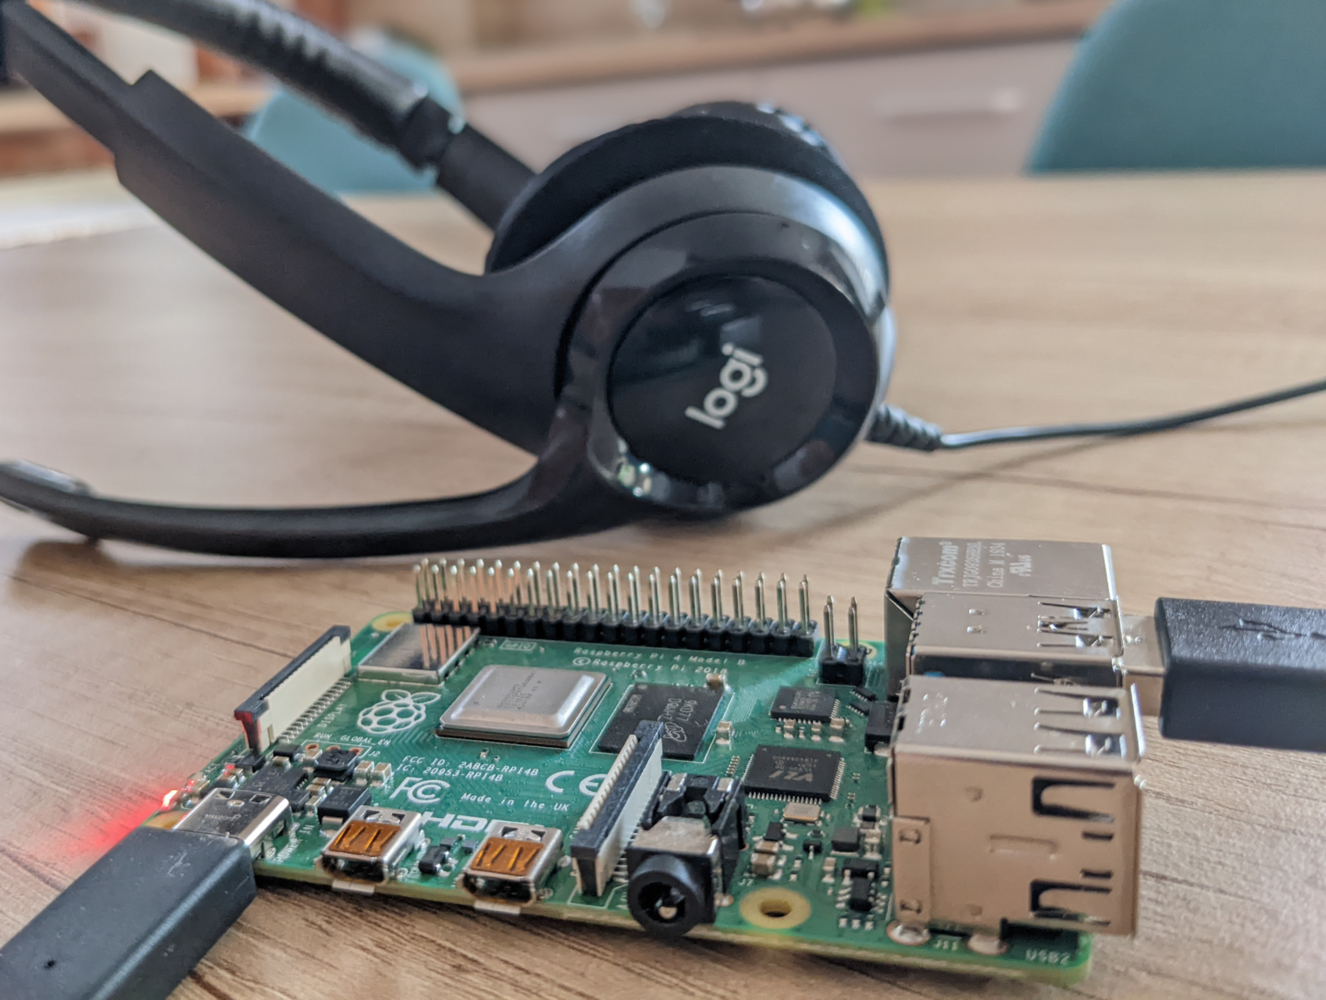
In the following sections I will describe how such an application can be implemented. We will start with the voice-to-text endpoint implemented with Azure ML, and then we will integrate this into an Edge Impulse application running on the Raspberry Pi.
Cloud ML with Azure ML
Azure Machine Learning is Microsoft’s cloud offering of machine learning services, covering the machine learning project lifecycle, including training and inference. It supports all the popular open-source machine learning frameworks such as TensorFlow, PyTorch and others. In this section I will show how to implement a voice-to-text translation endpoint with Azure ML.The Model
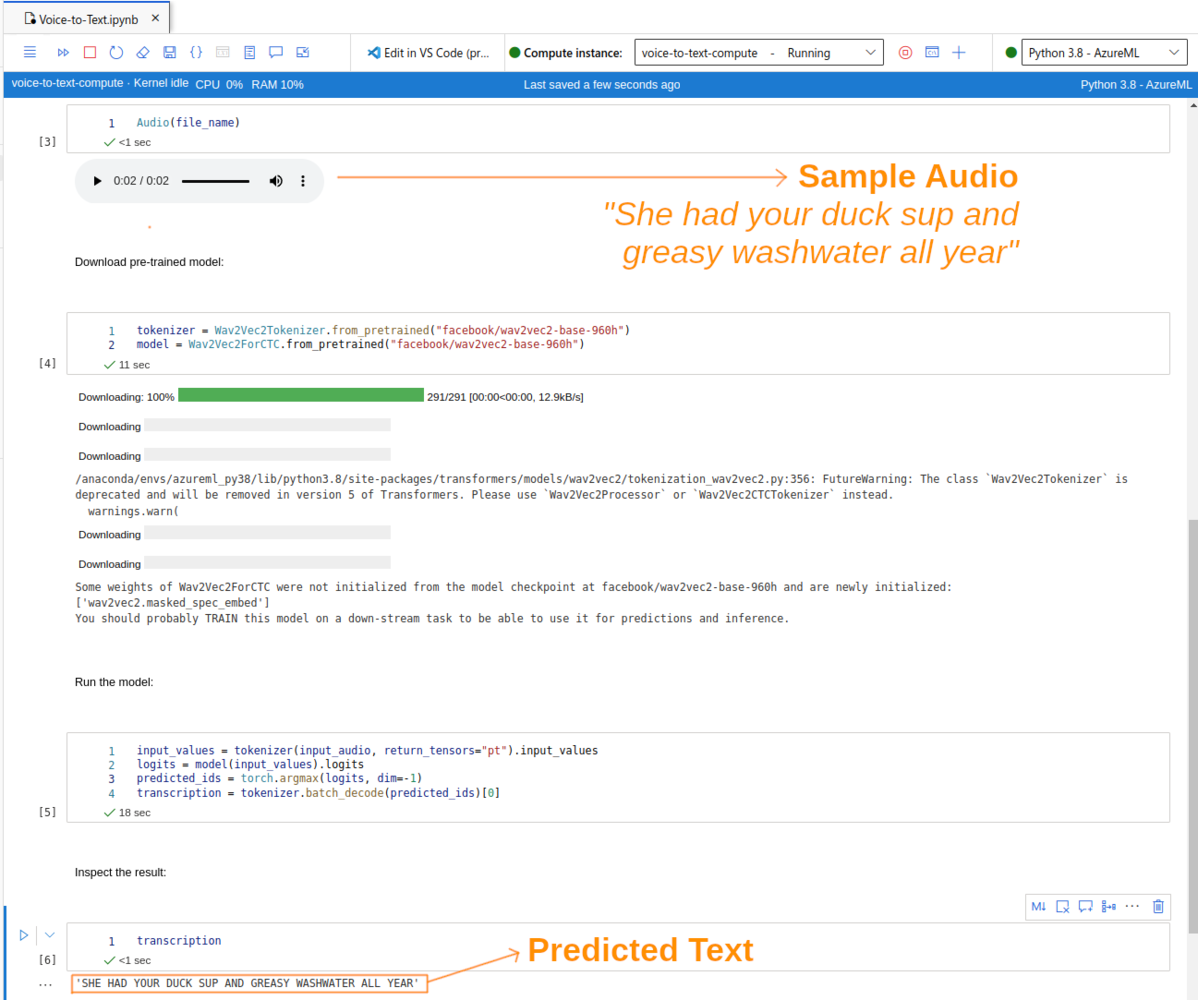
The machine learning model we will use for voice-to-text transformation is the Wav2vec 2.0 NLP framework, more specifically a pre-trained version of it. Wav2vec 2.0 is the second version of a speech recognition model developed by Facebook / Meta researchers:Wav2vec 2.0: Learning the structure of speech from raw audioA pre-trained version of Wav2vec 2.0 is available through the 🤗 Transformers library. The pre-trained model supports both PyTorch and TensorFlow libraries. We will use it with PyTorch.
&#xNAN;https://ai.facebook.com/blog/wav2vec-20-learning-the-structure-of-speech-from-raw-audio/
Getting Started with Azure ML
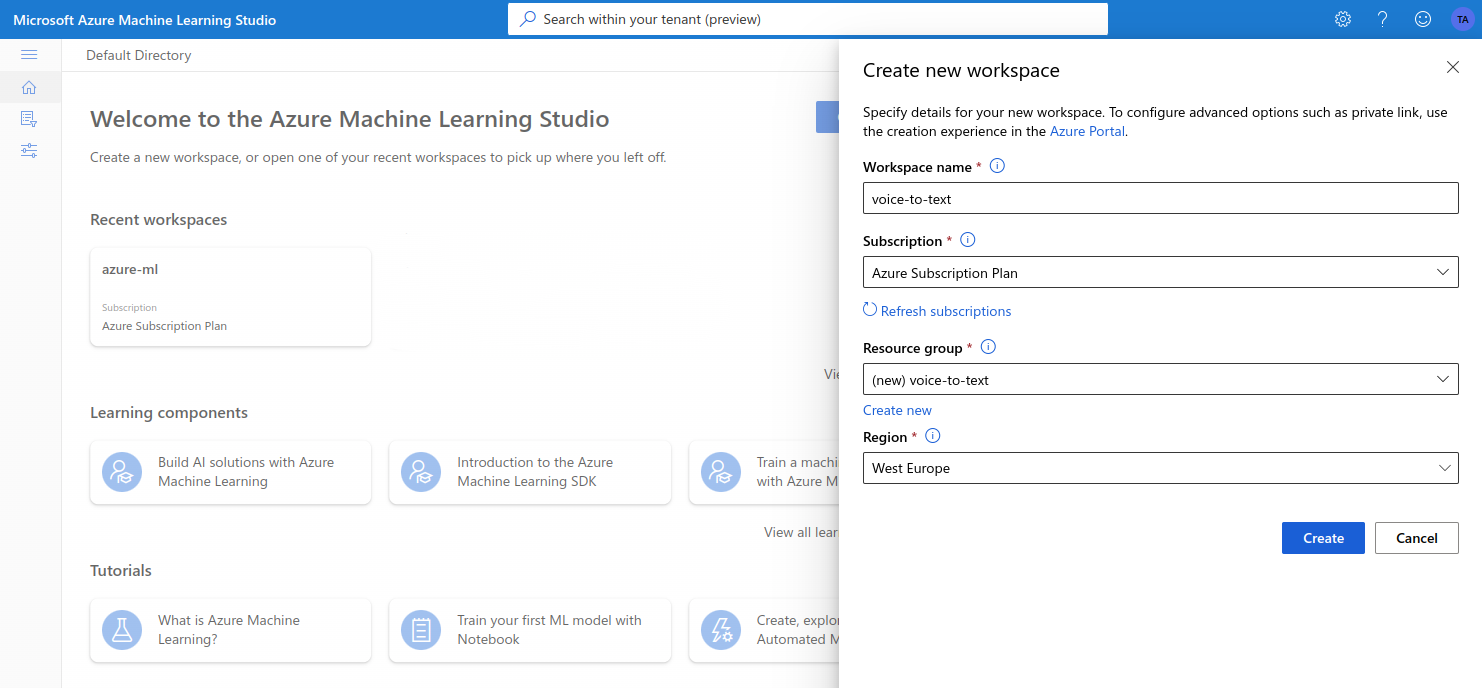
The functionality offered by Azure Machine Learning is accessed via the Azure ML Studio. As a prerequisite to accessing Azure ML Studio, we will need an Azure account and an active Subscription. Users whoa are new to Azure can also create a free account, with one year of free services and some credits for experimentation. Opening the Azure ML Studio brings us to a welcome page: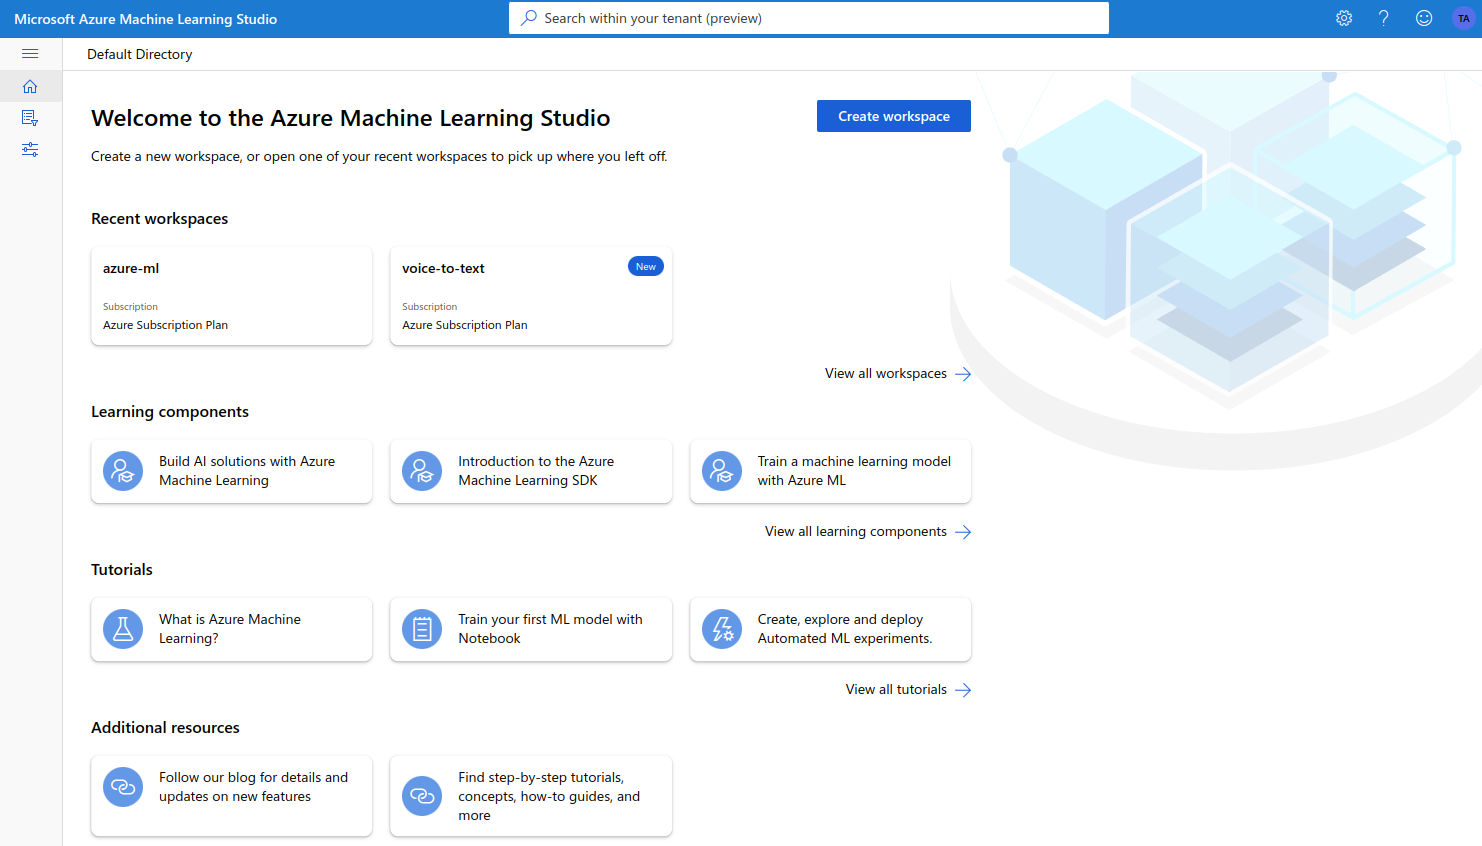
Jupyter Notebooks
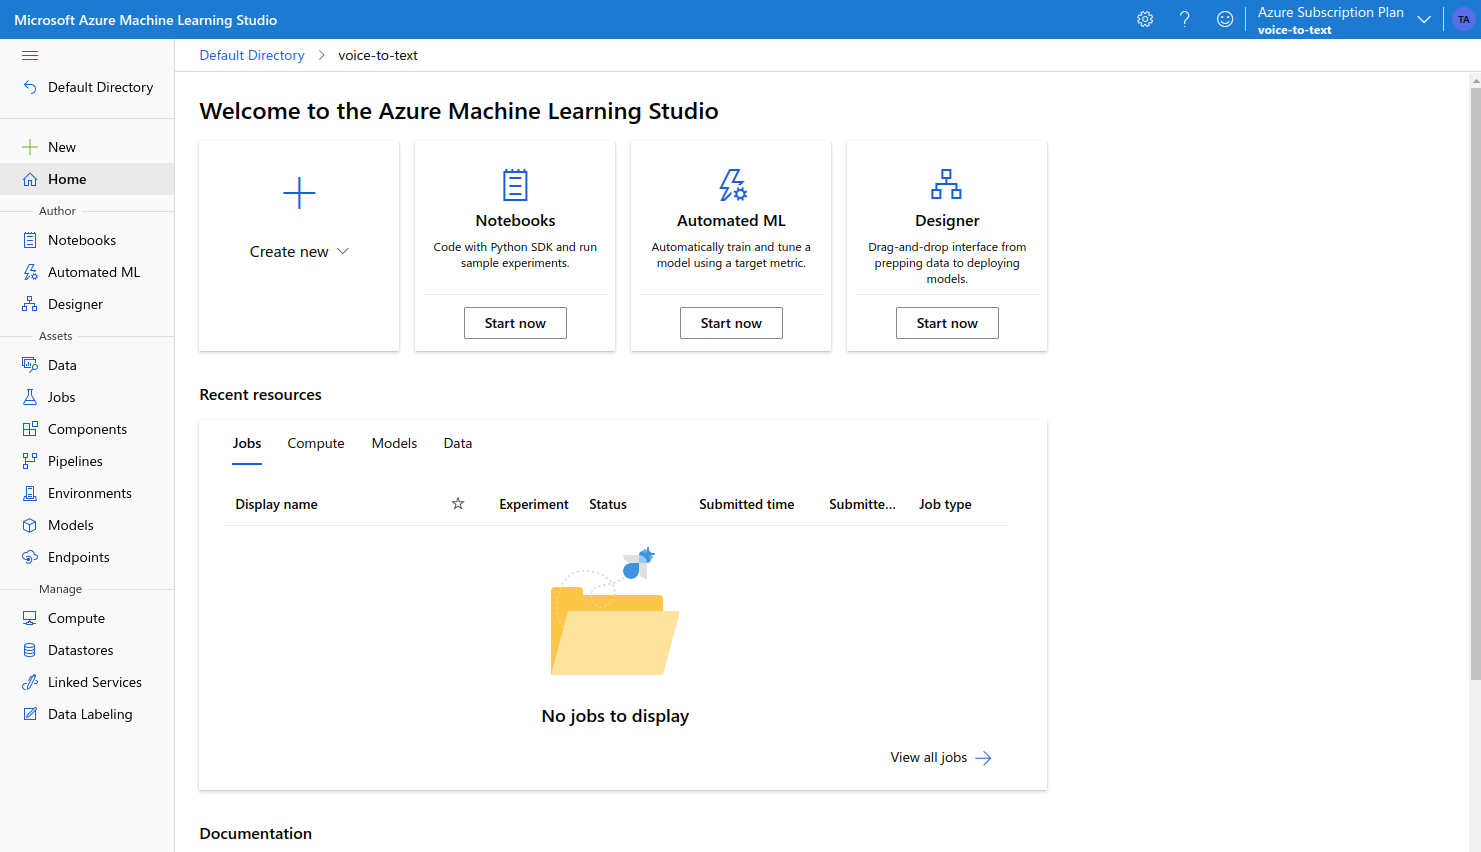
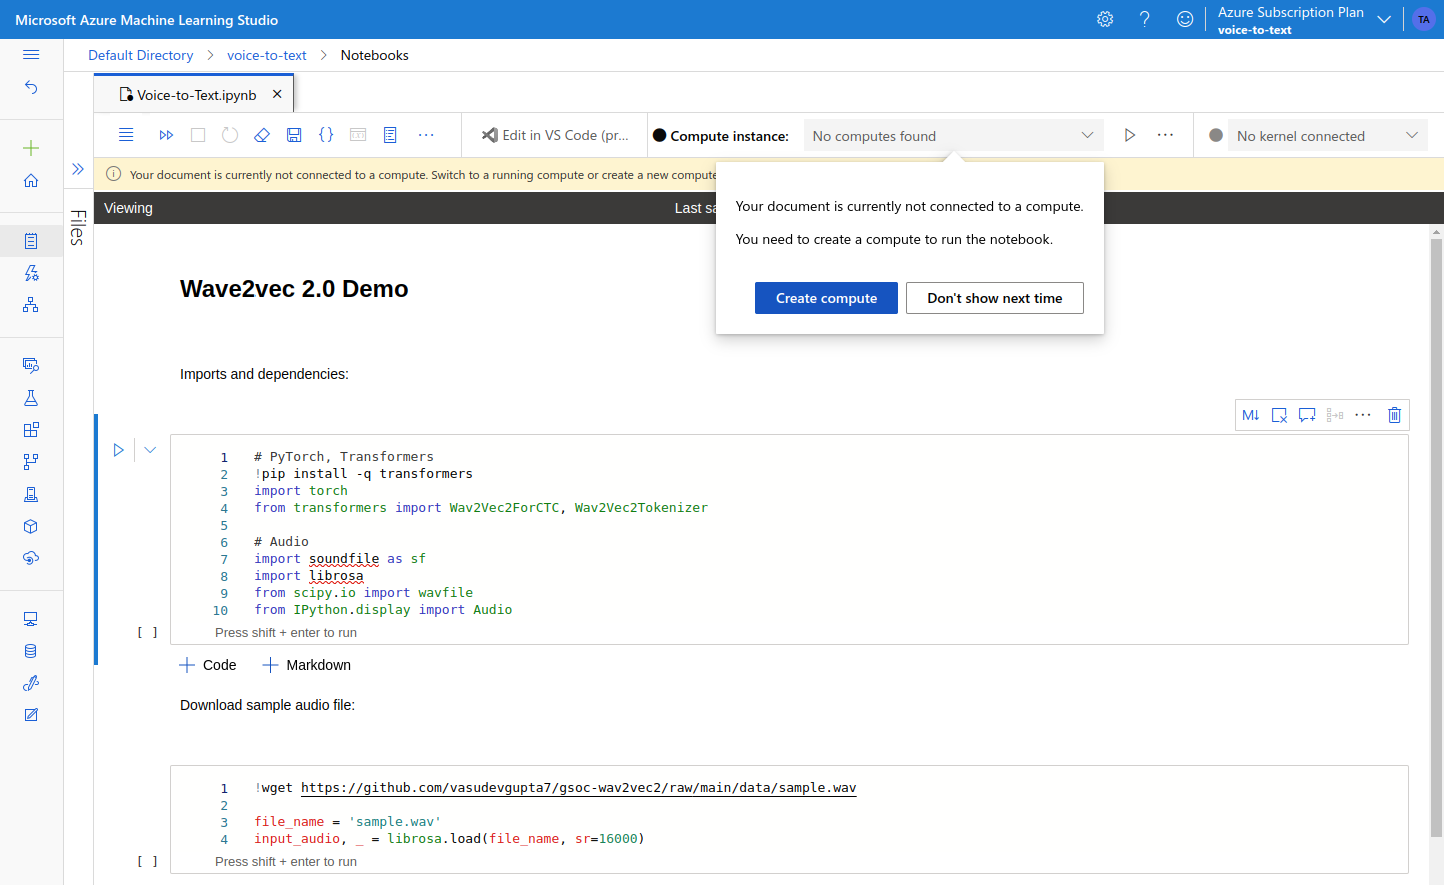
On the workspace overview page there are a couple of quick actions to choose from. I think Notebooks can be a good starting point. Notebooks allows us to work with a custom version of Jupyter Notebook, a tool which should be familiar for most people involved with ML projects. On the Notebooks page, we can either choose to create a new notebook, or to an upload existing one. I went ahead and created a new notebook, as I wanted to experiment with the Wave2Vec 2.0 model.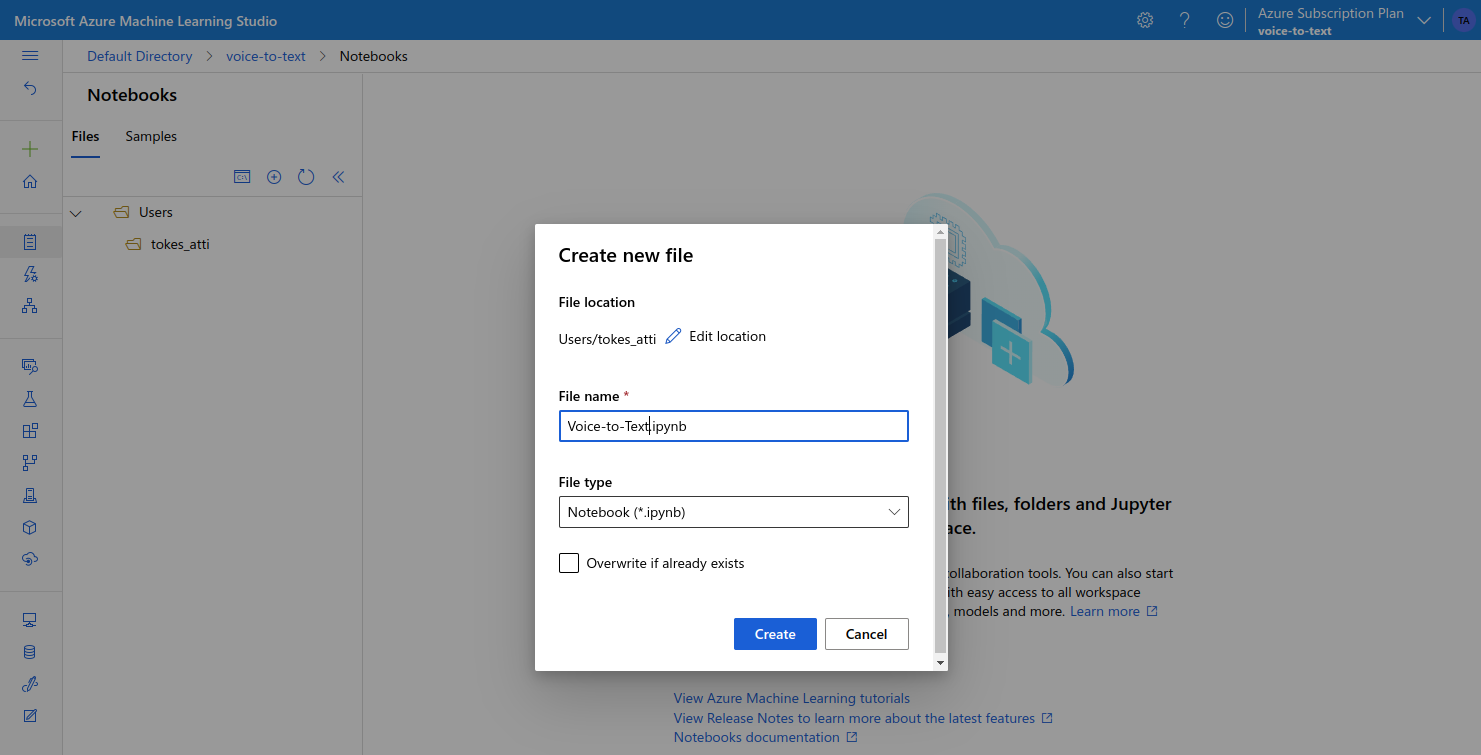

- downloads a sample audio file (WAV), with a person saying: “She had your duck soup and greasy washwater all year”
- downloads a pre-trained version of the Wave2Vec 2.0 model (
wav2vec2-base-960h) - runs the model on the sample audio file, and shows us the resulting transcript
ML Endpoints
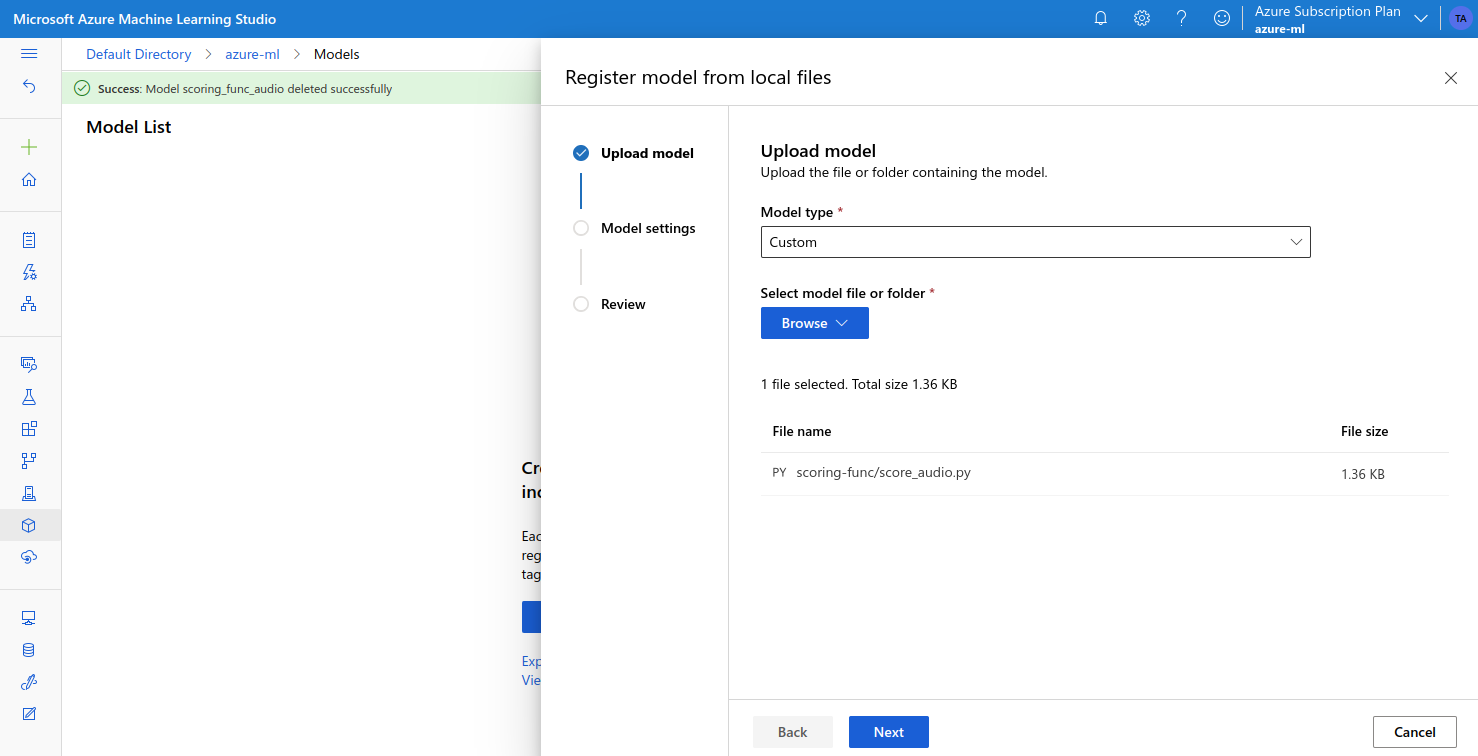
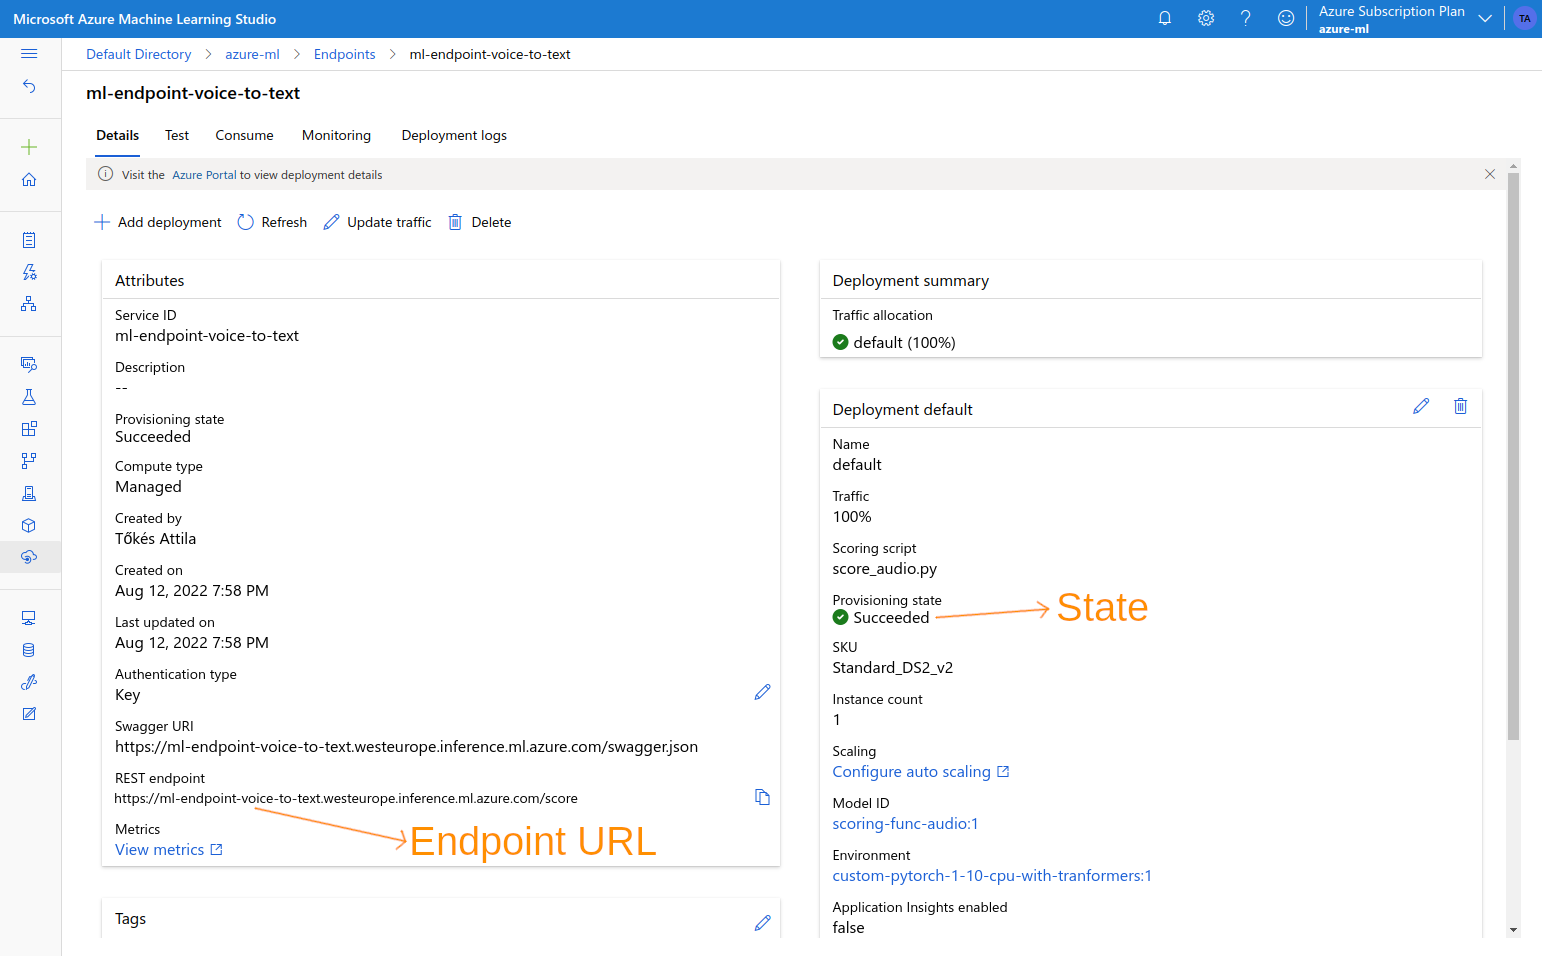
Notebooks are a good way for experimenting with ML models. But, in order to make use of the functionality offered by the model, we need a way to expose the model for consumption by other components. One way to do this is by using Azure Machine Learning Endpoints. Endpoints allows us to expose ML functionality over HTTPS endpoints, with features like SSL termination, authentication, DNS names and canary releases provided out-of-the-box. In order to deploy an ML Endpoint we need to setup two things: a Model and an Environment. The Model contains a machine learning model packaged in some form. Supported formats are Score Model, MLFlow and Triton. The Score Model is the easiest option to implement. All we need is a Python “scoring file” of the following form:/score endpoint. This endpoint can be accessed using a simple HTTP call.
The scoring file for our voice-to-text application can be found in the scoring-func/score_audio.py file.
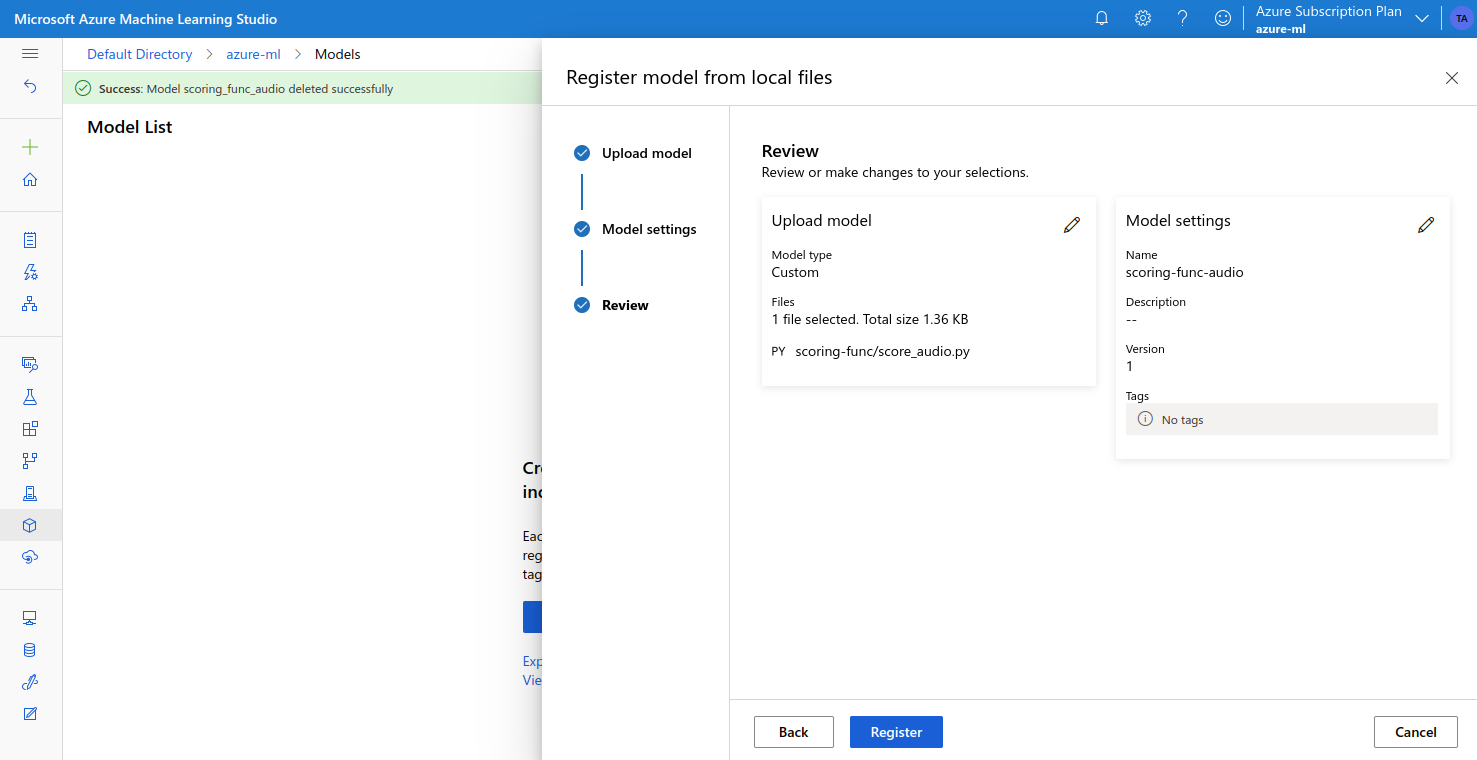
We can upload this to Azure ML from the Models page:
- first we need to select the “Custom” model type, and upload the
scoring-funcfolder
- then we choose a name
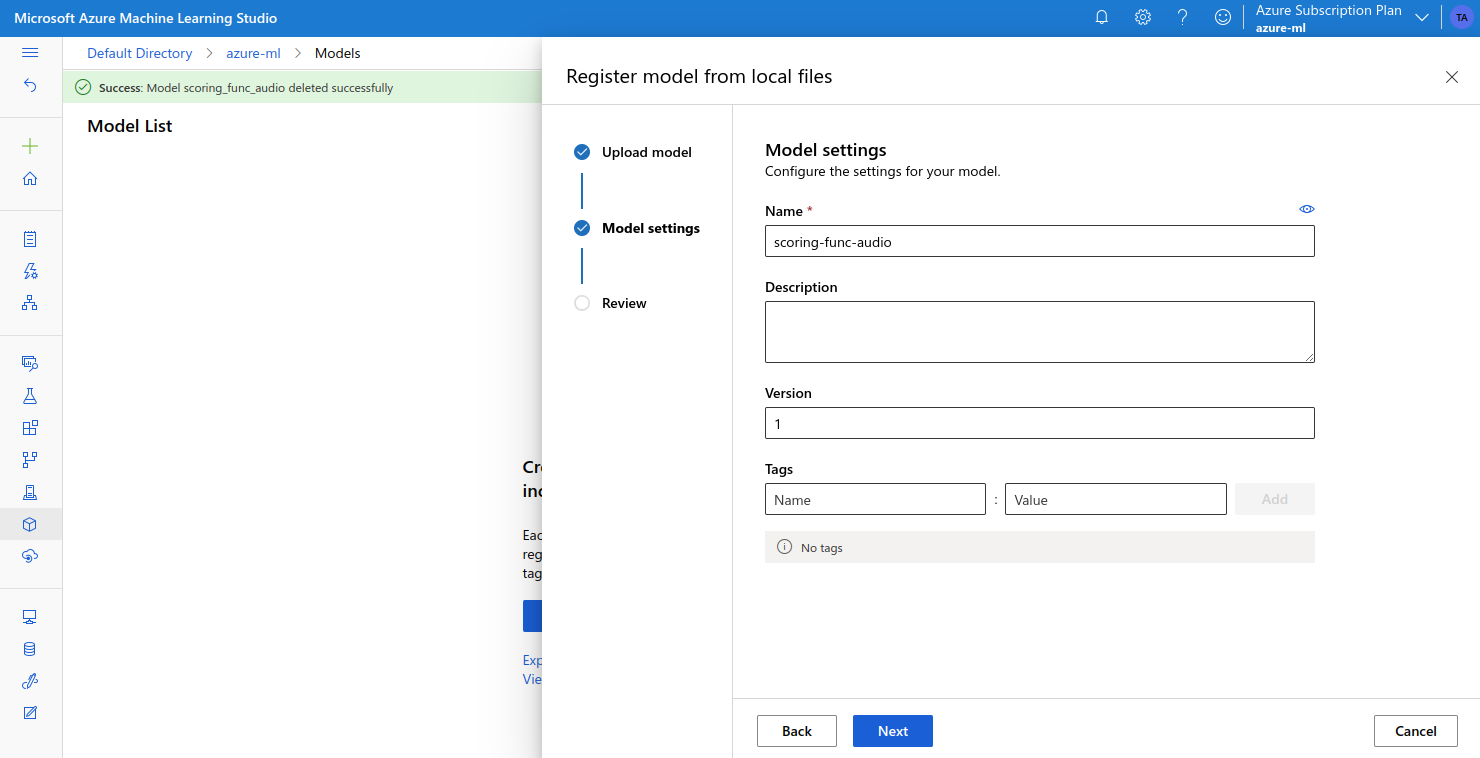
- and register the model
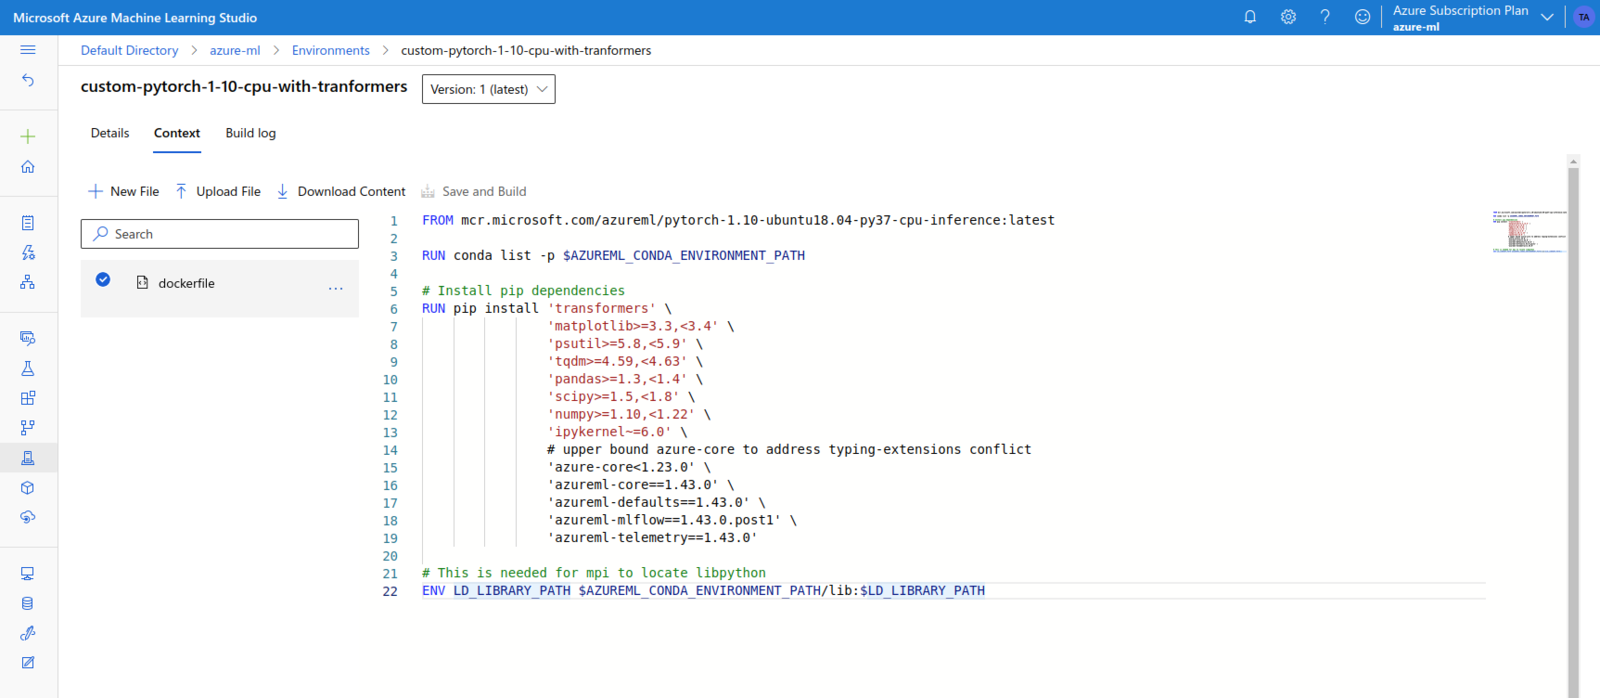
- Curated Environments - these are ready-to-use environments created by Microsoft, and they have popular ML frameworks like TensorFlow or PyTorch pre-installed
- Custom Environments - can be used we need custom libraries, or something that is not already present in the curated environments
transformers, we need a Custom Environment. This can be created from the Environments page. We can choose to start from a Curated Environment, or we can use our own Dockerfile. After multiple tries, I ended up creating a Custom Environment based on the mcr.microsoft.com/azureml/pytorch-1.10-ubuntu18.04-py37-cpu-inference image.
This is PyTorch based image, supporting only CPU inference. It also has Python 3.7 and the transformers library installed.
- choose a name, the compute type “Managed”, and “Key-based authentication”
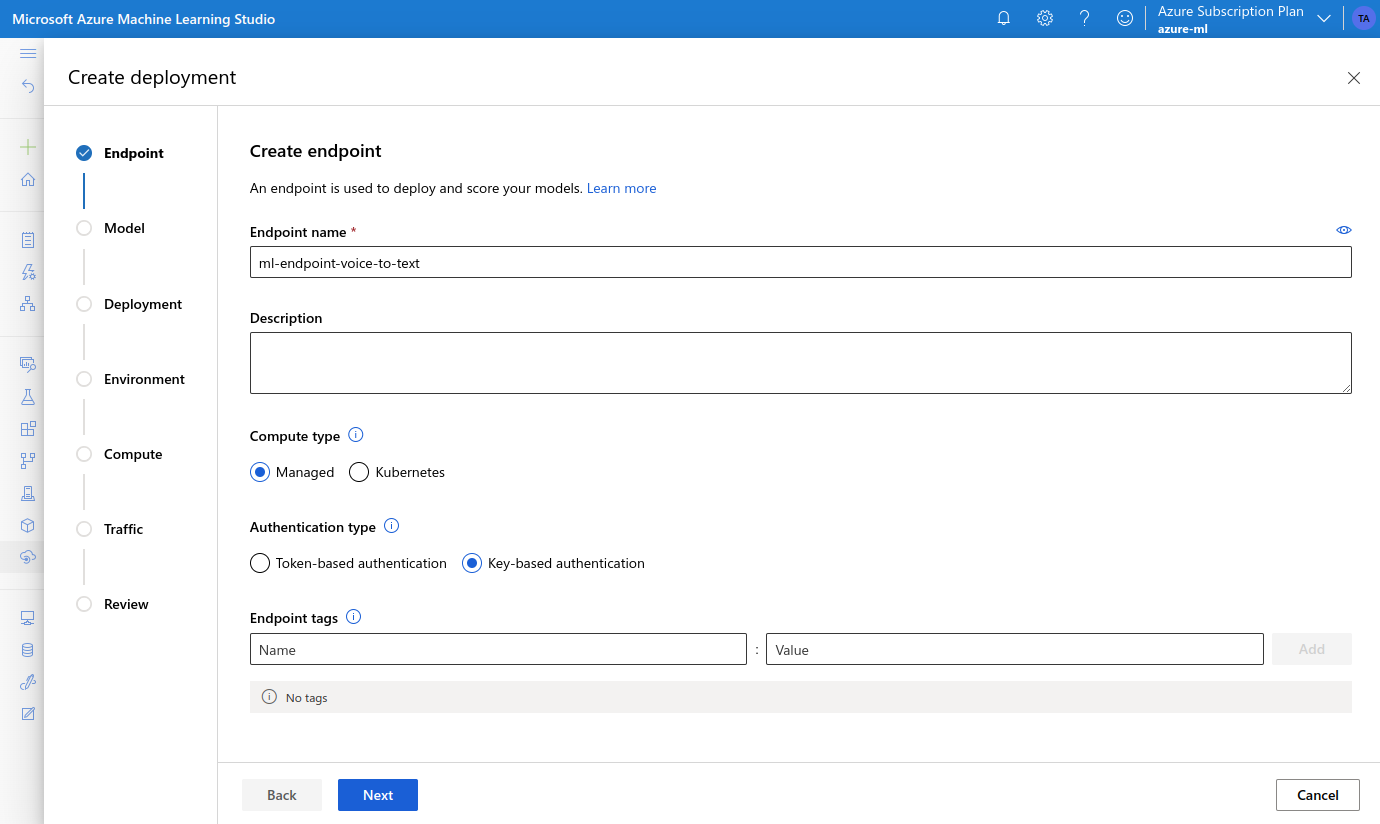
- select the model we created earlier

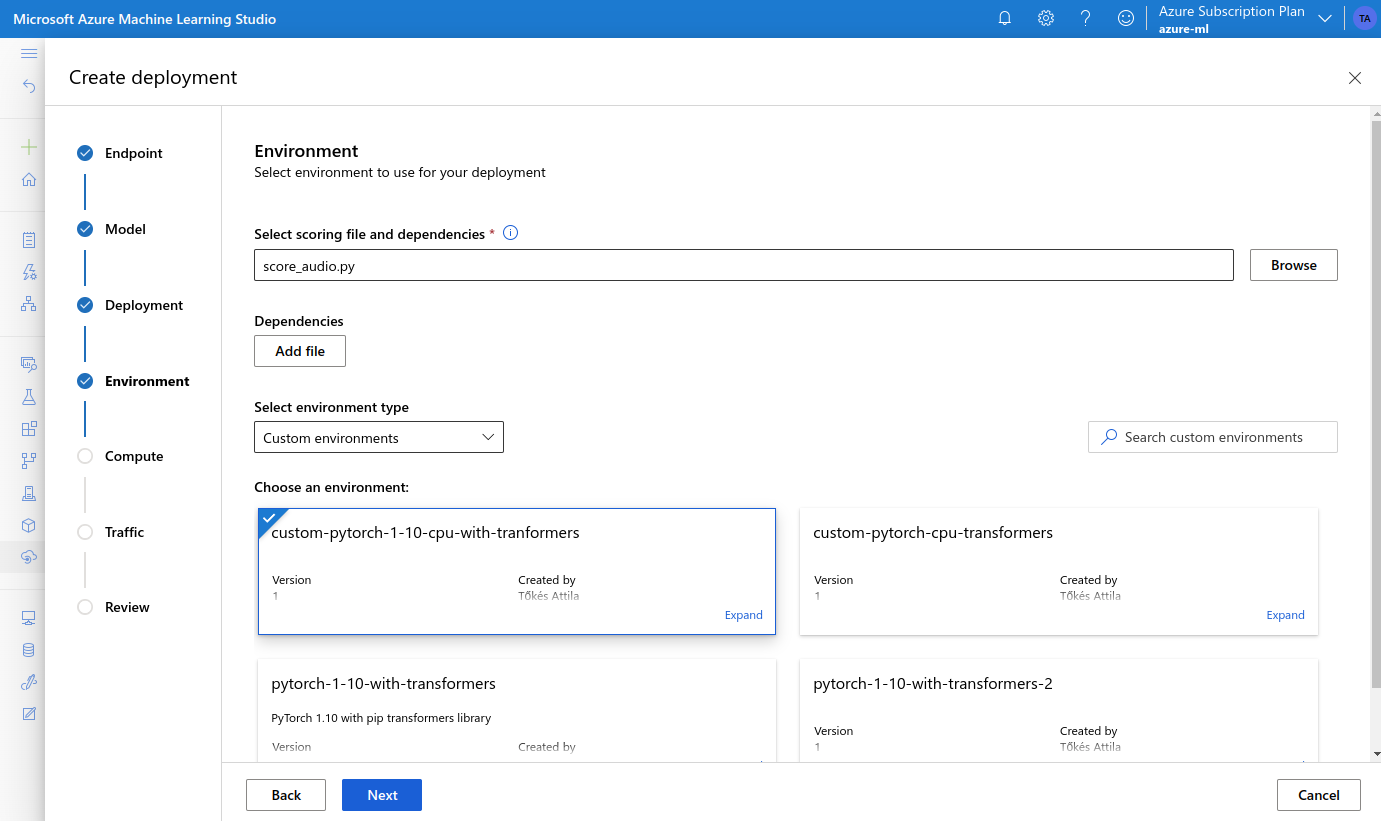
- on the Environment page we select our Custom Environment
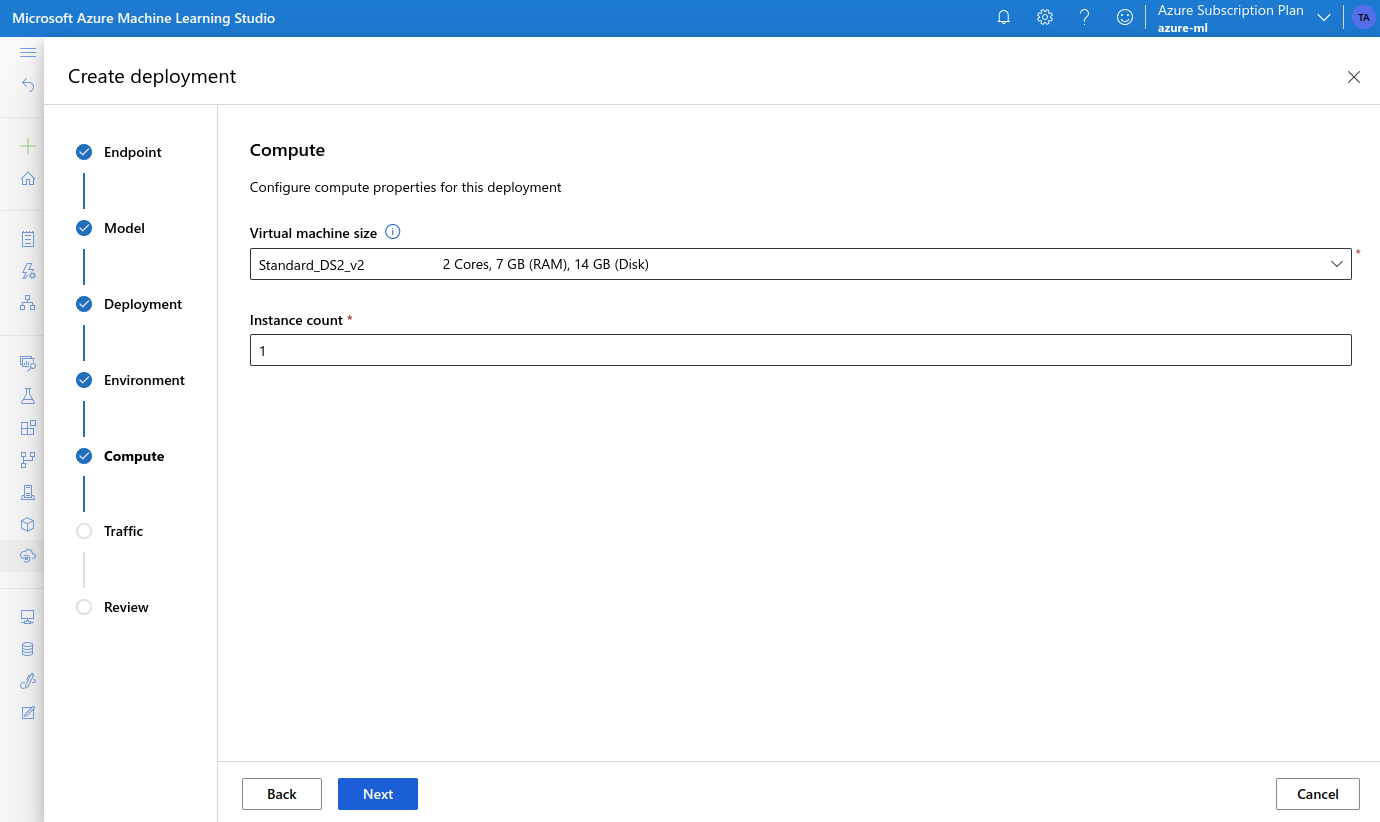
- choose a VM type, and set the Instance count to 1
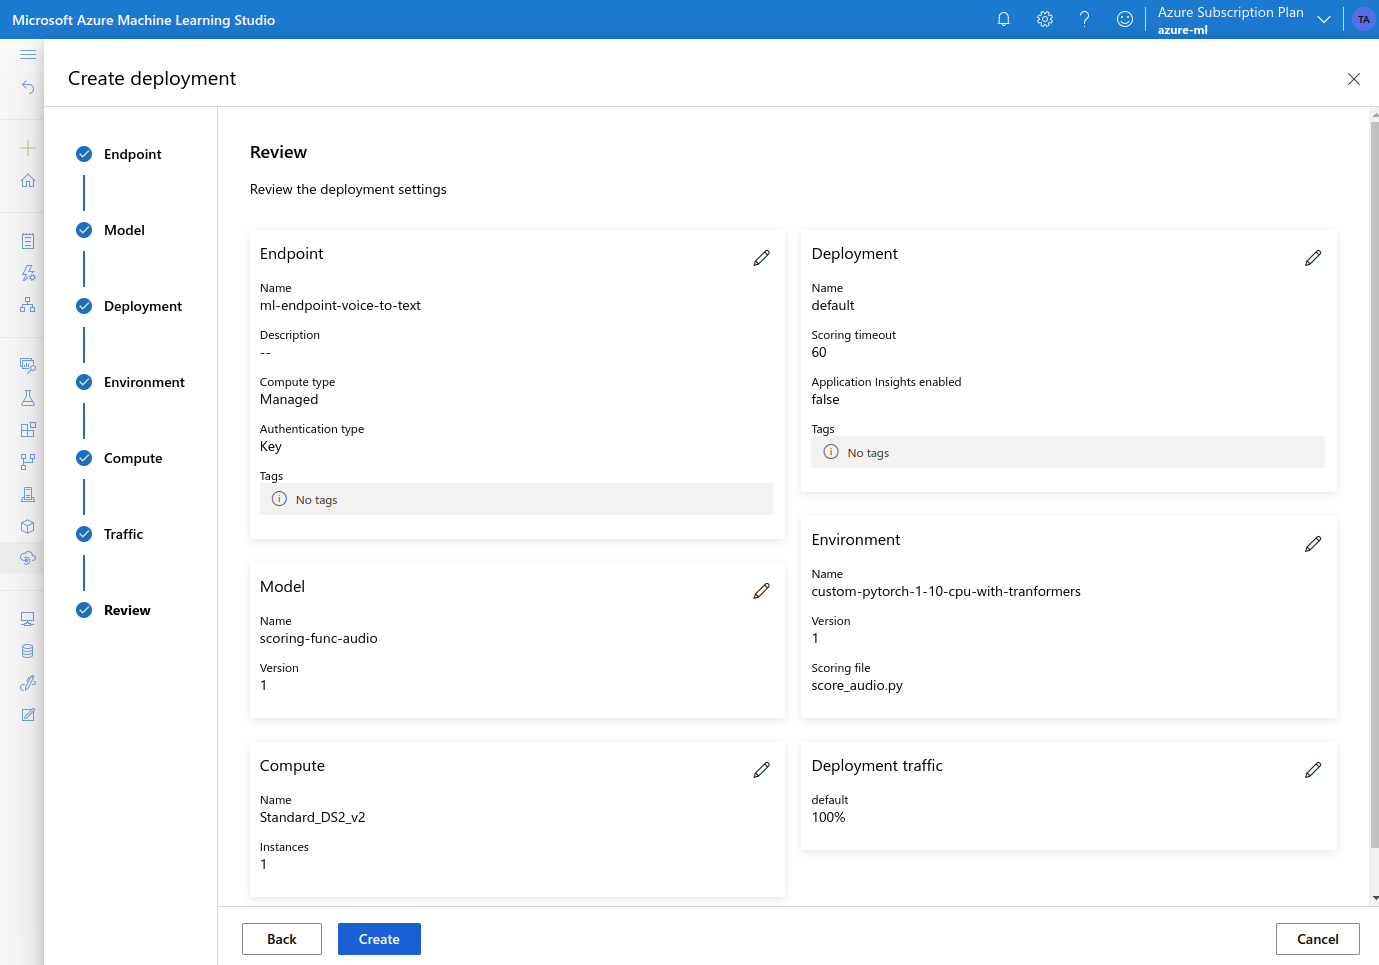
- review and confirm the settings, and click Create
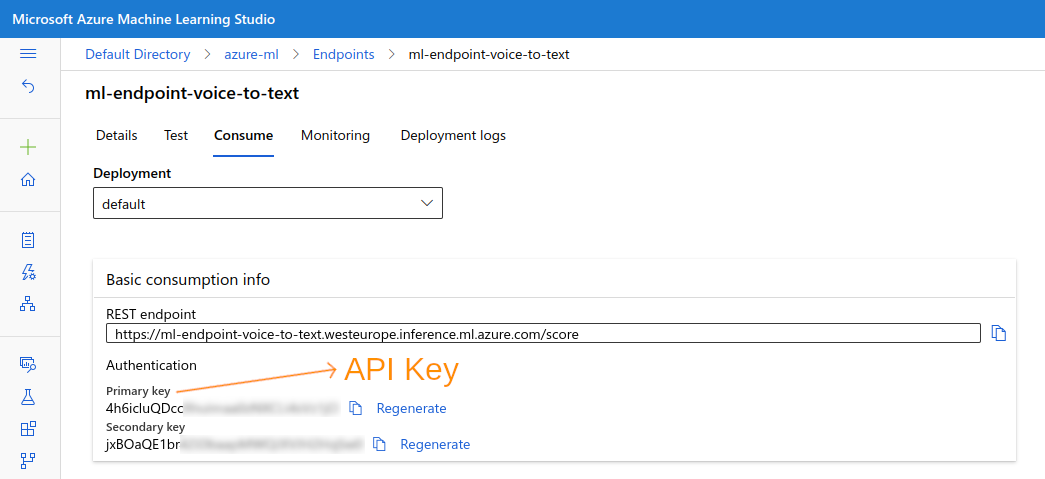
data field. To call it with a real audio file we can use a client side Python script like this:

Kubernetes Compute
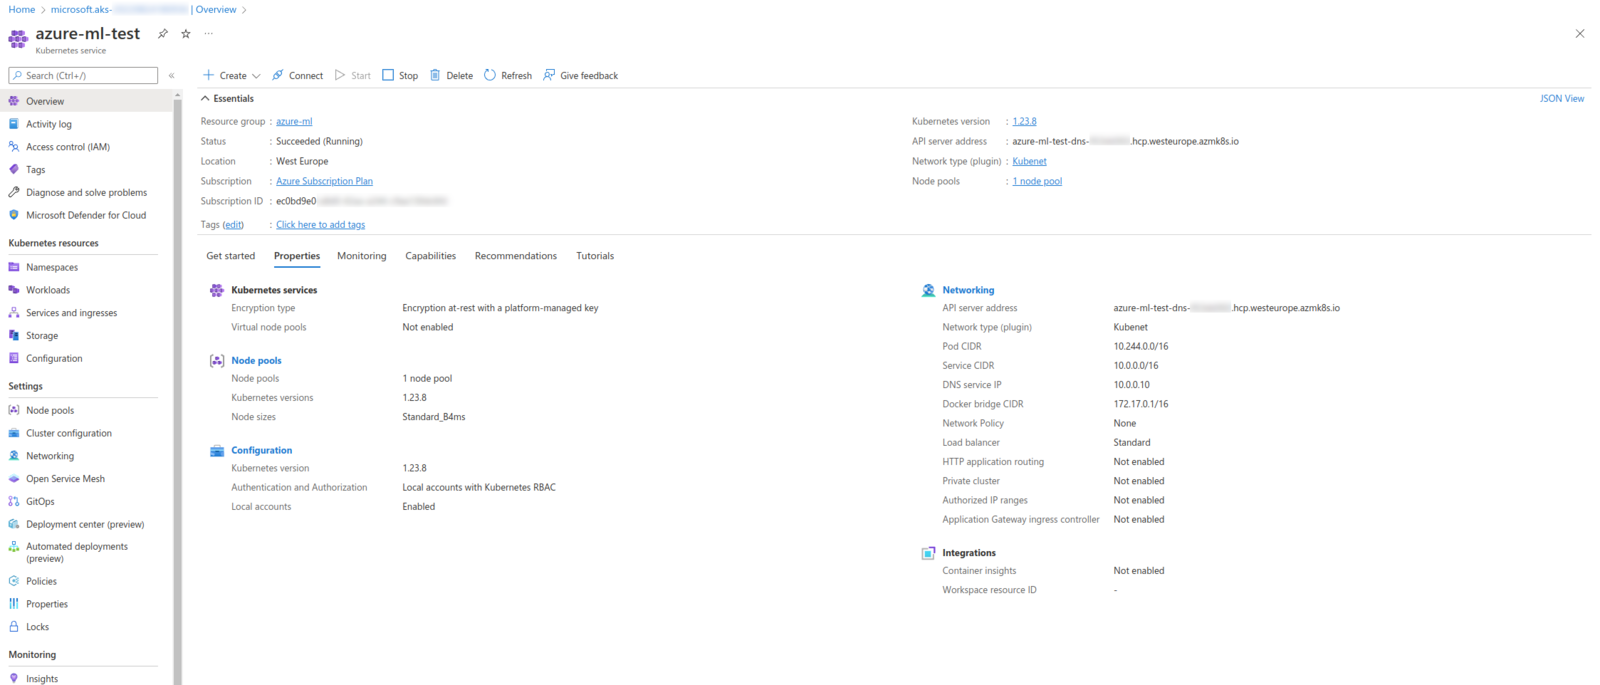
Up to this point, we have used the Managed Compute Instances / Clusters with Azure ML. Managed Compute Instances are Azure VM instances with lifecycle, OS updates, and software stacks fully managed by Azure. When using Managed Compute Instances we are able to select the VM instance type and size. Clusters can have either a fixed number of VM instances, or varying number of VM instances managed by auto-scaling functionality. Virtual Machines with dedicated GPUs are also supported. Along with Managed Compute Instances, Azure ML also supports several other instance types. The most notable is Kubernetes based compute clusters. Kubernetes is a widely used open-source container orchestration system. It supports automatic deployment, scaling and management of container based application. Thus, it is a great choice for cloud-based systems. Azure ML supports two types of Kubernetes compute clusters:- Azure Kubernetes Service (AKS) cluster - these are fully managed clusters offered by Azure
- Azure Arc enabled Kubernetes clusters - these are customer managed clusters connected to Azure via Arc
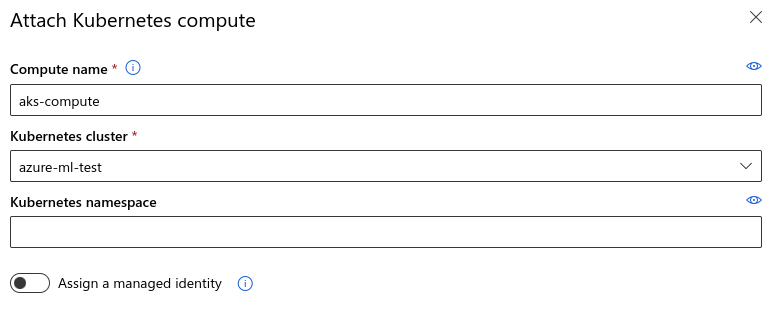 The attached Kubernetes Compute then can be used to create Endpoints with Kubernetes compute type:
 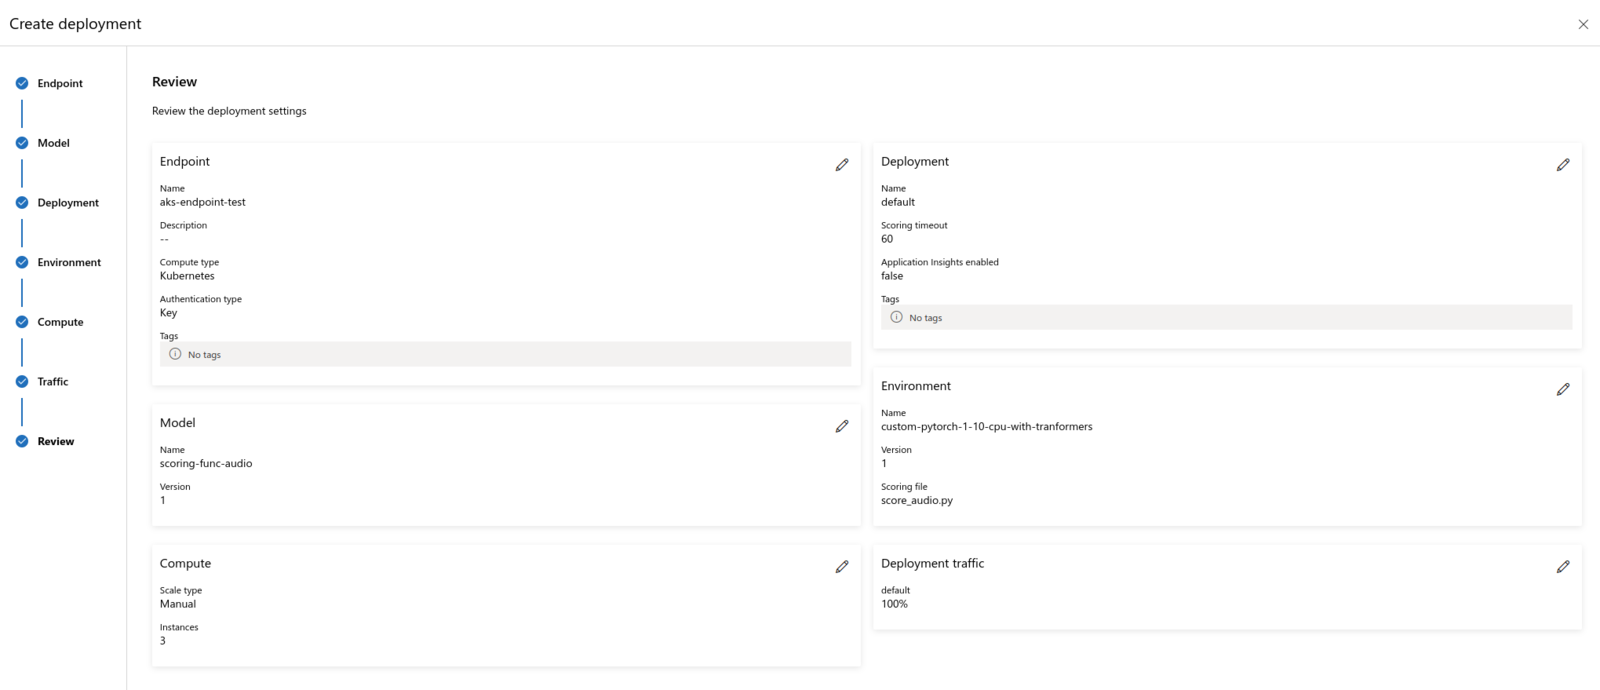 The deployed ML Endpoint will look and work similar to one with managed compute type:
 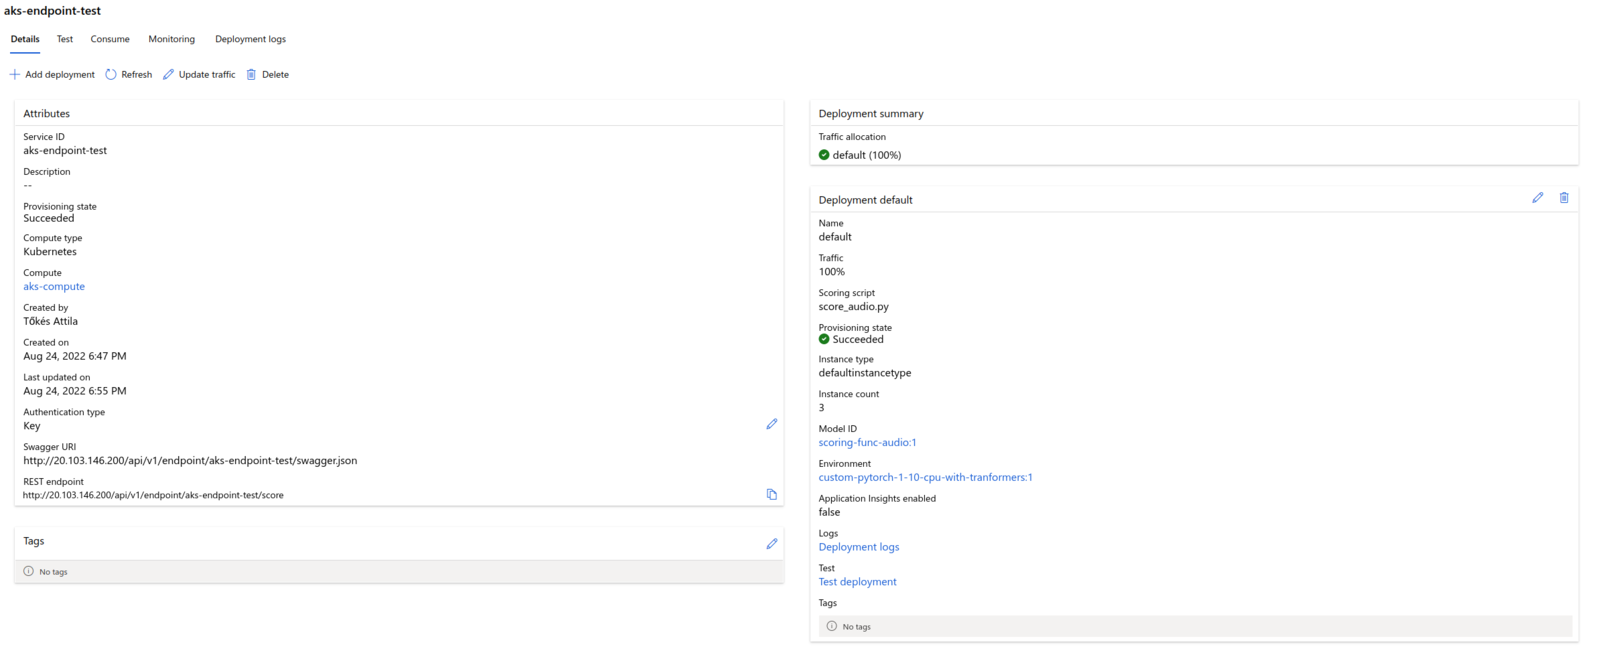 Using a
 kubectl CLI tool we can also see what resource Azure ML deployed in our Kubernetes Cluster: 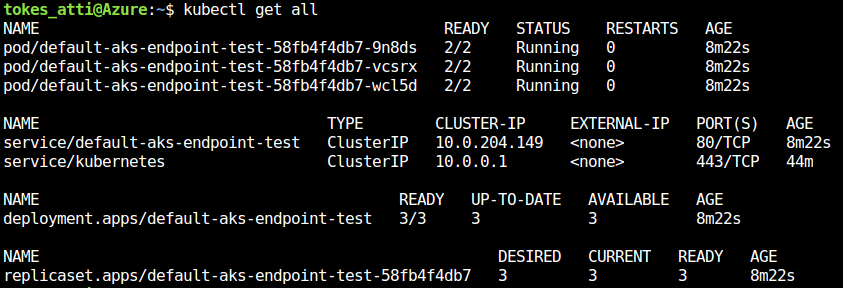
Azure ML CLI & SDK
Azure ML Studio offers a good visual UI for creating and managing Azure ML resources. For people using Azure ML for the first time, it offers a great overview of how to get started and what features are available on the platform. Additionally, Azure ML also has a CLI, and Python SDK for direct interaction from a console and code:What is Azure Machine Learning CLI & Python SDK v2?The Azure ML CLI and Python SDK enable engineers the use MLOps techniques. Similar to DevOps, MLOps is a set of practices that allows the reliable and efficient management of AI / ML application lifecycle. It enables processes like:
&#xNAN;https://docs.microsoft.com/en-us/azure/machine-learning/concept-v2
- deployment automation
- consistent and repeatable deployment
- ability to create / manage / deploy resources programmatically
- continuous integration and development (CI/CD)
Edge ML with Edge Impulse
Edge Impulse is the leading development platform for Edge Machine Learning (Edge ML). It enables the creation of smart solutions via efficient machine learning models running on edge devices. As a demonstration we will implement a voice-to-text application on a Raspberry Pi. The solution will feature a keyword spotting model implemented with Edge Impulse, as as well the Cloud ML endpoint we created in the previous section.Hardware
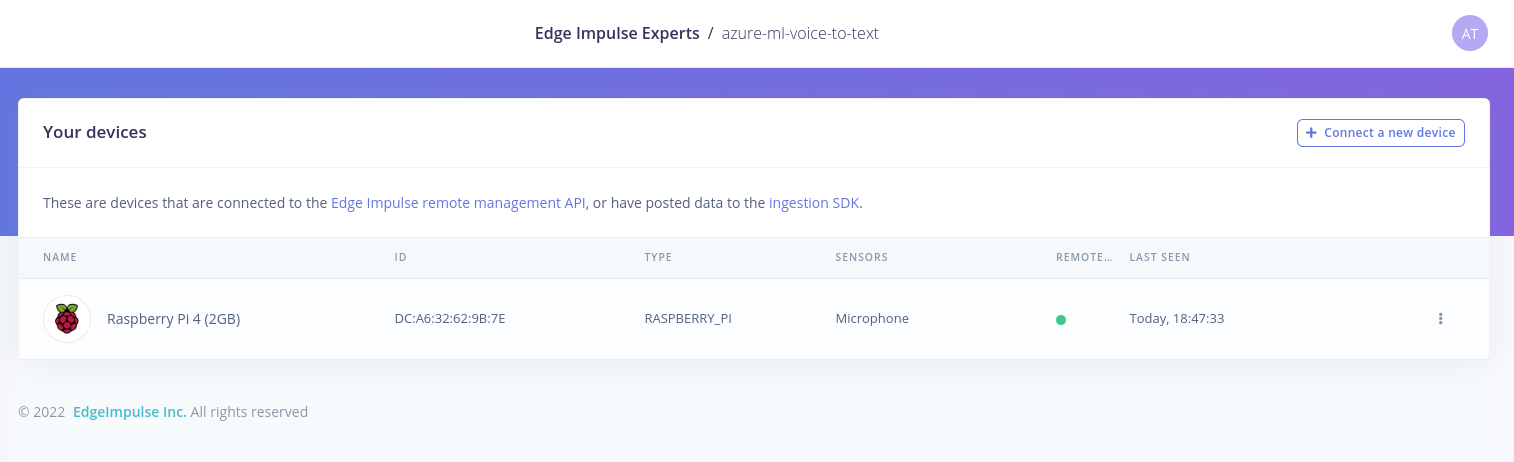
The hardware we will use is a Raspberry Pi 4 (2GB) development board, along with a Logitech USB headset used as the microphone input.Setting up your Raspberry PiNext, there are couple steps to be done in order to connect the device to EdgeImpulse. The goal is to install the
&#xNAN;https://projects.raspberrypi.org/en/projects/raspberry-pi-setting-up/0
edge-impulse-linux utility, which can be done as follows:
Audio Project with Raspberry Pi
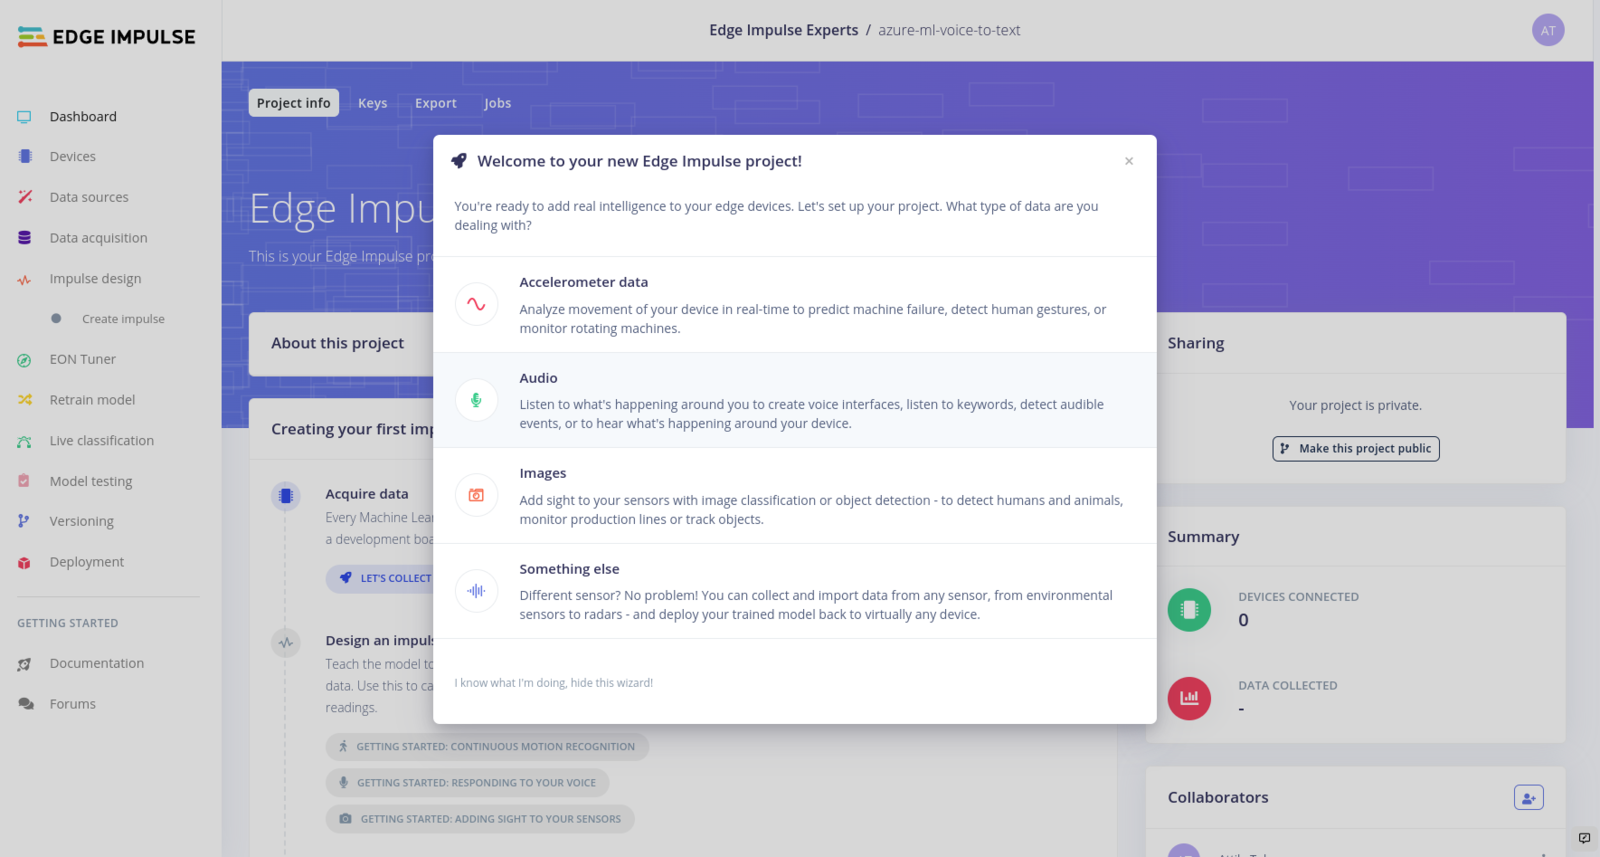
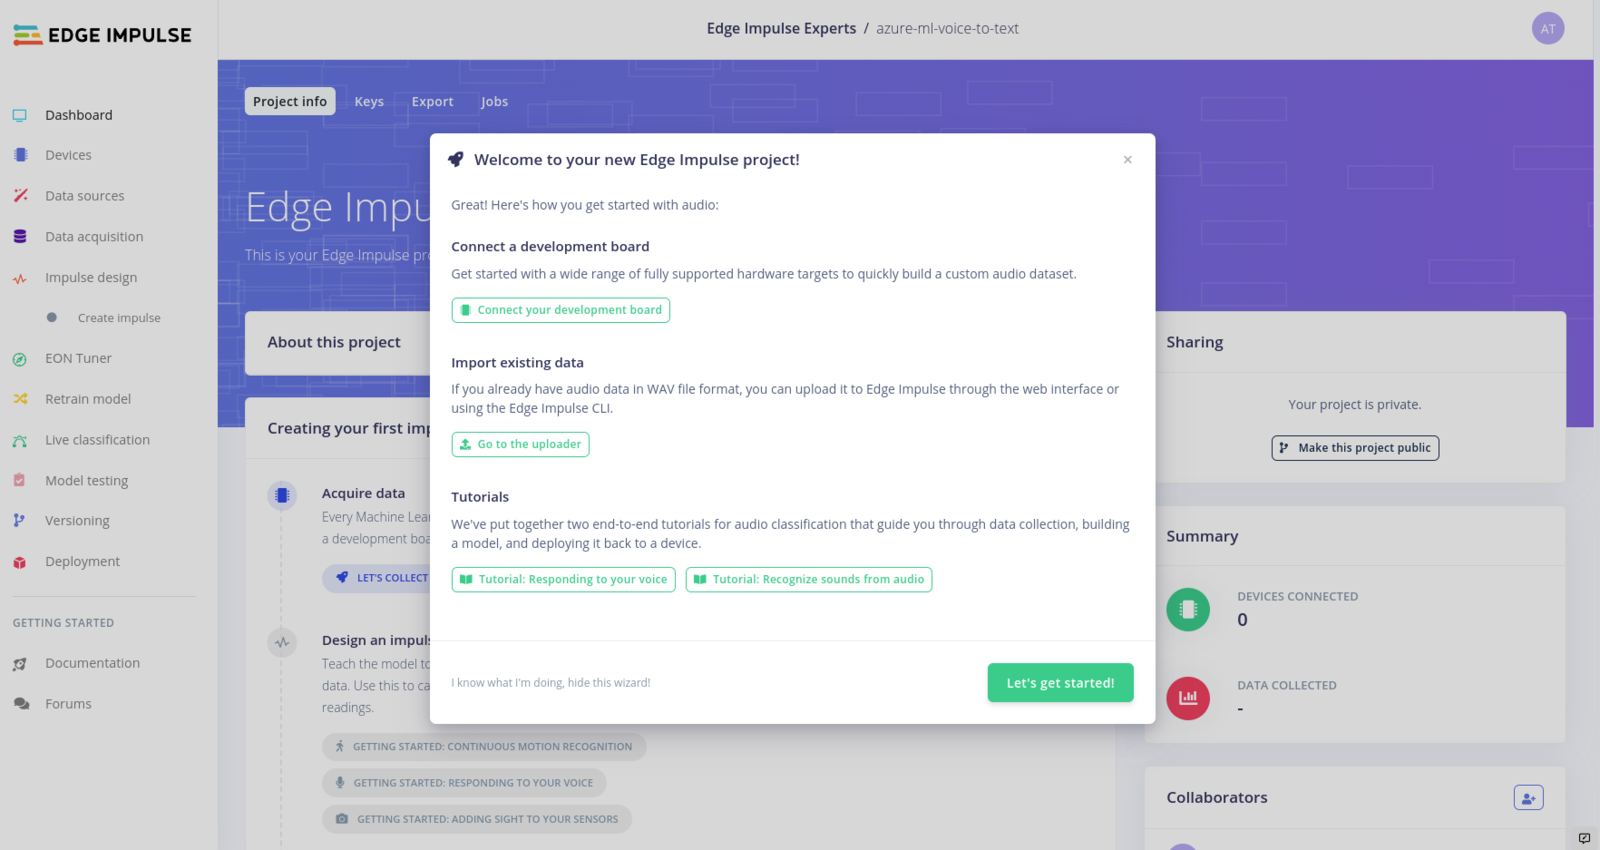
Next, we can login to the Edge Impulse Studio, and create a new project: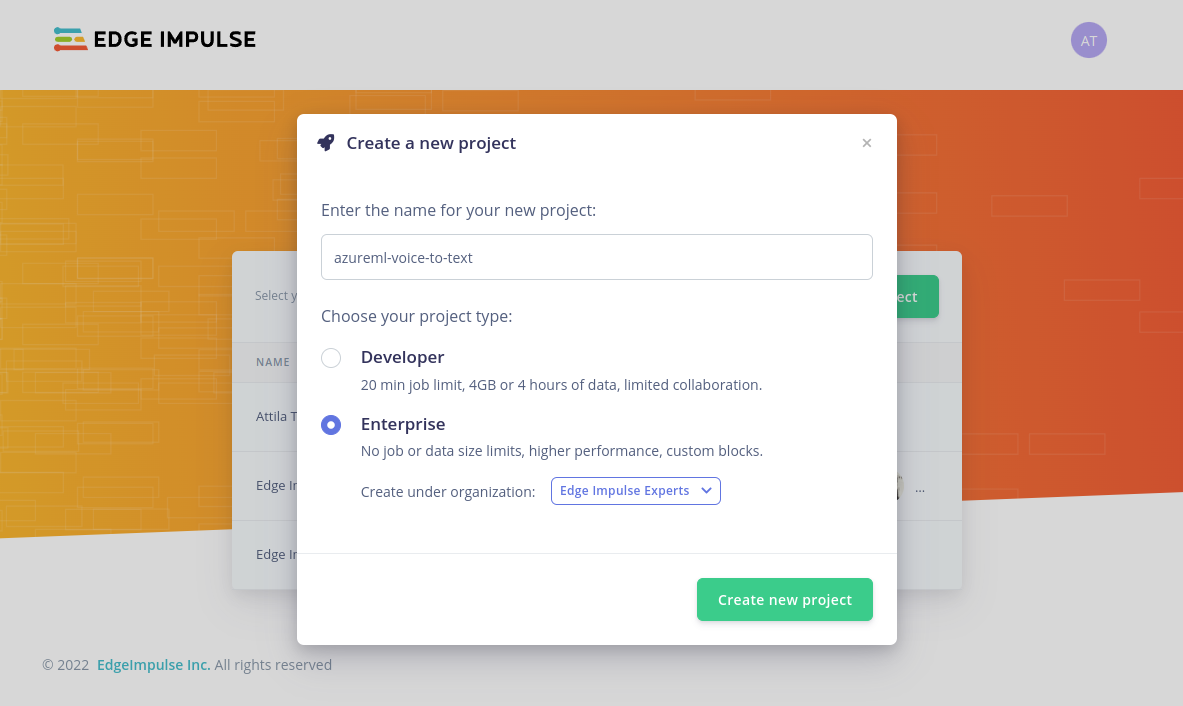
edge-impulse-linux on the Raspberry Pi:

Data Collection
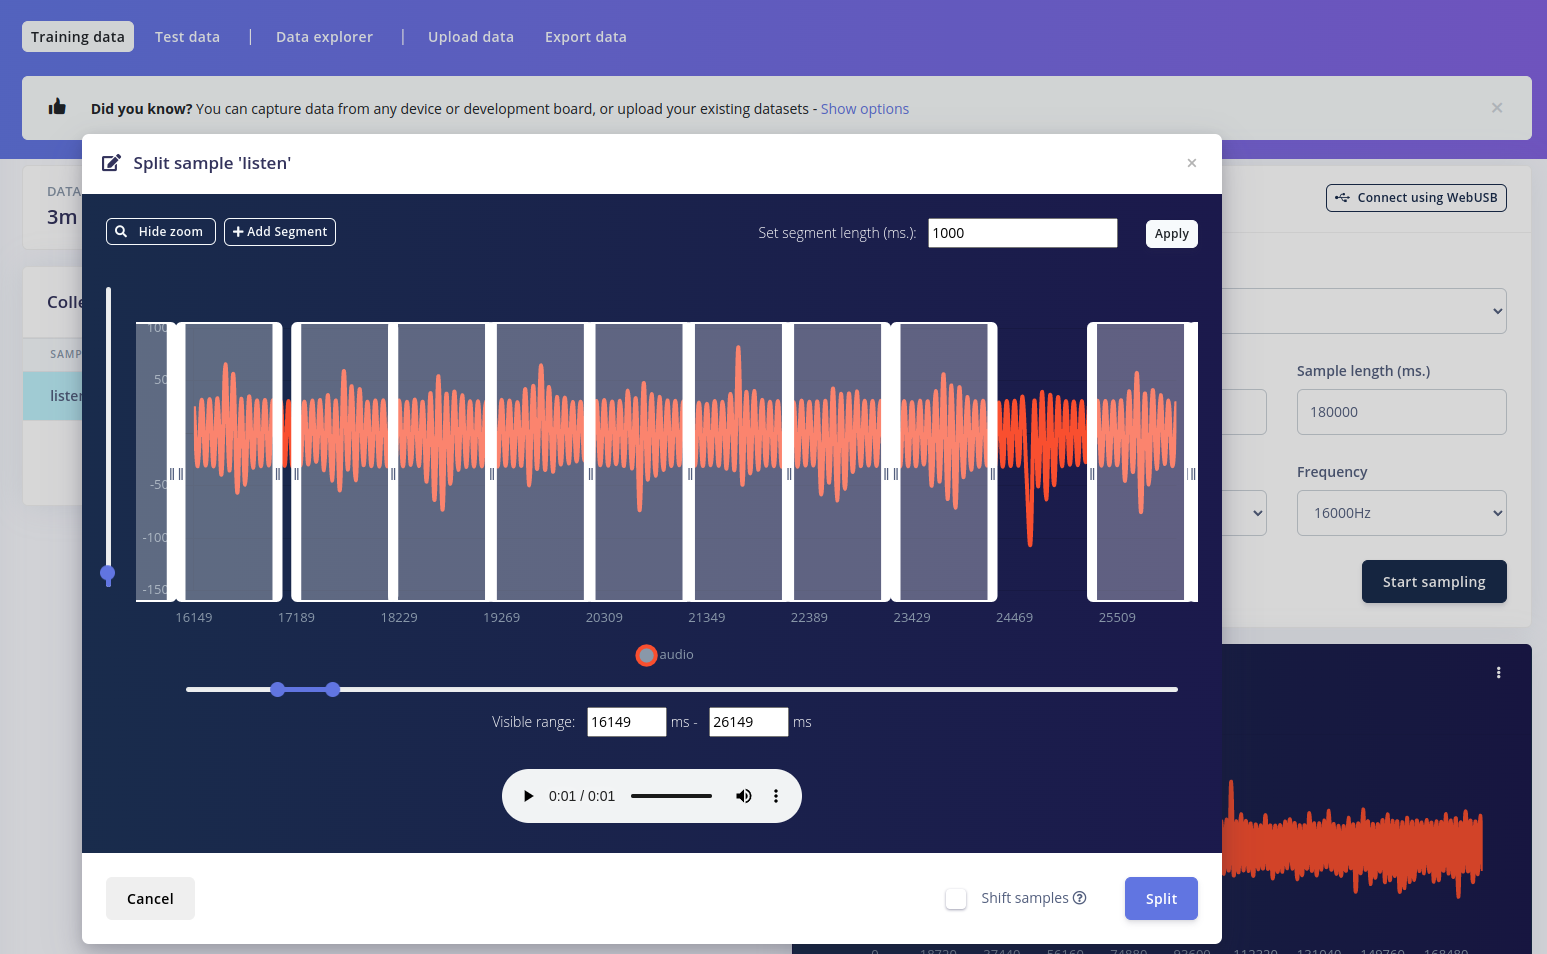
Now we can start building our keyword spotting model. Edge Impulse has a great tutorial on this: Keyword spotting The first step in training a keyword spotting model is to collect a set of samples of the word we want to detect. This can be done in the Data Acquisition tab: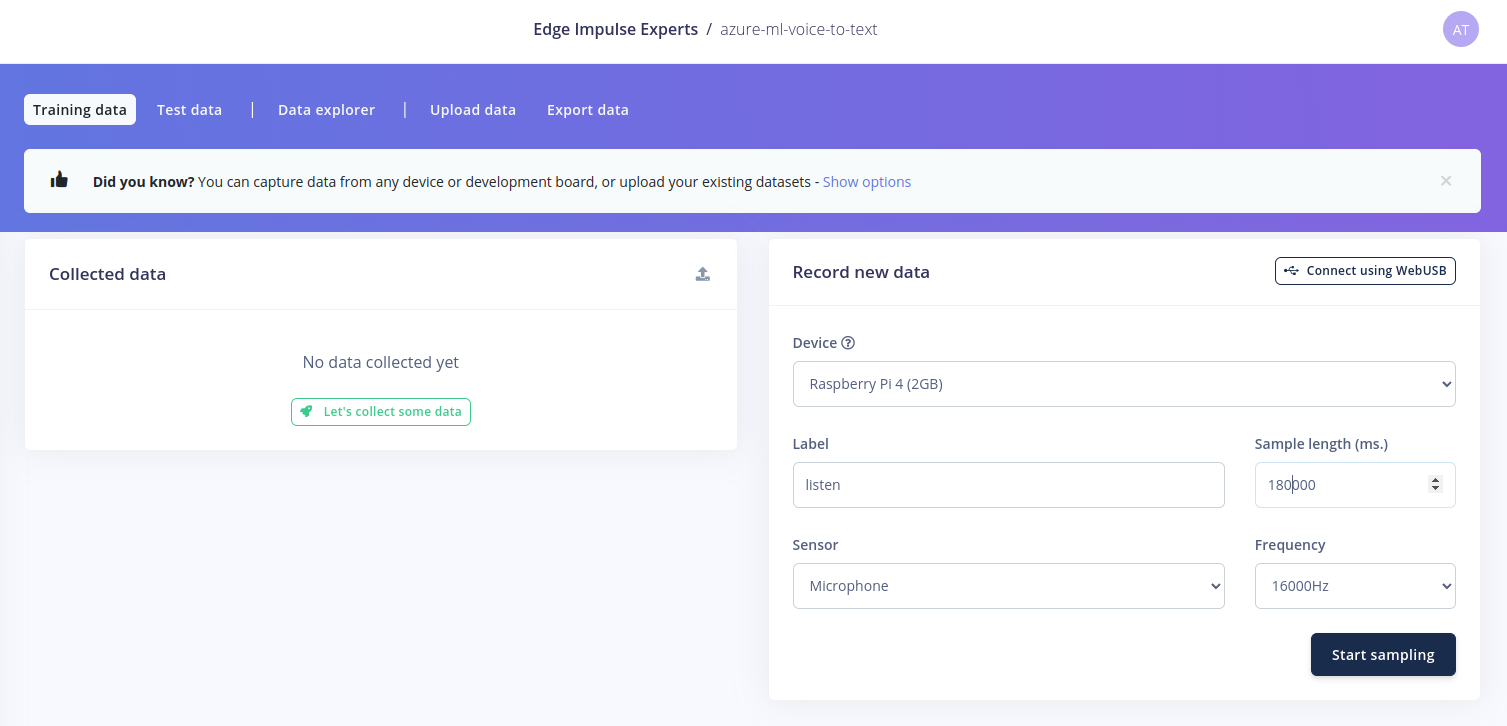
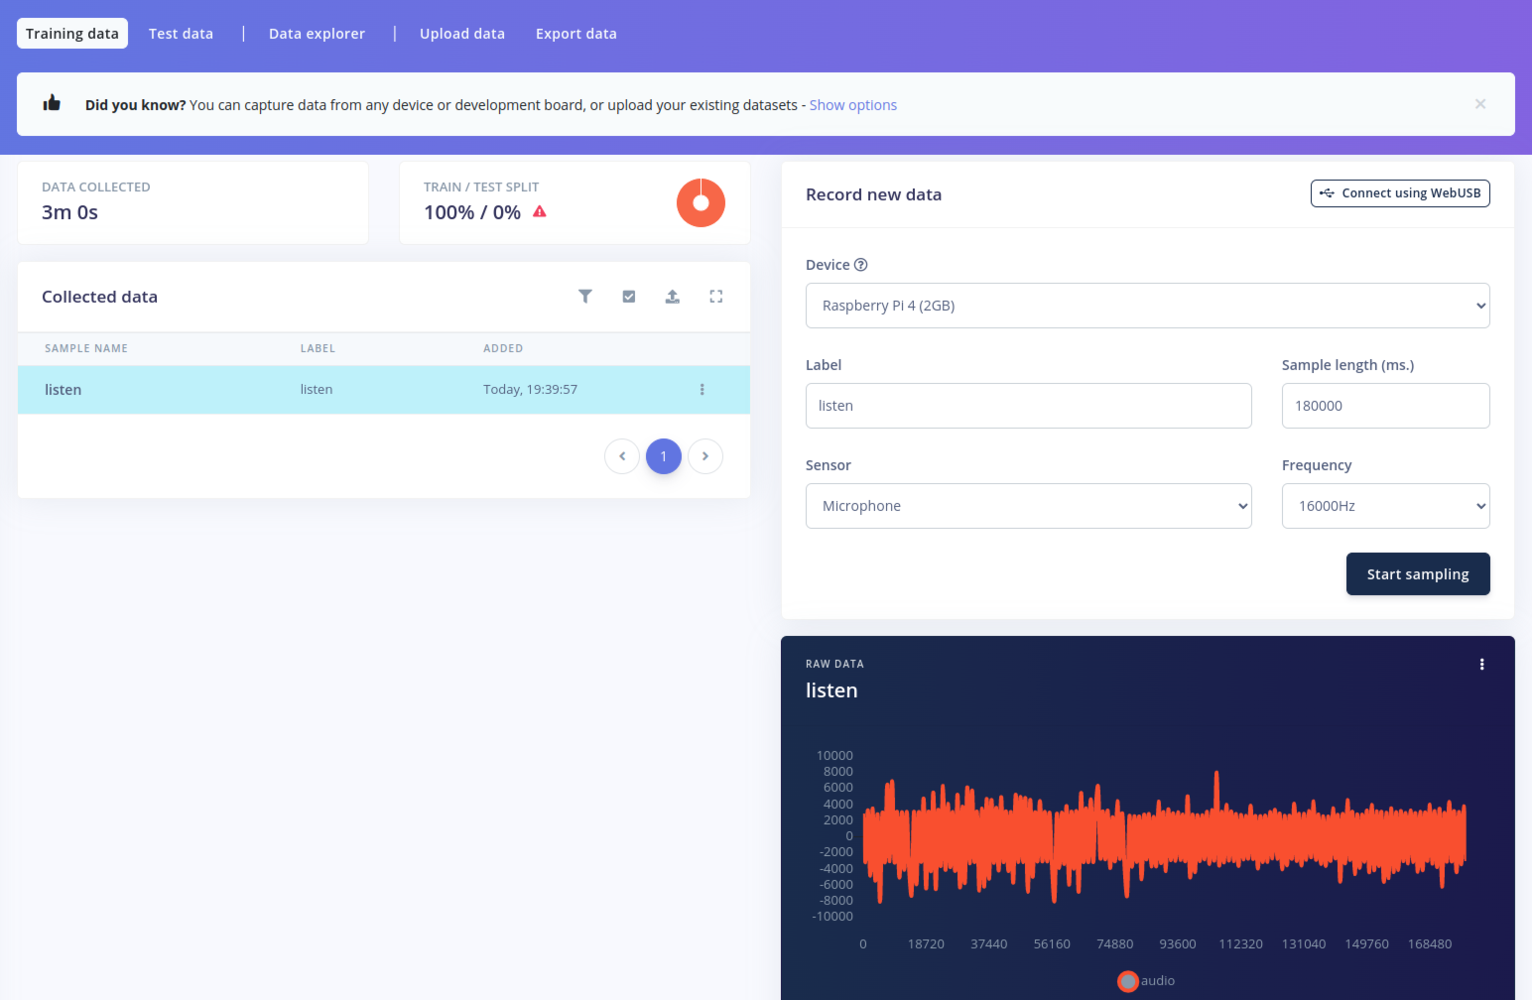
- download the dataset to the Raspberry Pi
- reduce the number of samples to about ~130 per class (so that it matches the
Listen!samples we have):
- use the Edge Impulse Uploader tool to upload the samples to our project:
listen, noise, unknown) are evenly distributed:

Training a Keyword Spotting Model
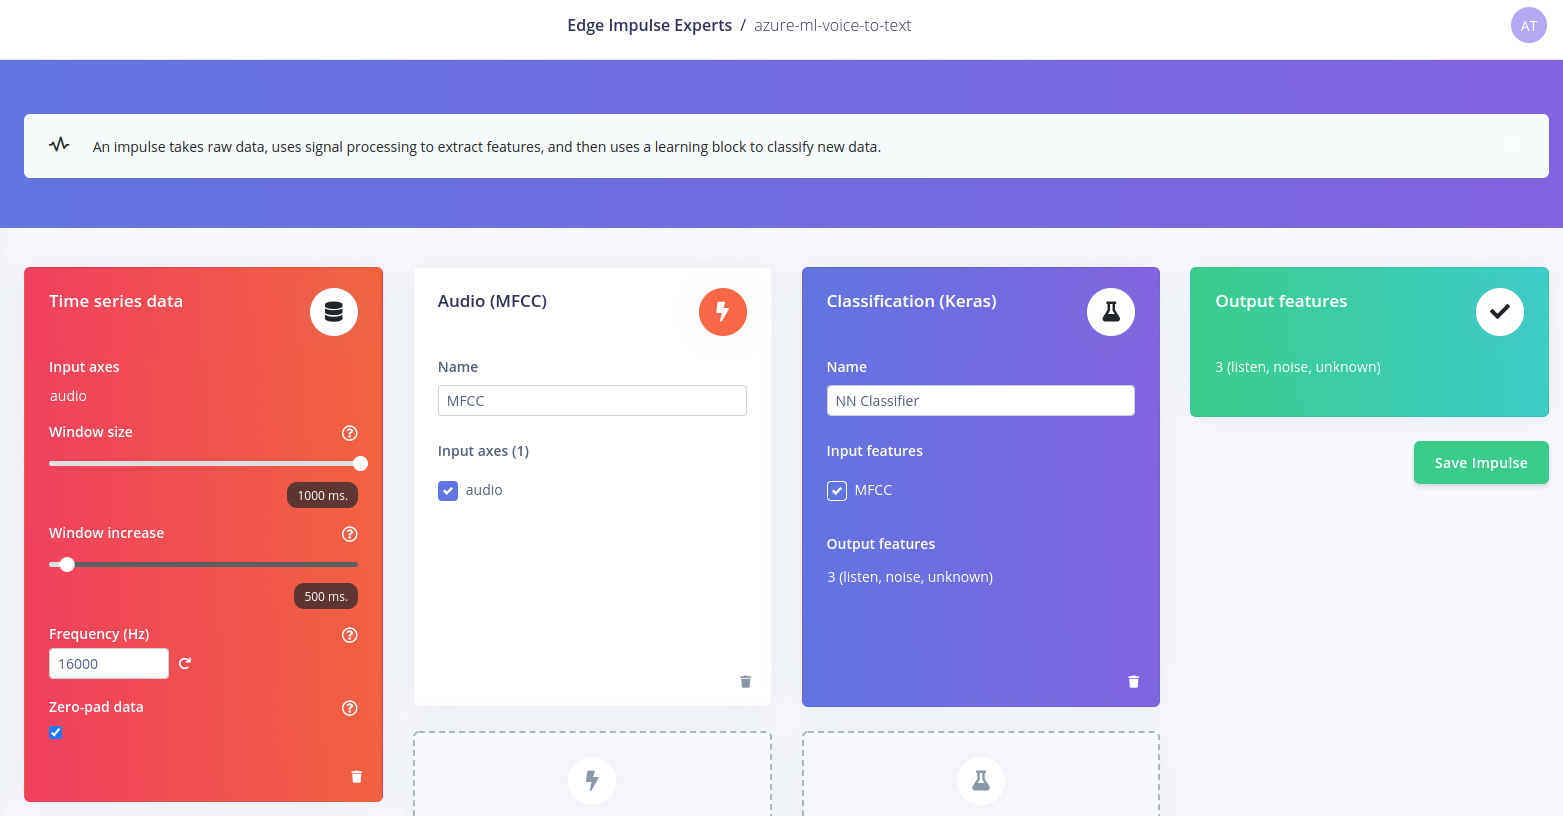
At this point our dataset is complete, and we can start building and training an ML pipeline / Impulse. This is relatively easy, as we can create an Impulse containing:- a Time series data input with windows size of 1 sec
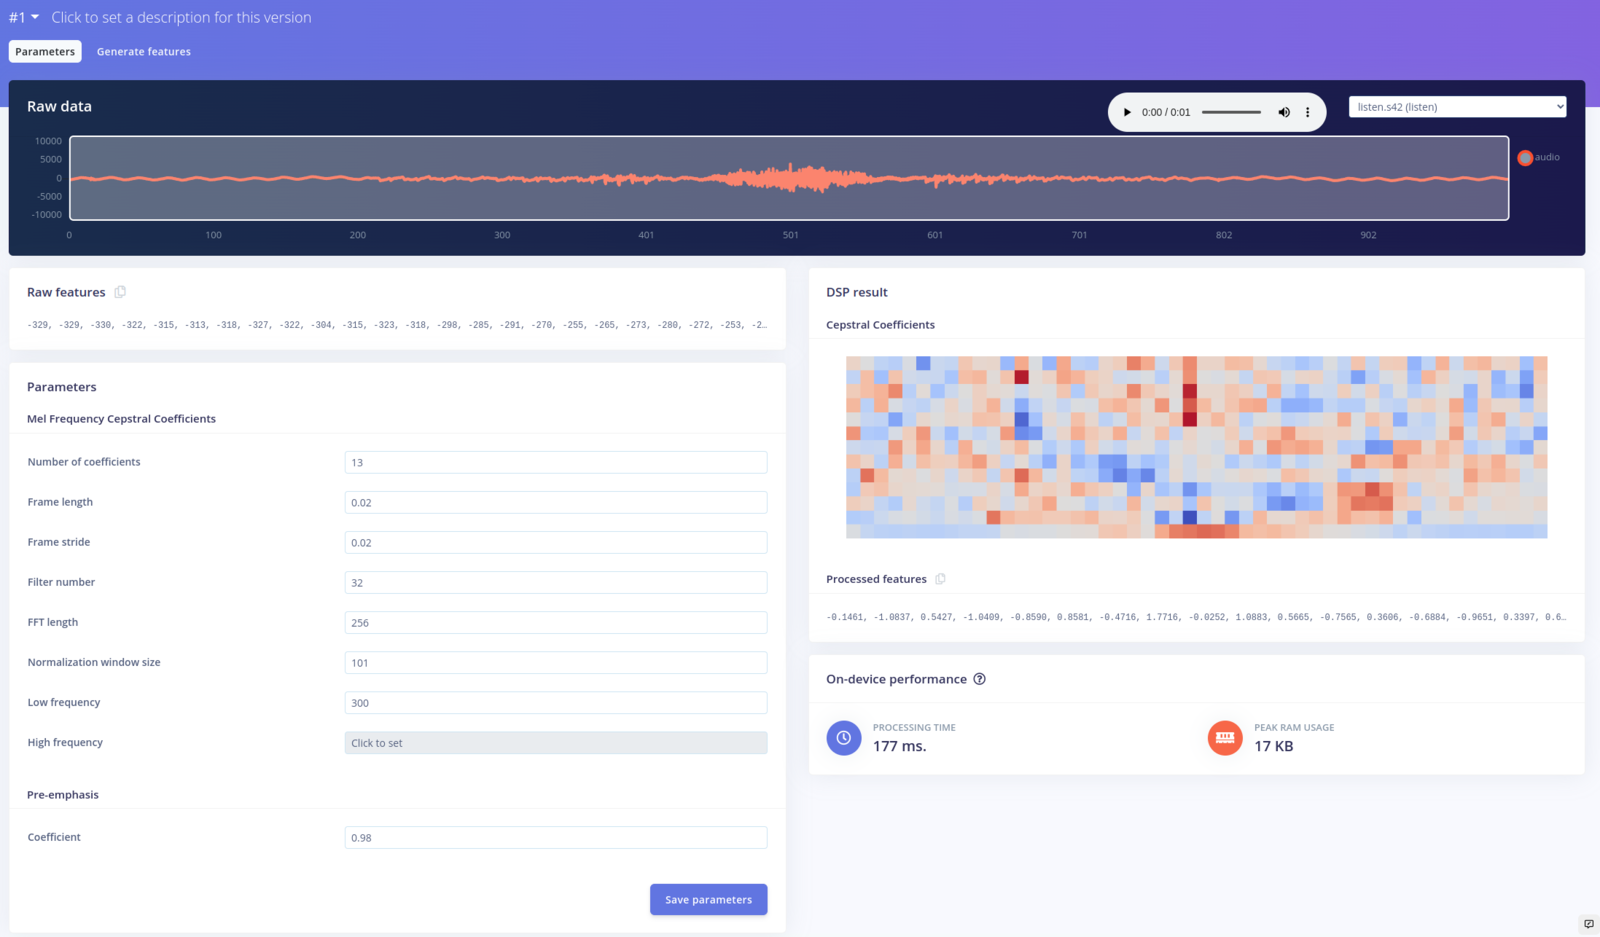
- an Audio MFCC processing block, which extracts cepstral coefficients from the audio data
- a Classification (Keras) neural network based learning block
- an Output block for our 3 classes
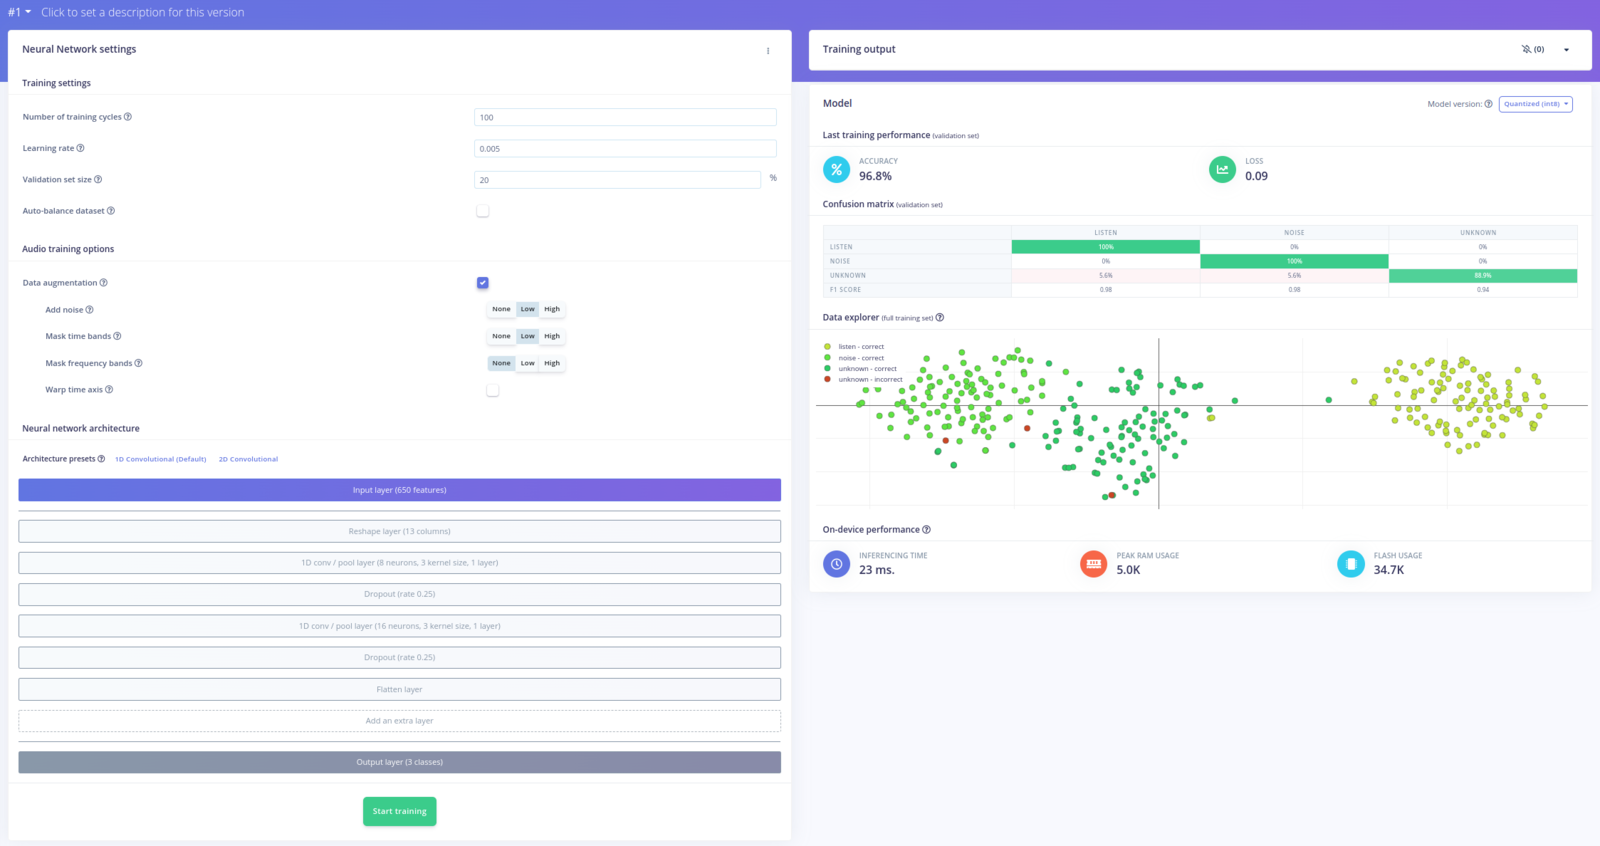
listen) are clearly separated from the unknown and noise samples.
Our Impulse at this point is ready to be used. We can try it out in the Live classification tab.
Raspberry Pi Deployment
The next step is to deploy the model as a standalone app on the Raspberry Pi. One way to do this is to use theedge-impulse-linux-runner app.
The edge-impulse-linux-runner tool automatically downloads and optimizes the model for the Raspberry Pi. Then it runs a sample app that continuously analyses the input audio, and gives the probabilities of the predicted classes:
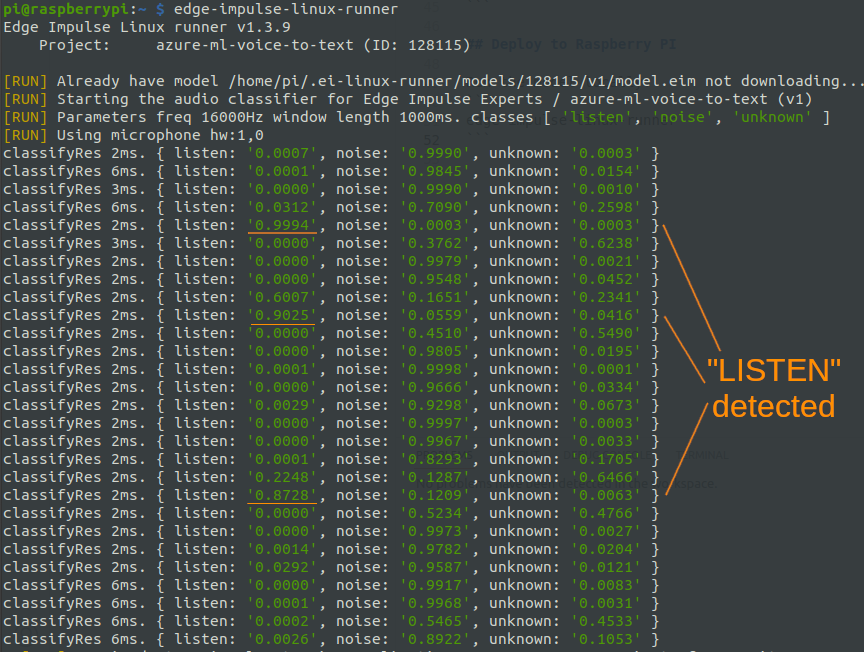
examples/audio/classify.py file. We can launch it as follows:
Cloud ML Integration
Now that we have the keyword spotting working, we can develop an app that also takes advantage of the Cloud ML functionality. So, using the Python SDK I created a simple app that does the following:- detects the “Listen!” keyword using the Edge Impulse model
- when the keyword is spotted, records a couple seconds of audio
- sends the recorded audio to the Cloud ML endpoint for voice-to-text transformation
- displays the result / decoded text
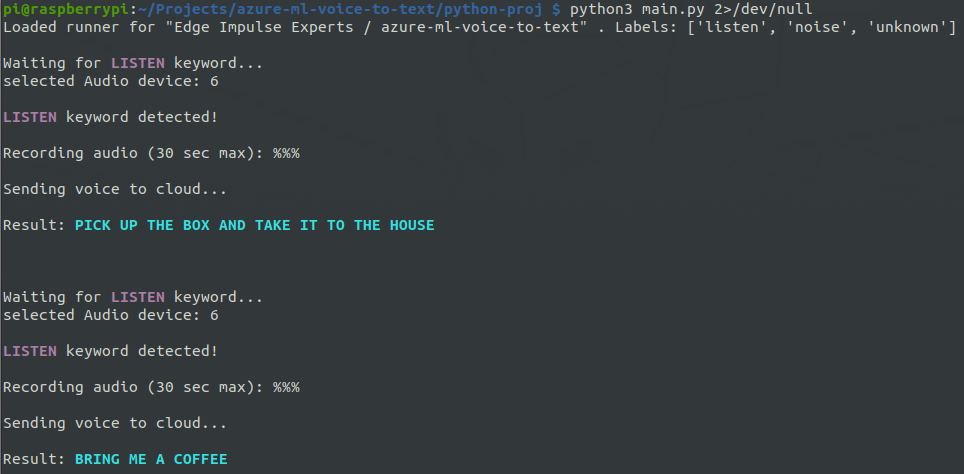
EdgeML/edgeml.py- responsible for running the keyword spotting model, until a given keyword is detectedAudio/audio.py- contains the audio recording functionality, with silence detectionCloudML/cloudml.py- responsible for talking to the Cloud ML endpointmain.py- the entry point of the app, with a control loop linking the above parts together
edgeml/python-app/ folder.
Conclusions
Using a combination of Edge ML and Cloud ML enables the creation of smart solutions with advanced functionality on low power edge devices. Edge ML is great for simpler tasks such as audio and signal processing, while Cloud ML enables the addition of more advanced functionality that would not otherwise be possible on edge devices. Platforms like Edge Impulse and Azure ML enable developers to create machine learning solutions, without the need for deep knowledge of machine learning architectures and frameworks.References
- Azure Machine Learning Documentation: https://docs.microsoft.com/en-us/azure/machine-learning/
- Edge Impulse Documentation: https://docs.edgeimpulse.com
- Wav2vec 2.0: Learning the structure of speech from raw audio: https://ai.facebook.com/blog/wav2vec-20-learning-the-structure-of-speech-from-raw-audio/
- Realizing Machine Learning anywhere with Azure Kubernetes Service and Arc-enabled Machine Learning: https://techcommunity.microsoft.com/t5/azure-arc-blog/realizing-machine-learning-anywhere-with-azure-kubernetes/ba-p/3470783