Introduction
In order to build an effective and high-quality MLOps lifecycle, three major components or phases need to be considered. First, data science and dataset curation tasks must be accomplished, to build, grow, and maintain effective data being fed into the machine learning model creation. Second, model training, and re-training as more data is captured and analyzed, is necessary to build more accurate and effective algorithms and models. Finally, edge device management and update methodologies are needed to push new models to endpoints when needed. The most successful edge AI projects ensure each of these three components are understood, and the right investments are made. In this project, we’ll demonstrate an MLOps pipeline consisting of Edge Impulse and Microsoft Azure IoT Edge, to build a scalable, enterprise-grade edge AI deployment. Edge Impulse will be used to address the first two components, consisting of the dataset curation and the machine learning model creation, and then the final component, the device management and model deployment, will be performed by Azure IoT Edge. We’ll wrap the code in Docker containers, so we’ll make use of small Linux-powered devices as our endpoints, and update them over-the-air for model deployments.Software Used in this Tutorial:
- Edge Impulse
- Azure IoT Edge
- Docker
- Docker Hub
Hardware Requirements:
- Raspberry Pi (or other Linux device)
- USB Webcam
Edge Impulse
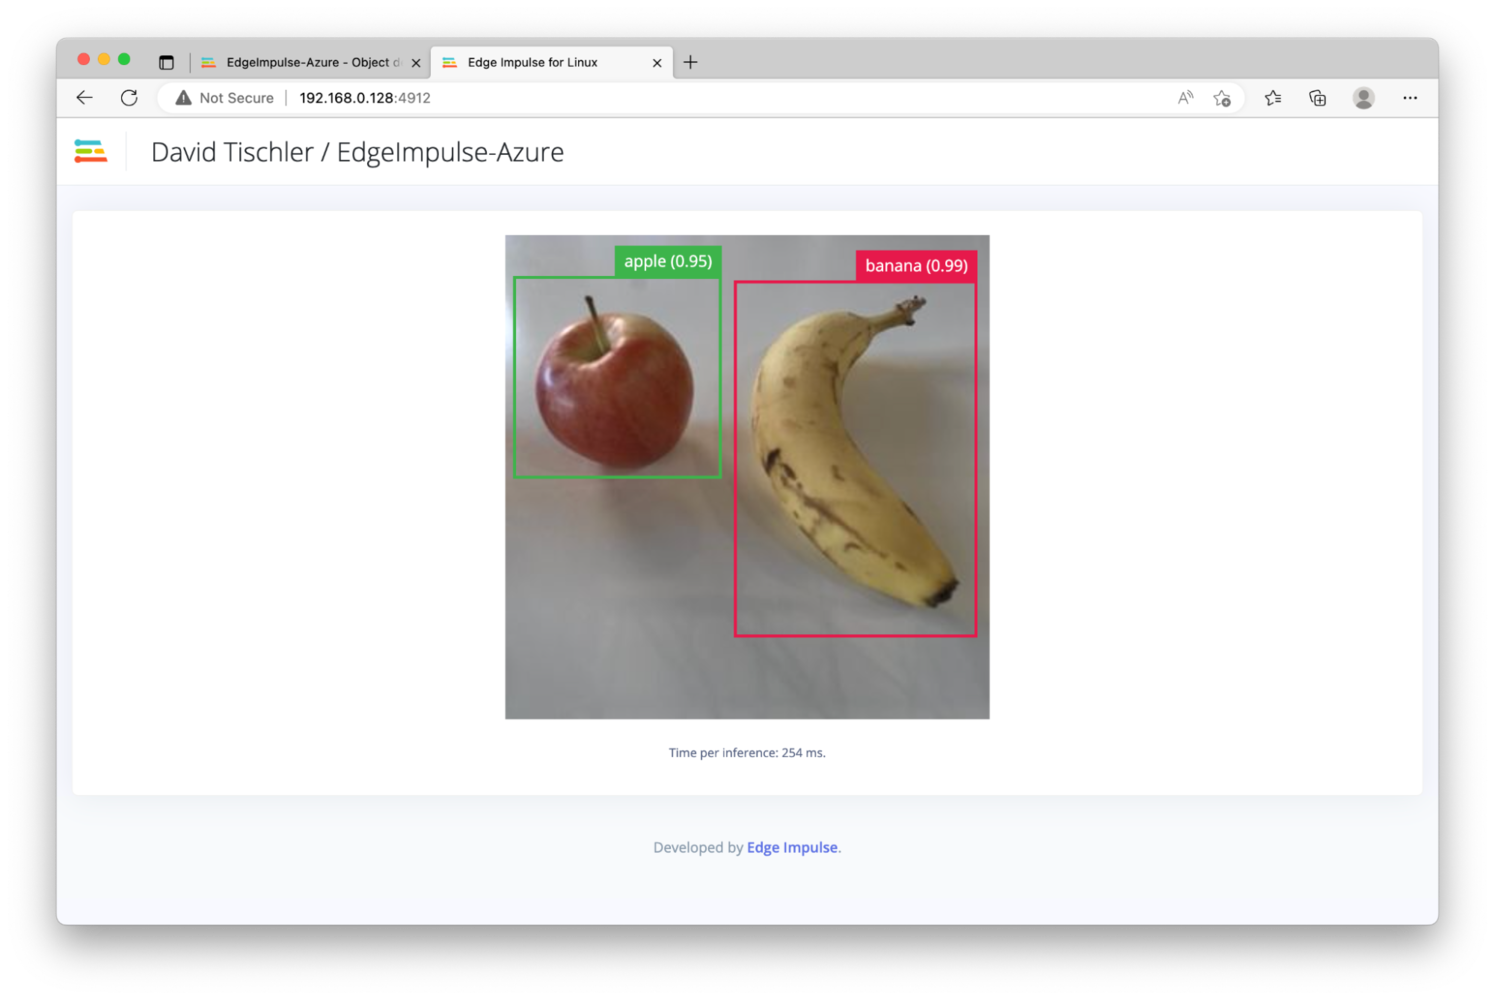
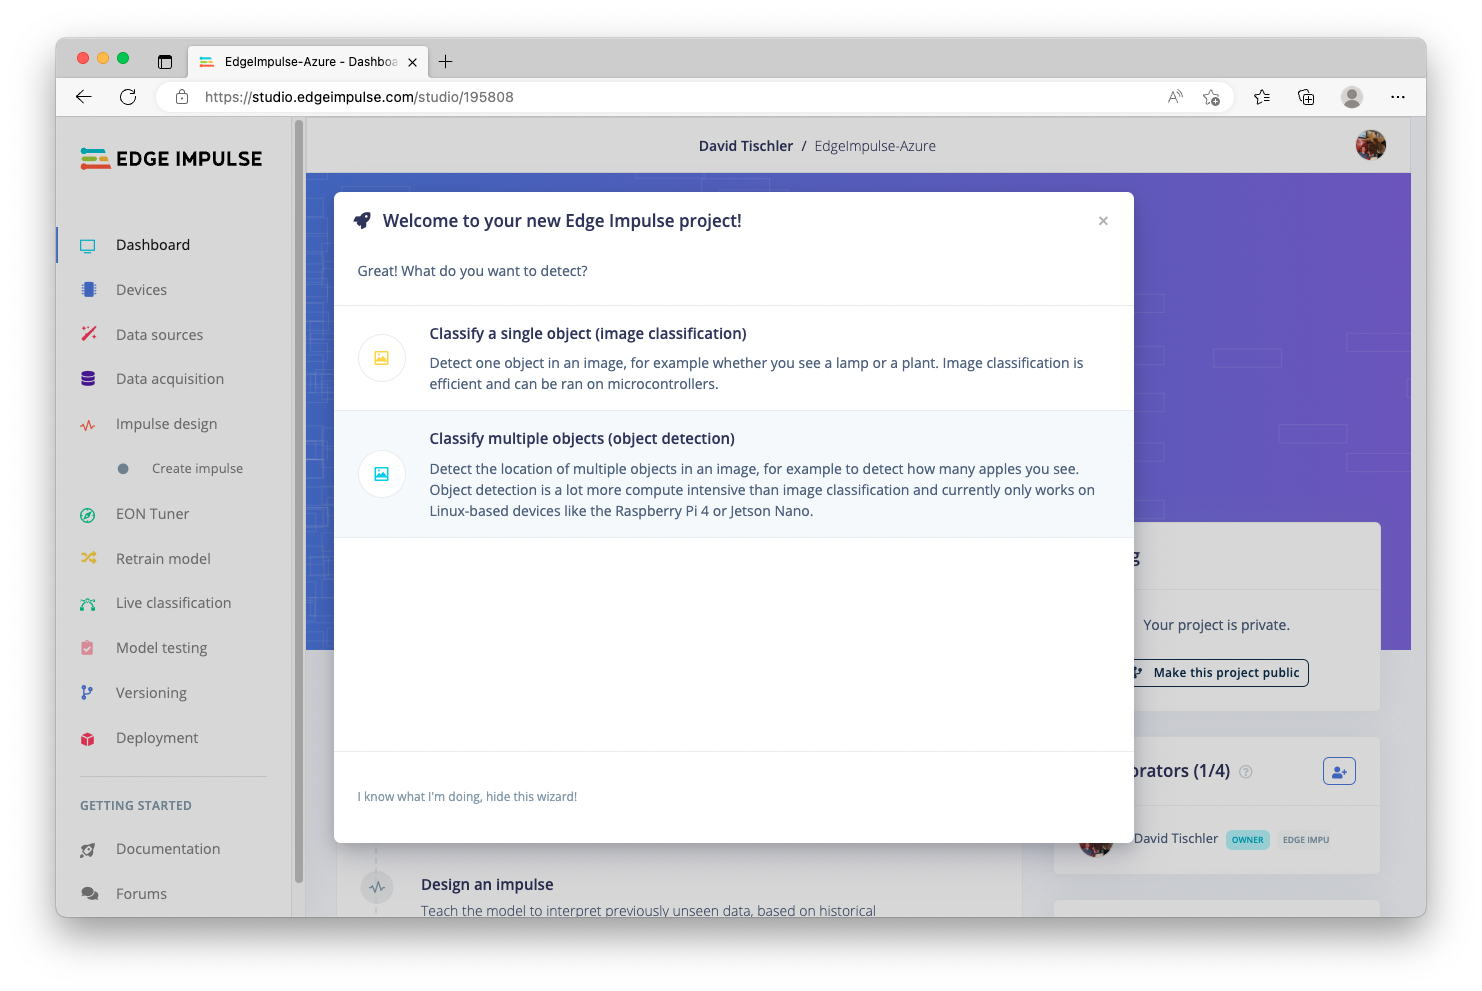
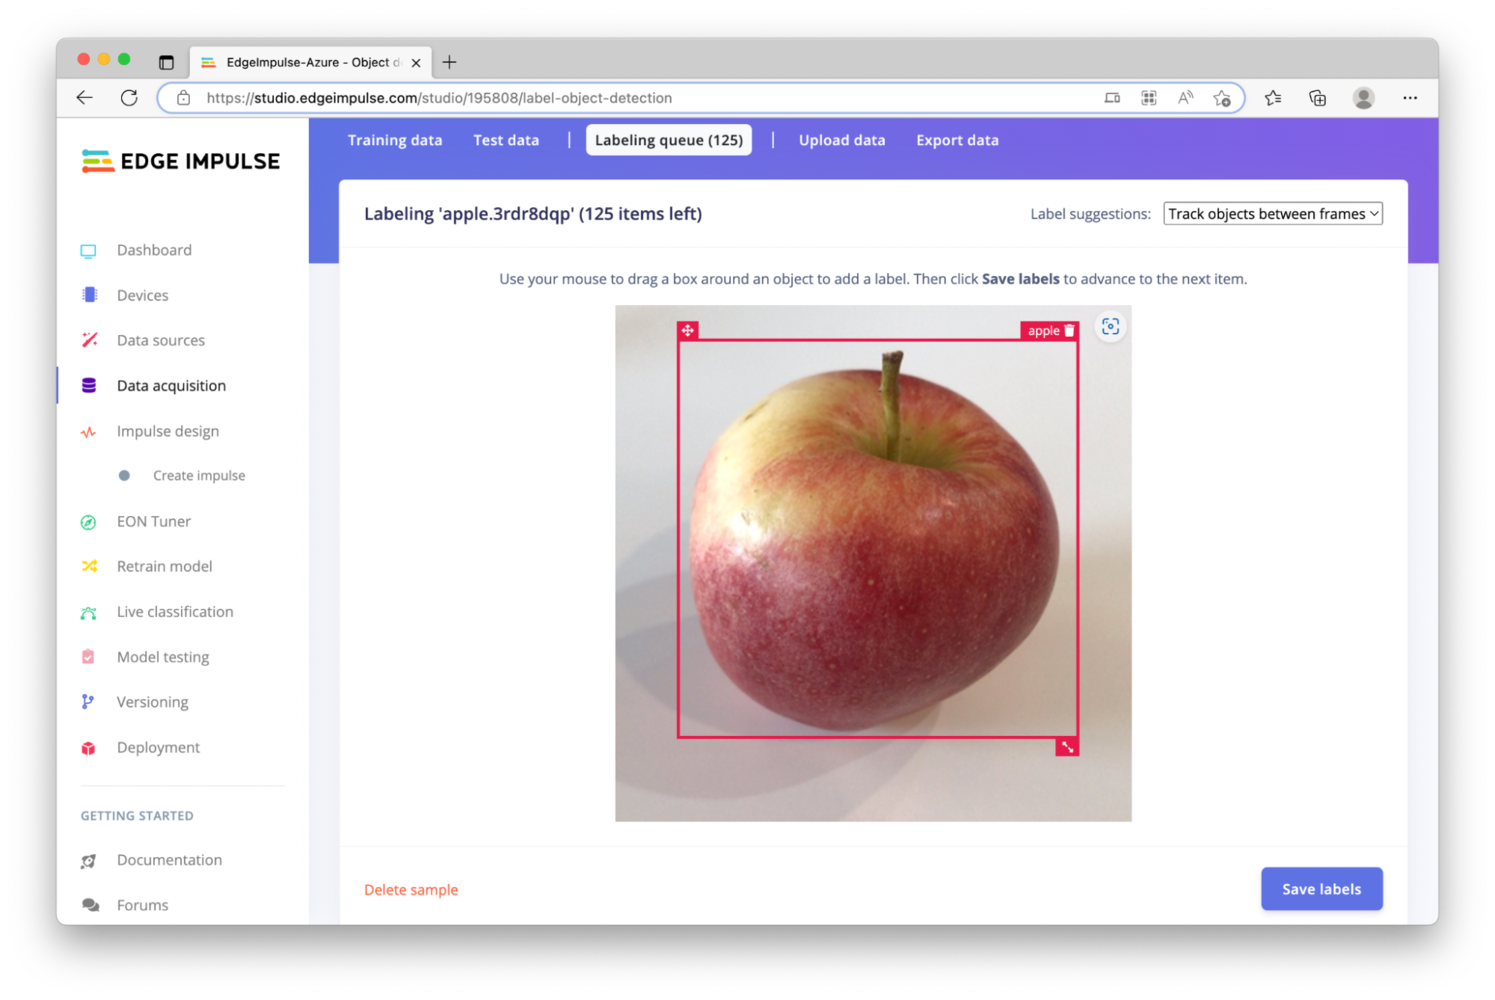
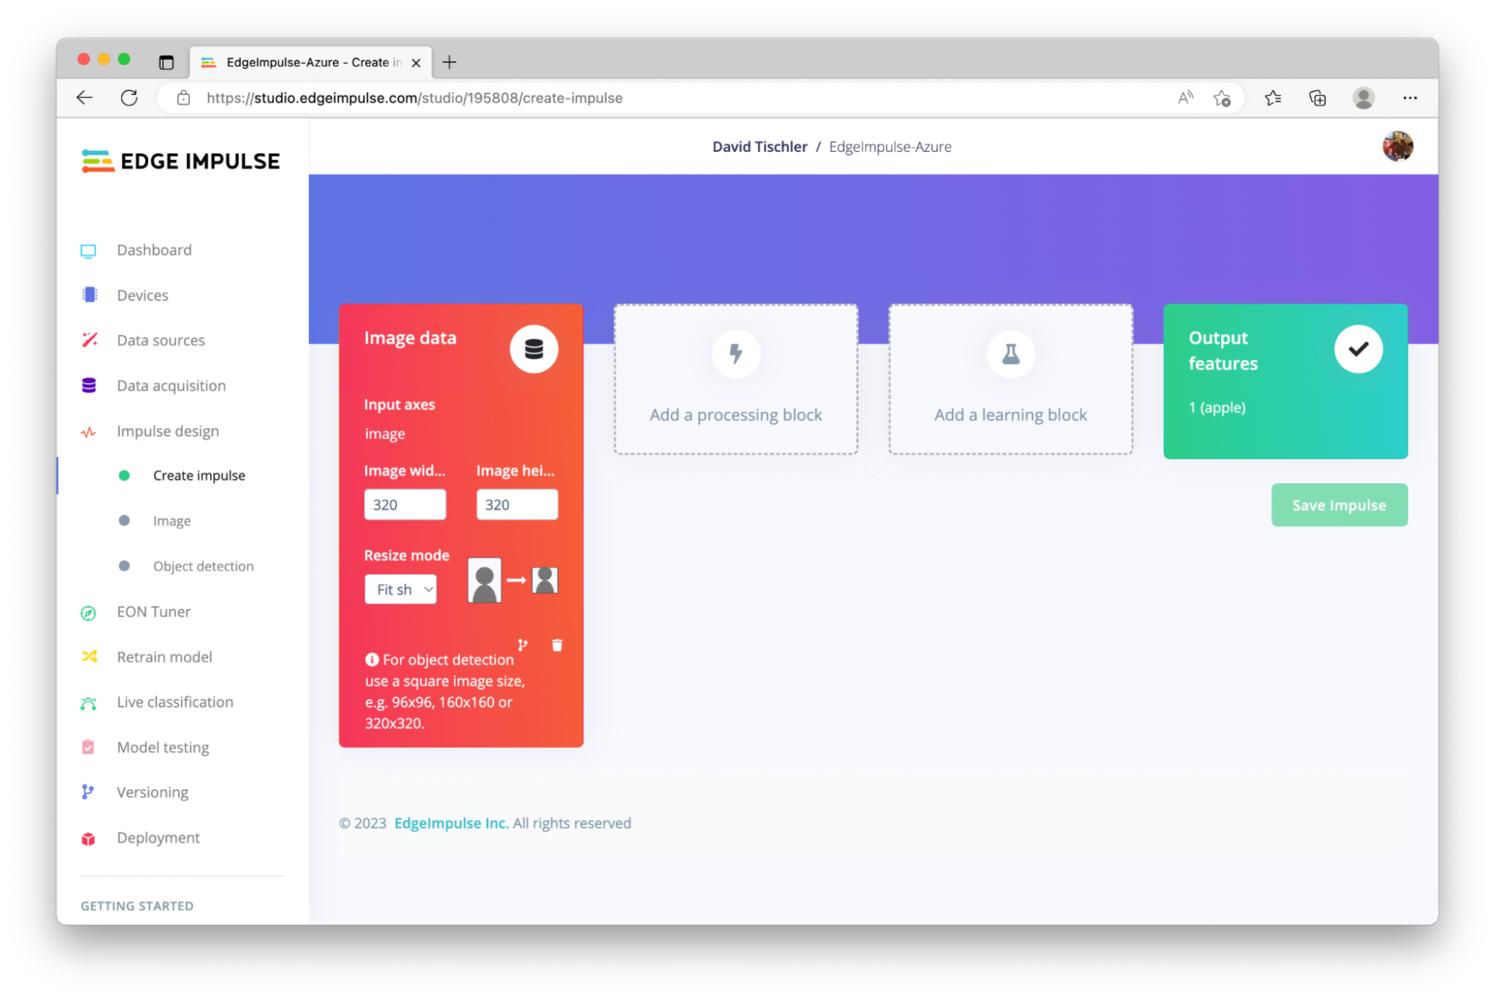
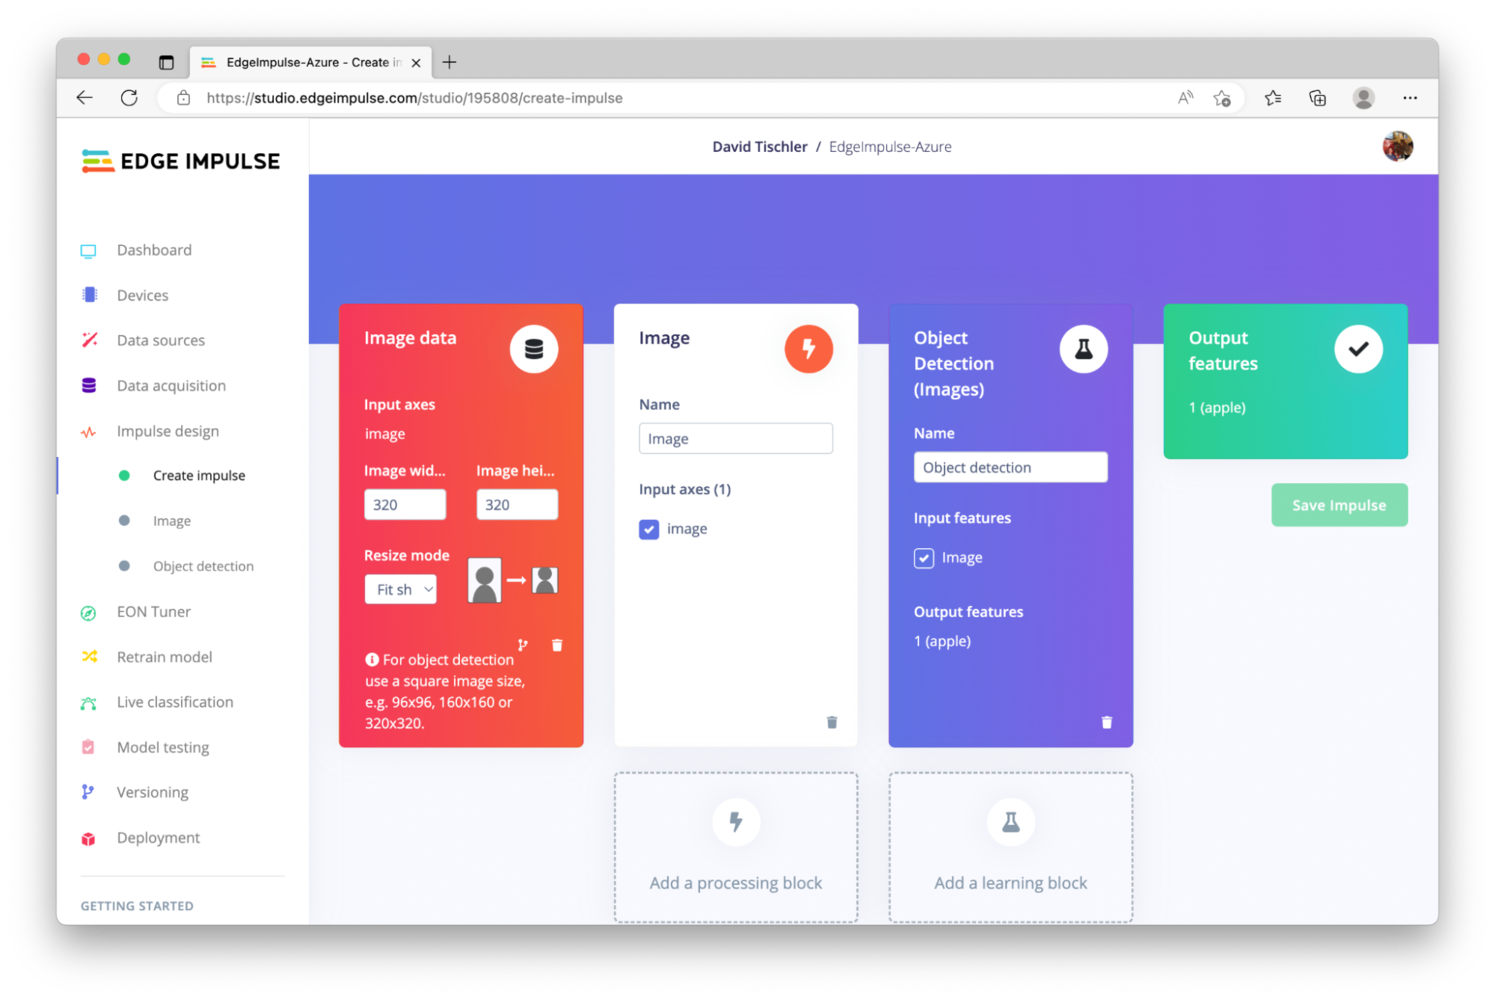
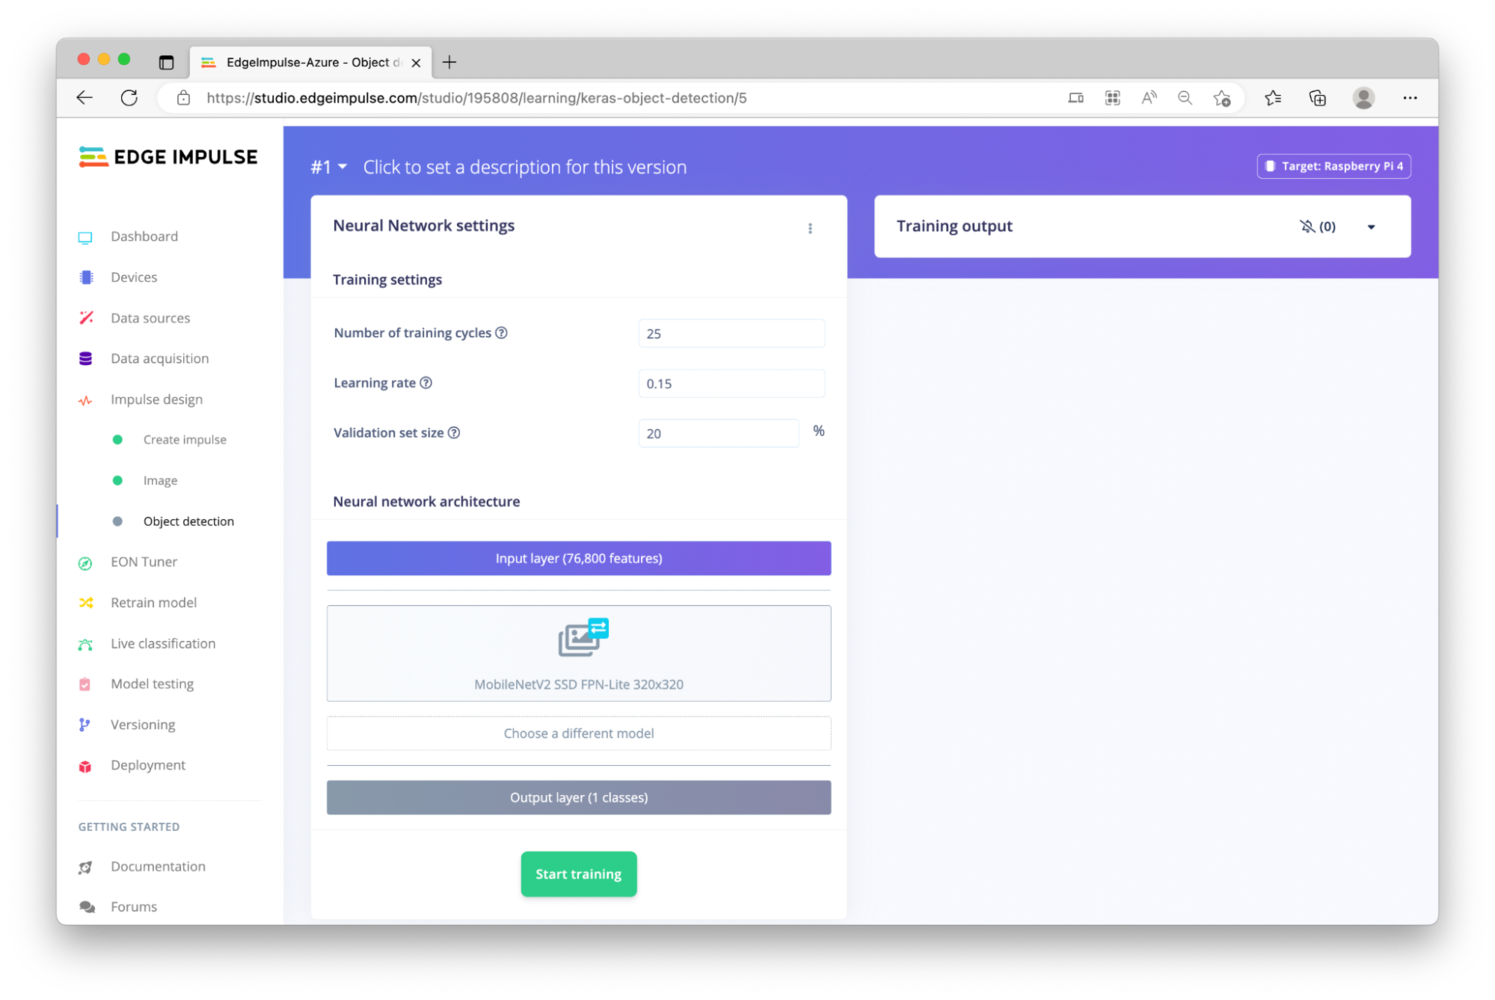
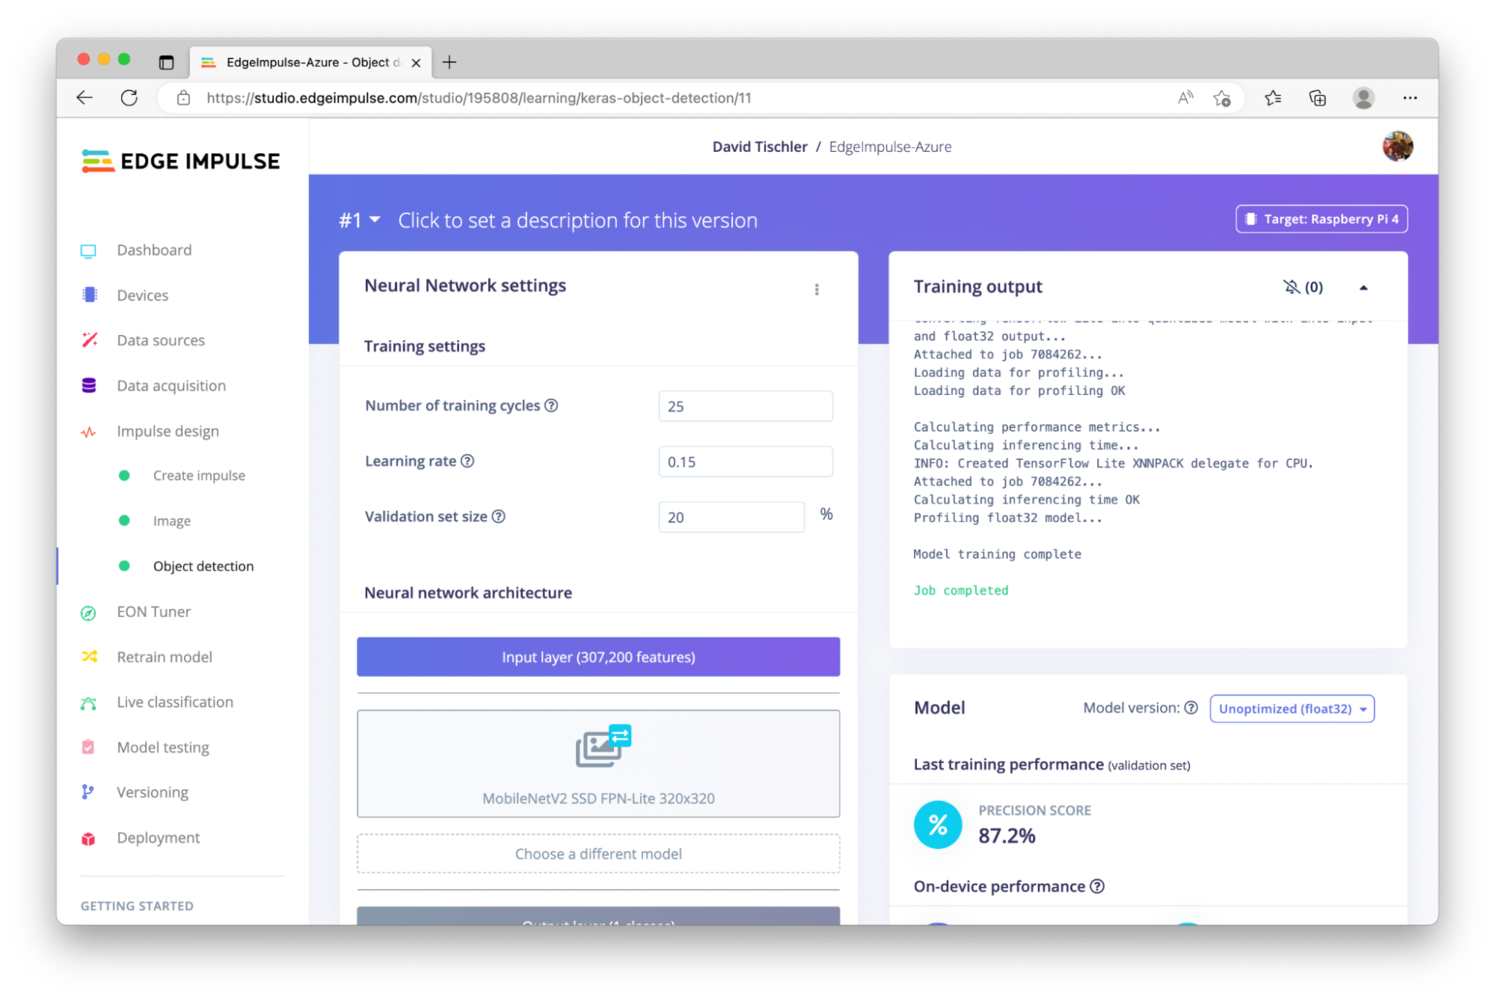
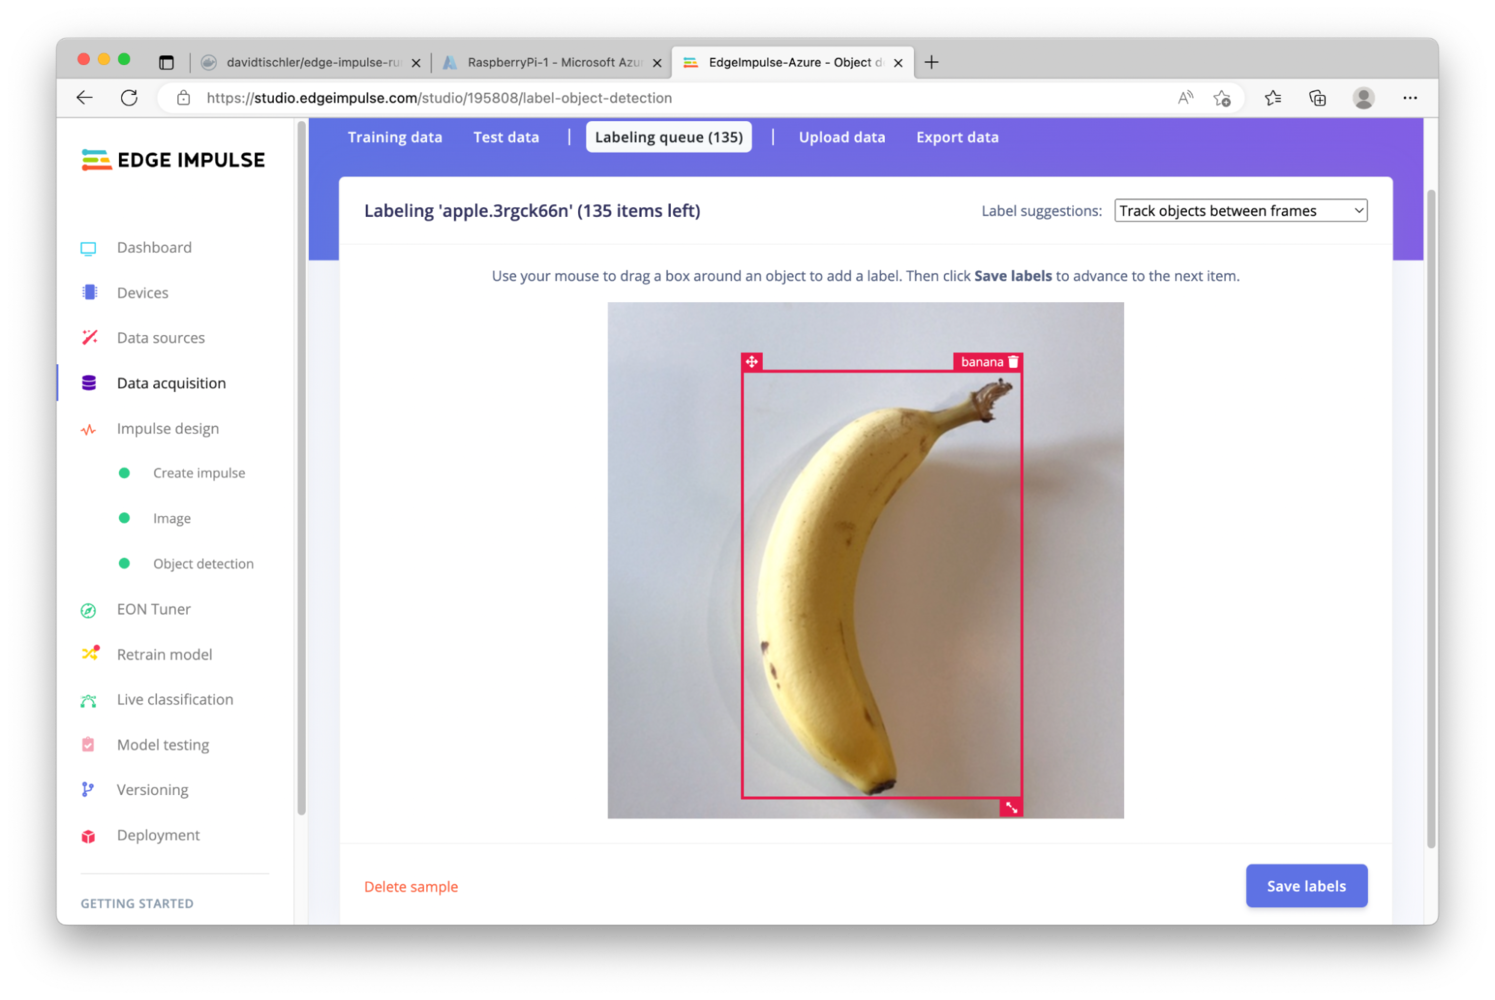
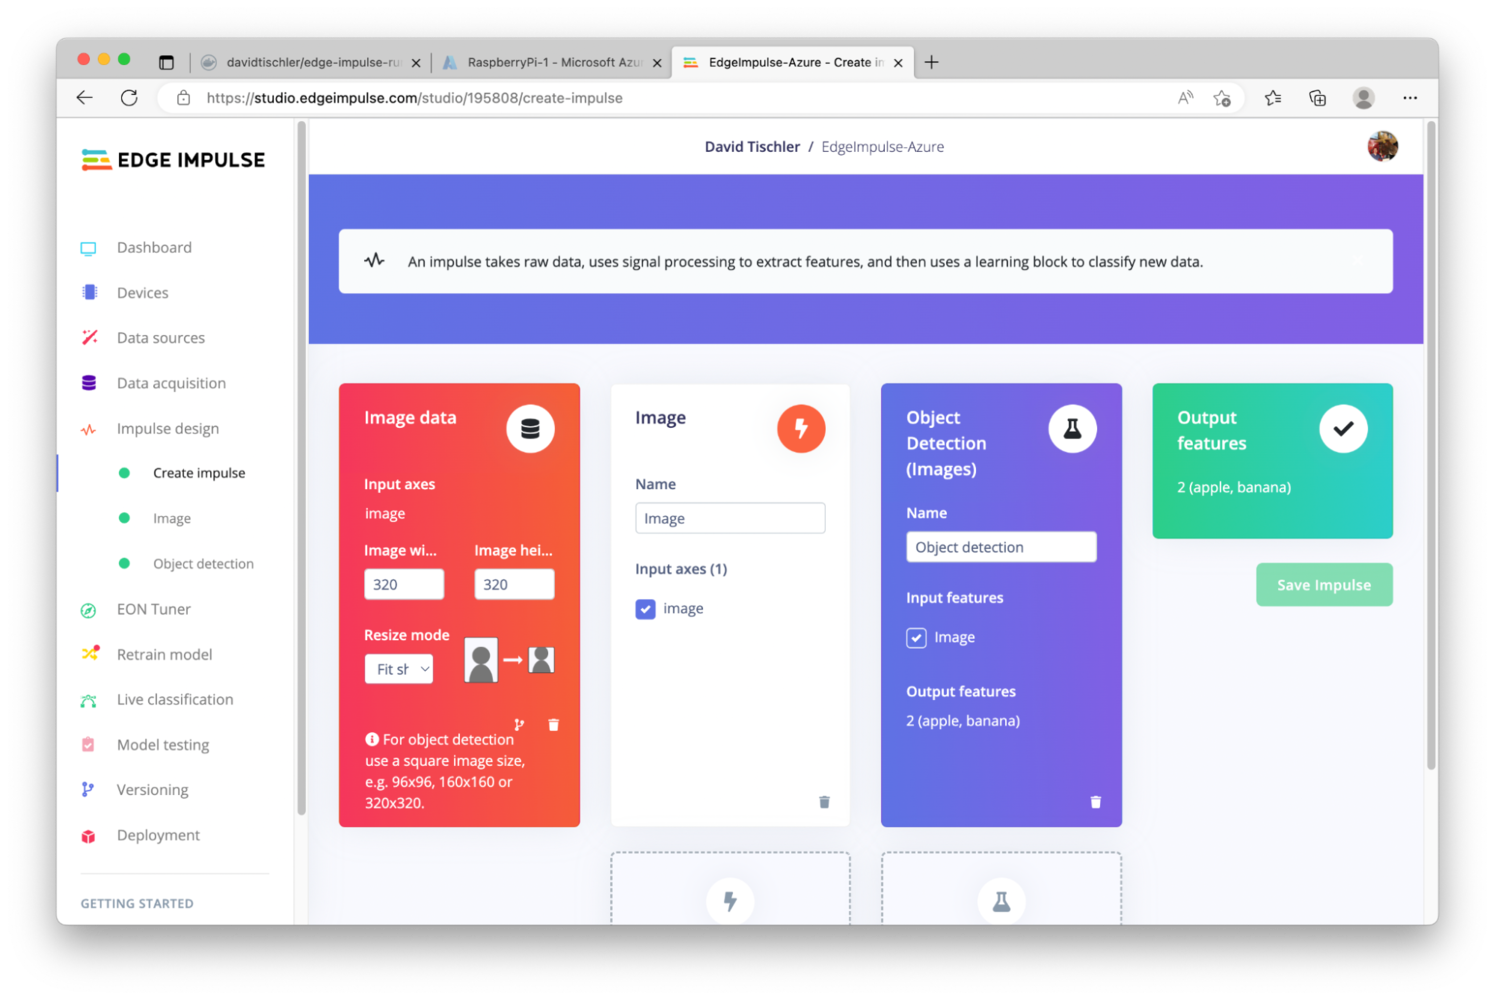
Artificial intelligence (AI) and machine learning (ML) used to require complex software, highly-specialized and expensive GPU servers, and lots of development time. But platforms like Edge Impulse have brought down the barrier significantly, democratizing machine learning for any developer to make use of sensor data, build anomaly detection applications, or perform computer vision tasks like image classification or object detection. This project will make use of object detection, which is easy to accomplish in the Edge Impulse Studio. Specifically, we will use Edge Impulse to collect a dataset of images and train a machine learning model to identify an apple. Then, we will augment our dataset with images of a banana, teach the neural network how to identify the banana, and then push this new updated model to the device with Azure. First, we’ll need to create an Edge Impulse account, or login if you already have an account. Click “Login” at the top right of the page, on http://edgeimpulse.com.
Raspberry Pi Setup
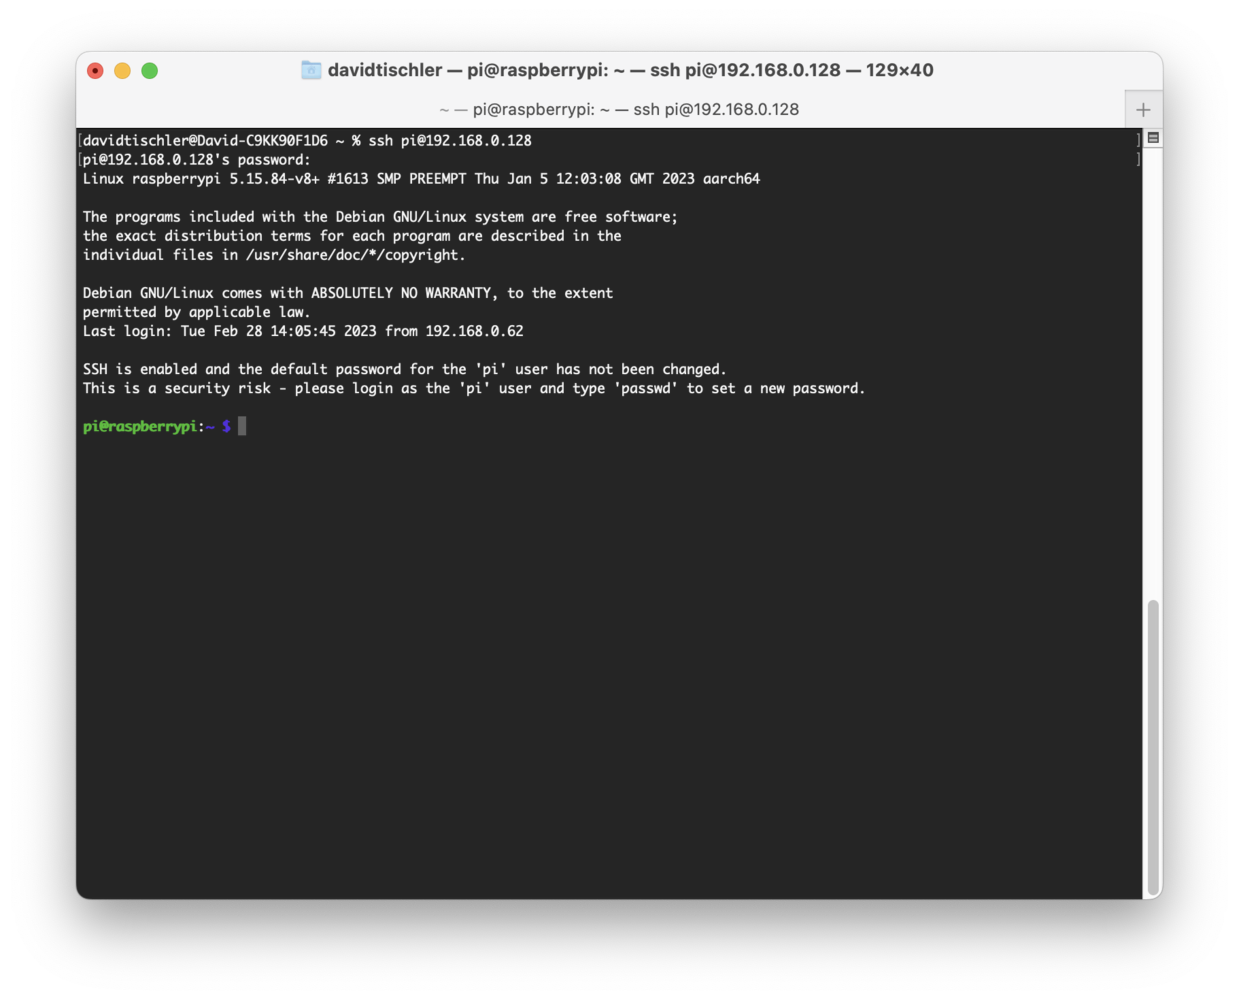
Proceeding on with using a Raspberry Pi for this tutorial, the standard installation and setup procedure for a Raspberry Pi can be followed, as documented here: https://projects.raspberrypi.org/en/projects/raspberry-pi-setting-up. Ultimately this consists of downloading Raspberry Pi OS 64-bit, flashing the downloaded image to an SD Card, inserting it into the Pi, and powering it on. Upon boot, you will choose a language, provide a username, connect to WiFi, and can choose to run any updates. Also make sure your USB Webcam is attached. Once completed, you’ll arrive at the desktop and it will be time to move on to the Azure IoT Edge installation steps.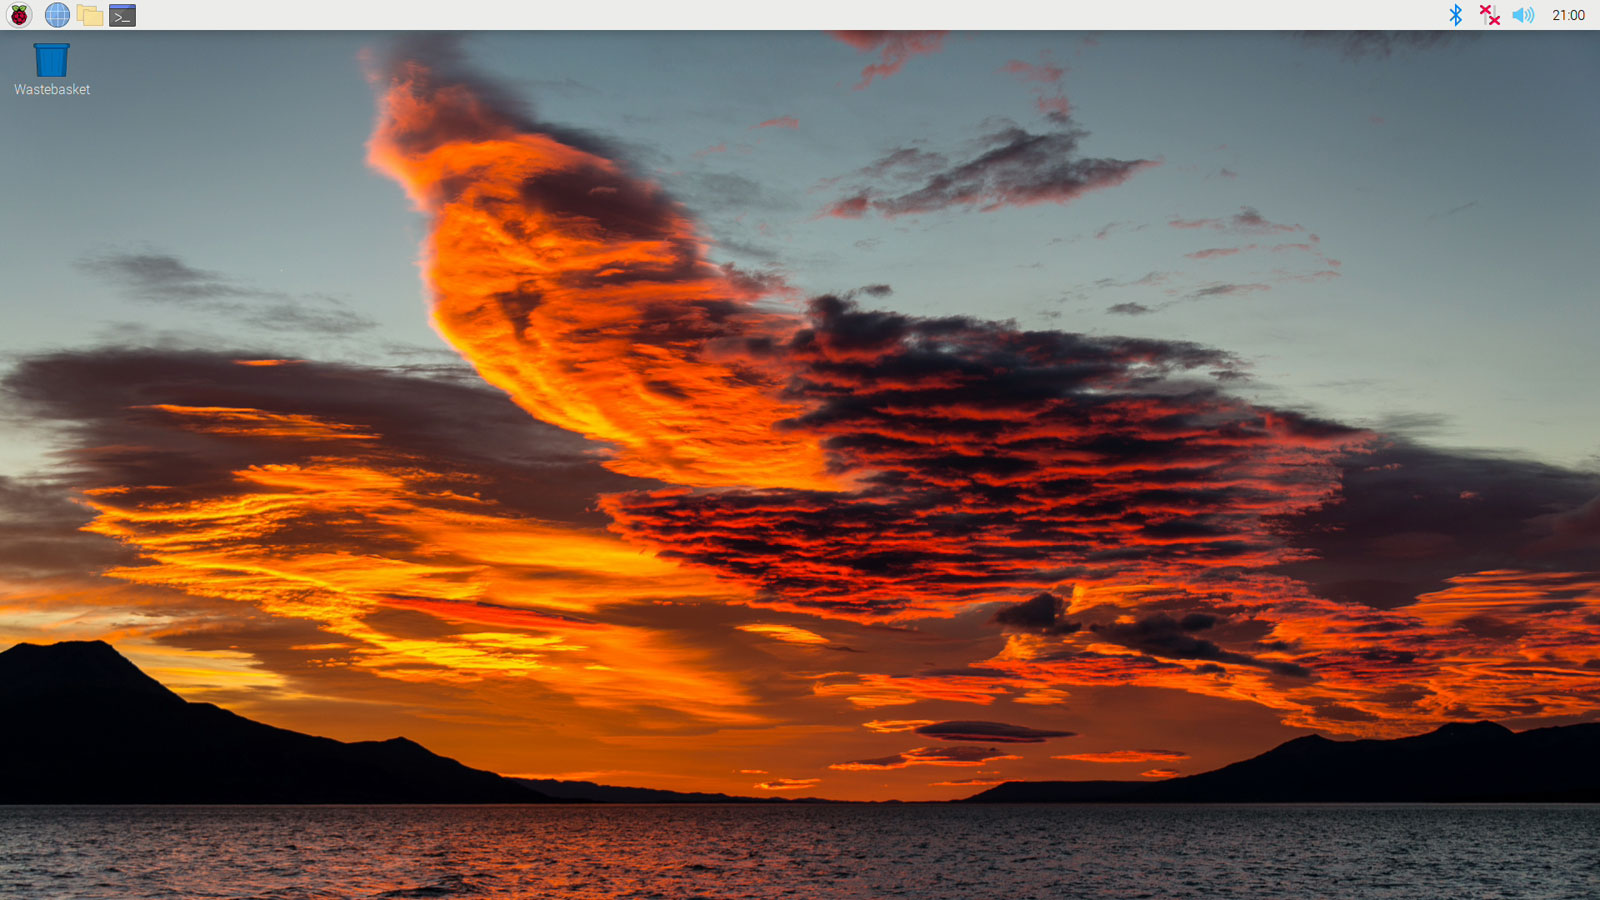
Azure IoT Edge
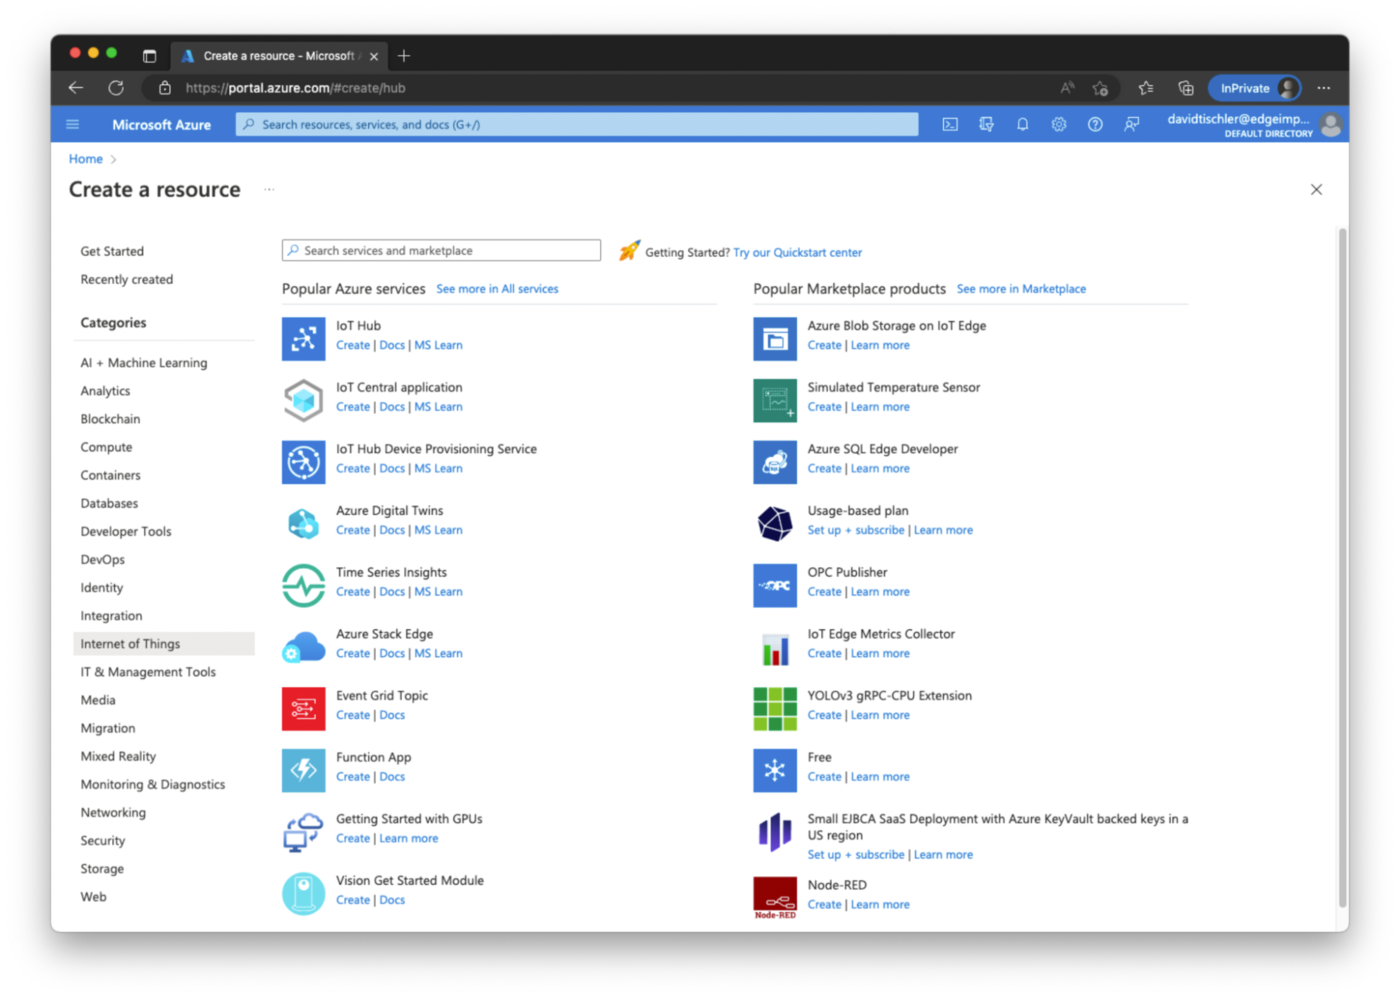
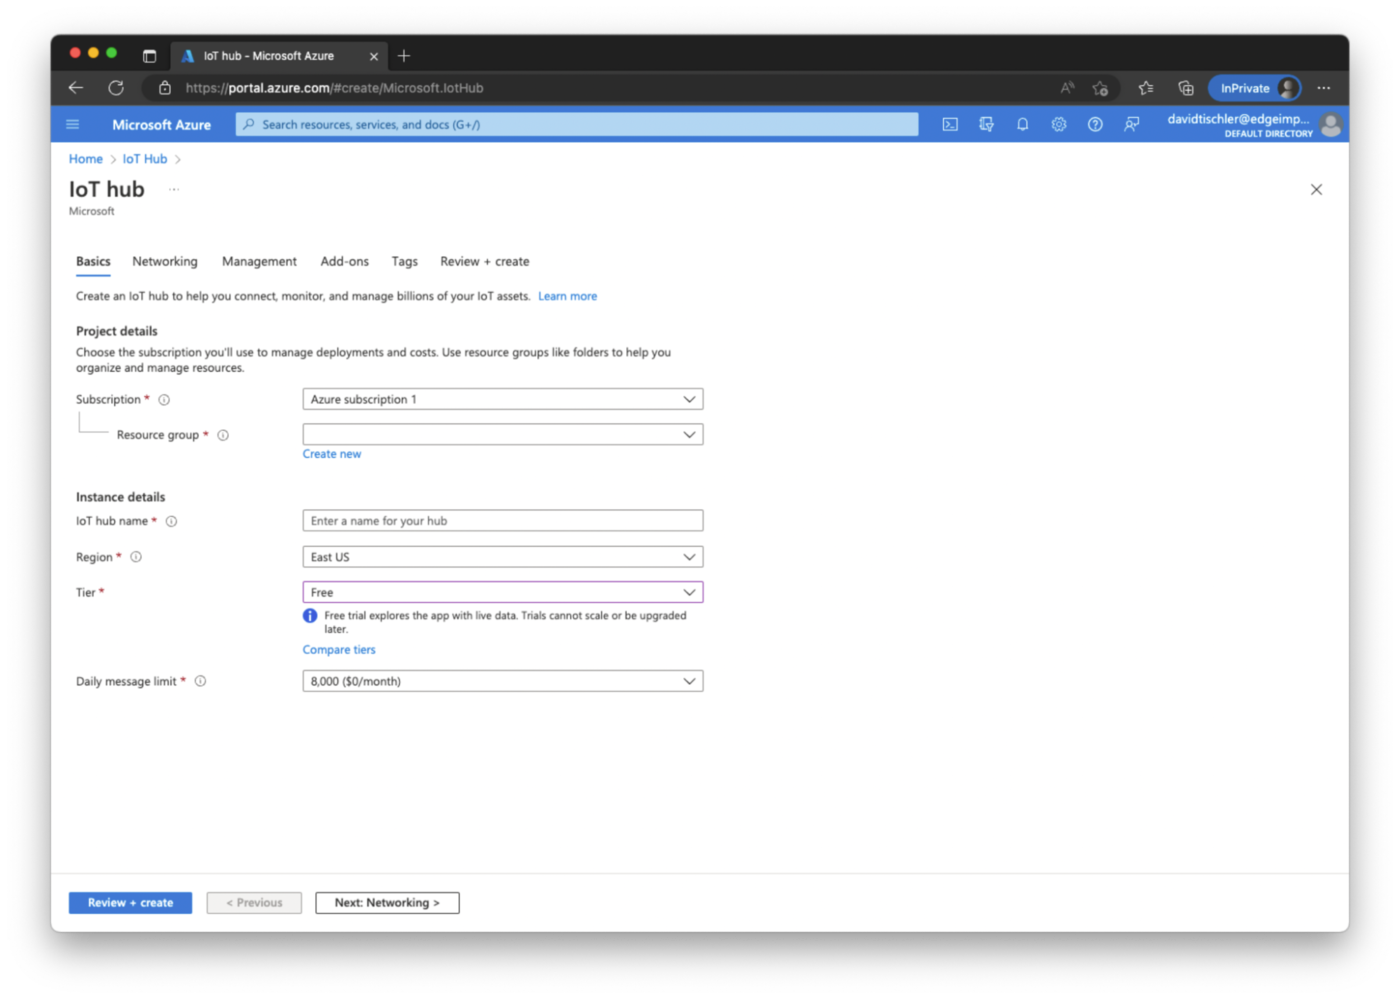
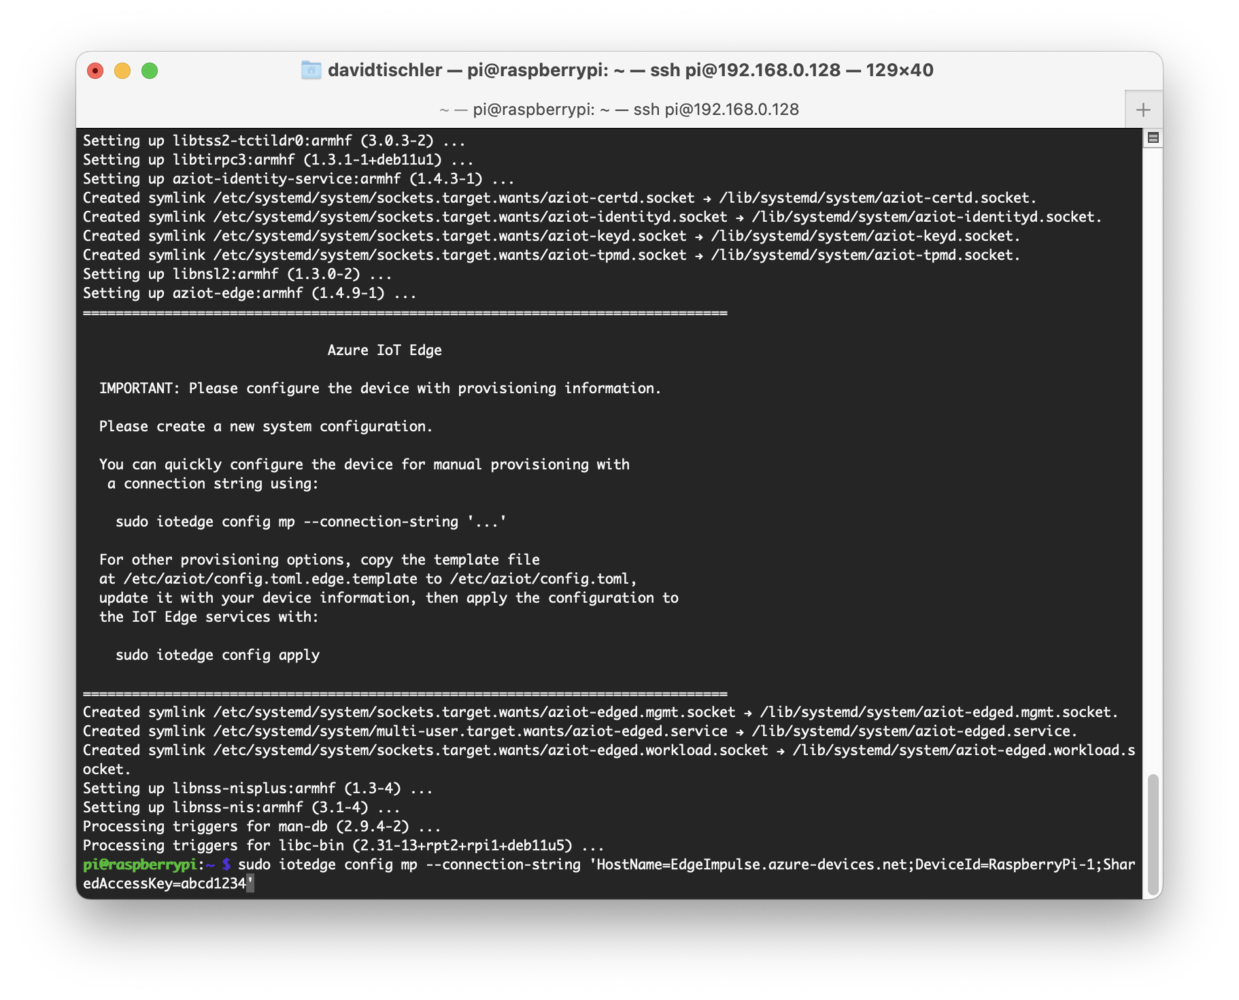
Next we will connect the Raspberry Pi to Azure IoT Edge, so that we can remotely deploy software to the Pi, no matter where it is located. The Azure IoT platform has many more capabilities and features as well, such as remote monitoring, digital twins, integrations with other Azure services, and more. You can read about the rest of the platform on their website, at https://azure.microsoft.com/en-us/products/iot-edge. For deploying applications to a device, the Azure IoT Edge tooling installs a Docker-compatible container runtime on the target device (the Raspberry Pi in this case), and then orchestration and decisions about what containers are sent to the device are performed either via the Azure CLI, VSCode, or directly from the Azure Portal GUI. Setup begins by heading to https://portal.azure.com/, and creating an Azure account if you don’t already have one, or logging in to an existing account. You can follow Azure’s official documentation for any setup steps or other account requirements. Once logged in, you will arrive at the main portal.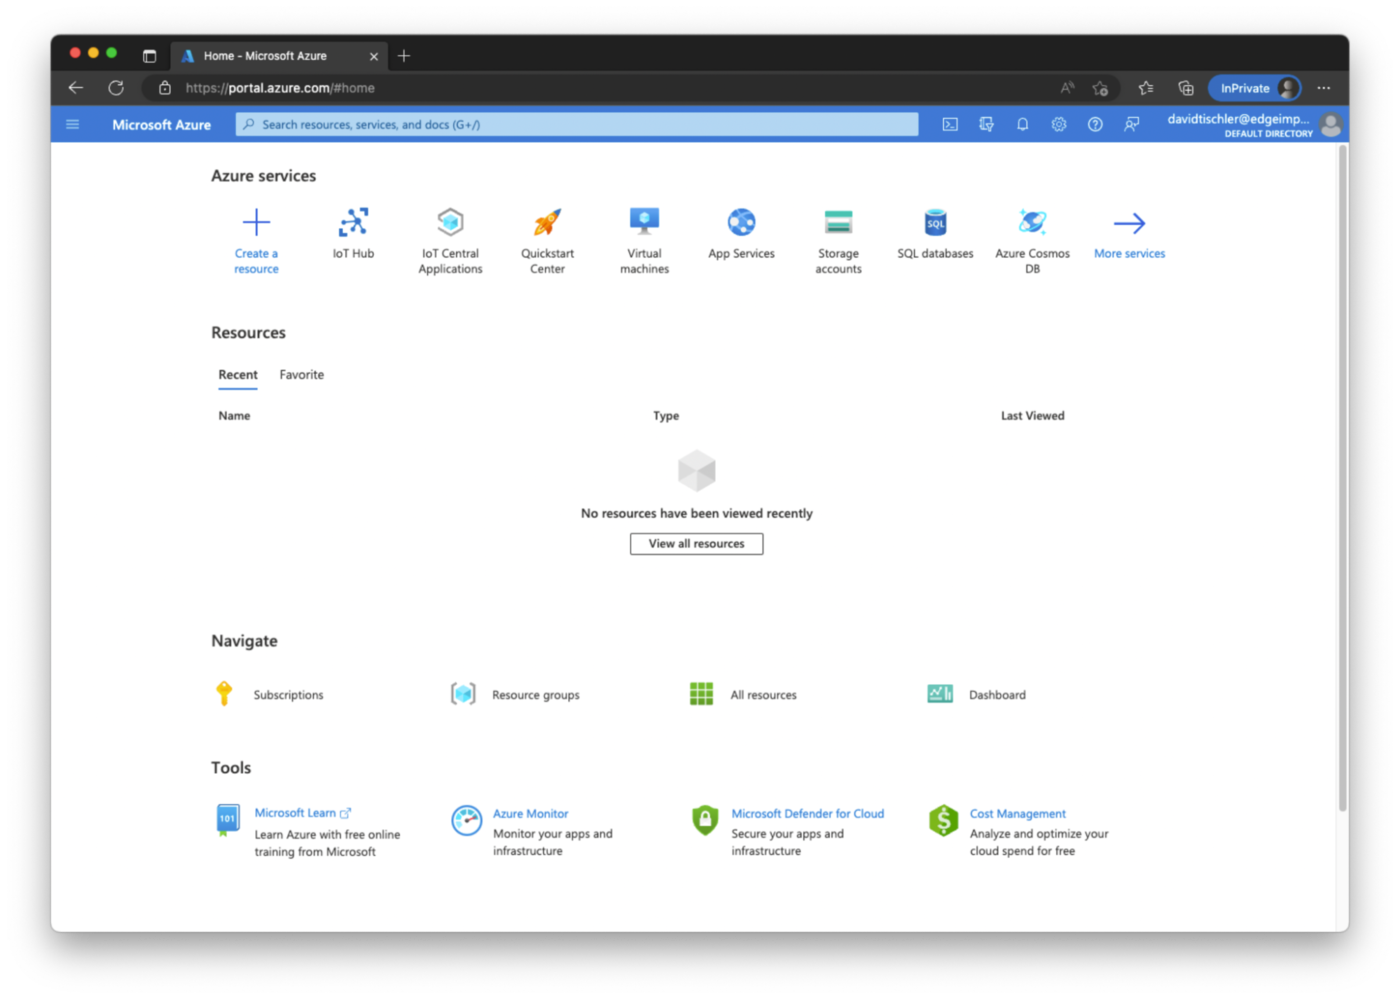
Step 1 - Initial Data Collection
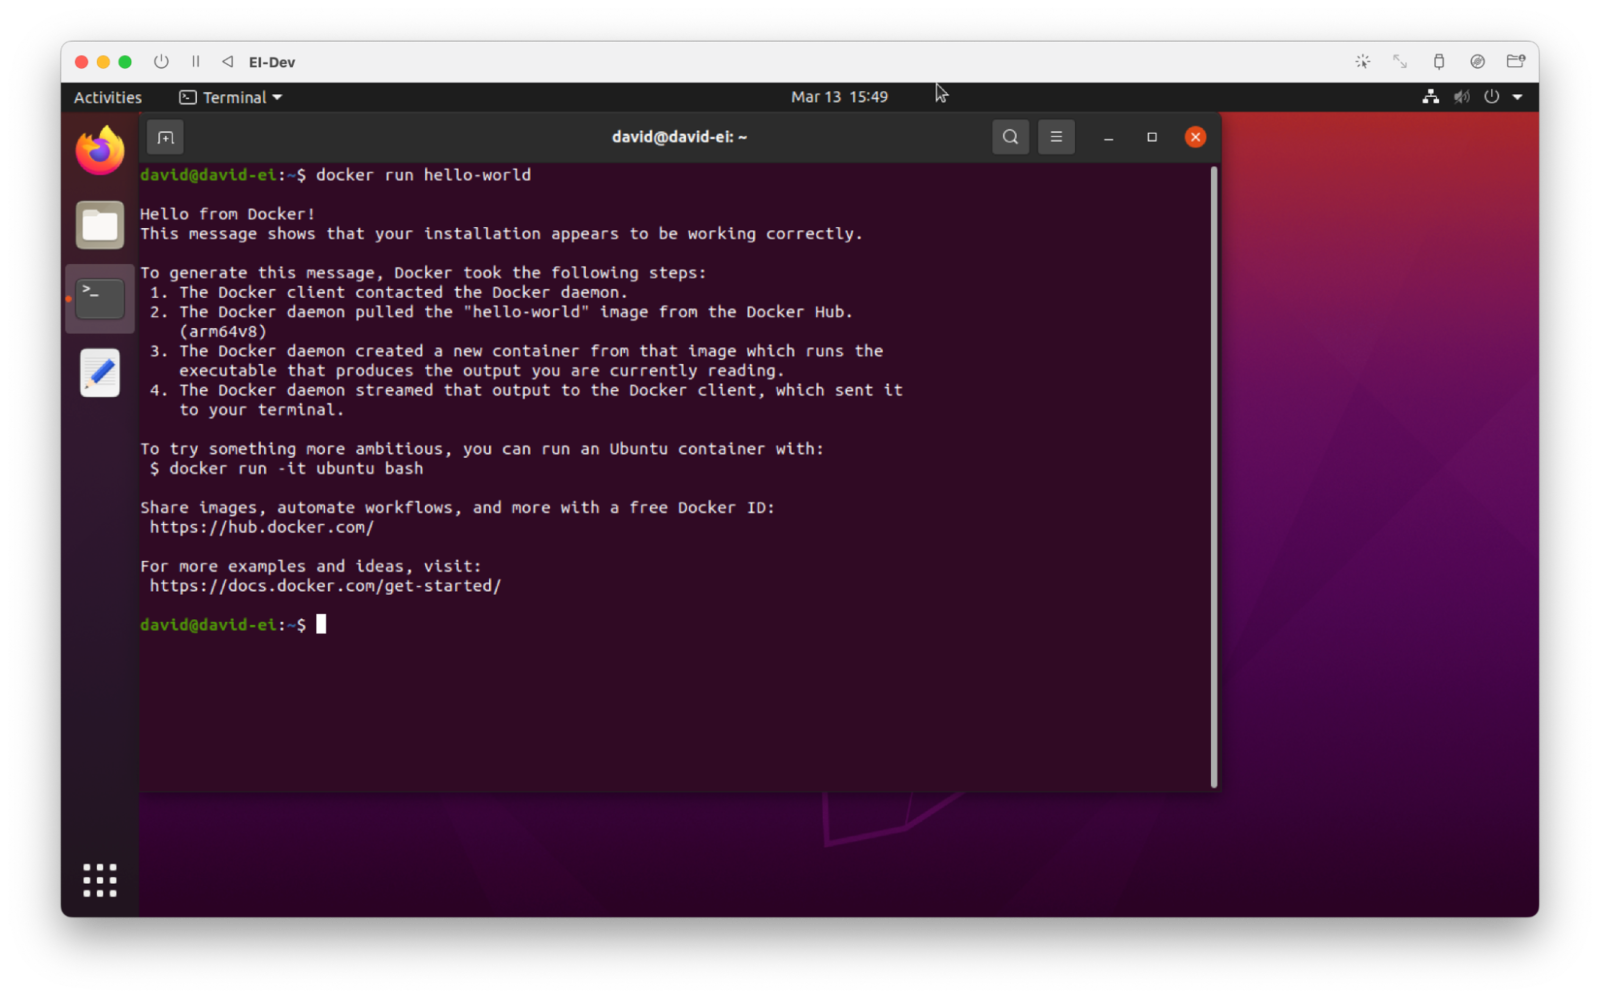
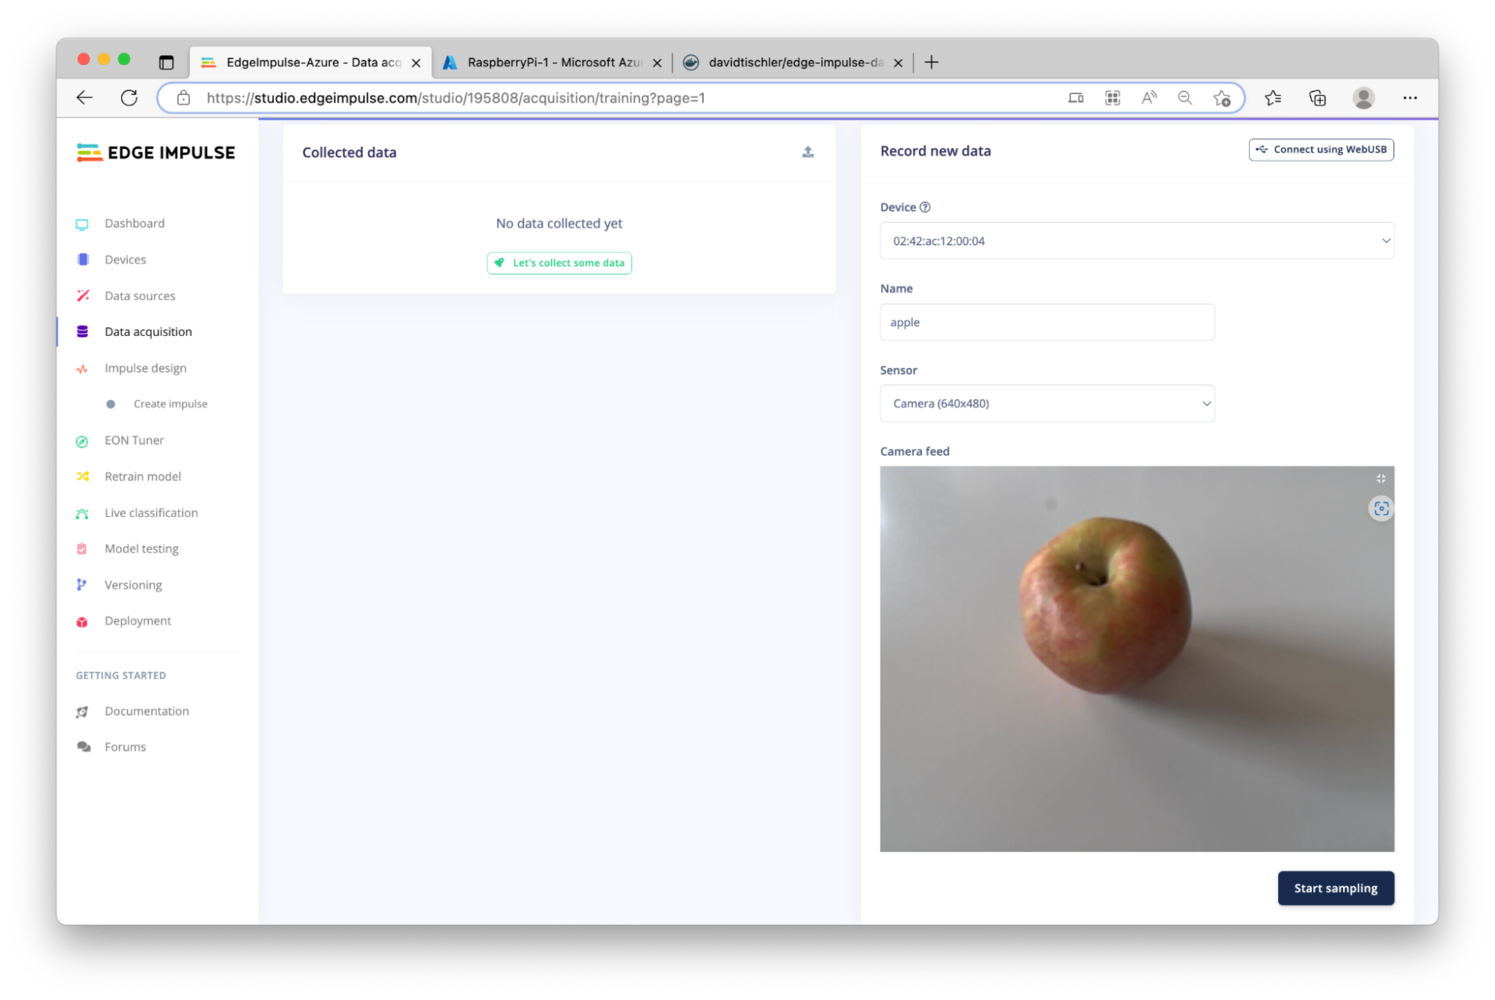
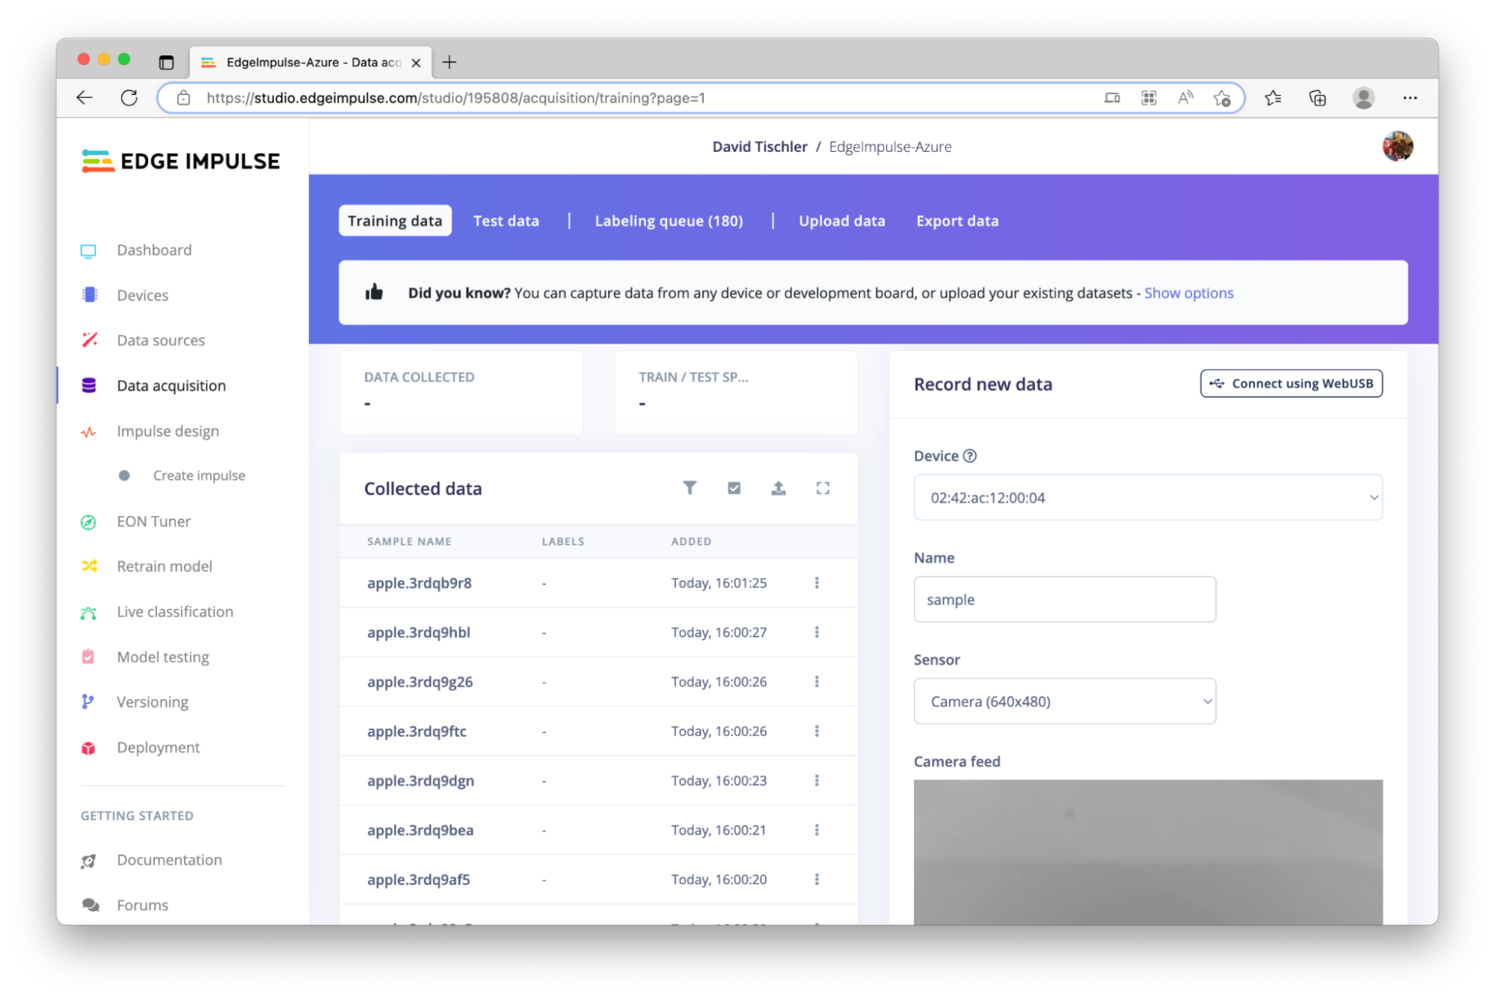
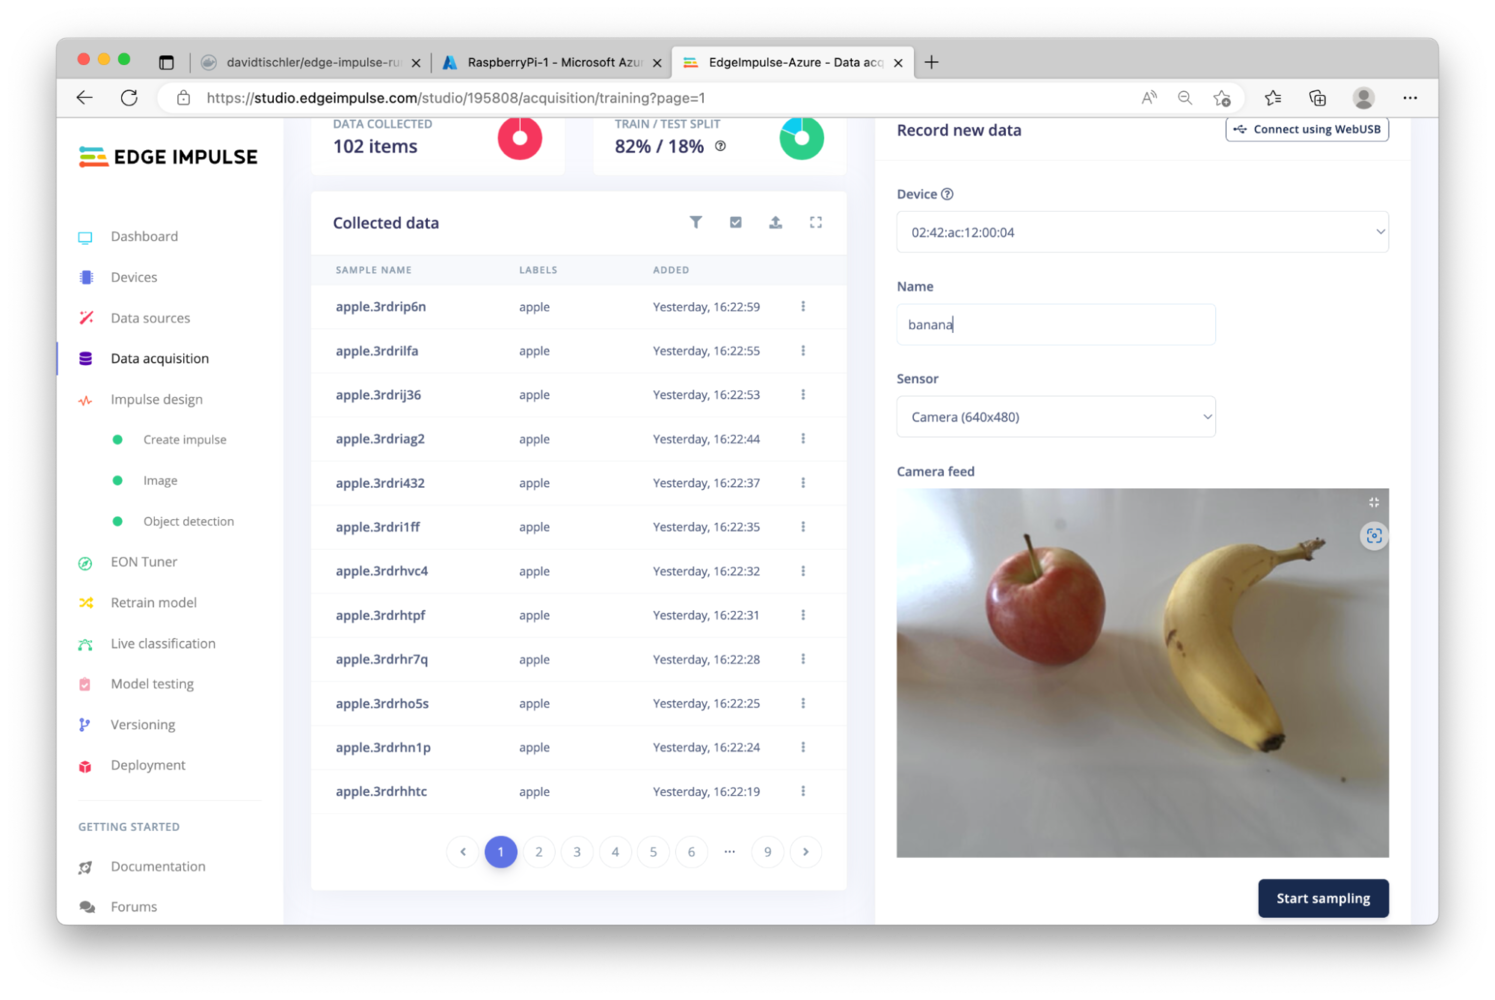
The first step in our MLOps loop is going to be data collection and building a high quality dataset to train our model with. Now that Edge Impulse, Azure IoT Edge, and the hardware are setup, we can begin the process and enter this feedback loop. The Edge Impulse project that we created earlier is still empty, but is ready to accept data. There are lots of ways to connect devices to Edge Impulse, and many ways to capture data. Some of the very easiest methods involve connecting supported devices directly to your computer via USB, and capturing data directly inside the Studio. Smartphones are another great way to easily upload pictures for image classification and object detection computer vision projects. You can refer to the Edge Impulse documentation for more information. In this tutorial we’ll take a less direct approach, but with the benefit of bulk deployment at scale and pushing new models over-the-air later, thanks to Azure. On your development machine, you will need to install Docker. The official documentation is located at https://docs.docker.com/engine/install/, so follow their guidance to reach a point that Docker is up and running on your machine. You should be able to do adocker run hello-world and get confirmation that everything is working, then you’re ready to proceed.
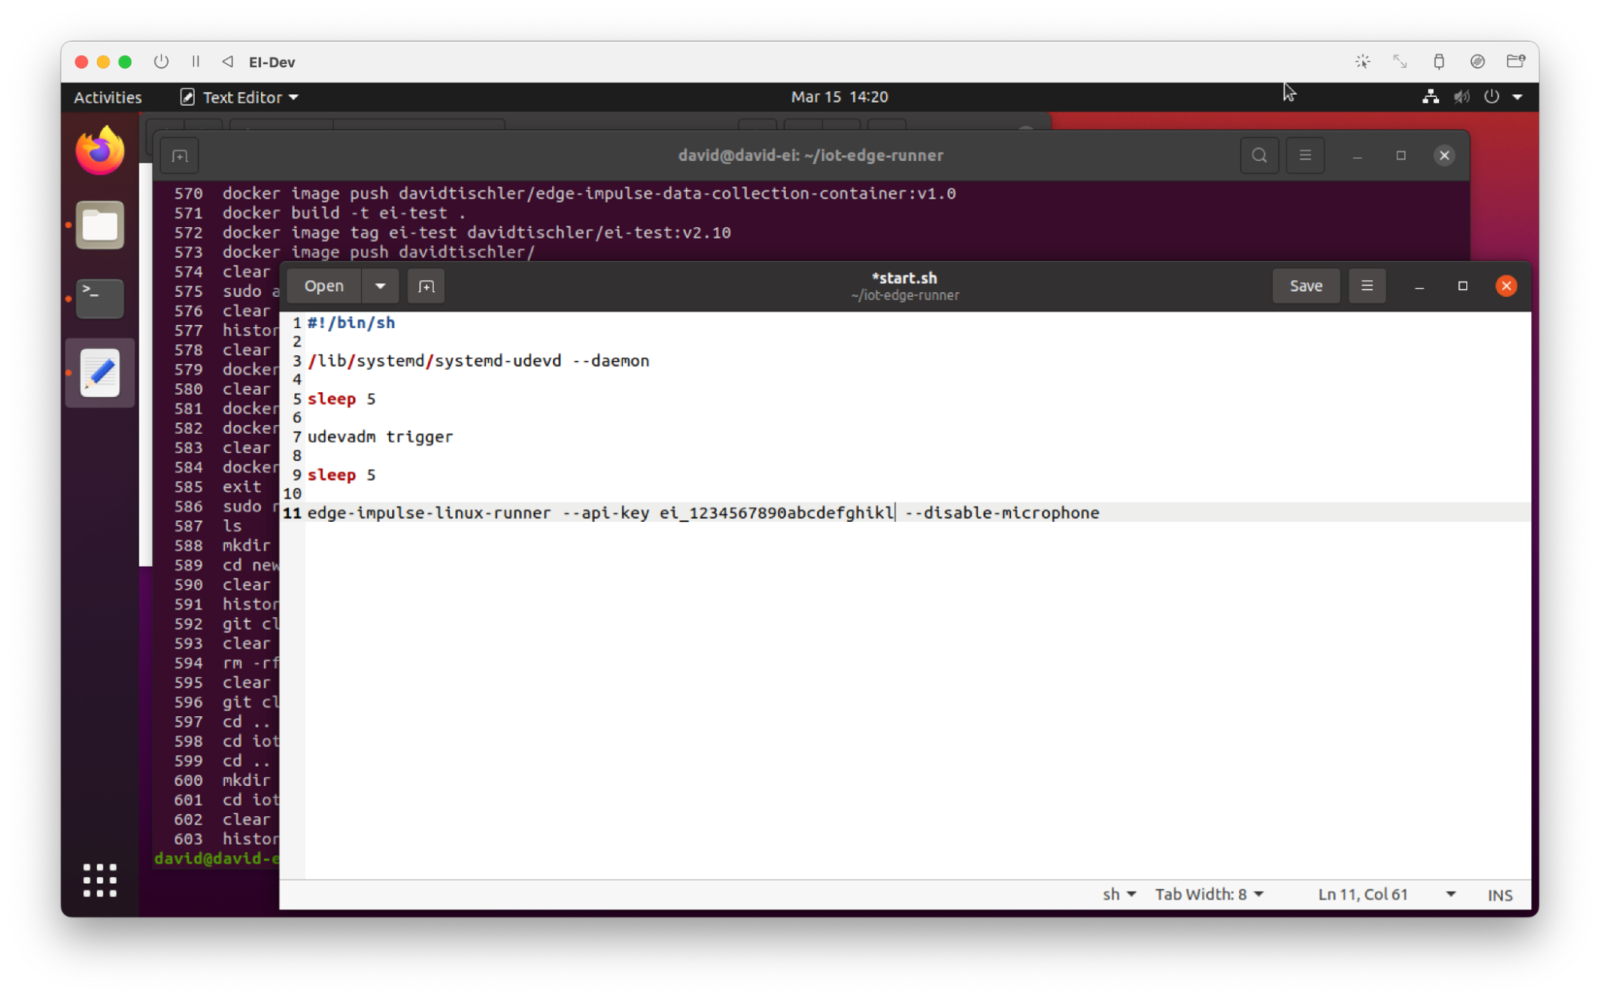
start.sh. This Docker file can be saved, call it literally dockerfile when you save it, and we’ll move on to creating the start.sh script.
Again make a new file, and copy / paste in this code:
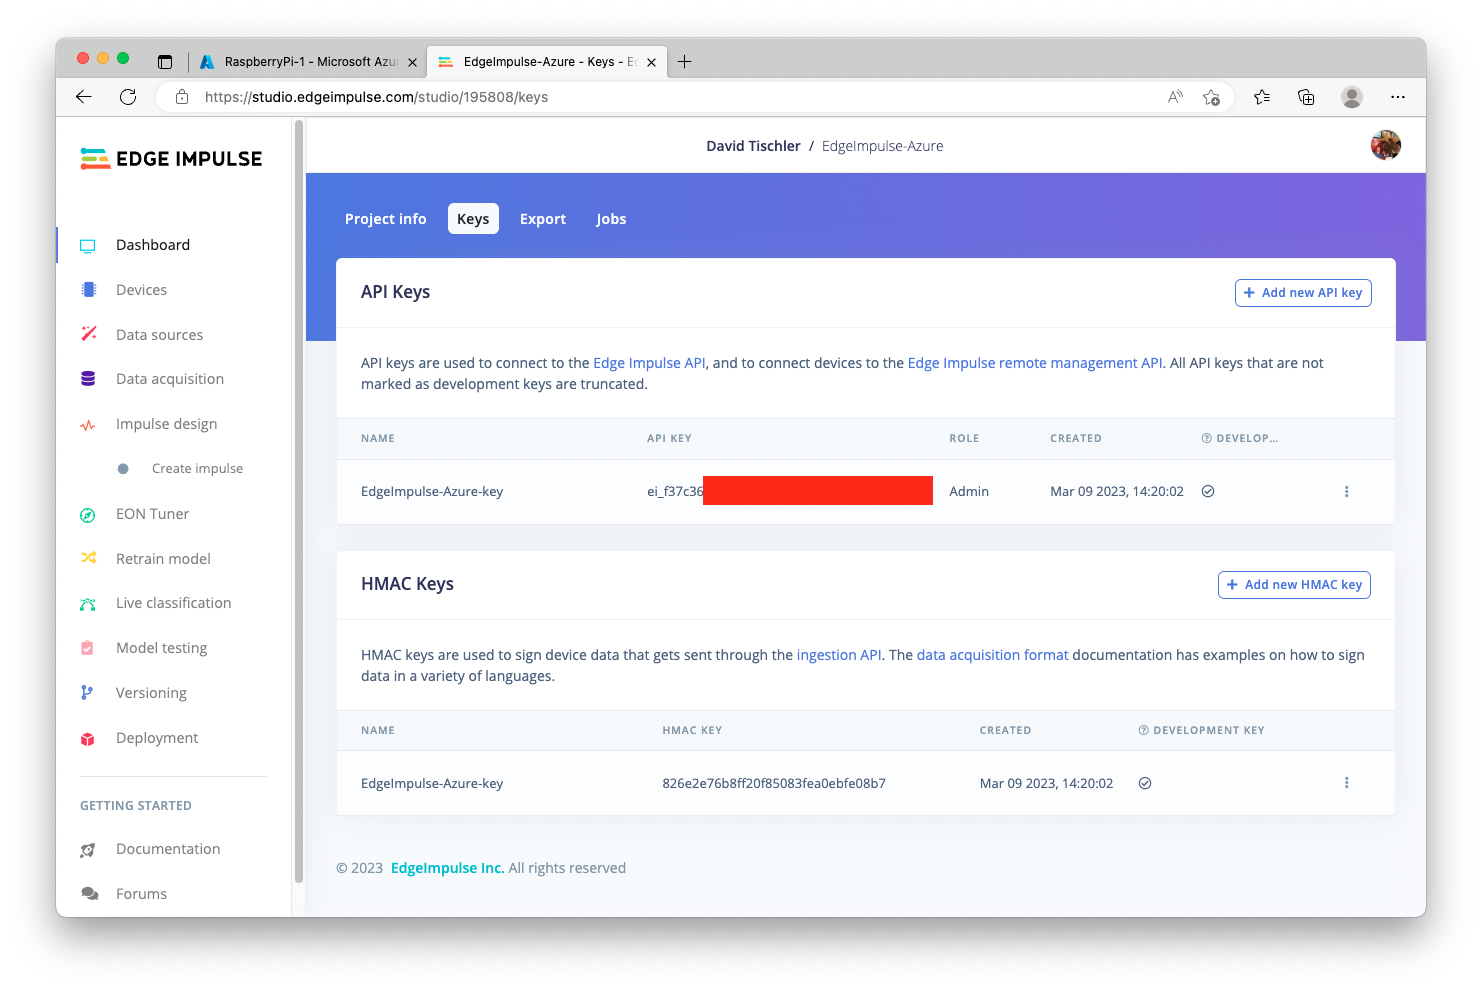
start.sh file, and are going to place it into the Docker Hub in a Public repository. This is not secure, nor a best practice. However, if you use a Private repository, that would be fine. Or, even better, is to use a variable here and then provide that variable as an input to the Docker container creation, over in Azure. That methodology has the added advantage of quickly being able to switch among Edge Impulse projects simply by altering the variable. However, for demonstration purposes, we’ll leave this key in the start.sh script, and proceed.
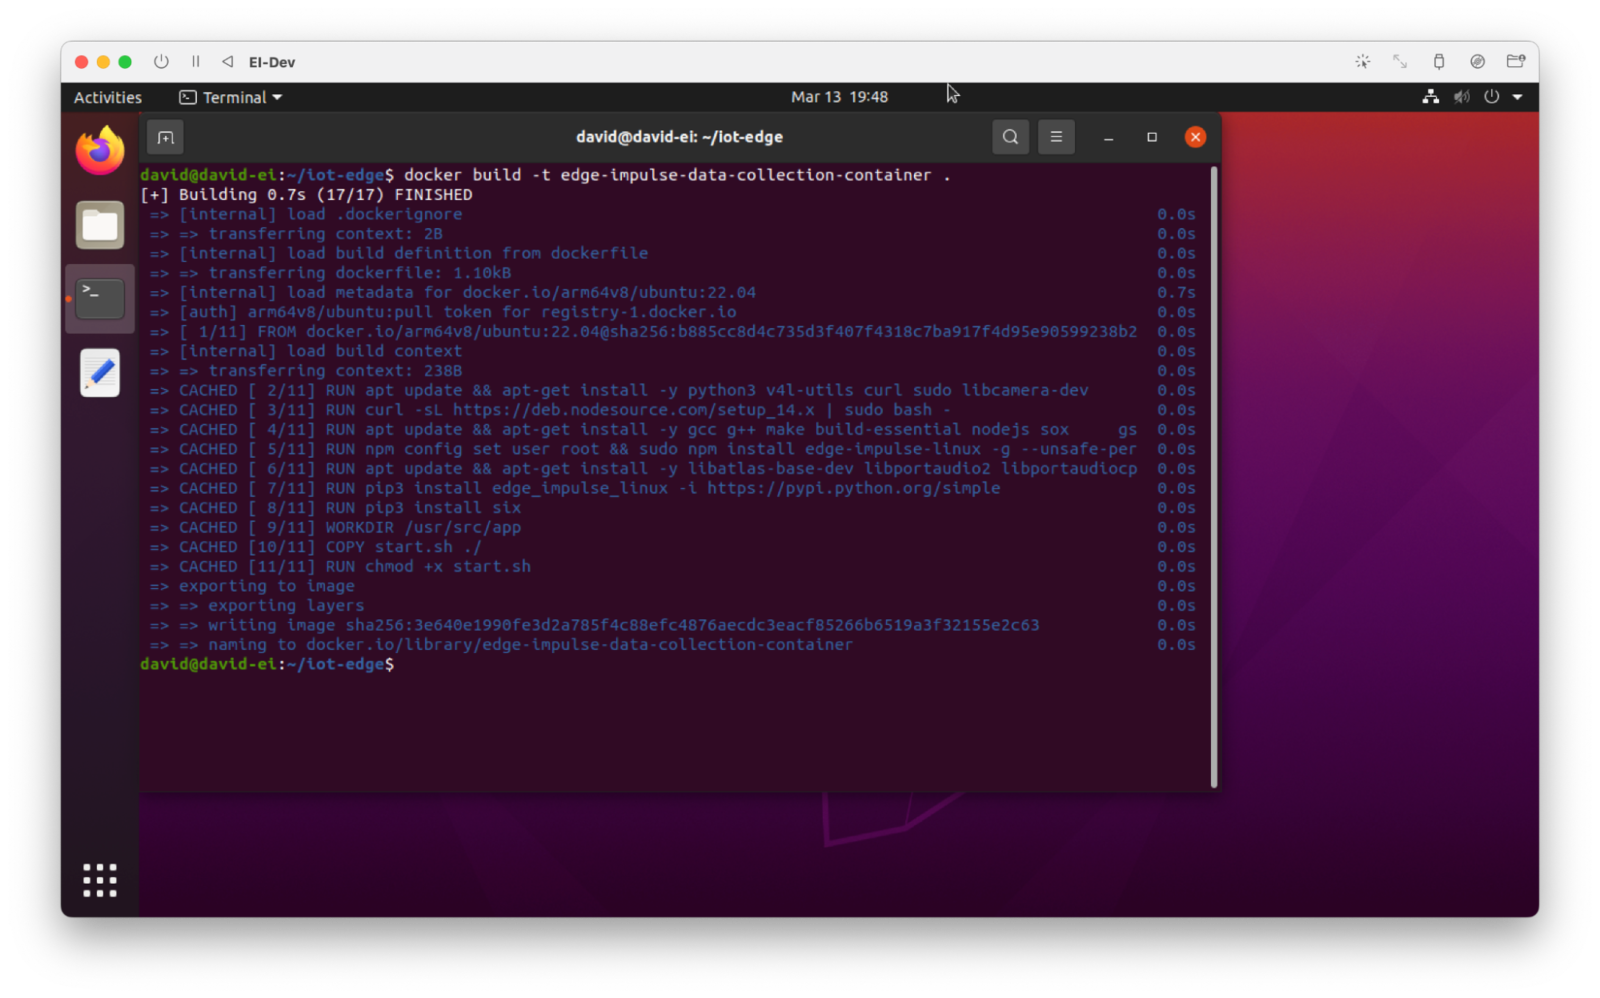
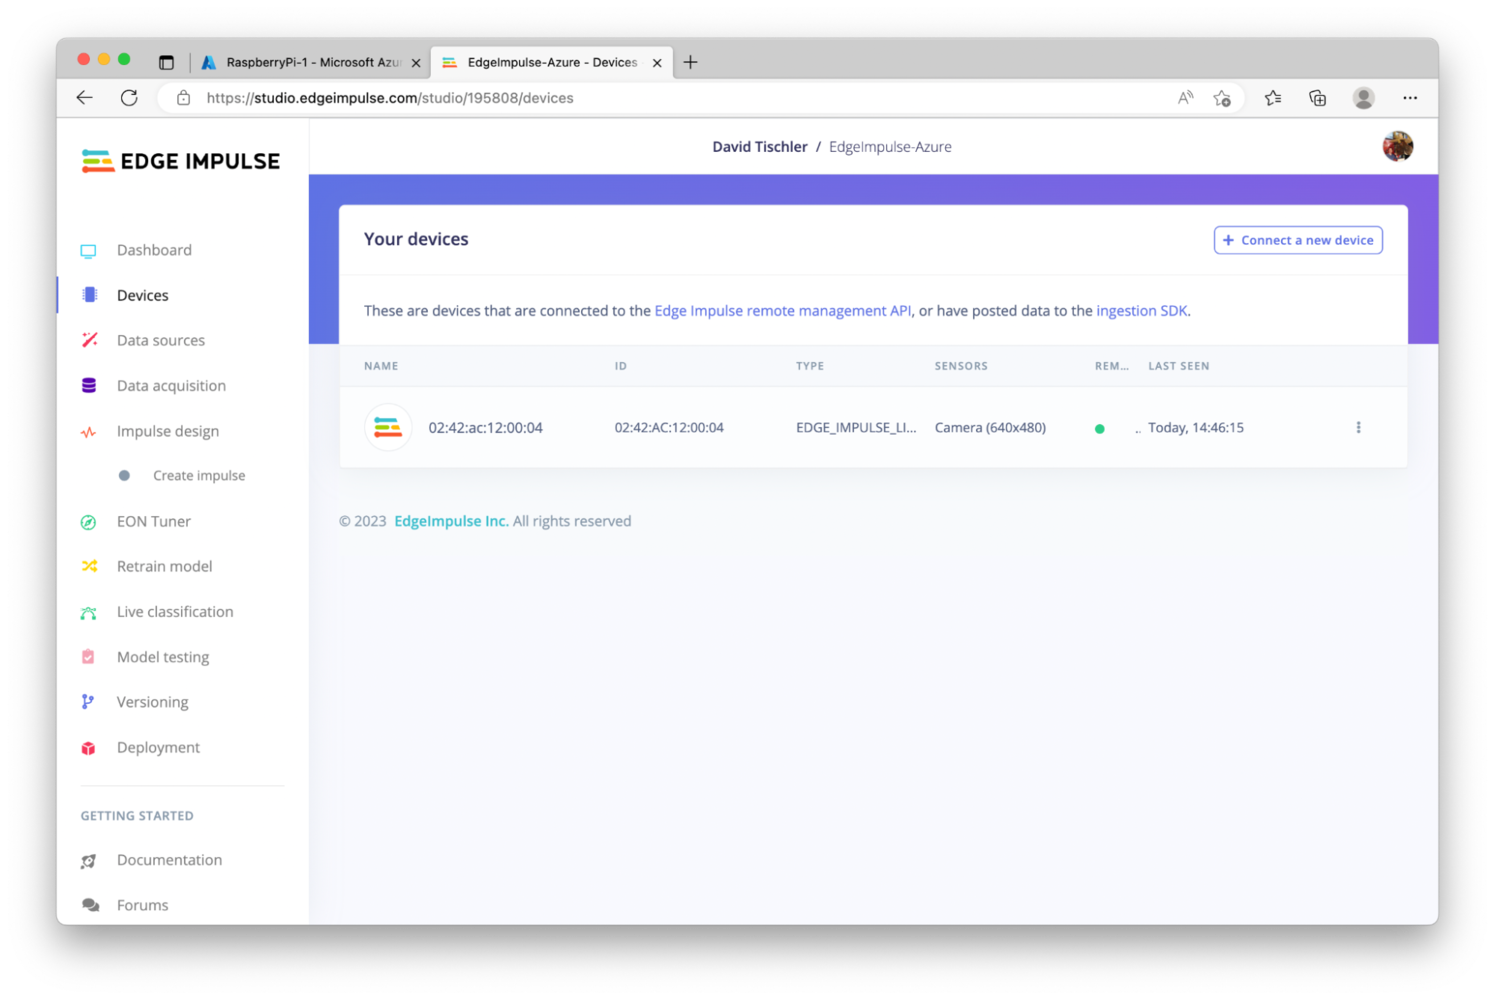
start.sh. With our Dockerfile and the startup script, this container will connect to the Edge Impulse Studio as a camera device, so that we can begin taking pictures of apples, or for more enterprise deployments, collect data from the field. The goal at this point is still go collect data and build a high-quality dataset, and this container will start us on that path. We’re now ready to build the container, and then place it somewhere that Azure can reach it.
Docker Hub
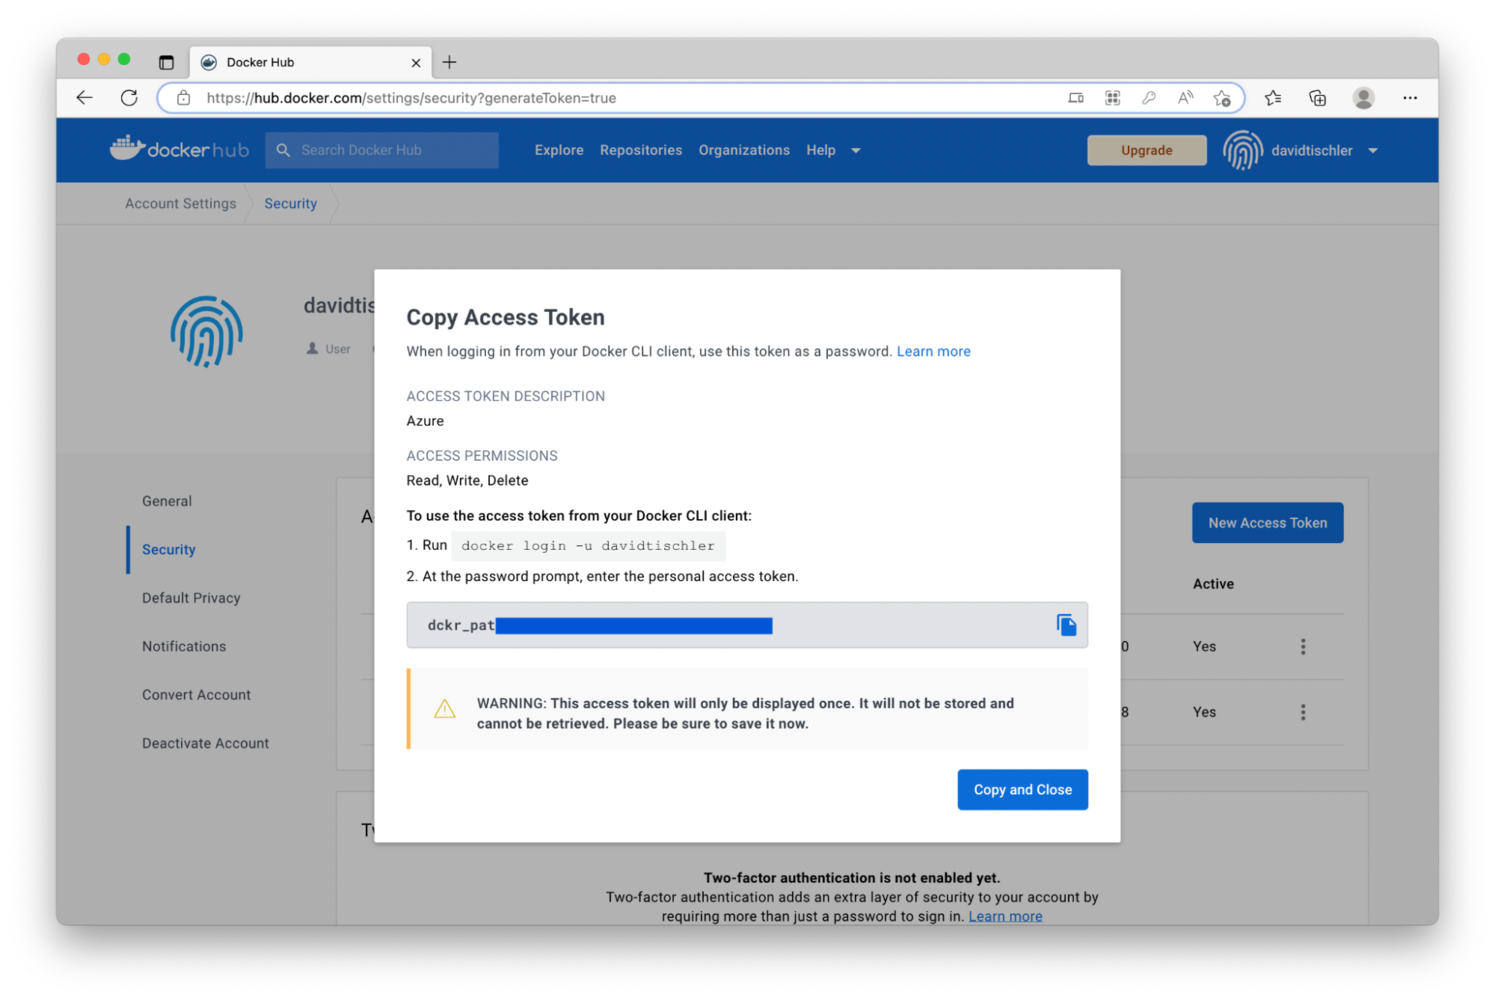
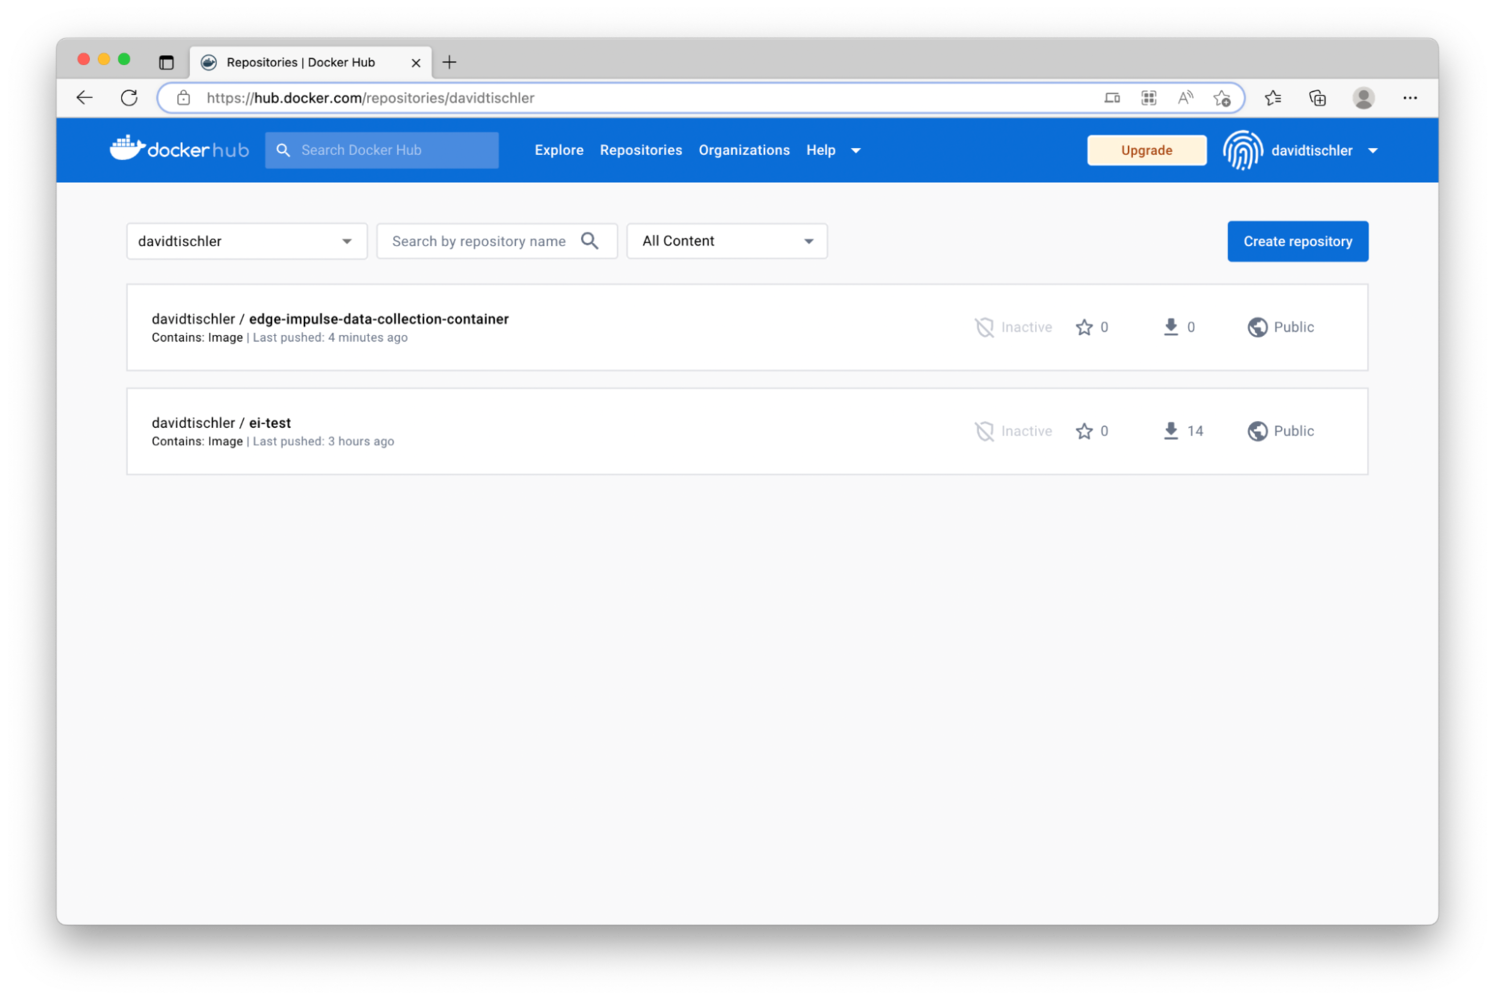
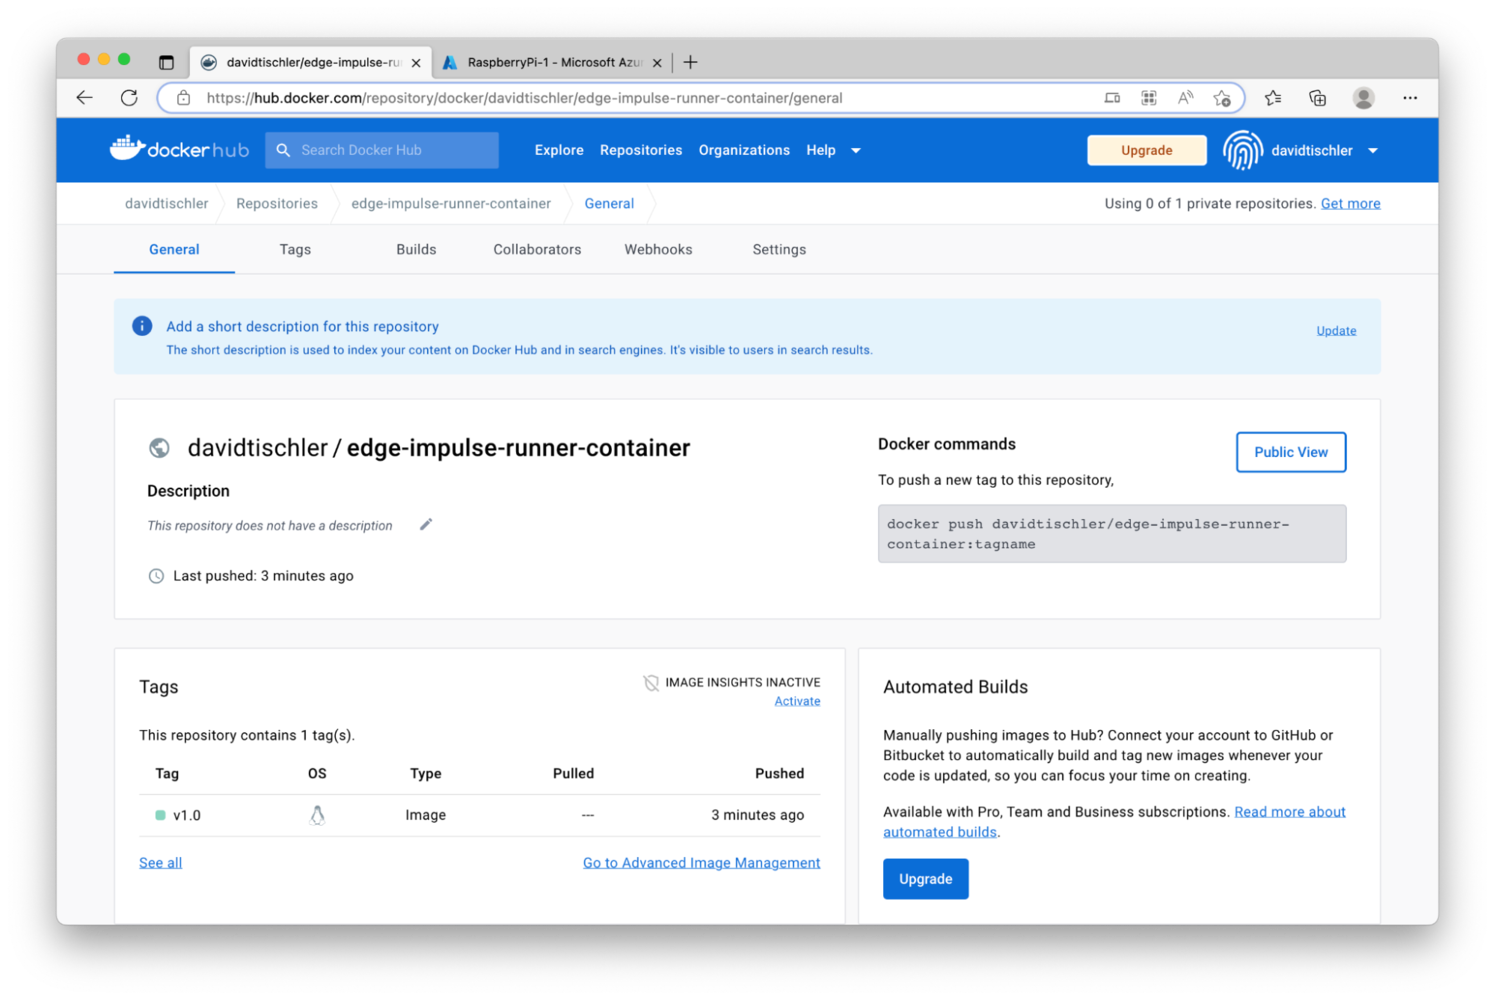
Depending on your experience with Docker, or as you may have seen while reading their documentation, containers get built and placed into container registries. You can host a container registry yourself, and store all of your containers on a private server, or even your own local desktop or laptop. However, many developers choose to use existing container registries like Docker Hub, or the Azure Container Registry. We’ll choose Docker Hub here, as it’s a popular platform that’s easy to use. If you don’t already have an account at https://hub.docker.com/, create one (again, a Free account works perfectly fine for this tutorial), log in, and click on your username at the top-right to view the drop-down menu. Click on Account Settings, then click on Security on the left, and then click the “New Access Token” button. This will be used to login to Docker Hub from the command line on your development machine.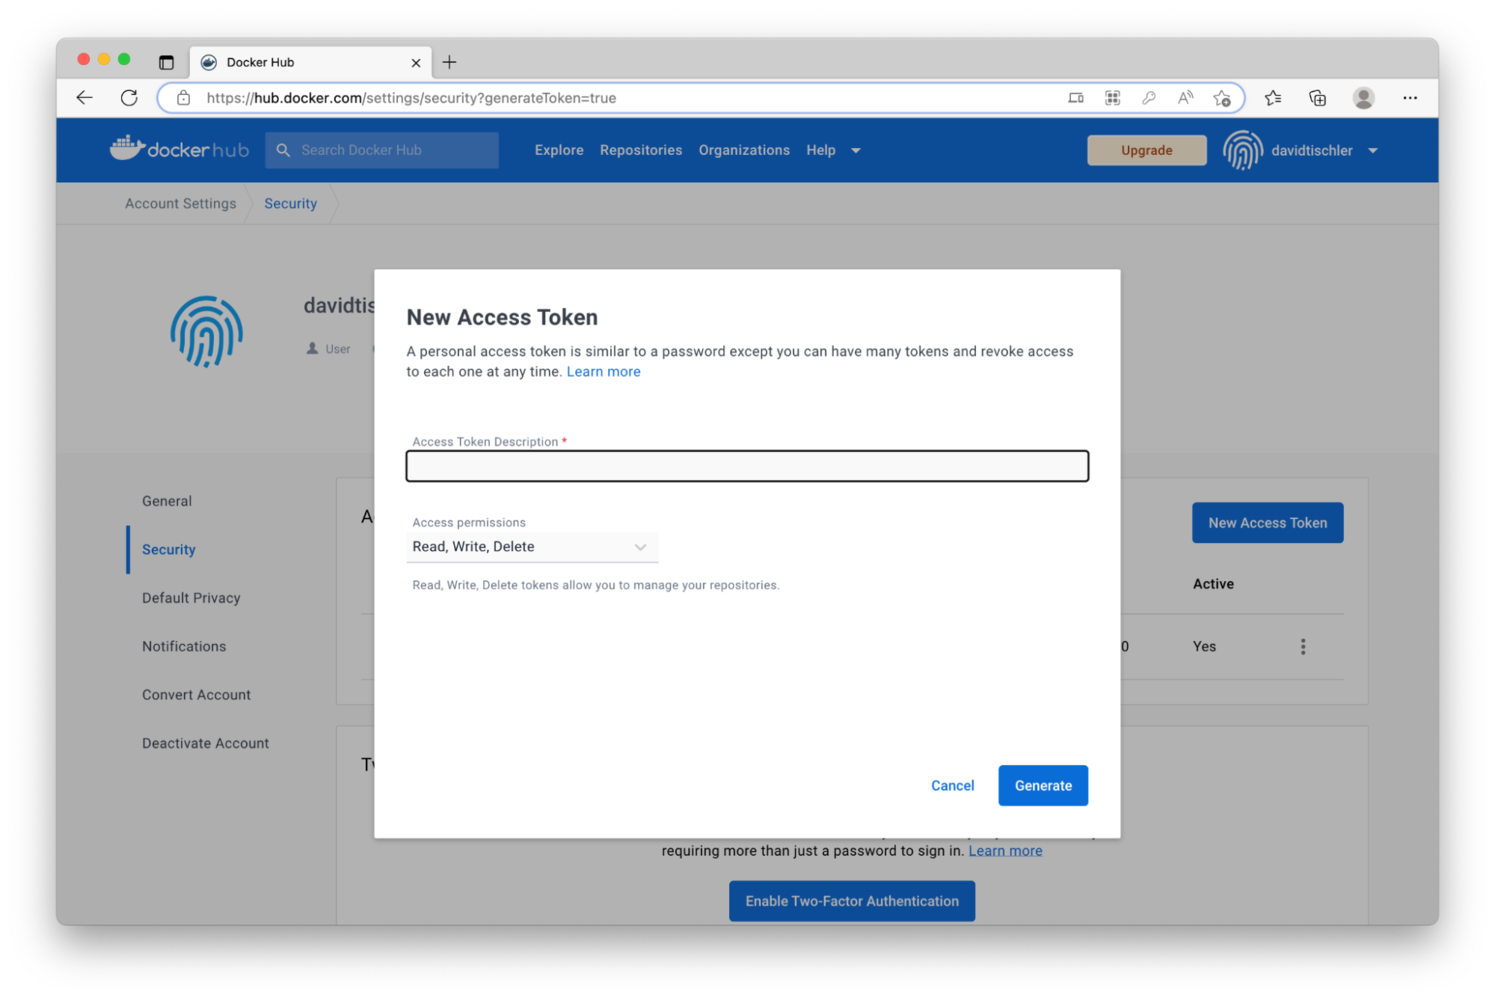
Azure IoT Edge Modules
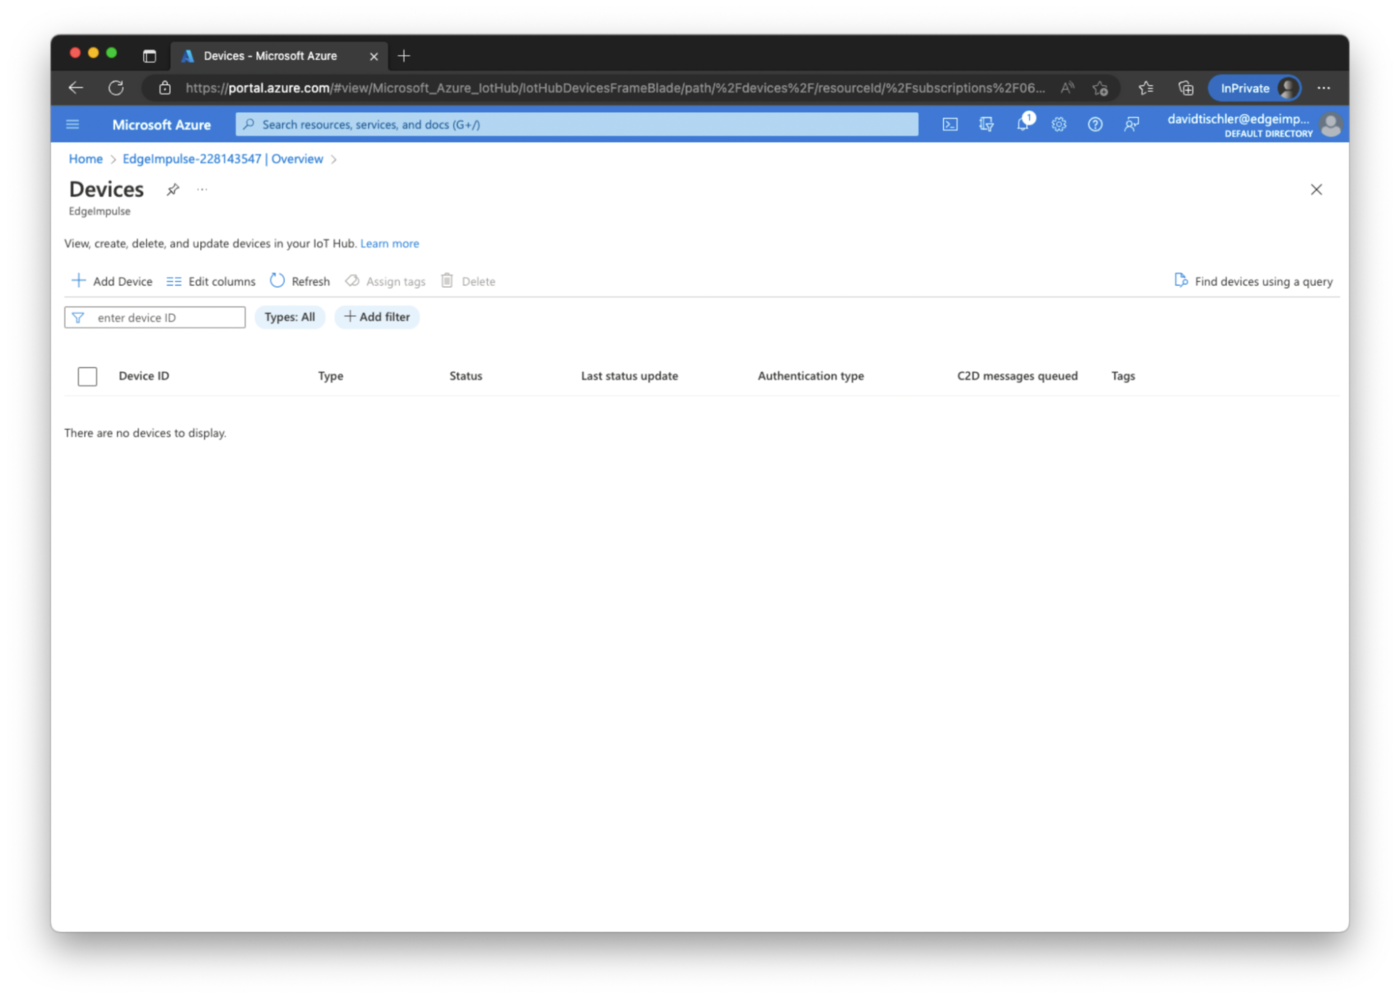
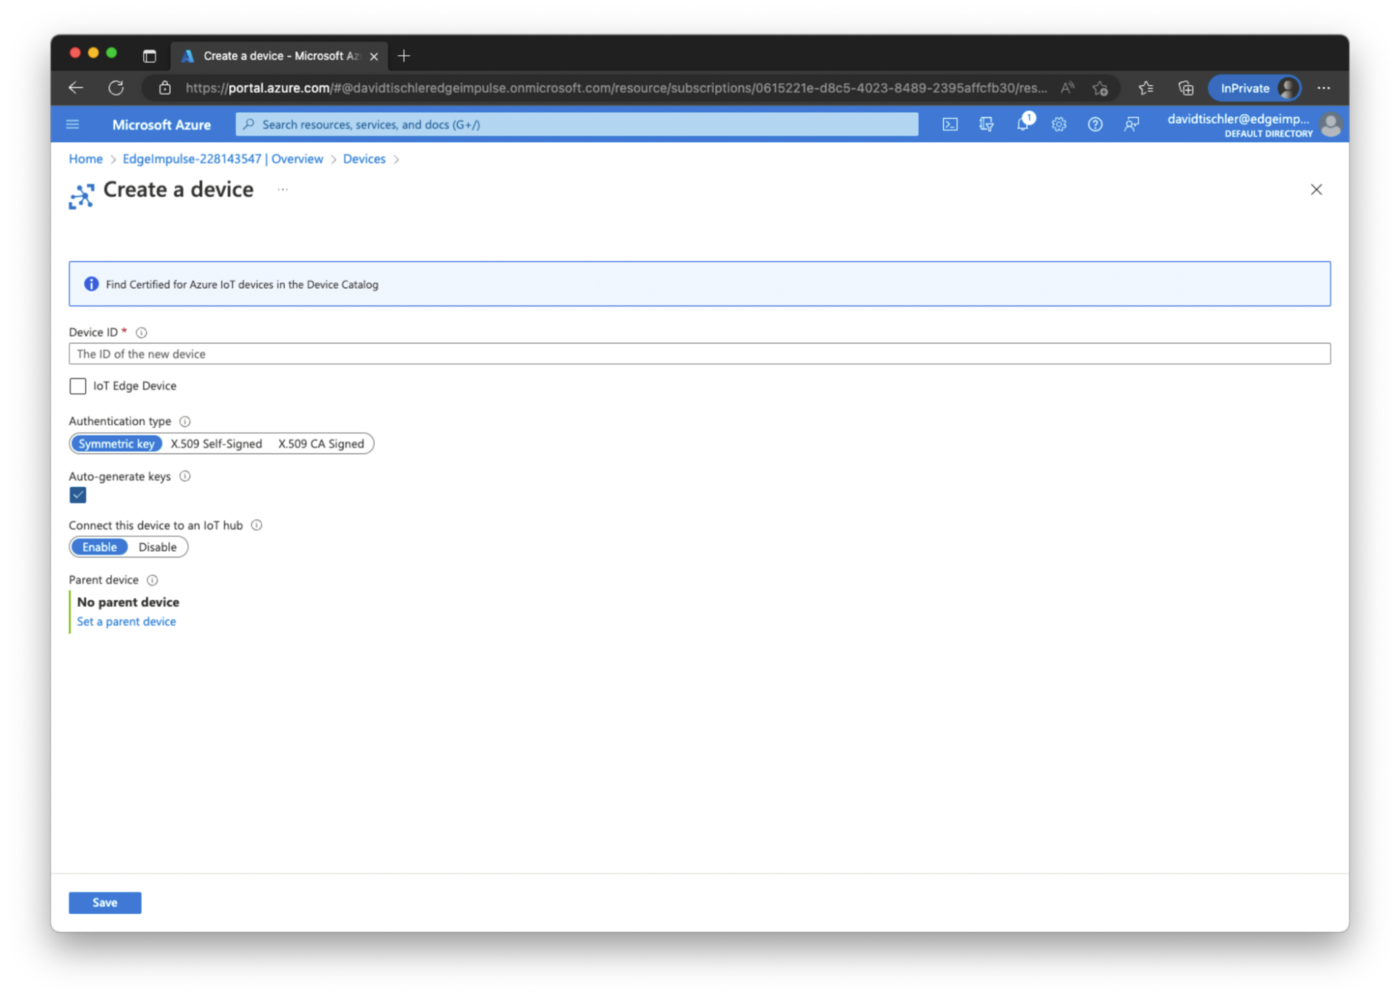
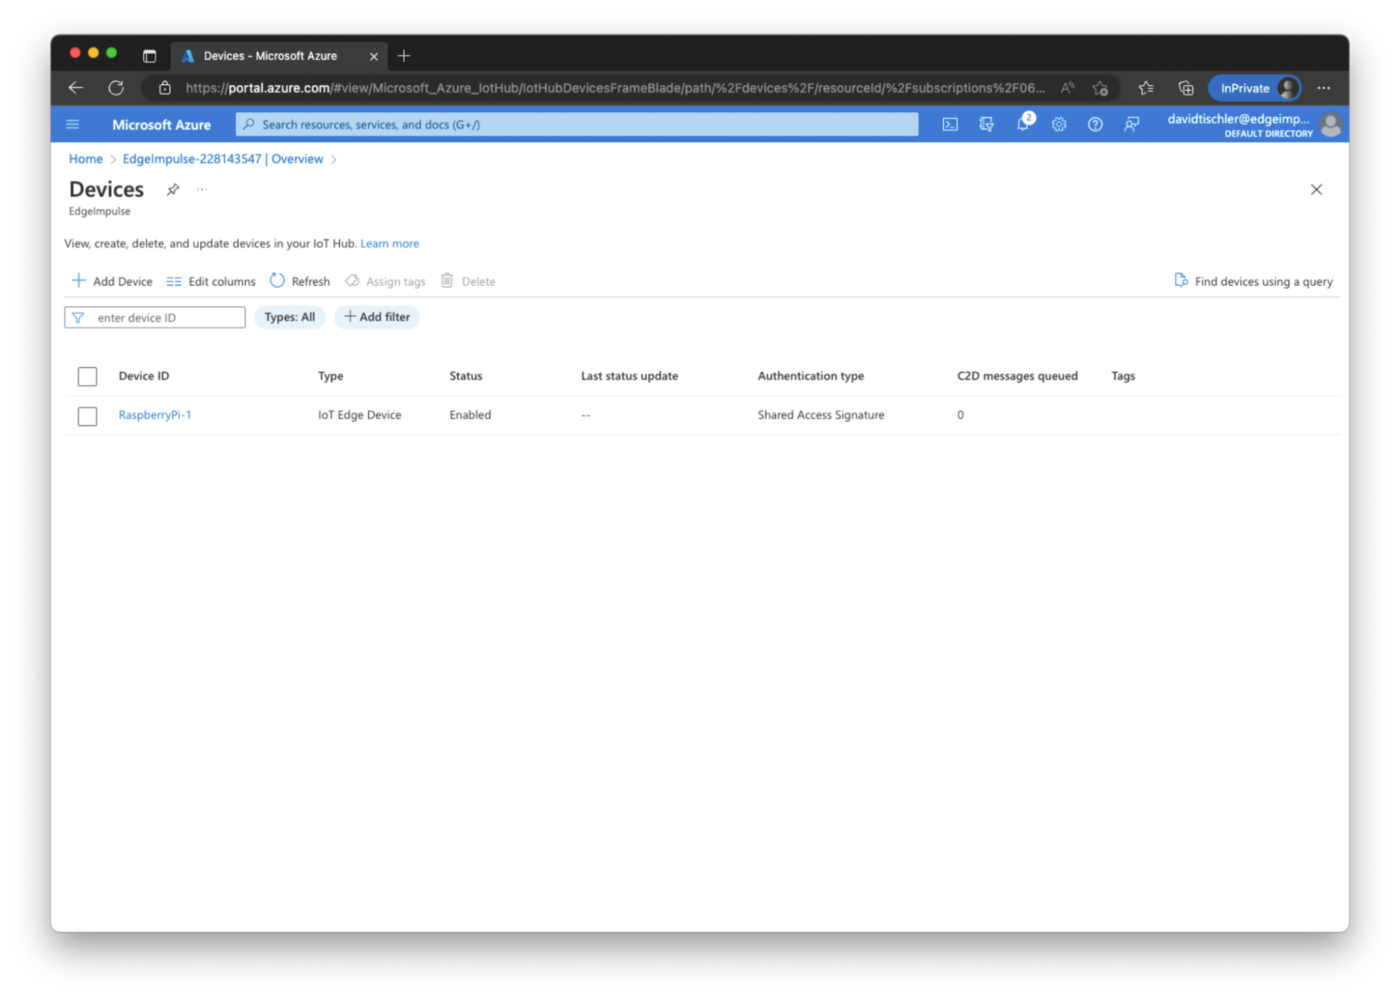
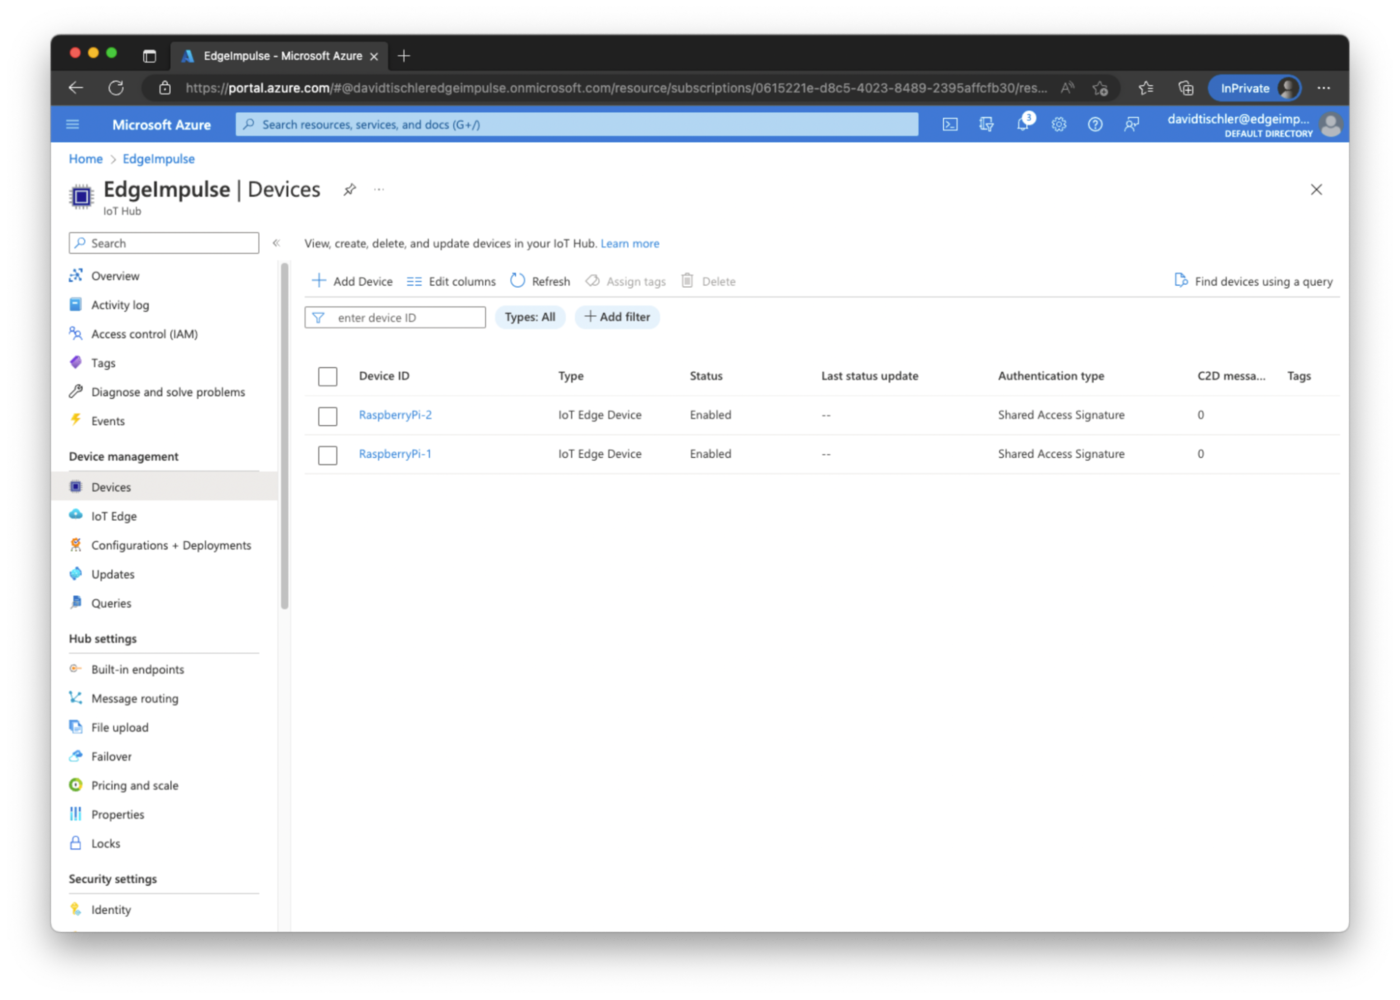
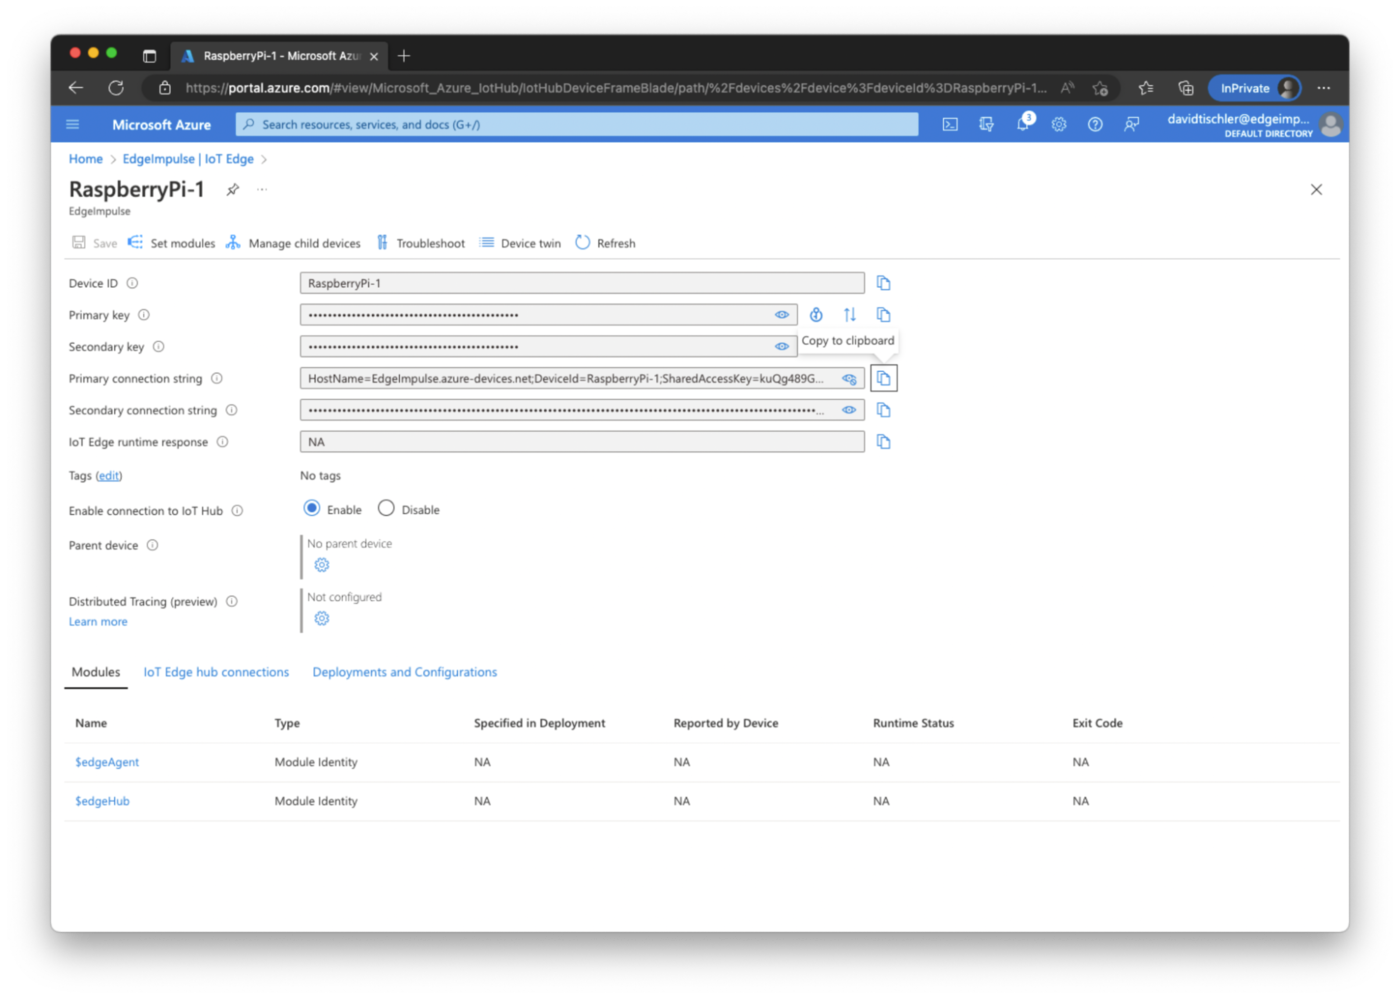
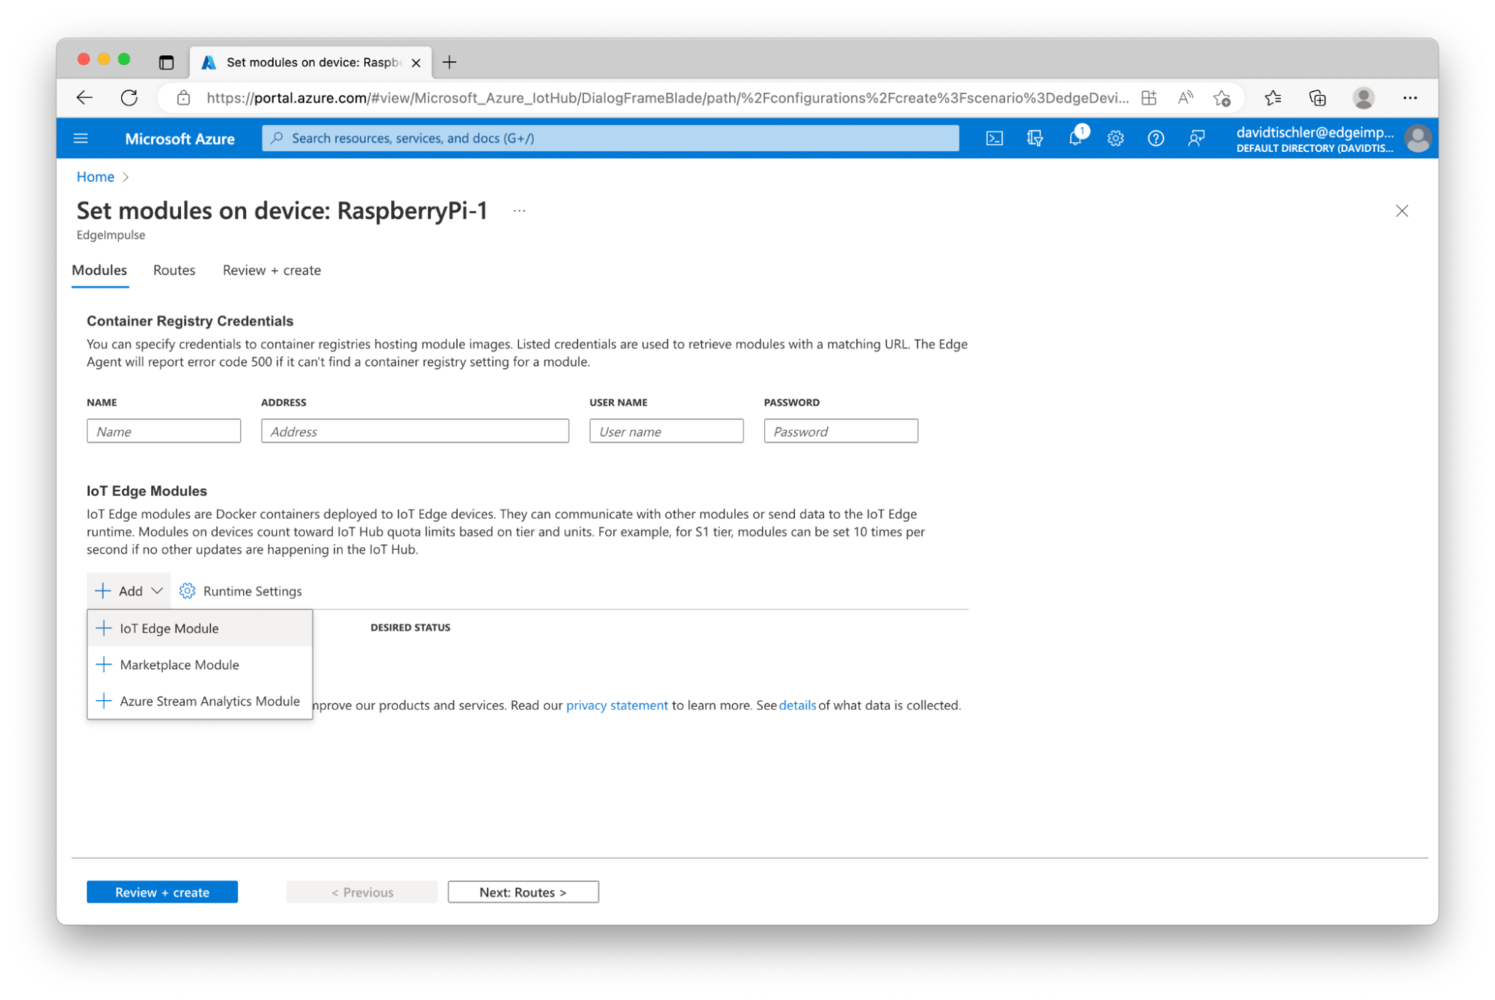
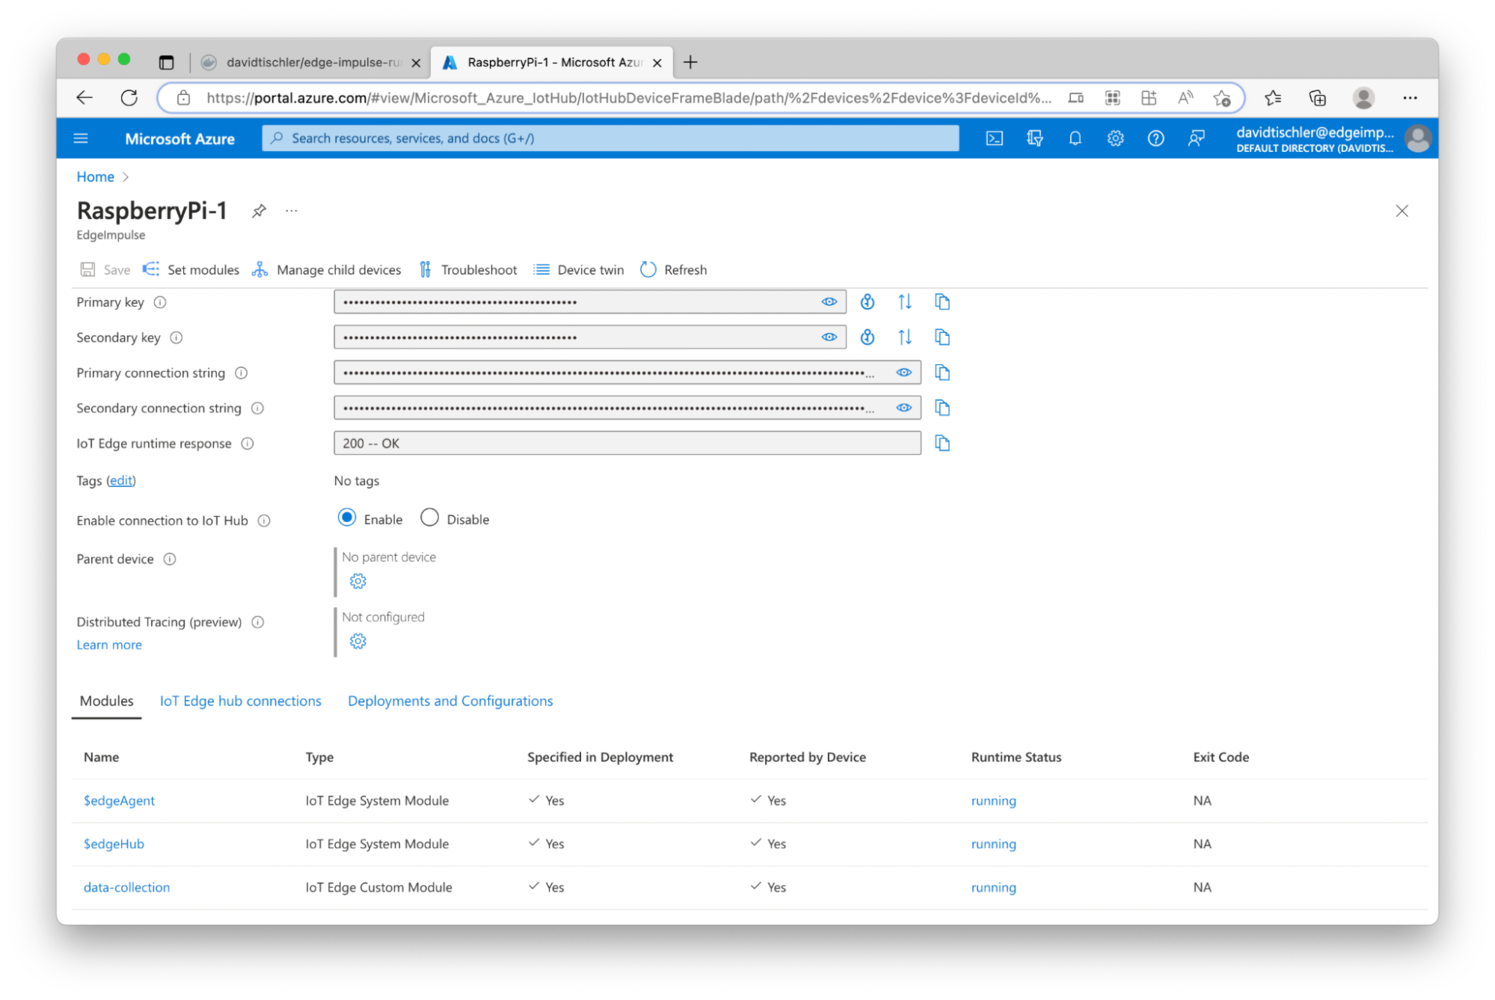
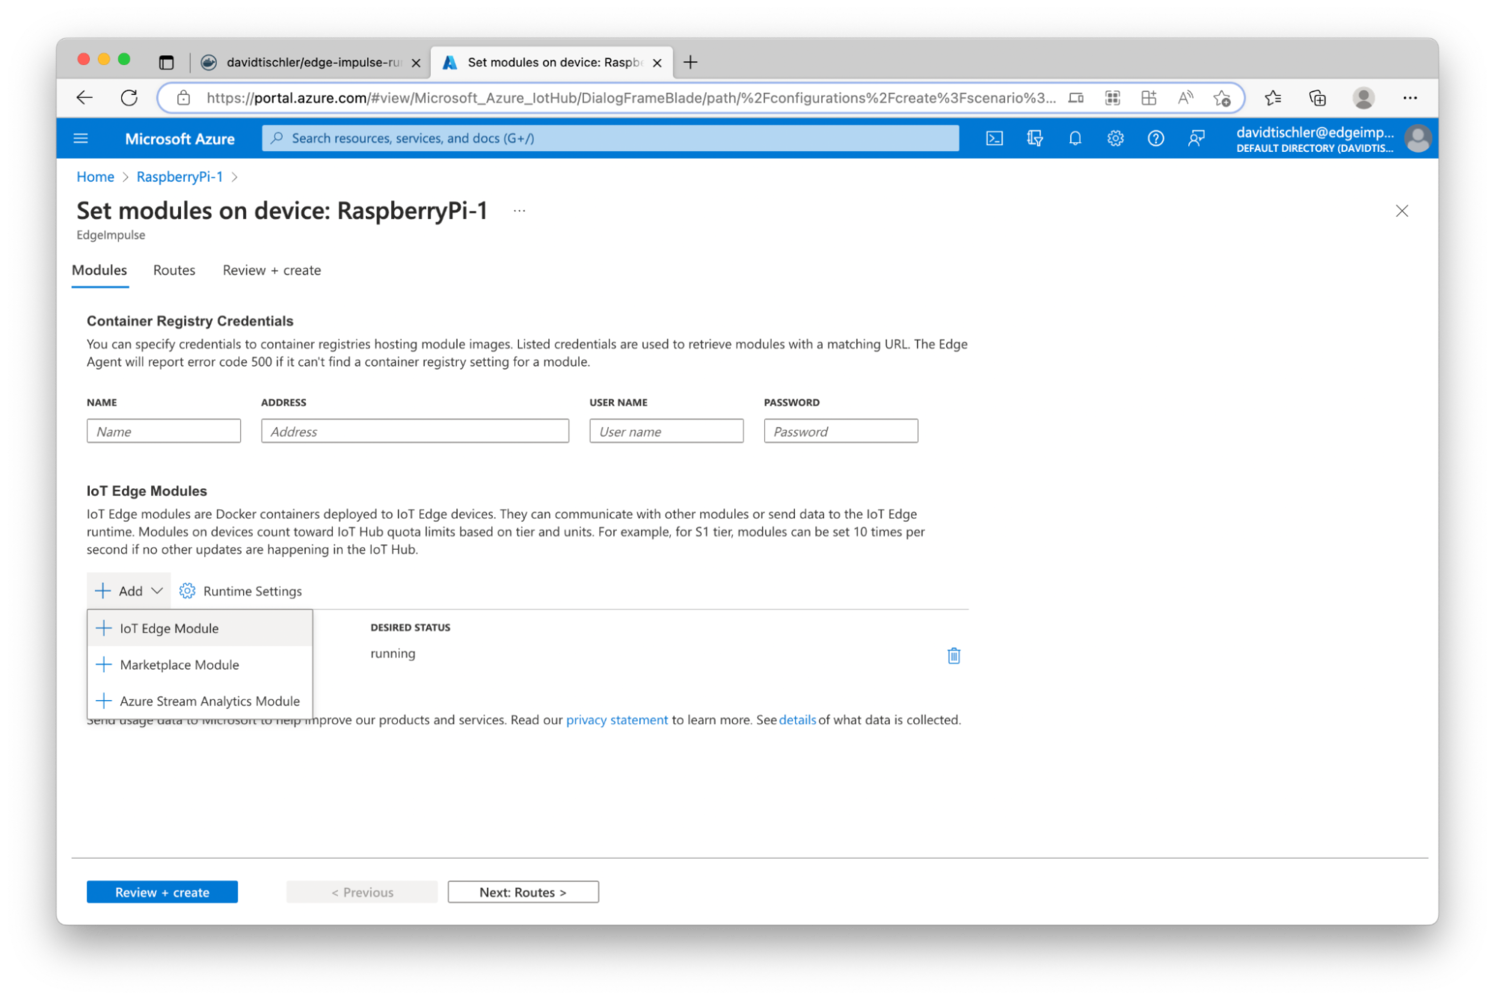
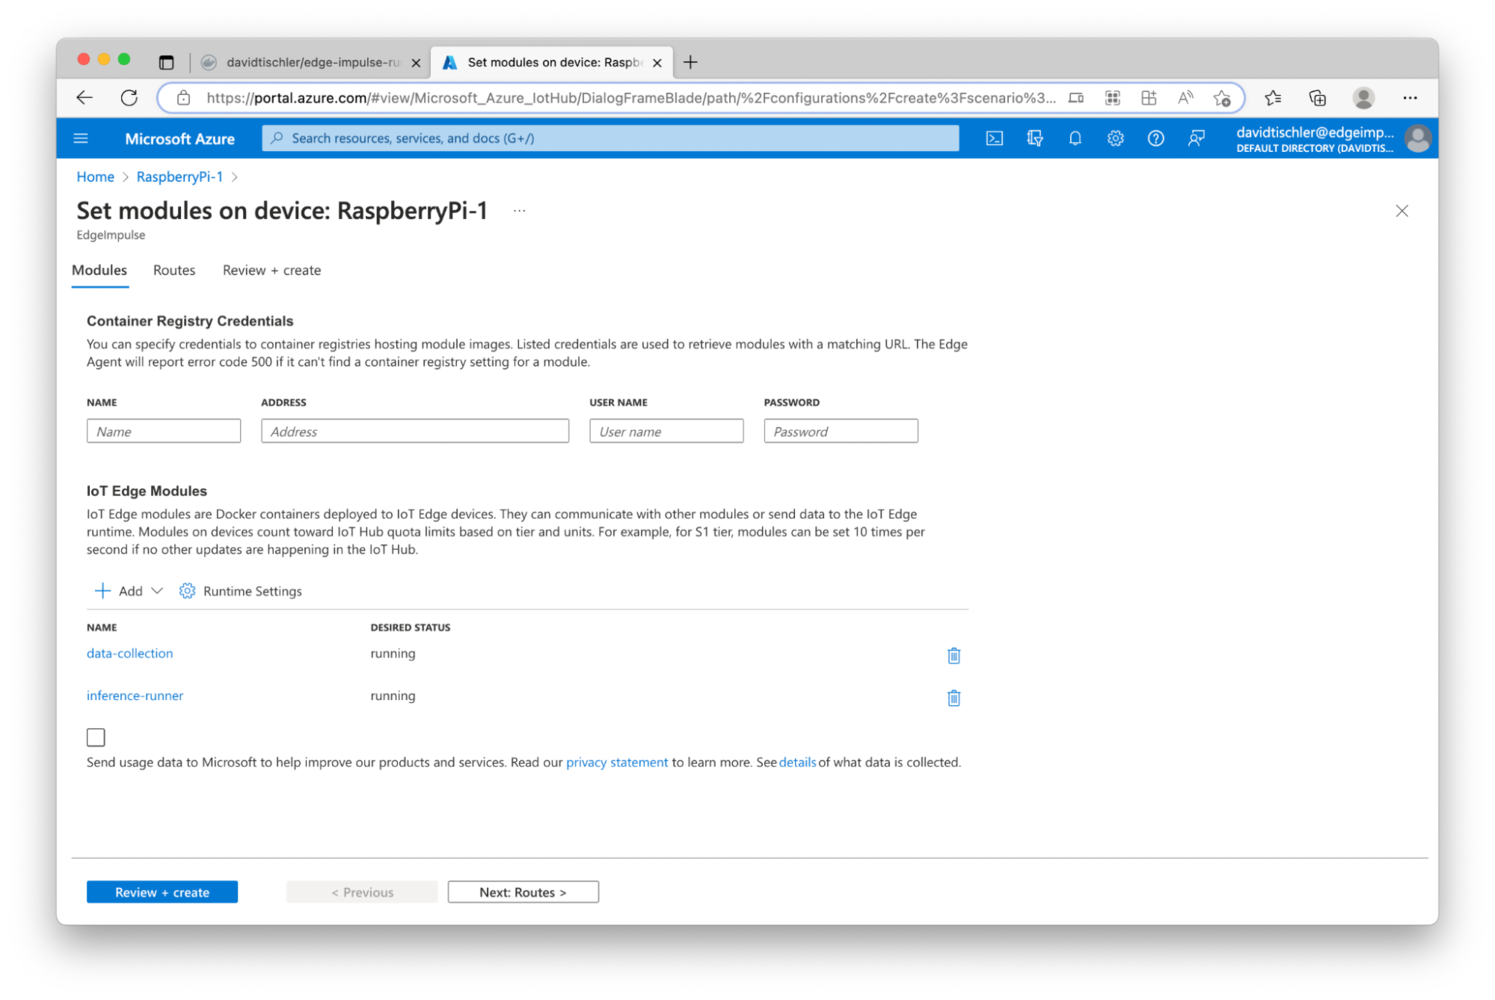
Azure IoT Edge uses the term “Modules” to refer to the containers and services that are orchestrated and run on devices. Modules can be pushed over-the-air to one device, or many devices, and there are very detailed methods for controlling the creation and running of services. We will keep things rather simple in this tutorial, but refer to the documentation for extremely granular deployment options and advanced capabilities of Azure IoT Edge. In the Azure Portal, click once again on Devices, then click on the name of one of your devices. We’ll start off deploying to only one of the Raspberry Pi’s, to ensure everything is working. Click on “Set Modules” near the top: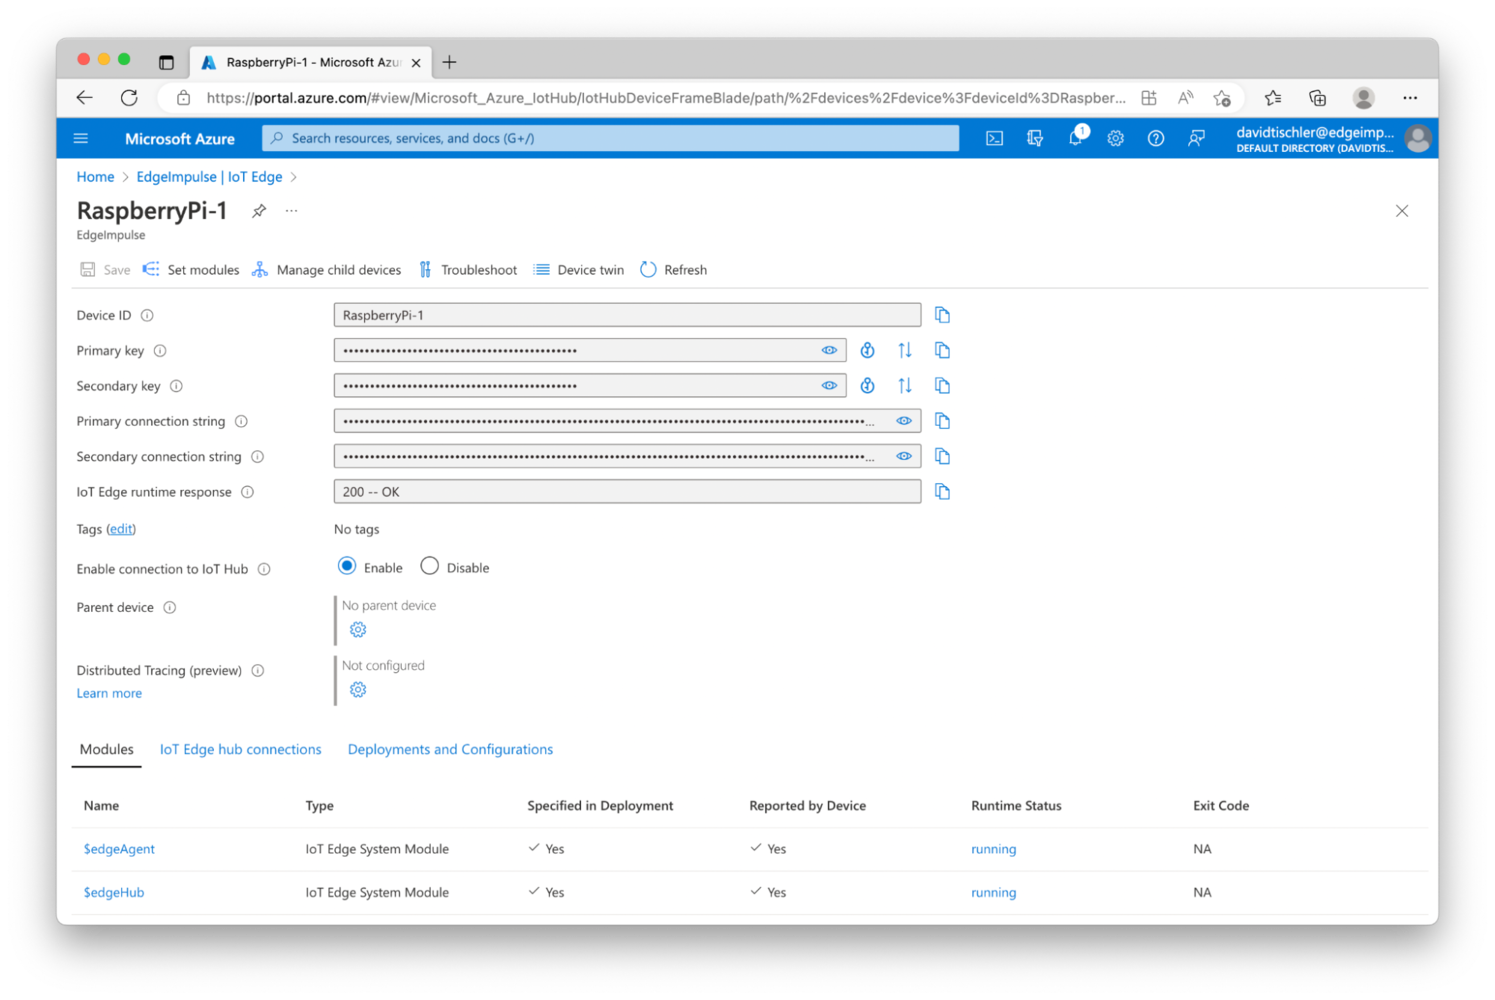
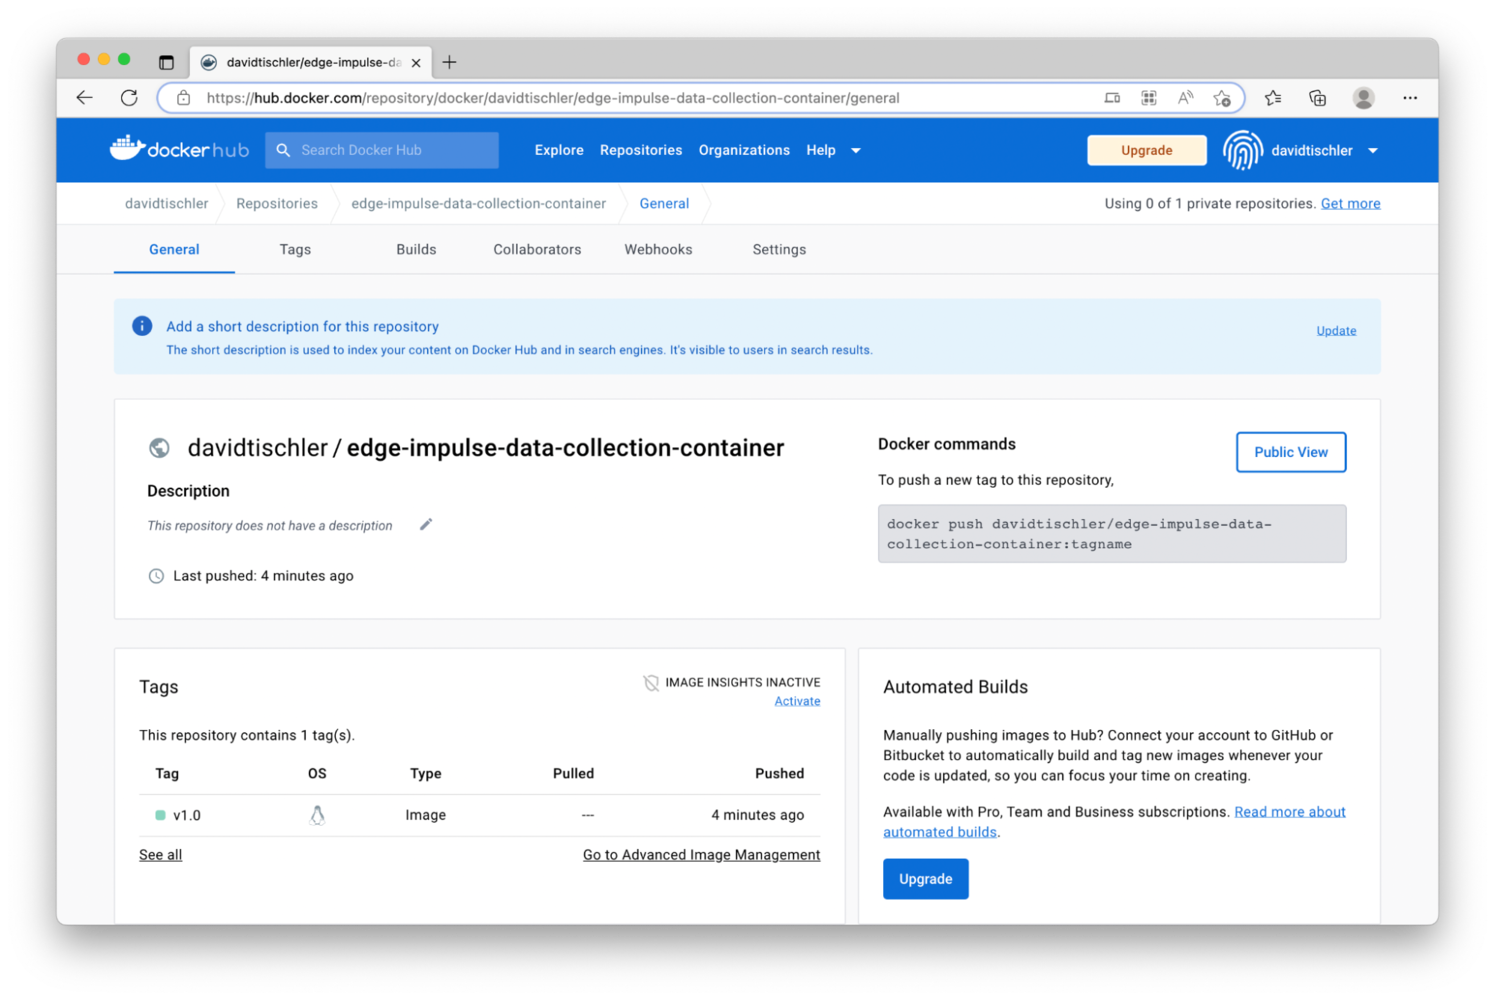
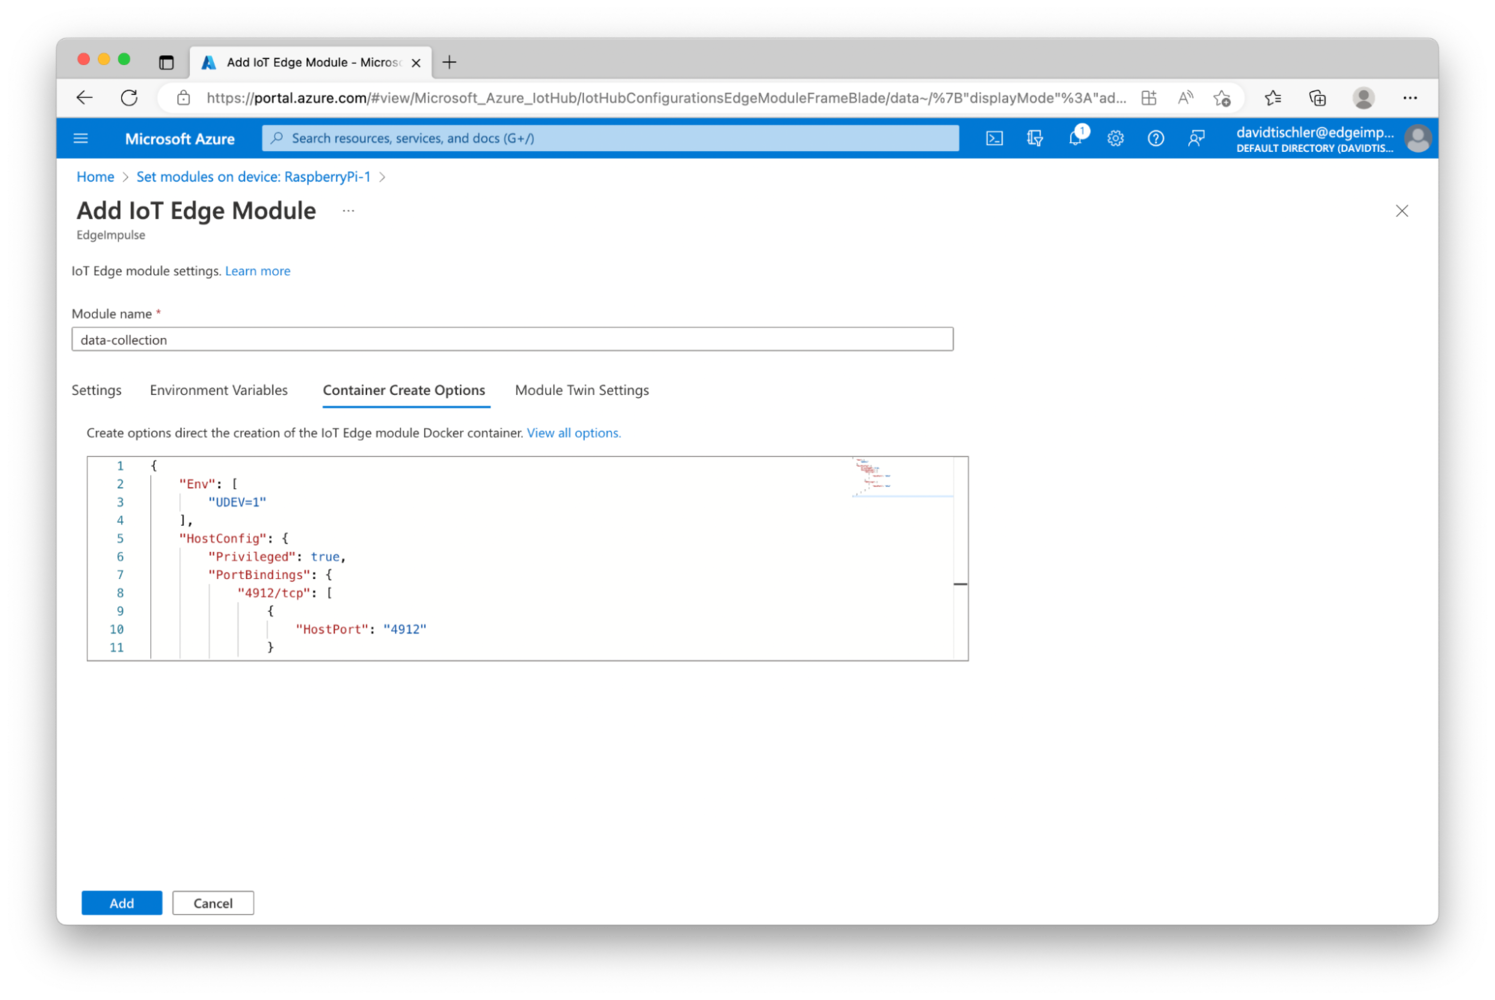
docker.io is used here, as opposed to hub.docker.com. Thus, you will use docker.io/YourUsernameThatYouCreated/edge-impulse-data-collection-container:v1.0:

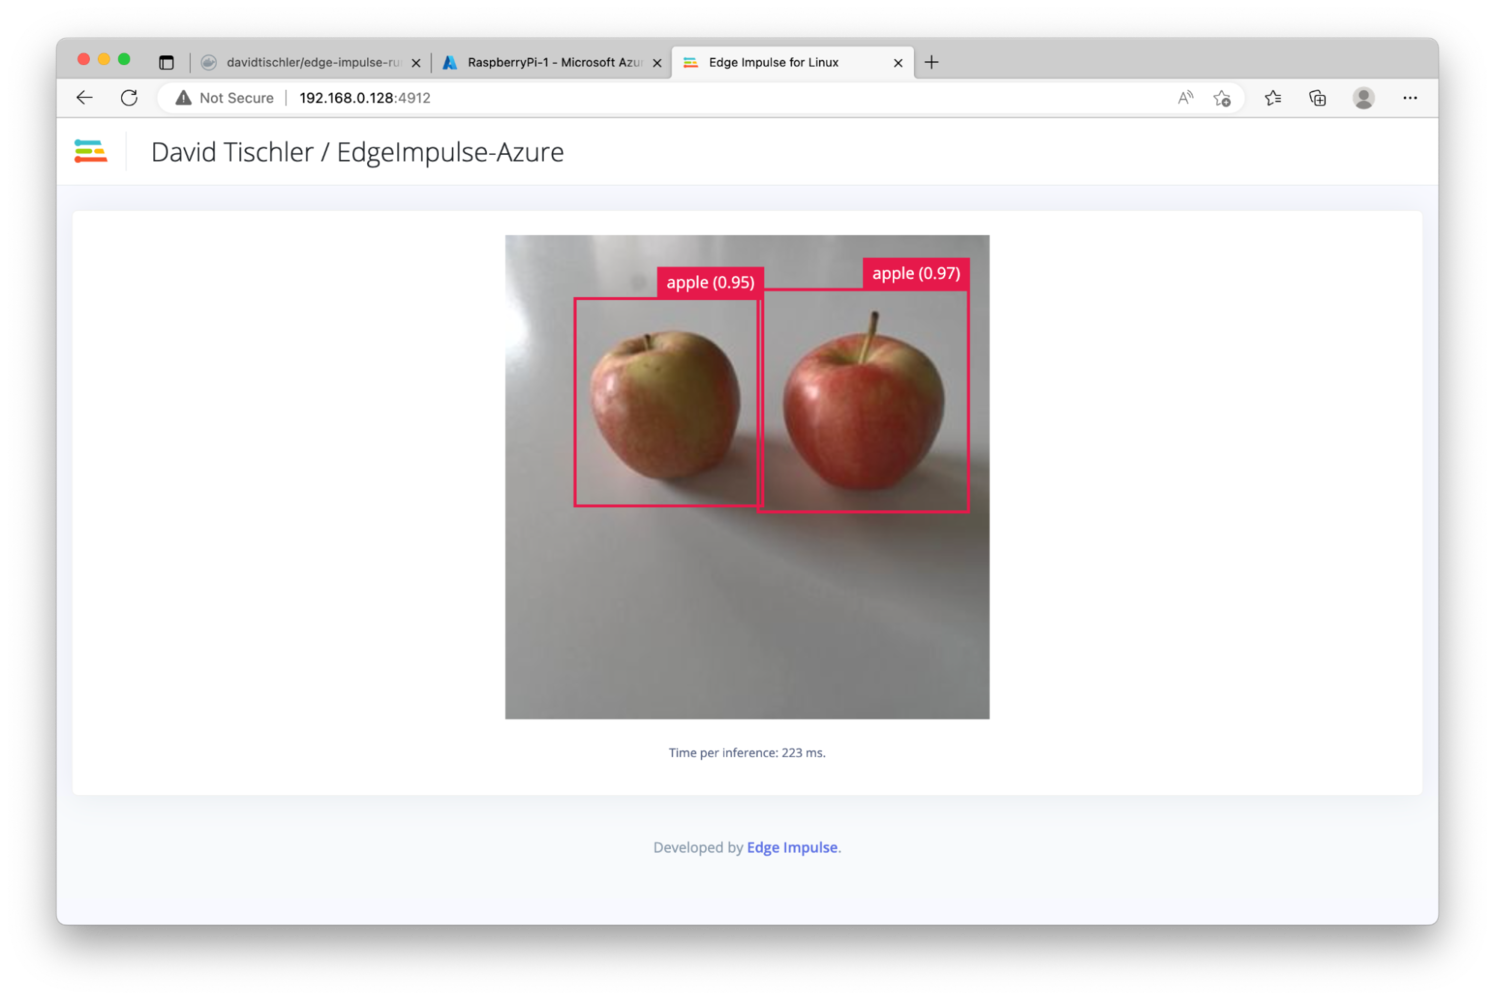
Step 2 - Model Deployment
At the moment, our Raspberry Pi is setup to collect data and upload results into the Edge Impulse Studio. So, we’ll need to make a change to the workload running on the Raspberry Pi, and instead direct the device to perform local inferencing using the Edge Impulse object detection model we just built in the previous step. The steps to make this change are quite similar to what we’ve already done: We will create a Docker container, upload that container to Docker Hub, and then provision it over-the-air using Azure Iot Edge. These steps will actually be very easy, thanks to the work we’ve already done. To begin, make a new folder on your development machine, and copy / paste the existingdockerfile and start.sh files we used in the last step, into the new folder. Open up the start.sh script, and make one small (but important!) change. On the last time, change edge-impulse-linux to edge-impulse-linux-runner, like so:
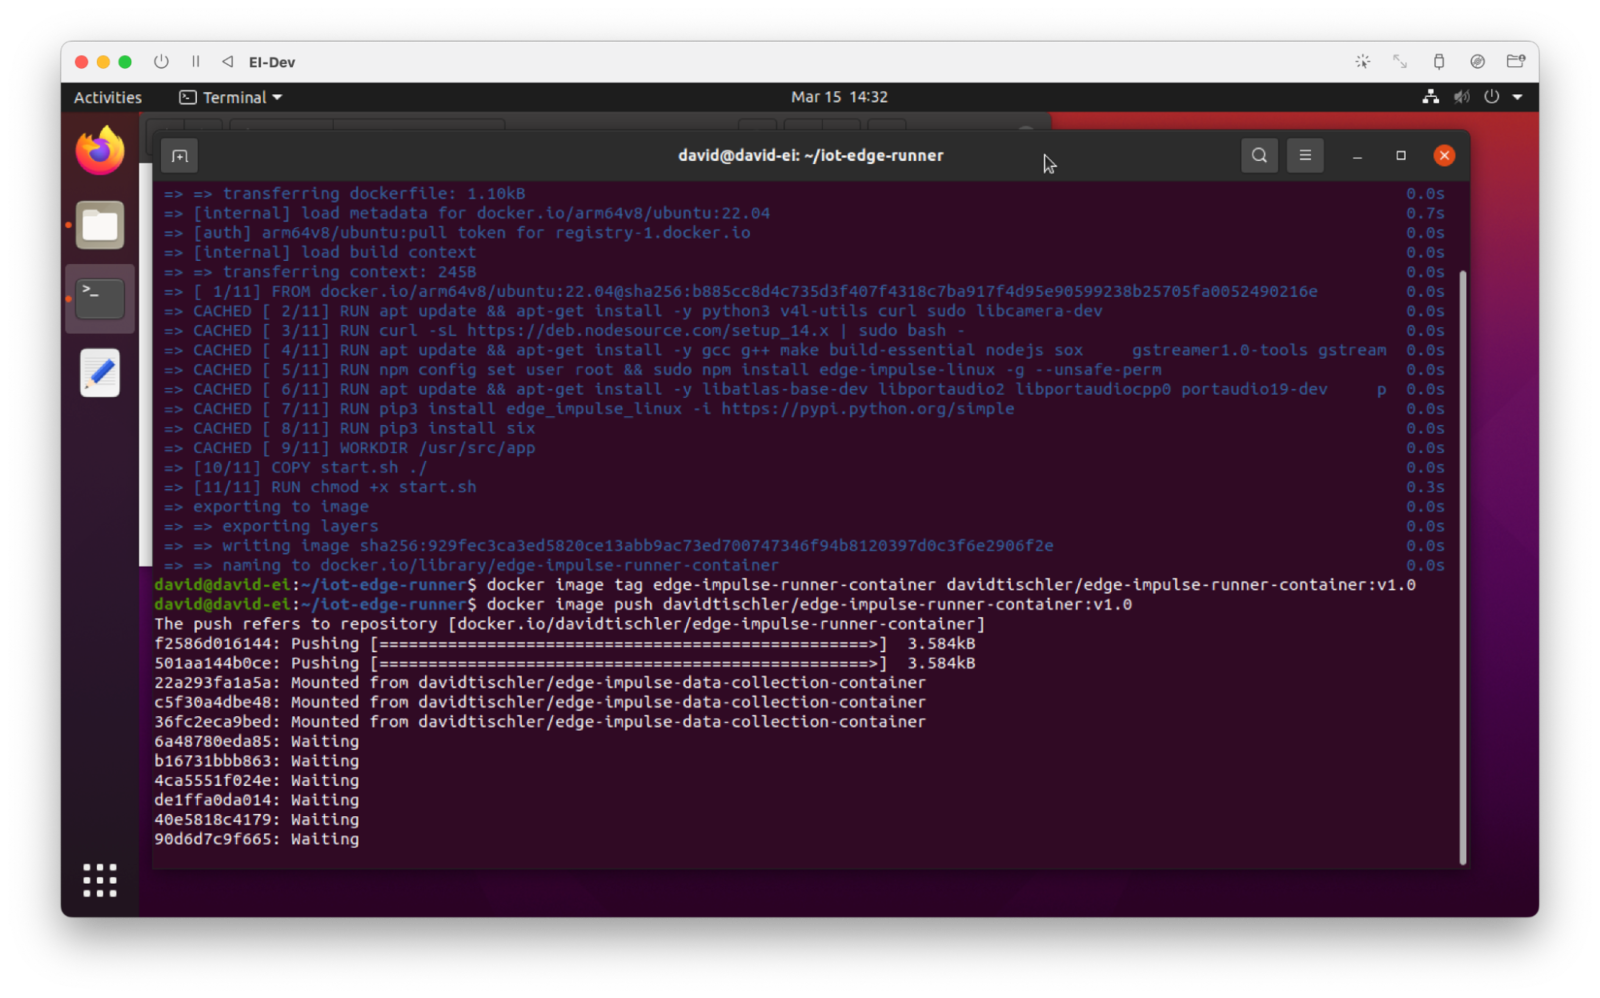
start.sh file here. When going to production and scaling enterprise applications, this is fine if you use a Private container repo, or even better is to replace this with a variable. But for demonstration purposes, we’ll go ahead and leave it in the script so you can see how it works. Next, we will do a similar Docker “build”, “image tag”, and “image push”, like we did previously. Specifically, from within this new directory with newly updated start.sh, run the following commands:
docker.io/YourUsernameThatYouCreated/edge-impulse-runner-container:v1.0. Then, click on “Container Create Options” and insert the same snippet we used earlier, which opens the port and sets the container to “Privileged” (again, recall, there are more secure ways of exposing only specific pieces of hardware, but for simplicity in this demo we’ll give it this access).


Step 3 - Model Retraining, and Redeployment
Introducing a banana exposes a flaw of our existing model. It thinks nearly anything placed in front of the camera, is an apple.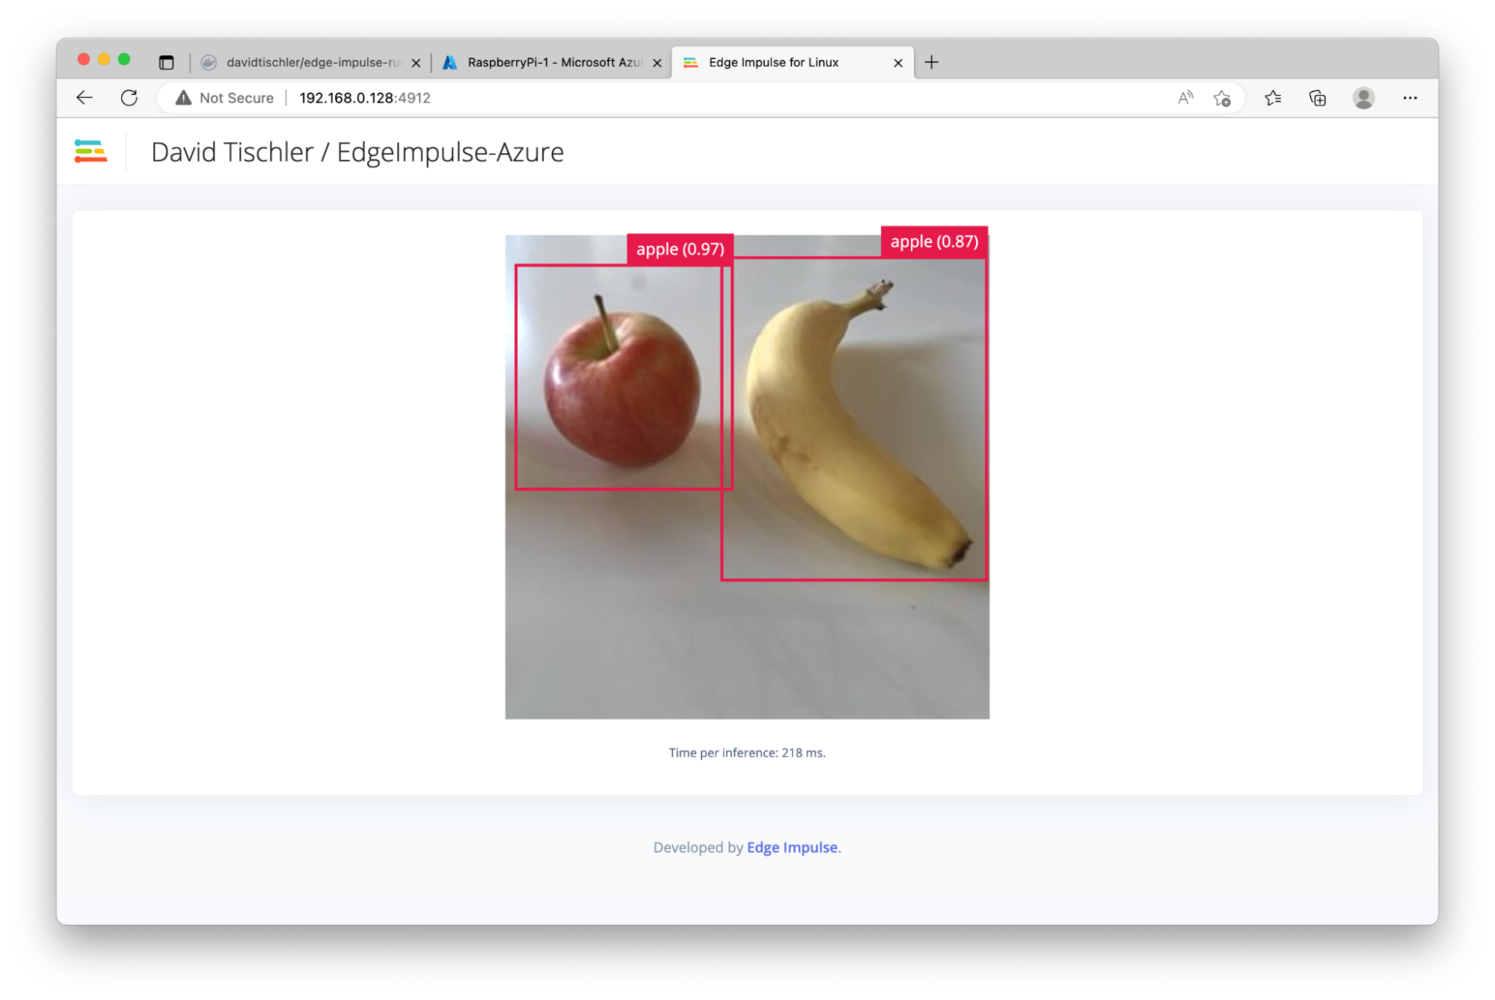
docker.io/YourUsernameThatYouCreated/edge-impulse-data-collection-container:v1.0. Also as usual, click on “Container Create Options” and of course enter the same JSON snippet to open ports and set Privileged:
docker.io/YourUsernameThatYouCreated/edge-impulse-runner-container:v1.0, click “Container Create Options”, and add the same JSON snippet we’ve been using: