Introduction
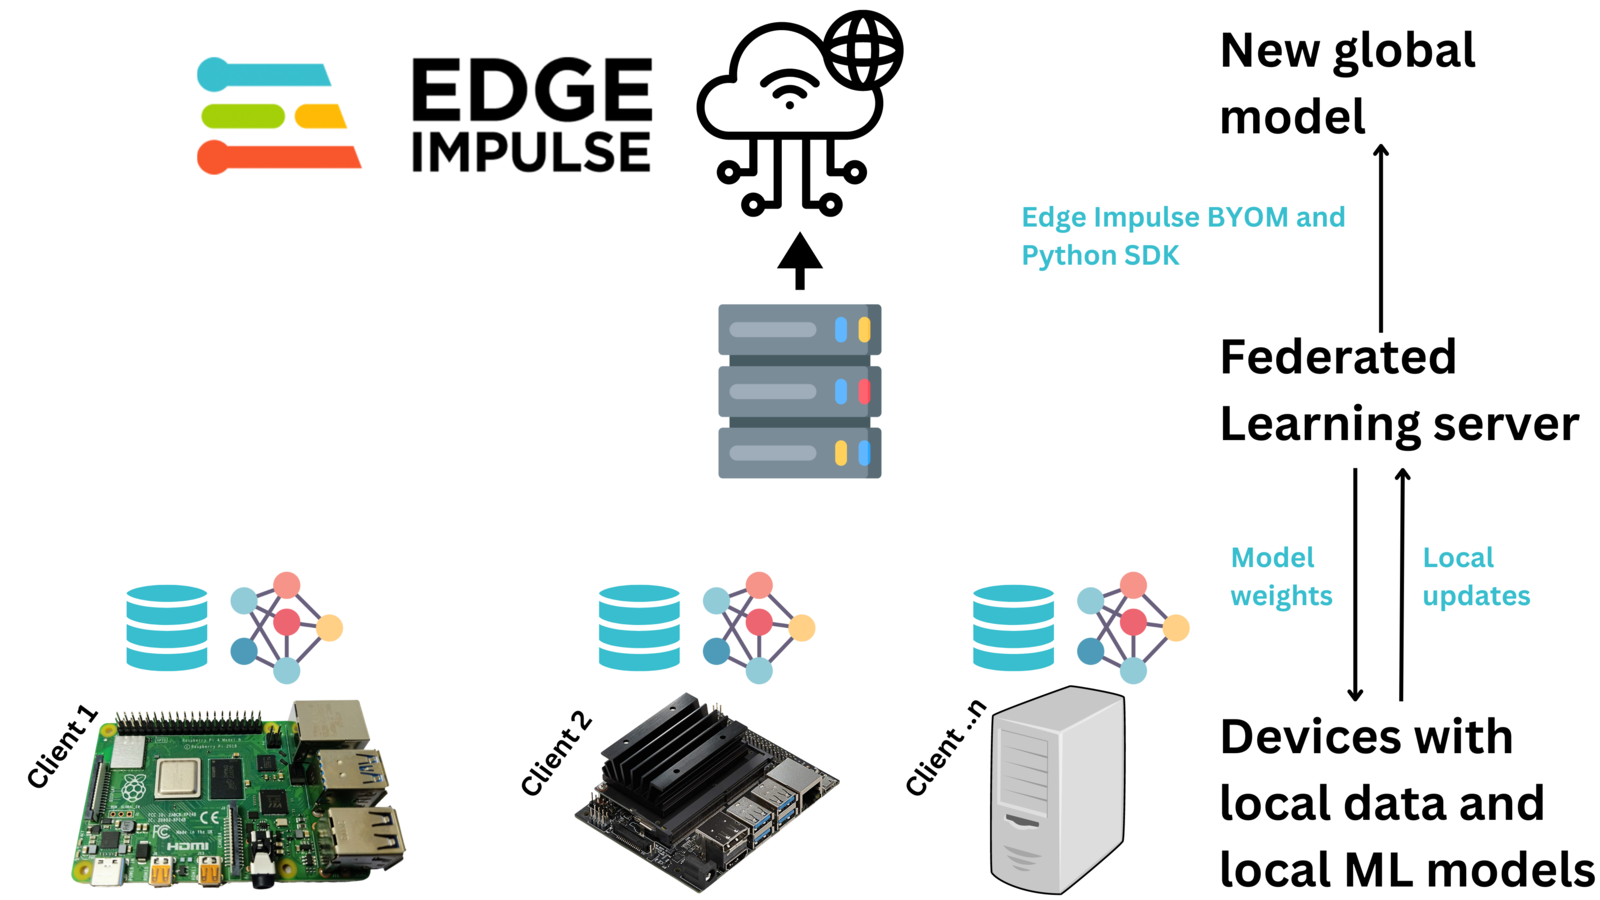
In Machine Learning (ML), we create a model that is trained to do a particular task like object detection, anomaly detection, or prediction. To develop a model, we normally collect data on one computer (possibly in the cloud) and then we train the model on the computer with the centralized data. However, in some situations, using a centralized machine learning model may not be effective or efficient. In some situations, the data may be sensitive, not diverse, or too large for the available internet bandwidth making it unable to be uploaded to the central computer. Federated Learning enables us to bring the model, to the data. For example, voice recognition and face recognition by Siri and Google Assistant are Federated Learning based solutions. In these cases, we do not want to send our voices or pictures to the cloud for training the model. Federated Learning works by training models locally on the devices using the data on the device. Once a model has been trained, a device uploads the new model updates to a server that aggregates model parameters from various devices and generates a global updated model. This global updated model can then be deployed to the devices for better Machine Learning task performance, and also continuous retraining of the model. The approach of federated learning normally follows four major processes:- A central server initializes a global model and its parameters are transferred to clients in each iteration
- Clients update their local model parameters by locally training a model
- The server gets model parameters from clients, aggregates them, and updates the global parameters
- The above steps are repeated until local and global parameters converge
- The supported Machine Learning frameworks
- Aggregation Algorithms - the most widely supported Federated Learning algorithm is Federated averaging (FedAvg). However, the specific algorithms offered by each framework may vary.
- The supported privacy methods, such as encryption
- The supported devices and operating systems
- Scalability - the complexity of adding your own model or aggregation algorithm
Demonstration
To demonstrate Federated Learning, I simulated a situation where we want to identify if workers at a construction site are wearing safety equipment (hardhats). At each construction site, we have a surveillance camera that is monitoring the workers. The camera device will be taking an image of a person and determining if it sees a head or a hardhat.
Head hardhat image
- how can we overcome sending sensitive photos of workers to the cloud?
- how can we overcome the need to send a lot of image data to a central server for training a model?
- how to acquire diverse data?
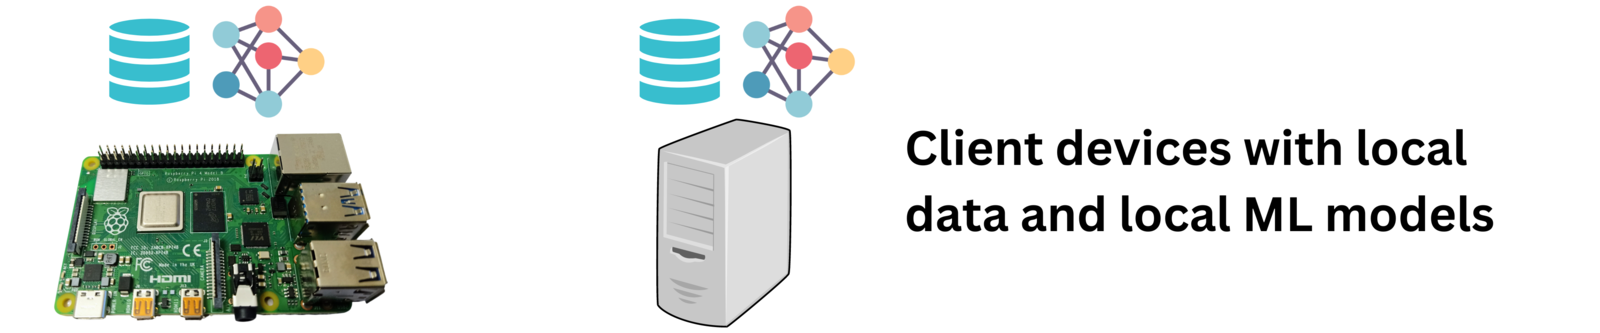
Client devices
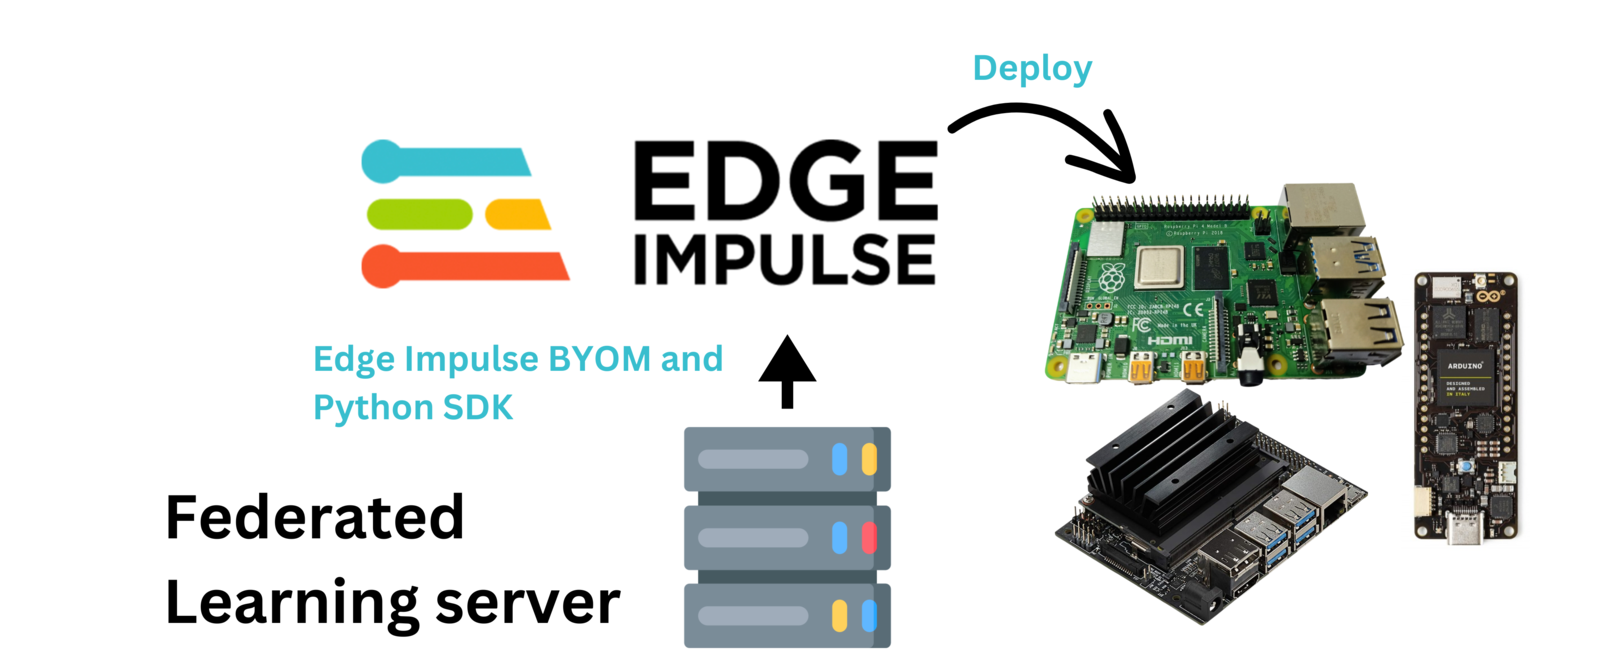
FL server to Edge Impulse
Components and Hardware Configuration
Software components:- Edge Impulse Studio account
- Python
- Edge Impulse for Linux
- Personal Computer with Windows or Linux based Operating System
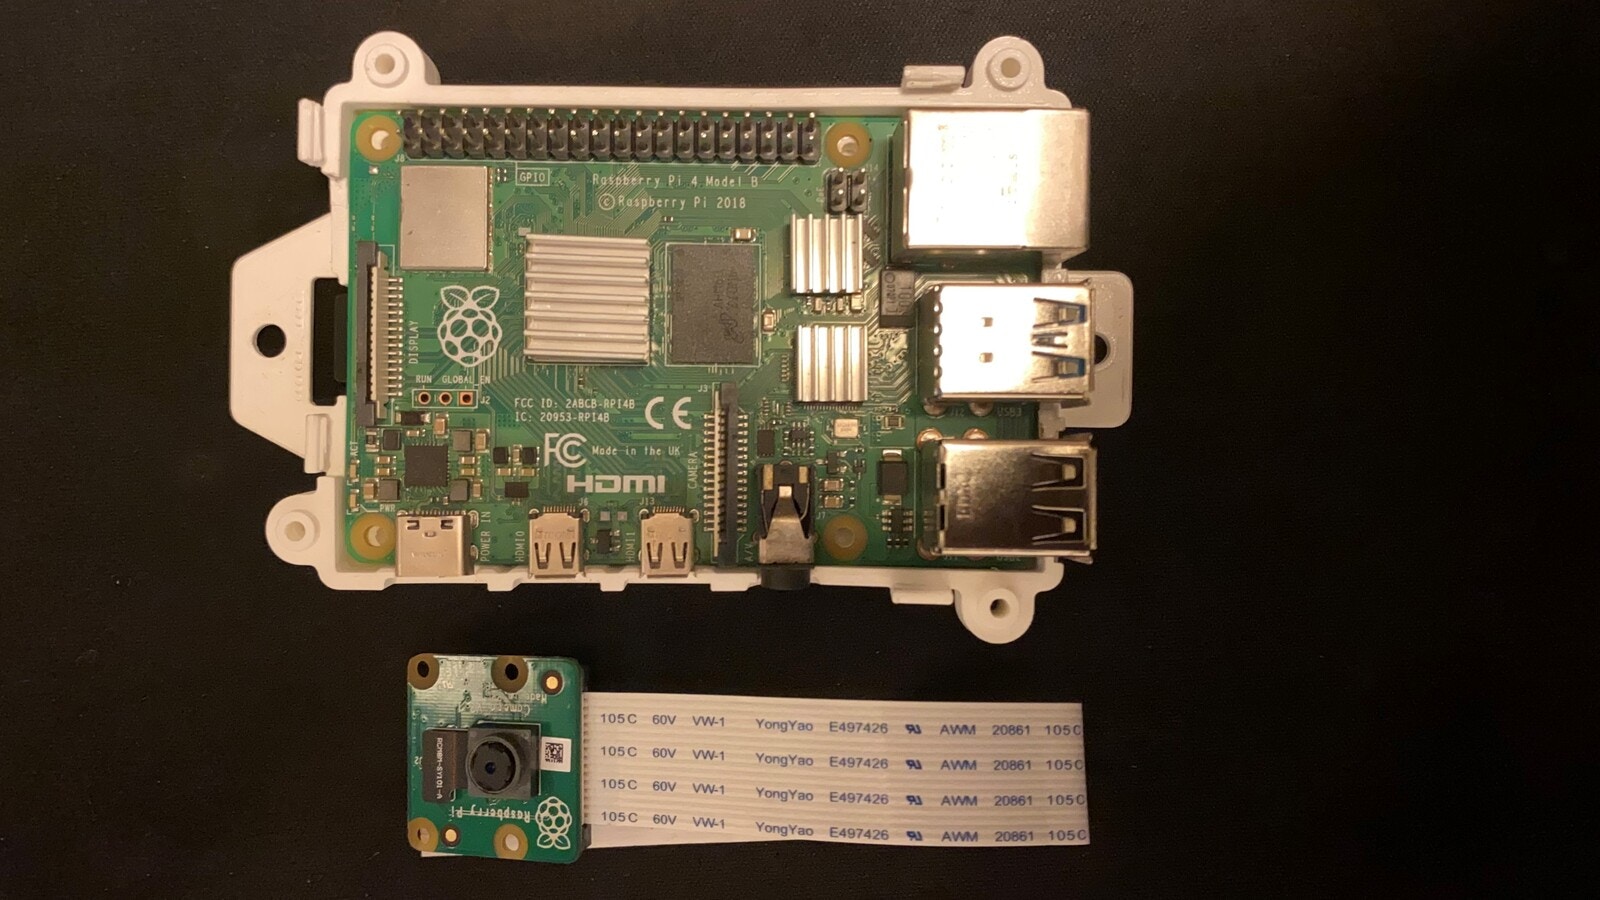
- Raspberry Pi 4 (recommended to use the 4GB RAM version) with Raspberry Pi OS
- Official Raspberry Pi 4 power adapter (recommended)
- Raspberry Pi V2 camera module
Data Collection Process
I first started by sourcing images with people’s heads and people wearing safety hats. I obtained my dataset from this Public Edge Impulse project. The project trains a MobileNetV2 SSD FPN-Lite 320x320 object detection model to identify heads and safety hats on an image. This project is a good demonstration of the classic Machine Learning approach where we train a centralized model with all the data on one computer. To get a better understanding of the project, please feel free to read the project’s write-up here. The public project has a total of 583 images of people’s heads and people wearing safety hats. I then split the images according to this:- two folders with training and test images for two client devices
- one folder with test images for the server model testing during the Federated Learning
- one folder with test images that we can give to the final global model after the Federated Learning
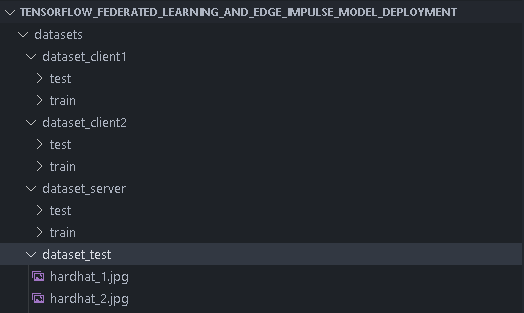
Dataset folders
Training the Model, the Federated Way
For the Federated Learning pipeline, I created this GitHub Repository that has the dataset and Python scripts for the server and client devices. To follow along as I describe how to run the Federated Learning system, start by cloning the repository on the device that will run as the server. For the client devices, we only need to copy to them thedatasets folder, requirements_client.txt and client.py. You _could_clone the repository on the client devices, but this will load unnecessary files on them.
First, we need computers for the server and clients. You can also use the same computer as both a server and client, provided the computer has enough resources to do that. The minimum number of required clients is two for the Federated Learning to start. This minimum number can be modified in the server.py code, but remember to also modify the client.py code to load datasets for the additional clients.
I decided to use my personal computer as the server and also as one client device. For the other client device, I decided to use a Raspberry Pi 4 with 4GB of RAM.
A Raspberry Pi 4
In my test with Raspberry Pi 3’s running as the client devices, they managed to train a model but failed at the model evaluation process. This can be related to the fact that the Raspberry Pi 3 is more resource constrained than the Raspberry Pi 4, with a less powerful CPU and less RAM. Using the top command on the Raspberry Pi 3’s showed that the CPU and RAM usage were at max capacity during the training process. When it reached the evaluation process, the RAM usage decreased to around 80%, CPU usage dropped to around 40%, but then the Federated Learning framework disconnected the Raspberry Pi 3 client devices. The Raspberry Pi 3’s also showed 92% CPU usage and 45% RAM usage when they were connecting as the client devices.
Next, we need to install dependencies on the devices. The difference between the server and client dependencies is that the server computer uses the Edge Impulse Python SDK for profiling and deploying the model. We can install dependencies on the server computer by running the command below on a terminal or a Command Prompt (CMD):
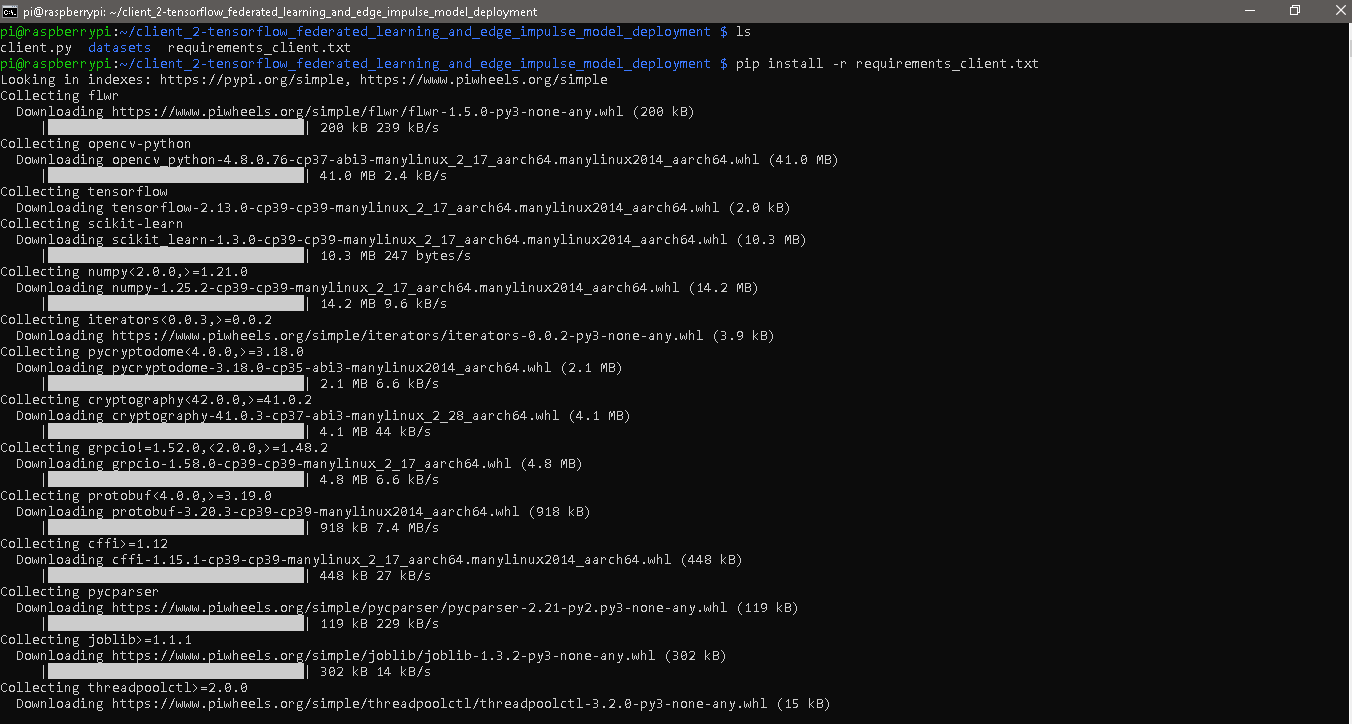
Installing dependencies
server_address value in both server.py and client.py with the IP address of the device running as the server. If you get an error message from server.py that says _ERROR_MESSAGE_PORT_BINDING_FAILED, change the server’s port to another one that is available.

Server_address variable
ei.API_KEY variable in server.py.
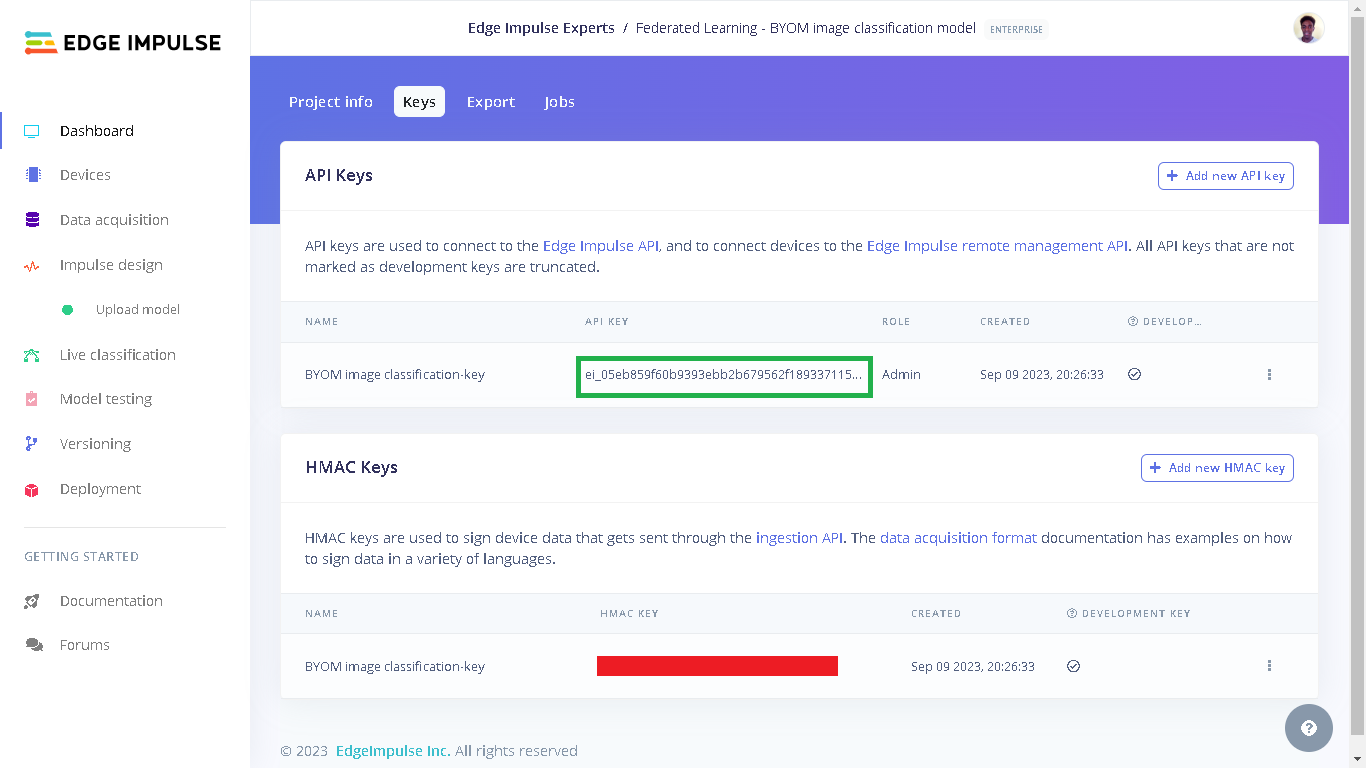
Edge Impulse API keys
python server.py. The server will load the test images, initialize the global model parameters, evaluate the initial model’s parameters, and then wait until at least two clients join before starting the Federated Learning.
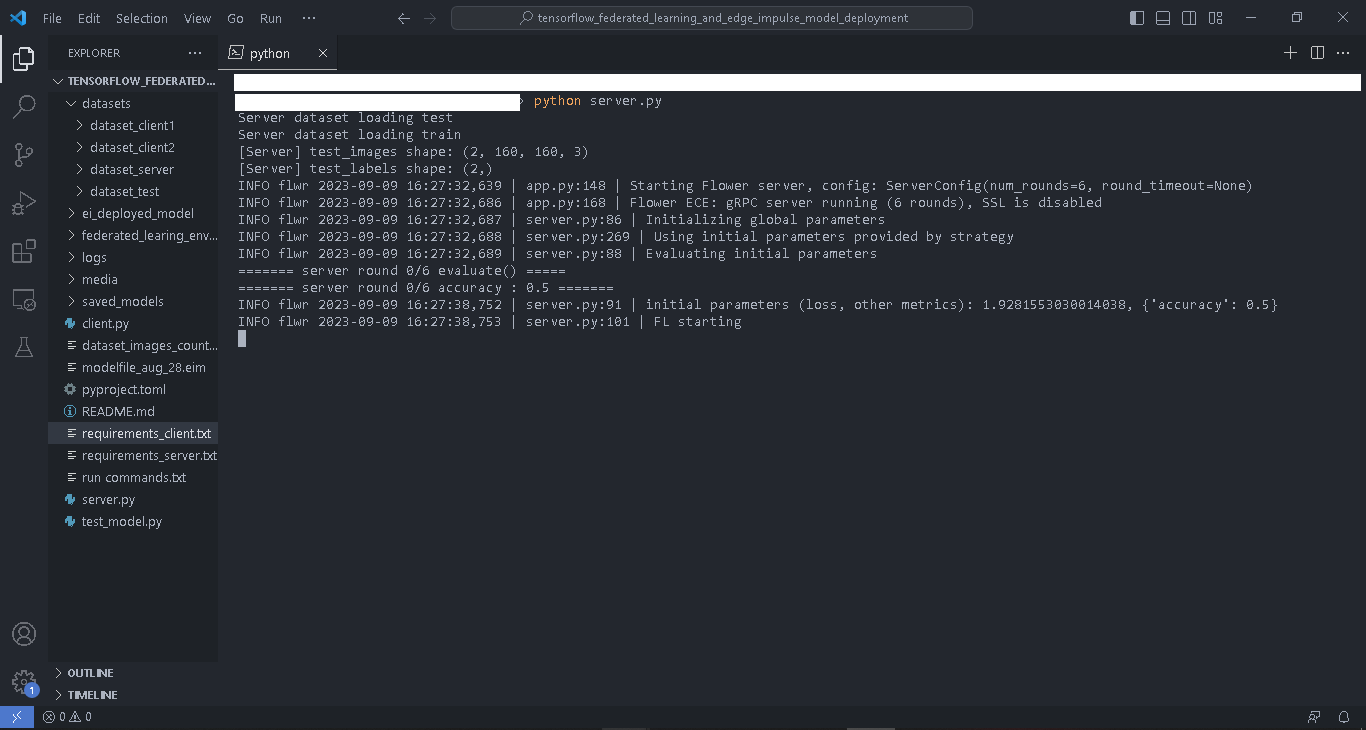
Running server.py
python client.py --client_number=1 in a Command Prompt (CMD). When running the client scripts we use the argument client_number to enable the script to load different datasets for each client using the two folders with the client’s dataset.
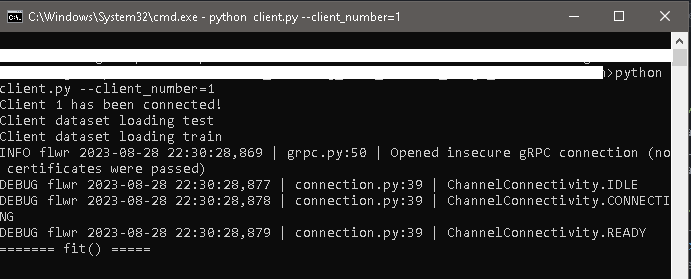
Running client 1
python client.py --client_number=2.
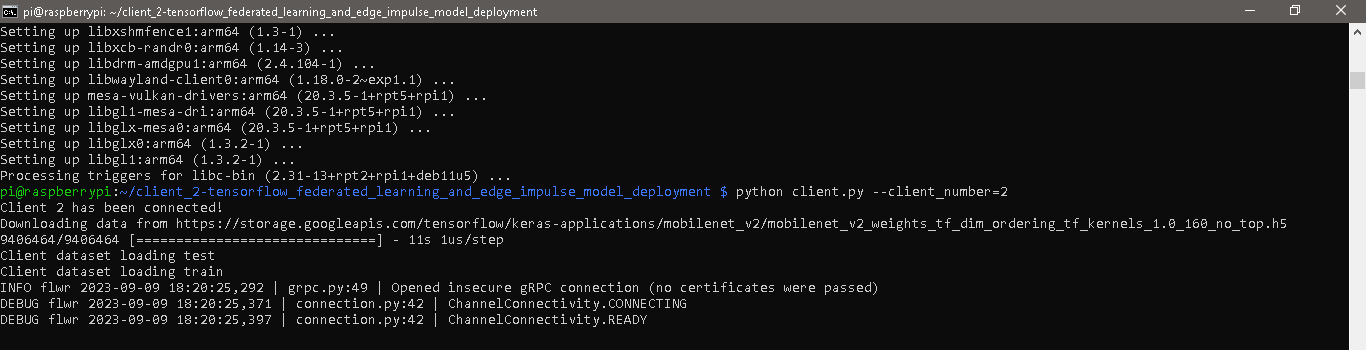
Running client 2
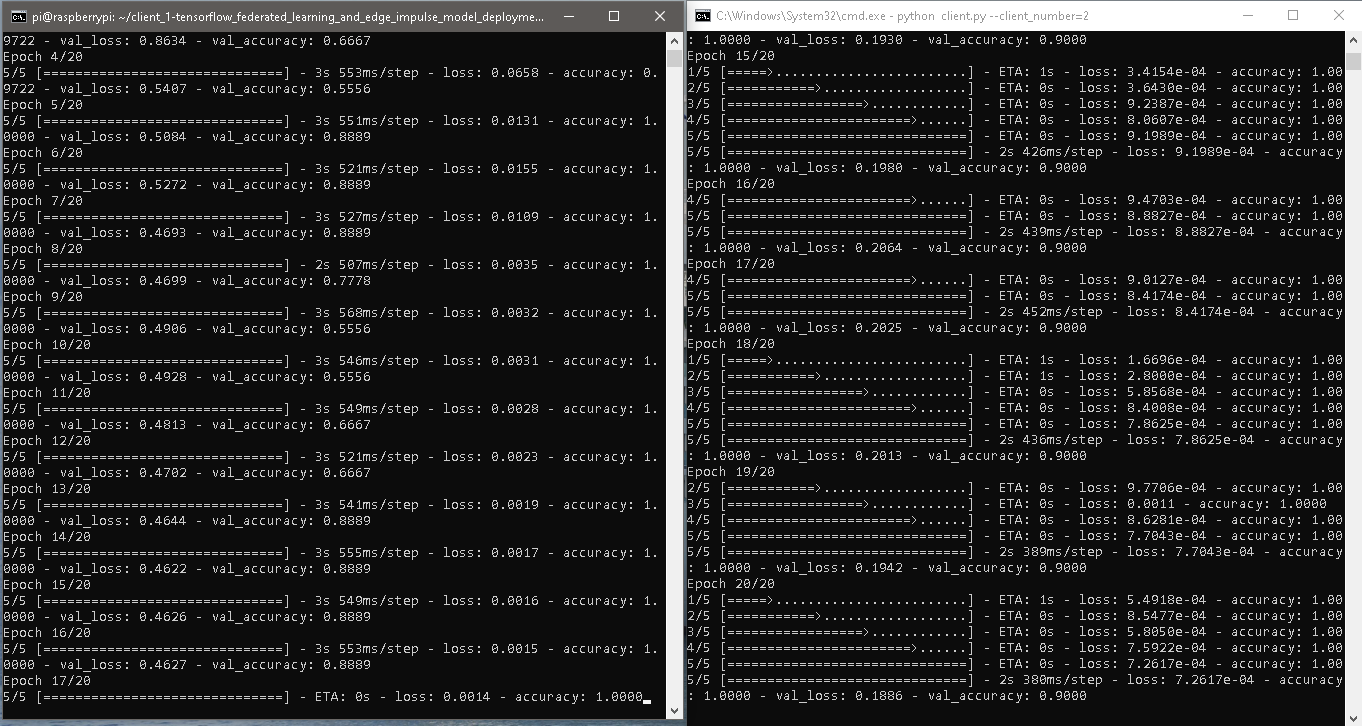
Clients logs
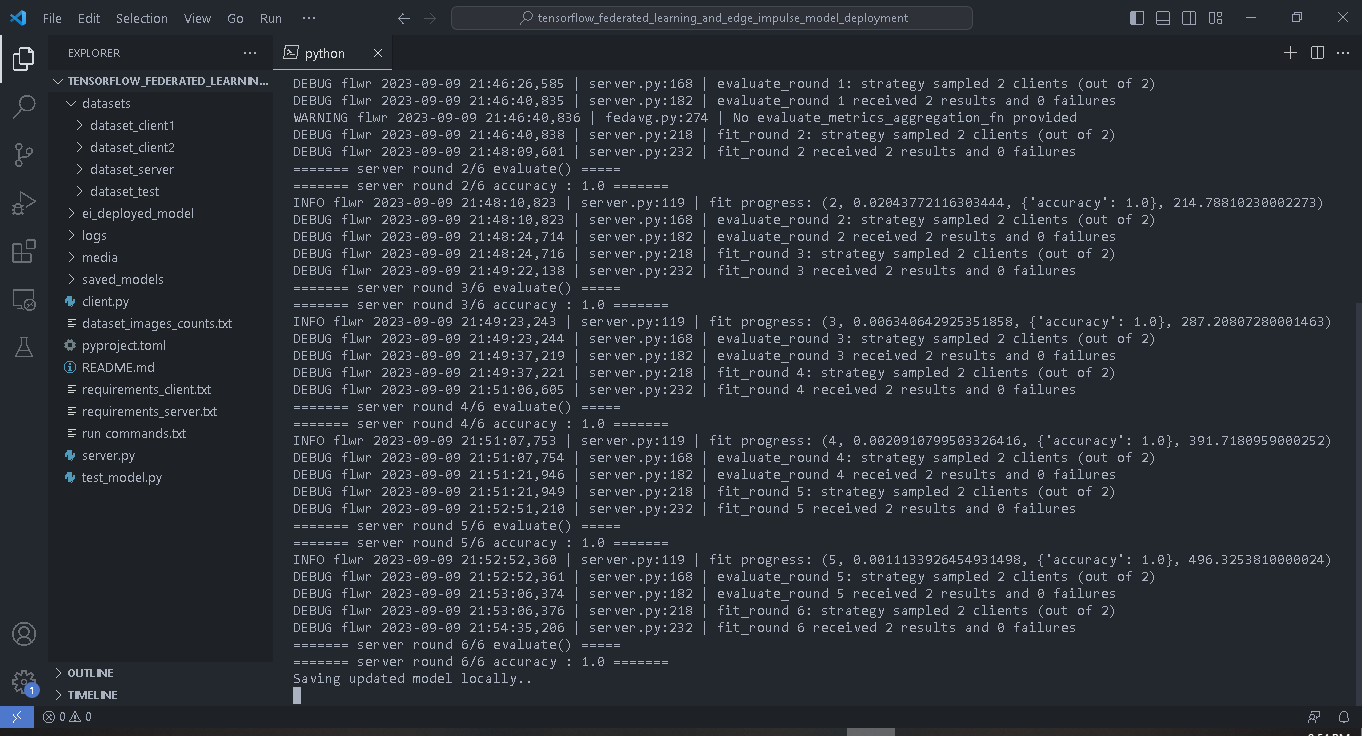
Server FL logs

Server testing model
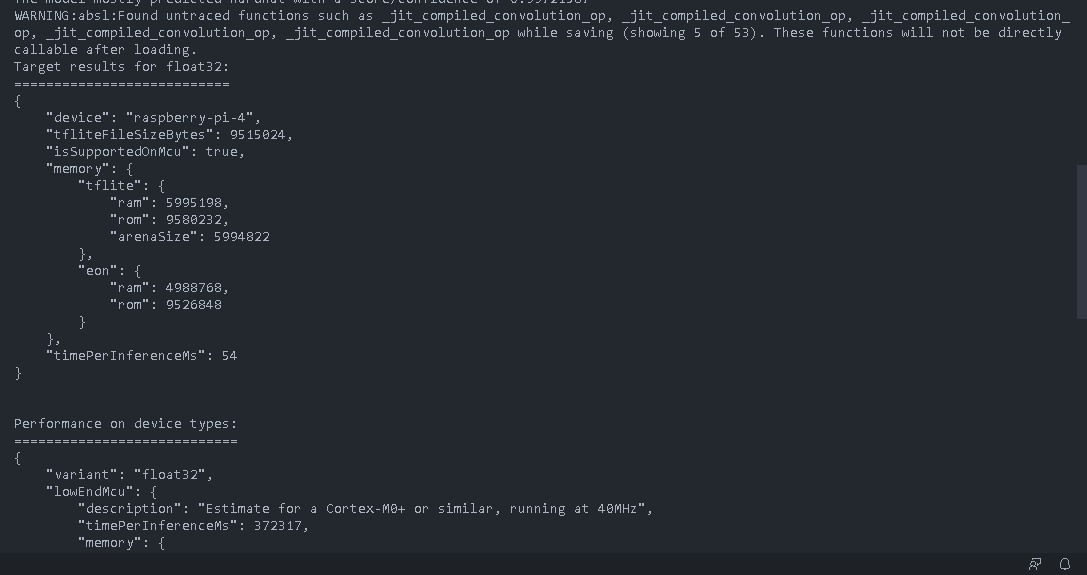
Edge Impulse profiling
Testing the Global Model
When we go to the Edge Impulse project, we will see “Upload model” under “Impulse design”. This is because our final global model was uploaded to the project during profiling.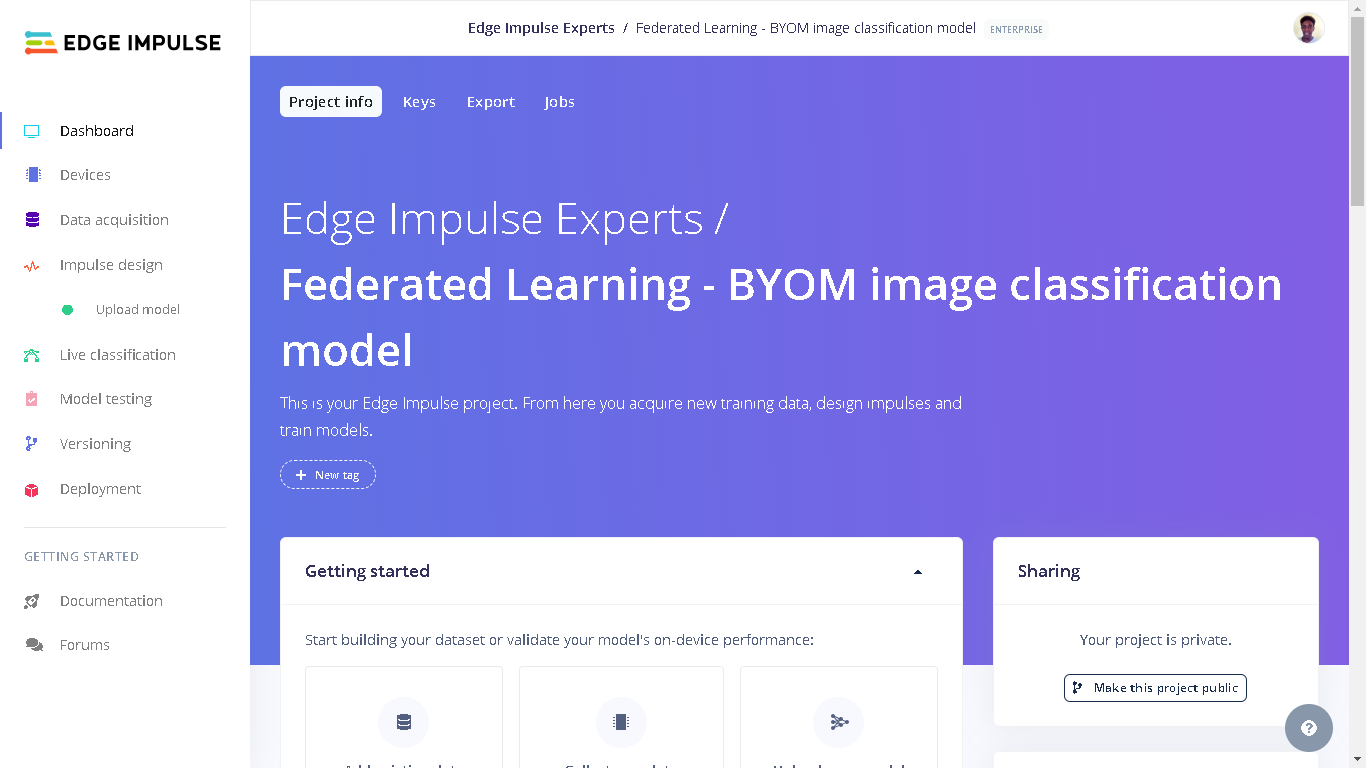
Edge Impulse Studio Dashboard
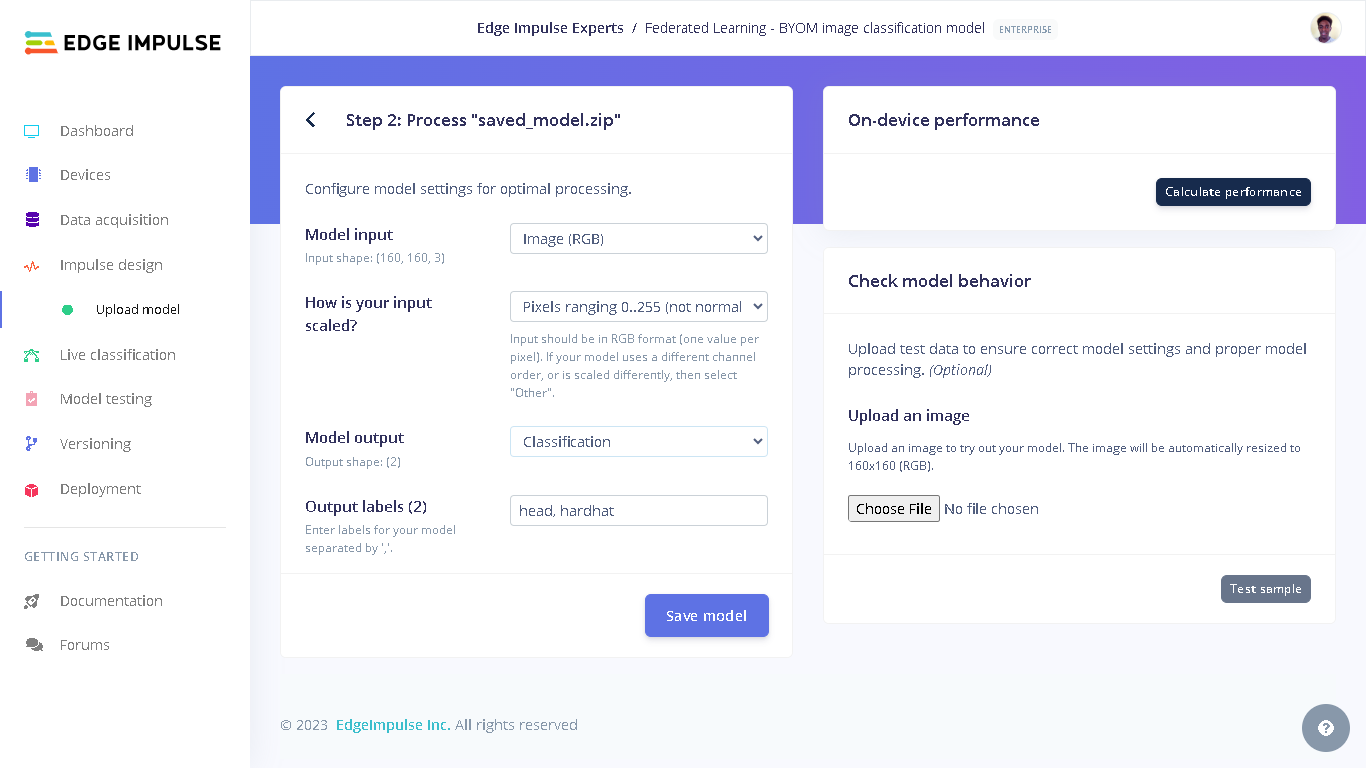
Upload model Step 2
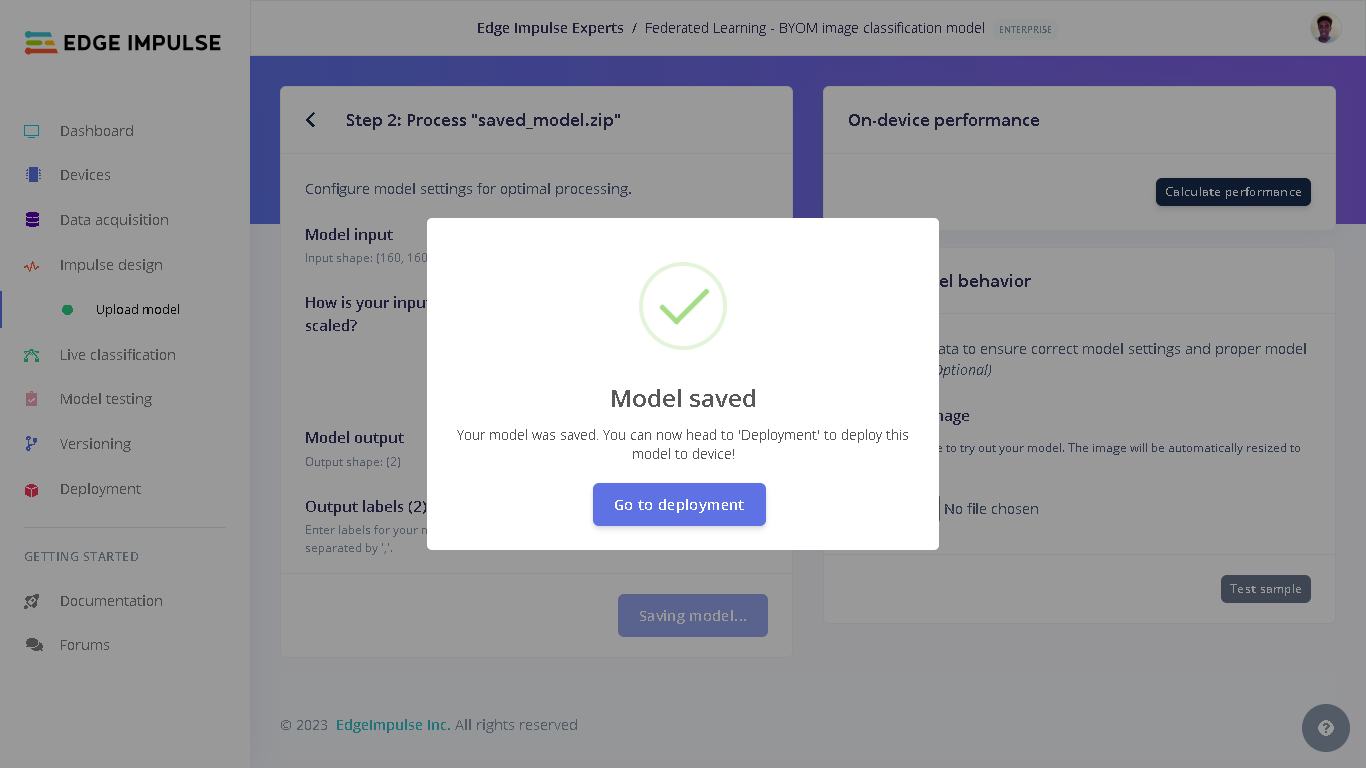
Save model successful
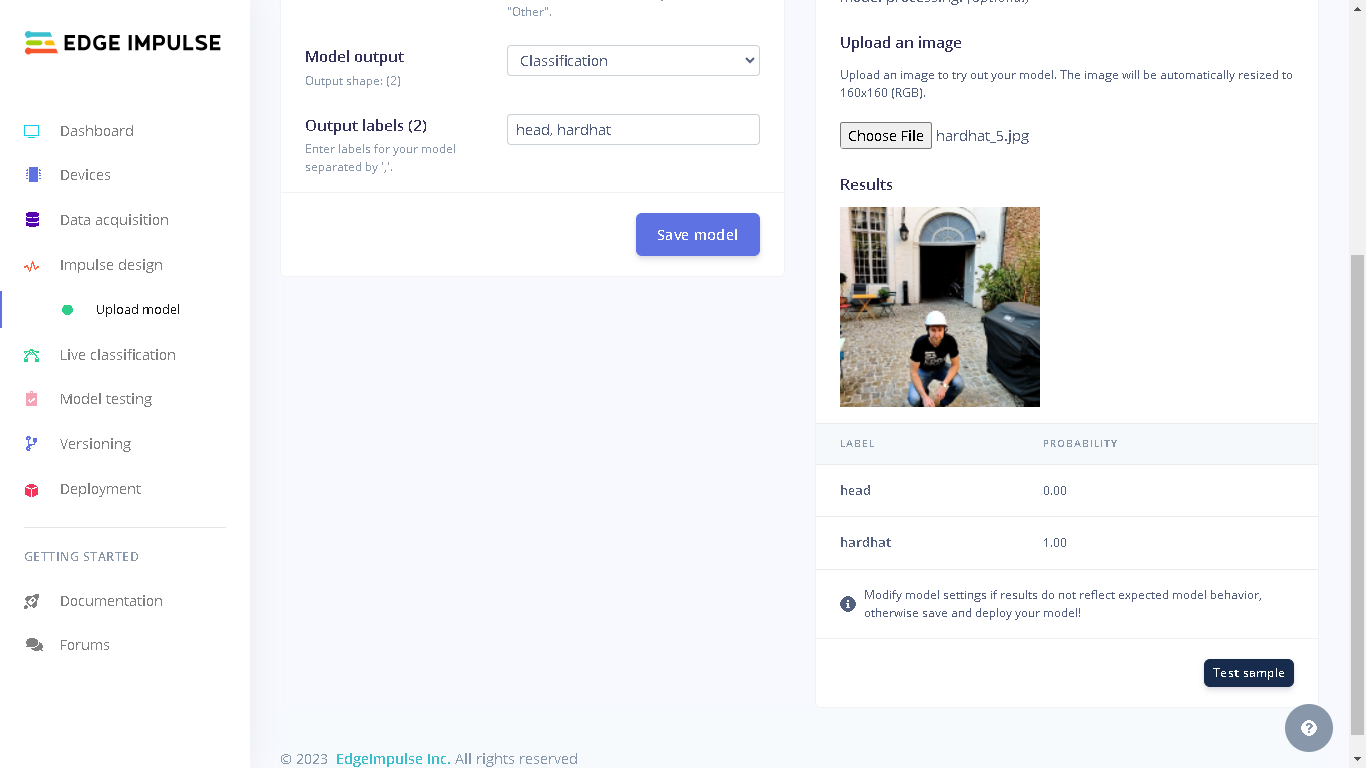
Model testing
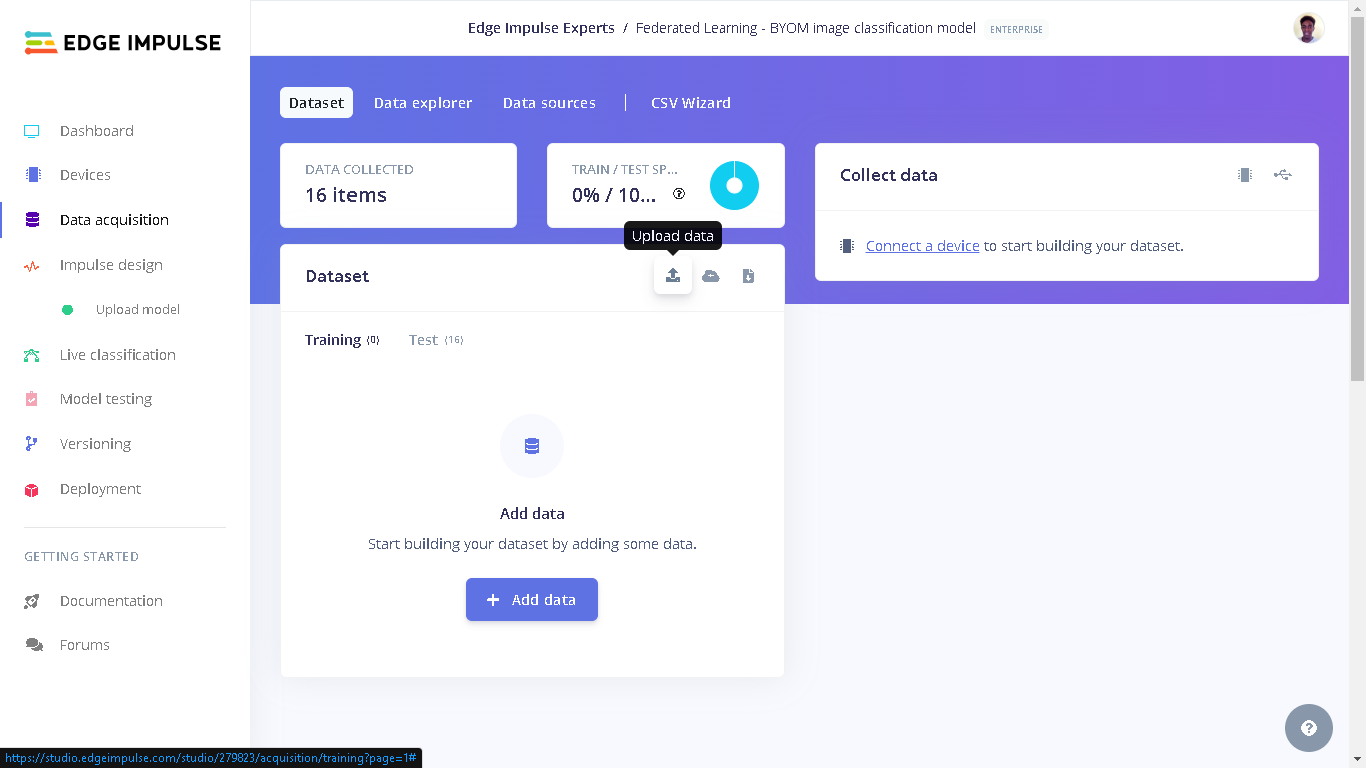
Upload data
dataset_test directory on your computer from where you cloned the GitHub repository to. Next, select “Testing” for the upload category since we have already trained a model and therefore there is no need to have training data. Next, for Label we select “Leave data unlabeled”. Finally, click “Upload data” and the images will be uploaded to the project. The uploaded images can be seen by going to “Test” in Data acquisition.
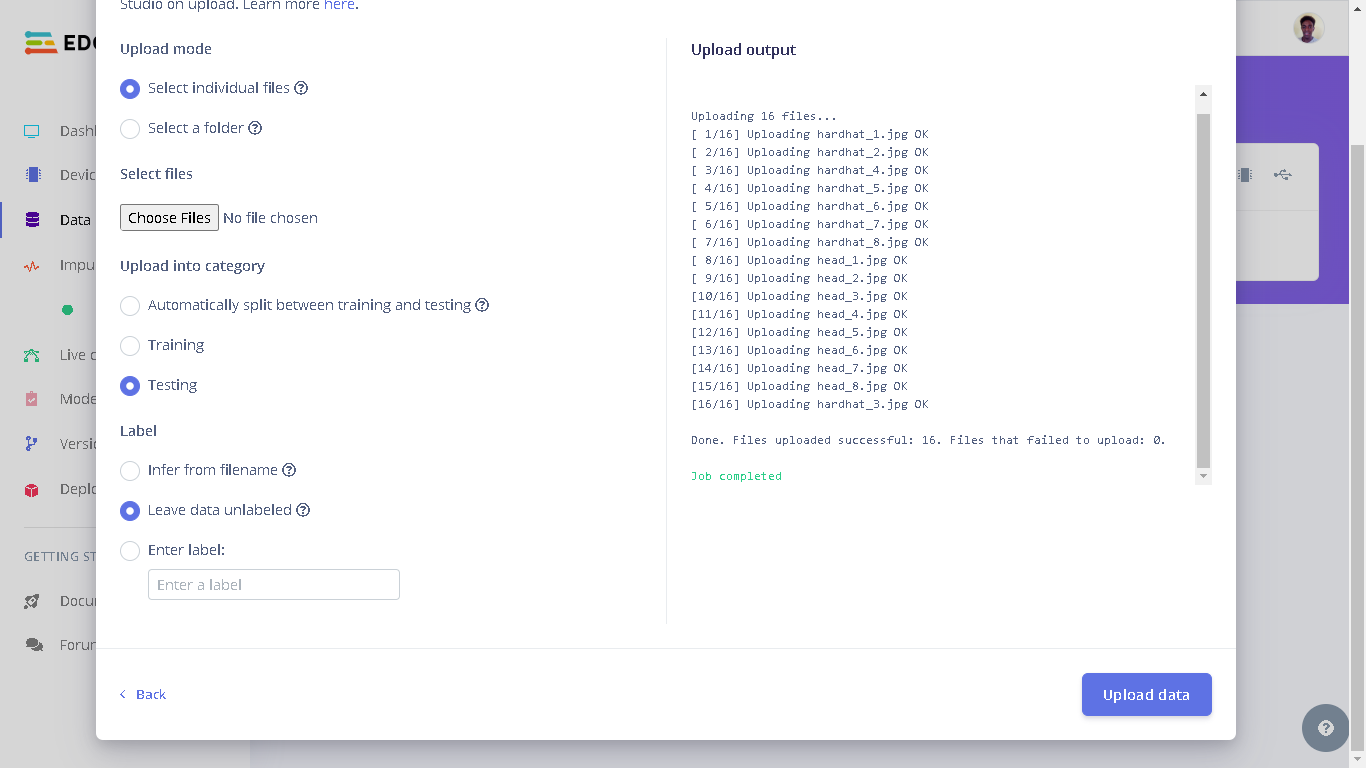
Uploading images
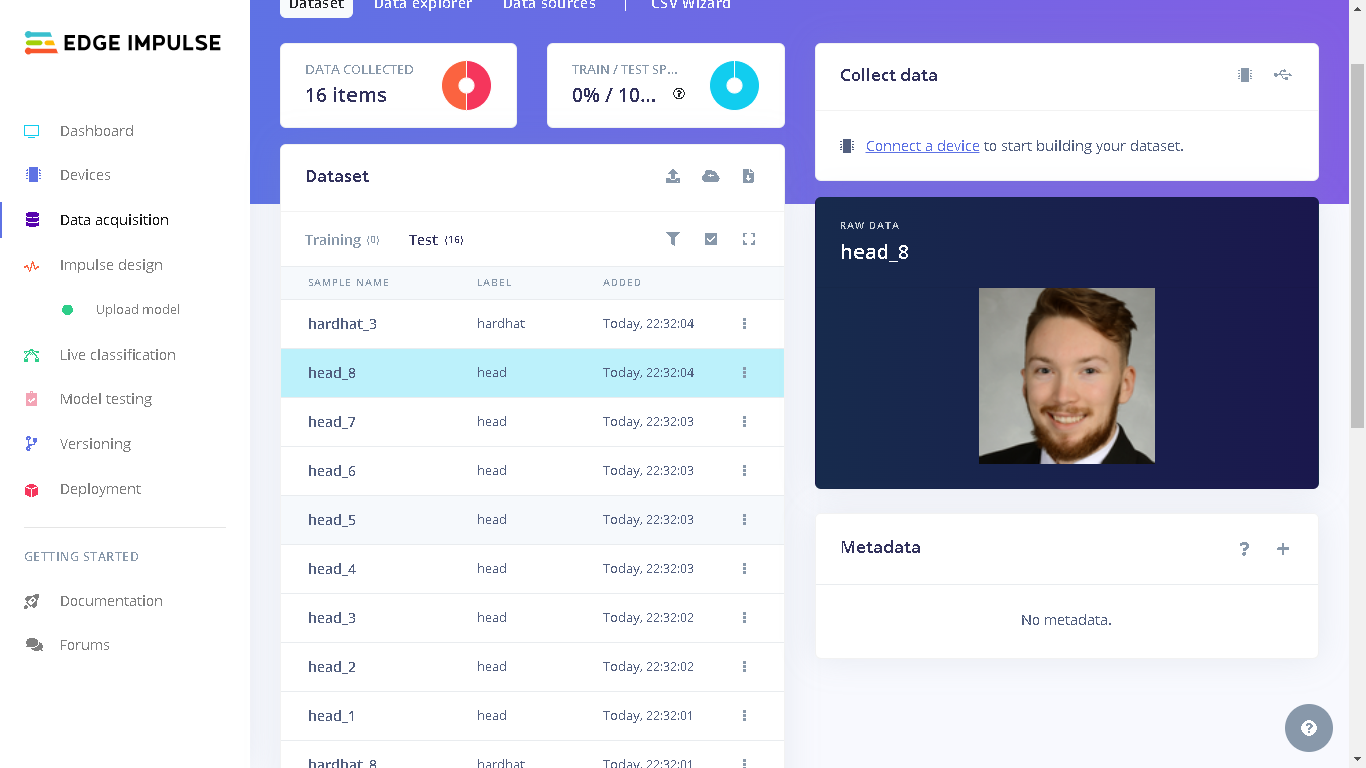
Test images

Kebab menu
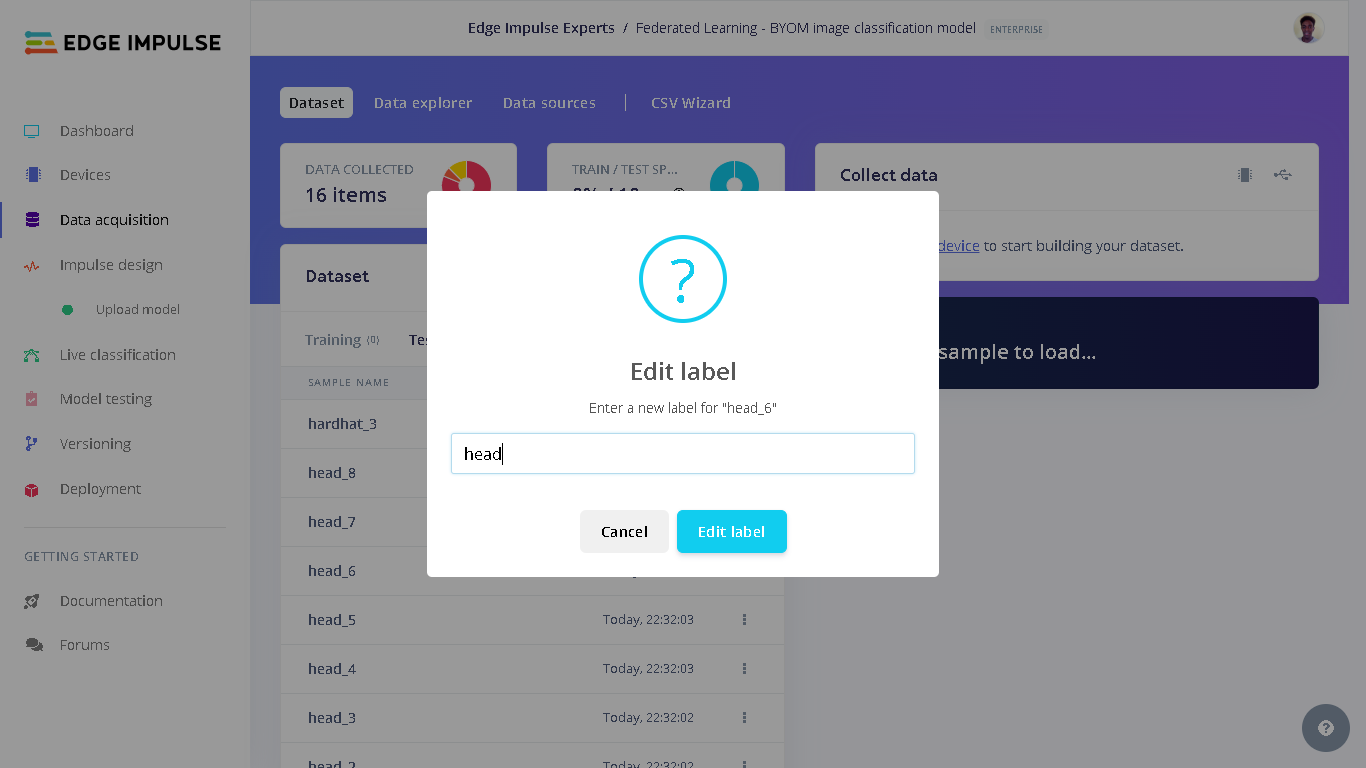
Labeling images
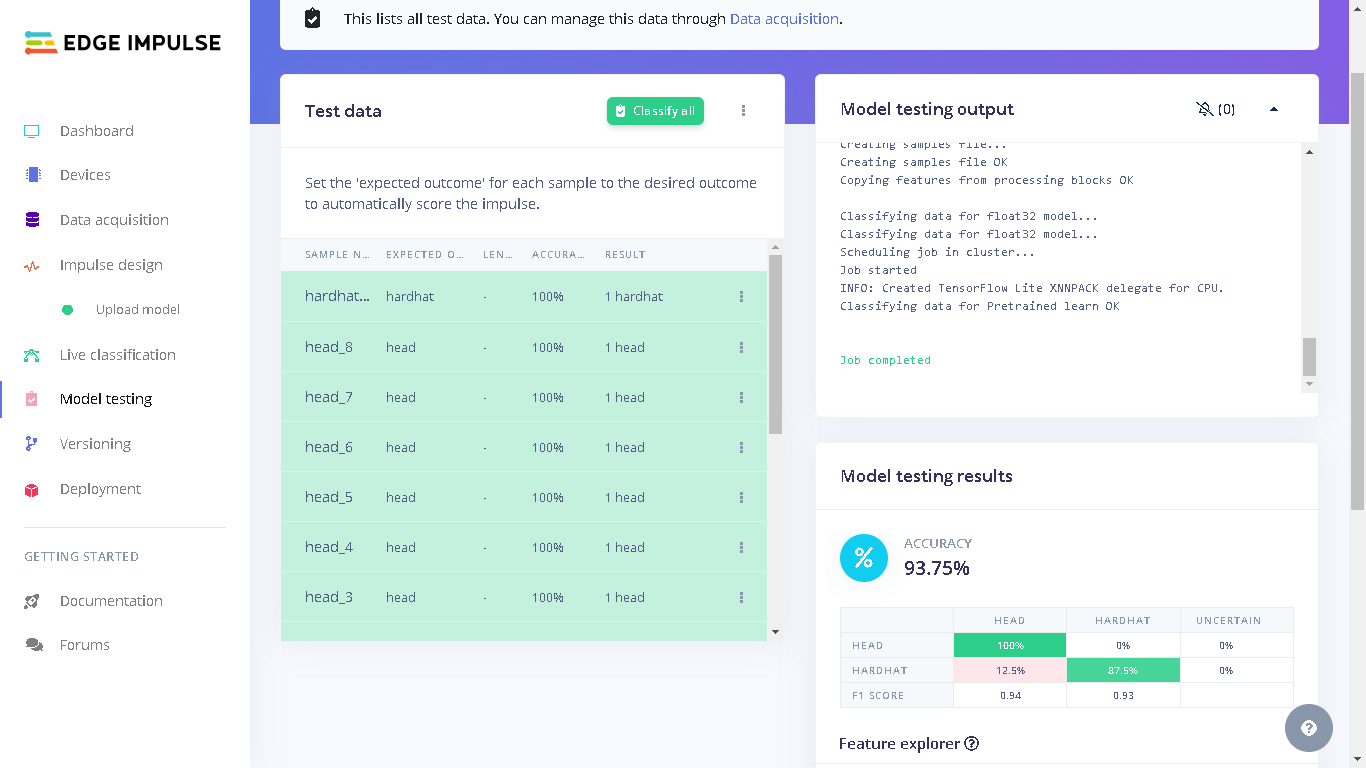
Model testing performance
Result
Finally, after training a decentralized model and uploading it to Edge Impulse, one incredible feature that we can benefit from is a seamless deployment of the model on hardware ranging from MCUs, CPUs, and custom AI accelerators. In this case, we can deploy our model to the Raspberry Pi as an .eim executable that contains the signal processing and ML code, compiled with optimizations for a processor or GPU (e.g. NEON instructions on ARM cores) plus a very simple IPC layer (over a Unix socket). First, we need to attach the Raspberry Pi camera to the board.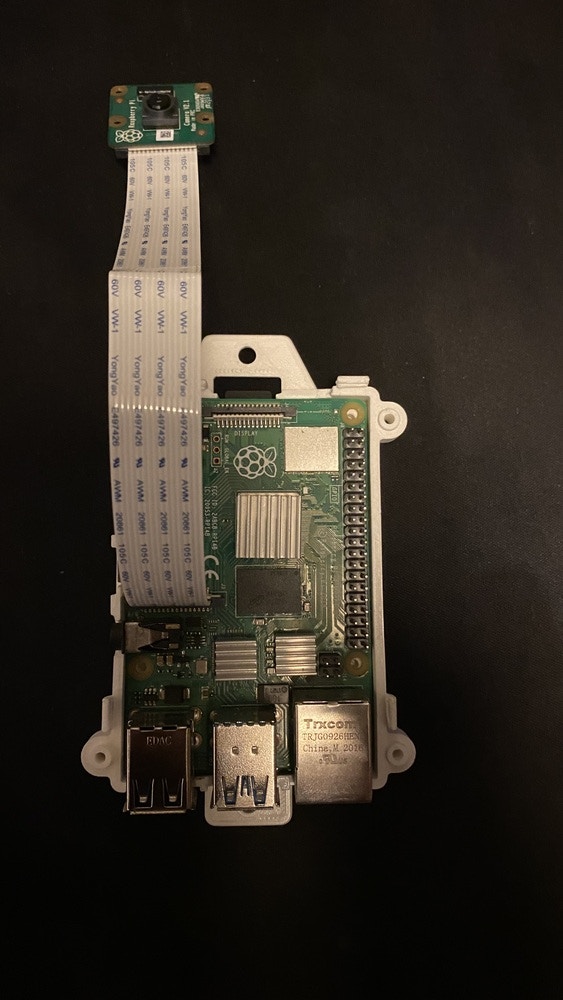
Raspberry Pi and camera
sudo raspi-config and use the cursor keys to select and open Interfacing Options, then select Camera, and follow the prompt to enable the camera. Finally, reboot the Raspberry Pi by running the command sudo reboot.
Once rebooted, we can download the final global model from the Edge Impulse project by running the command below. You will be prompted to input your username and password for your Edge Impulse account, followed by a prompt to select the Edge Impulse project.
modelfile.
We can go to the provided URL (Raspberry Pi’s IP address at port 4912) and we will see the feed being captured by the camera as well as the model’s predictions. At this point I used a 3D printed support to hold the Raspberry Pi camera upright and then projected the test images to the camera.
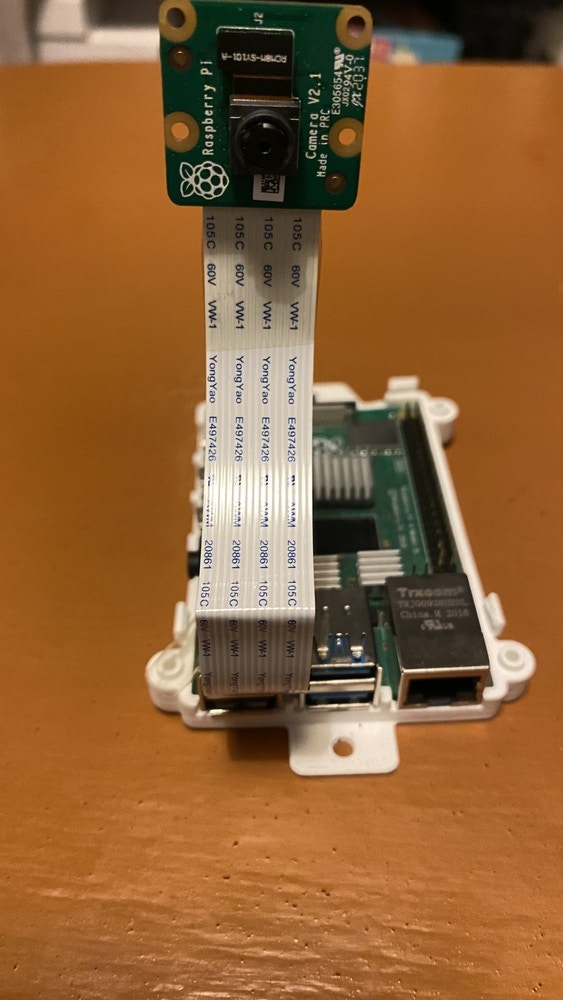
Raspberry Pi with camera
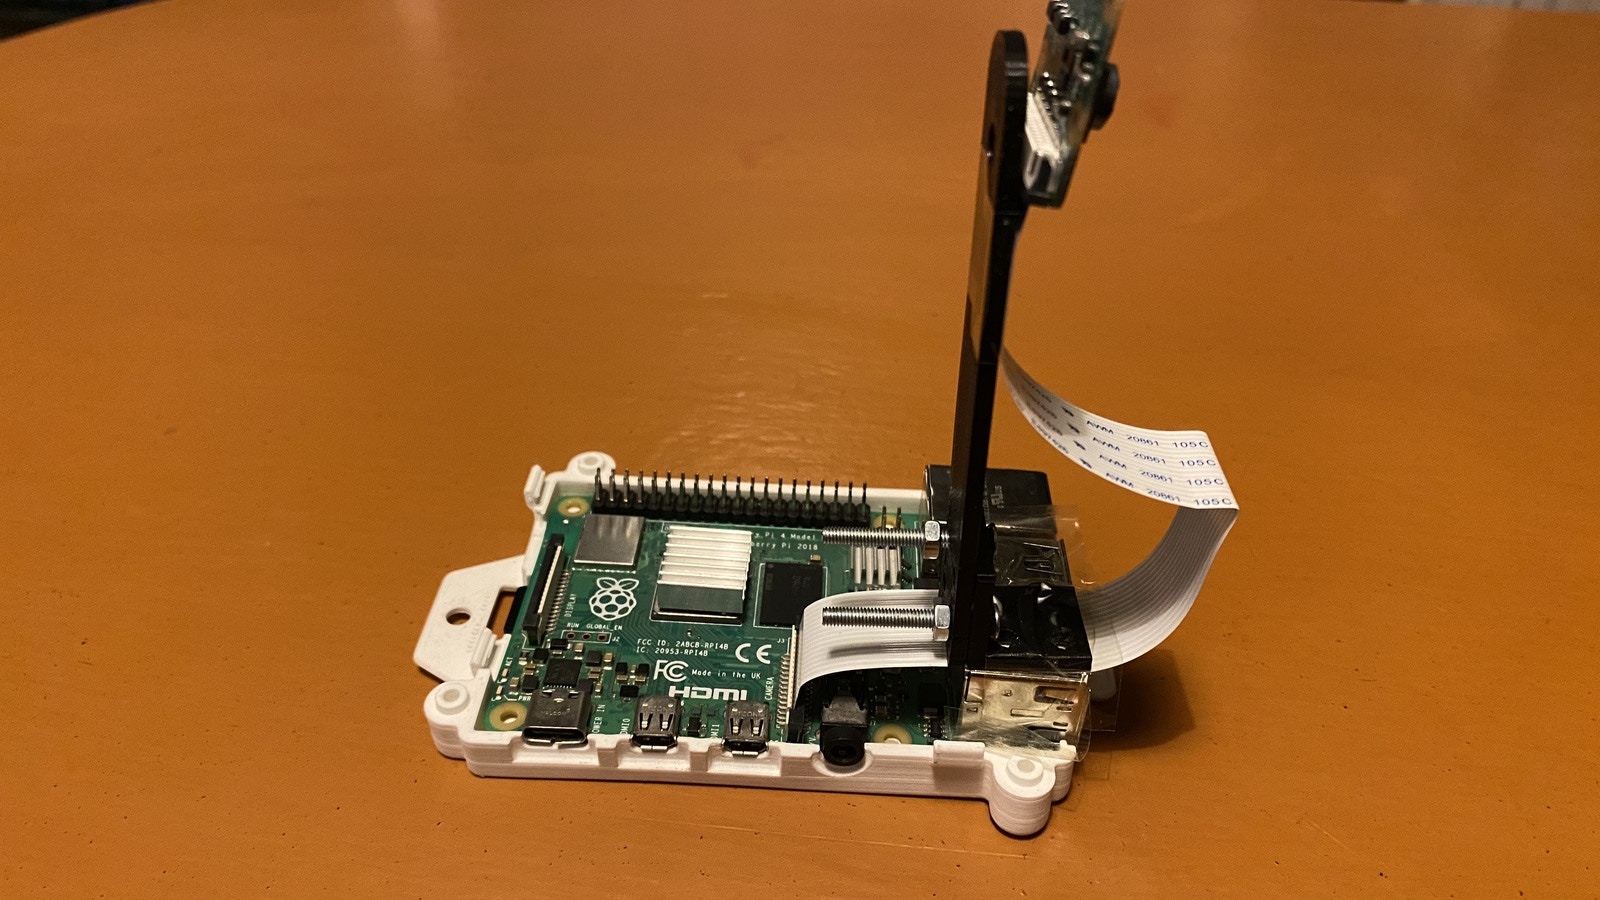
Raspberry Pi with camera - side view
Live classification GIF