Introduction
Large scale production and manufacturing operations rely on effective and accurate inventory and product counting, so that businesses have accurate and known quantities of products to fulfill orders, ship to retailers, and plan their finances accordingly. In typical scenarios, business have up-to-date counts of inputs such as supplies and raw materials, partially completed products that are currently being worked on, and finished goods ready for distribution. To alleviate the burden of counting the units in each stage by hand, which could possibly be very time-consuming, computer vision can be used to identify and quantify parts, supplies, or products instead. There are two distinct counting operations to consider. The first is a “total quantity” at any given time, such as “there are 8 objects on the assembly line at this exact moment”. The second scenario is a value that includes a time factor, for example, “14 items moved from point A to point B along the conveyor belt since we began work this morning.” Each of these counts are important, so we’ll cover both of them here. First, we’ll perform a count of items detected in a camera frame, then we will explore how to count the total number of objects that moved past a stationary camera placed above a conveyor belt. A machine learning model that recognizes a distinct item will be needed, along with the camera and hardware.Solution
We’ll use the Avnet RZBoard V2L along with Edge Impulse to accomplish this task. The Avnet RZBoard V2L is a compact single board computer powered by a Renesas RZ/V2L SoC, running a Linux operating system. It has 2gb of RAM, 32gb of onboard eMMC storage, an SD Card slot, micro-HDMI display output, an ethernet port, built-in WiFi and Bluetooth connectivity, USB ports, and a 40-pin GPIO header for expansion. It’s powered by a single 5V/3A USB-C power supply.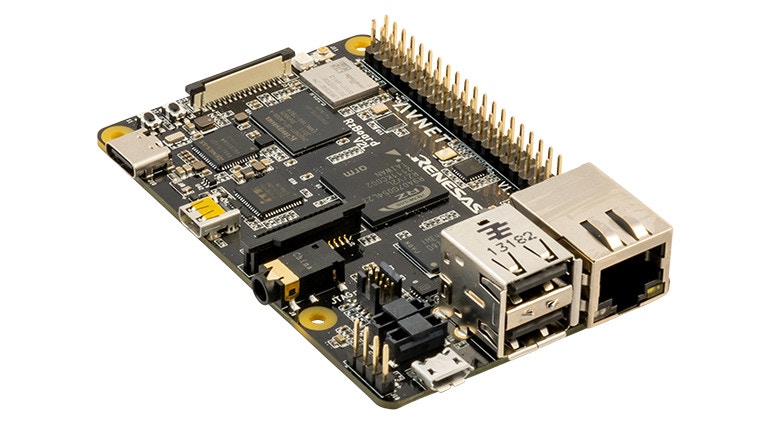
Hardware Requirements
- Avnet RZBoard V2L
- USB Webcam
- HDMI monitor, keyboard, mouse
- Conveyor belt, motor, power supply
- M5 hex nuts (this is the object I will be detecting, but you can choose something else)
Software Requirements
- Edge Impulse
- Updated RZBoard OS
Data Collection
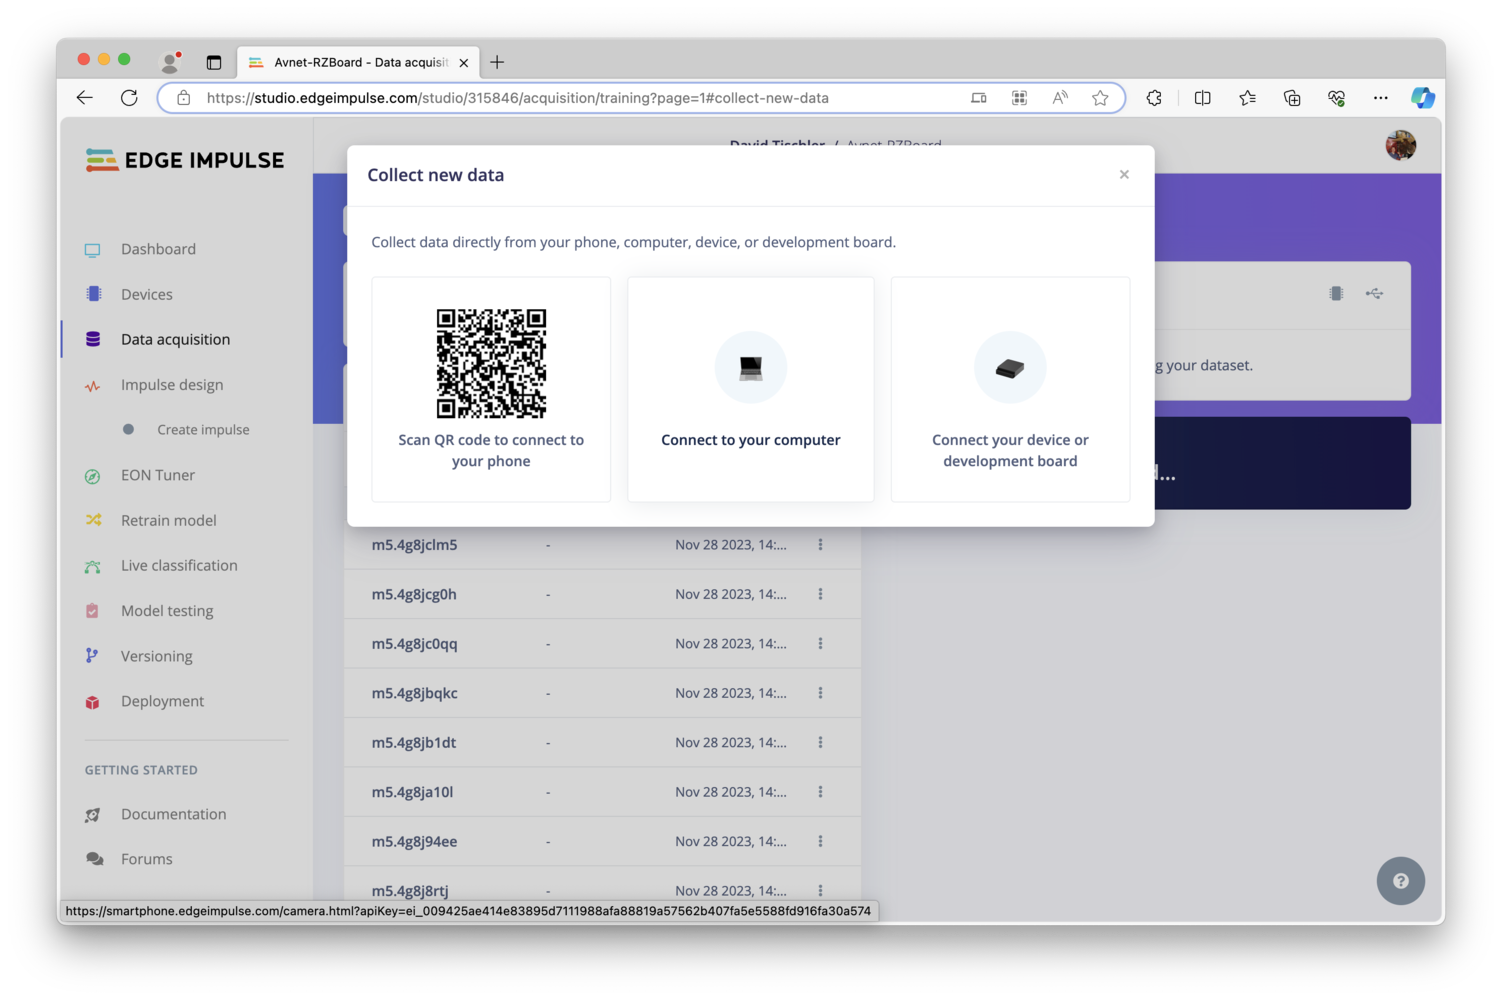
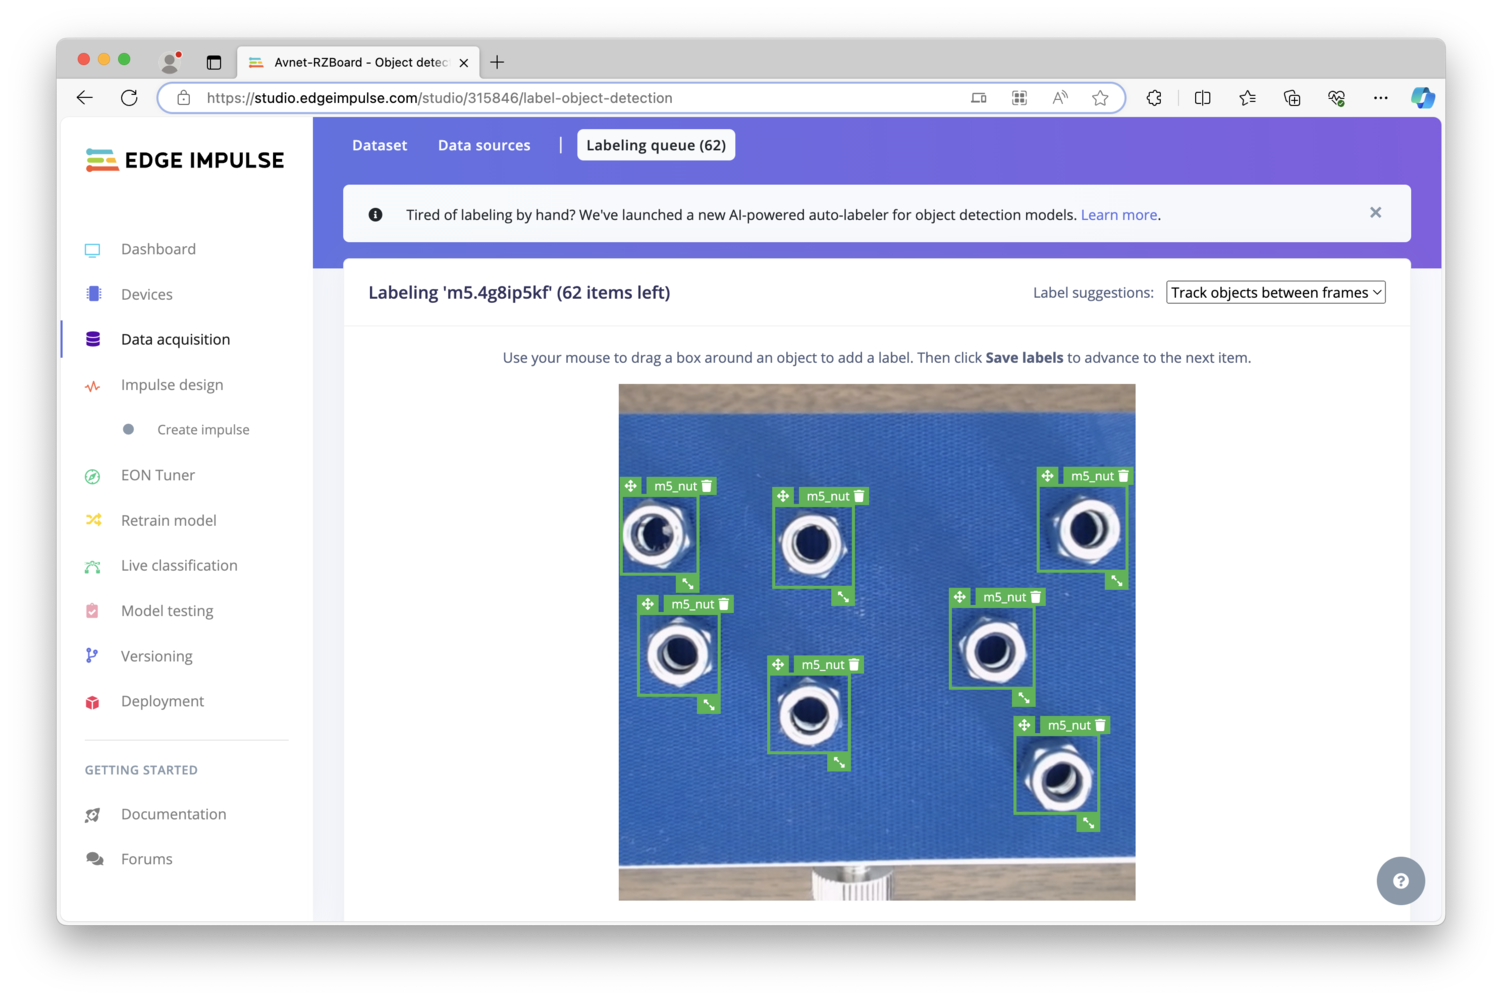
The first step in our machine learning workflow is data collection. In this example, we are going to identify, and count, some small M5 hex bolts traveling down a conveyor belt. I’ve used M5 hex nuts due to their convenient size, but you could use any object. To build a model that can identify a hex nut, we need to first take pictures of hex nuts and label them accordingly. Knowing that a USB camera is going to be hooked up to the RZBoard and placed above the conveyor belt, I have (for now) connected the same camera directly to my laptop in order to capture representative images. This allows me to gather pictures of the M5 nuts from the same angle, distance, and lighting as what we will experience once the model is deployed to the RZBoard.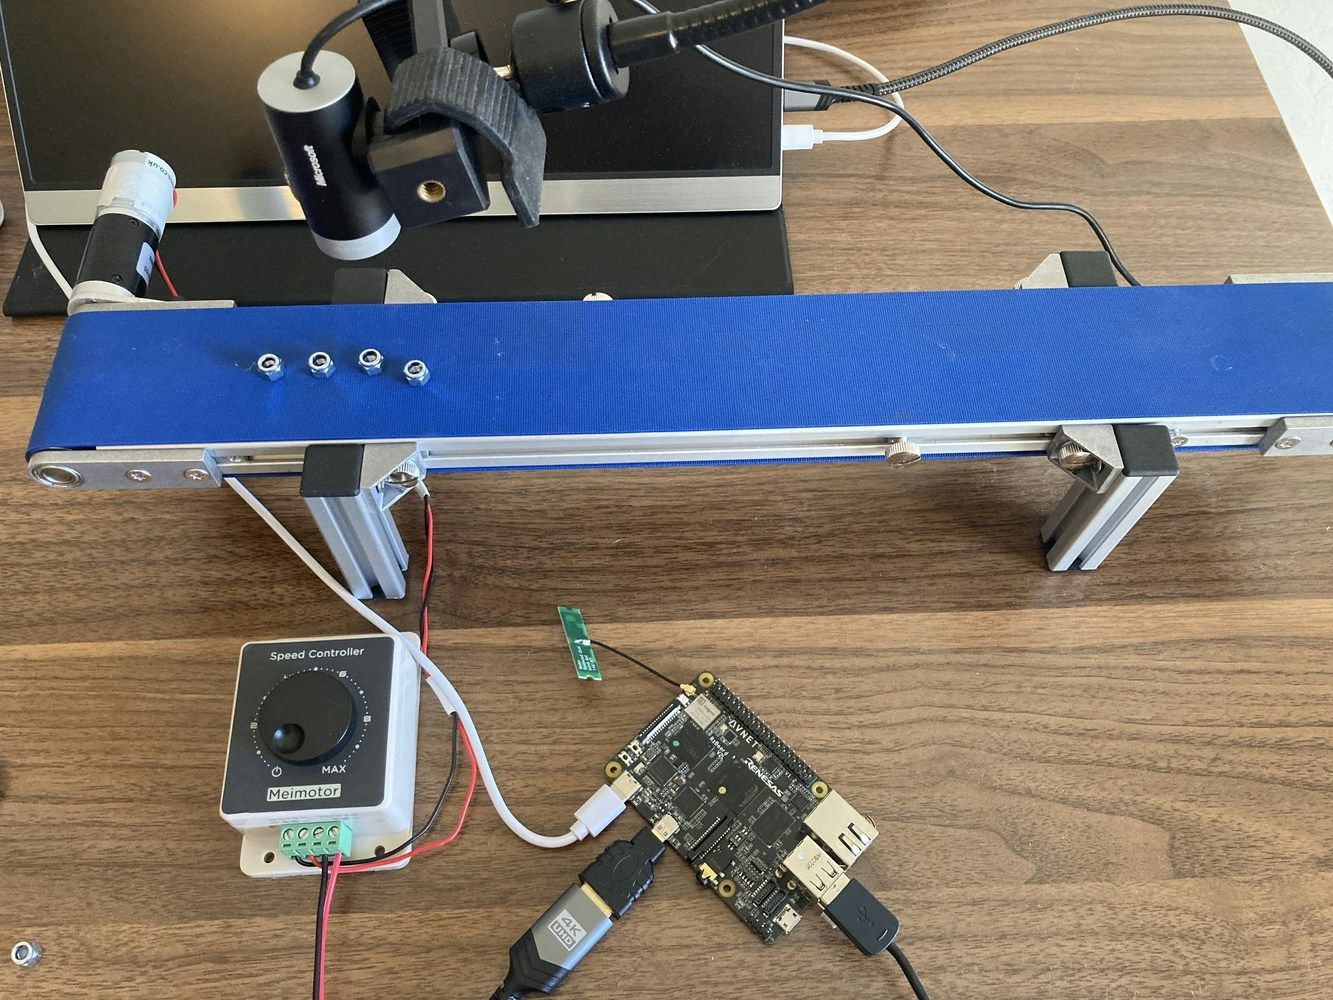
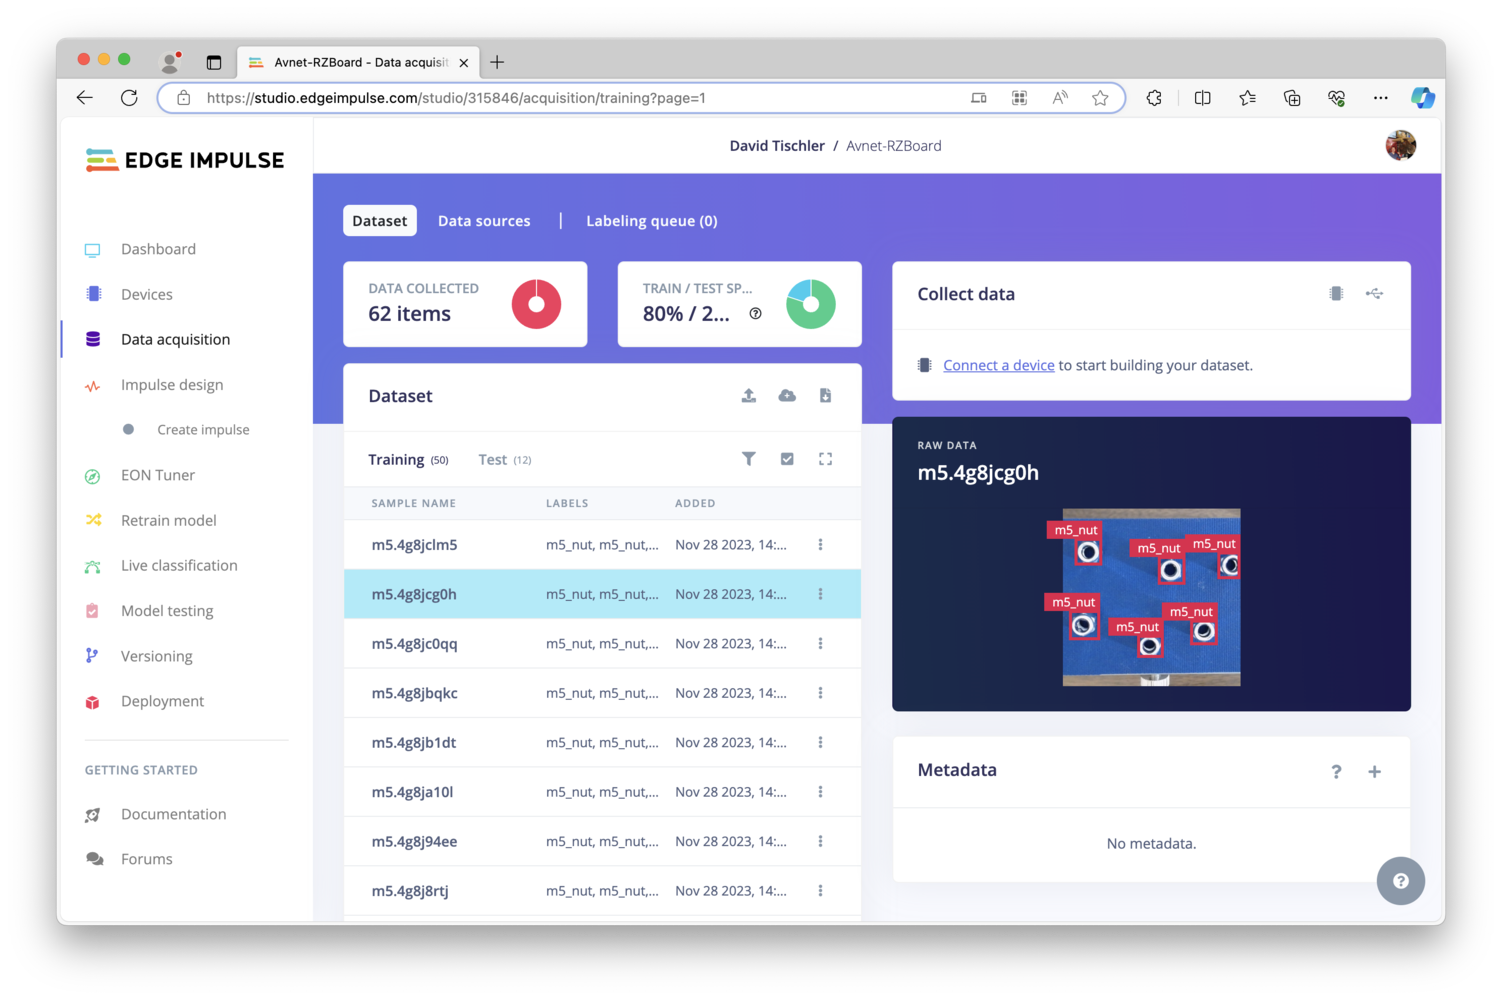
m5_nut on mine, though yours could vary. Click on “Save labels” to advance to the next image in the dataset, and you will notice that the bounding boxes will follow through to the next picture, making this process quick and easy. Once complete, you can click on “Dataset” to return to the summary list of data elements. You can click on them if you’d like to inspect them closer, but they should be ready for use at this point.
Model Creation
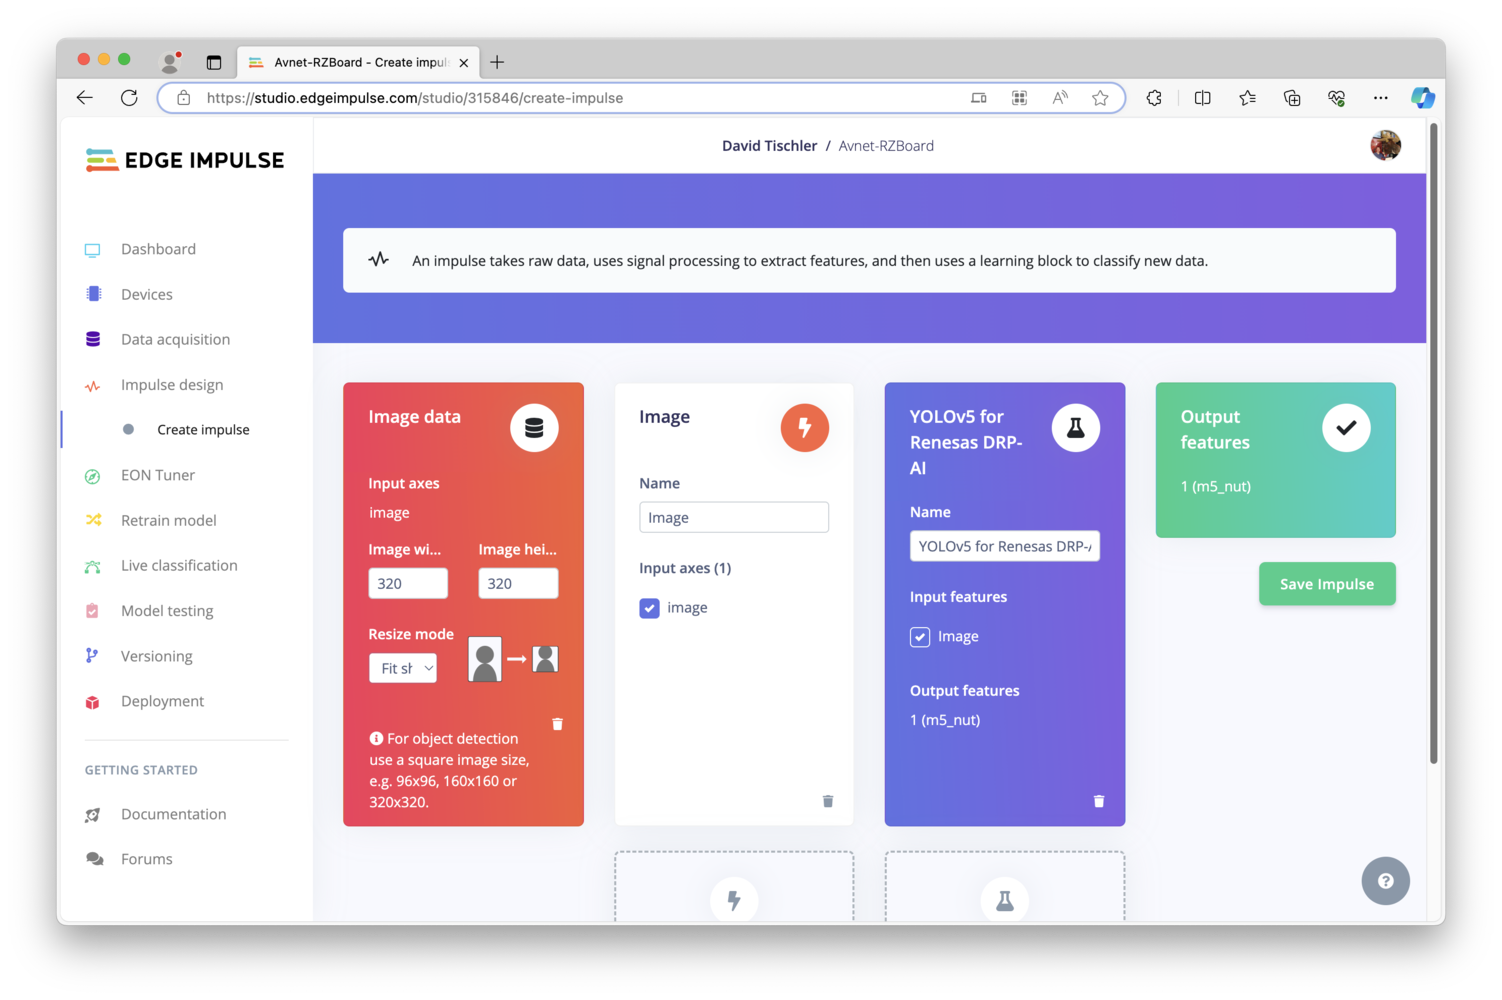
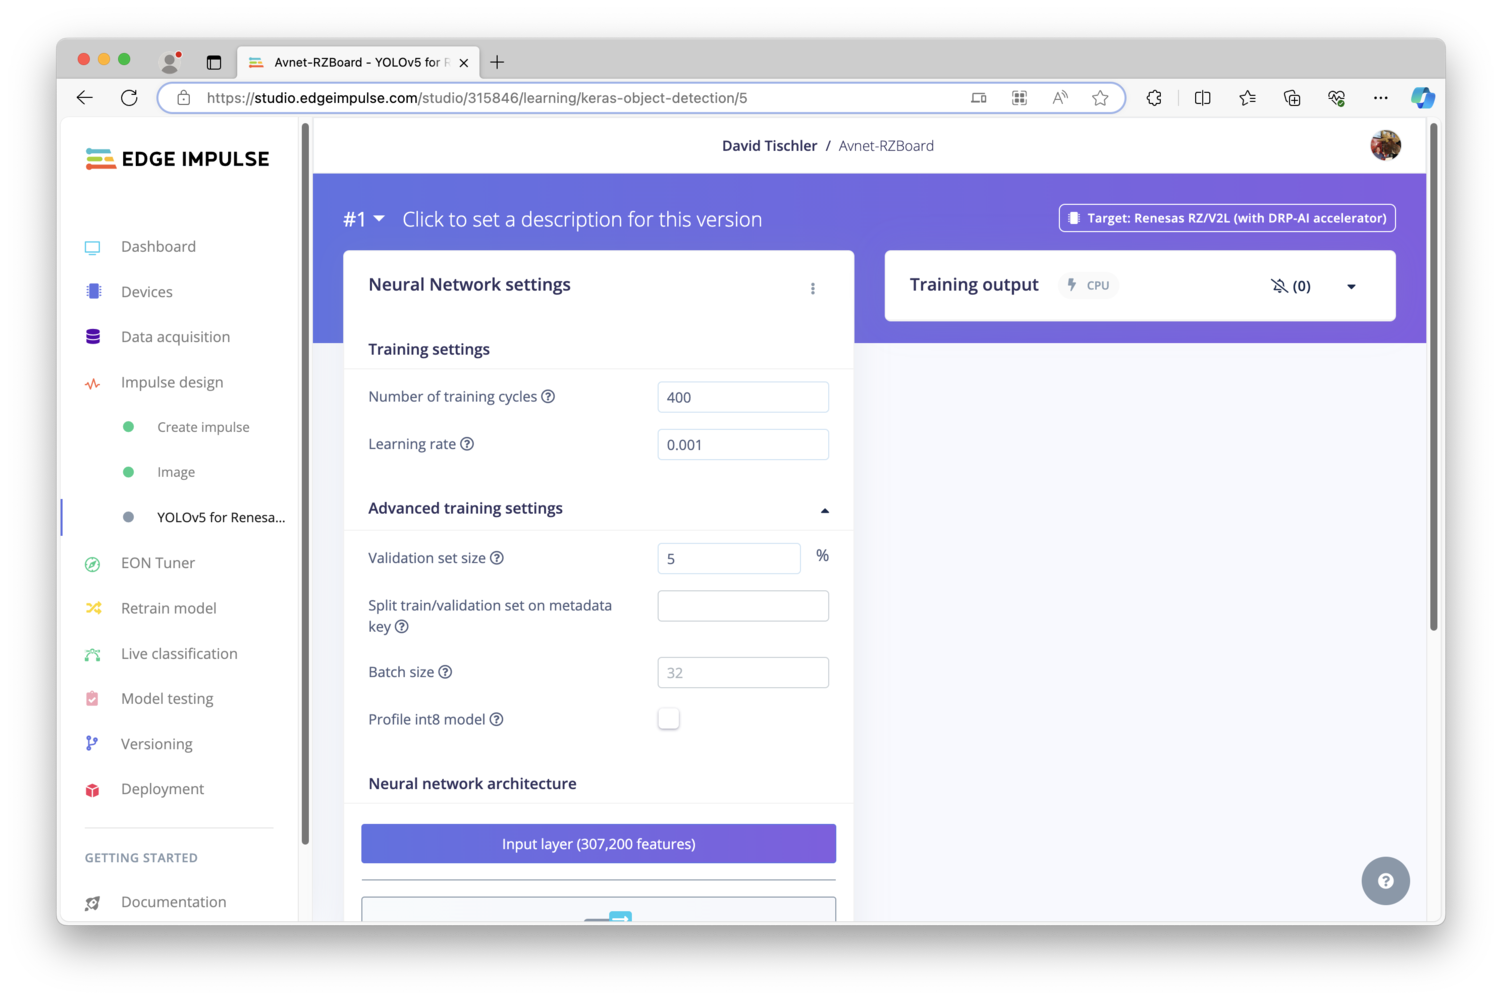
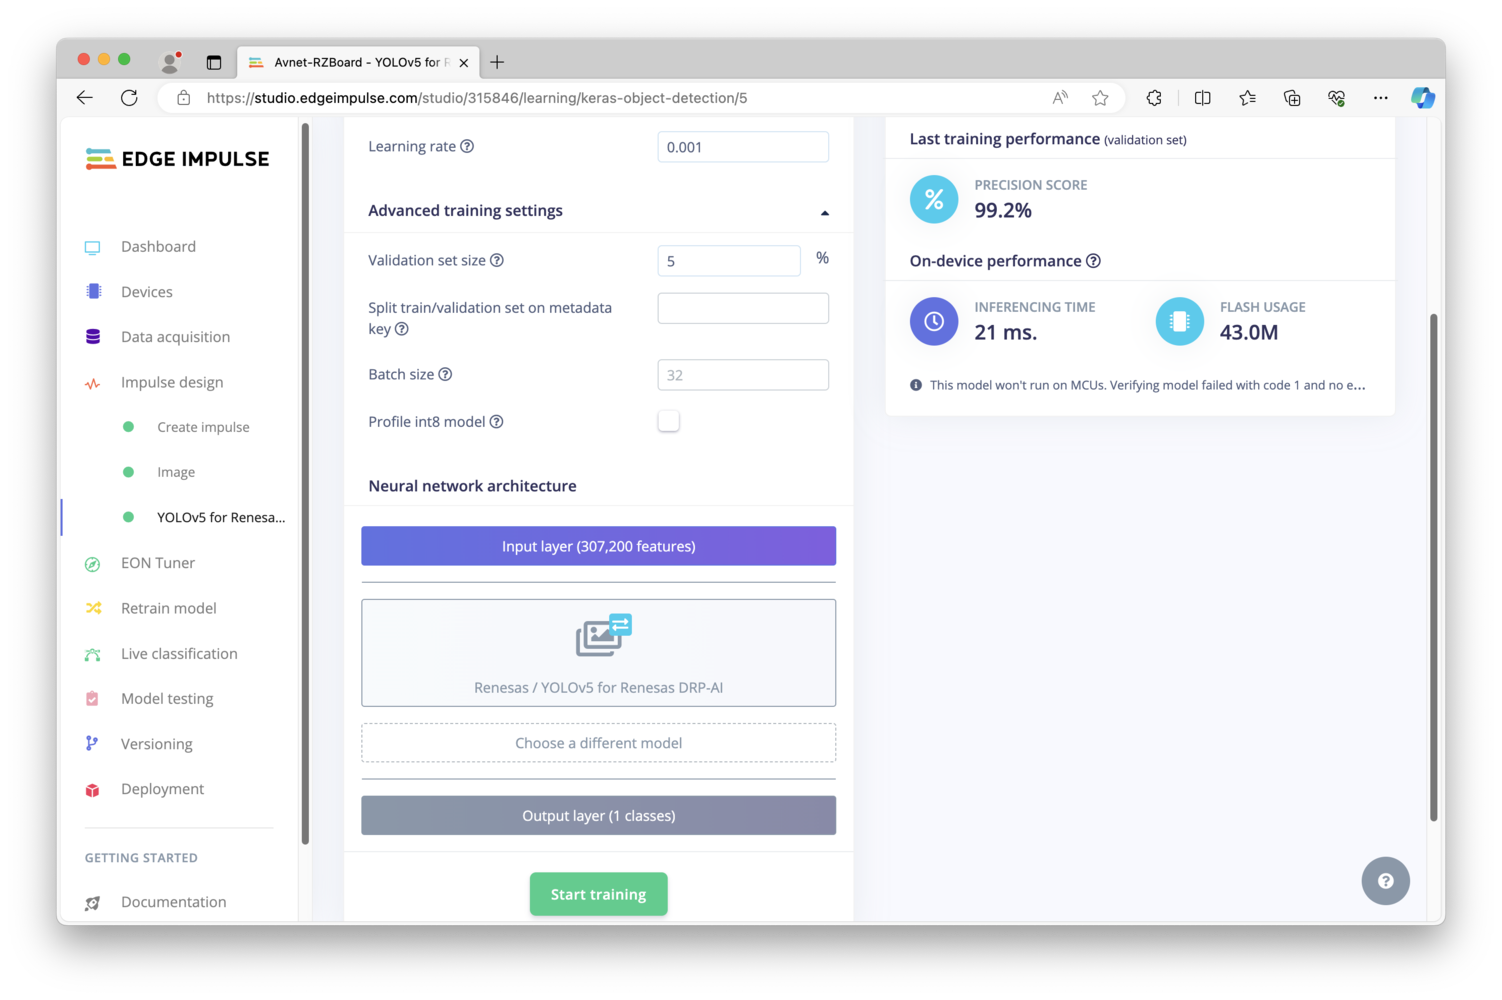
After the images have all been labeled, it is time to move on to the machine learning model creation phase. Click on “Impulse design” on the left, and you will see 4 columns (2 of which are empty for the moment), that will make up the machine learning pipeline. The first column is the input, which should be pre-populated with “Image data”. You can however, increase the image height and width to 320 by 320, as the RZBoard will have plenty of processing power available to make use of the larger image size (more on that in a bit). In the second column, click “Add a processing block”, and choose “Image” by clicking “Add”. In column 3, click “Add a learning block”, and choose “YOLOv5 for Renesas DRP-AI” by clicking “Add”. Finally, the fourth column should be pre-populated as well, with only one Output feature, the label we created earlier calledm5_nut. Click “Save Impulse”.
Deployment
In order to get the model (and eventually our counting application) onto the RZBoard V2L, we have a bit of prep work to do. The RZBoard comes from the factory with an operating system and sample application installed on it’s eMMC, which is nice for an immediate way to get started with the board and a great out-of-the-box experience, but won’t work for our purposes here. Instead, we need a version of the Yocto OS that includesnodejs and npm, so that we can install the Edge Impulse Linux Runner. You could go down the path of building Yocto yourself (I tested it, and it does work fine), but to save you the trouble Avnet has already gone ahead and built one, that you can find in their Sharepoint site here.
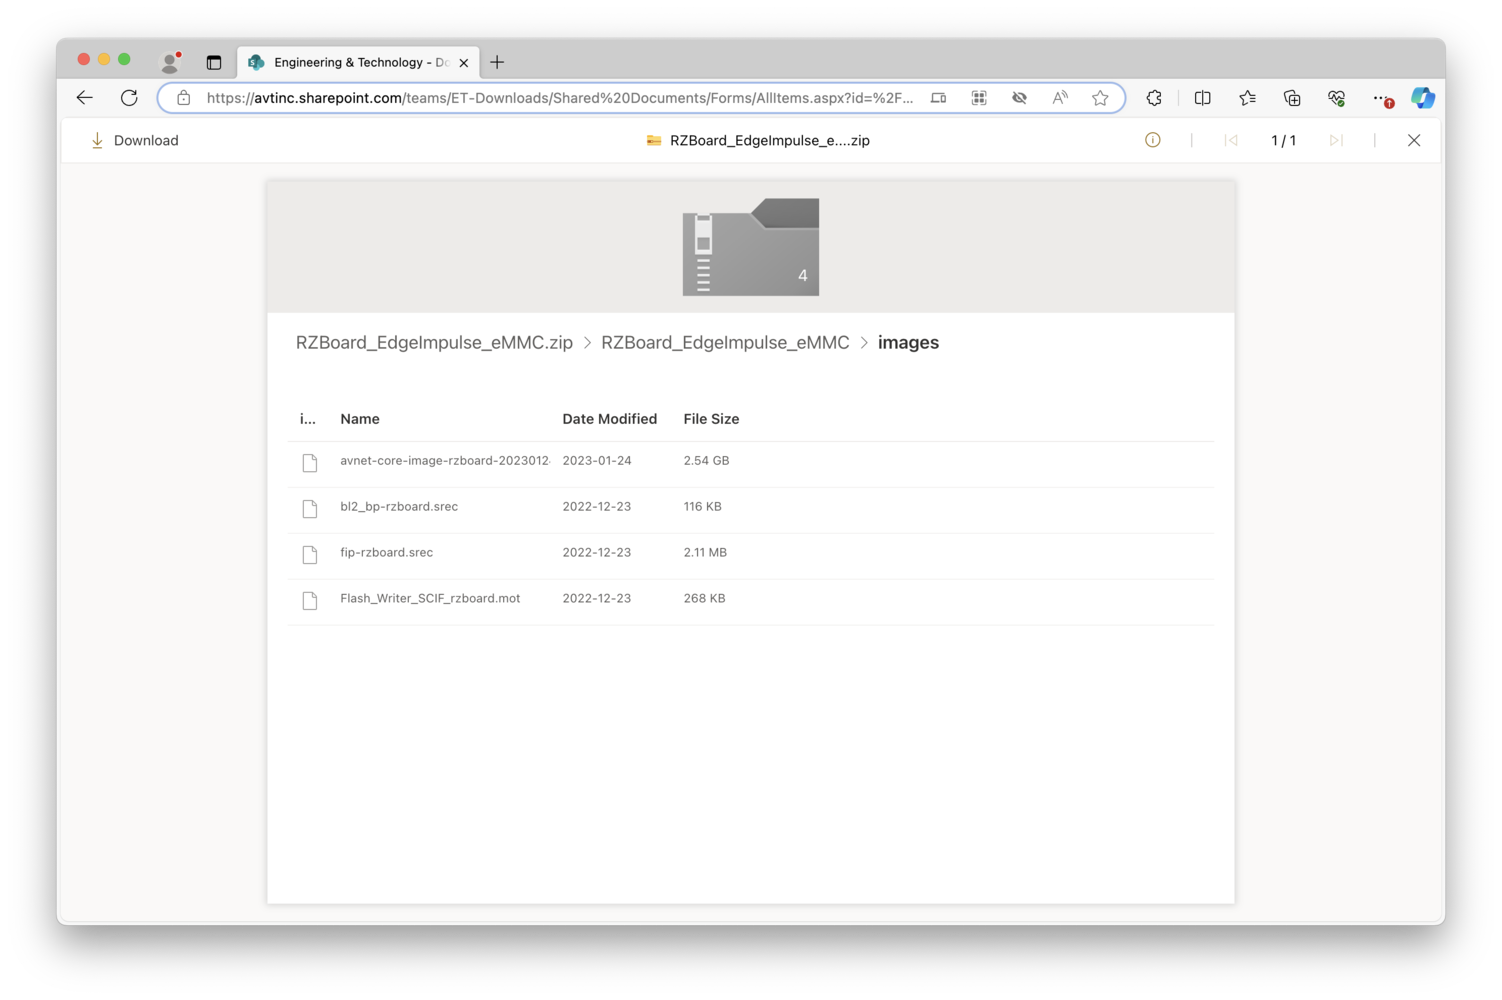
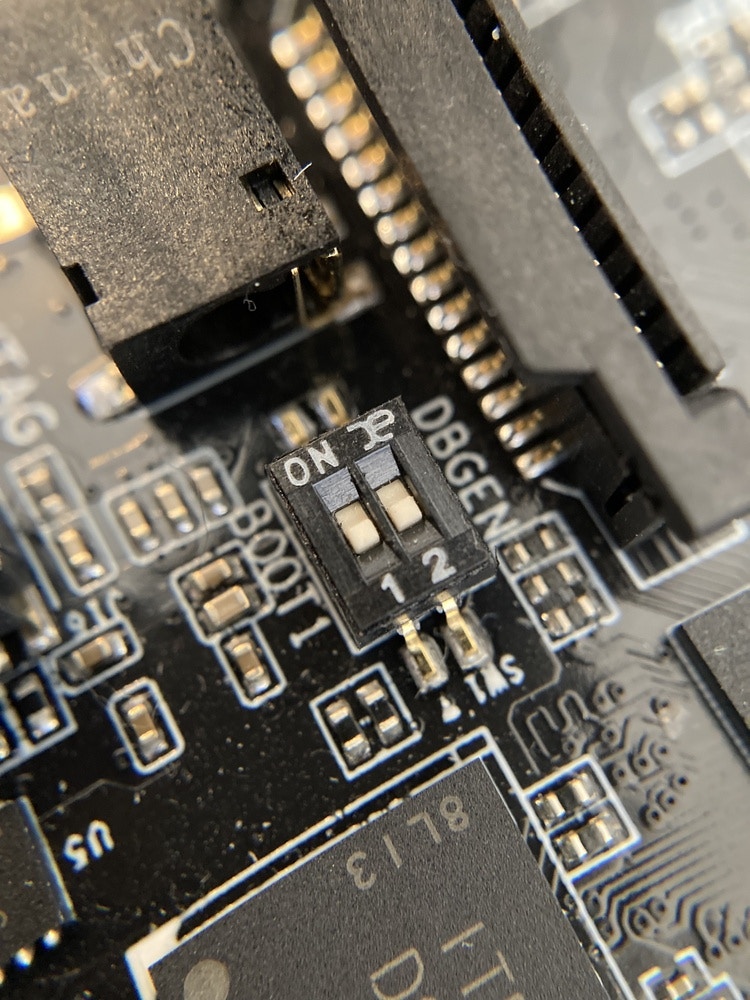
avnet-core-image-rzboard-20230124105646.rootfs.wic. (If you enter the folder at the top-most directory, navigate into the “images” folder to find it there). Download that file, and flash it directly to an SD Card. Now, on the RZBoard, you’ll need to flip a small DIP-switch that tells the board to boot from SD Card instead of the eMMC storage. Look for two tiny switches near the headphone jack, and make sure they are both flipped away from the headphone jack, facing the silkscreened 1 and 2 markings on the switch. Here is an example of how mine looks:
NOTE: You can also attach a serial console and use Putty or a similar terminal application, if that’s easier for you.We’ll also need to expand the available space on the SD Card, so enter:
p to print the current partition information, and make note of the mmcblk0p2 start address displayed on the screen. We’ll need that in a moment (mine was 204832). Follow the series of commands below to [p] print the partition info, [d] delete the current second [2] partition, make a [n] new [p] primary second [2] partition, and type in the start address you discovered a moment ago and press [enter]. Then press [enter] again on the next question to accept the default end address, [N] to not remove the signature, and [w] to write the changes to disk. The chain of commands is thus:
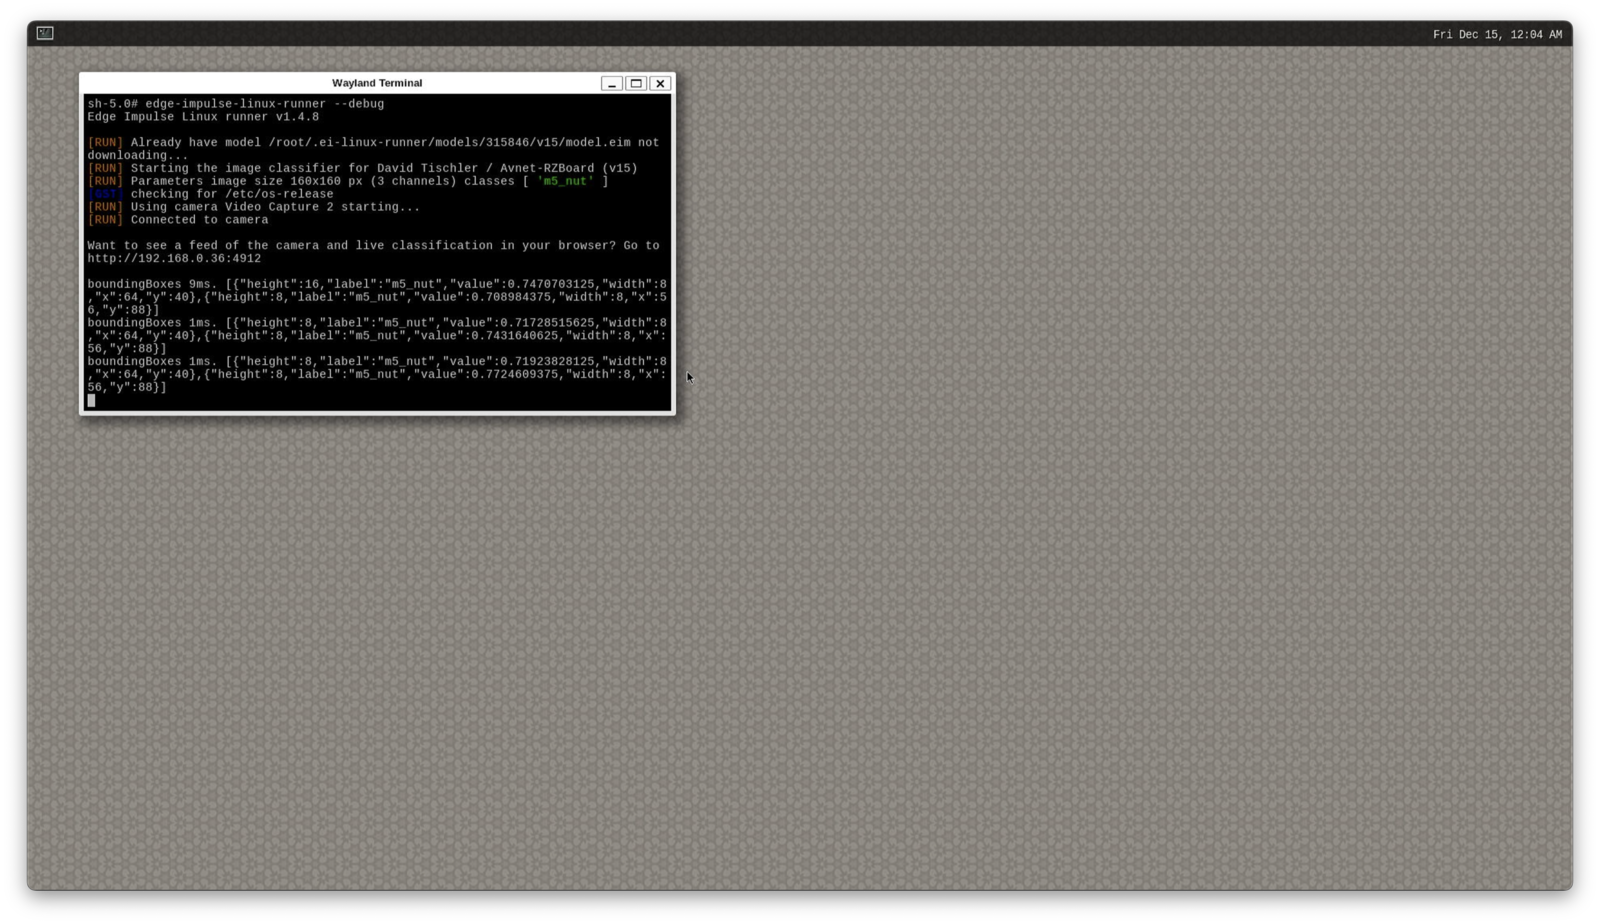
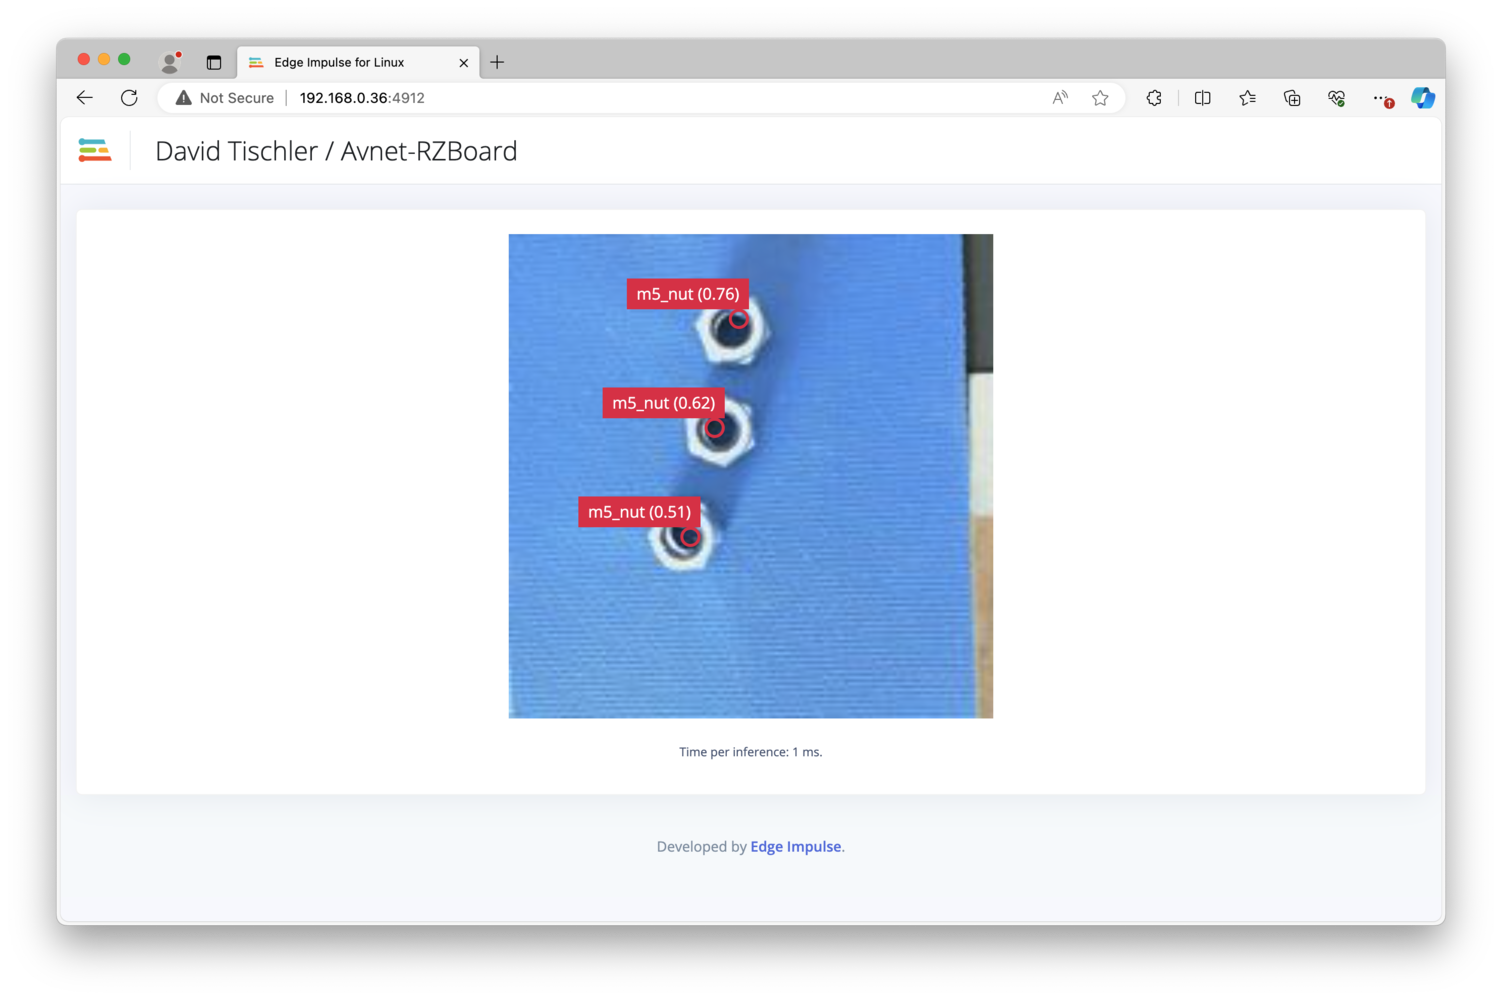
/root/.ei-linux-runner/models/315846/v15/model.eim). You can also load http://:4912 in a browser on your development machine, to get a view from the camera with any detected objects outlined by bounding boxes. Before we move on to building our object counting application, let’s highlight an important item here. My inference time as you can see below is approximately 8ms to 10ms, so roughly 100 inferences per second - incredible performance. The web view of the camera however, provides a slow frame rate: The reason is that the sample webserver sending the camera view is not really optimized, and the WiFi latency itself is also at play here. A compiled binary version of an application is much more responsive.
Object Counting Applications
Unique Count at any Moment
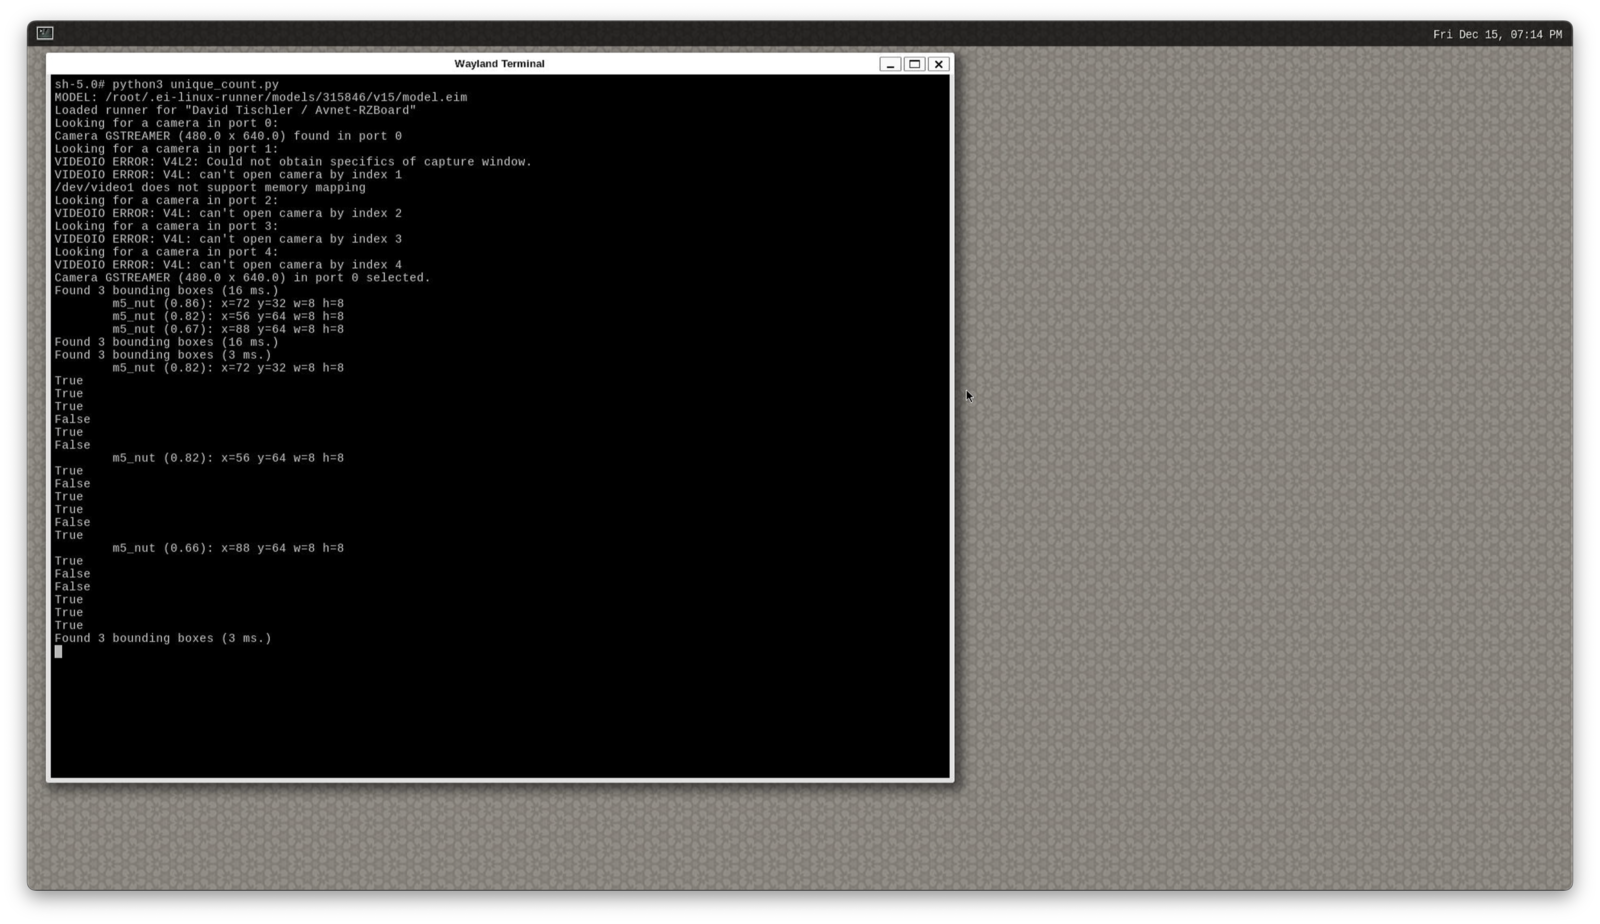
For our first counting task, we’ll quantify the number of objects detected within a camera frame. To do this, we’ll put together a bit of python code to run on the RZBoard - but this will also require some more tooling and dependencies to get installed. In that same terminal session you already have running, enter the following series of commands to installportaudio, pip, a few dependencies, edge_impulse_linux, and set the Display variable. You could probably wrap this all up into a shell command to run in bulk, but here are the individual commands to run:
nano unique_count.py and then pasting in the following python snippet (it might be faster to copy/paste this snippet into a file on your desktop/laptop, and then copy the file directly on to the RZBoard’s SD card, or use a serial console so that you can copy/paste from host to device, instead of typing this all in to that terminal window directly on the RZBoard).
/root/.ei-linux-runner/models/315846/v15/model.eim earlier when we ran the Linux Runner the first time. Finally, it is time to test out the counter, simply run python3 unique_count.py, and in the terminal you will see the number of detected M5 nuts that are in view of the camera printed out to the console.
I was able to then use the conveyor belt and observe the quantity increase and decrease as the bolts moved down the line and entered / exited the field of view of the camera.
Sum of Total Count Over Time
Now we can move on to our second counting application, which totals up the number of M5 hex nuts that pass in front of the camera over a period of time. For that, we’ll use a second python snippet, and this time we’ll render the camera view on screen so we can have a look at what the camera is seeing. Create a new file withnano total_count.py and paste in the following snippet:
Like the first application, it might be easier to use a serial console or just copy the file directly onto the RZBoard’s SD Card from your development machine, to save the typing.For this application, we’ll need to append the model file to use to the command, so from the terminal session on the RZBoard run:
python3 total_count.py /root/.ei-linux-runner/models/315846/v15/model.eim
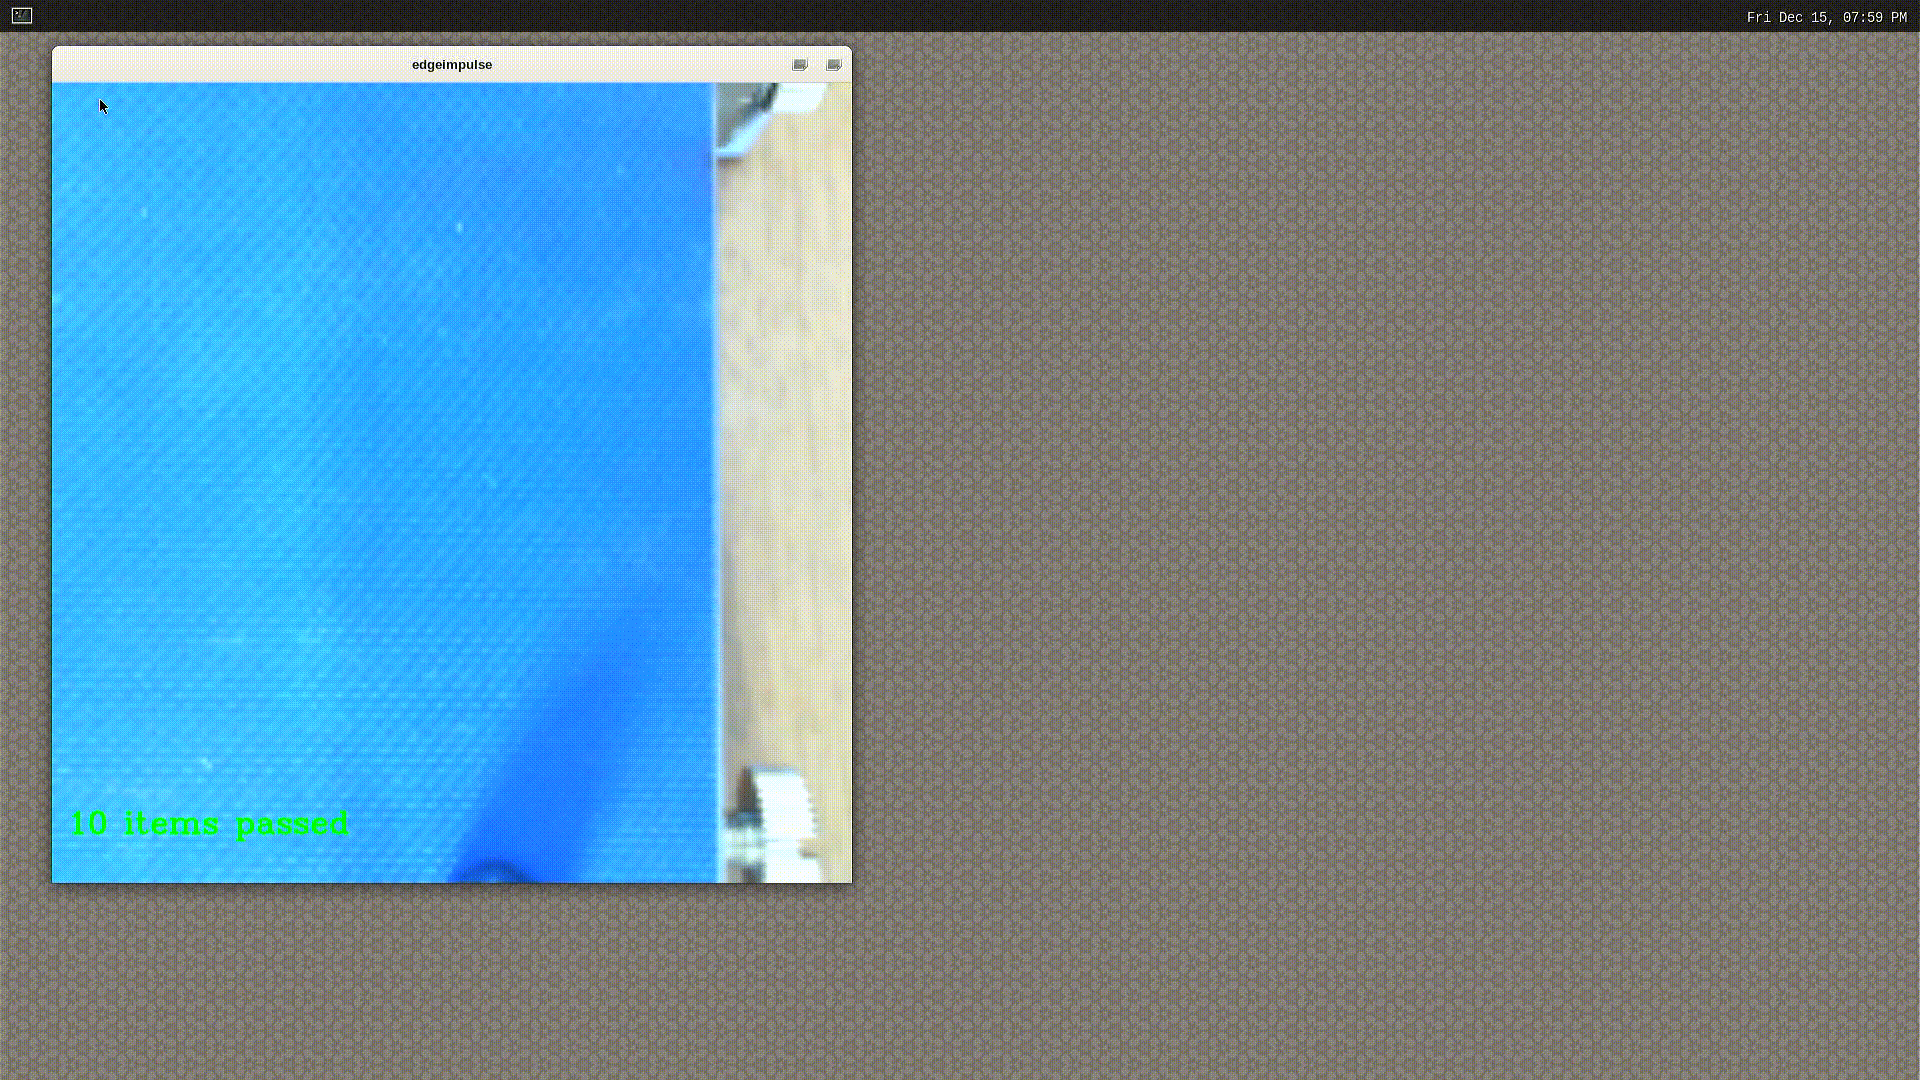
It will take a moment for the camera view to appear on screen, and it should be noted that once again the framerate here is not optimized, as we are running non-threaded single core python, and compiled code is much faster. But for purposes of demonstrating how to achieve the counting, this will work. I once again turned on the conveyor belt, and as M5 hex nuts travel past the camera, the count increases by one in the rendered camera view window. My model could probably benefit from some extra images added to my dataset, as I did have a few sneak by undetected, so perhaps 60 images was not quite enough in the training dataset, but we have proven the concept works!