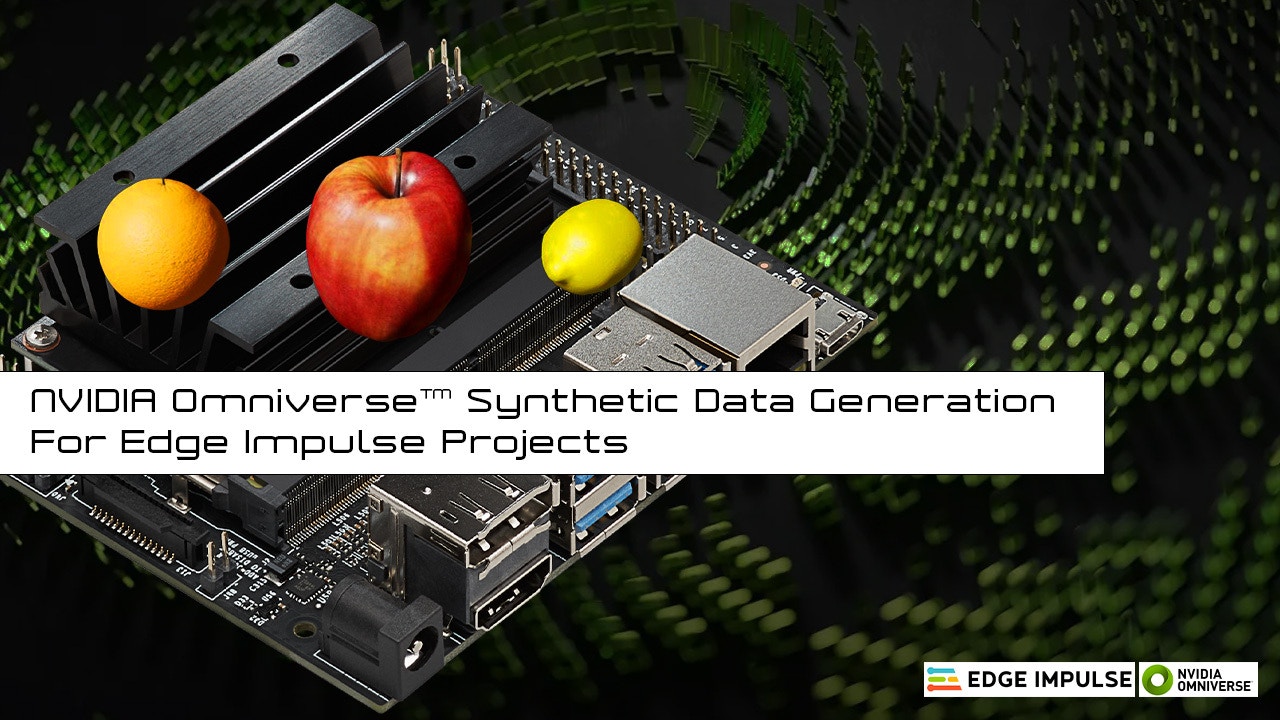
Introduction
In the realm of machine learning, the availability of diverse and representative data is crucial for training models that can generalize well to real-world scenarios. However, obtaining such data can often be a complex and expensive endeavor, especially when dealing with complex environments or limited data availability. This is where synthetic data generation techniques, coupled with domain randomization, come into play, offering innovative solutions to overcome these obstacles.Synthetic Data
Synthetic Data
Omniverse™
NVIDIA Omniverse™
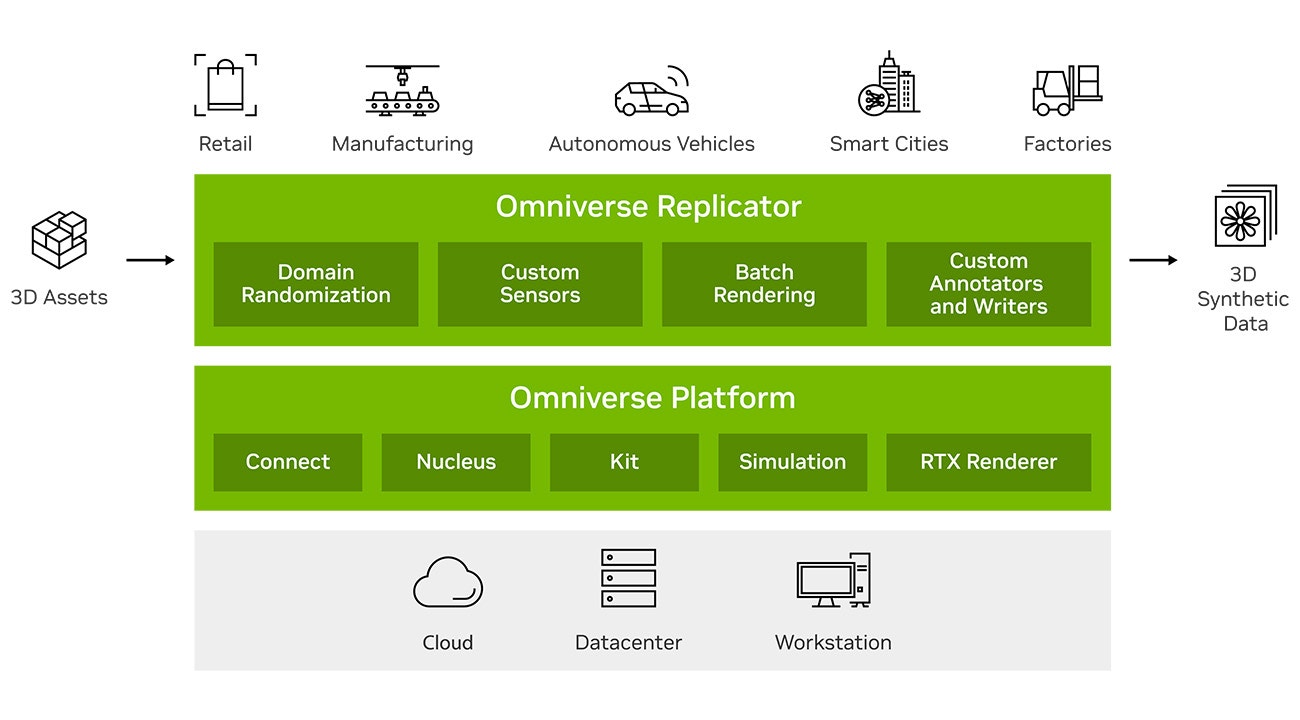
Omniverse™ Replicator
NVIDIA Omniverse™
Edge Impulse
Edge Impulse
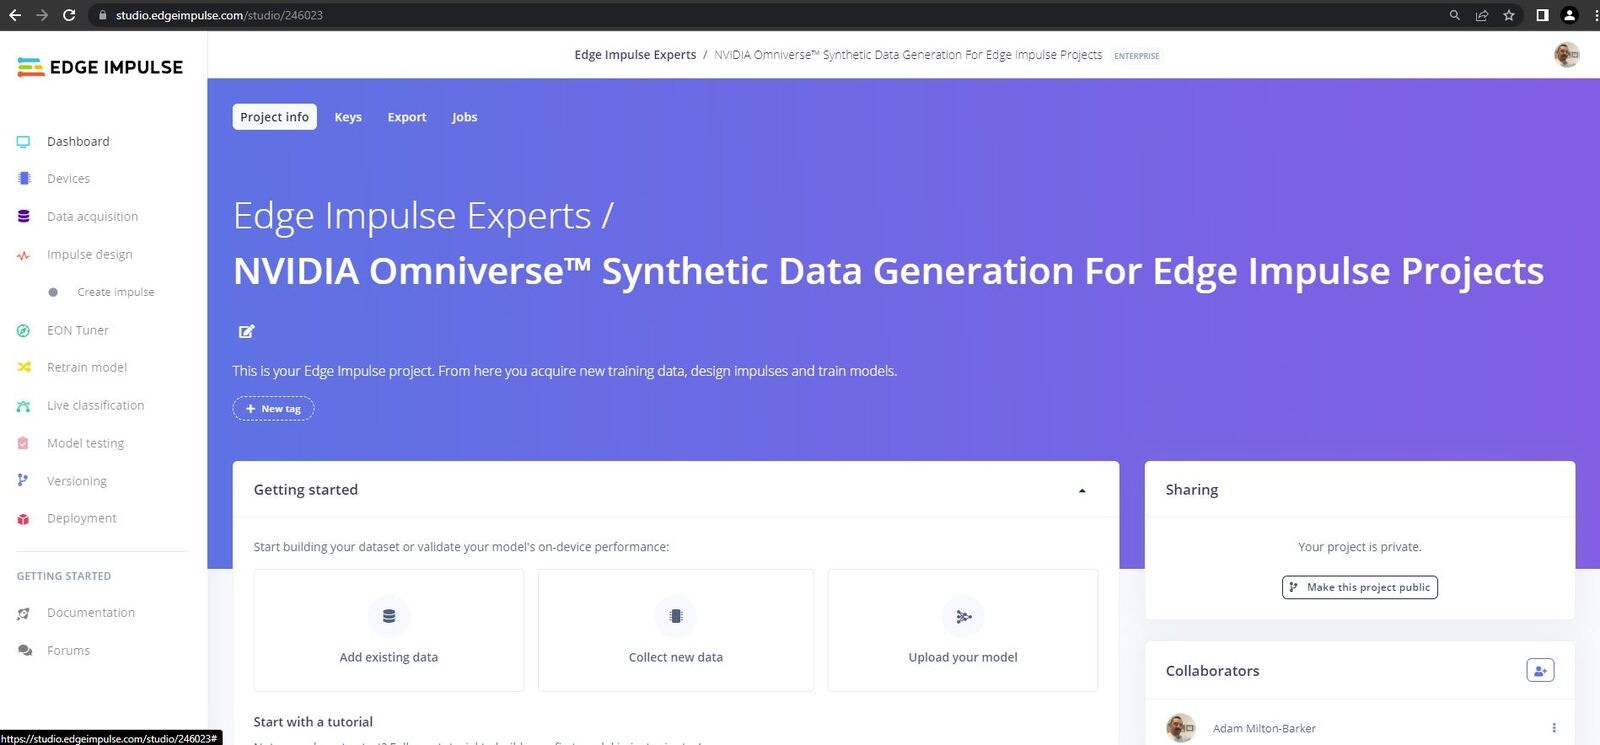
Project
On-Device Testing Results
Hardware
RTX-Enabled GPU

GPU Requirements
NVIDIA Jetson Nano
We will deploy our machine learning model to an NVIDIA Jetson Nano.Software
- NVIDIA Omniverse™
- NVIDIA Omniverse™ Replicator
- NVIDIA Omniverse™ Code (deprecated)
- Edge Impulse For Linux
- Visual Studio Code
Platform
Installation
NVIDIA Omniverse™ Launcher
Omniverse™ Code
NVIDIA Omniverse™ Code
Omniverse™ Code
Extensions tab and search for Code, then click on Code and install it.
Script Editor
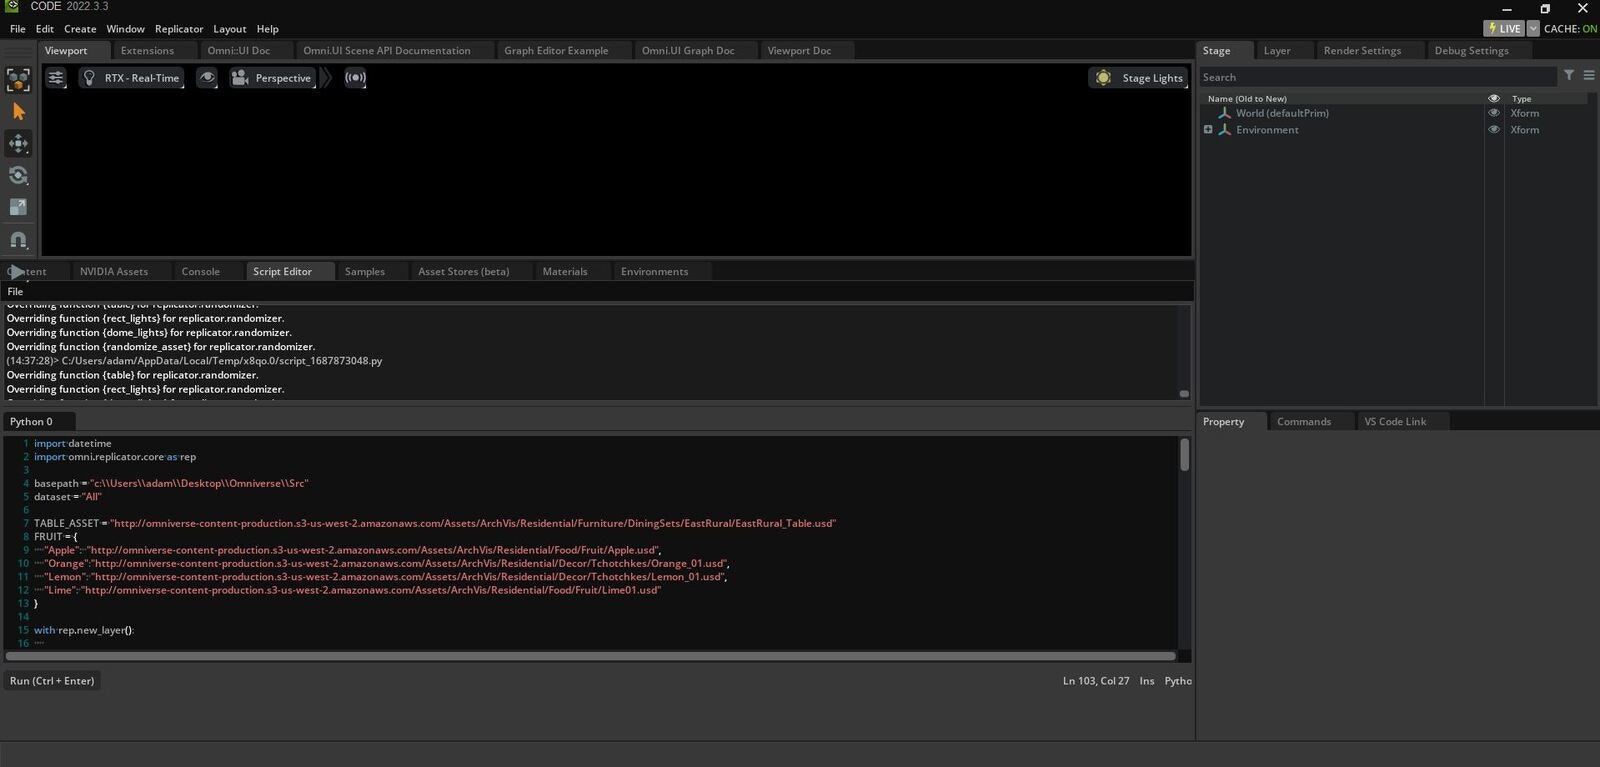
Script Editor
Script Editor. This editor allows us to load Python code into the IDE and execute it. This makes it very easy for us to set up our scenes and manipulate our assets.
Assets
For simplicity, in this tutorial we will use assets that are readily available in Omniverse™ Code. Within the IDE you will find a tab calledNVIDIA Assets, opening this tab will provide you with a selection of ready to use assets. The assets are of type USD which stands for Universal Scene Description.
Project Code
For this tutorial, code has been provided that will work out of the box in the script editor, all you will have to do is modify thebasepath variable and alternate the different datasets.
Clone The Repository
The first step is to clone the repository to a location on your machine.omniverse.py file.
Let’s take a quick look at some of the key features of the code.
Settings
At the top of the code you will find the settings for the program. You don’t have to use the same assets that I have used, but if you would like to quickly get set up it is easier to do so.basepath variable to the path to the project root on your machine. If you are using Linux you will need to modify any path in the code as the paths have backslashes for directory separators. For the dataset variable you can use the following to generate your dataset:
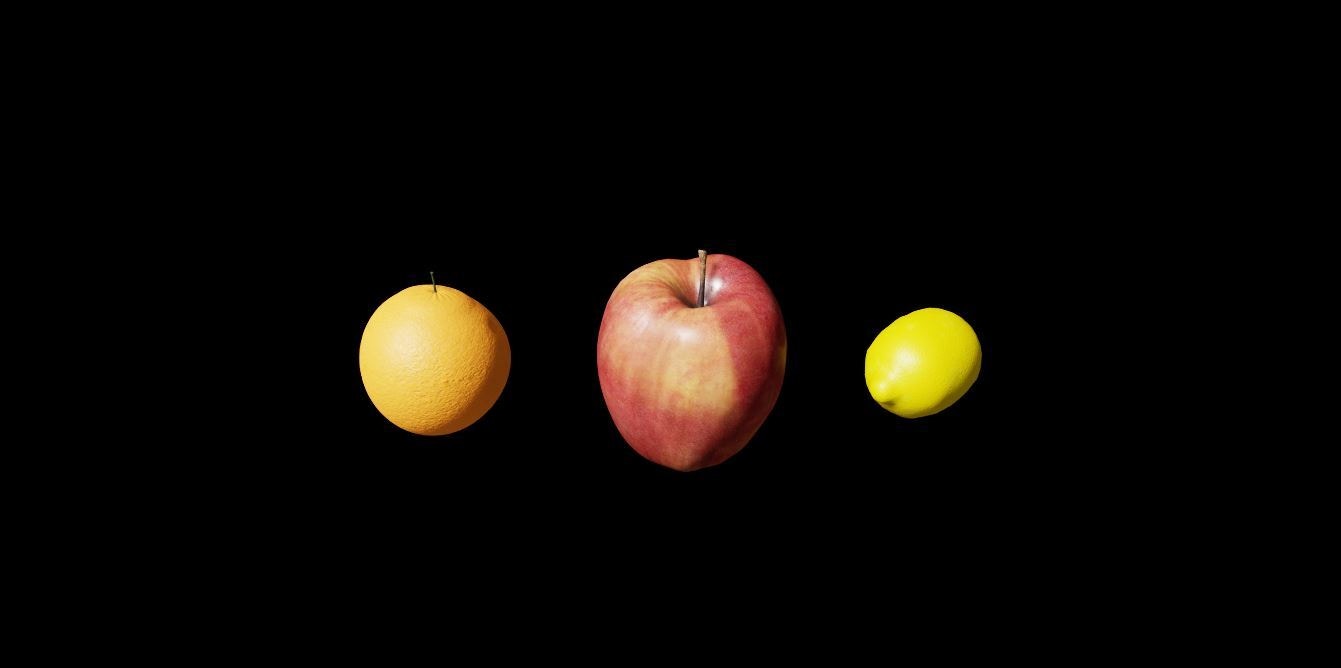
- All Will generate a dataset that includes images of all the fruit types on the table.
- Apple Will generate a dataset that includes images of apples on the table.
- Orange Will generate a dataset that includes images of oranges on the table.
- Lime Will generate a dataset that includes images of limes on the table.
Table
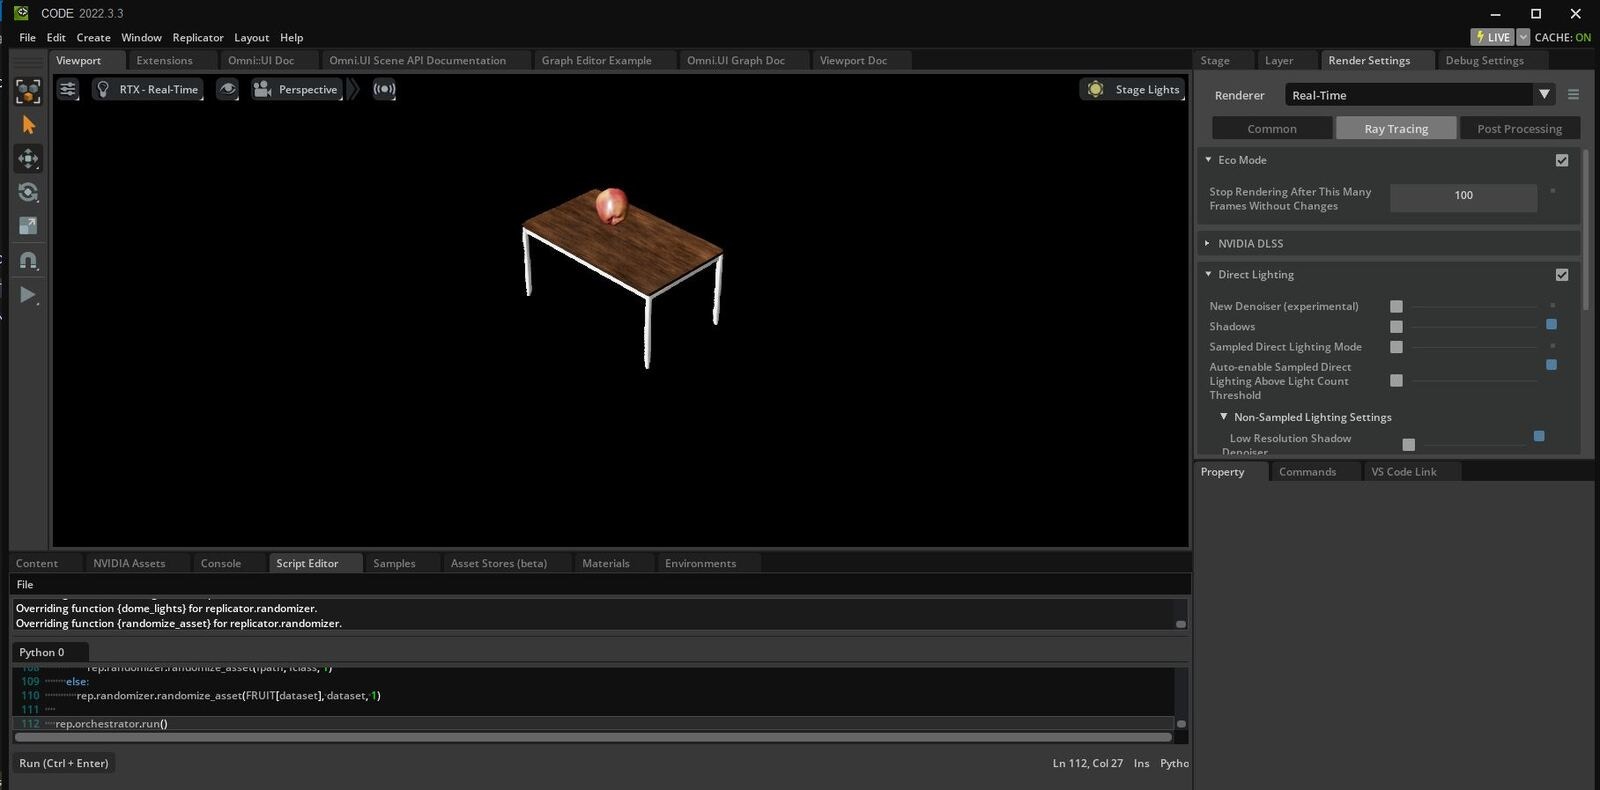
The first function we come to in the code will create the table. Here we create the table from the USD file in the settings, ensure that items do not fall through it by usingrep.physics.collider(), adds mass to the object with rep.physics.mass(mass=100), and then modifies the pose which includes position and rotation. Finally we register the randomizer.
Lighting
Next, the code will take care of the lighting.Fruits
The next function will take care of the fruits. Here you will notice we use a uniform distribution for theposition, rotation and scale. This means that each number in the ranges has an equal chance of being chosen. Here we also define a class for the data.
Camera
Next we set up the camera and set the value forfocus distance, focal length, position, rotation, and f-stop.
Basic Writer
The next code will create the writer which writes our images to the specified location on our machine. Here we set theoutput_dir, rgb, and bounding box values.
Randomizing & Running
Finally we set the randomizers to be triggered every frame, and then run the randomizers.Creating Our Dataset
Generate Data
omniverse.py and paste it into the script editor. Once you have done this press the Run button, or ctrl + enter.
Remember to change the dataset variable to the relevant class and run the script for each of the 3 classes.
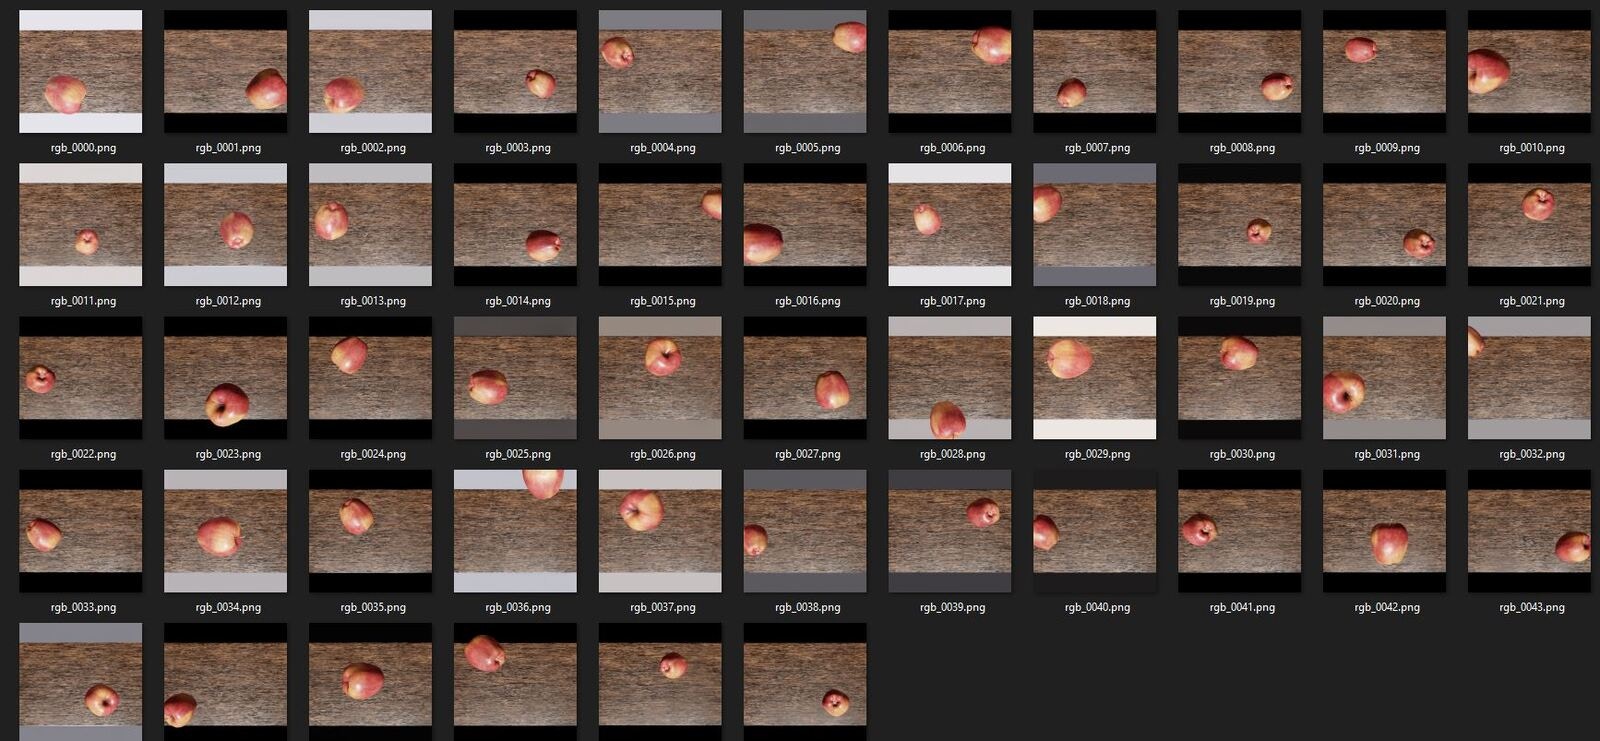
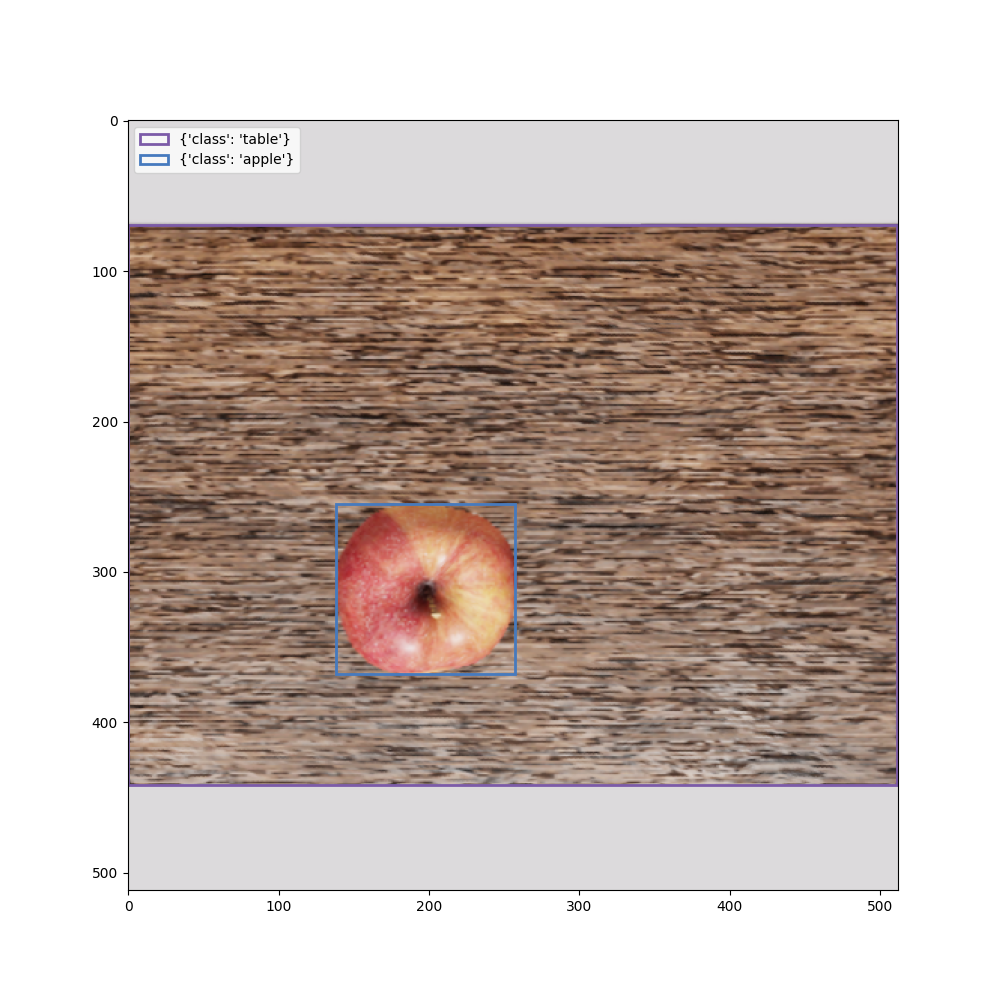
Generated Data
data/rendered directory and you will find all of your generated data. Navigate through the various folders to view the created datasets.
Visualize Our Dataset
Next we will visualize our dataset, including the bounding boxes that were generated by the writer. In Visual Studio Code, open the project root and open thevisualize.py file. Once it is opened, open the terminal by clicking view -> Terminal.
Next, install the required software. In the terminal, enter the following commands:
visualize.py you will see the following code:
rgb_0000.png, rgb_0001.png etc. To visualize your data simply increment the file_number variable.
You can now run the following code, ensuring you are in the project root directory.
Generated Data
Creating Our Model
Now it is time to head over to Edge Impulse and create our machine learning pipeline.
Create EI Project
Project Info area and make sure to change Labeling method to Bounding Boxes (Object Detection) and Target Device to Jetson Nano. Now scroll down to the Performance Settings and ensure that Use GPU for training and Enterprise performance are selected if you have those options.
Connect Your Device
Connect device
- Running the Edge Impulse NVIDIA Jetson Nano setup script
- Connecting your device to the Edge Impulse platform
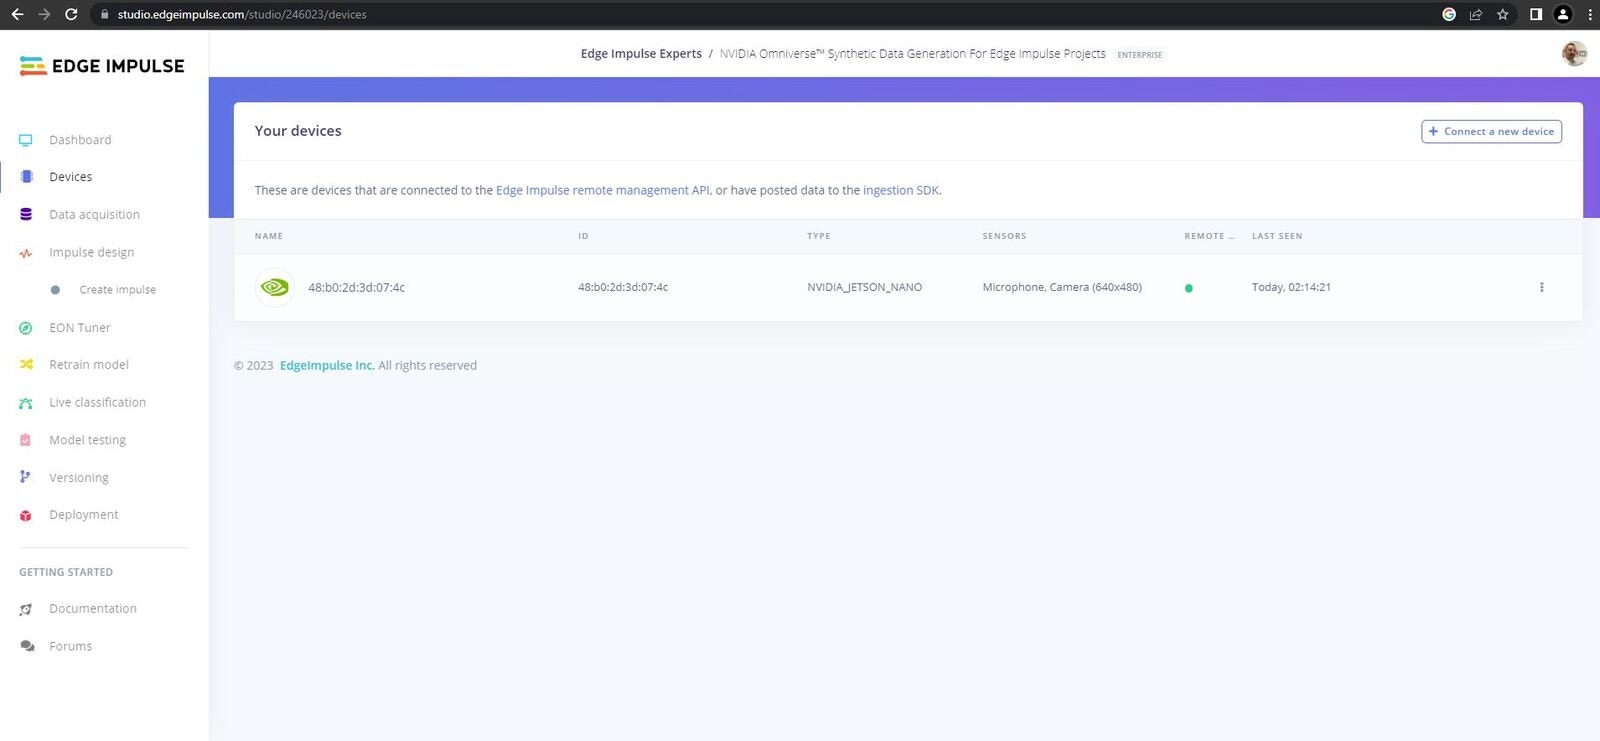
Device connected to Edge Impulse
Upload Data
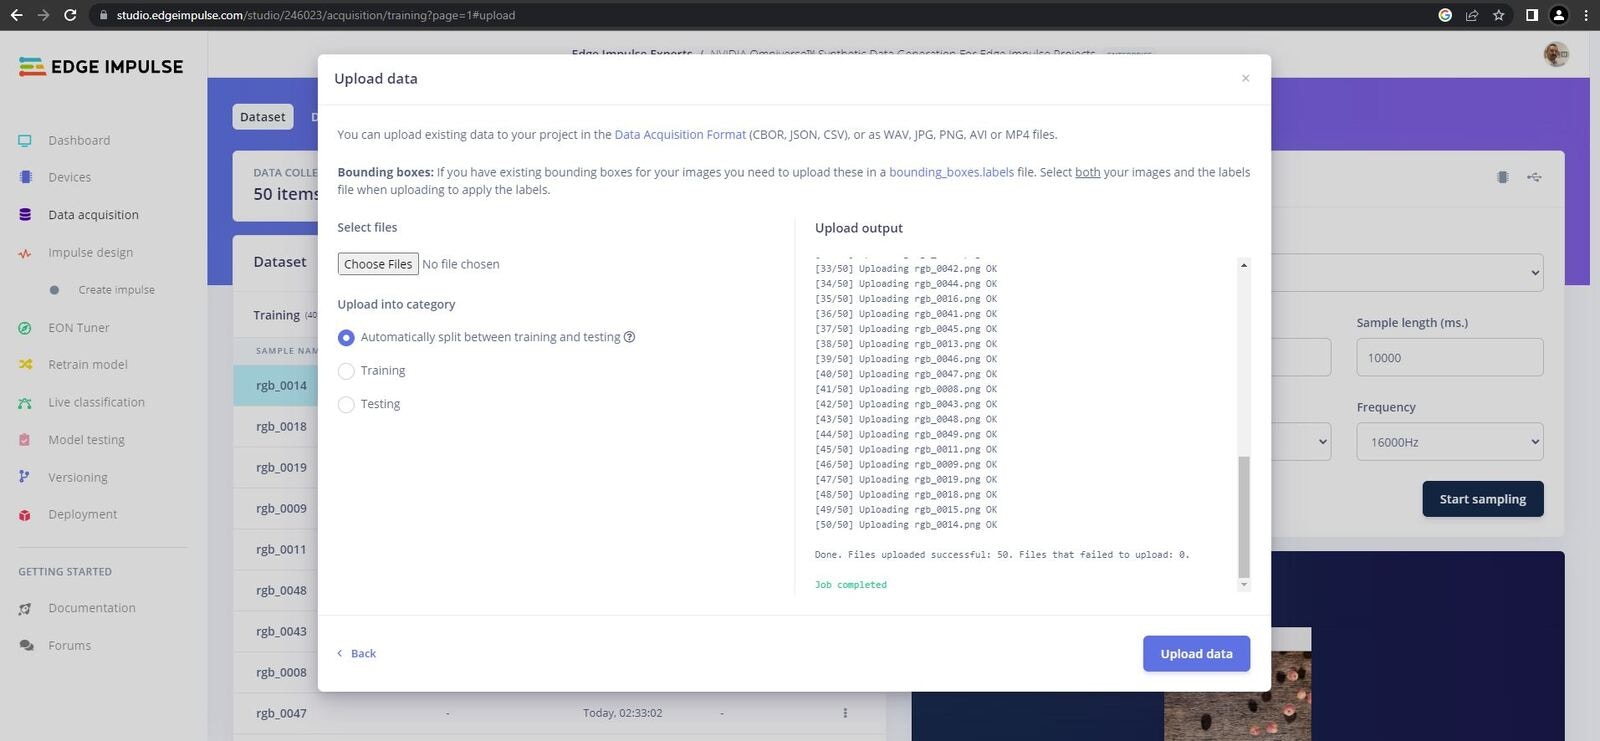
Upload Data
Apple class. Head over to the Data Aquisition page, select your 50 apple images, and click upload.
Labelling Data
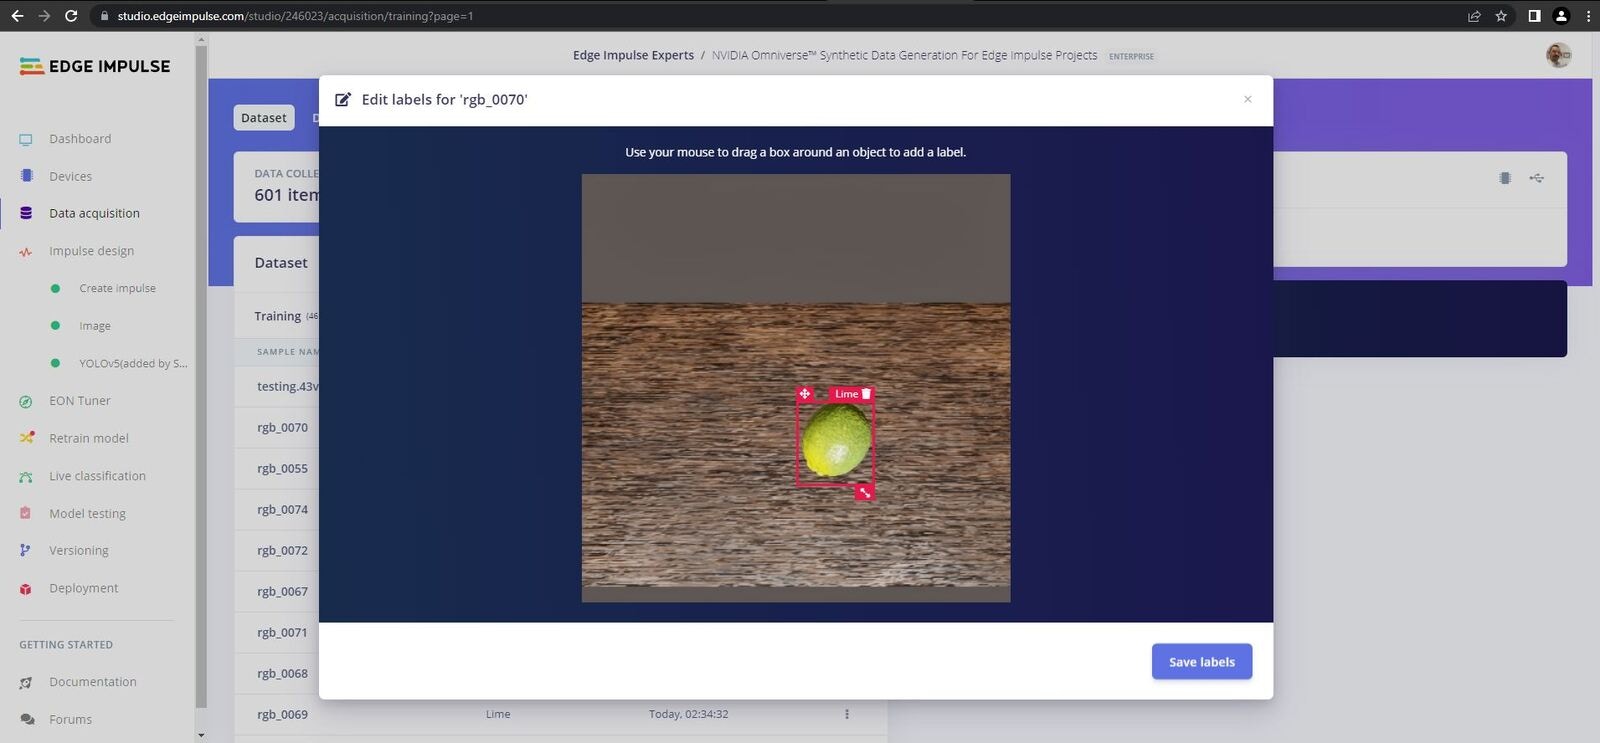
Labelling Data
Labelling Queue page. Here you can draw boxes around your data and add labels to each fruit in each image, then repeat these steps for each of the classes.
Note that the EI platform will attempt to track objects across frames, in some cases it makes duplicates or adds incorrect bounding boxes, ensure that you delete/modify these incorrect bounding boxes to avoid problems further down the line.
Once you have completed the apples data, repeat the steps for the oranges and limes images.
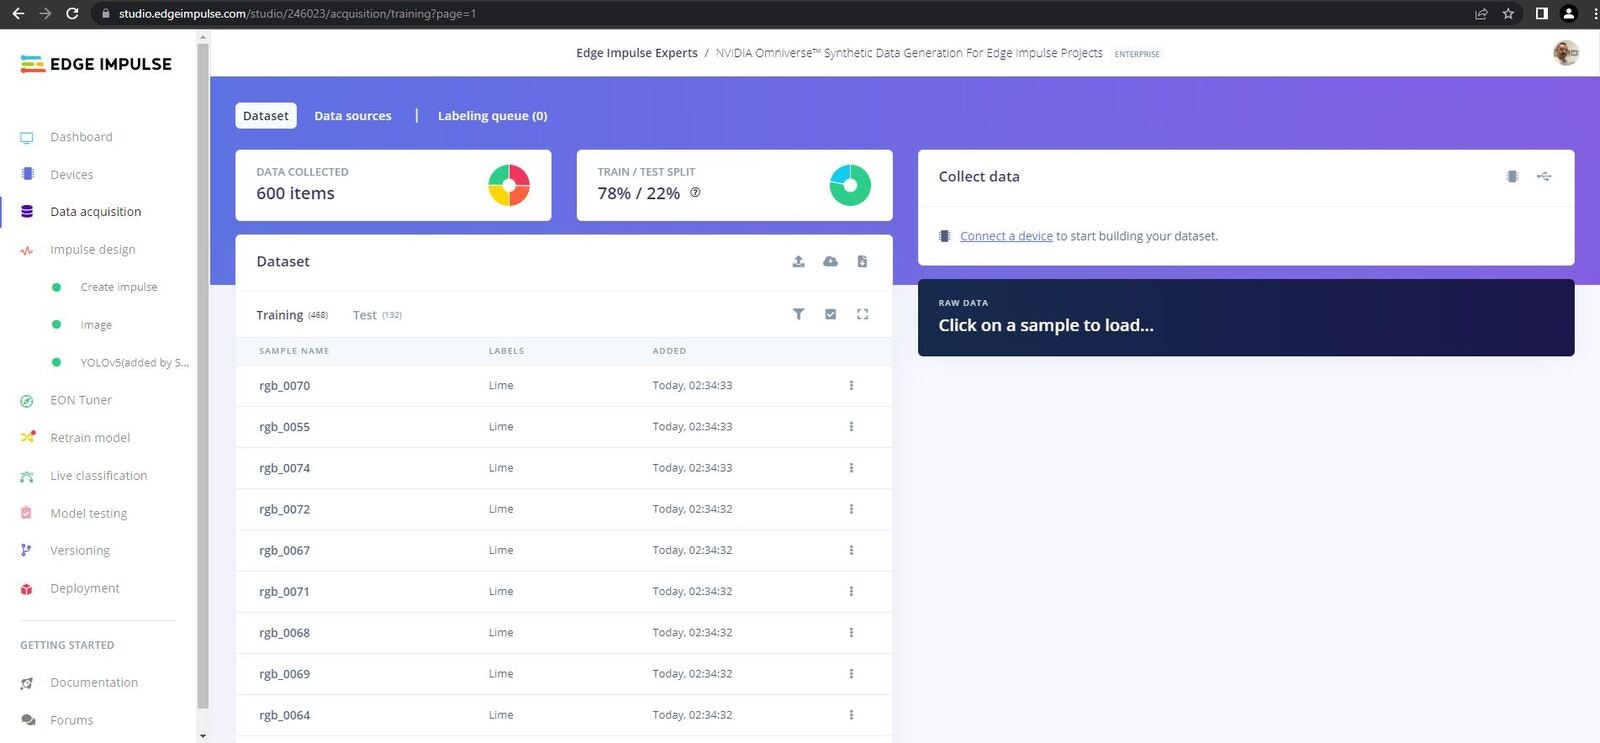
Completed Data
Create Impulse
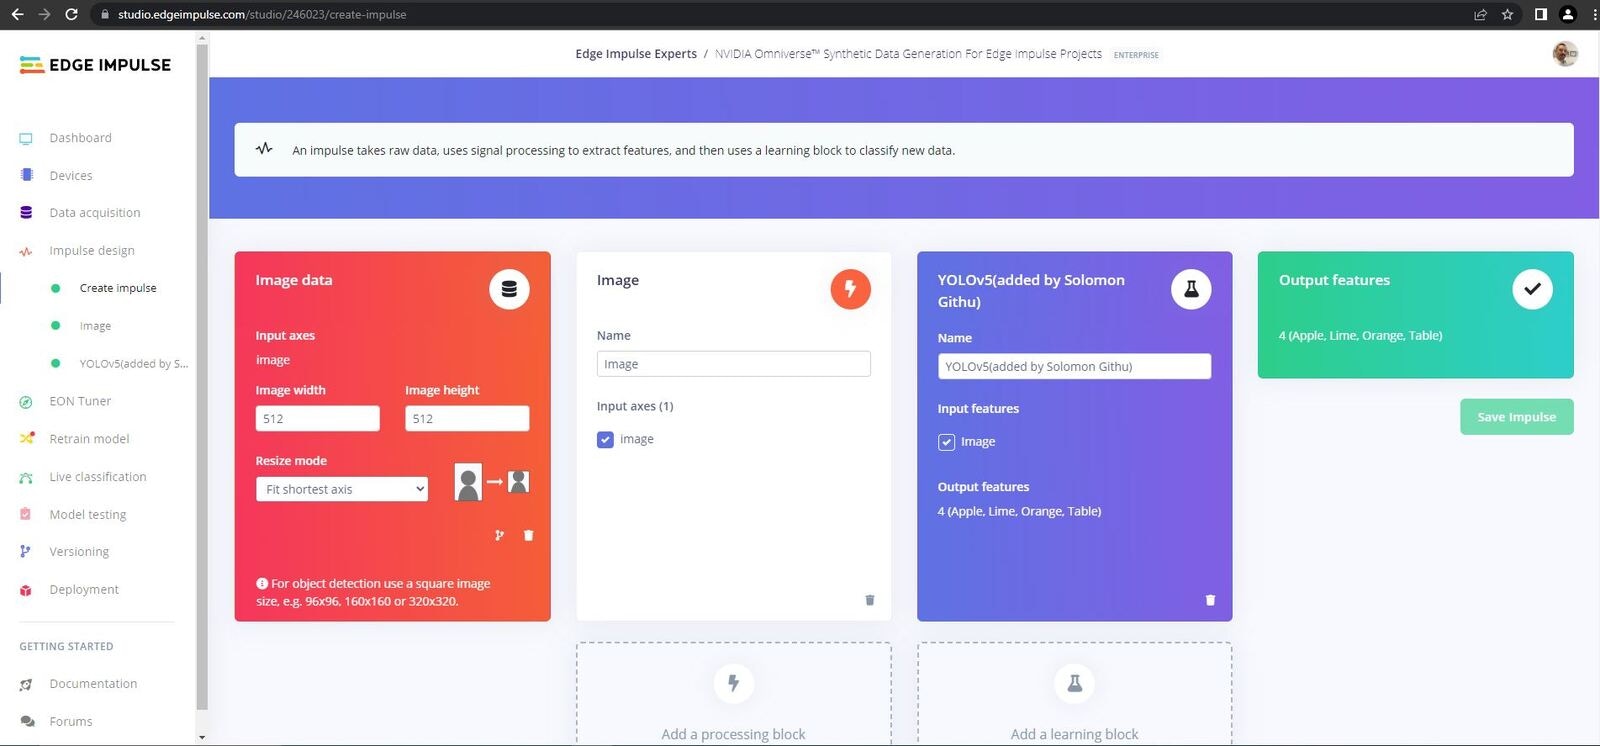
Create Impulse
Impulse Design tab and click on the Create Impulse tab. Here you should set the Image Width and Image Height to 512. Next add an Image block in the Processing Blocks section, then select Yolov5 in the Learning Blocks section, and finally click Save Impulse.
Parameters & Features

Parameters & Features
Images tab and click on Save Parameters, you will redirected to the features page. Once on the features page click Generate Features. You should see that your features are nicely grouped, this is what we are looking for to achieve satisfactory results.
Training
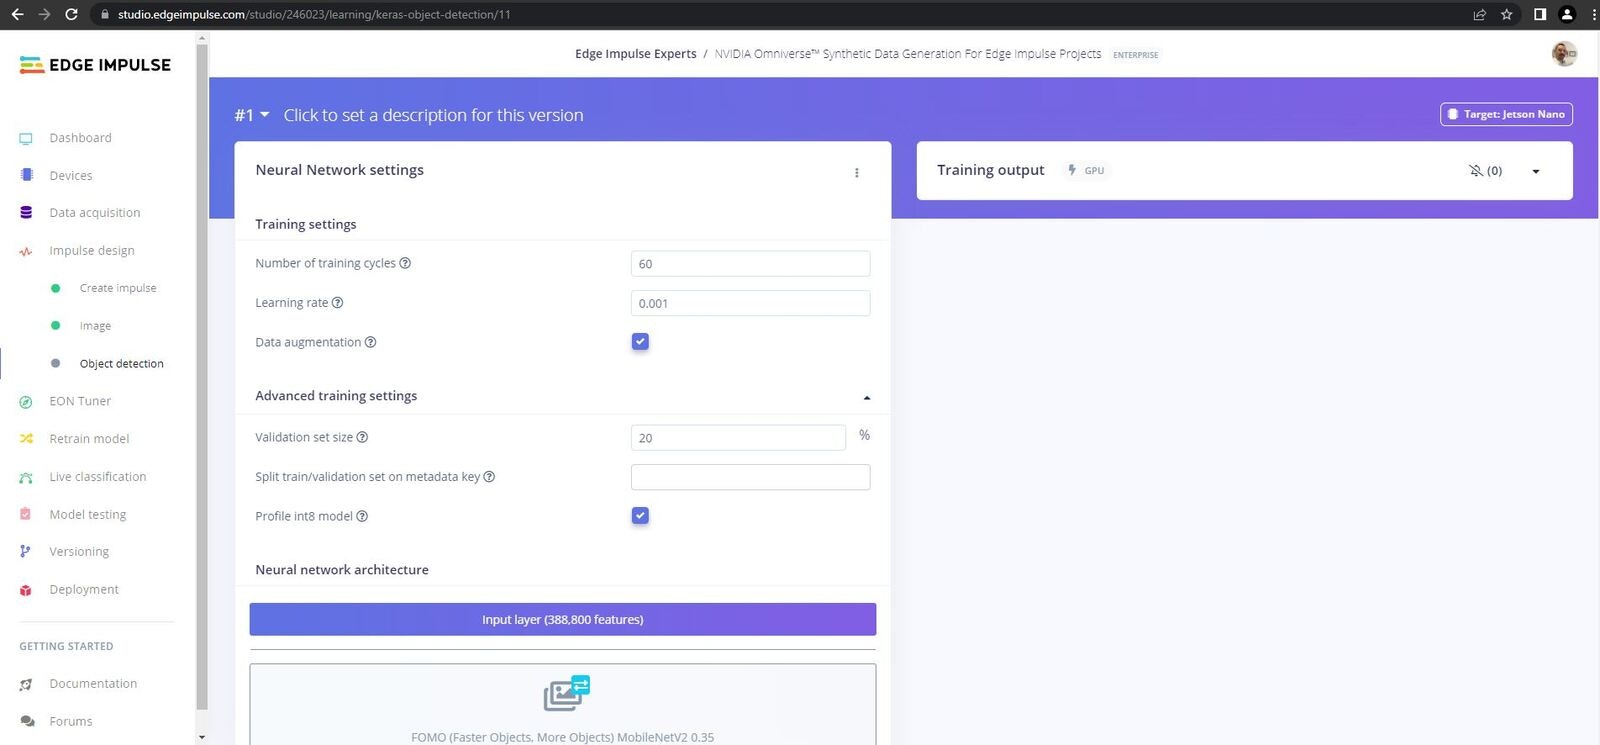
Training
Yolov5 tab, leave all the settings as they are aside from training cycles which I set to 750, then click Start Training. This while take a while so grab a coffee.

Training Results
Testing
Now it is time to test our model. There are a few ways we can test through Edge Impulse Studio before carrying out the ultimate test, on-device testing.Platform Testing
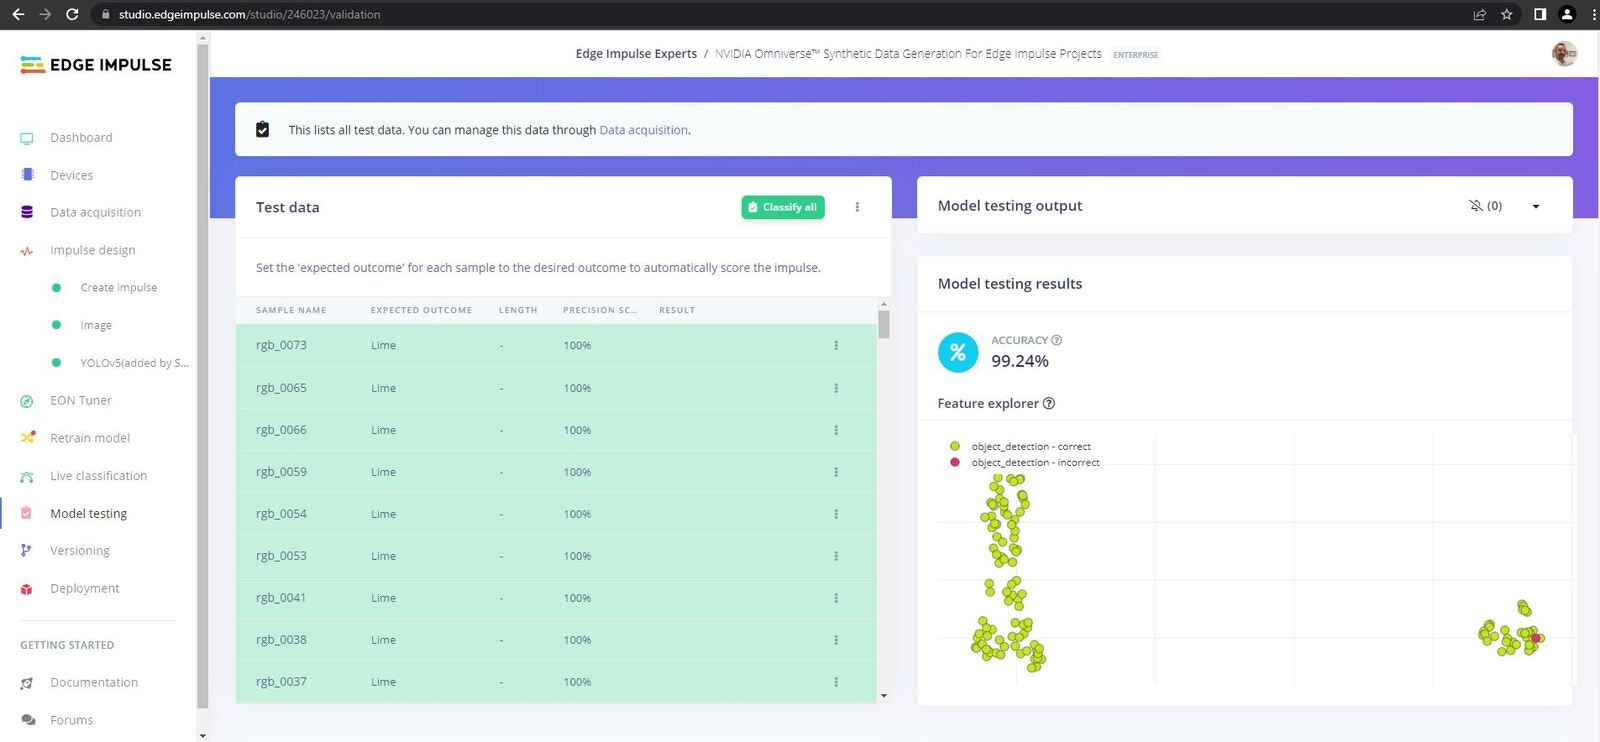
Platform Testing
Platform Live Testing
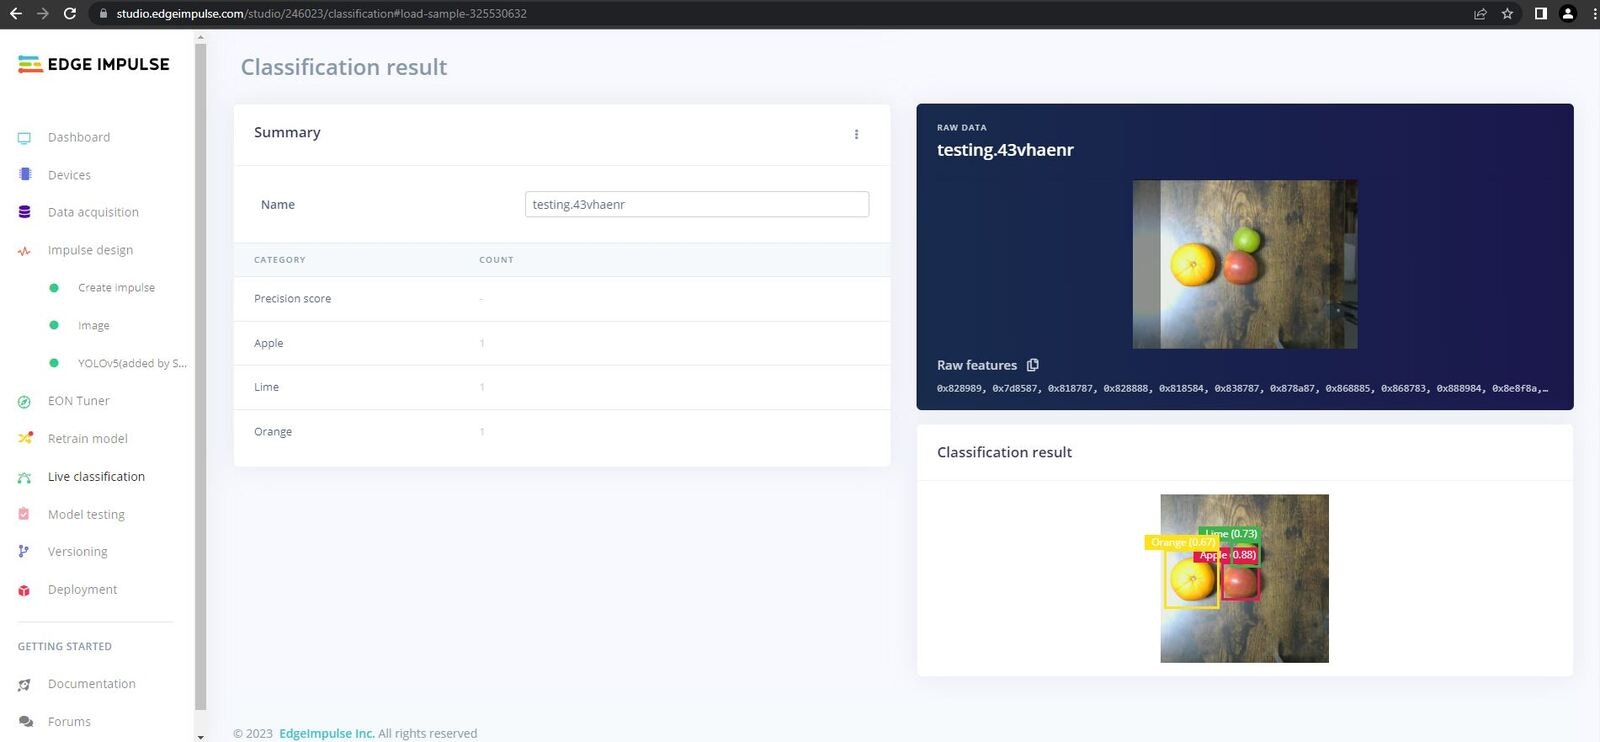
Platform Testing
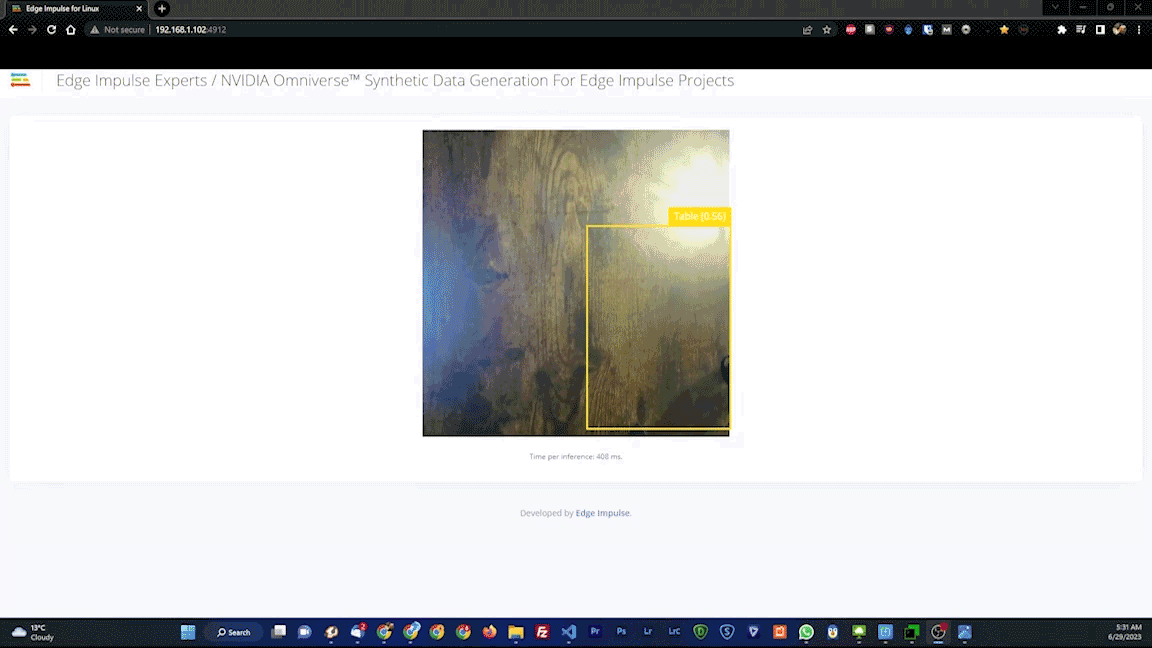
On-Device Testing
On-Device Testing Results