Introduction
Today more than ever we live with smart devices and personal assistants that work together to make our environment a more comfortable, efficient and personalized place. This project aims to contribute to the same field by suggesting a radical change in how we interact with smart things. Sometimes it can be inconvenient to have to ask a personal assistant to turn our appliances on or off. Because it’s simply too late at night to be talking, or because we’re watching our favorite movie and we don’t want annoying audio interrupting us. This is why I thought “What if we could control the whole house with just gestures?” It would be amazing to just point to the air conditioner and turn it on, turn off the light, and turn on our TV.Hardware and Software Requirements
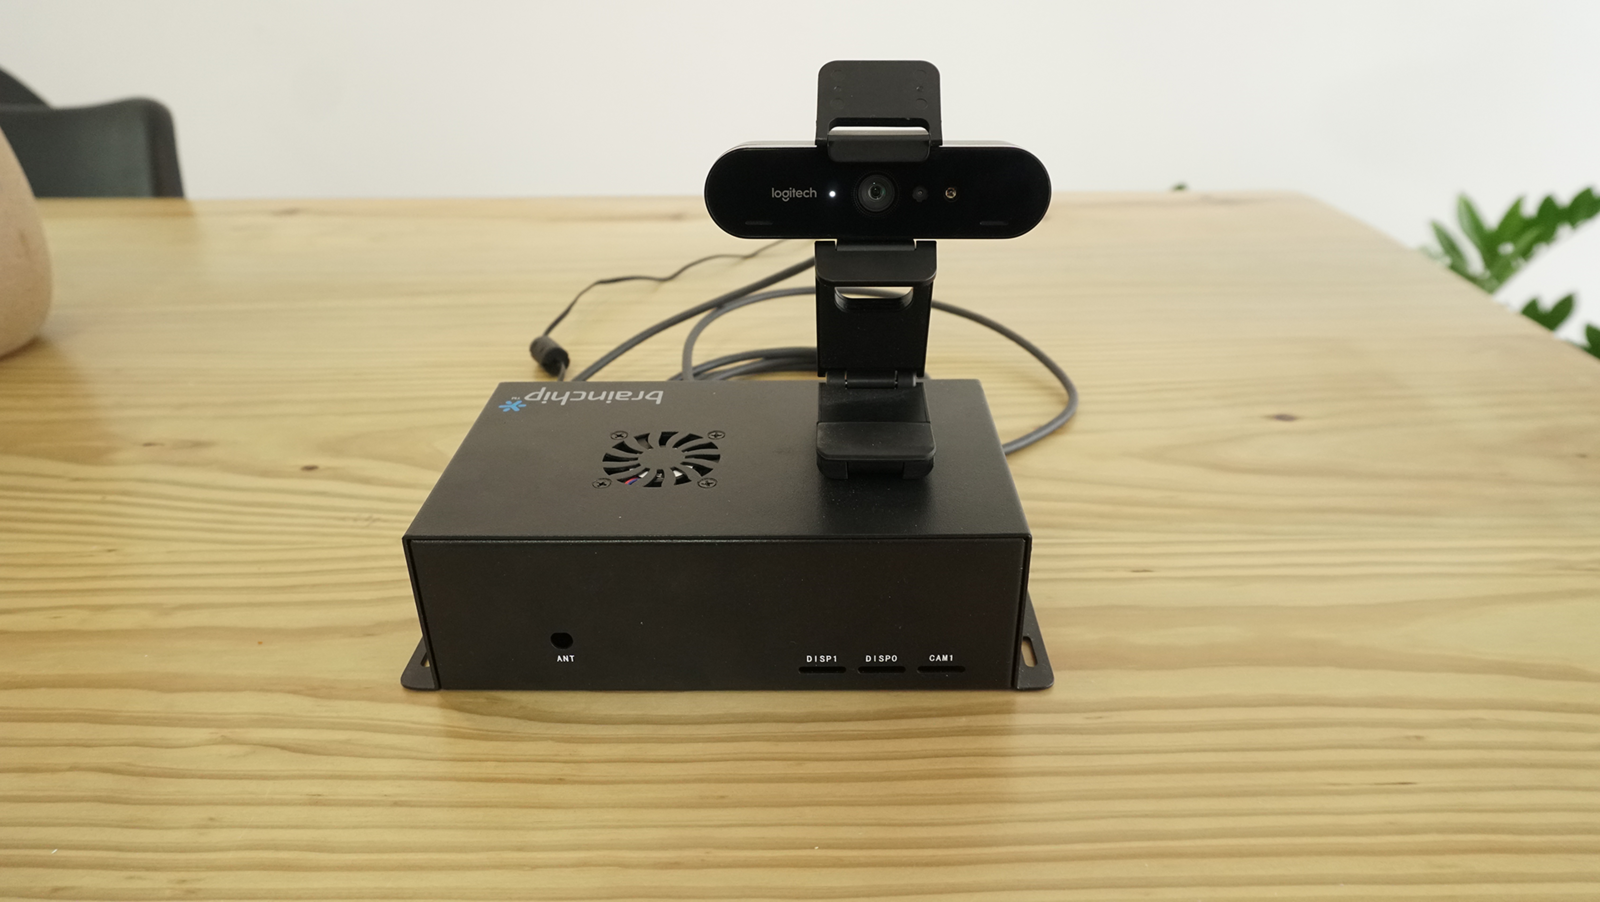
To develop this project we will use a BrainChip Akida Development Kit and a Logitech BRIO 4K Webcam, together with an Edge Impulse Machine Learning model for pose identification.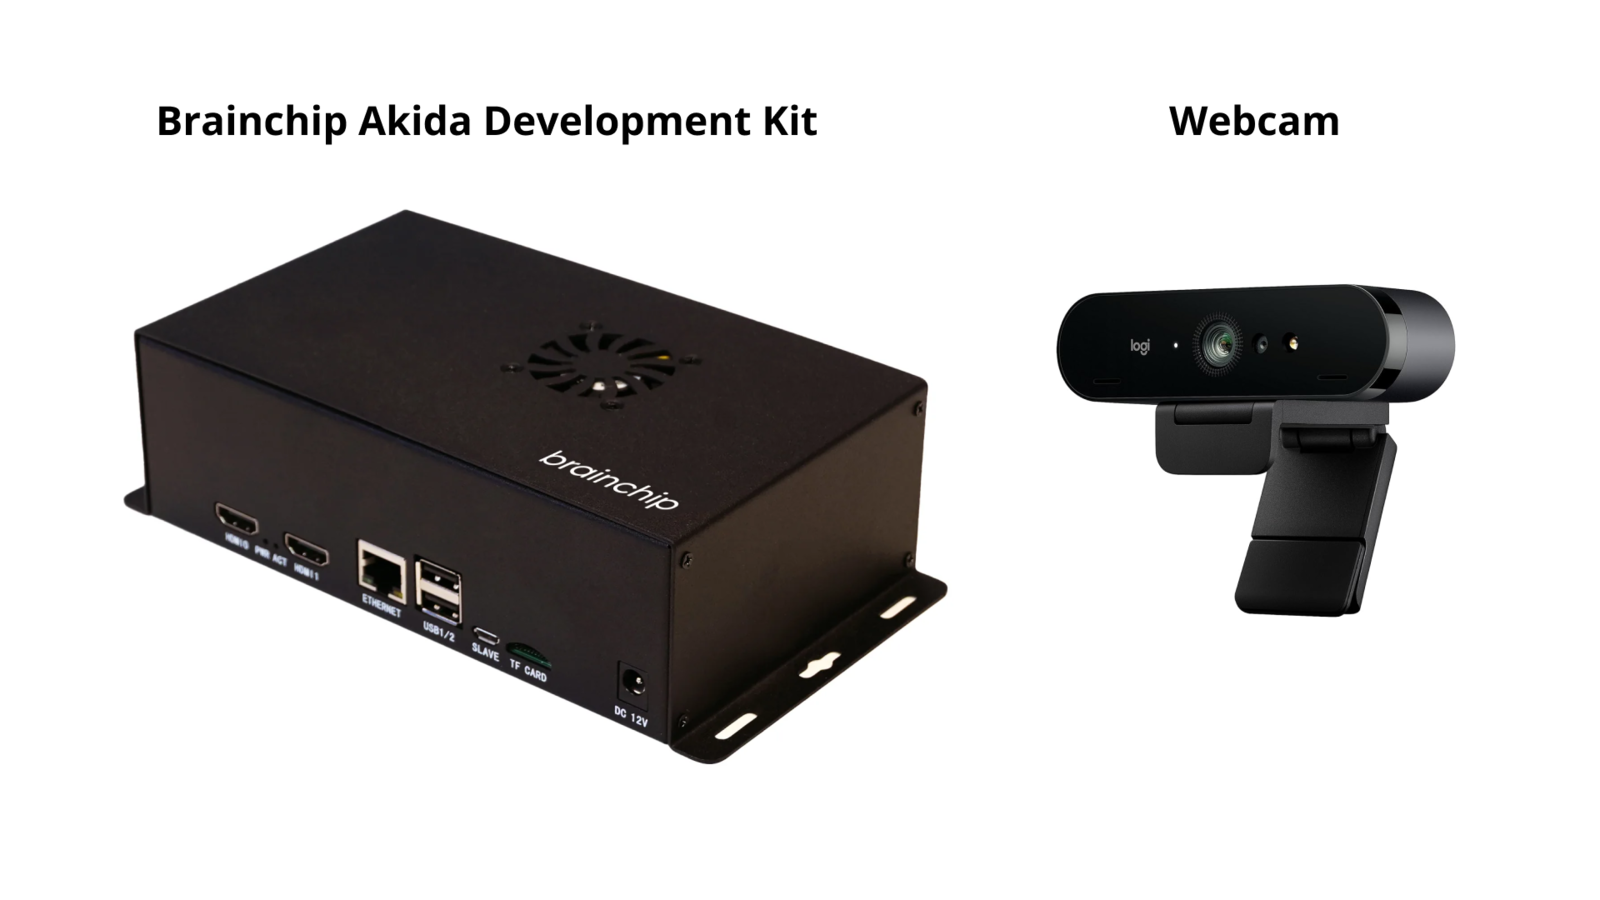
Hardware required for the project
Akida Dev Kit
It should be noted that this kit is the main component of this project thanks to some interesting characteristics that make it ideal for this use case. This kit consists of a Raspberry Pi Compute Module 4 with Wi-Fi and 8 GB RAM, also its IO Board, which includes a PCIe interface to carry an Akida PCIe board with the AKD1000 Neuromorphic Hardware Accelerator. Considering that our project will end up being one more smart device that we will have at home, it’s crucial that it can do its job efficiently and with very low energy consumption. This is where BrainChip’s technology makes sense. Akida™ neuromorphic processor mimics the human brain to analyze only essential sensor inputs at the point of acquisition—processing data with unparalleled performance, precision, and economy of energy.Software
The whole system will be running independently identifying poses, if a desired pose is detected it will send an HTTP request to the Google Assistant SDK being hosted by a Raspberry Pi with Home Assistant OS.Setting up the Development Environment
The system comes with the basic requirements installed to run machine learning models using Akida processor acceleration. Once the system is powered up and connected to the internet (I used an ethernet cable), you can access it by an SSH connection: you will need to know the device’s local IP address, in my case, I got it from the list of connected devices of my router.
Device IP Address
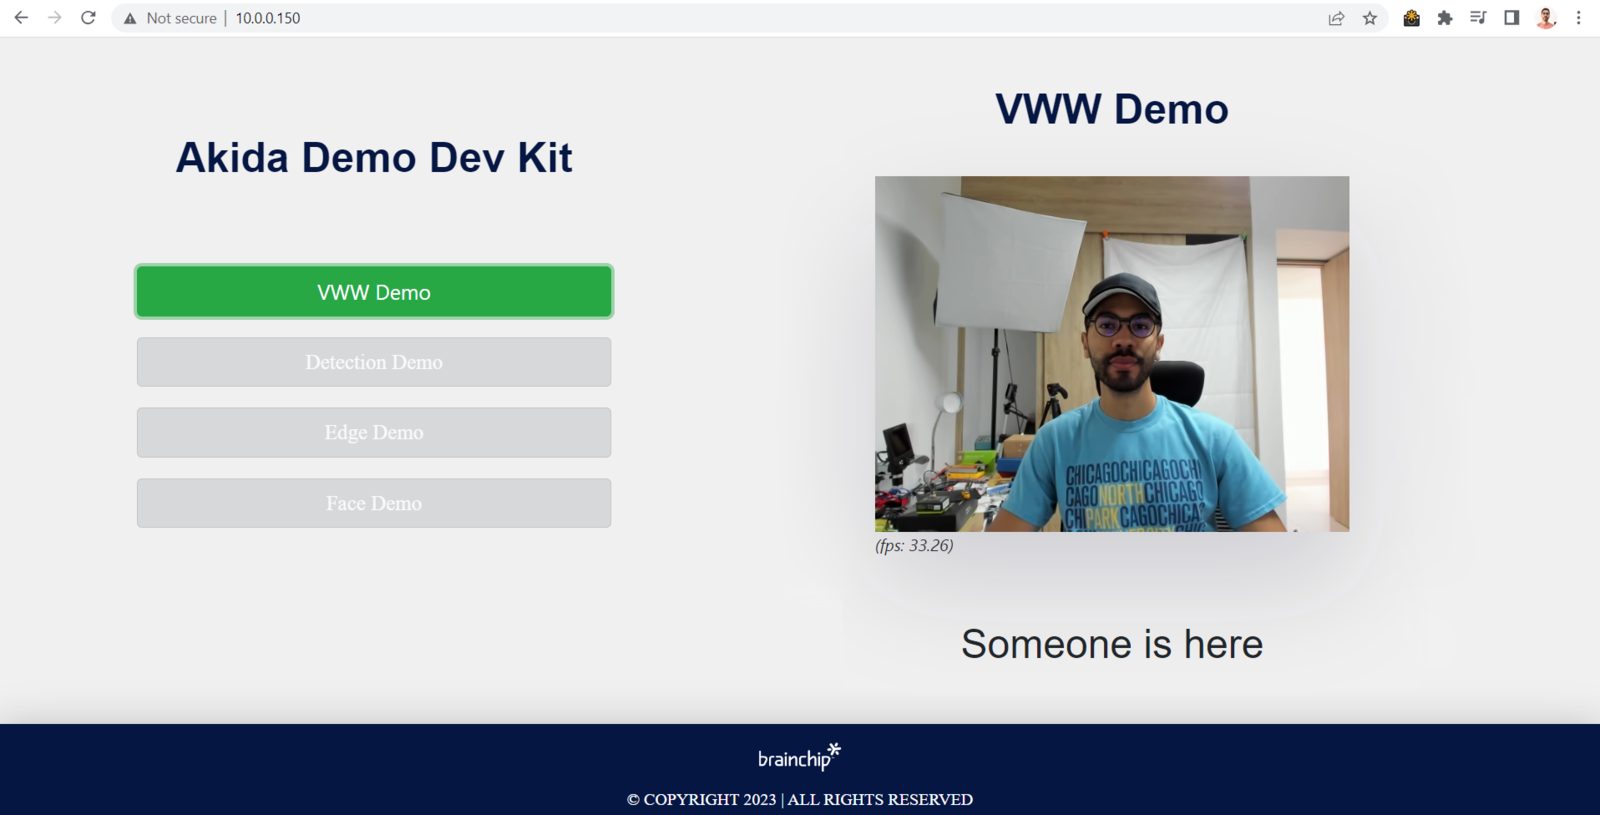
Built-in demo running
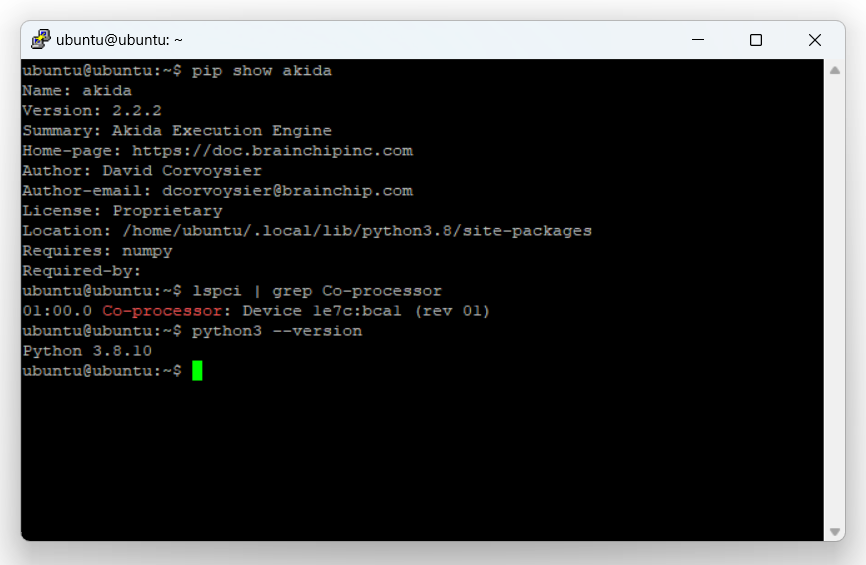
Verifying packages
As we are working with computer vision, we will need “opencv-python>=4.5.1.48, “PyAudio”, “Psutil”, and “Flask”
Data Collection
First, we need to create an Edge Impulse Studio account if we haven’t yet, and create a new project: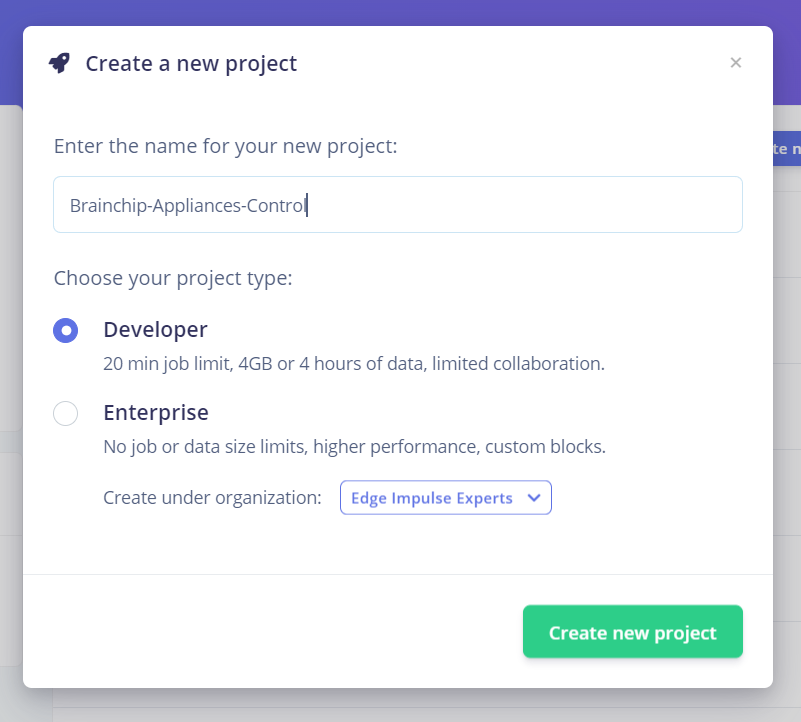
New project creation
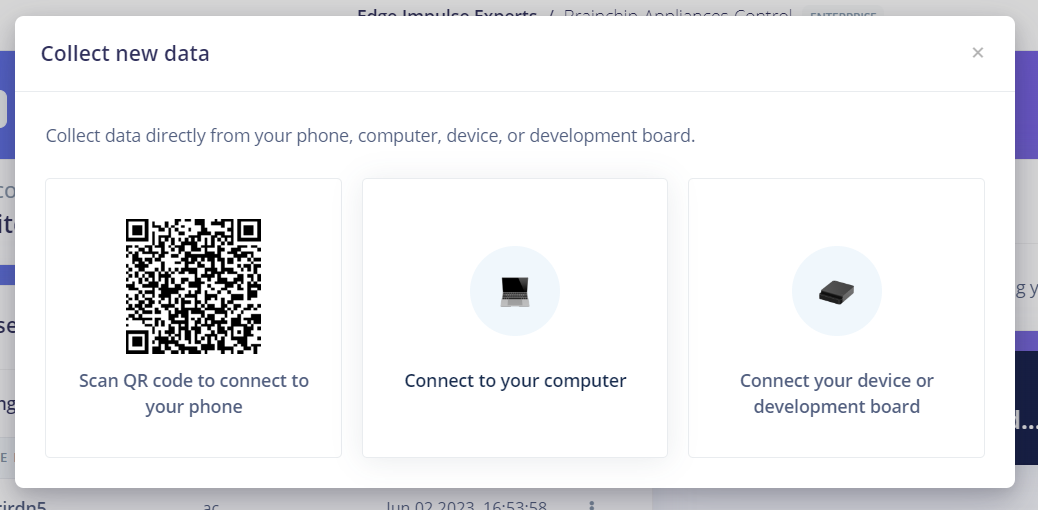
Dataset creating source
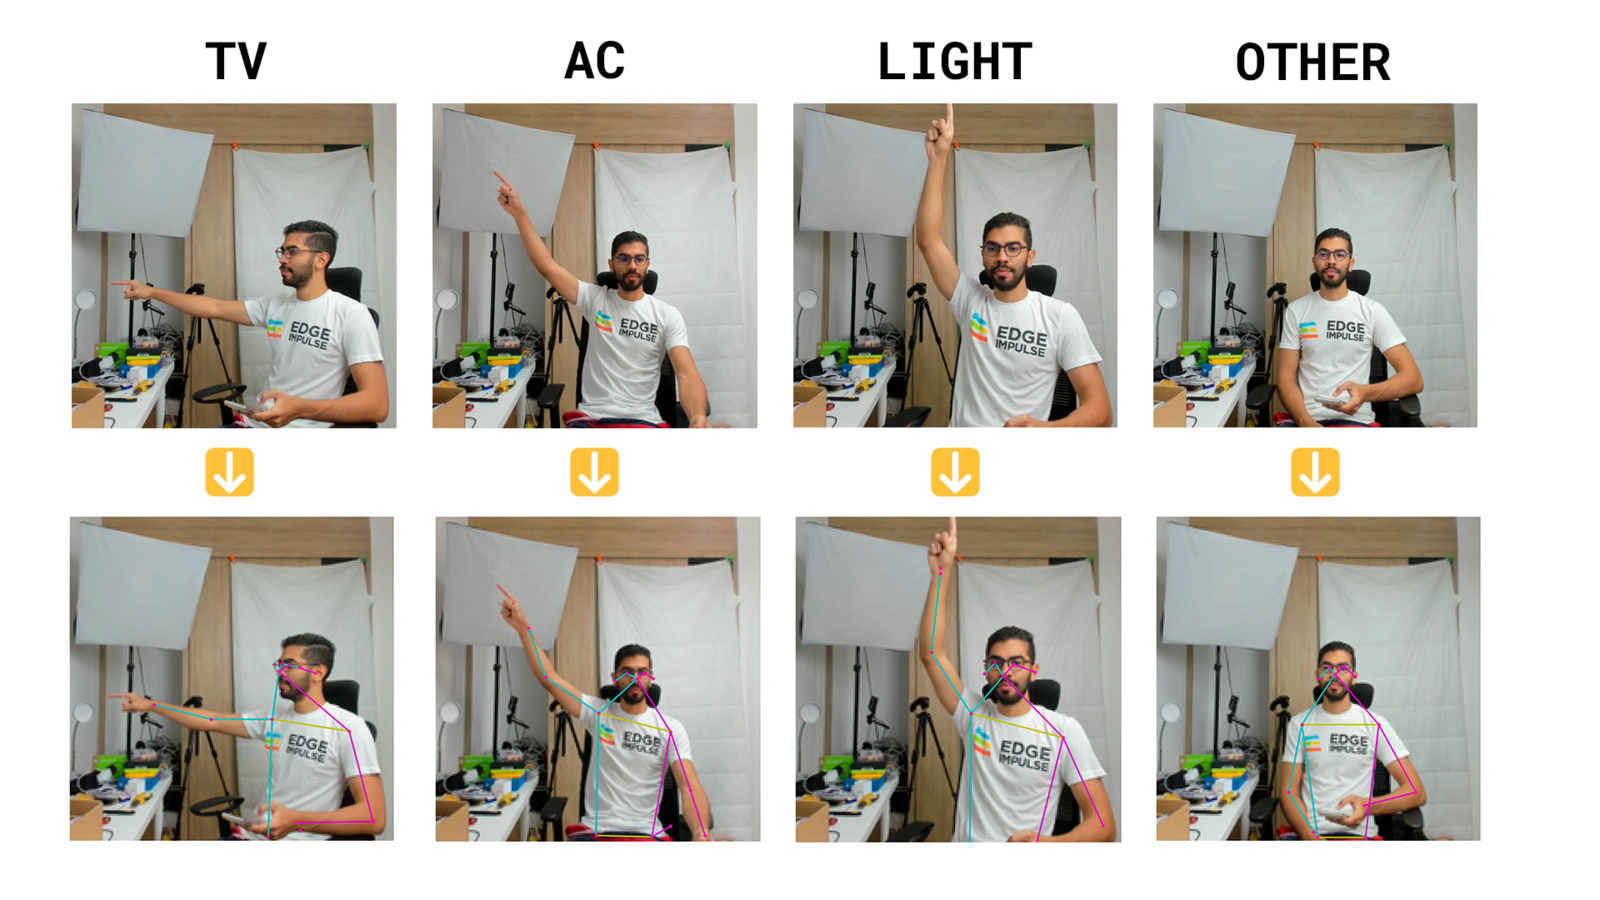
Raw image & PoseNet output
Taking at least +50 pictures of each class will let you create a robust enough model
Impulse Design
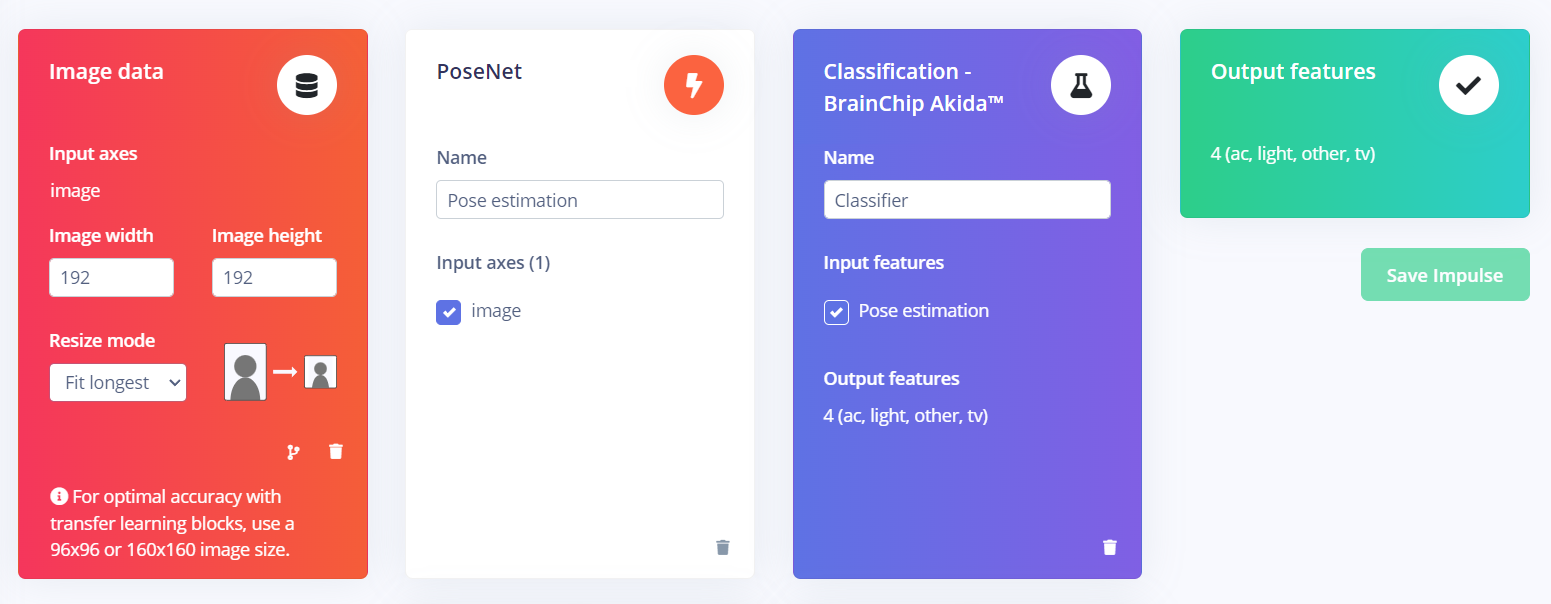
After having the dataset ready, it is time to define the structure of the model. In the left side menu, we navigate to Impulse design > Create impulse and define the following settings for each block, respectively:Input block (Image data):
- Image width: 192
- Image height: 192
- Resize mode: Fit longest
Processing block (PoseNet):
Use this block to turn raw images into pose vectors, then pair it with an ML block to detect what a person is doing. PoseNet processing block is just enabled for Enterprise projects, if we want to use it on a Developer one, we need to locally run the block, for this, you must clone the PoseNet block repository and follow the README steps. You will end up with an URL similar tohttps://abe7-2001-1308-a2ca-4f00-e65f-1ff-fe27-d3aa.ngrok-free.app hosting the processing block, click on Add a processing block > Add custom block, then paste the ngrok generated URL, and click on Add block.
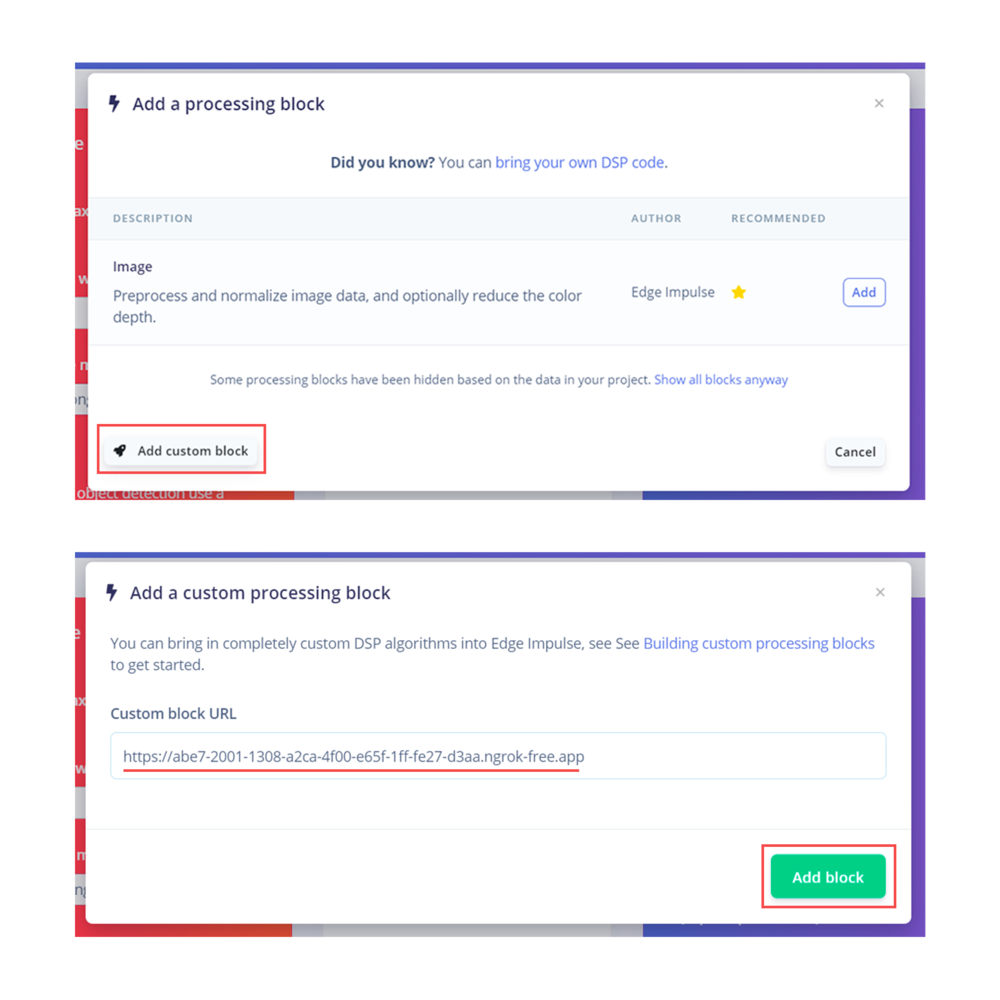
Adding a Custom Block
Learning block (BrainChip Akida)
To classify the features extracted from the different poses, we’ll use a classification learn block specifically designed for the hardware we’re using.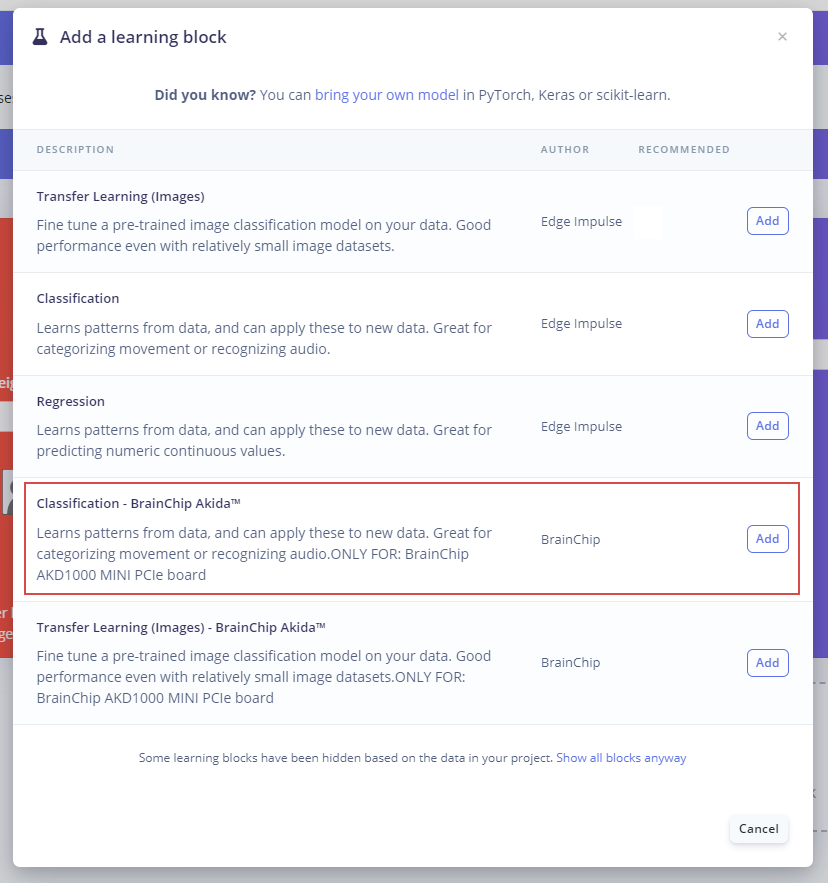
Adding a Custom Block
Adding a Custom Block
Model Training
After having designed the impulse, it’s time to set the processing and learning blocks. The Pose estimation block doesn’t have any configurable parameters, so we just need to click on Save parameters and then Generate features. In the classifier block define the following settings:- Number of training cycles: 100
- Learning rate: 0.001
Confusion Matrix
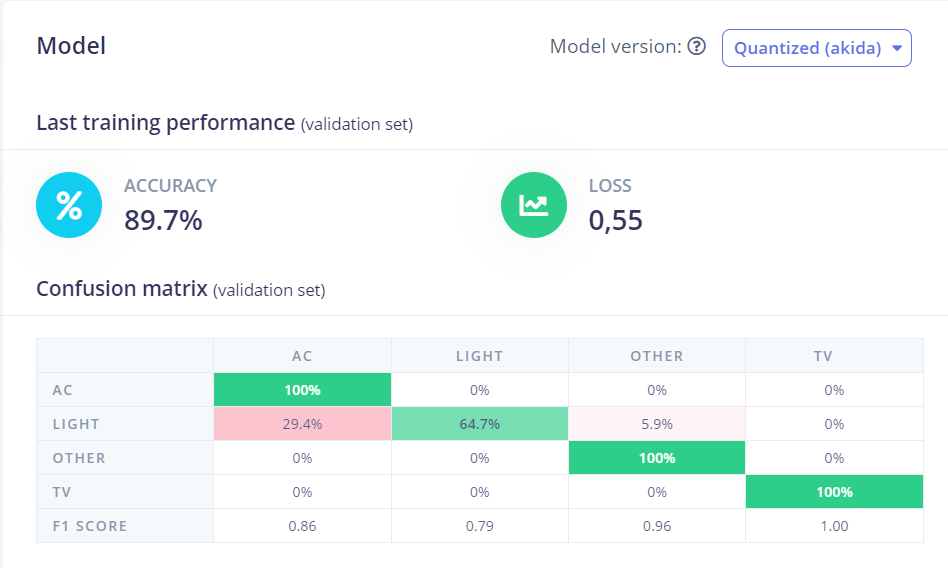
Confusion matrix results
Project Setup
To be able to run the project, we need to go back to our SSH connection with the device and clone the project from the Github repository, for this, use the following command:Deployment
Once the project is cloned locally in the Akida Development Kit, you can download the project model from Edge Impulse Studio by navigating to the Dashboard section and downloading the MetaTF.fbz file.

Downloading the project model
scp command as follows:
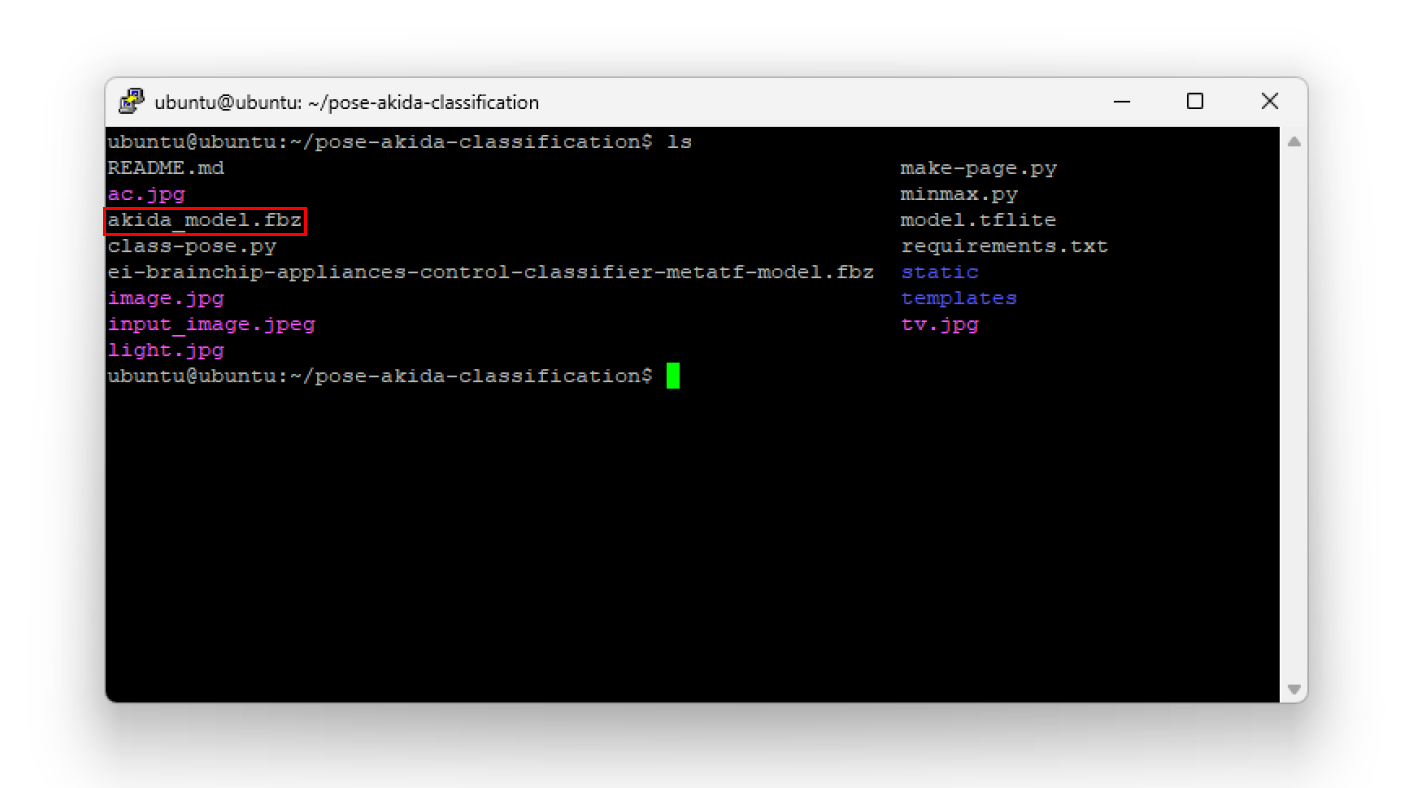
You will be asked for your Linux machine login password.Now, the model is on the Akida Dev Kit local storage
(/home/ubuntu) and you can verify it by listing the directory content using ls.
Move the model to the project directory with the following command:
Project directory
Run Inferencing
To run the project, type the following command:- The first parameter
class-pose.pyis the project’s main script to be run. akida_model.fbzis the Meta TF model name we downloaded from our Edge Impulse project.0force the script to use the first camera available.
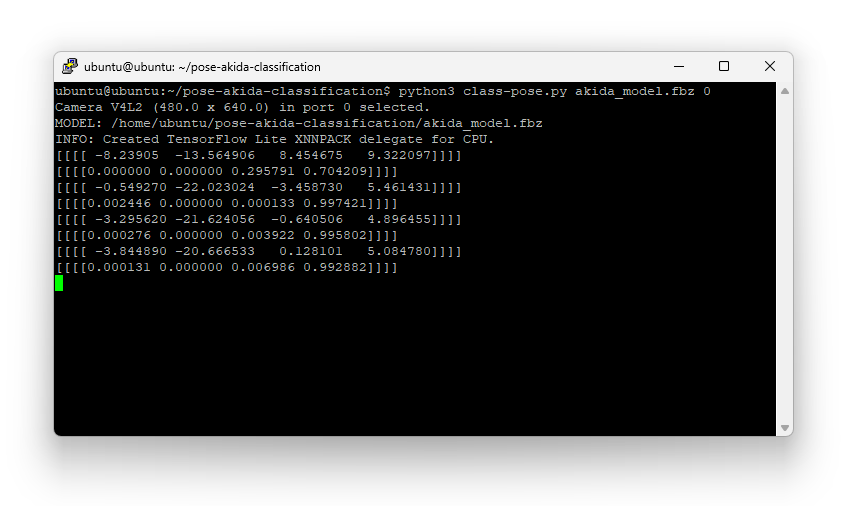
Project running and printing the results
ssh session and running the make-page.py script from the project directory:
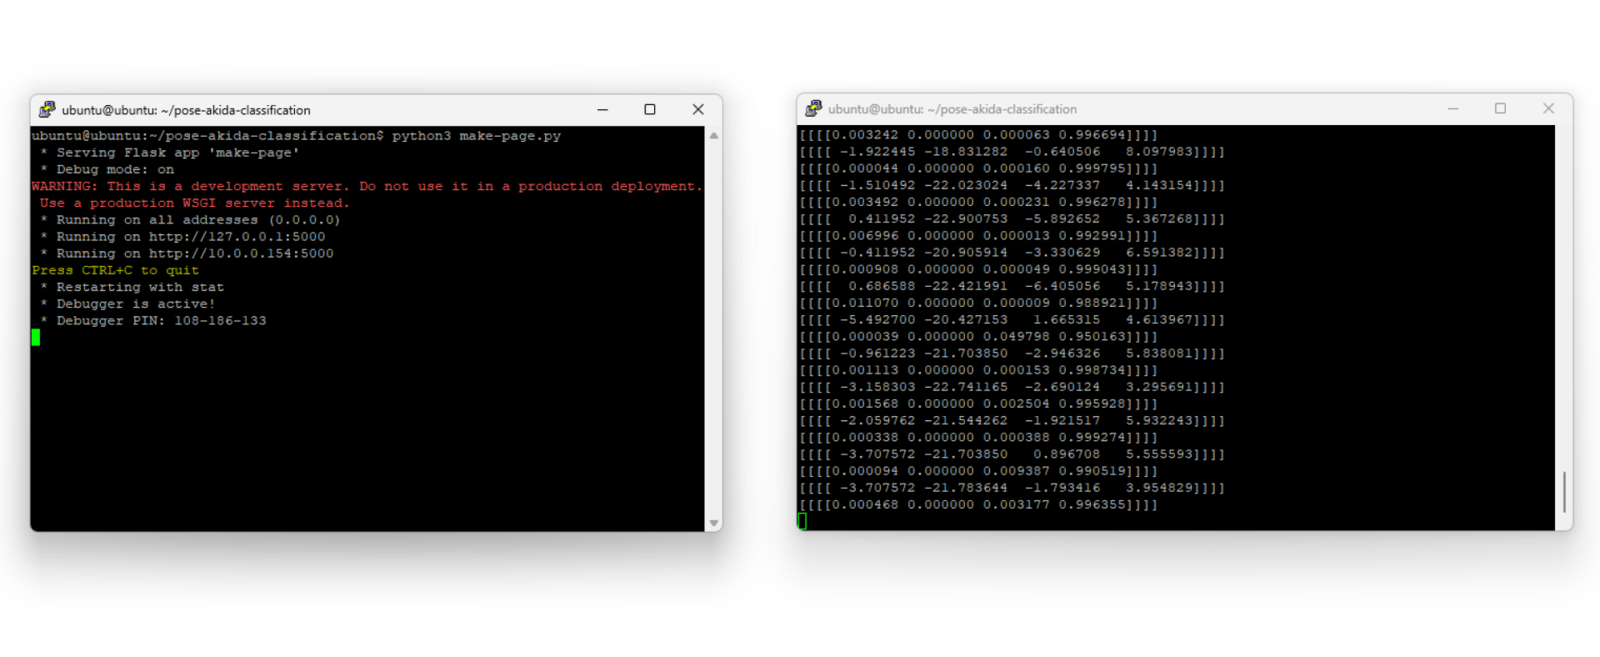
Preview Web Page script command
AC, Light, Other and TV.
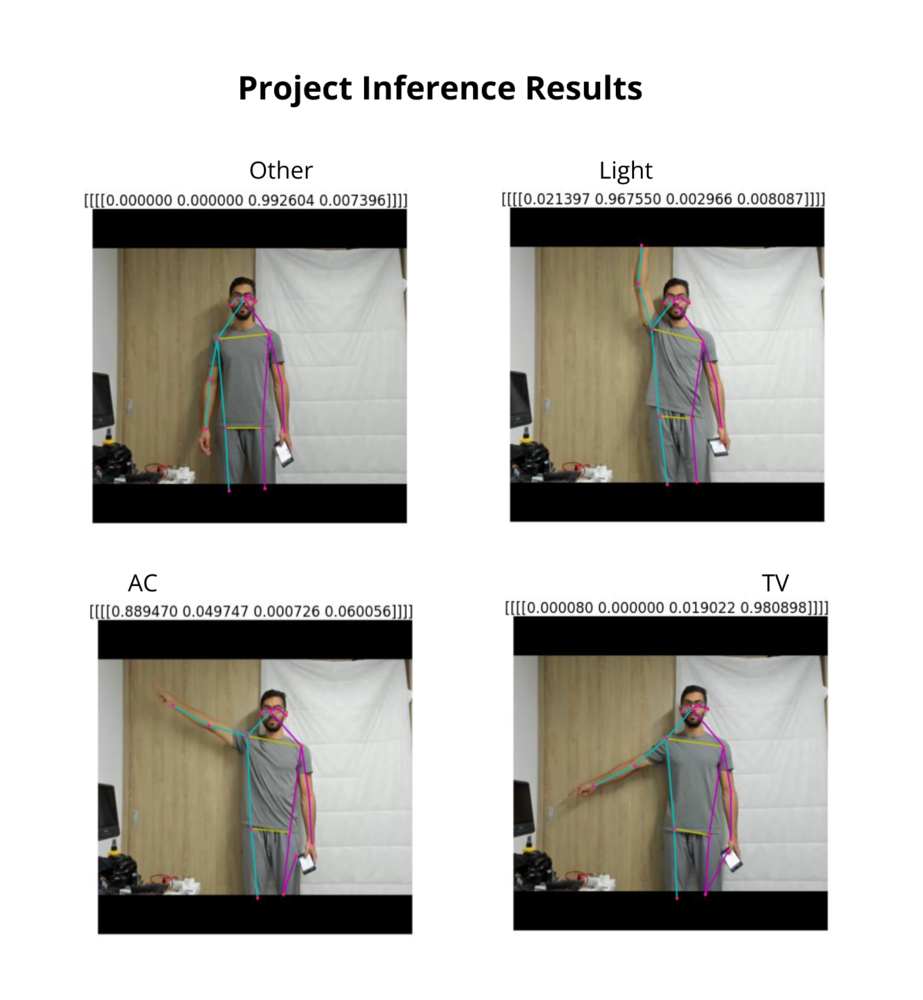
Project running | Inference results
Google Assistant Setup
For the actual appliance control, I used the Google Assistant SDK integration for Home Assistant. Follow the documentation to configure it for your setup.The Home Assistant is running on a separate Raspberry PI.Once the integration is set, we can send
HTTP requests to it with the following format:
- URL:
http://<Raspberry Pi IP>:8123/api/services/google_assistant_sdk/send_text_command - Headers:
- Authorization:
"Bearer" - Content-Type:
"application/json"
- Authorization:
- Body:
{"command":"turn on the light"}
url and auth variables in the code with the respective ones of your setup.
Demo
Final project deployment