Introduction
Illegal logging is a major environmental issue worldwide. It not only destroys forests but also decreases the amount of available timber for legal purposes. In addition, illegal logging often takes place in protected areas, which can damage ecosystems and jeopardize the safety of people and wildlife. One way to combat this problem is through the use of machine learning algorithms that can detect chainsaw noise and be deployed on battery-powered devices, such as sensors in the forest. This allows for real-time monitoring of illegal logging activity, which can then be quickly addressed.The Challenge
Detecting illegal logging is therefore essential for both environmental and economic reasons. However, it is difficult to detect illegal logging activity due to the vastness of forested areas, as it often takes place in remote and hard-to-reach areas. Traditional methods such as ground patrols are often ineffective, and satellite imagery can be expensive and time-consuming to analyze.
Our Solution

Hardware requirements
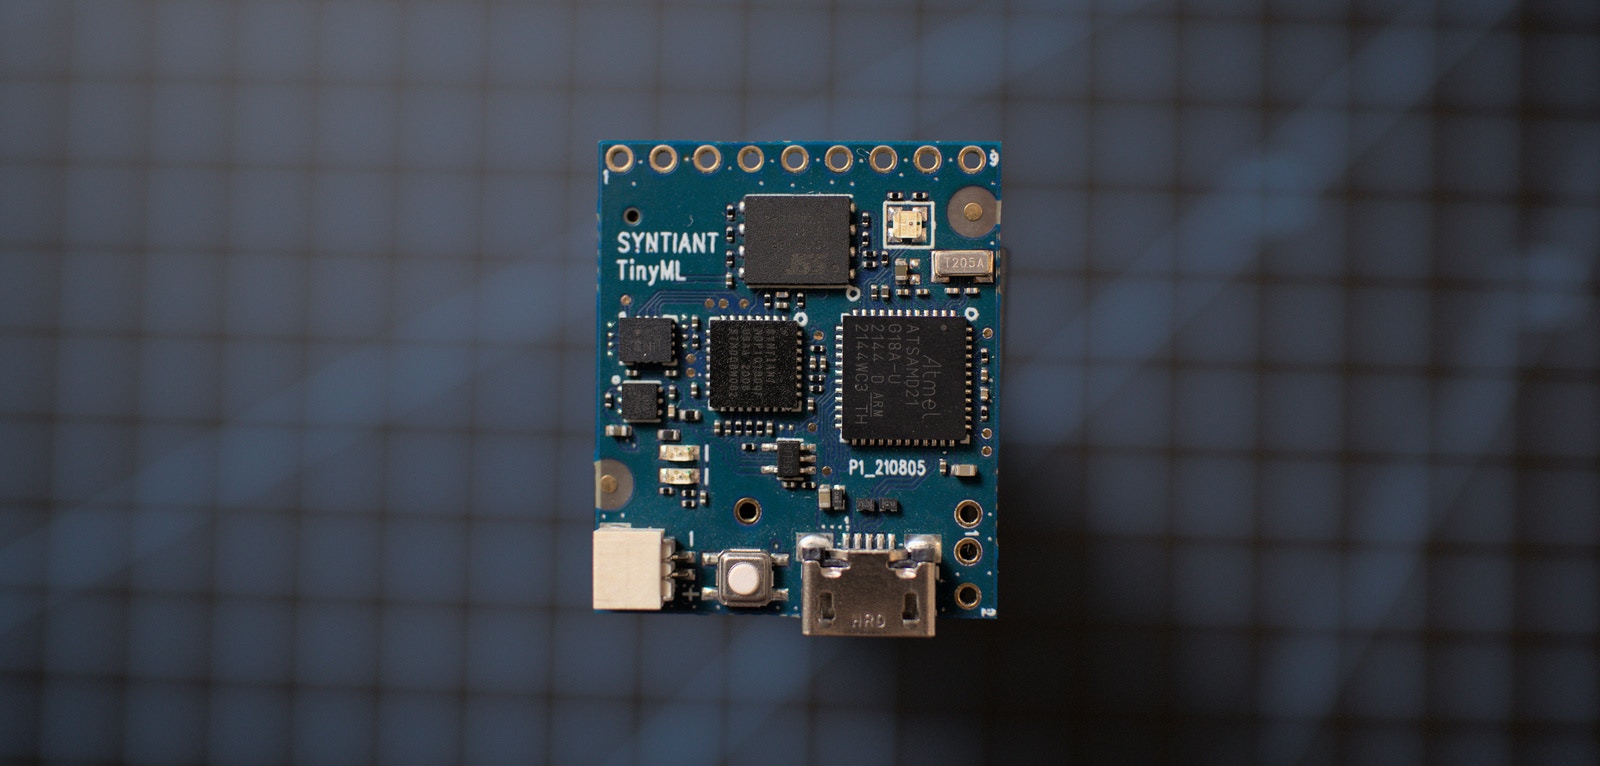
- Syntiant TinyML board
- Micro USB cable
- SIM800L GSM module
- ESP32
- ESP32 programmer
- 3.3V power supply (LD1117S33)
- Power bank: rechargeable Li-Ion battery (INR18650-29E6 SAMSUNG SDI) + charger
- Consumables (wires, prototyping board, LED)
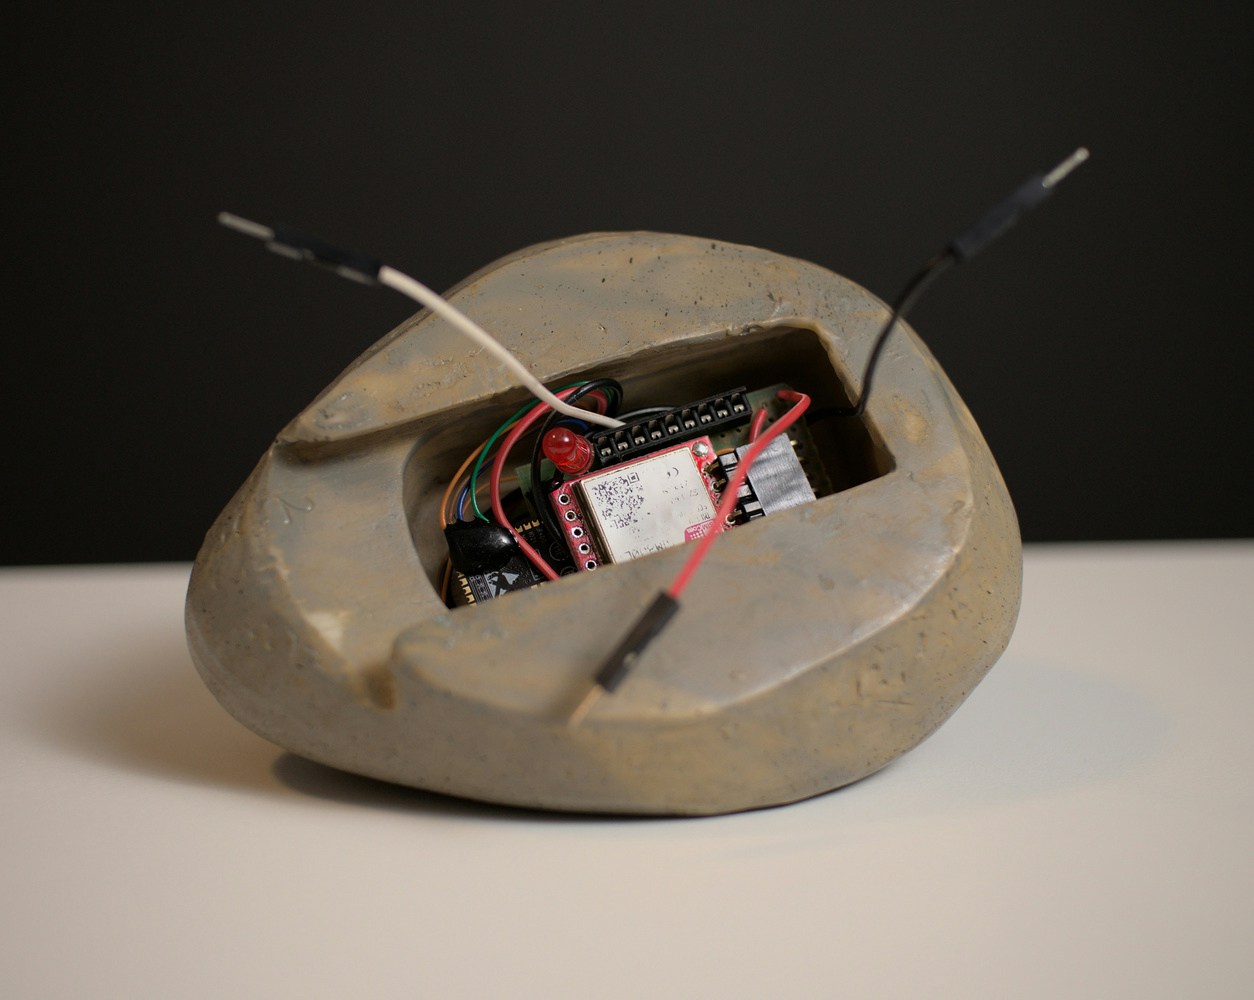
- Enclosure (carved stone)
Software requirements
- Edge Impulse account
- Edge Impulse CLI
- Arduino IDE
- Arduino CLI
- Git
Hardware Setup
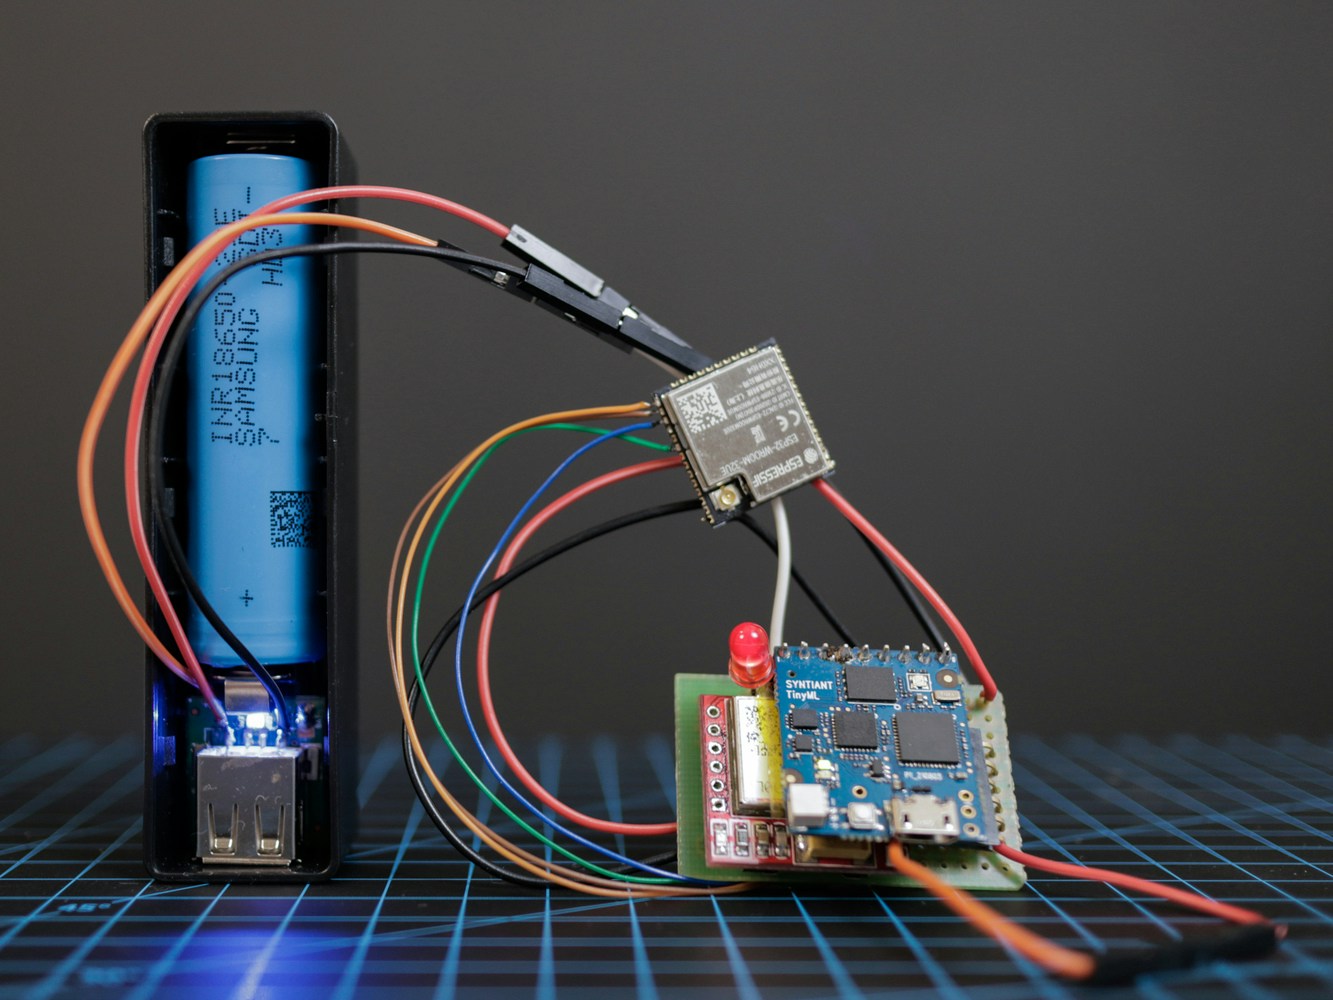
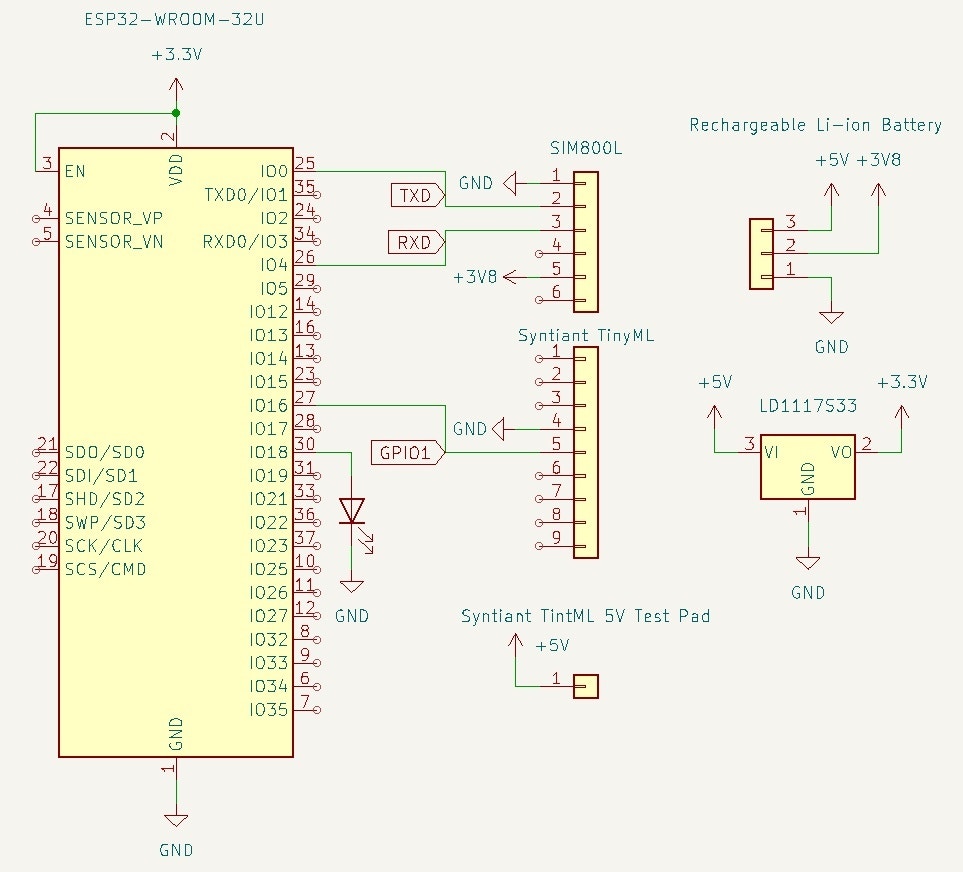
As stated before, our choice of Edge computing hardware for this use case is the Syntiant TinyML board, designed for working with Syntiant’s Neural Decision Processors (NDPs). This development board is a powerful tool for developing and deploying Machine Learning algorithms, as it is equipped with an ARM Cortex-M4 processor, which allows for real-time inference of the trained Machine Learning model. Another advantage of this Syntiant board is that it is equipped with 5 GPIOs that enable it to interact with other external circuitry and trigger an external output. Over the ML detection layer of our system, we will be adding a communication layer. In this case, we are using an external circuit based on the ESP32 MCU that can read a trigger from Syntiant TinyML, which is further interfaced with a SIM800L module, responsible for sending an SMS message to the user when chainsaw noise is detected. Be advised that the SIM800L is using 2G networks, in the EU there are still many providers for it and the coverage is way better for it in comparison with the speedier networks. Since we are deploying it in a forest it’s actually a good option for us. In the US the 2G networks are being phased out currently so be sure to check what GPRS module works best in your case.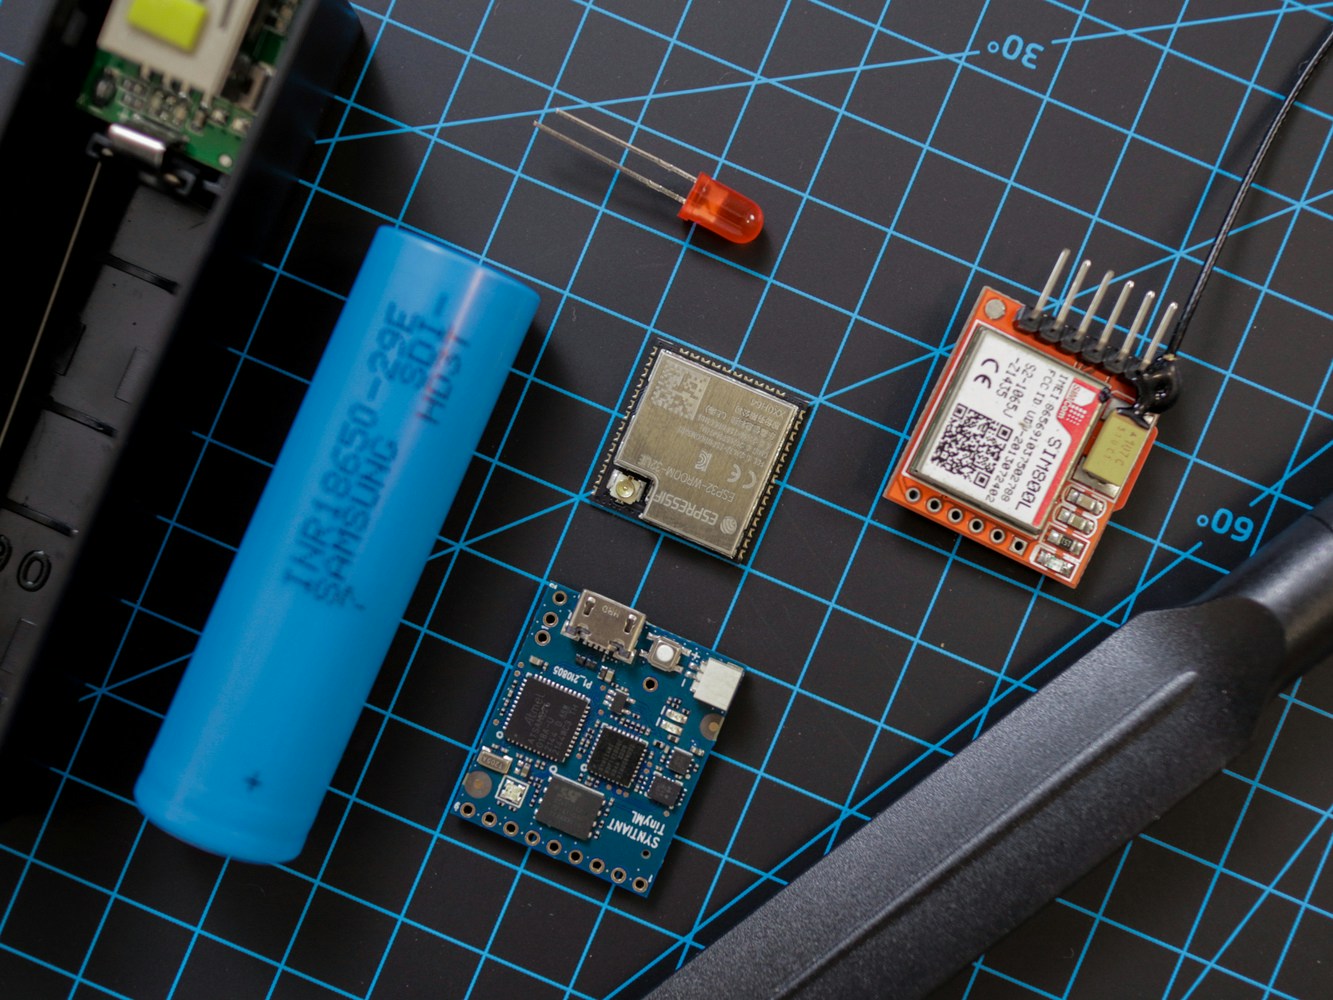


Software Setup
To connect the Syntiant TinyML to Edge Impulse, download the Audio firmware archive. Put the board in boot mode by double-clicking on the reset button when connecting the board to your computer, while the orange LED is blinking. In boot mode, you should see the red LED fading on and off. Then flash the firmware by running the script for your OS from the archive:Creating an Edge Impulse Project
Let’s start by creating an Edge Impulse project. Register an account with Edge Impulse. Select Developer as your project type, click Create new project, and then give it a memorable name.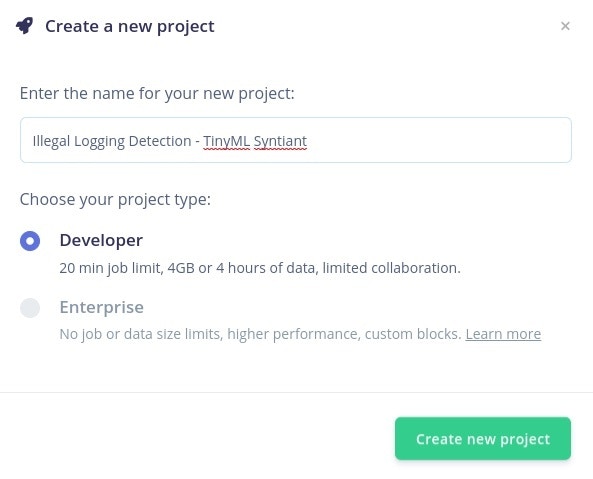
Data Collection
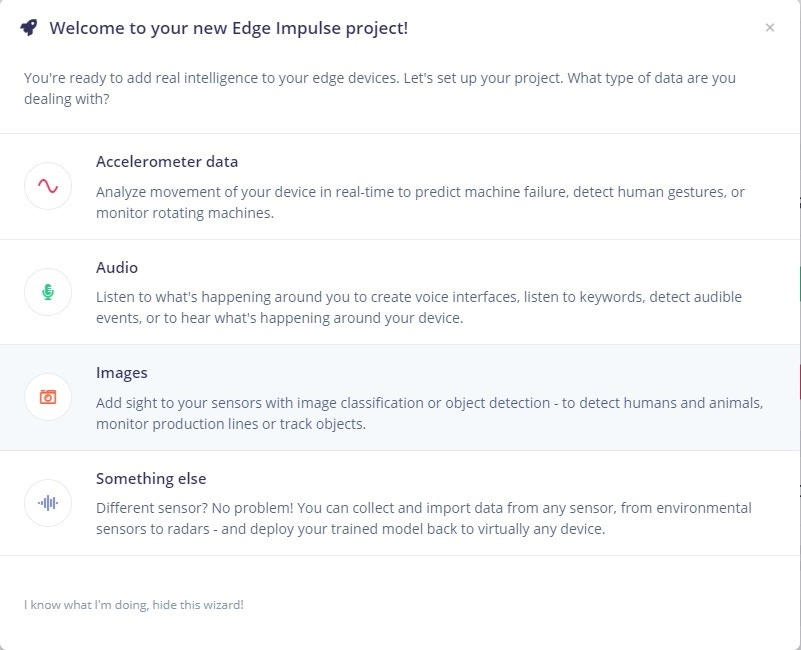
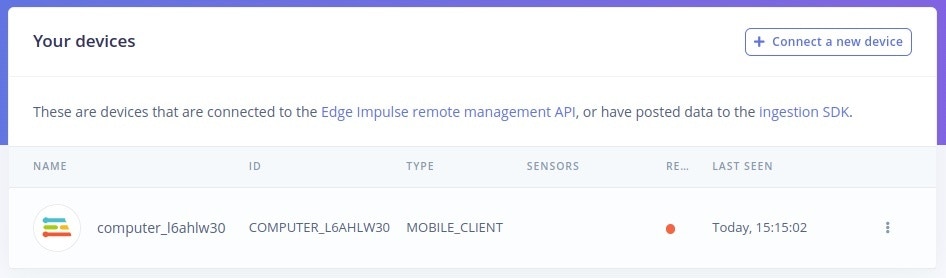
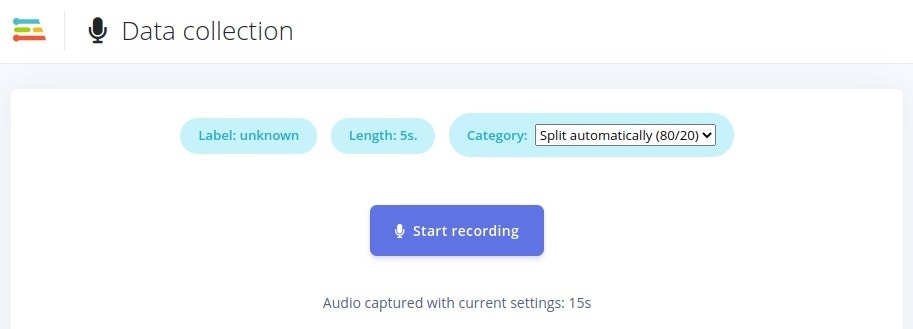
Create a new Edge Impulse project, give it a meaningful name, and select Developer as your desired project type. Afterward, select Audio as the type of data you wish to use. To collect audio data from the microphone, connect the board to your computer. Once plugged in, the Syntiant TinyML Board shows up as a USB microphone and Edge Impulse can use this interface to record audio directly. Make sure the board is selected instead of your default microphone in your audio input settings.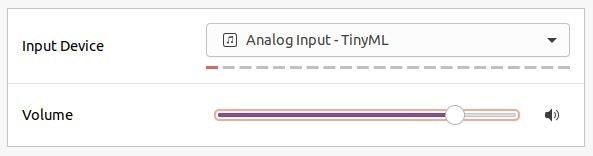
Building the Dataset
Sometimes, gathering relevant data for your TinyML model might be a complicated endeavor, just like in this case. This is a situation in which the Upload data function under the Data acquisition tab saves the day. What it allows you to do is use publicly available recordings of the phenomena you wish to identify and use them as training data for your model. In this case, what you must do is find publicly available recordings of chainsaws (in WAV format) and download them. Navigate to the Upload data menu, click on Choose Files and select your files, select Training as the upload category and manually enter the “Chainsaw” Label and click Begin upload. It’s important to upload data that corresponds to background or unknown sounds because the NDP101 chip expects one and only negative class and it should be the last in the list, that we will be naming Z_Background. For this, we will be using the Noise and Unknown dataset that can be found in the Keyword Dataset, which we will label Z_Background.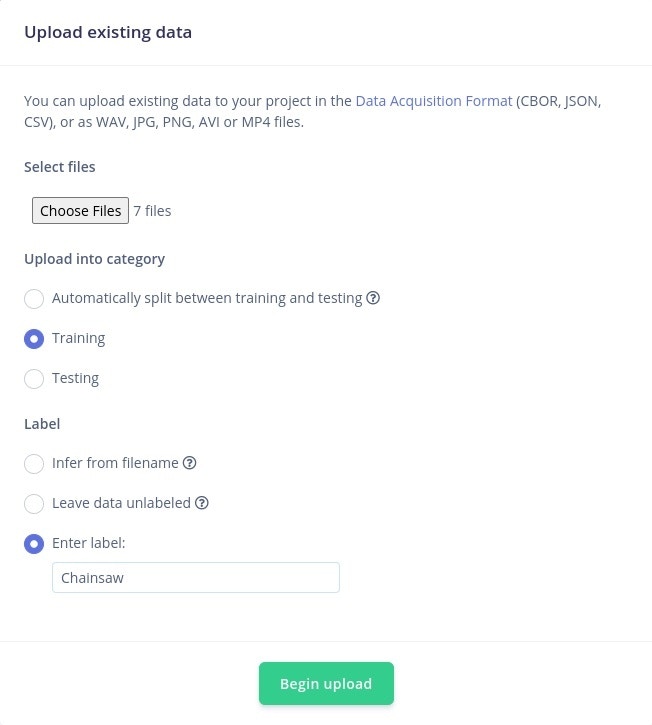

Designing the Impulse
Once the Data acquisition is over, it’s time to build the Impulse.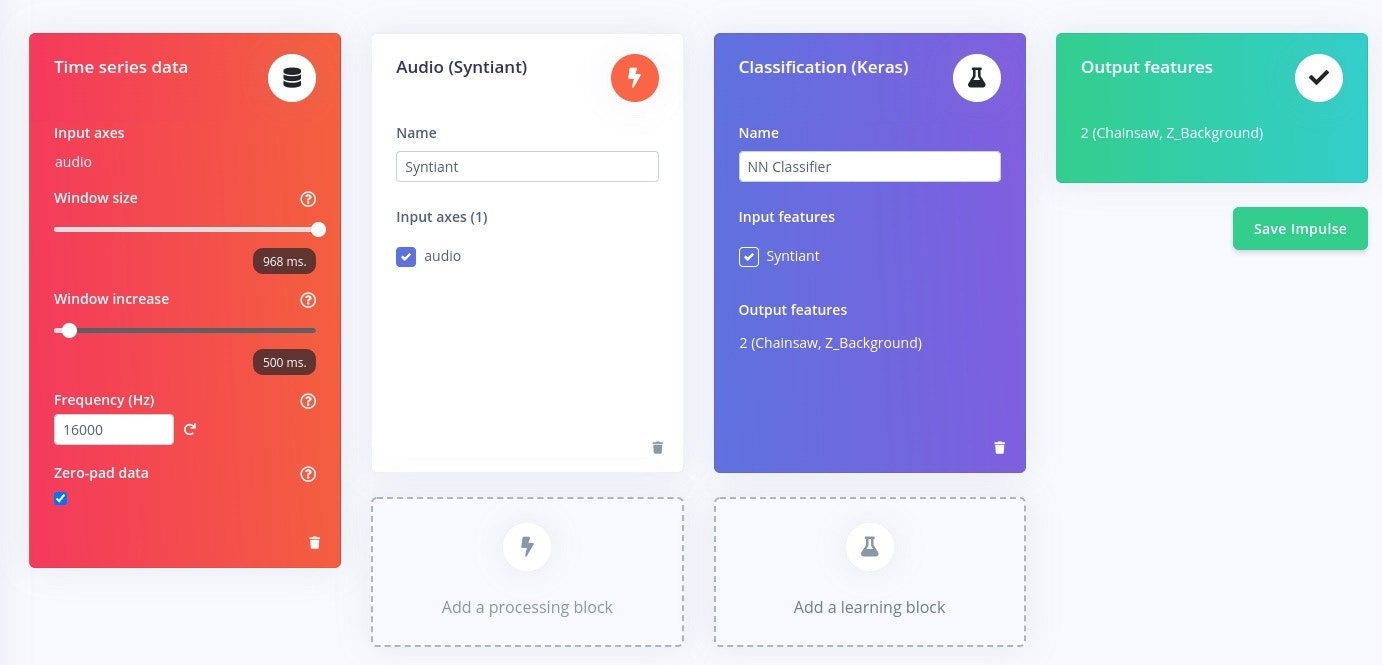
Configuring the Digital Processing Block
What this submenu does is let you explore the raw data, and see the signal processing block’s results.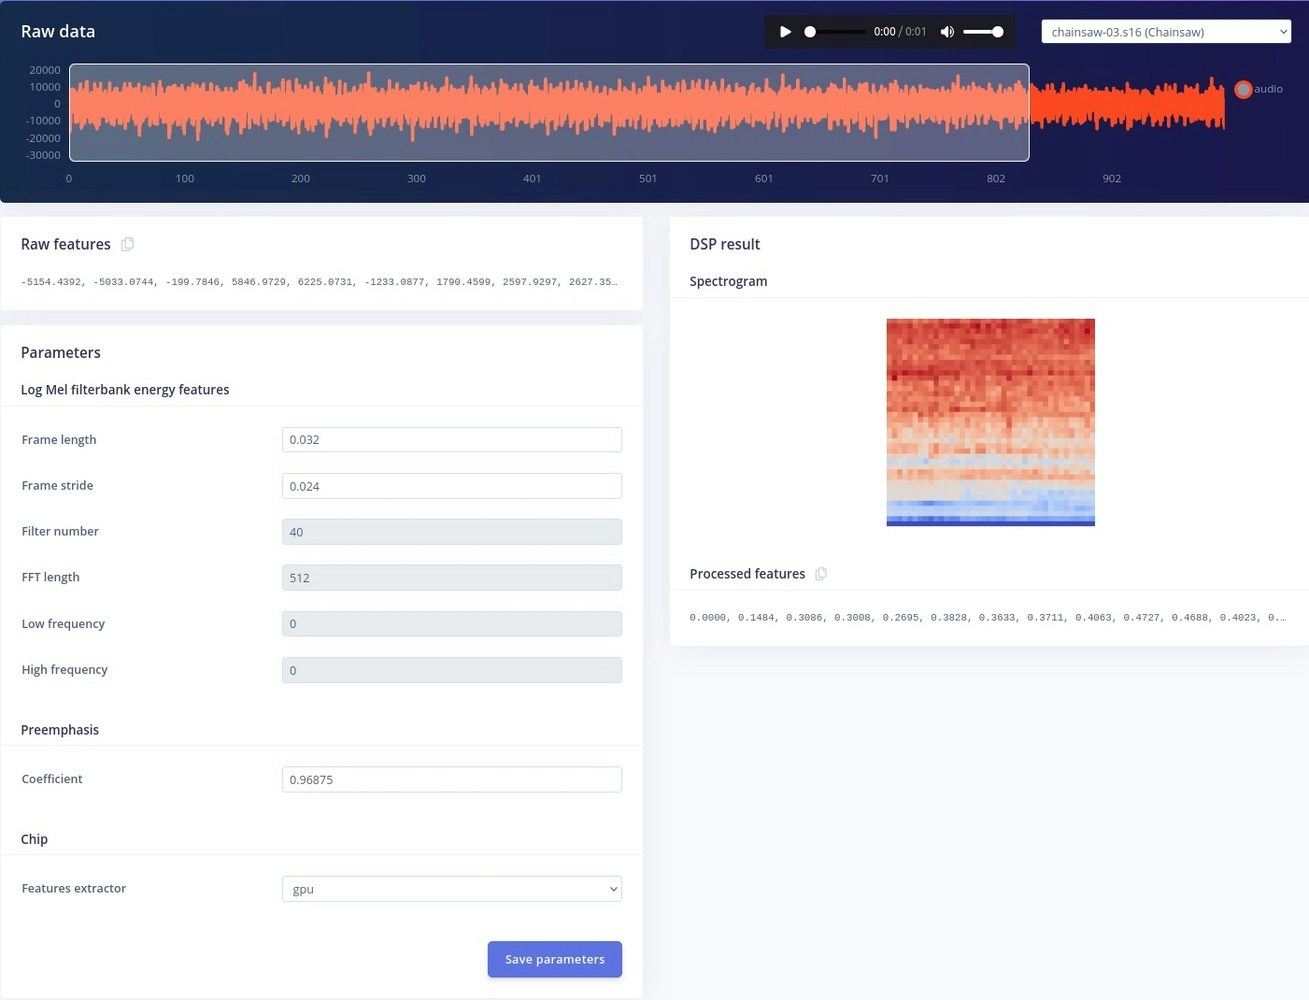
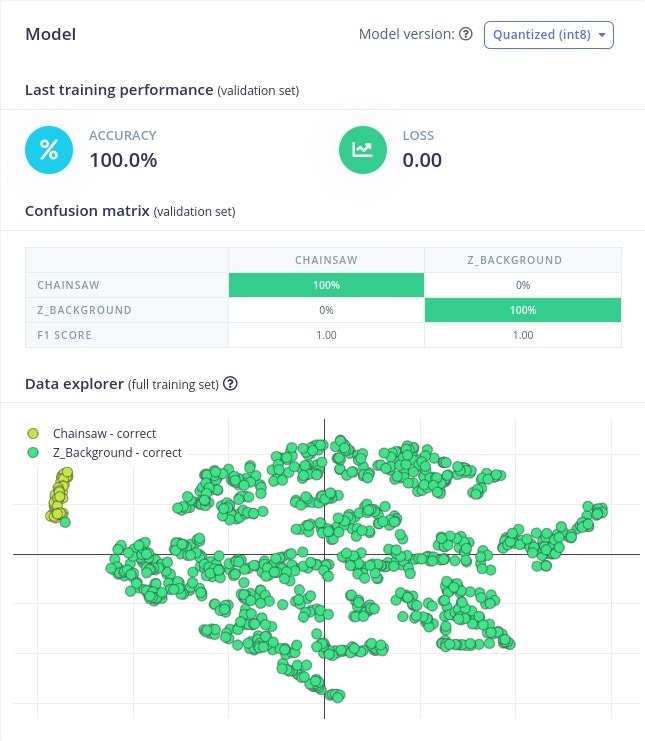
Configure the Neural Network
In this stage, we may provide a number of parameters that affect how the neural network trains under the NN Classifier tab in the Impulse Design menu. The Training set can now be kept at its default setting. When you click the Start Training button, take note of how a processing cluster is chosen to host the training process.
Model Testing
Navigating to the Model Testing page is a wonderful method to start testing our model before deployment. The samples kept in the Testing data pool will be displayed to you. To run all of this data through your impulse, select Classify all.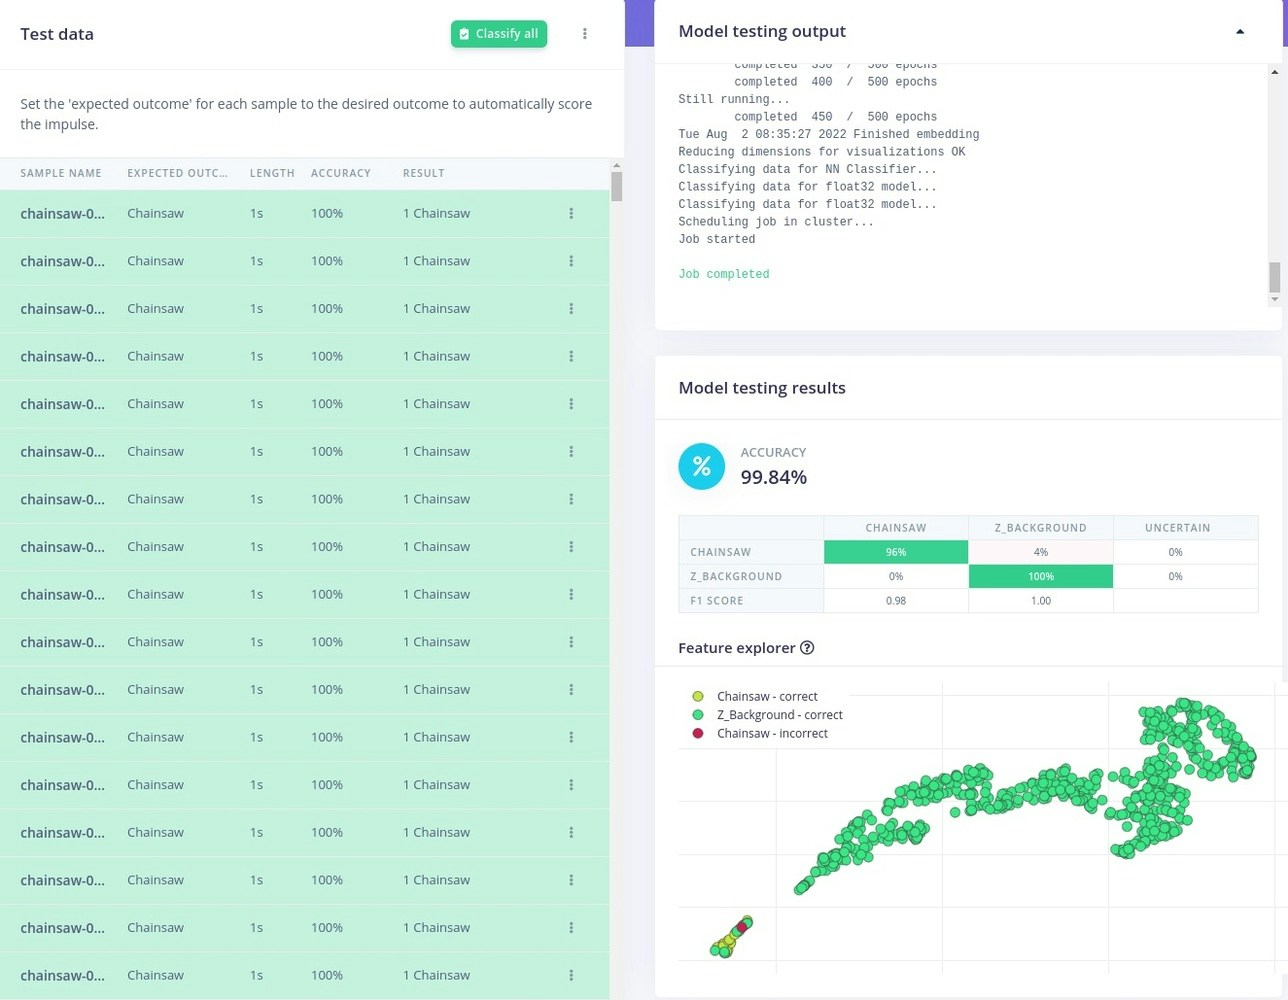
Deploying the Model on the Edge
Once you are happy with your model, it’s time to deploy it on the device. For our use case, we will be using our custom machine learning model alongside the firmware provided by Edge Impulse to create a custom application that will trigger an output when Chainsaw sounds are detected. First and foremost, navigate to the Deployment tab, select Syntiant NDP101 library, and then click on “Find posterior parameters”. This is a particularity of the NDP101 architecture that allows the user to set the thresholds for words or other audio events at which a model activates. Select “Chainsaw” as the audio event that you want to detect and press Find parameters. Once that is done, you are ready to press Build. The task will be assigned to a computing cluster and when the job finishes, you will be able to download it locally. Afterward, clone the Syntiant firmware repository and copy and paste the model files into the “src” folder. Open the “firmware-syntiant-tinyml.ino” in Arduino IDE, without creating a folder for it, and modify the on_classification_changed function like so:Sending SMS Notifications
Now that you have a Syntiant TinyML board that is able to detect chainsaw noises, you can program the ESP32 board to send an SMS notification through the SIM800L GSM module whenever the sound is detected. The GSM module is connected to the UART2 of the ESP32 microcontroller. Open Arduino IDE and paste the code below, then adjust the phone number and upload it to your ESP32 board: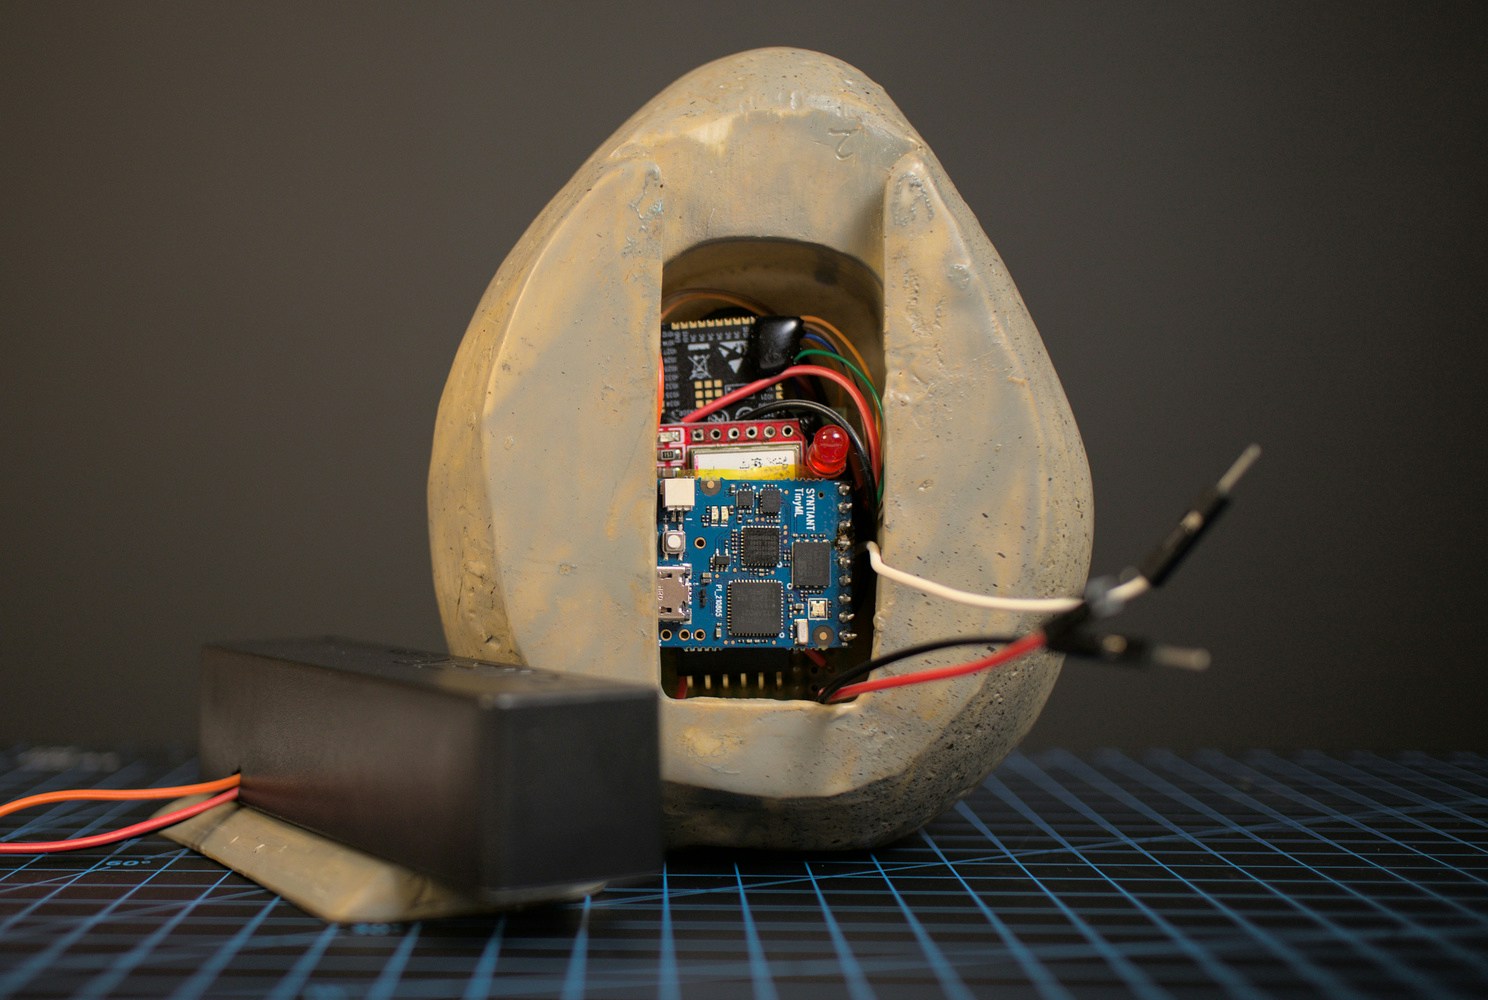


Conclusion