Warning Trigger warning: this post contains graphic images of wounds.
Introduction
Wound classification is a crucial step in wound diagnosis. This process helps clinicians to identify the right treatment procedure for a type of wound. Chronic wounds have an impact on human health and affects the quality of life, both emotionally and financially. According to the Wound Care Learning Network, an estimate of more than $50bn is spent on caring for wounds. Wound Classification has been a manual process done by specialists, but in the current age of AI advancements and intelligent machines, tools such as AI cameras can reduce the cost and time in wound diagnosis and with the right data, make better predictions. This can be of importance to patients who might not have access to clinicians and perform self diagnosis on themselves, or in remote rural areas where there is no access to good wound care practices. Overall, proper wound classification will result in the right treatment, improving the healing process and in general human health.Solution
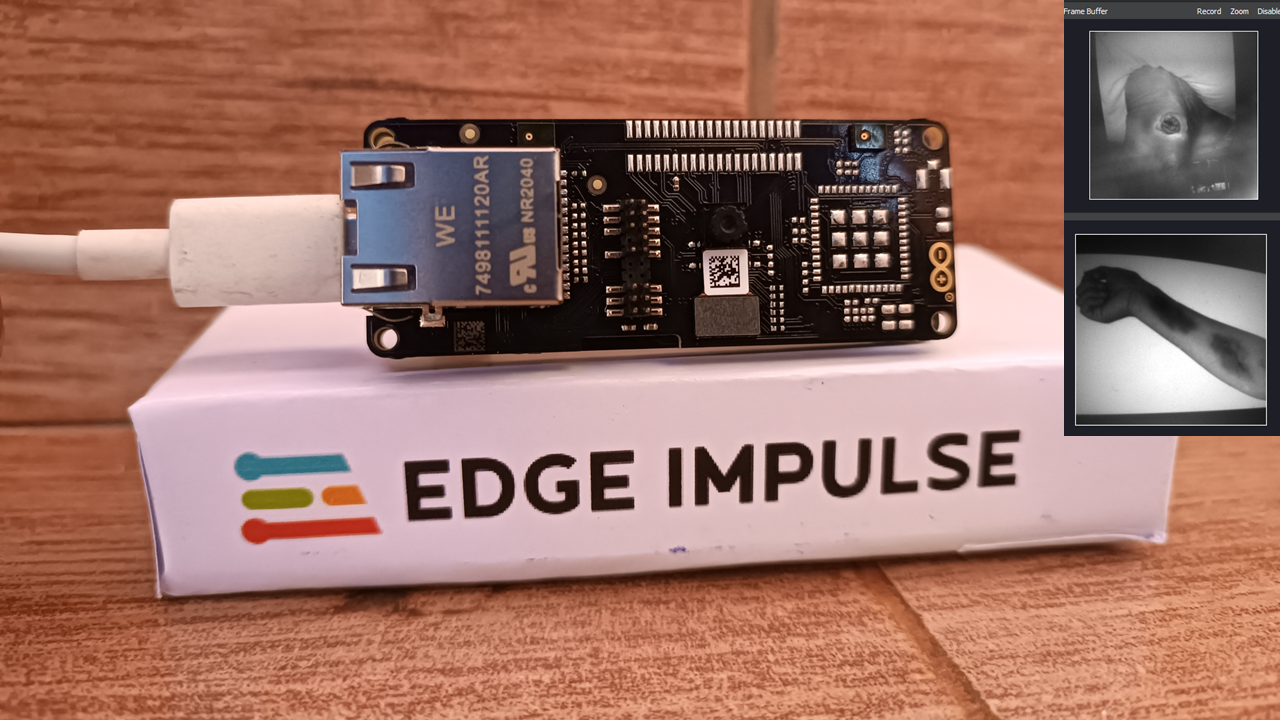
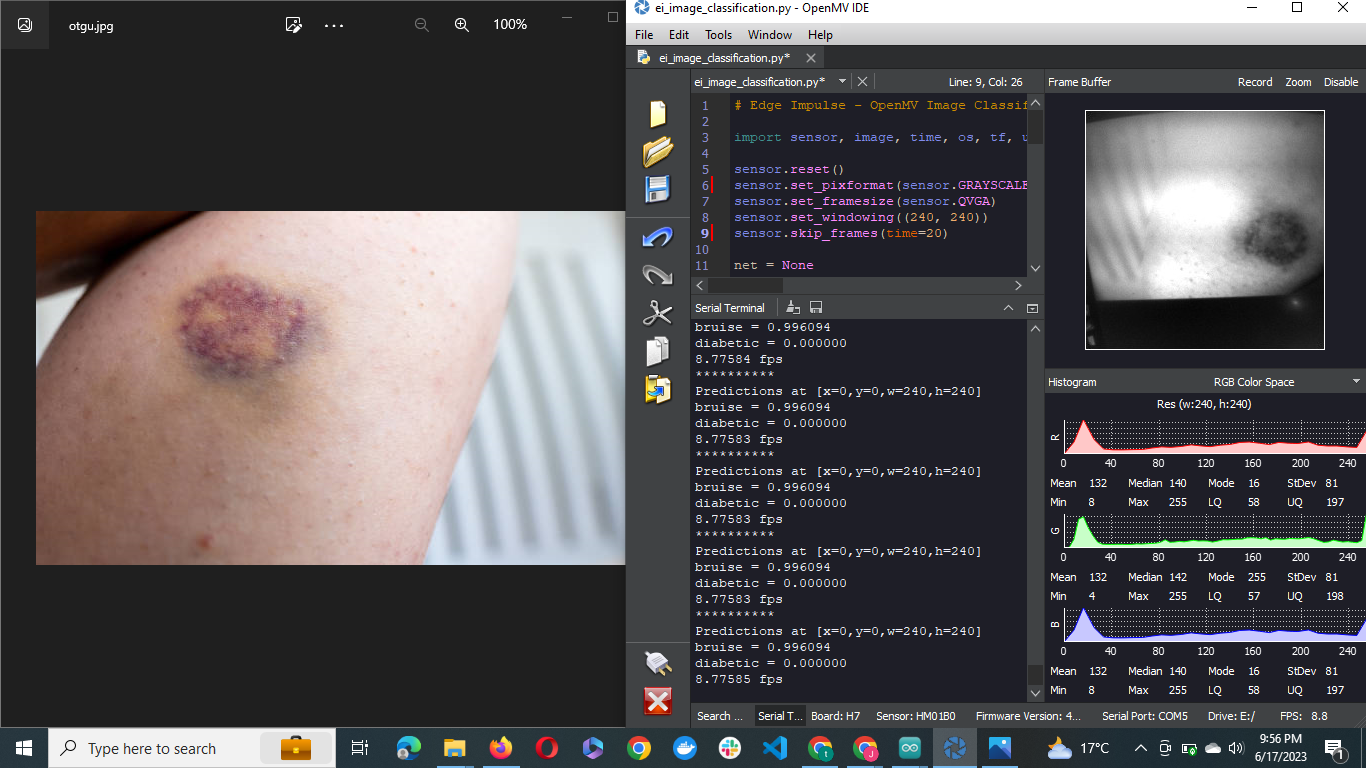
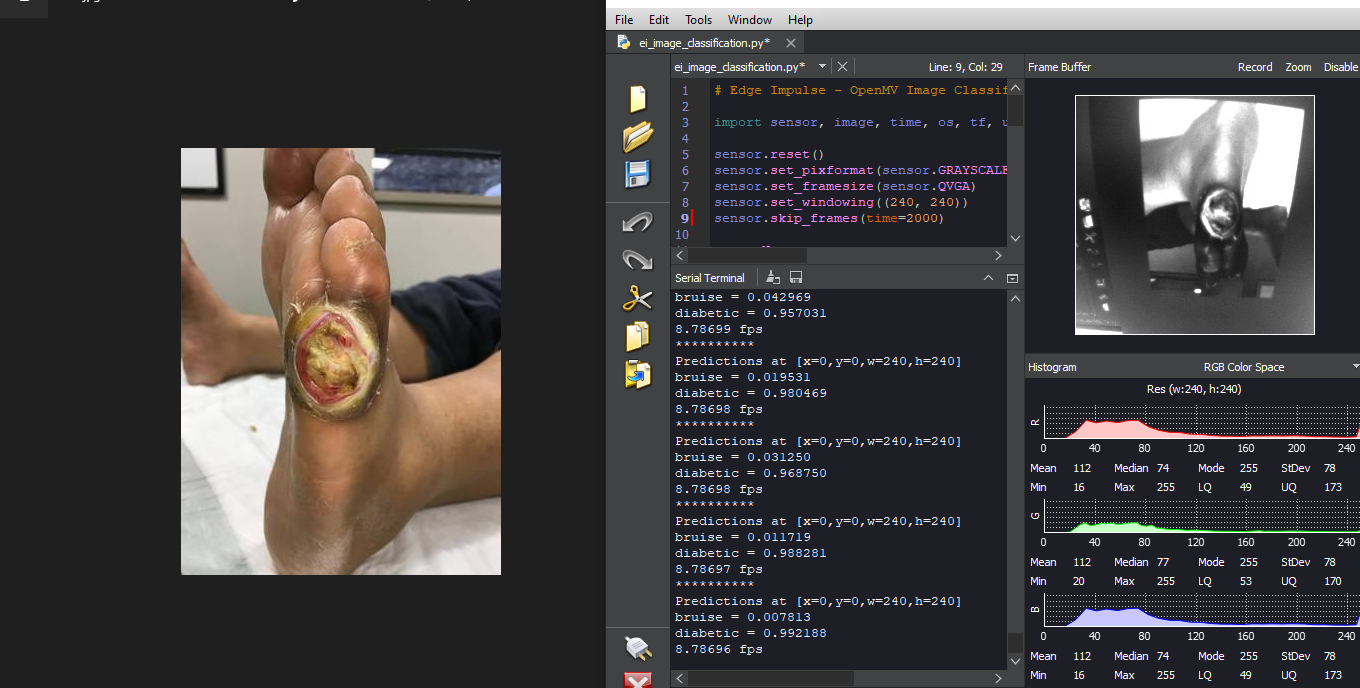
In this tutorial we will perform wound classification to distinguish between a bruise and a diabetic wound with a custom model deployed on an Arduino Portenta H7 + Vision Shield using the newly unveiled Edge Impulse Bring Your Own Model (BYOM) capability. With this feature, Machine learning engineers can build state of the art models and deploy them to their target edge devices with minimal effort.Hardware
An Arduino Portenta is a great fit for our use case because it is a powerful board that has two processors, a Cortex M7 running 480 MHZ and a Cortex M4 running at 240 MHZ. Both the the processors share the on-chip peripherals and can run Tensorflow Lite and Micropython, which we’ll need to deploy our model.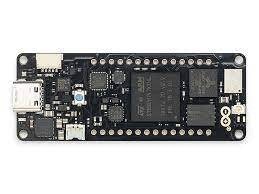
Hardware Requirements
- Arduino Portenta H7
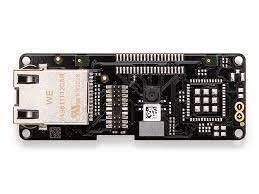
- Portenta Vision Shield
- USB-C cable
Software Requirements
Hardware Setup
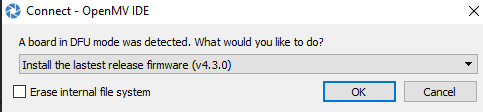
First, Install both the Arduino IDE and OpenMV IDE. OpenMV IDE is used to view the camera output and run inference scripts, while the Arduino IDE is used to update the bootloader on the Portenta H7. Follow the steps below to ensure you have the latest version of the bootloader: Connect the Vision Shield to the Portenta H7. Connect the Board to your computer with a USB-C cable. Open your Arduino IDE, make sure your board is connected, then click Files > Examples > STM_32H747_System > STM_32H747_manageBootloader .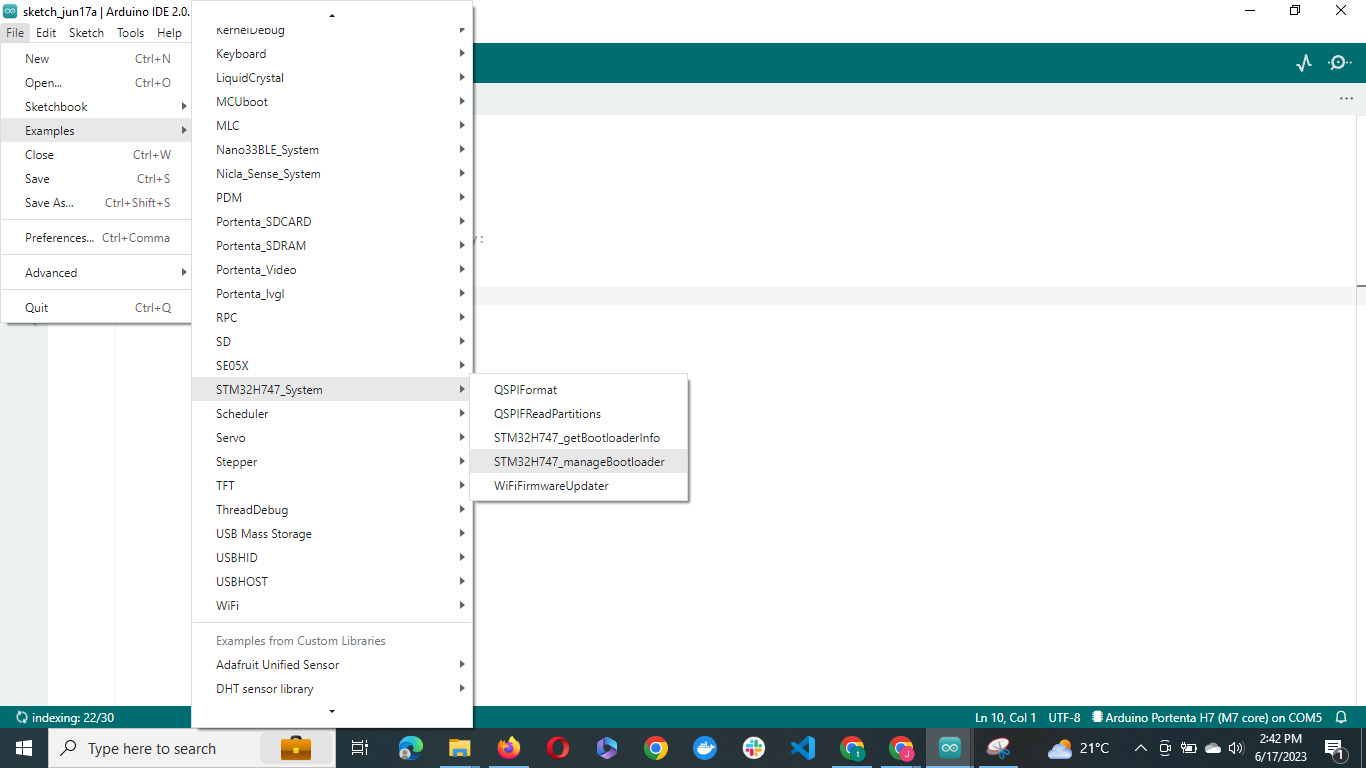


Data Collection
Wound diagnosis is a critical step in wound care and therefore requires an accurate dataset. In order to collect a dataset, there is a need to do so with the help of a licensed clinician. We use the AZH dataset for Diabetic Images, which was labeled by a specialist from the AZH Wound and Vascular Center. This ensures that the model is trained with accurate data. For the Bruise Images we use a curated dataset from Kaggle. We then perform data cleaning to remove any images that appear blurred, empty or distorted. I also wrote a custom script to perform augmentation on the data using Keras data generator in order to increase the number of images in the dataset. This script performs various transforms such as rotation and flipping. The code in this notebook performs various data augmentation on the dataset, and then saves the data in a directory to be used in training the model.Link to the Datasets
AZH DATASET KAGGLE DATASETModel Training
In this project, we leverage Bring Your Own Model (BYOM) capabilities offered by Edge Impulse, which enables easy deployment of models trained on various development platforms onto edge devices. The model training process took place on Google Colab. We utilize Transfer Learning with a MobileNet architecture and TensorFlow framework. By using the pre-trained MobileNetV2, we can benefit from its high-performance feature extraction capabilities while training on the wound dataset. We then optimize the model for edge deployment by applying Post Training Quantization, a technique that reduces the model size without significant loss in accuracy. This technique aids in minimizing the memory footprint and storage requirements of the model while maintaining its performance. Once the model is trained and optimized, we converted it to the TensorFlow Lite format, which is compatible with the Edge Impulse Platform. We saved and downloaded the model for further use. Find all the code on GitHub with the necessary steps, including training, quantization, conversion, and saving, to enable the deployment of the Model to Edge Impulse Platform.Model Deployment
Create an account on Edge Impulse if you haven’t yet, create a new project, name it and then select “Developer” for the project type. Because we want to deploy our model to our device and not collect data, select Upload Model. If you have an existing testing set, you can upload the images with the Existing data tab.


.zip file and copy the .tflite file and labels.txt file from the extracted folder to the connected Arduino Portenta.


Conclusion
In this project, we have seen how it is possible to leverage AI-powered cameras to classify wounds, which offers a great advantage in reducing the time taken to diagnose wounds as well as reduce cost associated with the process. This project could be scaled further by sending the inference results over a web platform for results to be conveniently accessed by clinicians. This enables accurate administration of treatment to patients regardless of their location and mitigates the severe effects of misdiagnosis, leading to improved human health, especially in rural areas without local expertise. Adding more dataset images in order to improve the model performance on diabetic wound classification would also be helpful. With Bring Your Own Model on Edge Impulse, ML engineers can build robust, state of the art models and deploy to edge devices. This creates a huge opportunity to solve challenges with Machine Learning and deploy to suitable hardware devices. This project is Public, you can clone and modify it for your own use case, as well as further optimize it.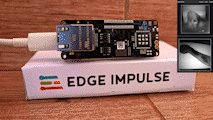
Credits
- Anisuzzaman, D.M., Patel, Y., Rostami, B. et al. Multi-modal wound classification using wound image and location by deep neural network. Sci Rep 12, 20057 (2022). https://doi.org/10.1038/s41598-022-21813-0
- https://www.kaggle.com/datasets/yasinpratomo/wound-dataset