Introduction
In today’s world, voice commands are becoming a popular user input method for various devices, including smart home appliances. While classical UI methods like physical buttons or a remote control will not be soon displaced, the convenience of using voice commands to control an appliance when multitasking or when having your hands busy with something else, like cooking, cannot be denied.The Challenge
While very convenient in day to day use, using human speech as user input comes with a number of challenges that must be addressed. First and foremost, using human speech as user input for smart appliances requires the recognition and understanding of natural language. This means that there must be some sort of keyword detection or voice recognition technology involved. As each user may have their own unique way of phrasing a request, like “ turn on the fan” or “start a 5 minute timer”, the voice recognition algorithms must be fine tuned to obtain the best accuracy. Another big challenge when implementing such technologies is the security of the gathered data. Privacy concerns regarding speech recognition require cutting-edge encryption techniques to protect voice data and ensure the privacy of any sensitive personal or corporate information transmitted. An easy way to circumvent this is by employing IoT devices that run a machine learning algorithm on the edge and which do not store any data while running the detection algorithm.Our Solution
Hardware requirements
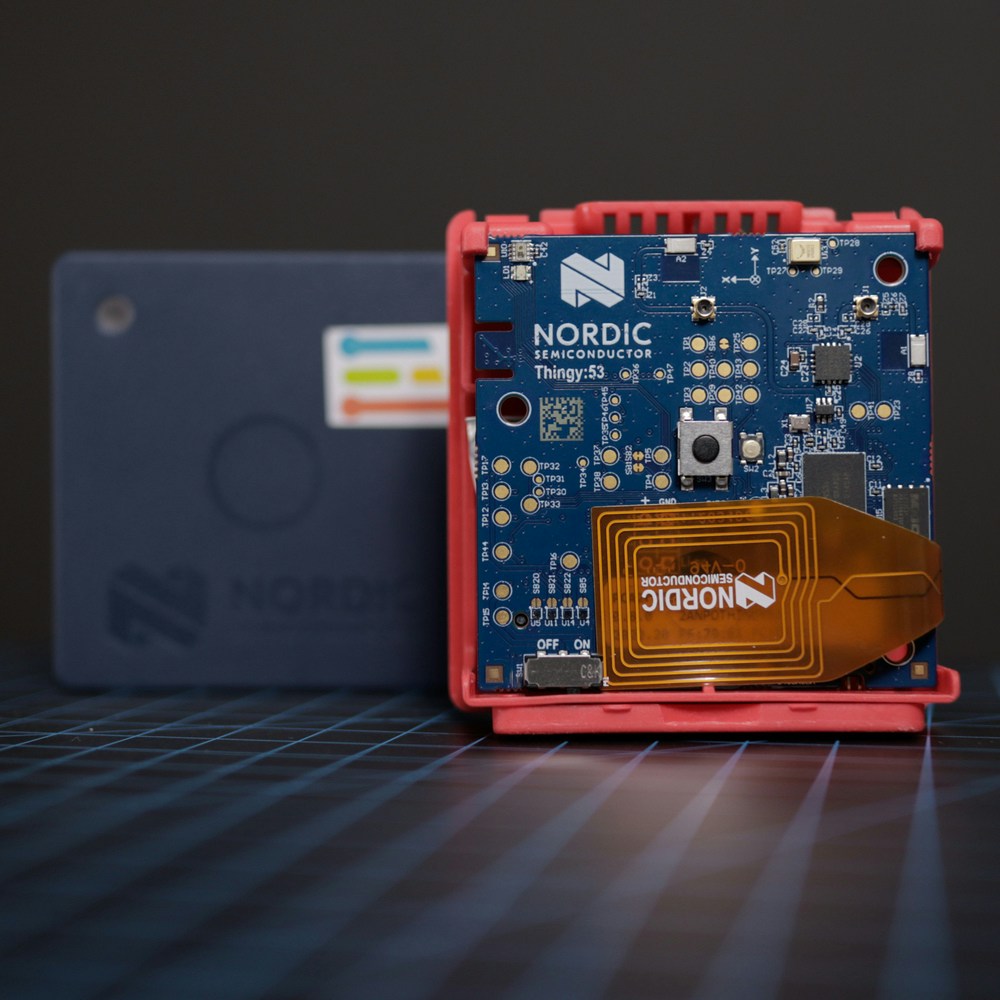
- Nordic Thingy:53
- Esp32 DevKit
- Relay
- Android/iOS device
- J-link mini Edu
- 220V to 5V power regulator
- Plug-in plastic enclosure
Software requirements
- Edge Impulse account
- Edge Impulse CLI
- Arduino IDE
- Arduino CLI
- Git
- A working Zephyr environment
Hardware Setup
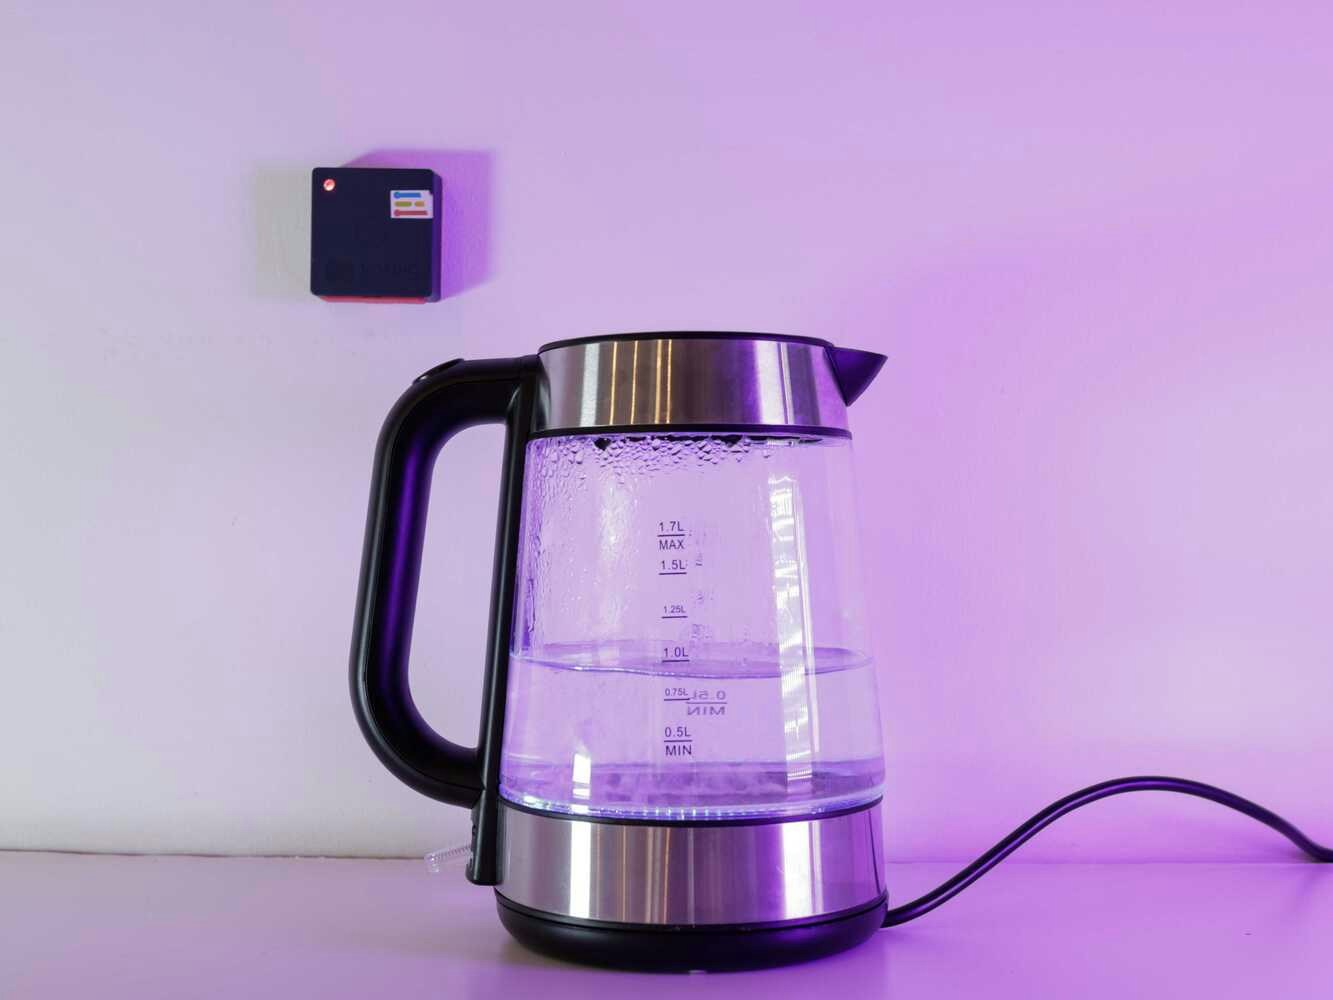
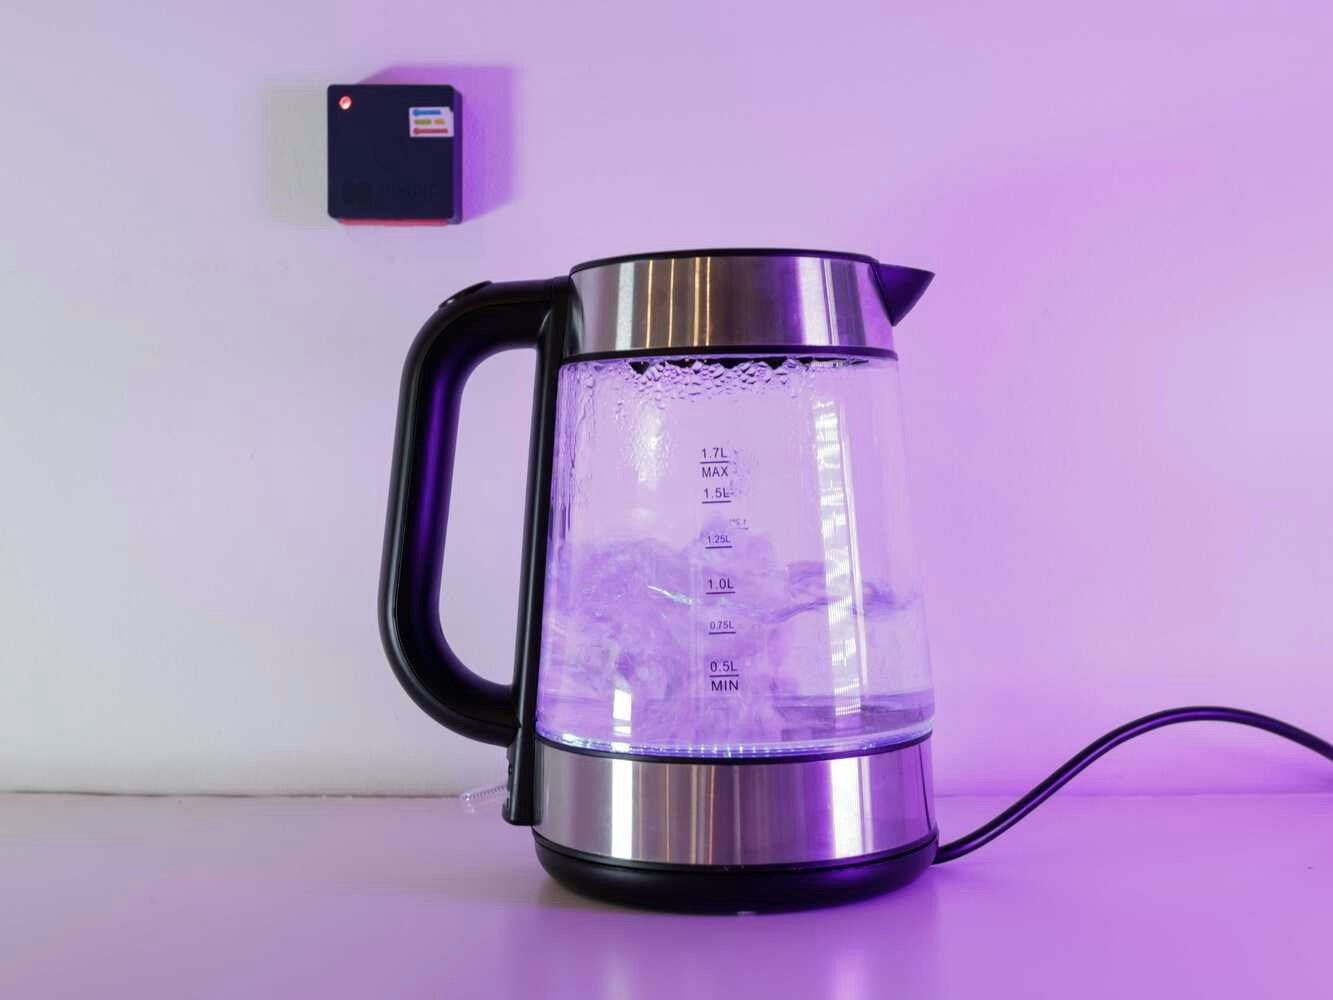
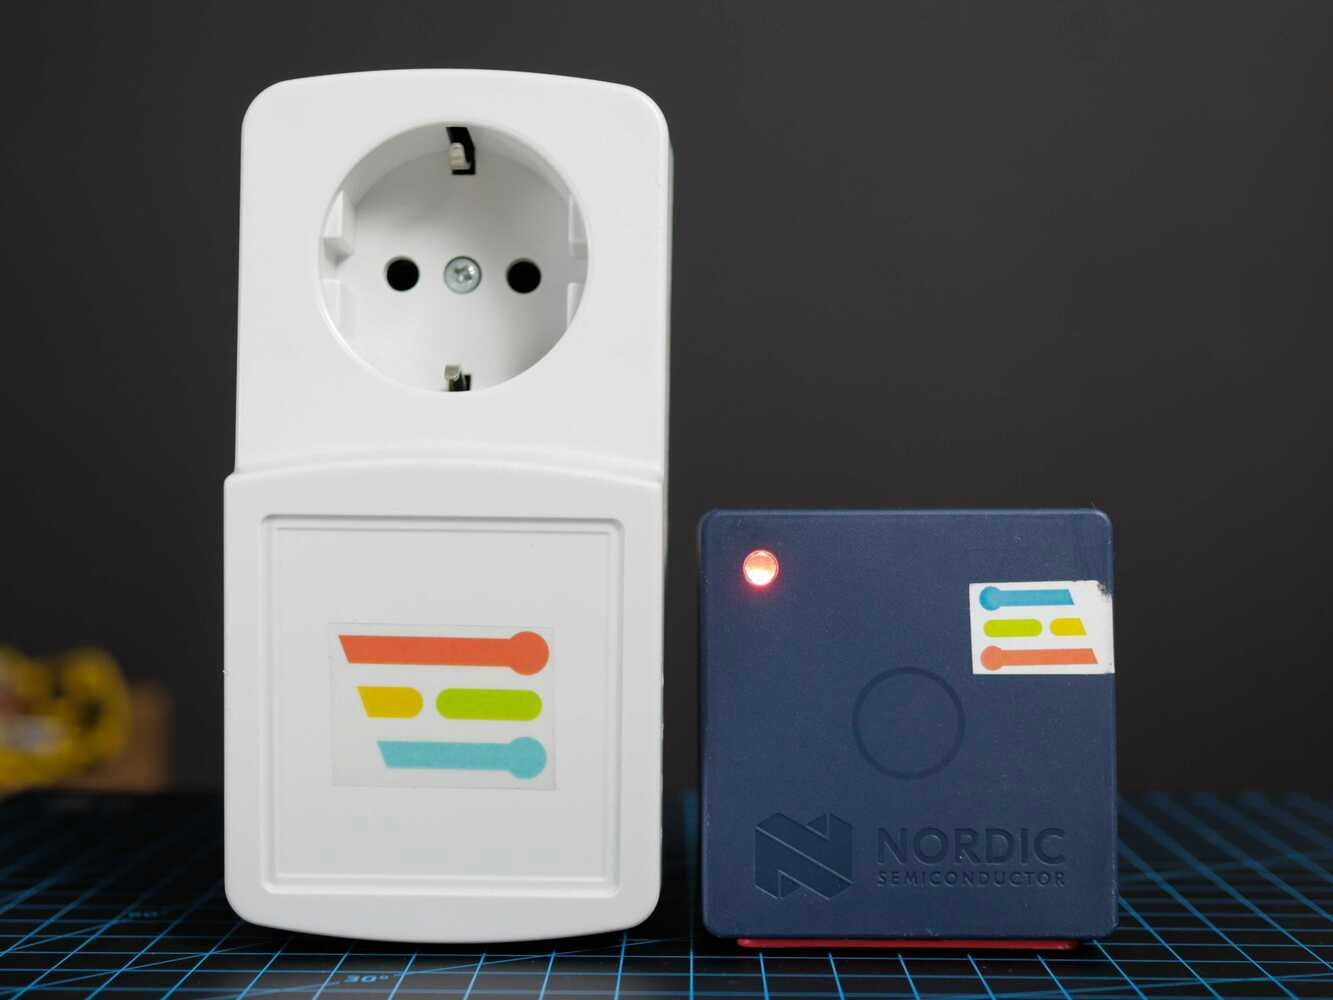
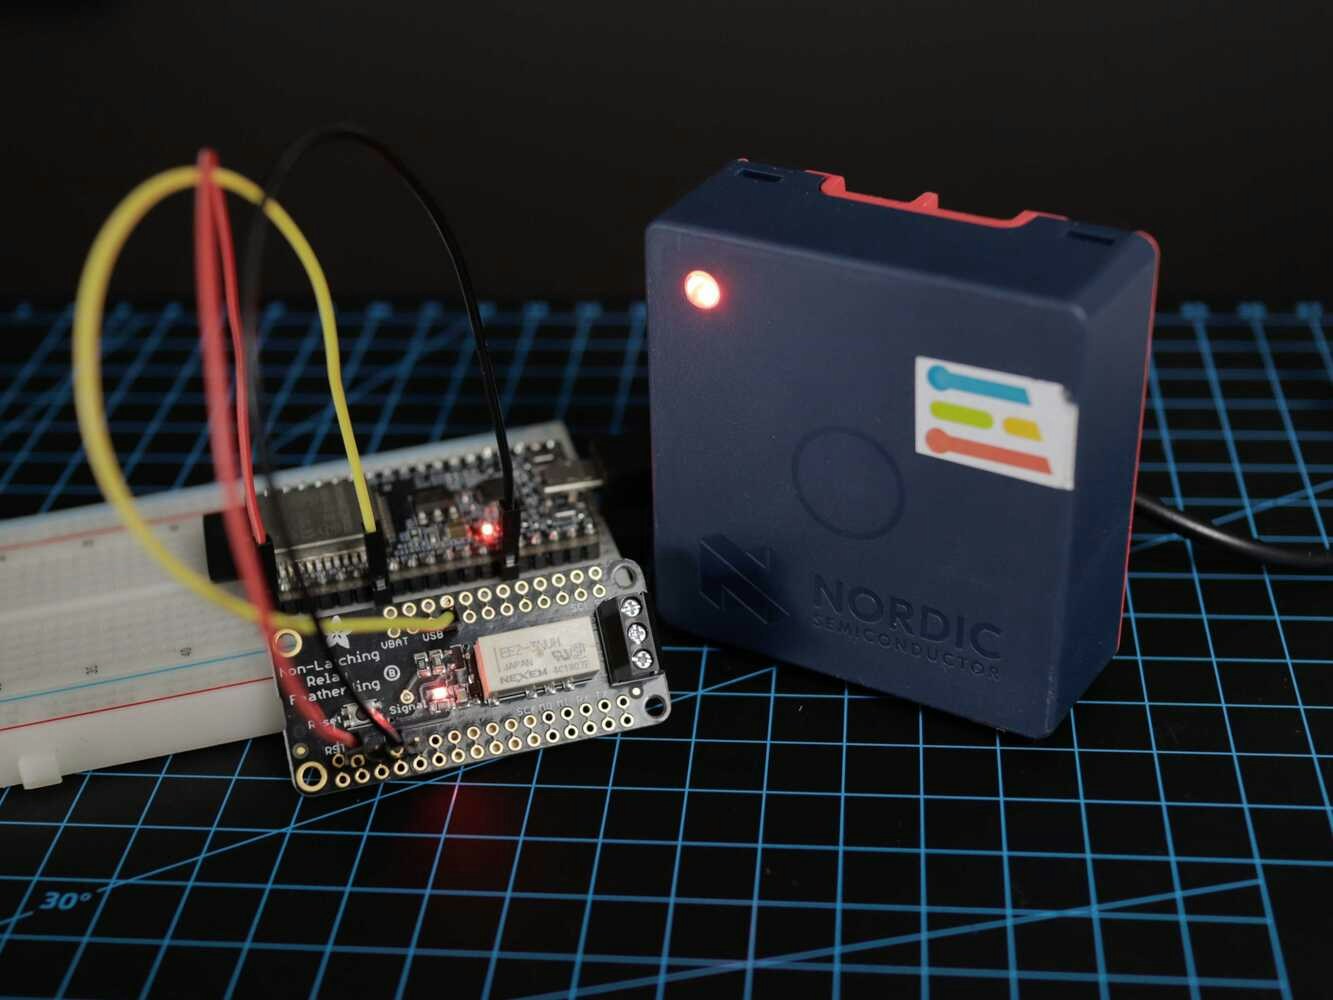
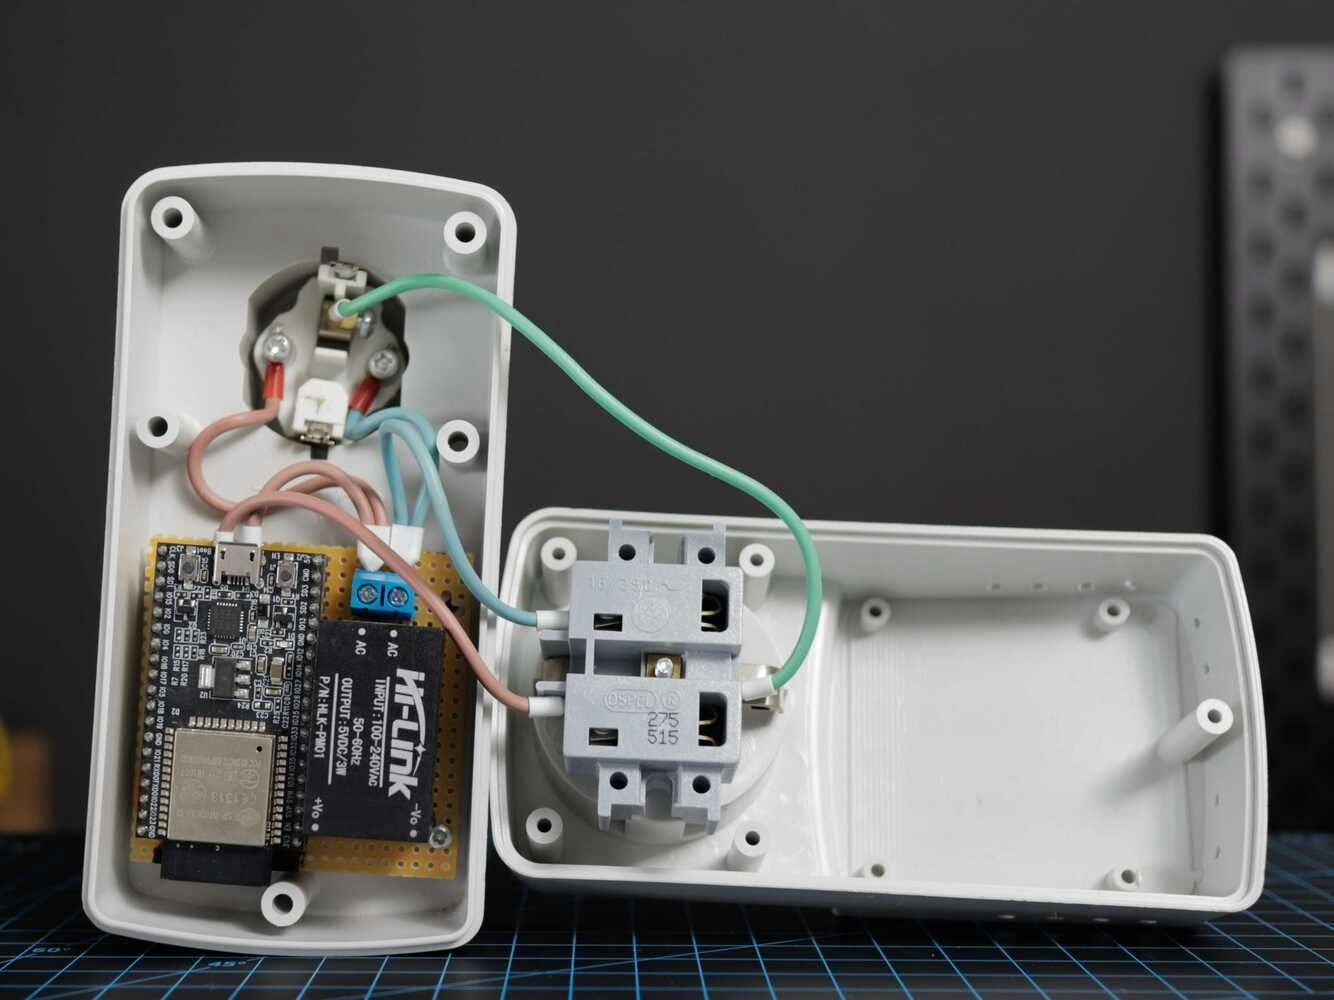
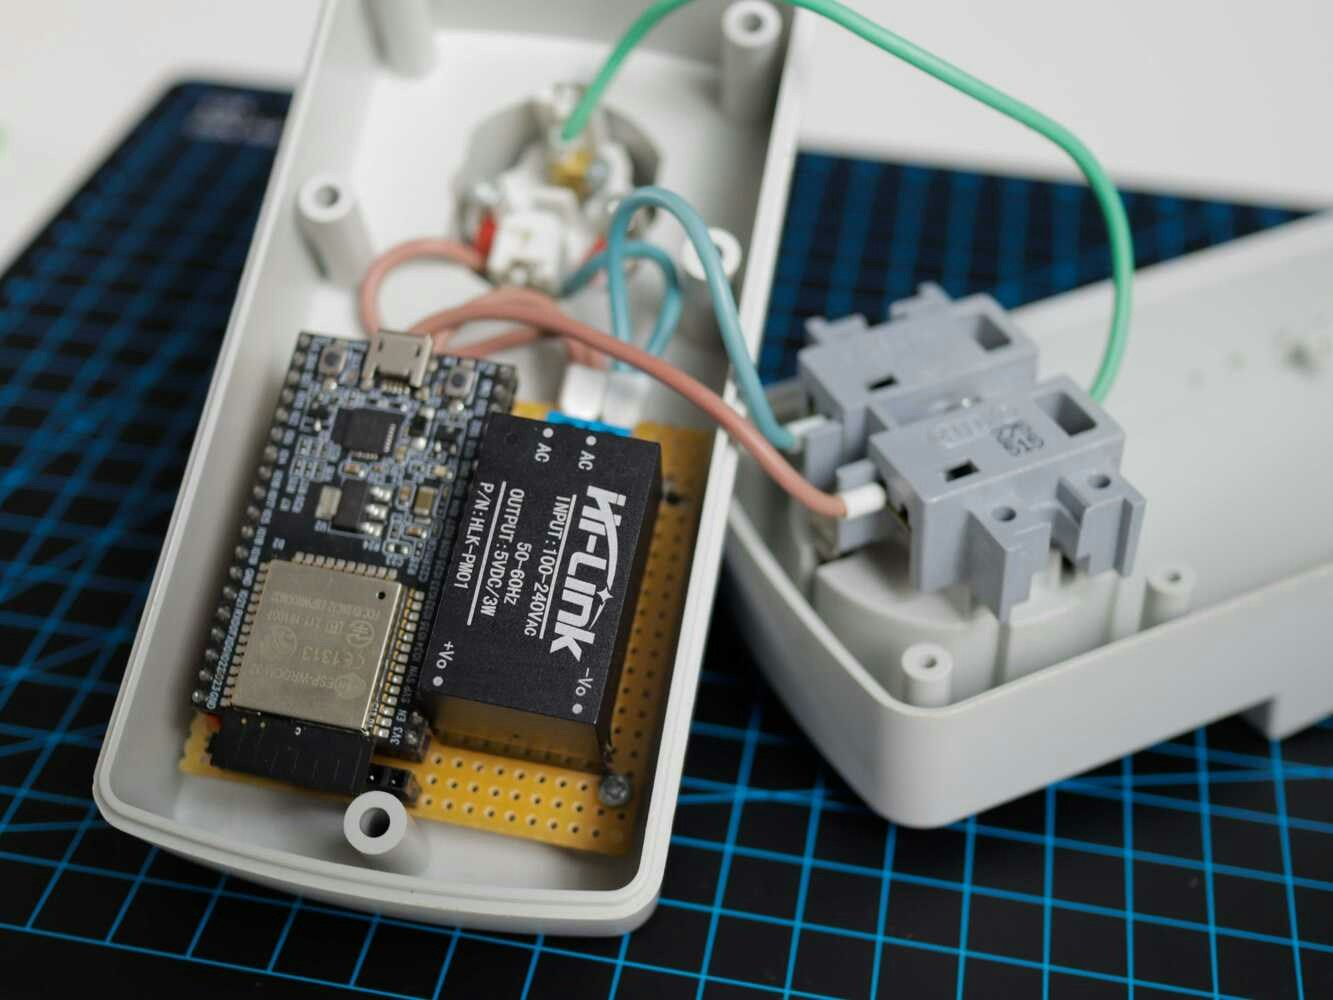
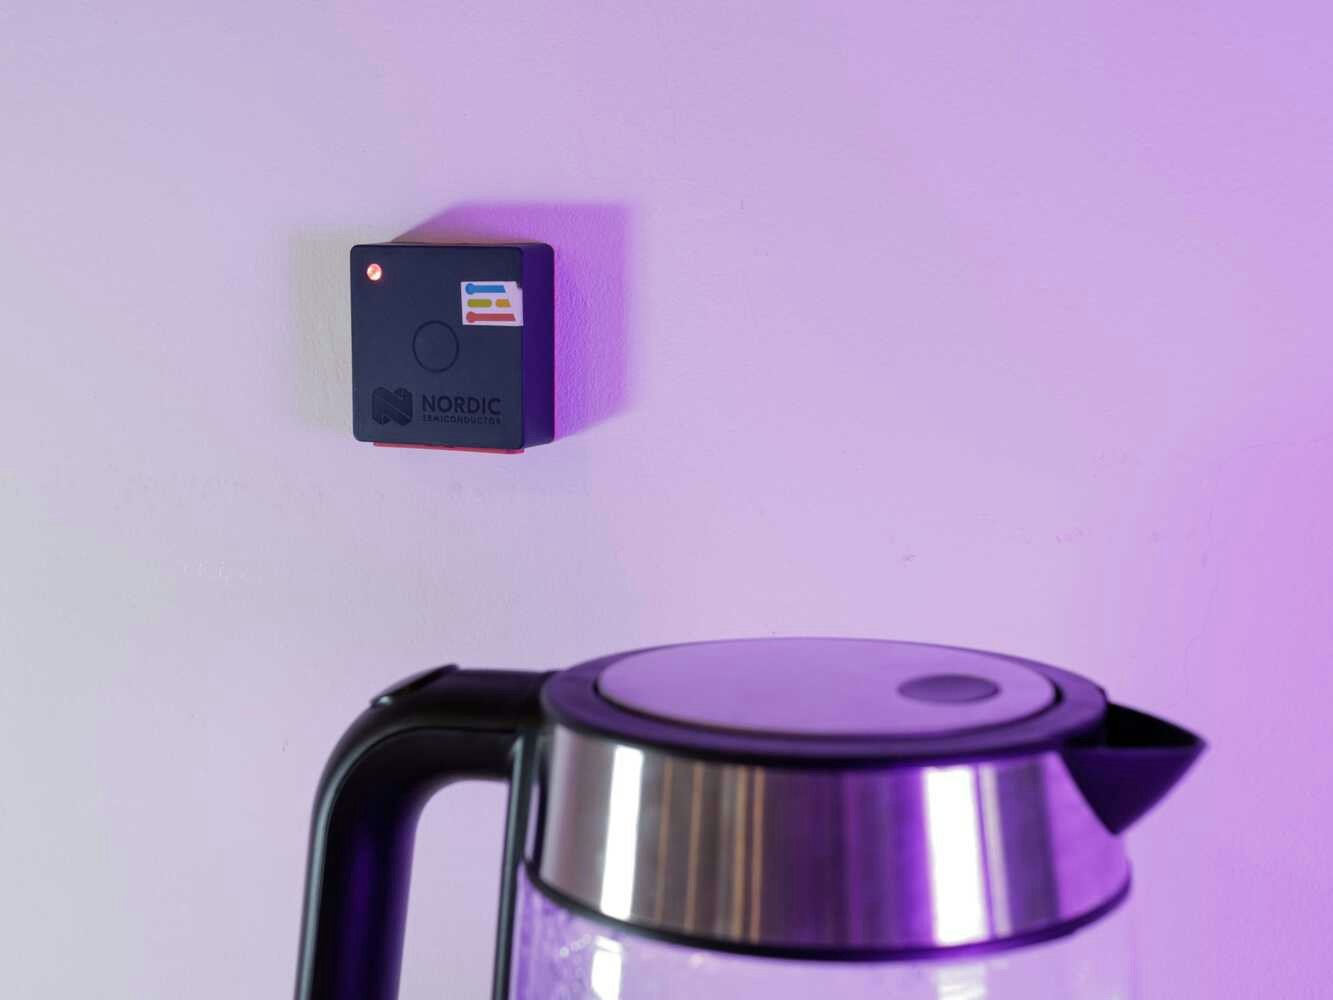
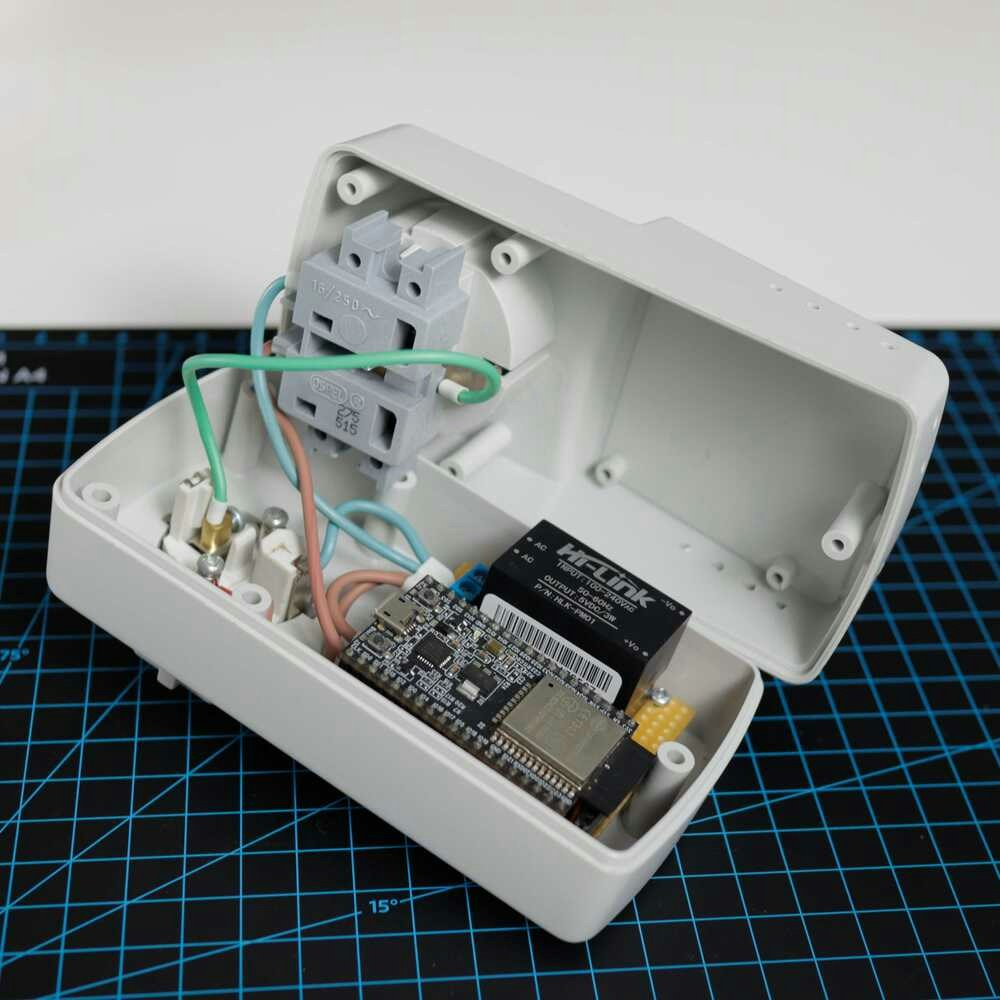
To control appliances you will either have to work with AC mains or integrate with some functionality that the appliance might have, such as IR control or switches. We chose to connect the Adafruit Non-Latching Mini Relay FeatherWing to the ESP32 development board as presented in the following schematic. The Signal pin of the relay is connected to the GPIO32 pin of the ESP32 and the ground is common between the ESP32 and the relay. You can use this circuit to control AC powered household devices, such as kettles, lights, or stove smoke extractors. We have chosen an enclosure that will safely protect users from the AC Mains and the rest of the electronics. We have soldered the circuit on a test board by using the following schematic that we tested first on a breadboard. We have kept the testboard neatly separated between low DC voltage that was routed in the top part and AC High voltage that was routed in the lower part of the testboard. Warning: Working with AC mains is dangerous if you have never done it before, please ask for an electronics senior or document yourself thoroughly before undergoing this schematic. The enclosure provides an AC In and an AC Out socket plug that allows us to integrate our electronics between thus keeping the test boards continuously supplied and enabling or disabling the output thus turning on or off the supply. Use the appropriate wire gauge when working with AC so the current draw of the appliance is met. We have used standard 16A wire gauge with the proper colors (blue for neutral, brown for line and yellow/green for grounding according to EU standards).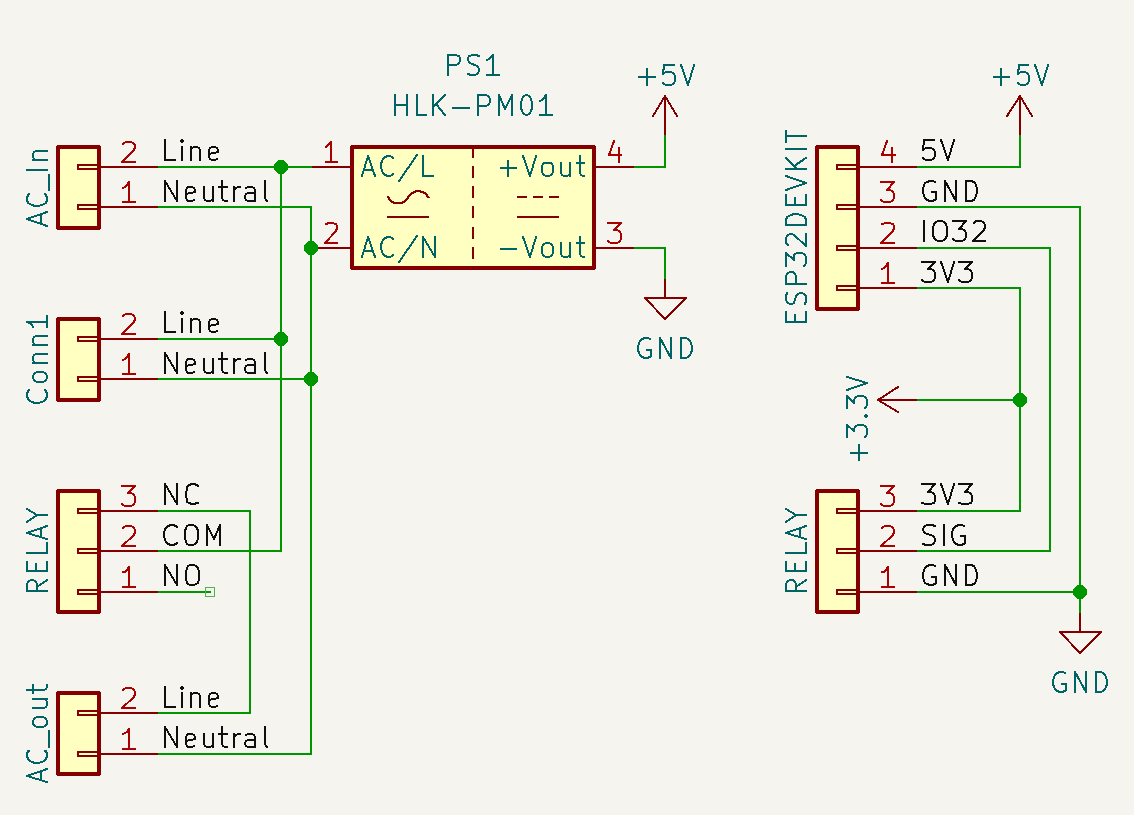
Software Setup
Setup the Build Environment
Building and flashing custom applications on the Nordic Thingy:53 board require a working Zephyr environment. To create it, follow the steps in the Getting Started guide from the official Zephyr documentation. Afterwards, follow the steps presented in the Developing with Thingy:53 guide from the official Nordic Semiconductor documentation. While this might not be mentioned in either of the documents, you must also install the J-Link Software and Documentation Pack and the nRF Command Line Tools(version 10.15.4) to be able to flash the board. After following the steps in the guides presented above, you should have a working Zephyr environment. Remember to always work in the virtual environment created during the Getting Started guide when developing applications for this platform.Creating an Edge Impulse Project
Let’s start by creating an Edge Impulse project. Select Developer as your project type, click Create a new project, and give it a significant name.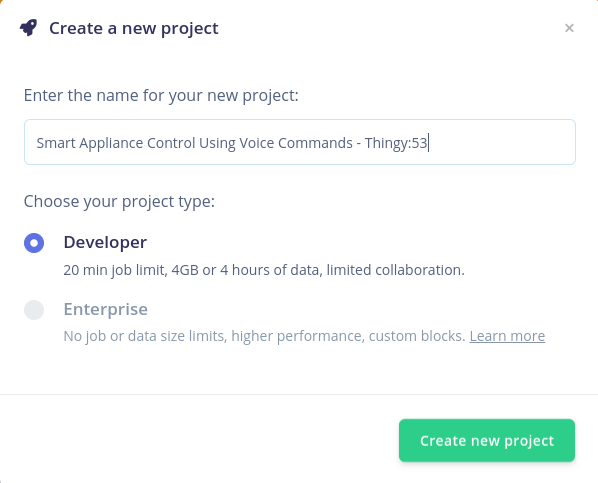
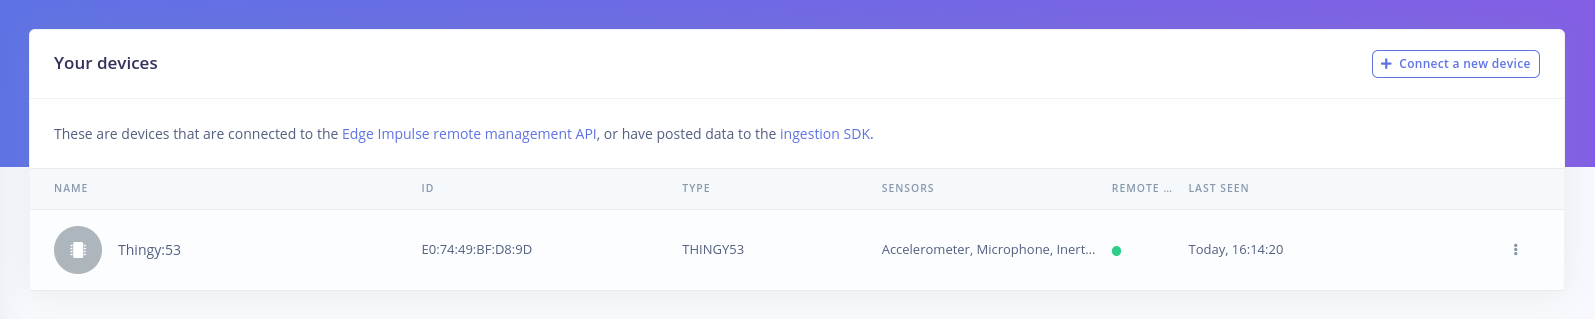
Connecting the Device
Thingy:53 devices will work with the Nordic nRF Edge Impulse iPhone and Android apps or with the Edge Impulse Studio right away. First of all, the firmware of the Thingy:53 device must be updated. Download the nRF Programmer mobile application and launch it. You will be prompted with a number of available samples.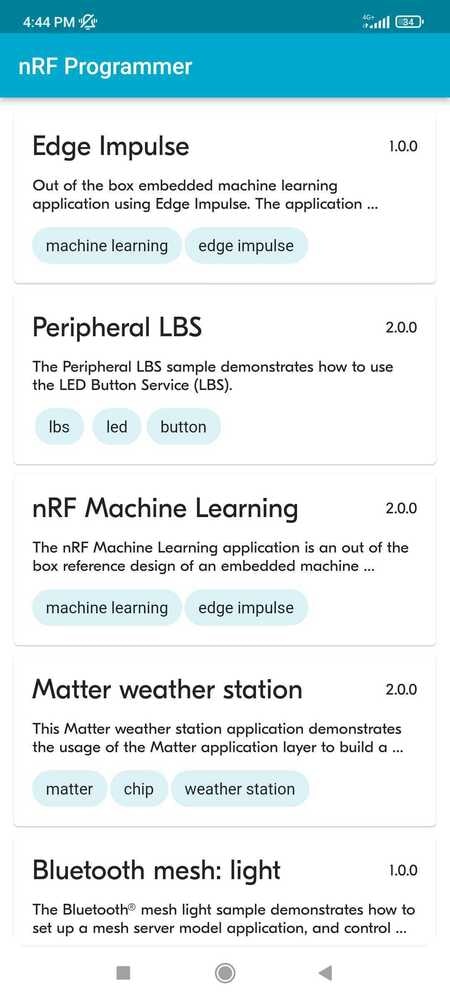
.jpg?fit=max&auto=format&n=Nm5pkV8HYHPDwlJp&q=85&s=fe346a71632b5d8bf2f7171b88808678)
Building the Dataset
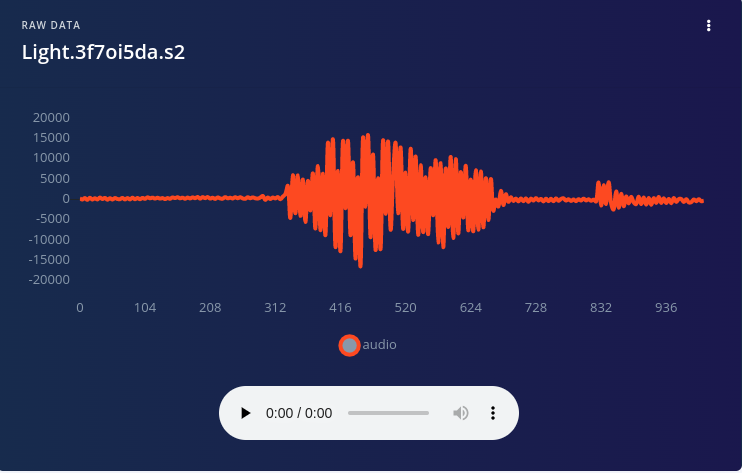
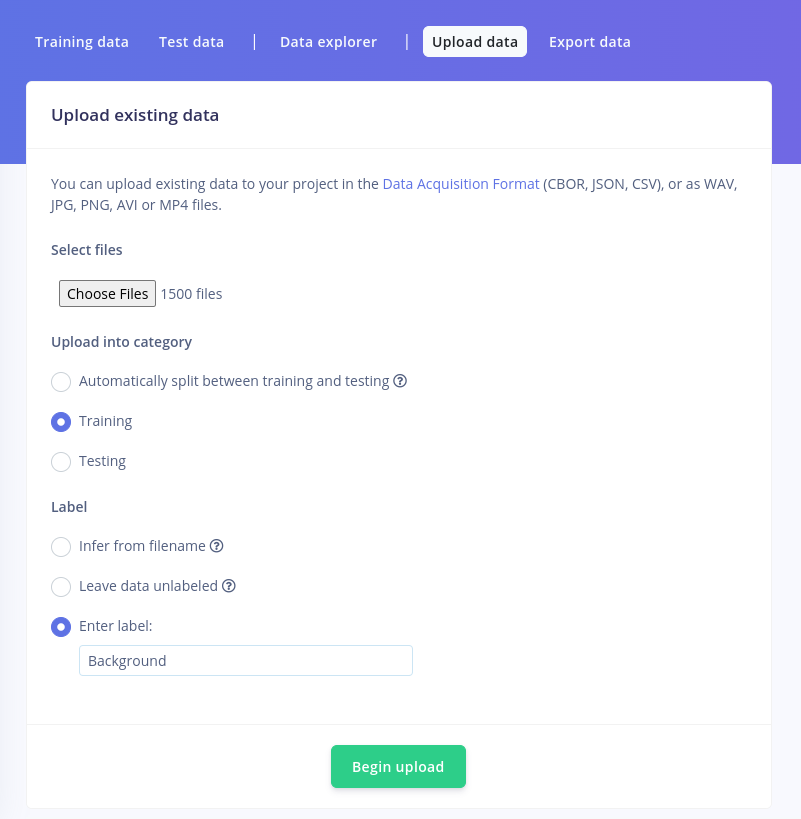
Considering the context, the best way to gather relevant data for your Thingy:53 is to record yourself. To achieve the best performance of the speech recognition model, you can add samples of your own voice to increase the specificity of the detection algorithm. Go to Data Acquisition in your Edge Impulse project and you can start gathering the data set.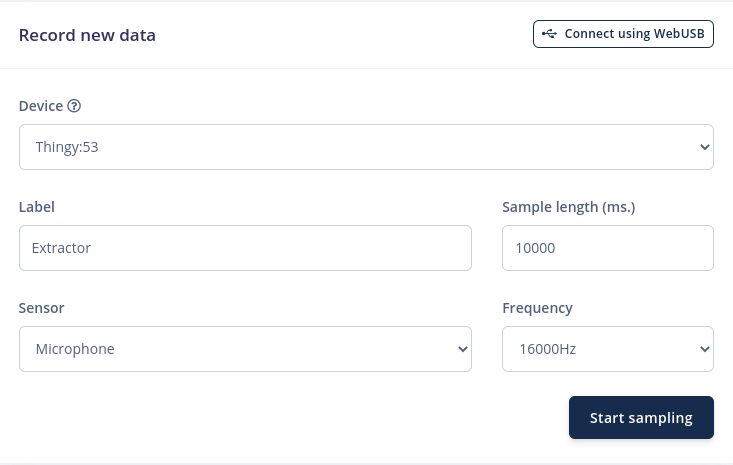
Designing the Impulse
Let’s begin developing our Impulse now that the data are available. An Impulse describes a group of blocks through which data flows and can be viewed as the functional Block of the Edge Impulse ecosystem. The input level, the signal processing level, the learning level, and the output level are the four levels that make up an impulse.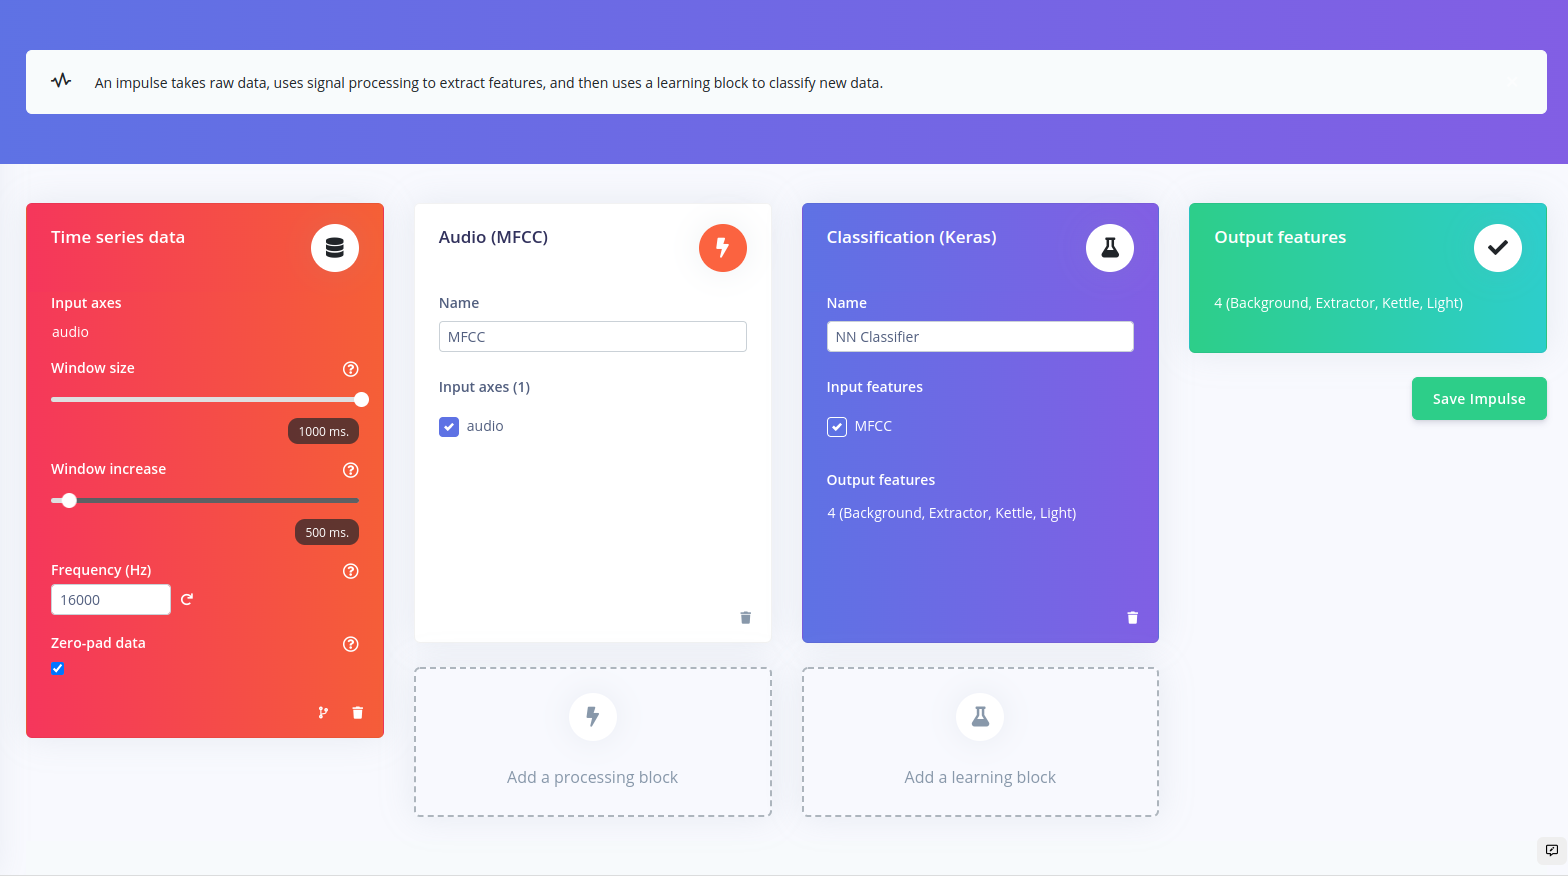
Configuring the Audio Features Block
The Audio MFCC (Mel Frequency Cepstral Coefficients) block extracts coefficients from an audio signal using Mel-scale, a non-linear scale. This block is used for human voice recognition, but can also perform well for some non-voice audio use cases. You can read more about how this block works here.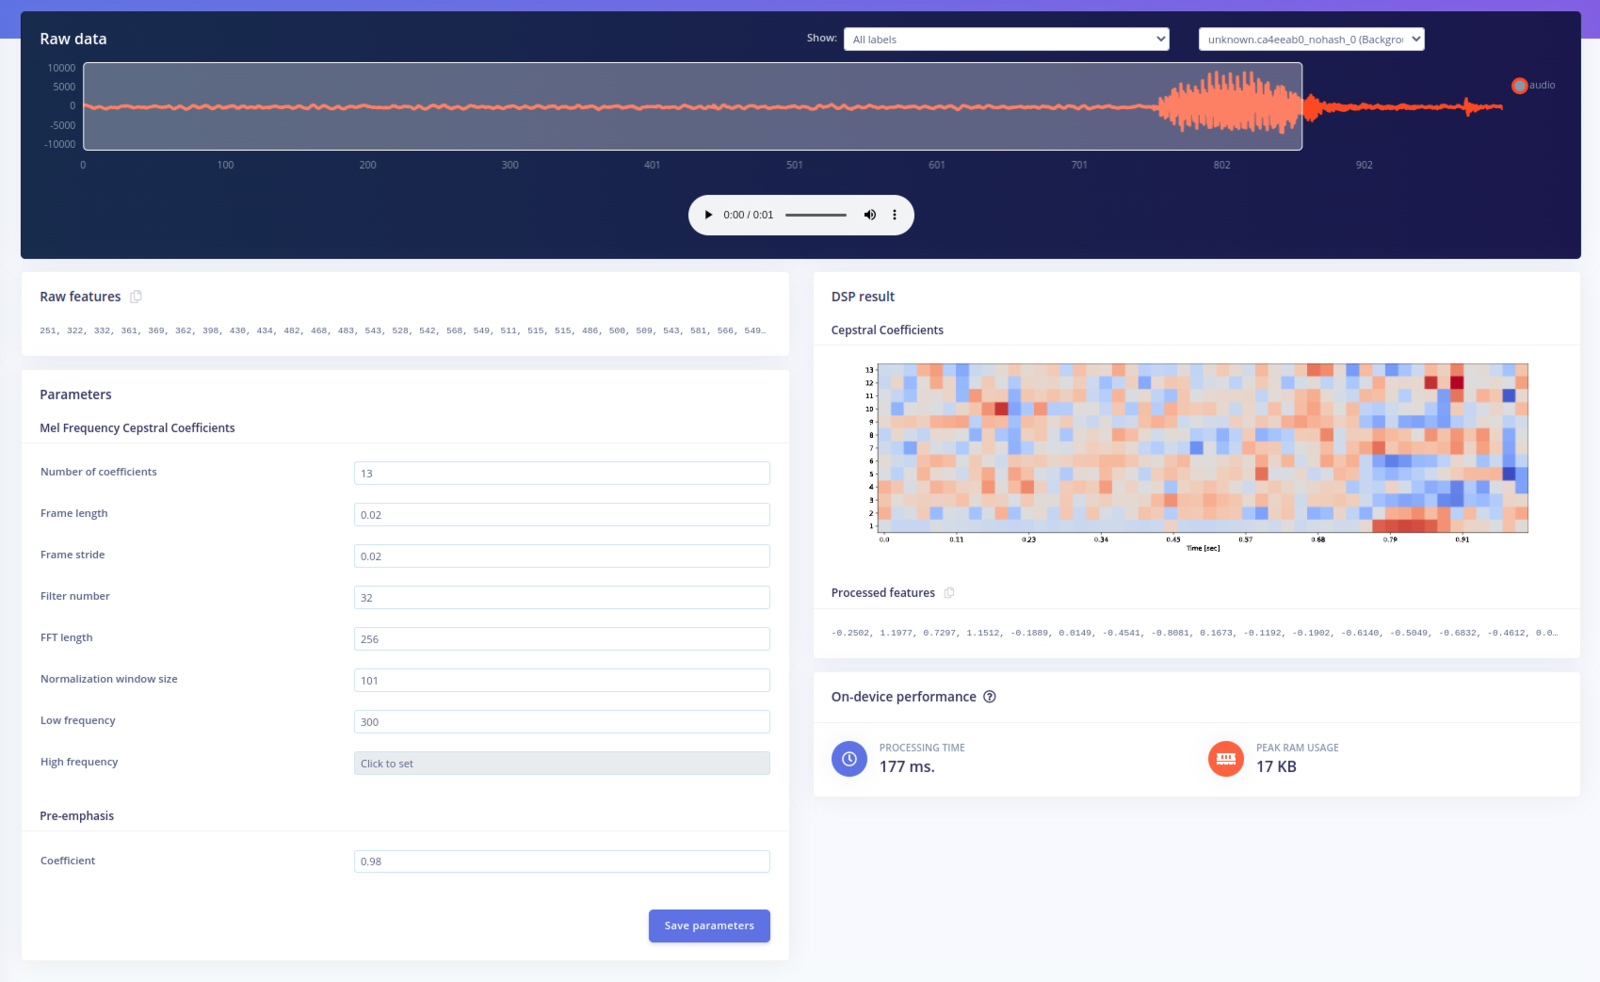
Configure the Classifier (NN)
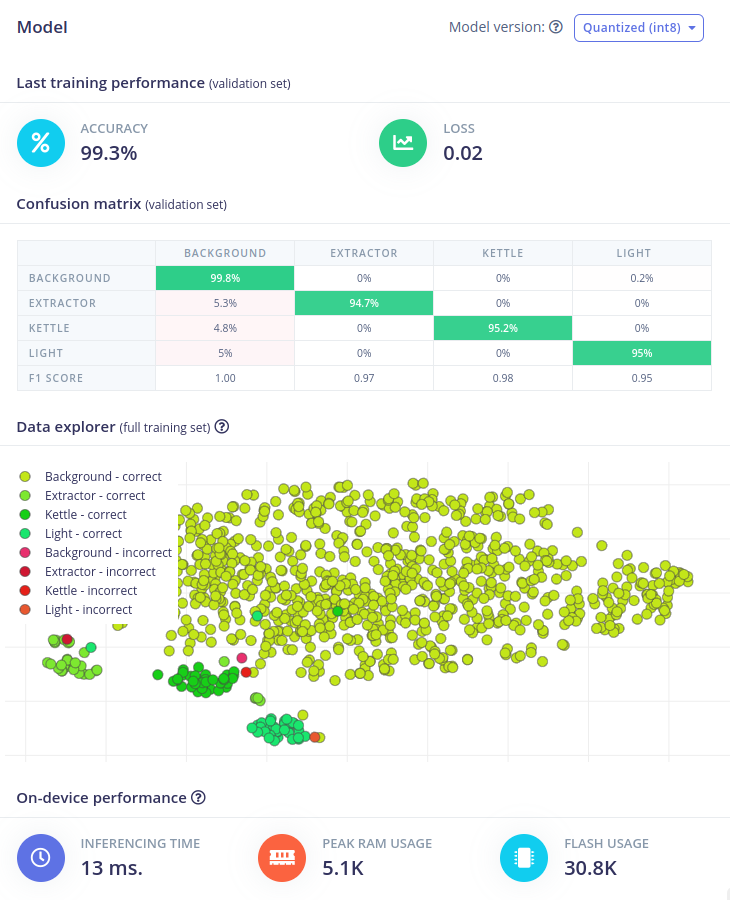
The next step in developing our machine learning algorithm is configuring the NN classifier block. Before training the model, you have the opportunity to modify the Number of training cycles, the Learning rate, the Validation set size and to enable the Auto-balance dataset function. The learning rate defines how quickly the NN learns, the number of training cycles determines the number of epochs to train the NN on, and the size of the validation set sets the percentage of samples from the training data pool utilized for validation. You can leave everything as it is for now and press Start training.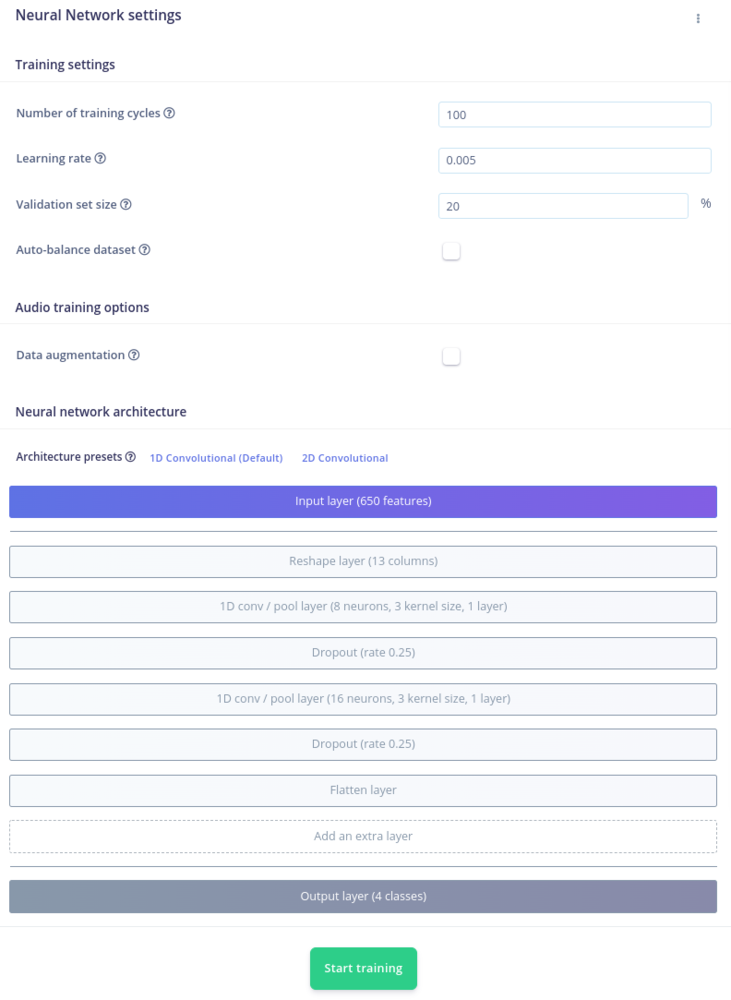
Test the Impulse Using iOS / Android
One way of deploying the model on the edge is using the Nordic nRF Edge Impulse app for iPhone or Android:- Download and install the app for your Android/IoS device.
- Launch it and log in with your edgeimpulse.com credentials.
- Select your Smart Appliance Control Using Voice Commands project from the list
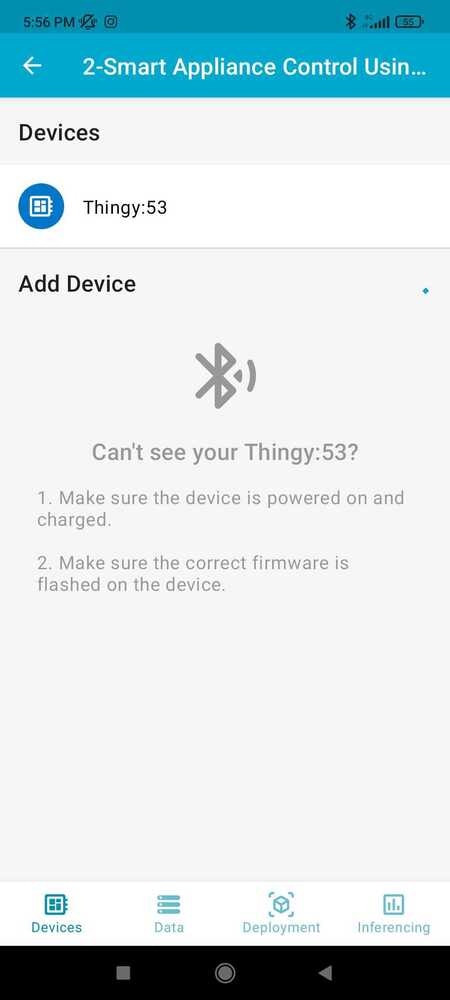
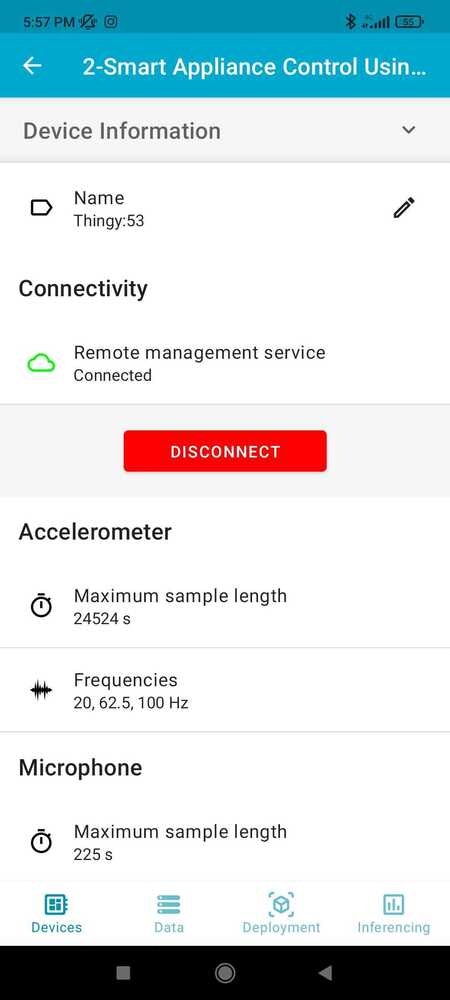
- Navigate to the Devices tab and connect to the Thingy:53:
- Navigate to the Data tab and press Connect. You will see the status on the button changing from Connect to Disconnect.
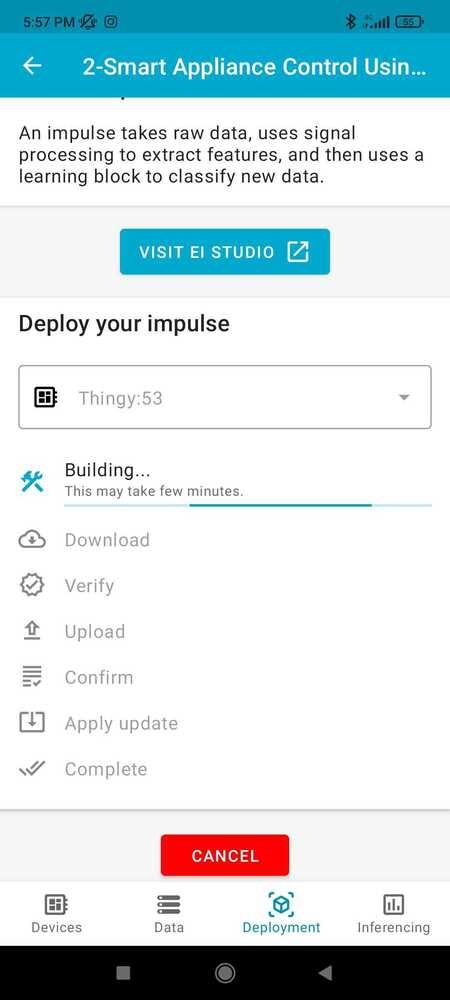
- Navigate to the Deployment tab and press Deploy.
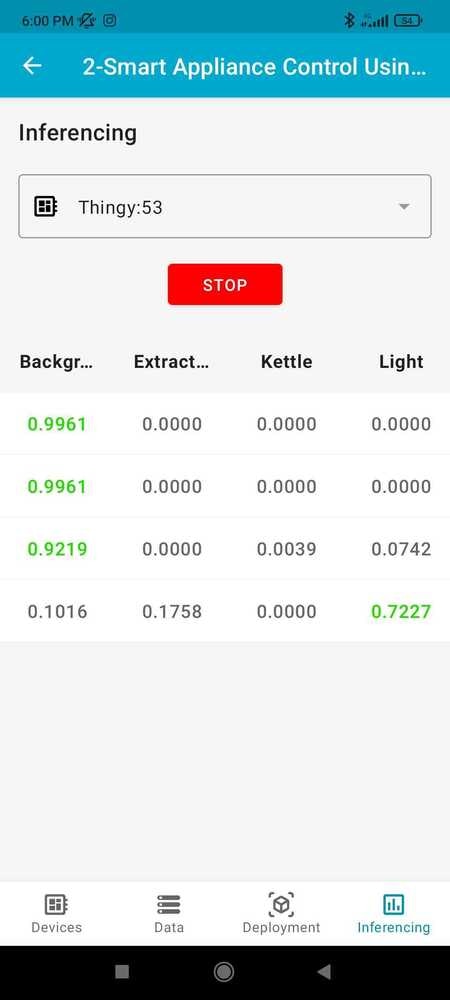
- In the Inferencing tab, you will see the results of the Edge Impulse model you have flashed on the device:
Creating a Custom Application
To showcase the process of creating a custom application, we have decided to create a basic Bluetooth application. In this application, the Thingy:53 functions as a peripheral bluetooth device that advertises itself. The ESP32 functions as a bluetooth client that scans for available devices to connect to. When it detects the Thingy:53, it pairs with it and awaits a command. After the devices are paired, when the central button of the Thingy:53 is pressed, it sends a message to the Esp32 which triggers a Relay. Here you can find the source code for the Thingy:53 and the Esp32. To build and flash the application on the Nordic hardware, copy the folder namedThingy53_Peripheral from the repository, to ncs/nrf folder and then run:
Future Development
For this project we have decided to deploy the machine learning algorithm on the Bluetooth peripheral device. This enables the possibility of using multiple Central devices that are dedicated to switching the appliance on and off, while the processing load of running the machine learning algorithm is done by the Thingy:53.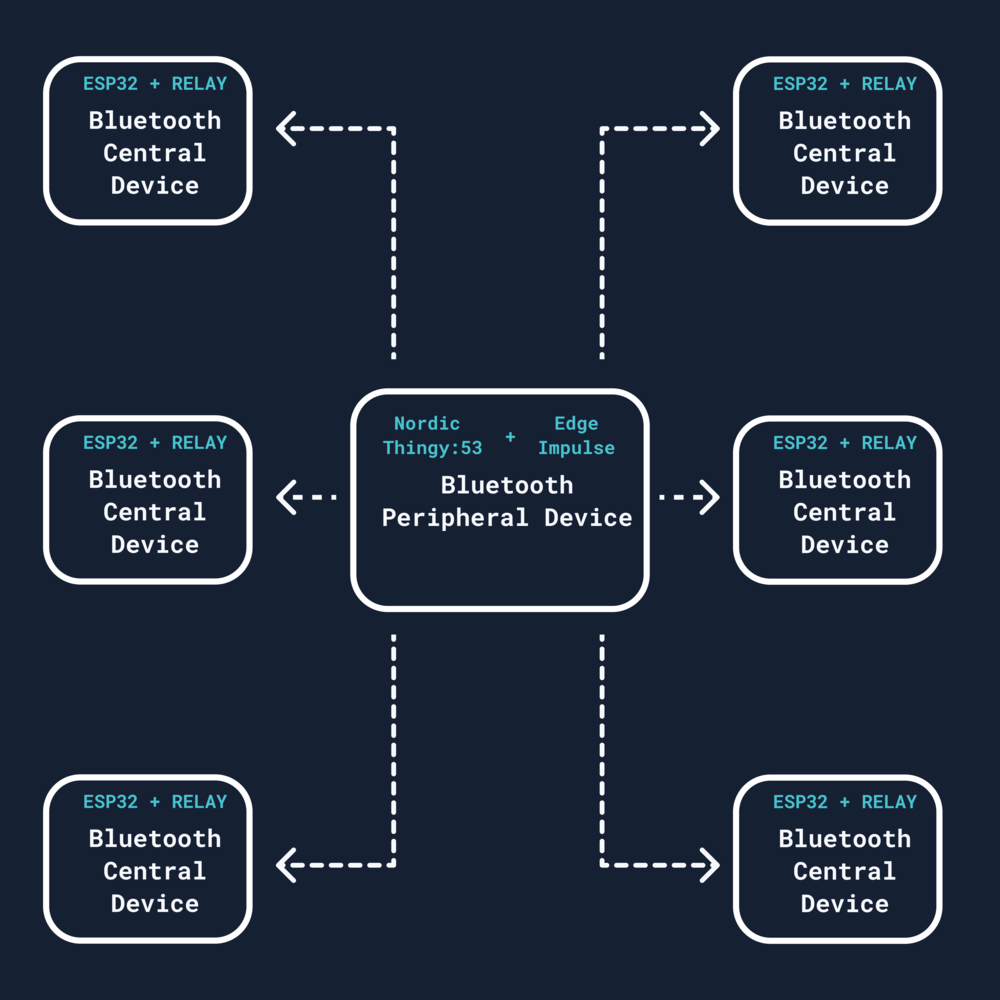
Conclusion