Description
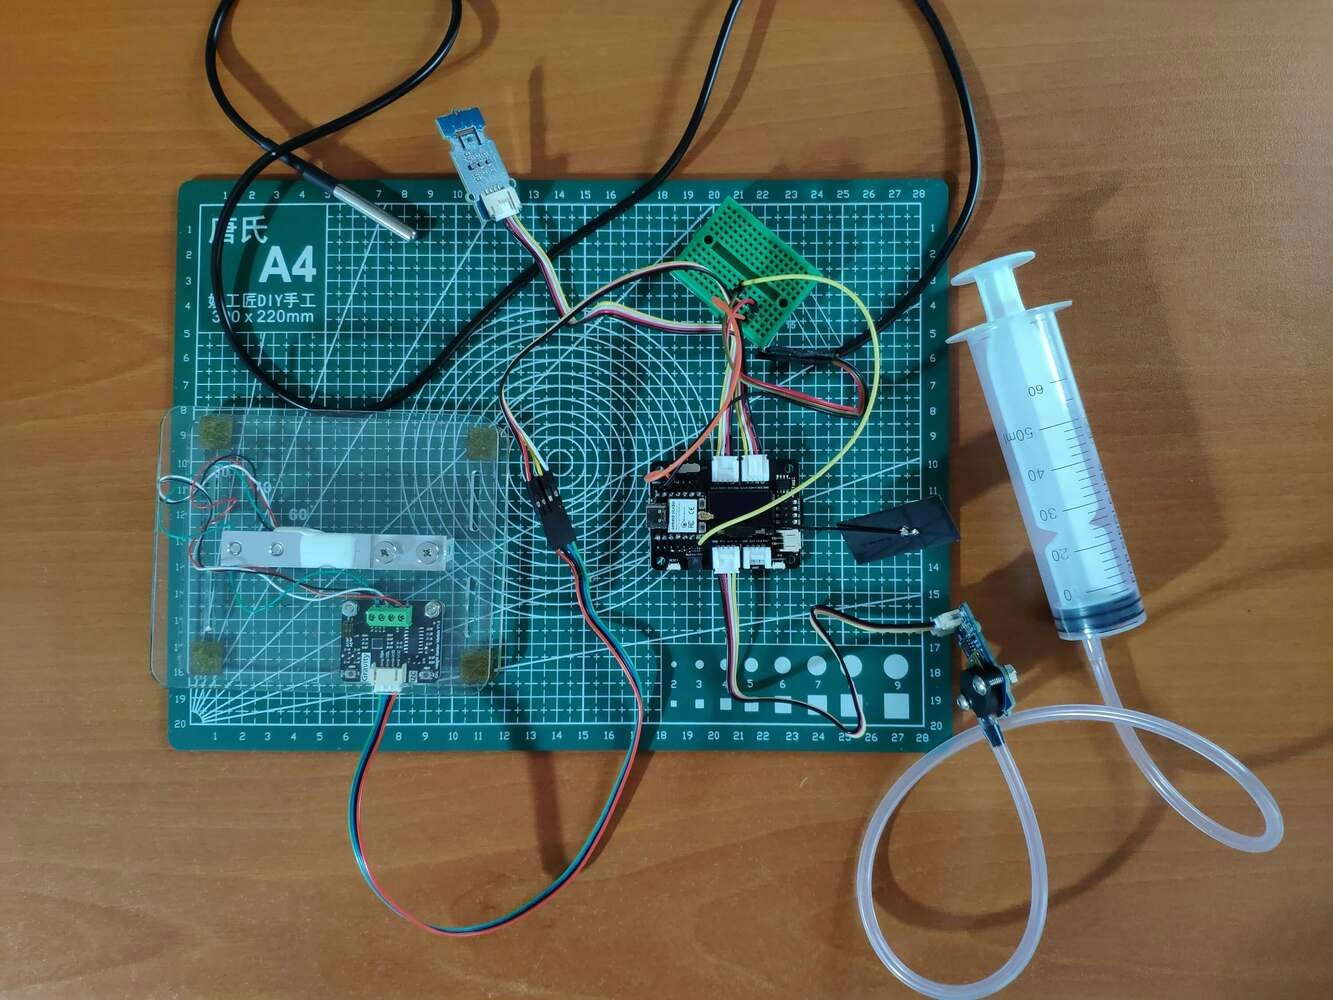
As many of us know, yogurt is produced by bacterial fermentation of milk, which can be of cow, goat, ewe, sheep, etc. The fermentation process thickens the milk and provides a characteristic tangy flavor to yogurt. Considering organisms contained in yogurt stimulate the gut’s friendly bacteria and suppress harmful bacteria looming in the digestive system, it is not surprising that yogurt is consumed worldwide as a healthy and nutritious food[^1]. The bacteria utilized to produce yogurt are known as yogurt cultures (or starters). Fermentation of sugars in the milk by yogurt cultures yields lactic acid, which decomposes and coagulates proteins in the milk to give yogurt its texture and characteristic tangy flavor. Also, this process improves the digestibility of proteins in the milk and enhances the nutritional value of proteins. After the fermentation of the milk, yogurt culture could help the human intestinal tract to absorb the amino acids more efficiently[^2]. Even though yogurt production and manufacturing look like a simple task, achieving precise yogurt texture (consistency) can be arduous and strenuous since various factors affect the fermentation process while processing yogurt, such as:- Temperature
- Humidity
- Pressure
- Milk Temperature
- Yogurt Culture (Starter) Amount (Weight)
- Thinner
- Optimum
- Curdling (Lumpy)


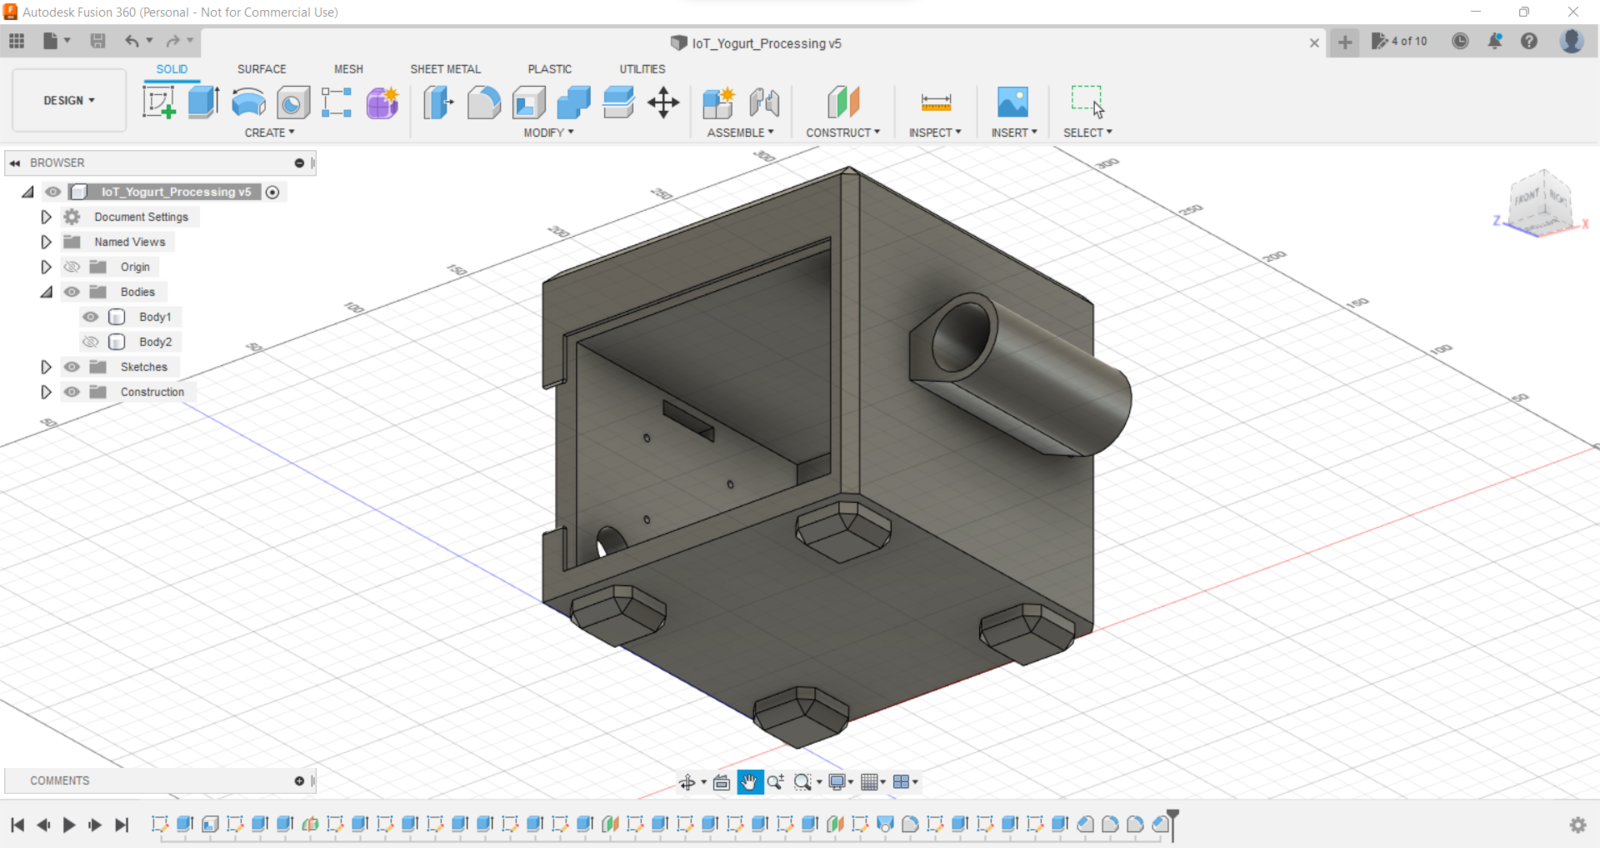
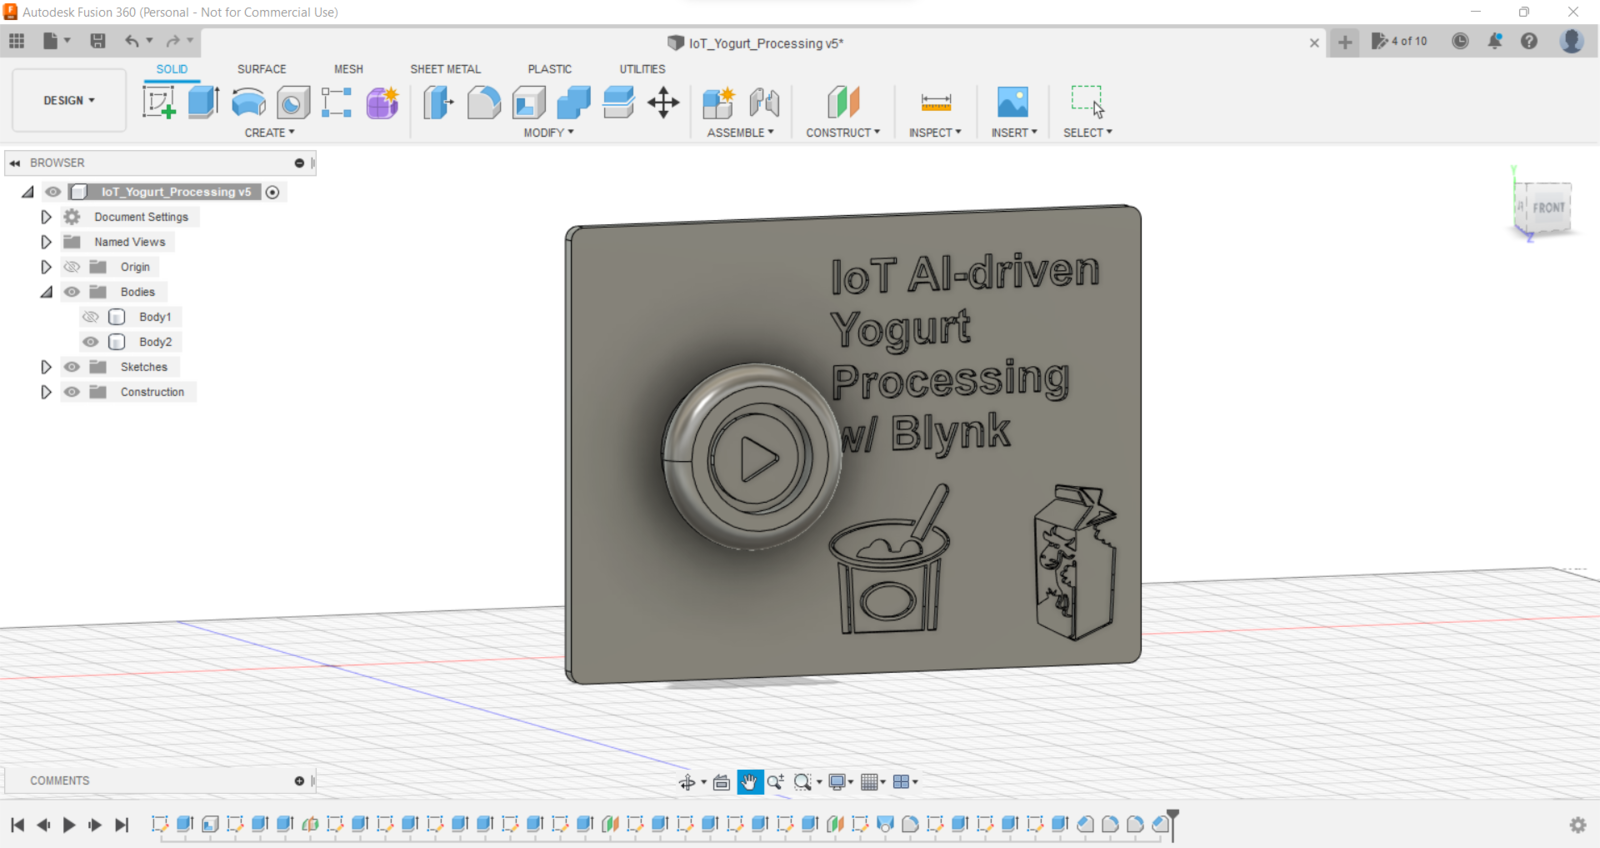
Step 1: Designing and printing a dairy-themed case
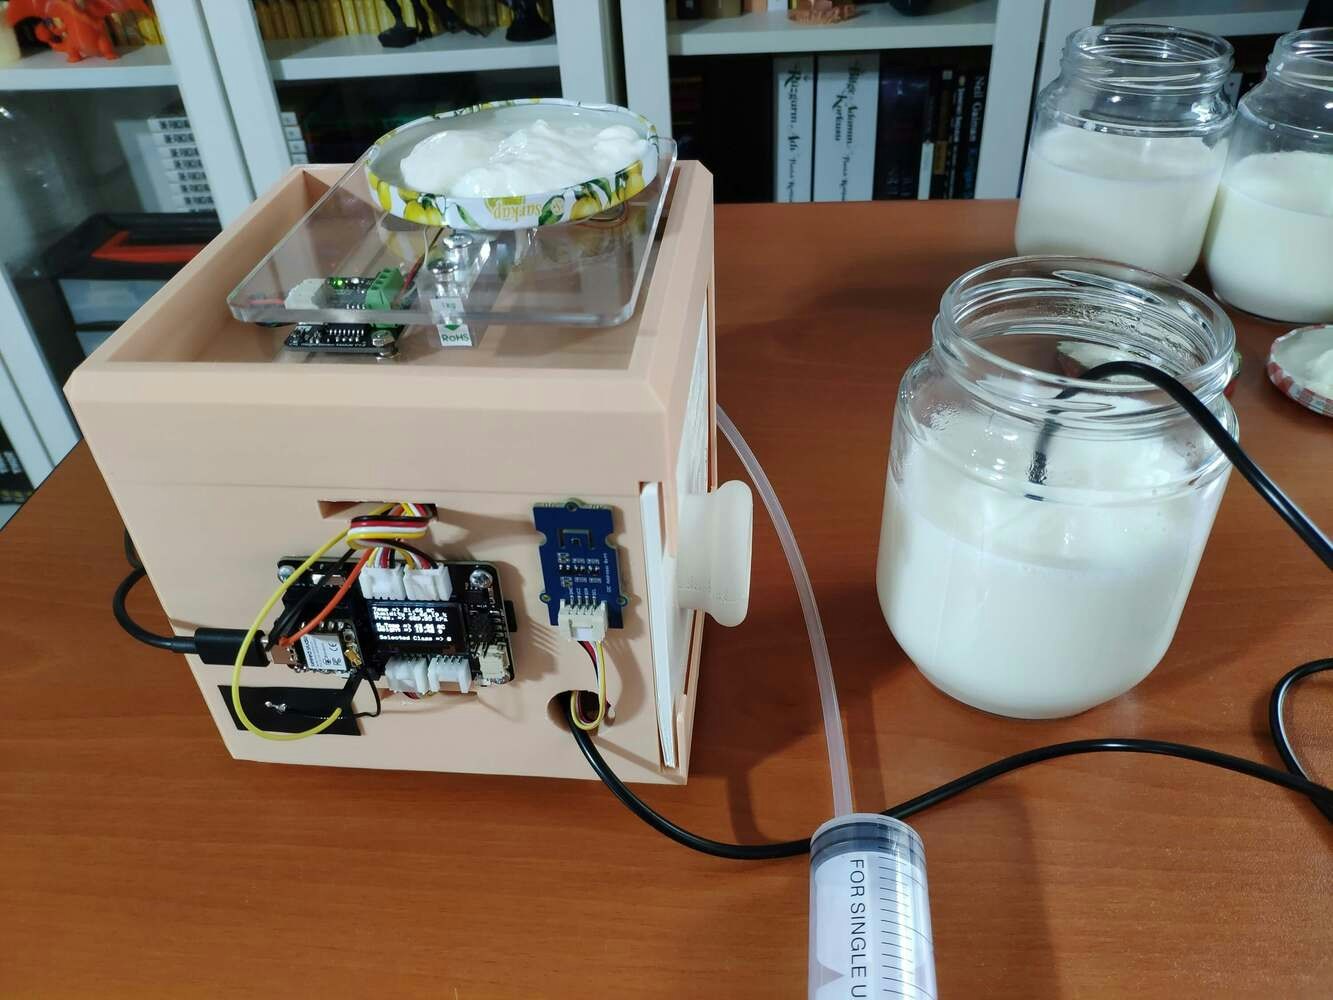
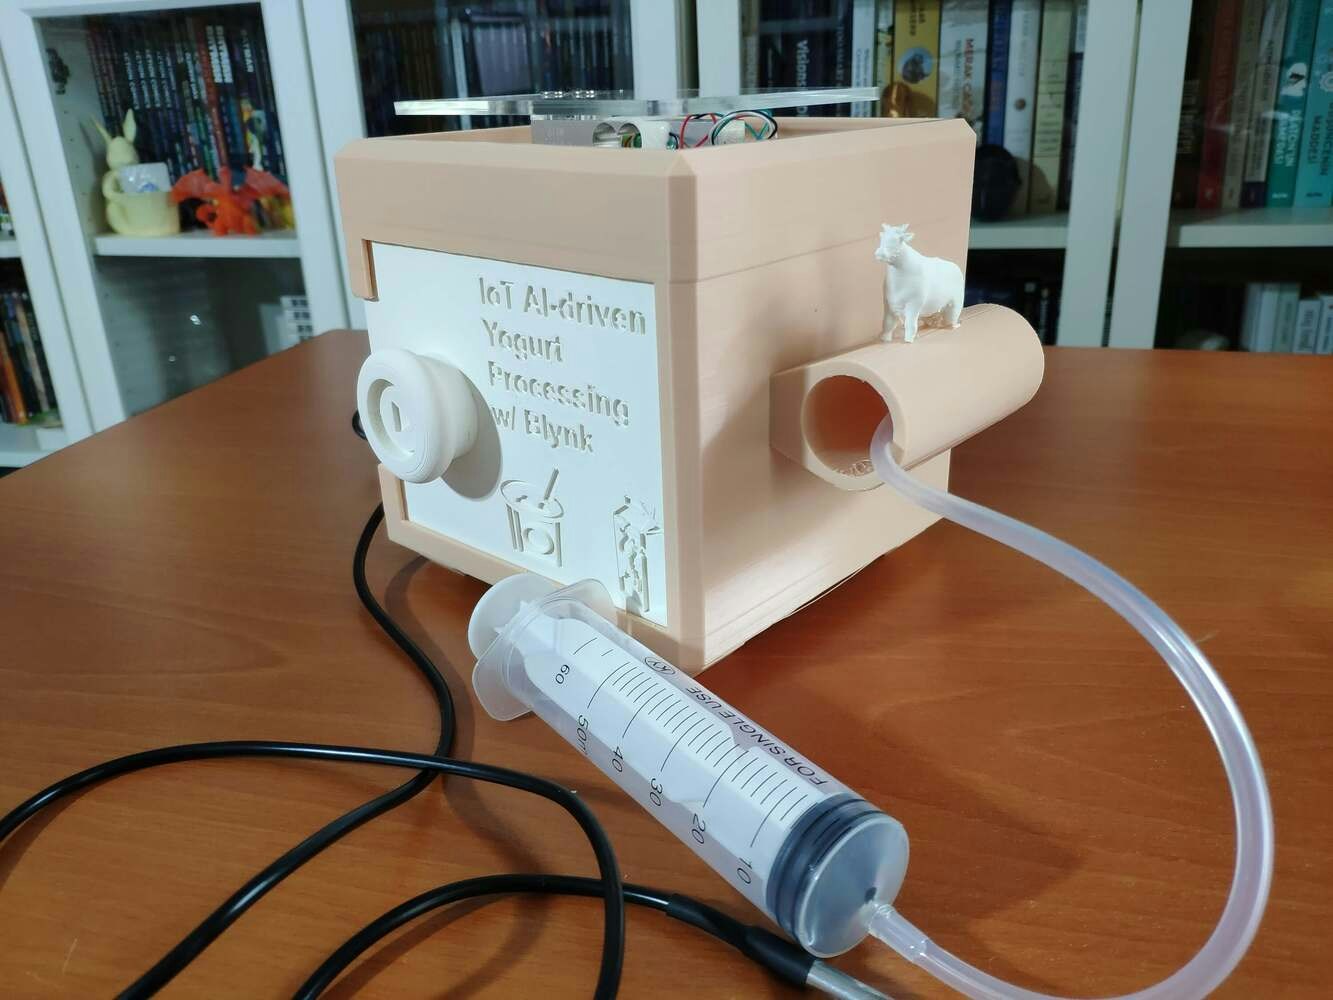
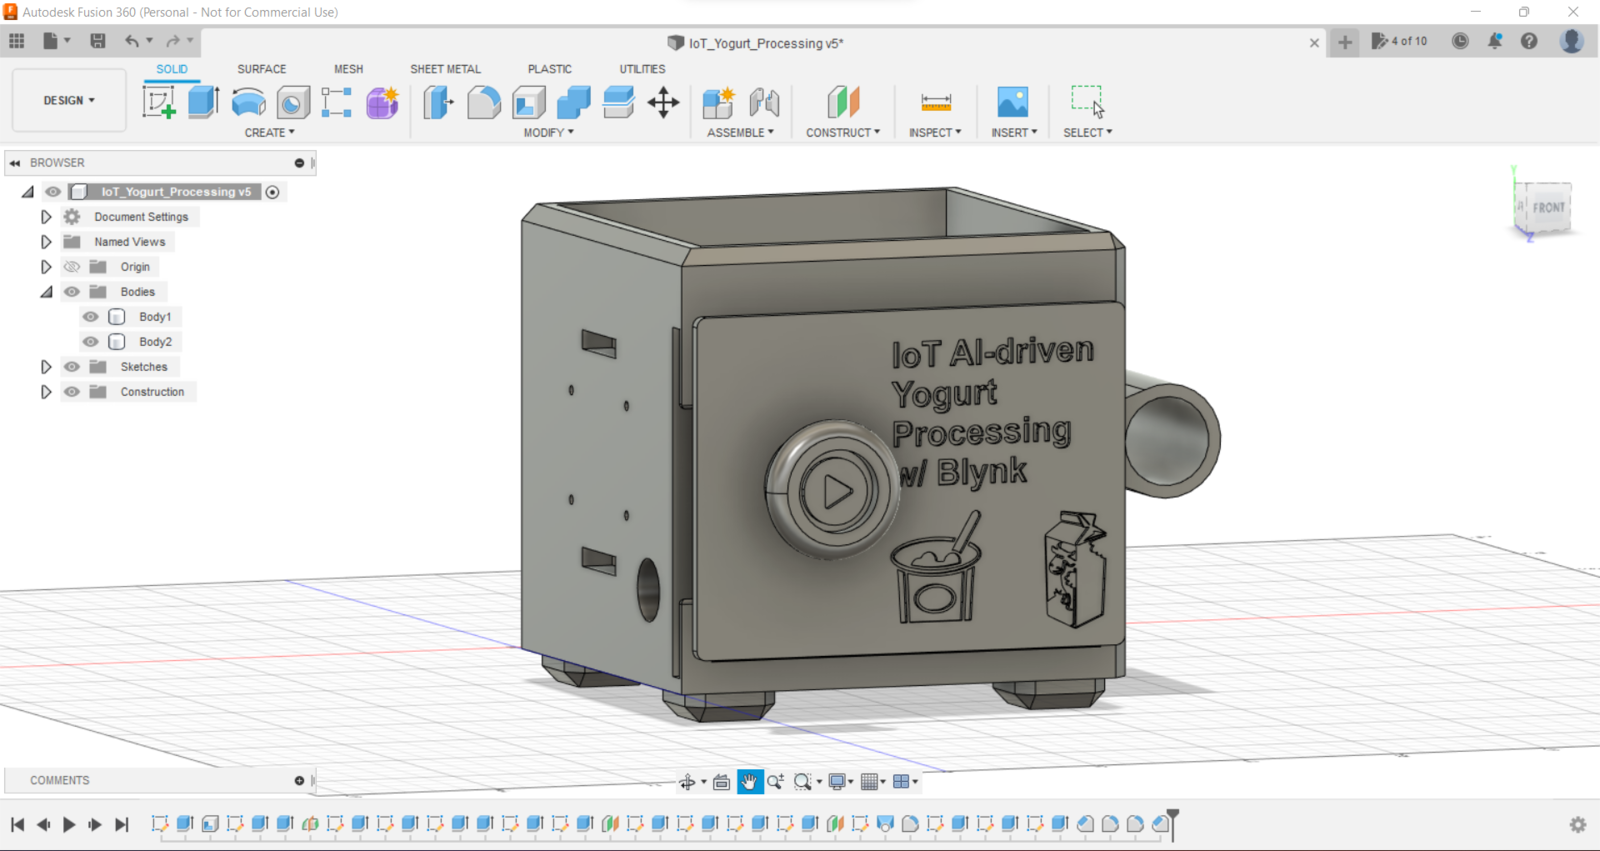
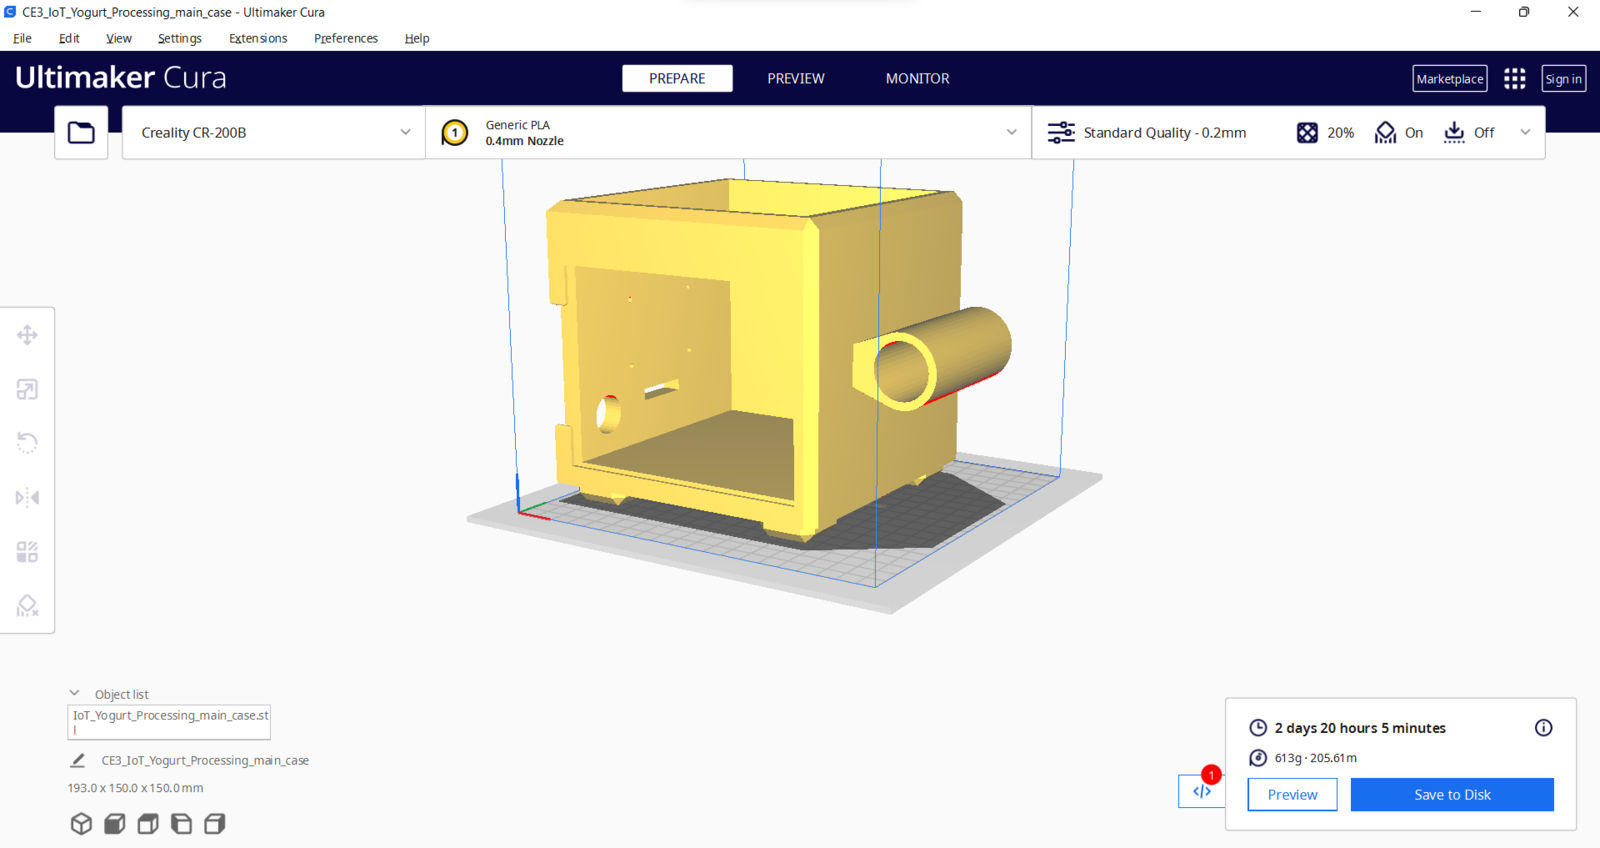
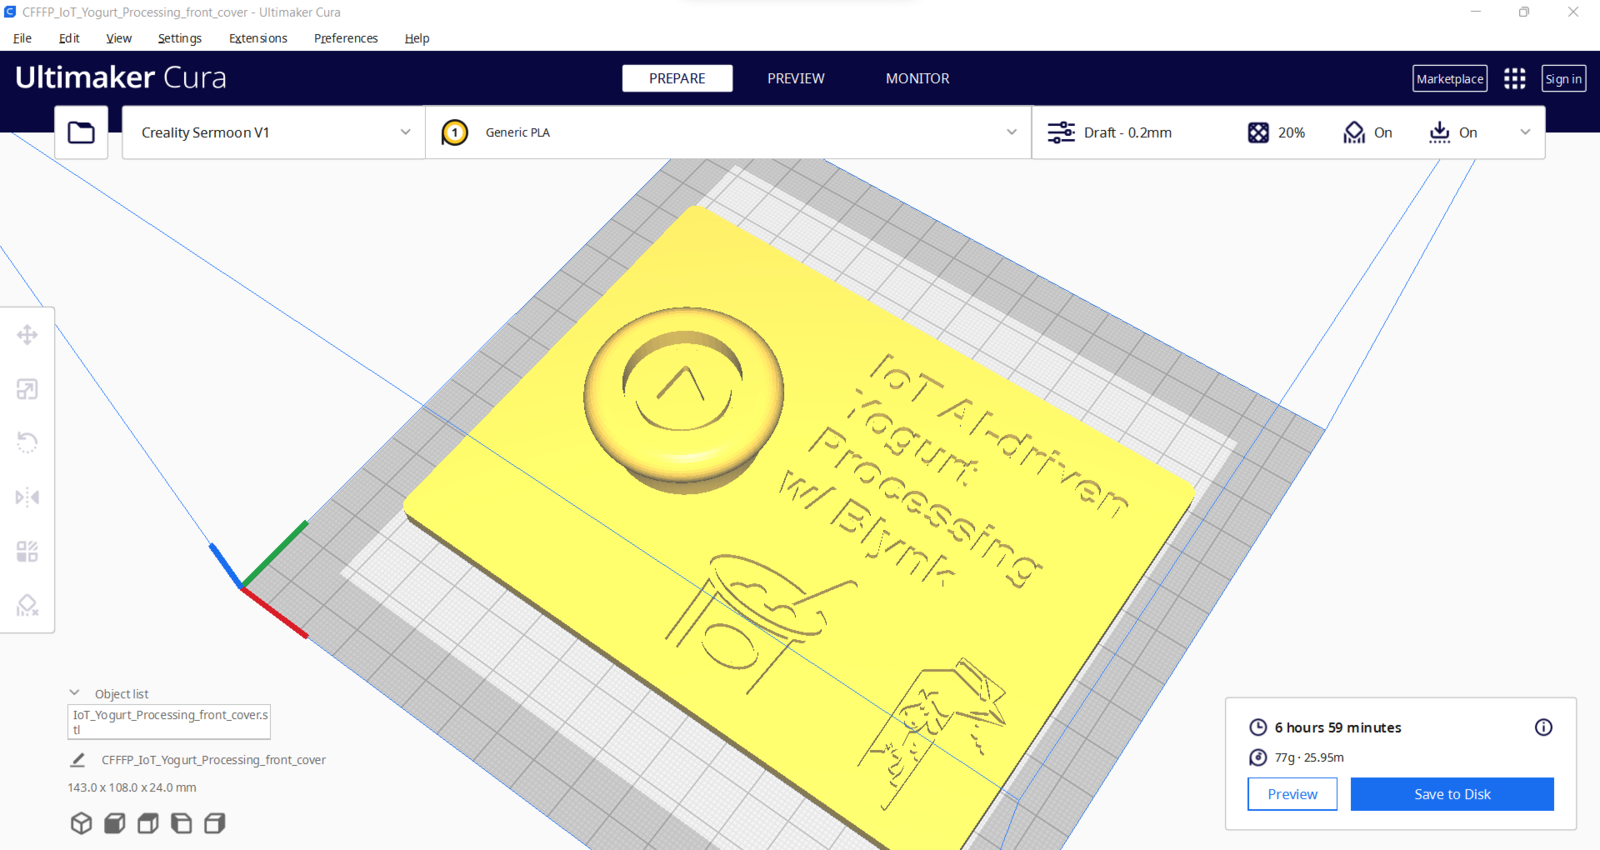
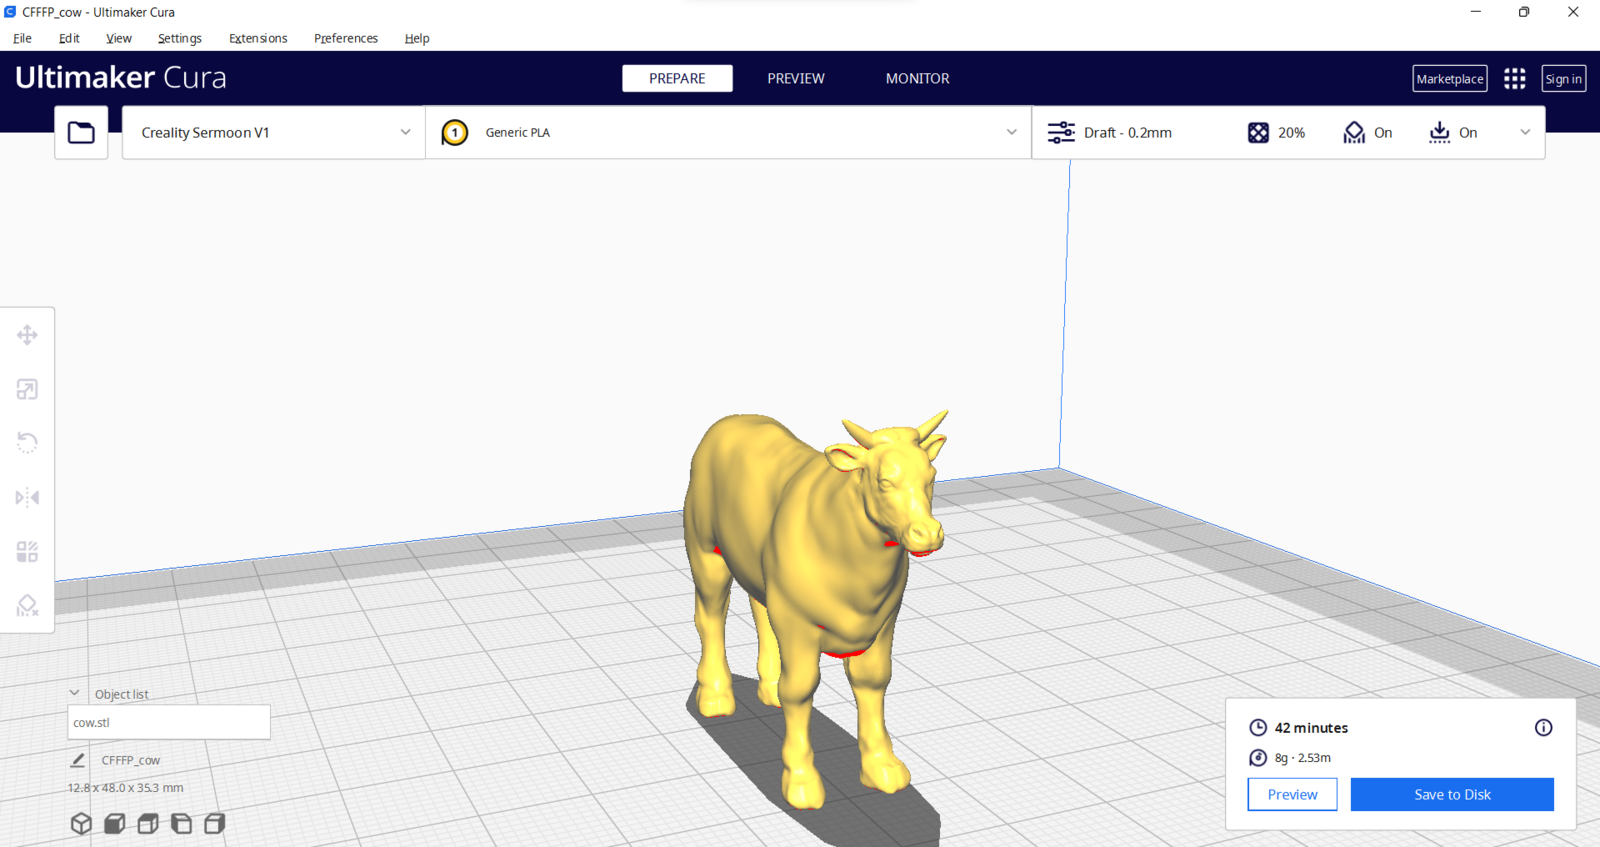
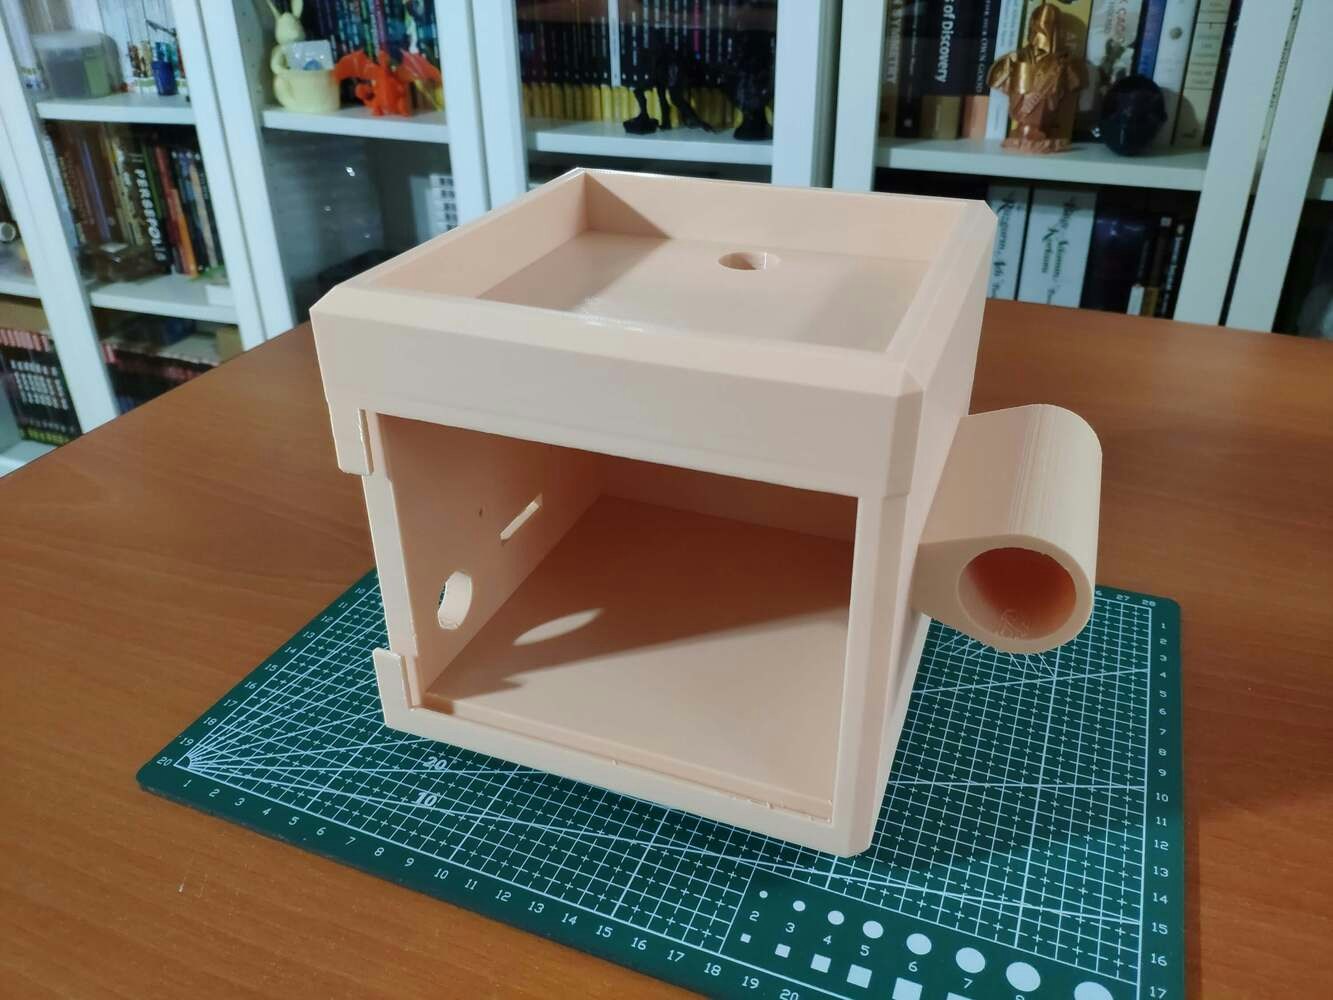
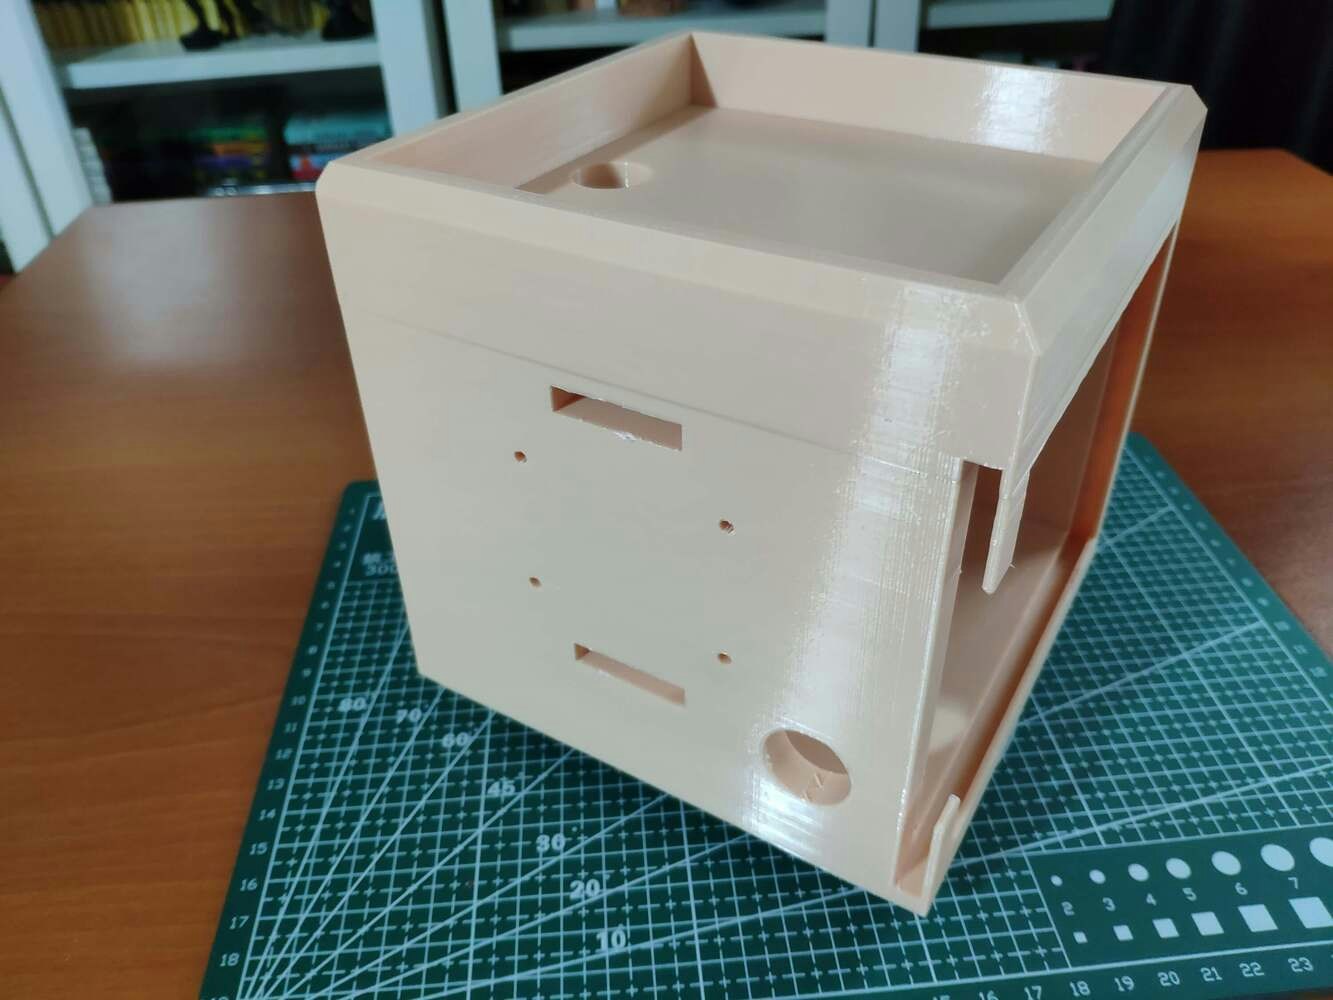
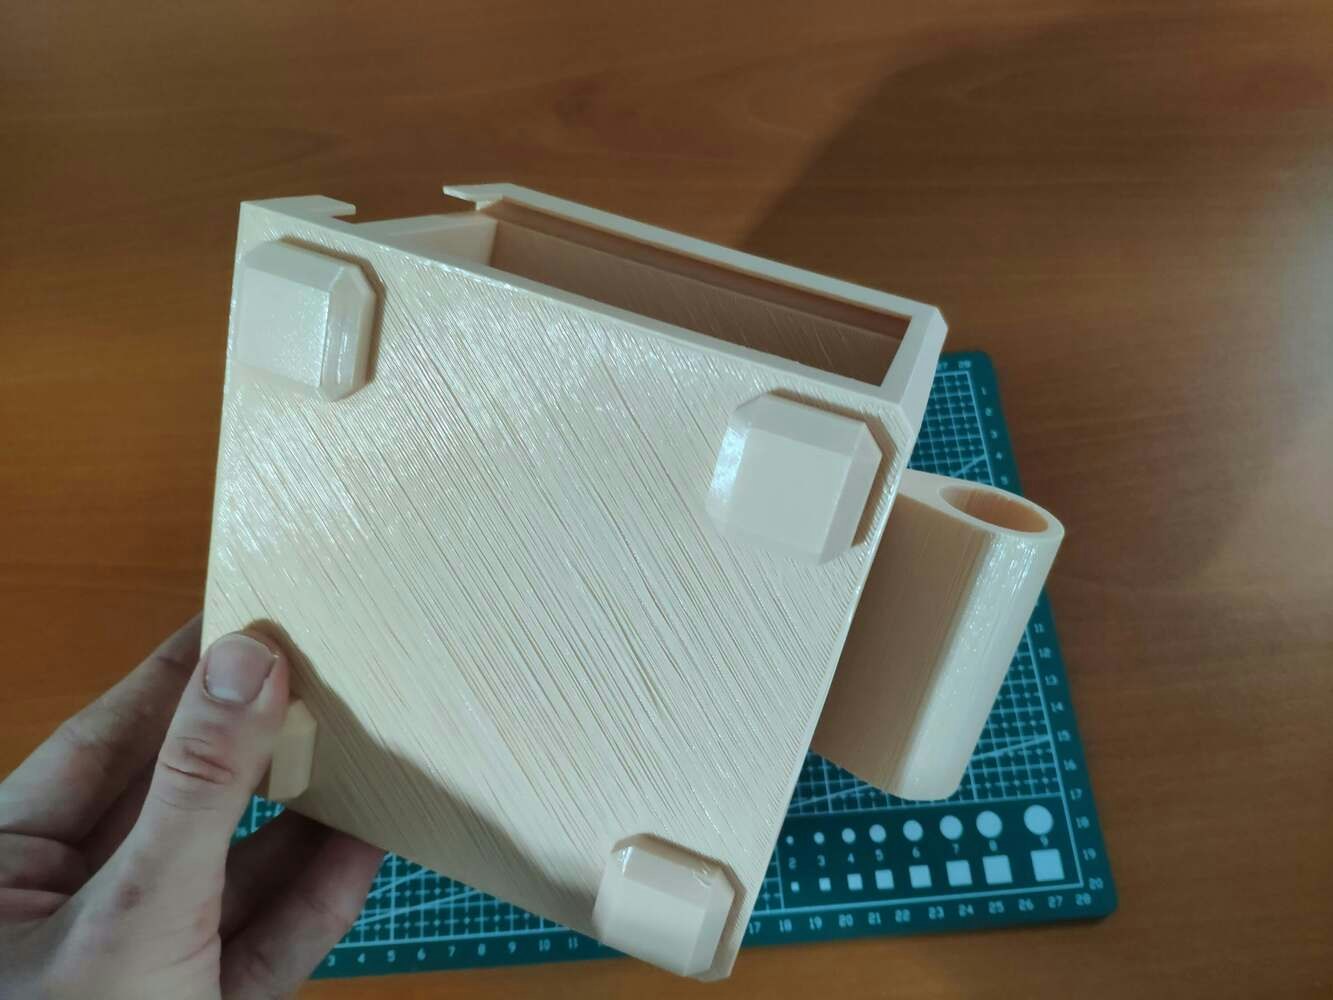
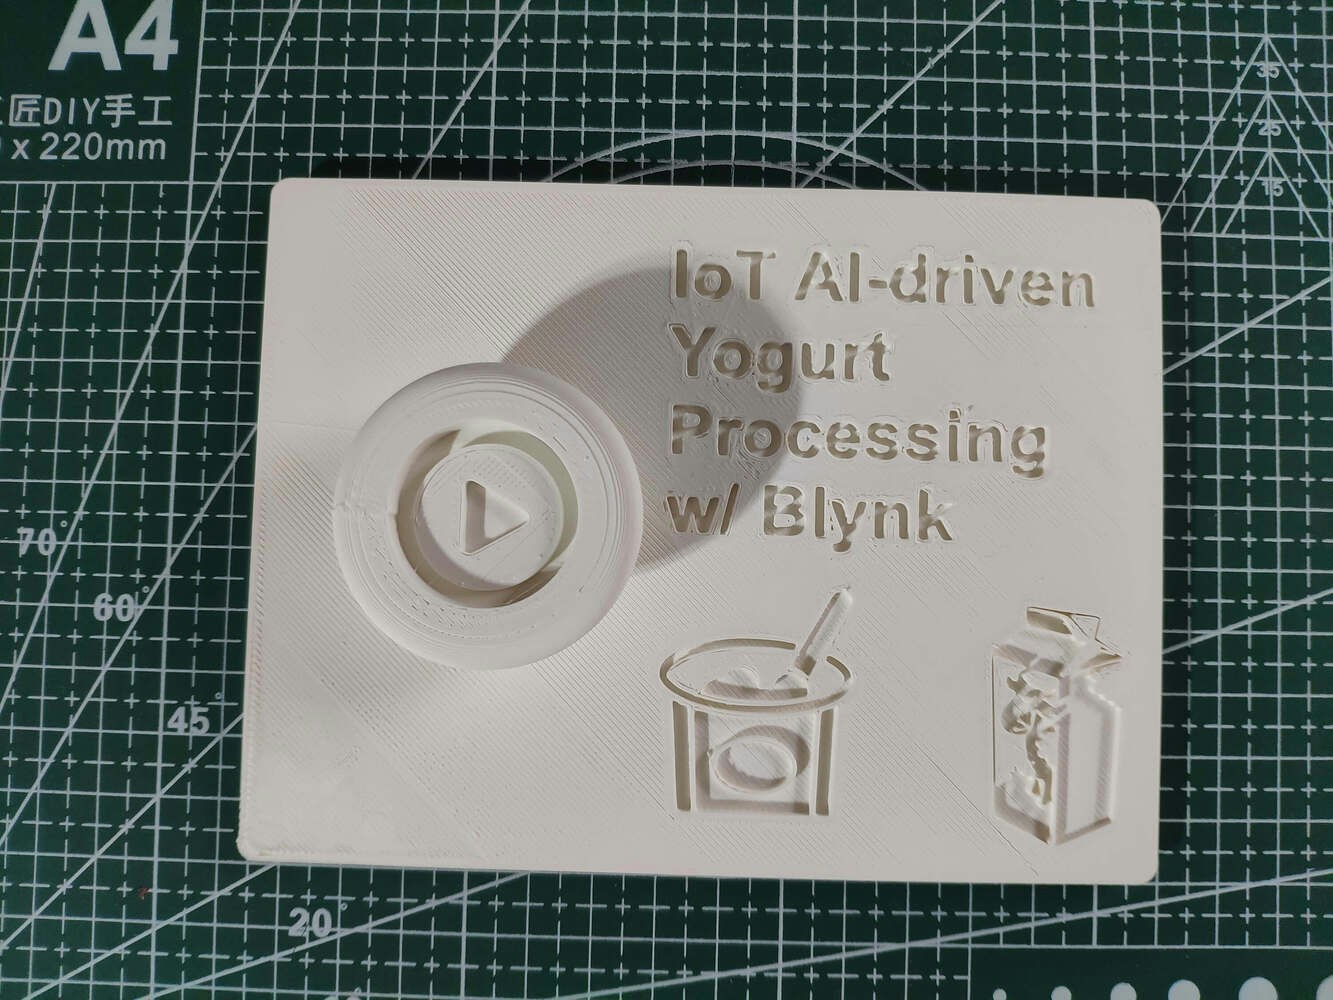
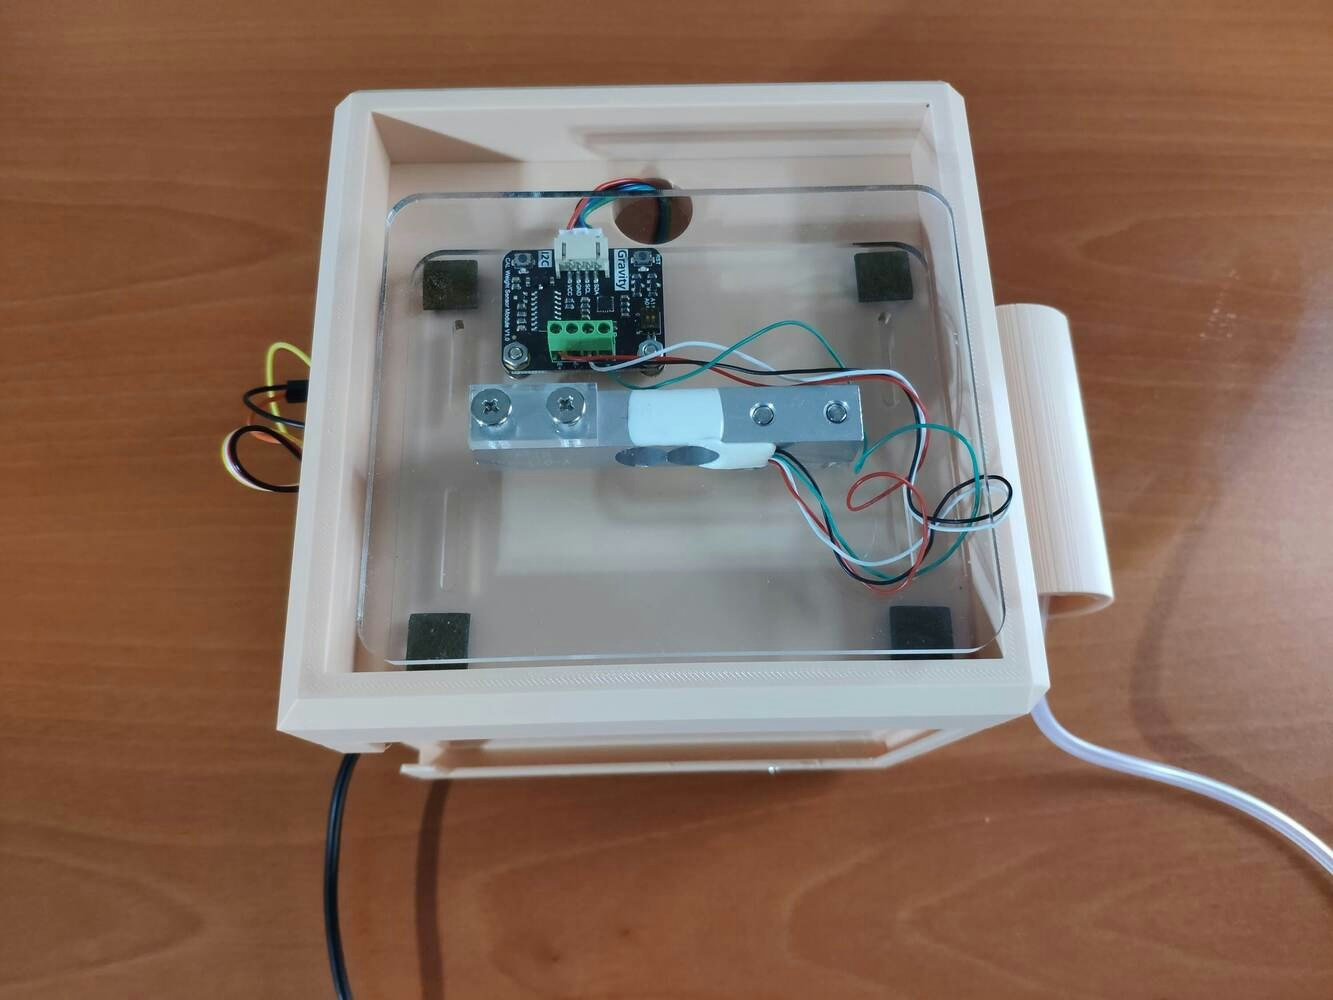
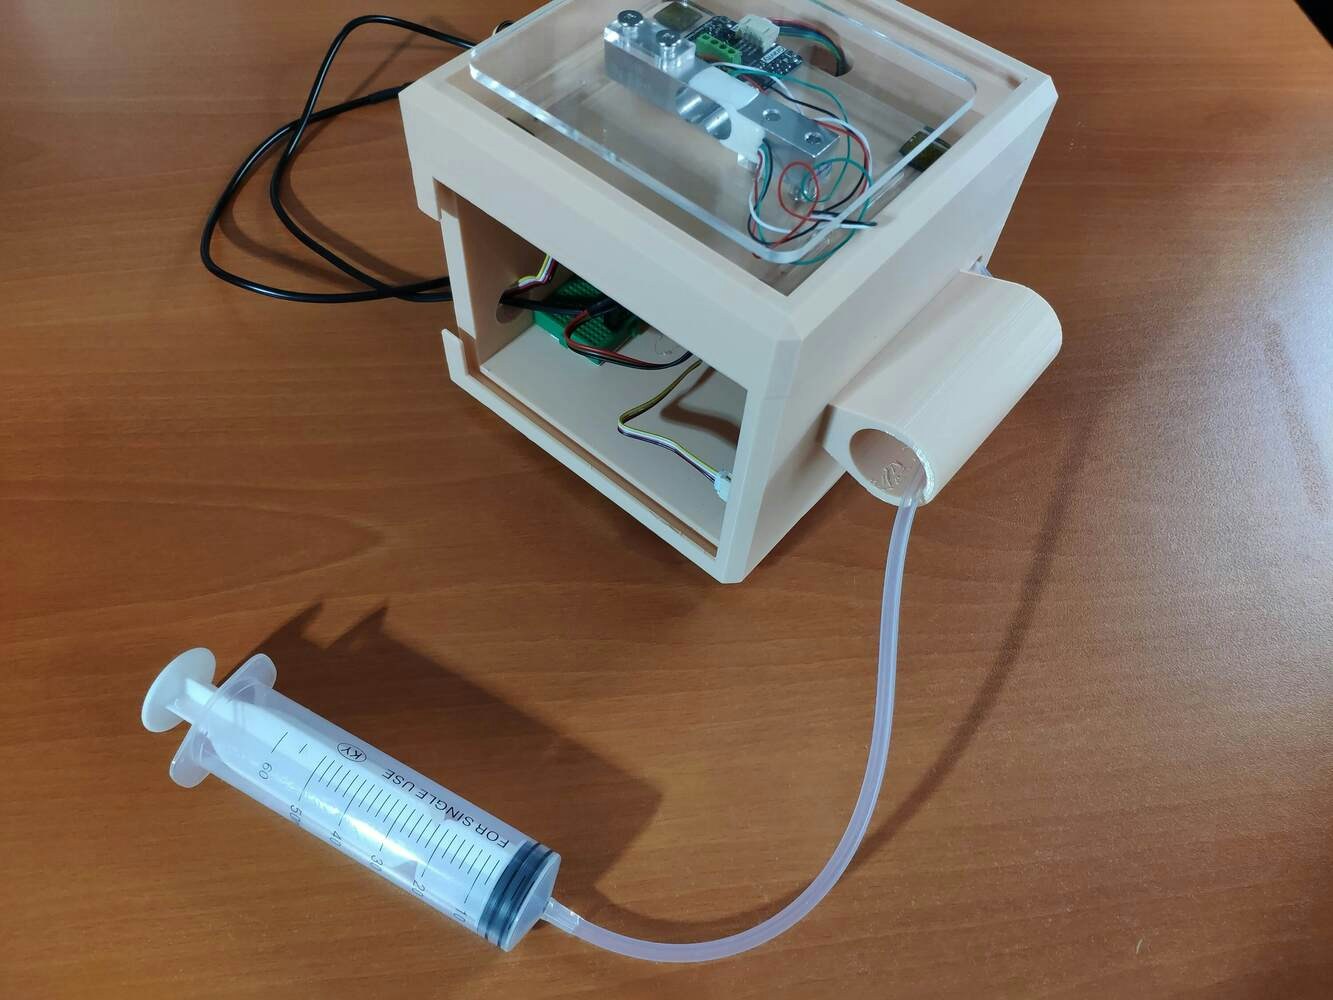
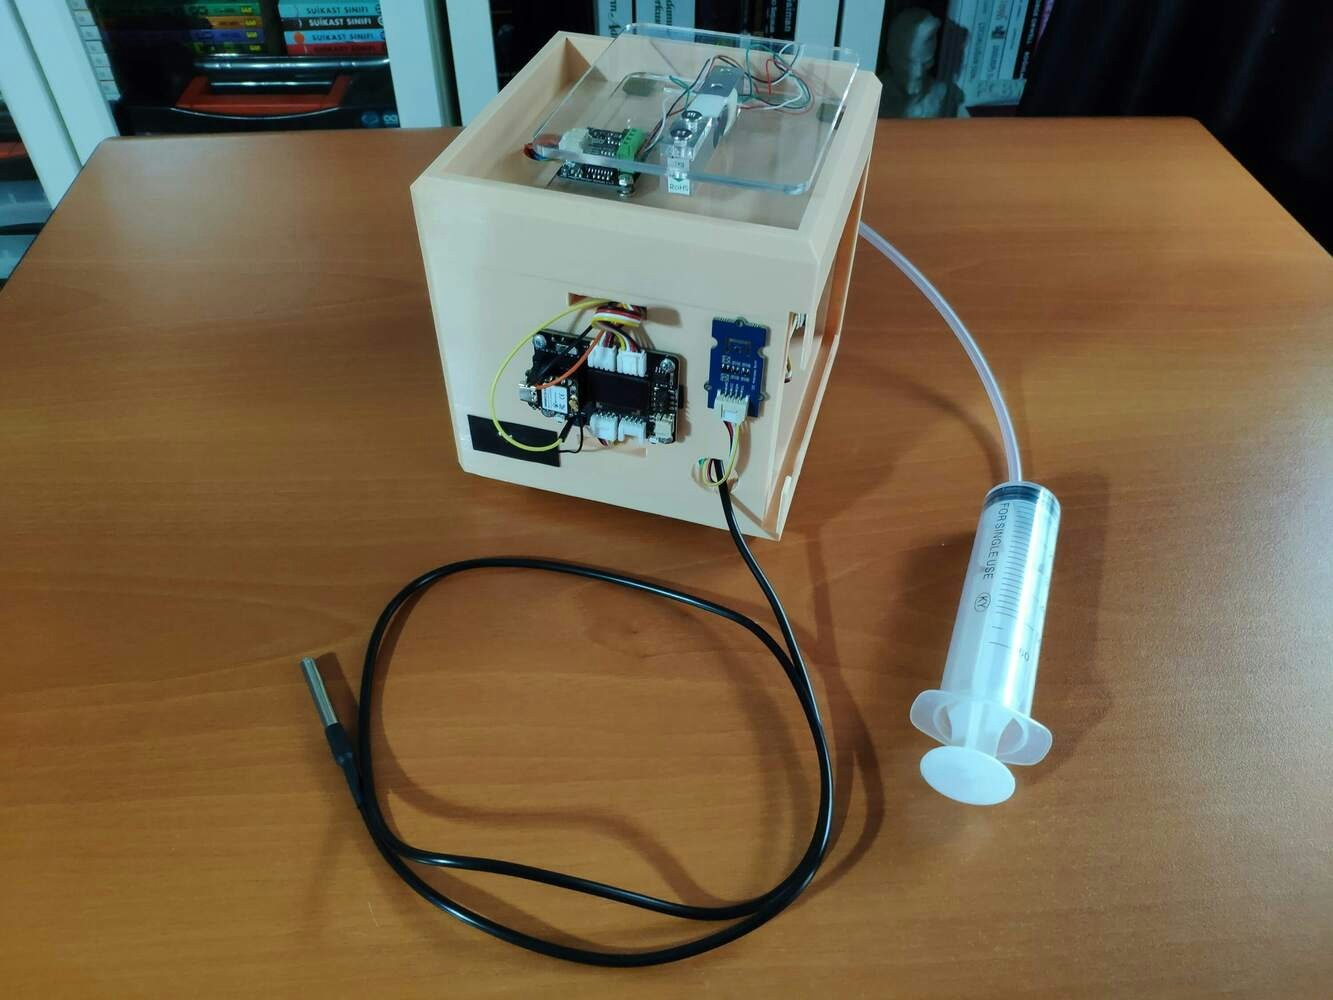
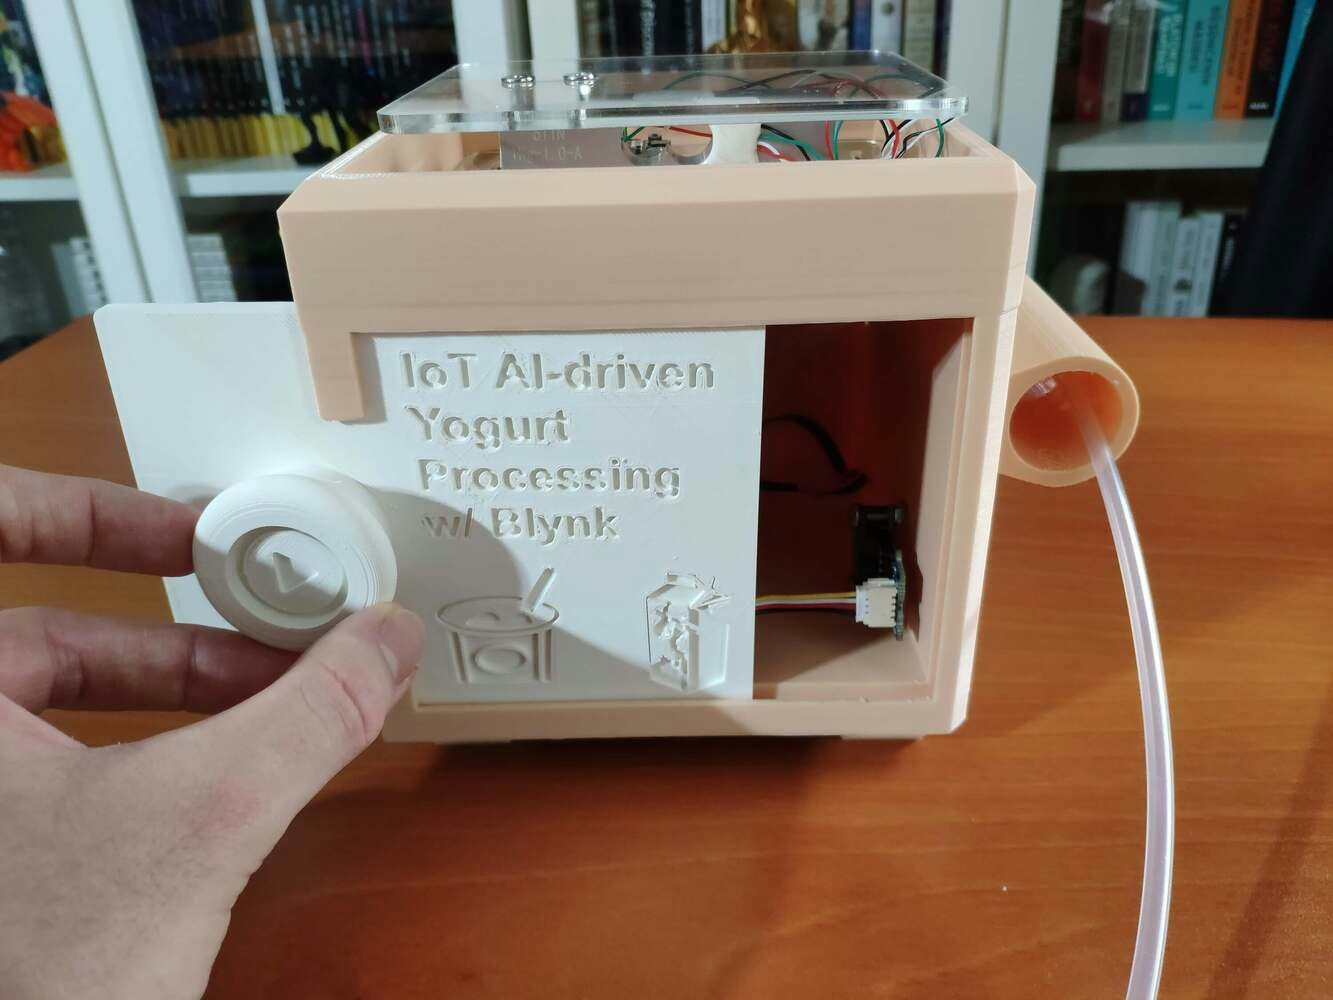
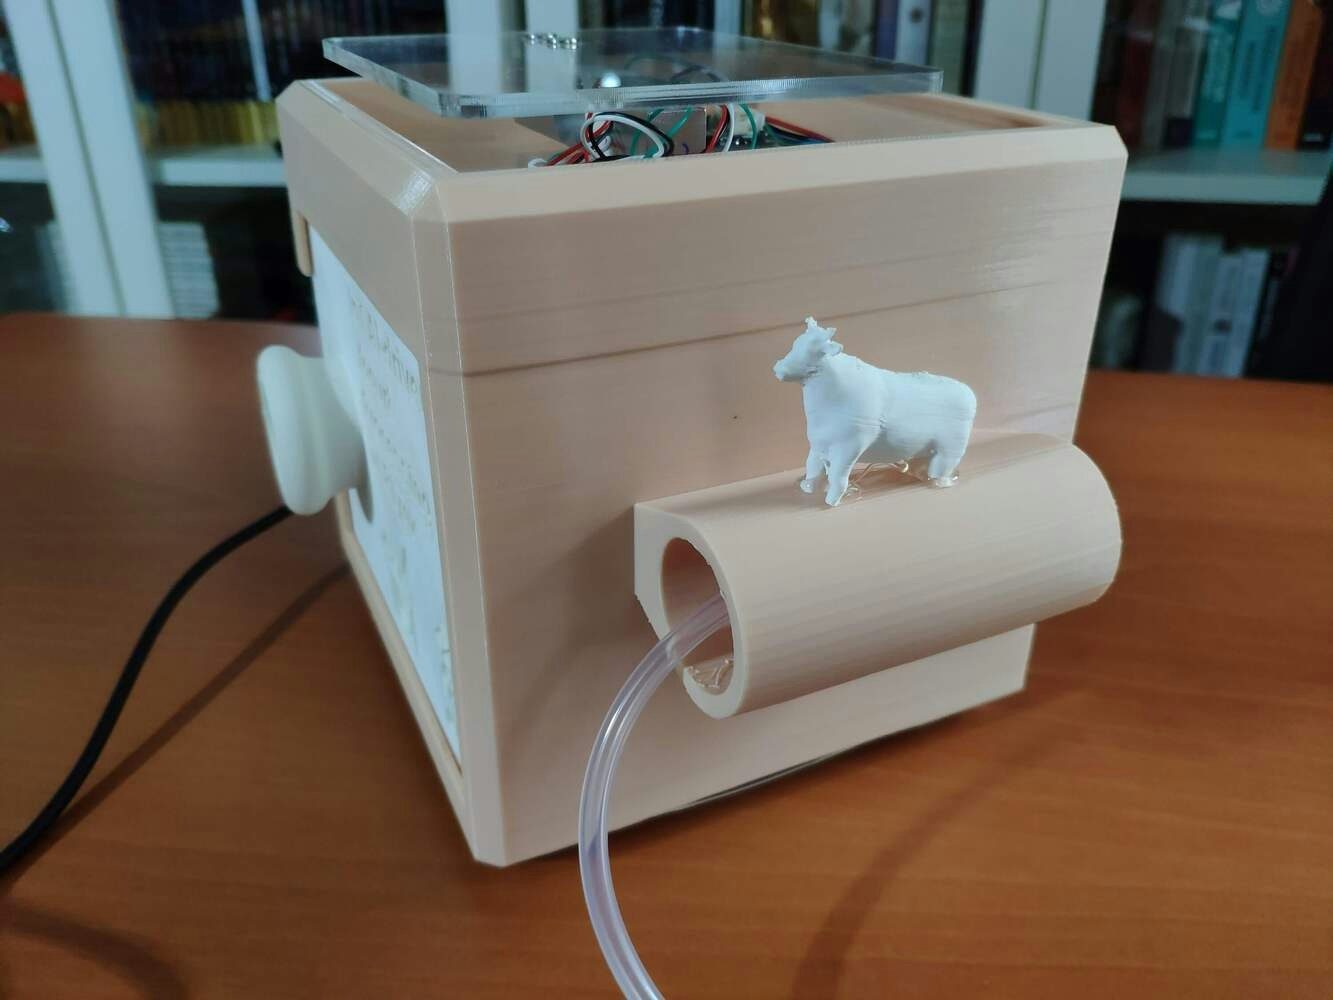
Since I focused on building a budget-friendly and easy-to-use device that collects yogurt processing data and informs the user of the predicted yogurt consistency level before fermentation, I decided to design a robust and sturdy case allowing the user to access the SD card after logging data and weigh yogurt culture (starter) easily. To avoid overexposure to dust and prevent loose wire connections, I added a sliding front cover with a handle to the case. Also, I decided to emboss yogurt and milk icons on the sliding front cover so as to complement the dairy theme gloriously. Since I needed to adjust the rubber tube length of the integrated pressure sensor, I added a hollow cylinder part to the main case to place the rubber tube. Then, I decided to fasten a small cow figure to the cylinder part because I thought it would make the case design align with the dairy theme. I designed the main case and its sliding front cover in Autodesk Fusion 360. You can download their STL files below.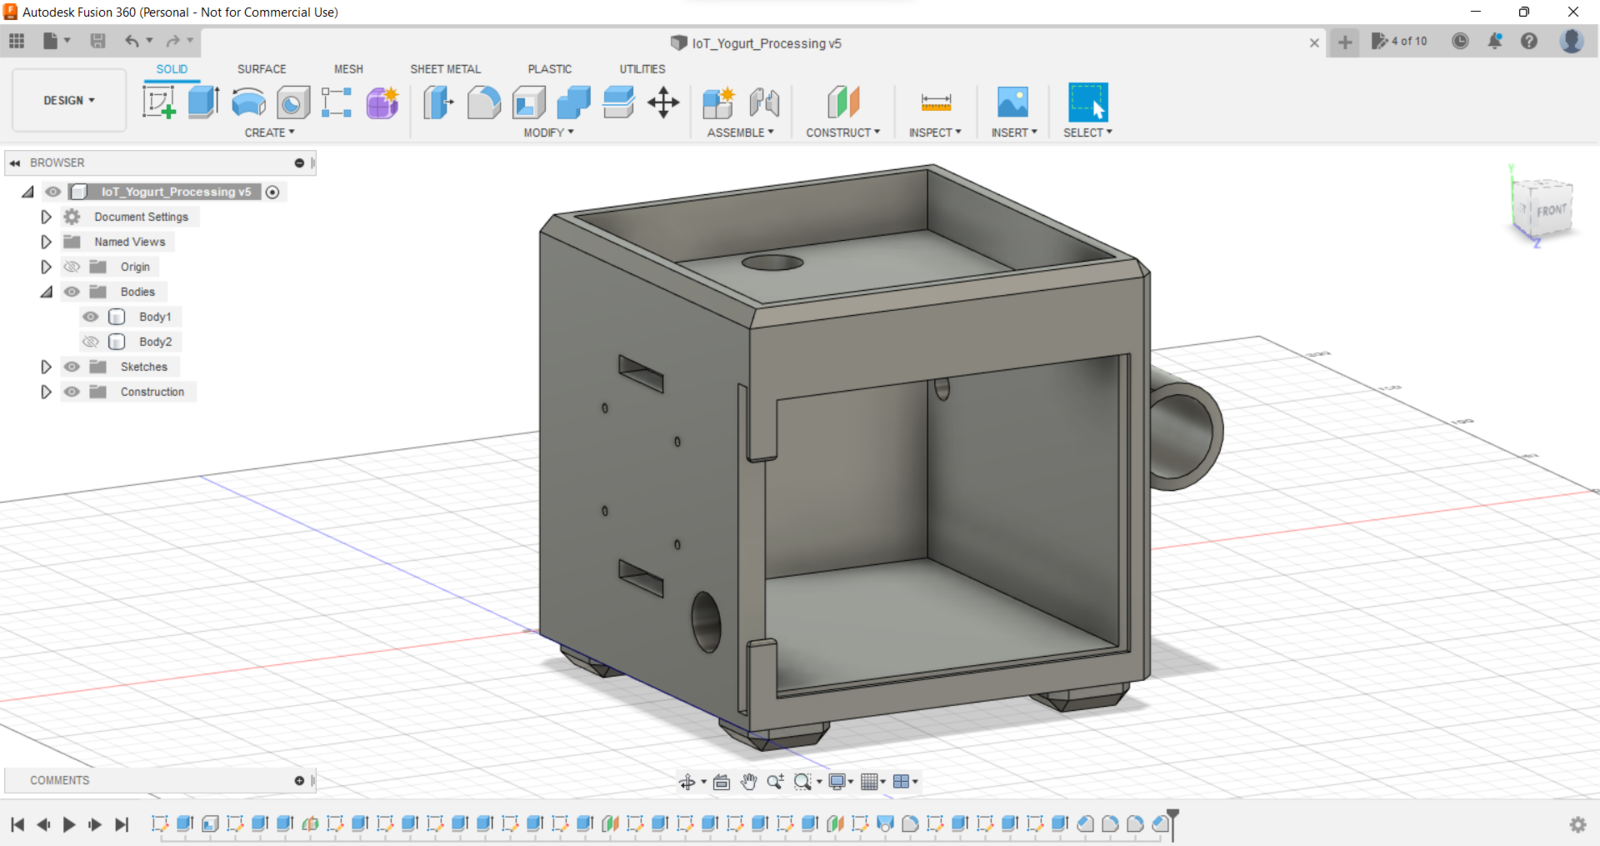

- Beige
- ePLA-Matte Milky White
.jpg?fit=max&auto=format&n=cTLnQohdrJO-nQ6f&q=85&s=f7e0414724182bfe83f20920c9d714c7)
.jpg?fit=max&auto=format&n=cTLnQohdrJO-nQ6f&q=85&s=5edc39bf7053ea864ed871977b922355)
.jpg?fit=max&auto=format&n=cTLnQohdrJO-nQ6f&q=85&s=d8ab559a6327f8c490f9a6298cd91c05)
.jpg?fit=max&auto=format&n=cTLnQohdrJO-nQ6f&q=85&s=80edfc36452dd2bbb05224b6f8f029ab)
.jpg?fit=max&auto=format&n=cTLnQohdrJO-nQ6f&q=85&s=bf06dbbf72fe9bd879e16fb7c50eb163)
.jpg?fit=max&auto=format&n=cTLnQohdrJO-nQ6f&q=85&s=c3cf554c8d846c6323cd5476e8dabac5)
.jpg?fit=max&auto=format&n=cTLnQohdrJO-nQ6f&q=85&s=9d01bd3d9ac7a0055902ec844deef7e1)
.png?fit=max&auto=format&n=cTLnQohdrJO-nQ6f&q=85&s=4220d8451d57dd88afb53f36609c5334)
.png?fit=max&auto=format&n=cTLnQohdrJO-nQ6f&q=85&s=2366671f9bb70d60152663428c1994ad)
.png?fit=max&auto=format&n=cTLnQohdrJO-nQ6f&q=85&s=494e052fc41dbf5ef80a4f4a8710d19c)
Step 1.1: Improving print quality and speed with the Creality Sonic Pad
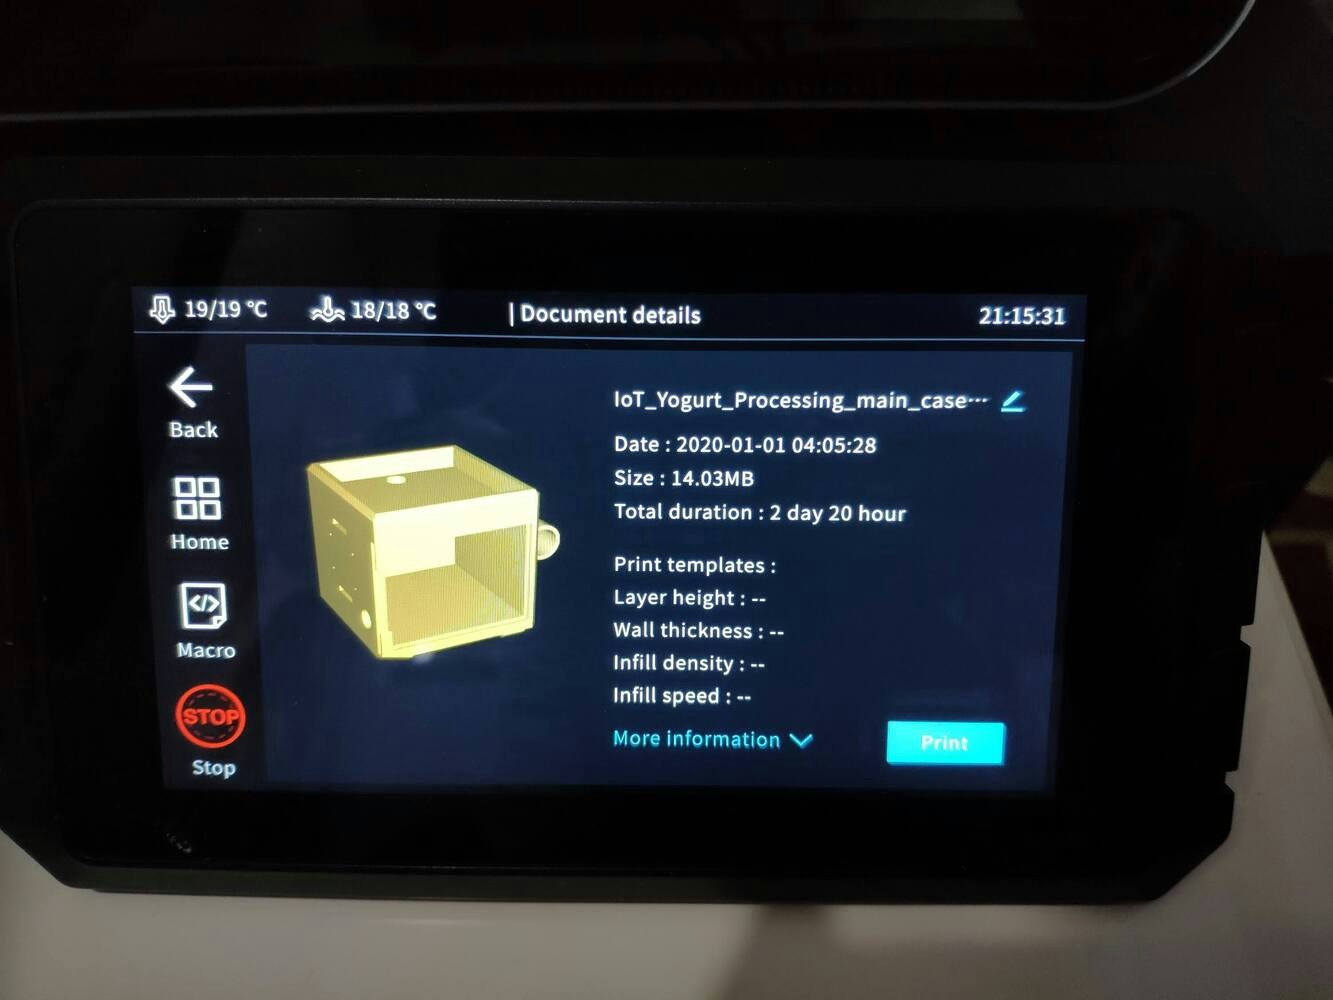
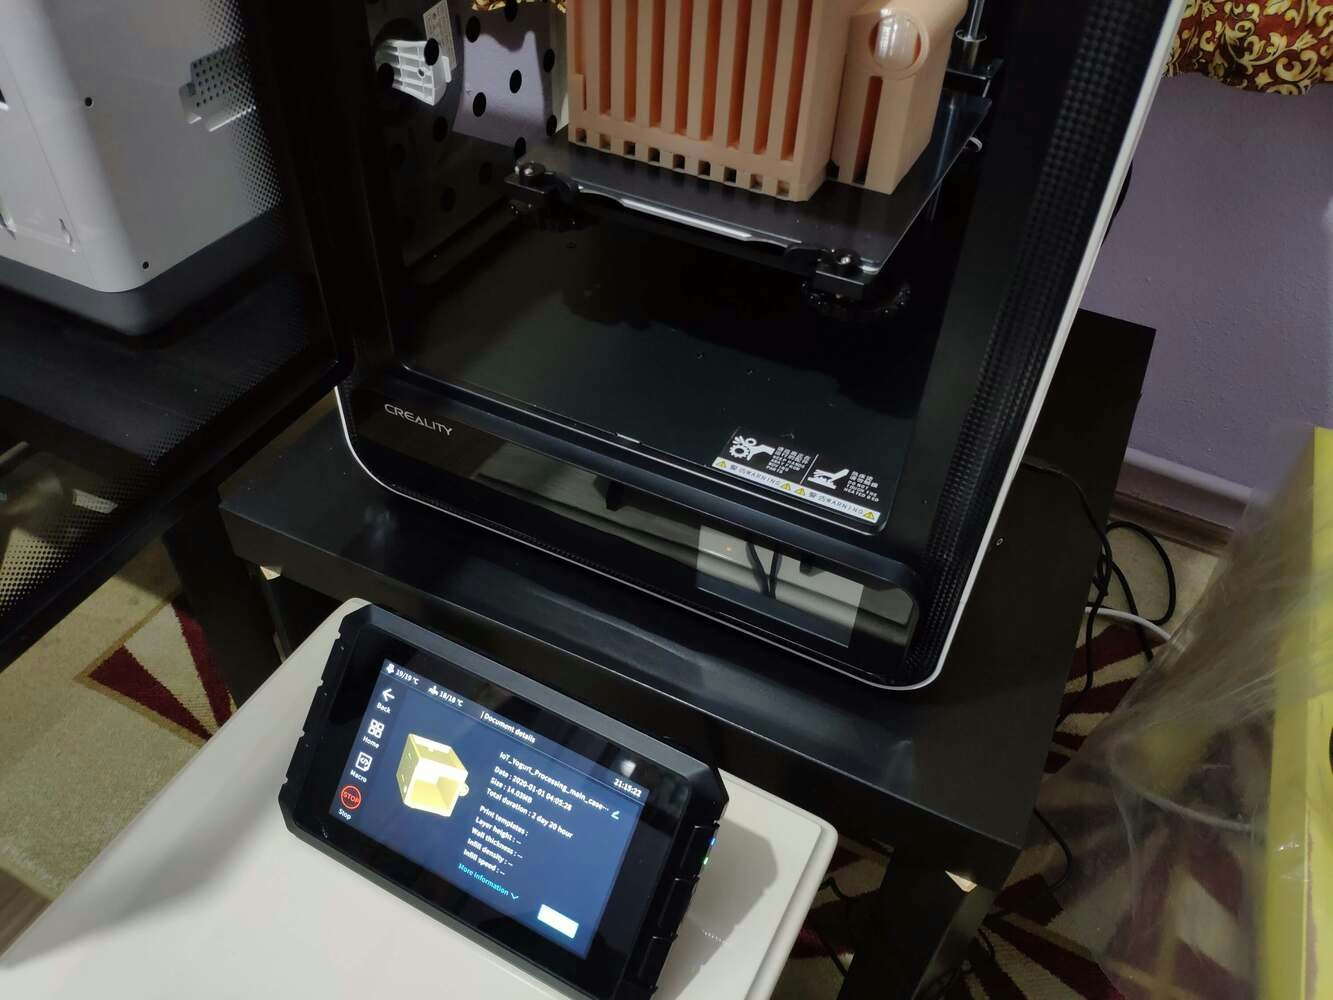
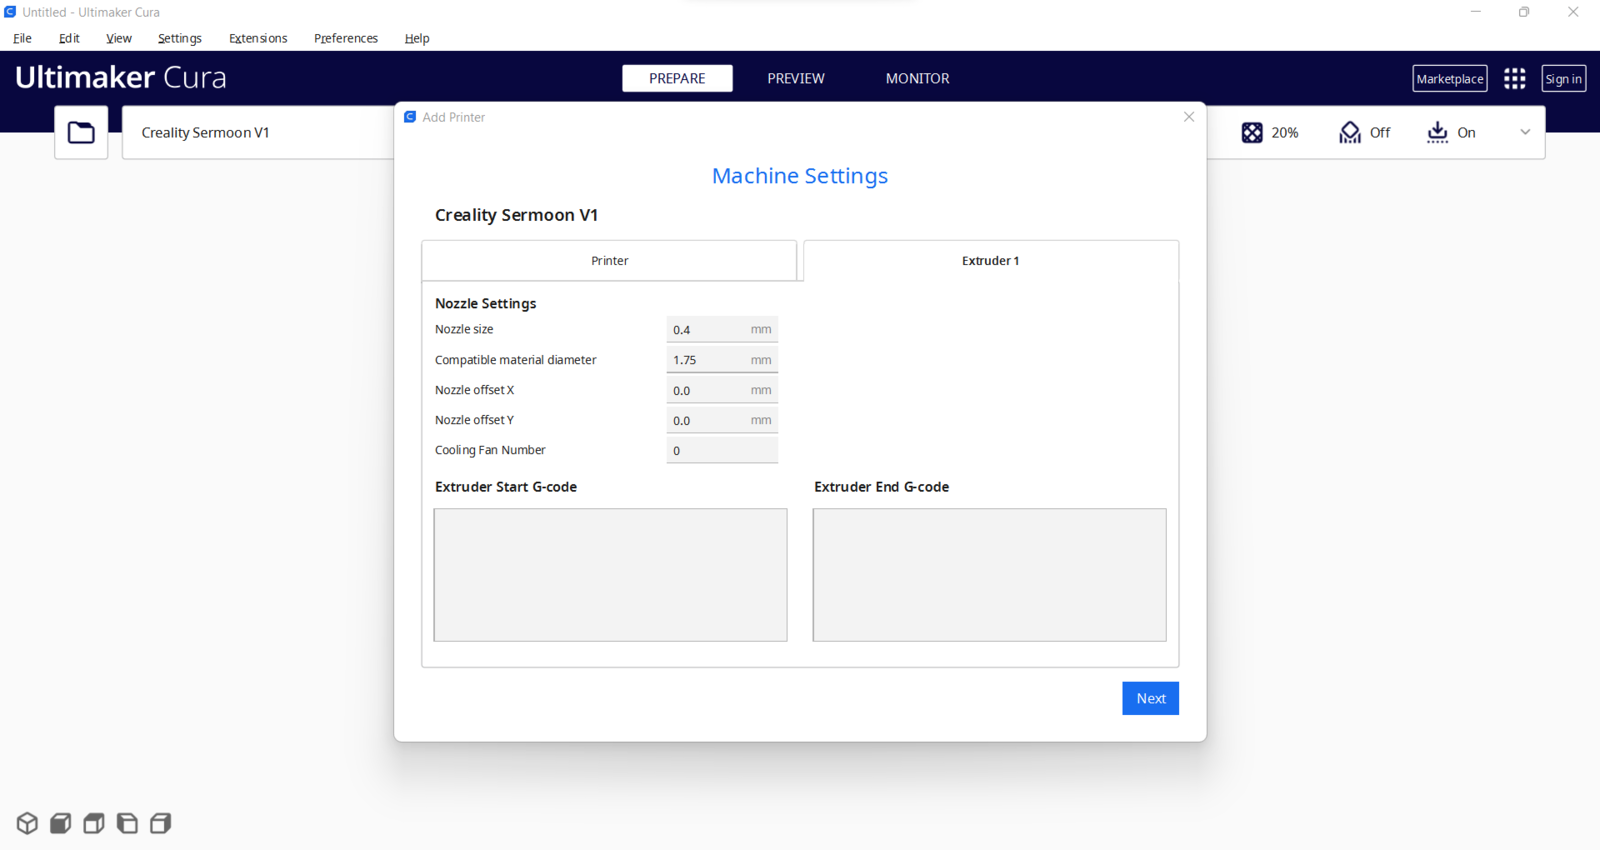
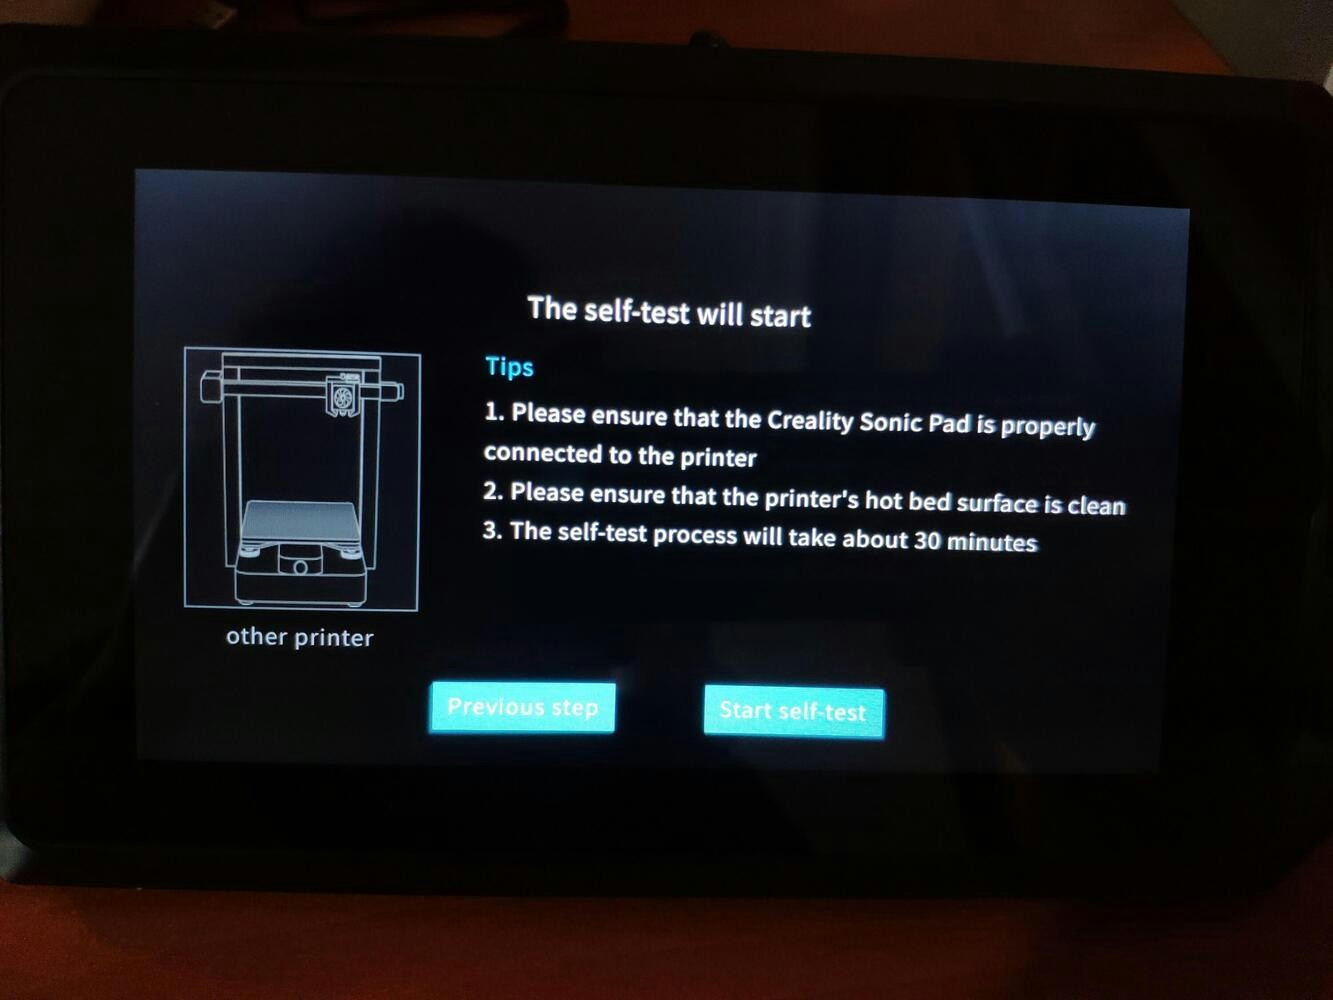
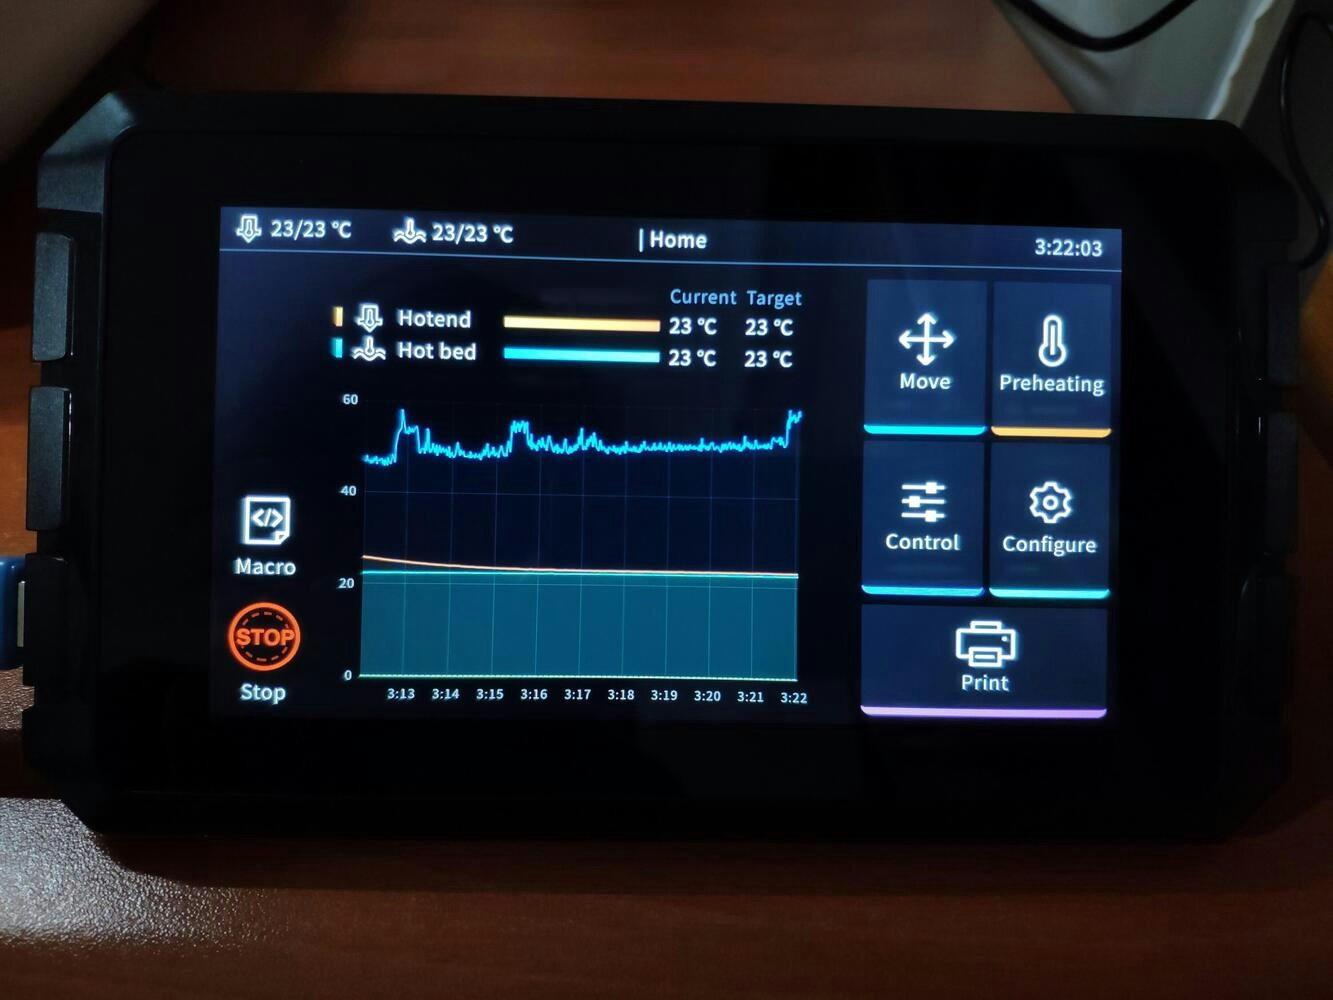
Since I wanted to improve my print quality and speed with Klipper, I decided to upgrade my Creality CR-200B 3D Printer with the Creality Sonic Pad. Creality Sonic Pad is a beginner-friendly device to control almost any FDM 3D printer on the market with the Klipper firmware. Since the Sonic Pad uses precision-oriented algorithms, it provides remarkable results with higher printing speeds. The built-in input shaper function mitigates oscillation during high-speed printing and smooths ringing to maintain high model quality. Also, it supports G-code model preview. Although the Sonic Pad is pre-configured for some Creality printers, it does not support the CR-200B officially yet. Therefore, I needed to add the CR-200B as a user-defined printer to the Sonic Pad. Since the Sonic Pad needs unsupported printers to be flashed with the self-compiled Klipper firmware before connection, I flashed my CR-200B with the required Klipper firmware settings via FluiddPI by following this YouTube tutorial. If you do not know how to write a printer configuration file for Klipper, you can download the stock CR-200B configuration file from here. :hash: After flashing the CR-200B with the Klipper firmware, copy the configuration file (printer.cfg) to a USB drive and connect the drive to the Sonic Pad. :hash: After setting up the Sonic Pad, select Other models. Then, load the printer.cfg file..jpg?fit=max&auto=format&n=cTLnQohdrJO-nQ6f&q=85&s=9443f6f79cfe290c0893d5df52372cb9)
.jpg?fit=max&auto=format&n=cTLnQohdrJO-nQ6f&q=85&s=3f843529448d488e83266c82b9bd0996)
.jpg?fit=max&auto=format&n=cTLnQohdrJO-nQ6f&q=85&s=3792f881dd9fa020939416a52ab669dc)
.jpg?fit=max&auto=format&n=cTLnQohdrJO-nQ6f&q=85&s=97f02e2696f8b8b6b35f711d8be153ab)
.jpg?fit=max&auto=format&n=cTLnQohdrJO-nQ6f&q=85&s=1638cf5b16b54d0c5625fef41a95cf04)
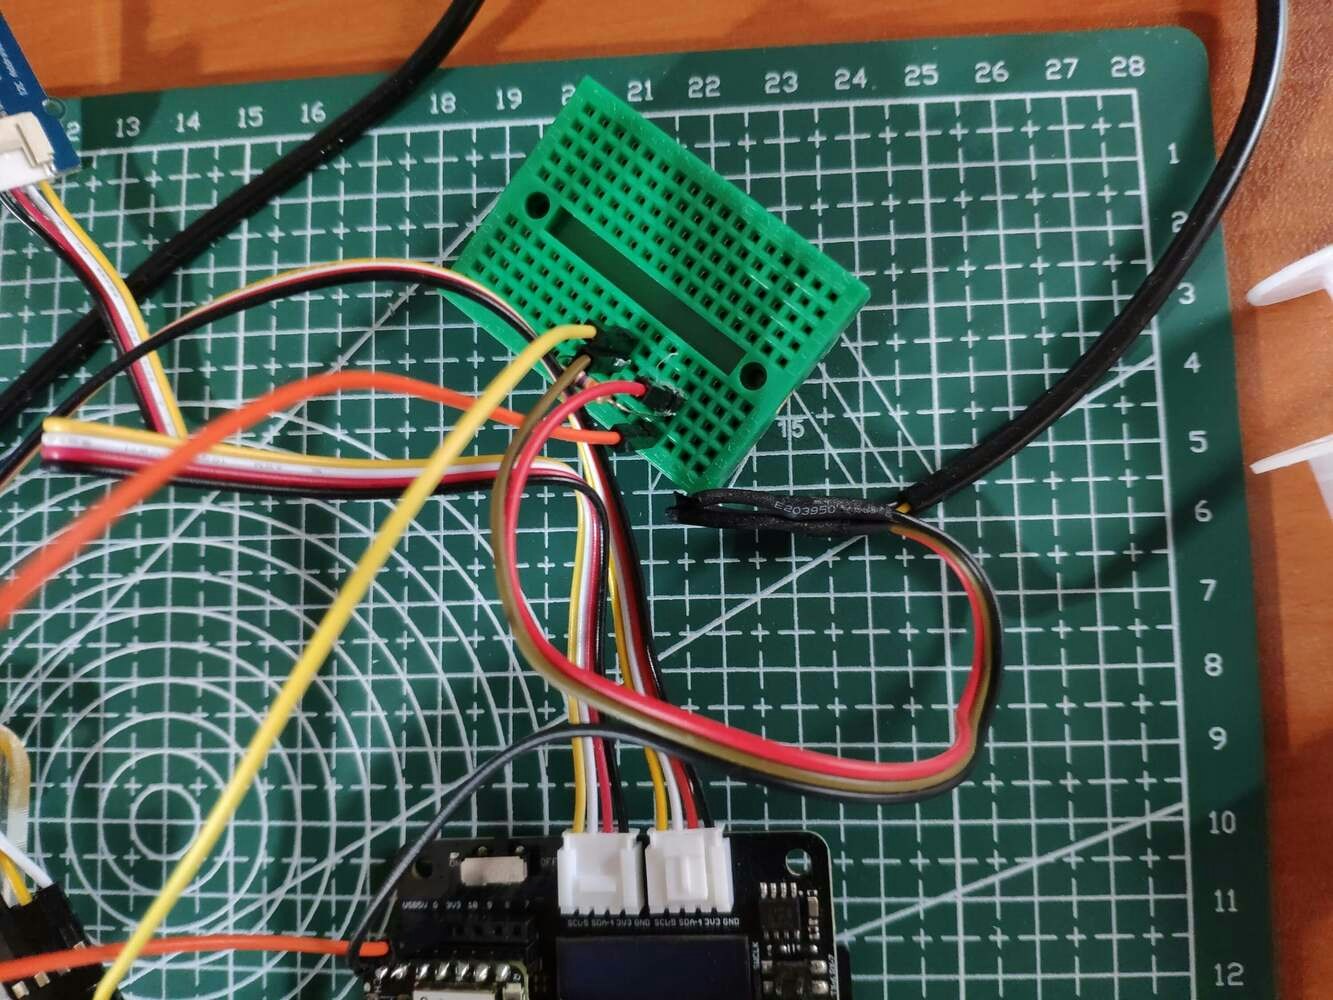
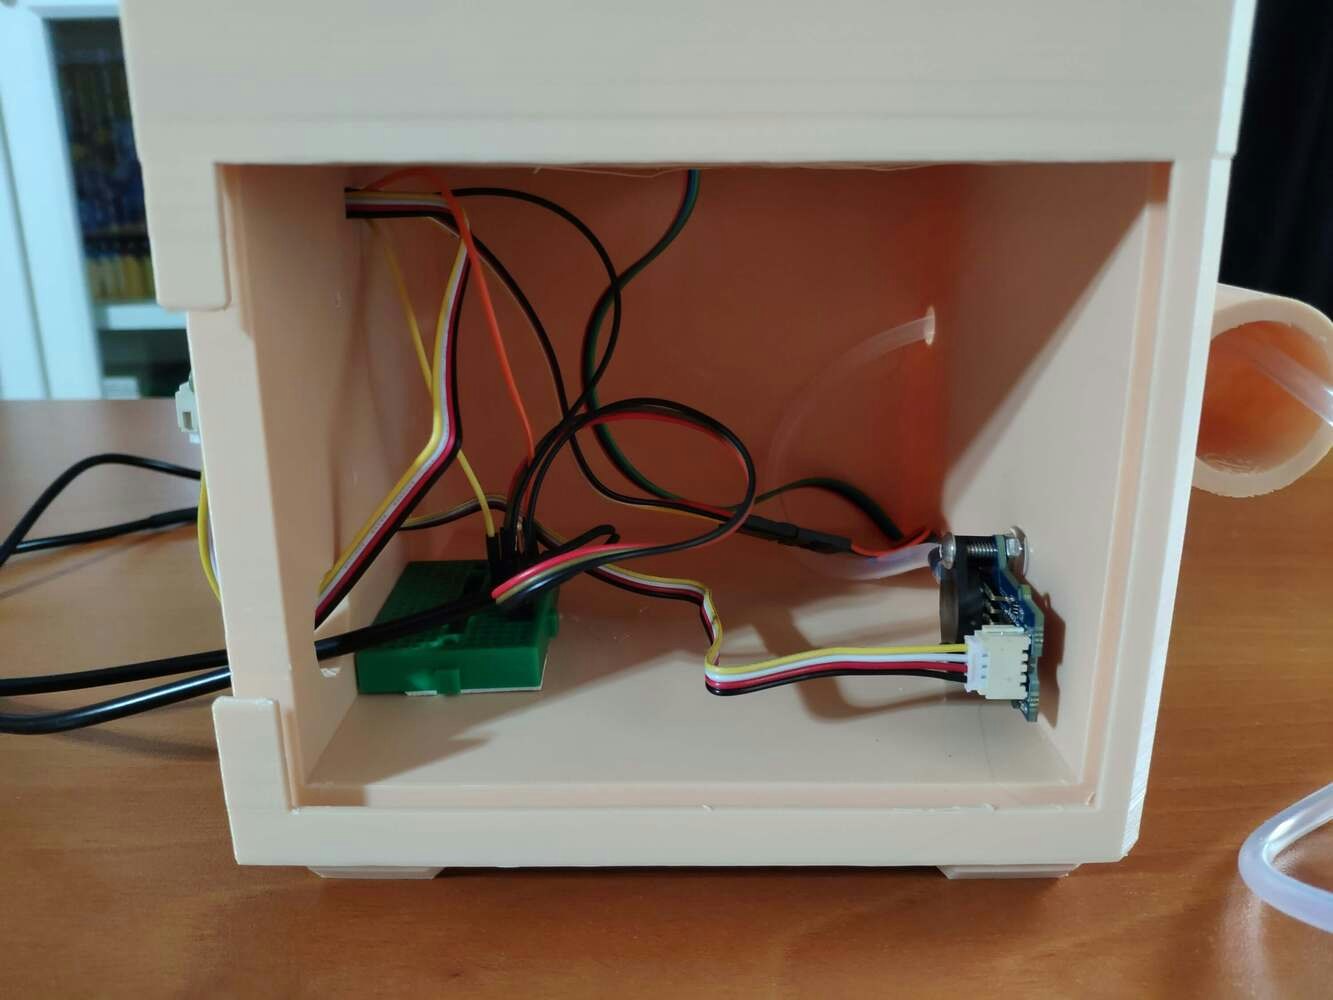
Step 1.2: Assembling the case and making connections & adjustments


Step 2: Creating a Blynk application and user interface for XIAO ESP32C3
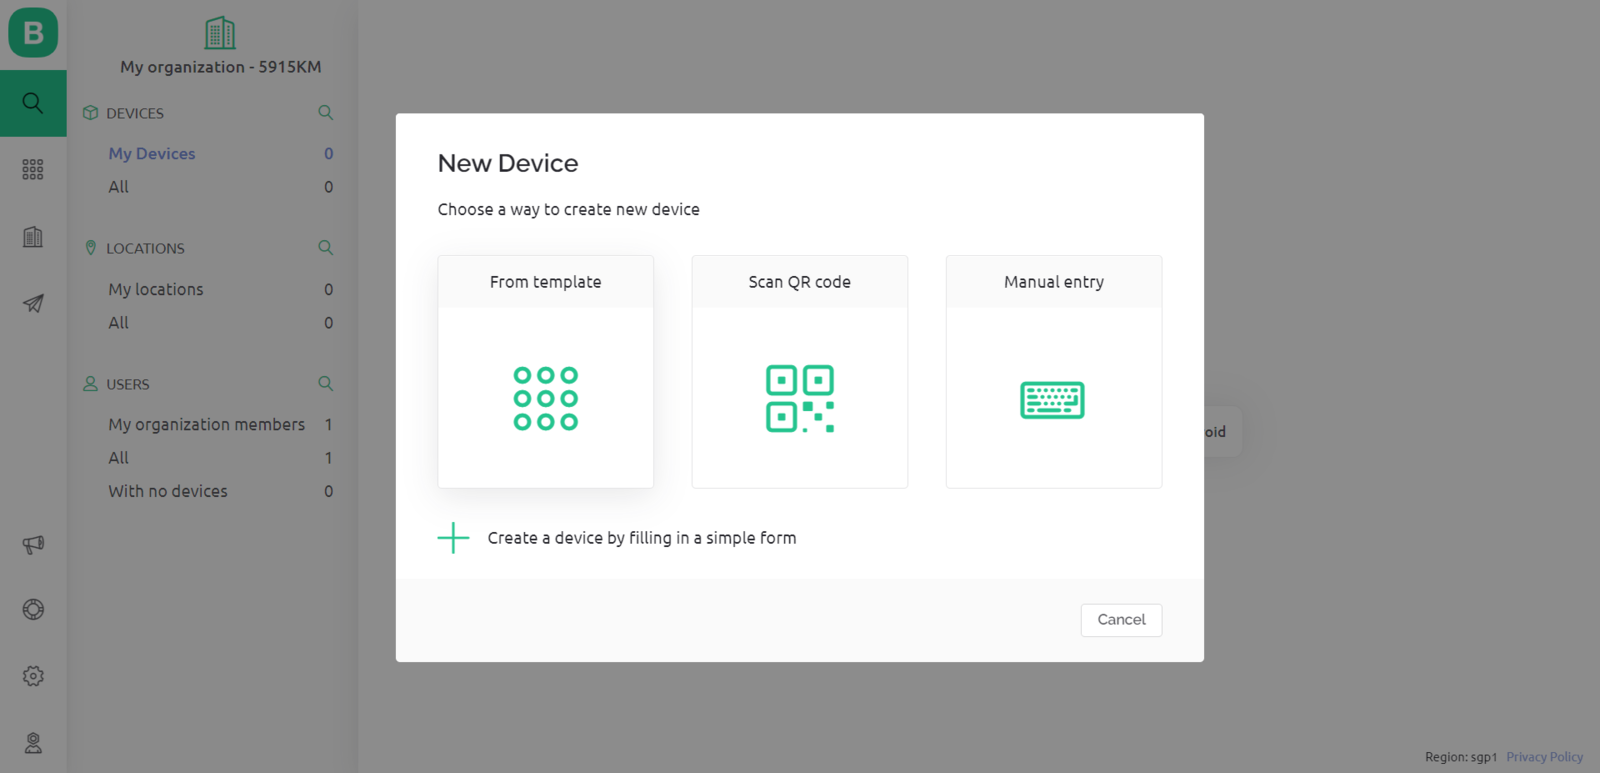
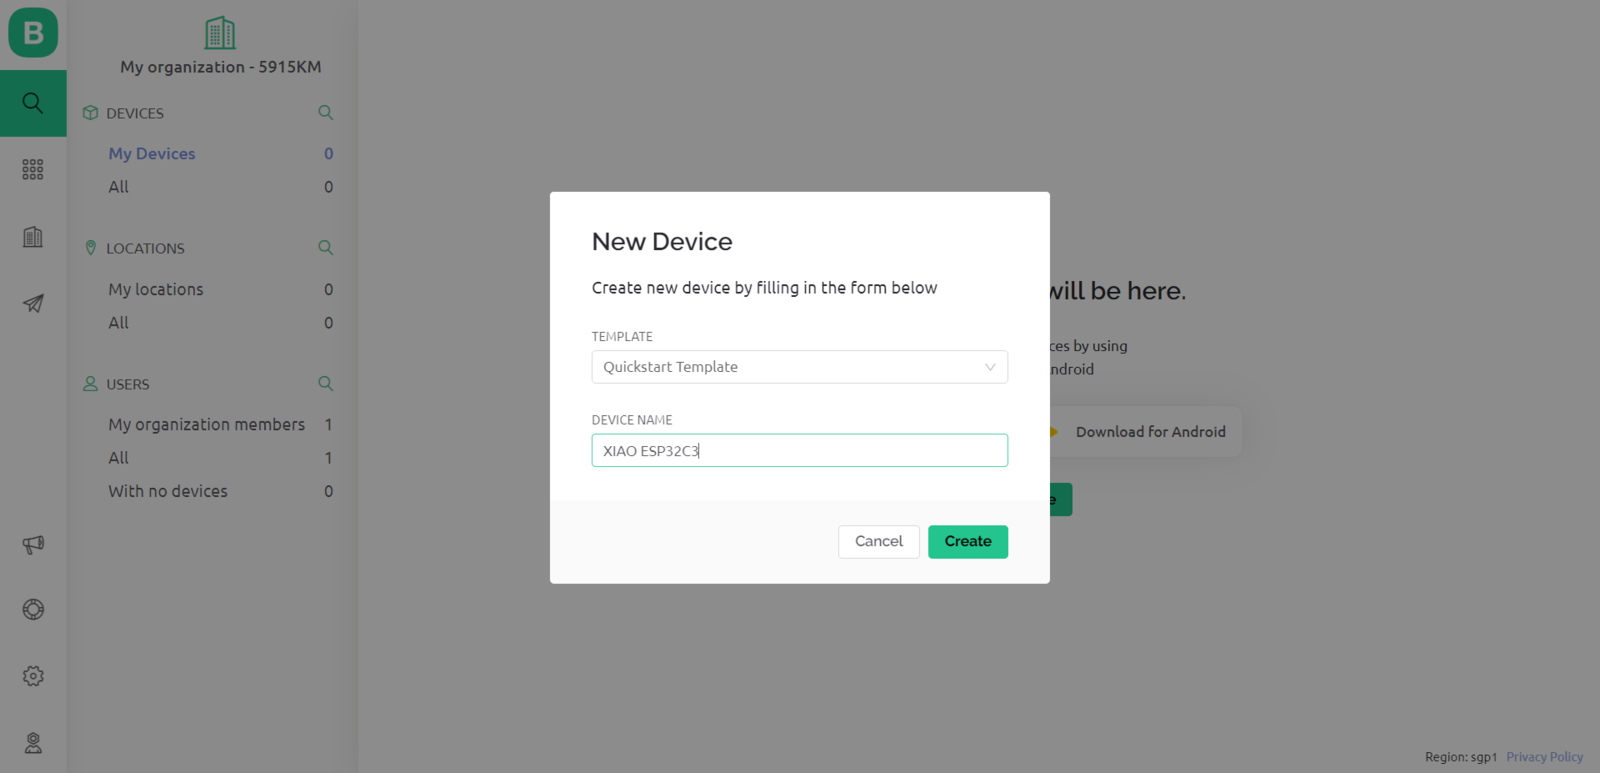
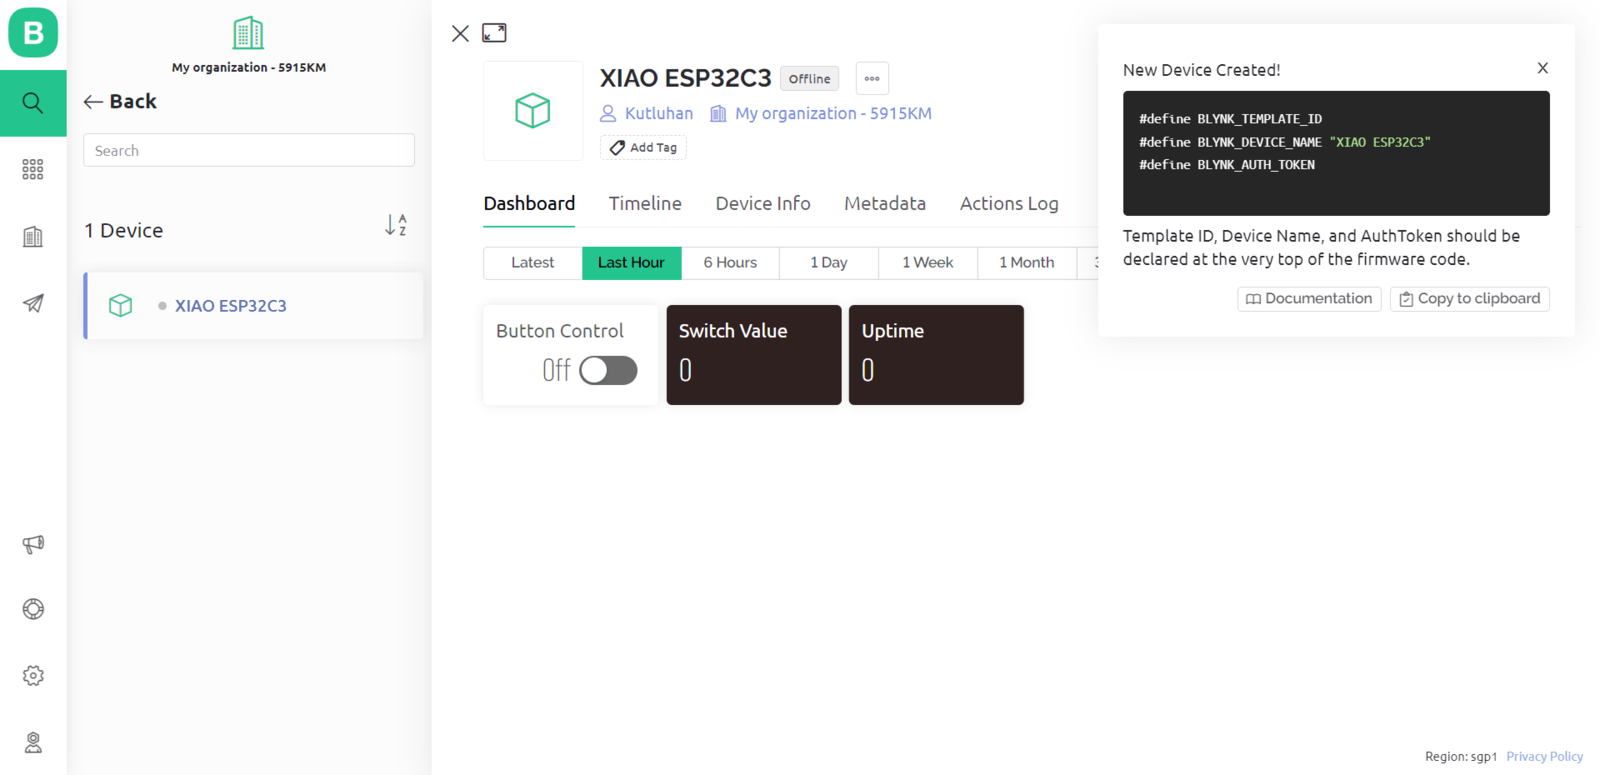
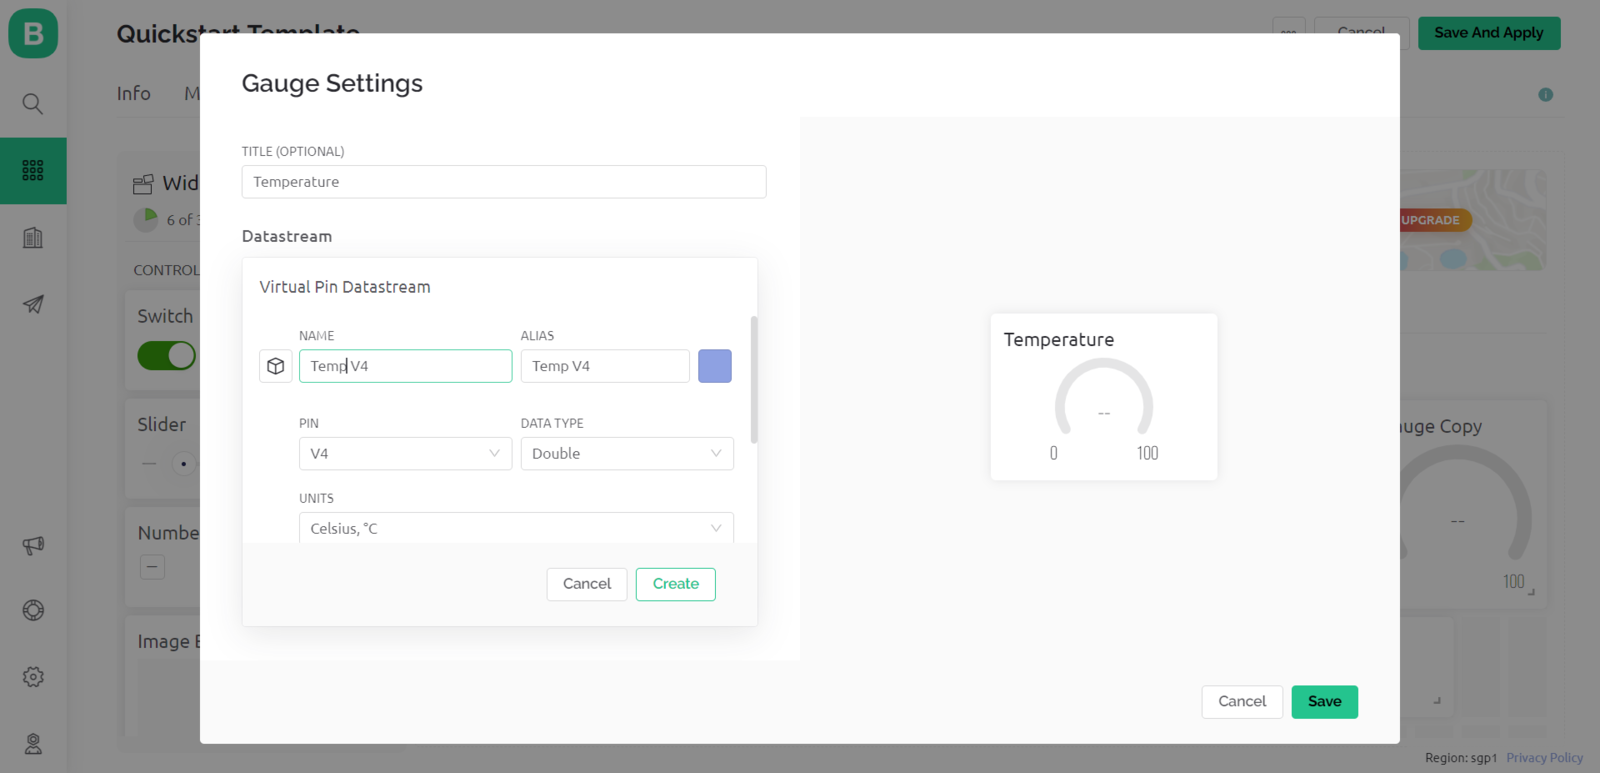
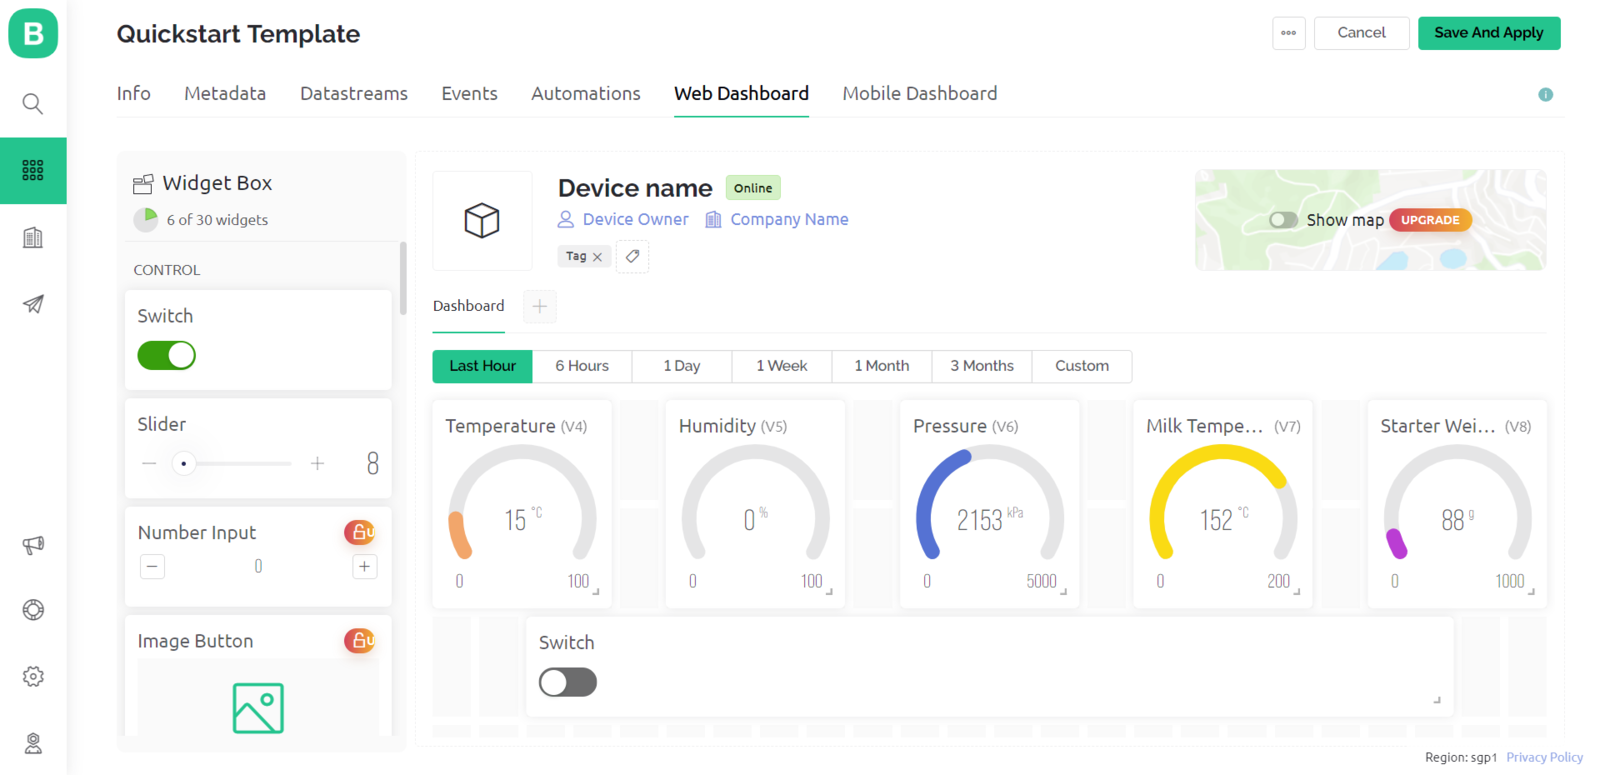
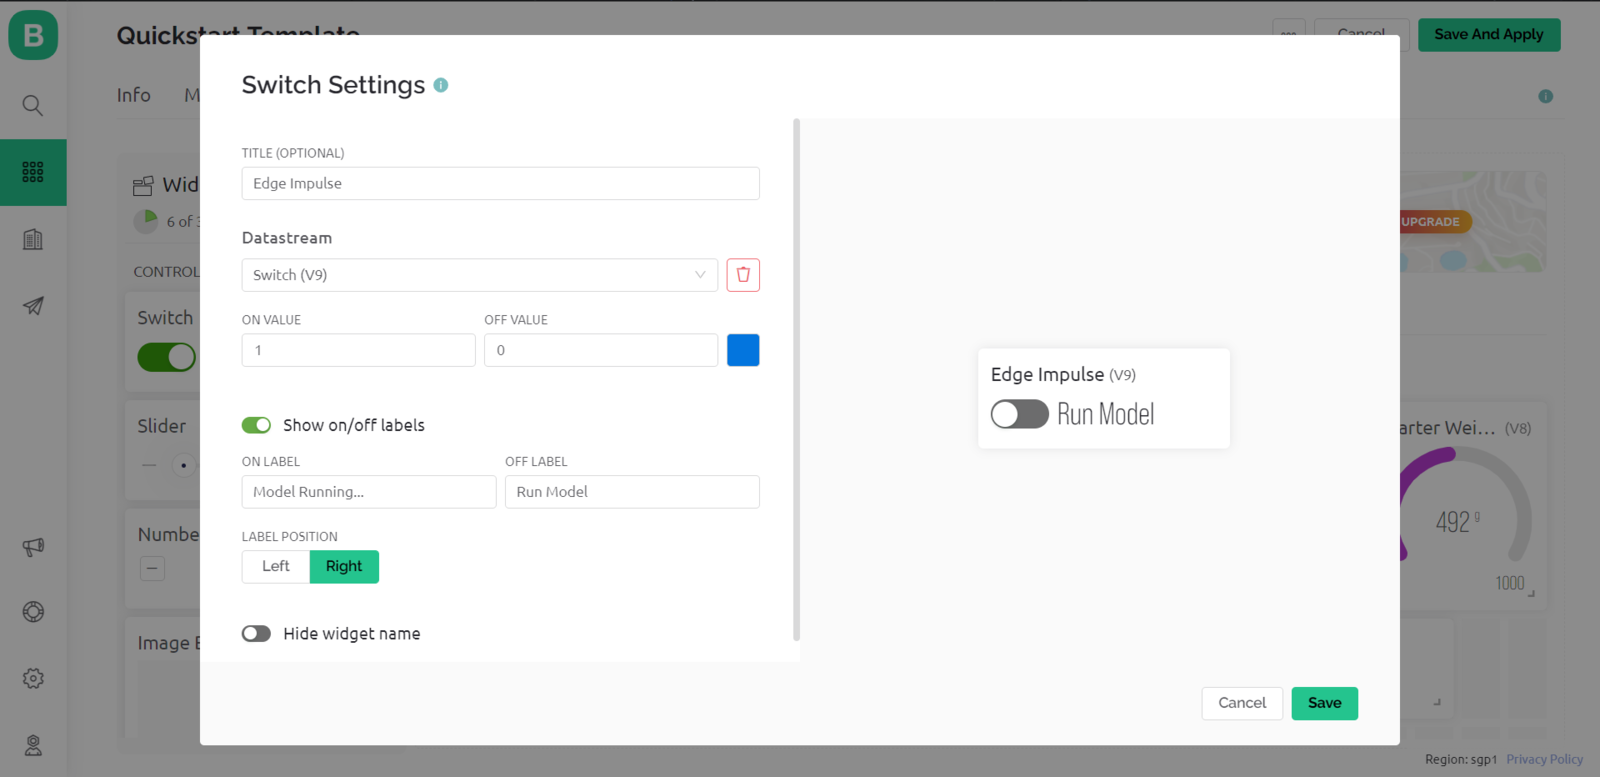
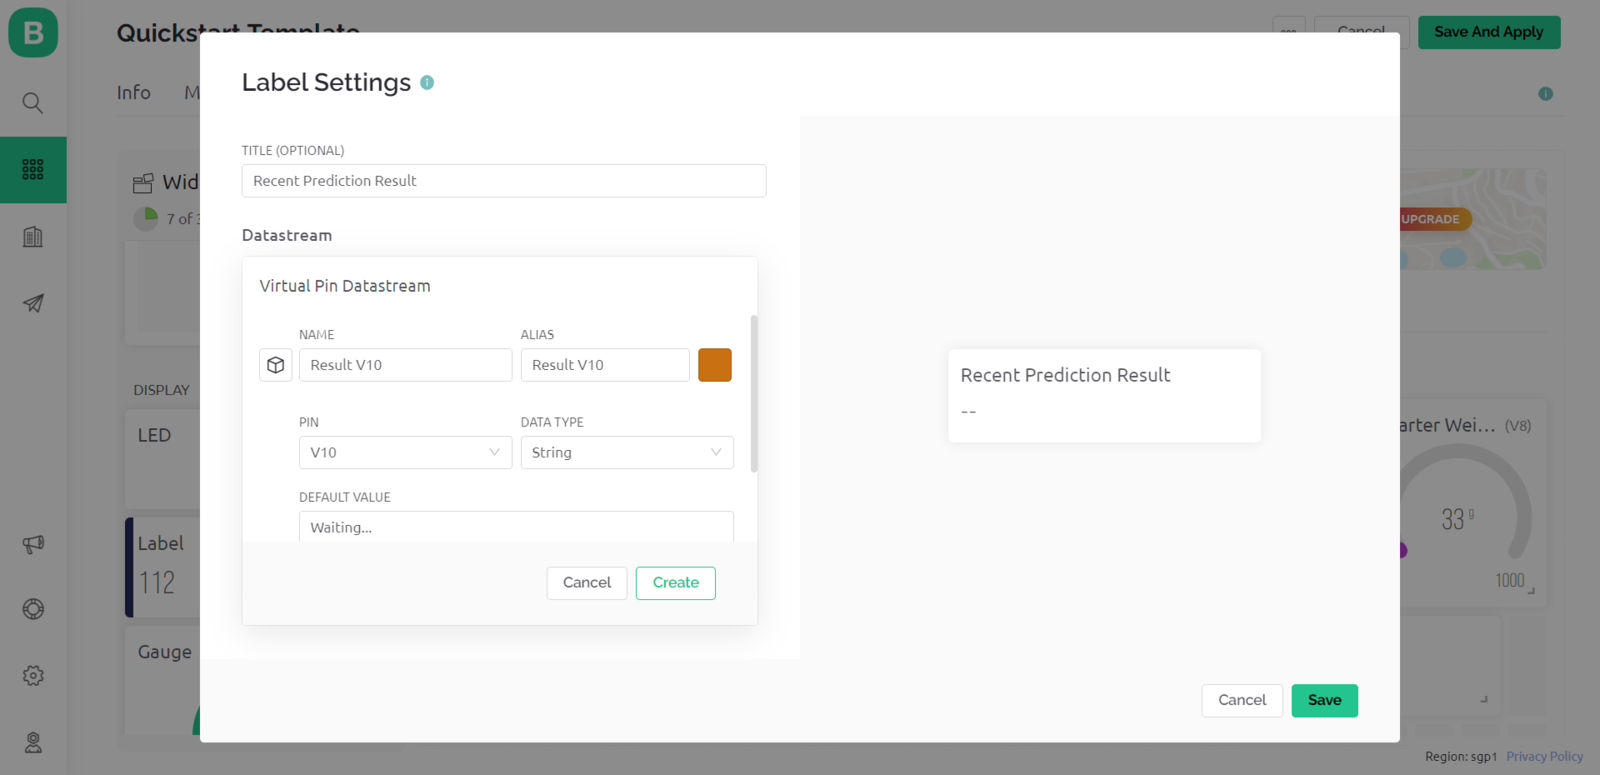
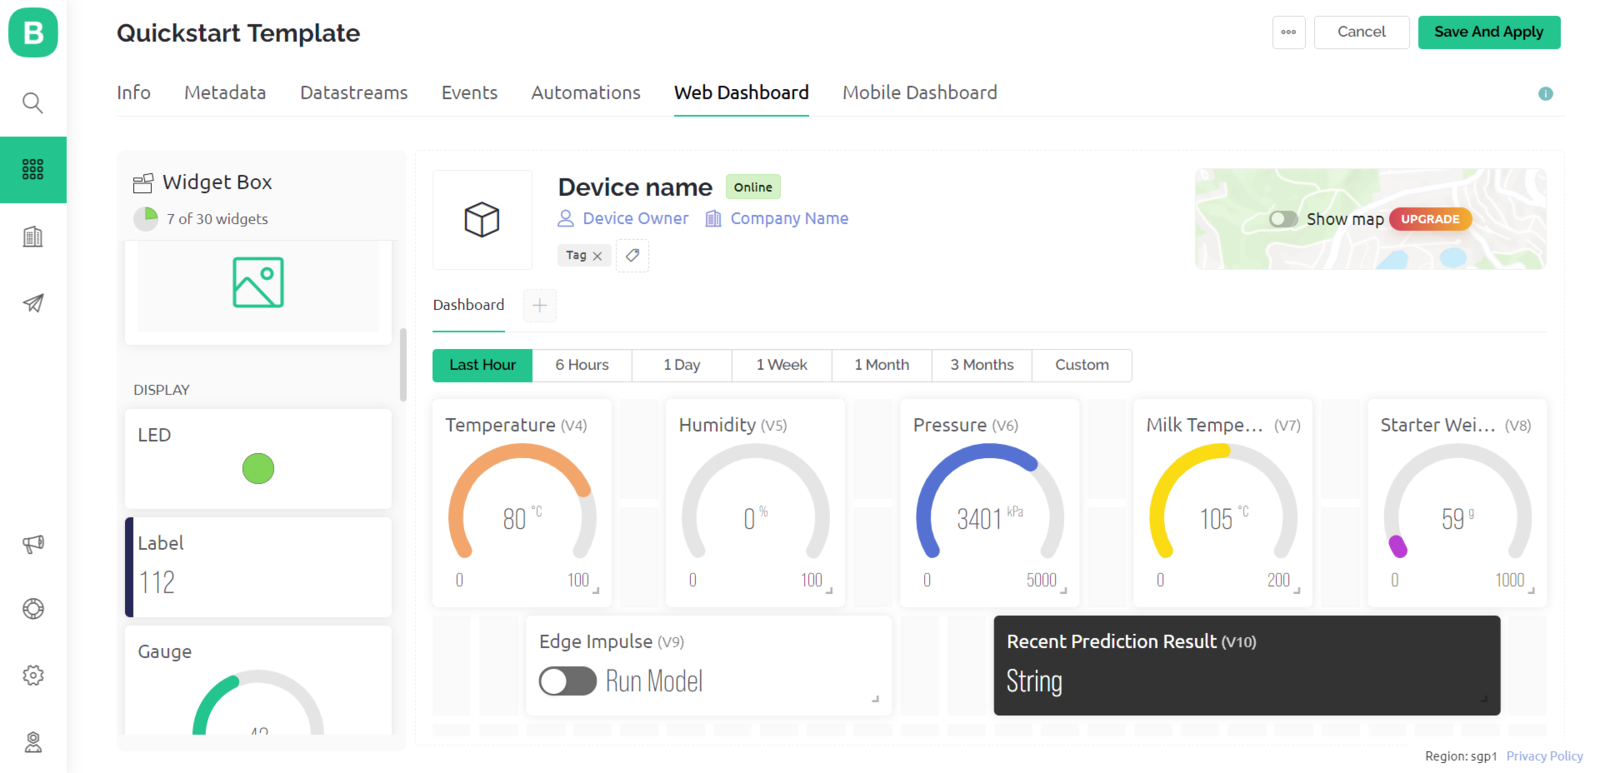
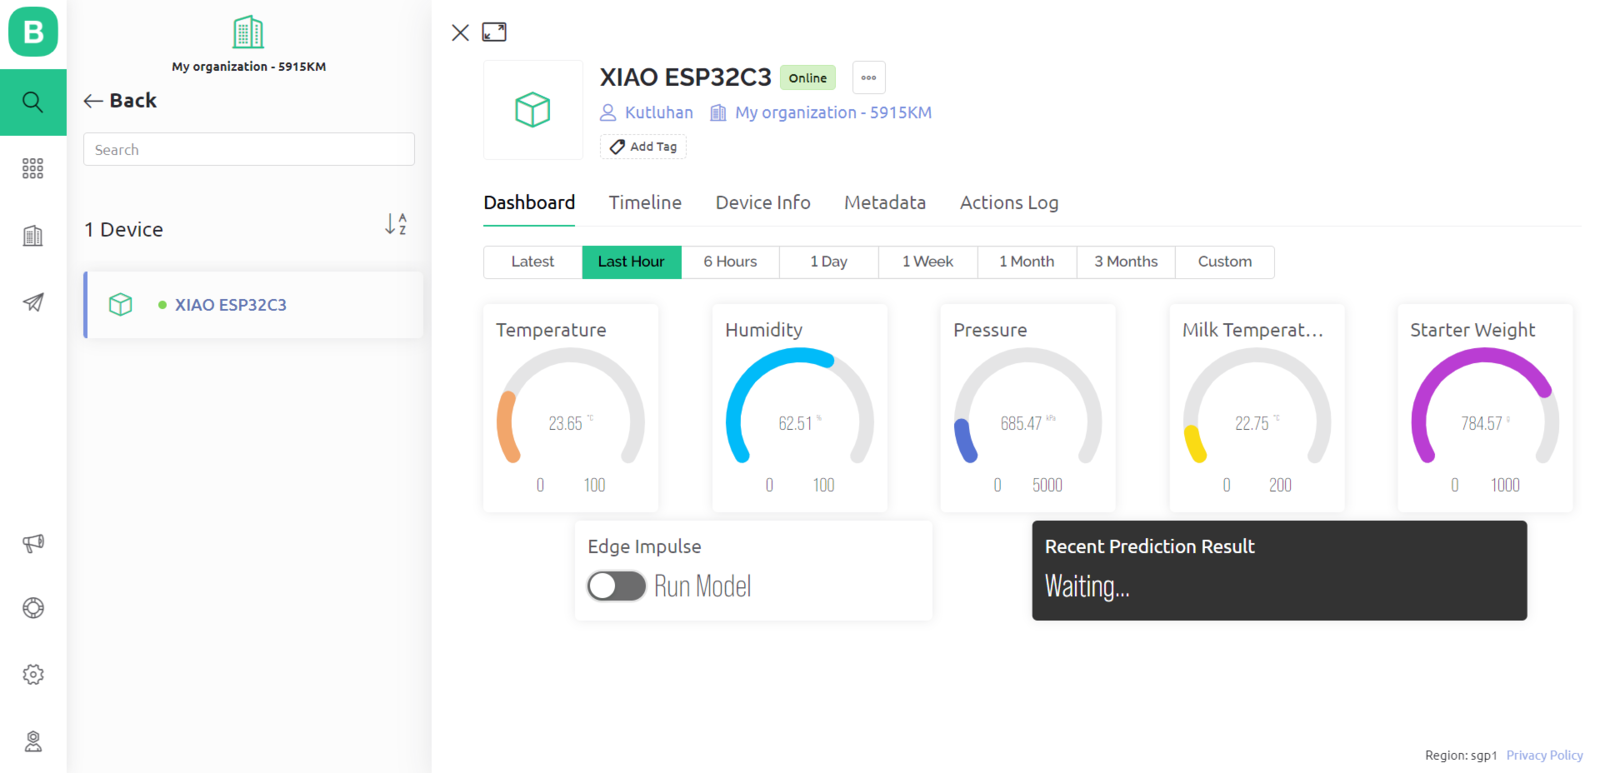
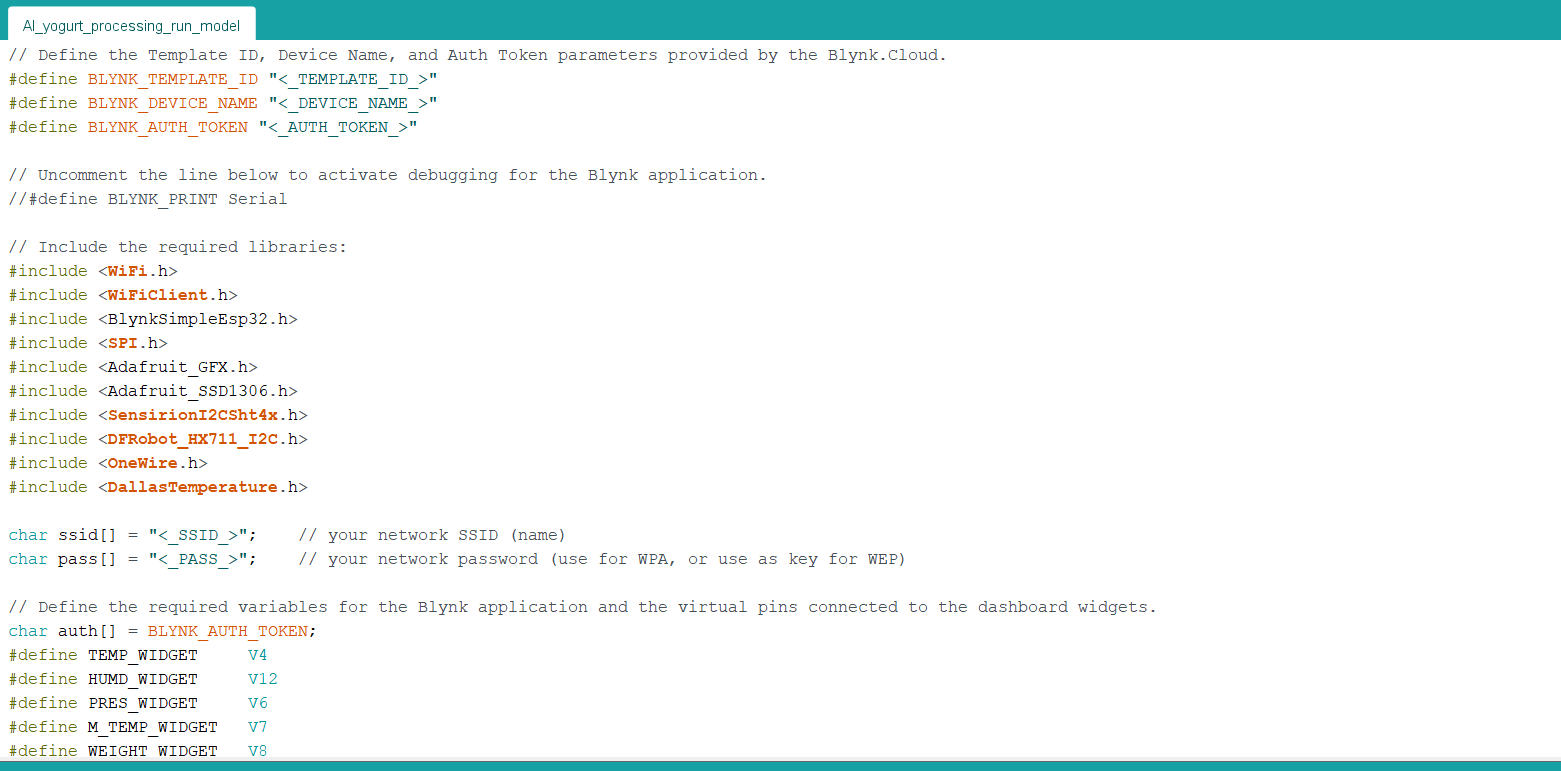
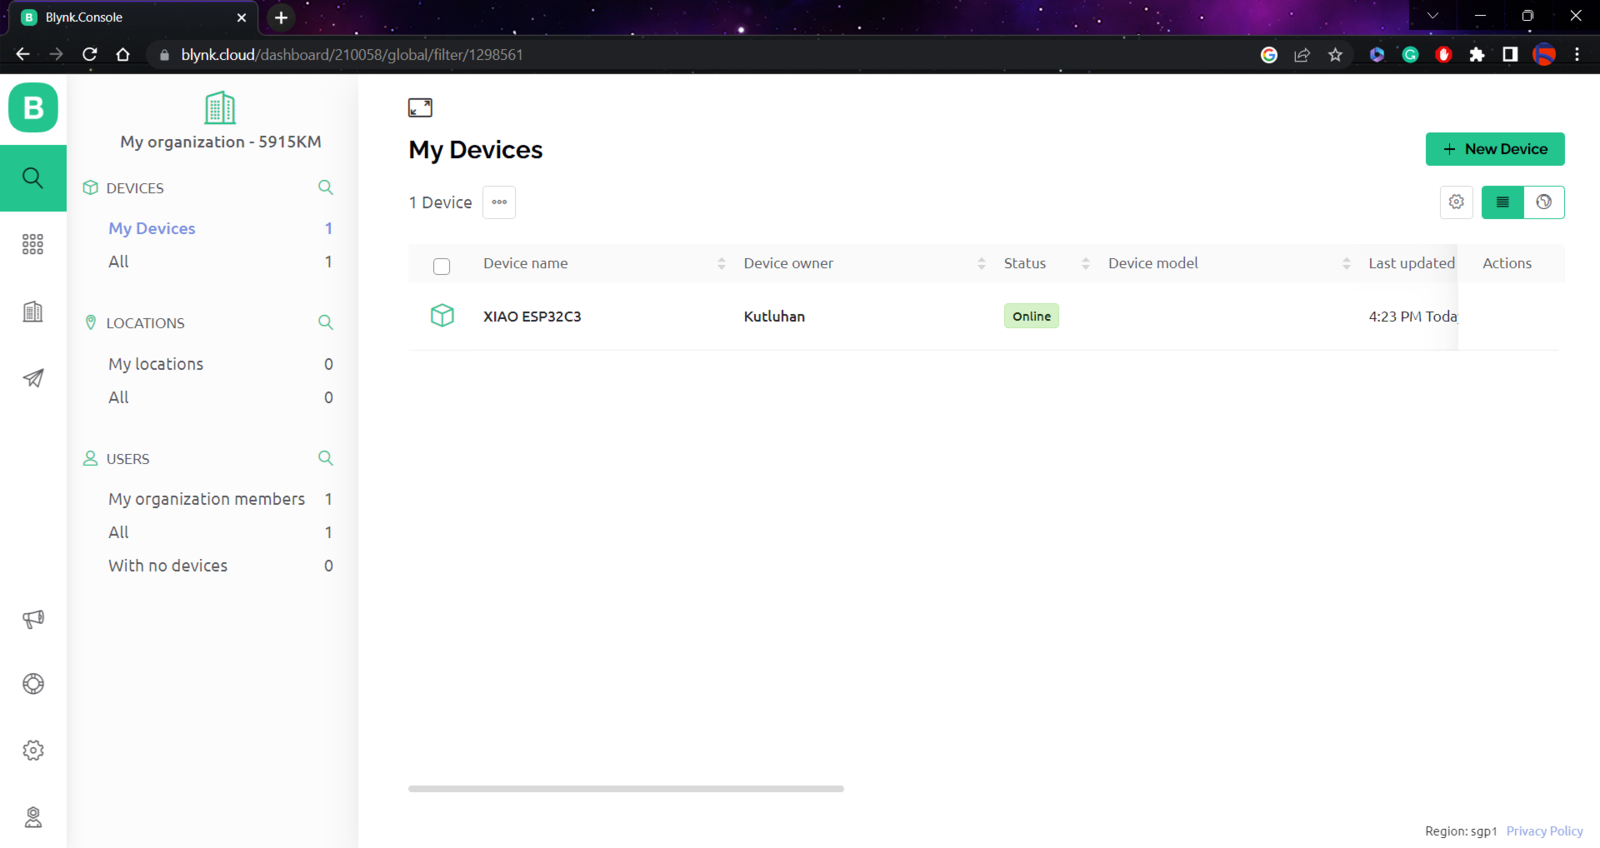
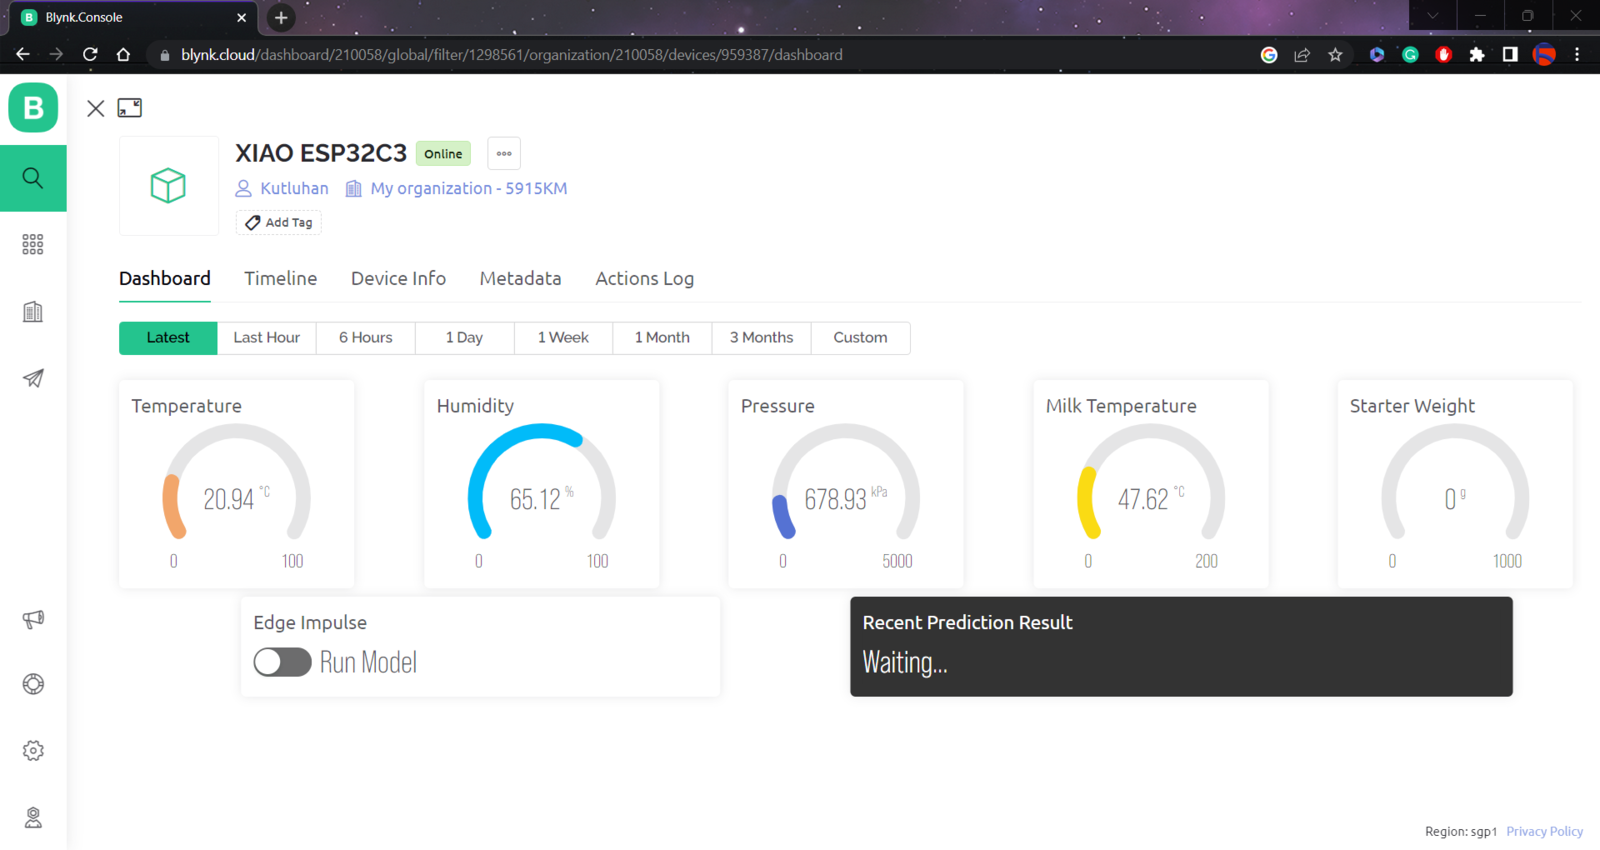
Since I focused on building an accessible device, I decided to create a complementing Blynk application for allowing the user to display recent sensor readings, run the Edge Impulse neural network model, and get informed of the prediction result remotely. The Blynk IoT Platform provides a free cloud service to communicate with supported microcontrollers and development boards, such as ESP32C3. Also, Blynk lets the user design unique web and mobile applications with drag-and-drop editors. :hash: First of all, create an account on Blynk and open Blynk.Console.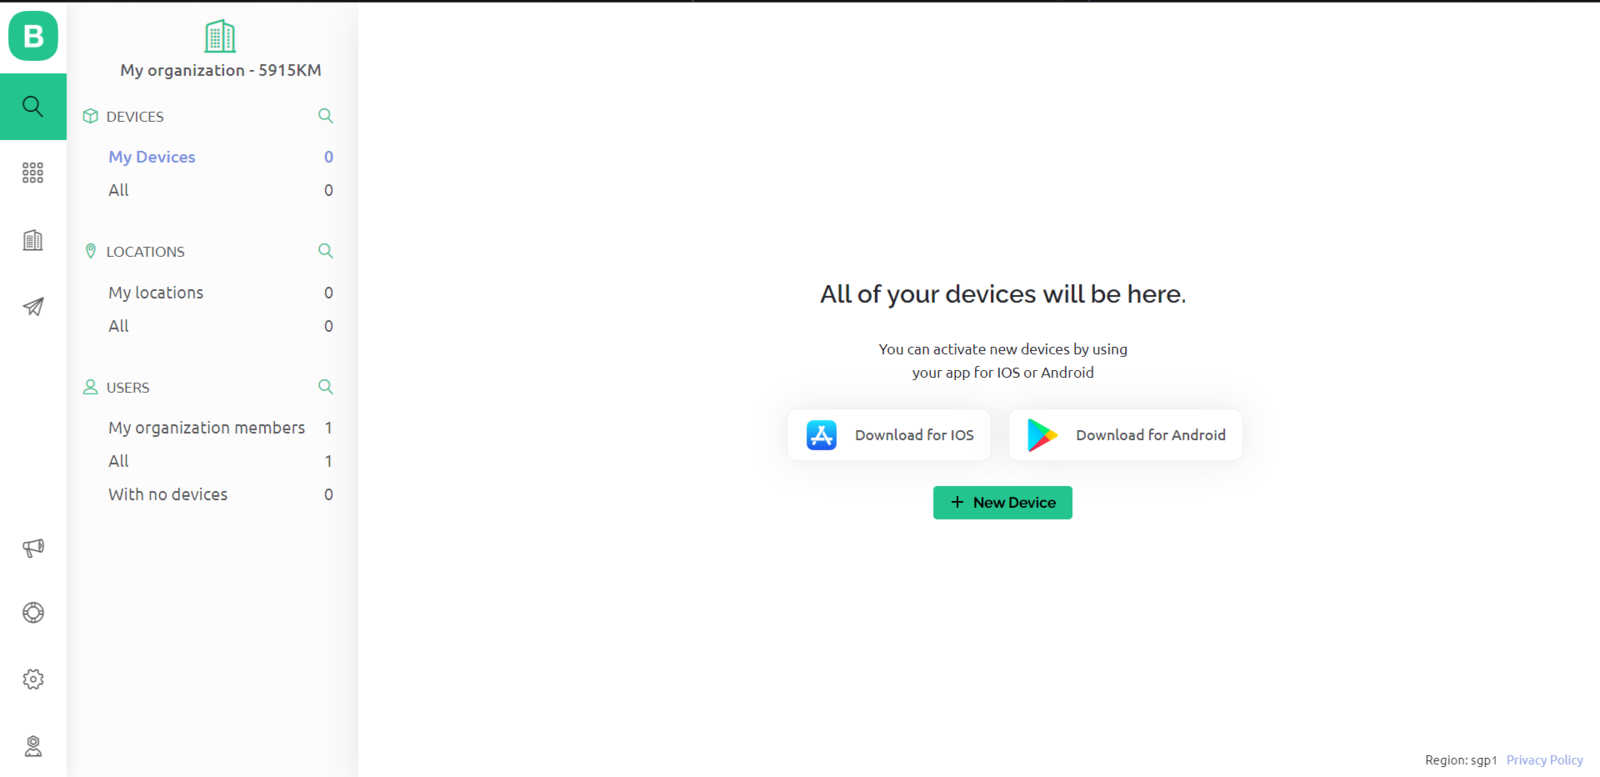

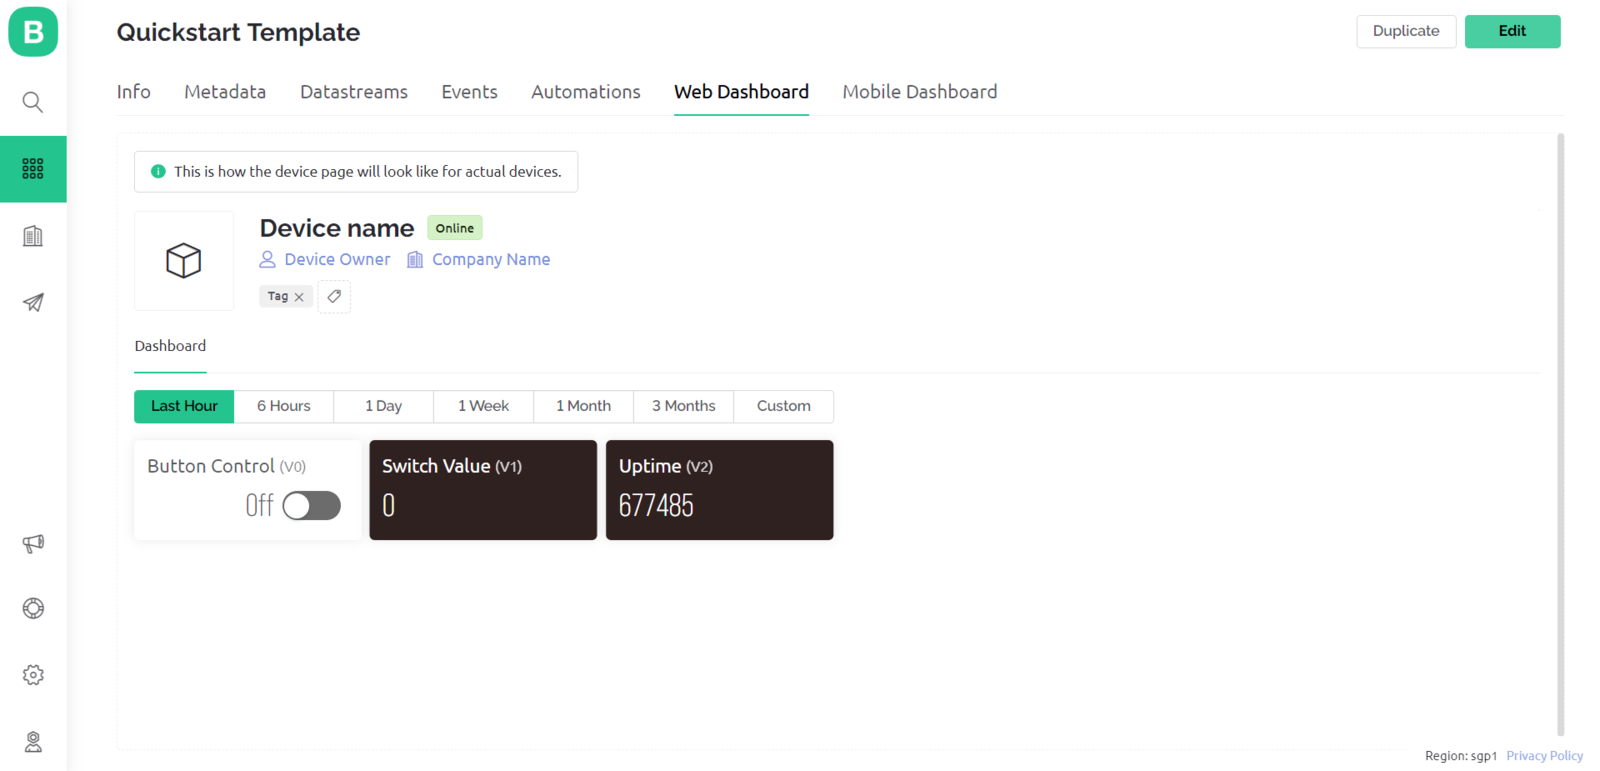
- Temperature Gauge ➡ V4
- Humidity Gauge ➡ V12
- Pressure Gauge ➡ V6
- Milk Temperature Gauge ➡ V7
- Weight Gauge ➡ V8
- Switch Button ➡ V9
- Label ➡ V10
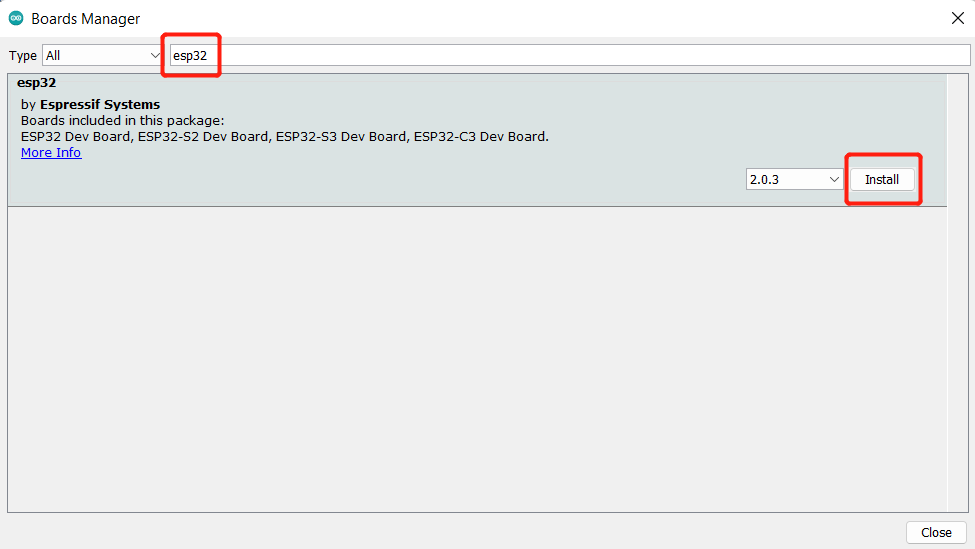
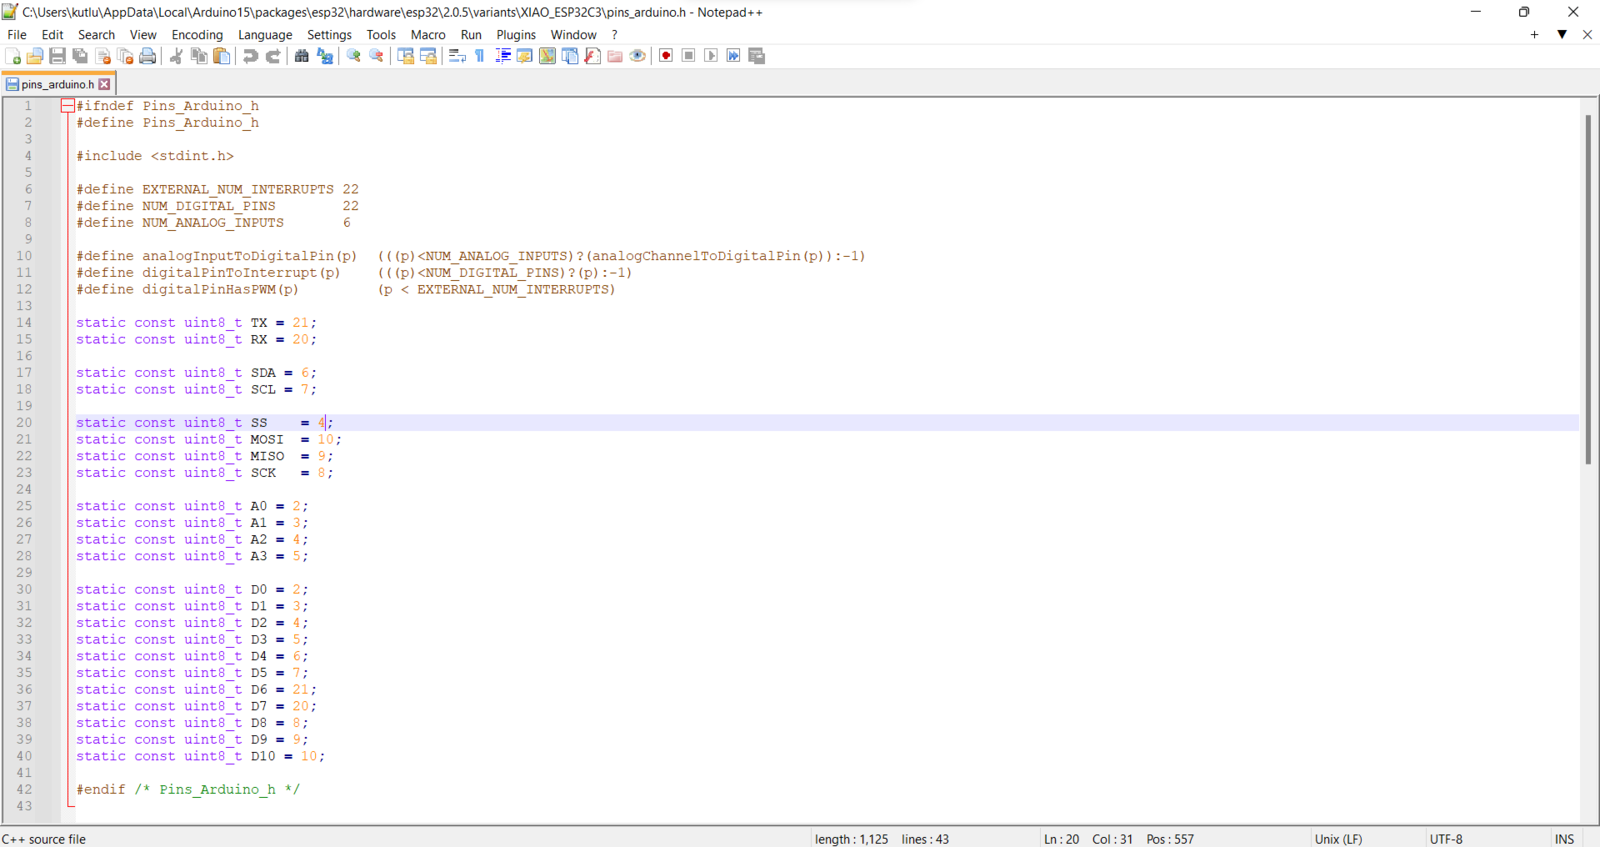
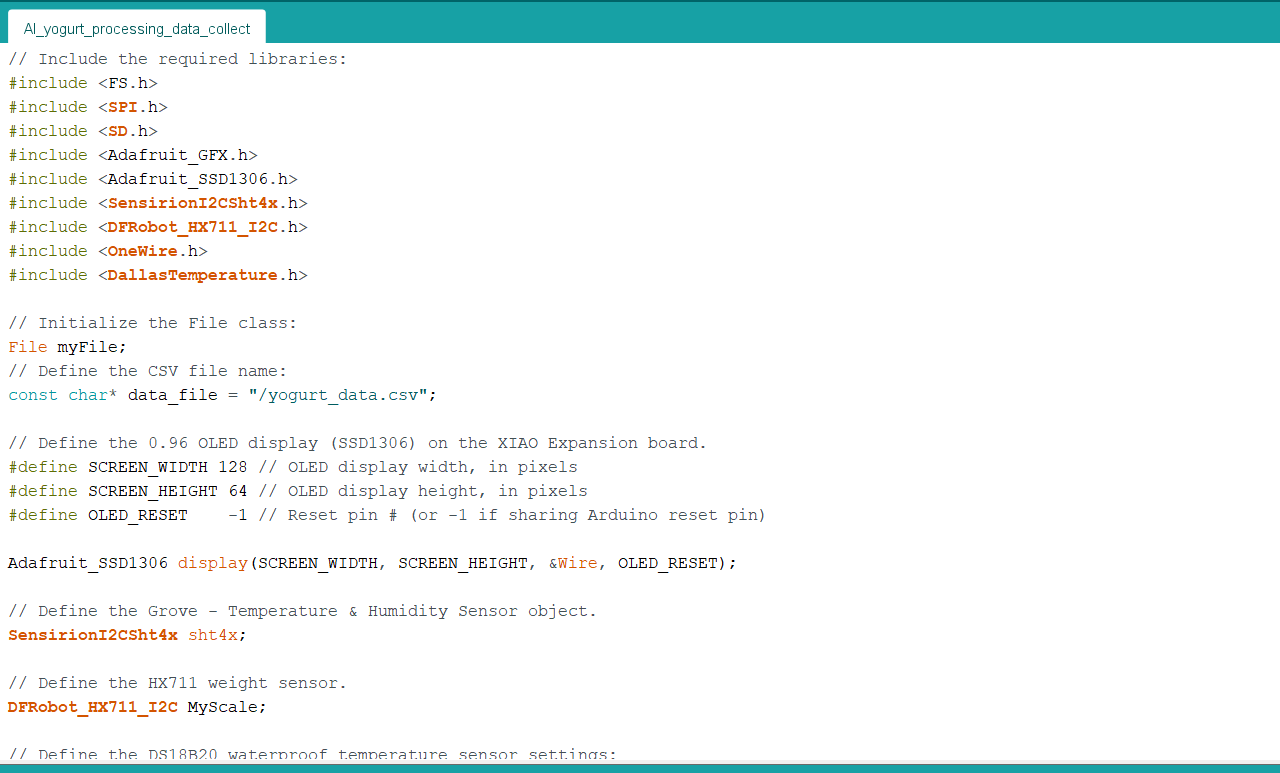
Step 3: Setting up XIAO ESP32C3 on the Arduino IDE
Since the XIAO expansion board supports reading and writing information from/to files on an SD card, I decided to log the collected yogurt processing data in a CSV file on the SD card without applying any additional procedures. Also, I employed XIAO ESP32C3 to communicate with the Blynk application to run the neural network model remotely and transmit the collected data. However, before proceeding with the following steps, I needed to set up XIAO ESP32C3 on the Arduino IDE and install the required libraries for this project. :hash: To add the XIAO ESP32C3 board package to the Arduino IDE, navigate to File ➡ Preferences and paste the URL below under Additional Boards Manager URLs. https://raw.githubusercontent.com/espressif/arduino-esp32/gh-pages/package\_esp32\_dev\_index.json.png?fit=max&auto=format&n=cTLnQohdrJO-nQ6f&q=85&s=880d841d2c984d0925dce6813451f491)

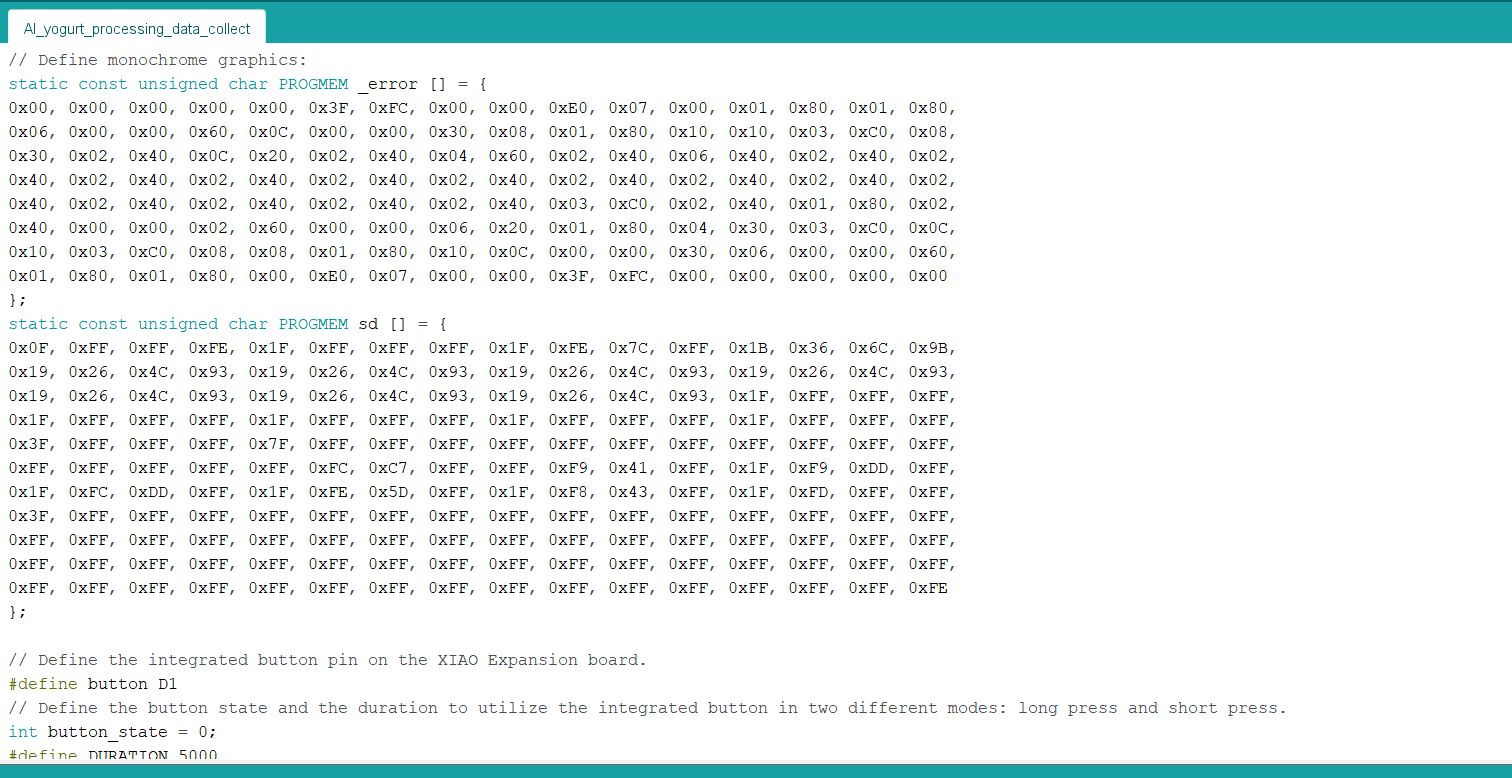
Step 3.1: Displaying images on the SSD1306 OLED screen
To display images (black and white) on the SSD1306 OLED screen successfully, I needed to create monochromatic bitmaps from PNG or JPG files and convert those bitmaps to data arrays. :hash: First of all, download the LCD Assistant. :hash: Then, upload a monochromatic bitmap and select Vertical or Horizontal depending on the screen type. :hash: Convert the image (bitmap) and save the output (data array). :hash: Finally, add the data array to the code and print it on the screen.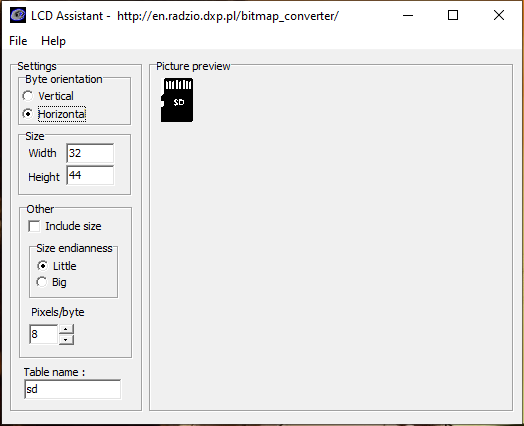
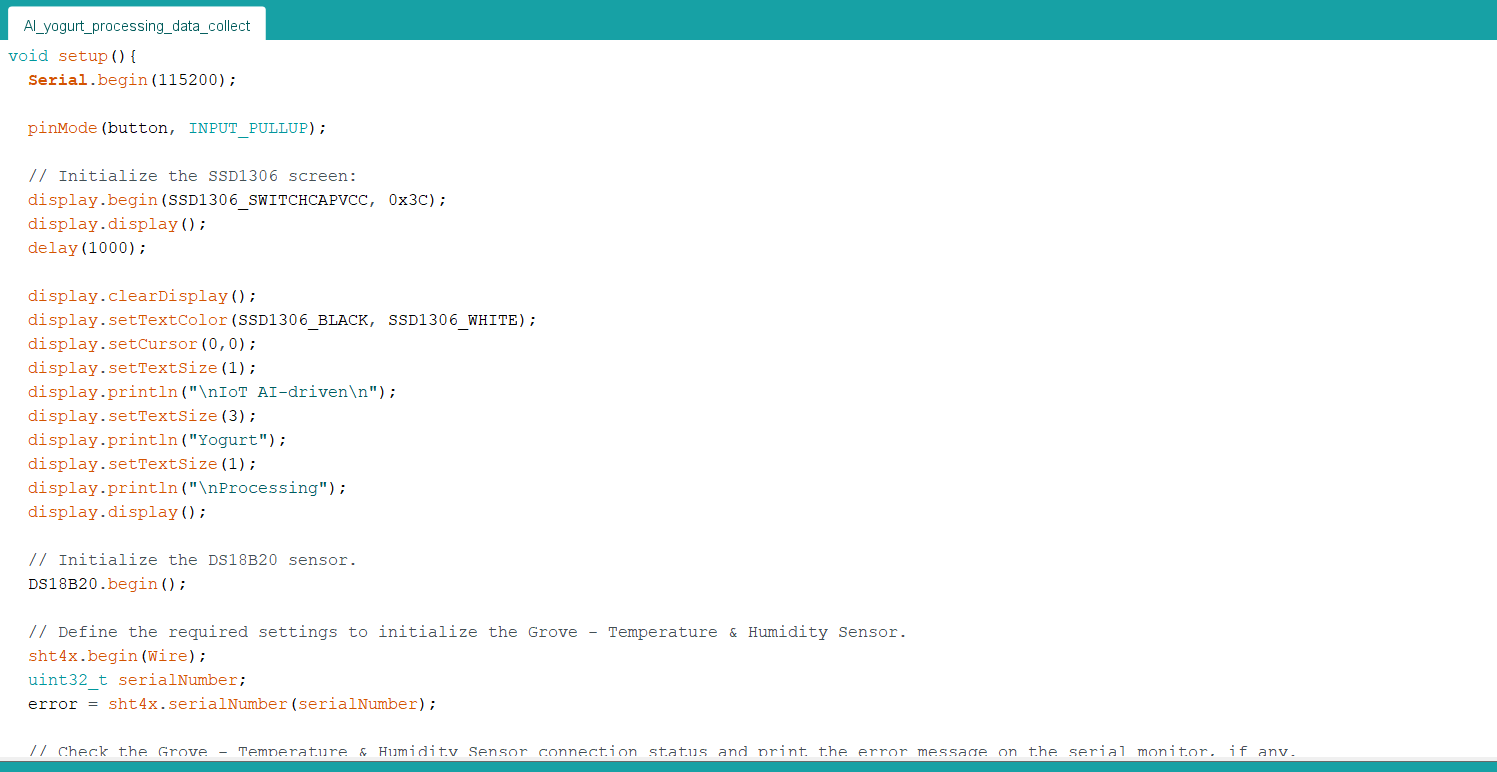
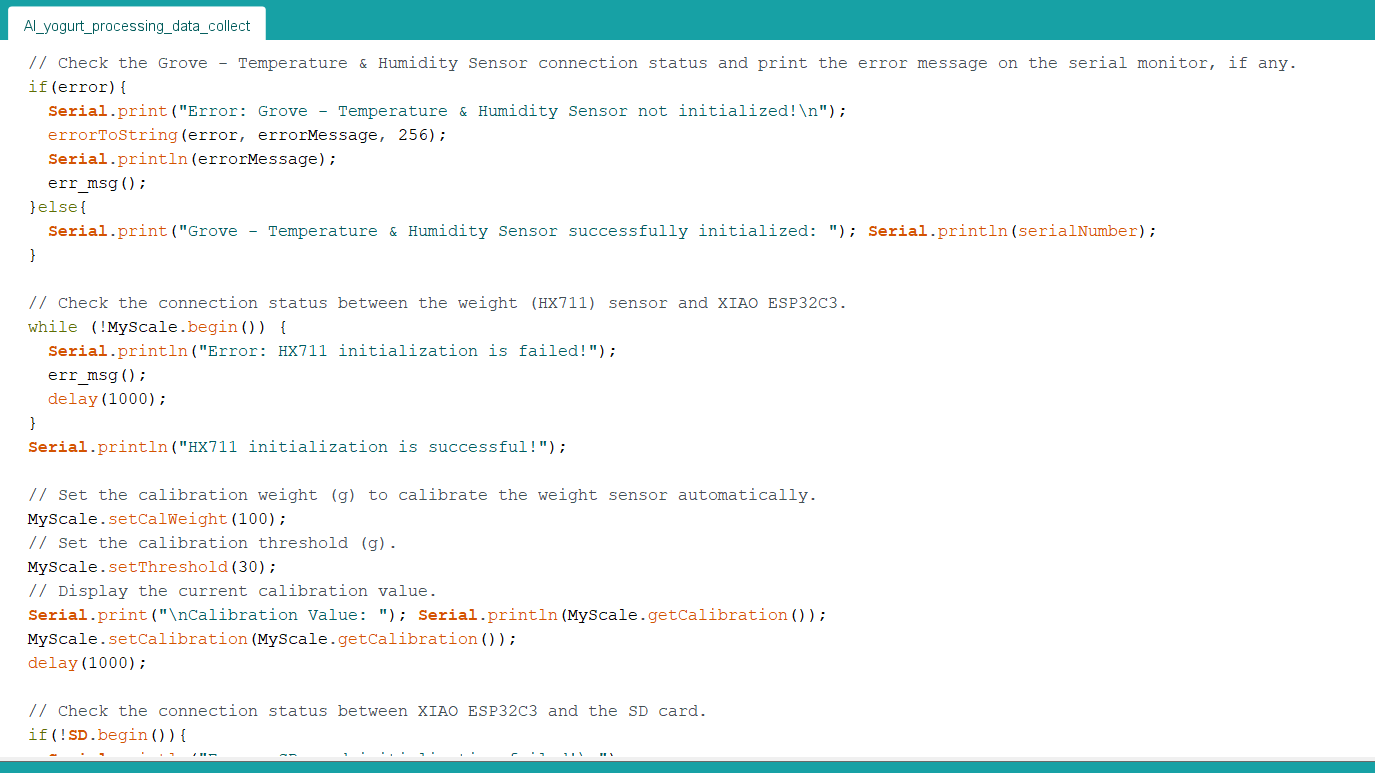
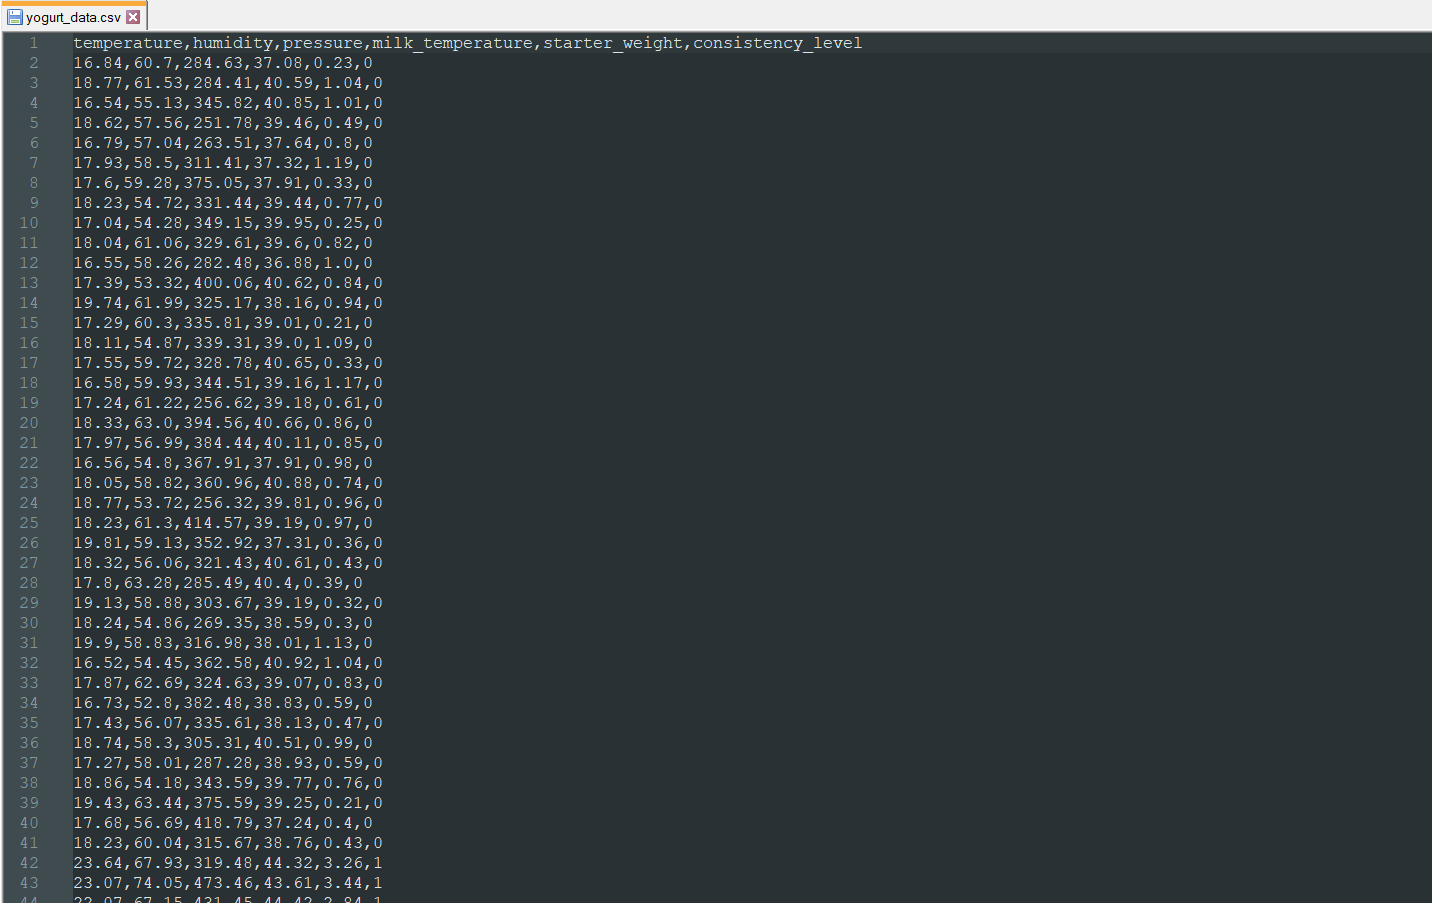
Step 4: Logging yogurt processing information in a CSV file on the SD card w/ XIAO ESP32C3
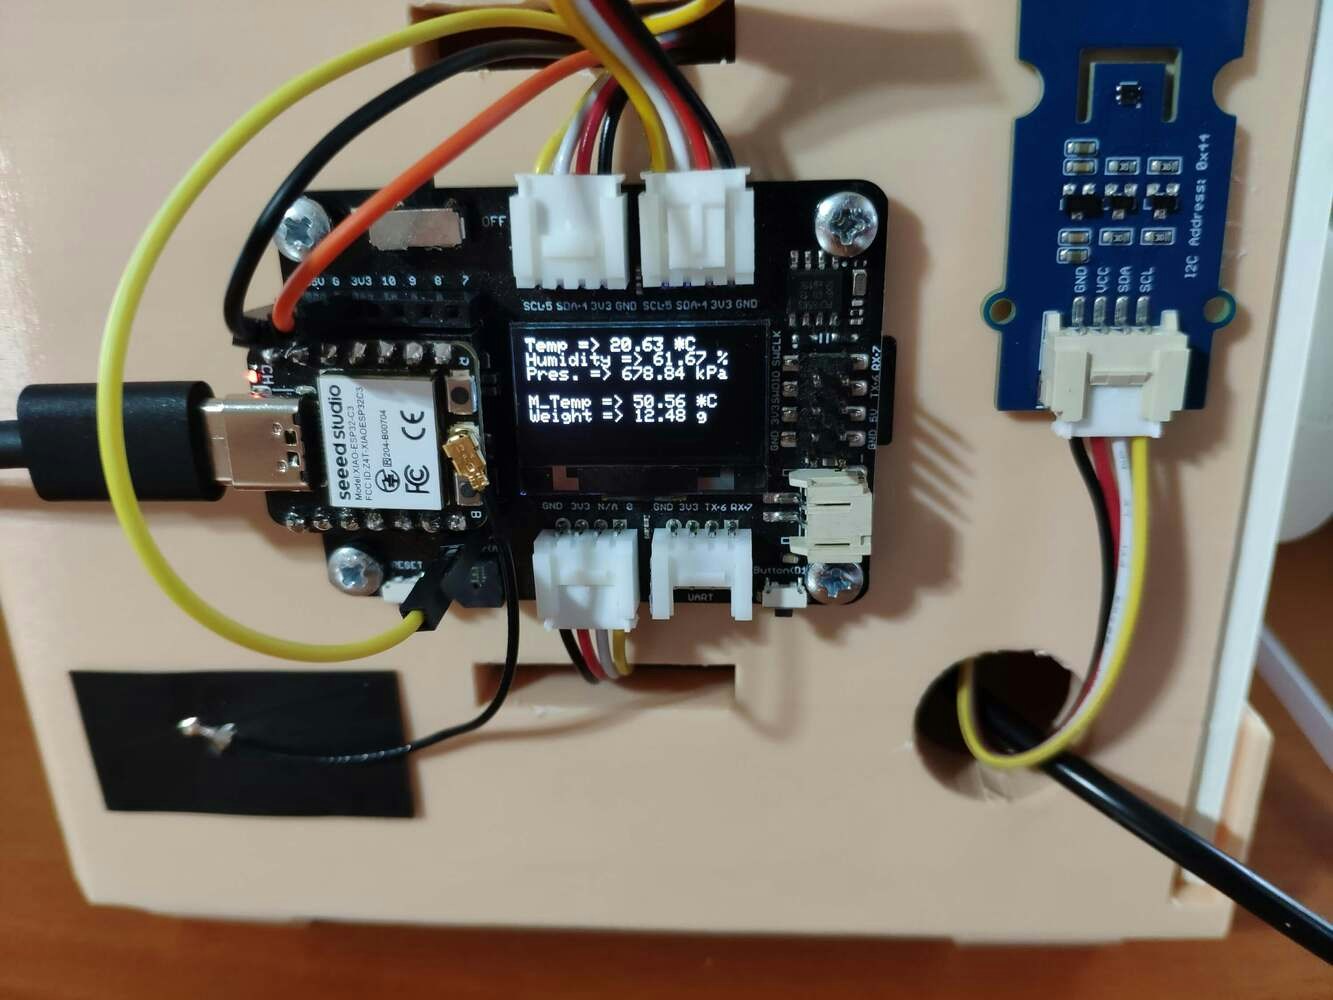
After setting up XIAO ESP32C3 and installing the required libraries, I programmed XIAO ESP32C3 to collect environmental factor measurements and the culture (starter) amount in order to save them to the given CSV file on the SD card.- Temperature (°C)
- Humidity (%)
- Pressure (kPa)
- Milk Temperature (°C)
- Starter Weight (g)
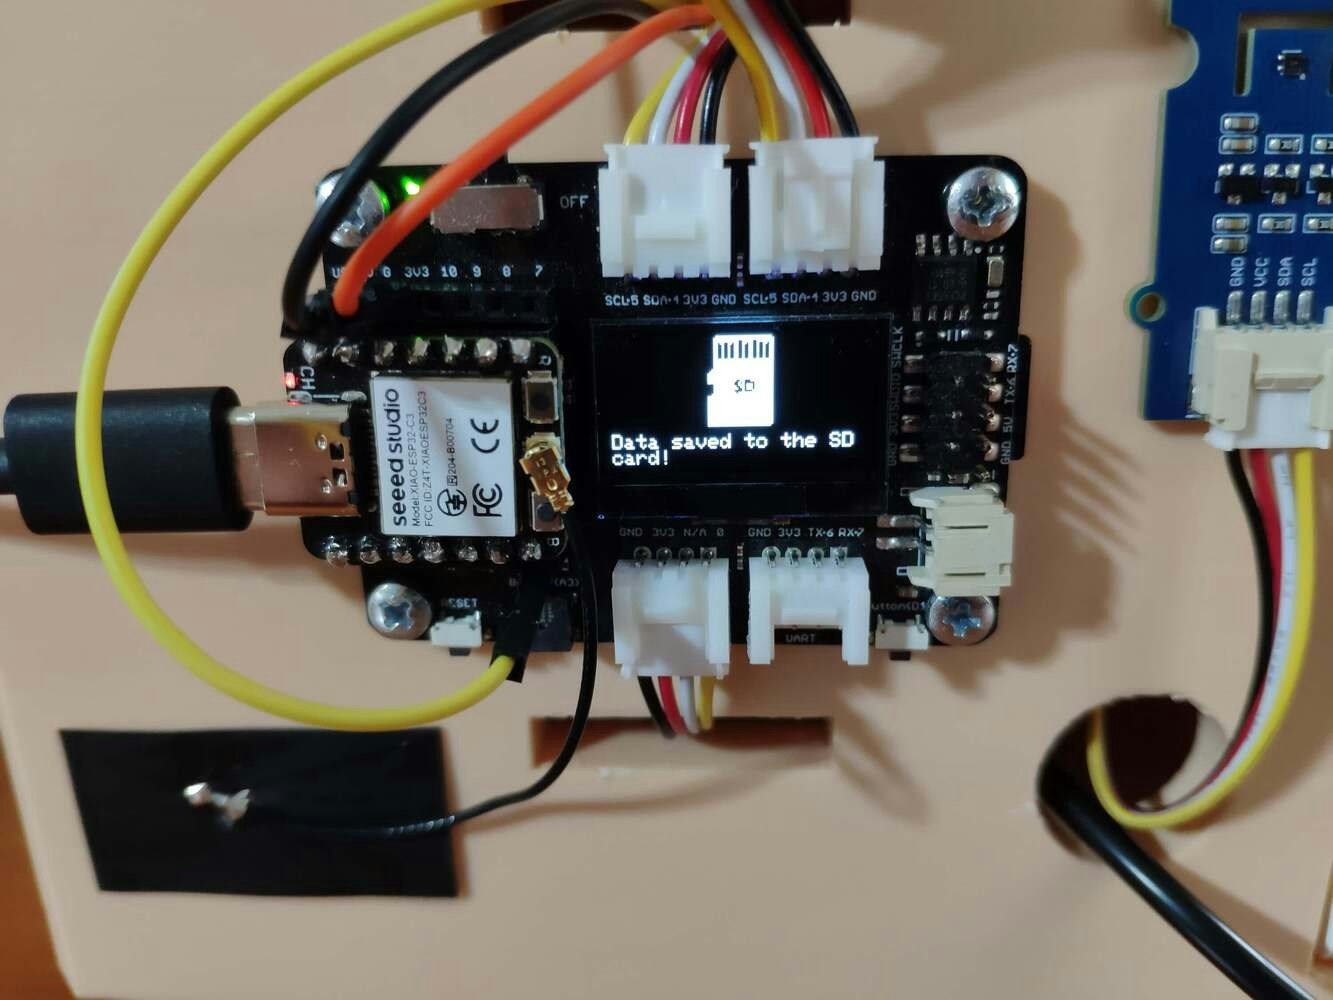
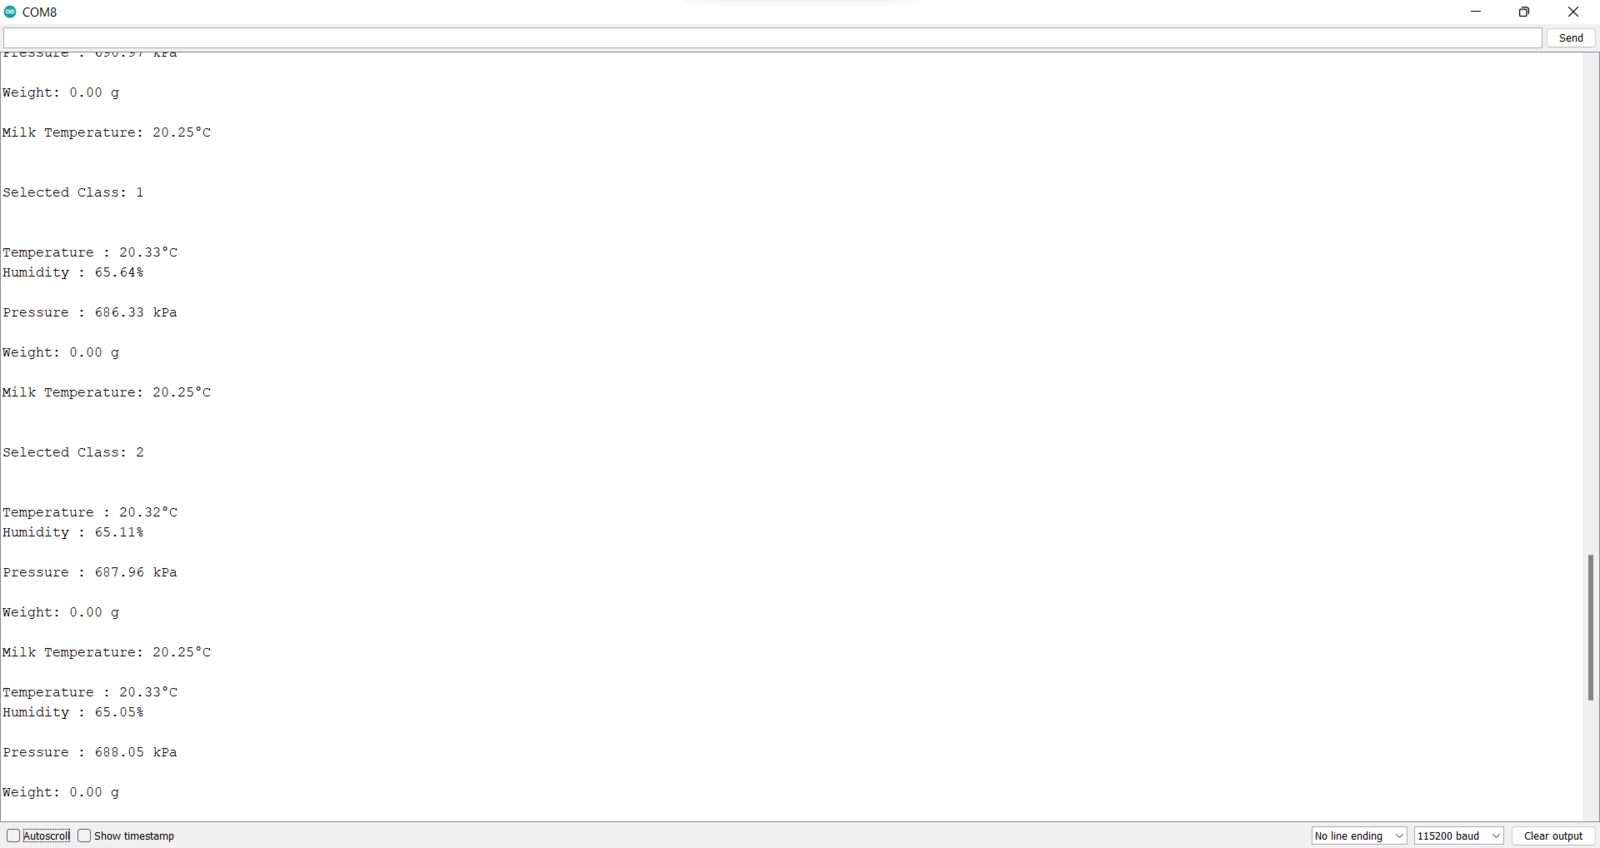
- Button (short-pressed) ➡ Select a class (Thinner, Optimum, Curdling)
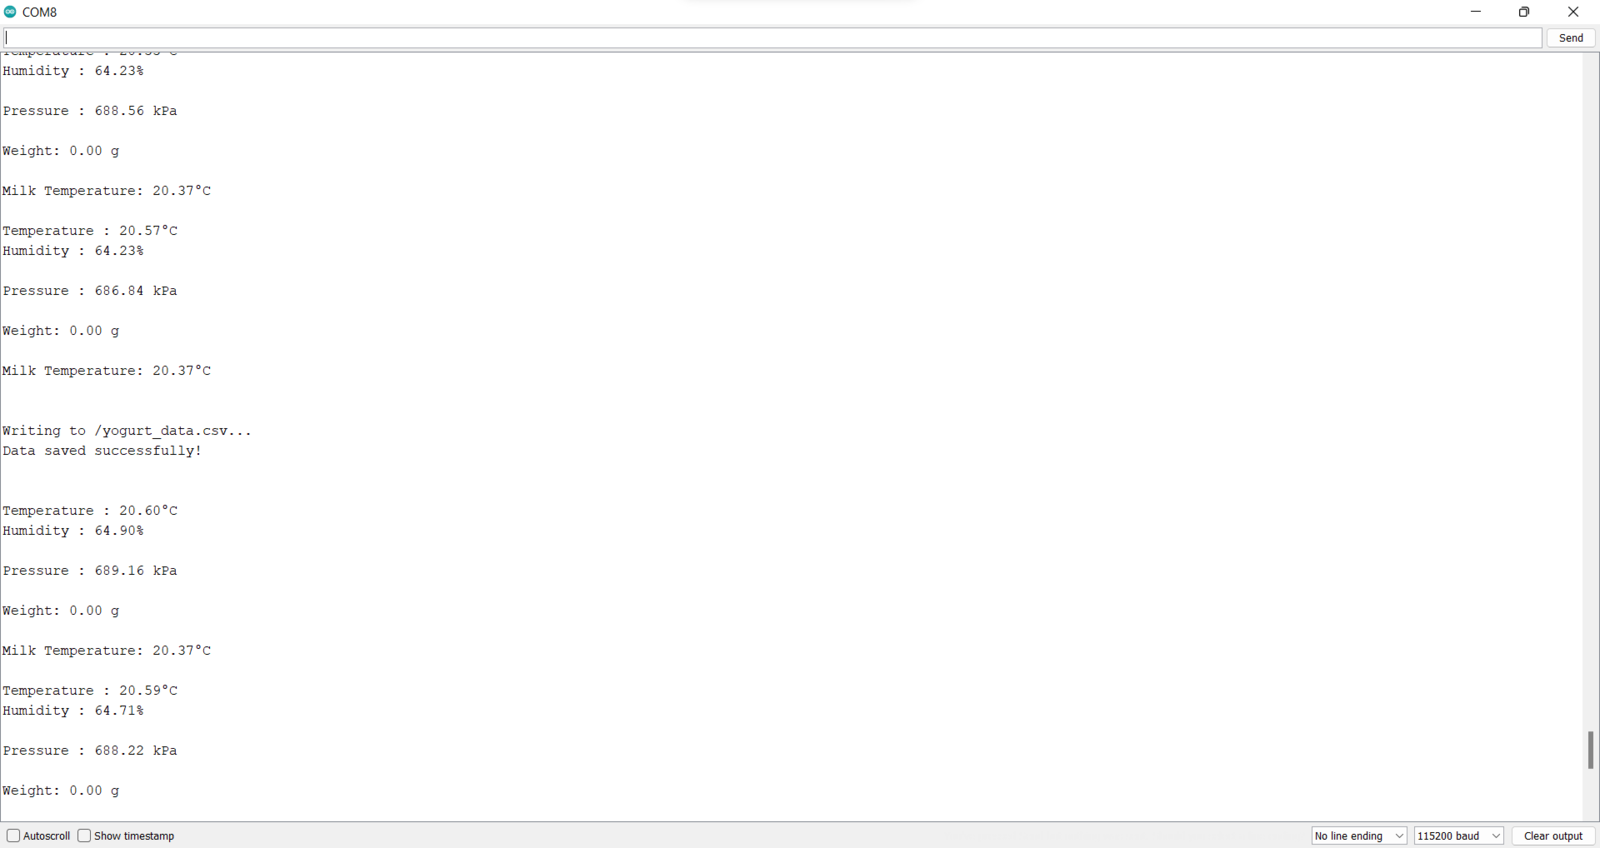
- Button (long-pressed) ➡ Save data to the SD card
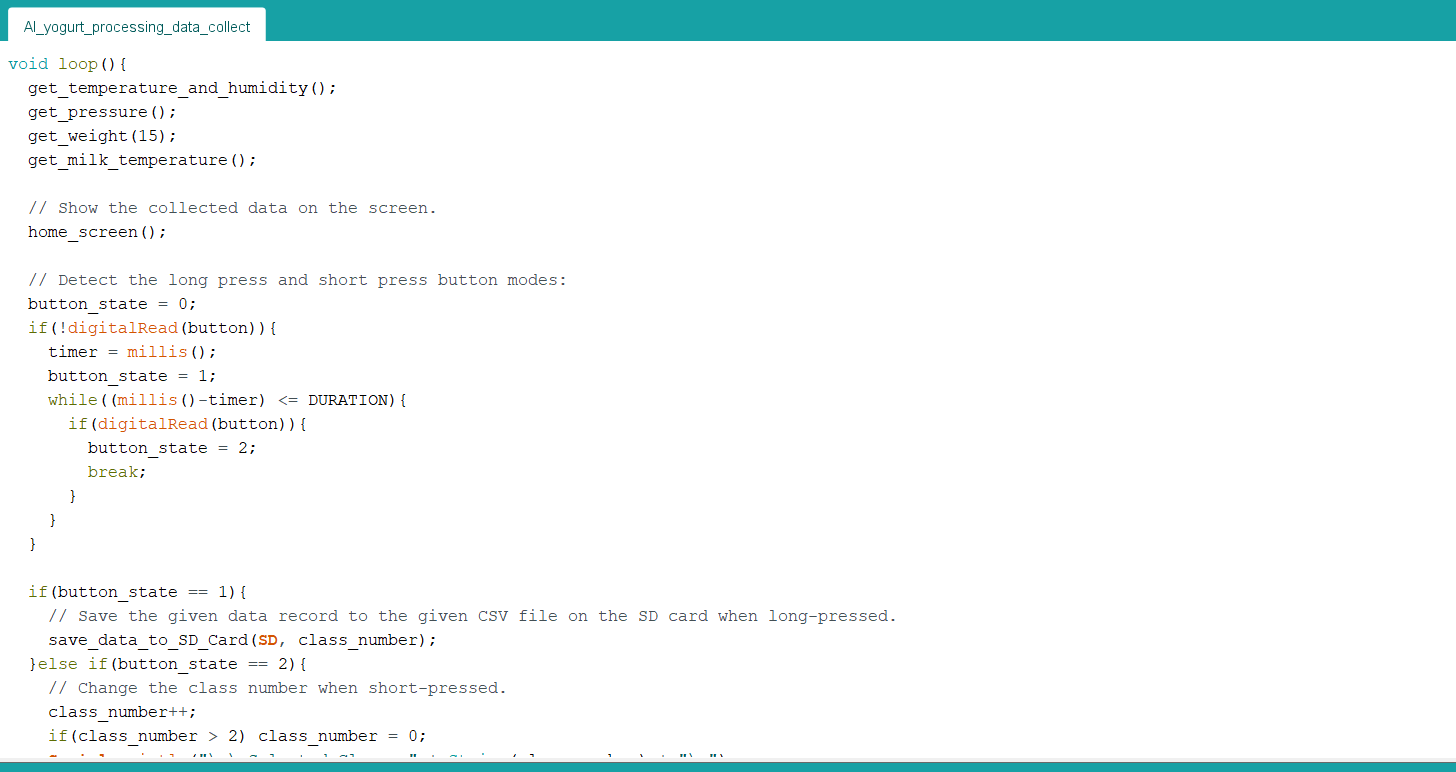
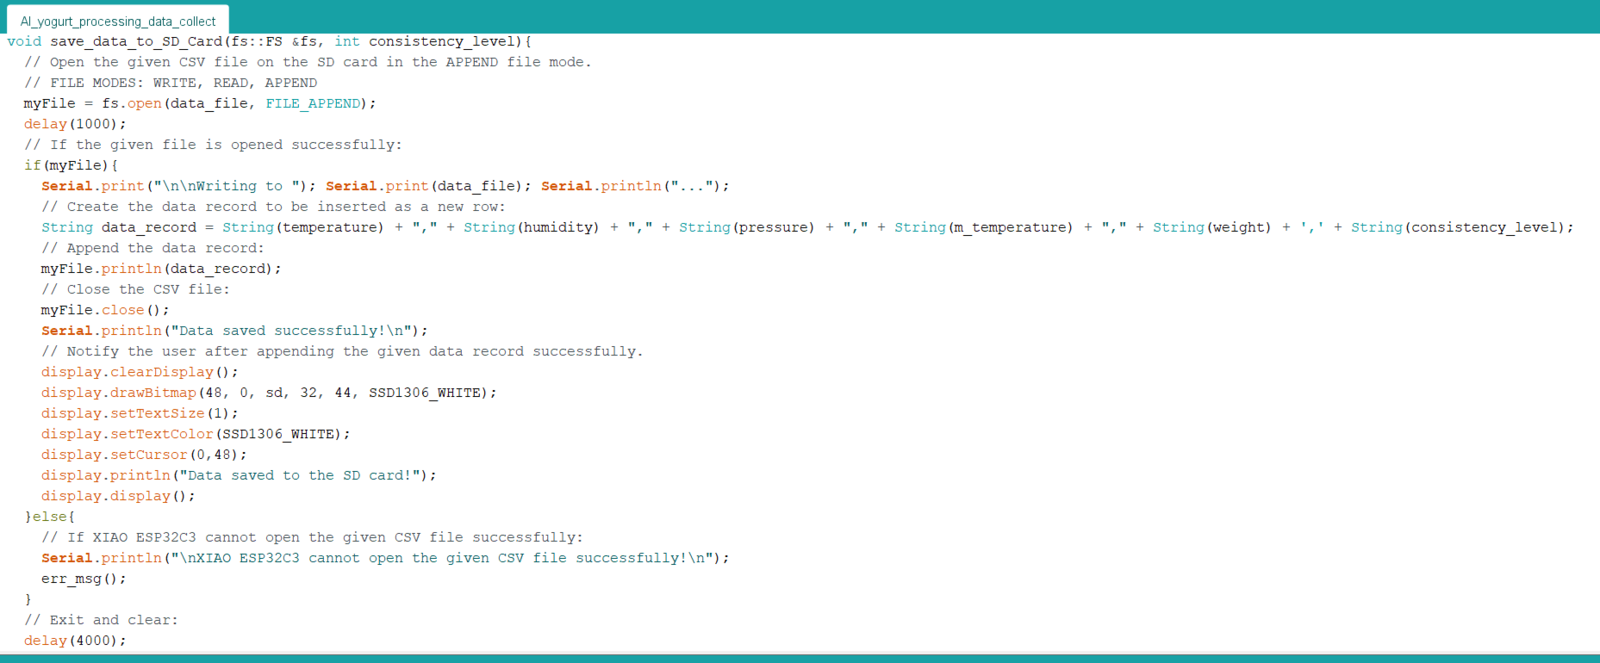
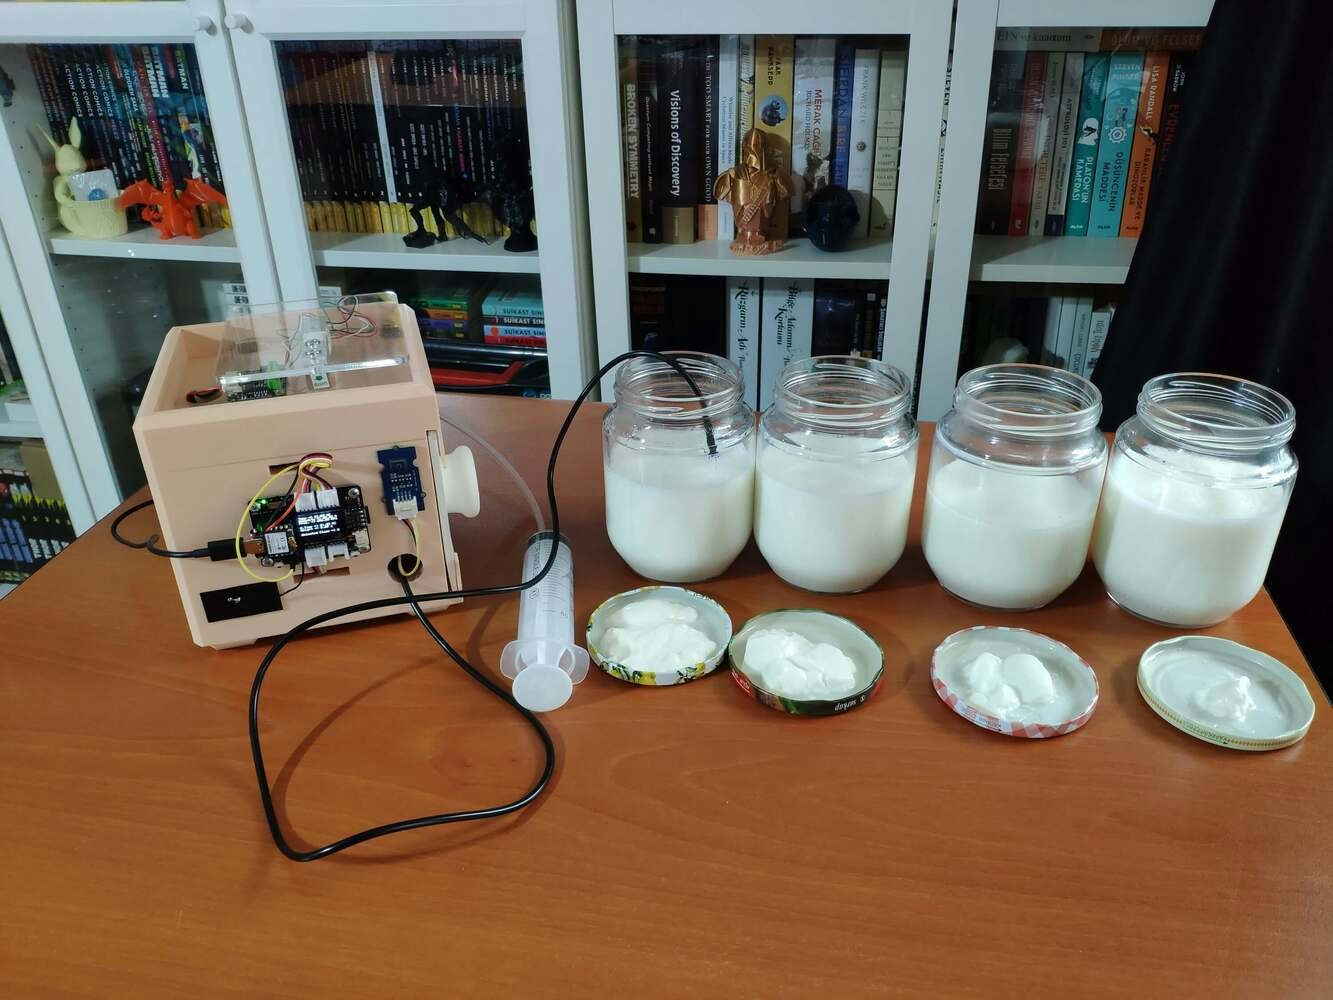
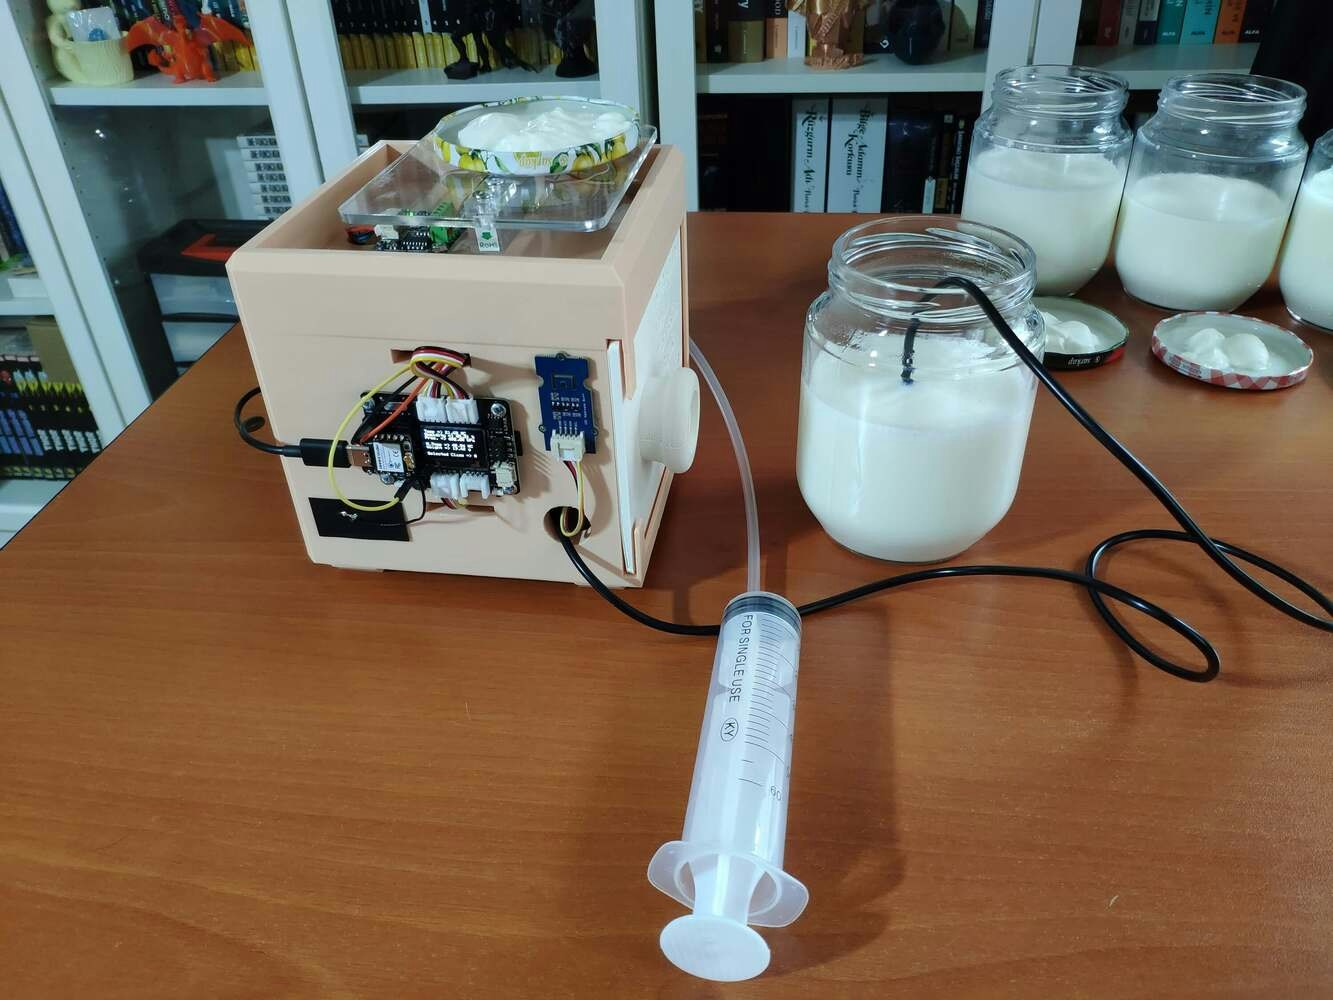
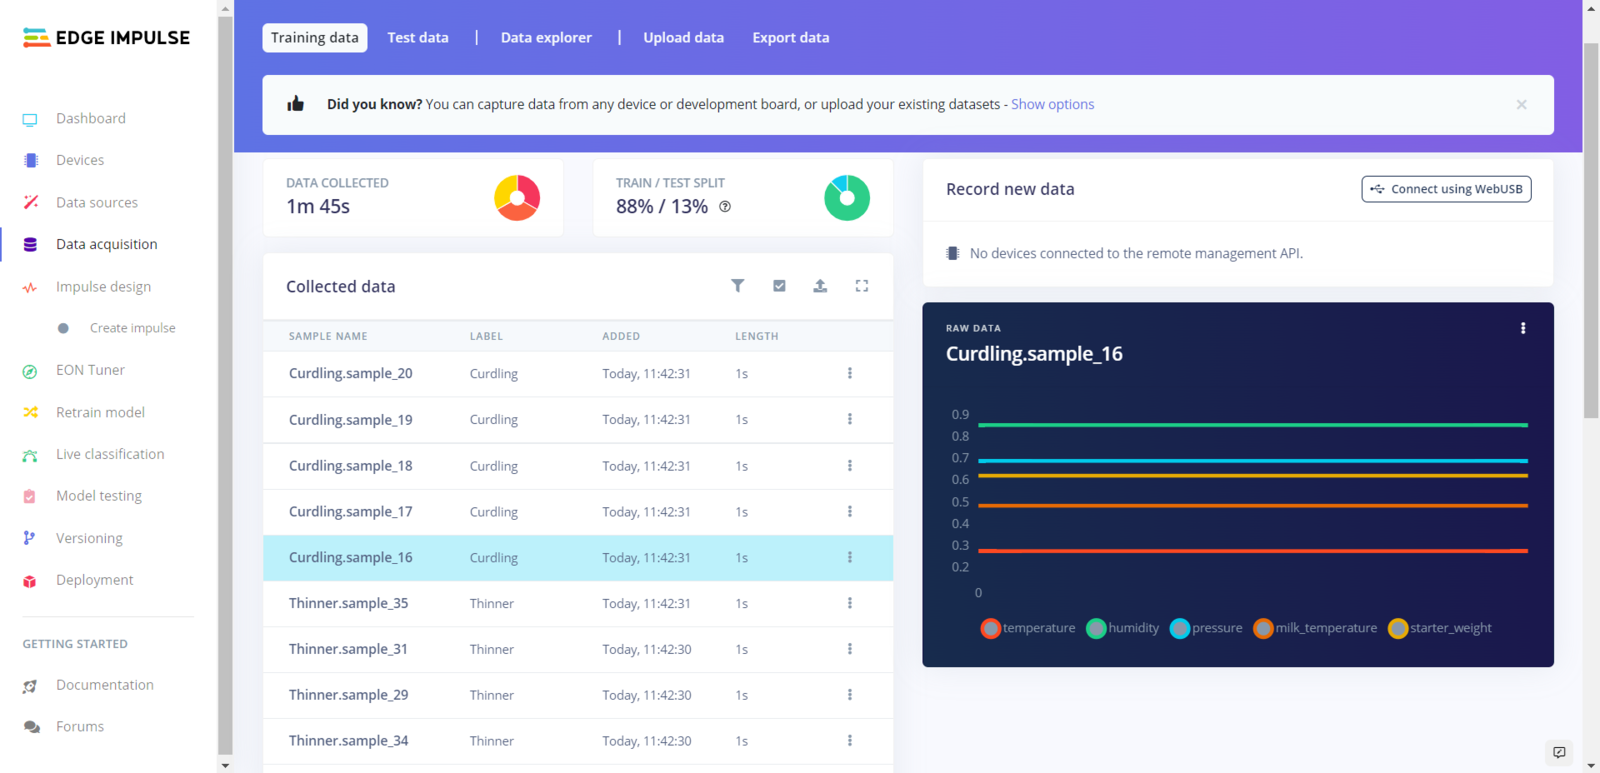
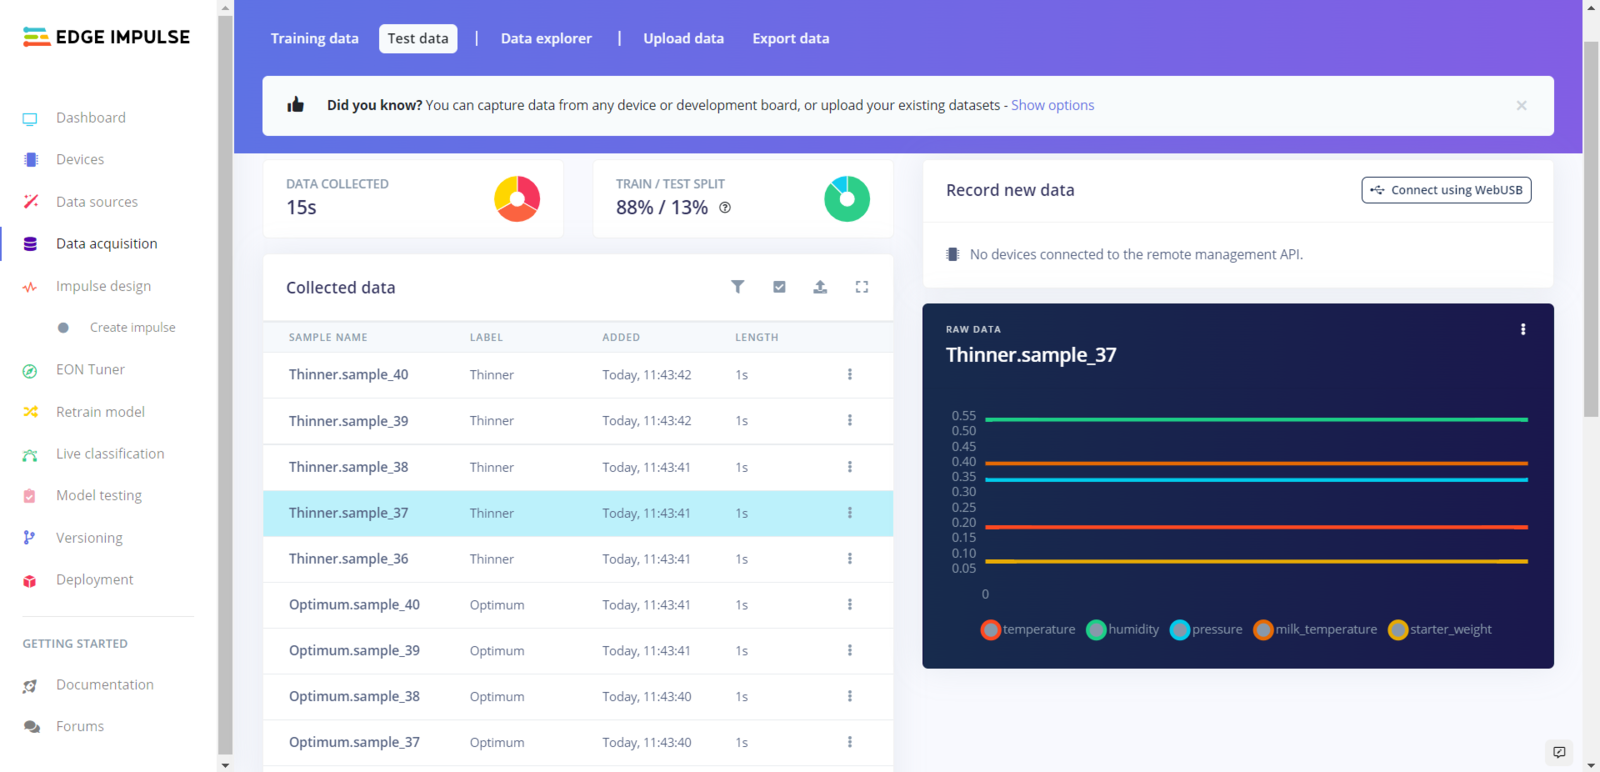
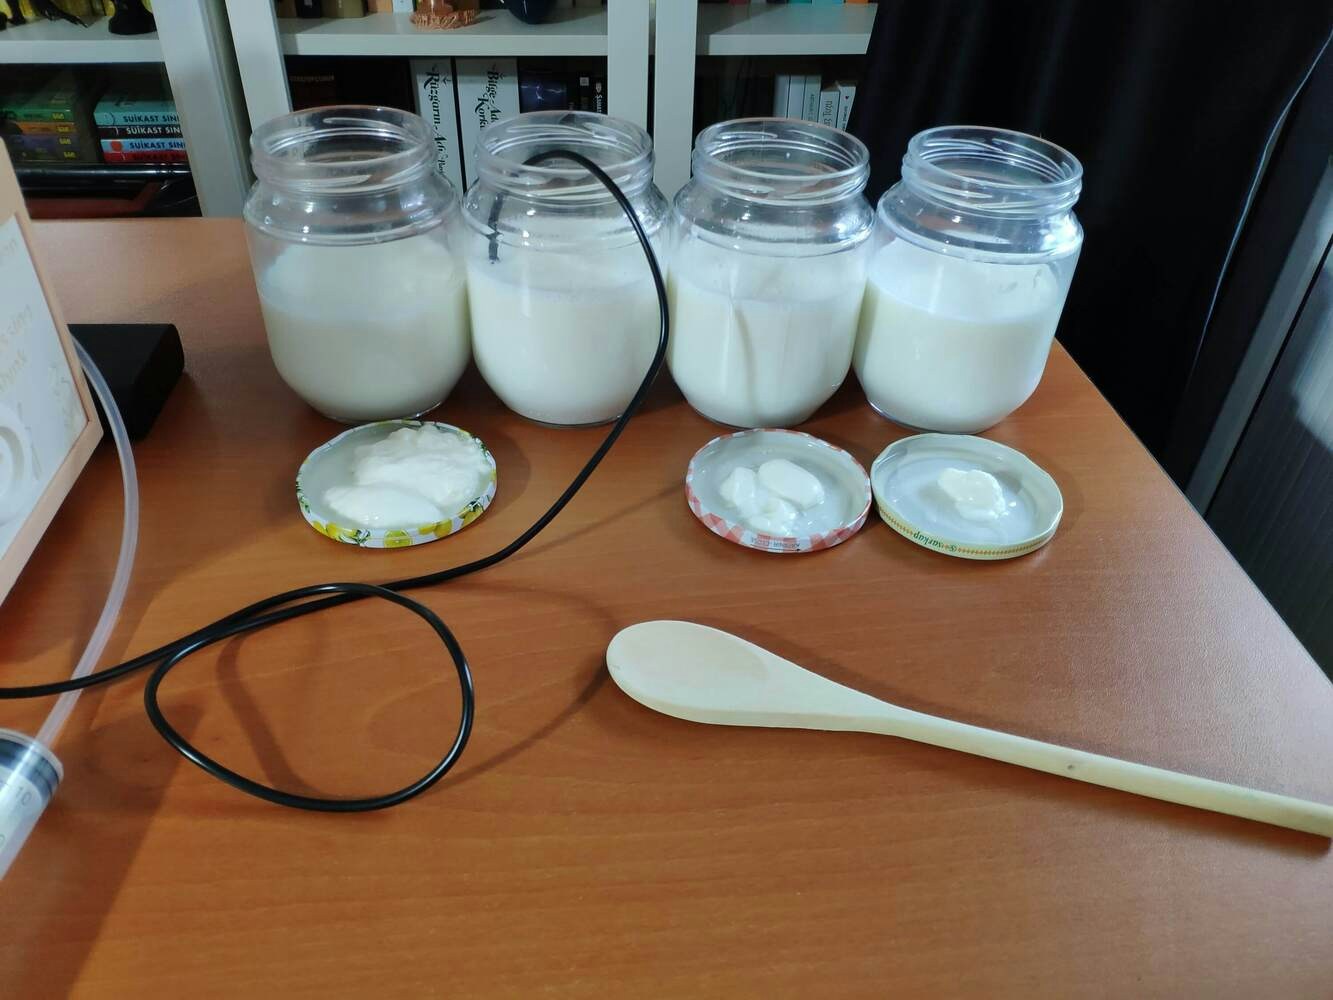
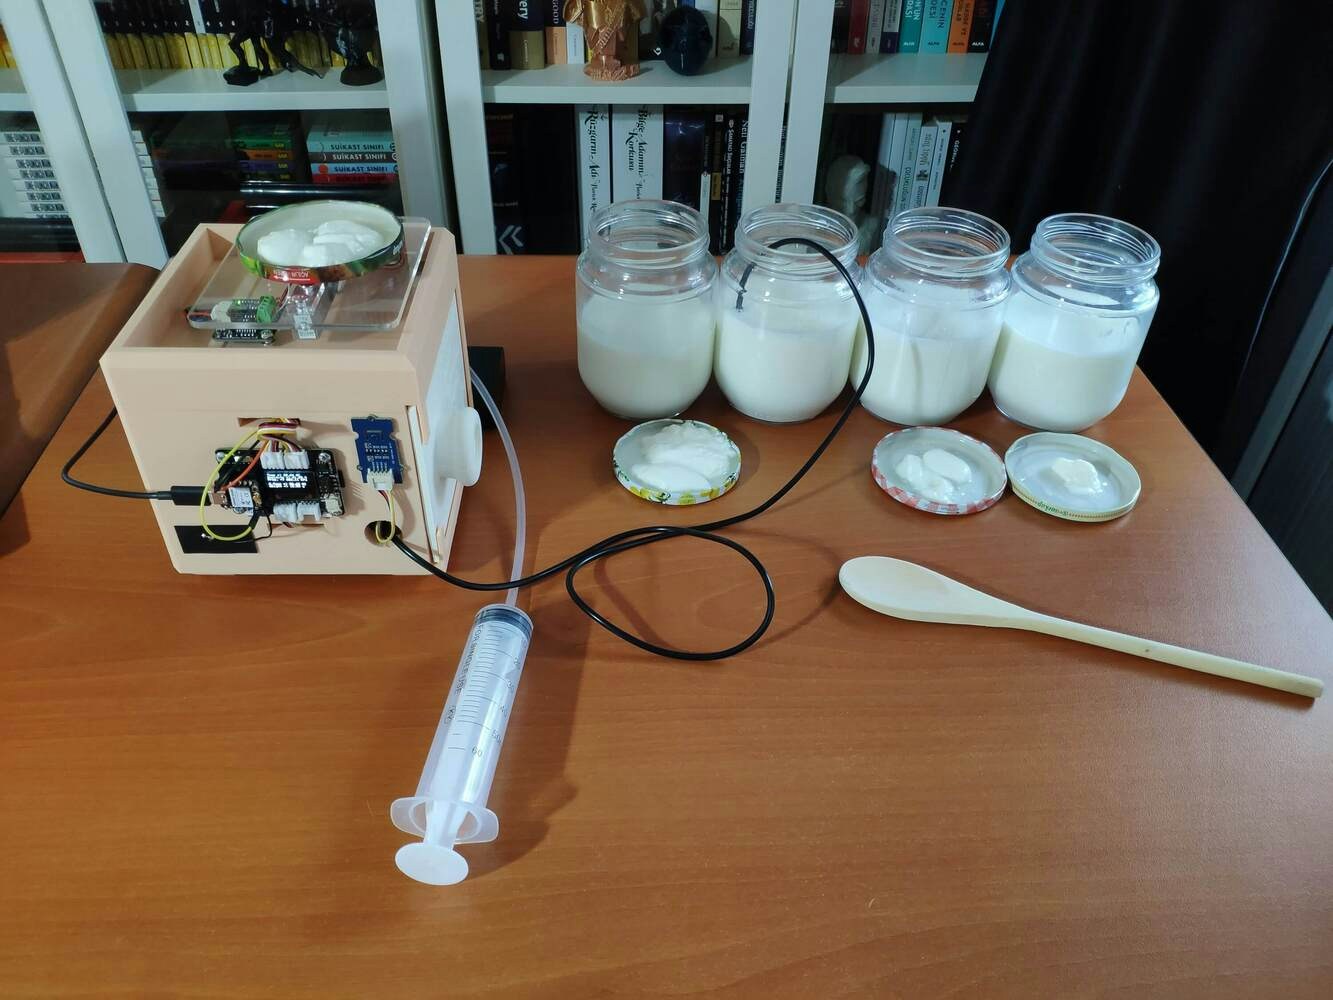
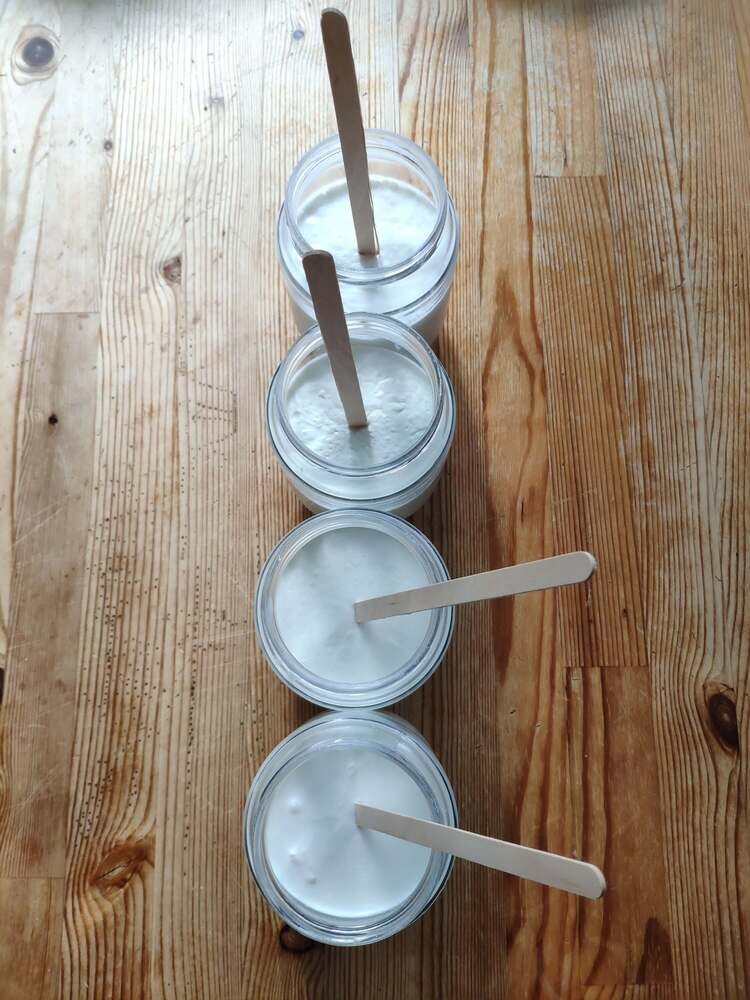
Step 4.1: Collecting samples while producing yogurt to create a data set
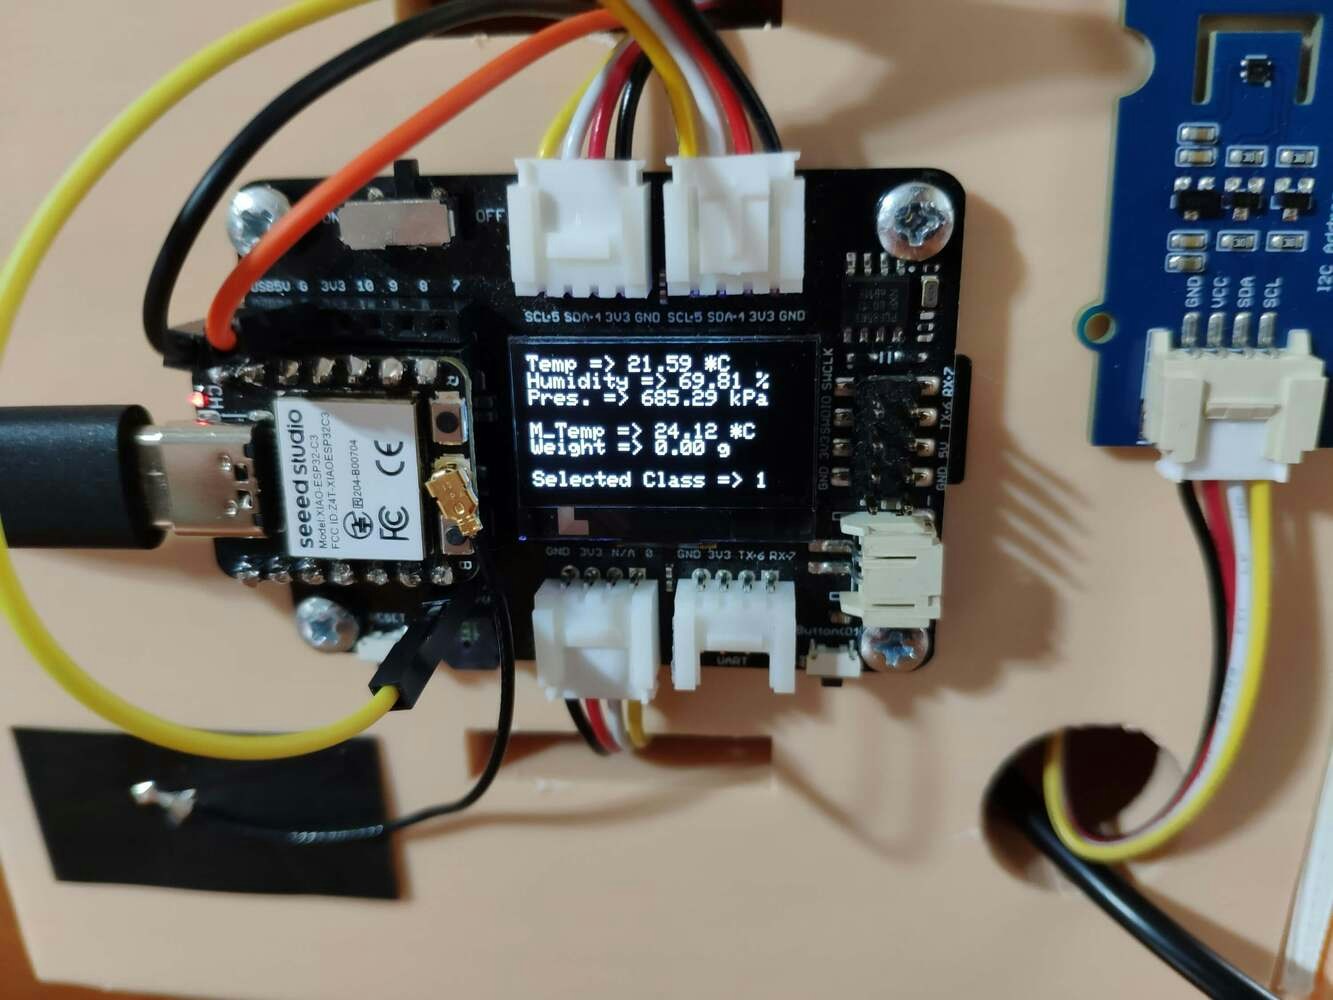
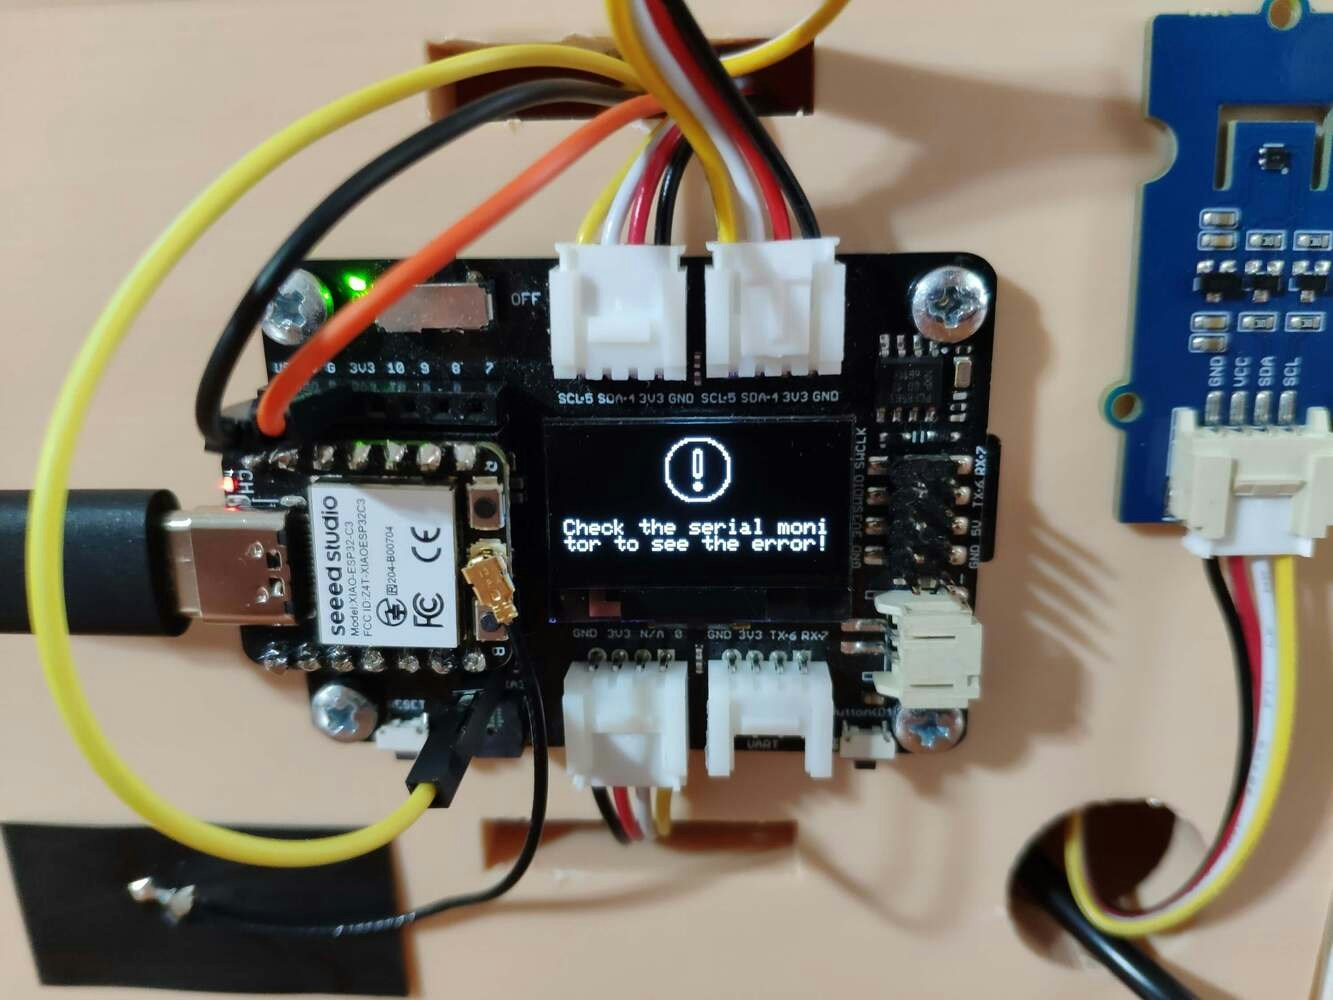
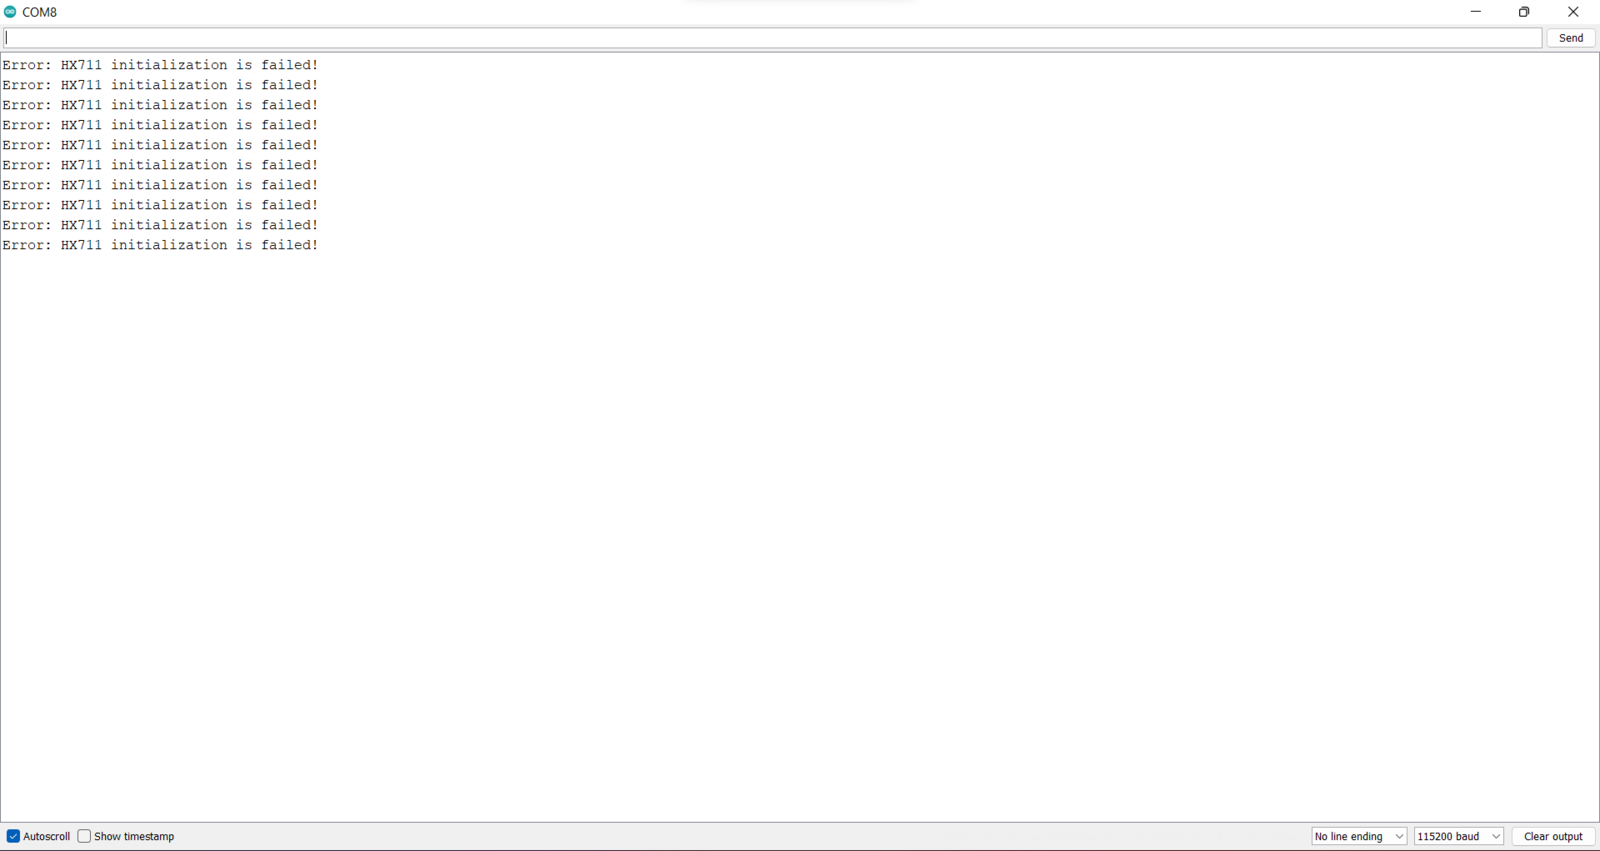
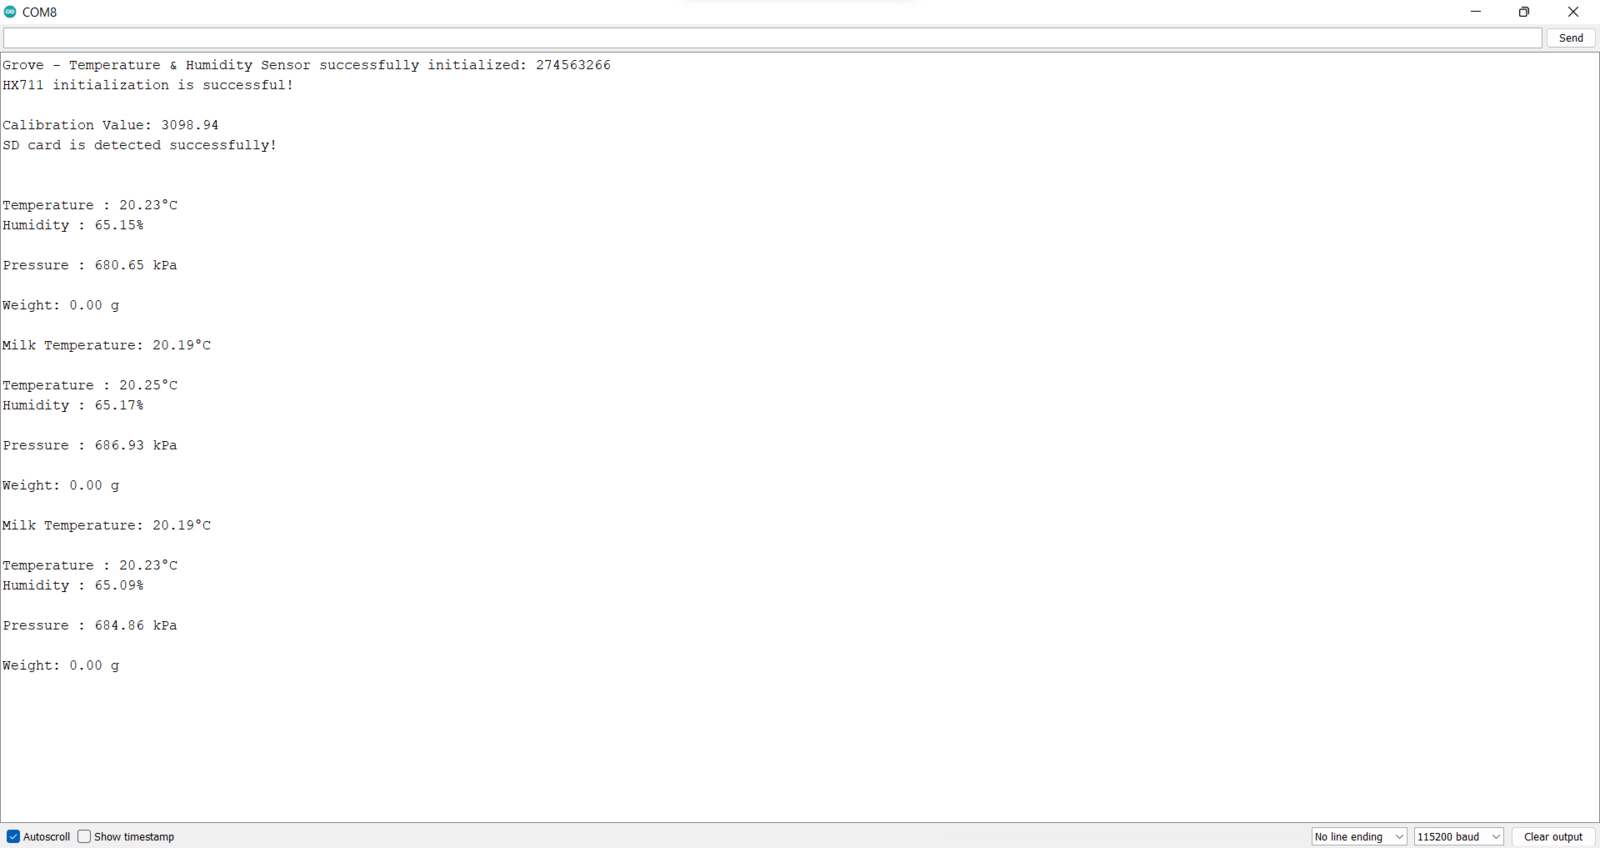
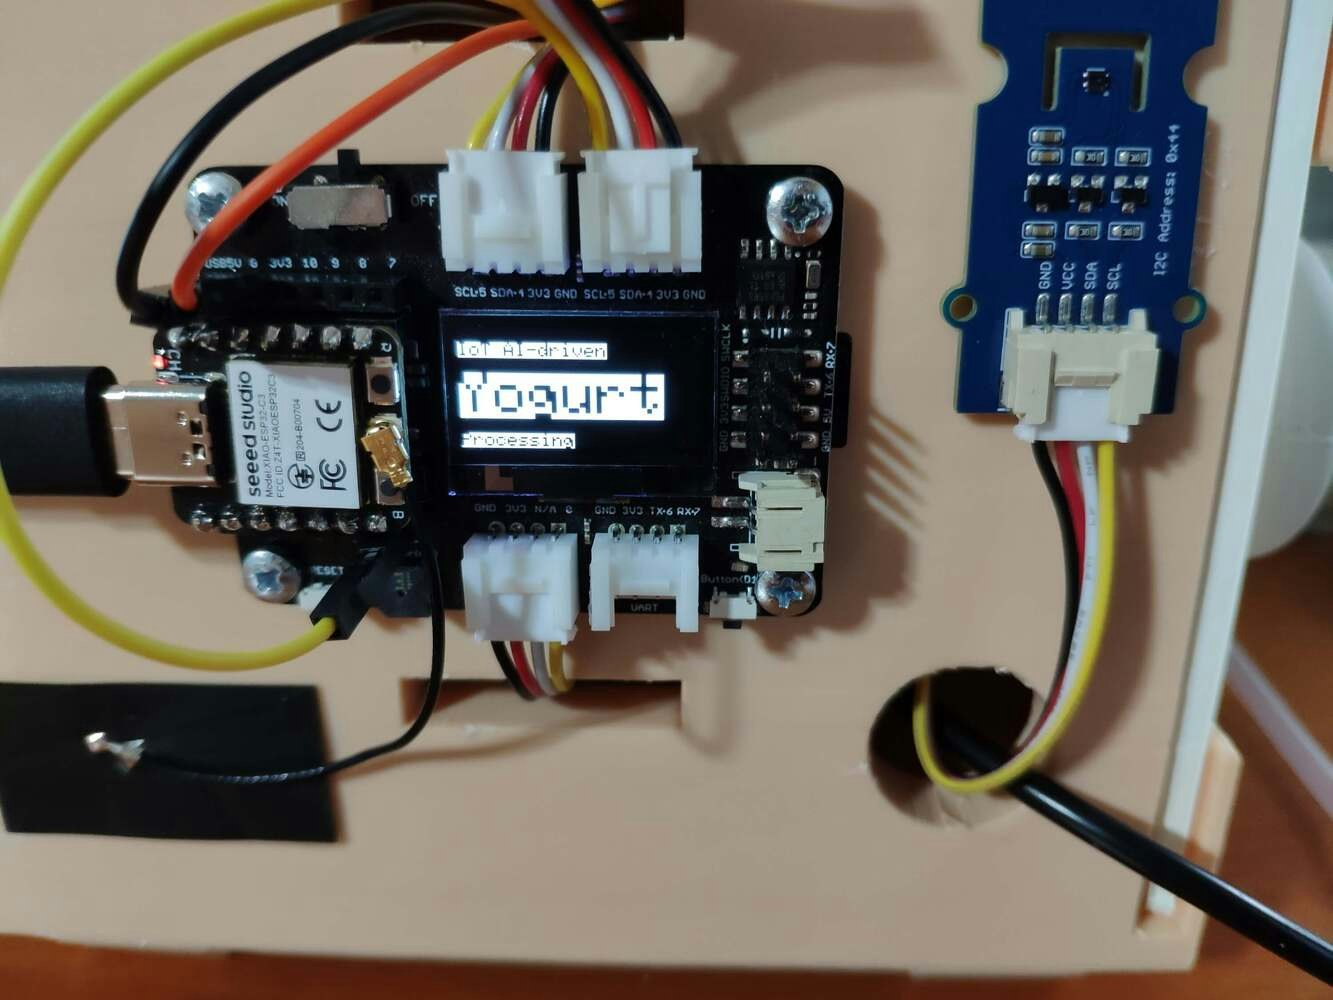
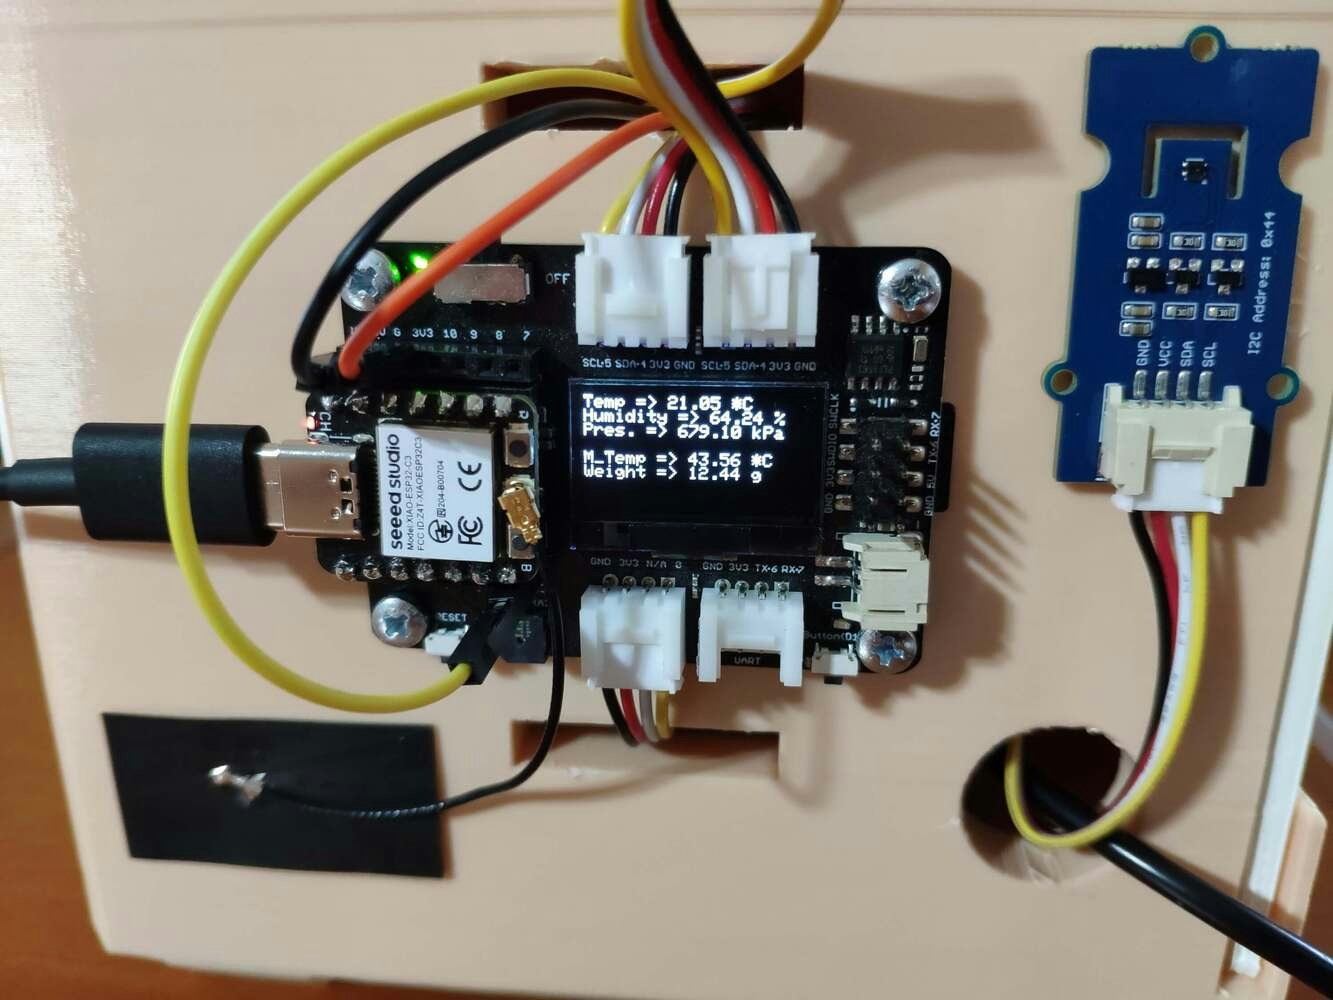
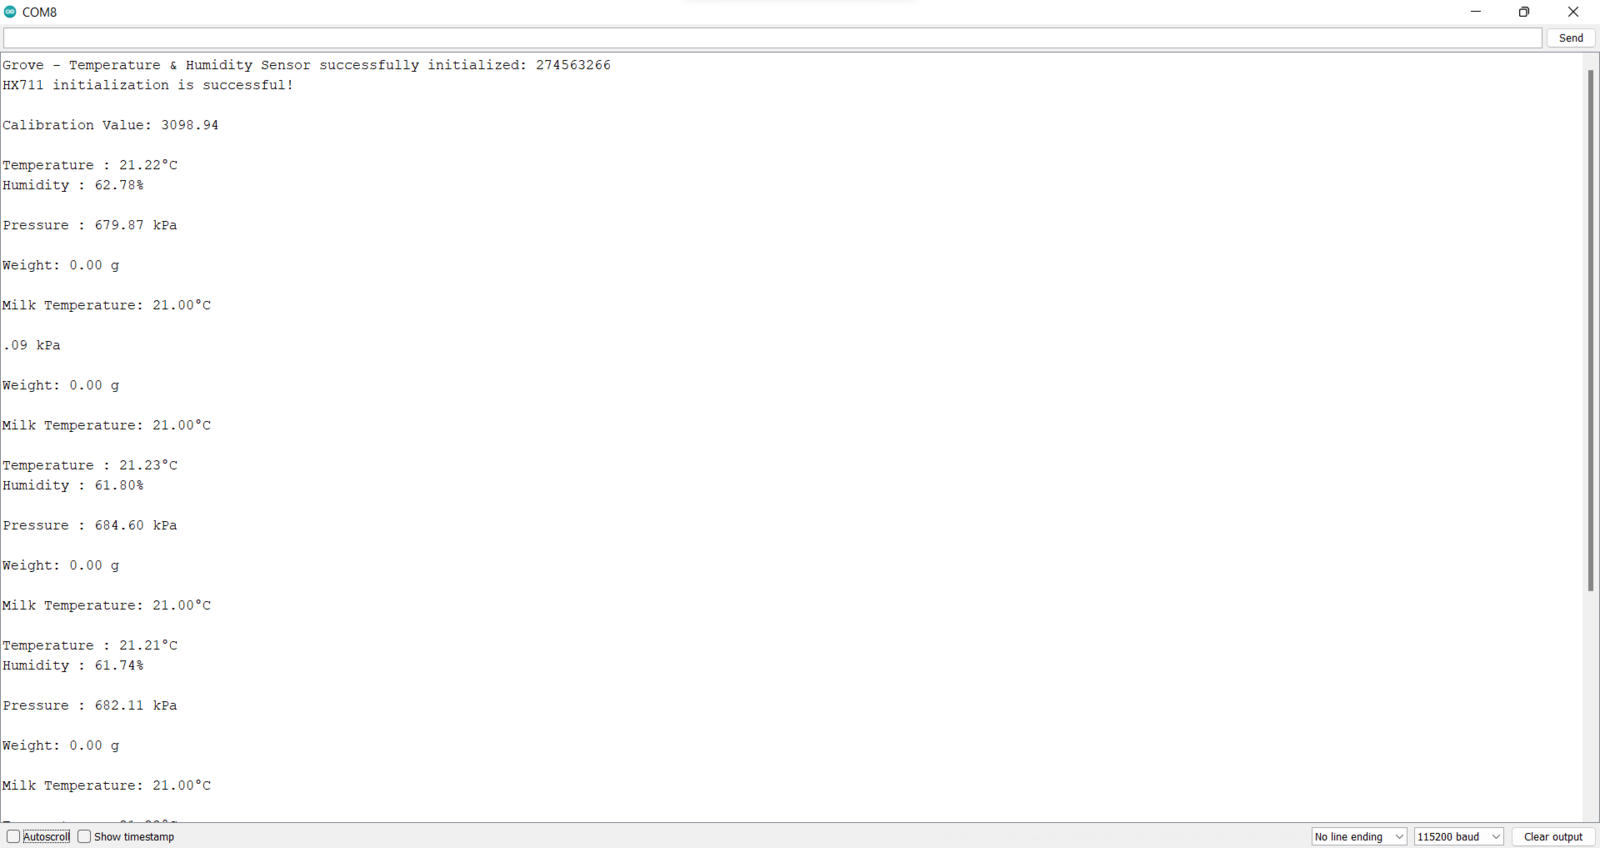
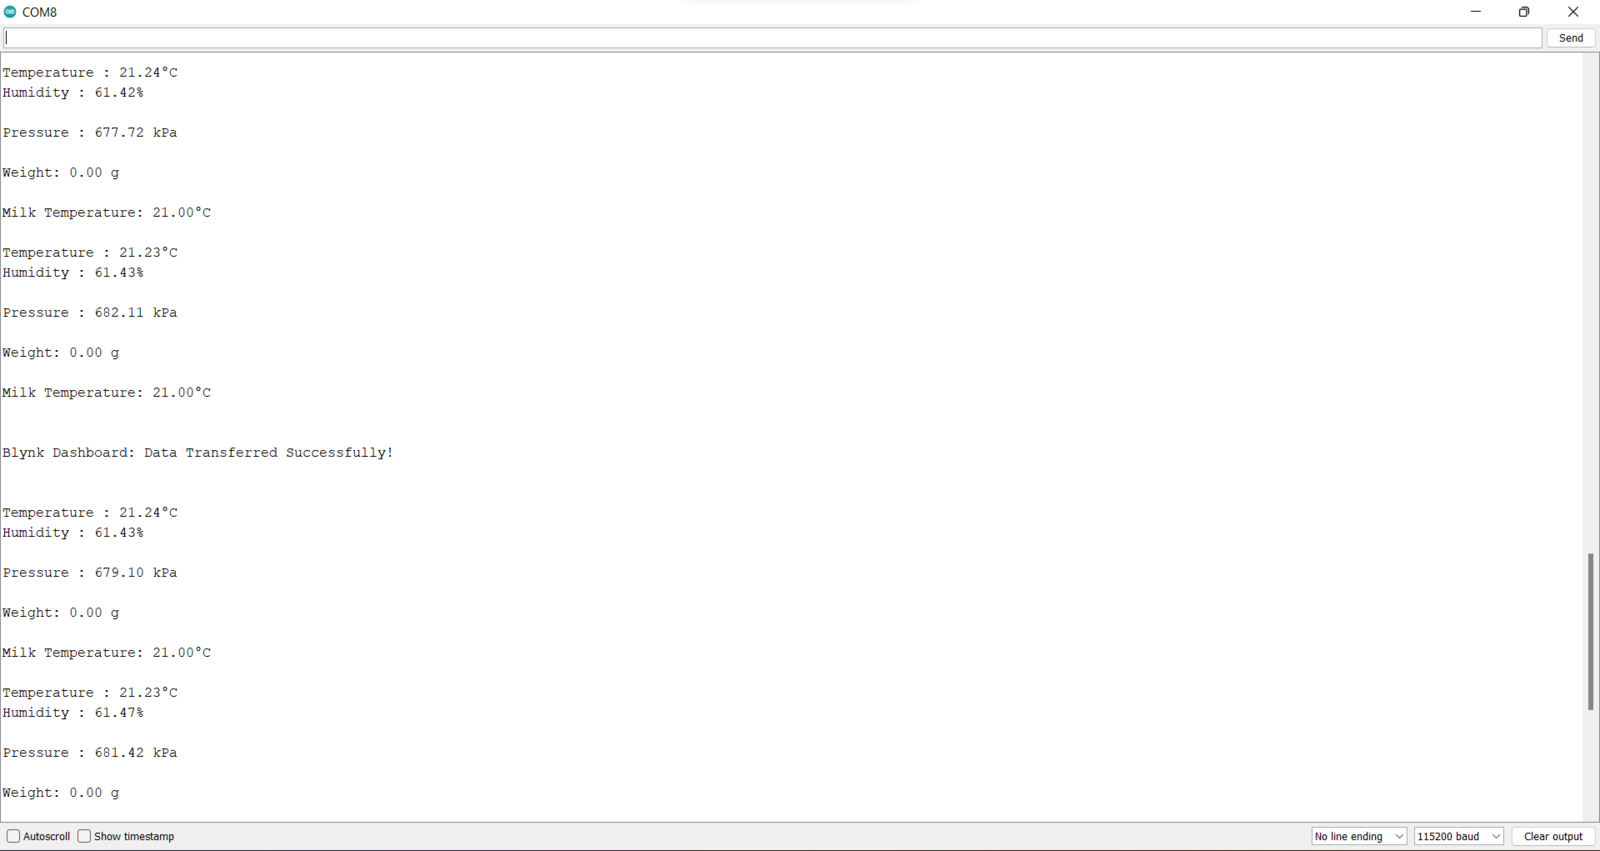
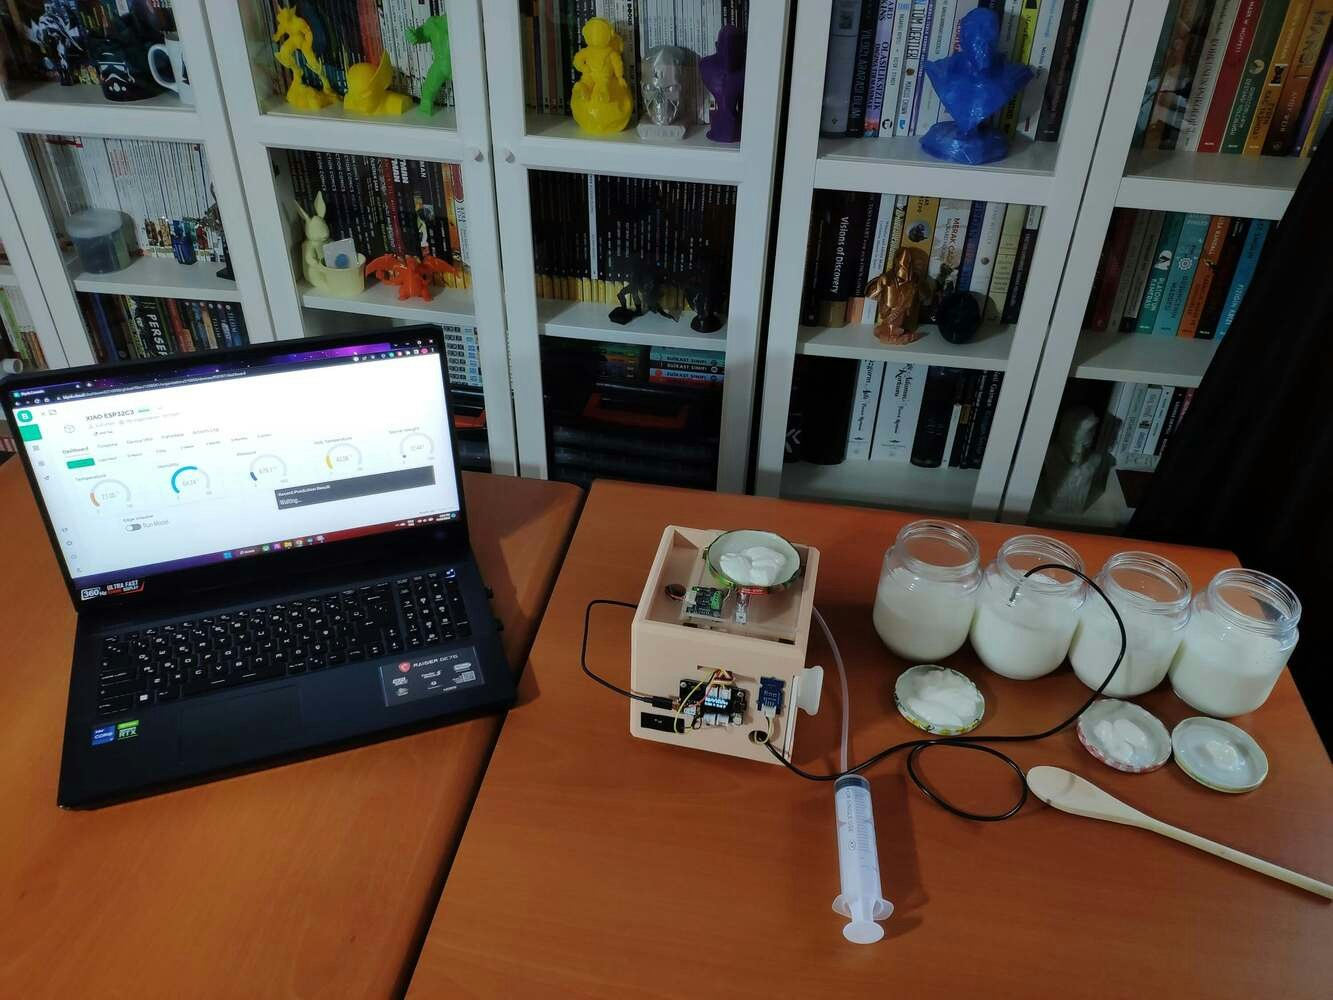
After uploading and running the code for collecting yogurt processing data and for saving information to the given CSV file on the SD card on XIAO ESP32C3: 🐄🥛📲 The device shows the opening screen if the sensor and MicroSD card module connections with XIAO ESP32C3 are successful.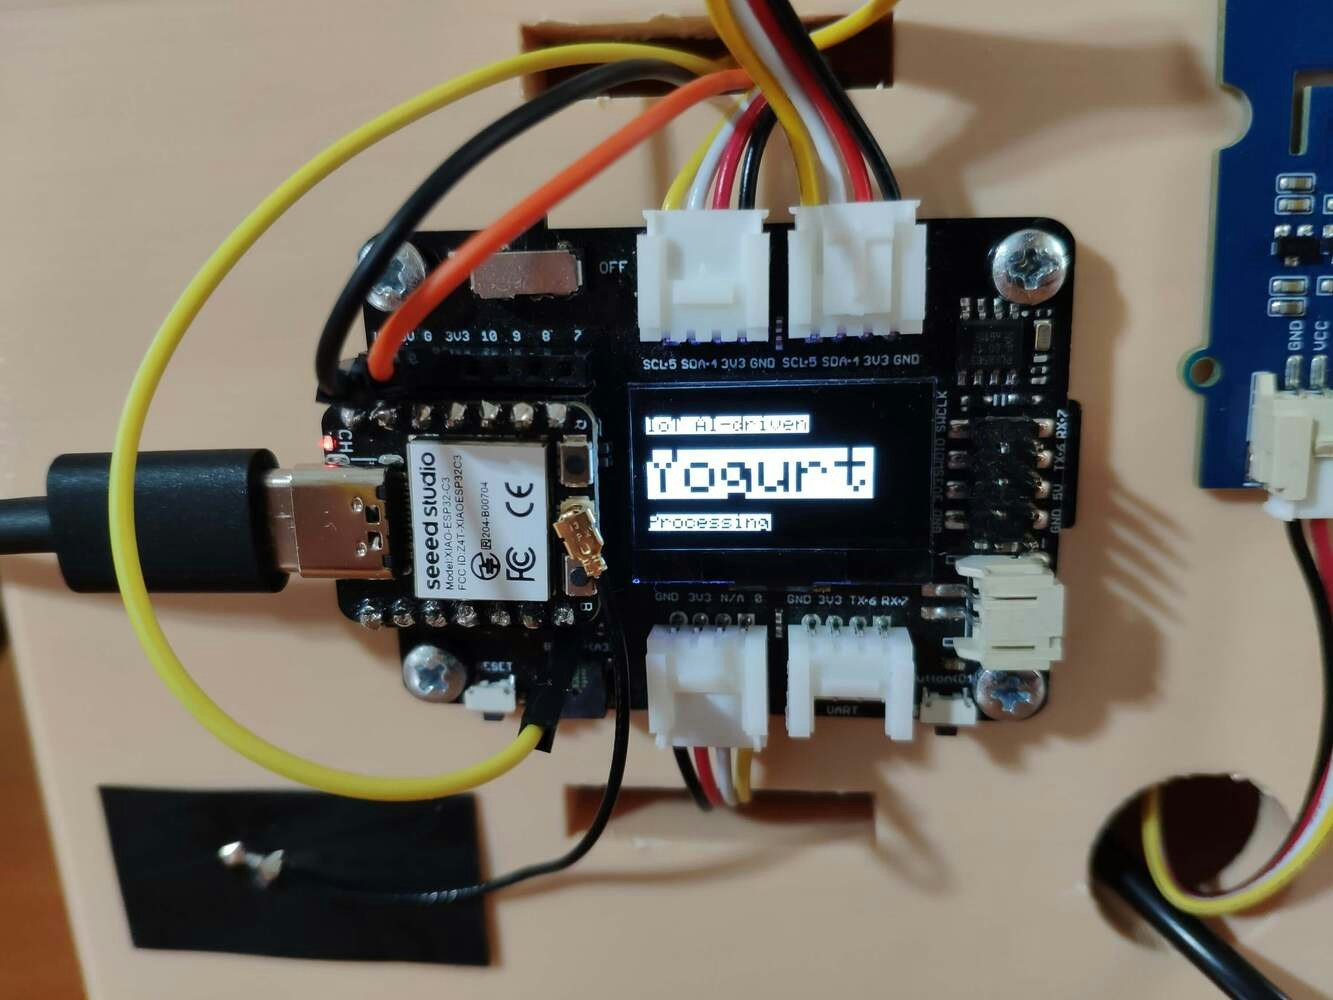
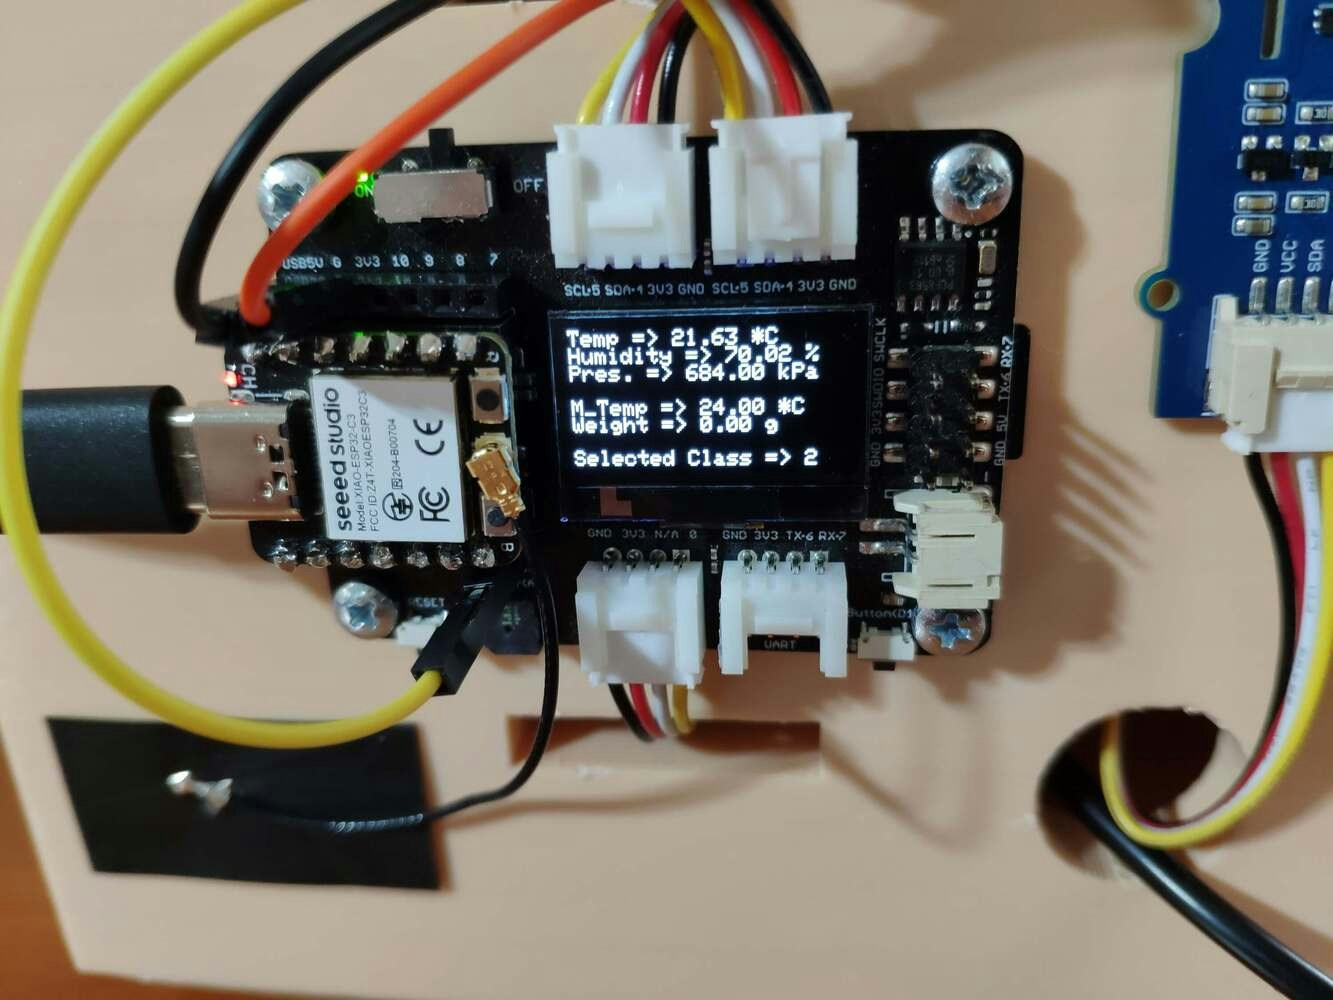
- Temperature (°C)
- Humidity (%)
- Pressure (kPa)
- Milk Temperature (°C)
- Starter Weight (g)
- Selected Class
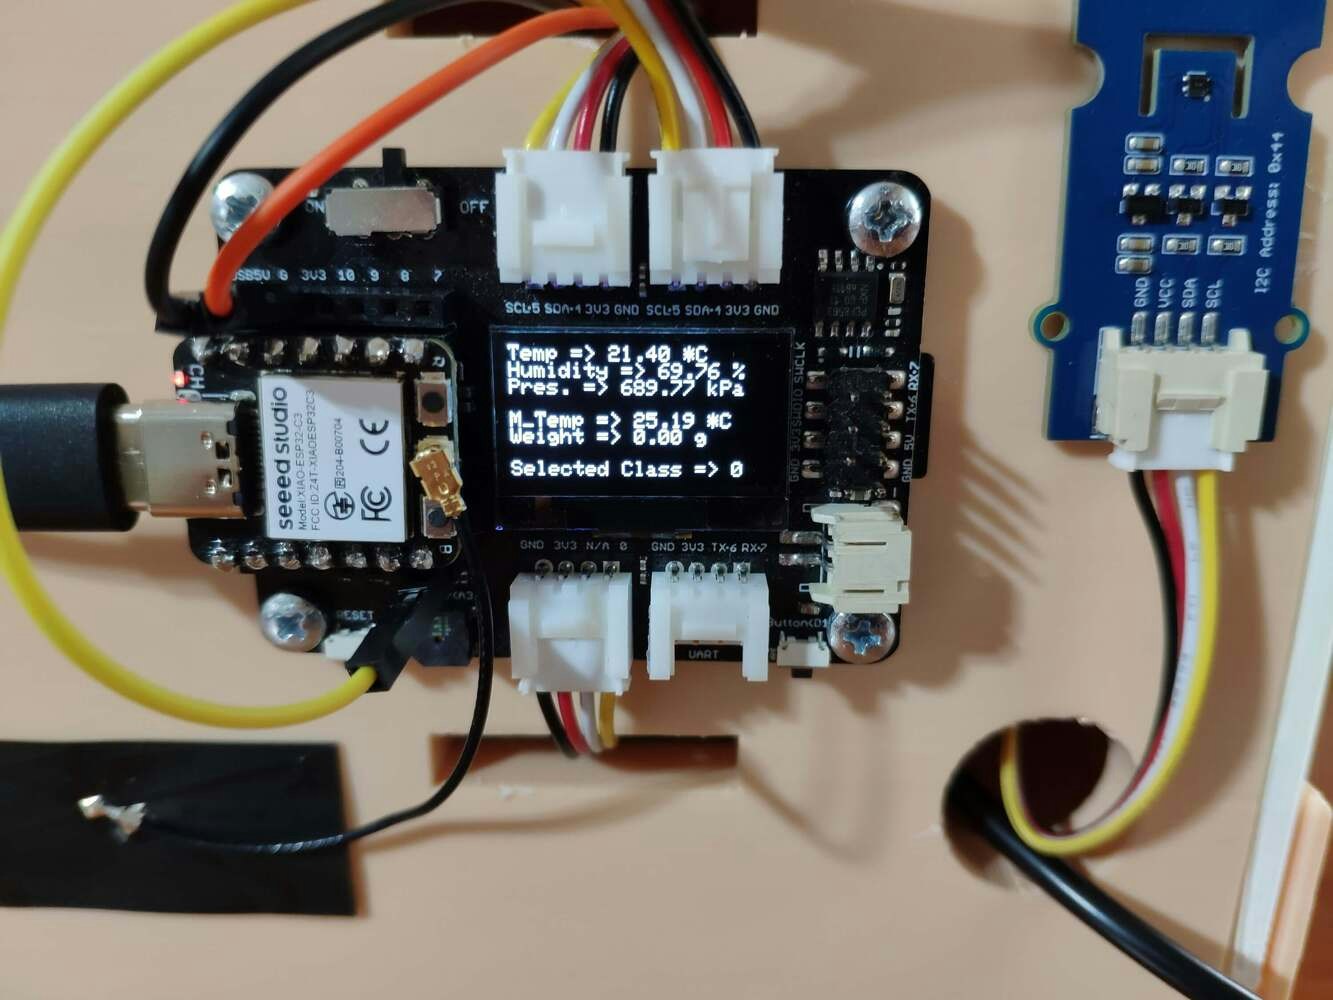
- Thinner [0]
- Optimum [1]
- Curdling [2]

Step 5: Building a neural network model with Edge Impulse
When I completed logging the collected data and assigning labels, I started to work on my artificial neural network model (ANN) to detect yogurt consistency (texture) levels before fermentation so as to improve product quality and reduce the total cost for small dairies. Since Edge Impulse supports almost every microcontroller and development board due to its model deployment options, I decided to utilize Edge Impulse to build my artificial neural network model. Also, Edge Impulse makes scaling embedded ML applications easier and faster for edge devices such as XIAO ESP32C3. Even though Edge Impulse supports CSV files to upload samples, the data type should be time series to upload all data records in a single file. Therefore, I needed to follow the steps below to format my data set so as to train my model accurately:- Data Scaling (Normalizing)
- Data Preprocessing
- 0 — Thinner
- 1 — Optimum
- 2 — Curdling
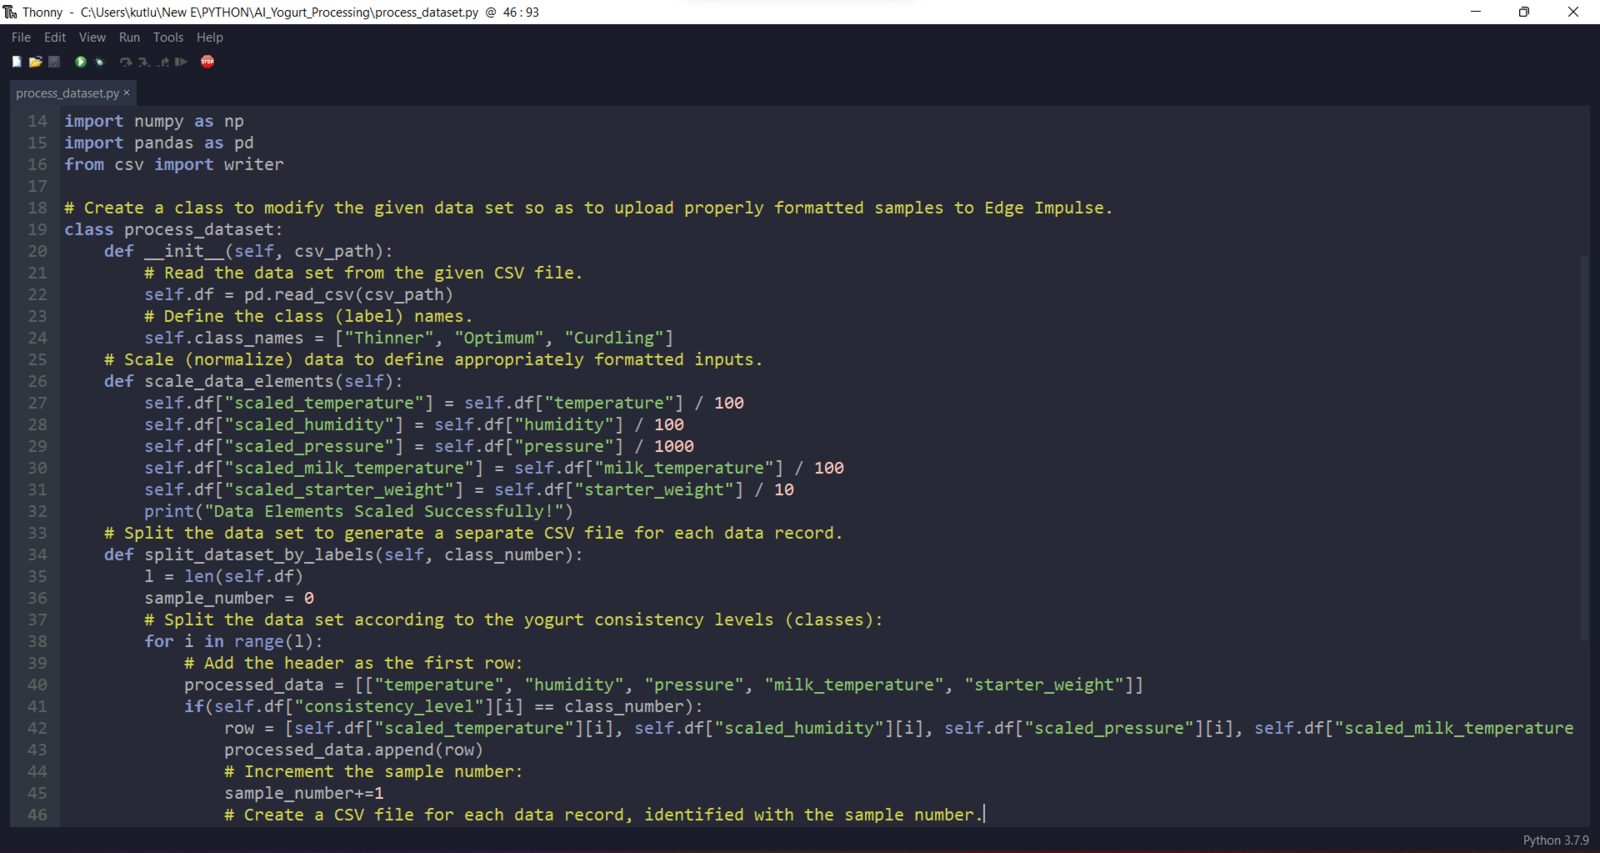
Step 5.1: Preprocessing and scaling the data set to create formatted samples for Edge Impulse
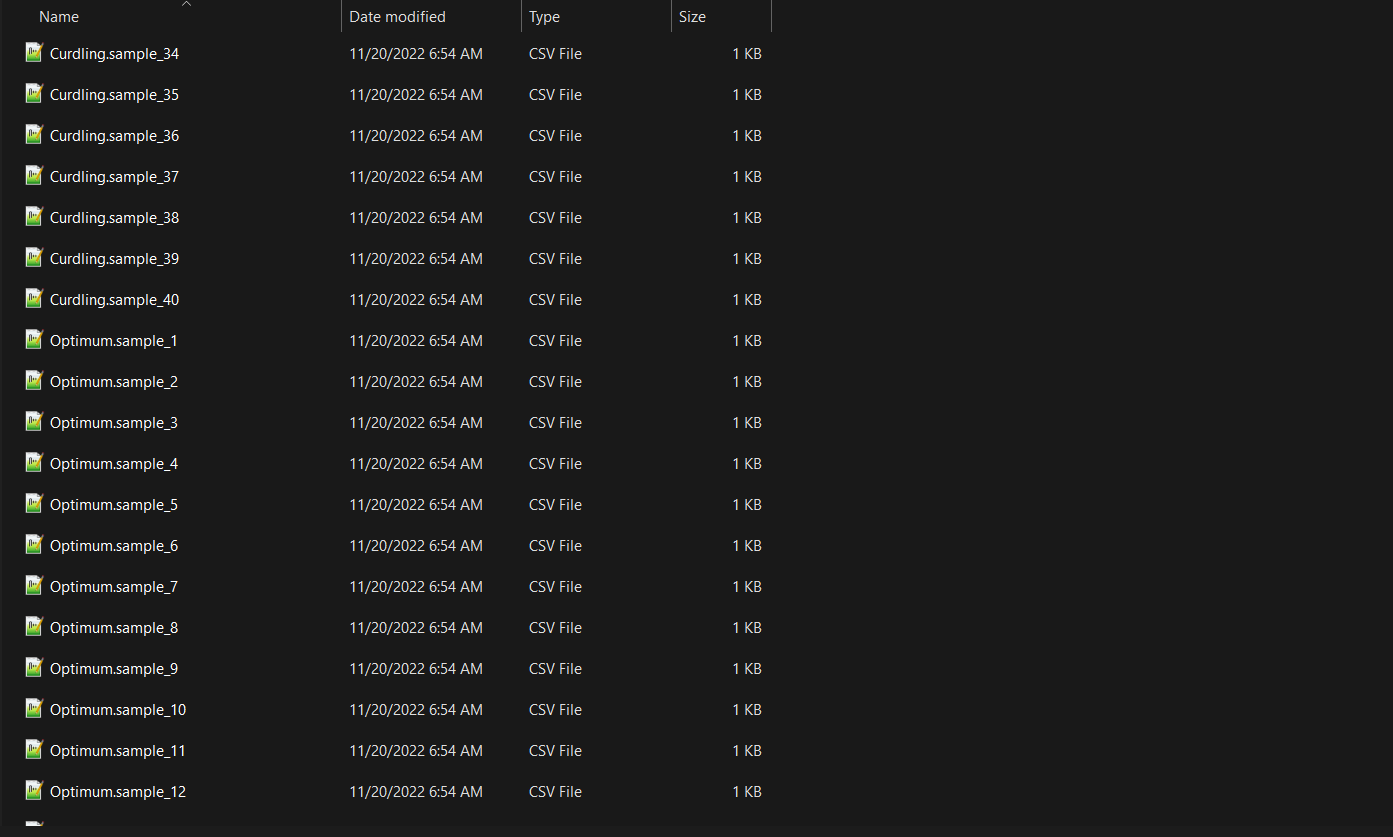
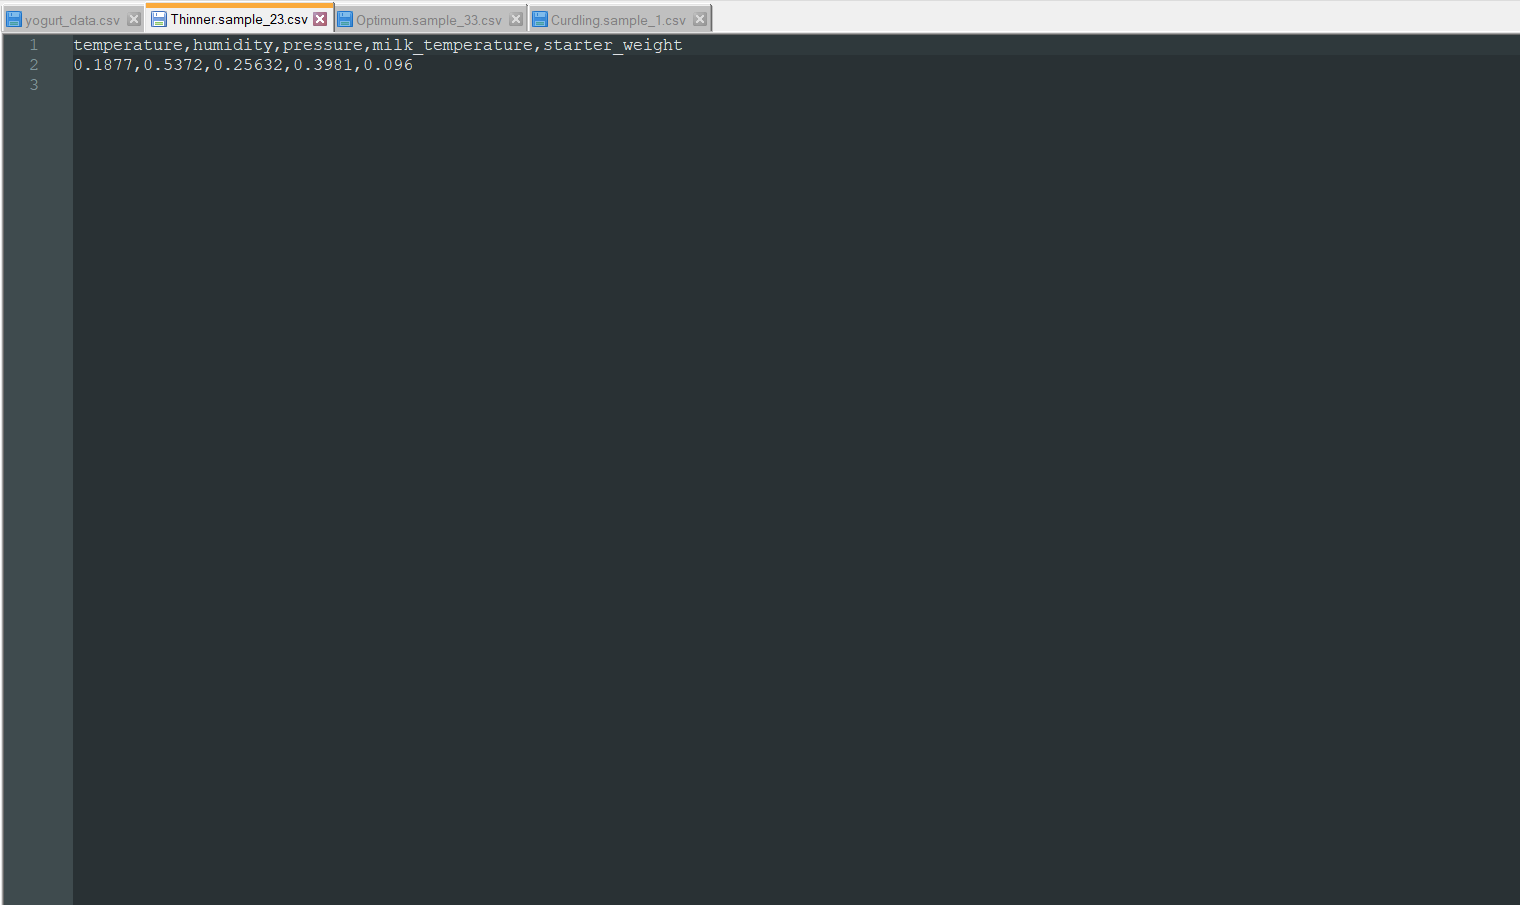
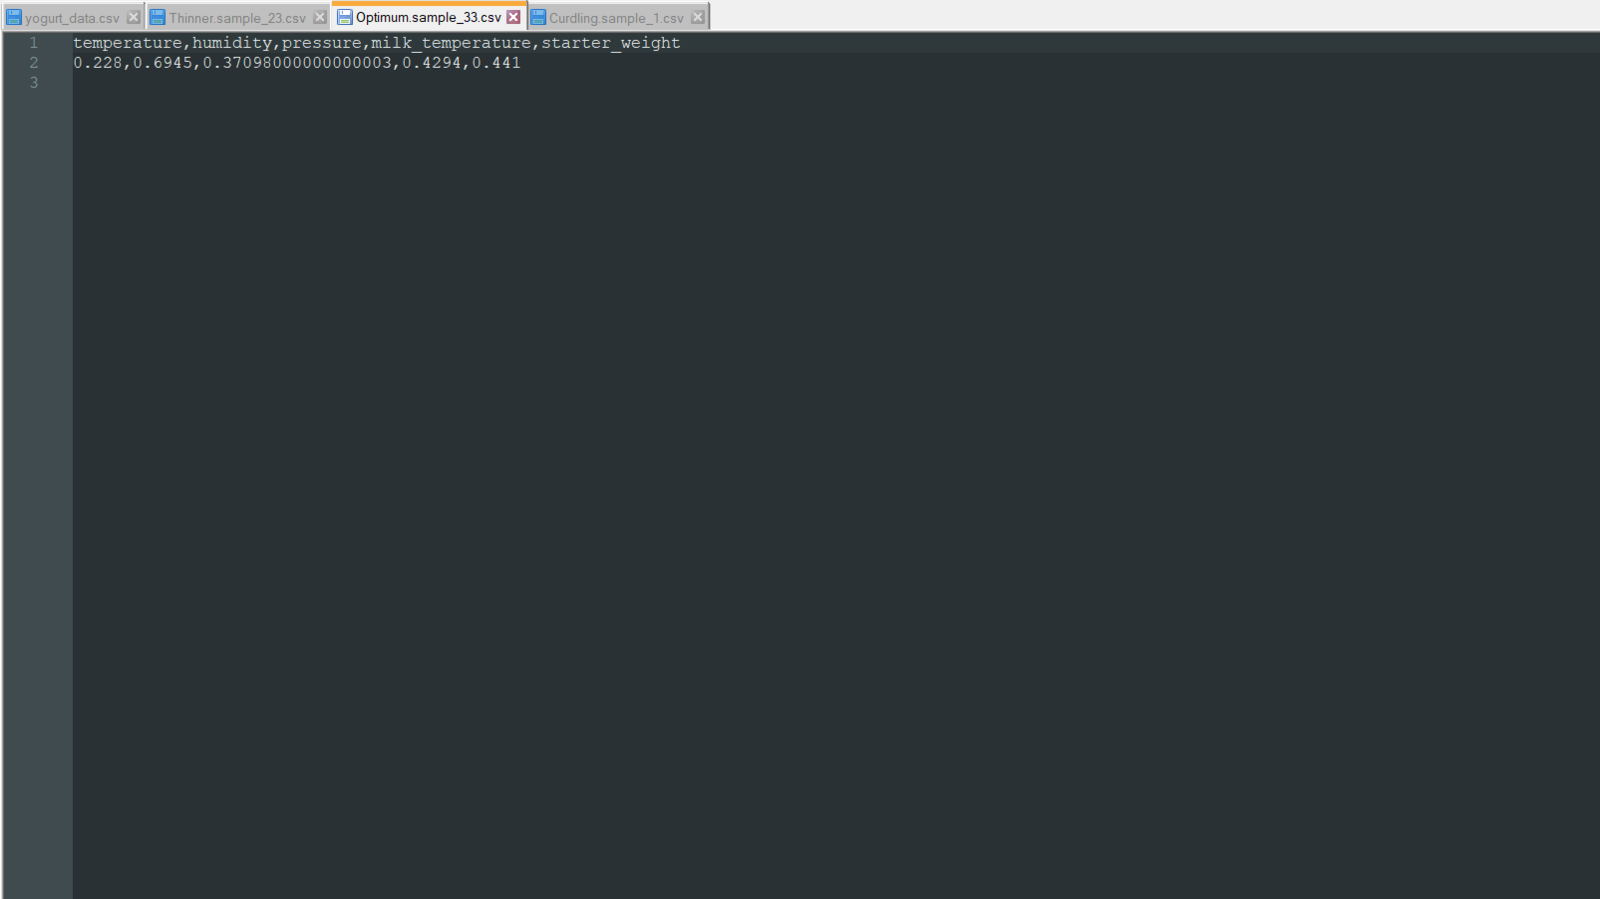
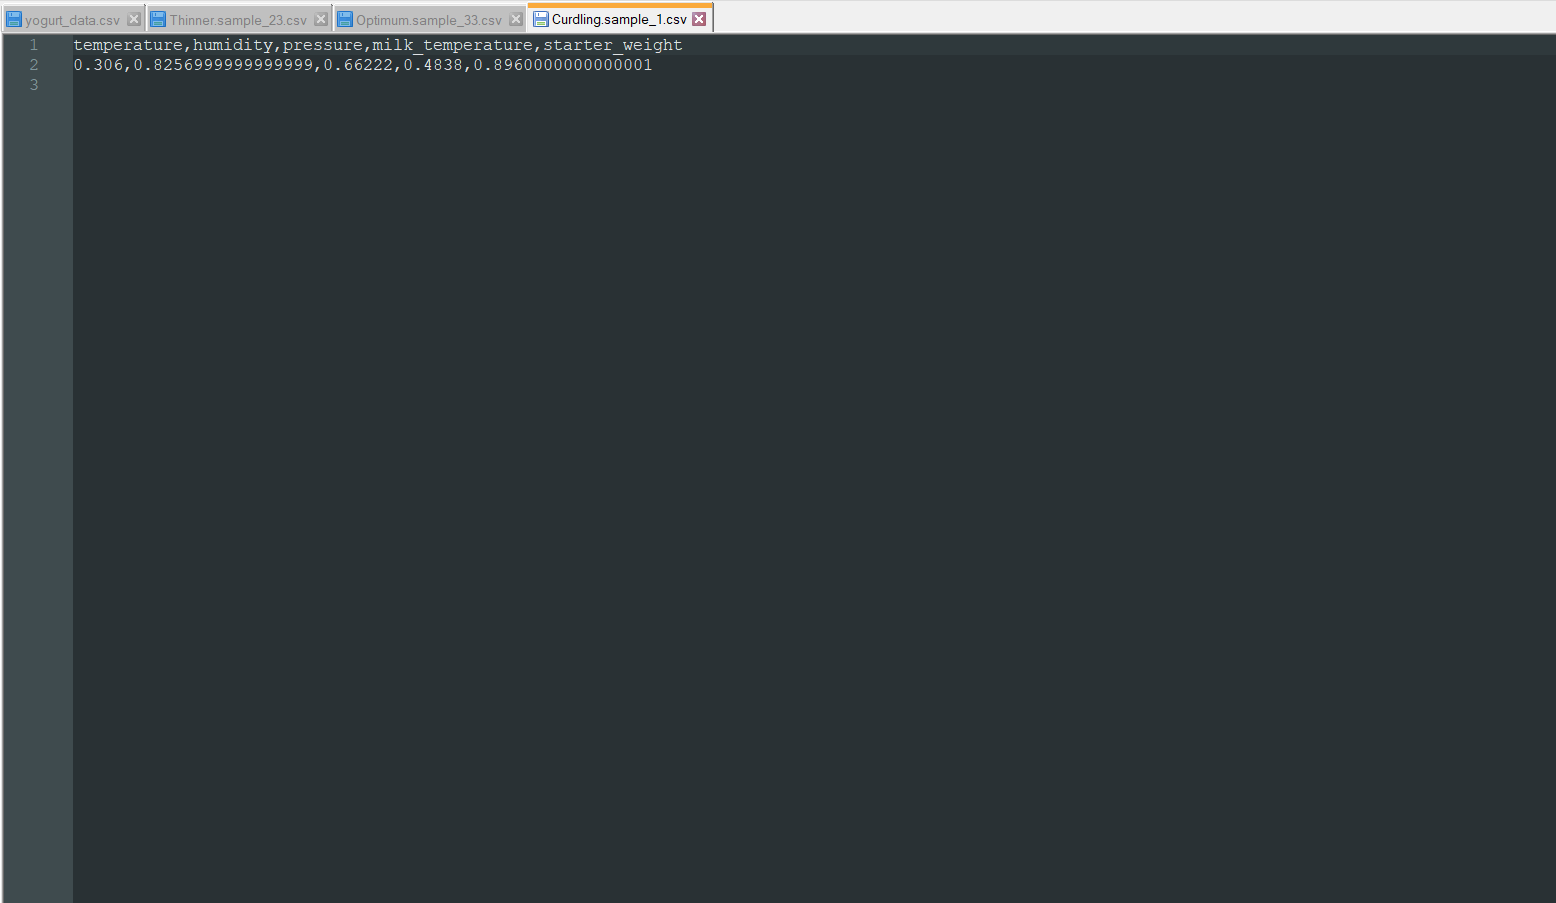
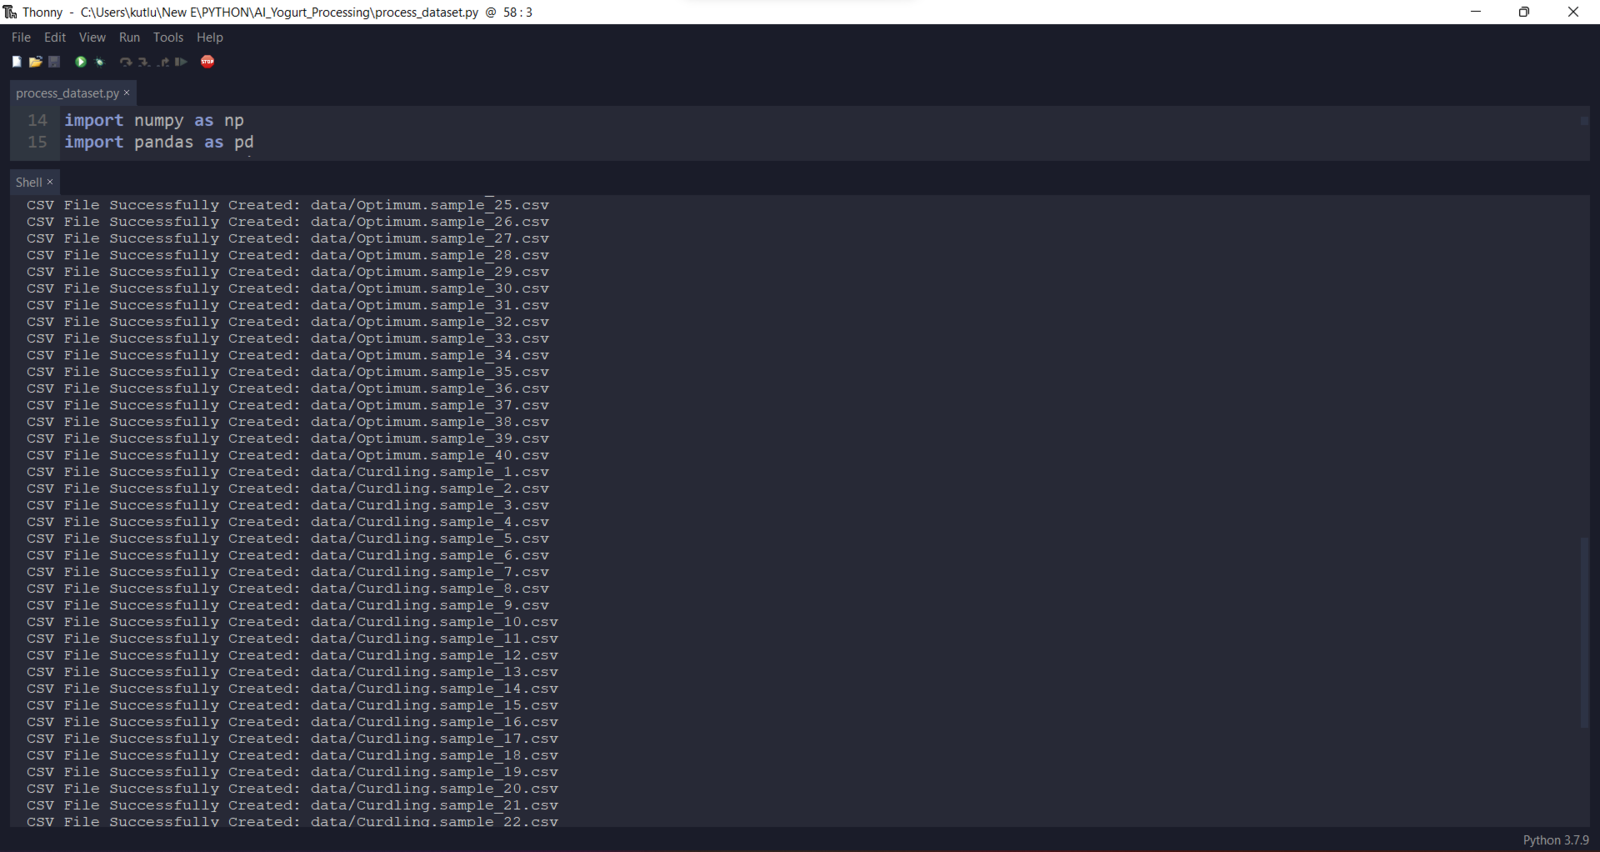
If the data type is not time series, Edge Impulse cannot distinguish data records as individual samples from one CSV file while adding existing data to an Edge Impulse project. Therefore, the user needs to create a separate CSV file for each sample, including a header defining data fields. To scale (normalize) and preprocess my data set so as to create individual CSV files as samples automatically, I developed a Python application consisting of one file:- process_dataset.csv
- Thinner.sample_1.csv
- Thinner.sample_2.csv
- Optimum.sample_1.csv
- Optimum.sample_2.csv
- Curdling.sample_1.csv
- Curdling.sample_2.csv
- temperature
- humidity
- pressure
- milk_temperature
- starter_weight
Step 5.2: Uploading formatted samples to Edge Impulse
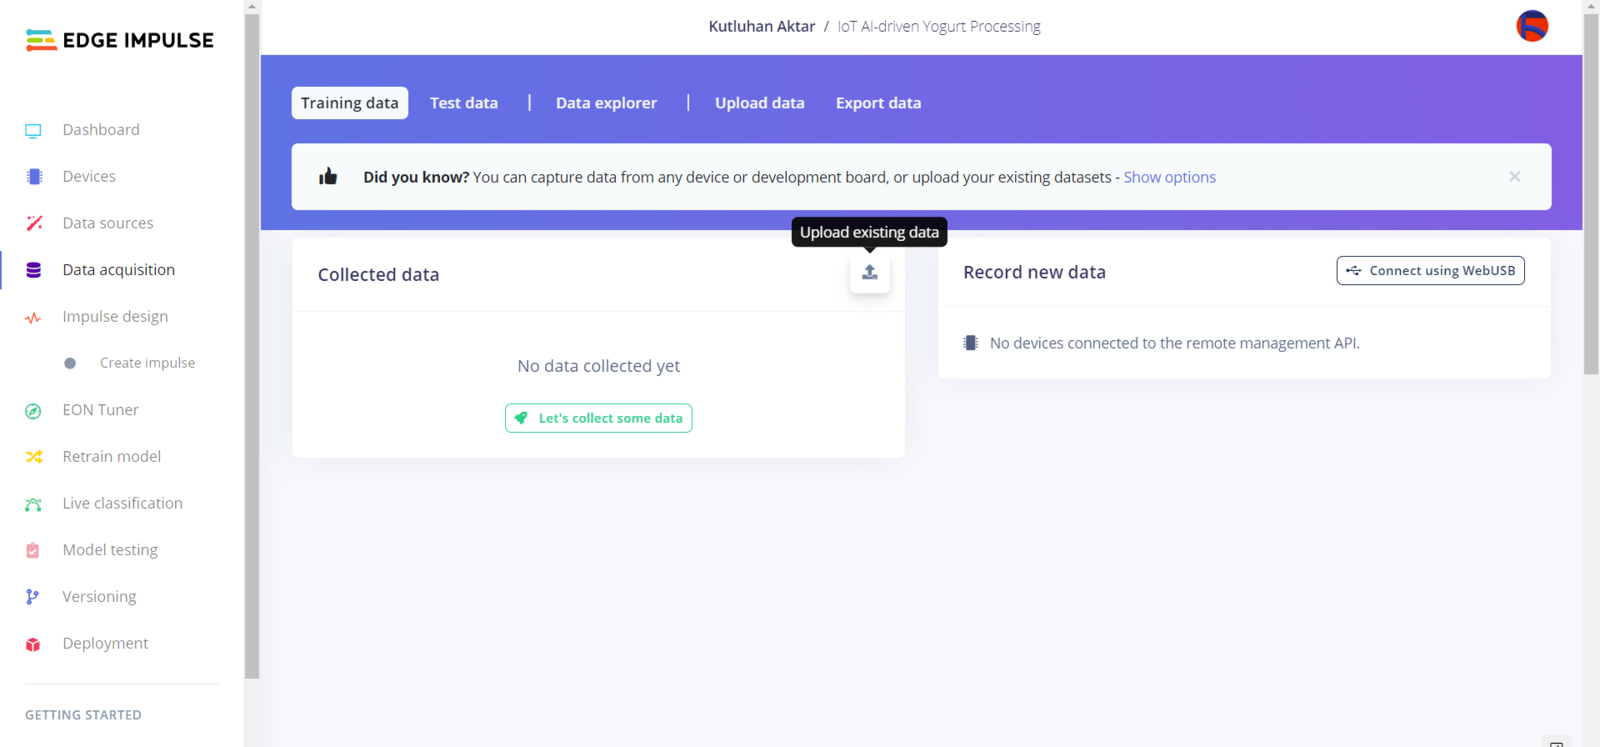
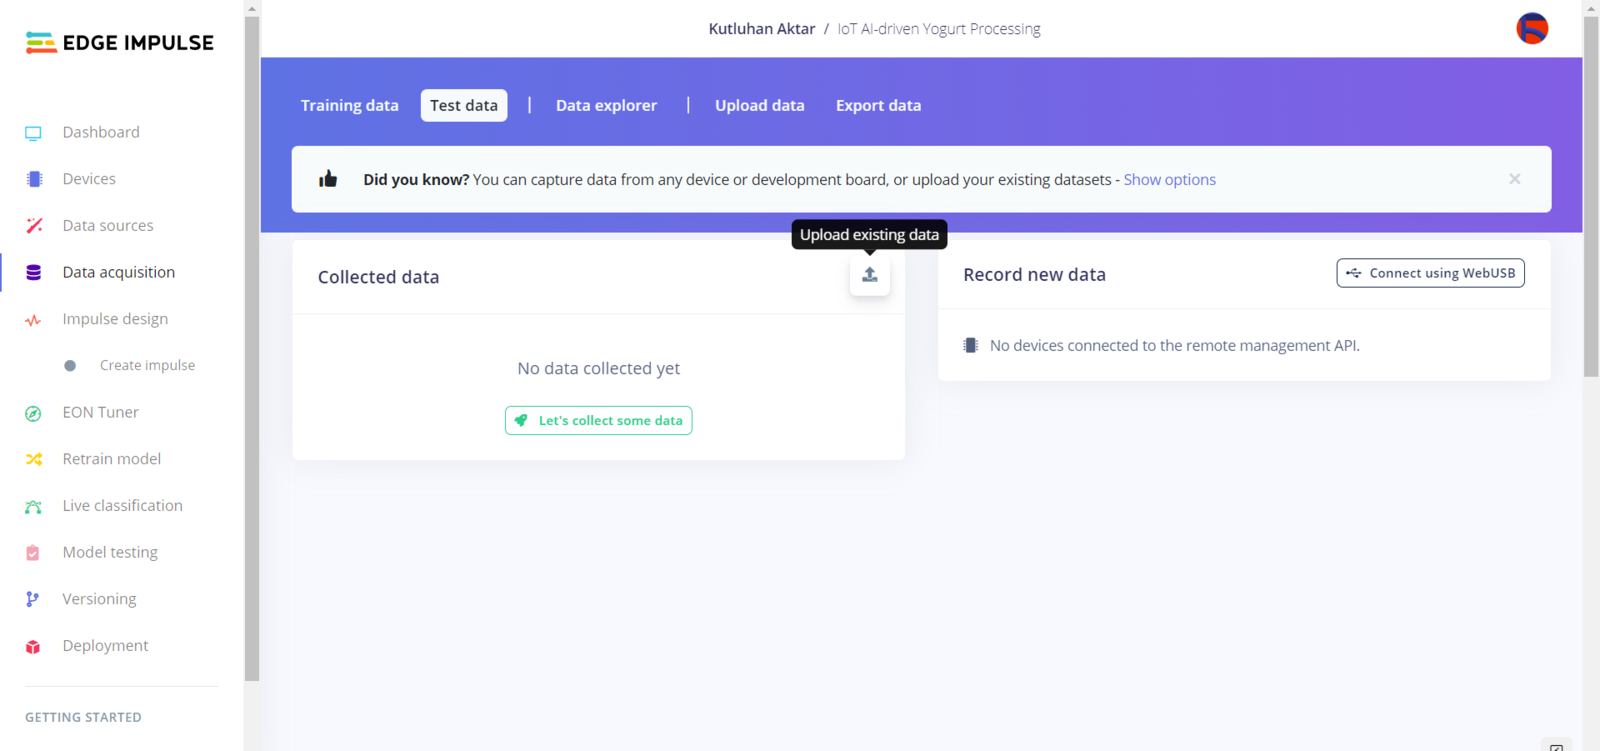
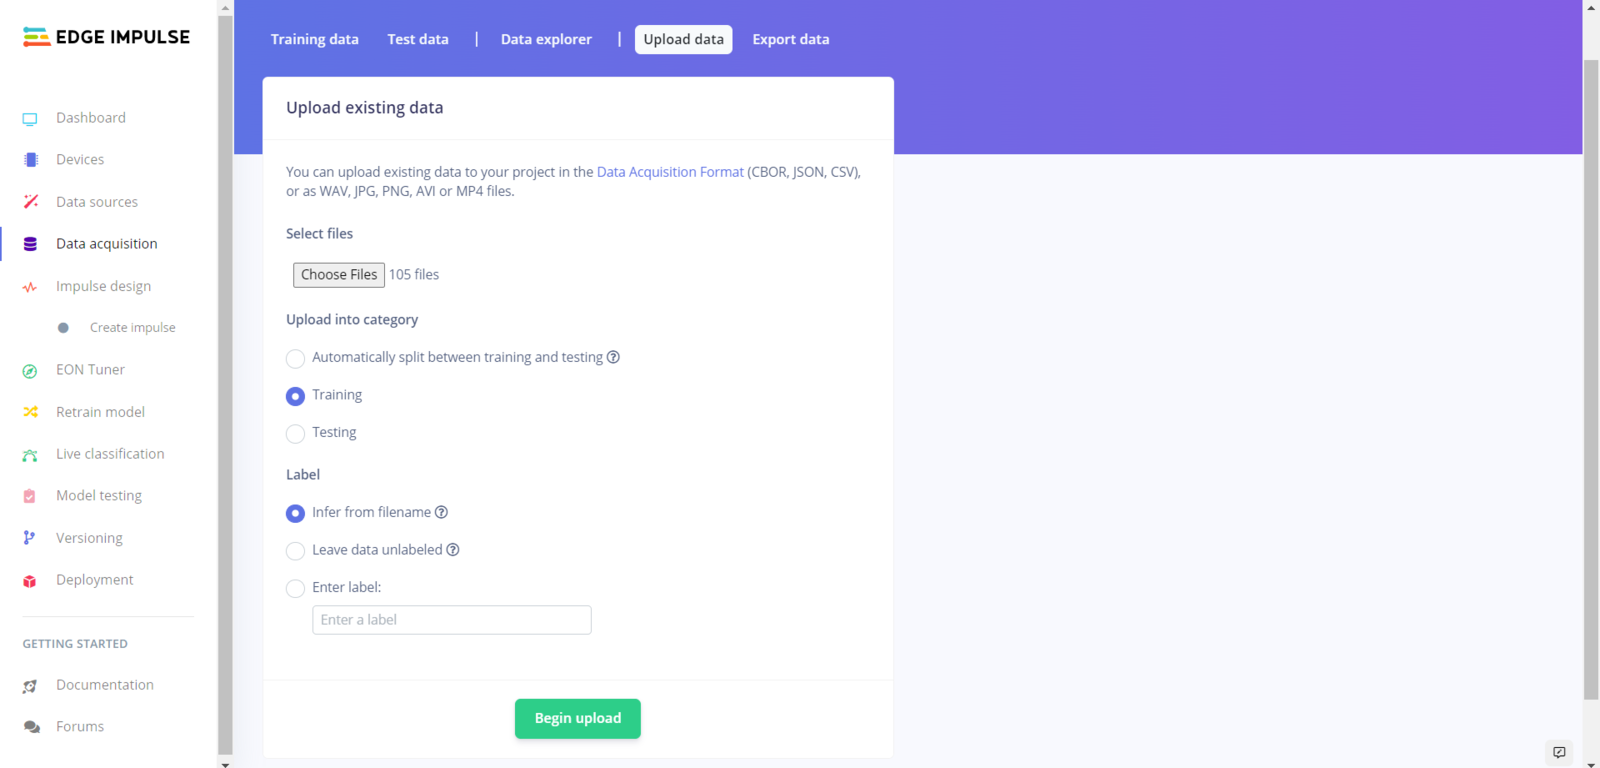
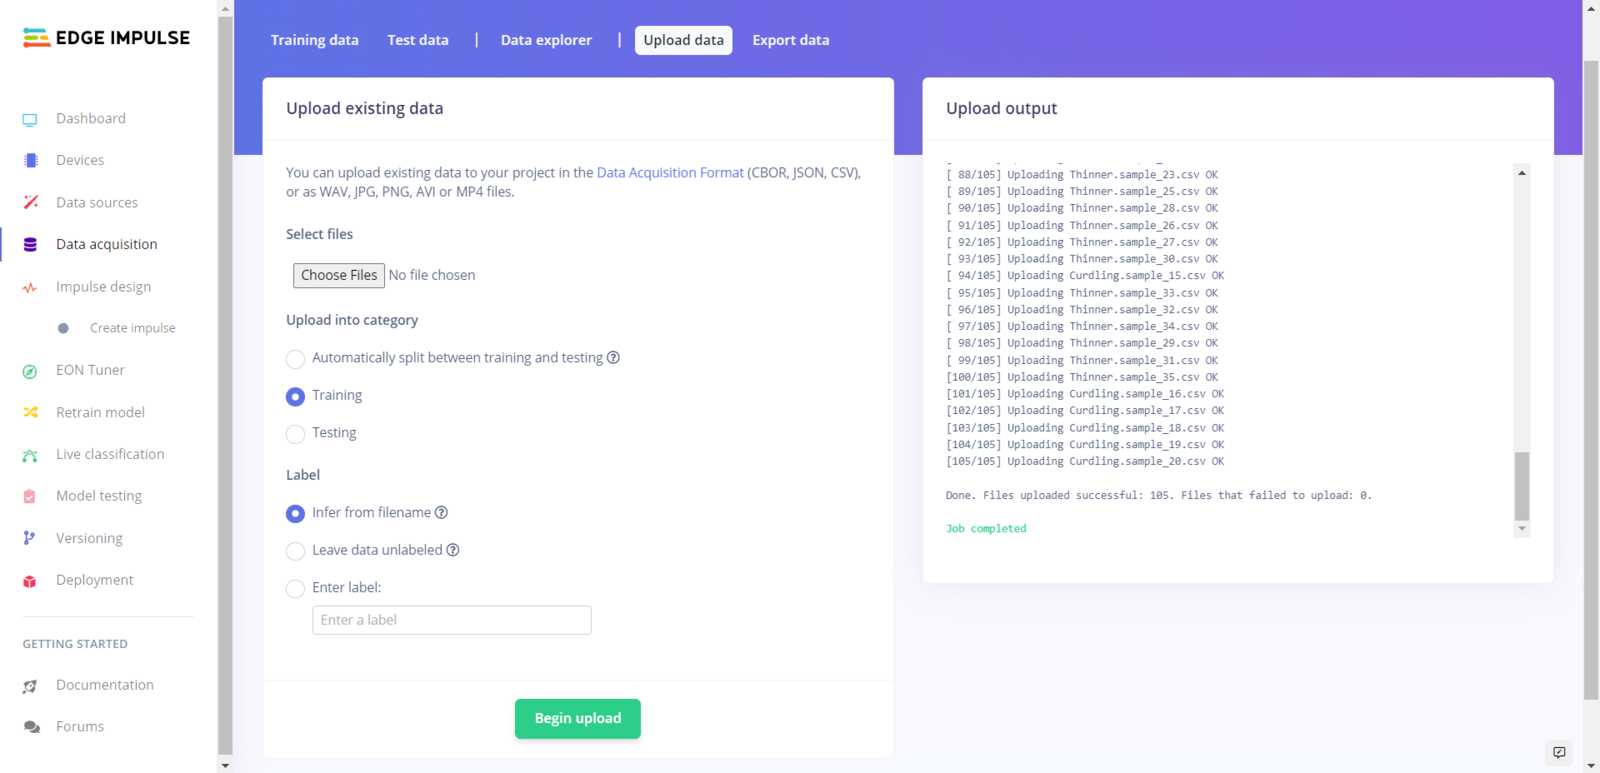
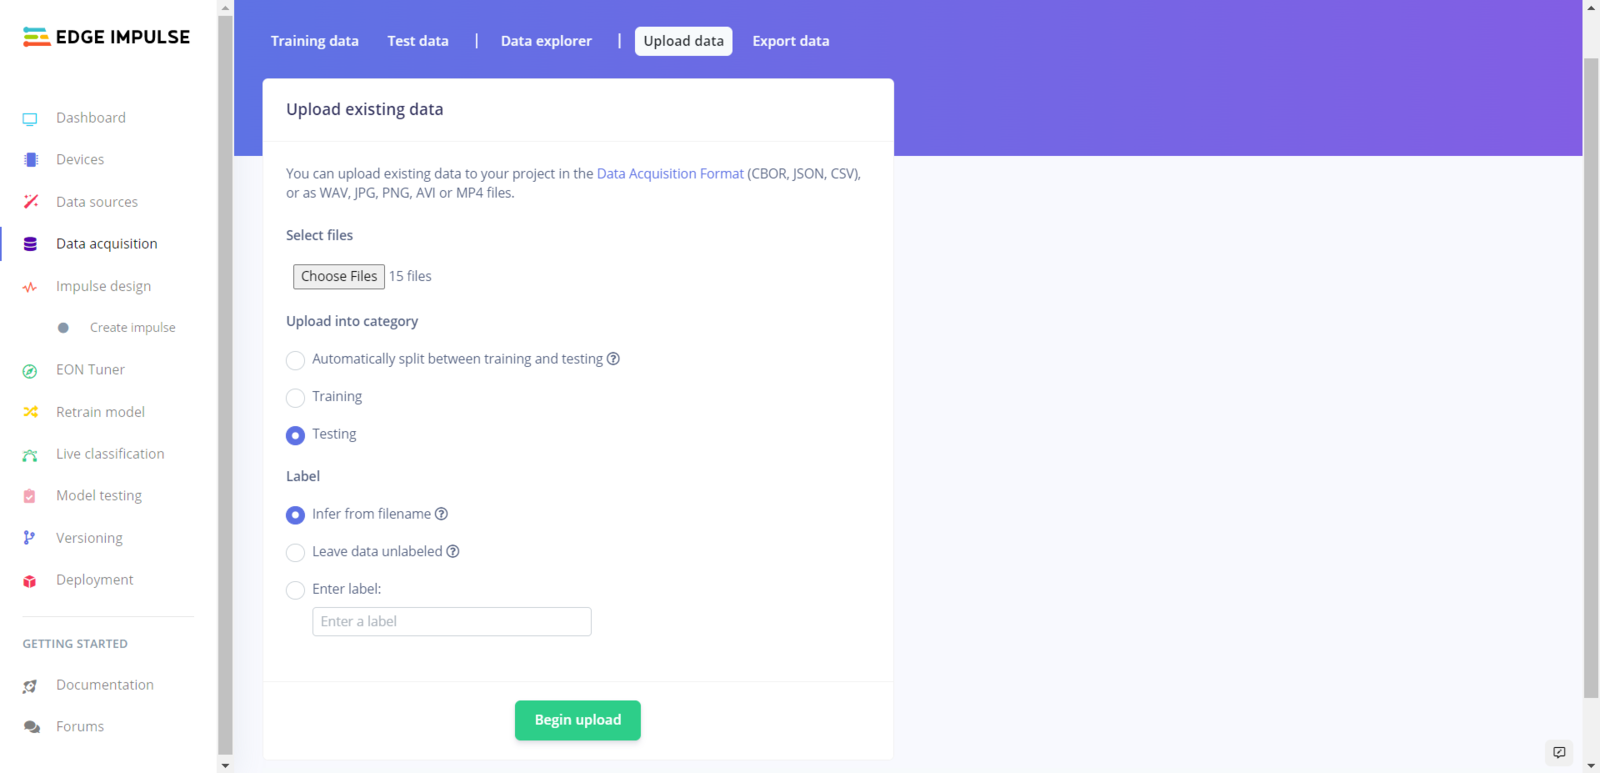
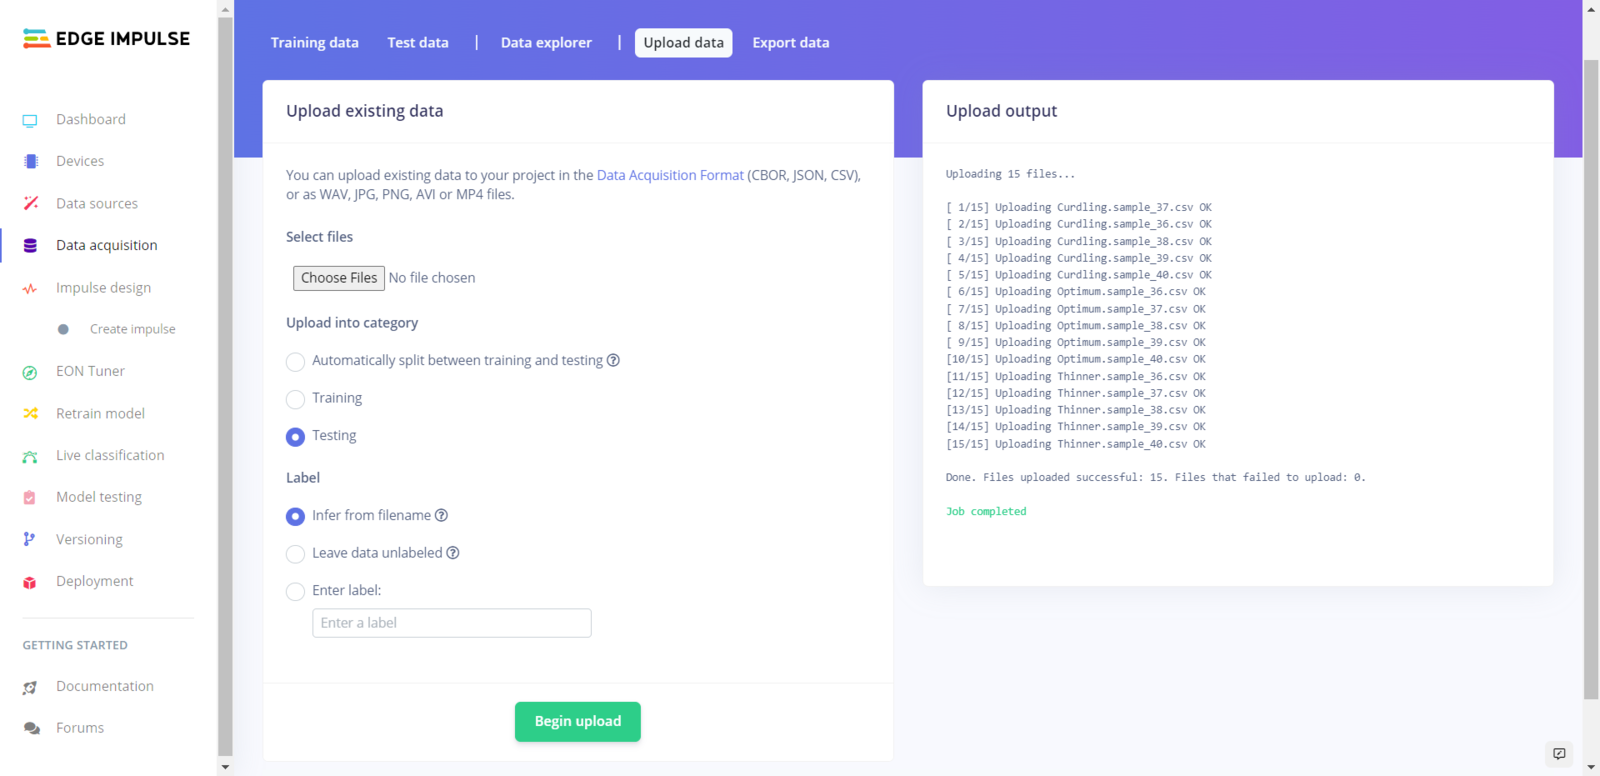
After generating training and testing samples successfully, I uploaded them to my project on Edge Impulse. :hash: First of all, sign up for Edge Impulse and create a new project.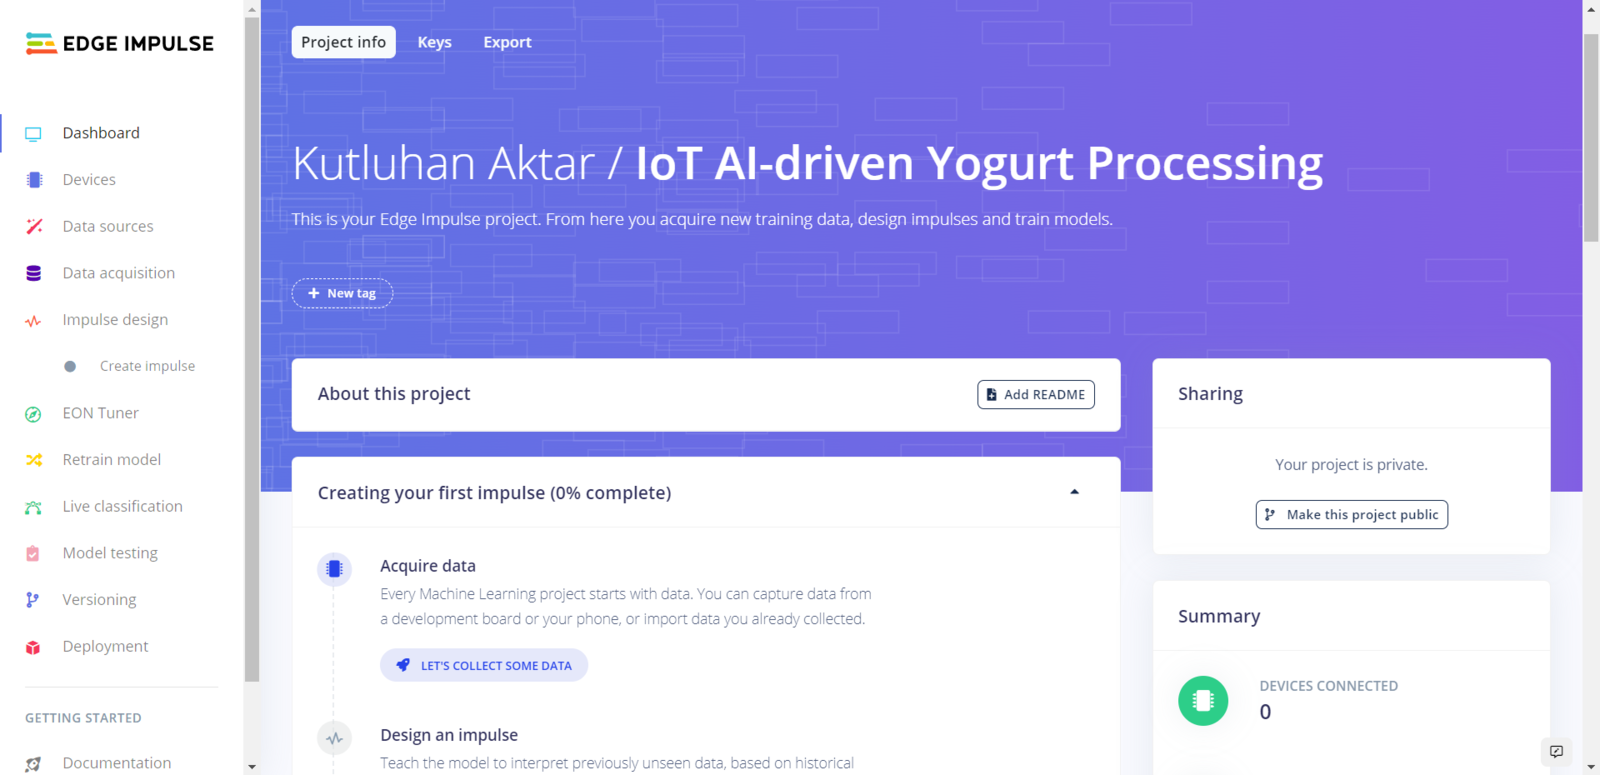
Step 5.3: Training the model on yogurt consistency levels
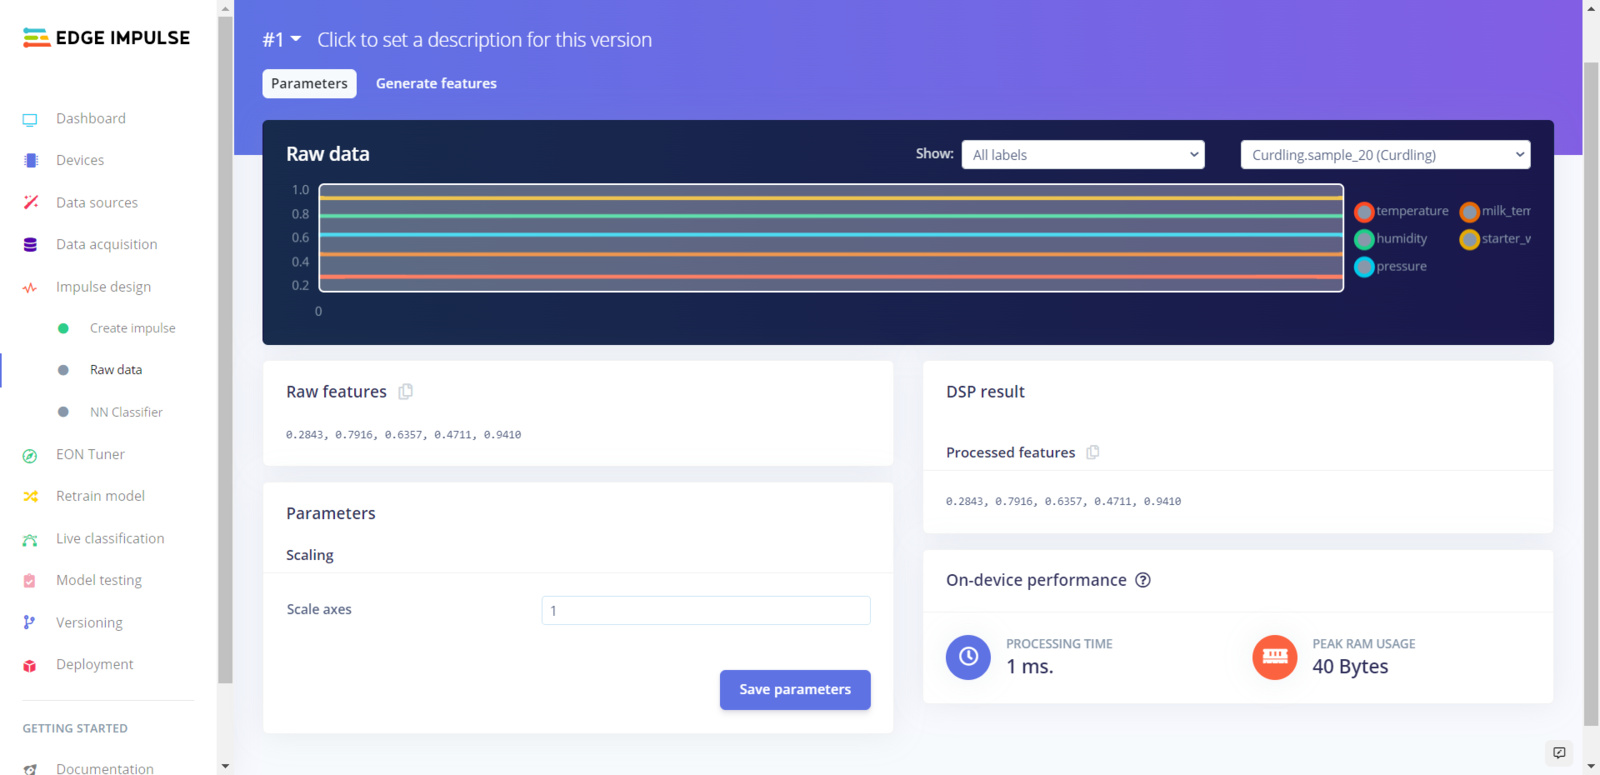
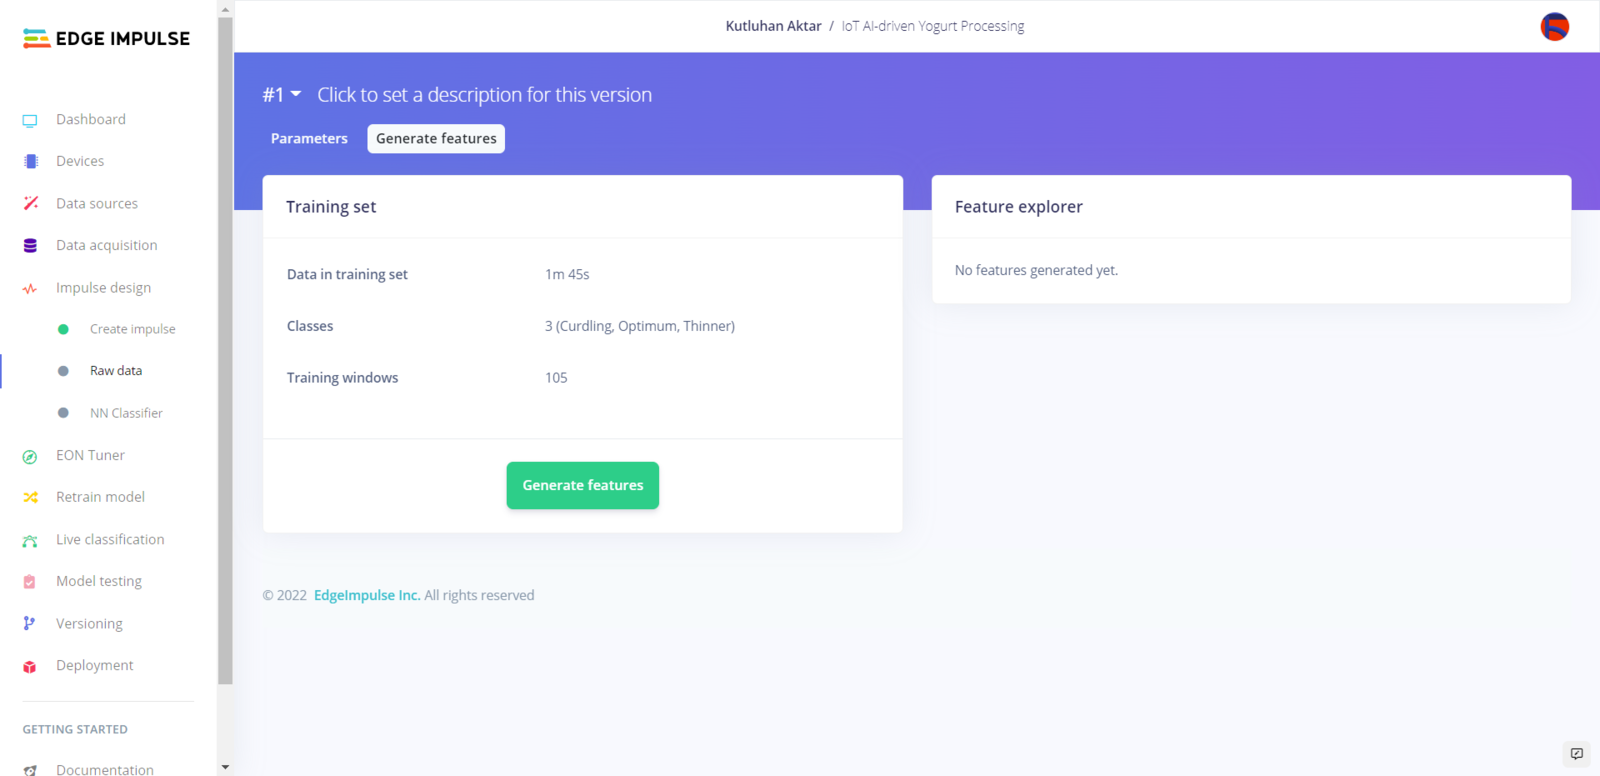
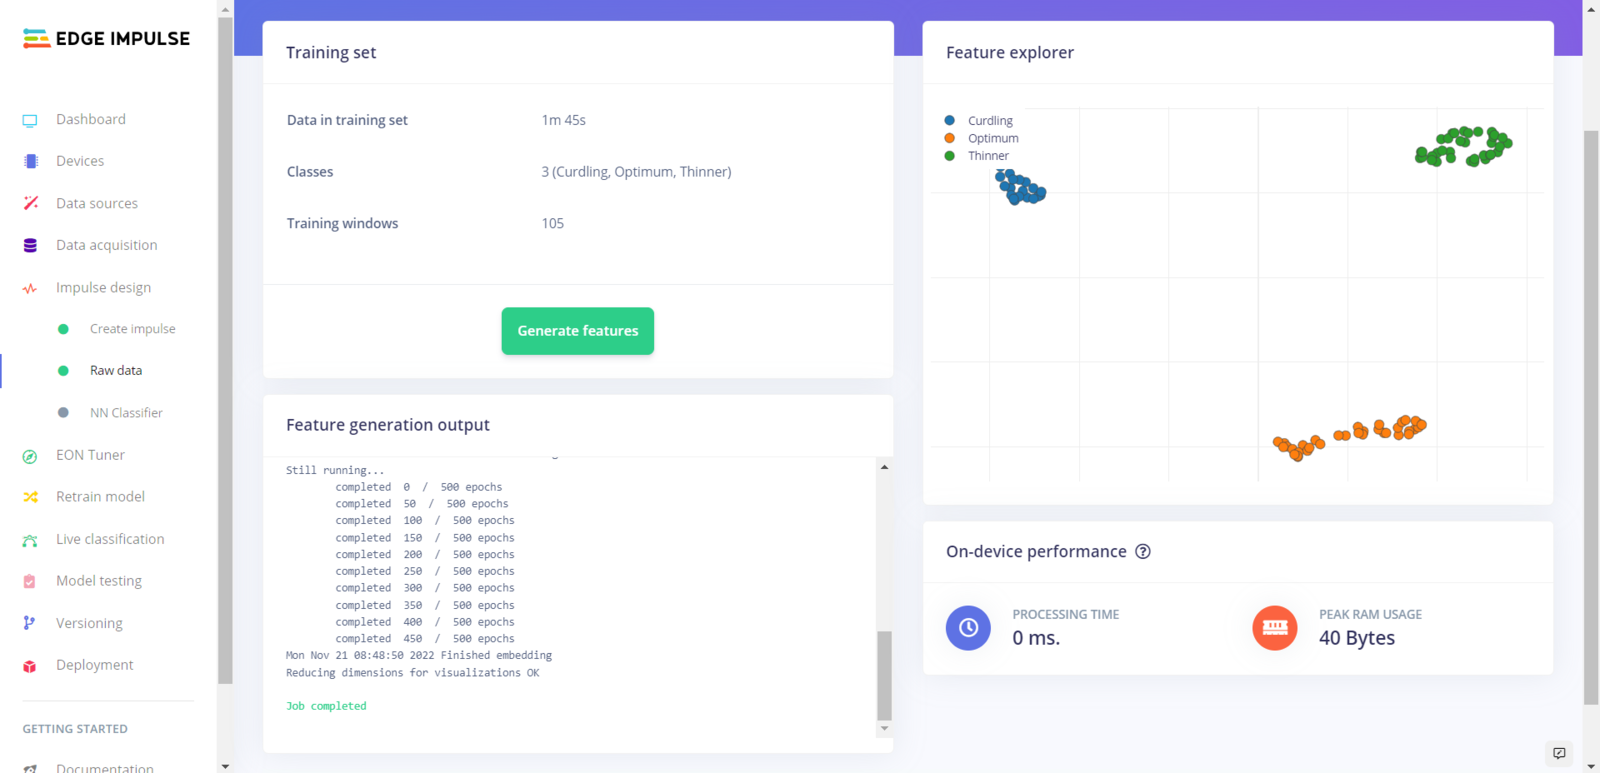
After uploading my training and testing samples successfully, I designed an impulse and trained it on yogurt consistency levels (classes). An impulse is a custom neural network model in Edge Impulse. I created my impulse by employing the Raw Data processing block and the Classification learning block. The Raw Data processing block generate windows from data samples without any specific signal processing. The Classification learning block represents a Keras neural network model. Also, it lets the user change the model settings, architecture, and layers. :hash: Go to the Create impulse page. Then, select the Raw Data processing block and the Classification learning block. Finally, click Save Impulse.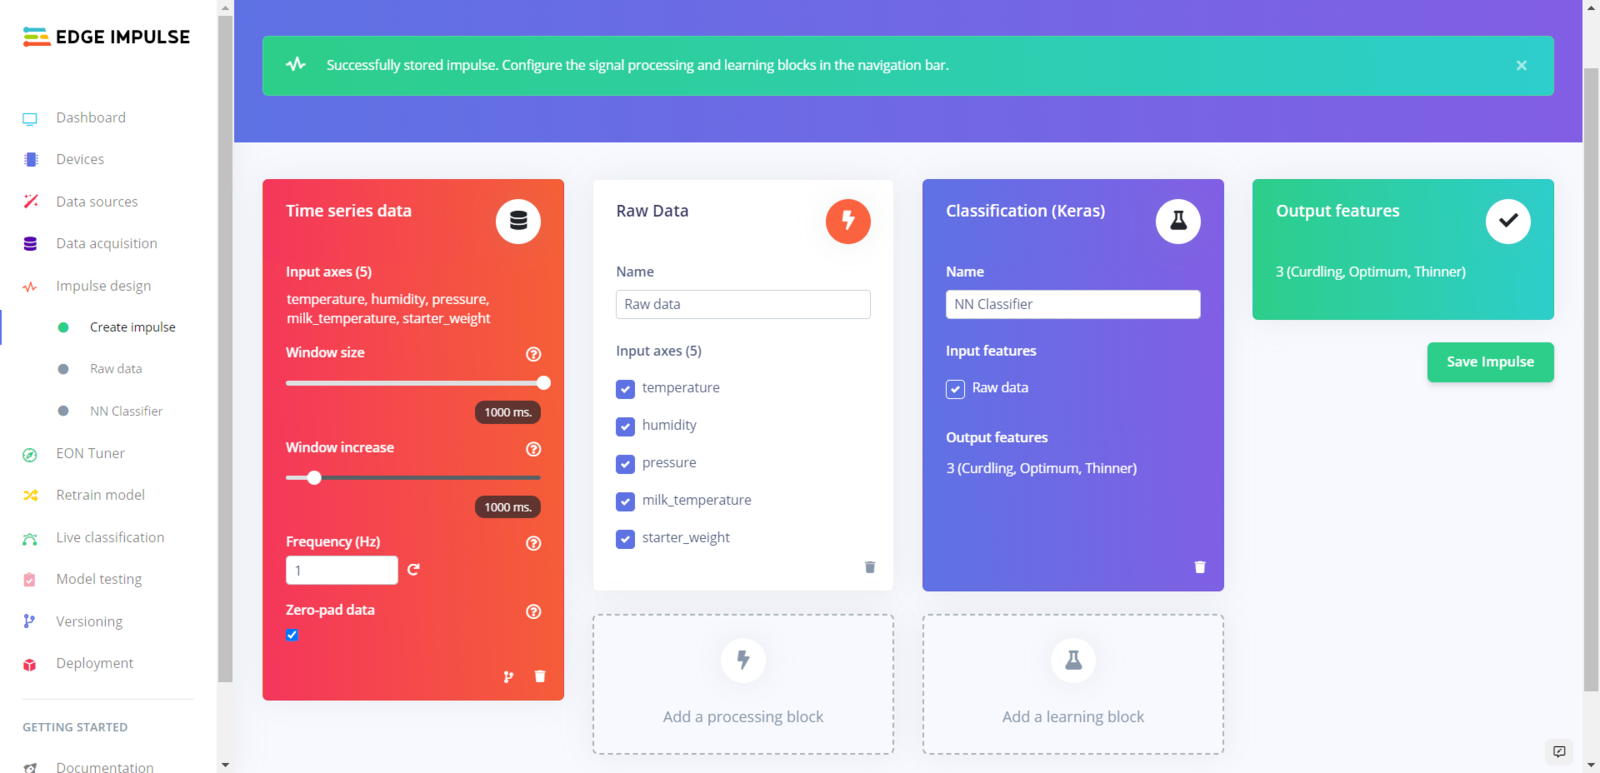
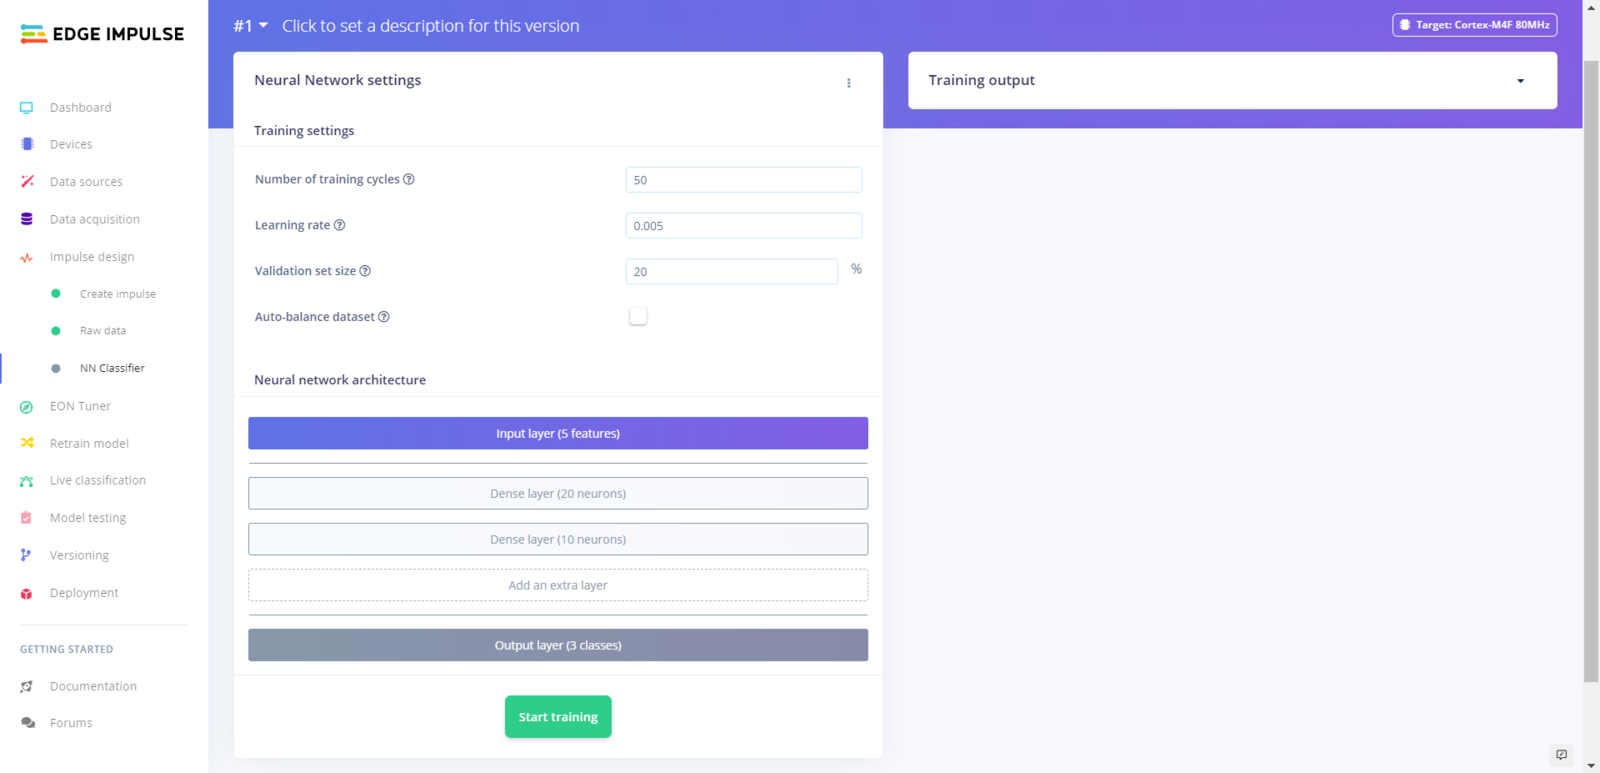
- Number of training cycles ➡ 50
- Learning level ➡ 0.005
- Validation set size ➡ 20
- Dense layer (20 neurons)
- Dense layer (10 neurons)
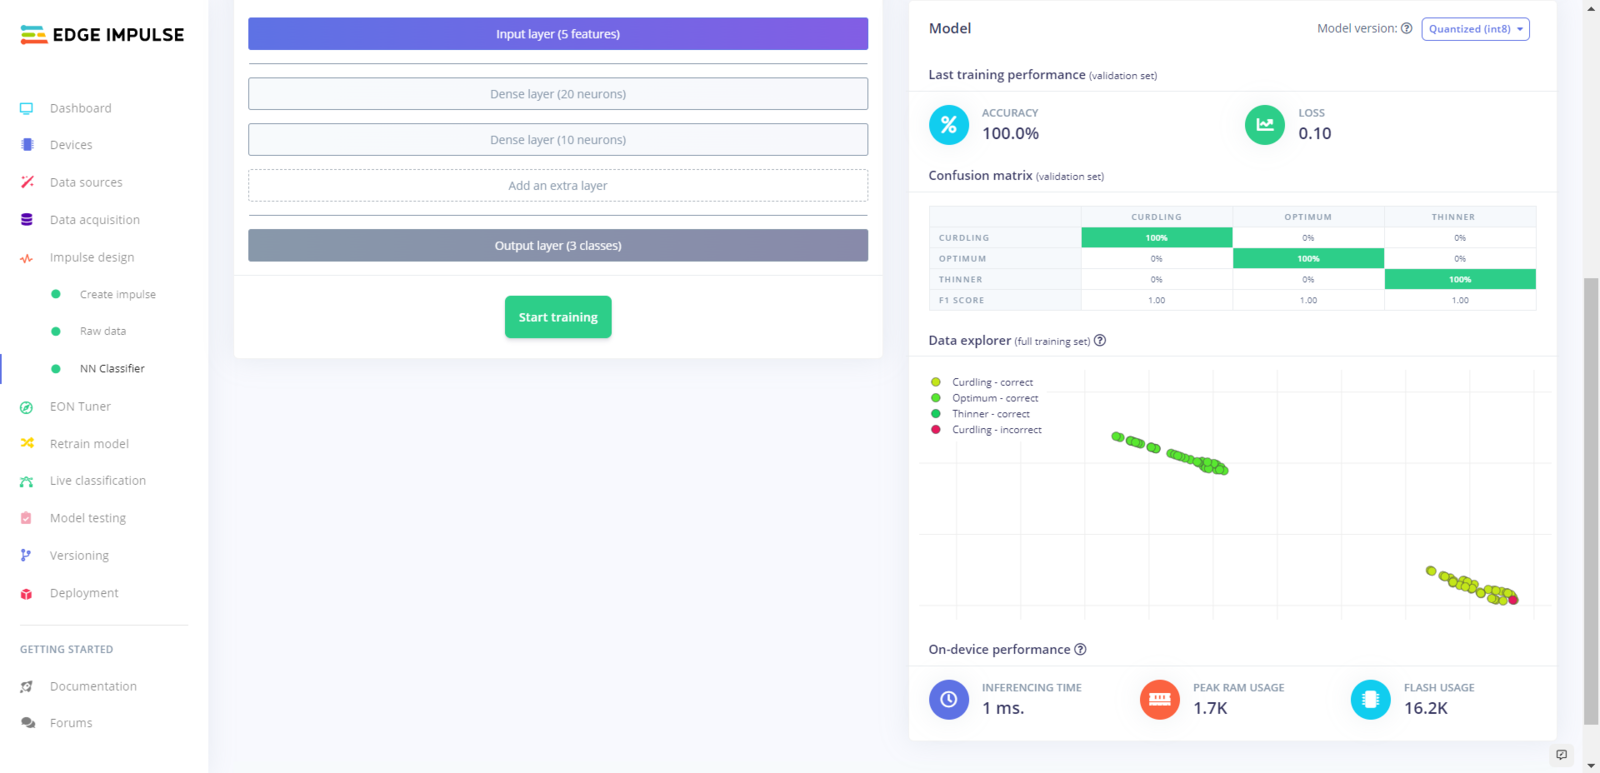
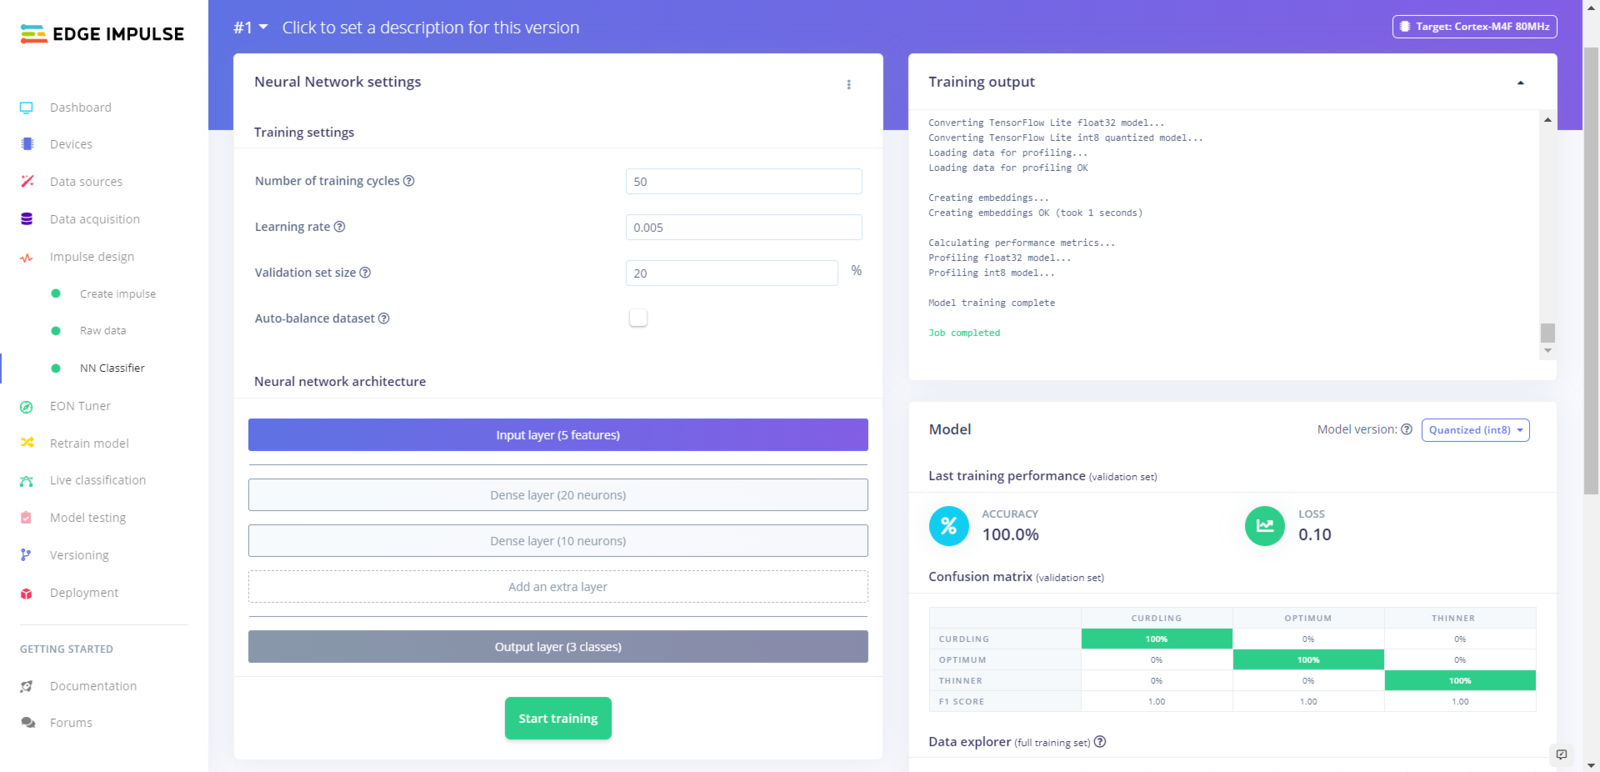
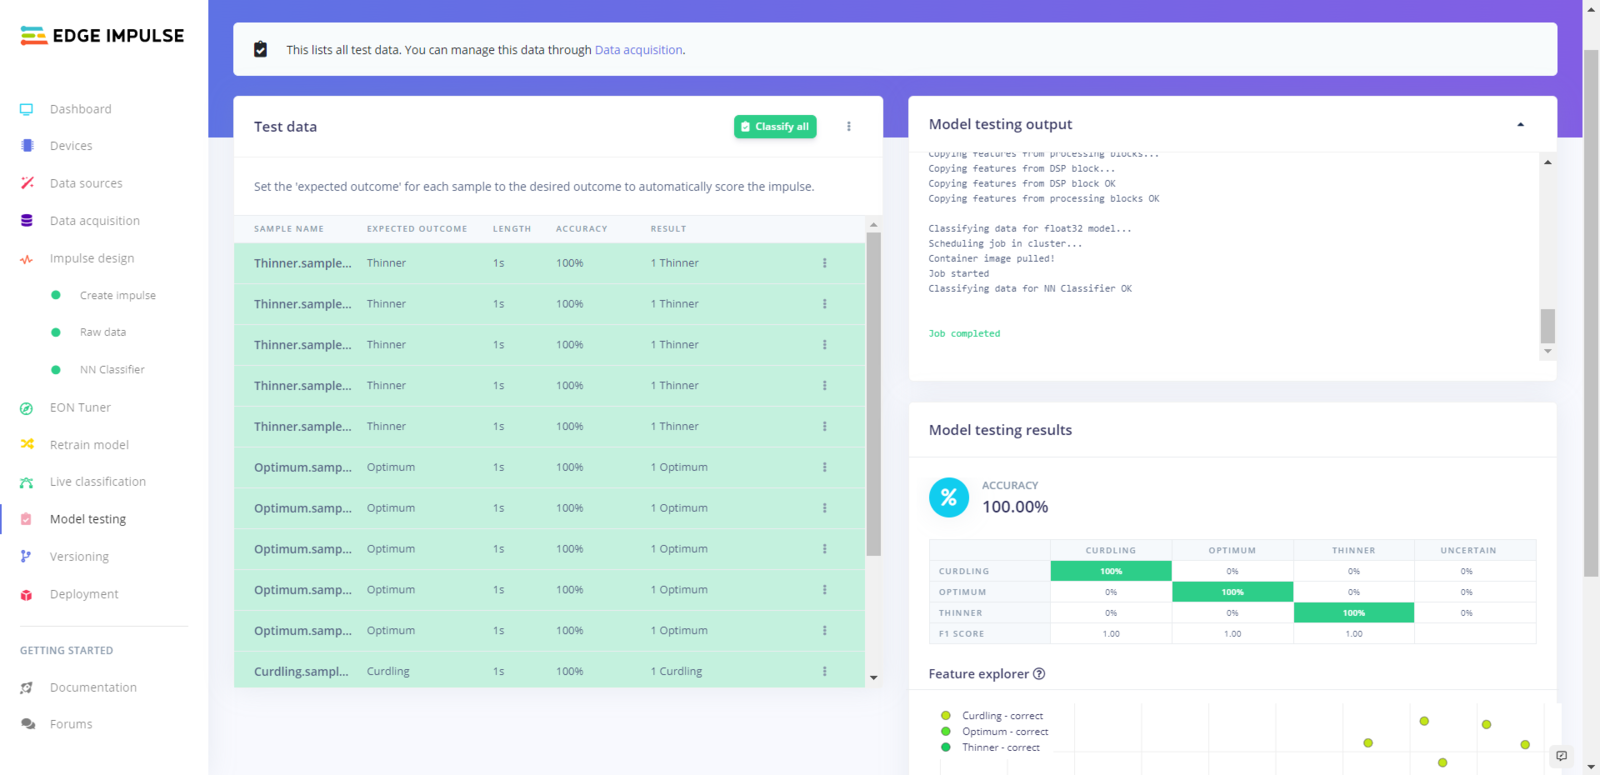
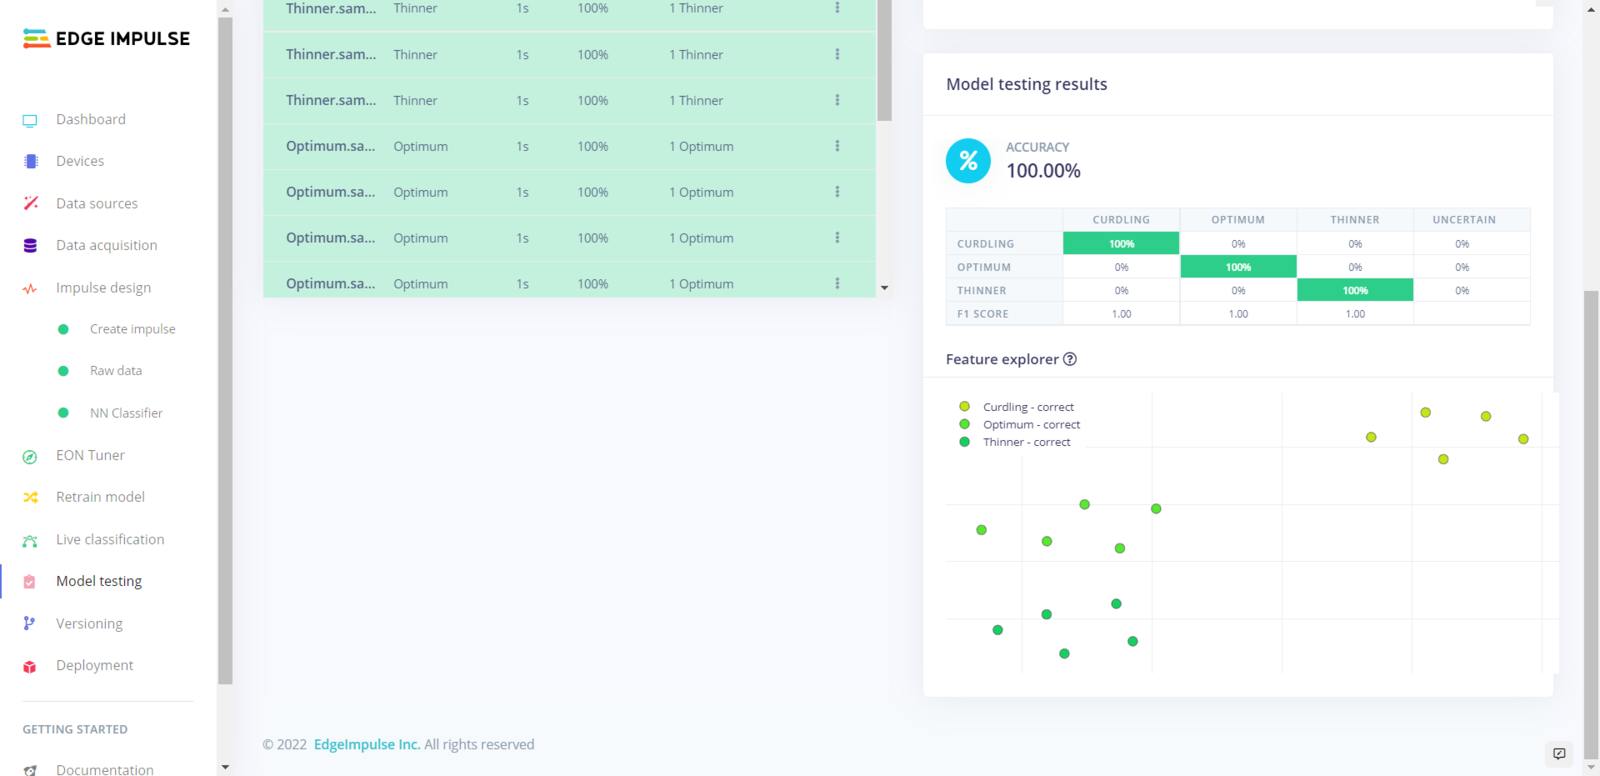
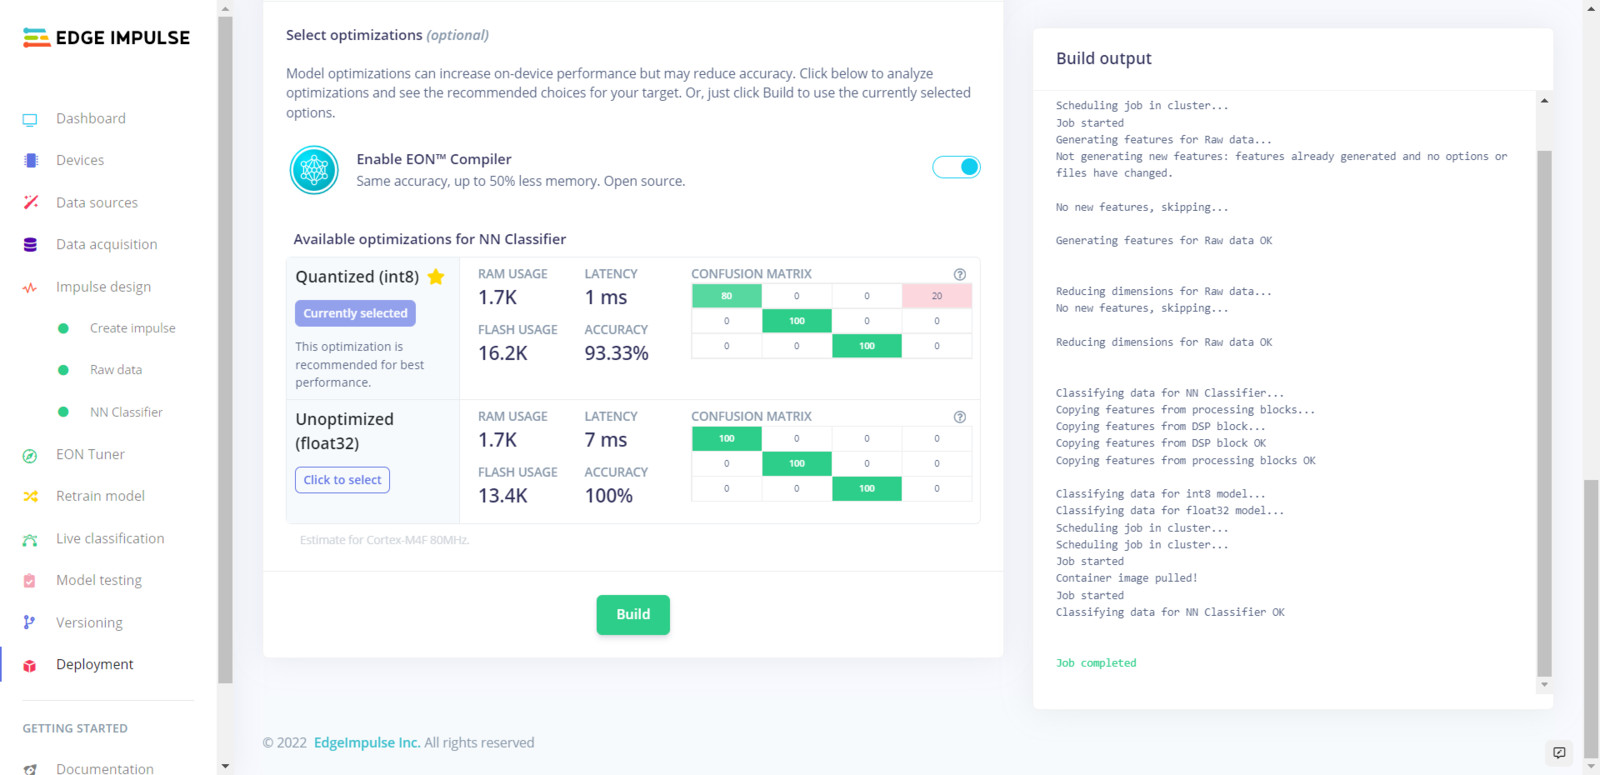
Step 5.4: Evaluating the model accuracy and deploying the model
After building and training my neural network model, I tested its accuracy and validity by utilizing testing samples. The evaluated accuracy of the model is 100%. :hash: To validate the trained model, go to the Model testing page and click Classify all.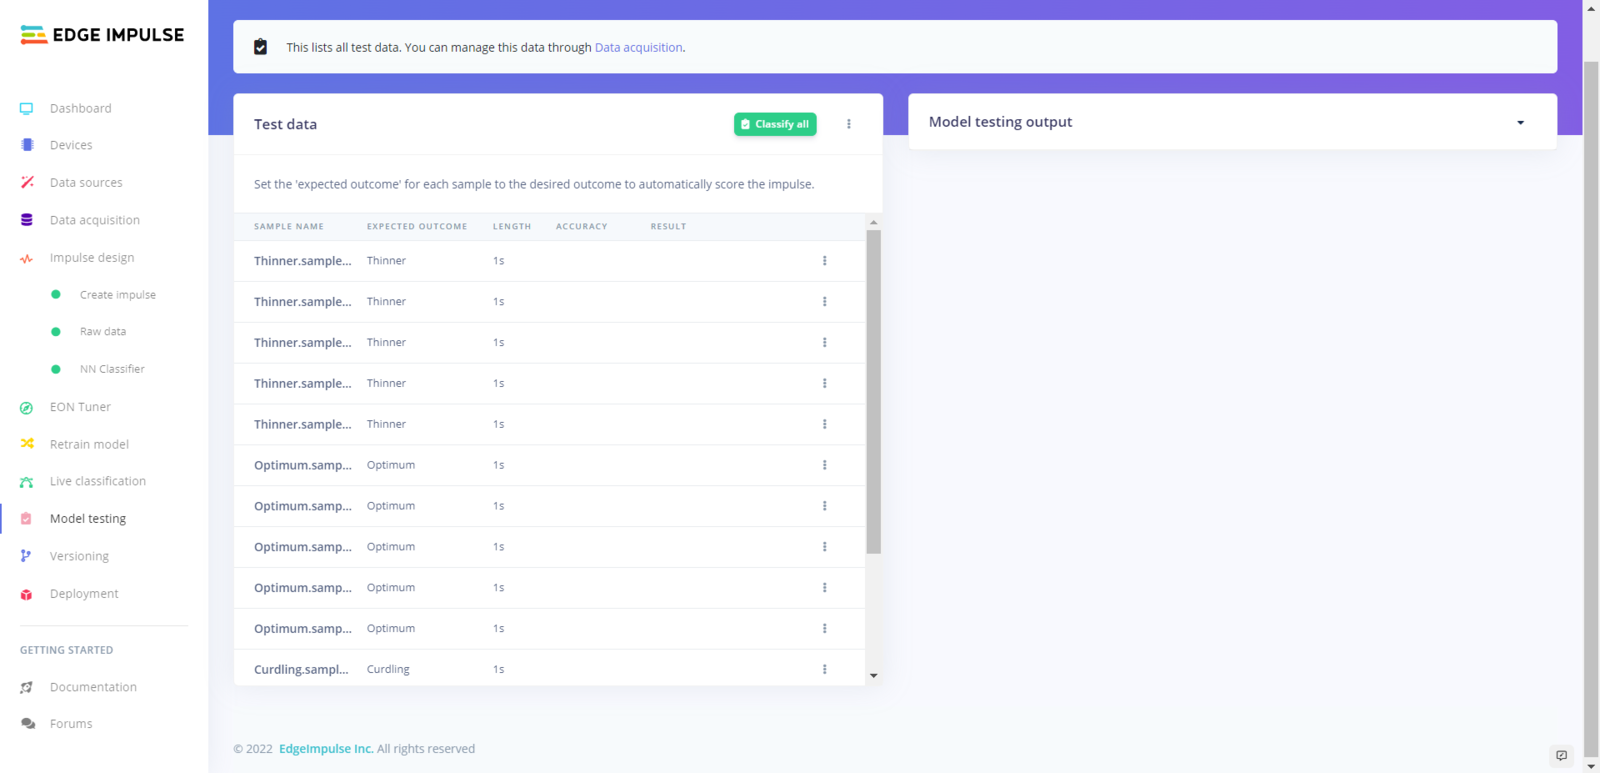
Step 6: Setting up the Edge Impulse model on XIAO ESP32C3
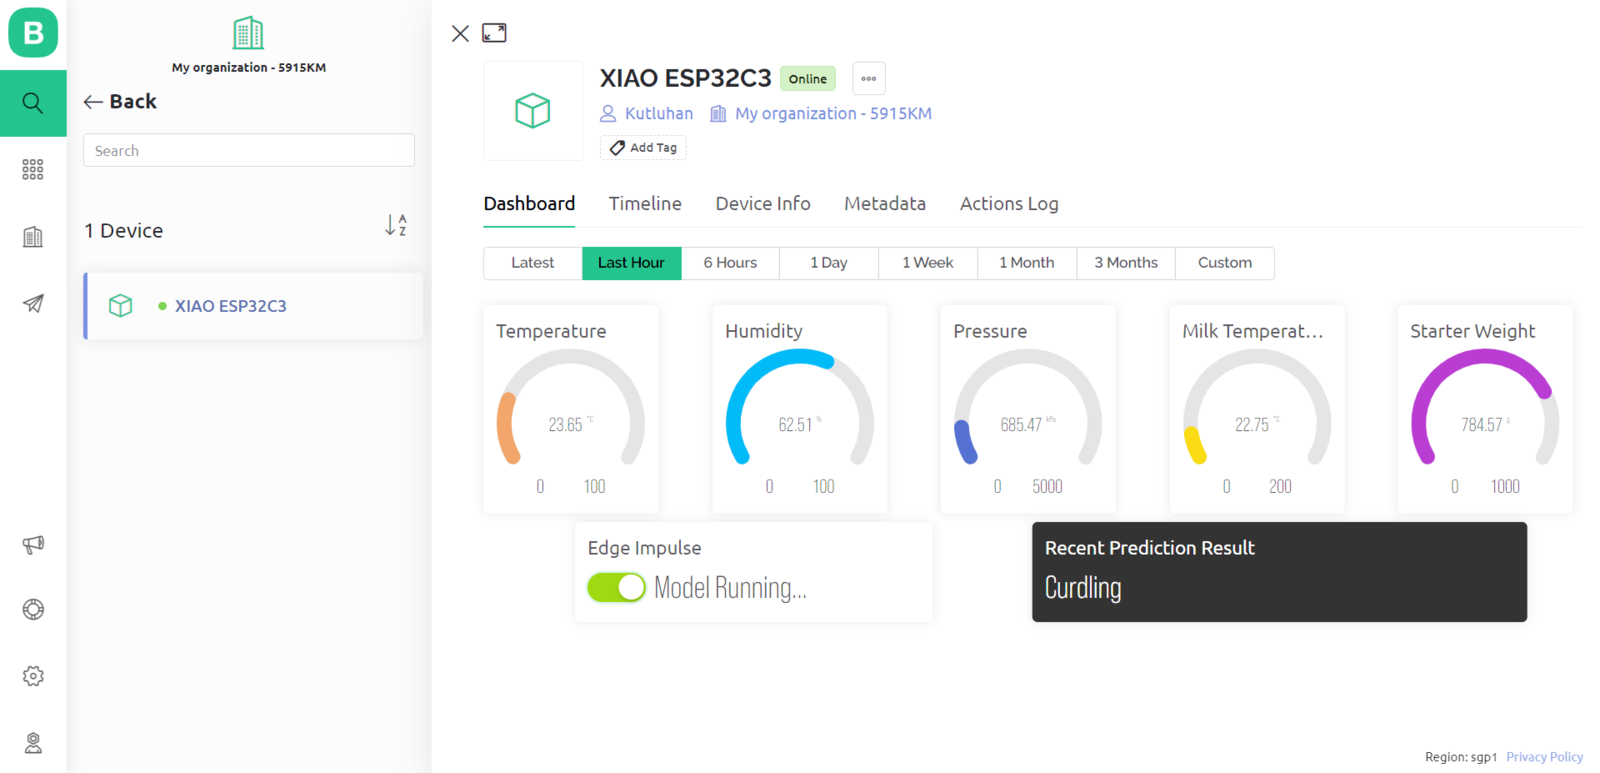
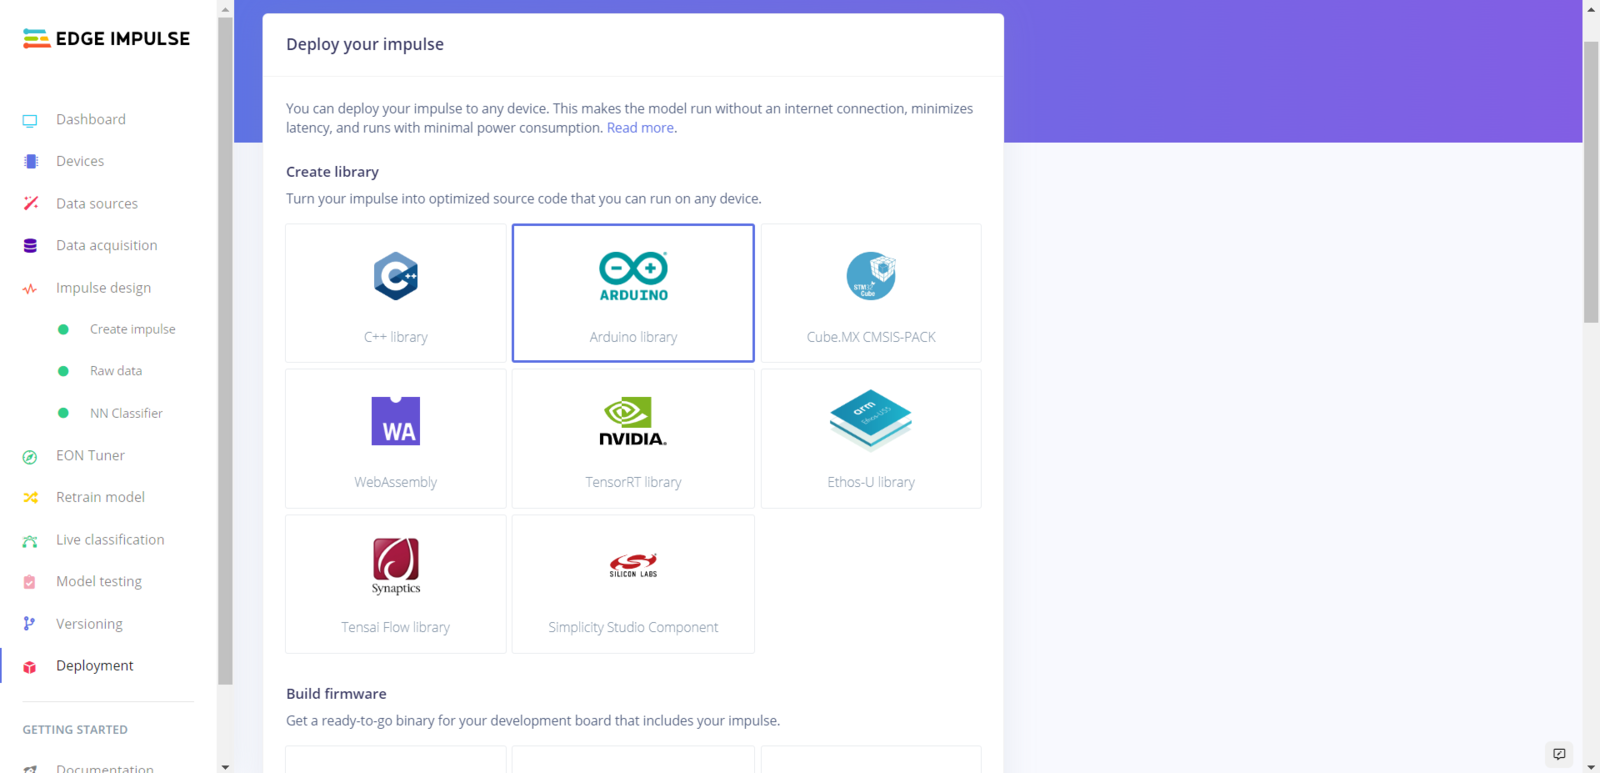
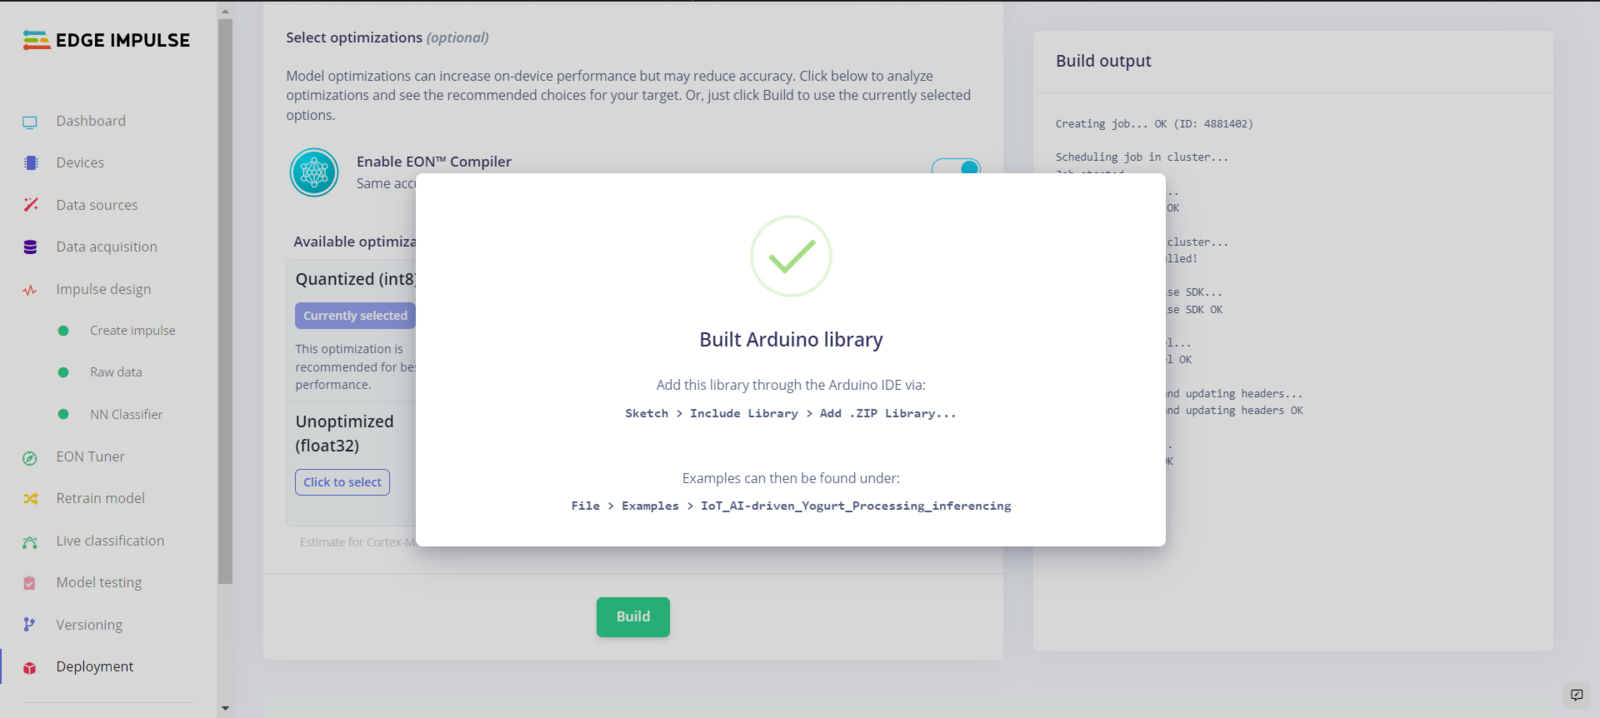
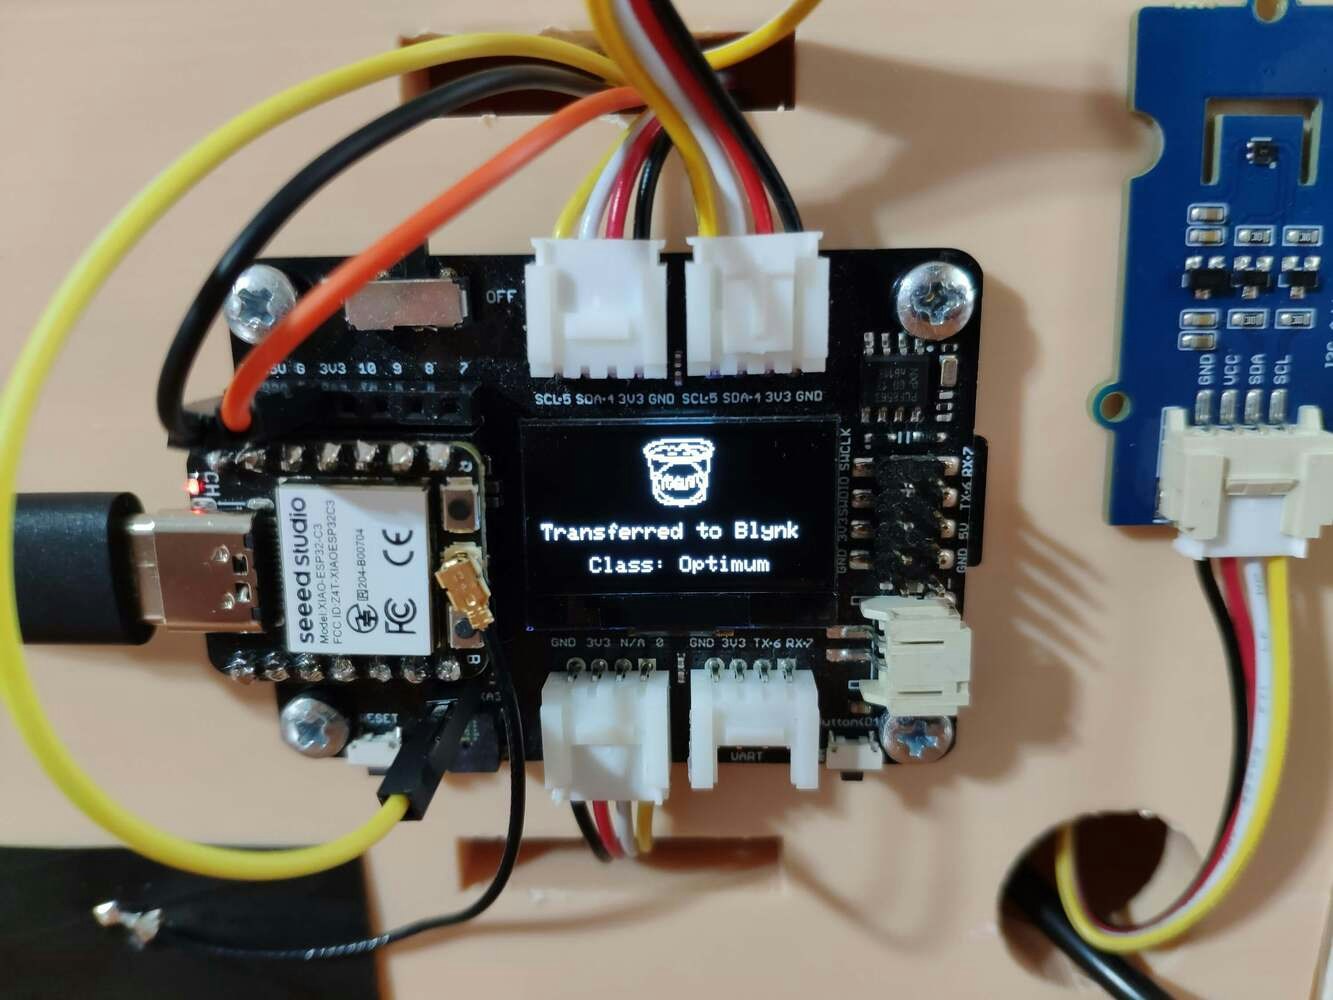
After building, training, and deploying my model as an Arduino library on Edge Impulse, I needed to upload the generated Arduino library on XIAO ESP32C3 to run the model directly so as to create an easy-to-use and capable device operating with minimal latency, memory usage, and power consumption. Since Edge Impulse optimizes and formats signal processing, configuration, and learning blocks into a single package while deploying models as Arduino libraries, I was able to import my model effortlessly to run inferences. :hash: After downloading the model as an Arduino library in the ZIP file format, go to Sketch ➡ Include Library ➡ Add .ZIP Library… :hash: Then, include the IoT_AI-driven_Yogurt_Processing_inferencing.h file to import the Edge Impulse neural network model.- Blynk Switch Button ➡ Run Inference
- Thinner
- Optimum
- Curdling


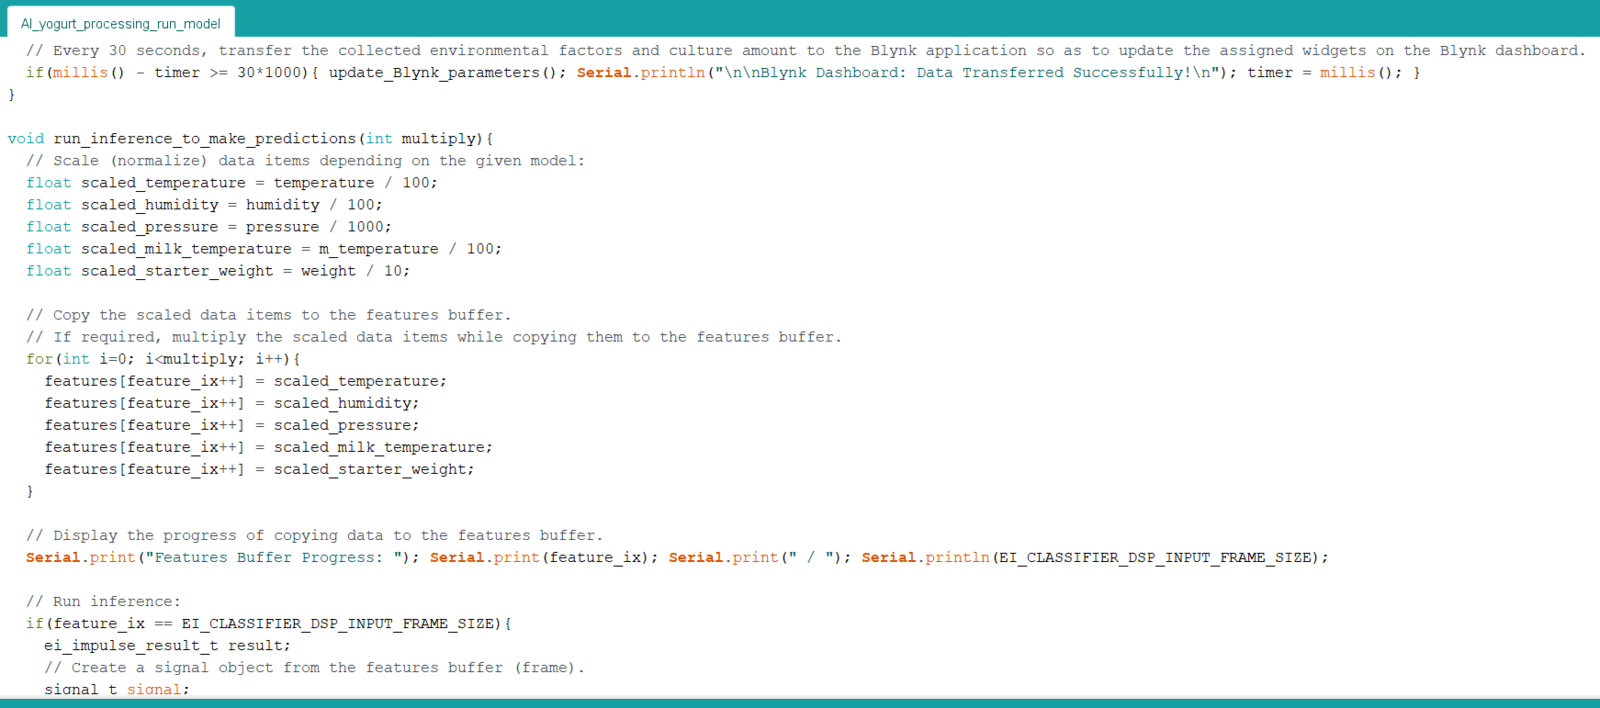
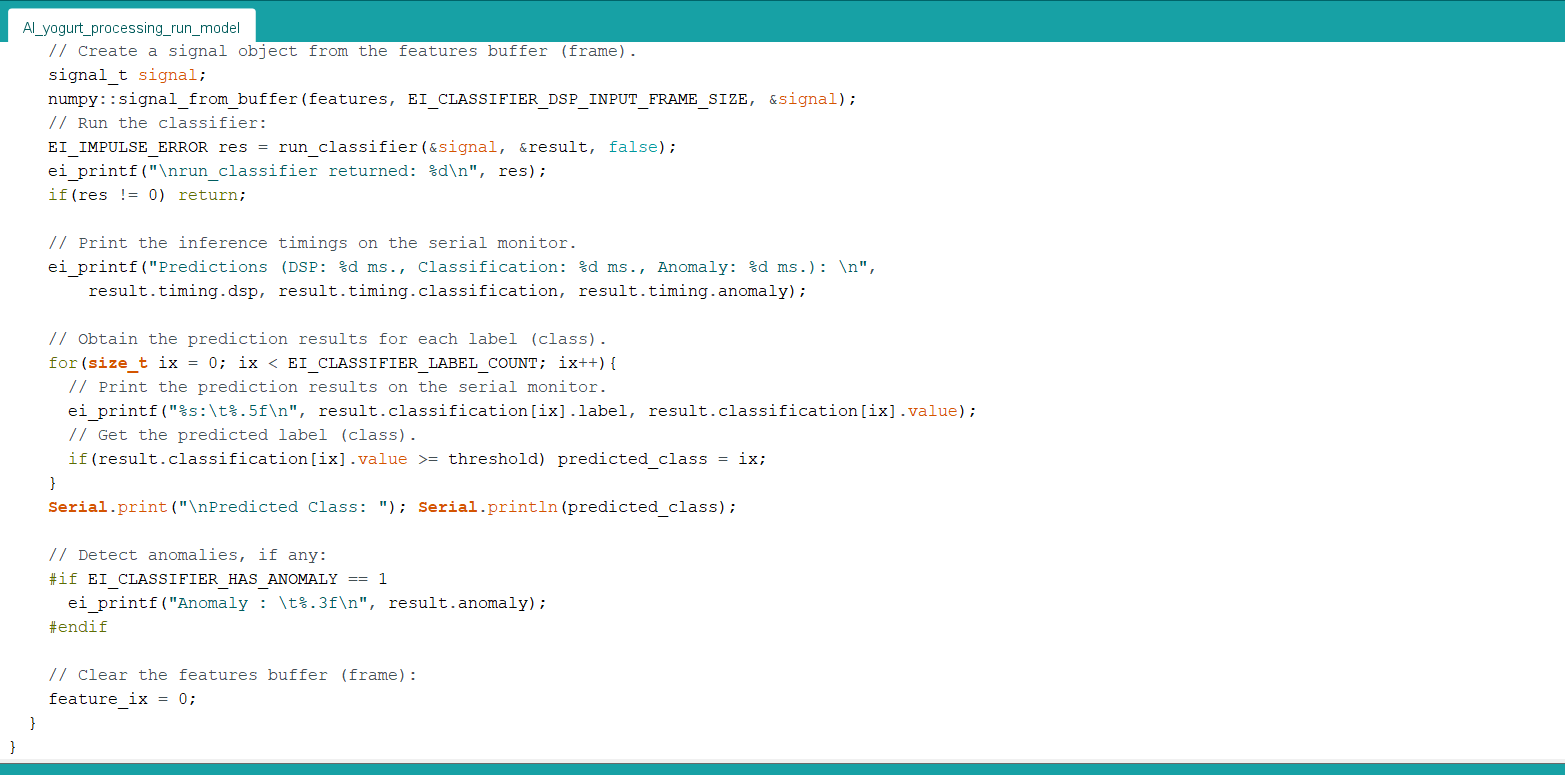

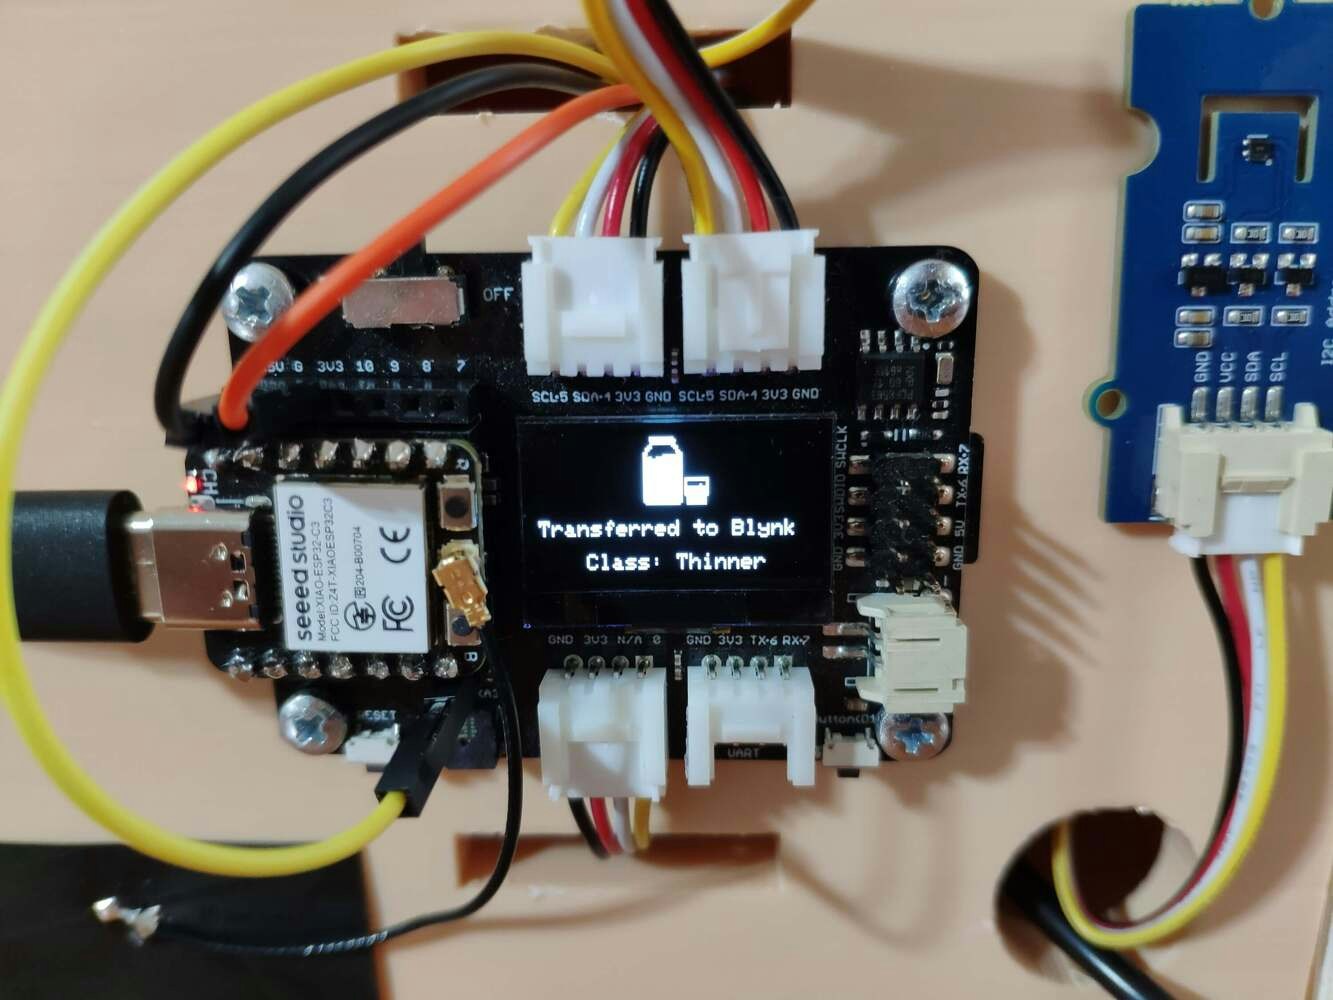
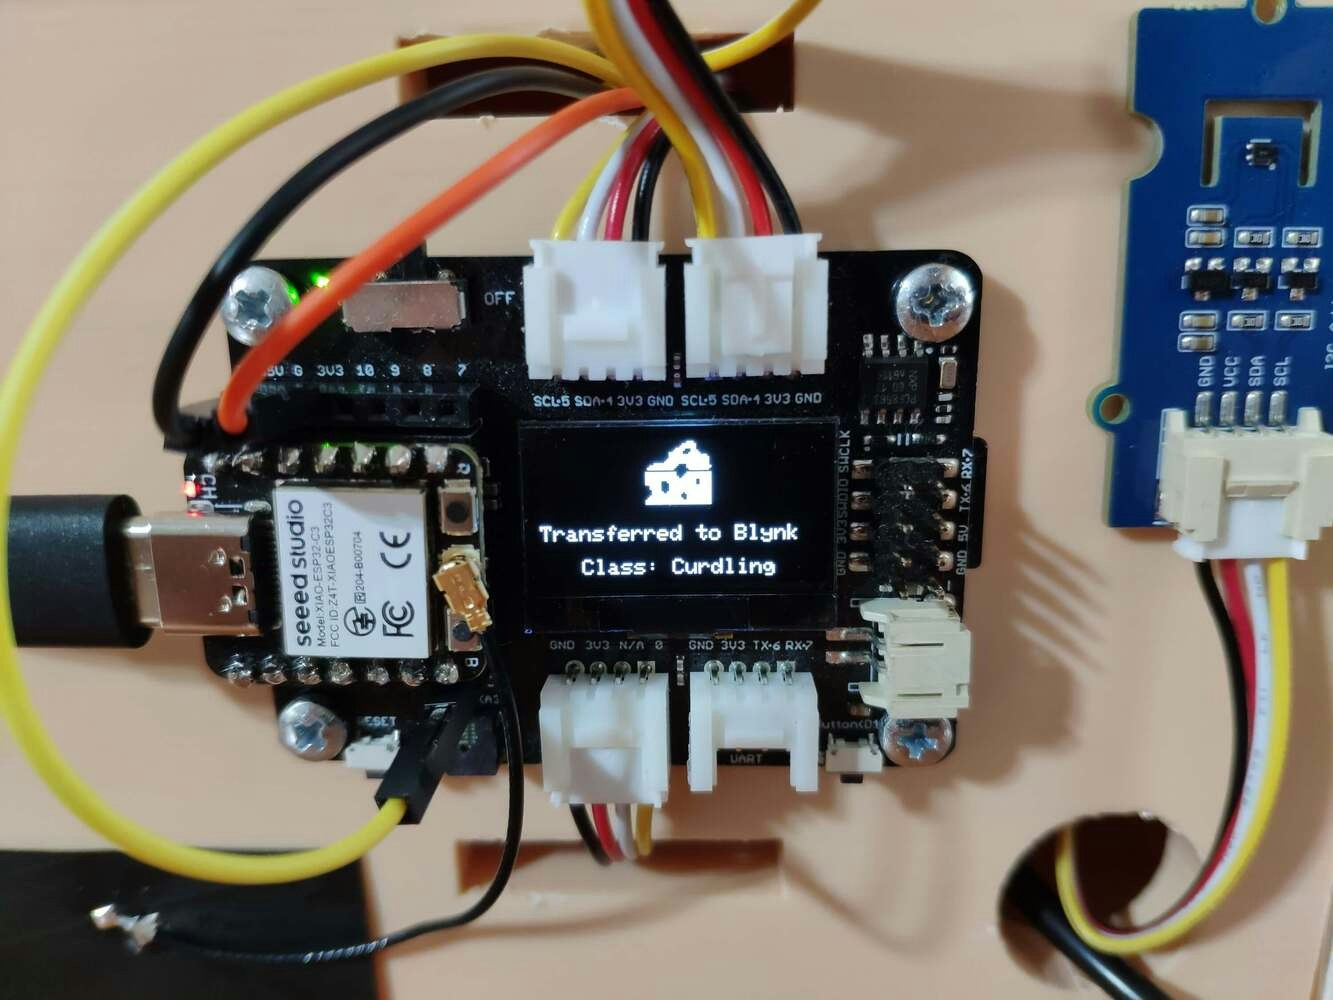
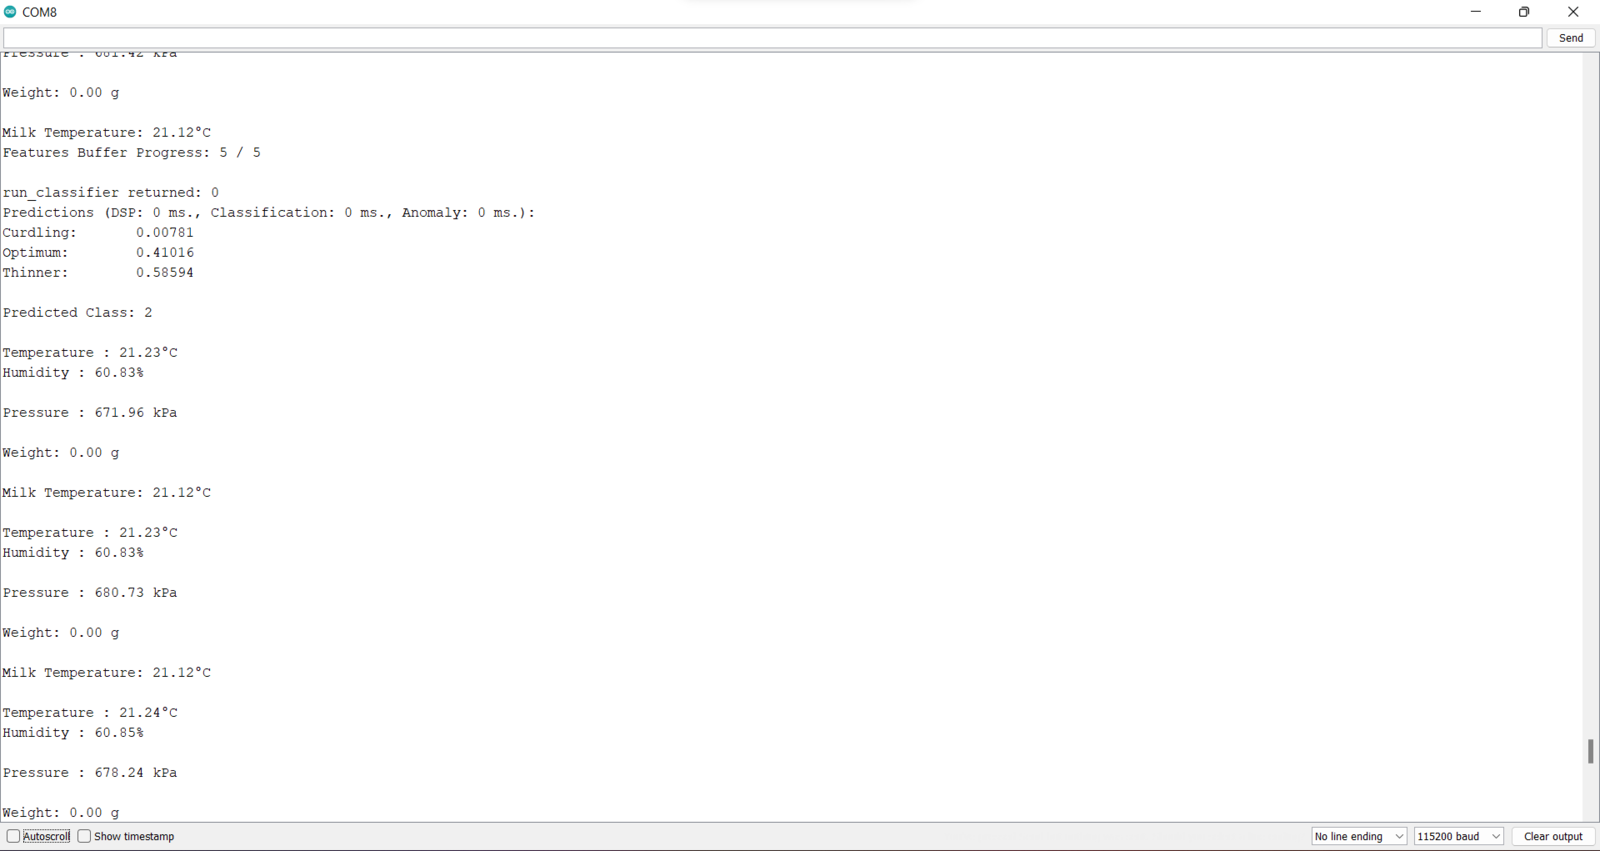
Step 7: Running the model on XIAO ESP32C3 to predict yogurt texture levels
My Edge Impulse neural network model predicts possibilities of labels (yogurt consistency classes) for the given features buffer as an array of 3 numbers. They represent the model’s “confidence” that the given features buffer corresponds to each of the three different yogurt consistency levels (classes) [0 - 2], as shown in Step 5:- 0 — Thinner
- 1 — Optimum
- 2 — Curdling
- Temperature (°C)
- Humidity (%)
- Pressure (kPa)
- Milk Temperature (°C)
- Starter Weight (g)


- Thinner
- Optimum
- Curdling (Lumpy)

Videos and Conclusion
Data collection | IoT AI-driven Yogurt Processing & Texture Prediction w/ Blynk Experimenting with the model | IoT AI-driven Yogurt Processing & Texture Prediction w/ BlynkFurther Discussions
By applying neural network models trained on temperature, humidity, pressure, milk temperature, and culture weight measurements in detecting yogurt consistency (texture) levels, we can achieve to: 🐄🥛📲 improve product quality without food additives, 🐄🥛📲 reduce the total cost for local dairies, 🐄🥛📲 incentivize small businesses to produce organic (natural) yogurt.