Introduction
HCI (Human Computer Interaction) is an evolving topic these days that is finding its way into the life of many people, with a large application potential in the consumer, health, and assistive technology industries. Free-form interfaces (for example, voice and gestures) have become ubiquitous and the cost of inclusion is getting lower and lower. One type of interface that may come handy in the bleeding-edge field of AR/VR, or in the health industry for low-mobility people, is one that uses finger and hand movement to interact with a device. Essentially: a smart glove. A smart glove is one that is able to react to the movements of the fingers, by recognizing either their fixed position or moving patterns. In this project I’m going to build a flex smart glove - one that uses flex sensors on the fingers and an Edge Impulse TinyML model - with a BOM (Bill of Materials) that is less than $5 USD (excluding the microcontroller).DIY Flex Sensor
Flex sensors change their resistance based on the amount of “bend” they’re subjected to. Commercial flex sensors for the Arduino and embedded ecosystem exist, but they cost about 75 USD. It may not be a prohibitive cost, but doing it yourself will cut this value down to just about one dollar USD. Moreover, you can build flex sensors of the size you wish to use in other settings too (you could attach them to your arms or legs, for example). Let’s see how to build one!Velostat
There are few materials that can be used to build a flex sensor by yourself. In this project, I selected Velostat because it is widely available and pretty cheap. An 11”x11” sheet costs $5 USD on Adafruit. It is a pressure-sensitive material that can react well to bending too. Follow this YouTube video for a step by step tutorial: https://www.youtube.com/watch?v=FEPgLbPv6NM You will then sew the bends to the glove to keep them in place.Feature Construction
Since each finger has its own flex sensor, we’ll be dealing with 5 axis of data. Considering that the user can perform both still positions and moving gestures, we need to collect data over time. If we collectN timesteps, our feature vector will be of size 5 x N.
Our DIY flex sensors, though, are not very precise. Relying on their absolute values alone could lead to bad results because they can vary based on the stretch force applied at rest state (e.g., how we wear the glove). This is why we are augmenting the input features by adding the cross-difference among each pair of fingers. The rationale behind this is to capture the relative position/movement of one finger from the others.
So, calling F1…F5 each finger’s reading, a single row in the feature vector will be made of:
How long should N be?
The value ofN depends on 2 factors:
- Gestures duration: how long (in seconds) is the longest gesture?
- Sampling frequency: how fast are you reading the flex sensors?
Data Collection
To handle the sensor readings, we’re going to create aHand class: this will encapsulate the actual reading and cross-difference calculations. We’re also adding exponential smoothing to eliminate high frequency fluctuations.
Create a file, I’ve called it hand.h, with the following:
edge-impulse-data-forwarder command line tool to import the data into Edge Impulse platform.
Here is the Sketch I’ve created:
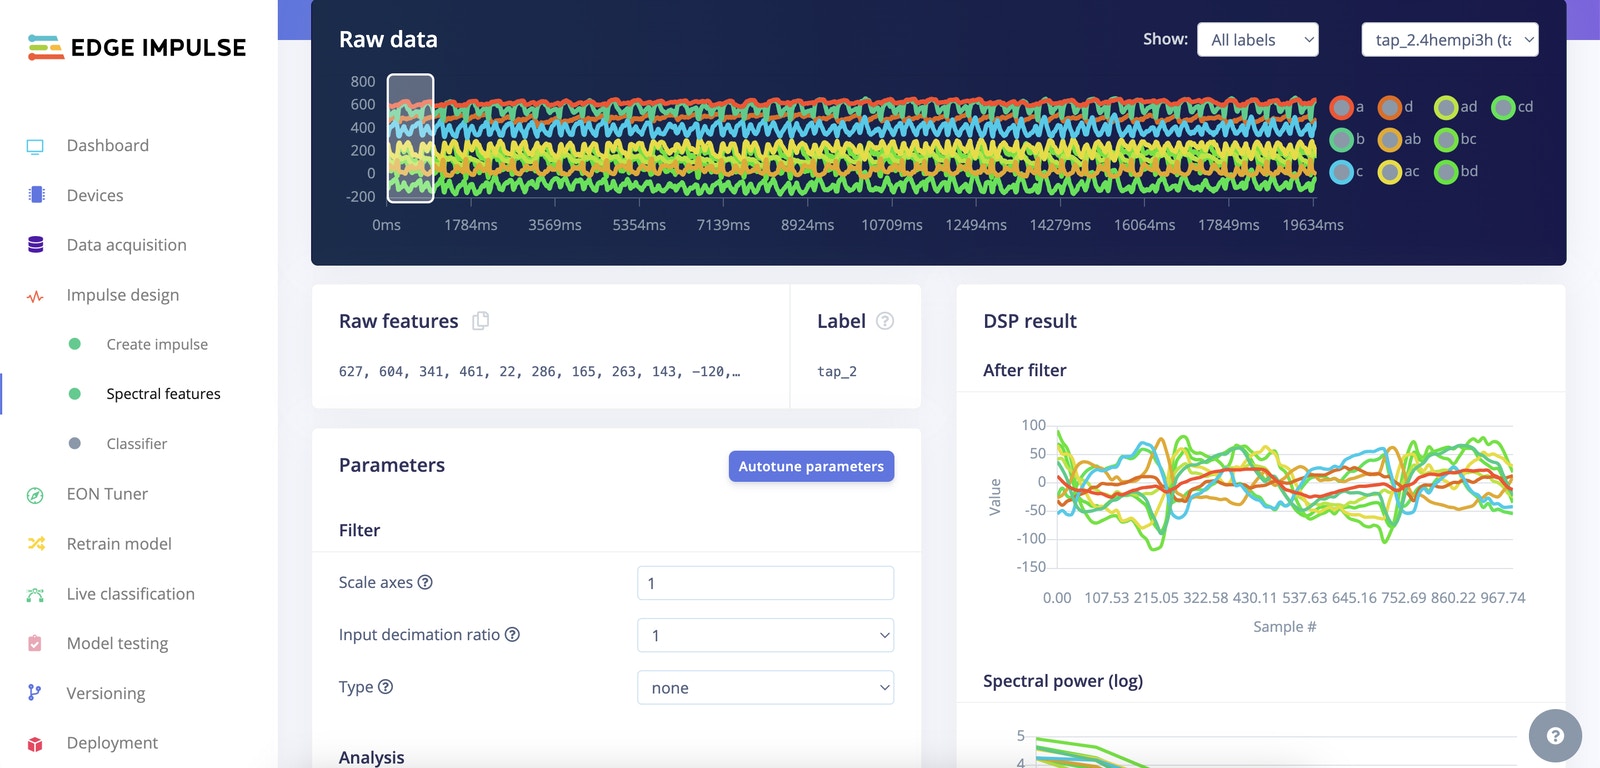
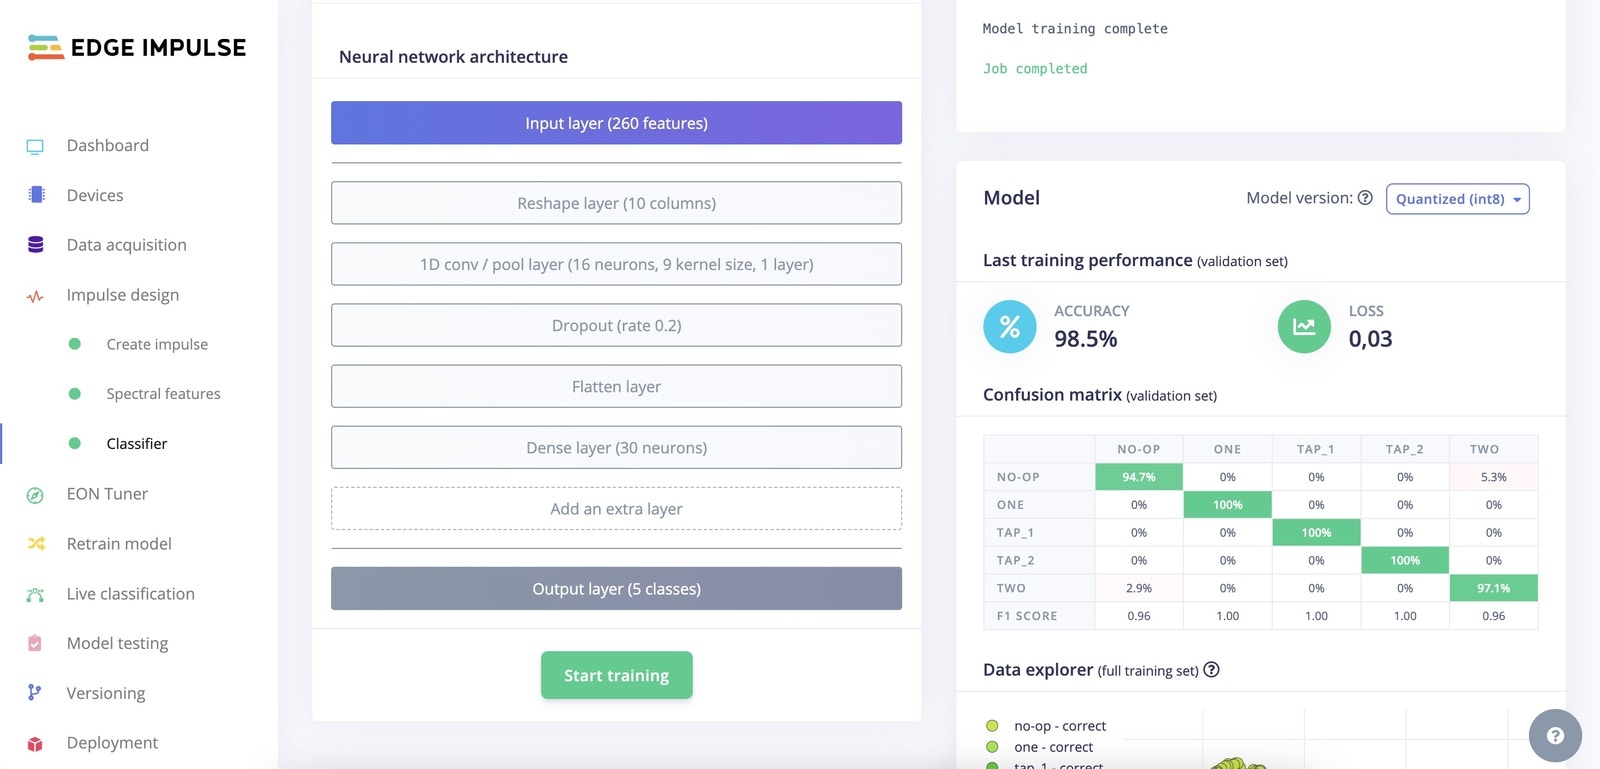
Impulse Design
Our data is a multi-axis time series. This usually means the processing block will be made of Spectral Features (FFT frequencies and their power spectrum). For the Classifier, I opted for a fully connected network with 2 layers. As you can see from the confusion matrix, you can expect to achieve a very high score on all the gestures.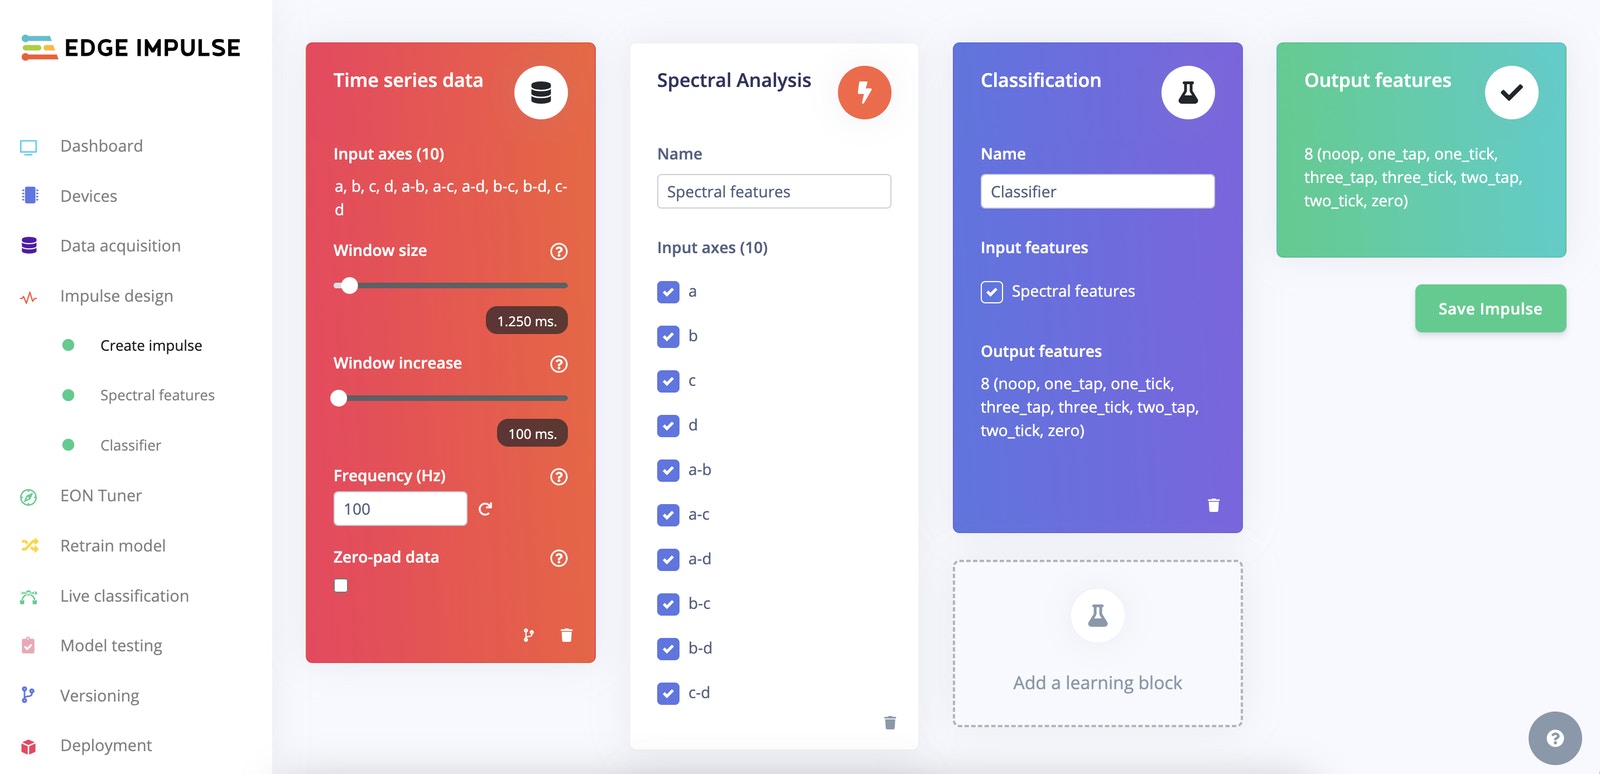
Deployment
Now move to theDeployment tab and download the project as an Arduino library. To run the model on our board, we’re going to leverage the EloquentArduino library, which makes this a breeze.
After you have imported the downloaded zip as a library in the Arduino IDE, compile and upload the following Sketch:
ImpulseBufferallows you to push values to a circular queue that will discard older values when new ones arriveQuorumallows you to batch the latestNpredictions and check that at least N/2 + 1 of them agree on the same label. This helps smooth out prediction noise.