Description
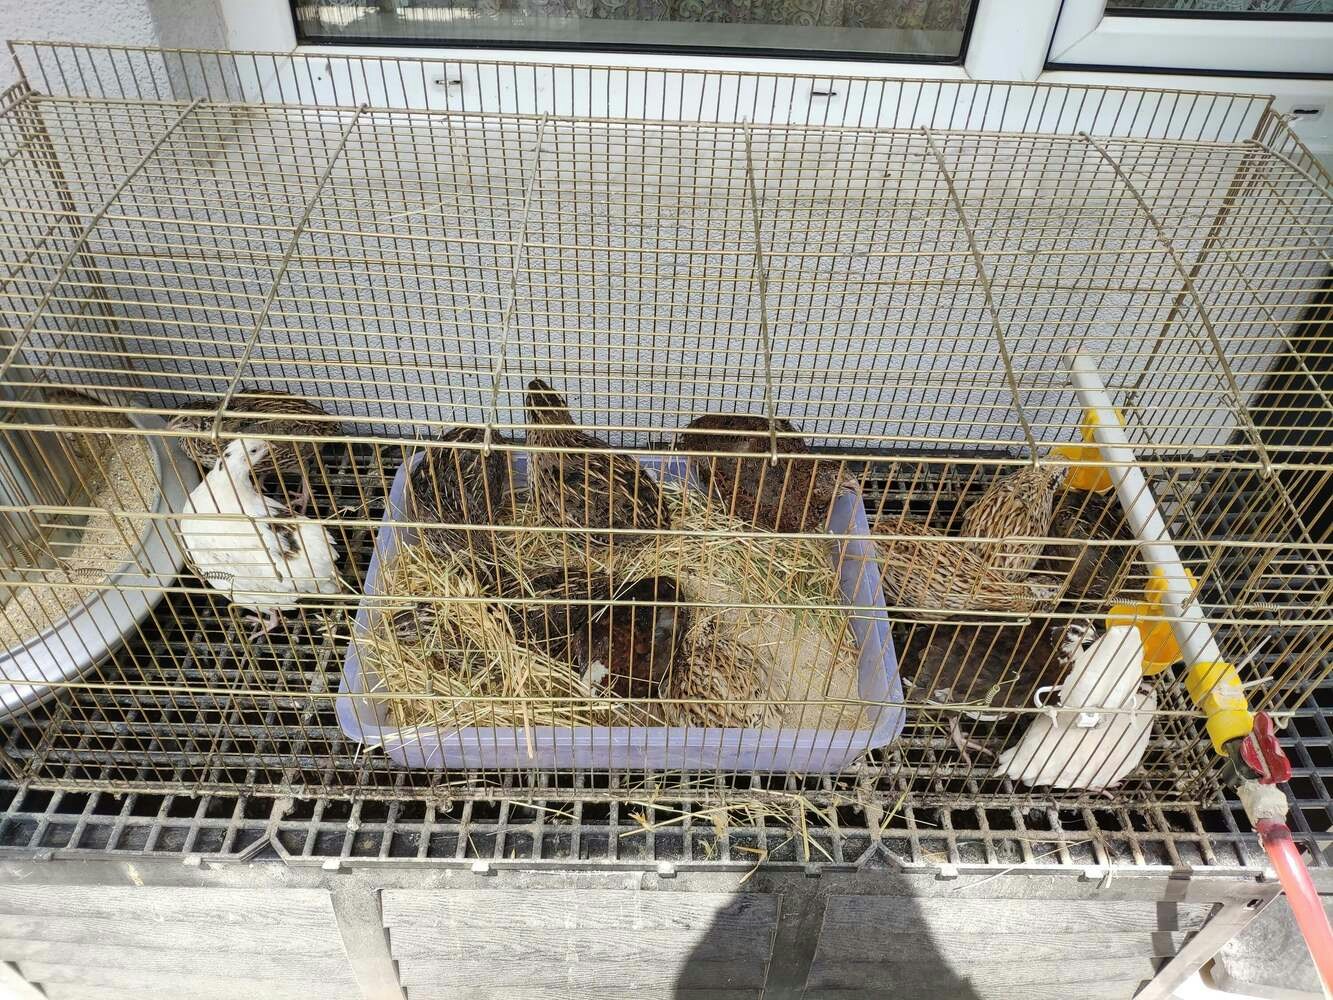
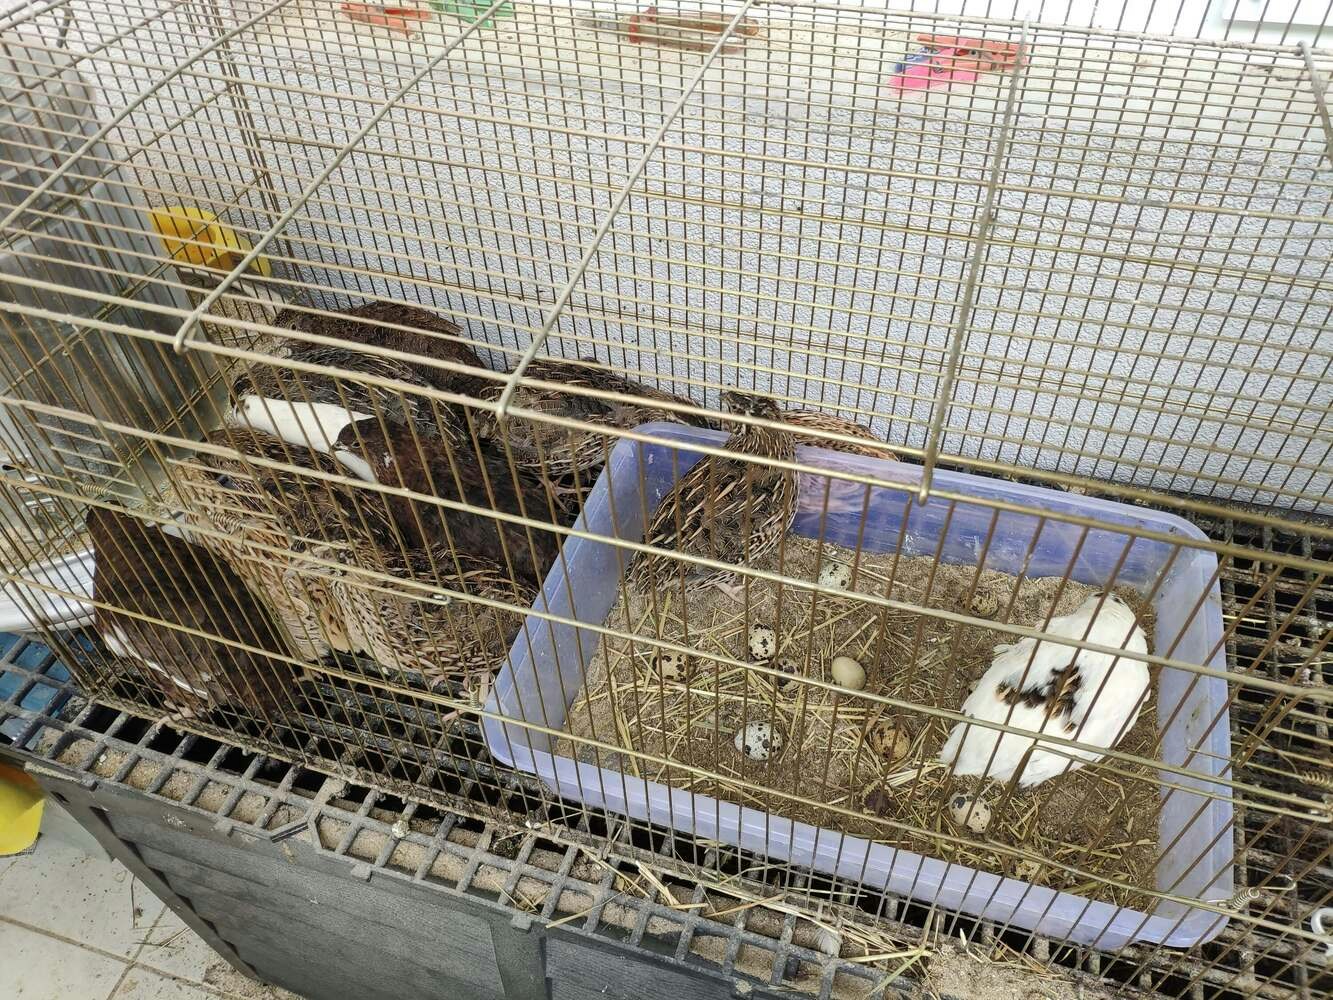
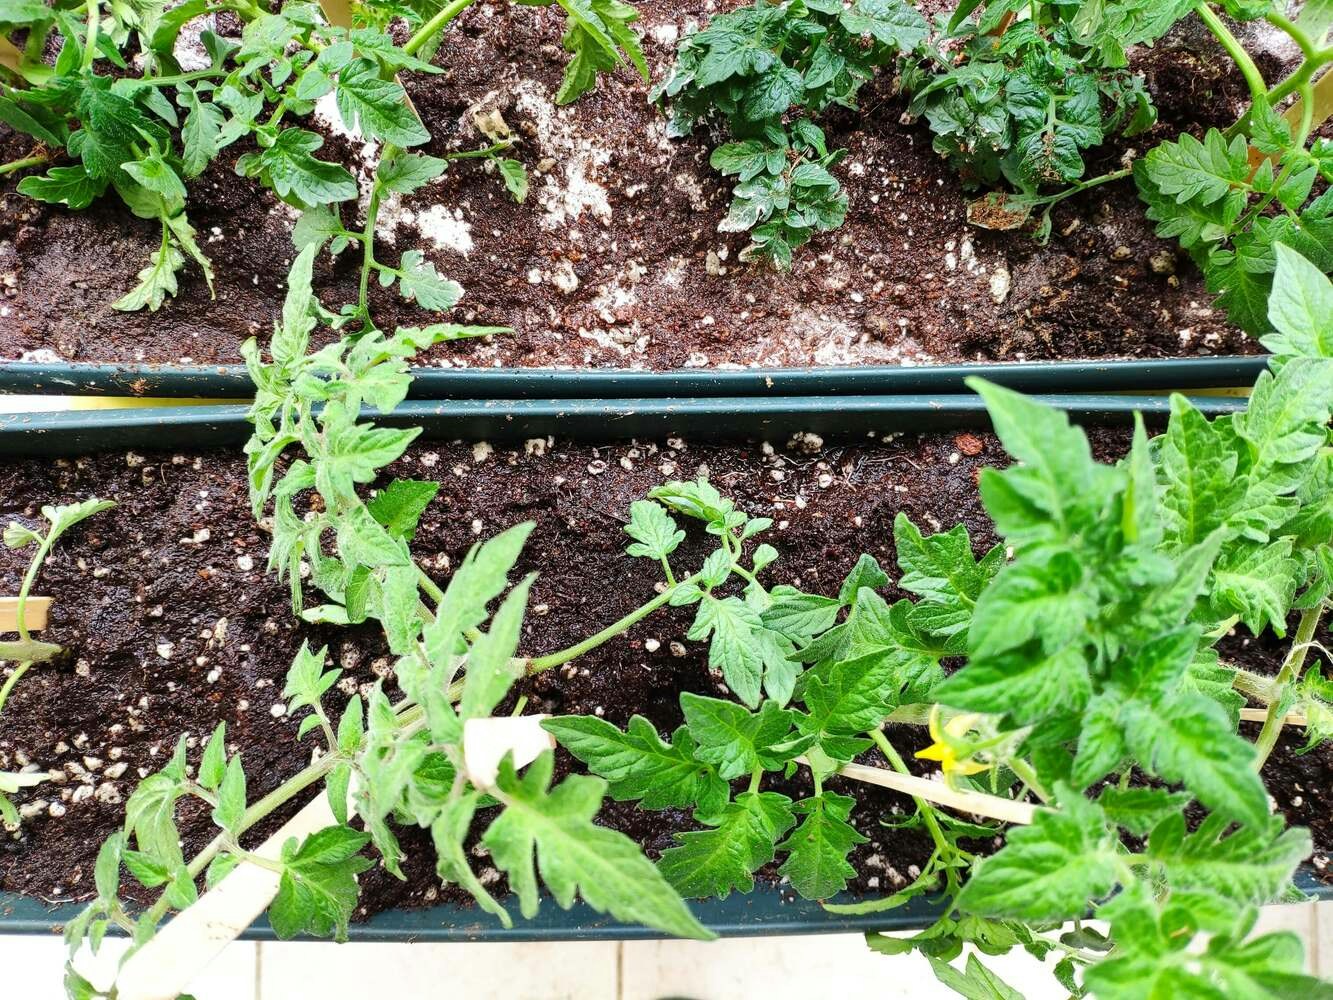
To achieve a successful harvest season with prolific plants, farmers utilized a type of fertilizer to increase soil fertility, dating back to the earliest attempts to provide enough food in order to sustain larger populations. Until the industrial revolution, farmers mostly applied organic fertilizers and materials to supply adequate nutrients for plants, including naturally available mineral sources, manure, crop residues, etc. However, due to the evergrowing human population and declining fertile lands, agriculturalists started to utilize organic fertilizers in conjunction with chemical fertilizers to improve crop yield, even to the extent of causing soil contamination. Chemical fertilizers are synthesized industrially out of estimated proportions of elements like nitrogen, phosphorus, and potassium[^1], which provide necessary nutrients for plants to flourish vigorously. Due to intensive cultivation and the insufficient replenishment of nutrients, fertilizers mitigate precipitously declining soil fertility. In combination with organic fertilizers, chemical fertilizers can even revitalize arable lands. Although chemical fertilizers are indispensable to sustain soil fertility and avoid food shortages considering the current human population, they can also be noxious without painstaking attention to soil test reports. Since chemical fertilizers directly affect soil integrity and permeate through water bodies, they can contaminate the groundwater and the environment. Also, chemical fertilizers infiltrate the soil and make plants vulnerable to various pathogens by hampering their roots[^1]. When chemical fertilizers disperse throughout water bodies, they increase macronutrients in the environment, such as nitrogen, potassium, and phosphorus, resulting in contamination and eutrophication (nutrient pollution). These macronutrients can cause serious health problems due to overexposure. For instance, nitrogen can remain in water bodies for several years and cause nitrite (and nitrate) to accumulate exponentially. As a result of the high nitrite accumulation, nitrite-contaminated water can cause a blood disorder called methemoglobinemia (MetHb), also known as Blue Baby Syndrome. Furthermore, chemical reactions between nitrites heavily used in synthetic fertilizers instigate DNA damage, lipid peroxidation, and oxidative stress, which can all result in increased cellular degeneration. As a major health issue caused by the excessive use of chemical (synthetic) fertilizers, cellular degeneration can increase the risk of developing cancer. Forebodingly, a 2009 study by researchers at Rhode Island Hospital has found a substantial link between increased levels of nitrates in our environment and food with increased deaths from diseases, including Alzheimer’s, diabetes mellitus, and Parkinson’s[^2]. According to earlier estimations, fertilizers provided approximately 70% of plant nutrients in 2020 at a global level[^3]. Therefore, at this point, we cannot obviate the need for organic and chemical fertilizers to achieve sustainable crop production. Nevertheless, applying organic fertilizers in conjunction with chemical fertilizers can engender unexpected results and exacerbates the detrimental effects of chemical (synthetic) fertilizers. Since organic fertilizers behave differently depending on their manufacturing conditions, they change the degree of soil permeability of different soil types, such as loamy, peaty, silty, chalky, etc., not only unpredictably but also structurally. Hence, applying chemical fertilizers to the soil structurally altered by organic fertilizers may intensify the mentioned hazardous effects and lead to serious health conditions. After scrutinizing the recent research papers on the effects of chemical and organic fertilizers, I noticed there are nearly no appliances focusing on detecting the excessive use of chemical fertilizers in the presence of organic fertilizers and providing real-time detection results for further inspection. Therefore, I decided to build a budget-friendly and easy-to-use proof-of-concept device to detect chemical fertilizer contamination levels with object recognition and inform the user of the model detection results simultaneously in the hope of averting the detrimental effects of fertilizer overuse by pre-warning farmers. To detect chemical fertilizer contamination levels accurately in relation to organic fertilizers, I needed to collect data from a controlled environment manifesting different soil conditions so as to train my object detection model with notable validity. Since utilizing manure as organic fertilizer affects soil acidification, integrity, and structure depending on the manure decomposition stages (fresh, active, mature, and old), I decided to produce my organic fertilizers by composting manure. Fortunately, I am raising quails on my balcony and have experience in utilizing quail manure as organic fertilizer. To change the soil integrity and structure in relation to the applied organic fertilizer, I collected quail manure in different decomposition stages:- Fresh (1 month)
- Active (3 months)
- Old (6 months)
- Calcium Nitrate
- Magnesium Sulphate
- Ammonium Sulphate
- Ammonium Phosphate
- Enriched
- Unsafe
- Toxic


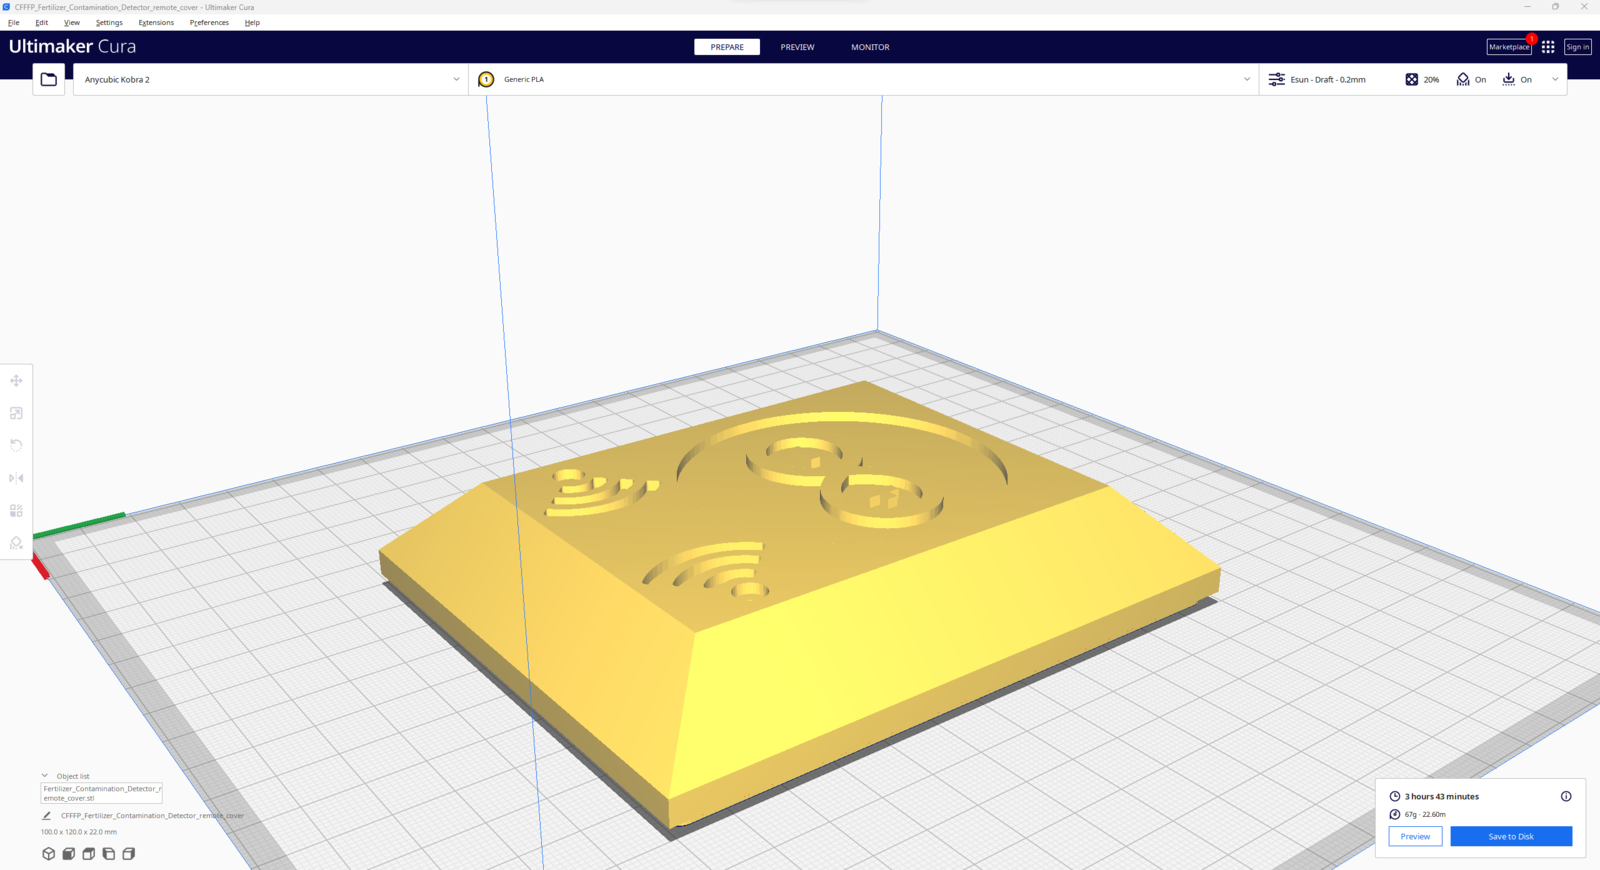
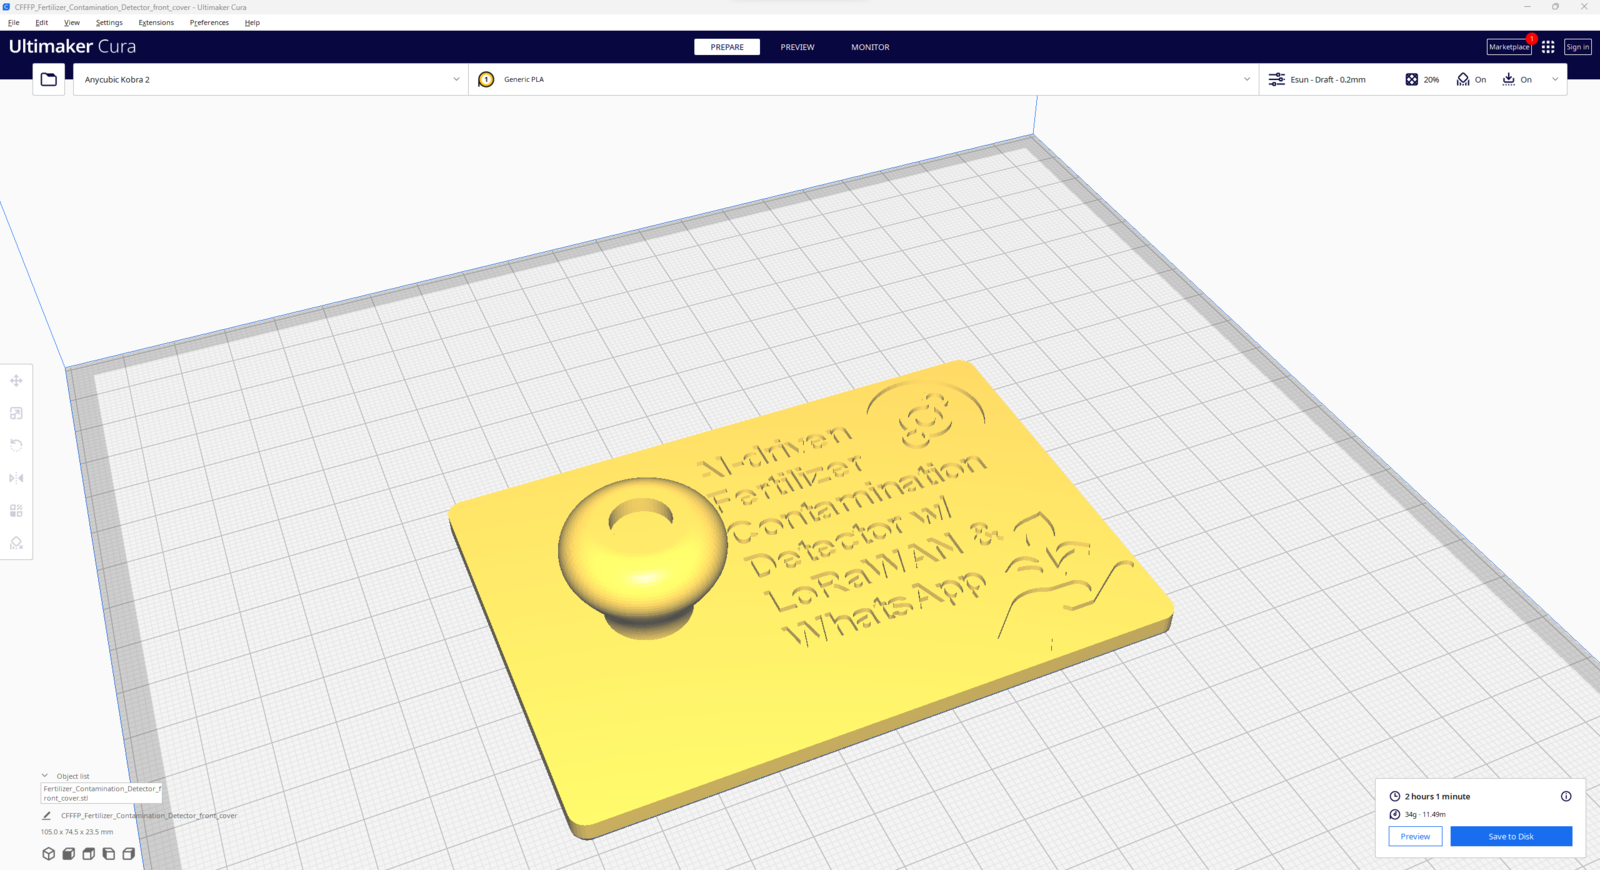
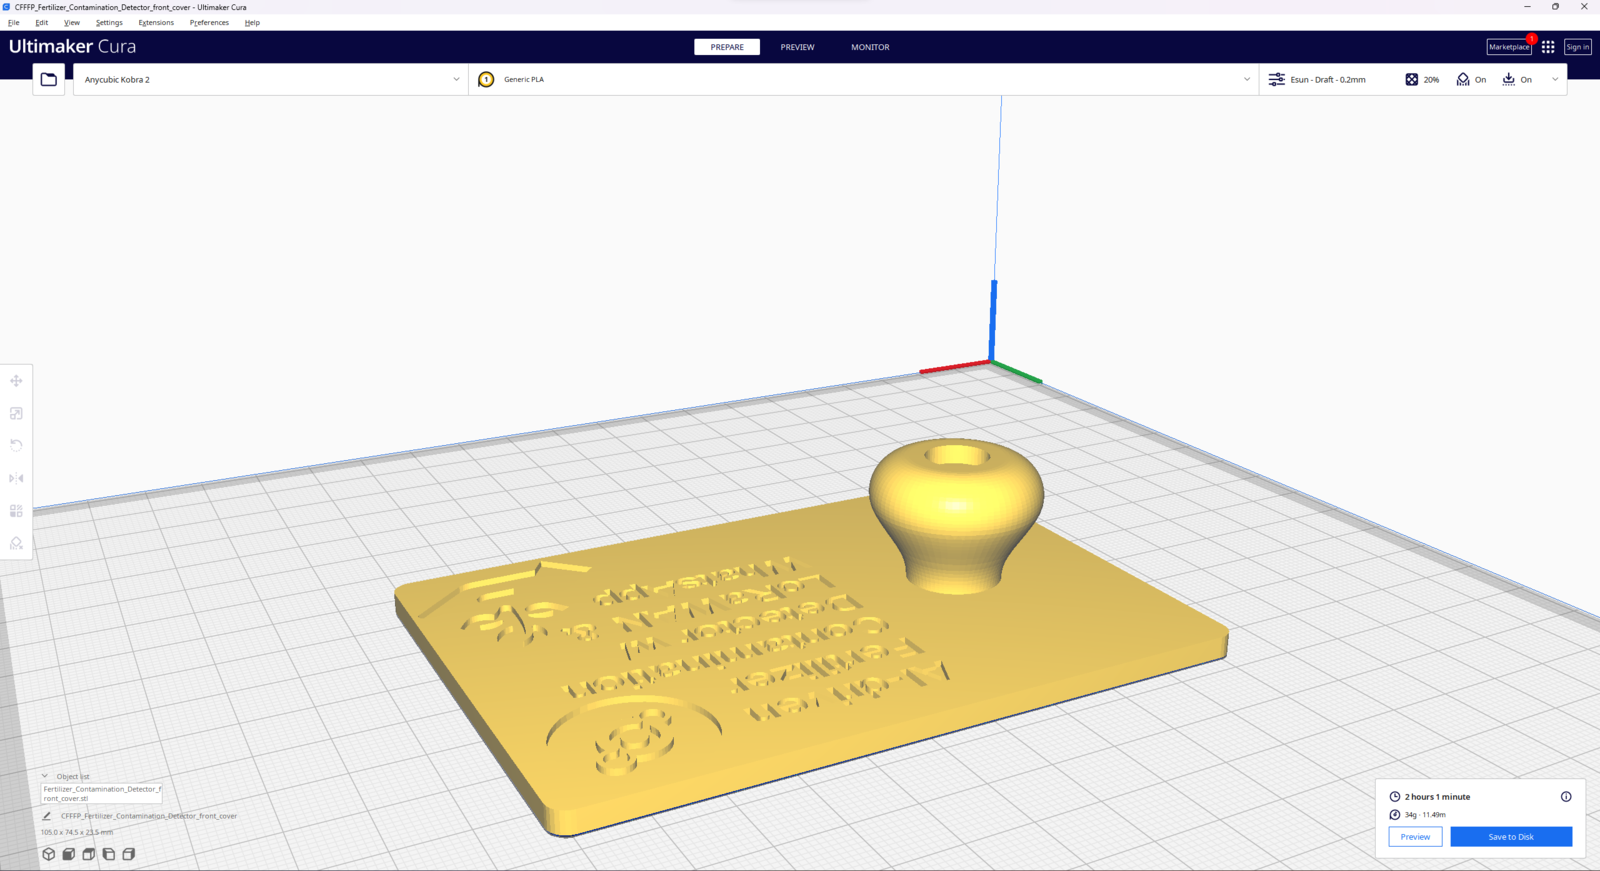
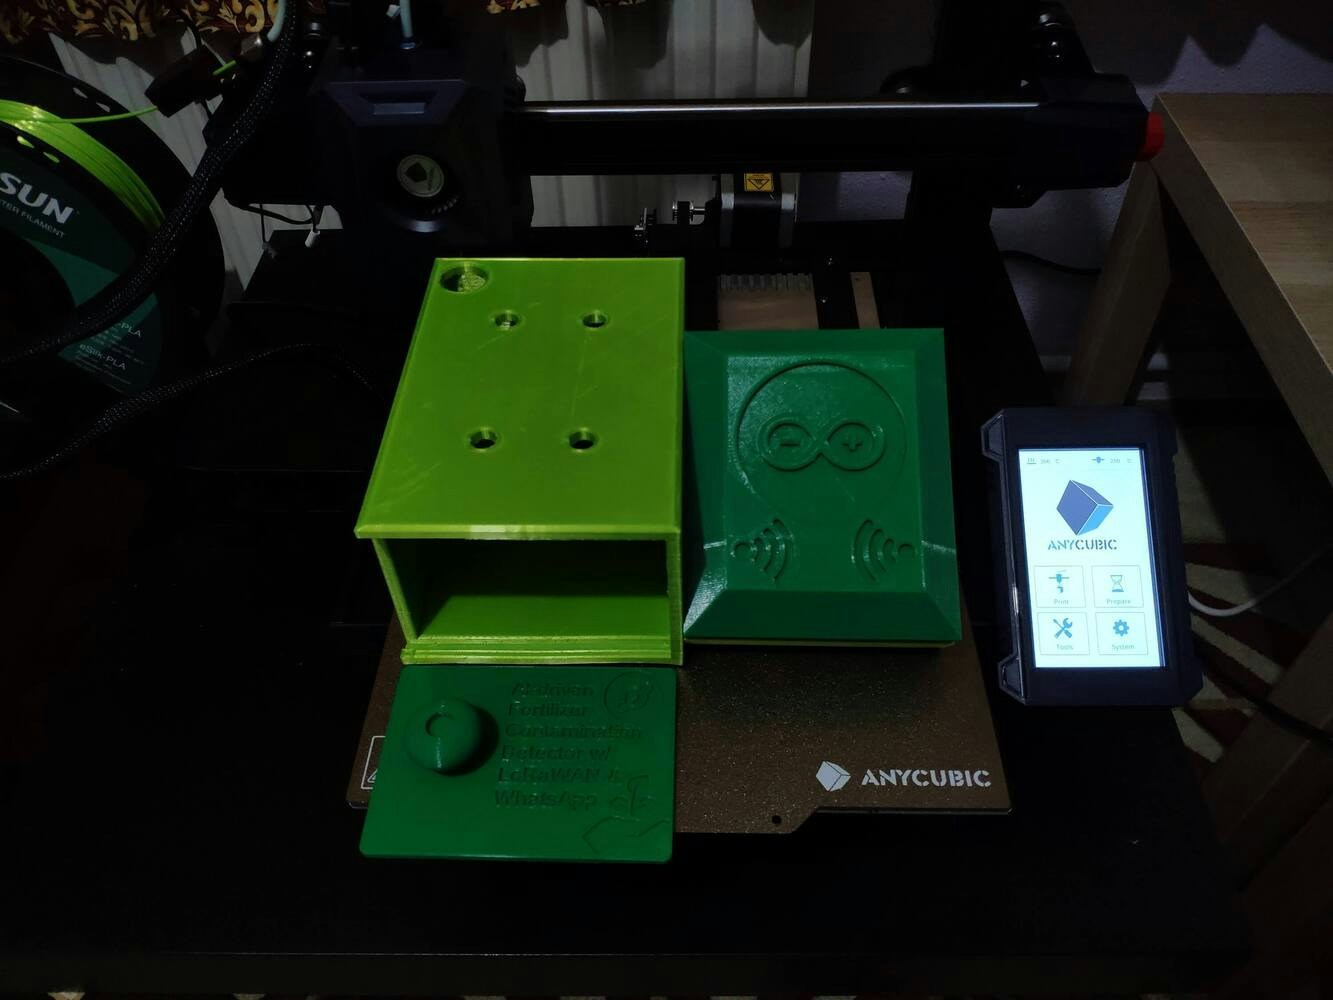
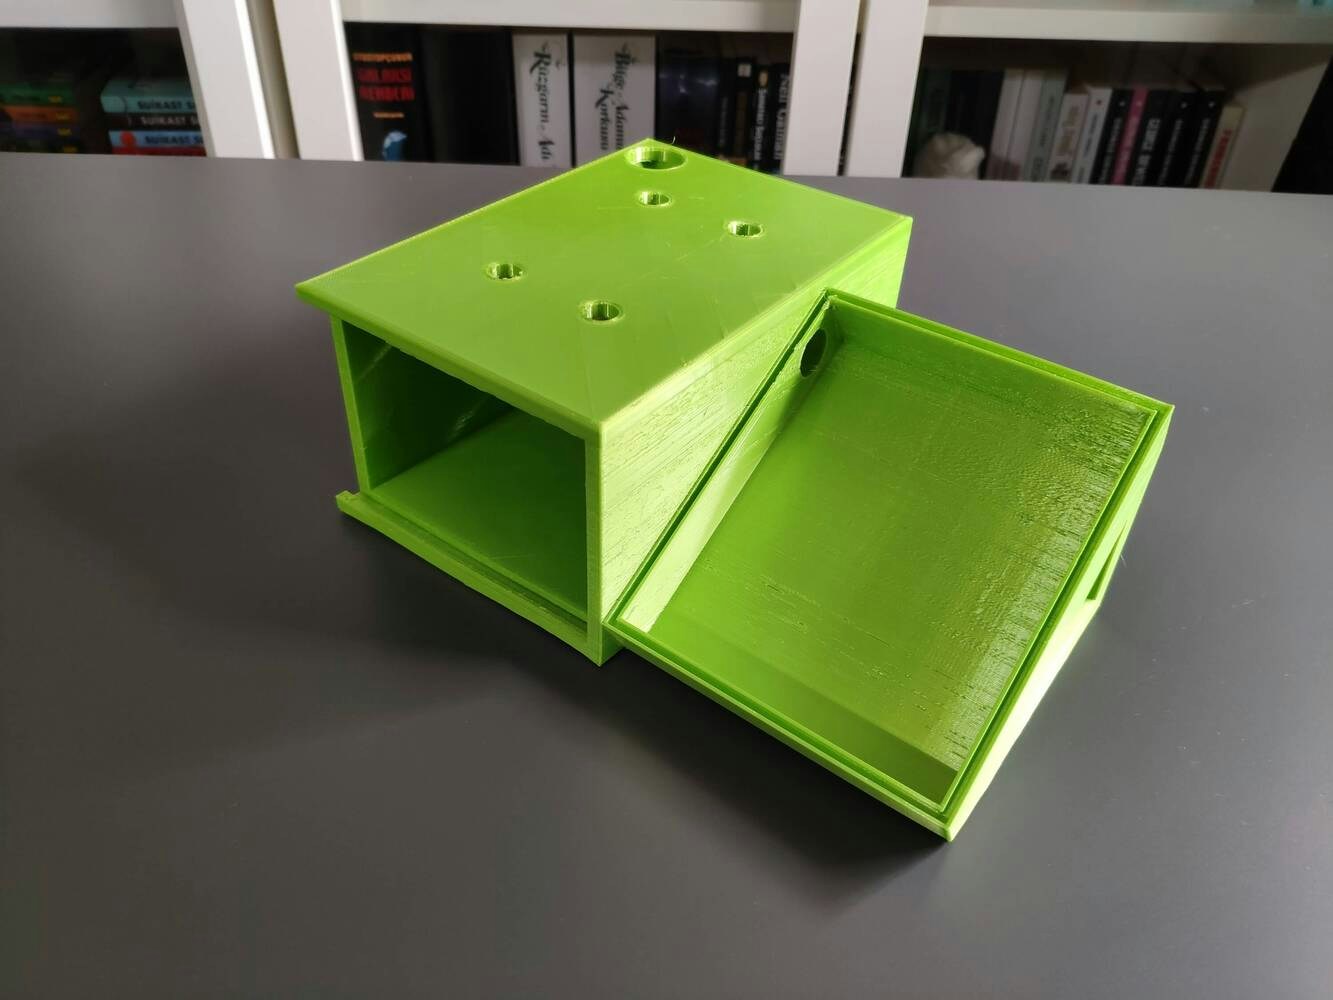
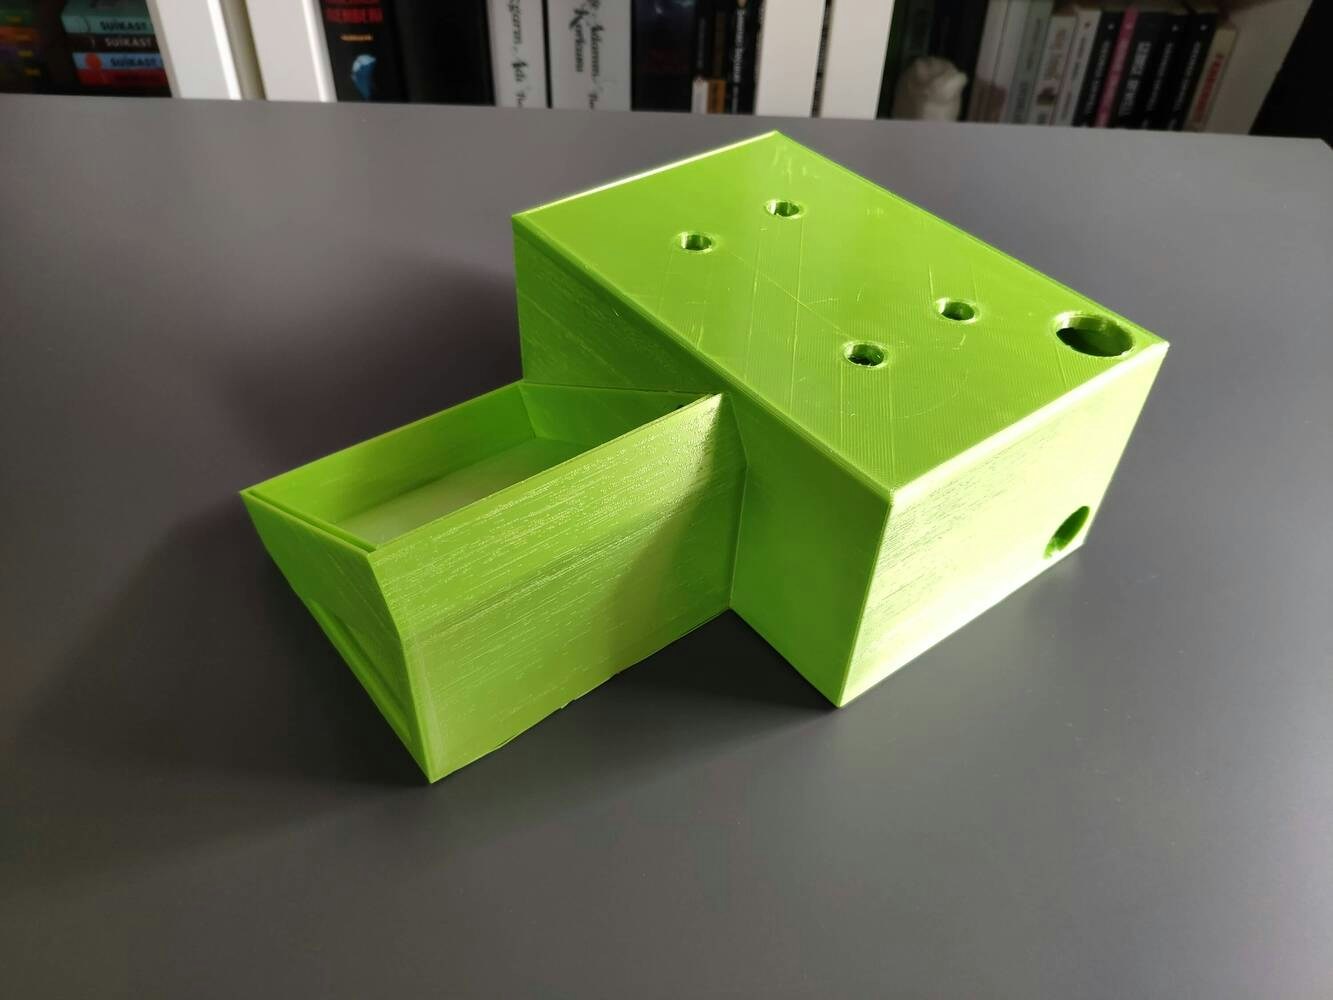
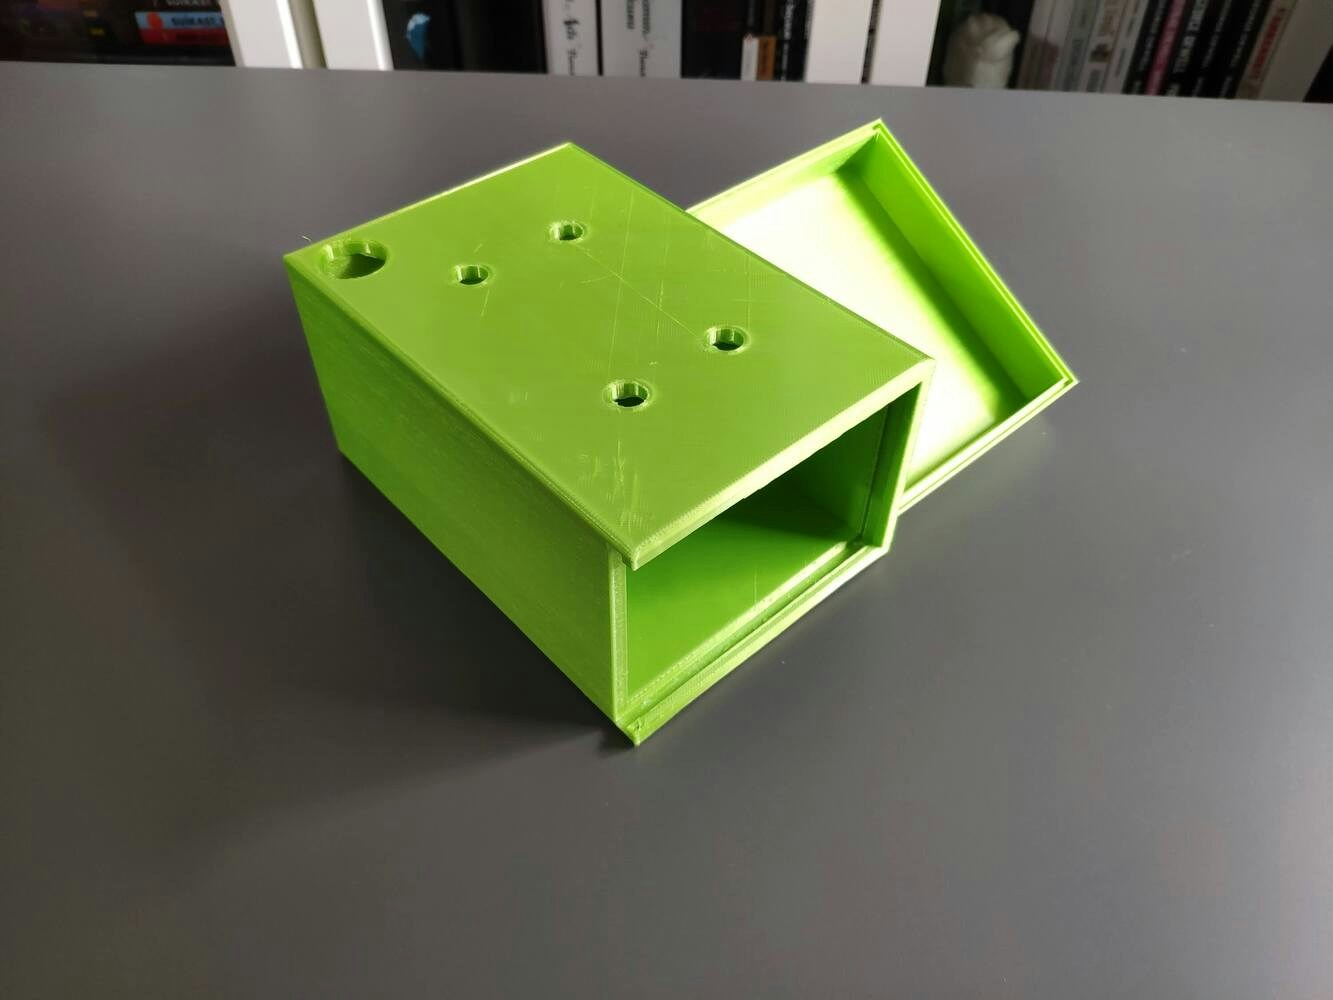
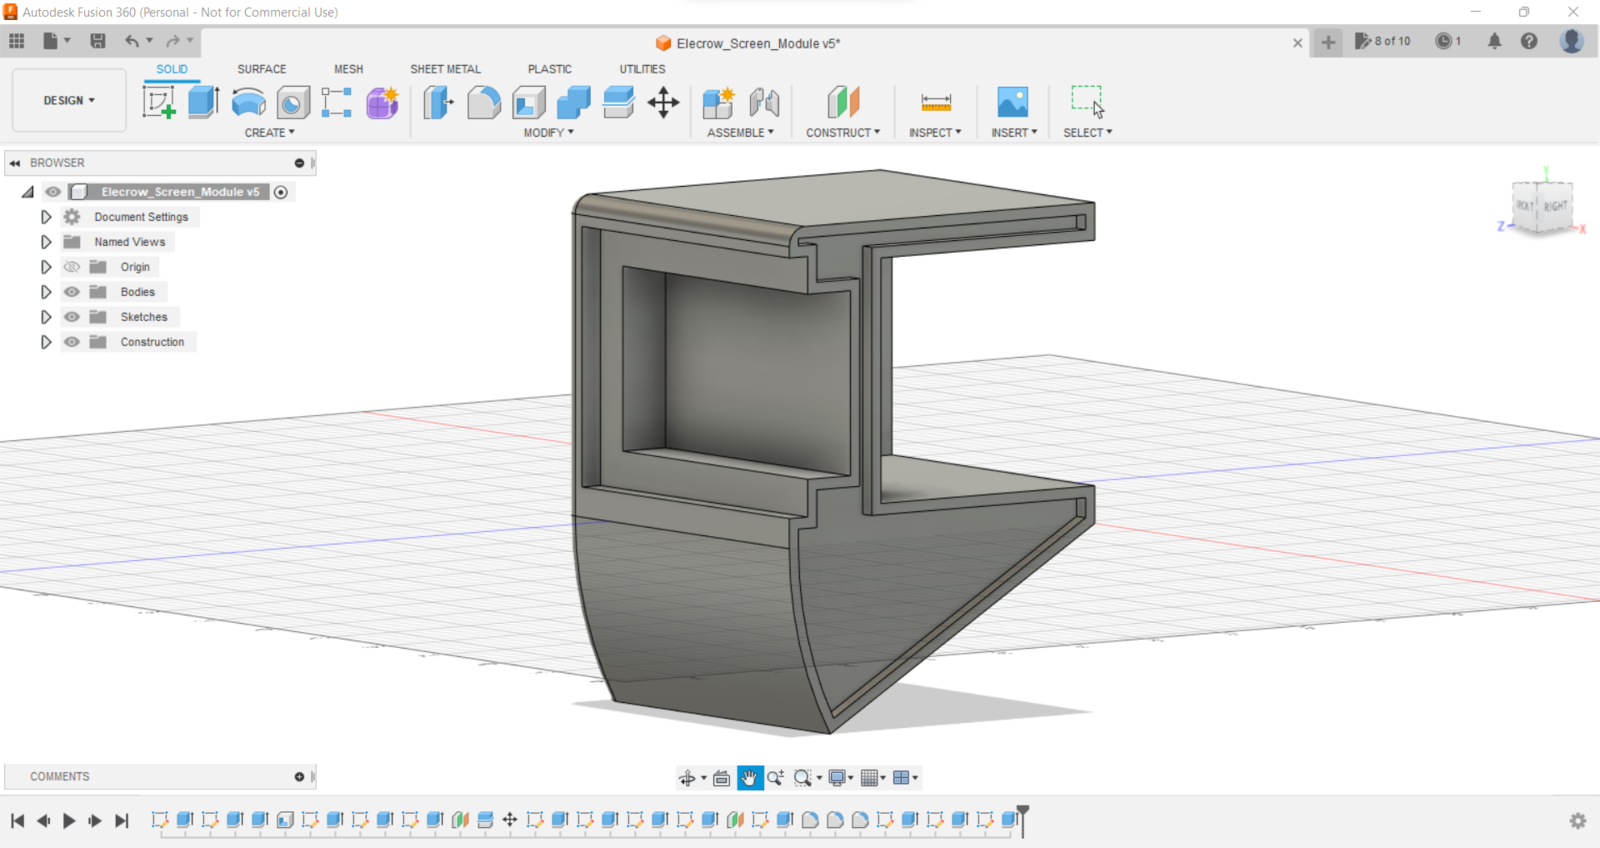
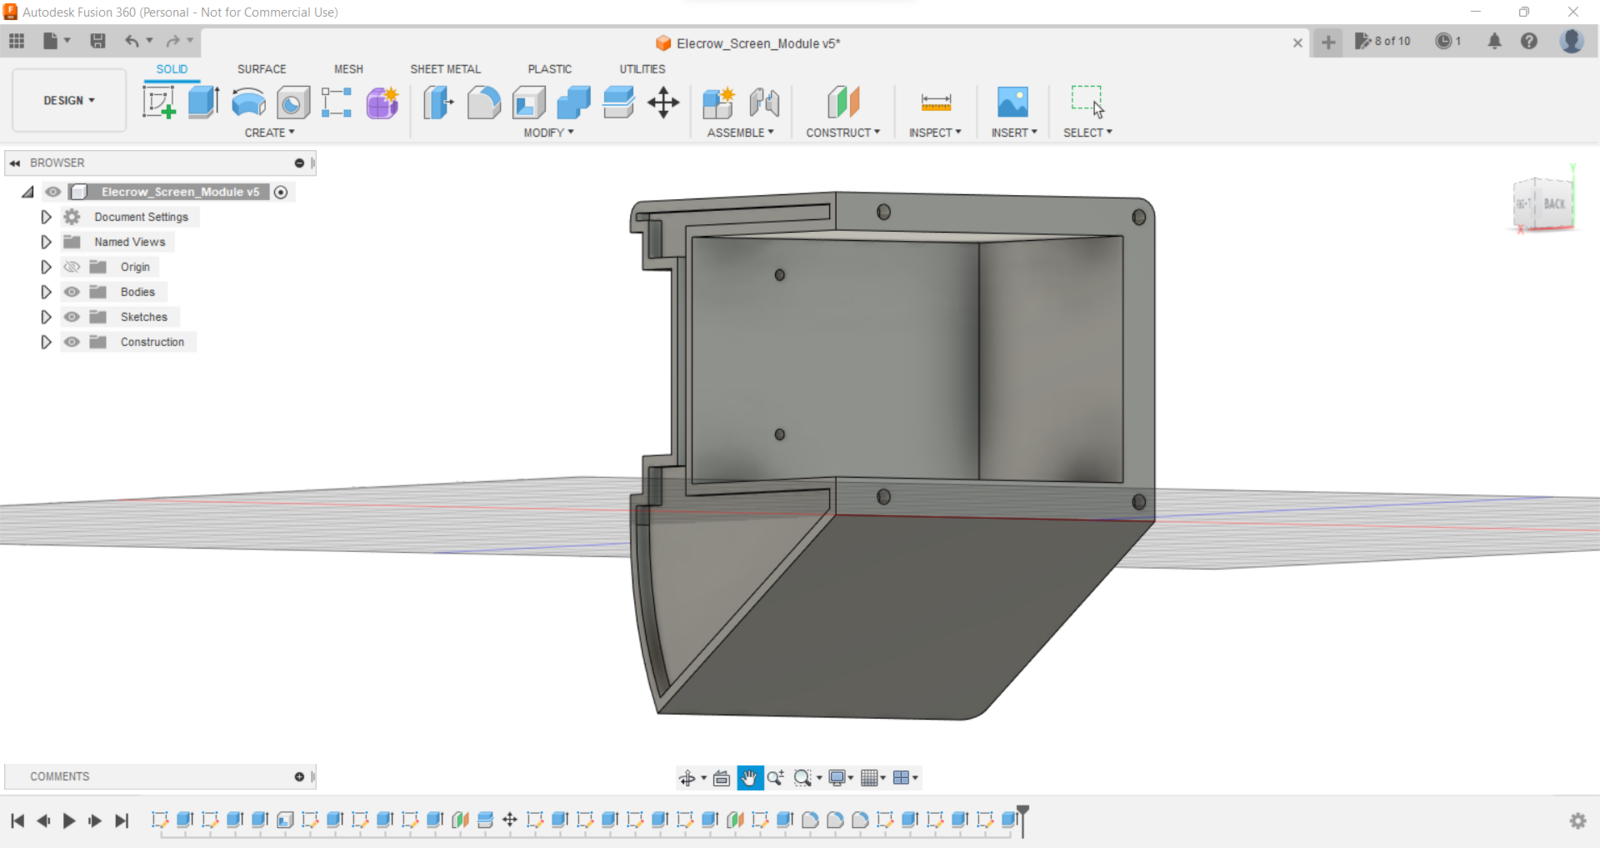
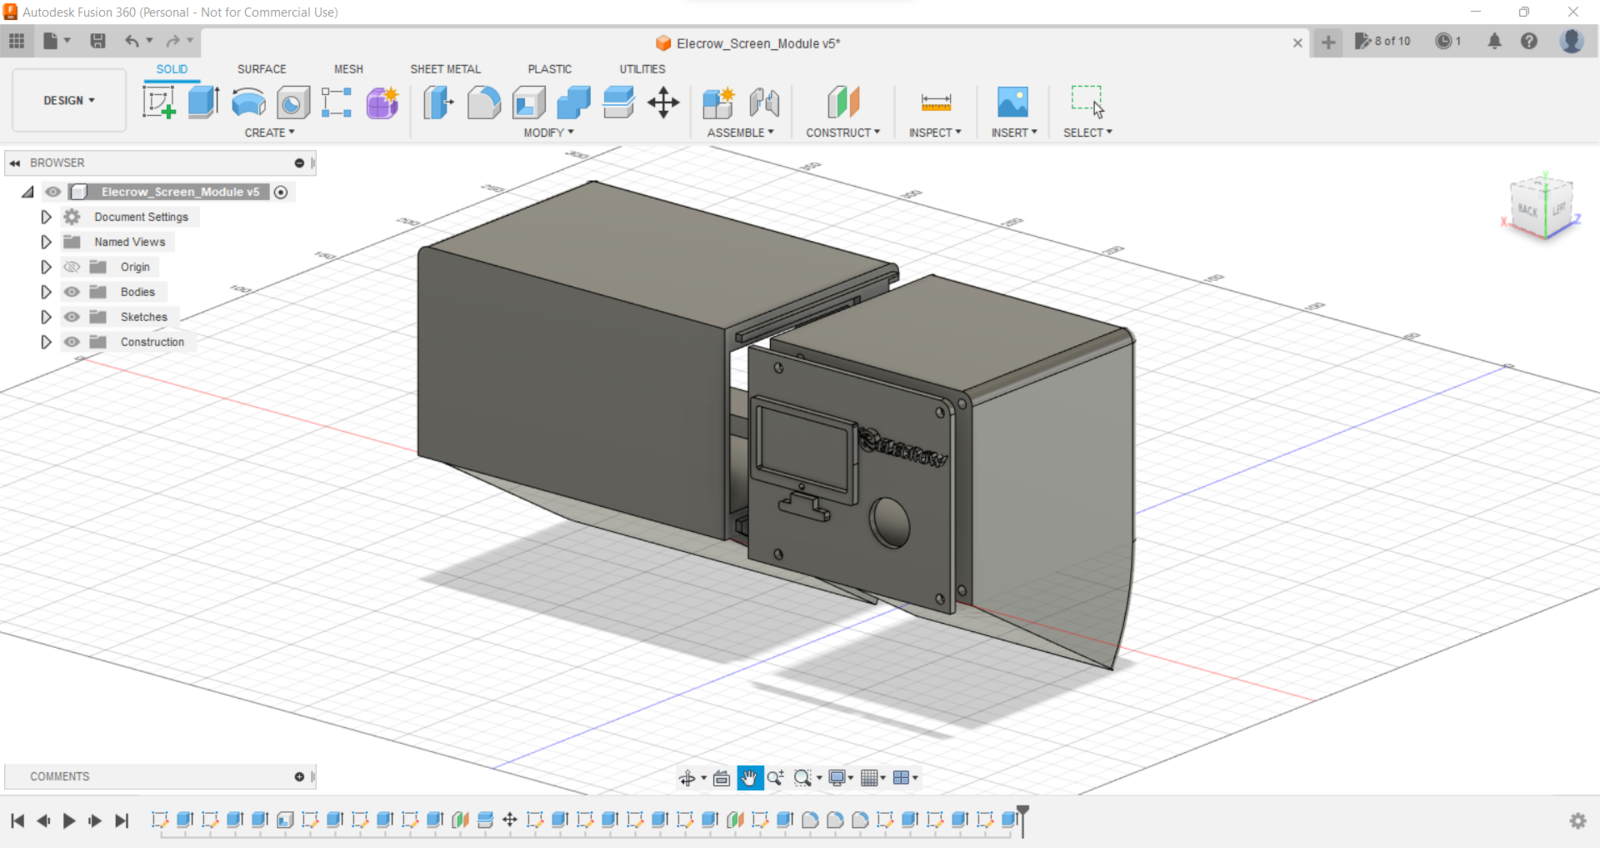
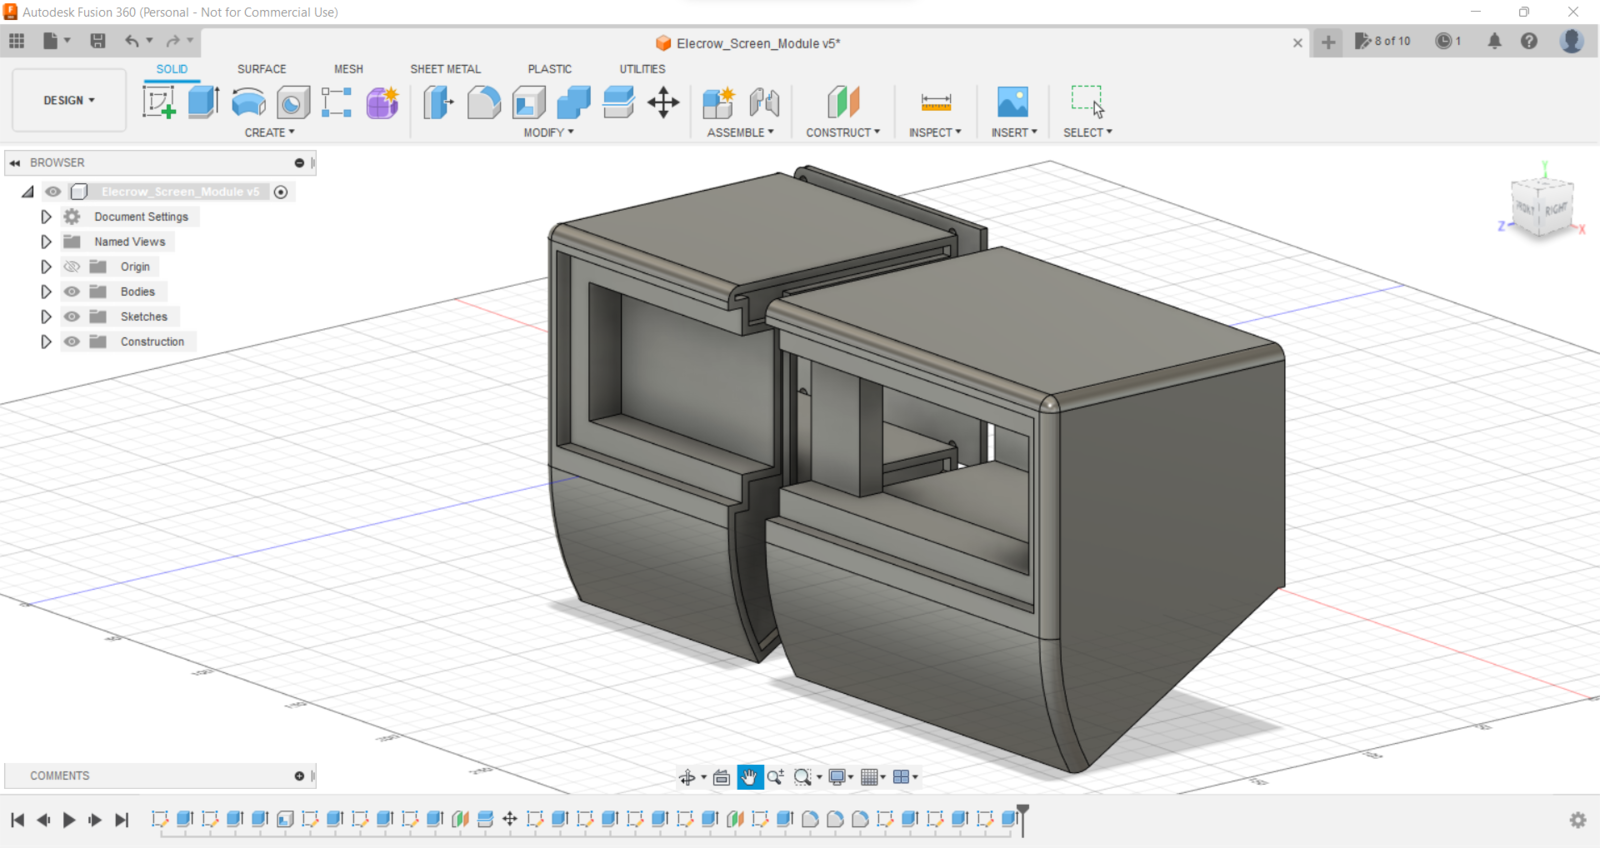
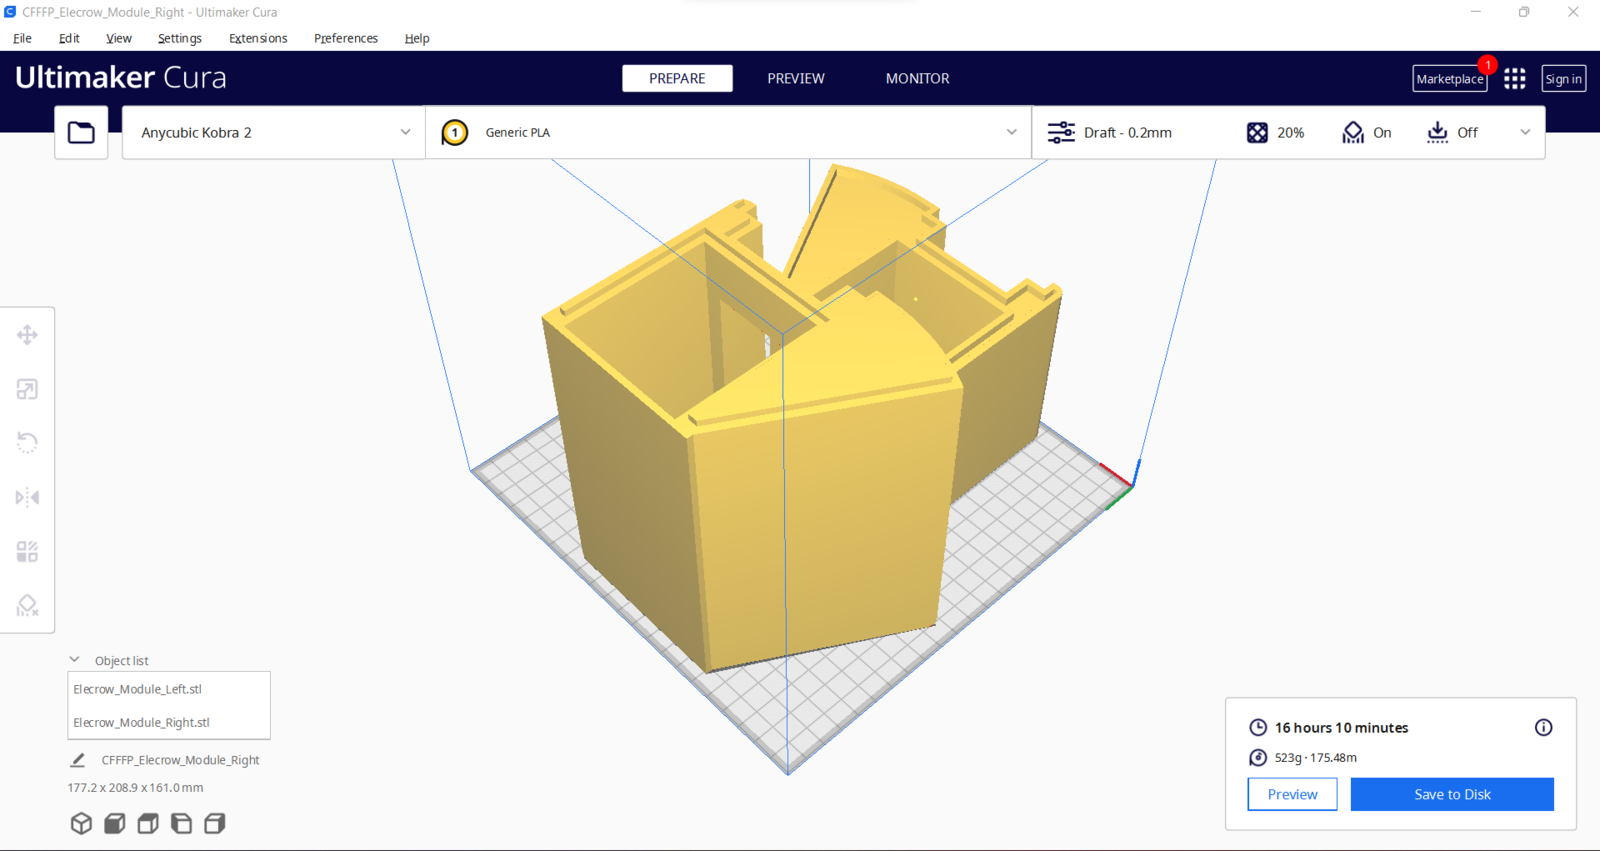
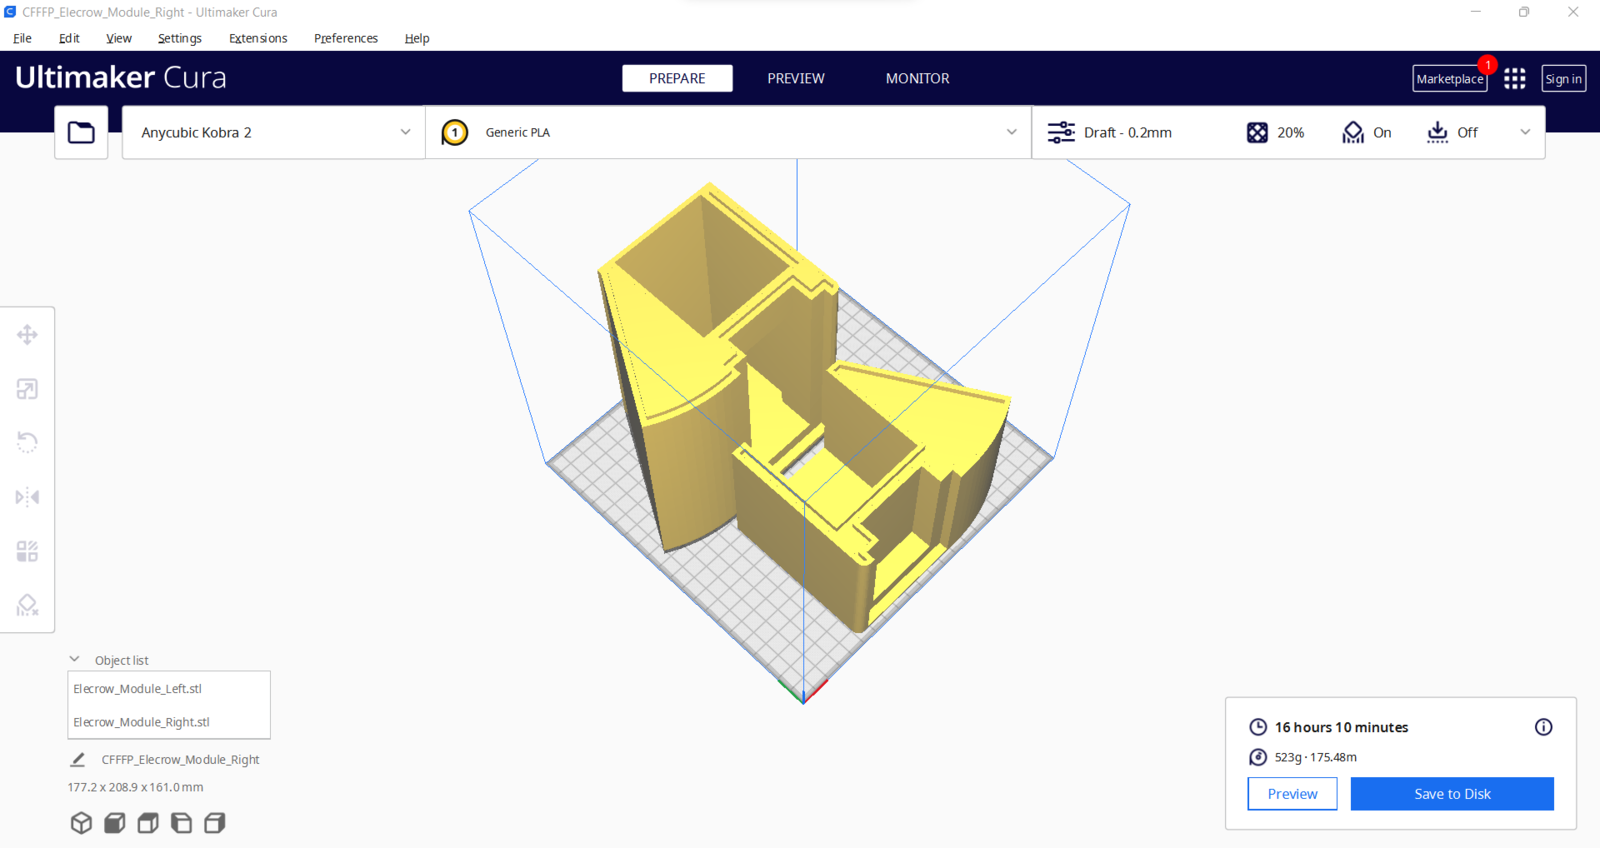
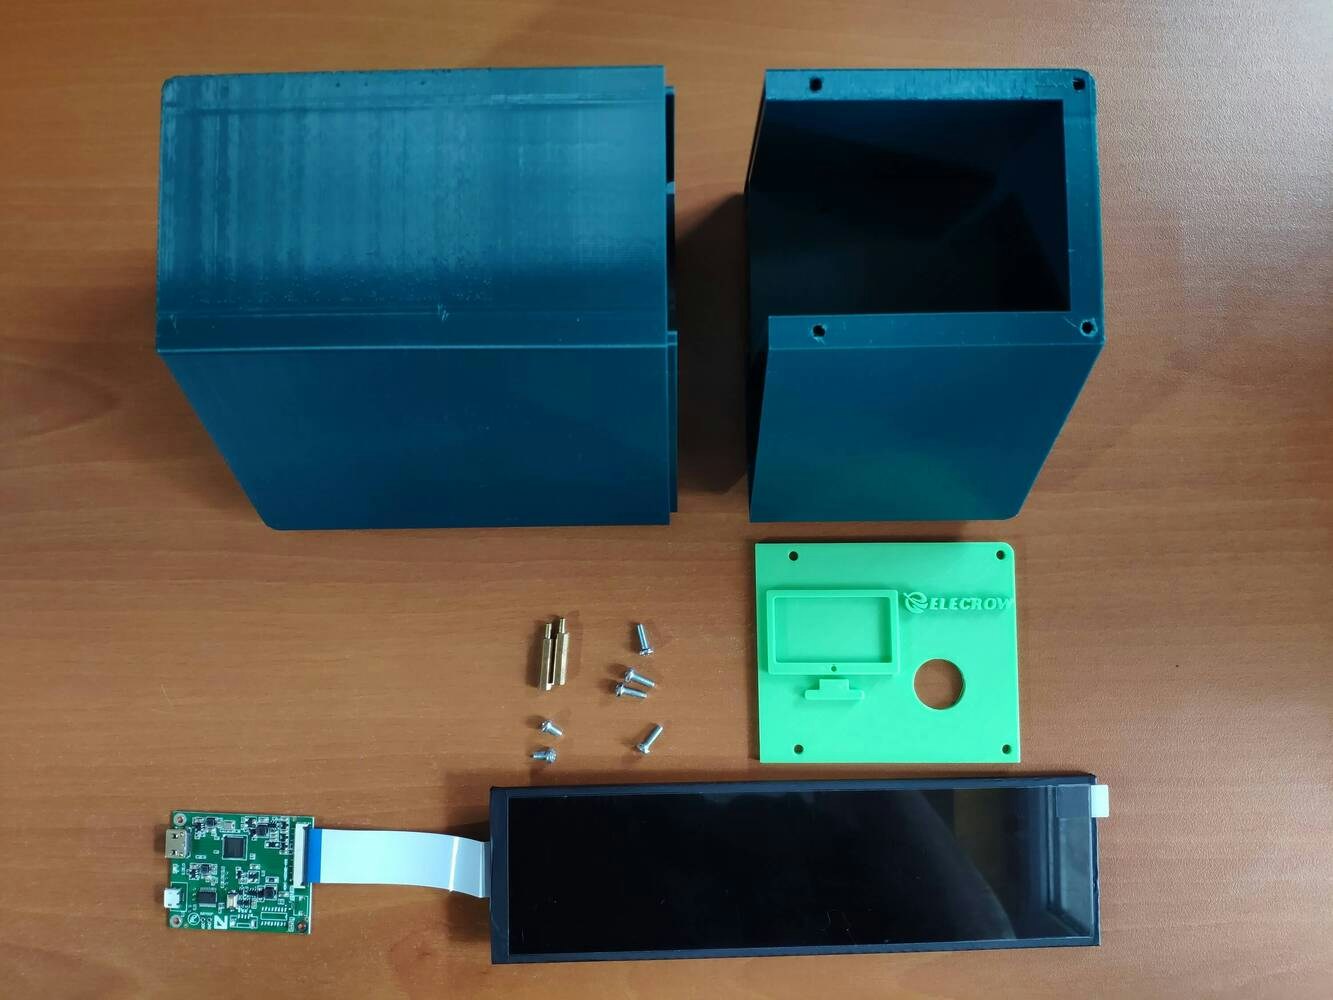
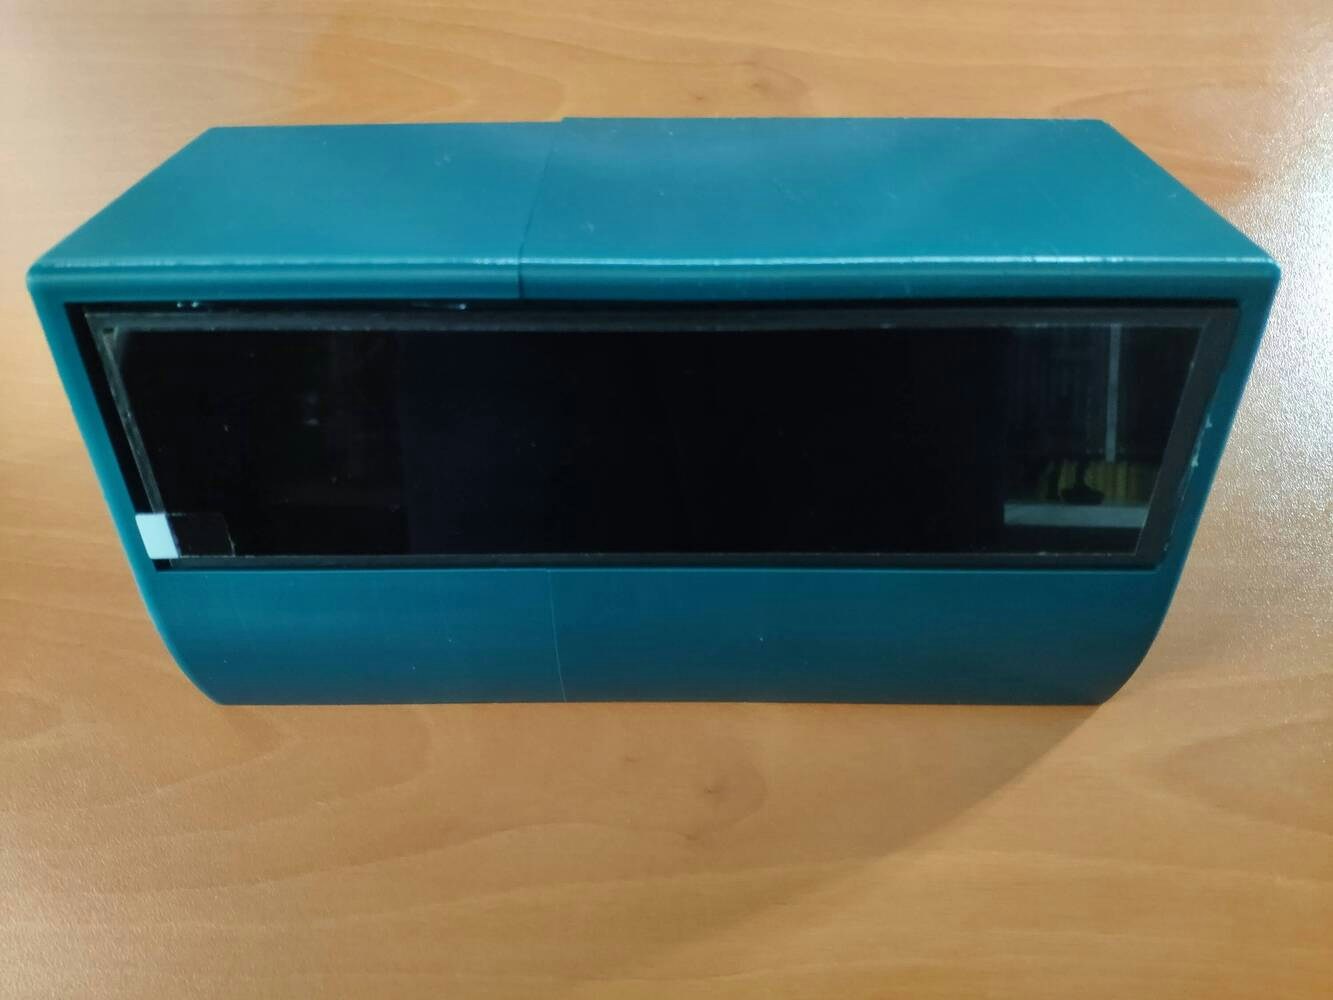
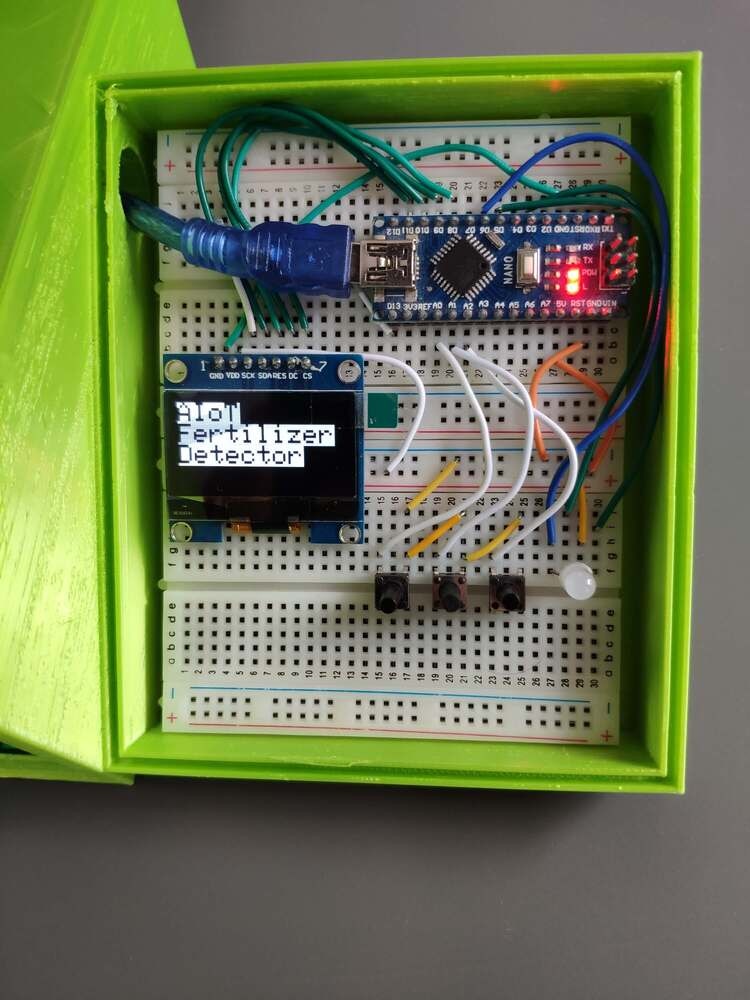
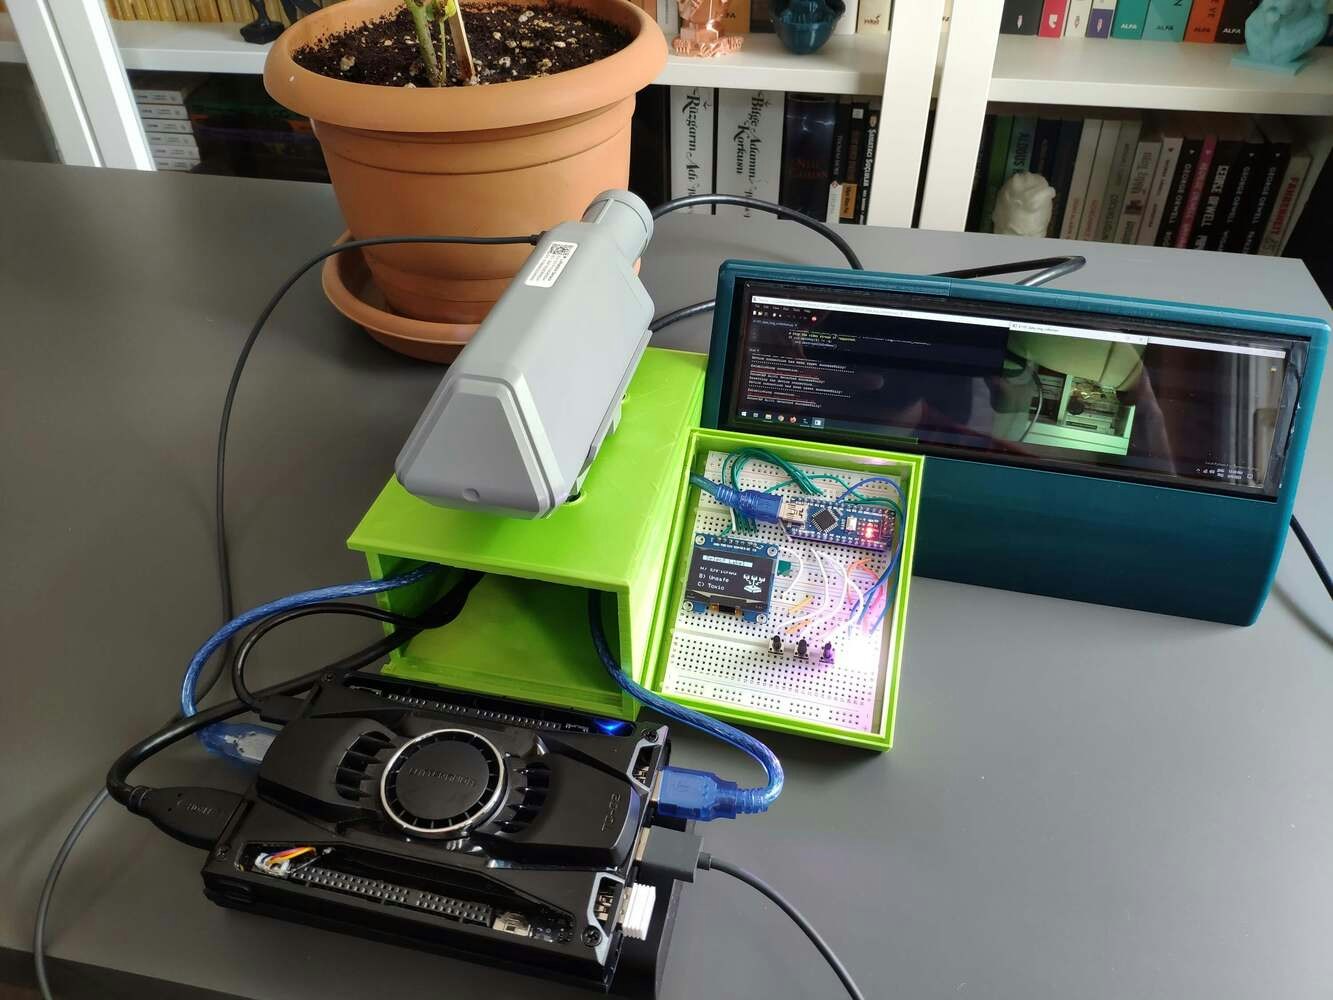
Step 1: Designing and printing a plant-themed case
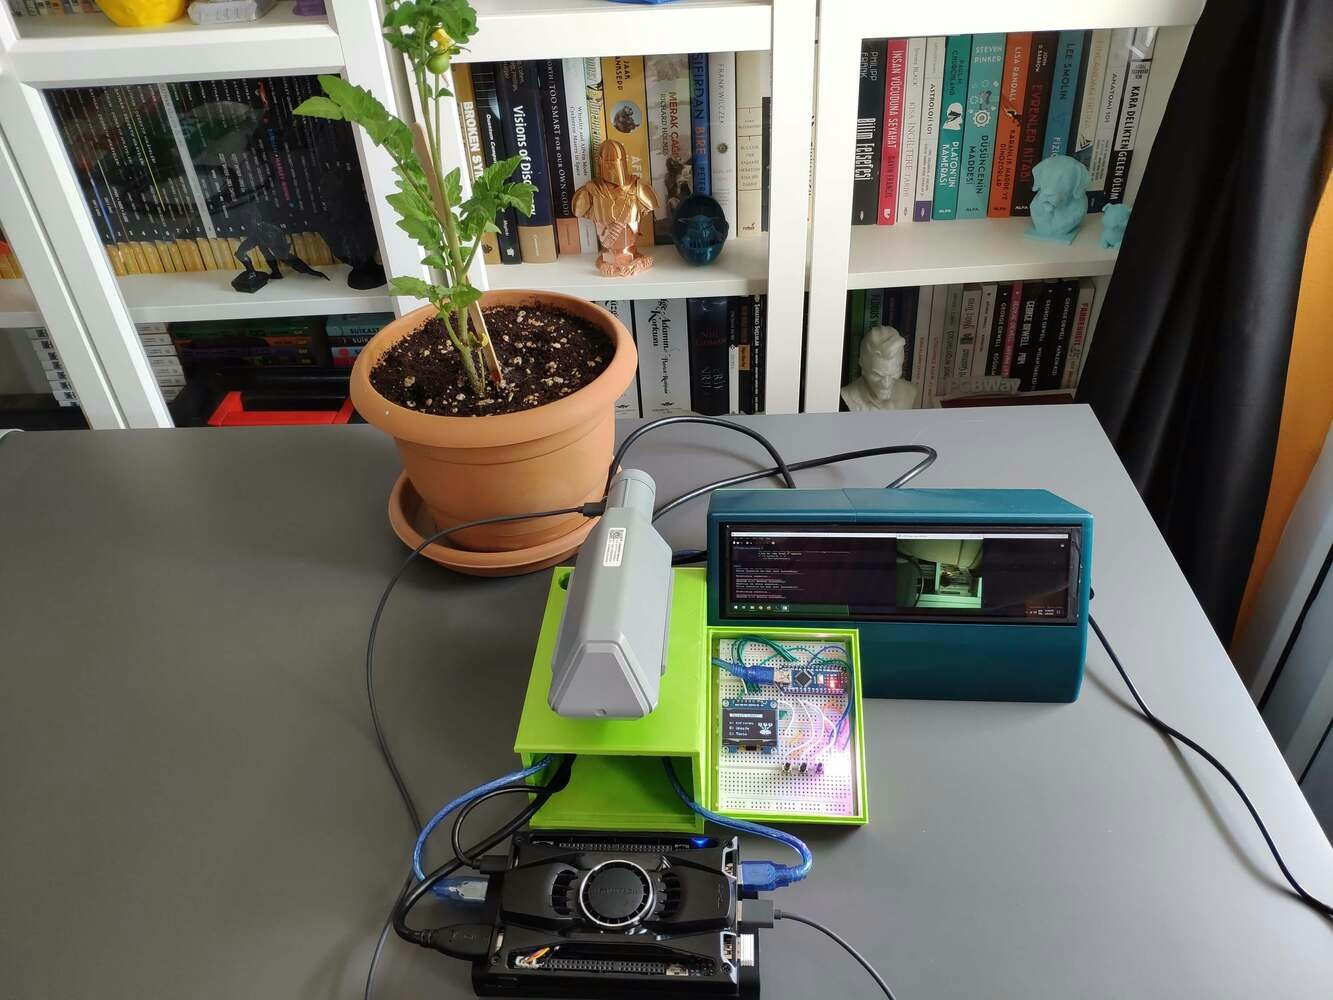
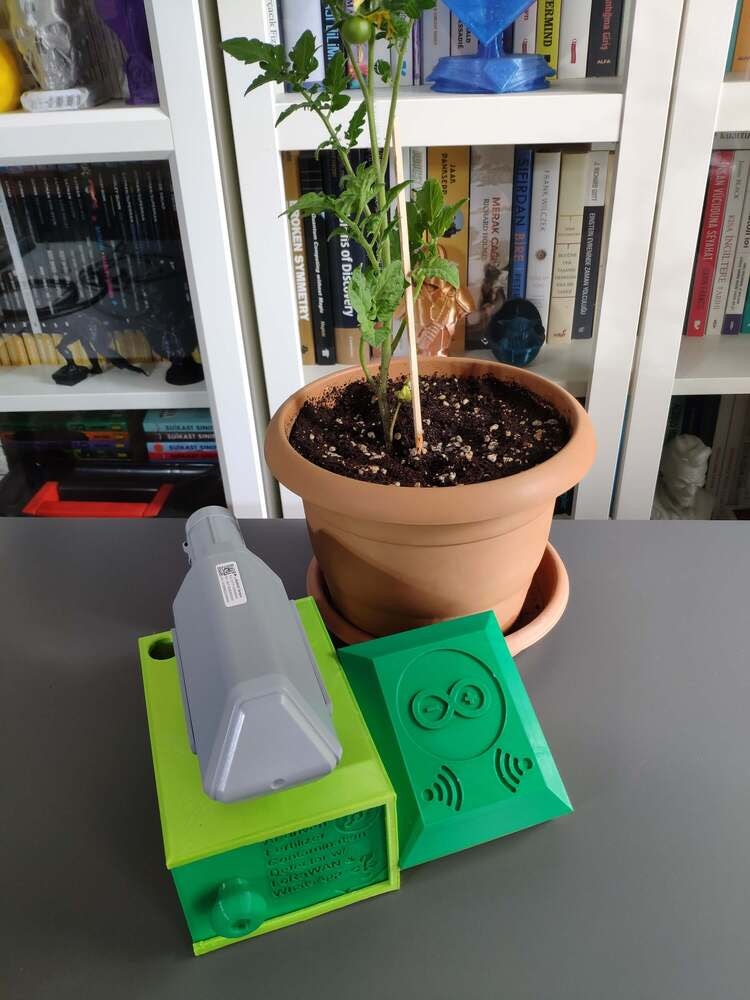
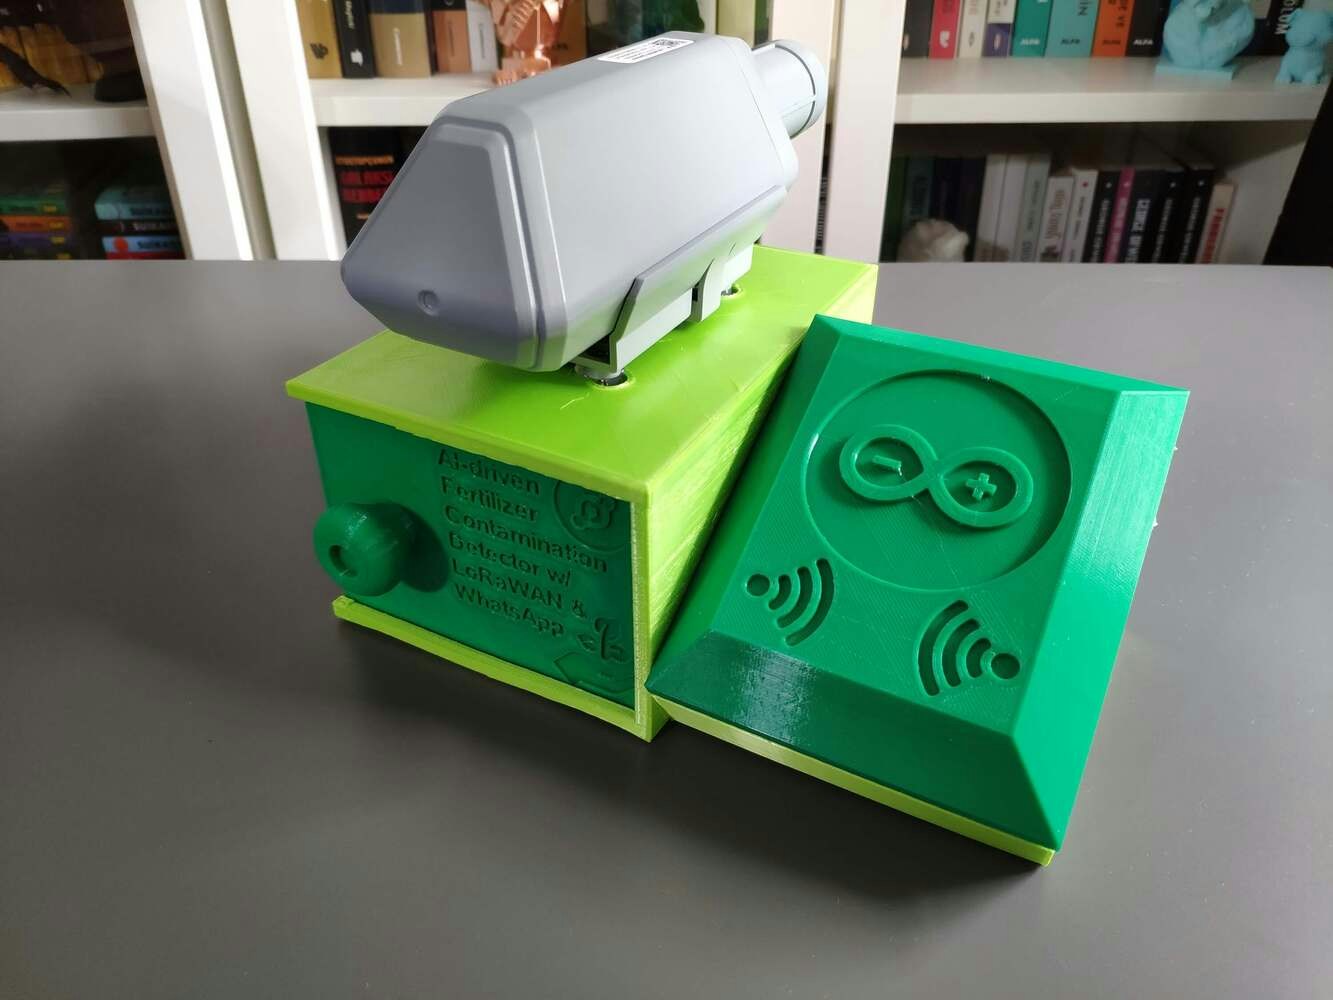
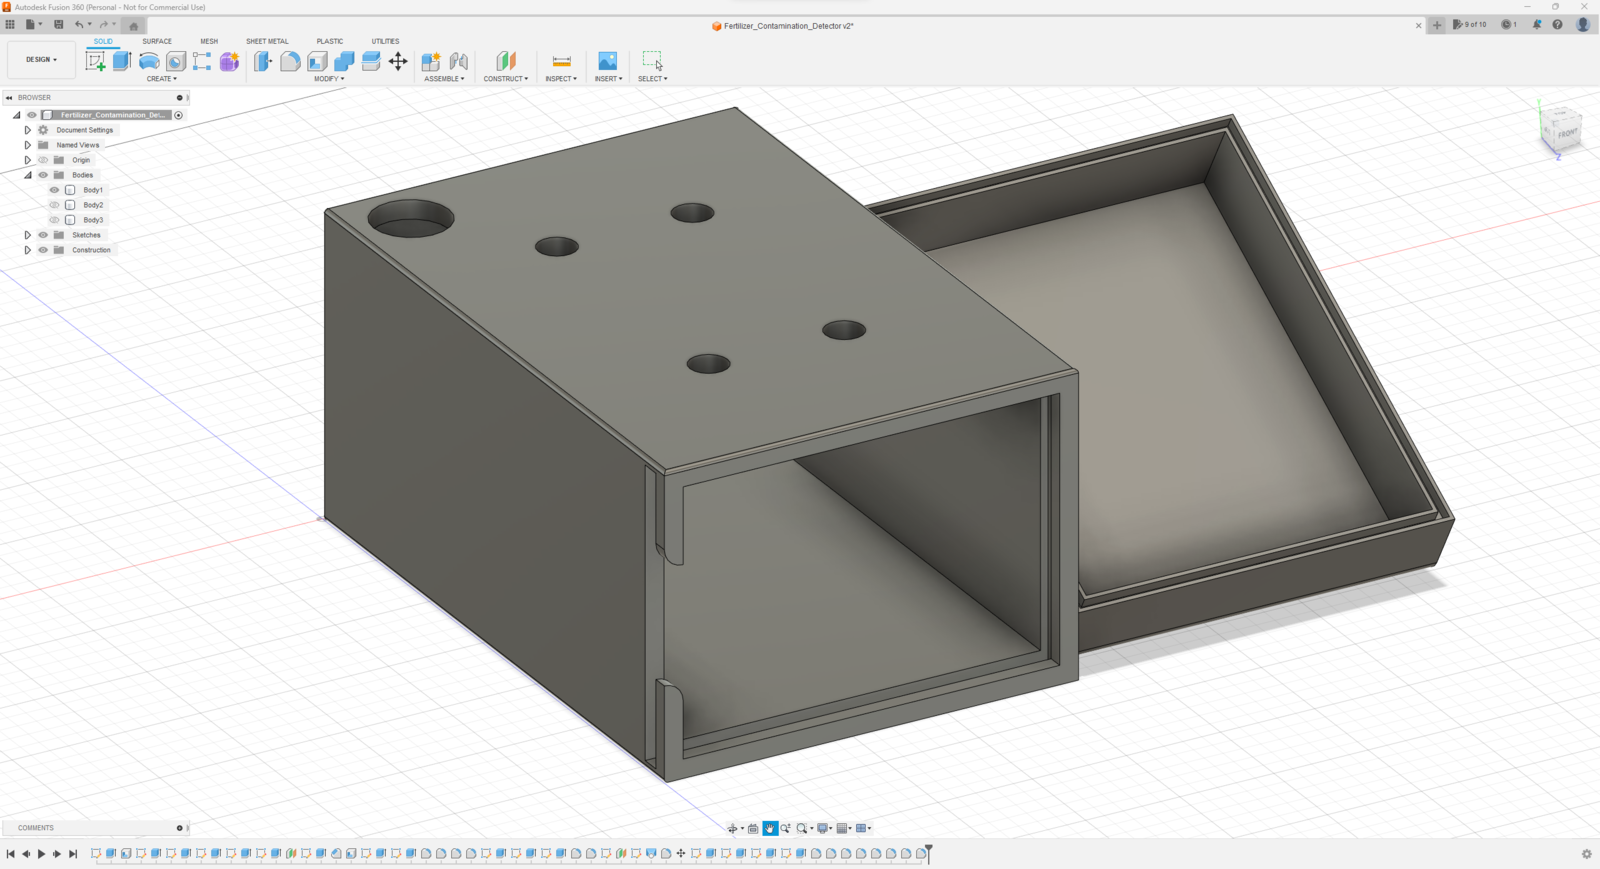
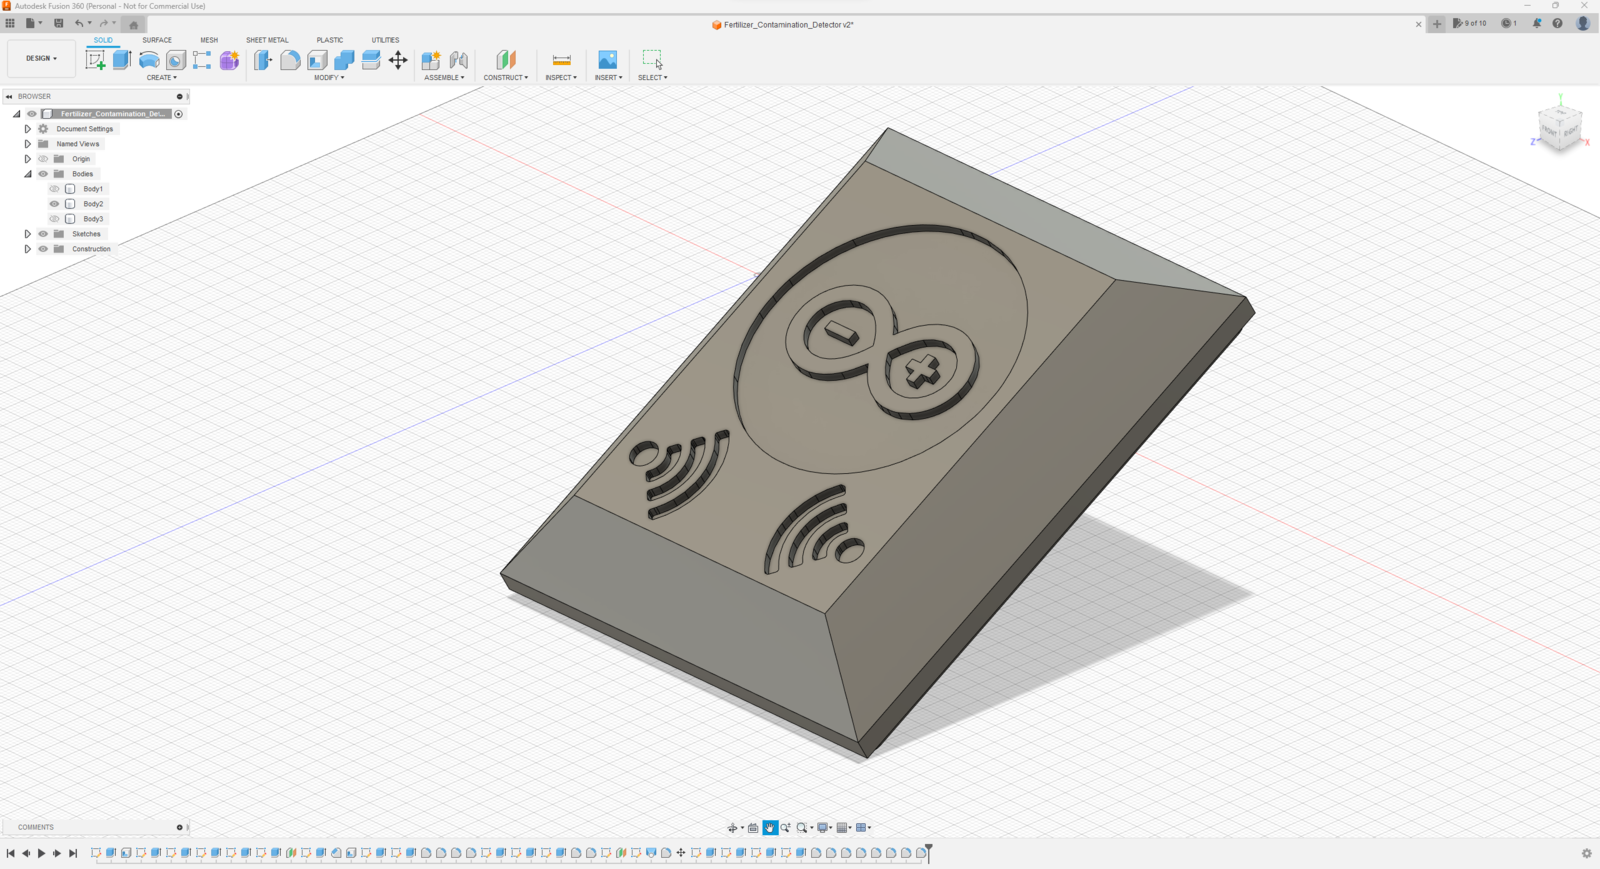
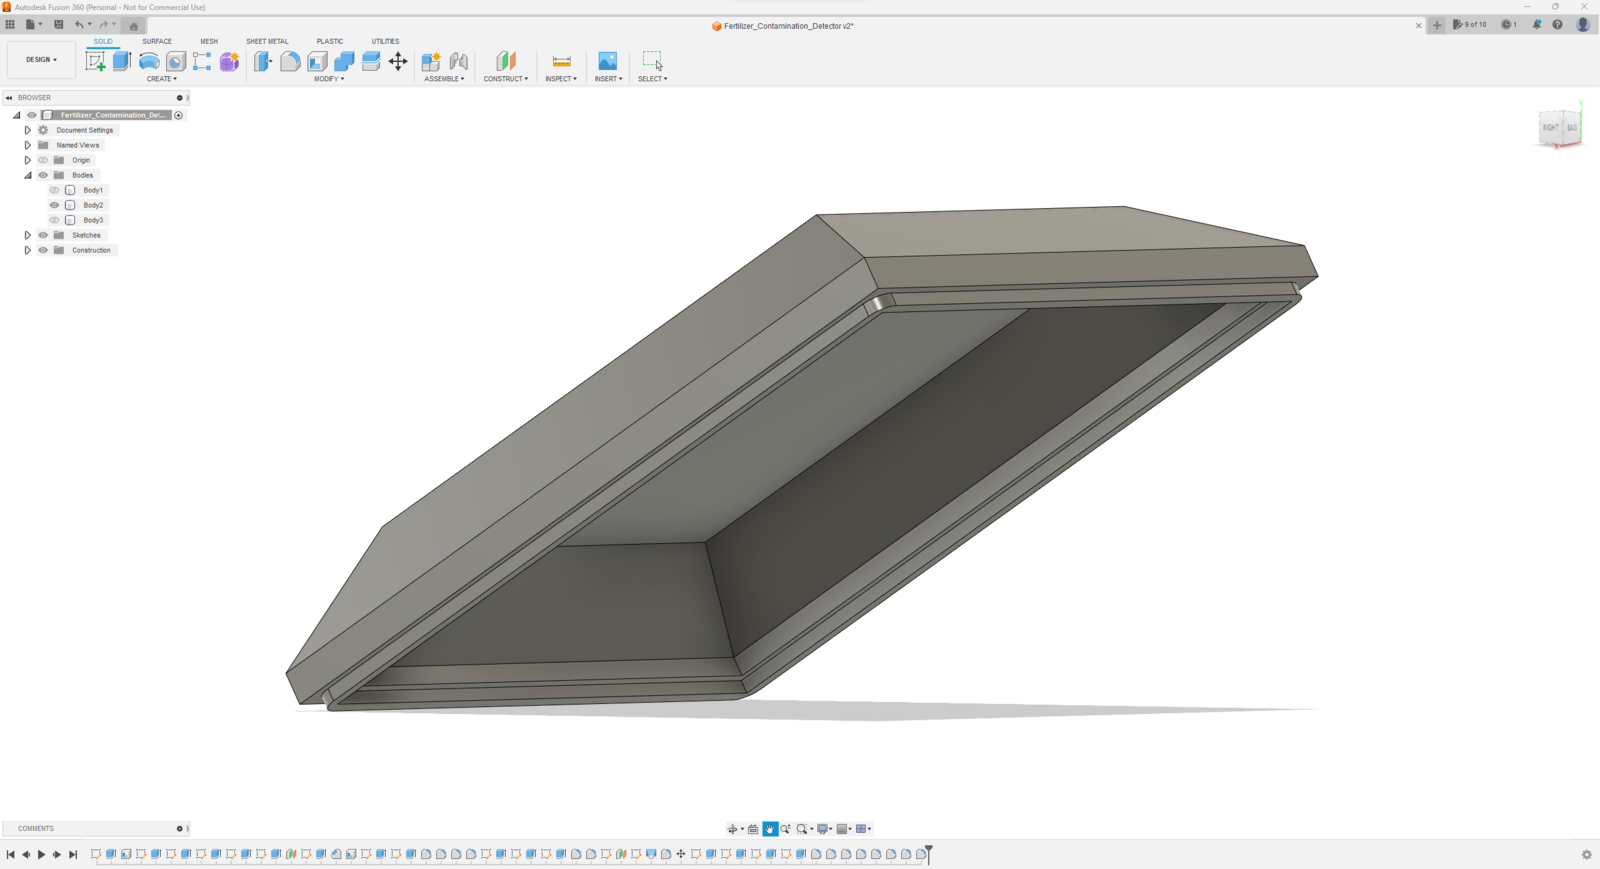
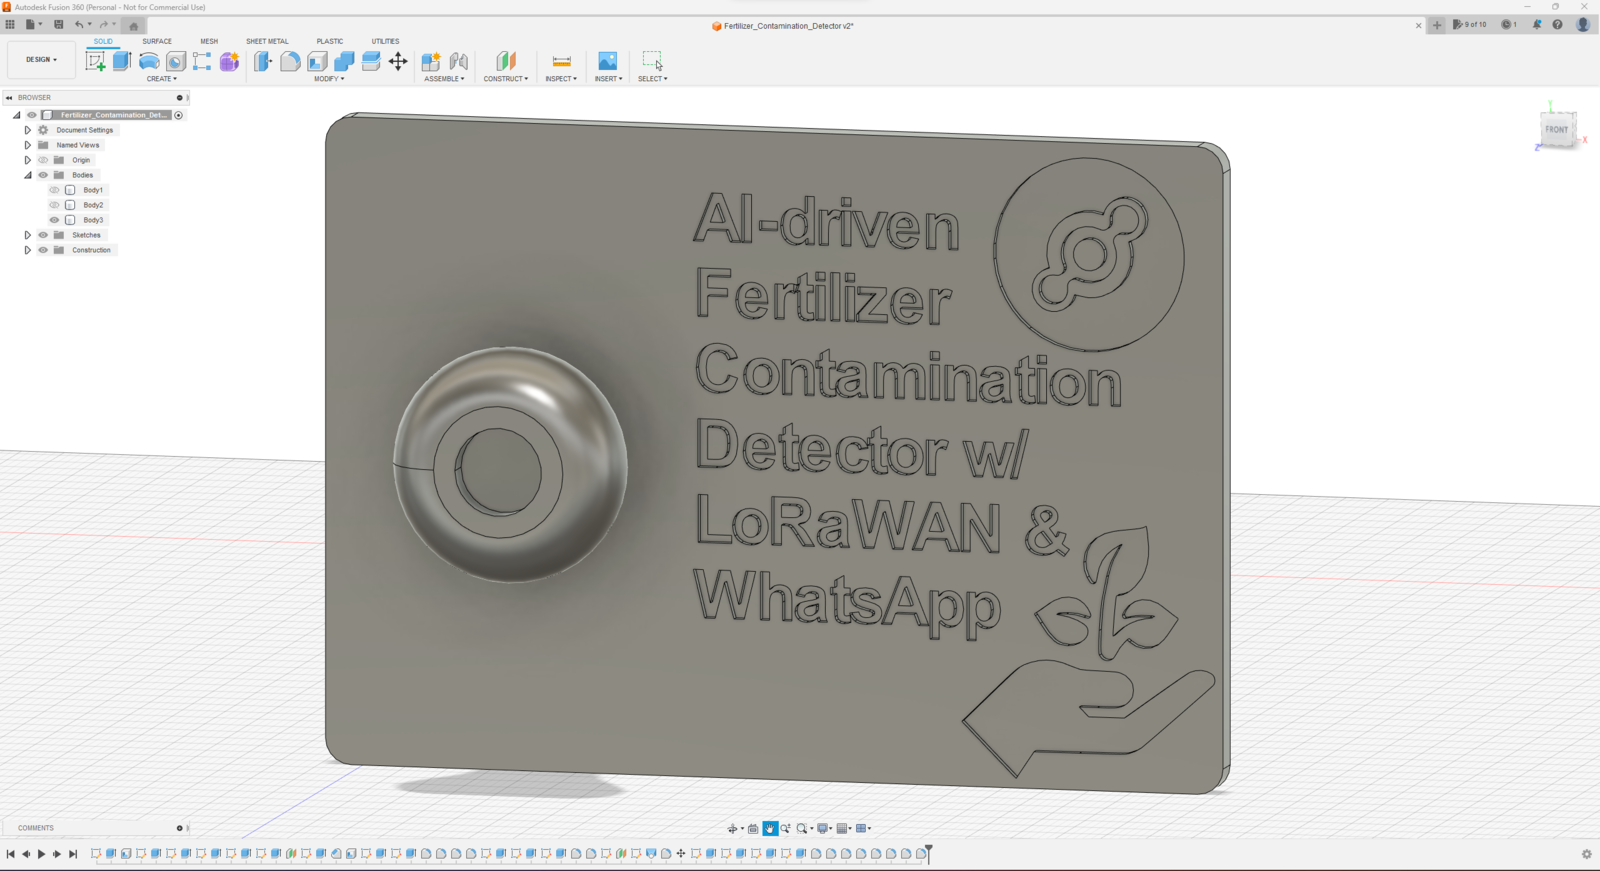
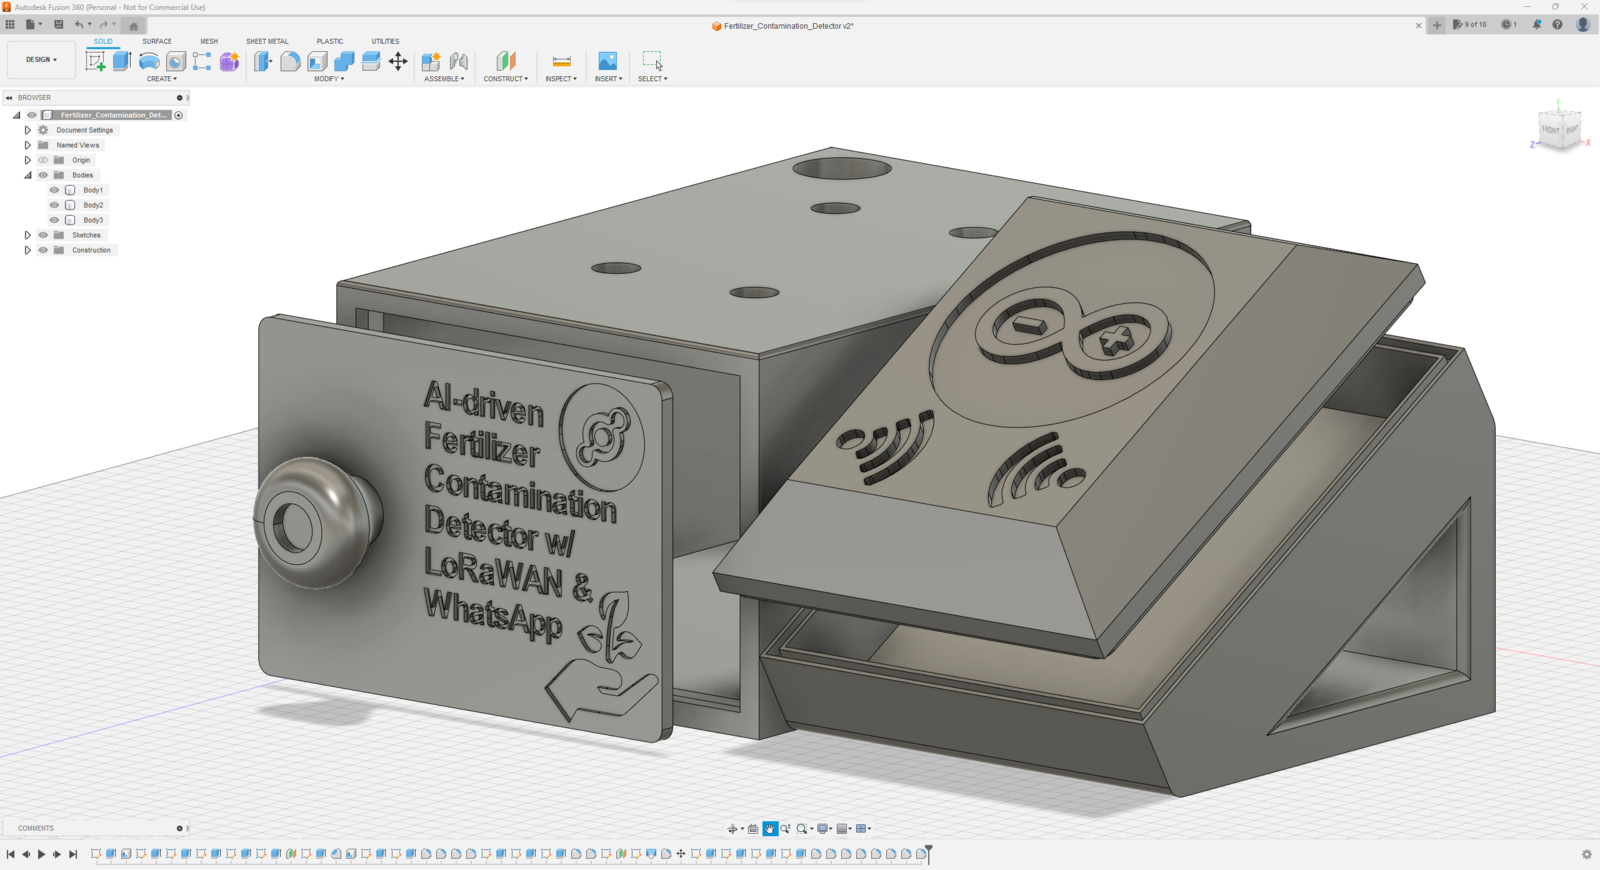
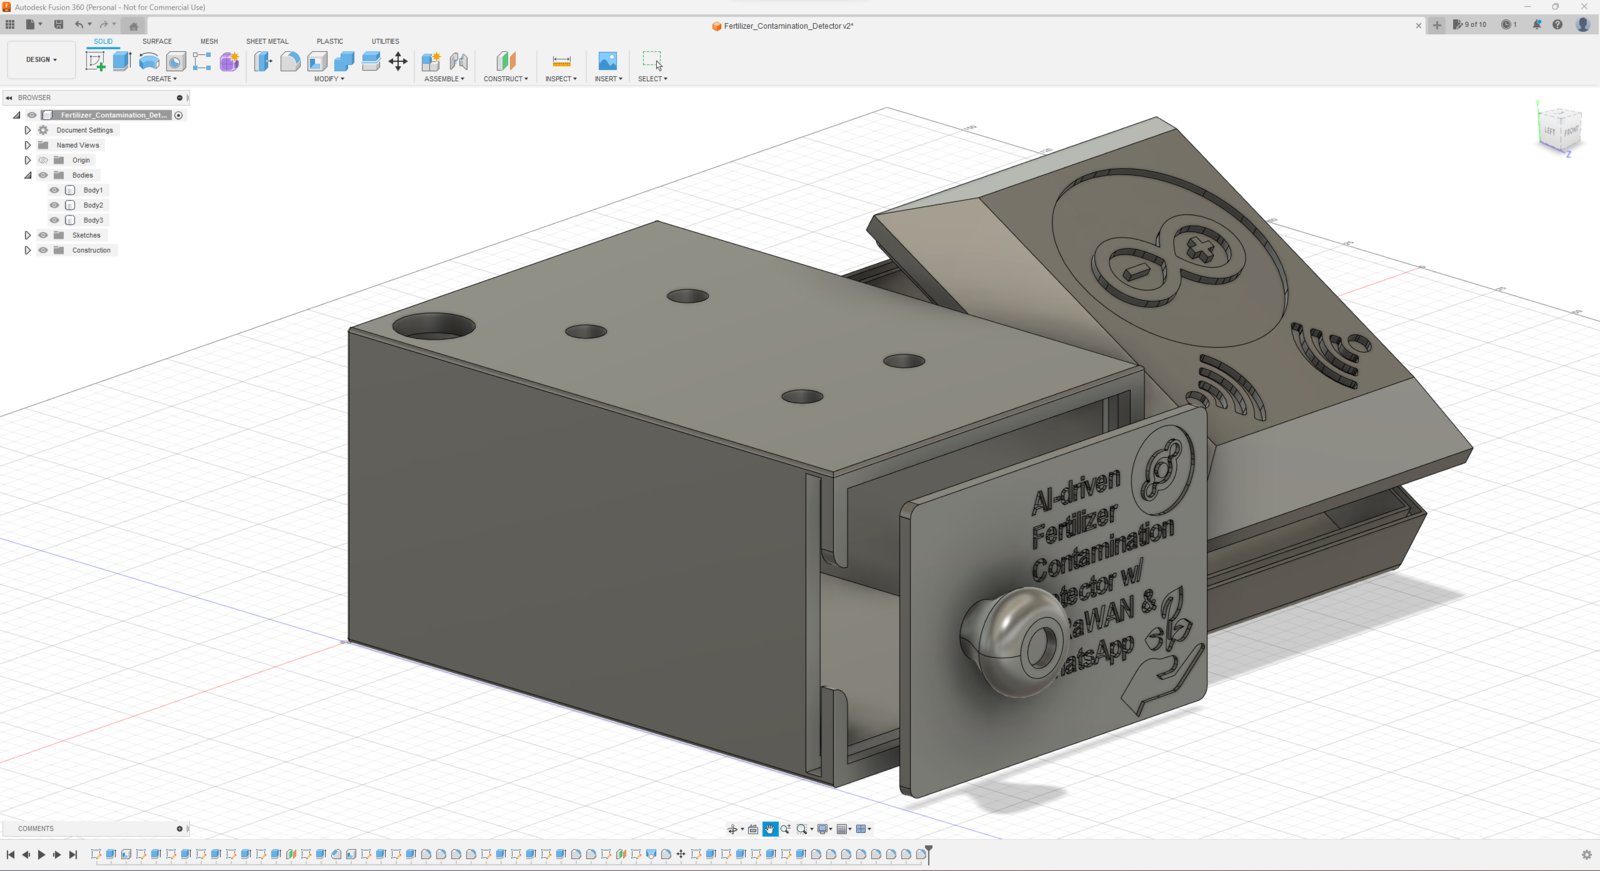
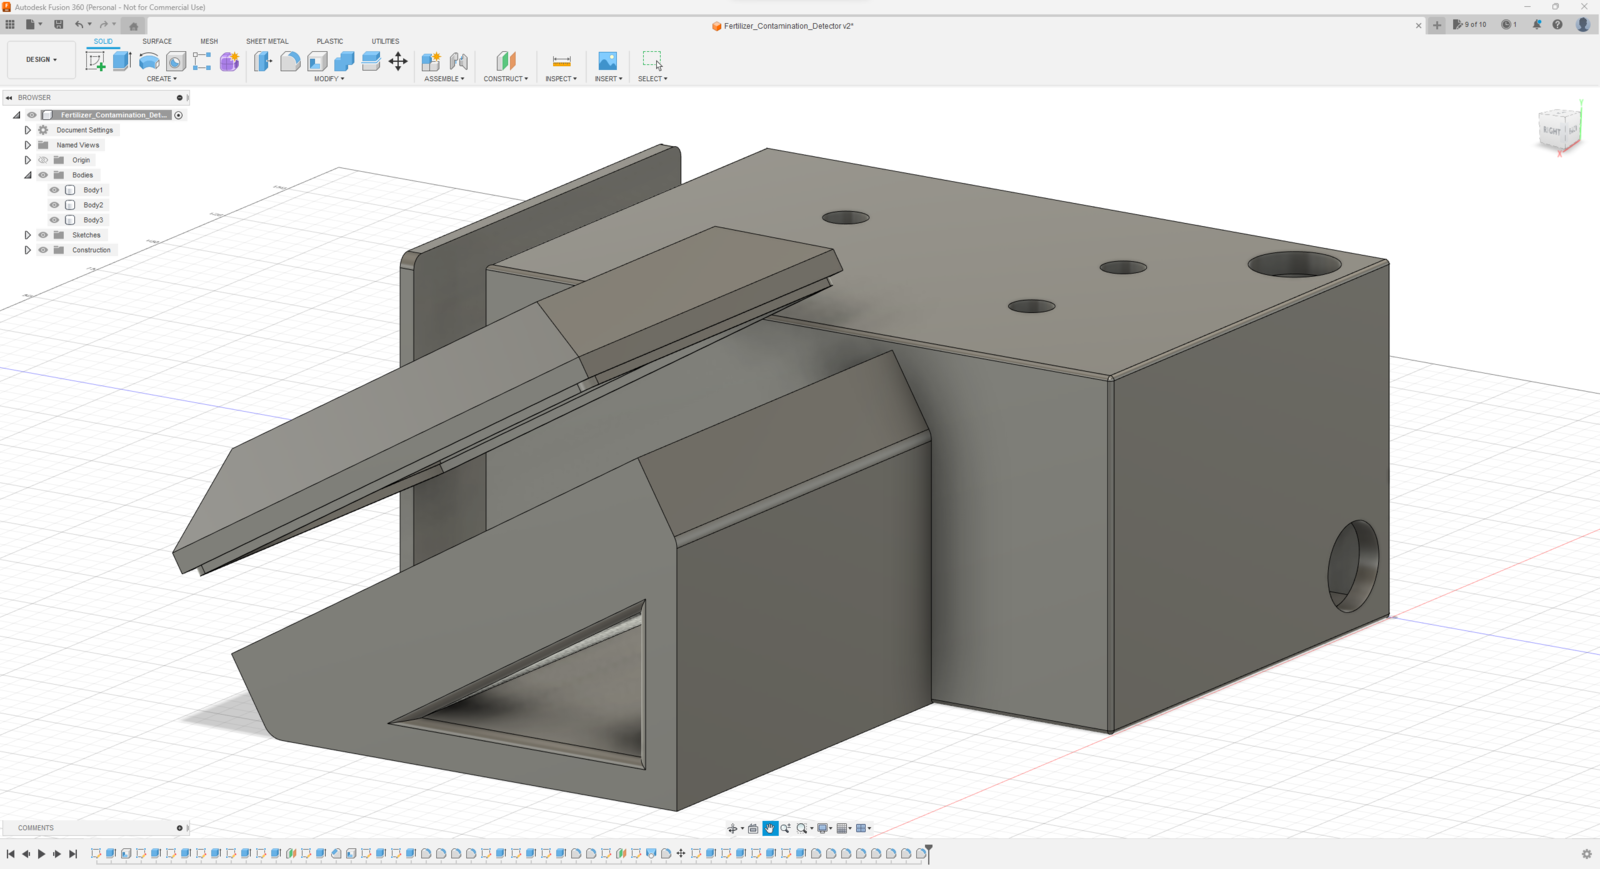
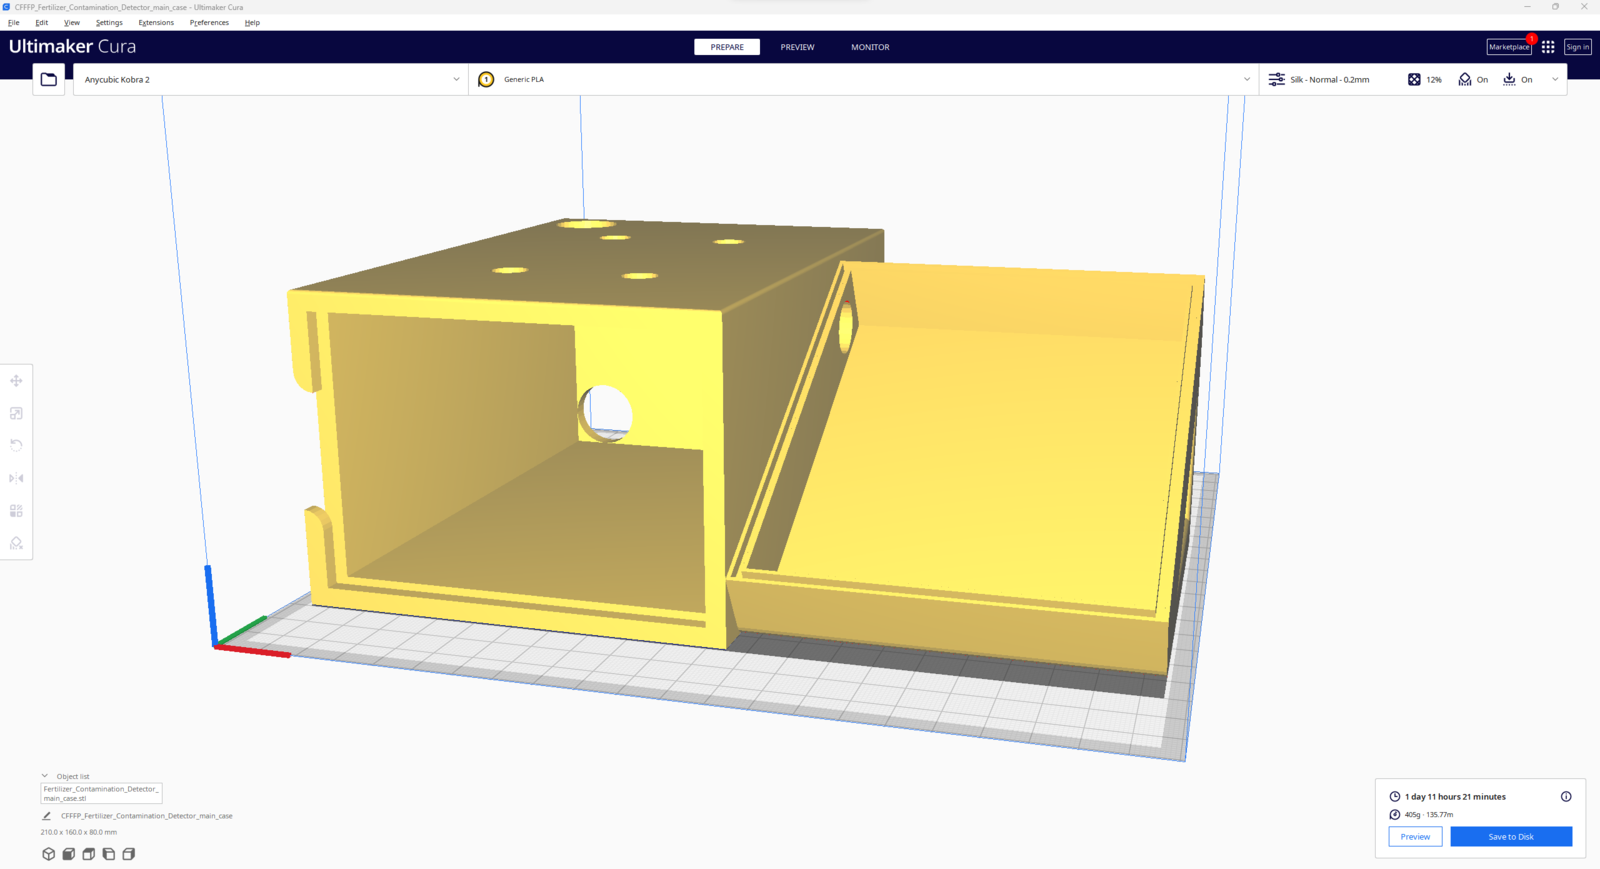
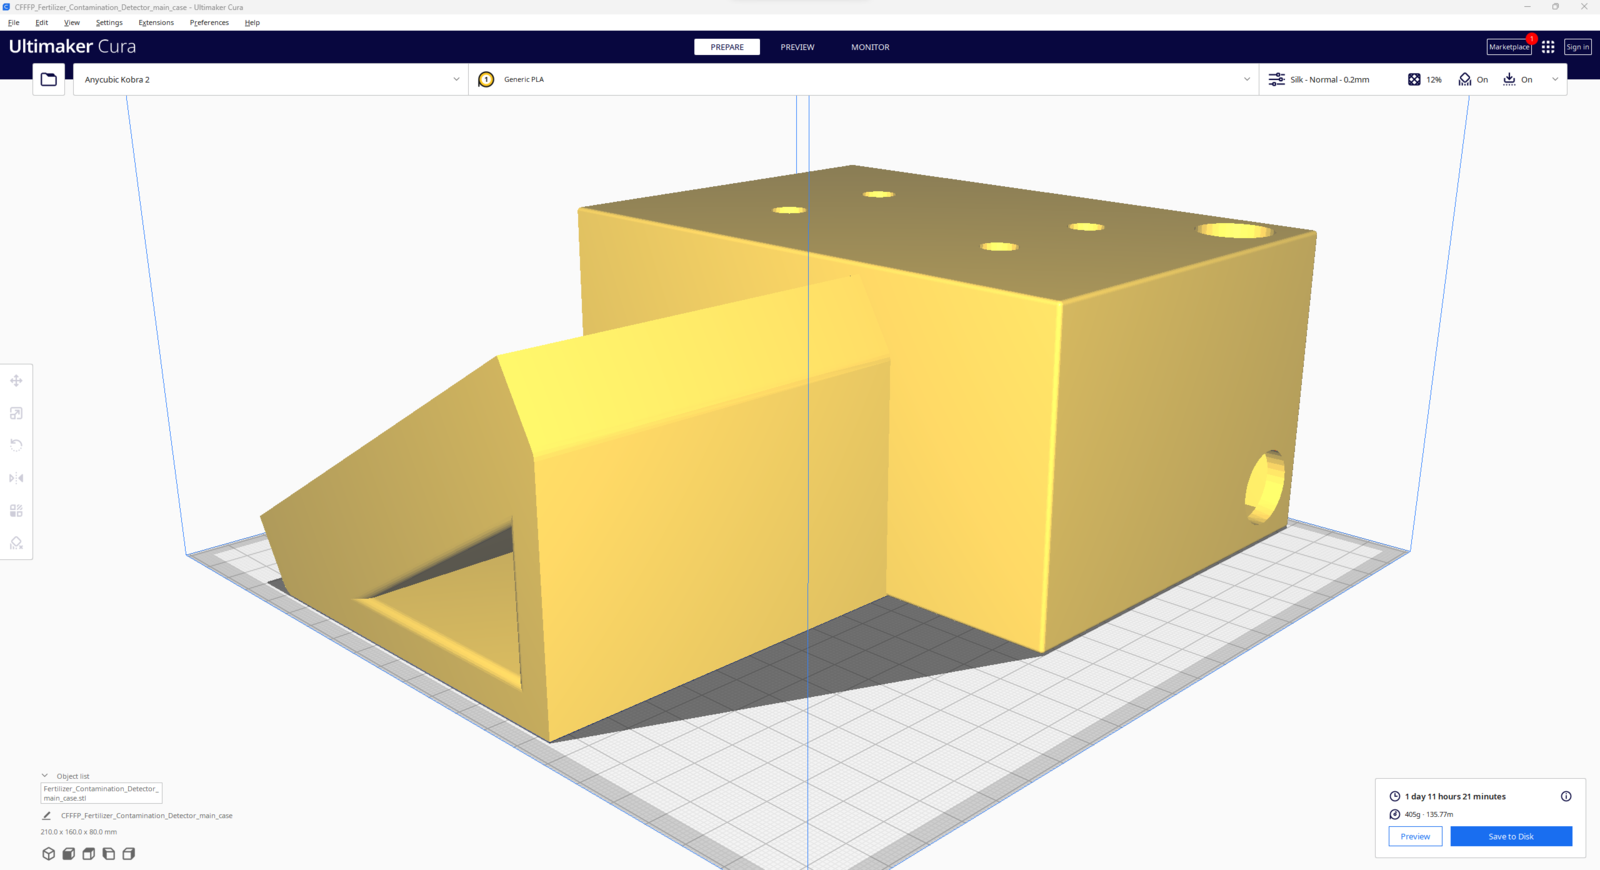
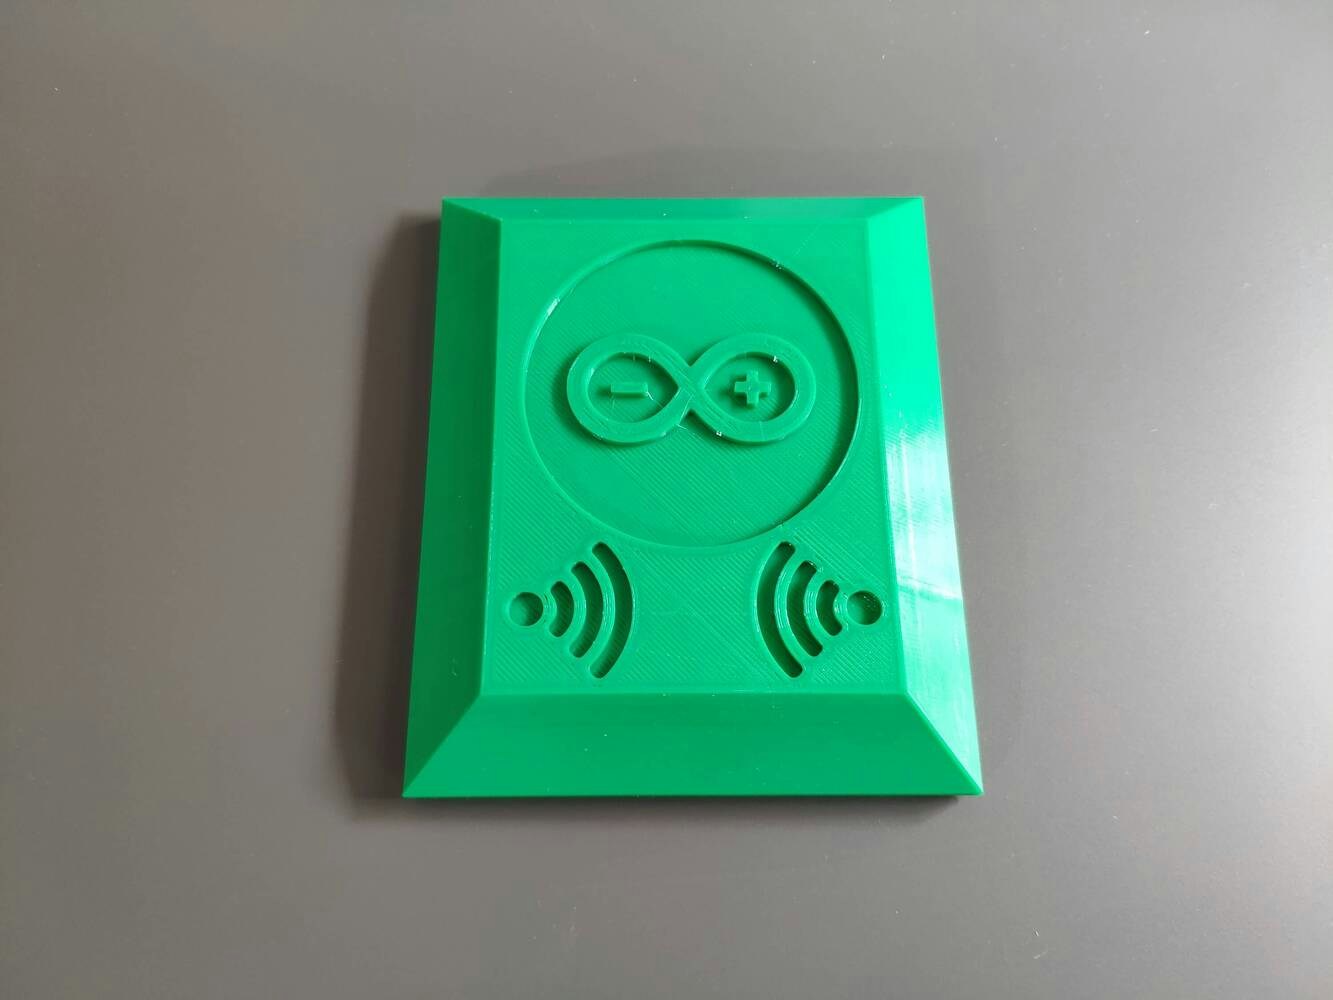
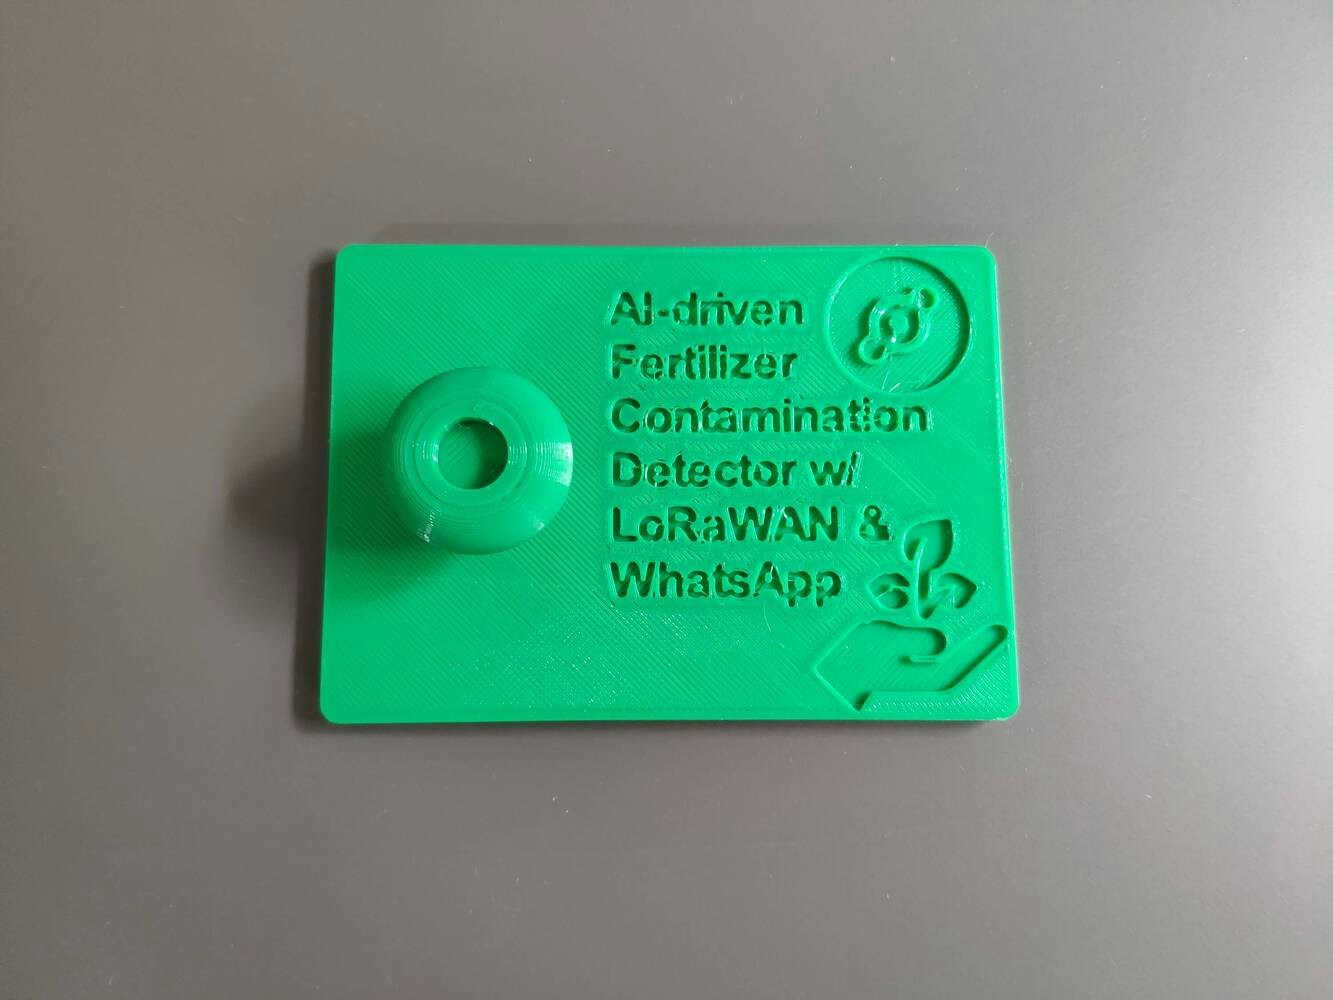
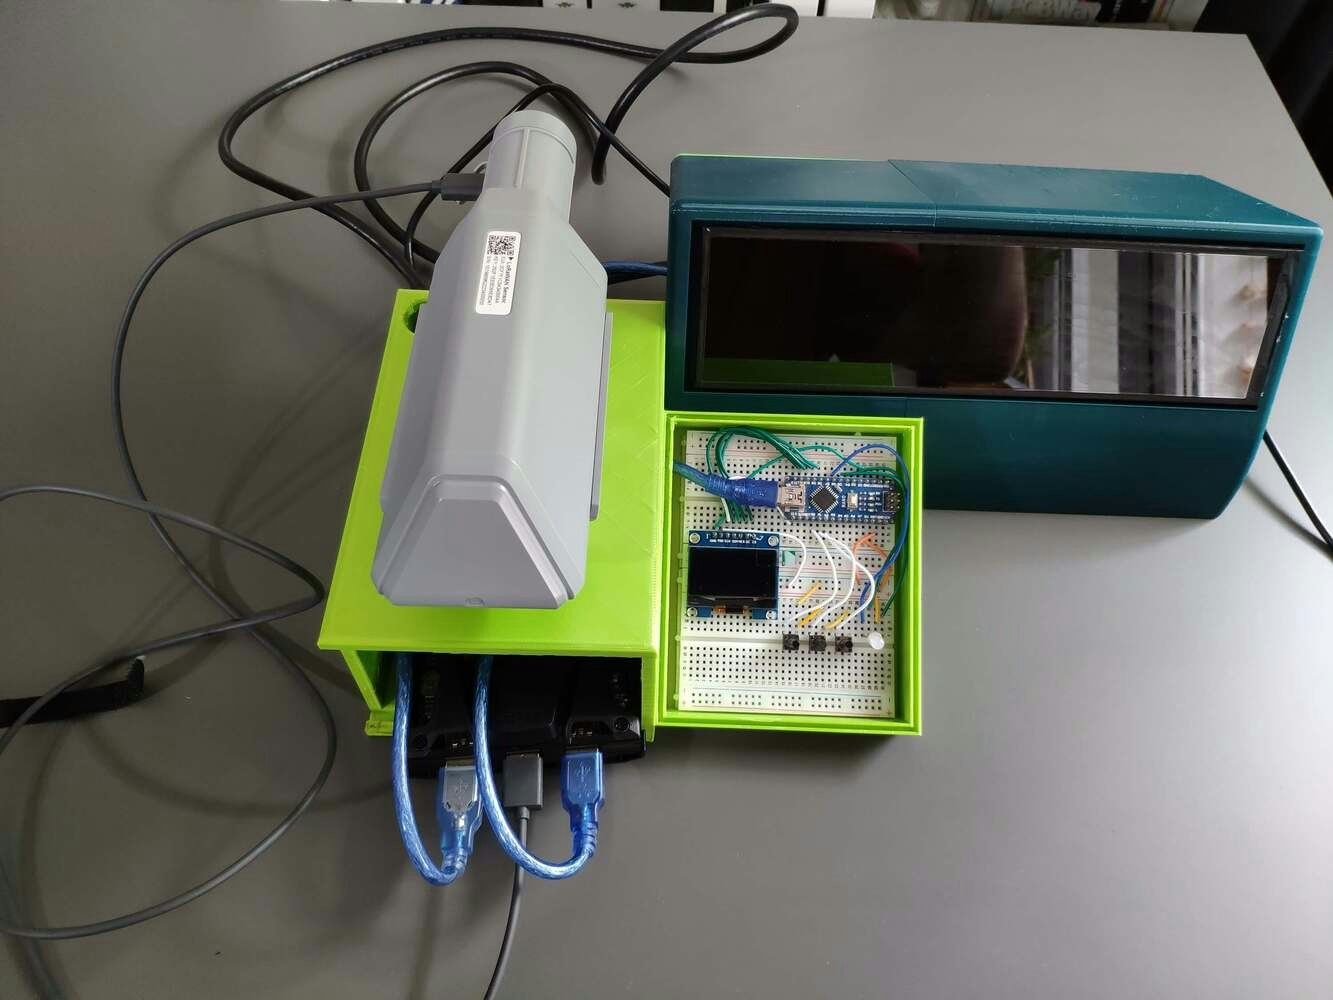
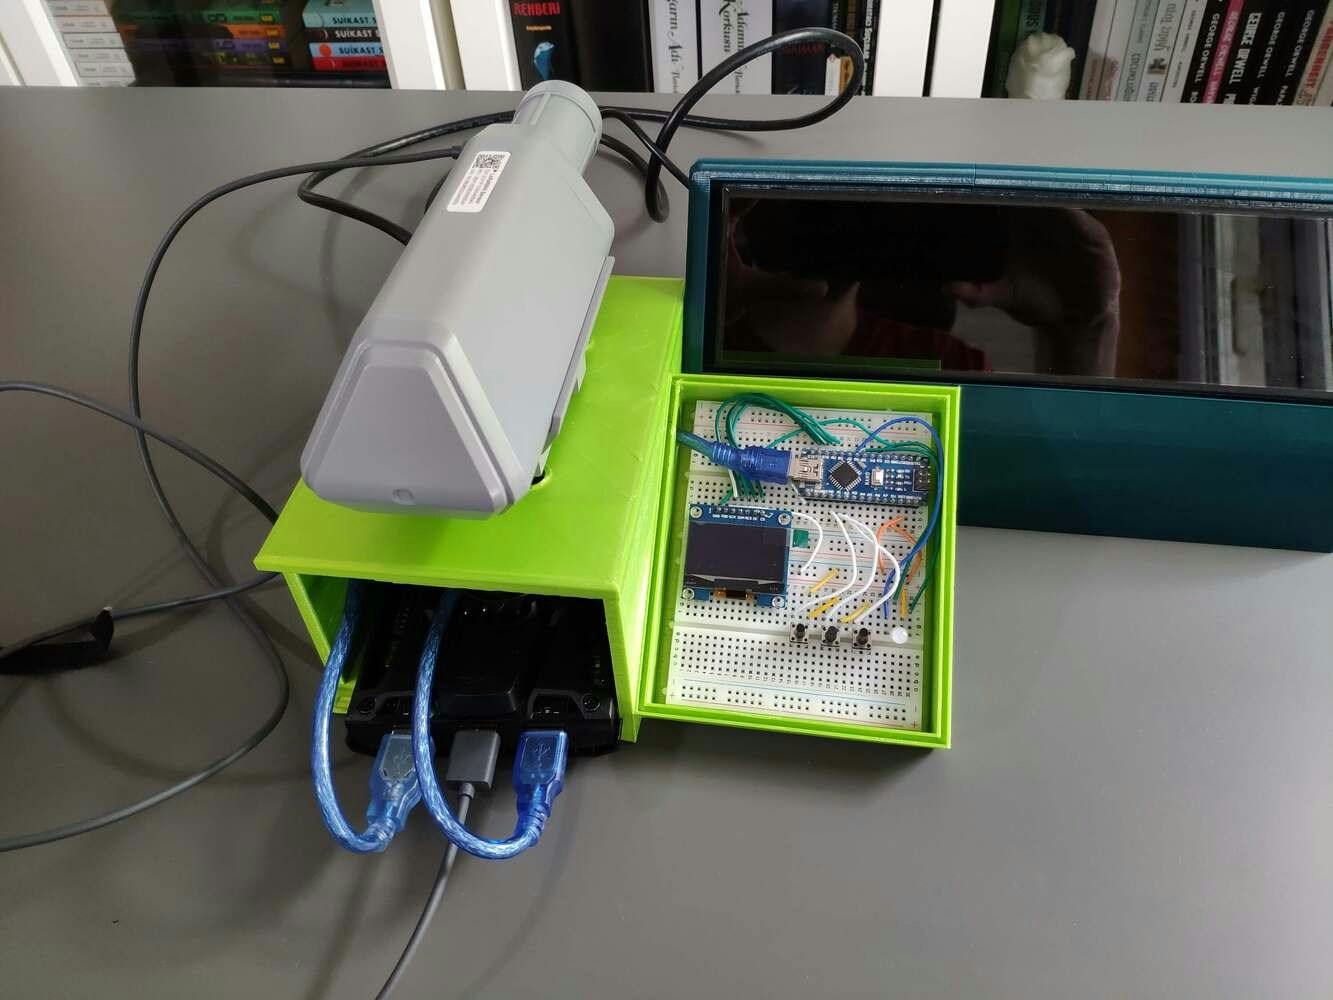
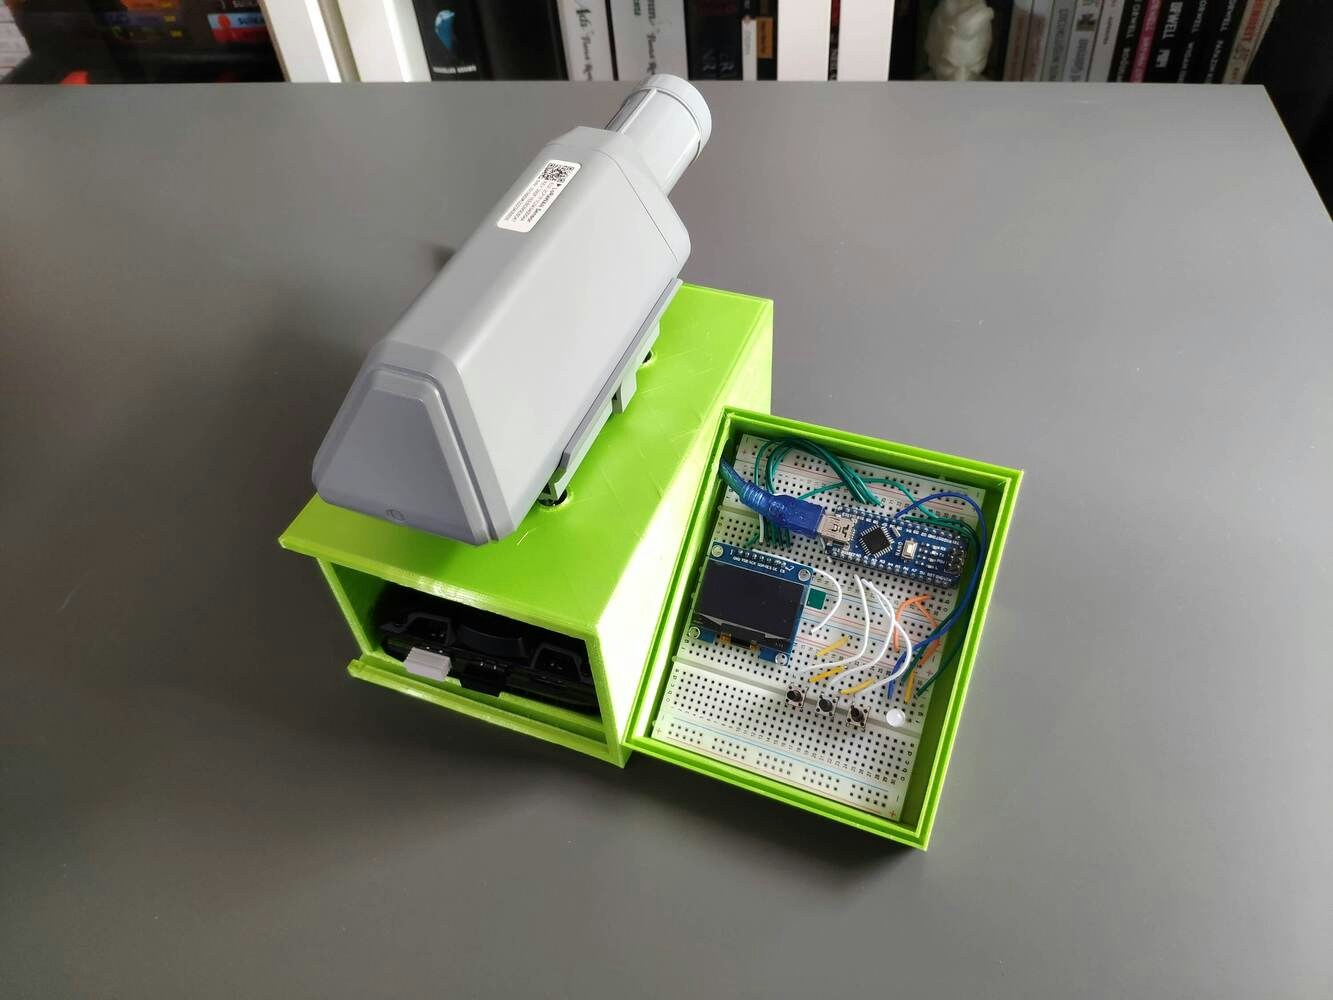
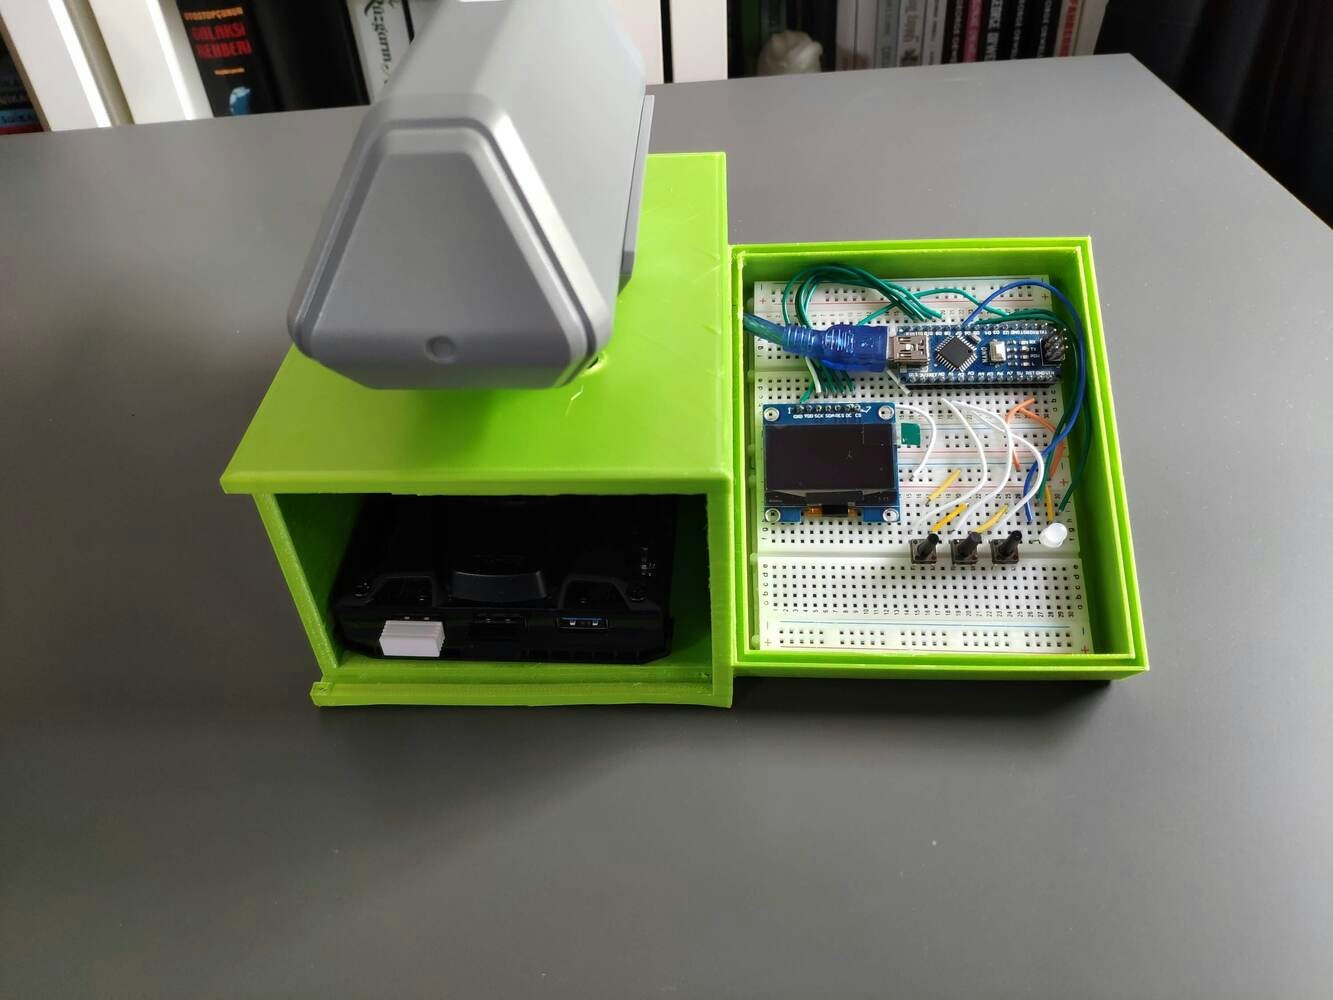
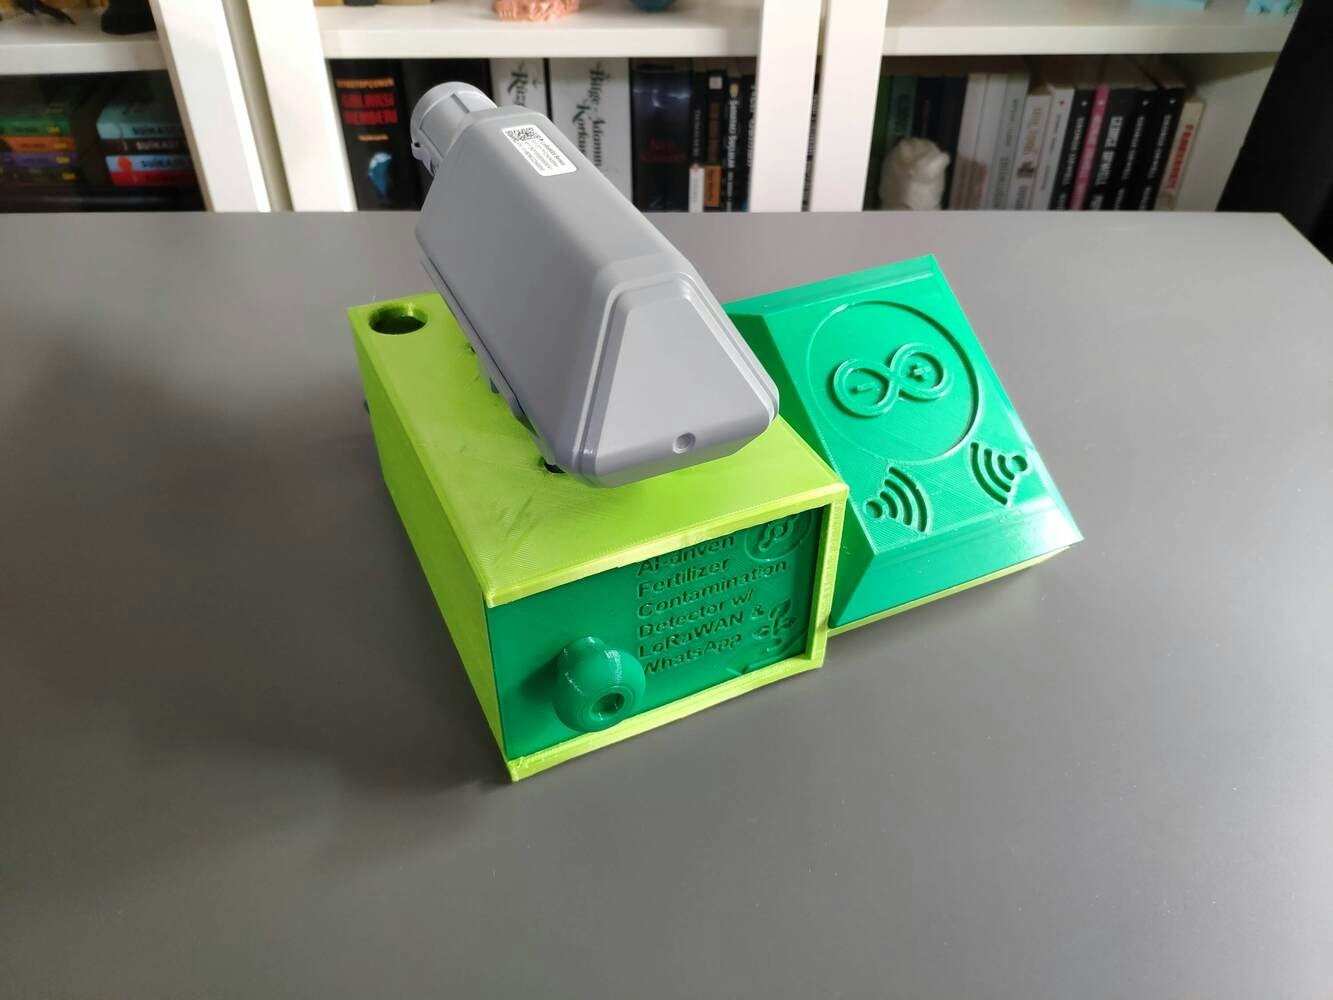
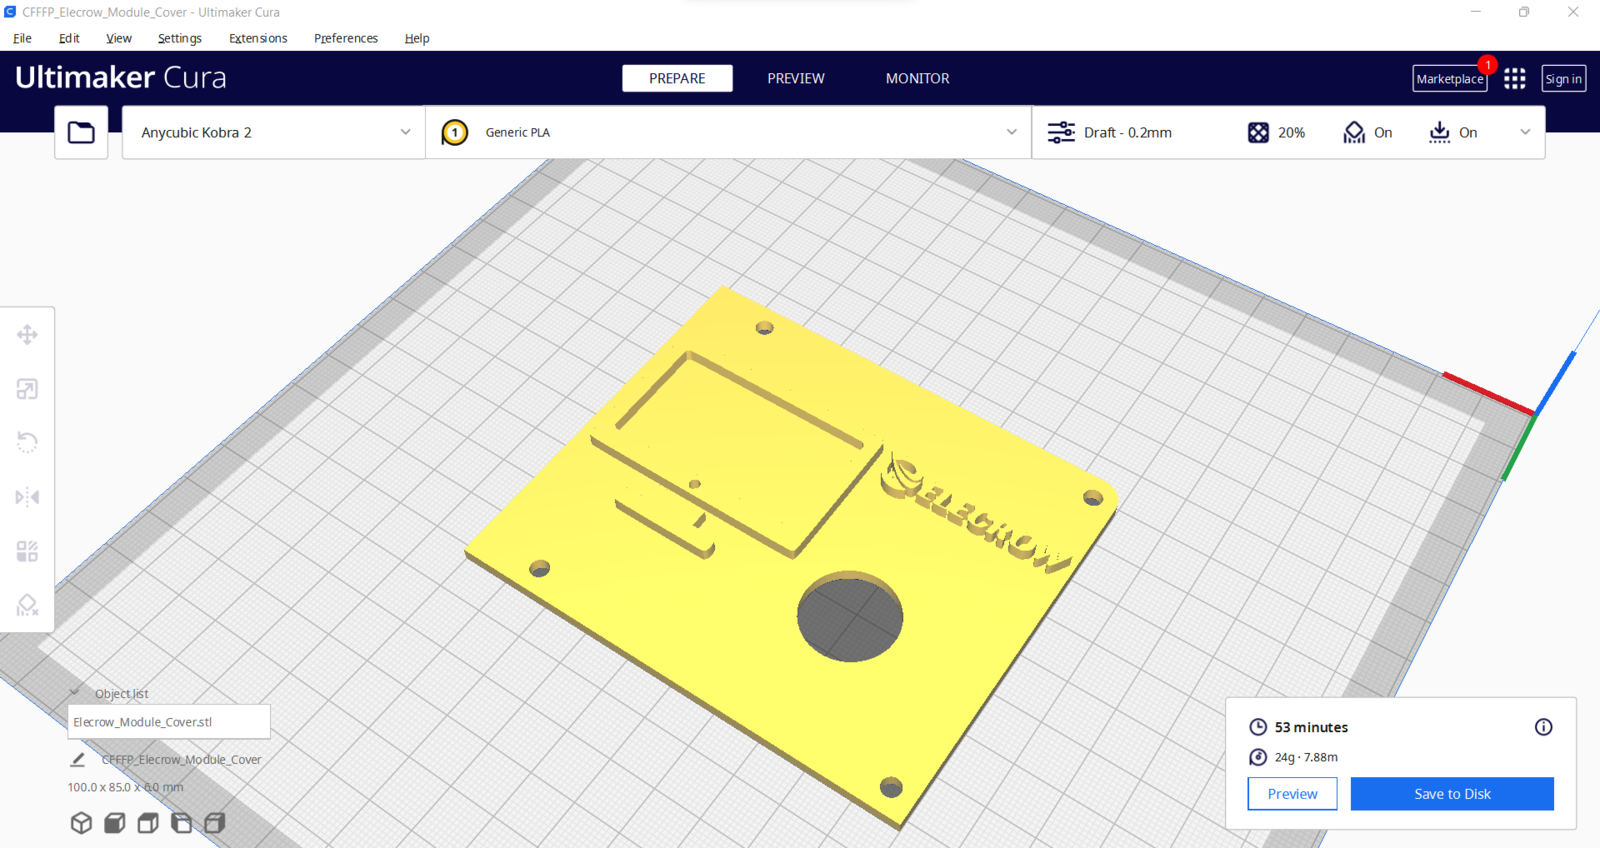
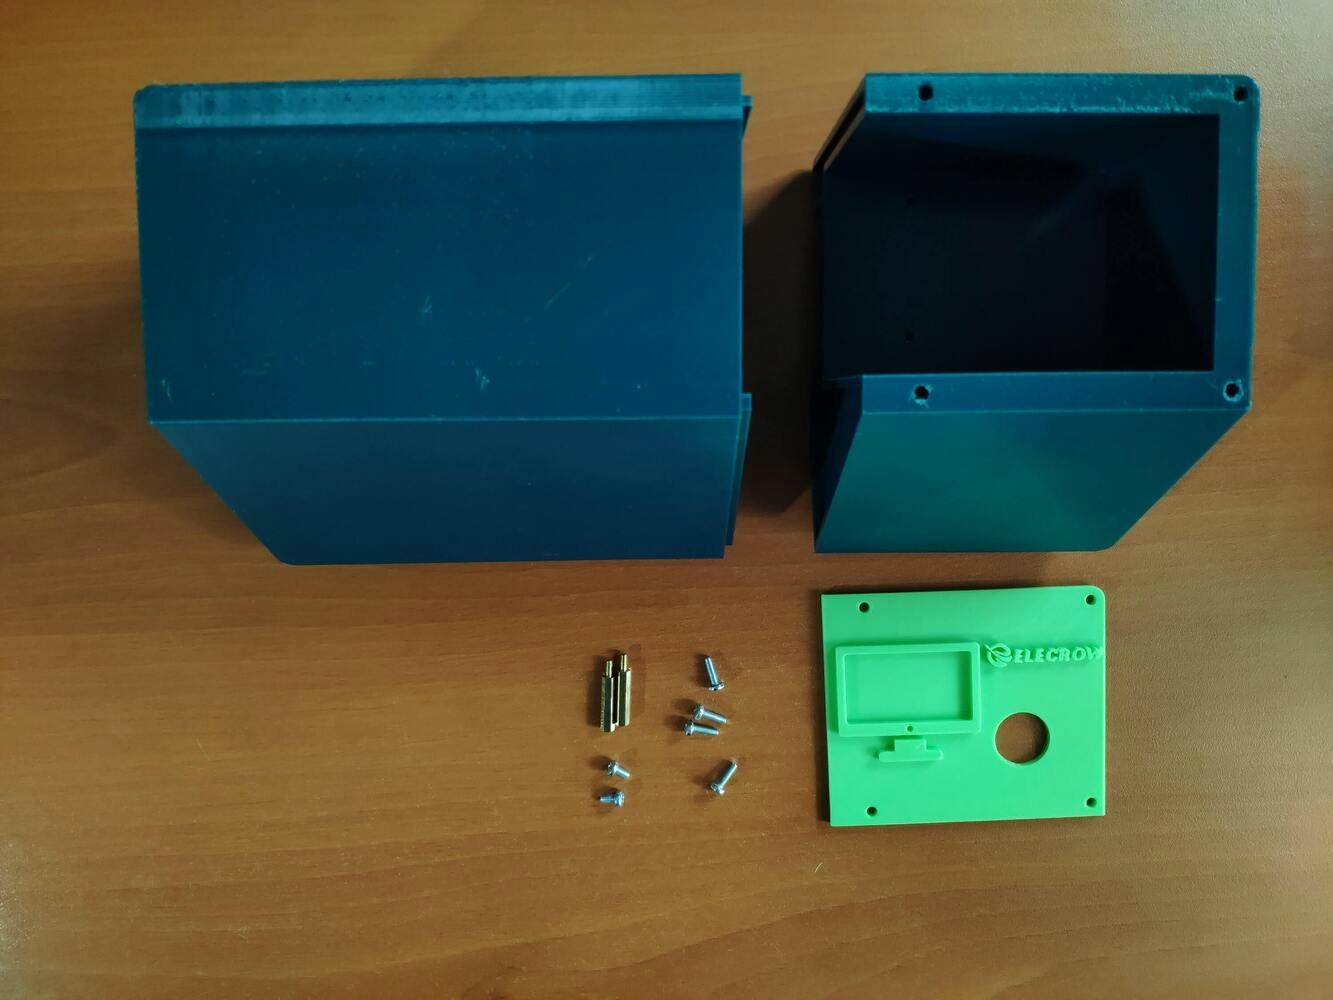
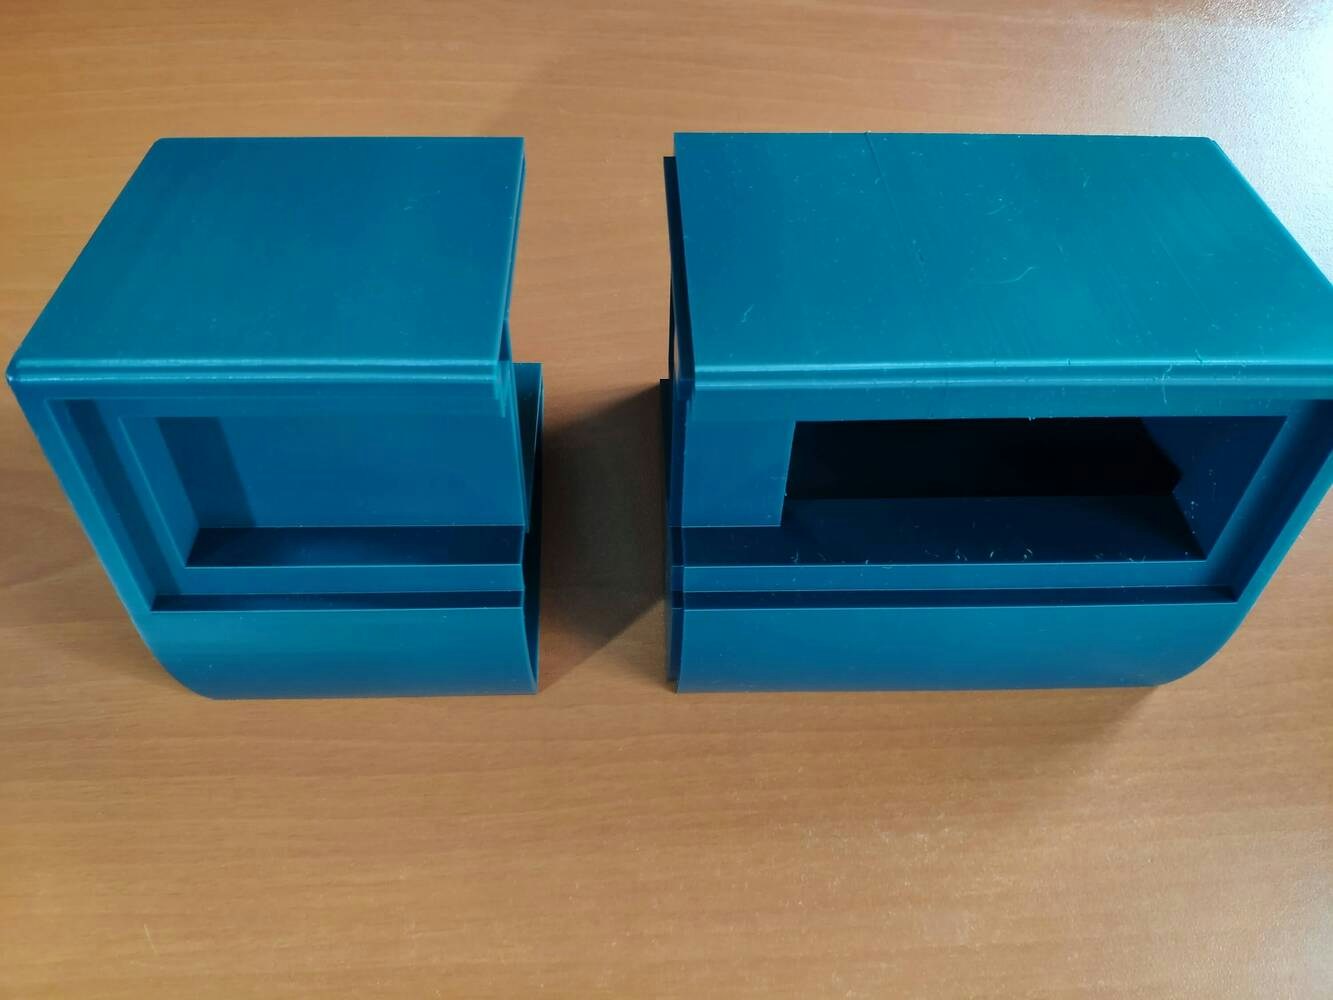
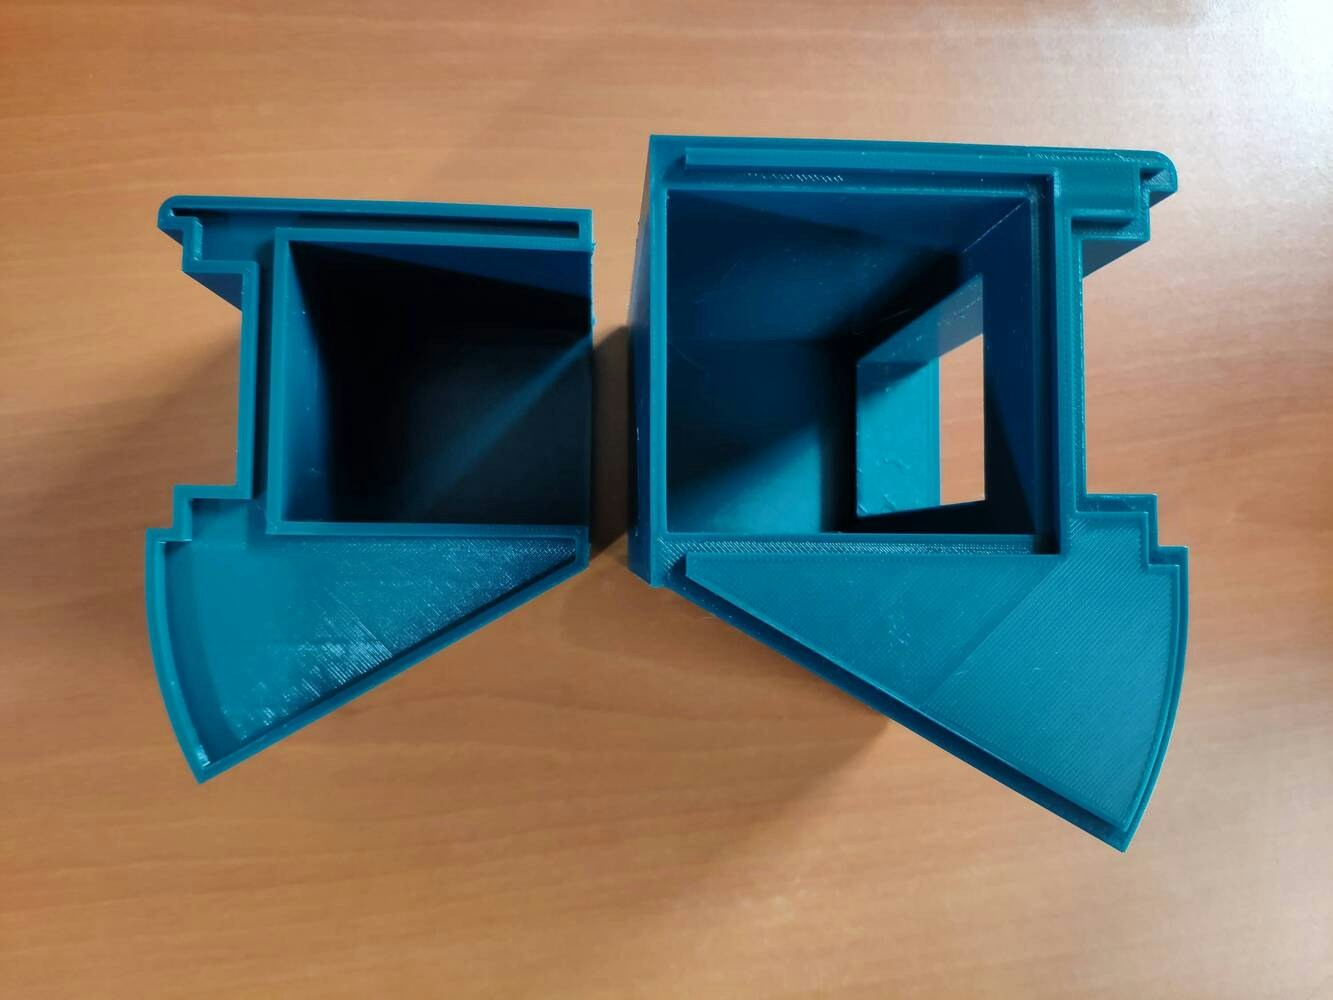
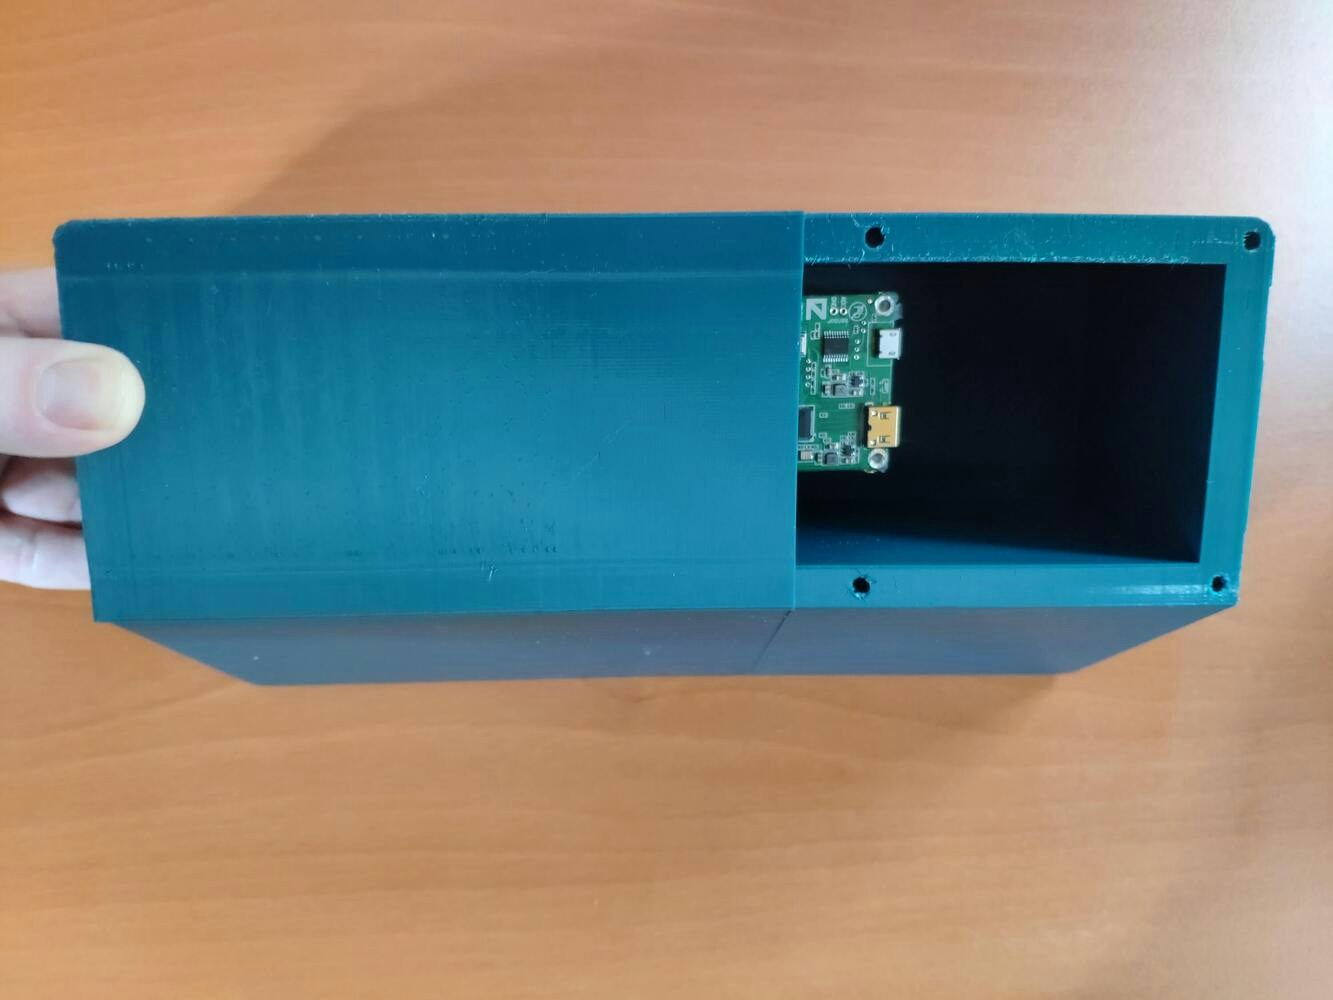
Since I focused on building a budget-friendly and accessible appliance that captures images of fertilizer-exerted soils and runs an object detection model to inform the user of the excessive use of chemical fertilizers over WhatsApp via the LoRaWAN network, I decided to design a modular and compact case allowing the user to place the remote control and position SenseCAP A1101 with LattePanda 3 Delta effortlessly. To avoid overexposure to dust and prevent loose wire connections, I added a sliding front cover. Then, I designed a diagonal top cover for the separate remote control section of the main case, mountable via snap-fit joints. Also, I decided to inscribe the Helium logo and the Arduino symbol on the sliding front cover and the diagonal top cover to highlight the LoRaWAN-enabled fertilizer contamination detection. Since I needed to attach SenseCAP A1101 to the main case via its bracket, I decided to add compatible screw holes on the top of the main case. Due to the separate section, I was able to fit the remote control and connect it to LattePanda 3 Delta as a single unit. I designed the main case, its sliding front cover, and the diagonal top cover in Autodesk Fusion 360. You can download their STL files below.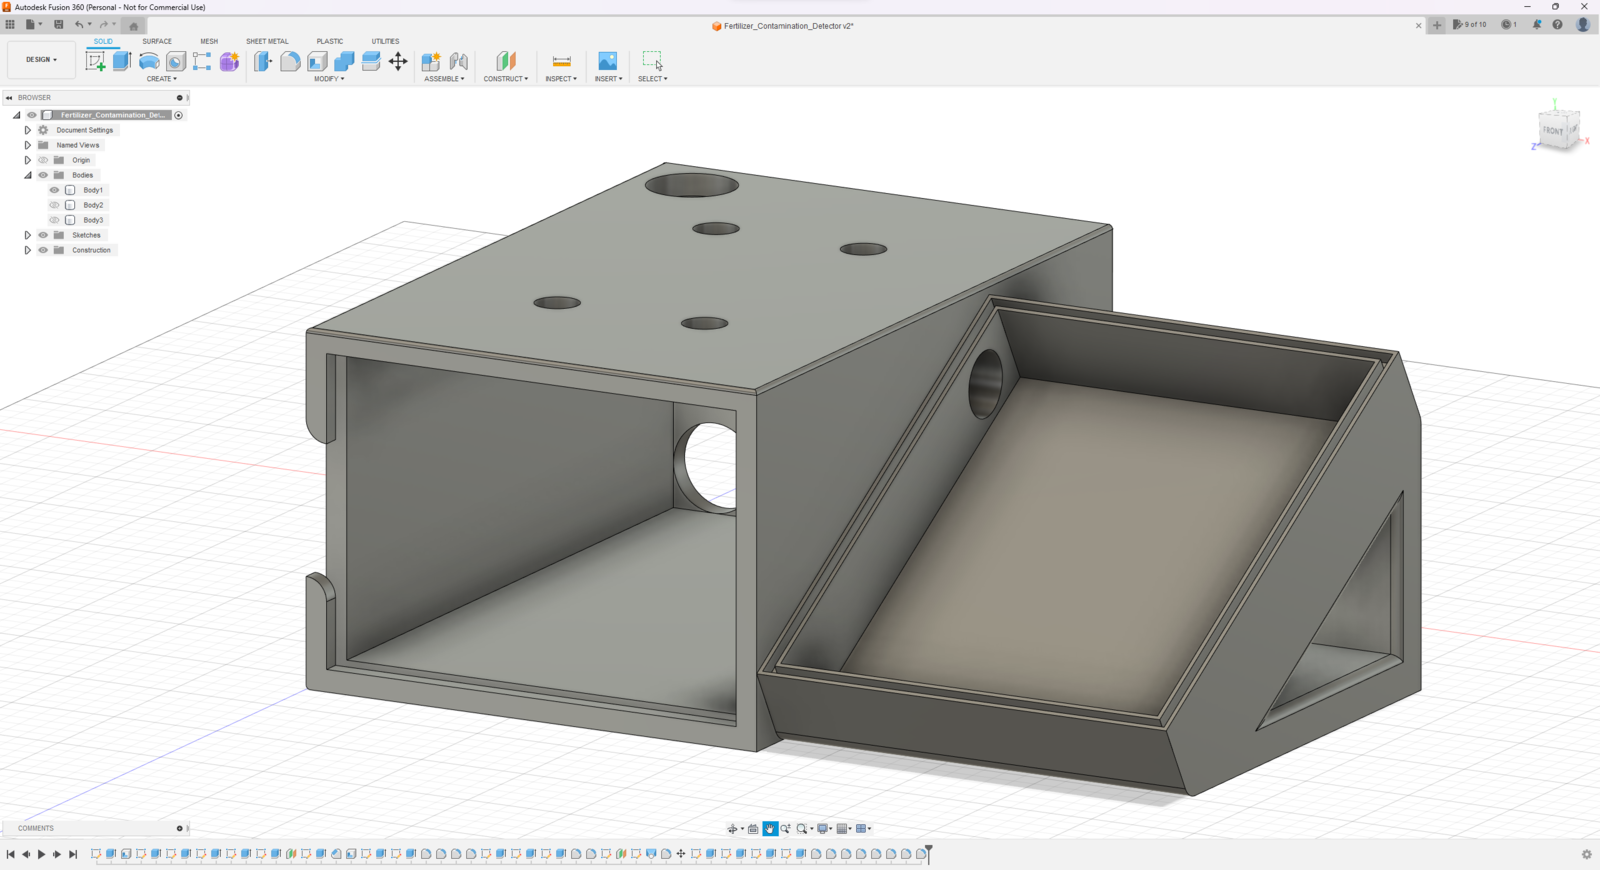

- eSilk Lime
- Green RAL 6029
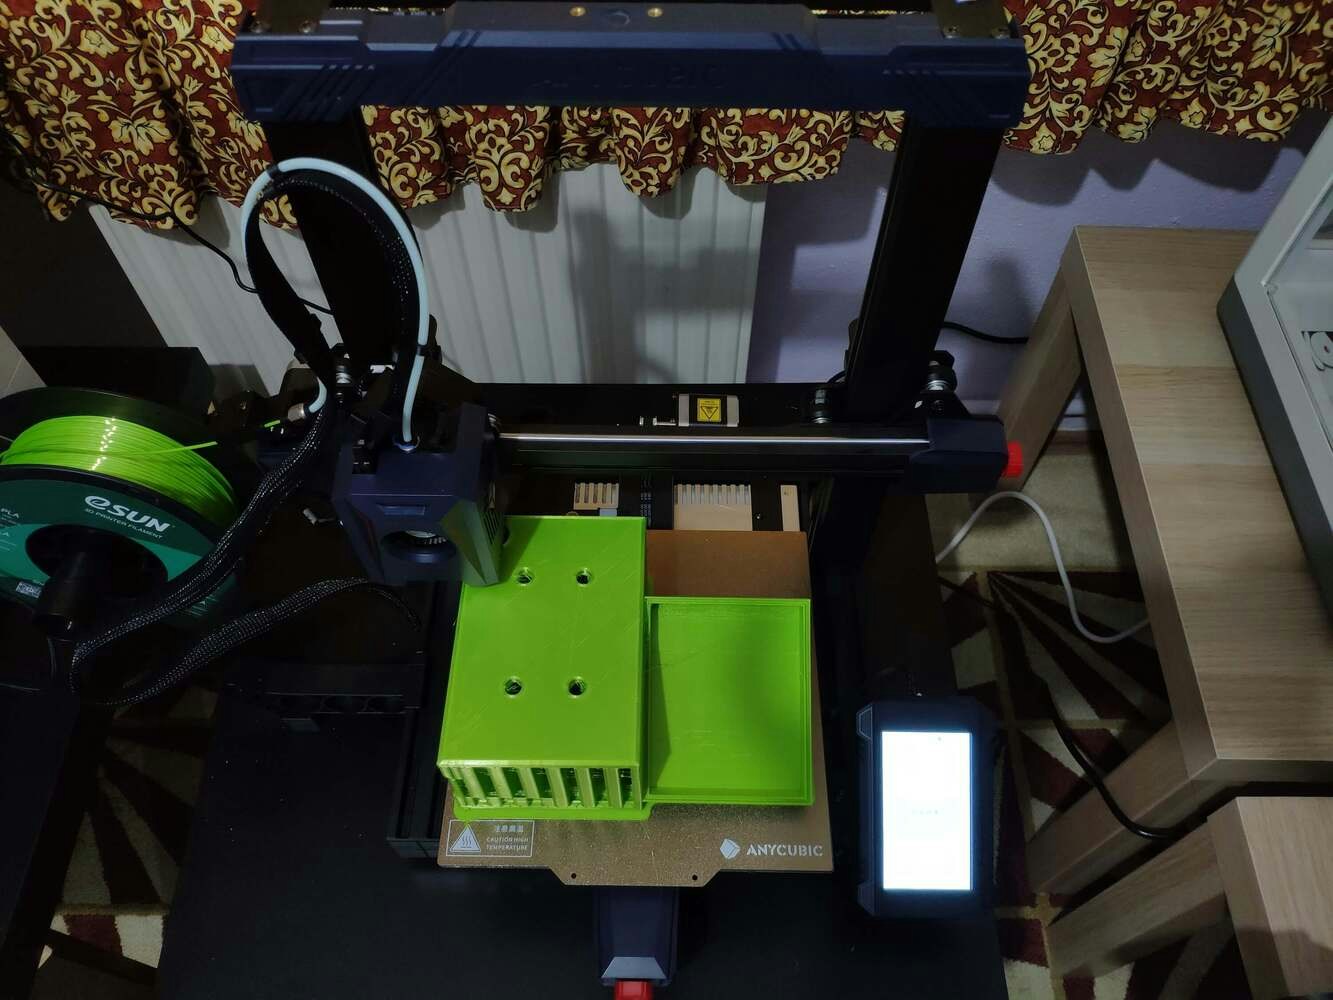
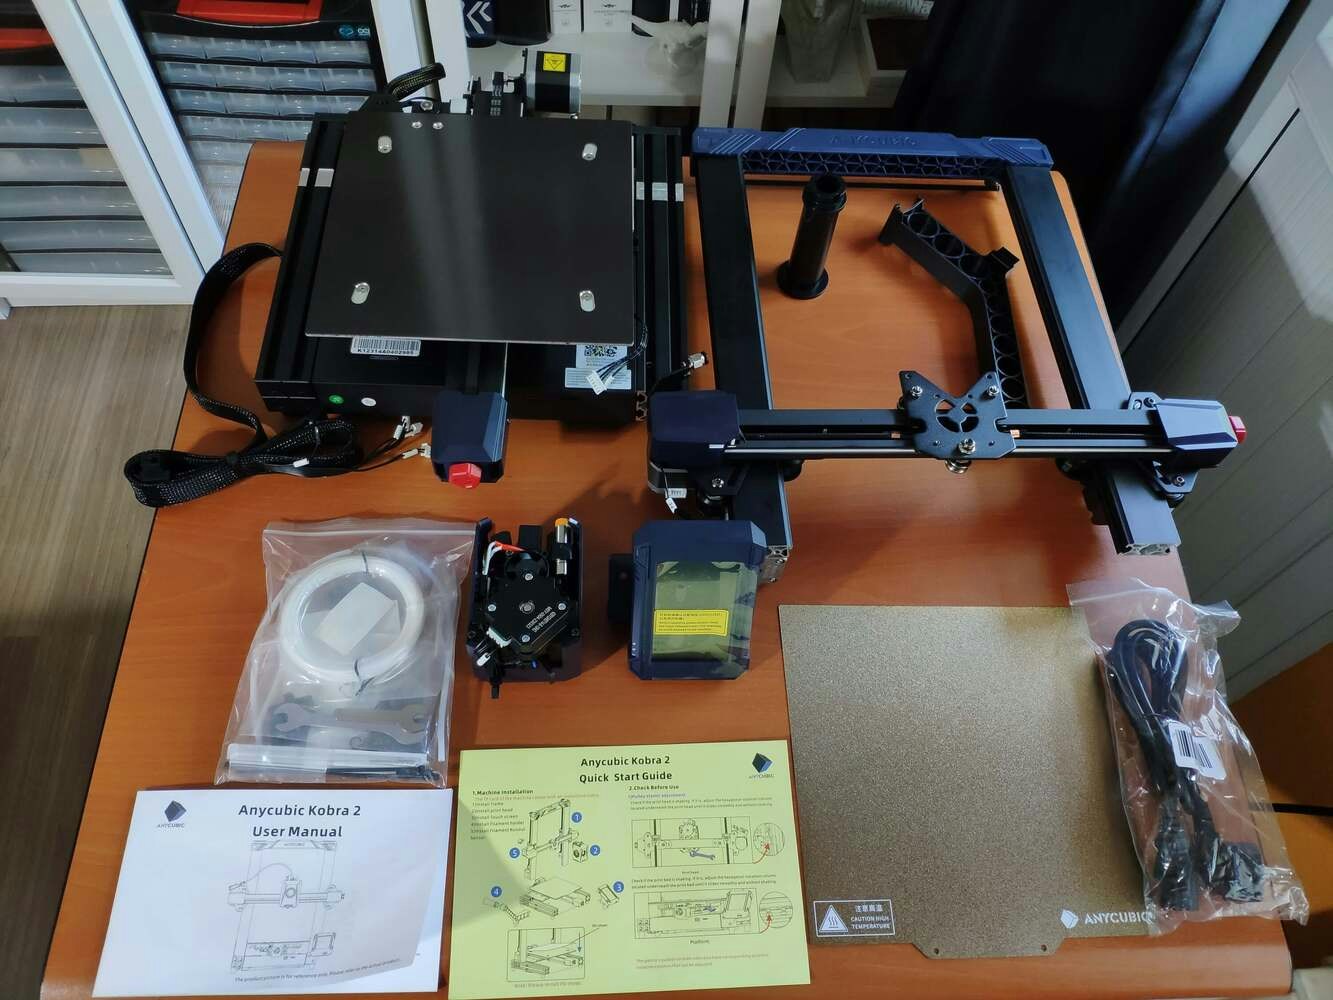
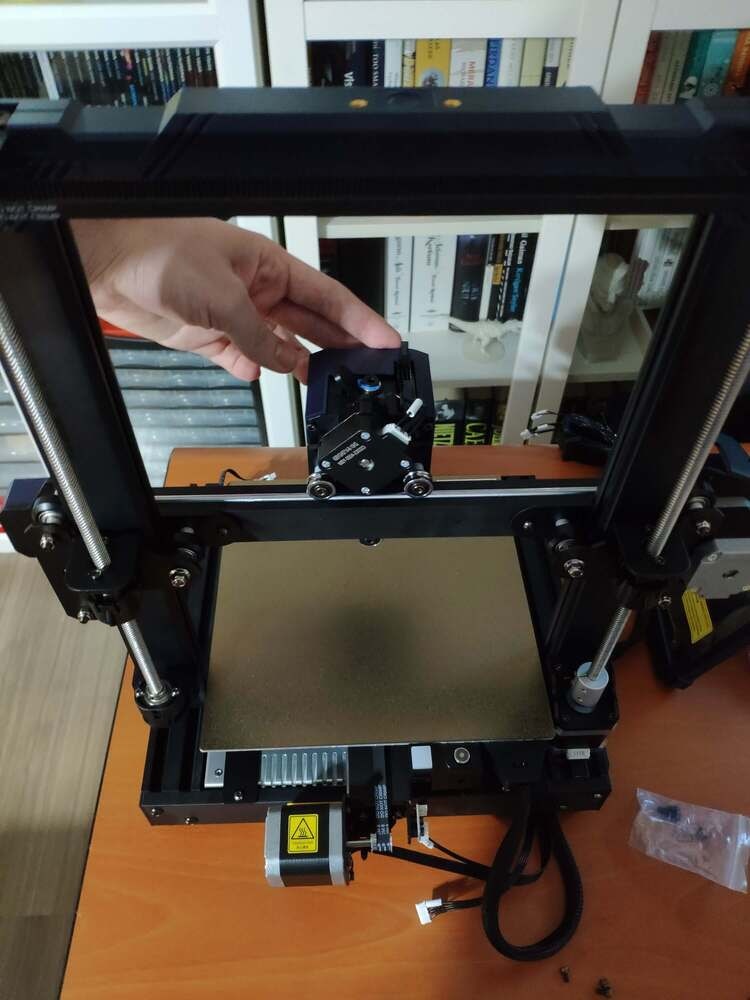
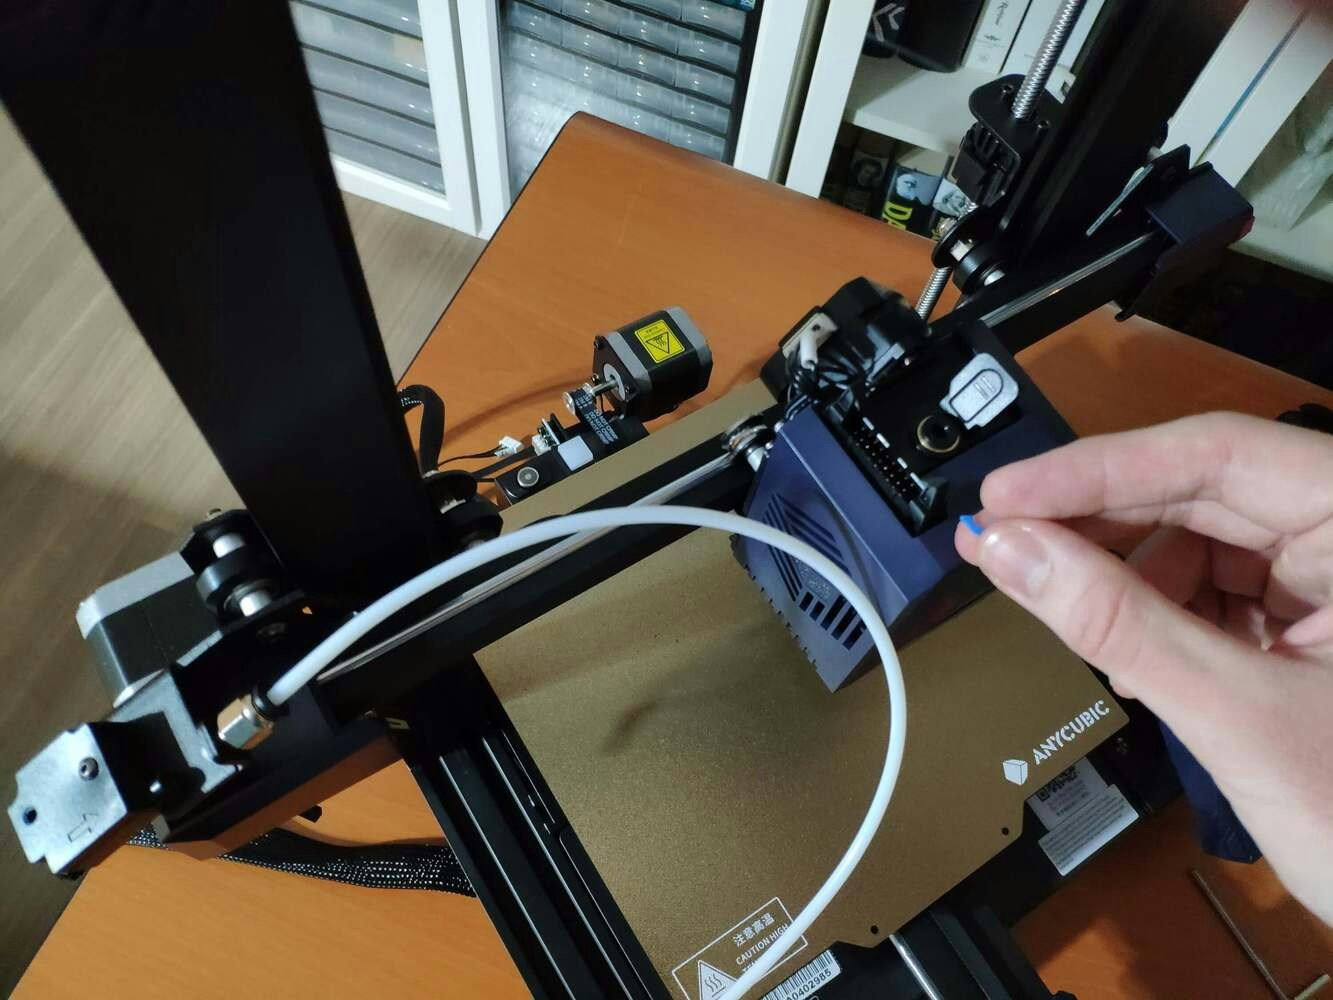


Step 1.1: Assembling the case and making connections & adjustments
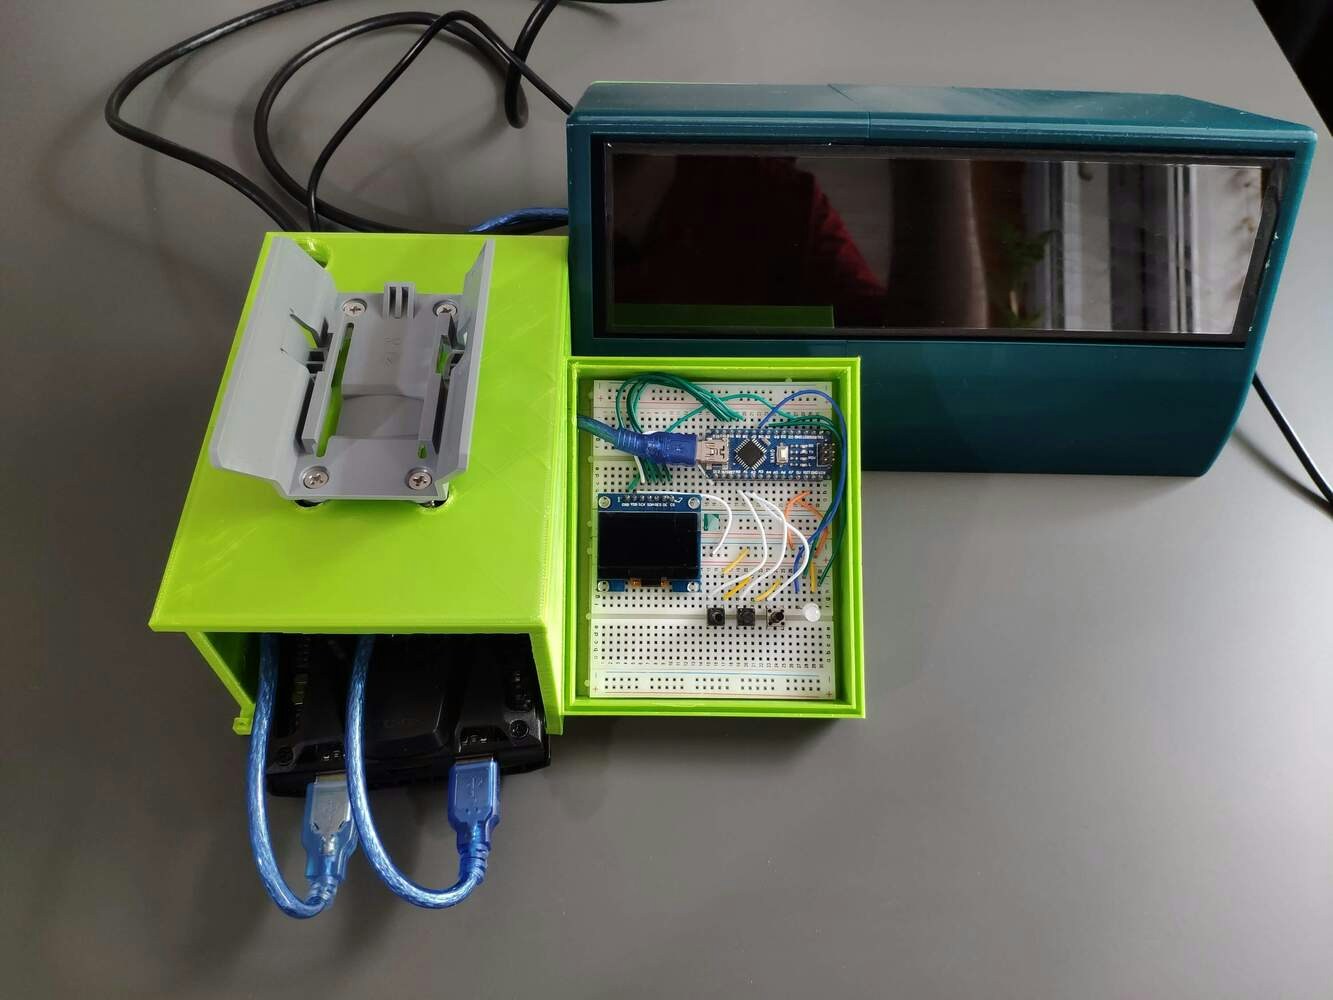
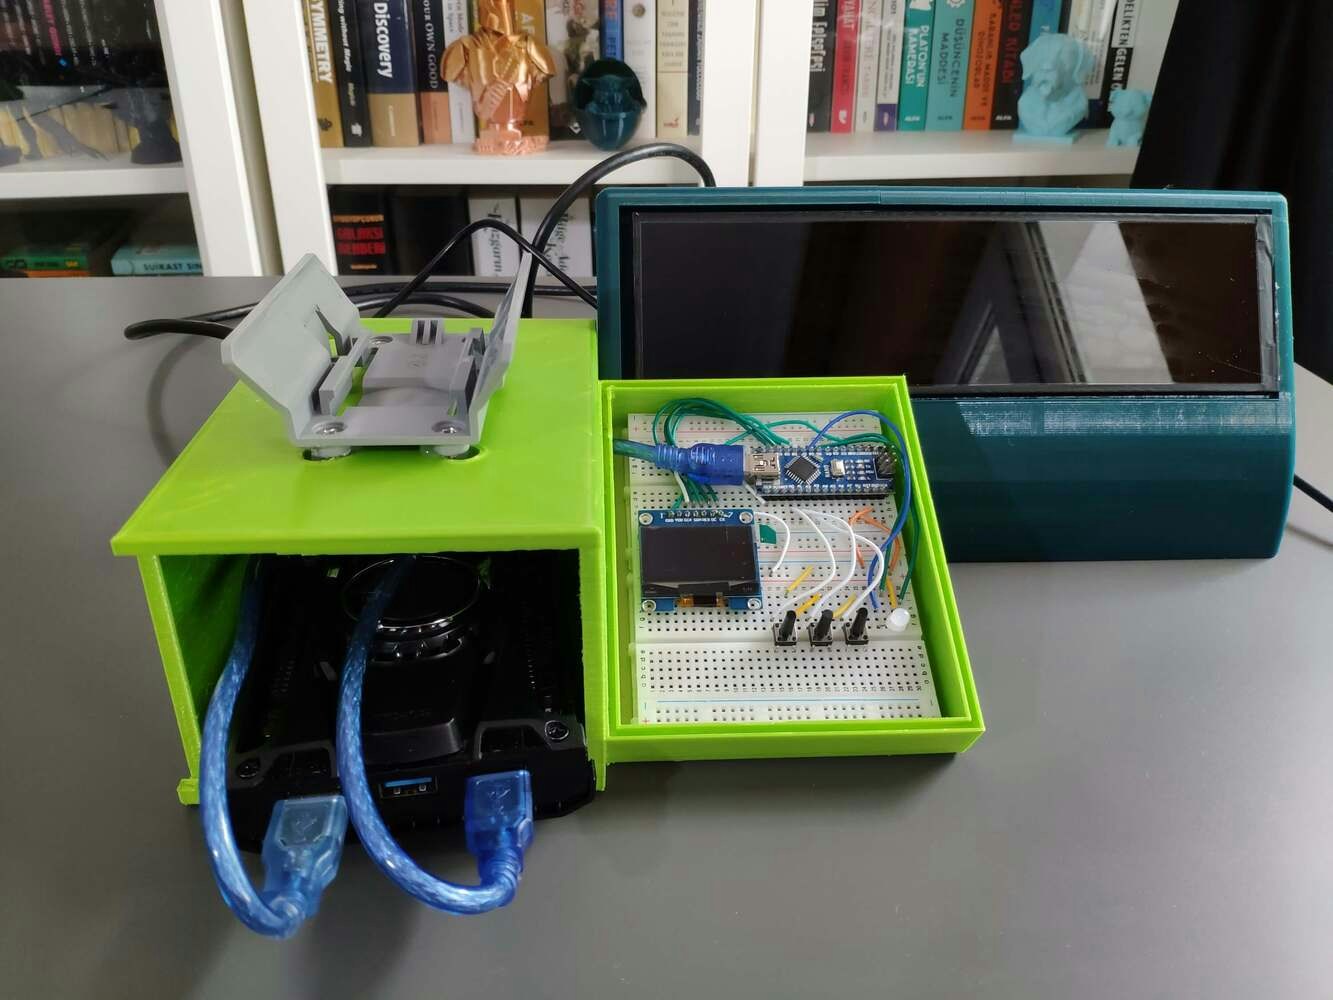
Step 1.2: Creating a LattePanda Deck to display the video stream
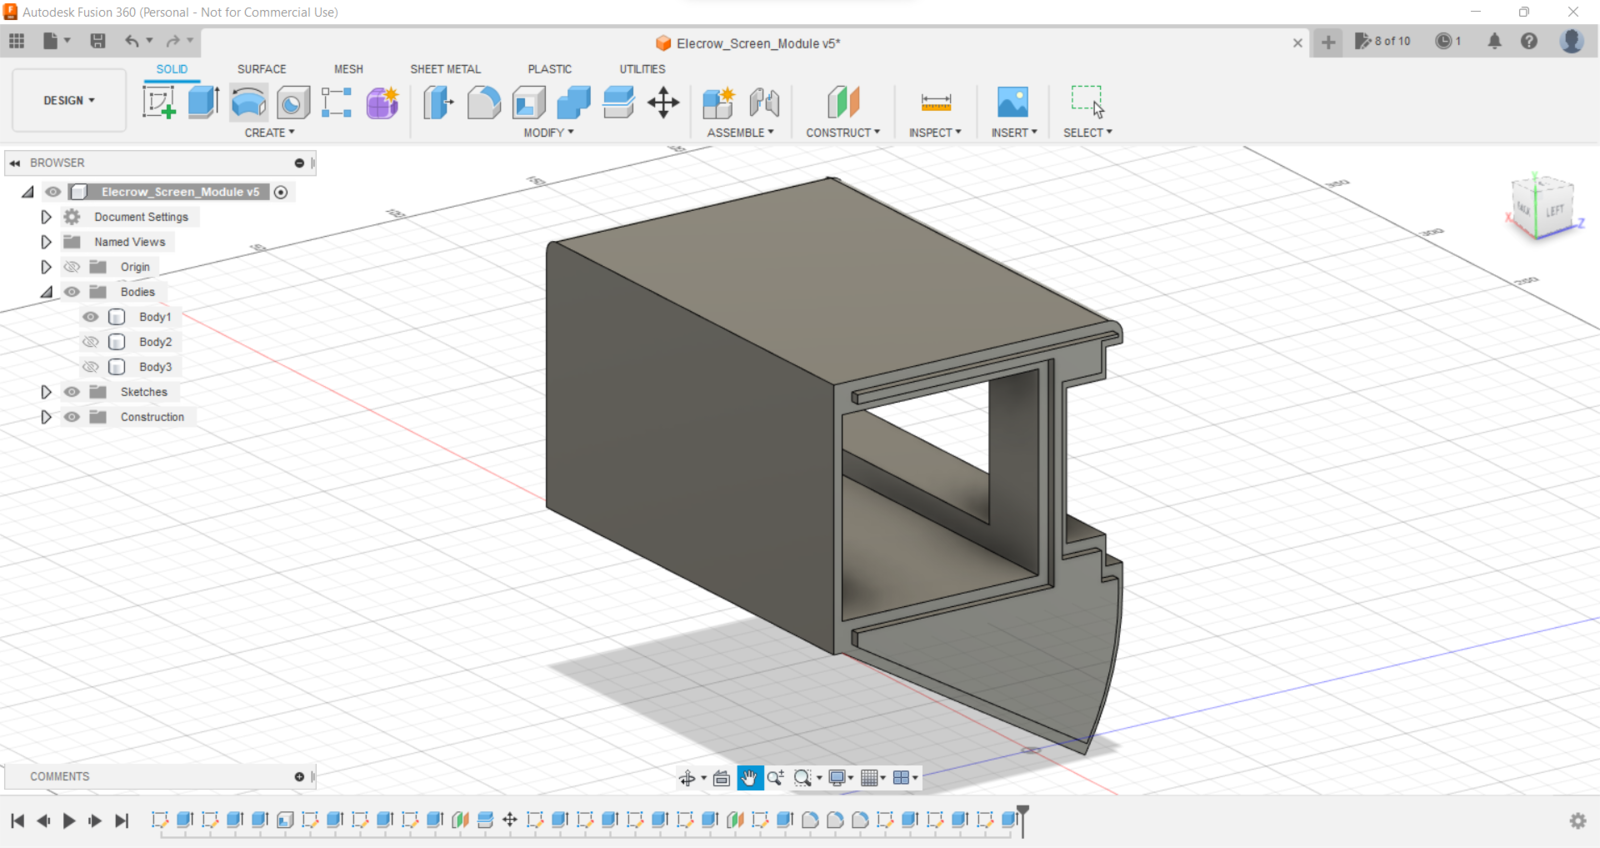
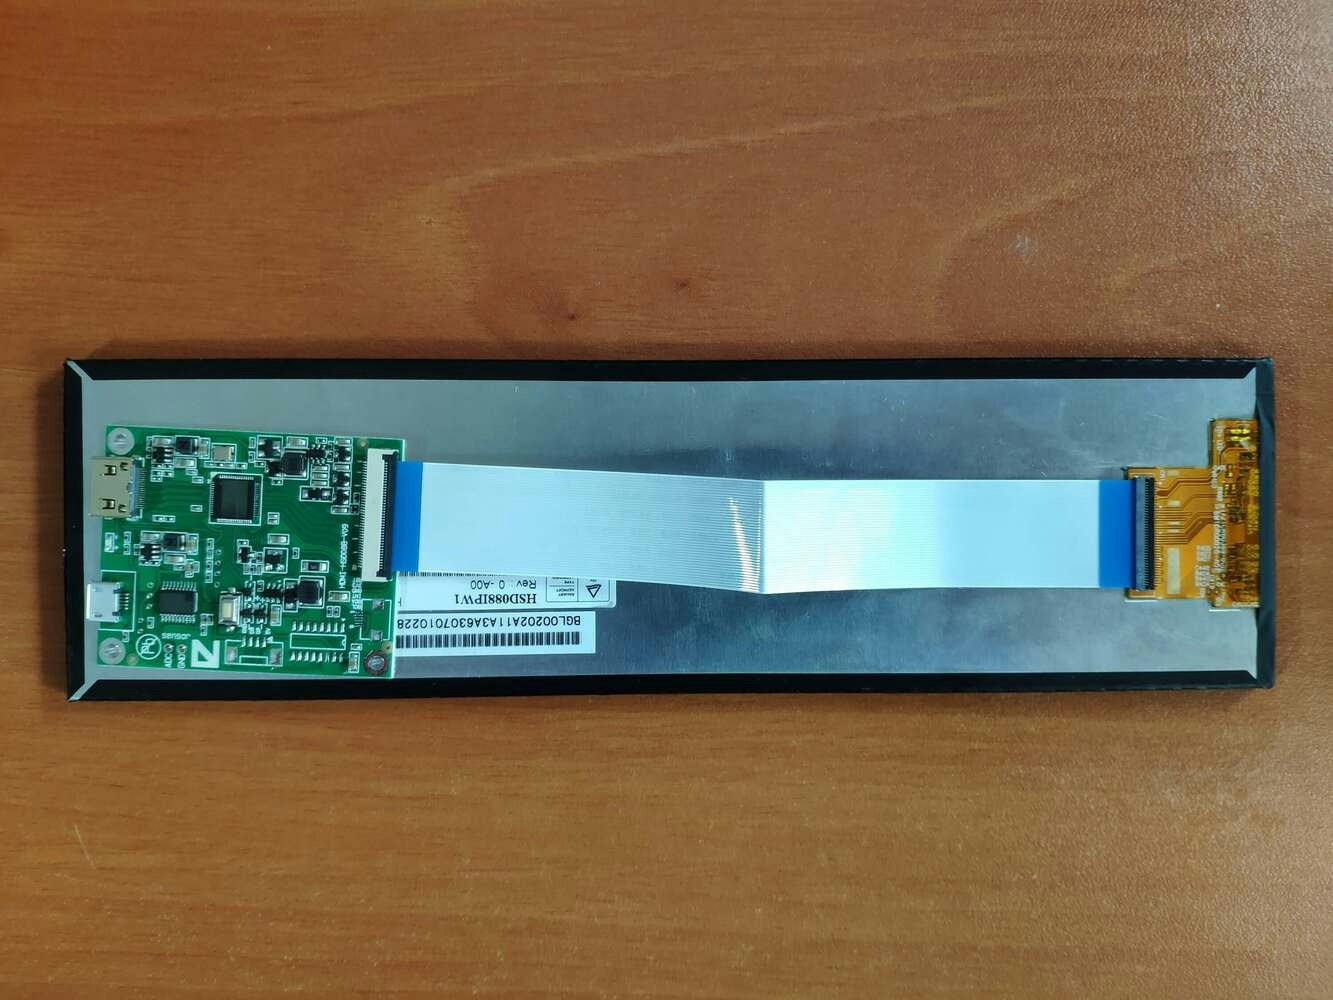
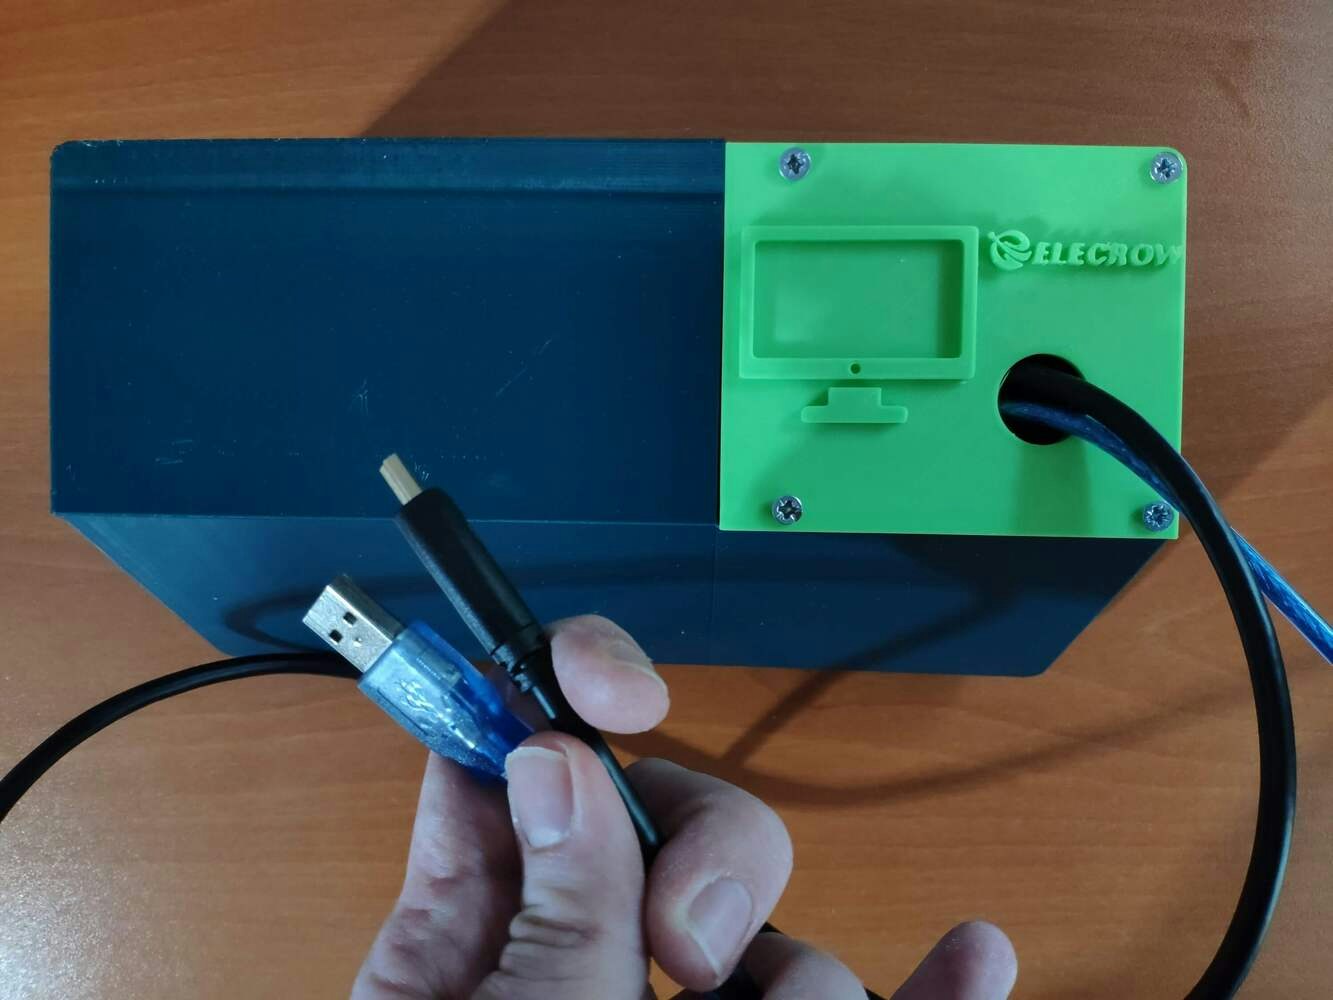
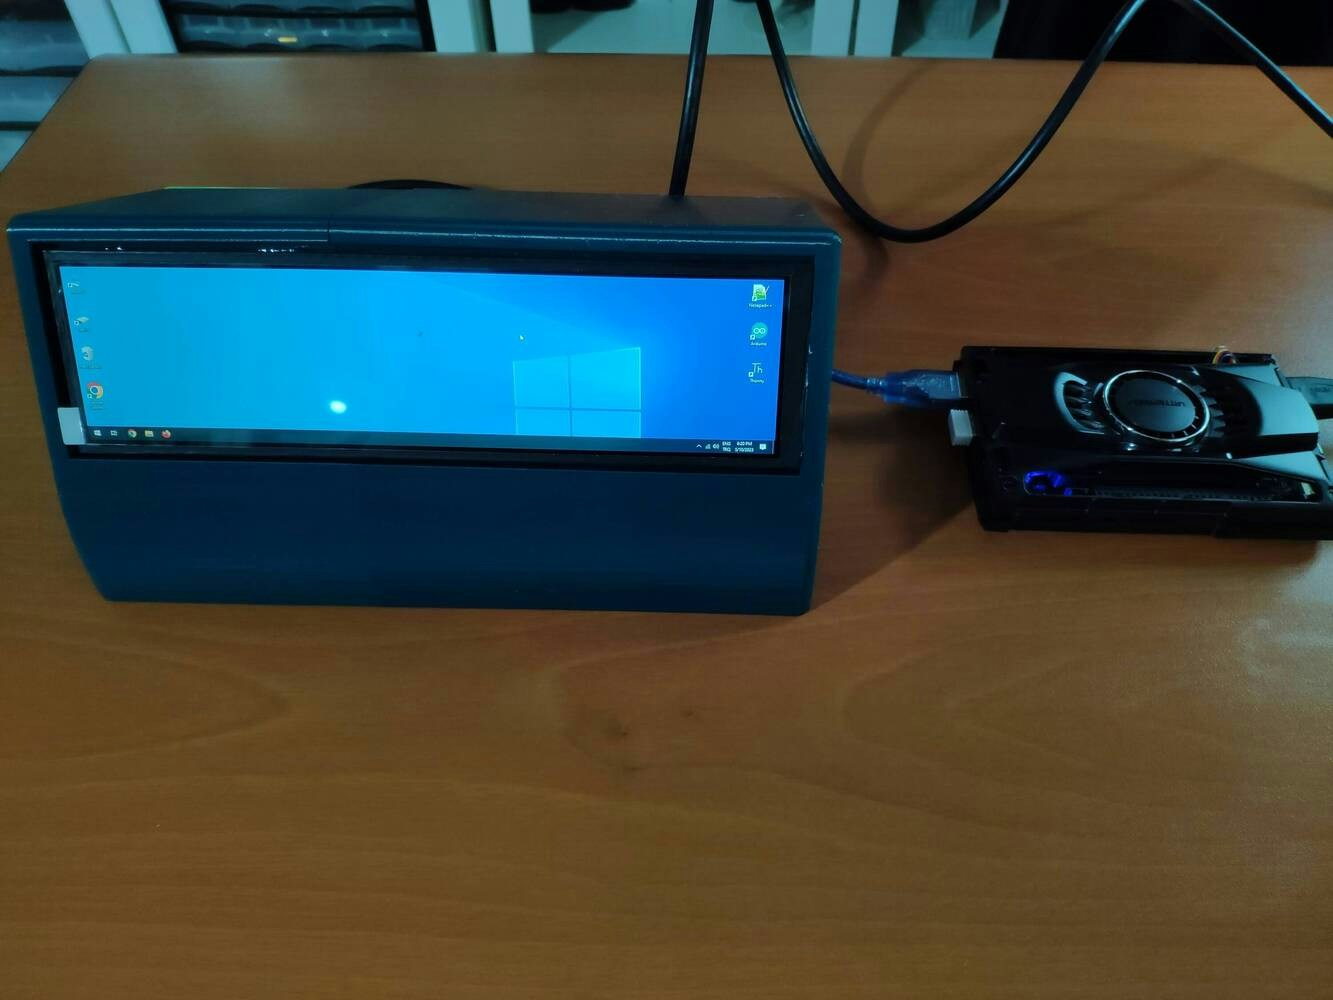
Since I decided to program SenseCAP A1101 with LattePanda 3 Delta to capture images depending on labels transferred by the remote control via serial communication, I decided to design a unique and compact LattePanda Deck to display the real-time video stream generated by SenseCAP A1101, which is not only compatible with LattePanda but also any single-board computer supporting HDMI. I decided to employ Elecrow’s 8.8” (1920*480) high-resolution IPS monitor as the screen of my LattePanda Deck. Thanks to its converter board, this monitor can be powered via a USB port and works without installing any drivers. Therefore, it is a compact plug-and-play monitor for LattePanda 3 Delta, providing high resolution and up to 60Hz refresh rate. Due to the fact that I wanted to build a sturdy and easy-to-use deck, I designed a two-part case covering the screen frame and providing a slot for the converter board. To avoid overexposure to dust and provide room for cable management, I added a mountable back cover adorned with the brand logo. I designed the two-part case and its mountable back cover in Autodesk Fusion 360. You can download their STL files below.

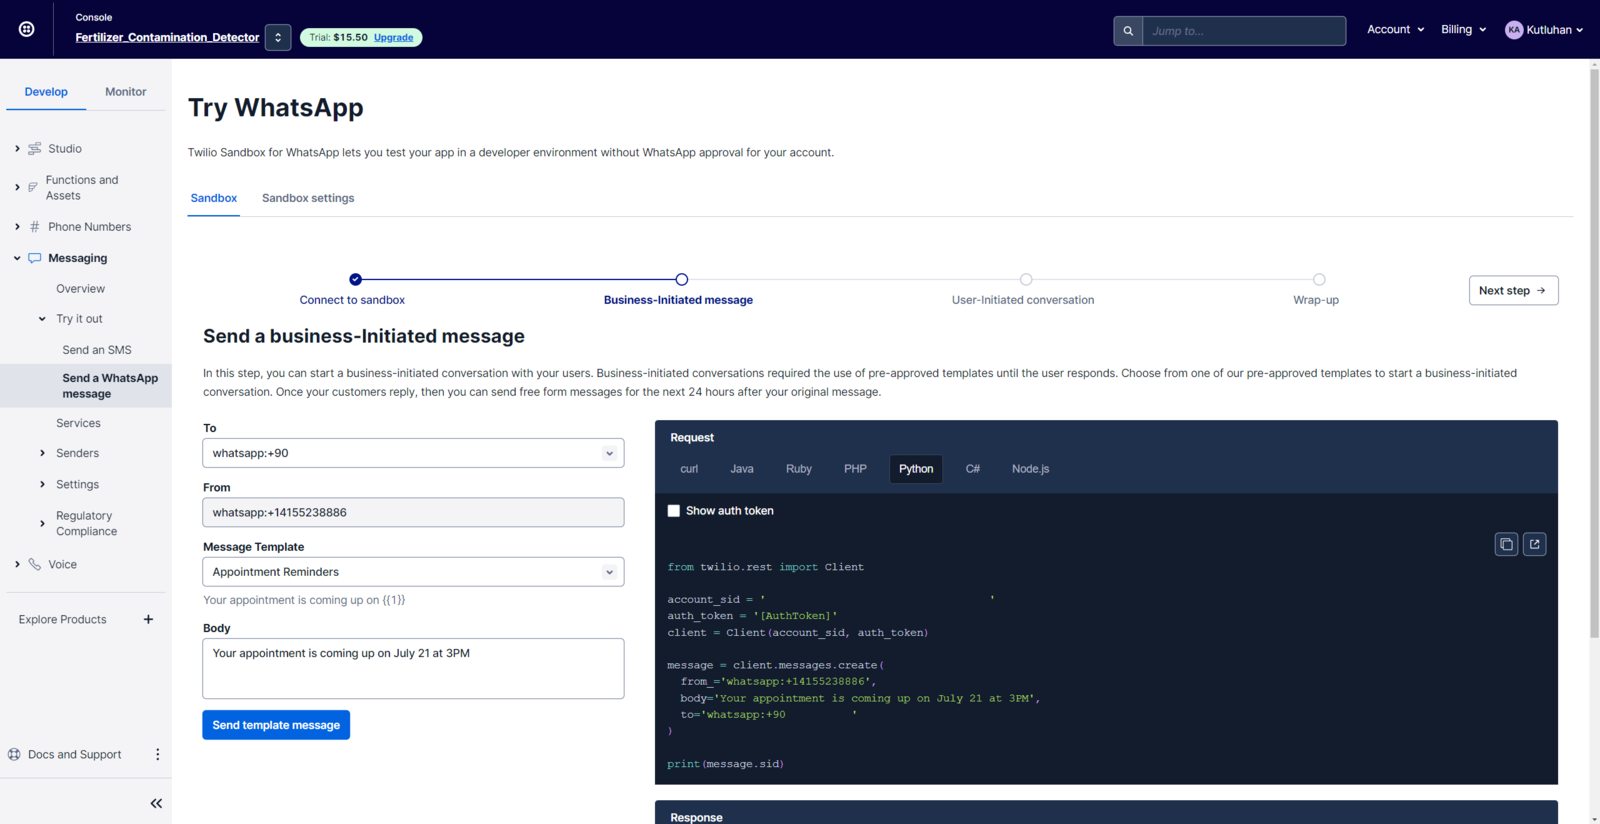
Step 2: Creating an account to utilize Twilio’s WhatsApp API
Since I decided to inform the user of the model detection results over WhatsApp via the LoRaWAN network, I needed to utilize Twilio’s WhatsApp API. Twilio gives the user a simple and reliable way to communicate with a Twilio-verified phone over WhatsApp via its WhatsApp API for trial accounts. Also, Twilio provides official helper libraries for different programming languages, including Python. :hash: First of all, sign up for Twilio and create a new free trial account (project).


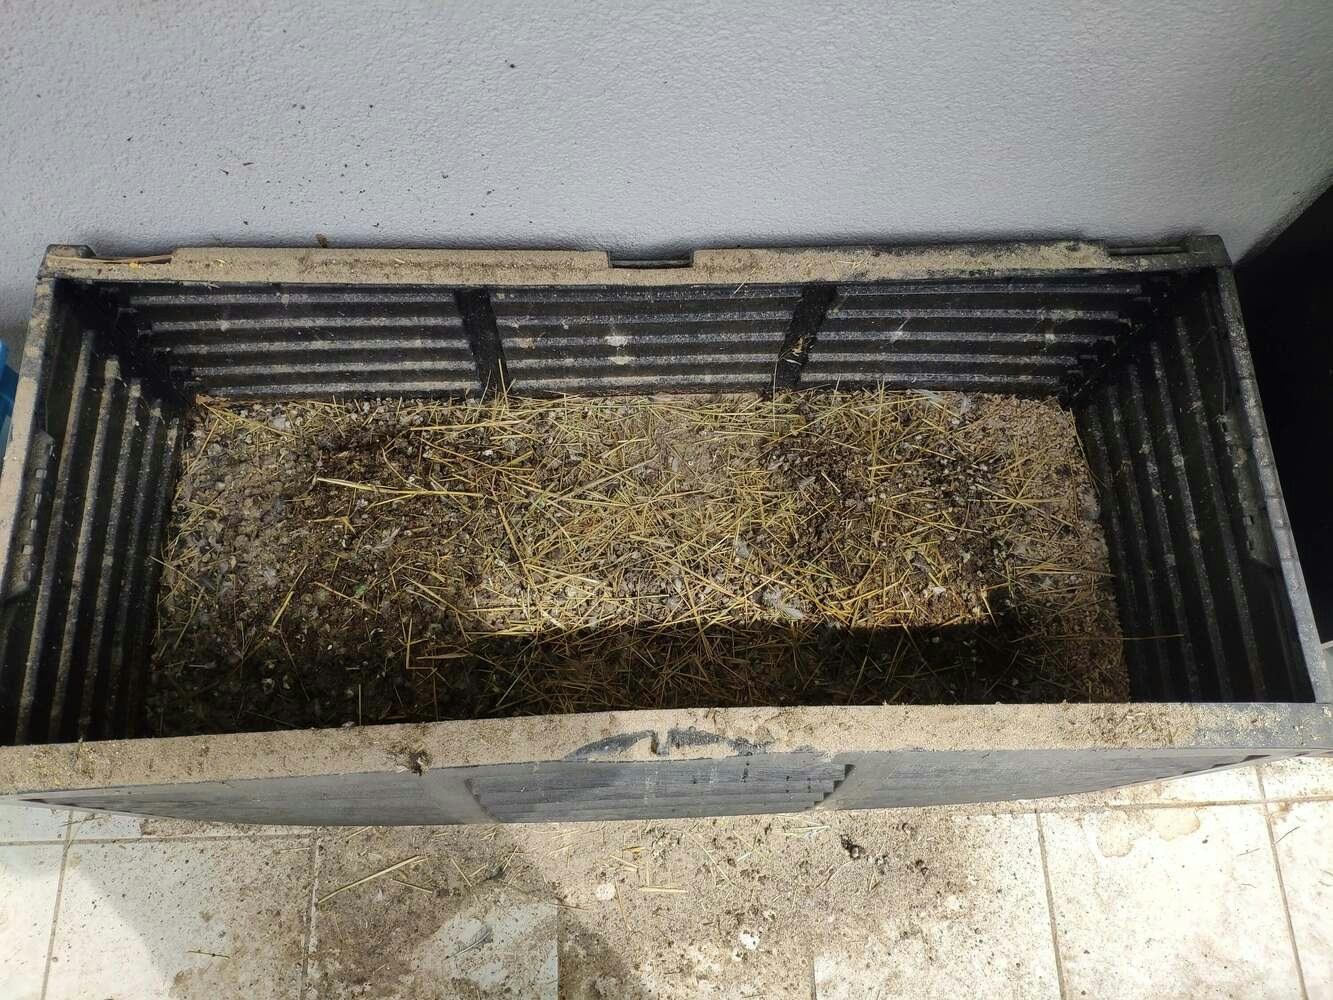
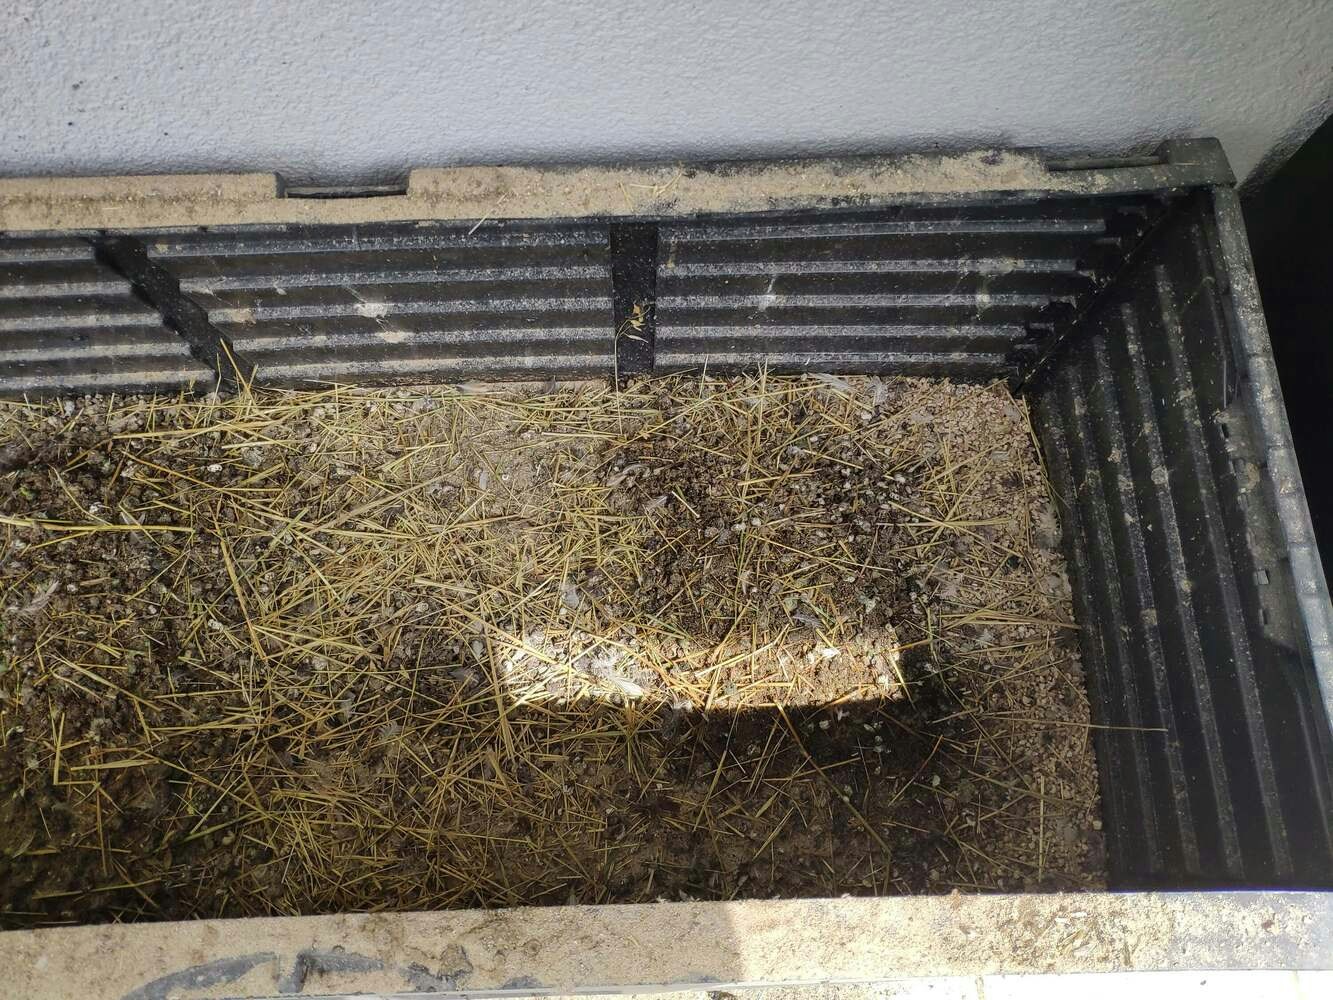
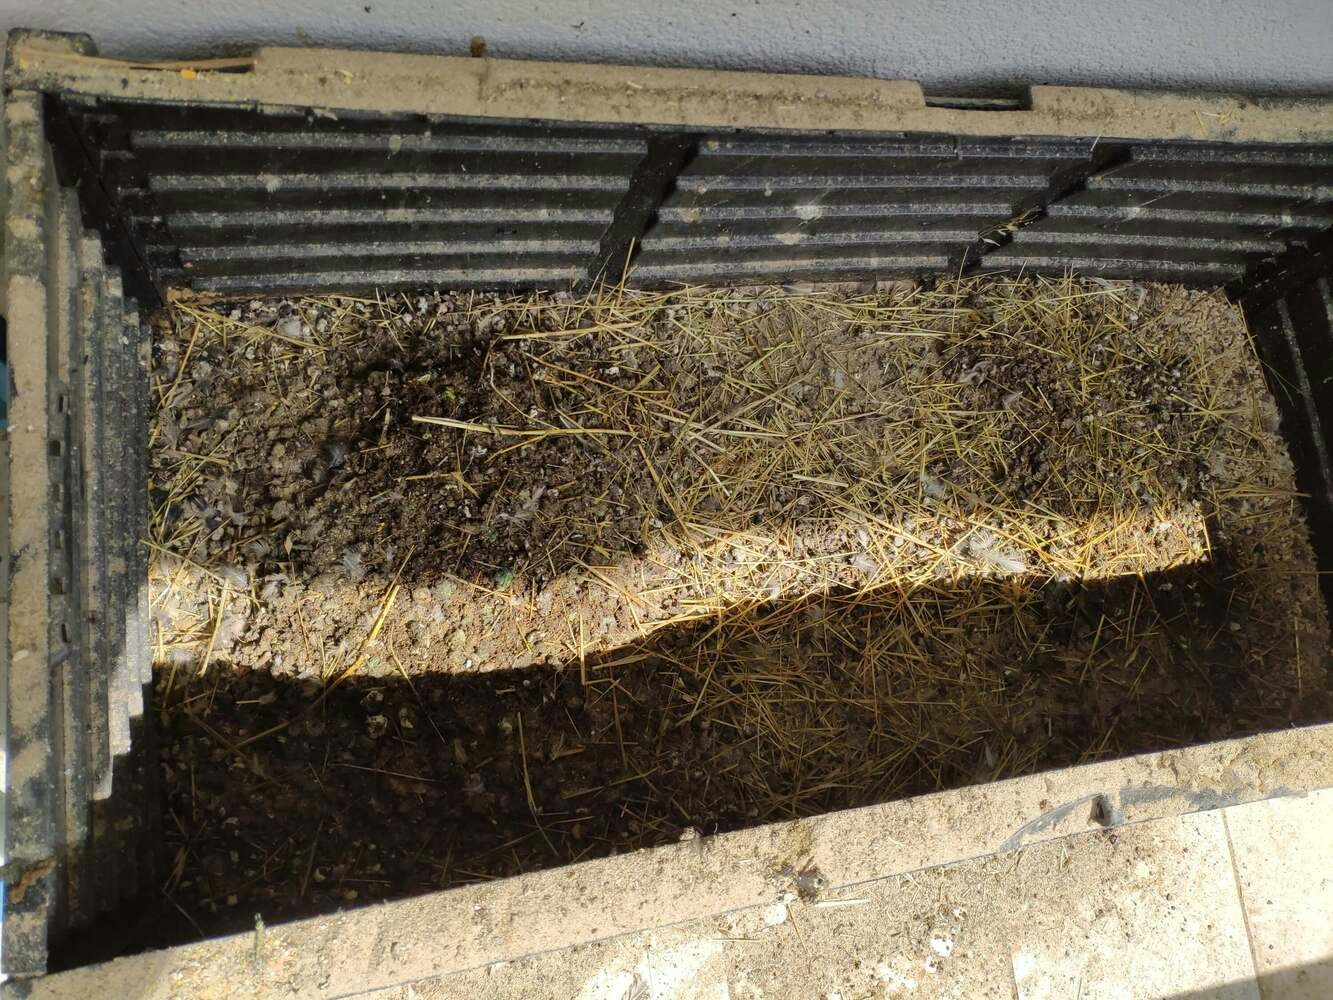
Step 3: Producing organic fertilizers from quail manure in different decomposition stages
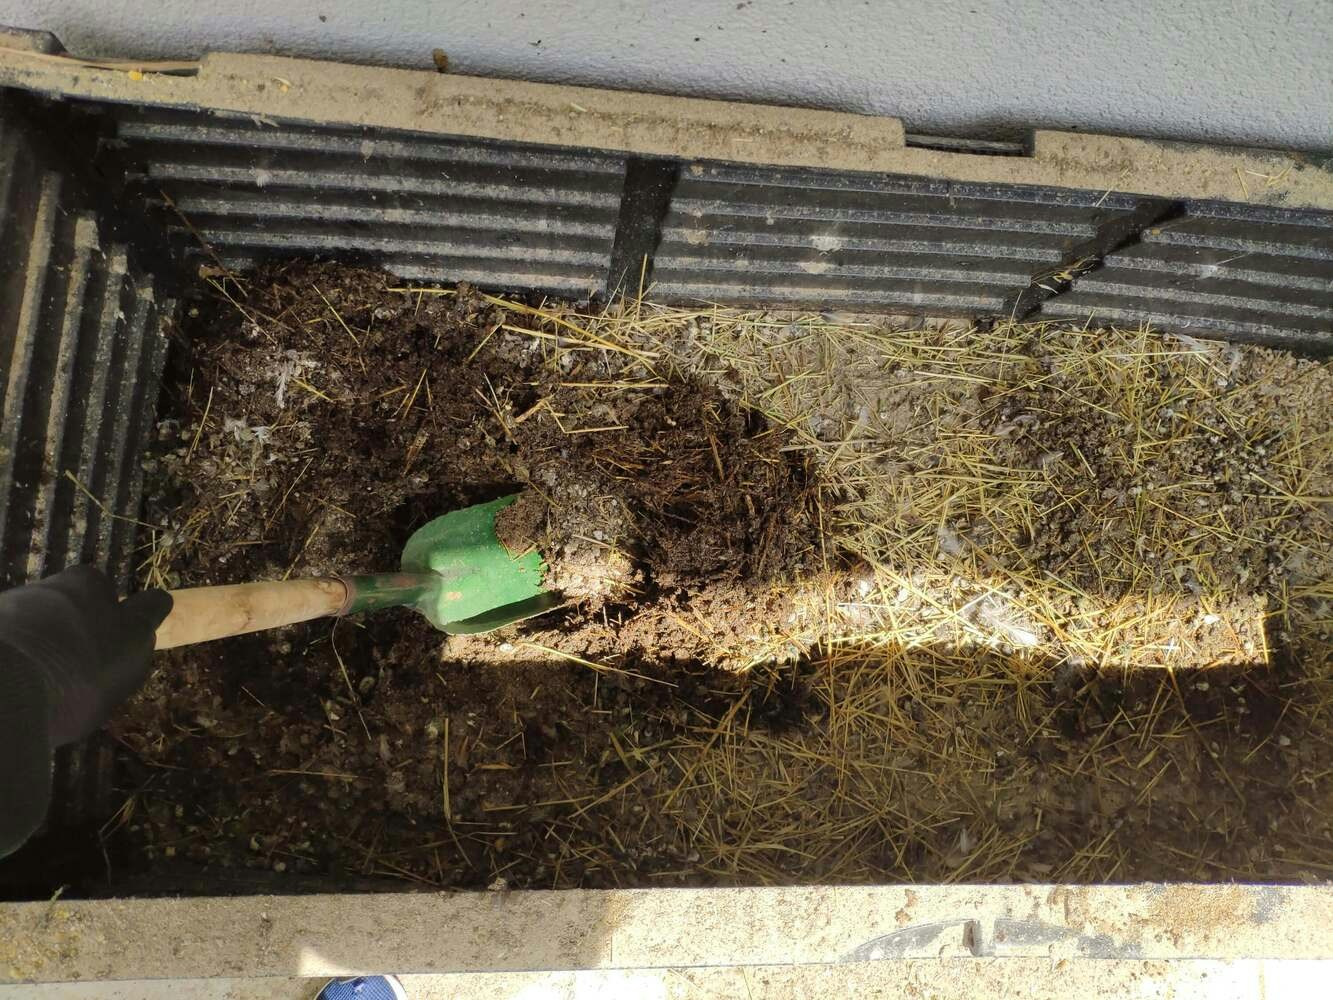
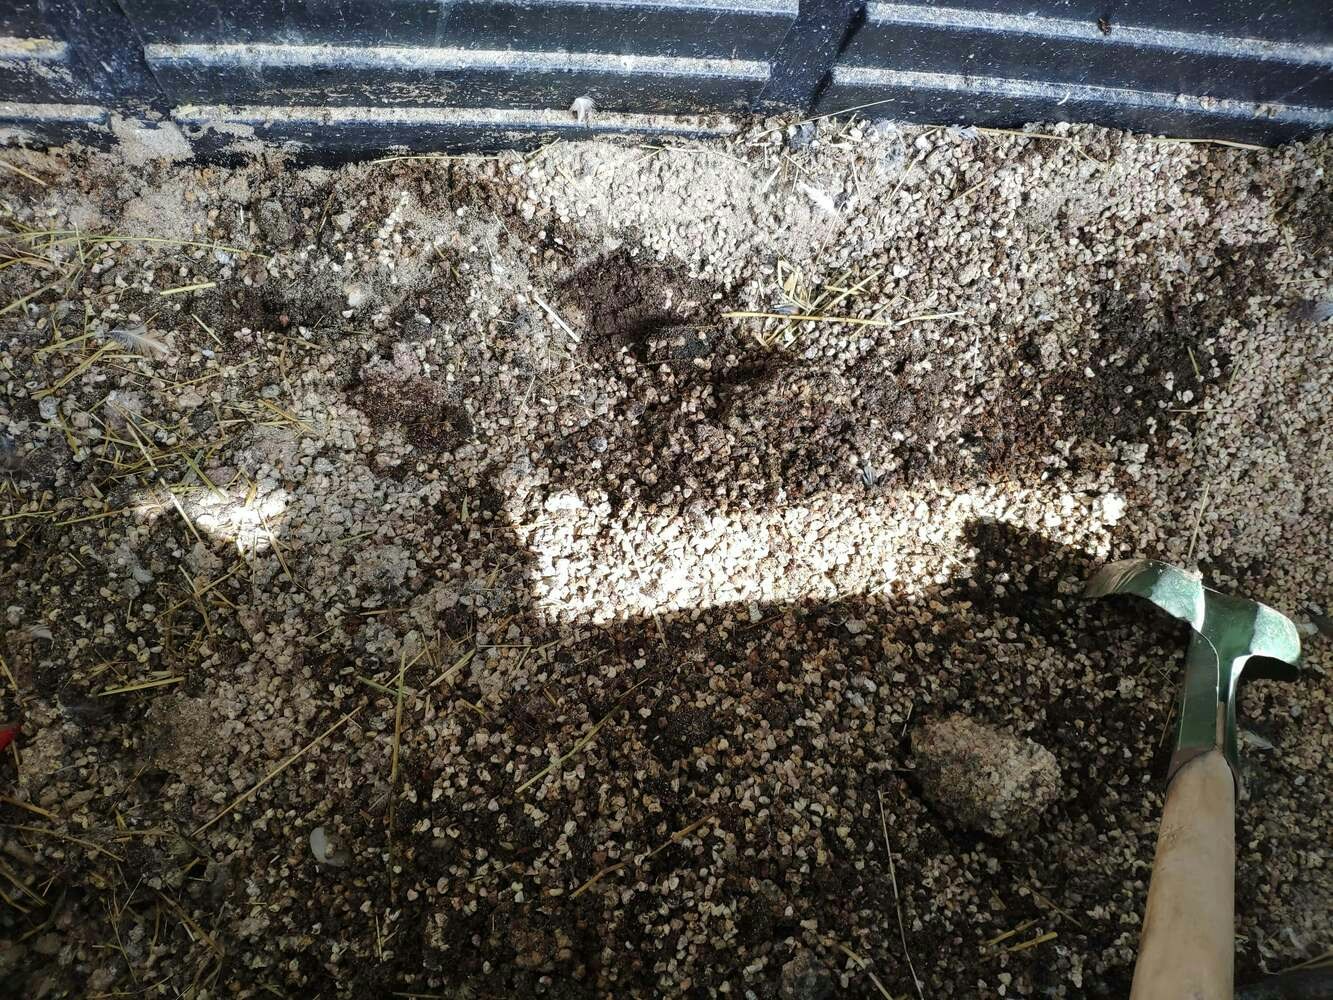
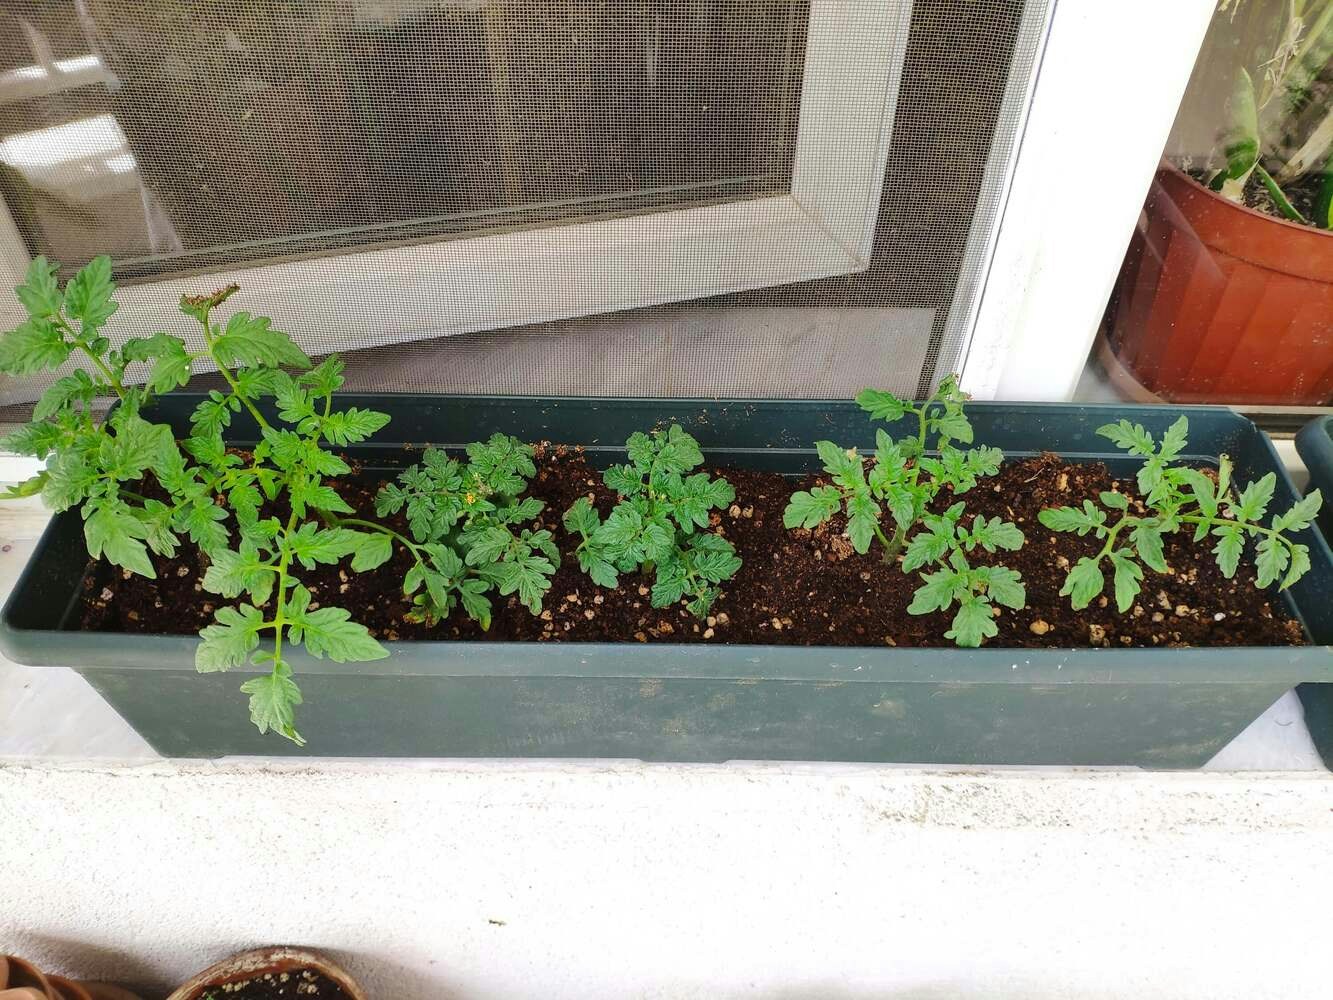
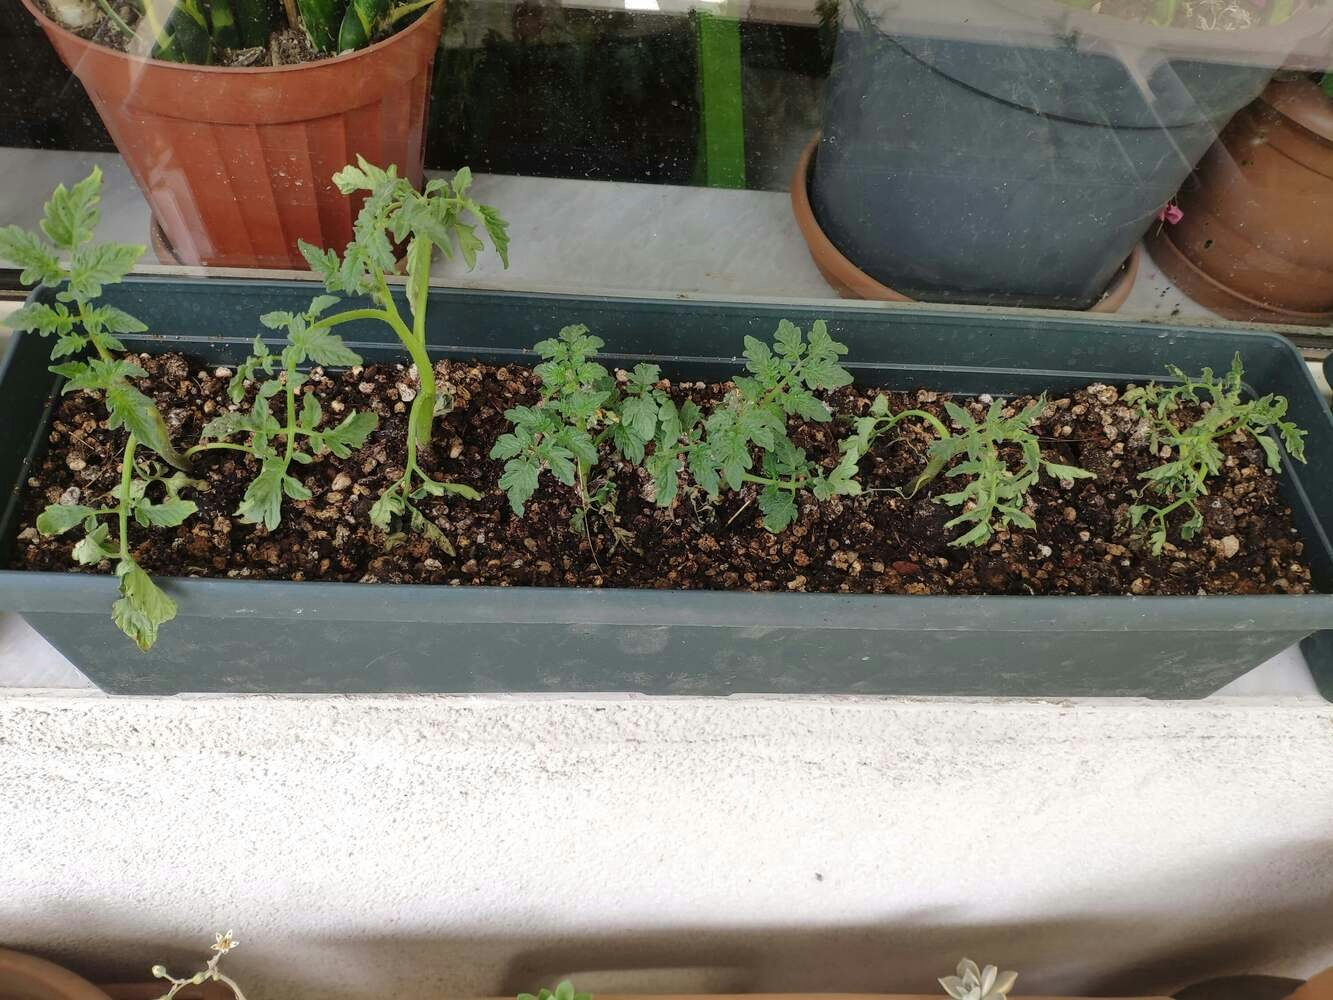
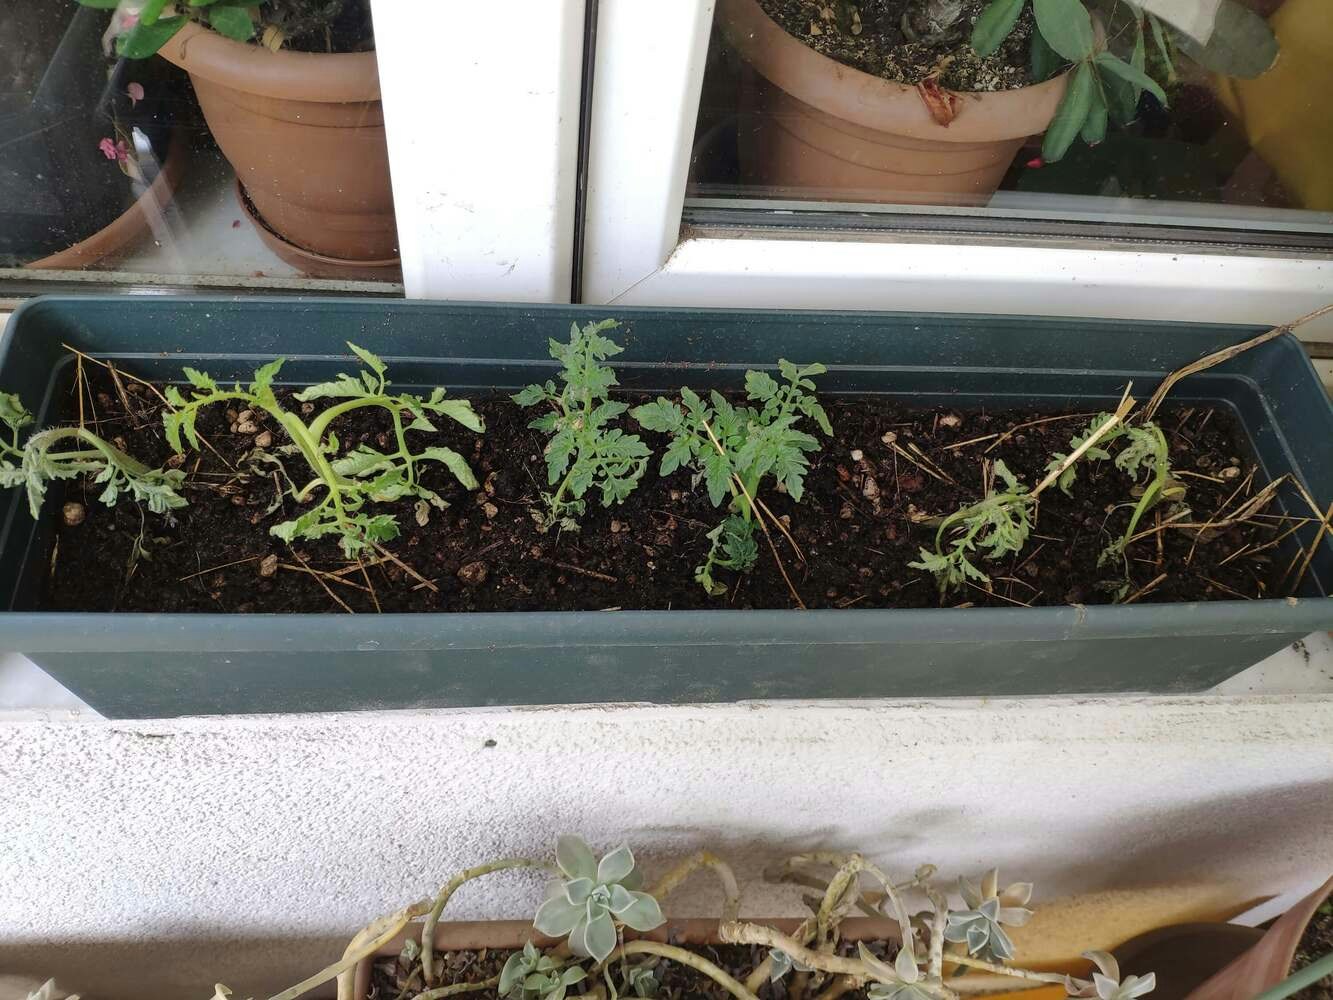
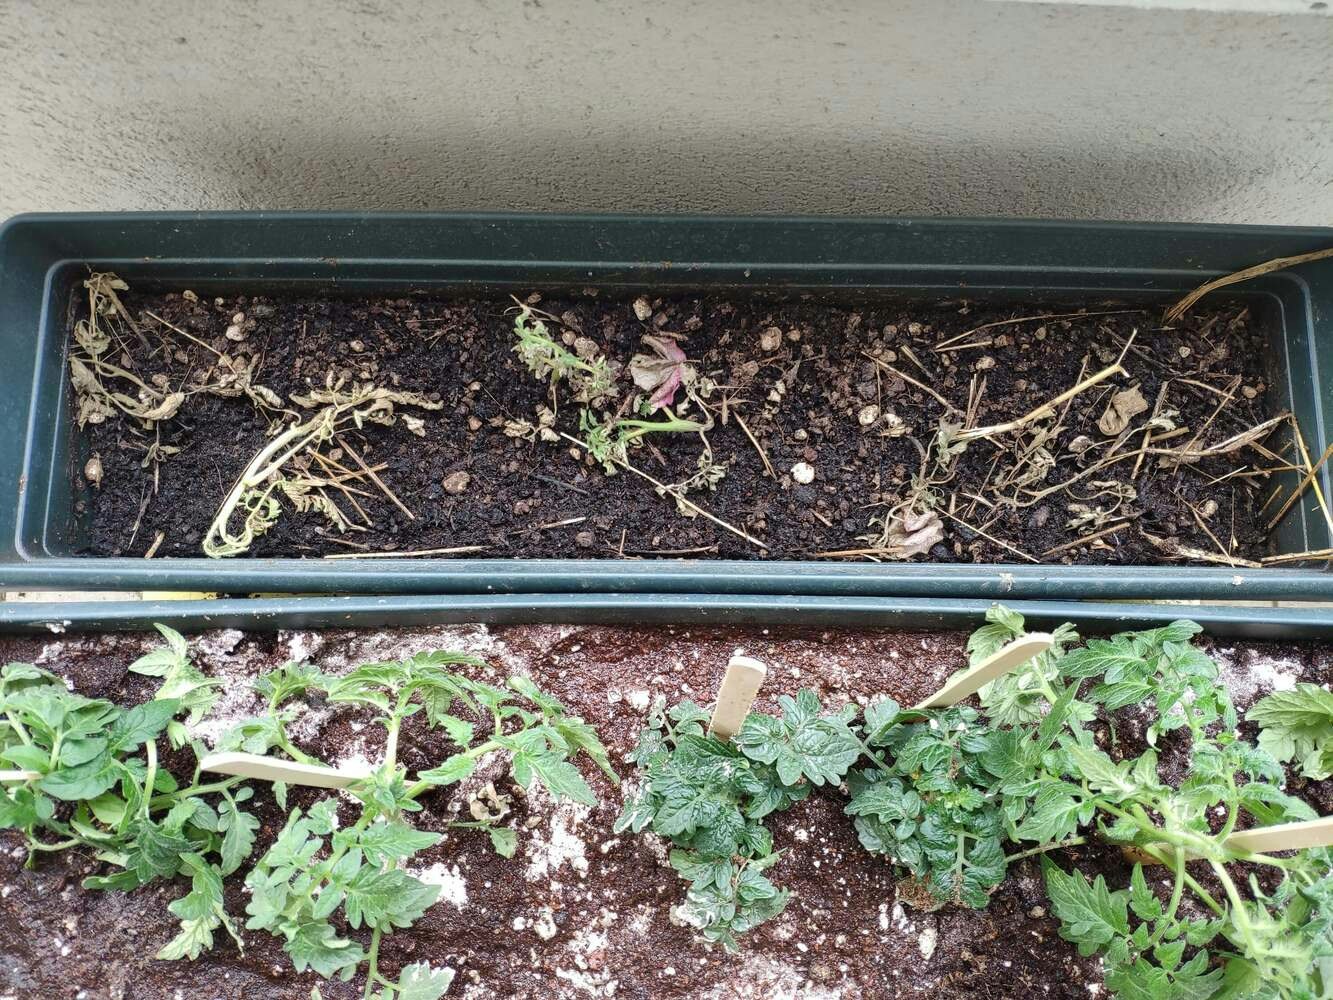
As mentioned earlier, utilizing composted manure as organic fertilizer can affect soil acidification, integrity, and structure depending on the manure decomposition stages (fresh, active, mature, and old). Since I needed a controlled environment manifesting varying soil structure and integrity in order to build a valid object detection model to detect excessive chemical fertilizer use, I decided to produce my organic fertilizers by composting manure. Fortunately, I am raising quails for egg production on my balcony and have experience in composting quail manure as organic fertilizer. To examine the correlation between the chemical (synthetic) fertilizer contamination and the soil integrity differences due to the applied organic fertilizers, I started to compost quail manure and collected the manure in different decomposition stages:- Fresh (1 month)
- Active (3 months)
- Old (6 months)

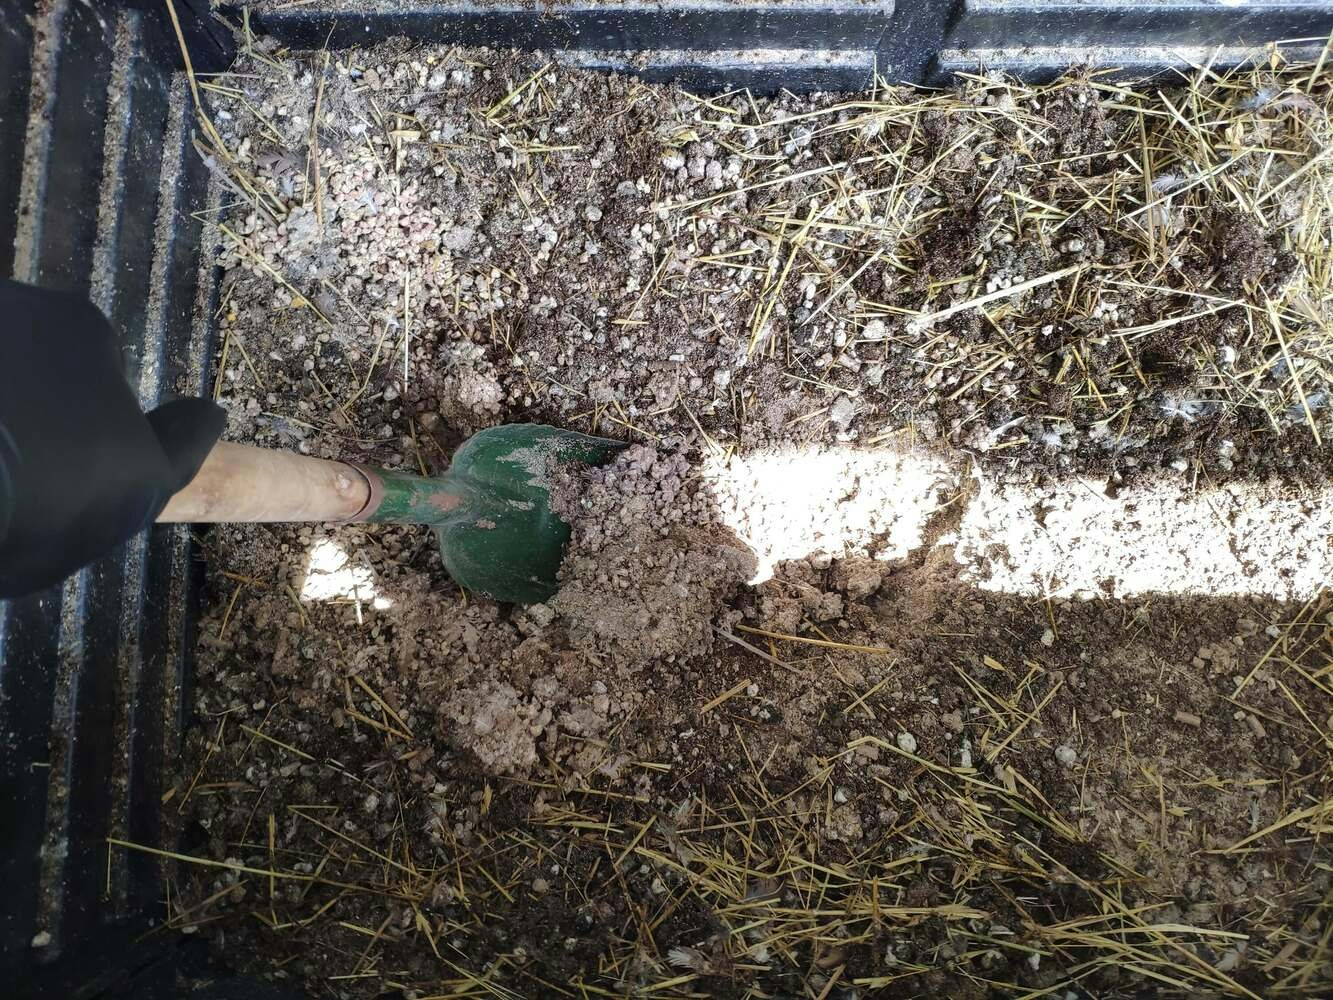

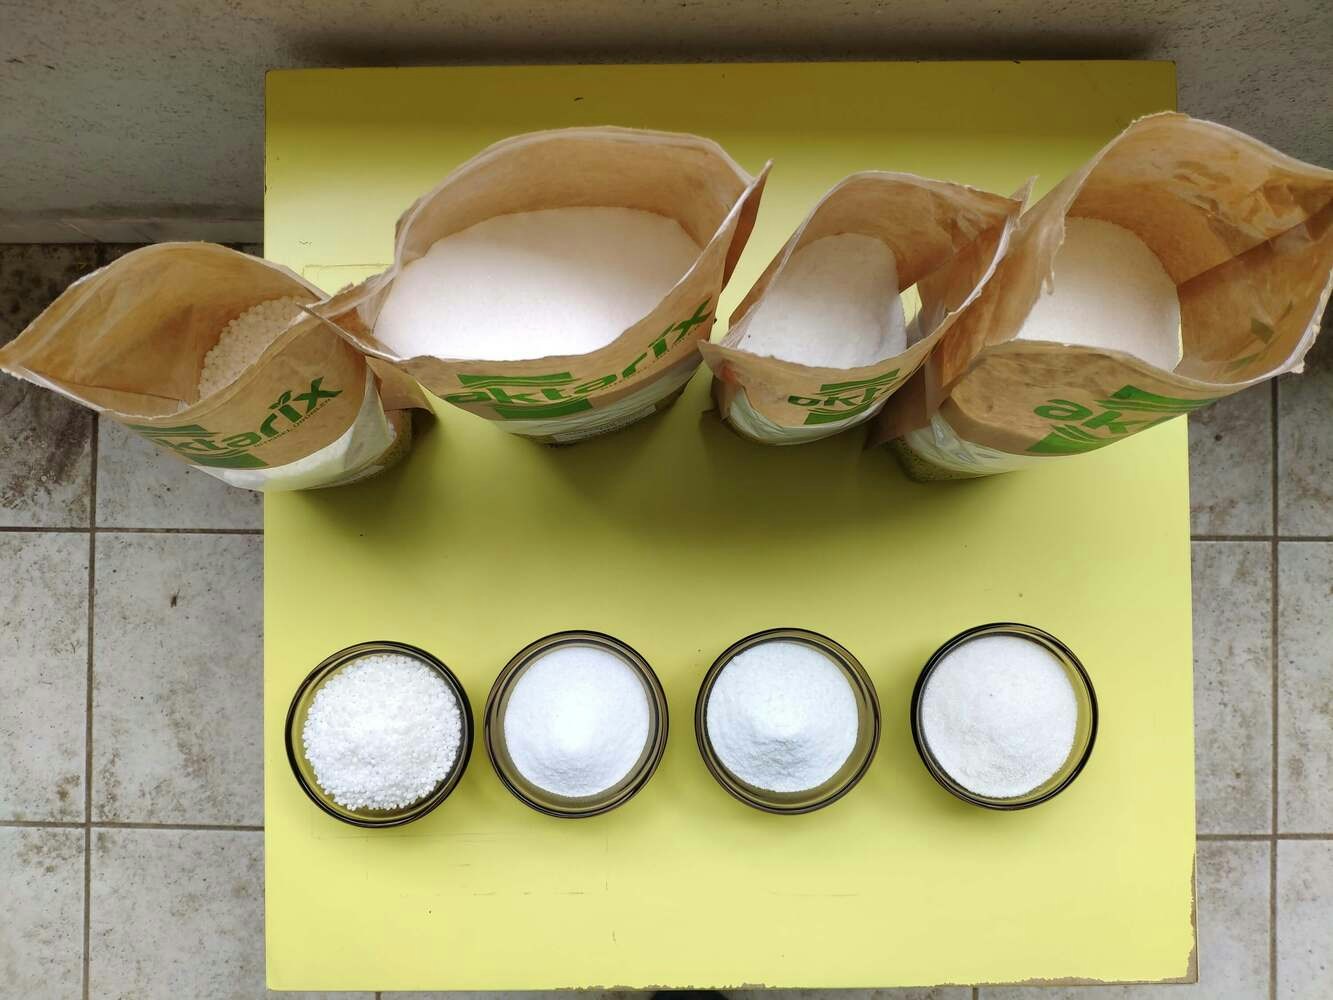
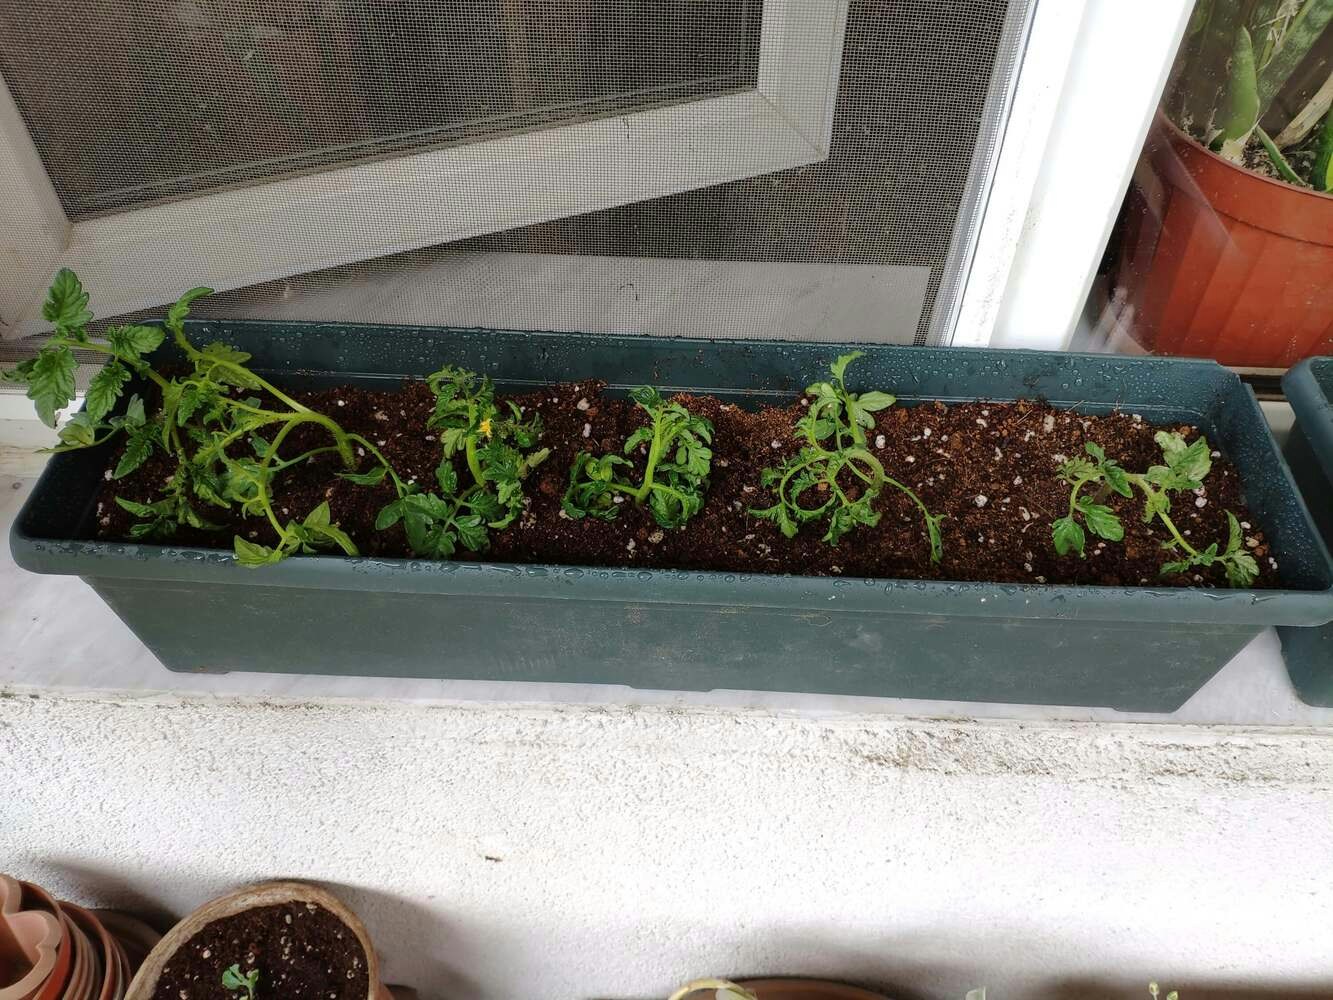
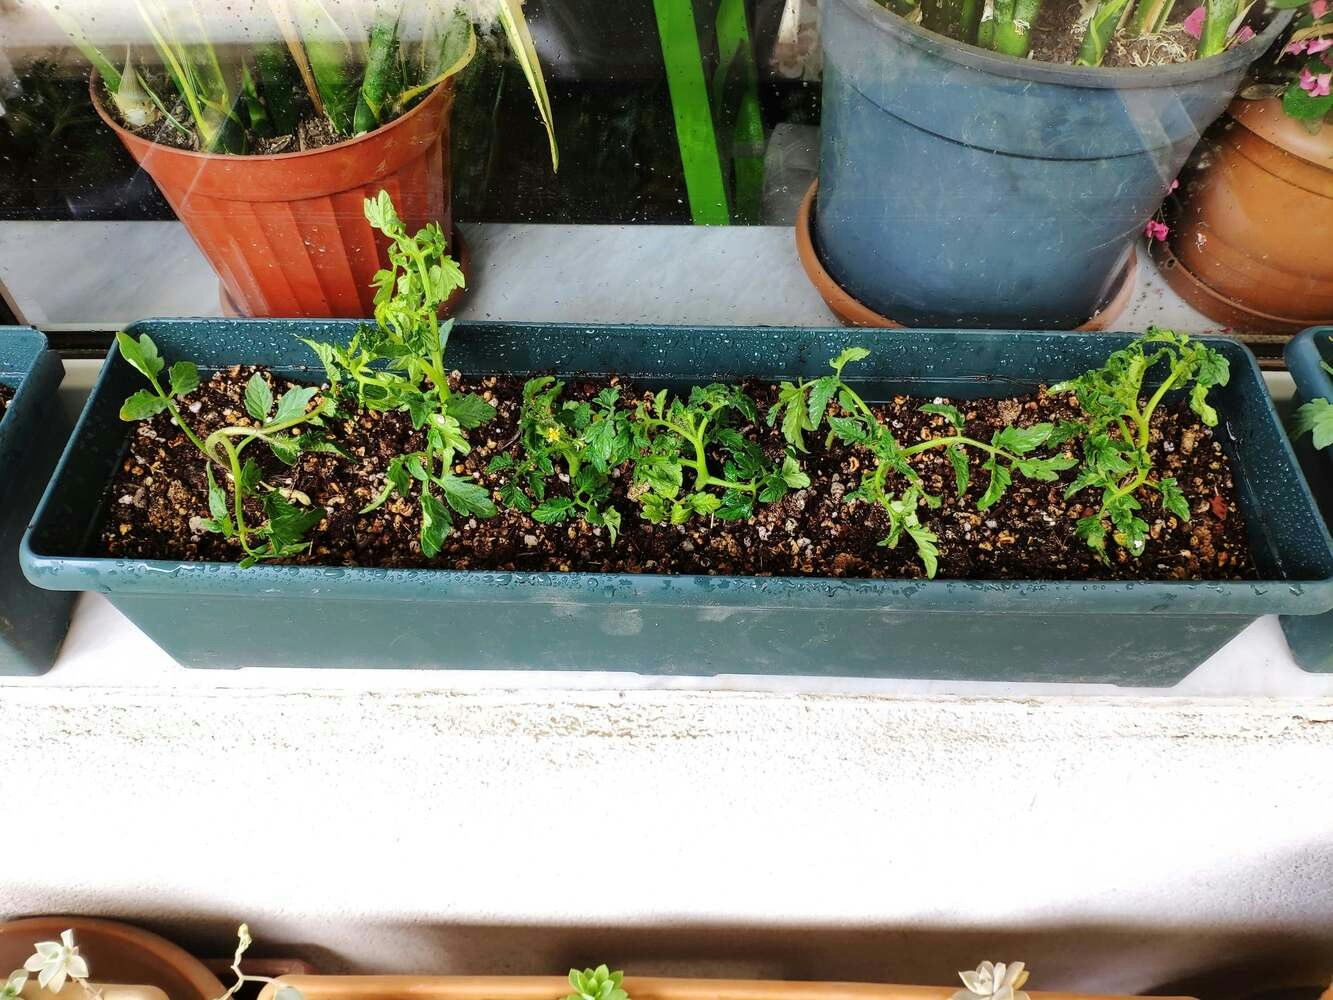
Step 3.1: Adding chemical fertilizers and sowing tomato seedlings
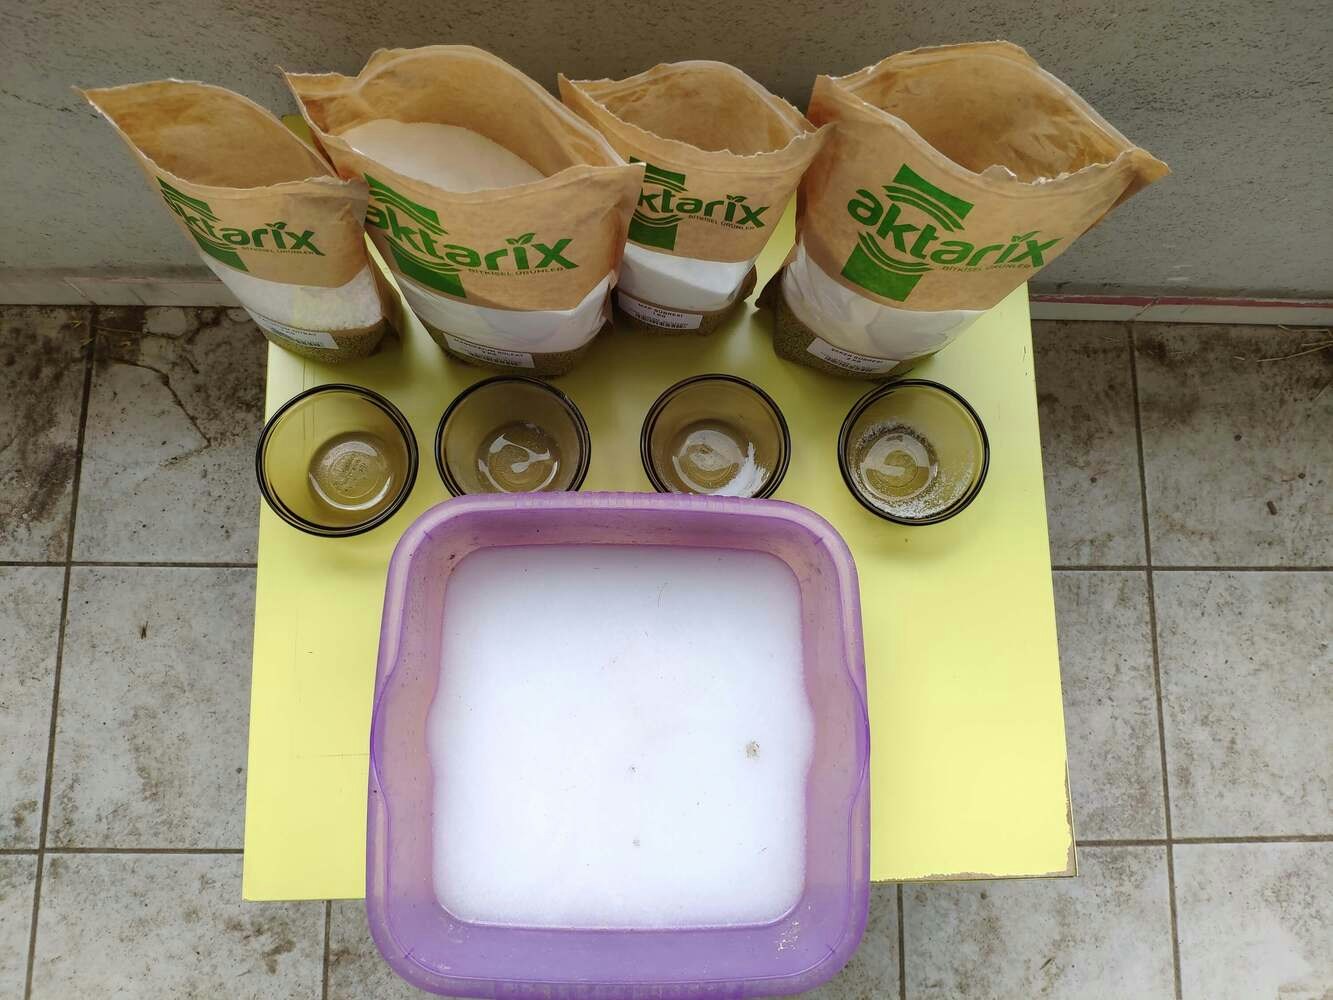
After adding organic fertilizers to the flowerpots, I ploughed the organic fertilizer-exerted soils and let them rest for a while. Then, I added chemical (synthetic) fertilizers to each flowerpot in the same amount to examine the excessive use of chemical fertilizers depending on the soil integrity and structure altered by organic fertilizers. I applied some of the most common water-soluble chemical fertilizers:- Calcium Nitrate
- Magnesium Sulphate
- Ammonium Sulphate
- Ammonium Phosphate
- Enriched
- Unsafe
- Toxic

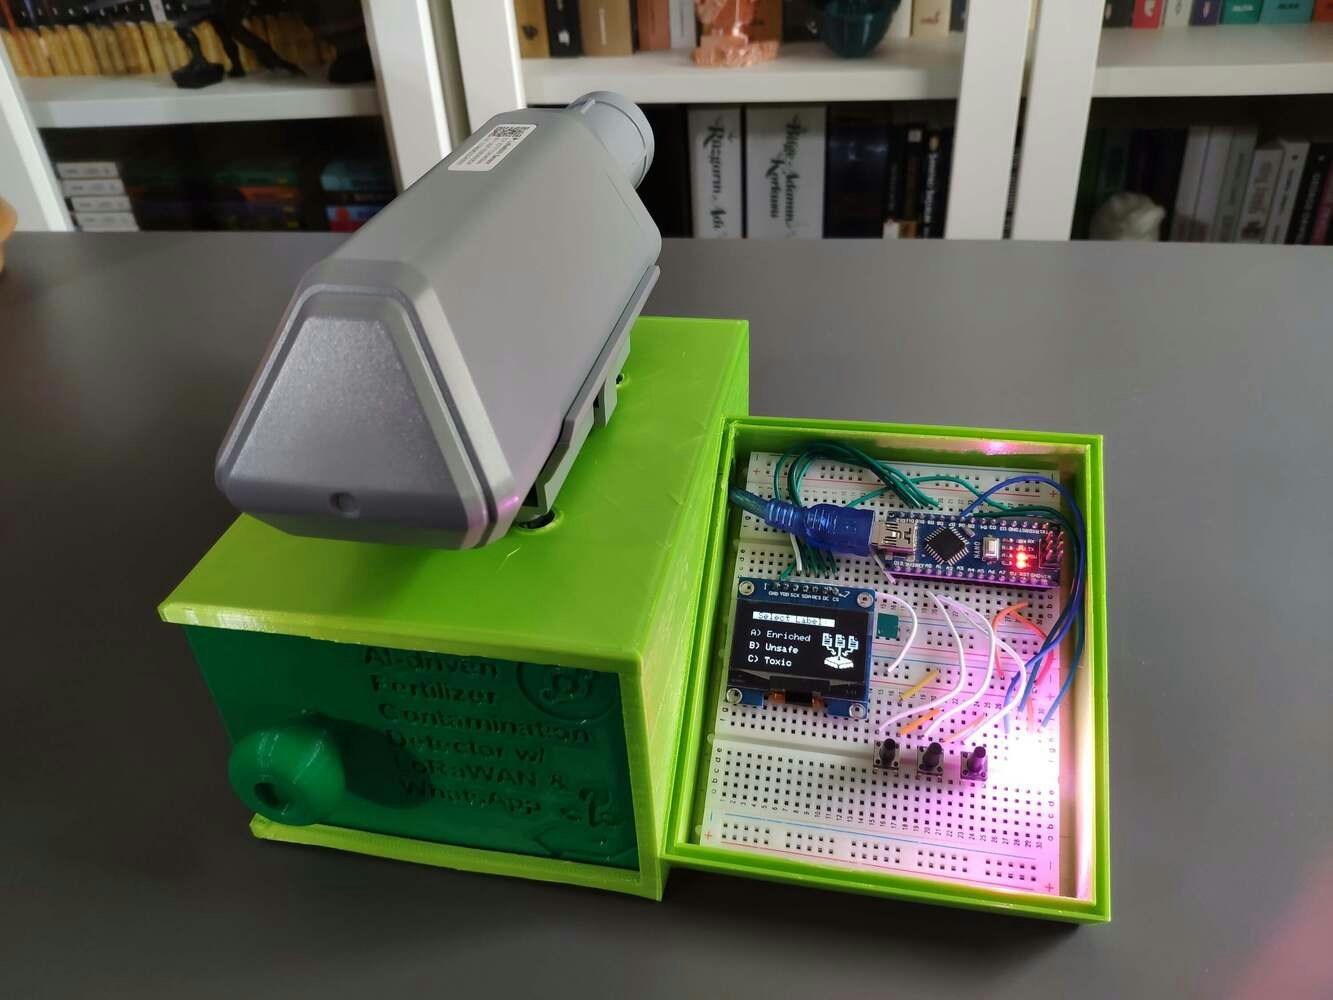
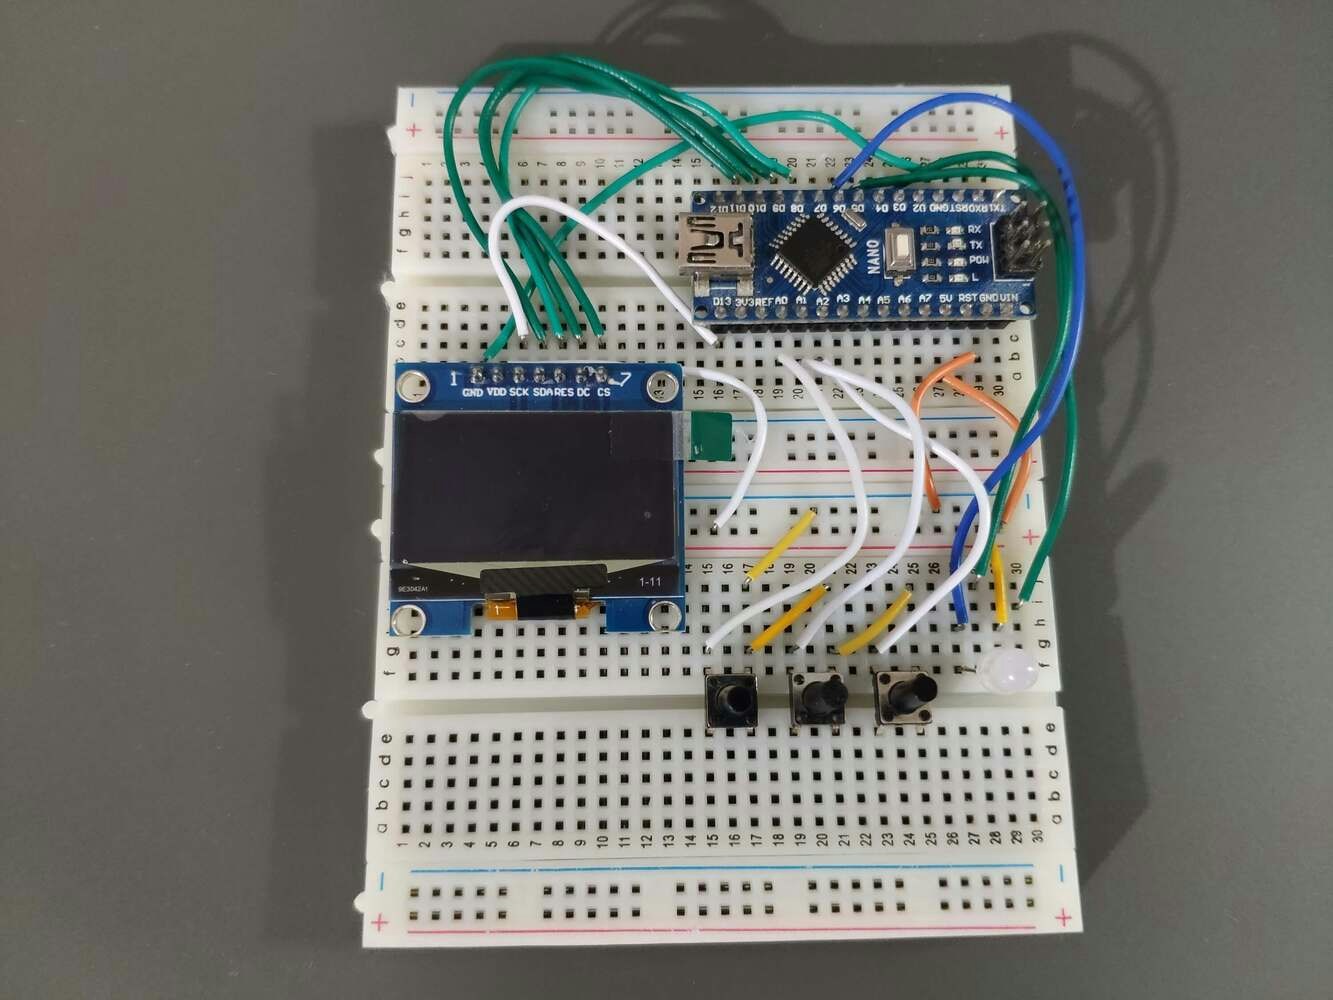
Step 4: Utilizing Arduino Nano as a remote control to send commands via serial communication
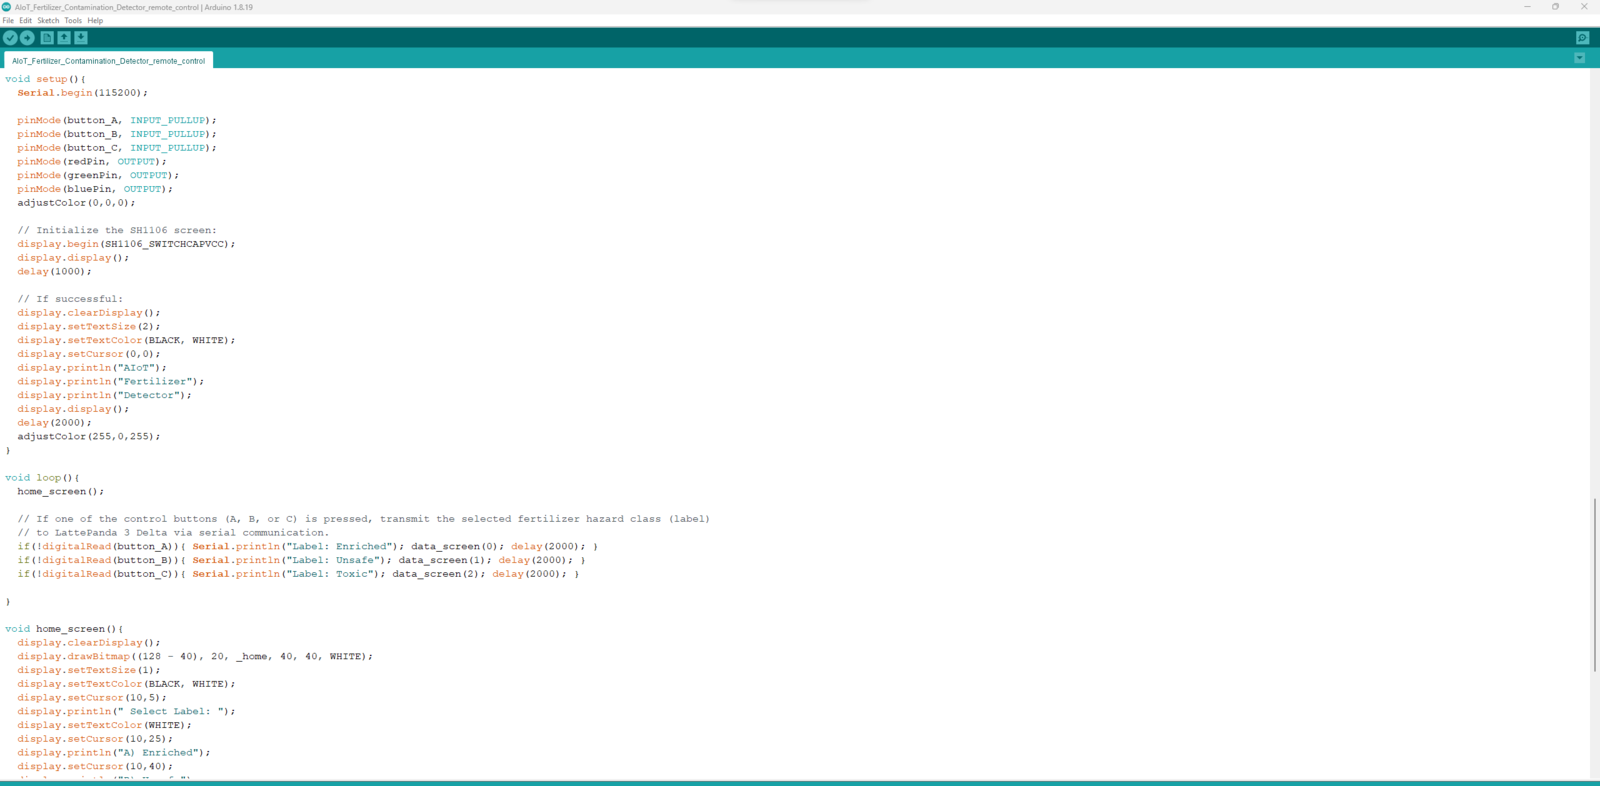
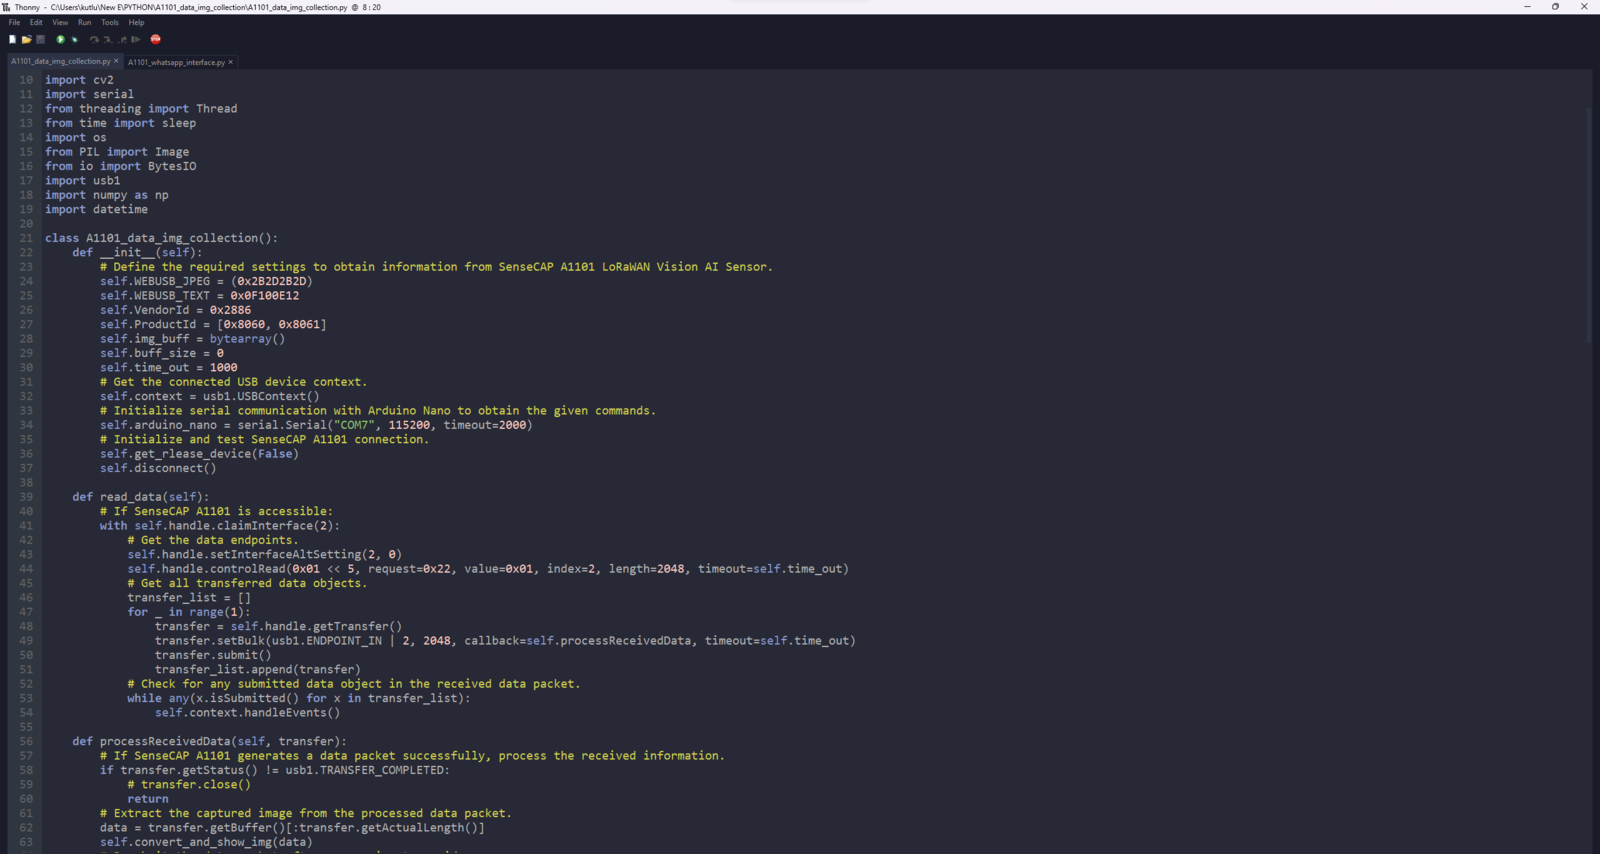
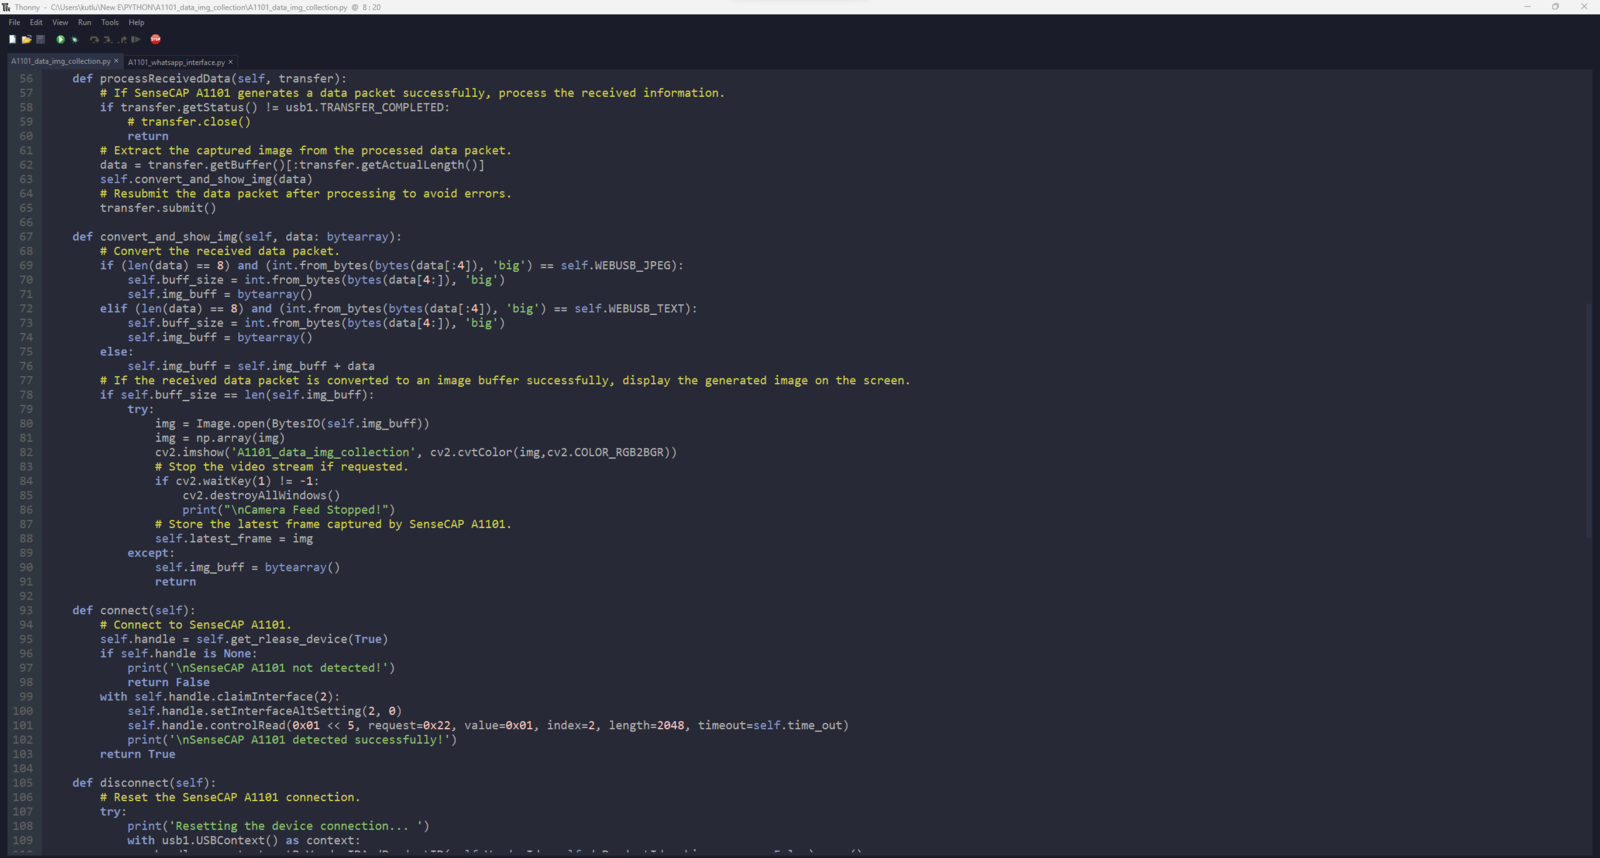
As explained earlier, SenseCAP A1101 does not support capturing images and saving them with different labels out of the box. Therefore, I decided to build a simple remote control with Arduino Nano to transfer commands (labels) to SenseCAP A1101 via serial communication, both connected to LattePanda 3 Delta. You can download the AIoT_Fertilizer_Contamination_Detector_remote_control.ino file to try and inspect the code for transferring commands to SenseCAP A1101 via serial communication. :hash: Firstly, download the required libraries to utilize the SH1106 OLED screen with Arduino Nano: Adafruit_SH1106 | Download Adafruit-GFX-Library | Download ⭐ Include the required libraries.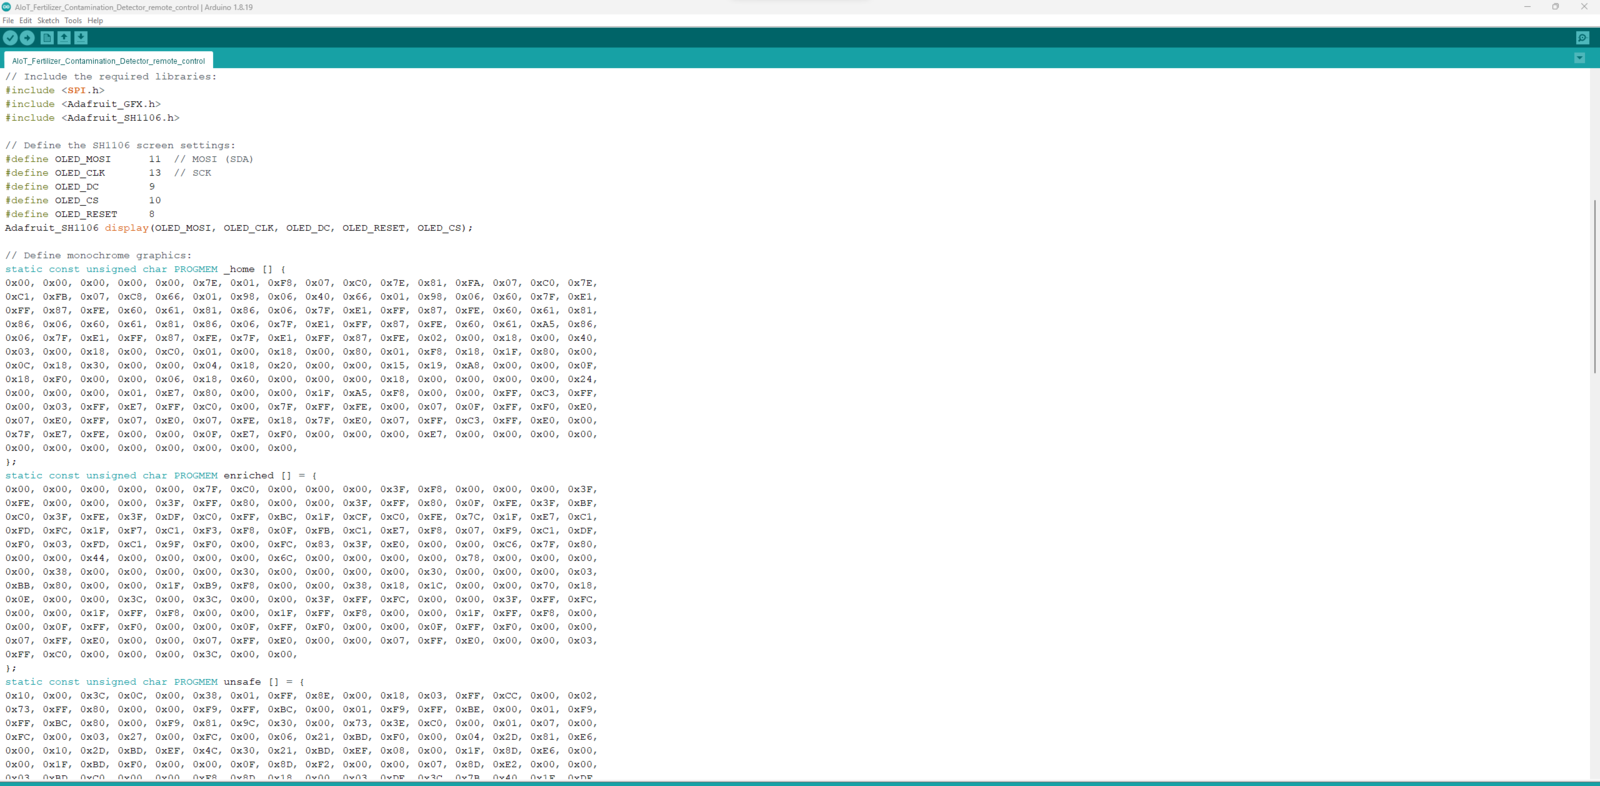
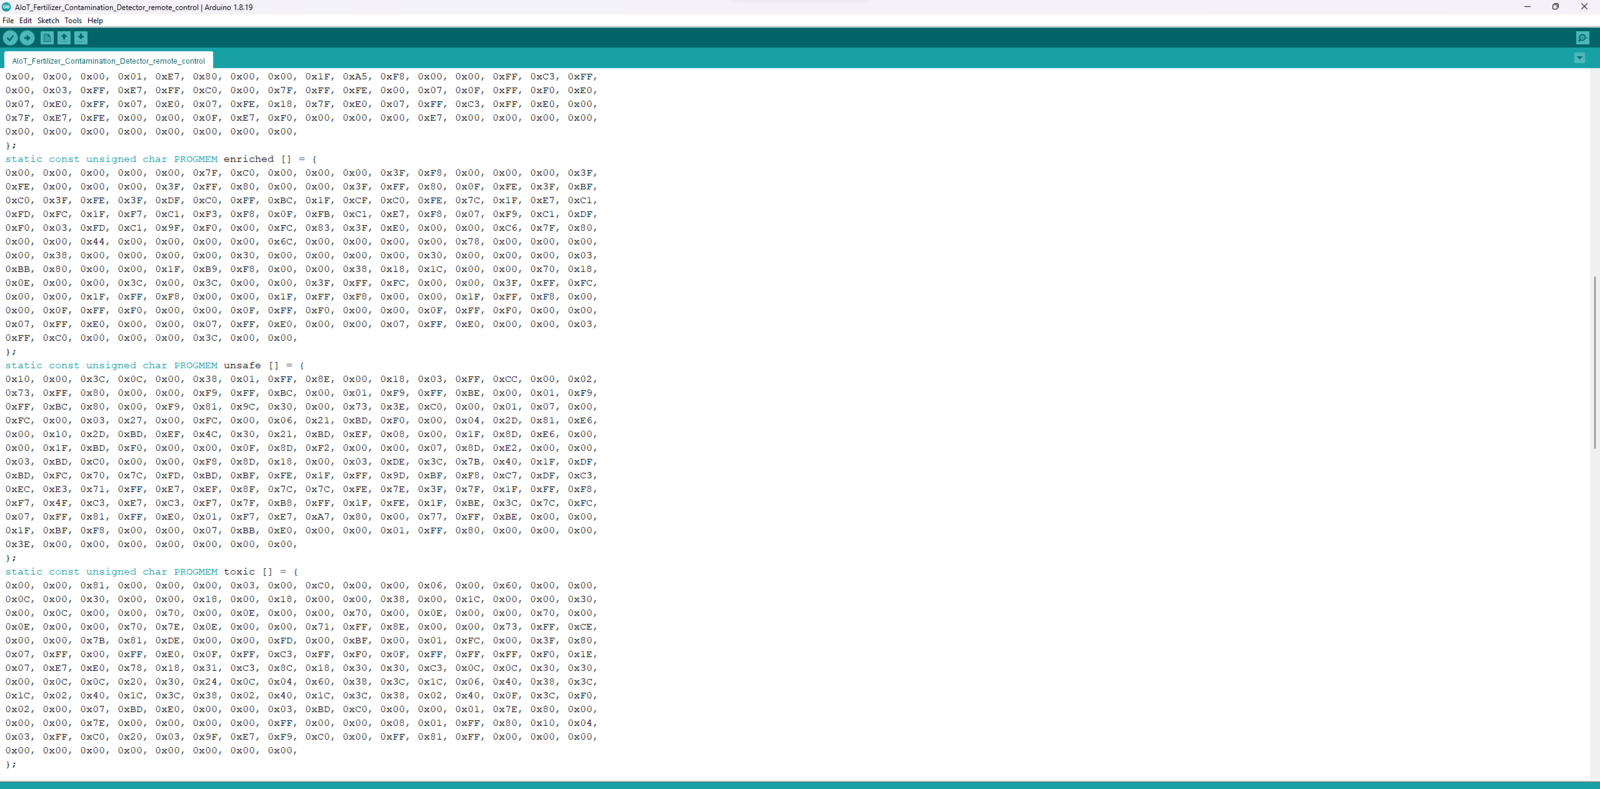
Step 4.1: Displaying images on the SH1106 OLED screen
To display images (black and white) on the SH1106 OLED screen successfully, I needed to create monochromatic bitmaps from PNG or JPG files and convert those bitmaps to data arrays. :hash: First of all, download the LCD Assistant. :hash: Then, upload a monochromatic bitmap and select Vertical or Horizontal depending on the screen type. :hash: Convert the image (bitmap) and save the output (data array). :hash: Finally, add the data array to the code and print it on the screen.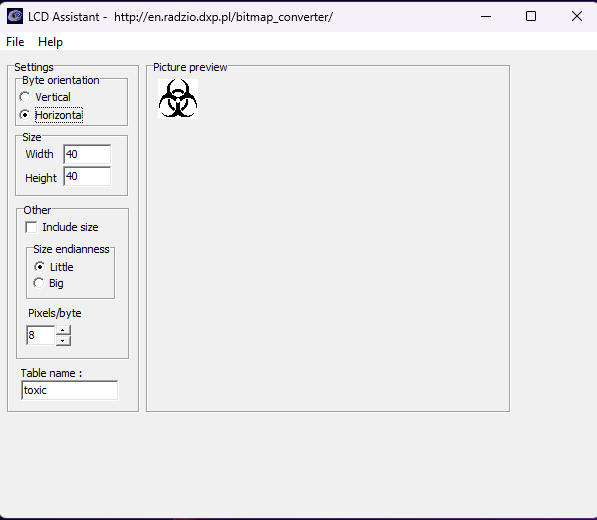
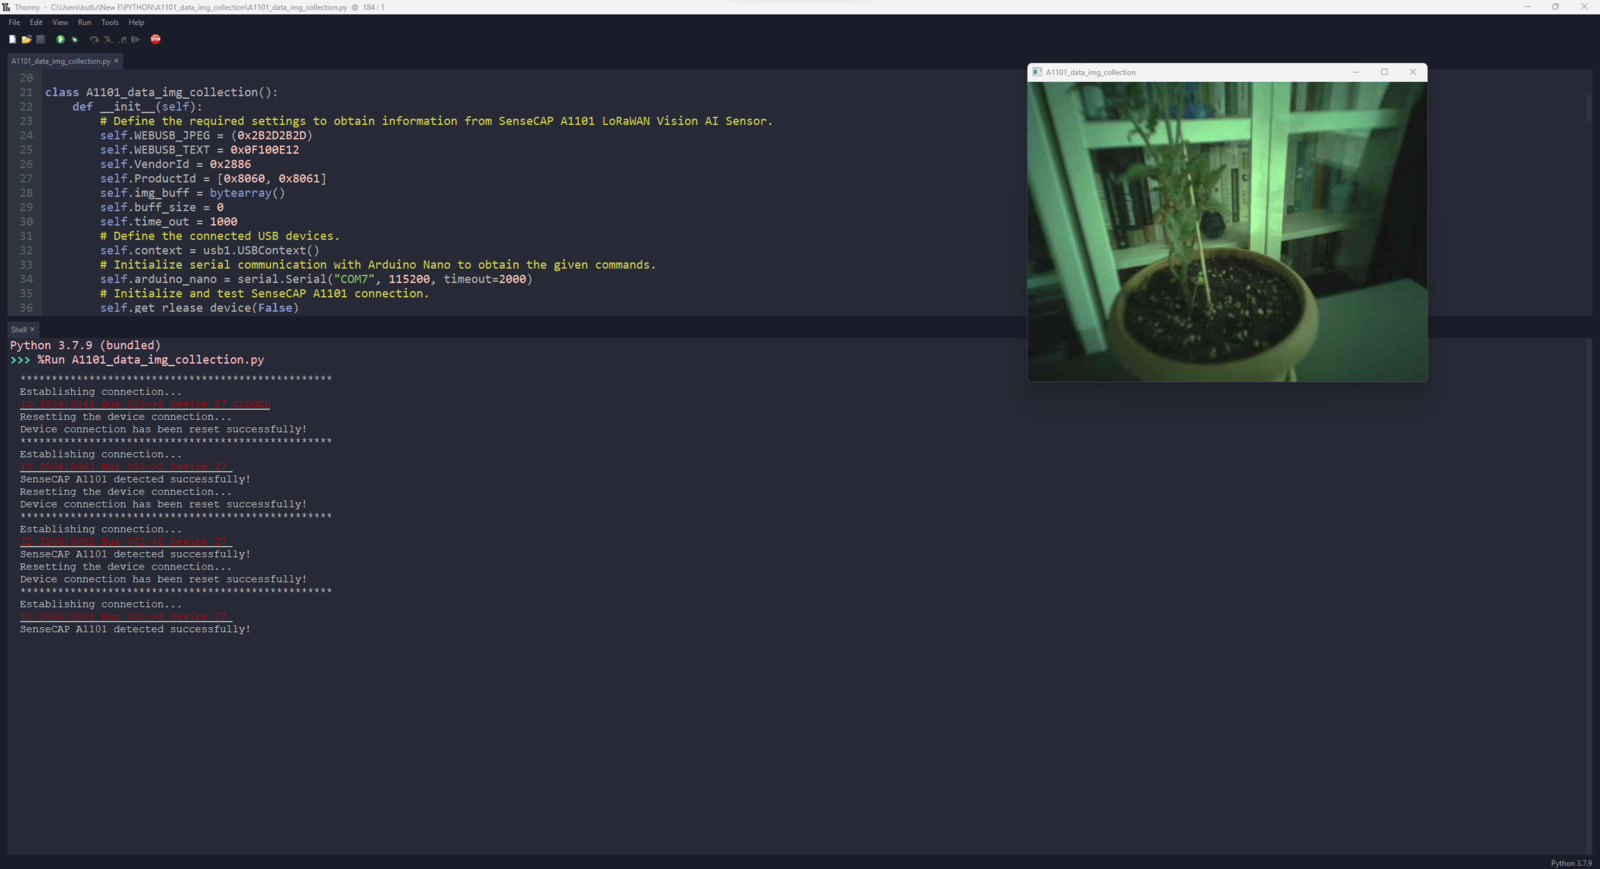
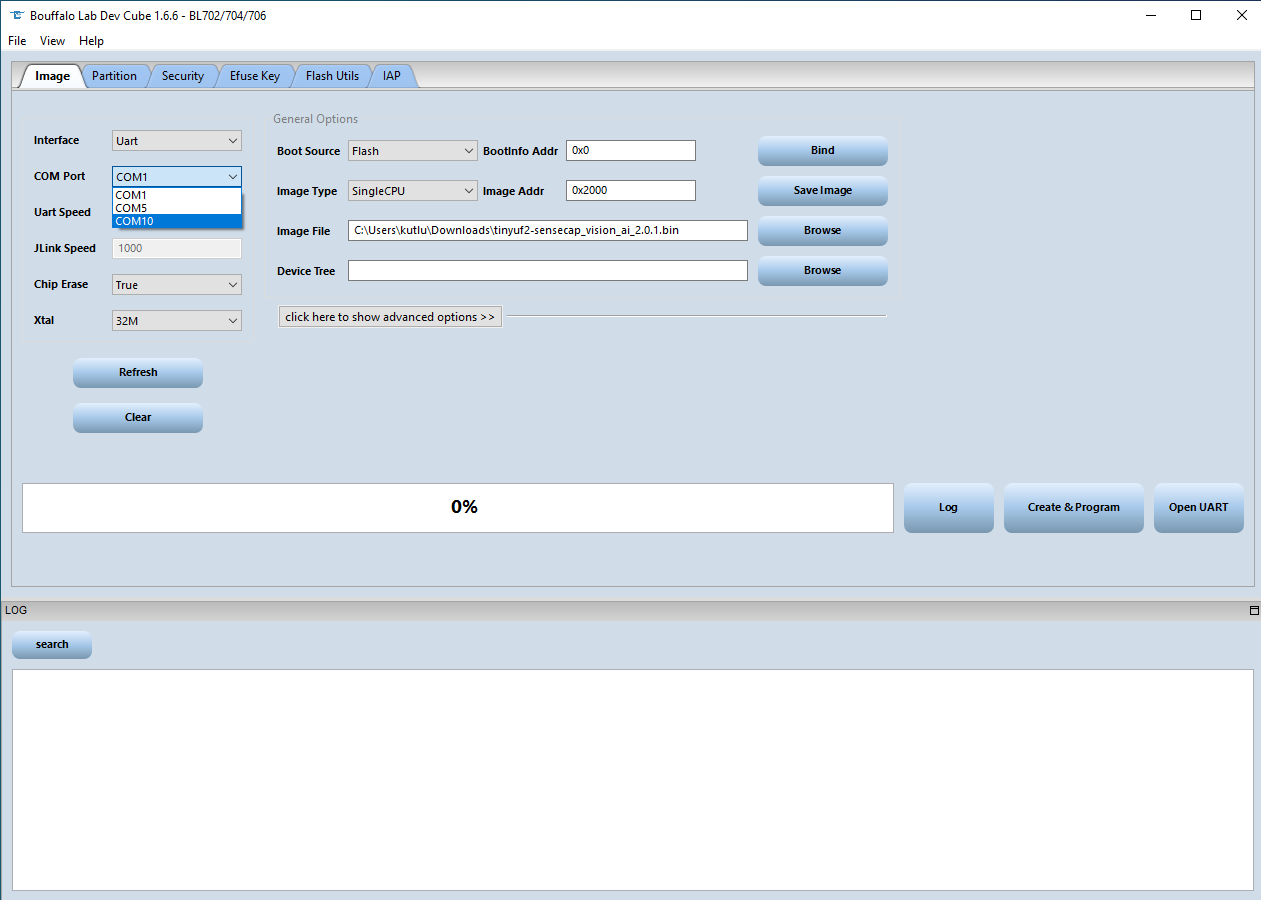
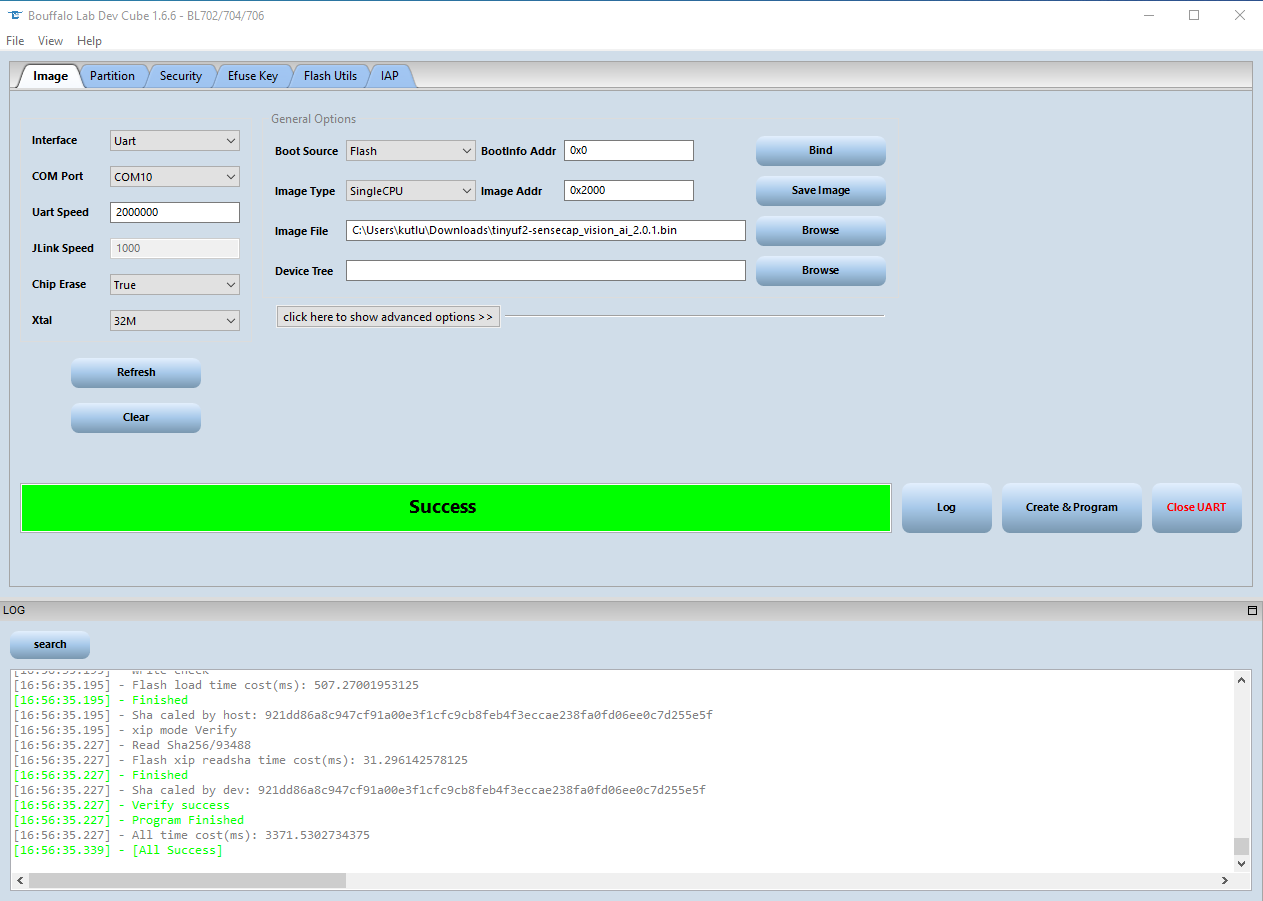
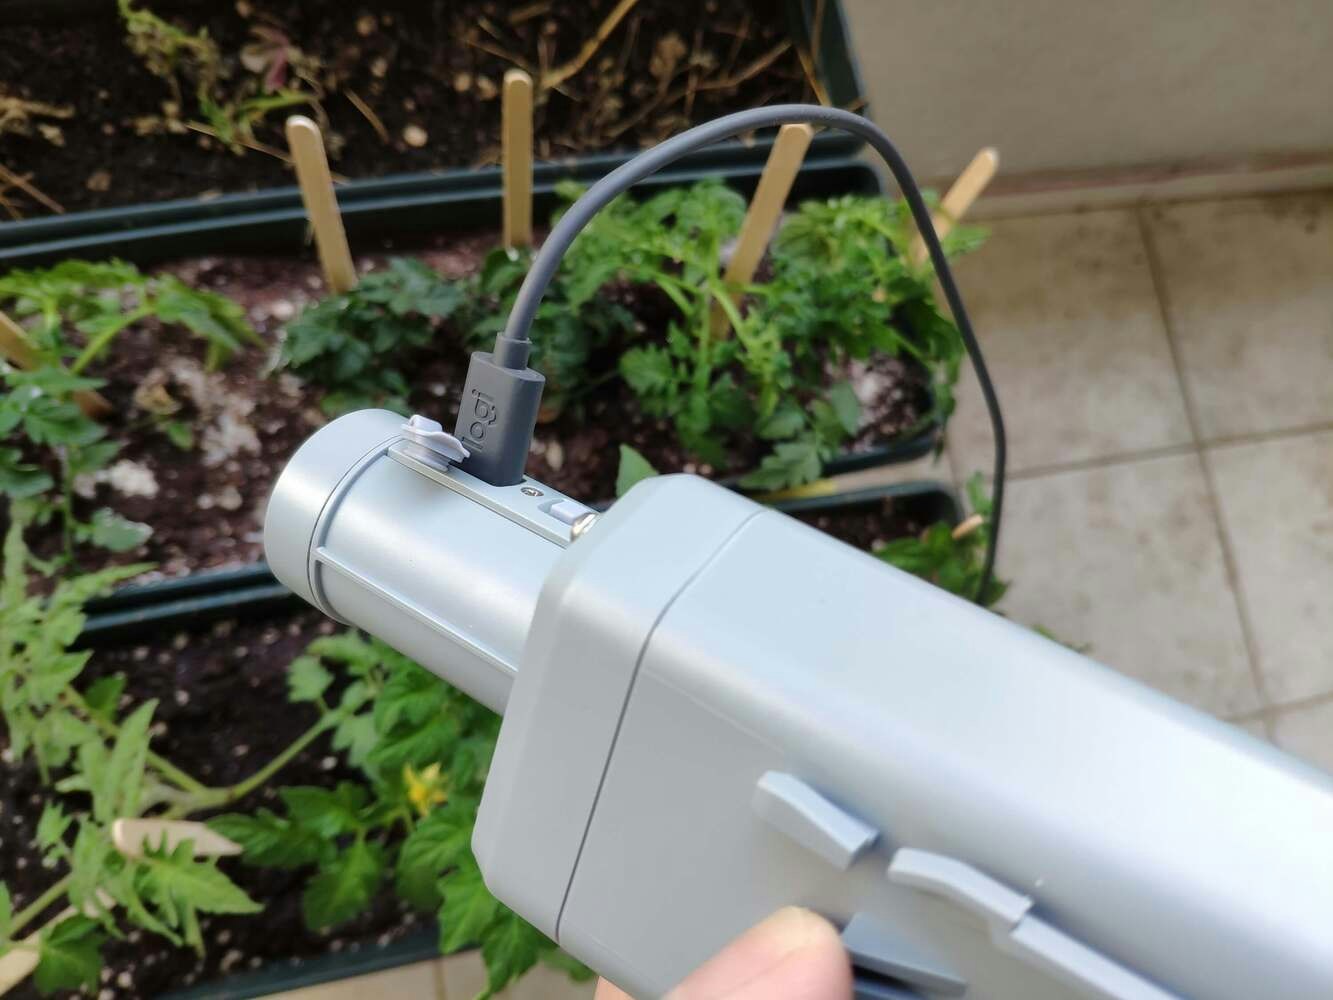
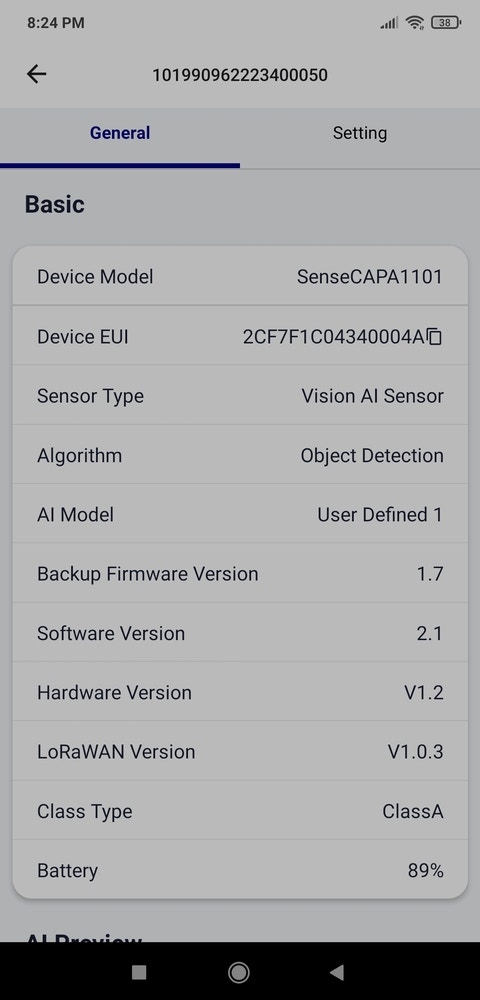
Step 5.0: Setting up SenseCAP A1101 on LattePanda 3 Delta
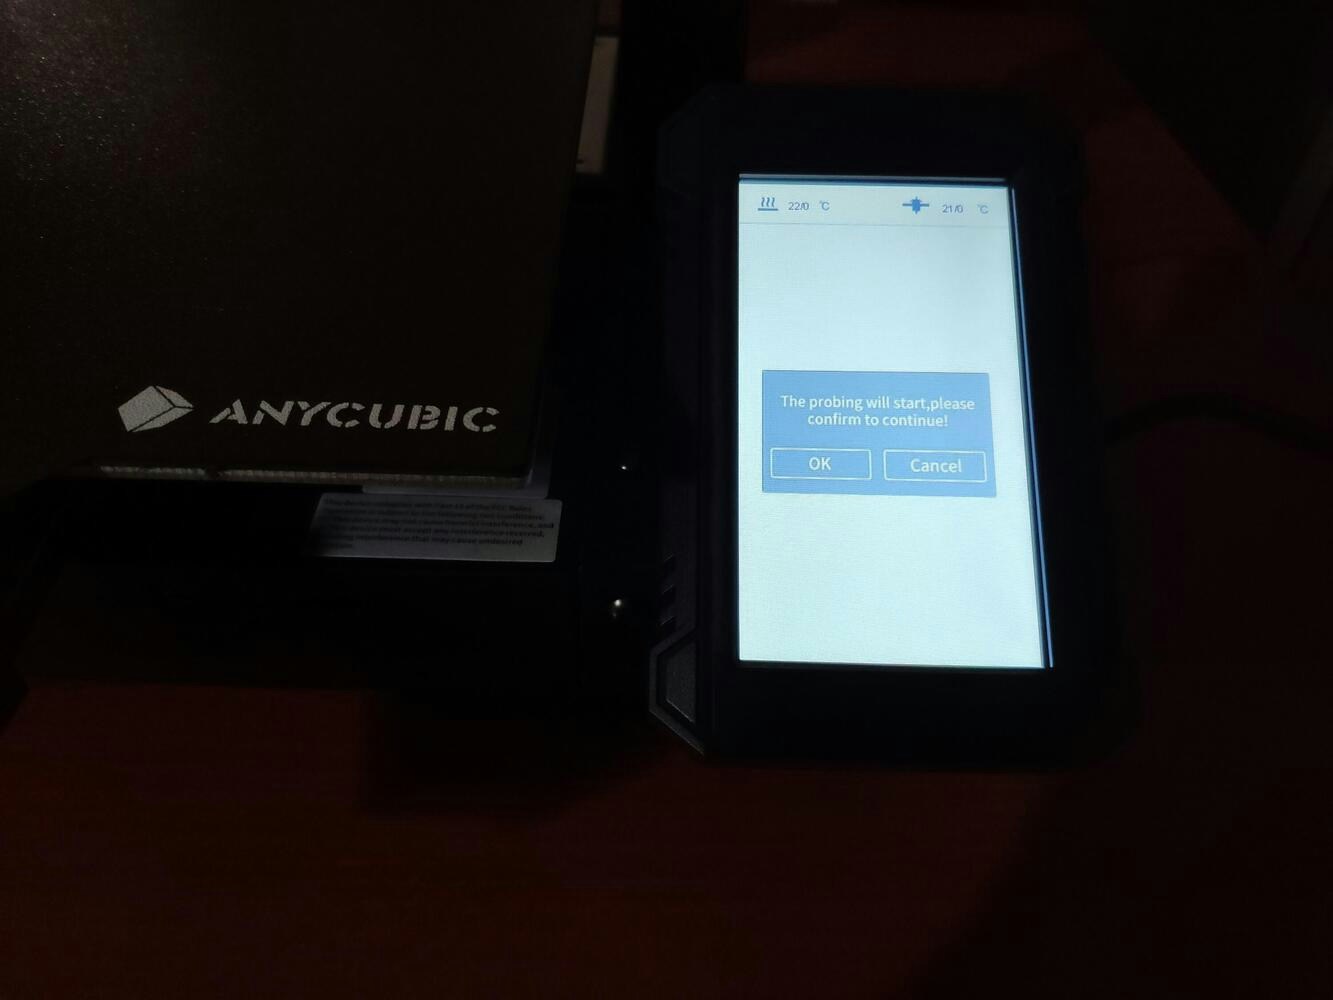
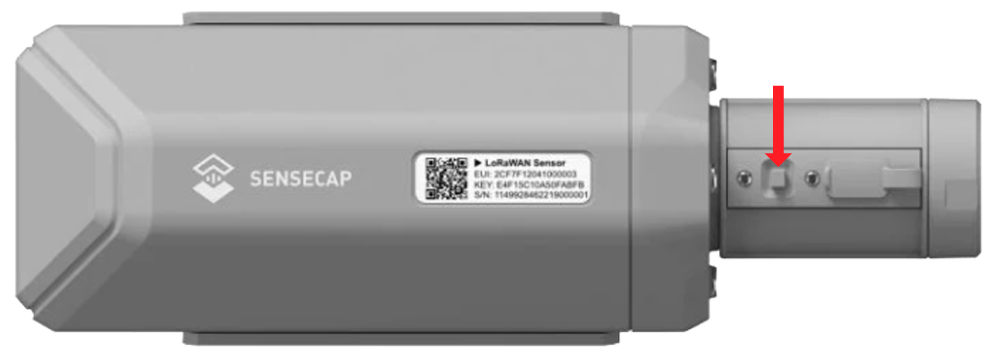
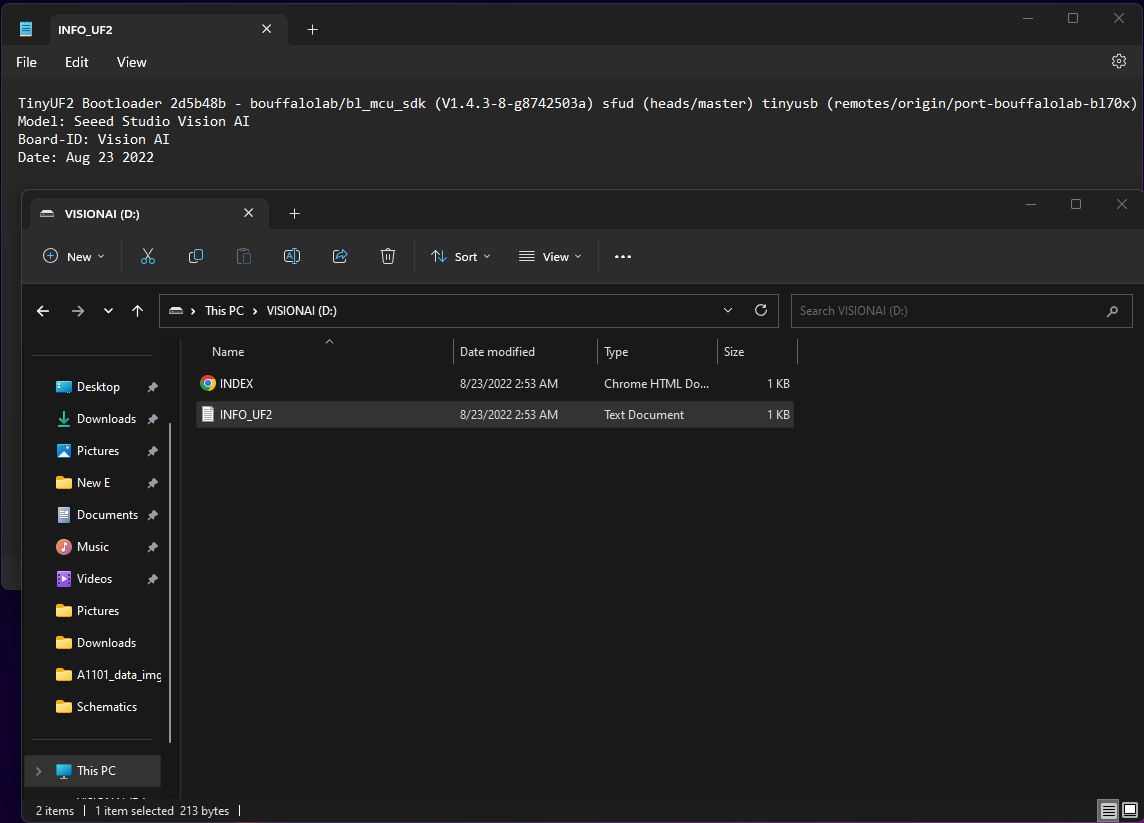
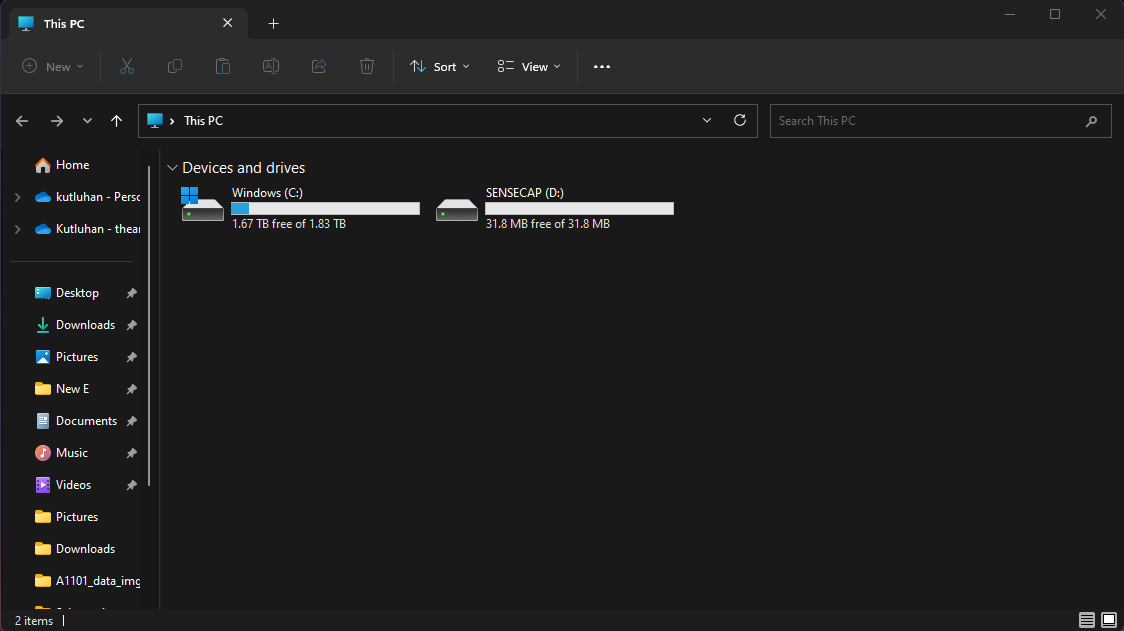
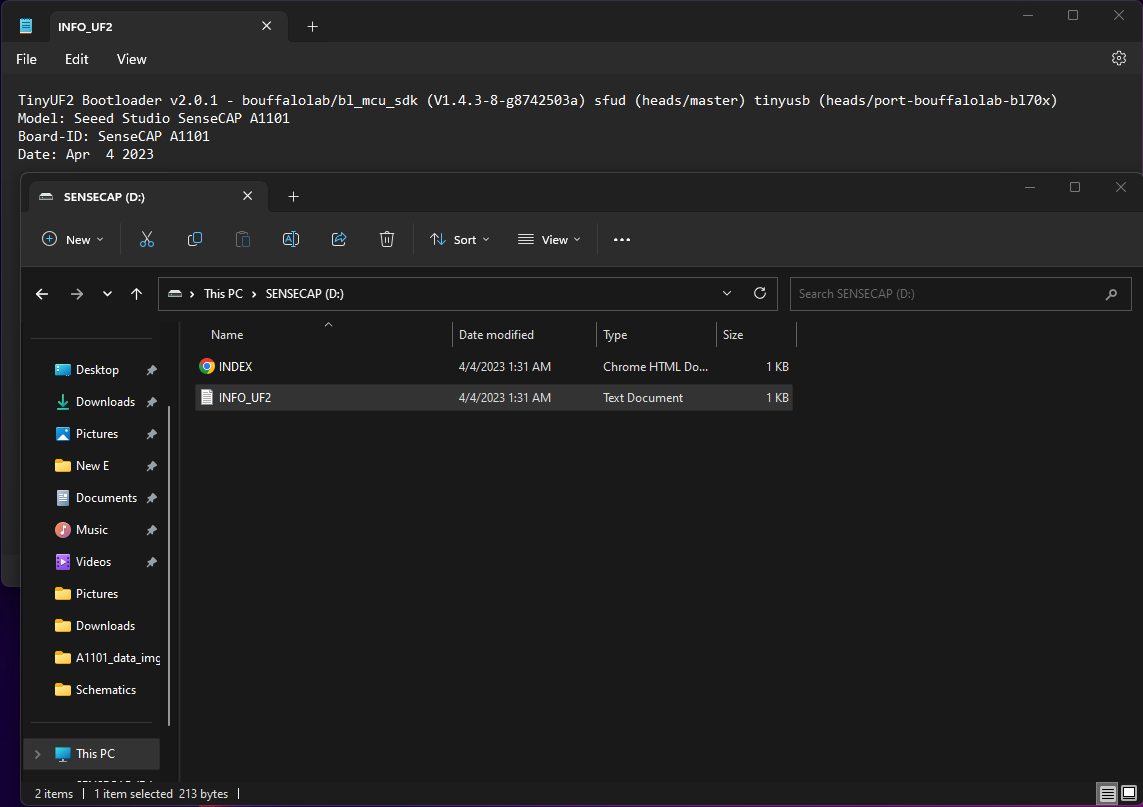
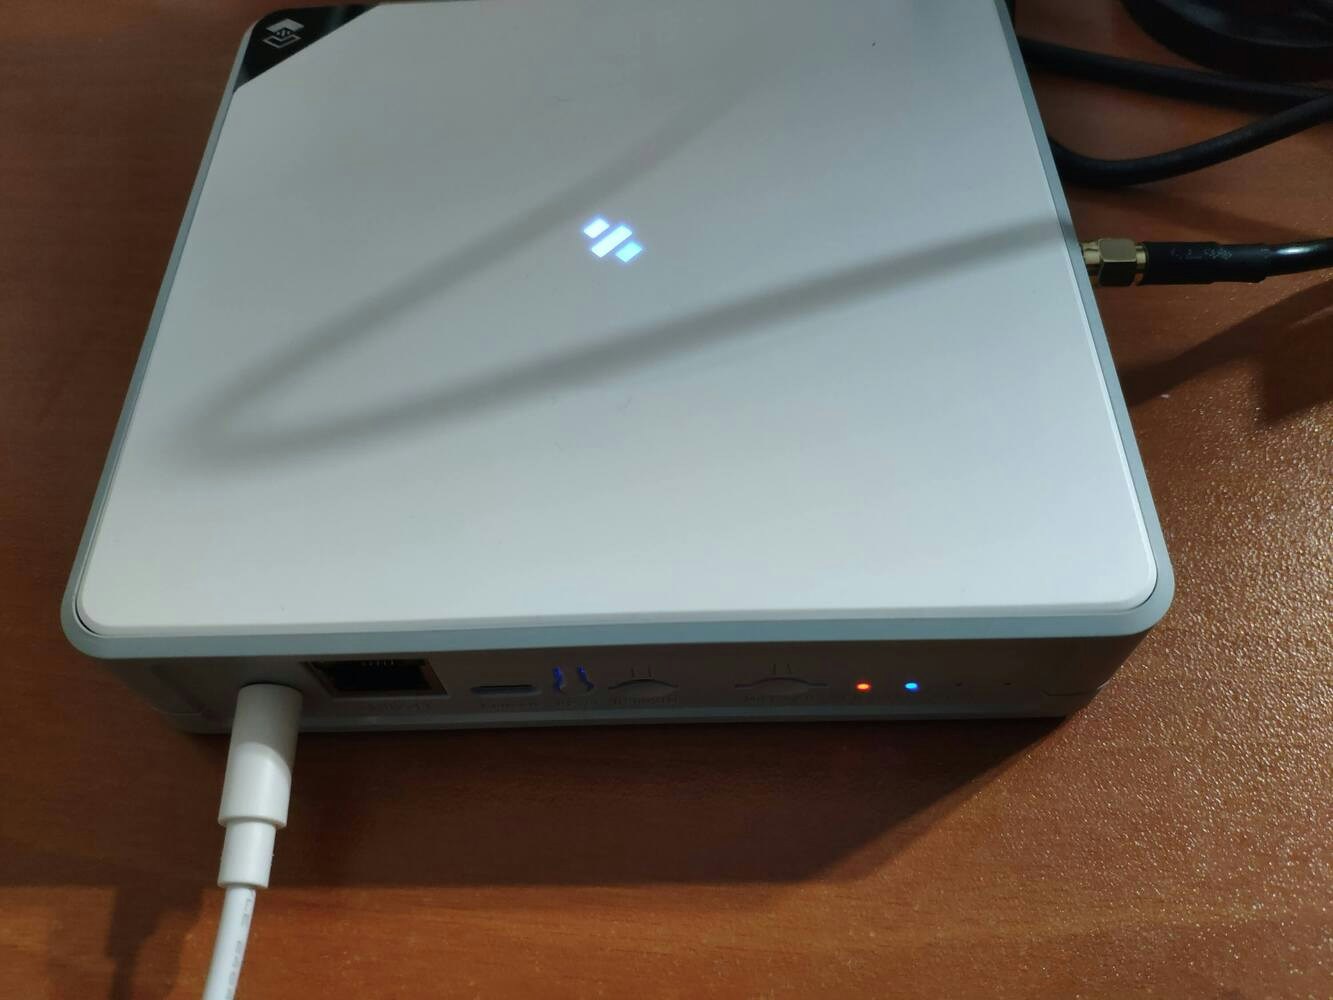
Before proceeding with the following steps, I needed to set up SenseCAP A1101 to program it with LattePanda 3 Delta in Python. Even though Seeed Studio provides official firmware (UF2) to capture images in Python, I needed to upgrade the BootLoader to the latest version. If your device’s BootLoader version is greater than 2.0.0, you do not need to upgrade the BootLoader. :hash: First of all, connect SenseCAP A1101 to LattePanda 3 Delta via a USB Type-C cable. :hash: Then, double-click the boot button on SenseCAP A1101 to enter the boot mode and open the storage drive.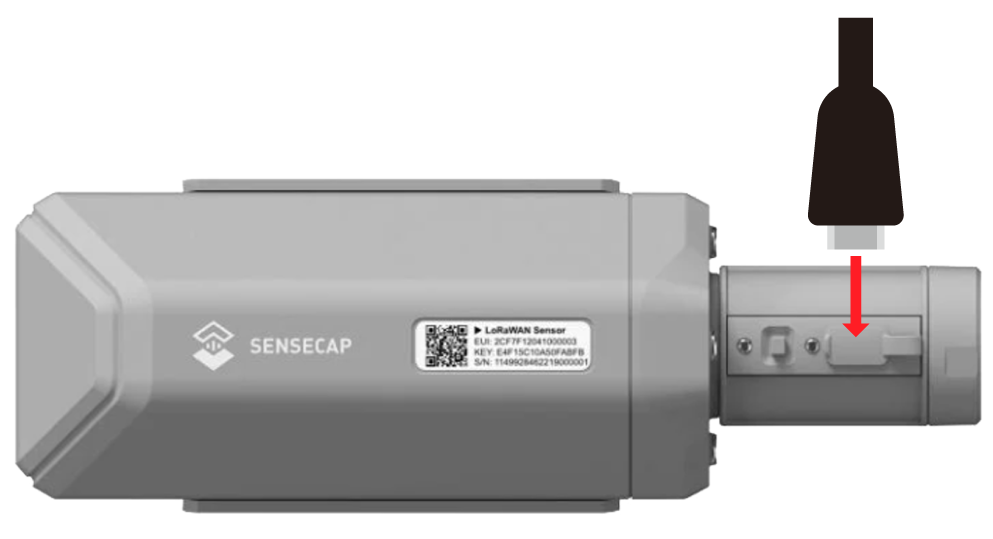

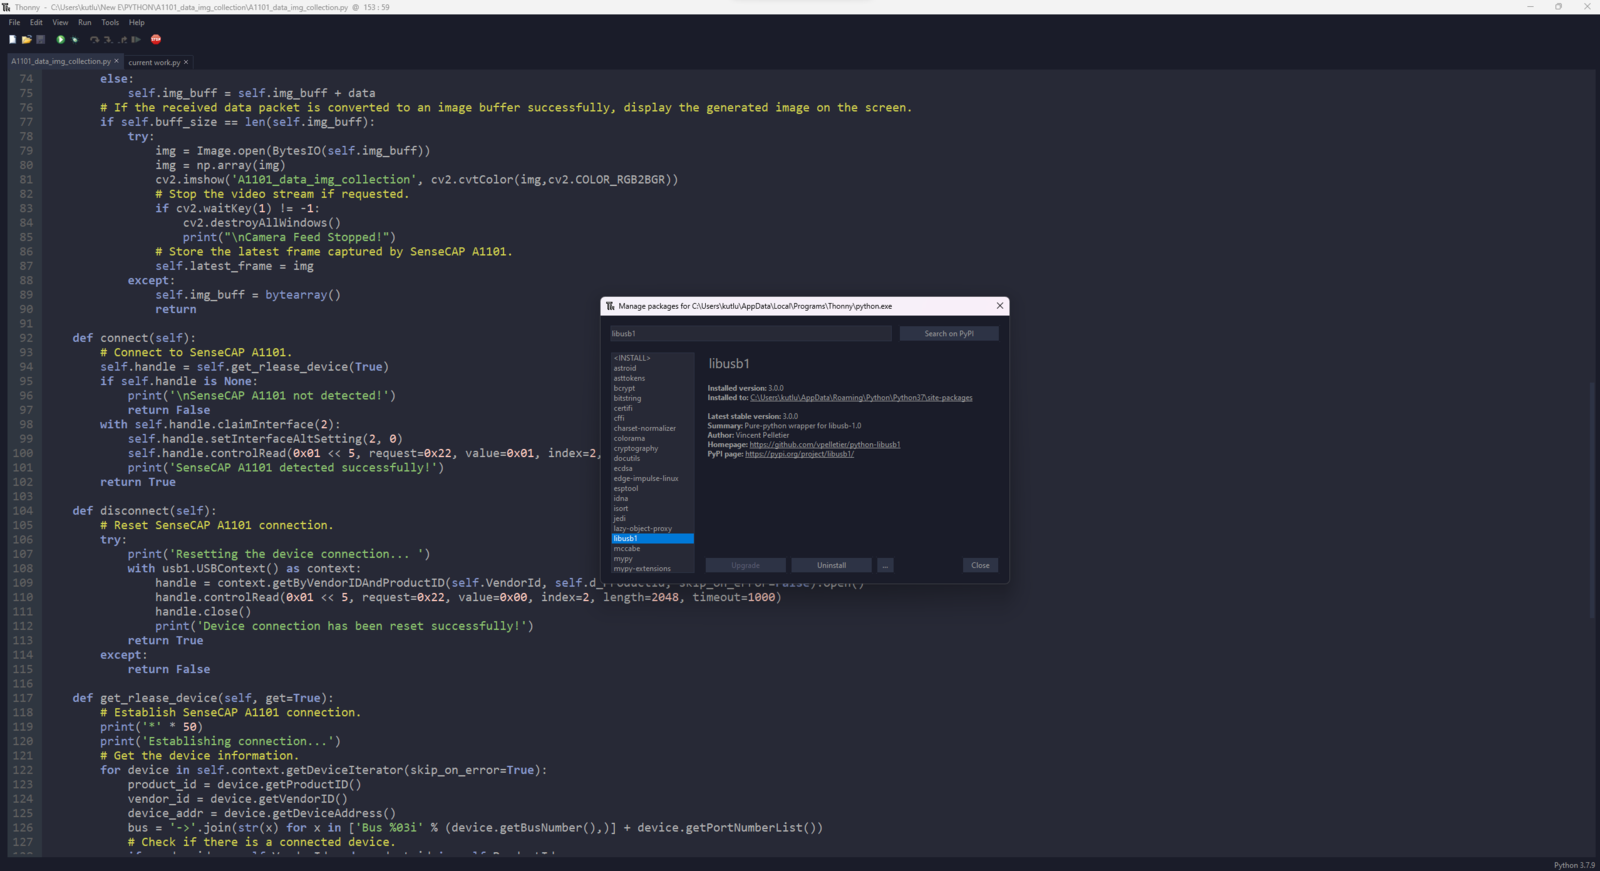
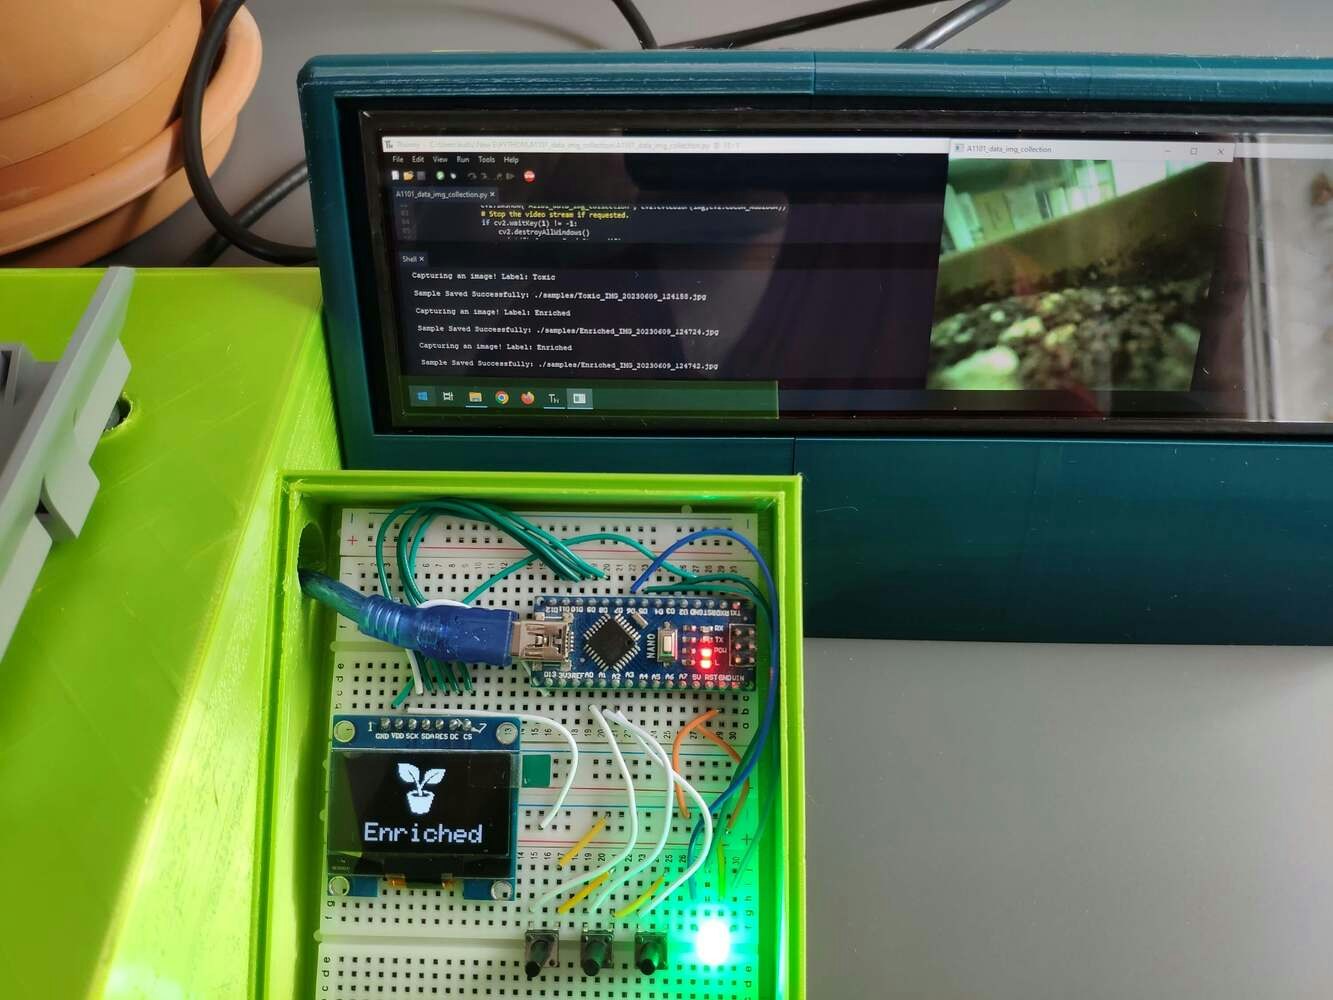
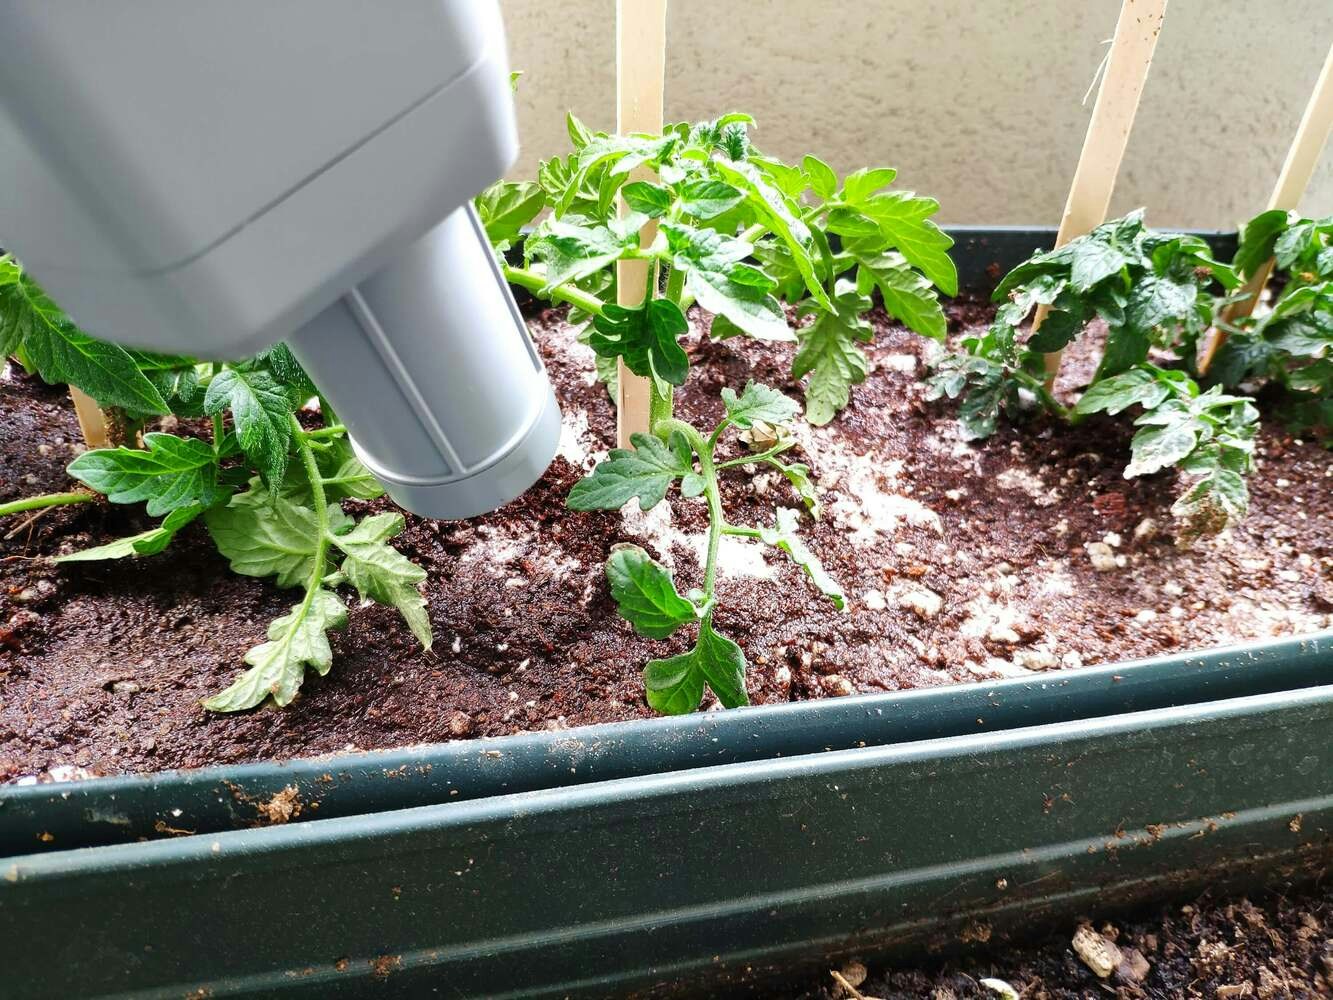
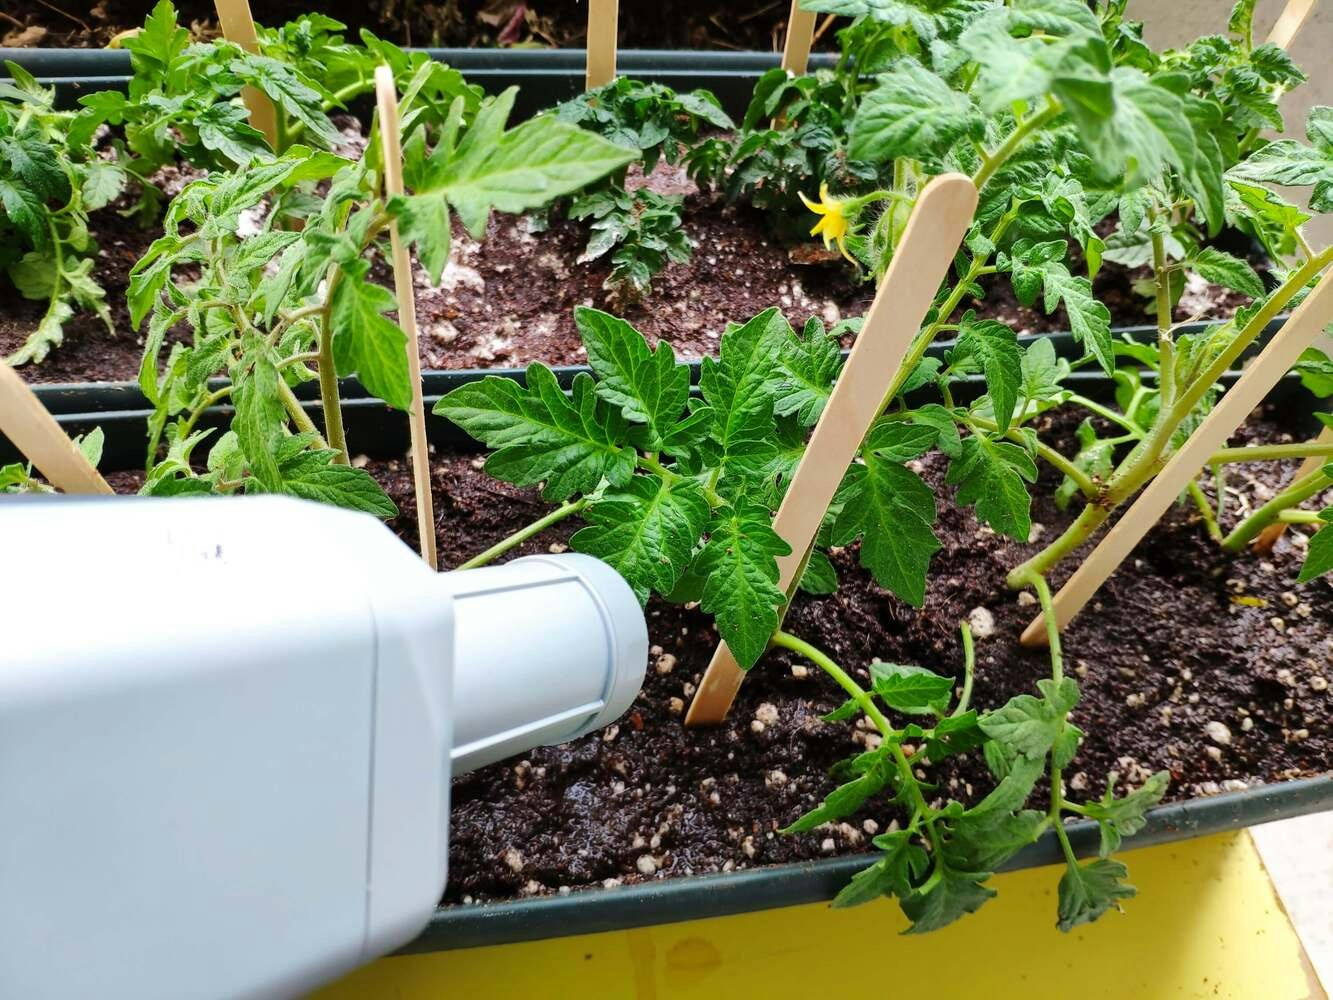
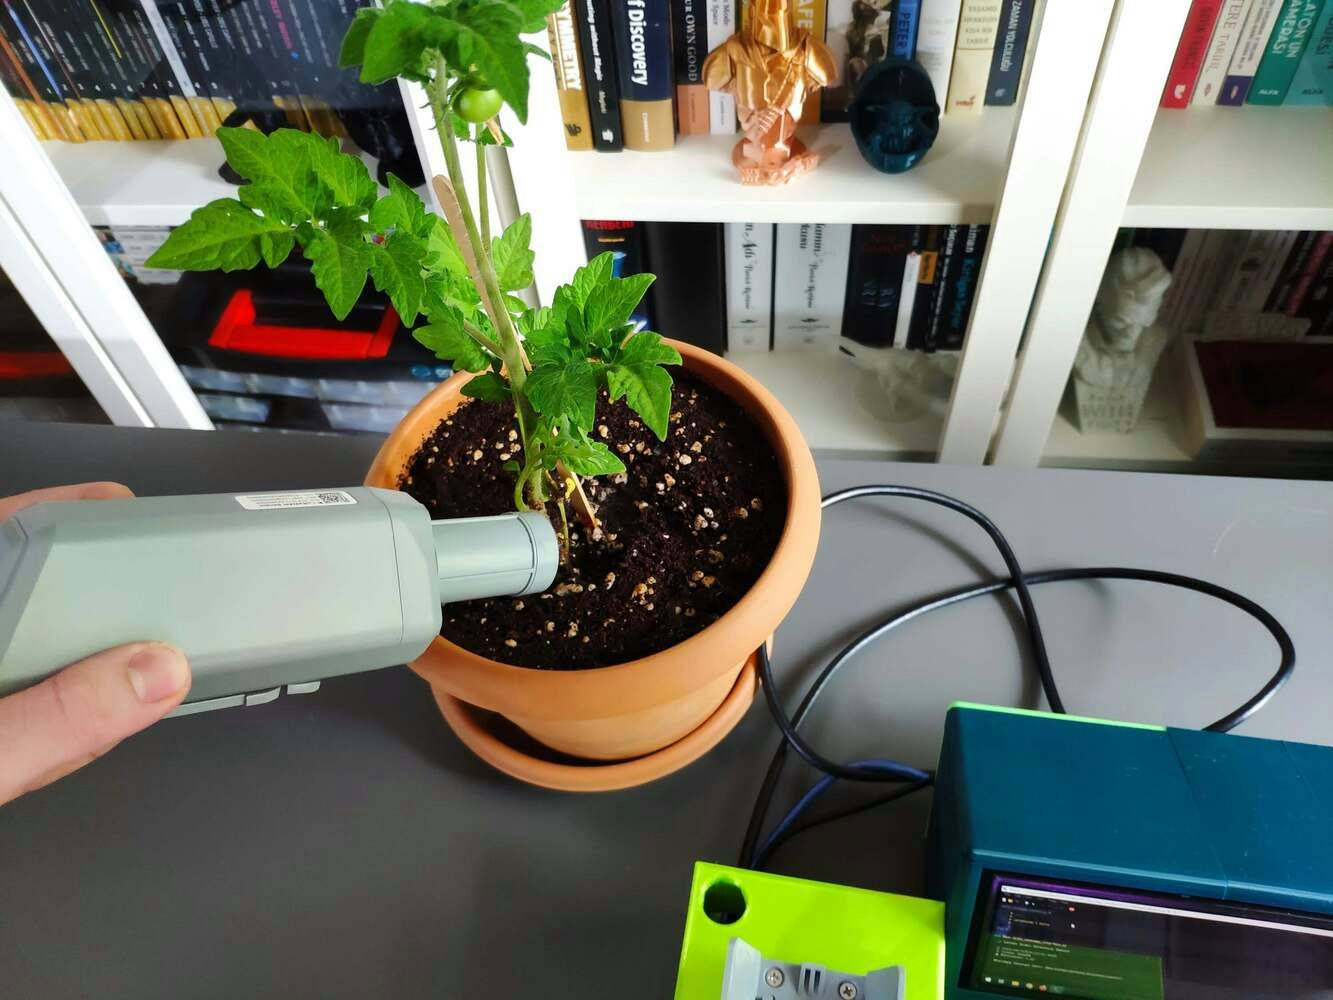
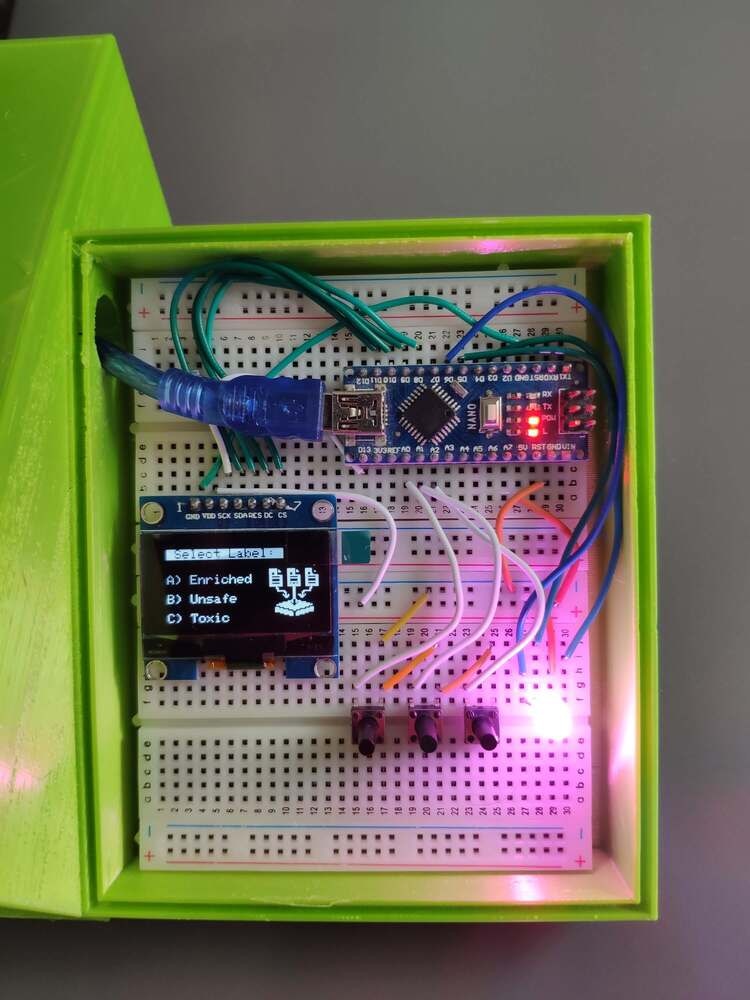
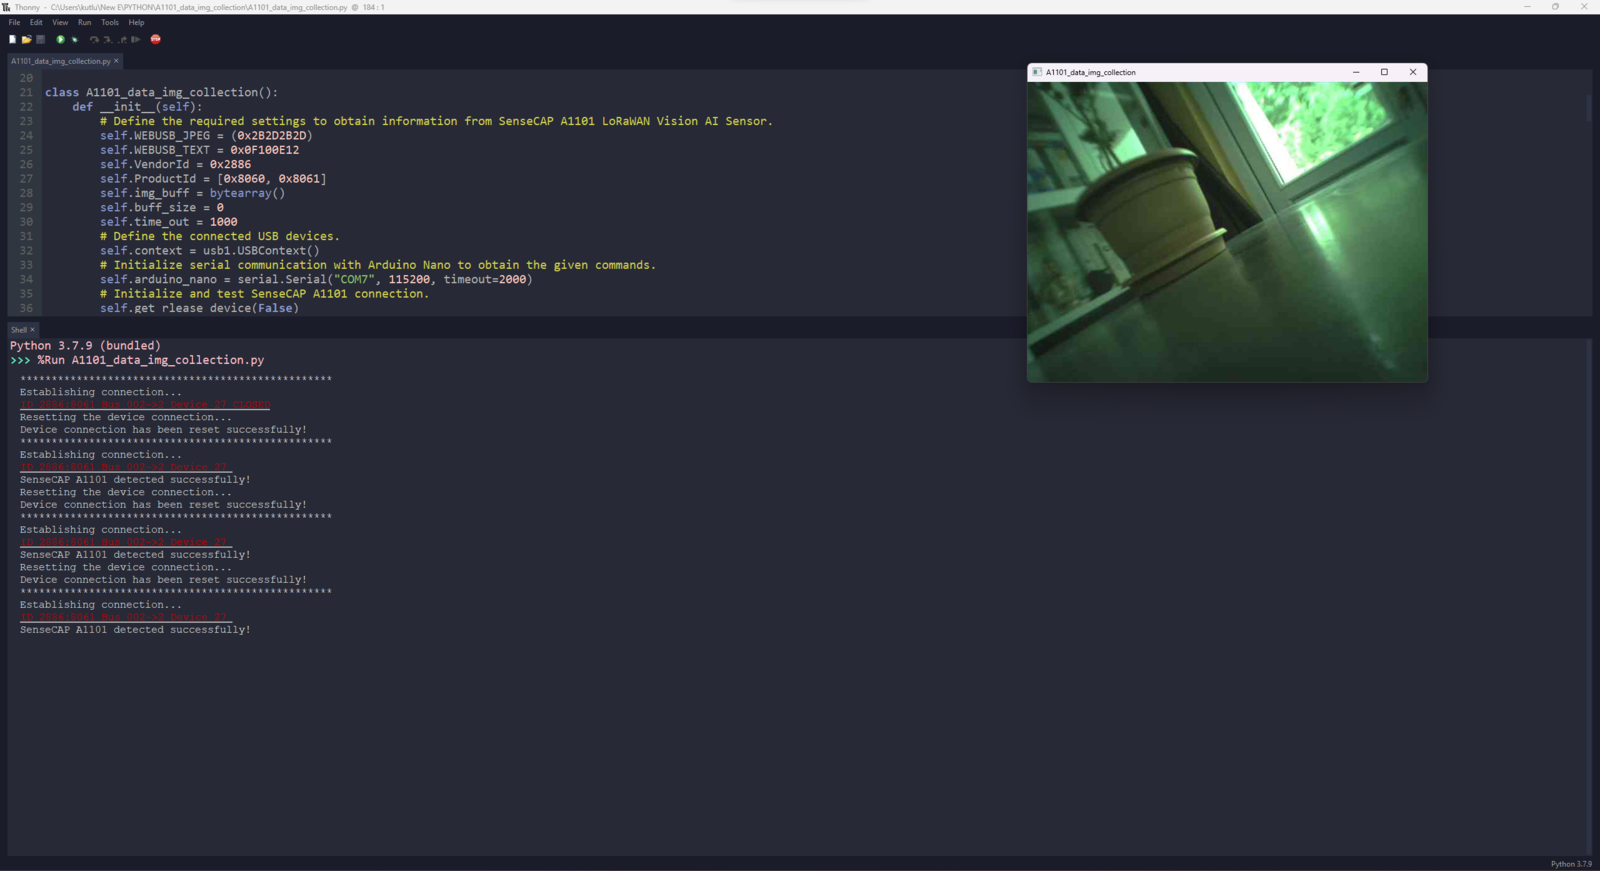
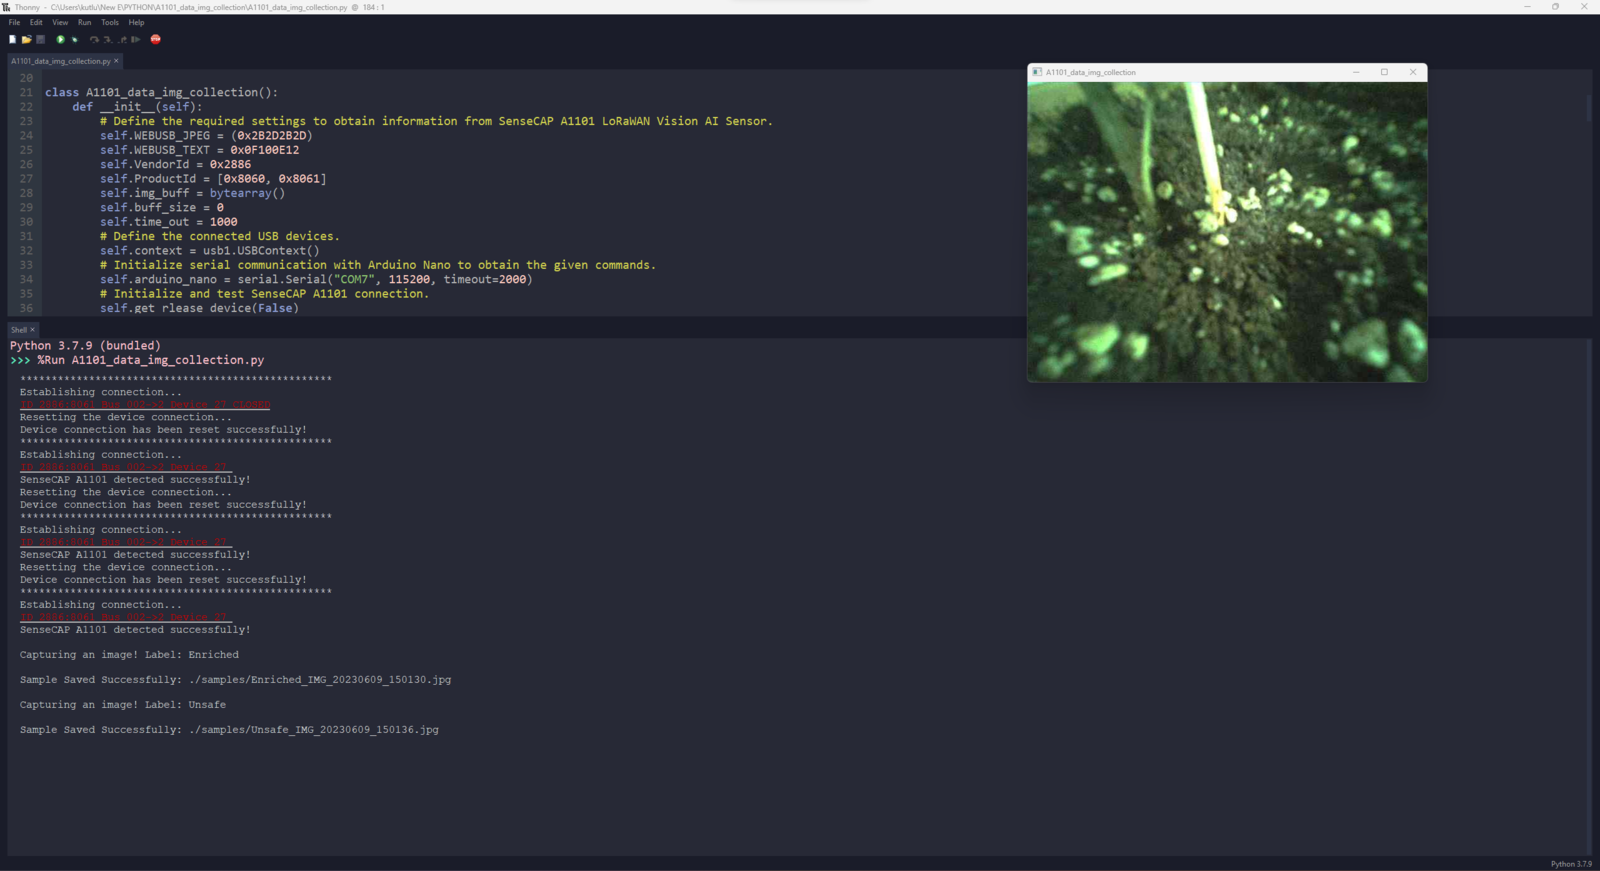
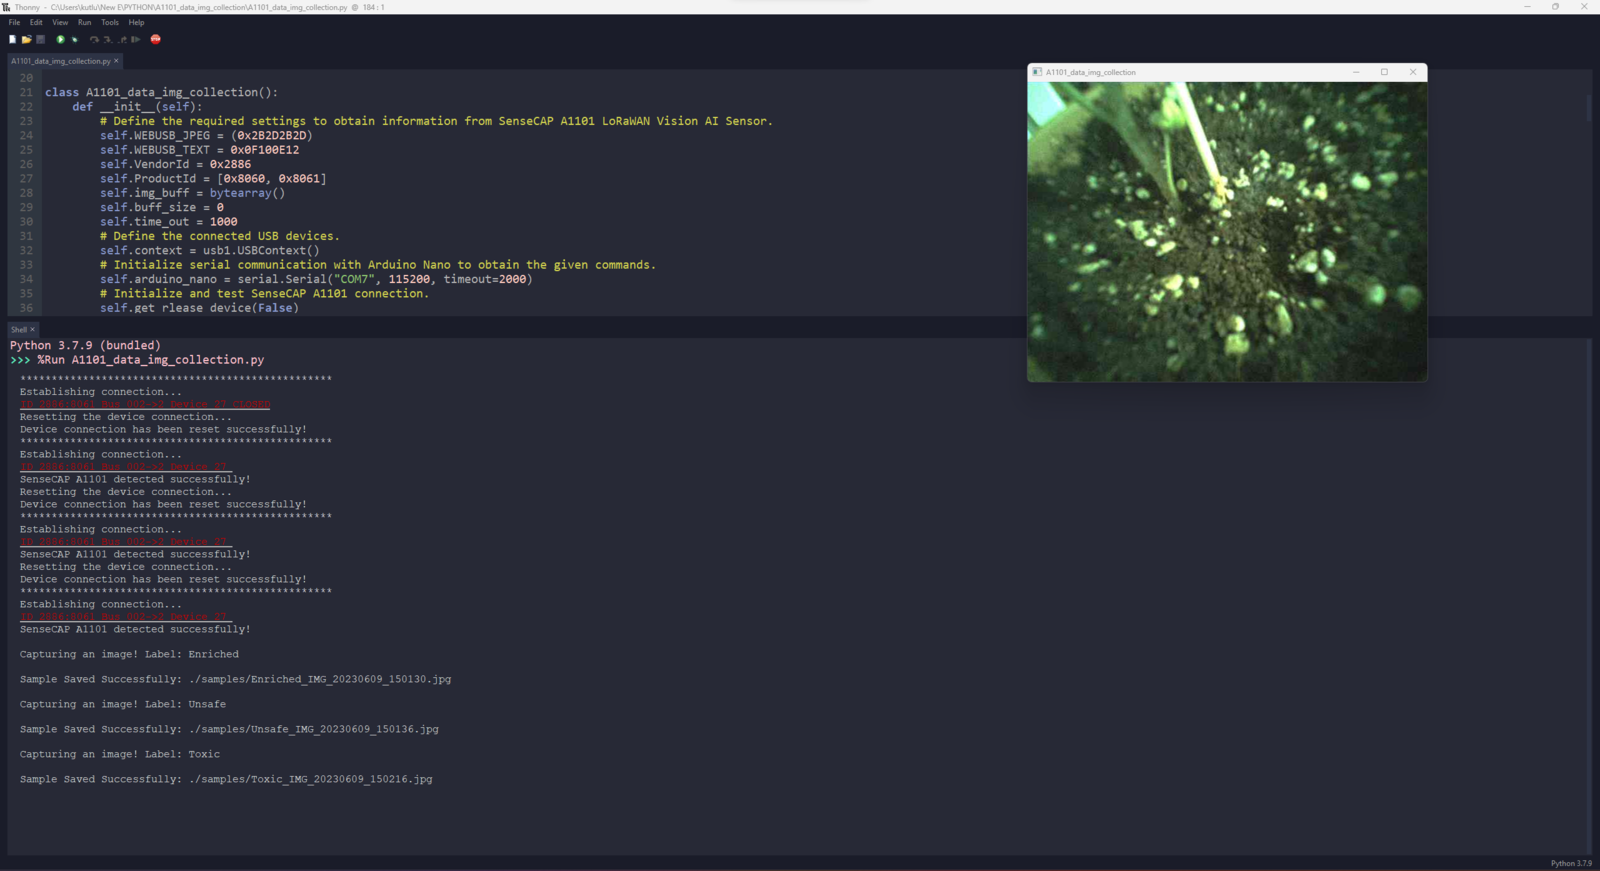
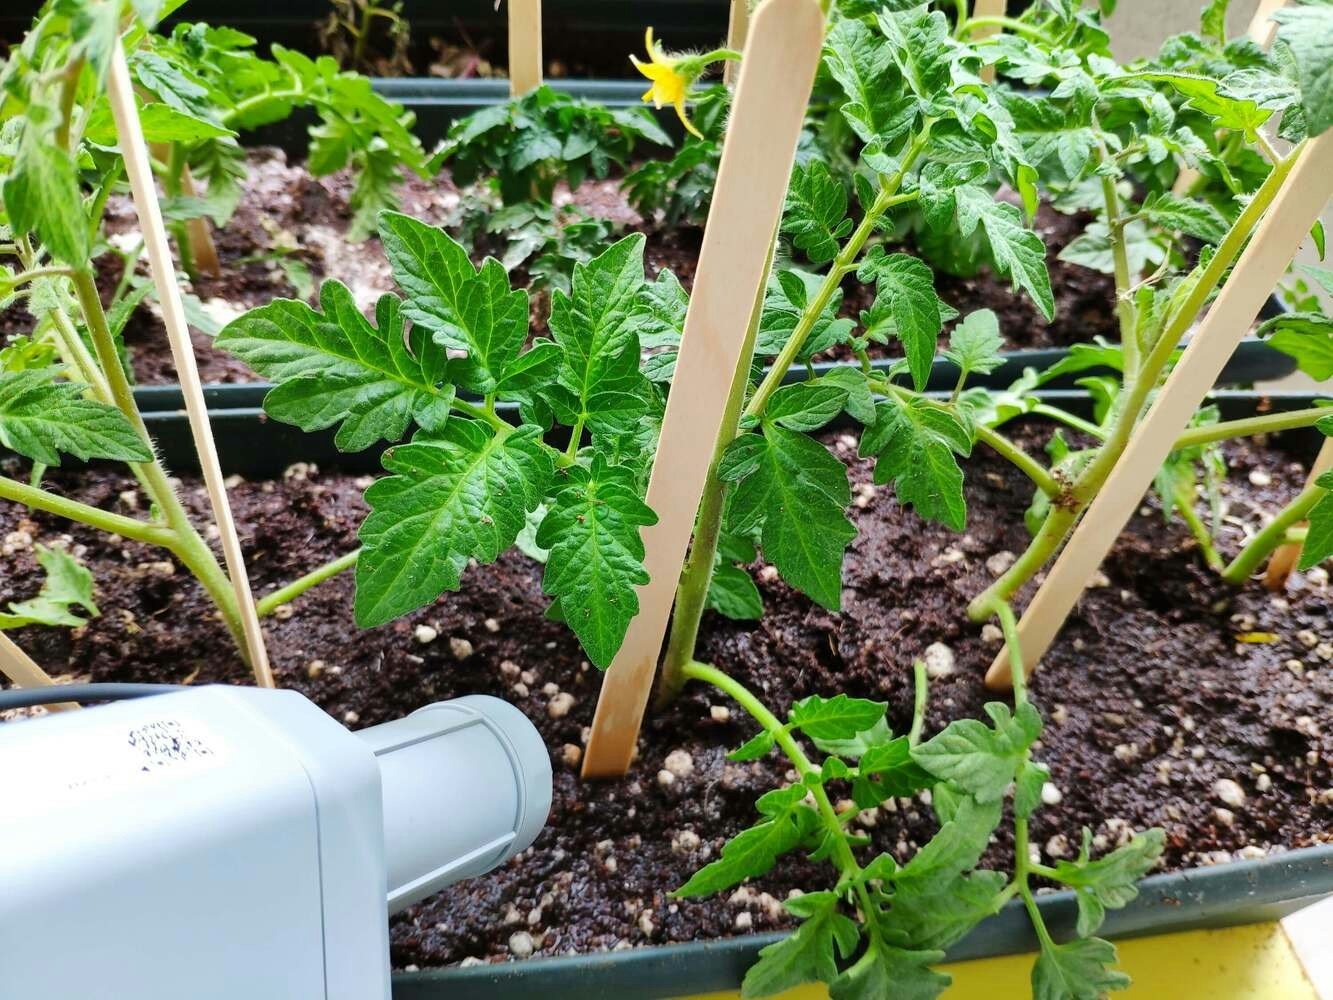
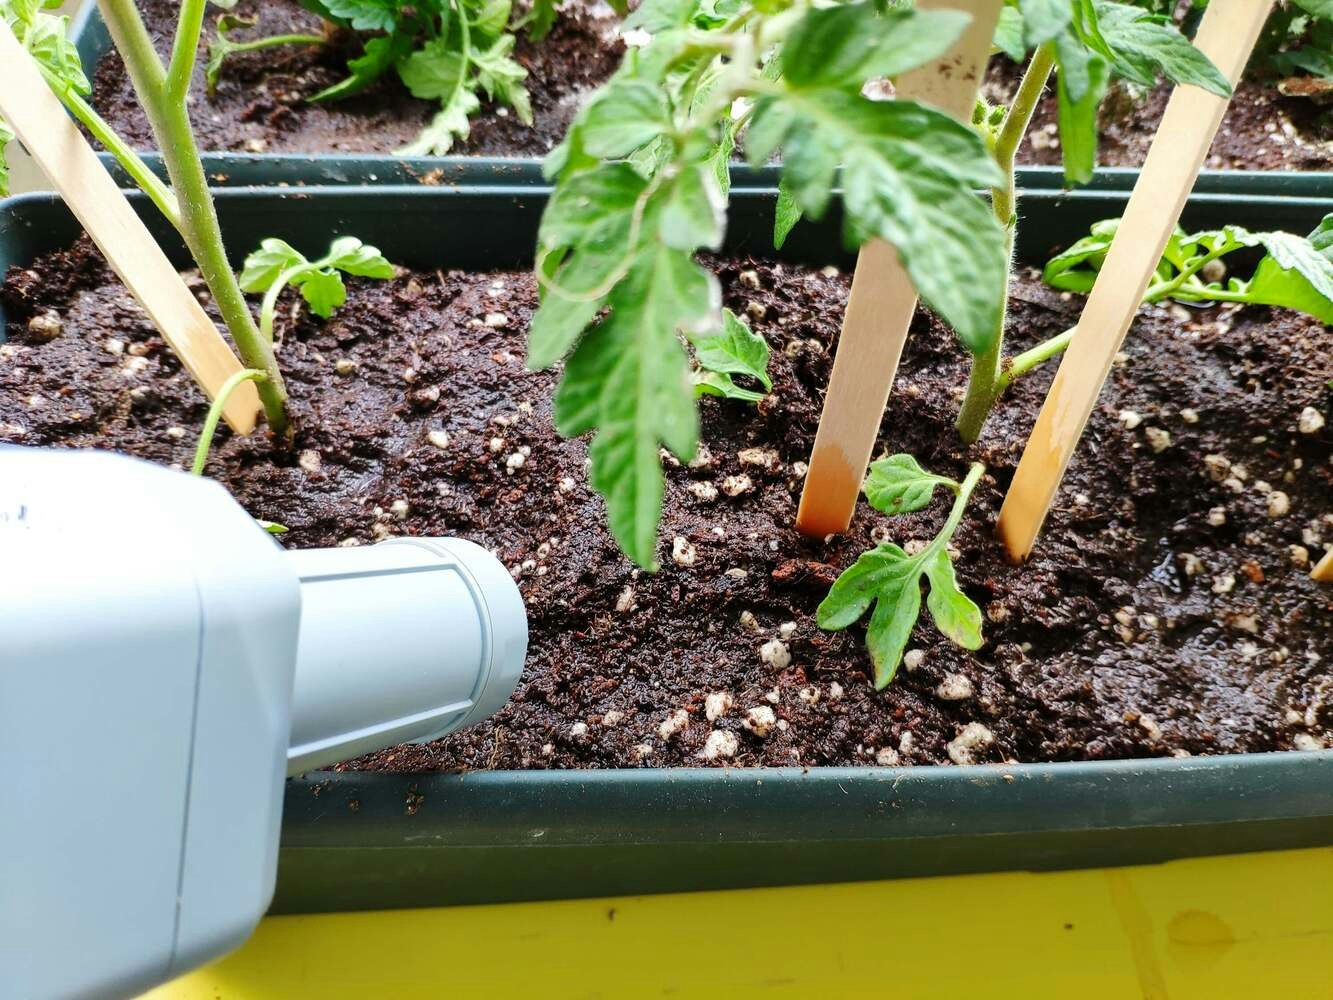
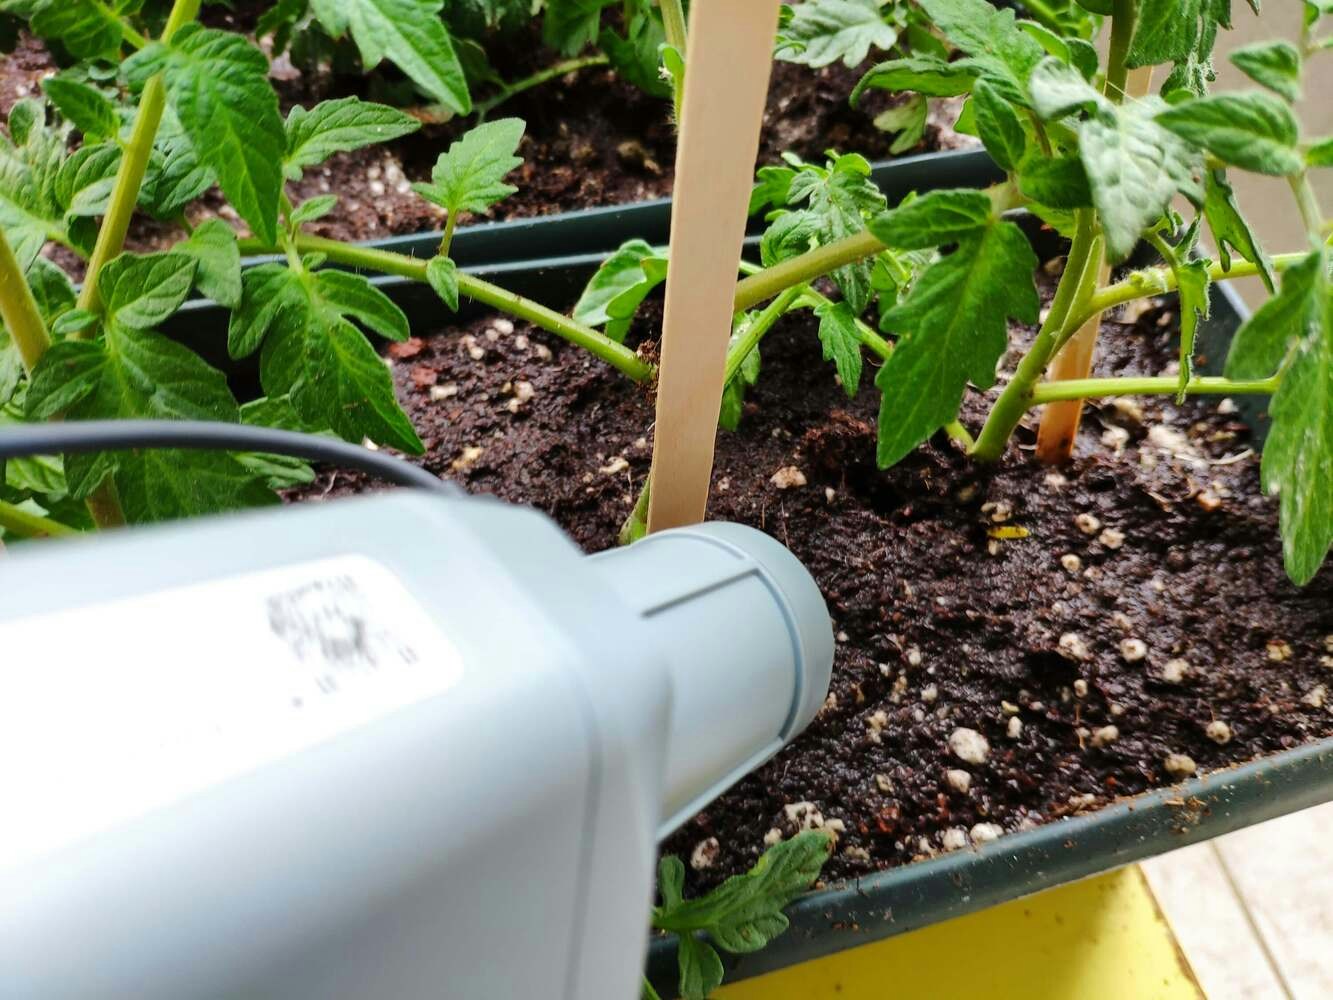
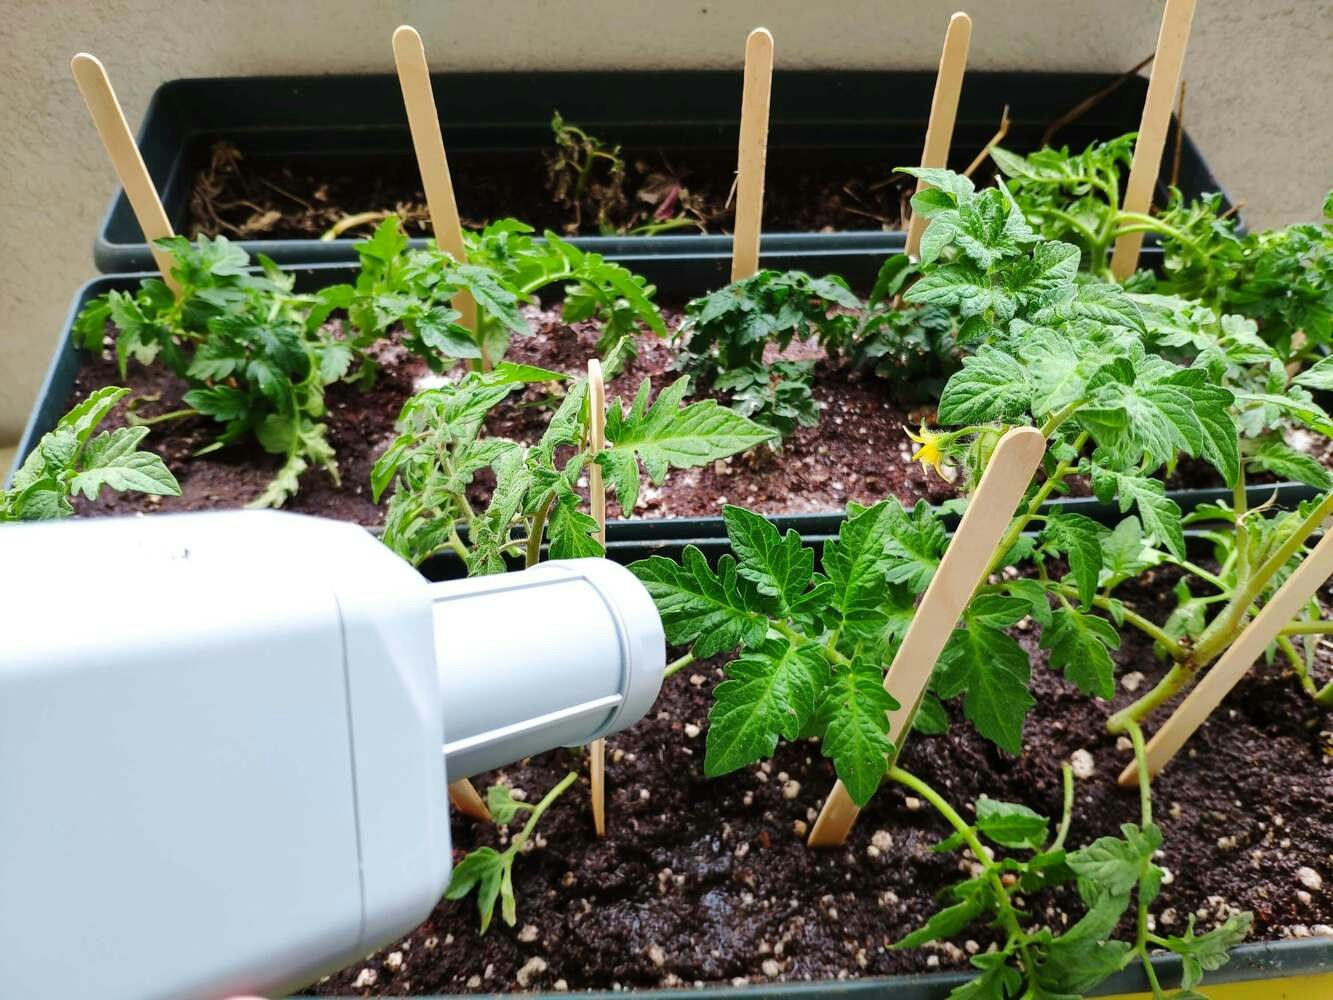
Step 5: Capturing fertilizer-exerted soil images w/ SenseCAP A1101 and communicating with Arduino Nano via serial communication
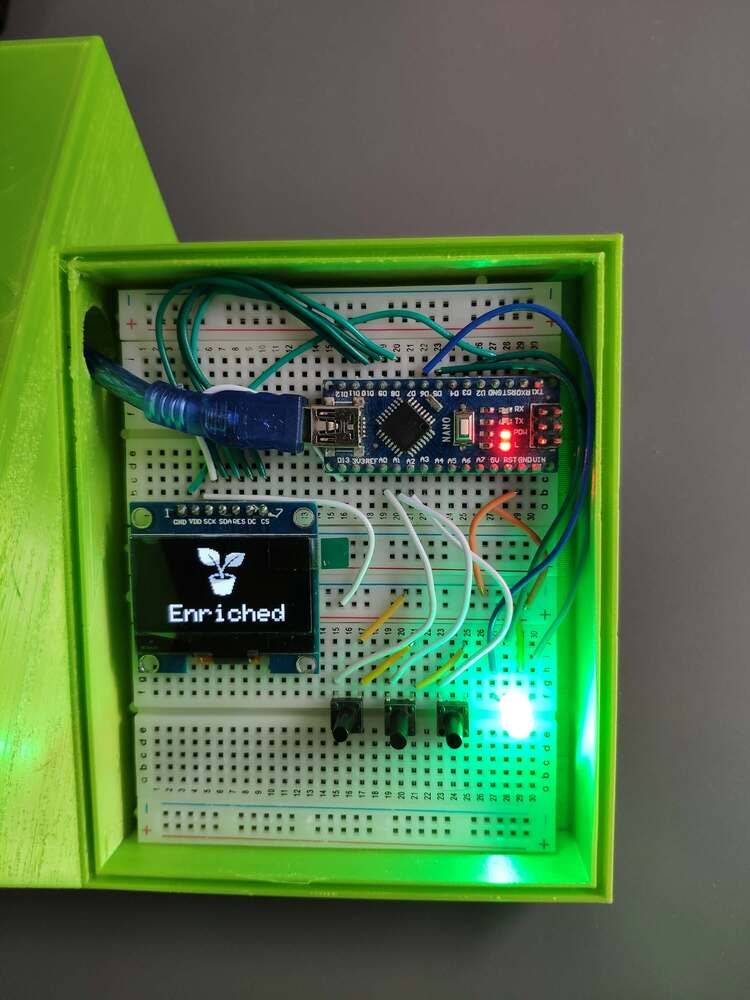
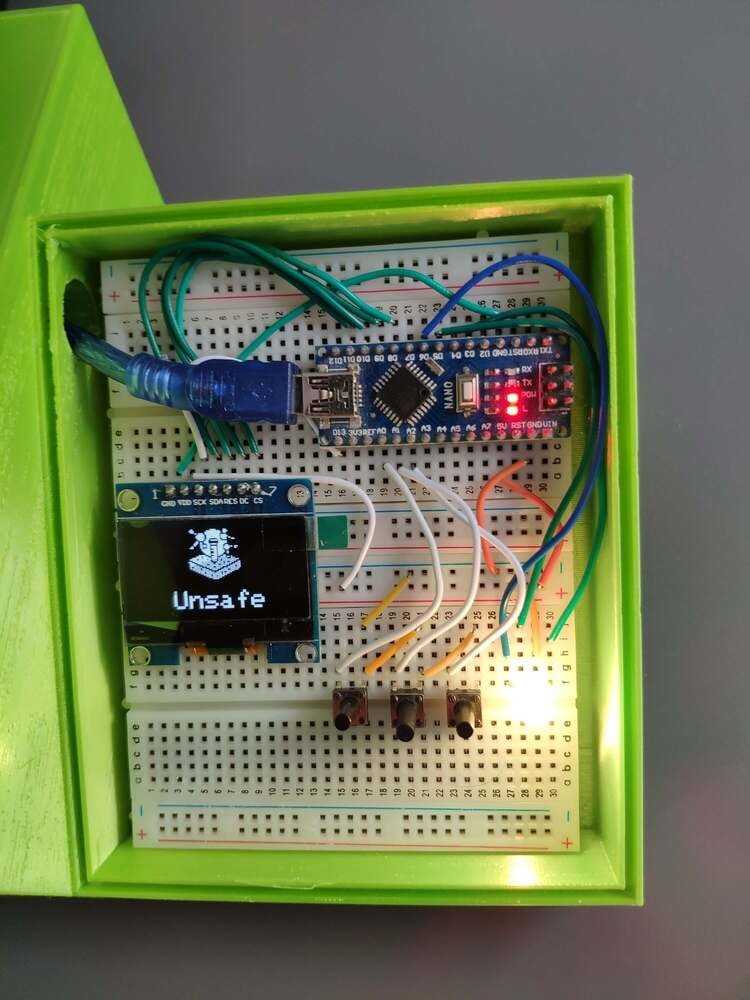
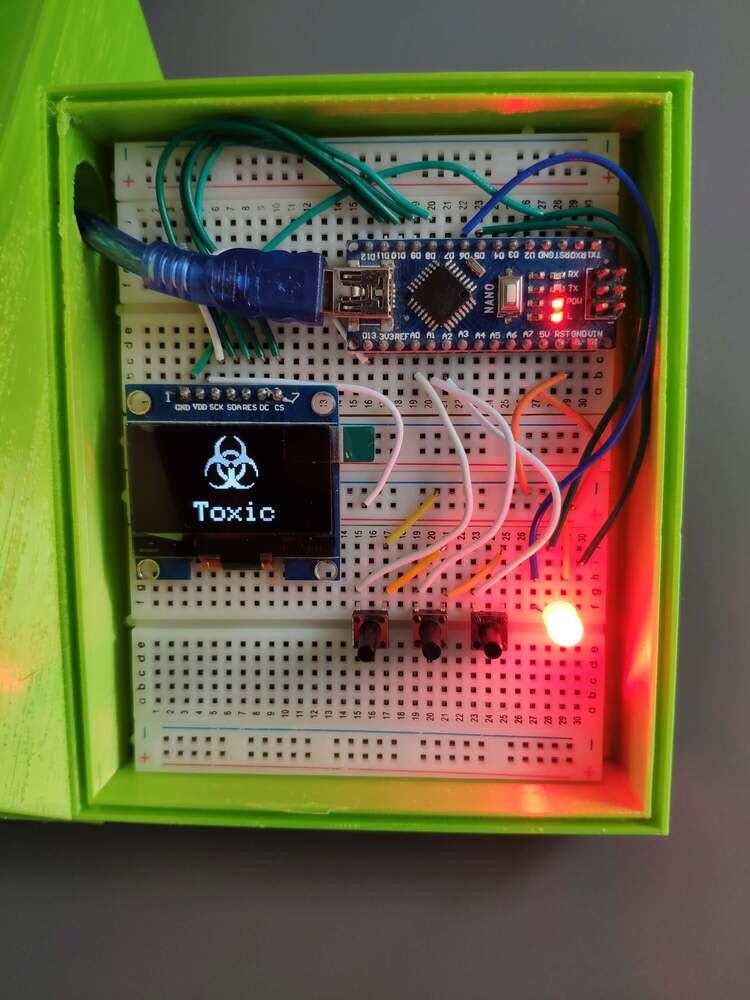
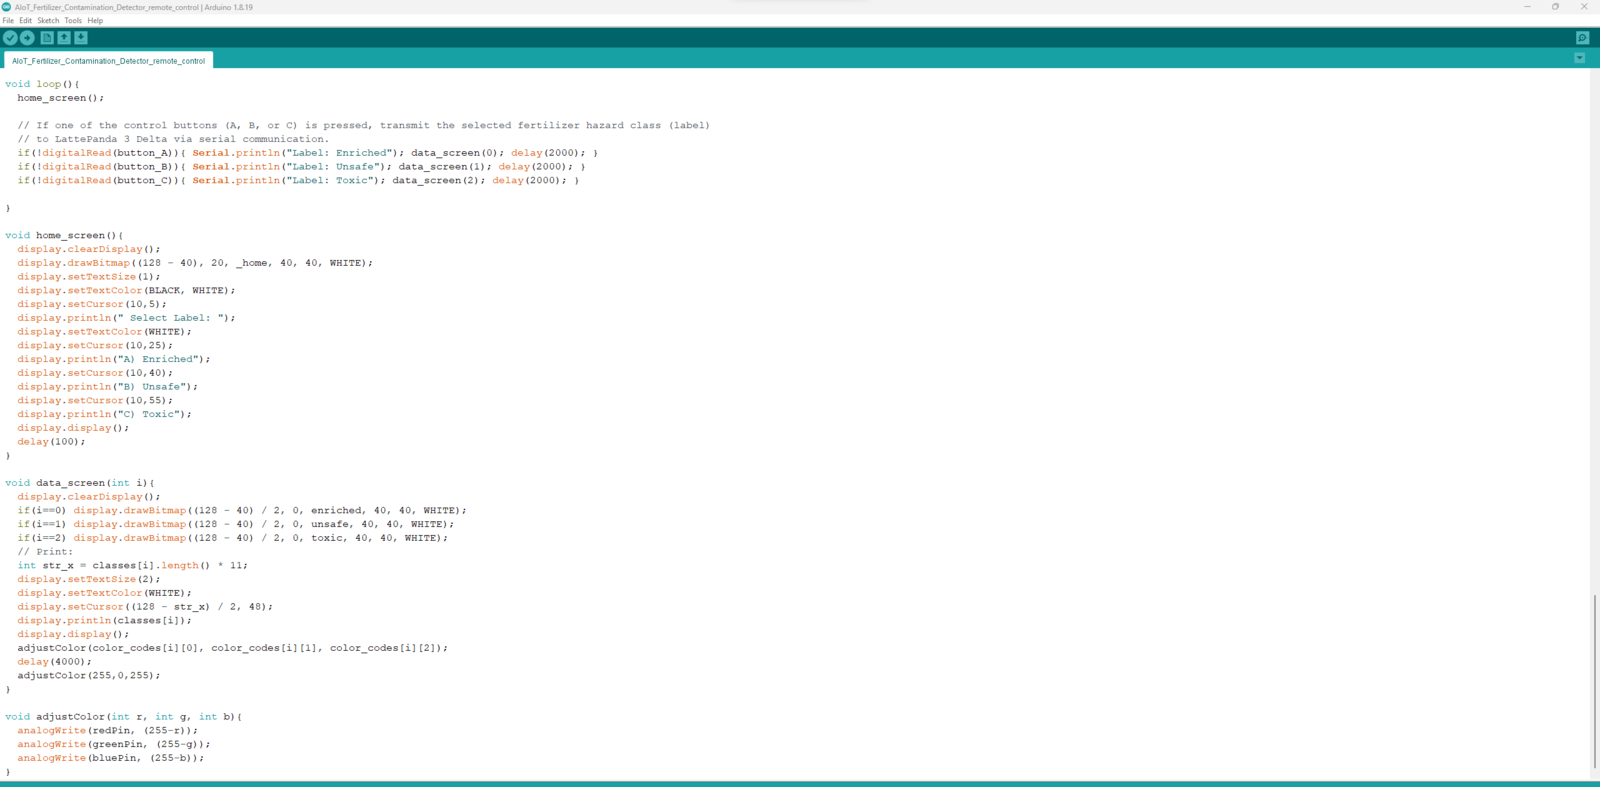
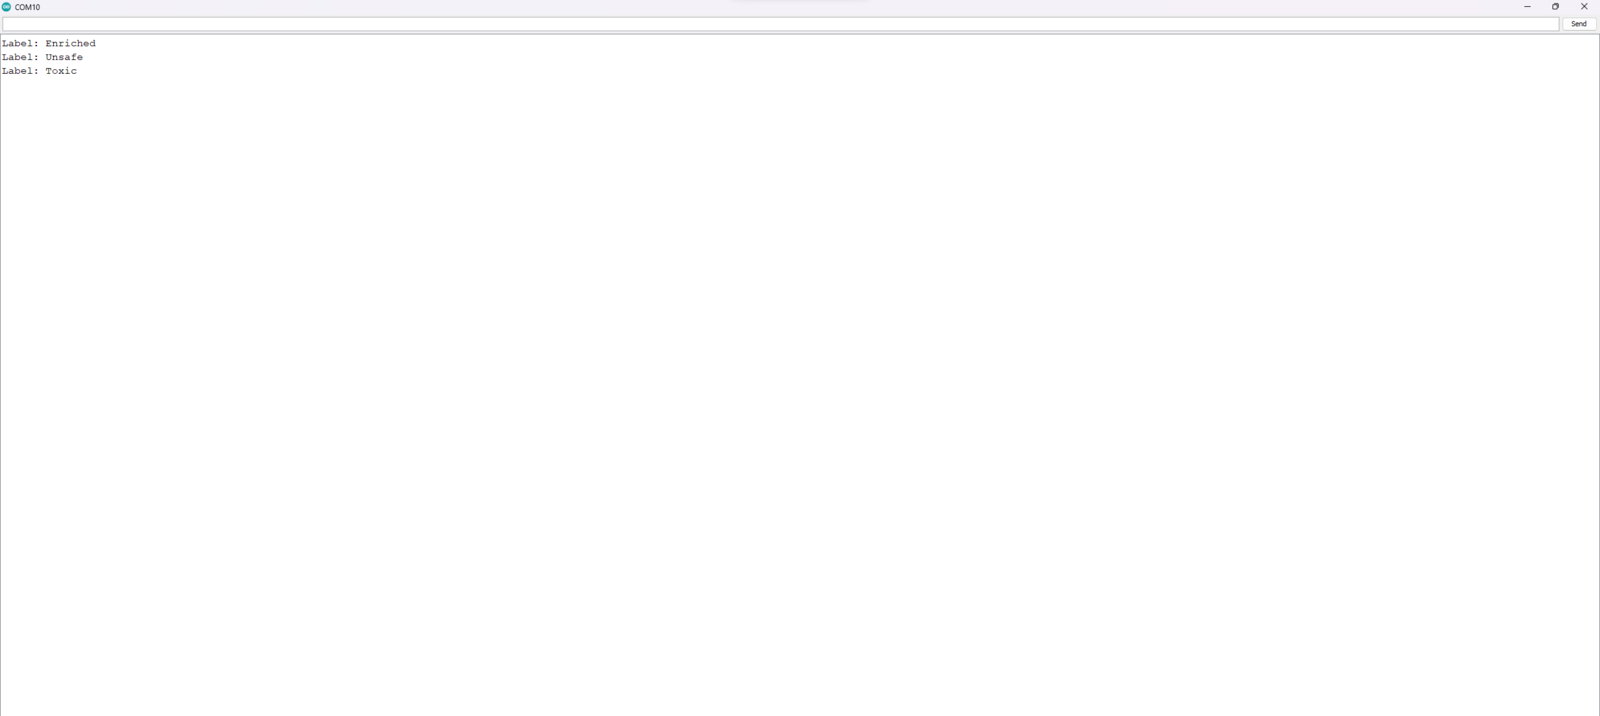
After setting up SenseCAP A1101 and installing the required libraries, I programmed SenseCAP A1101 via LattePanda 3 Delta to obtain the commands transferred by Arduino Nano via serial communication and capture pictures of fertilizer-exerted soils. As explained in the previous steps, SenseCAP A1101 does not provide the option to capture images with different labels out of the box. Since I needed to assign fertilizer contamination levels as labels for each image while capturing pictures of fertilizer-exerted soils with altered soil integrity to create a valid data set for my object detection model, I utilized three control buttons connected to Arduino Nano so as to choose among classes and transfer commands via serial communication. After selecting a fertilizer contamination class by pressing a control button, Arduino Nano transmits the selected class to LattePanda 3 Delta via serial communication.- Control Button (A) ➡ Enriched
- Control Button (B) ➡ Unsafe
- Control Button (C) ➡ Toxic
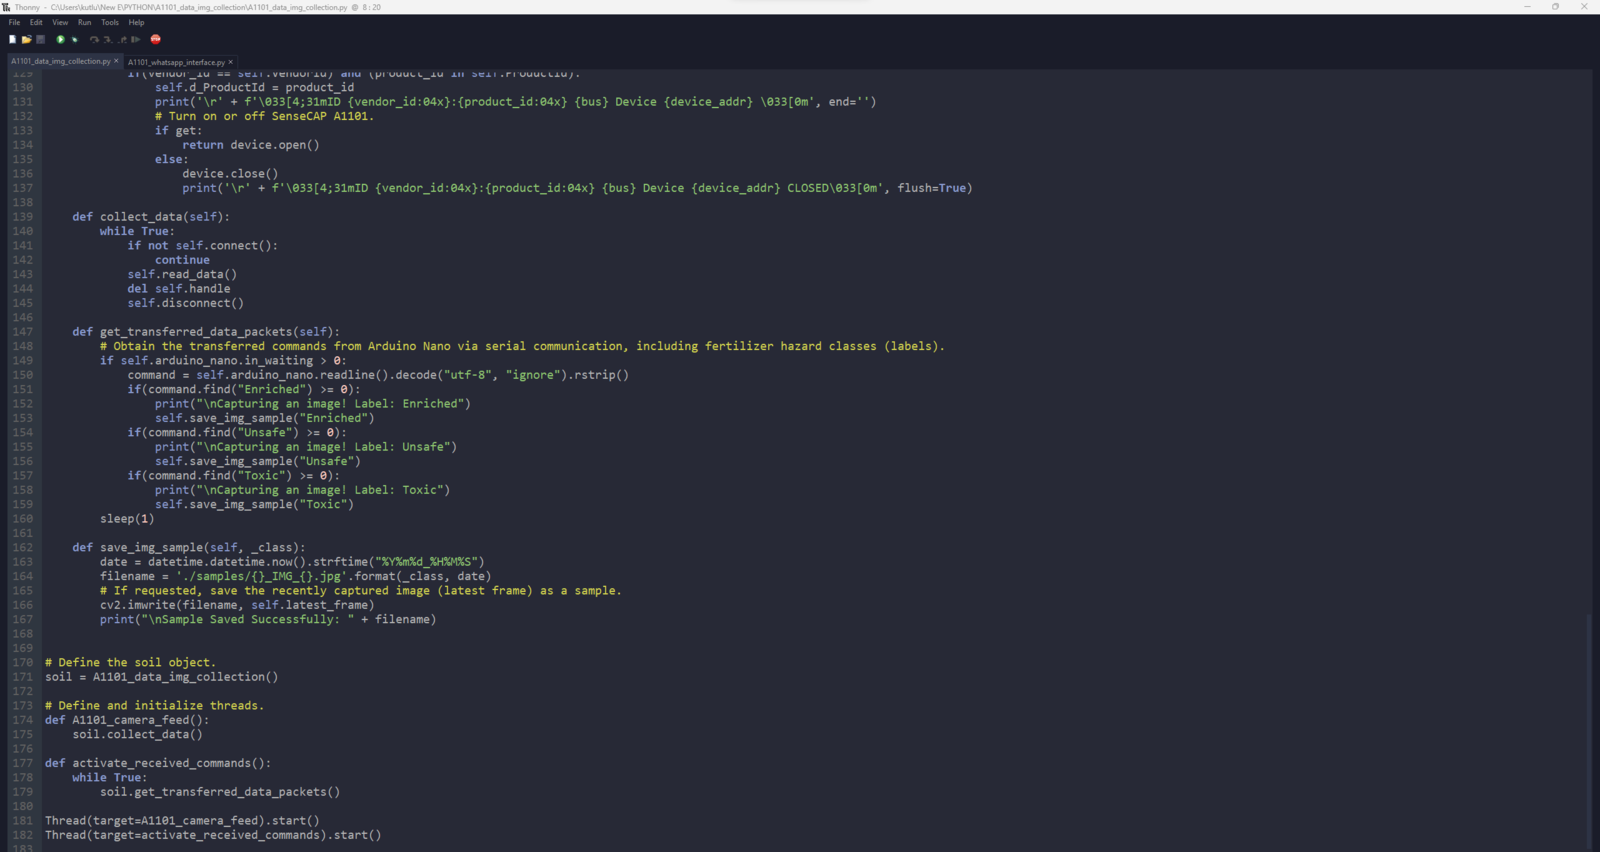
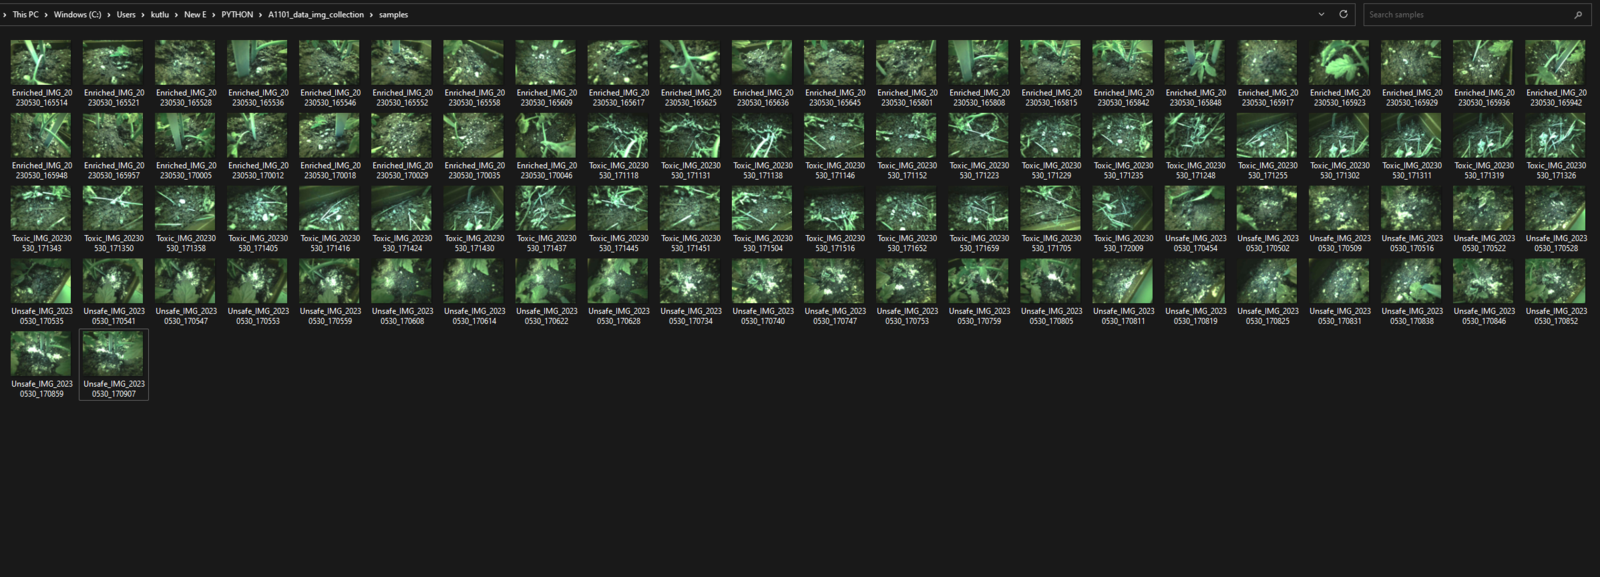
Step 5.1: Saving the captured images as samples on LattePanda 3 Delta
After uploading and running the code for obtaining commands via serial communication and capturing images with SenseCAP A1101 on LattePanda 3 Delta: 🌱🪴📲 If the device works accurately, the remote control shows the menu interface on the SH1106 OLED display and turns the RGB LED to magenta.- A) Enriched
- B) Unsafe
- C) Toxic

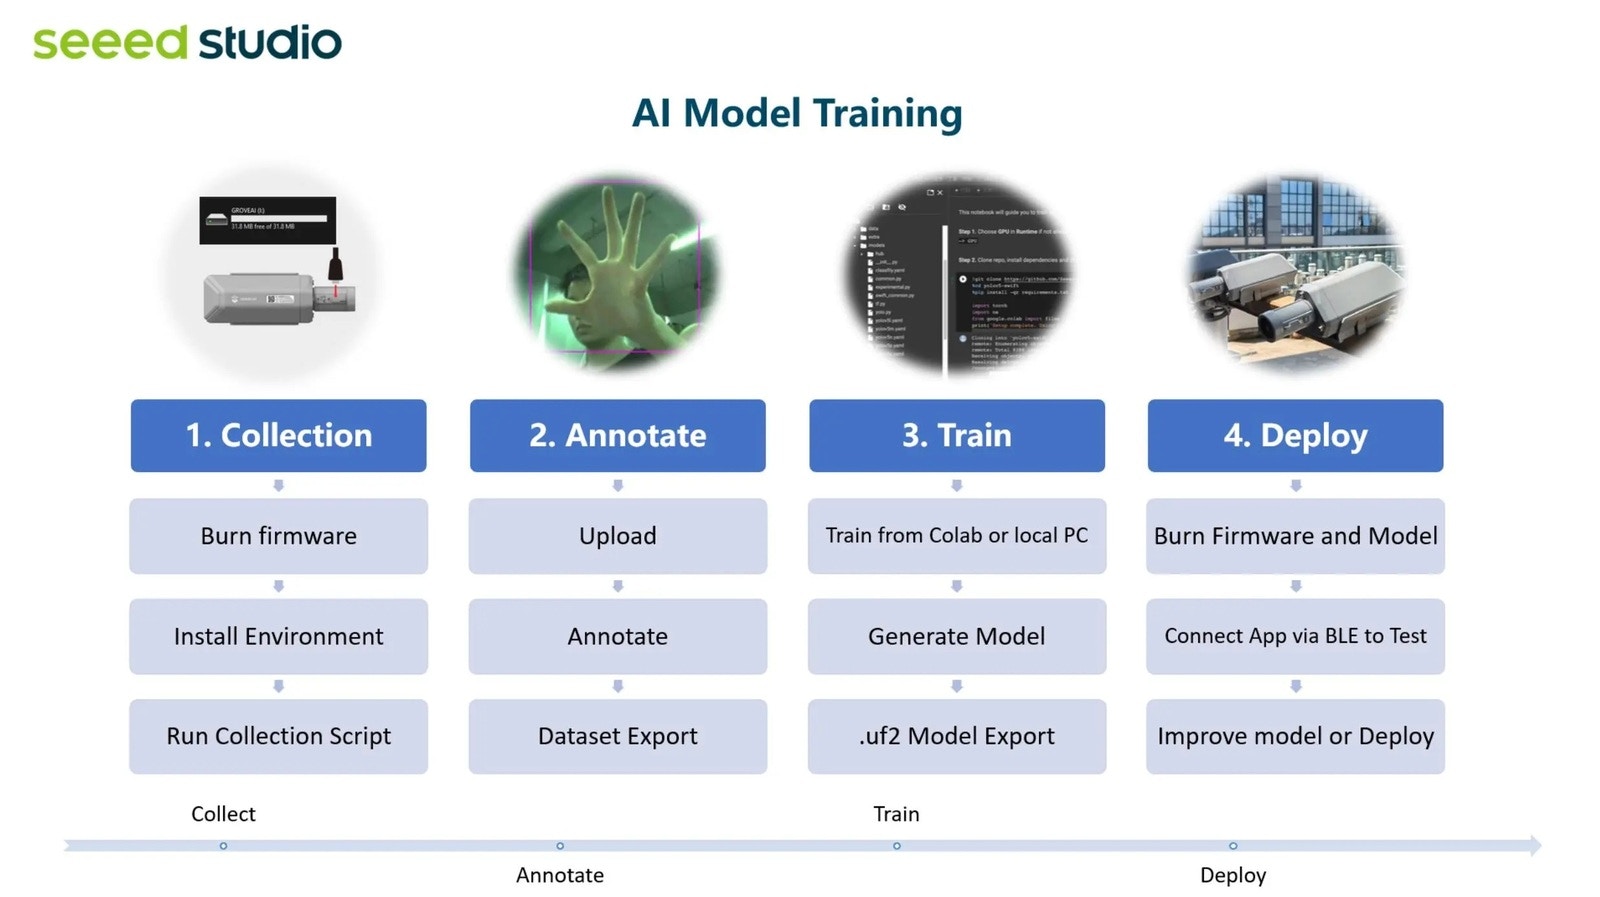
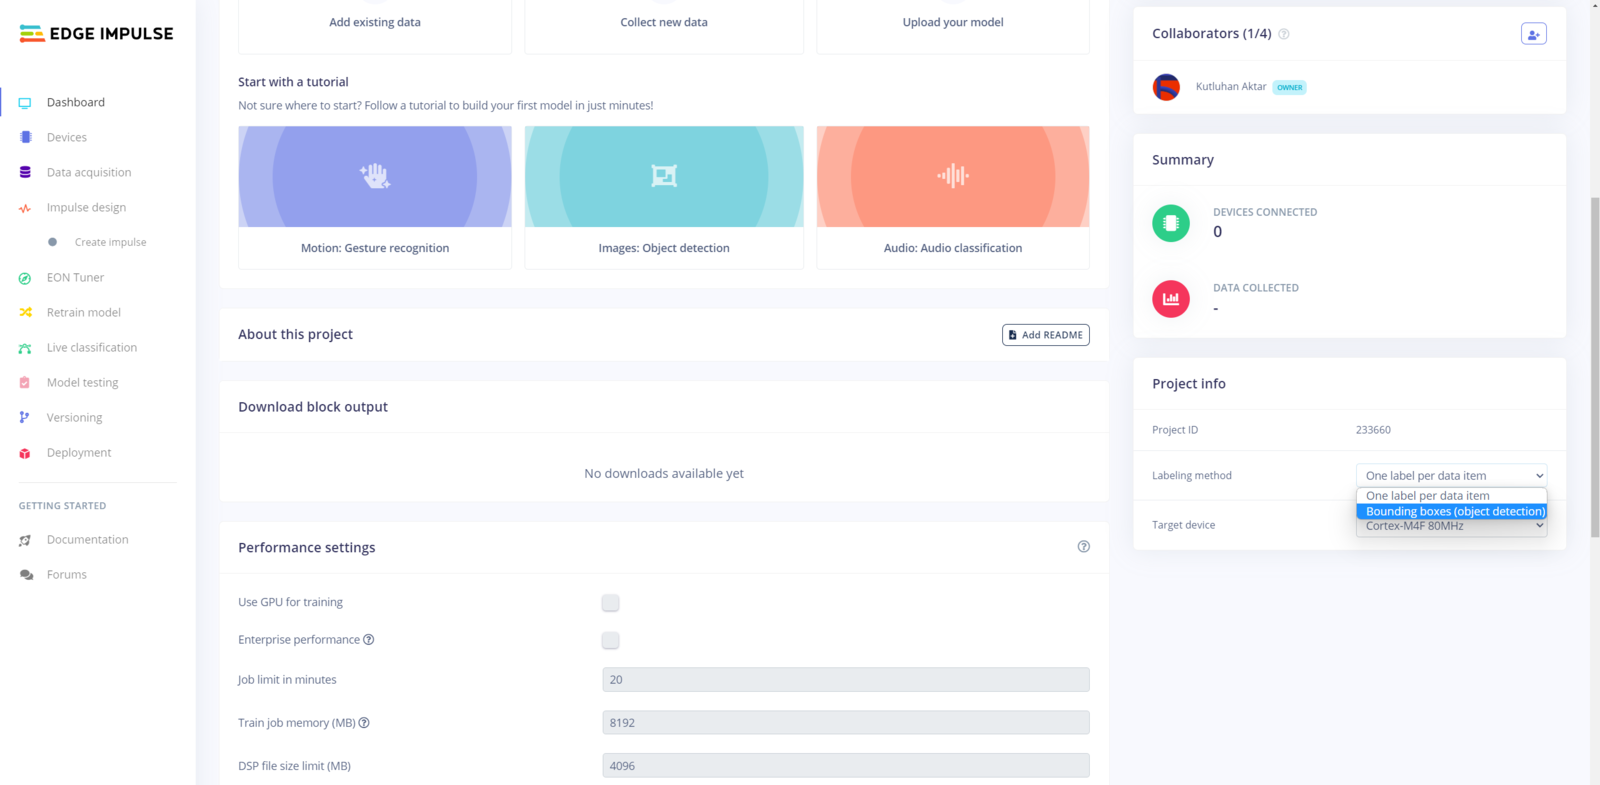
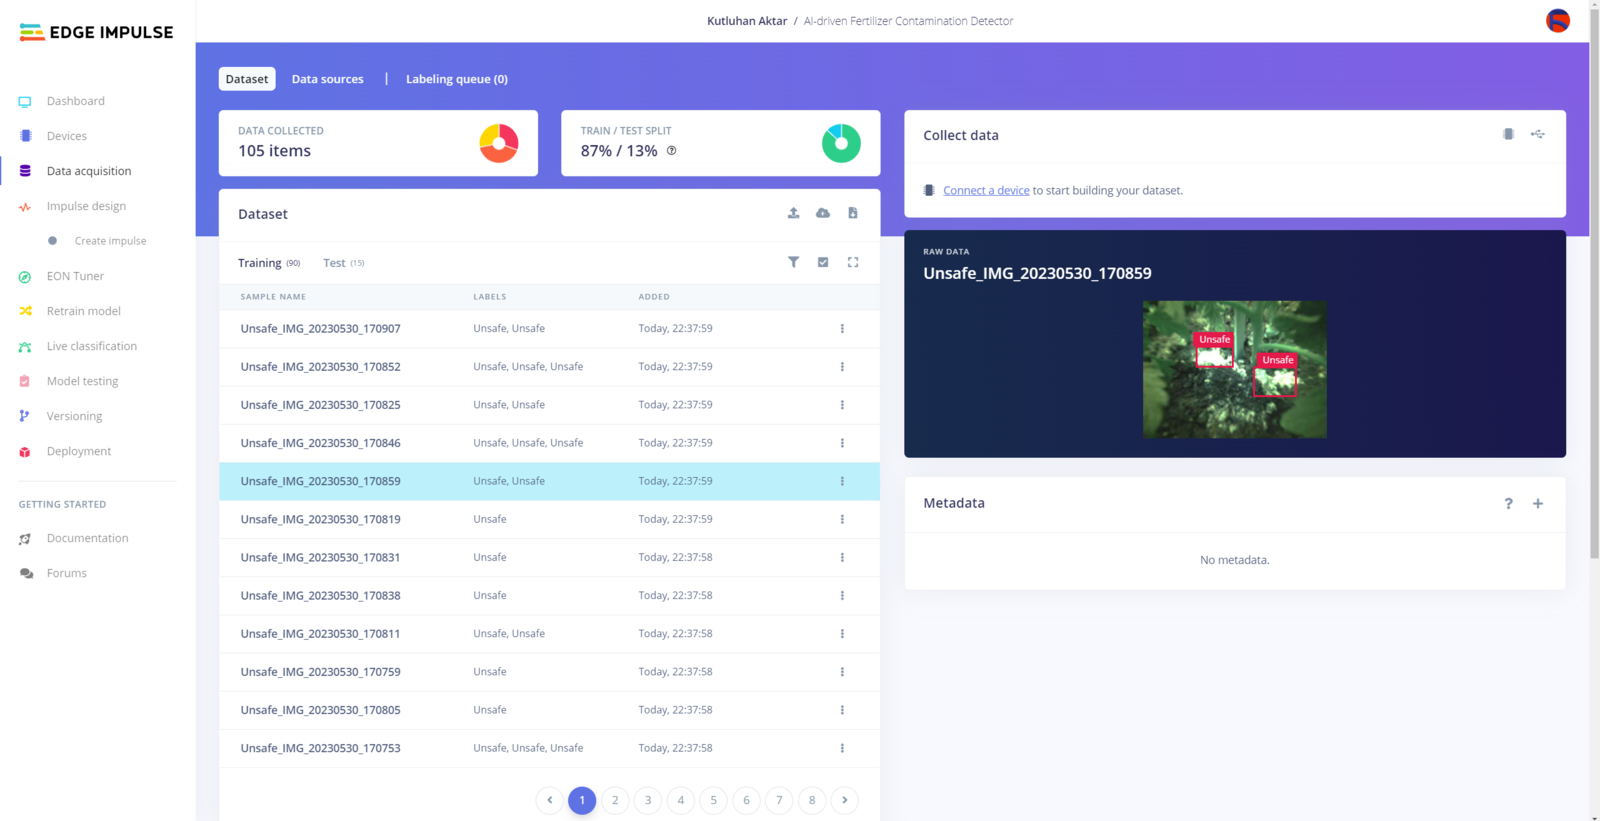
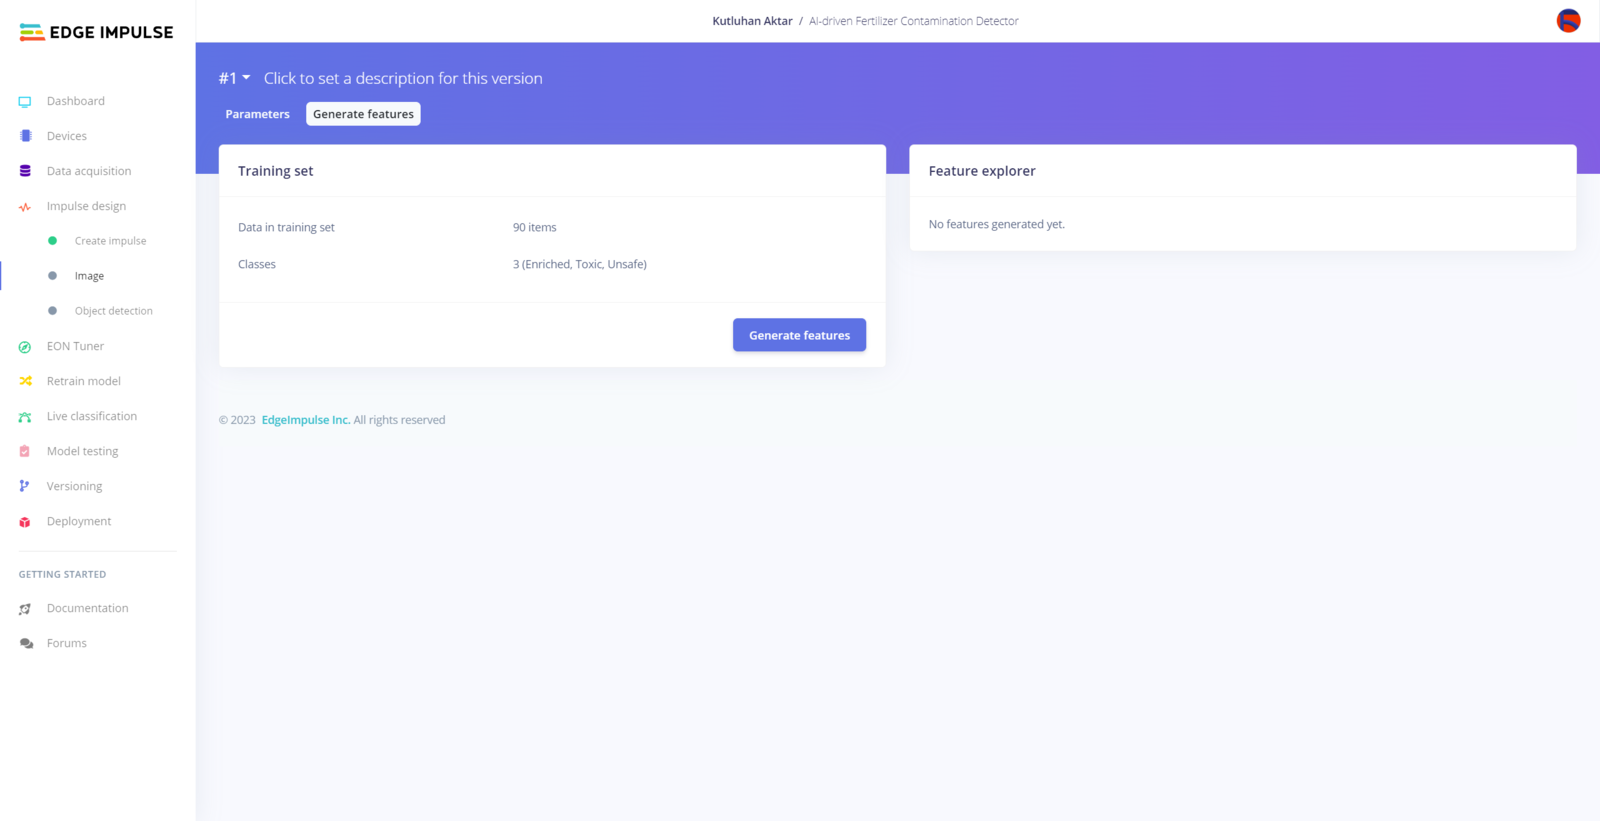
Step 6: Building an object detection (FOMO) model with Edge Impulse
As explained in the previous steps, I needed a controlled environment manifesting varying soil structure and integrity in order to build a valid object detection model. Therefore, I applied composted quail manure collected in different decomposition stages (fresh, active, mature, and old) as organic fertilizers to alter soil acidification, integrity, and structure in three separate flowerpots. Then, I added chemical fertilizers to each flowerpot in the same amount to examine the excessive use of chemical fertilizers. When I completed capturing images of fertilizer-exerted soils in three separate flowerpots and storing them on LattePanda 3 Delta, I started to work on my object detection (FOMO) model to detect the excessive use of chemical fertilizers in relation to organic fertilizers so as to prevent their hazardous effects on the environment and our health. Since Edge Impulse supports almost every microcontroller and development board due to its model deployment options, I decided to utilize Edge Impulse to build my object detection model. Also, Edge Impulse provides an elaborate machine learning algorithm (FOMO) for running more accessible and faster object detection models on edge devices such as SenseCAP A1101. Edge Impulse FOMO (Faster Objects, More Objects) is a novel machine learning algorithm that brings object detection to highly constrained devices. FOMO models can count objects, find the location of the detected objects in an image, and track multiple objects in real time, requiring up to 30x less processing power and memory than MobileNet SSD or YOLOv5. Even though Edge Impulse supports JPG or PNG files to upload as samples directly, each target object in a training or testing sample needs to be labeled manually. Therefore, I needed to follow the steps below to format my data set so as to train my object detection model accurately:- Data Scaling (Resizing)
- Data Labeling
- Enriched
- Unsafe
- Toxic
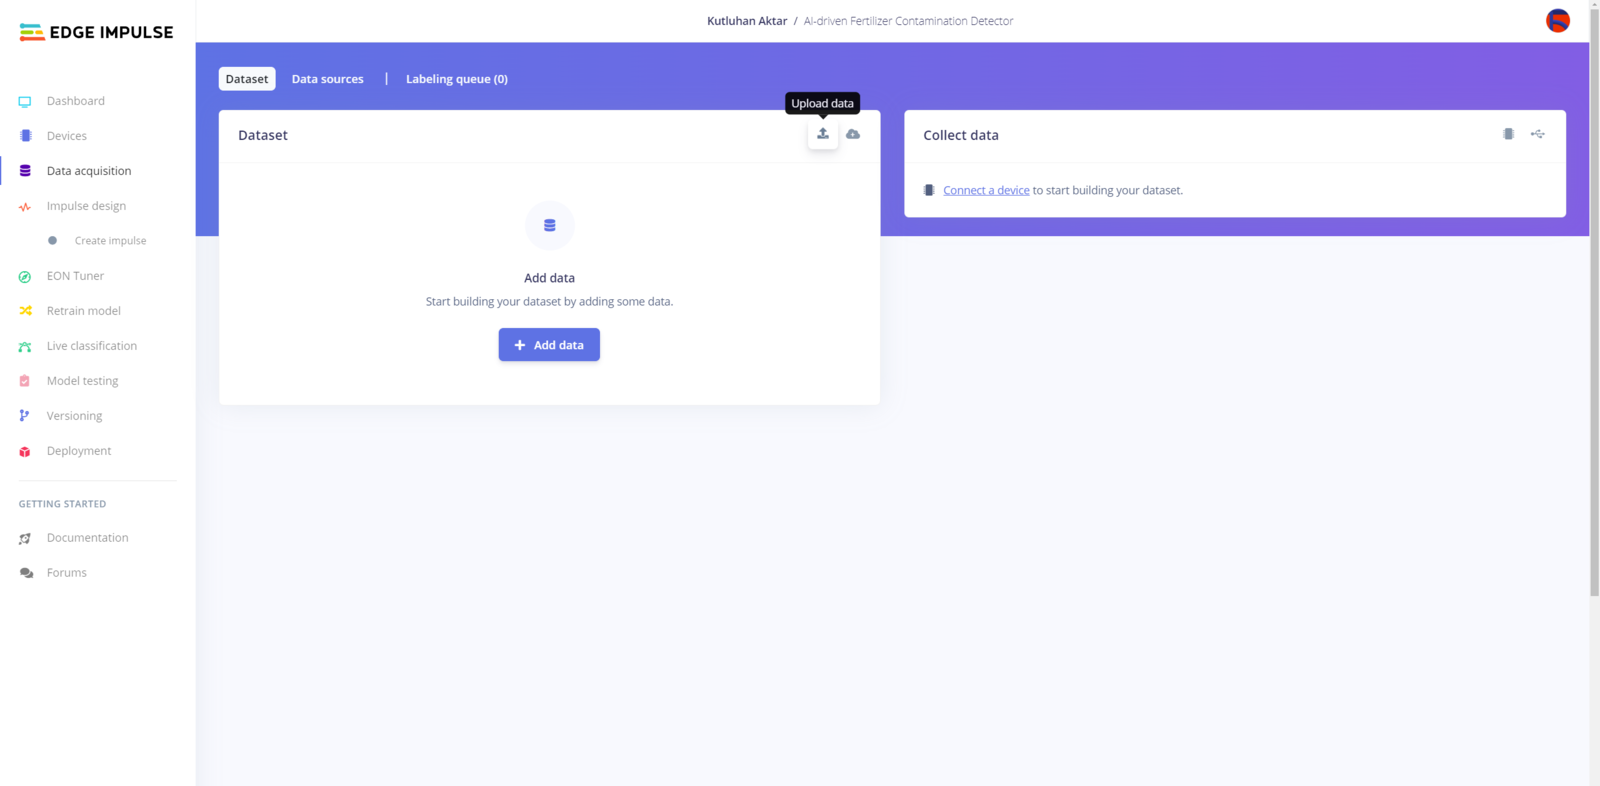
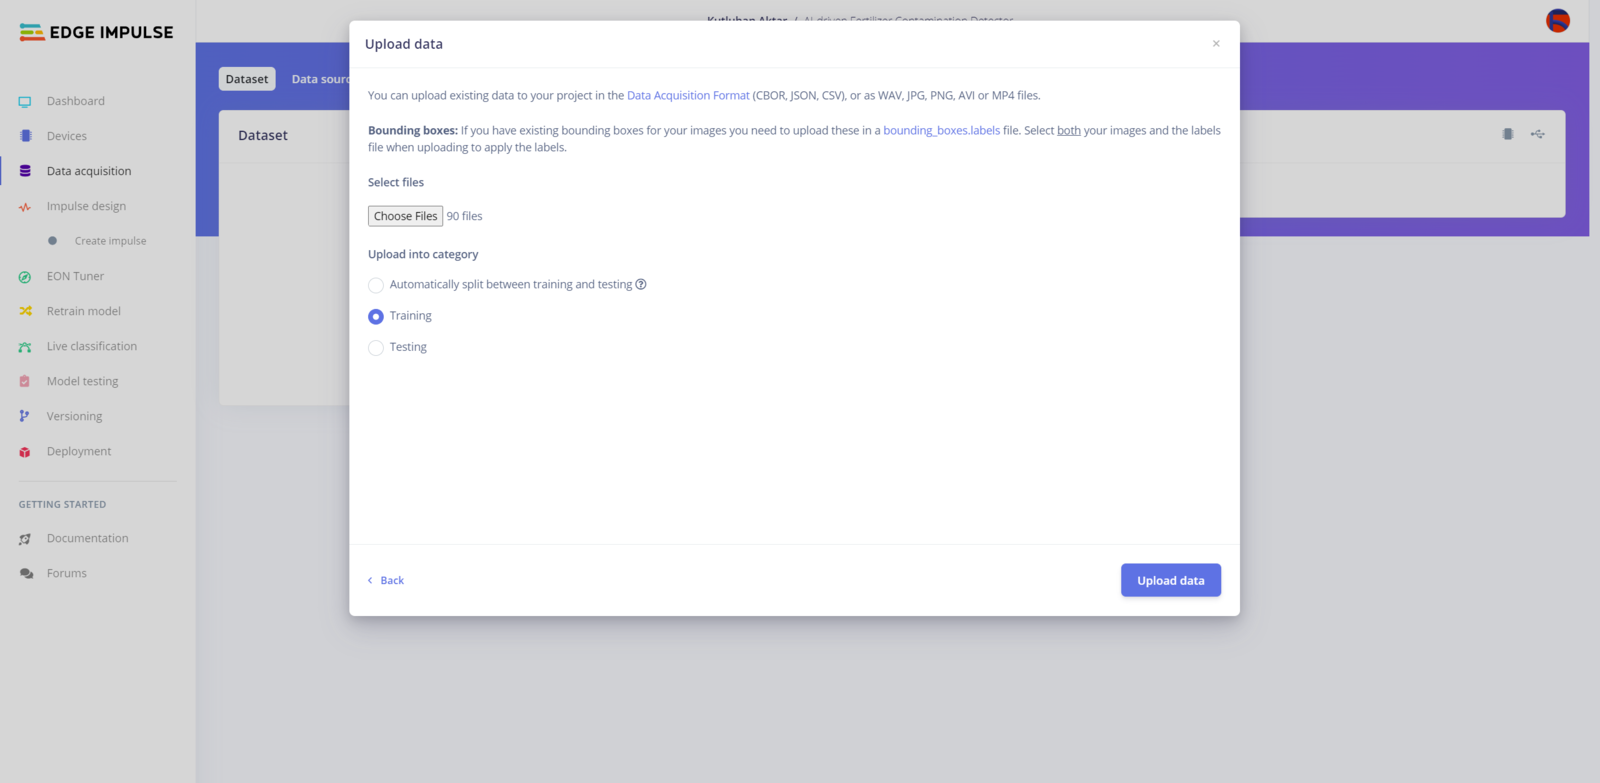
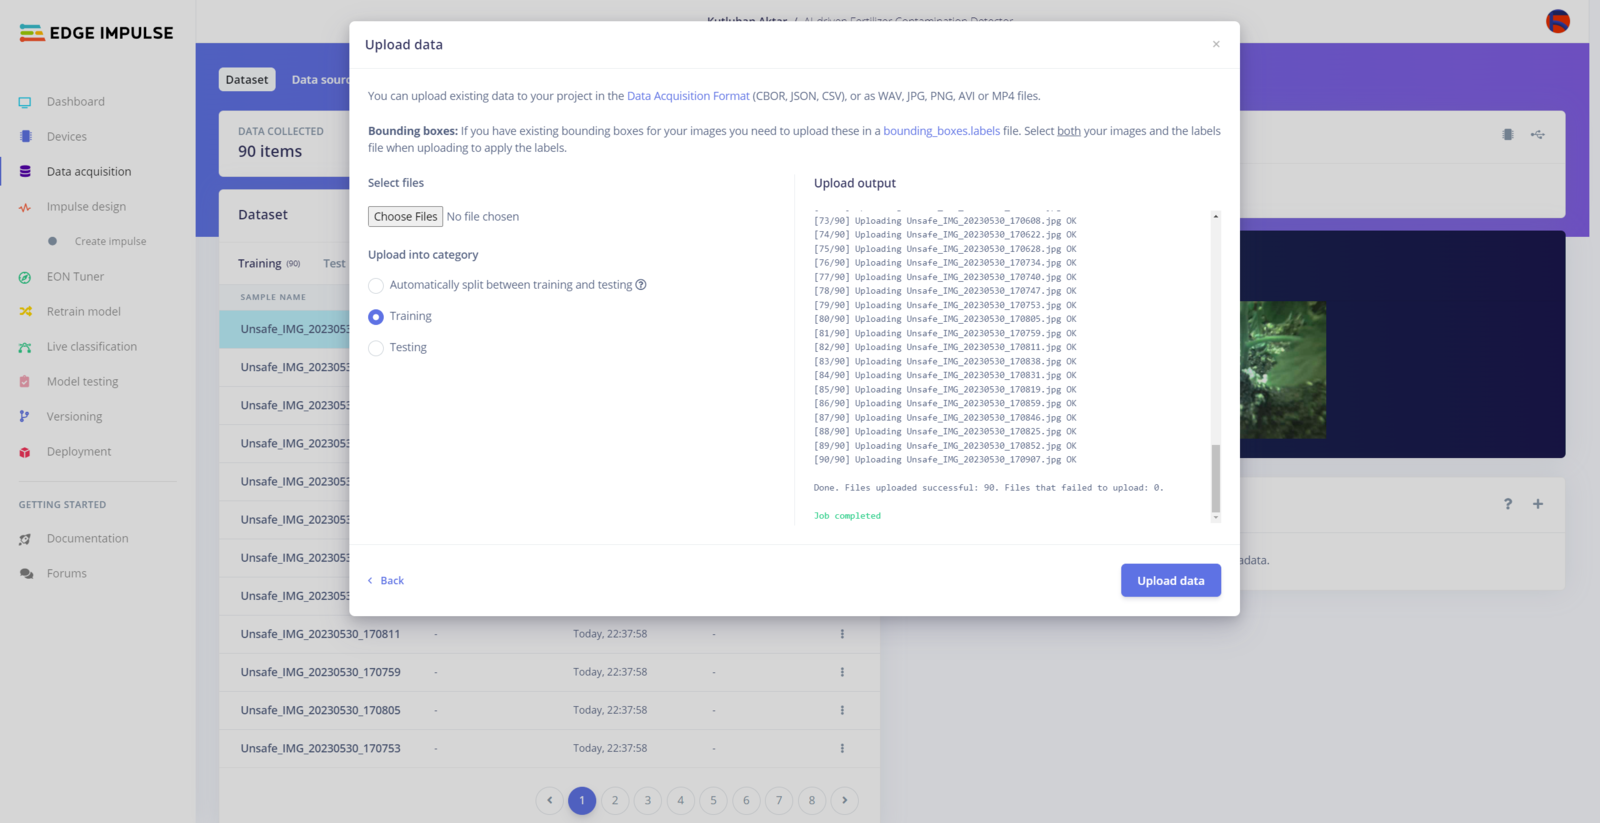
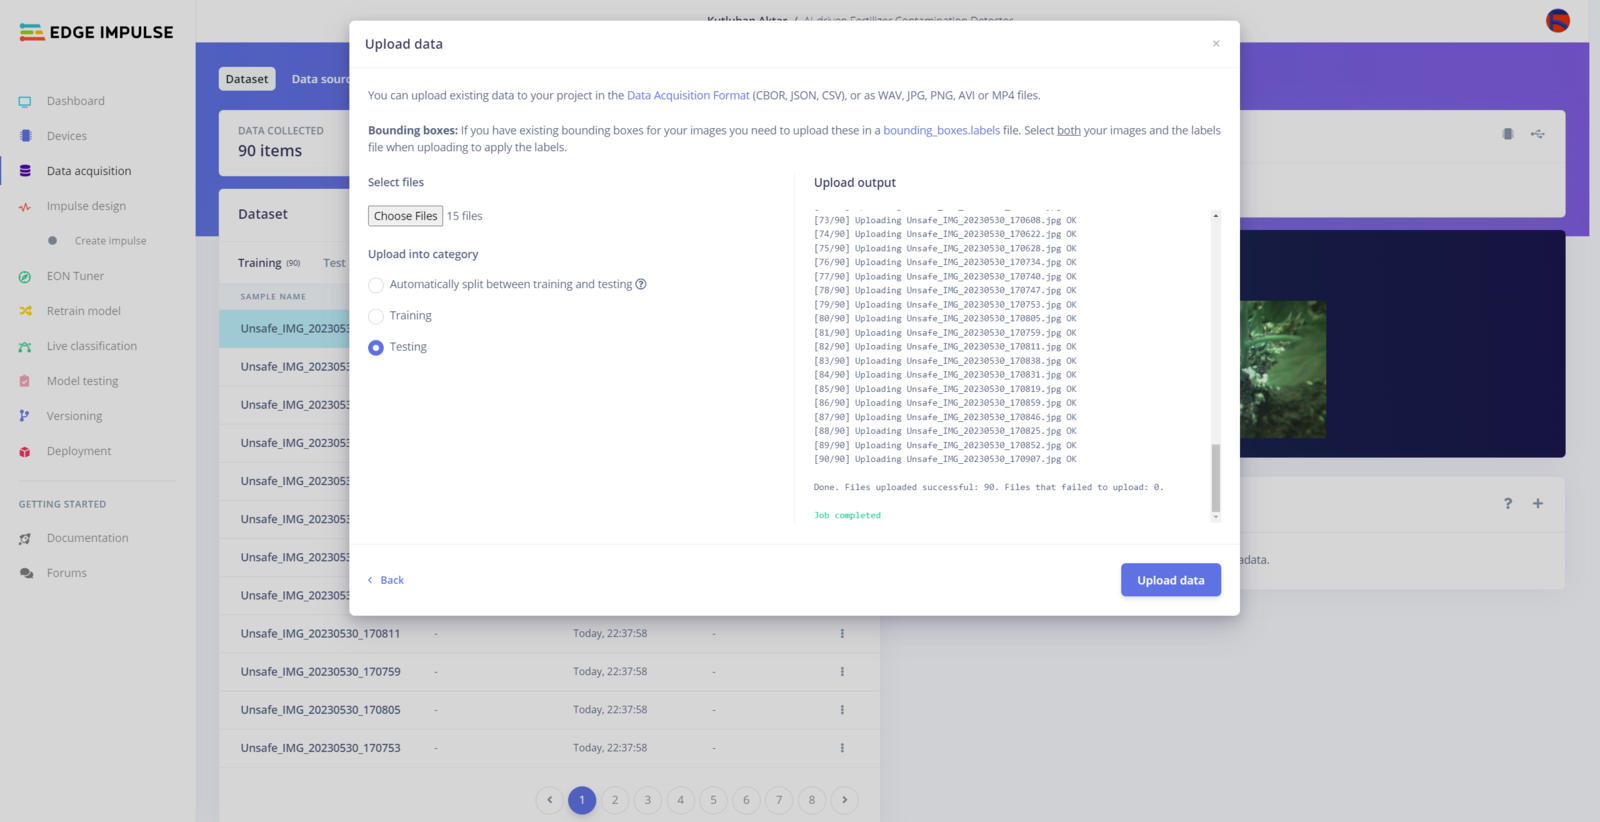
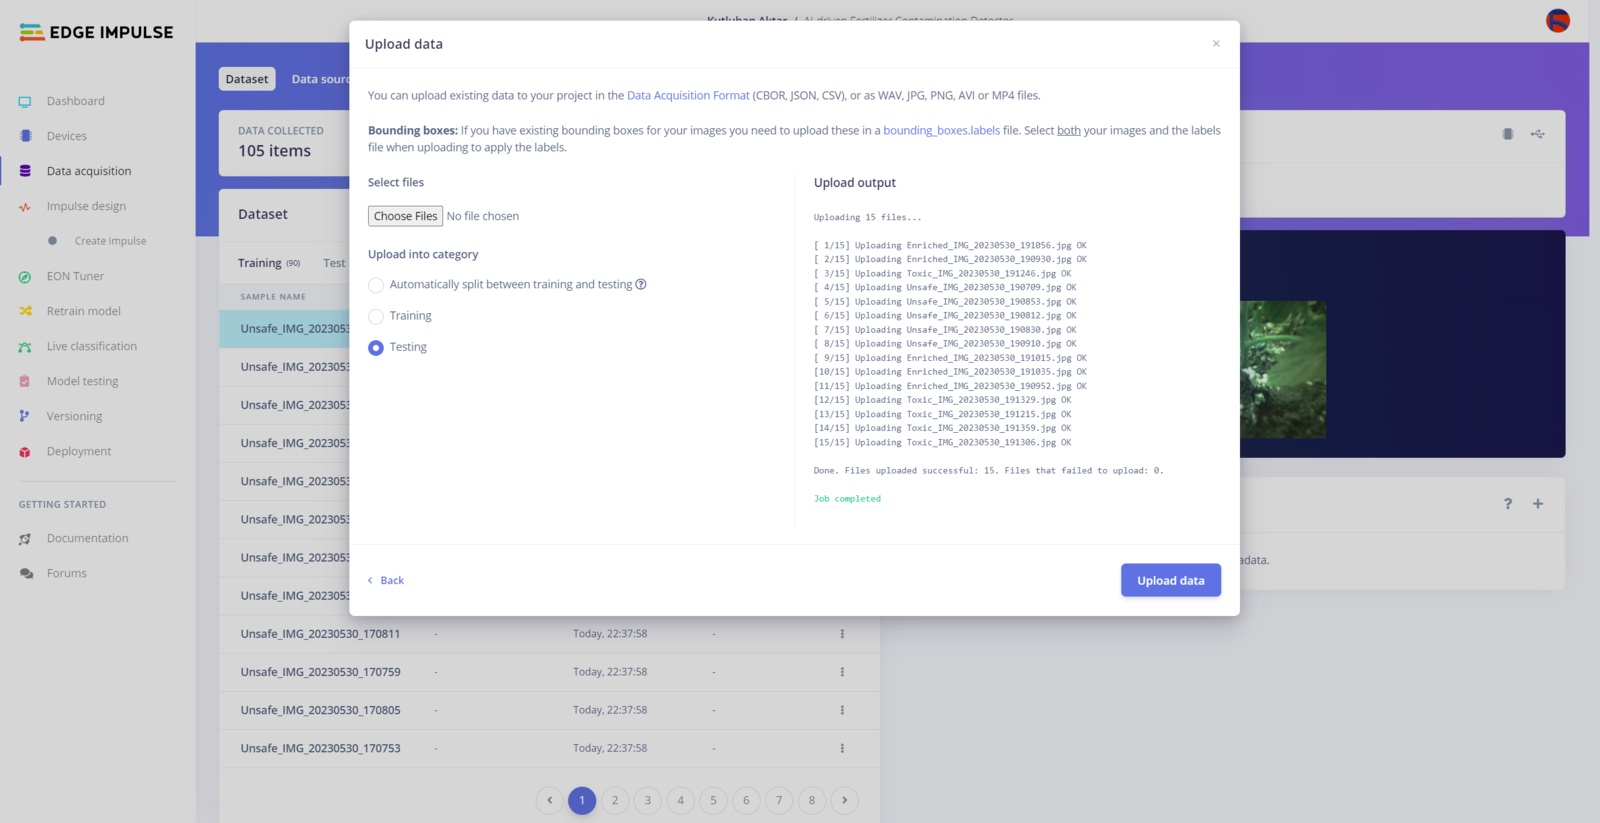
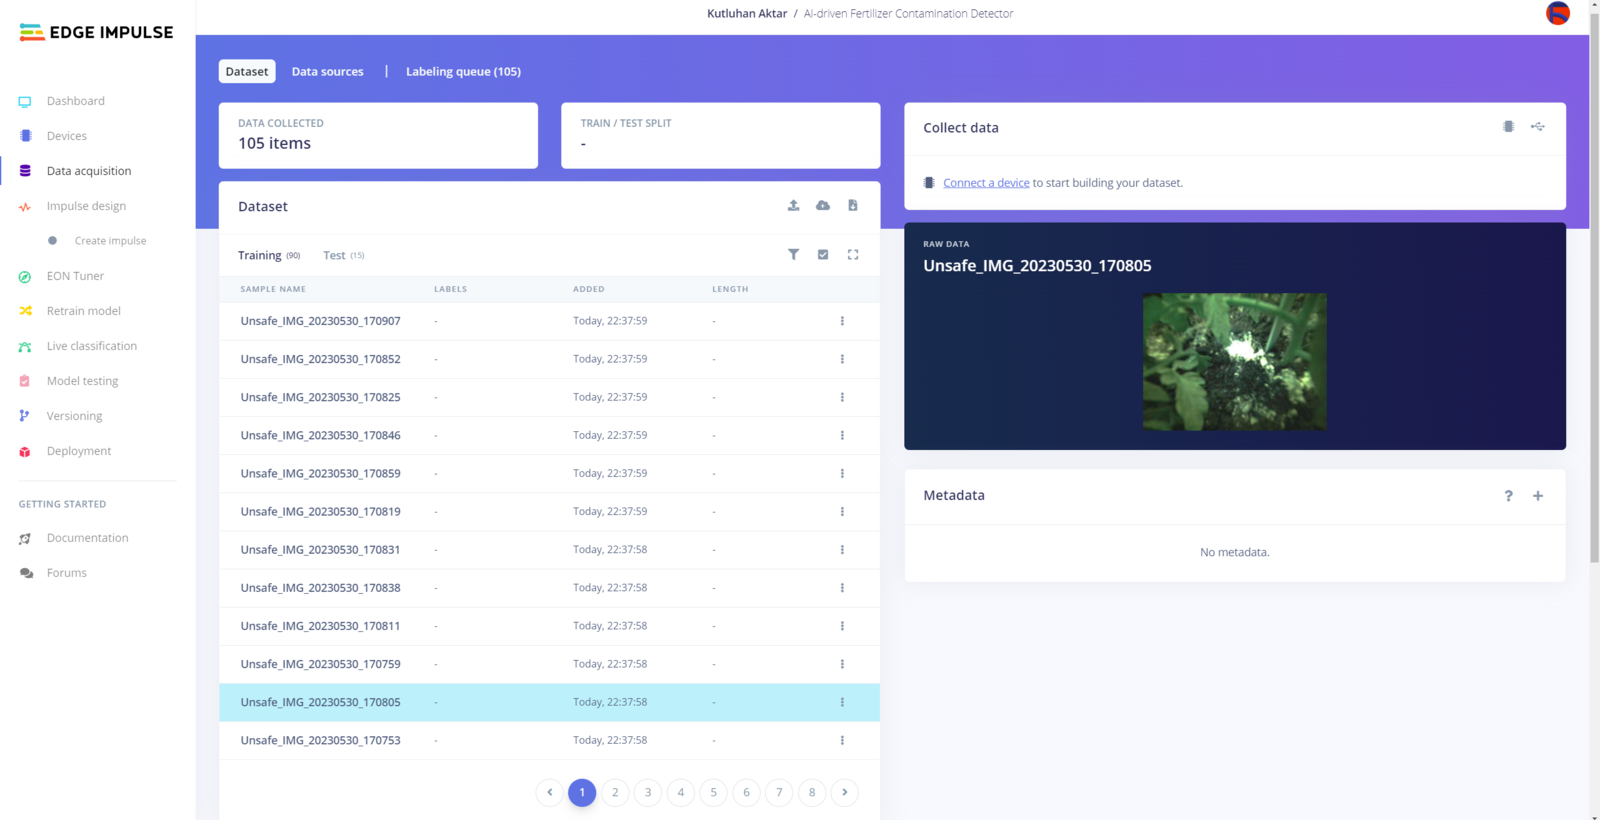
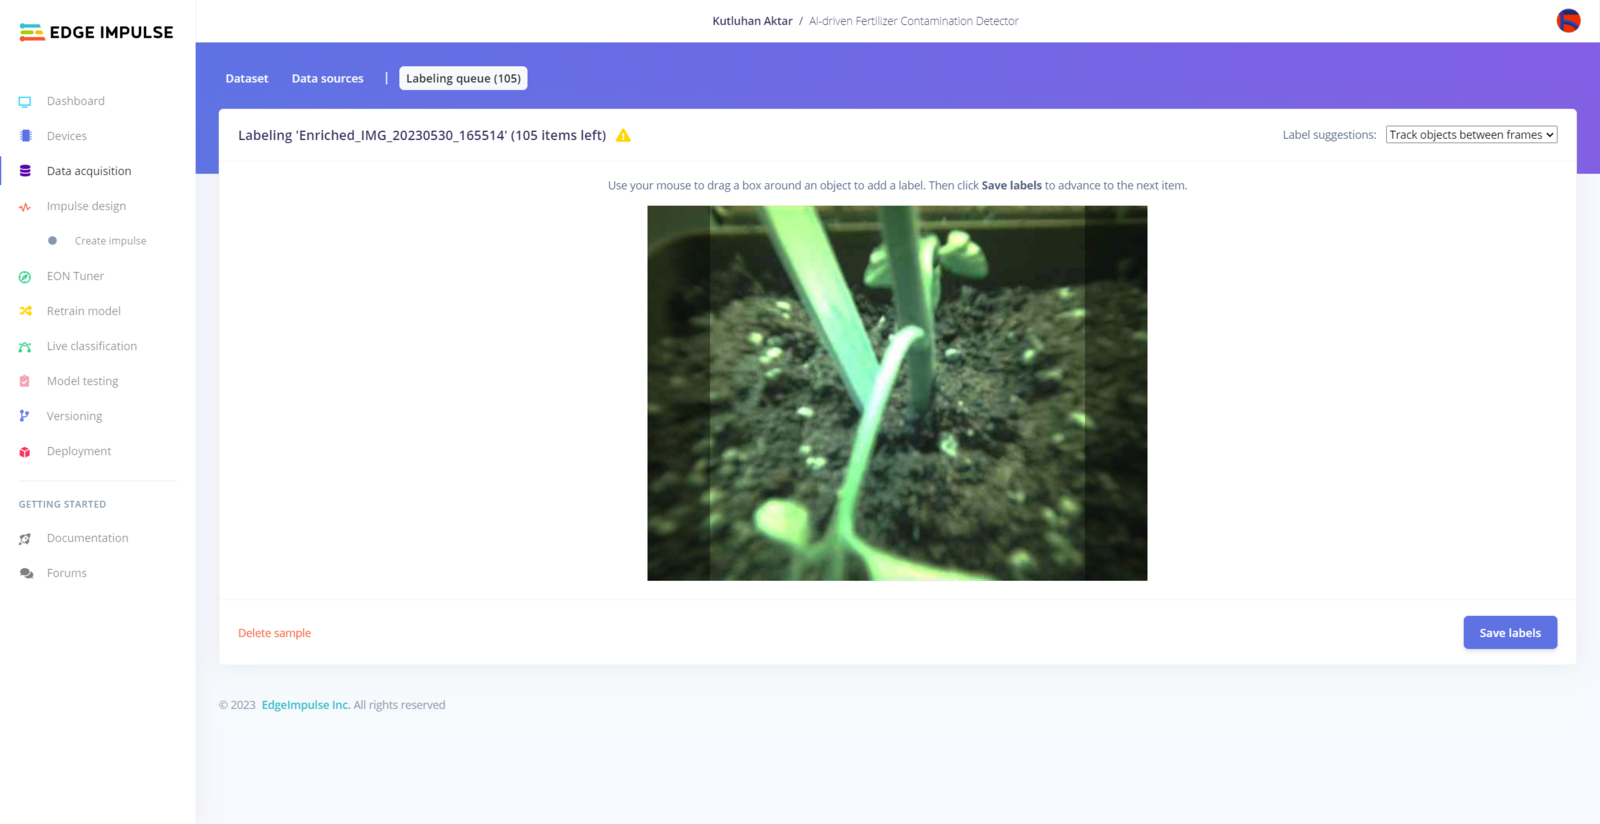
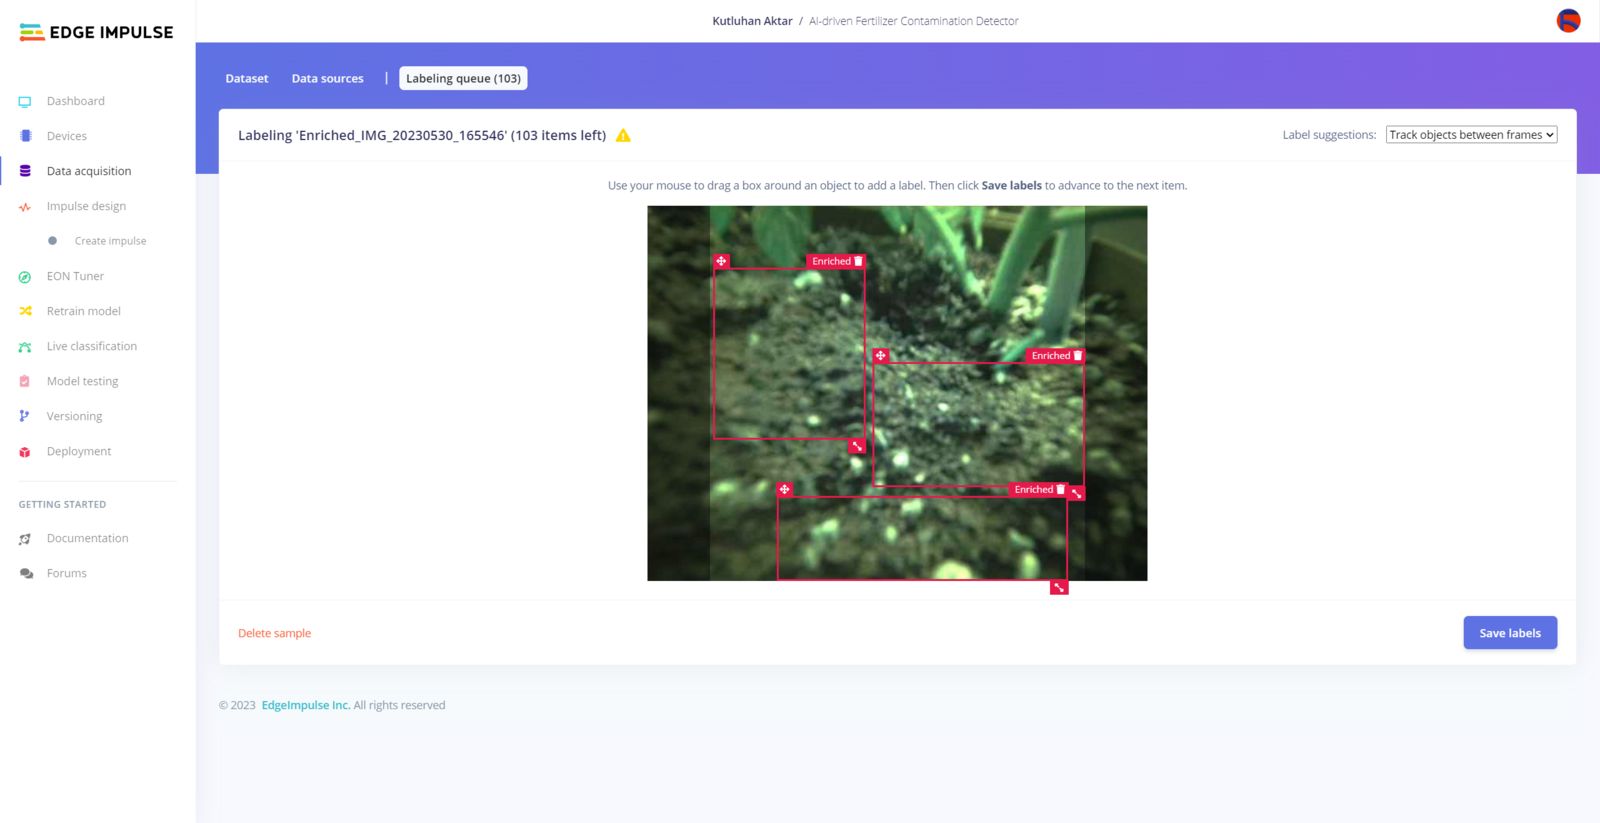
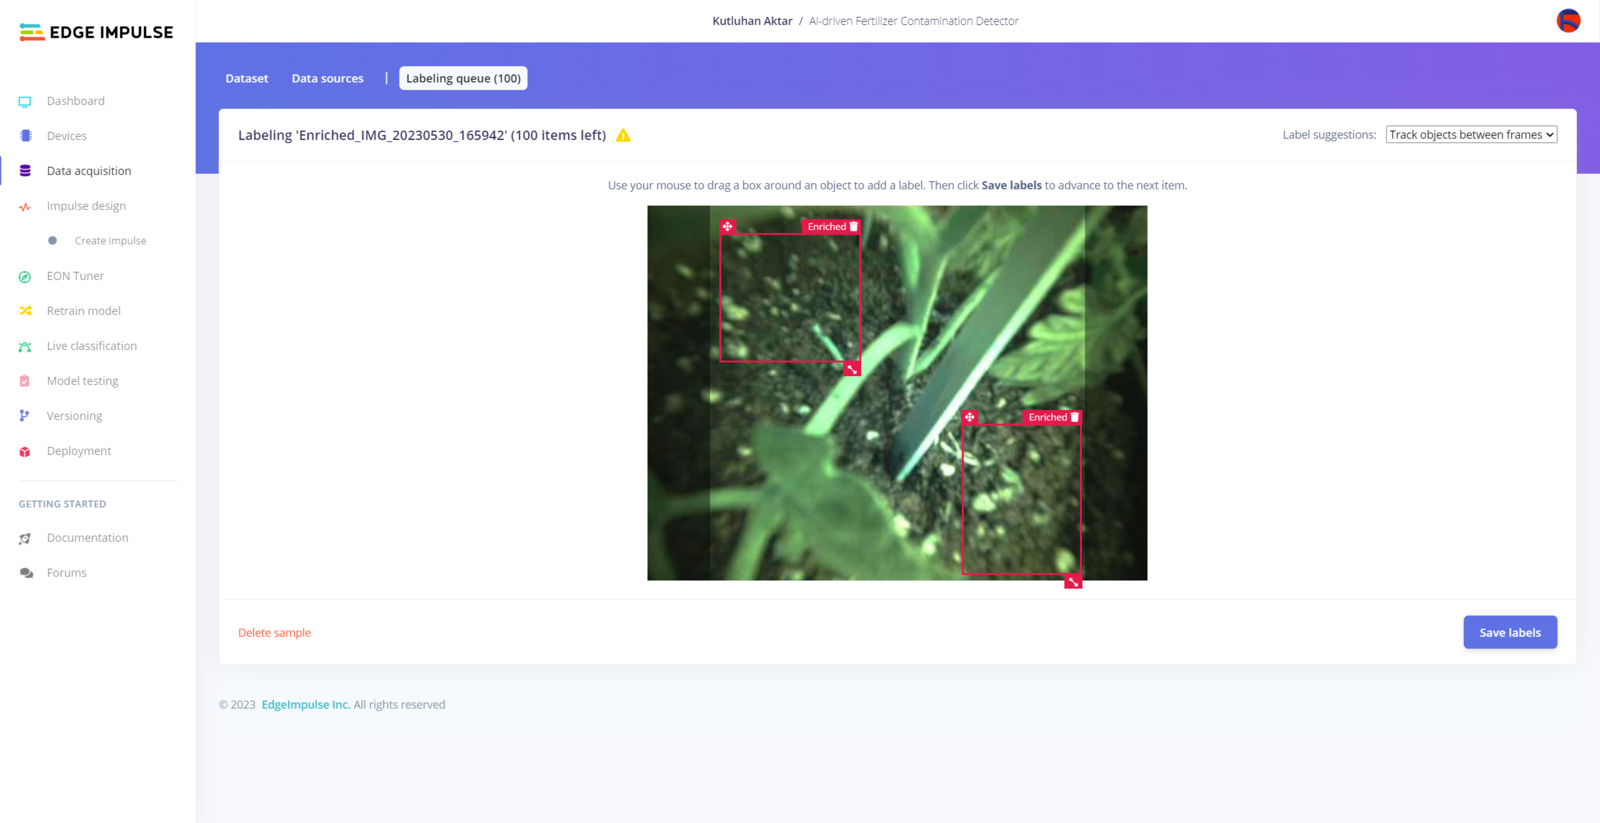
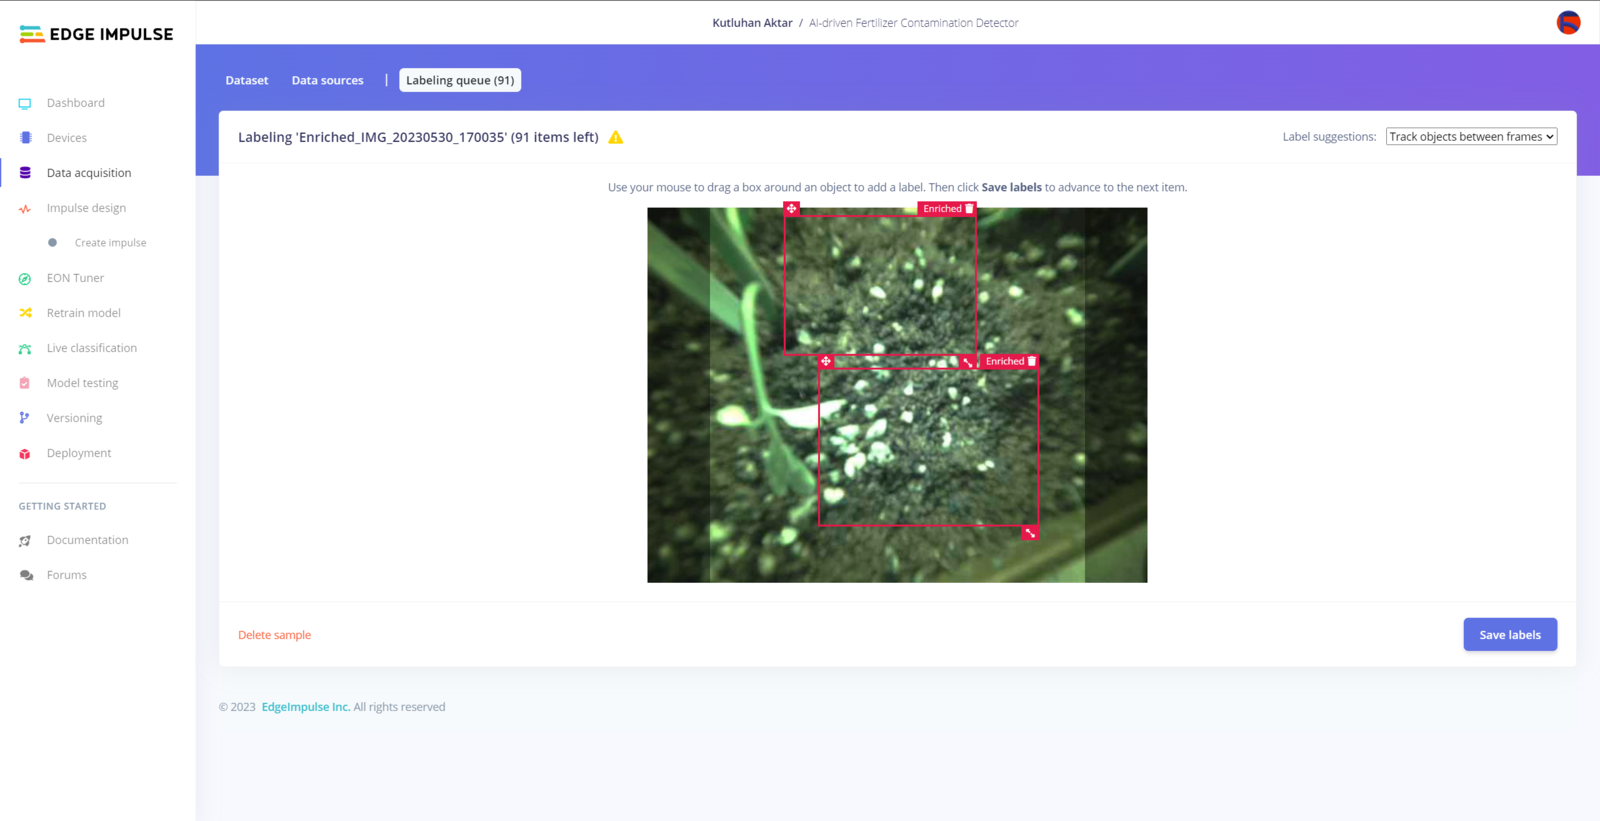
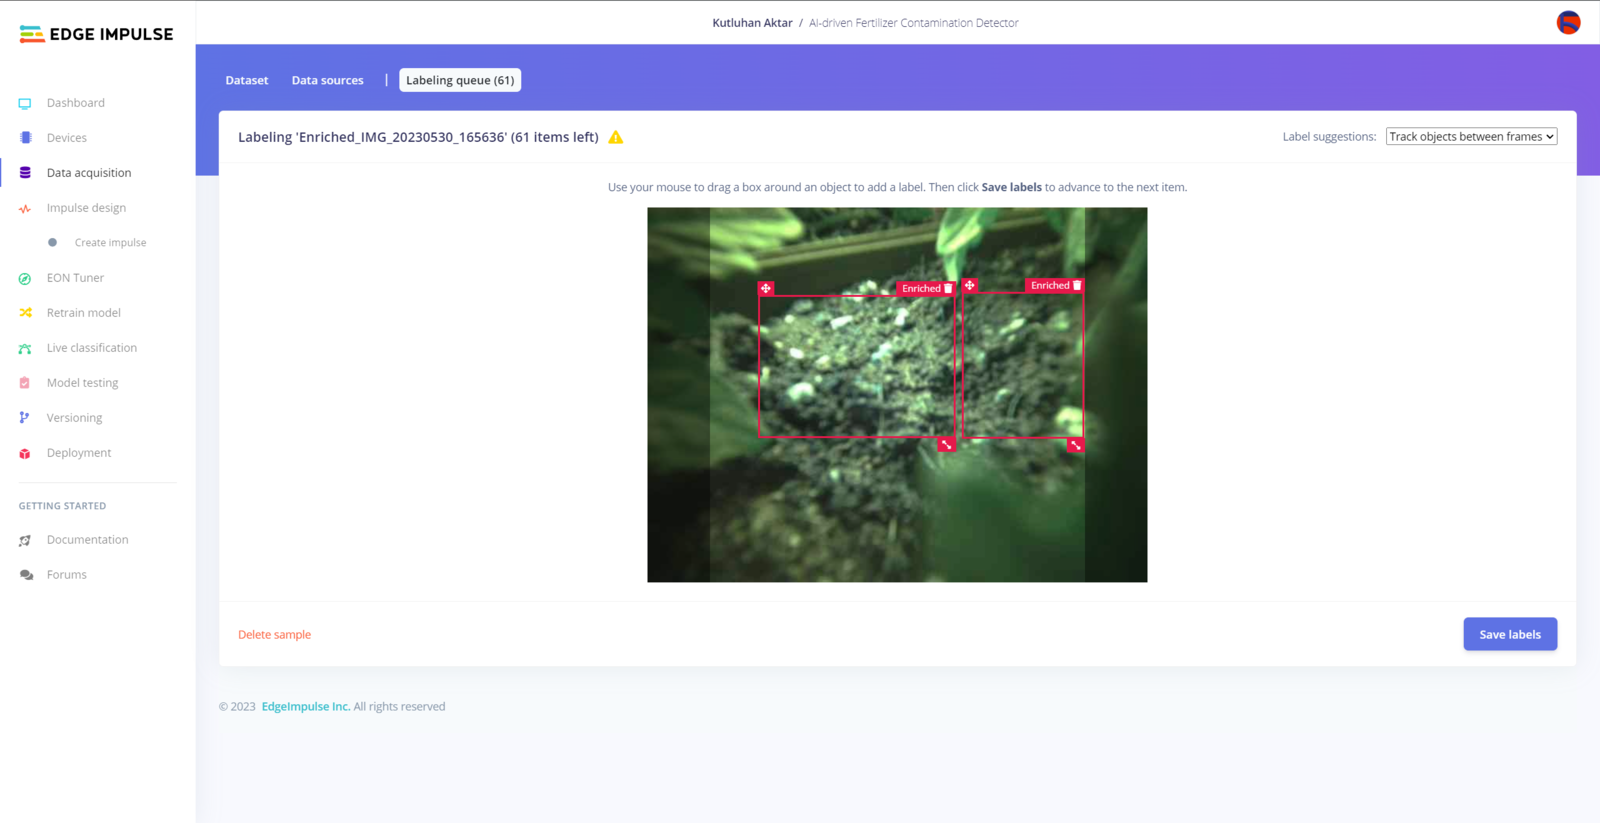
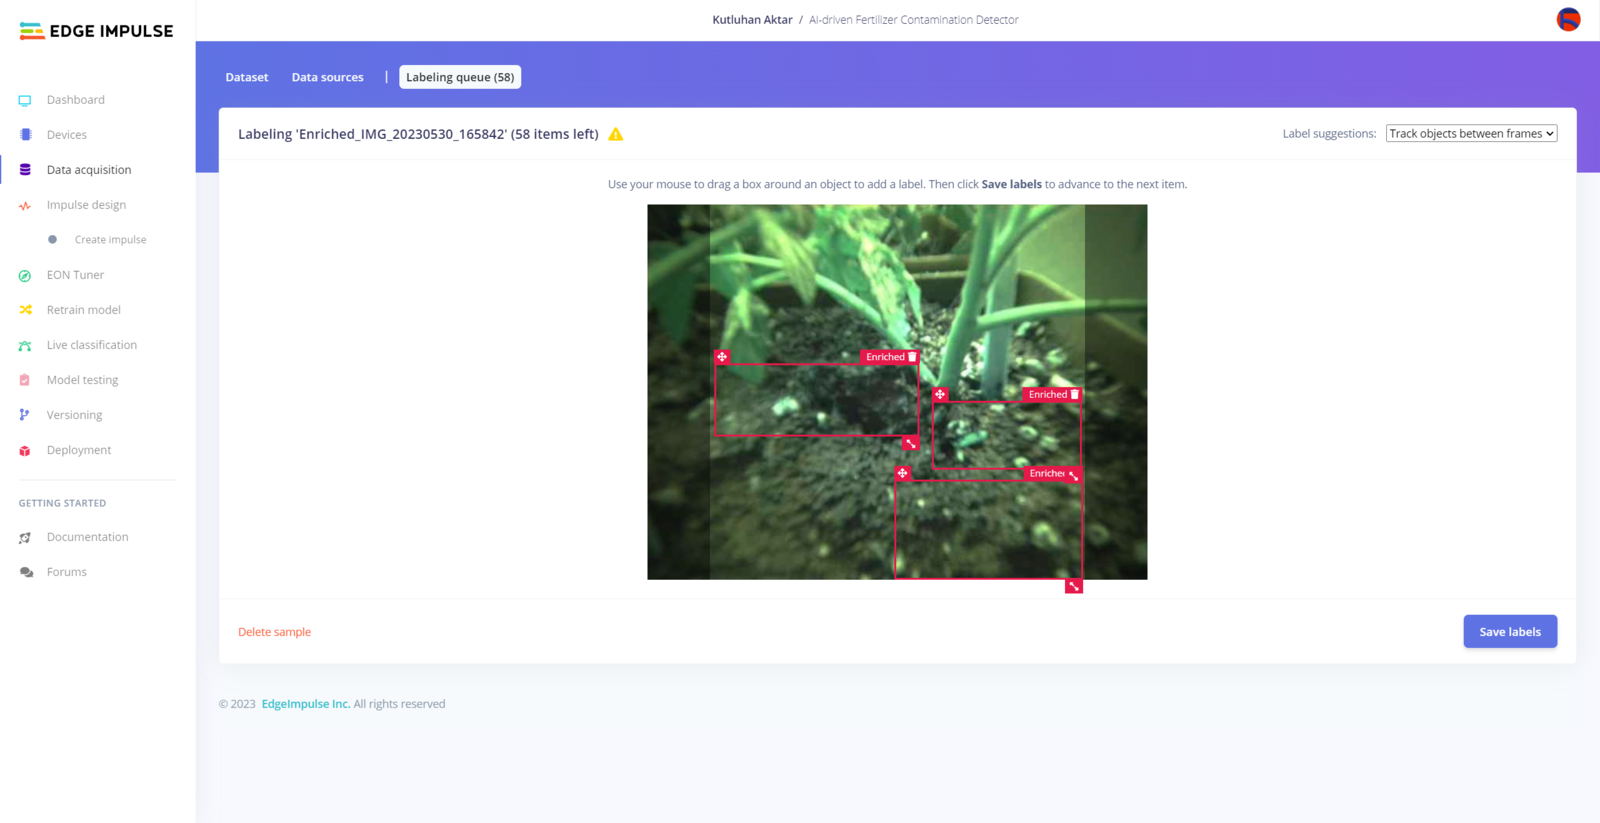
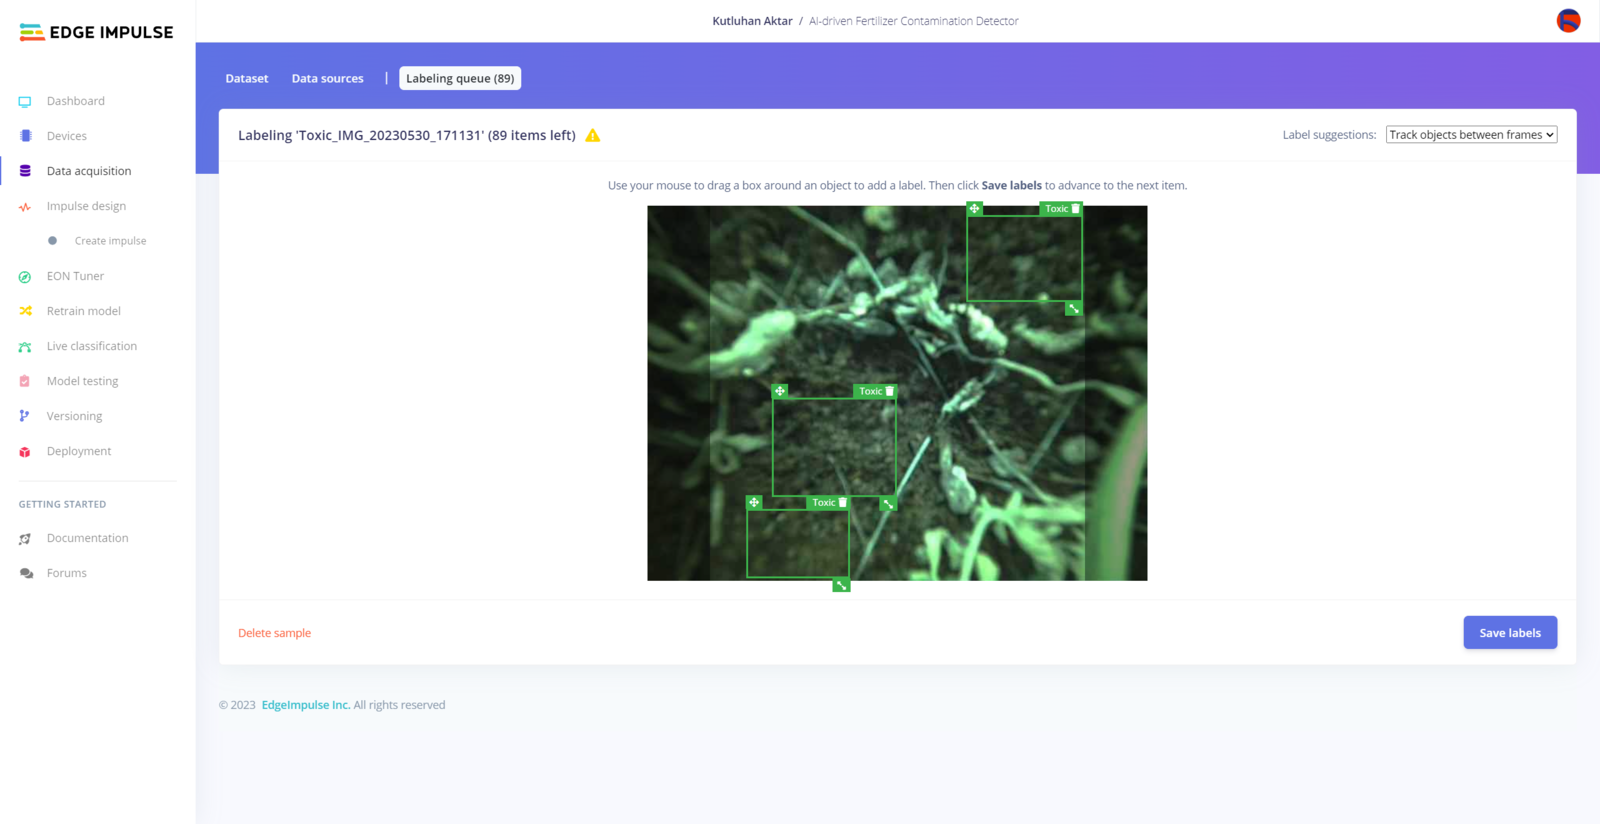
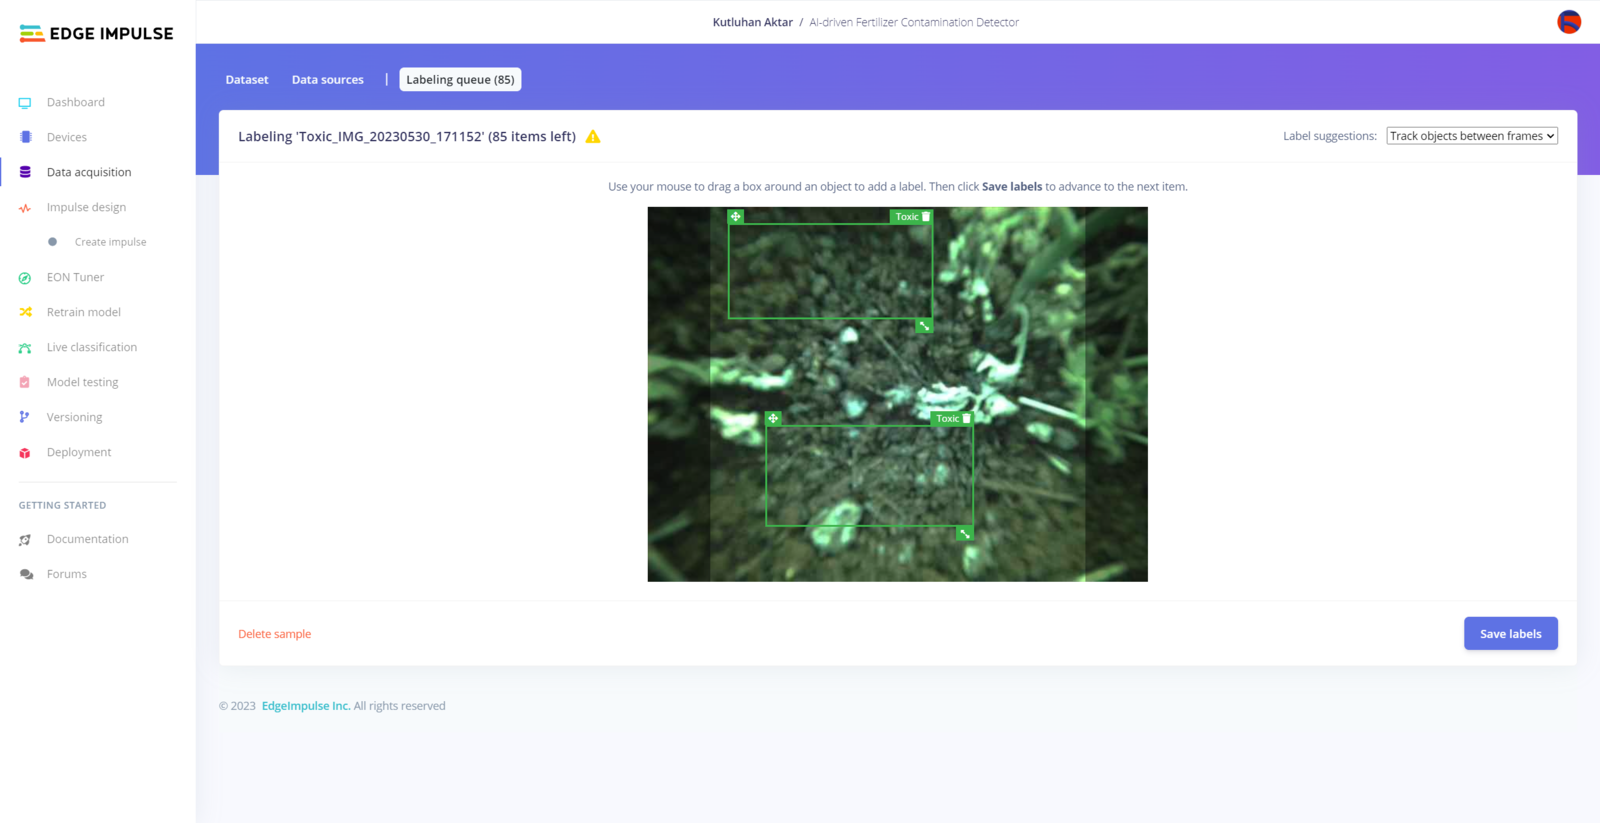
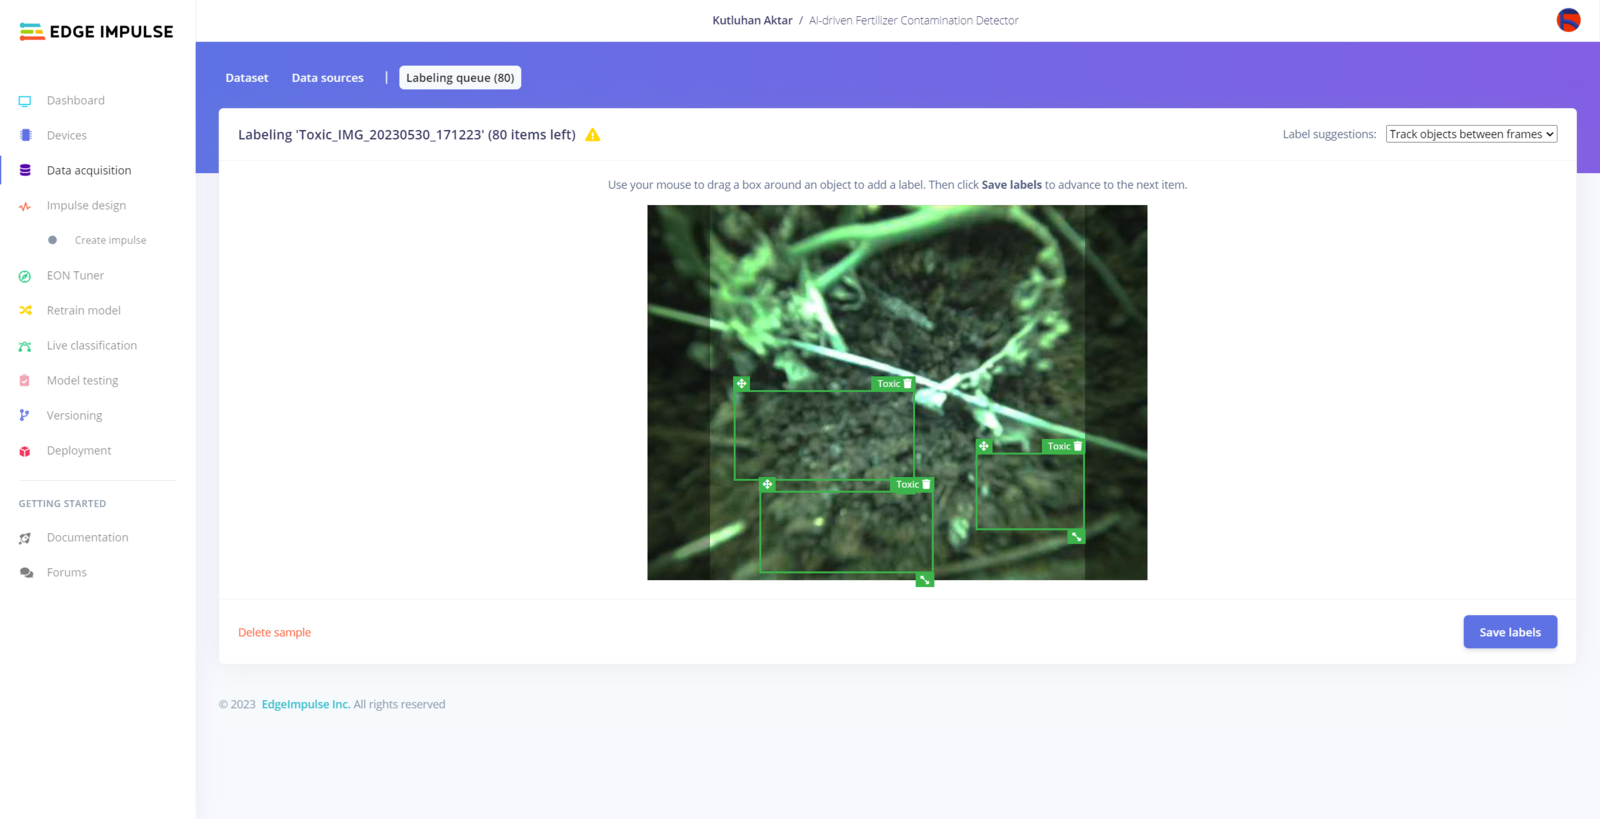
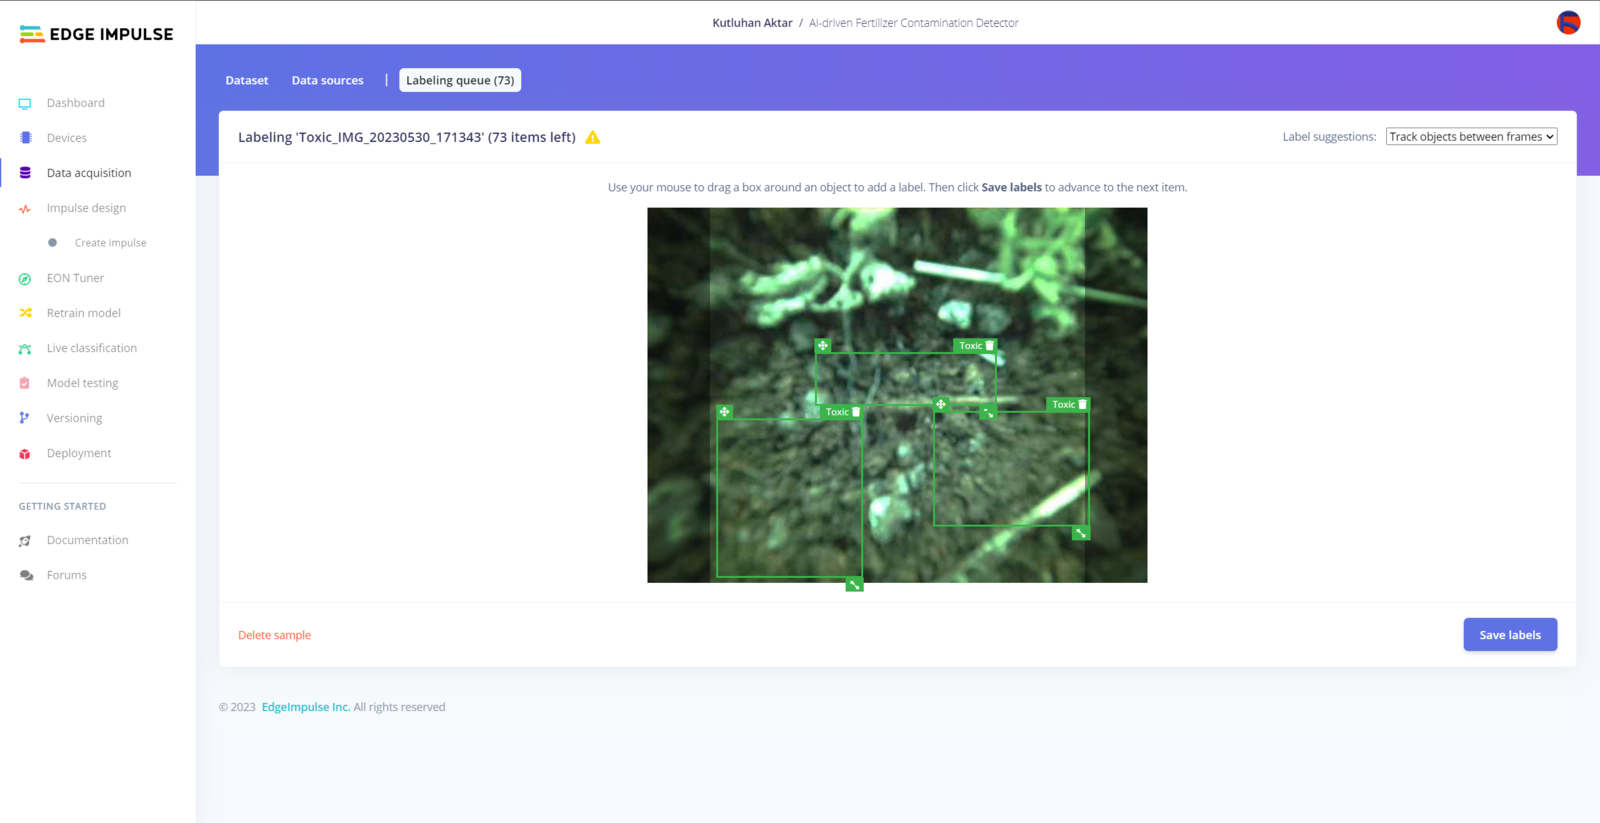
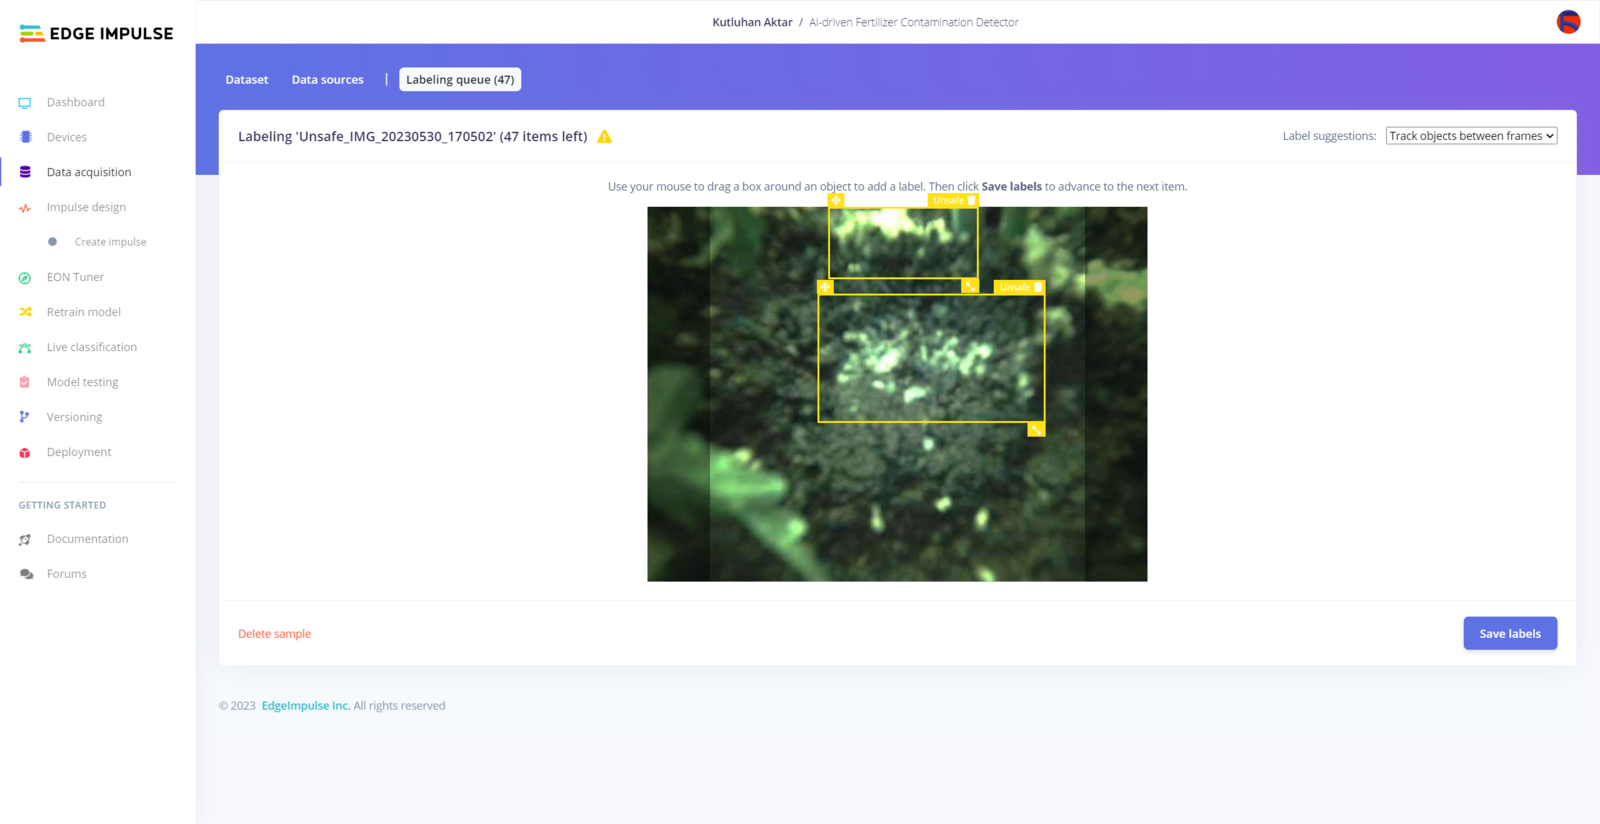
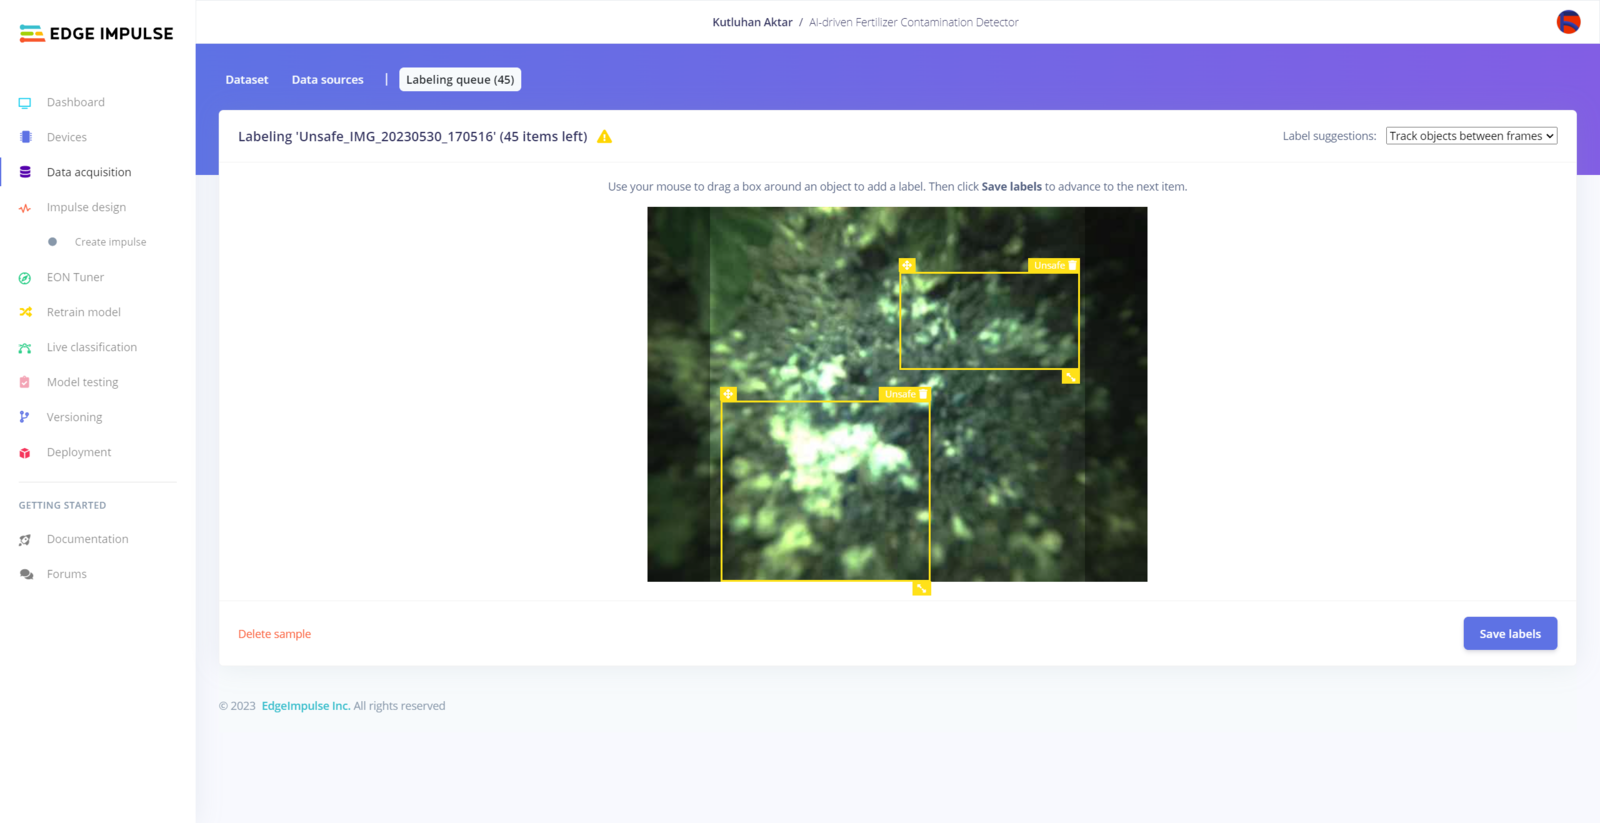
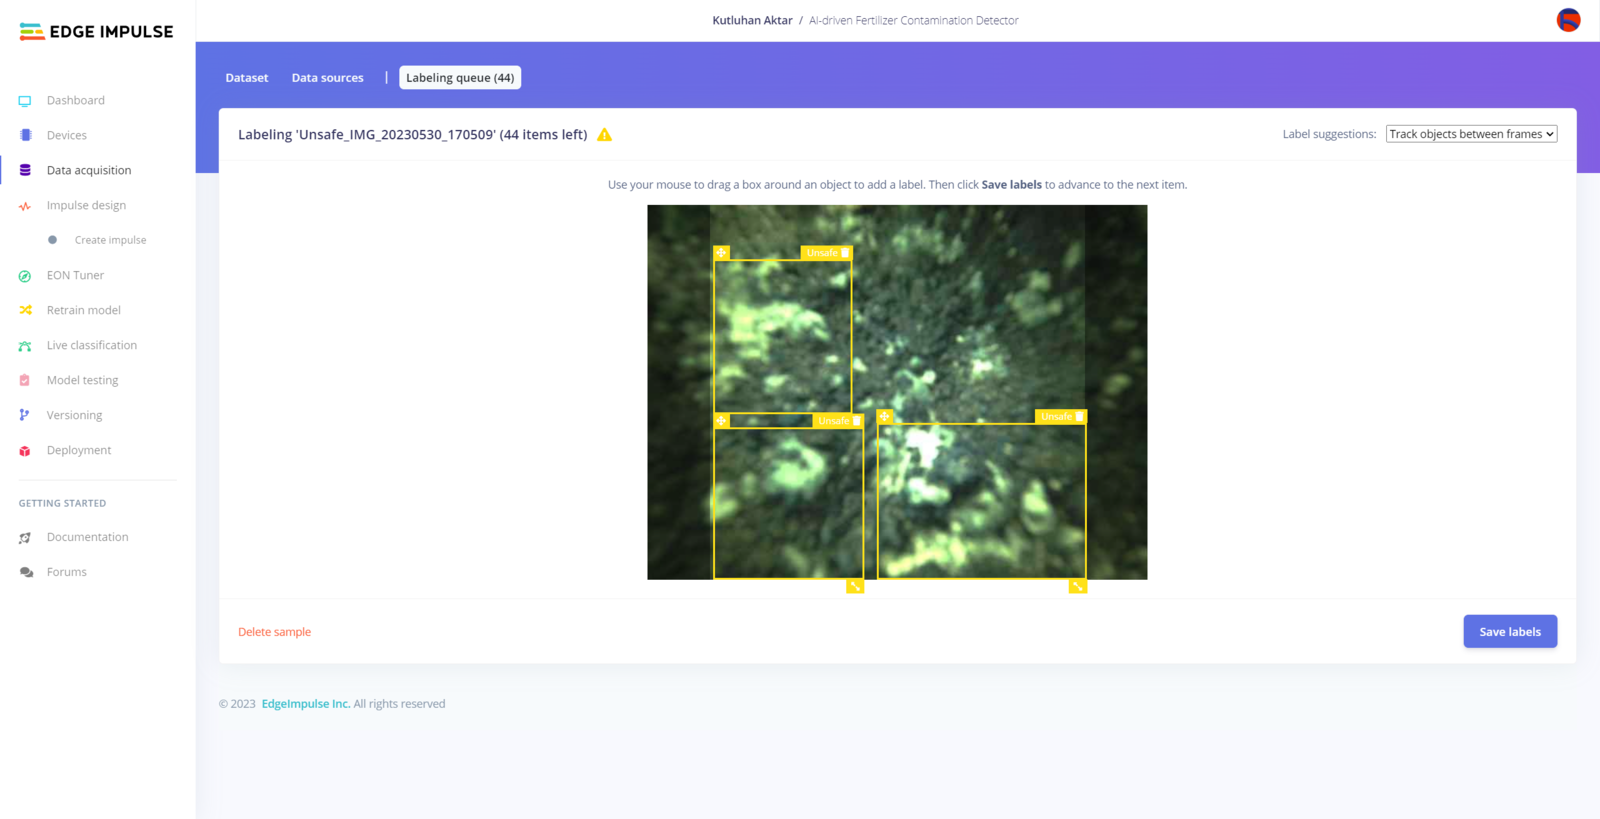
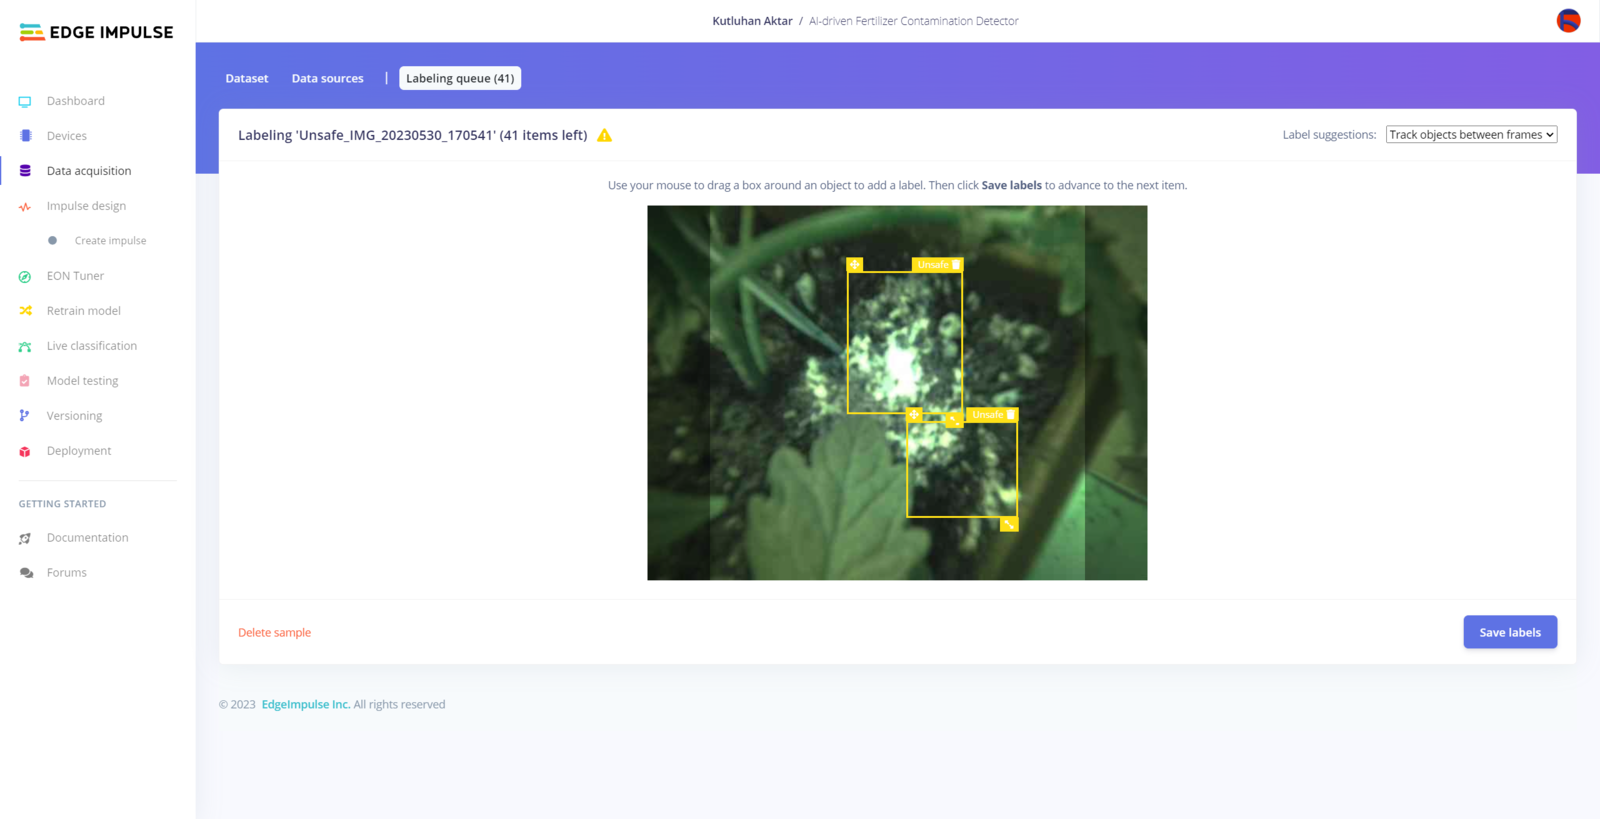
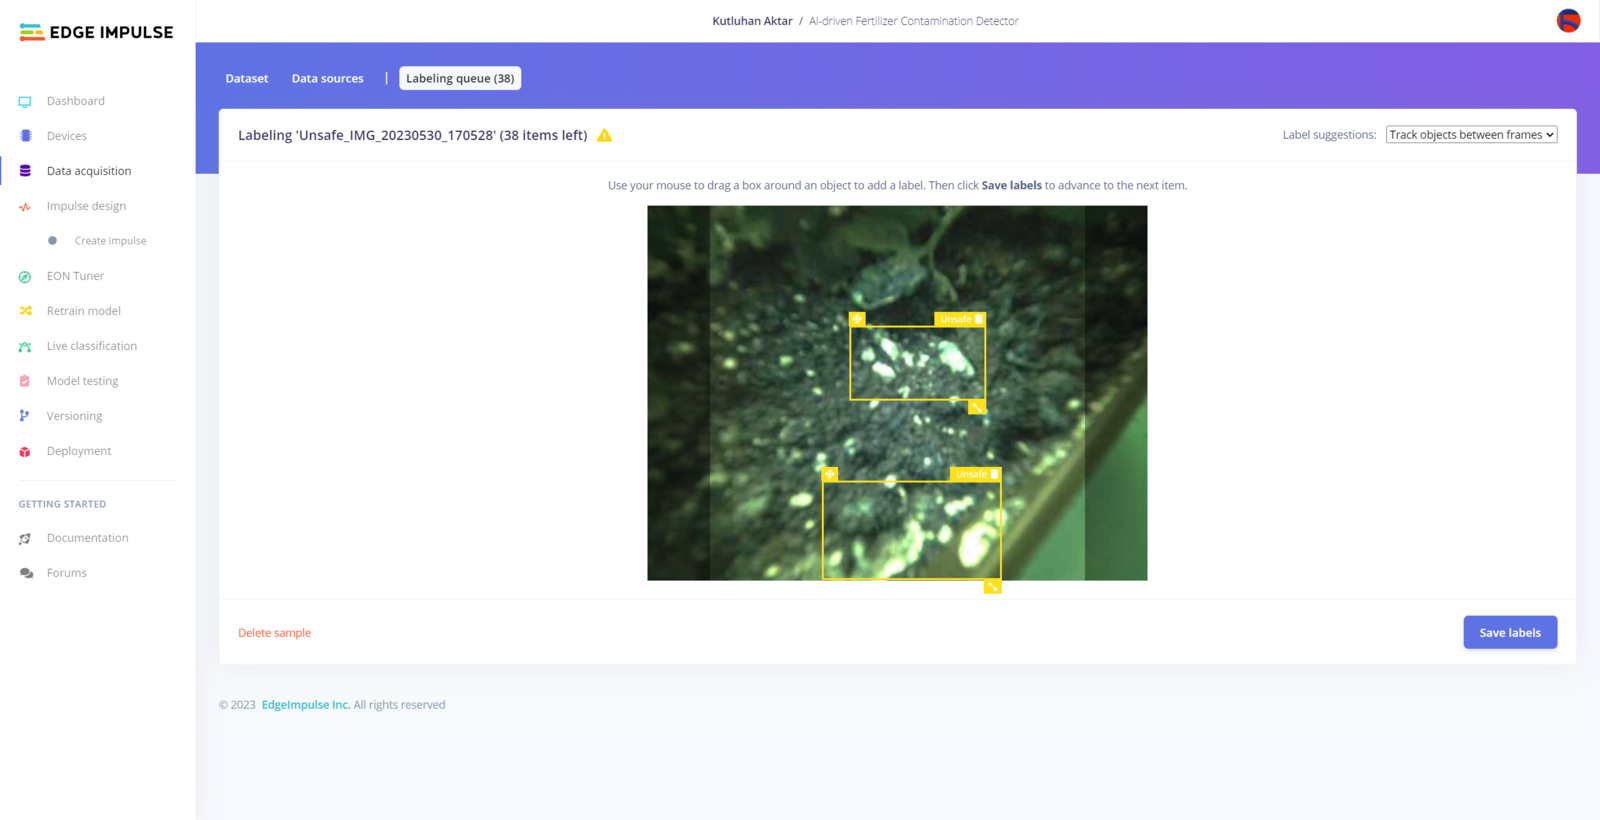
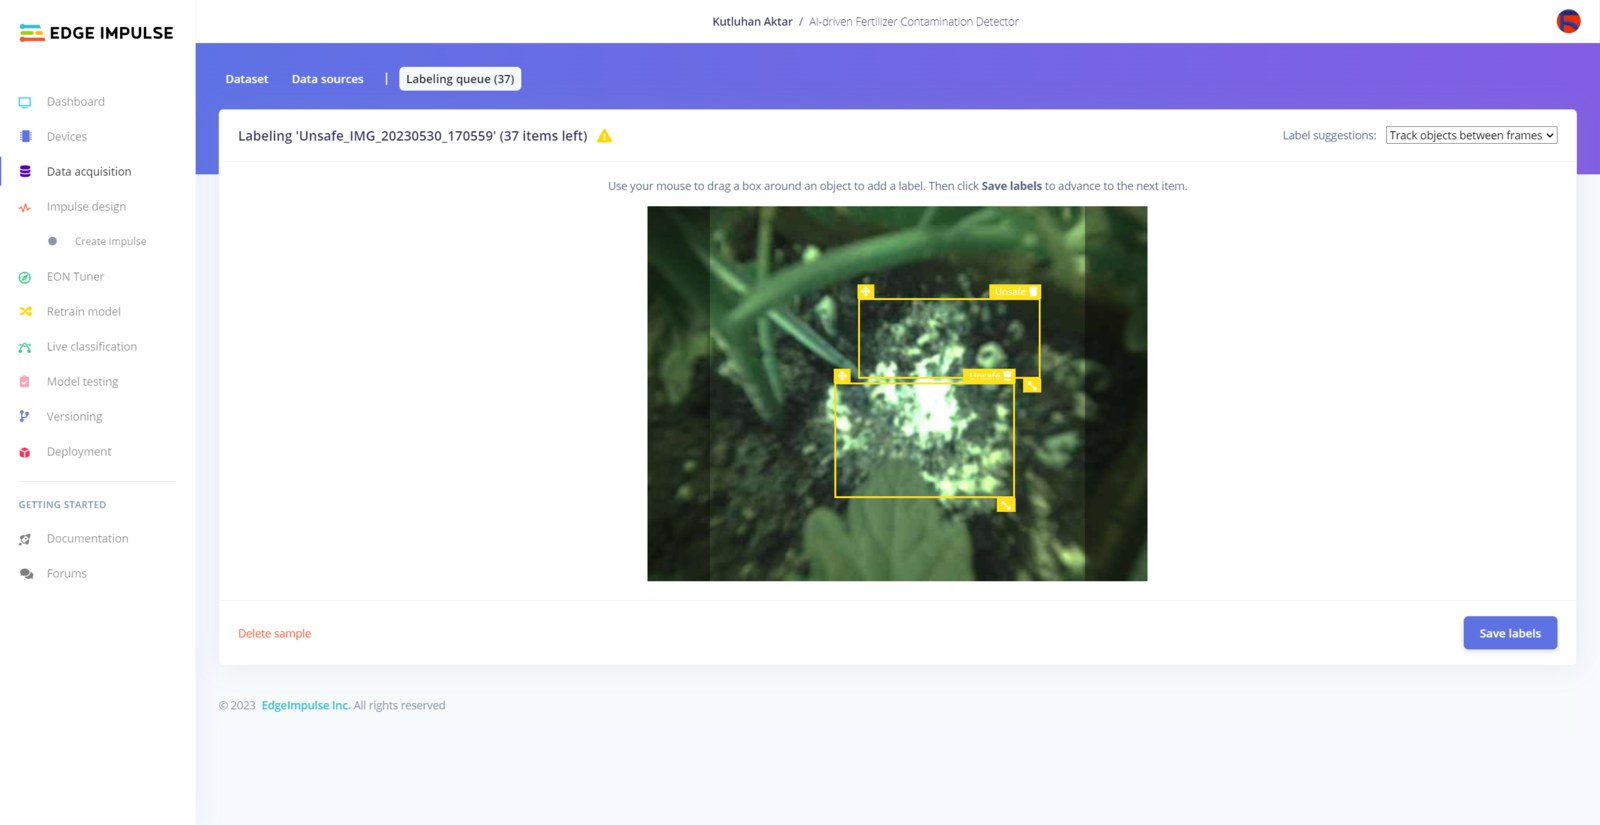
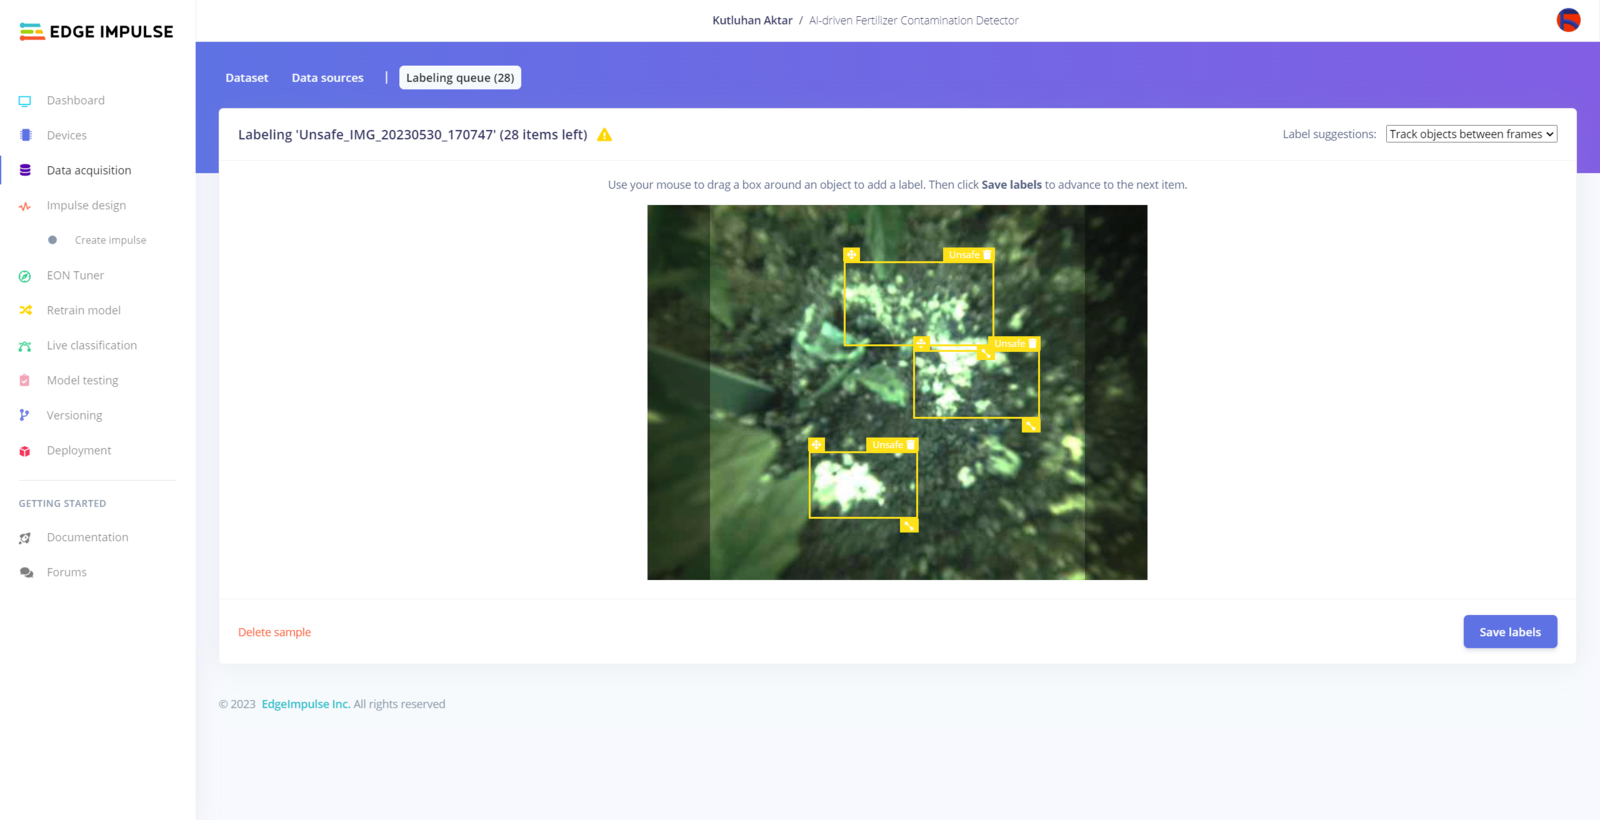
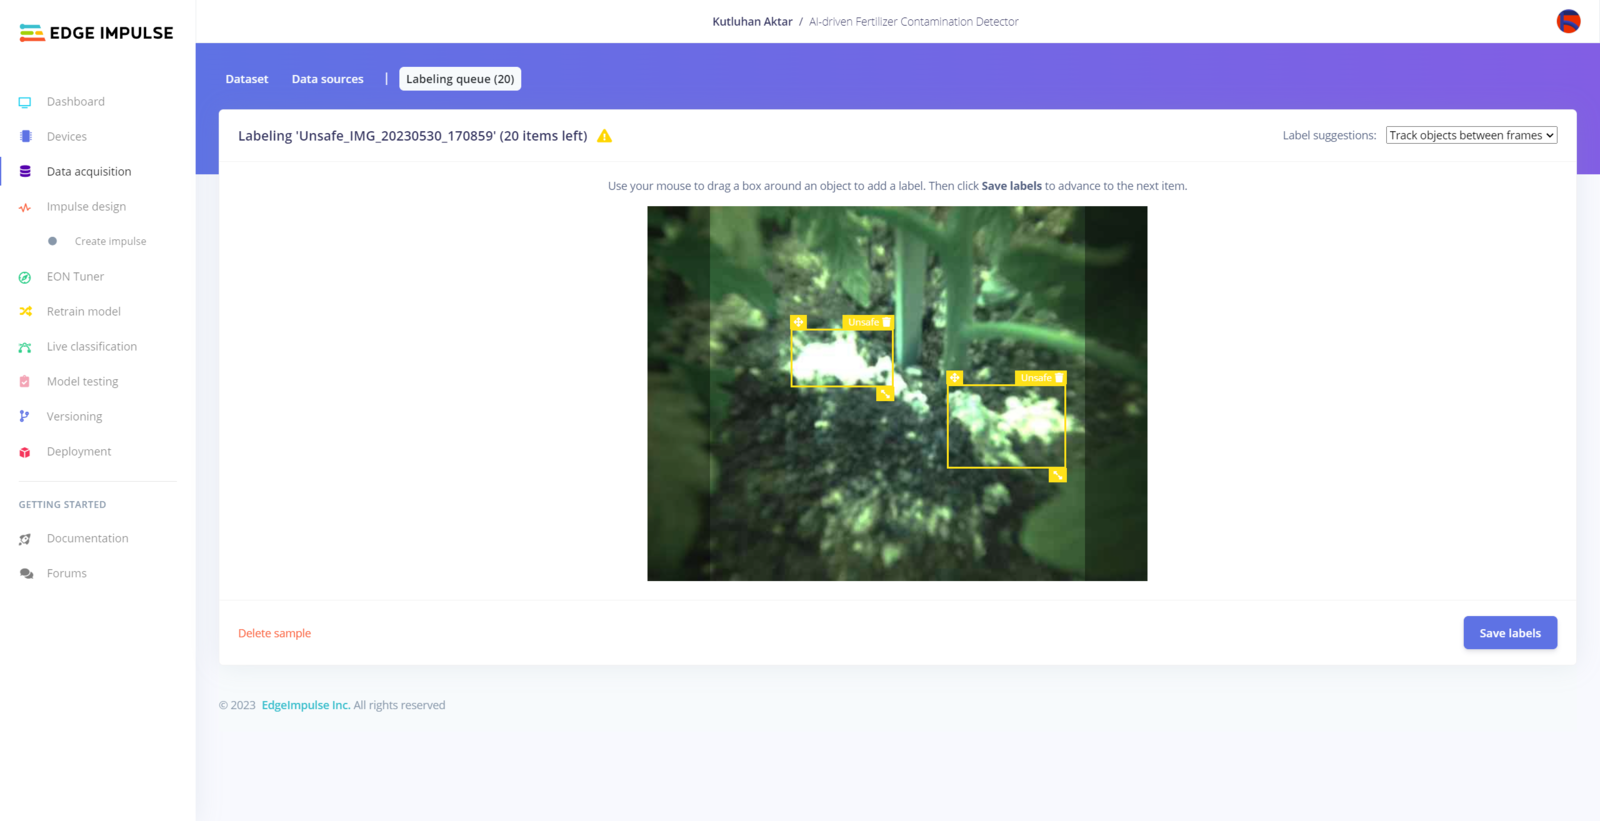
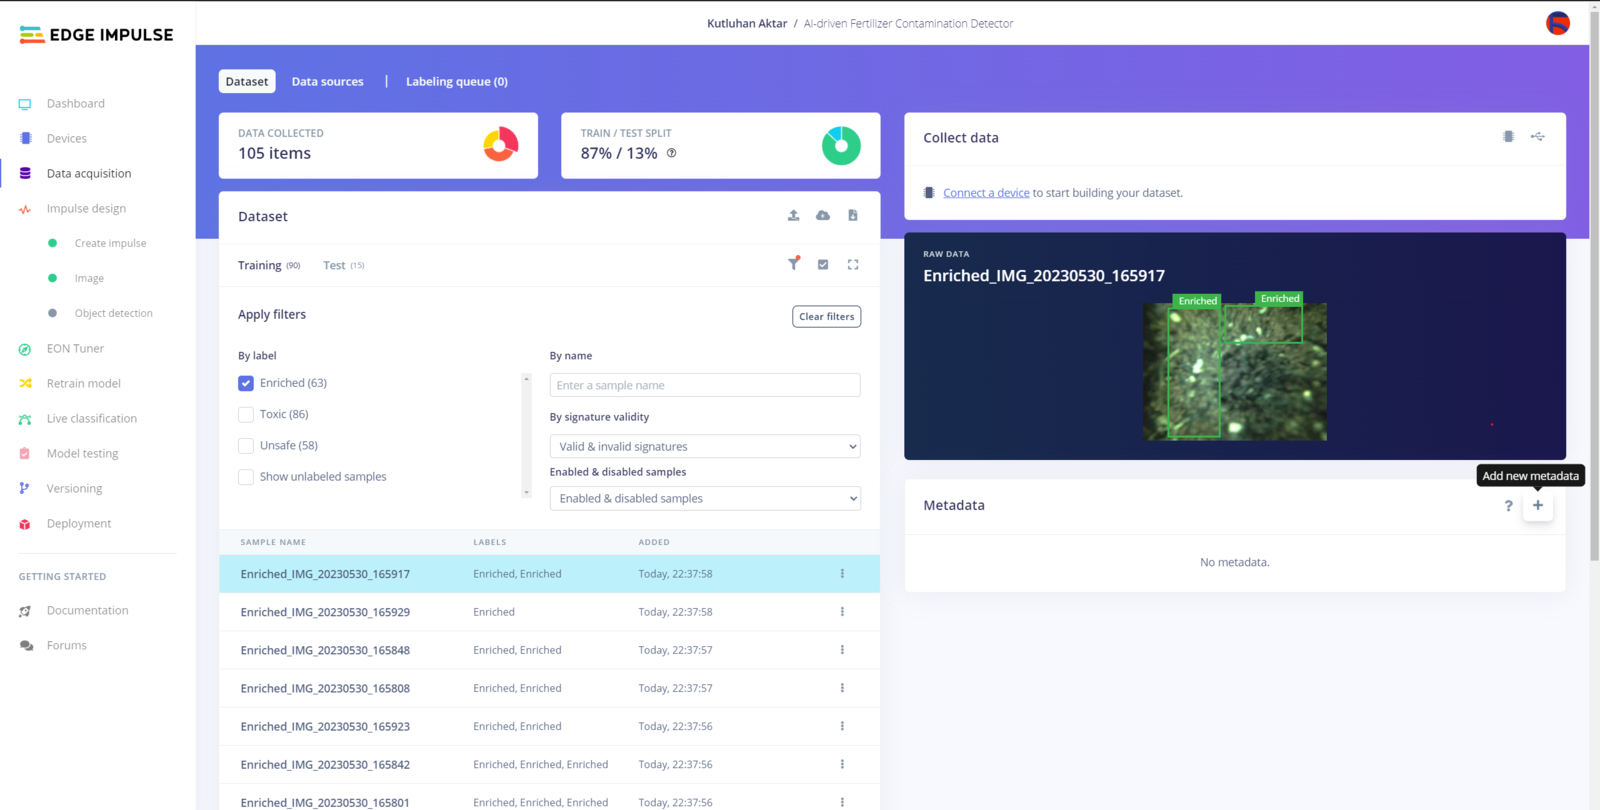
Step 6.1: Uploading images (samples) to Edge Impulse and labeling objects
After collecting training and testing image samples, I uploaded them to my project on Edge Impulse. Then, I labeled each target object on the image samples. :hash: First of all, sign up for Edge Impulse and create a new project.

Step 6.2: Training the FOMO model on the fertilizer-exerted soil images
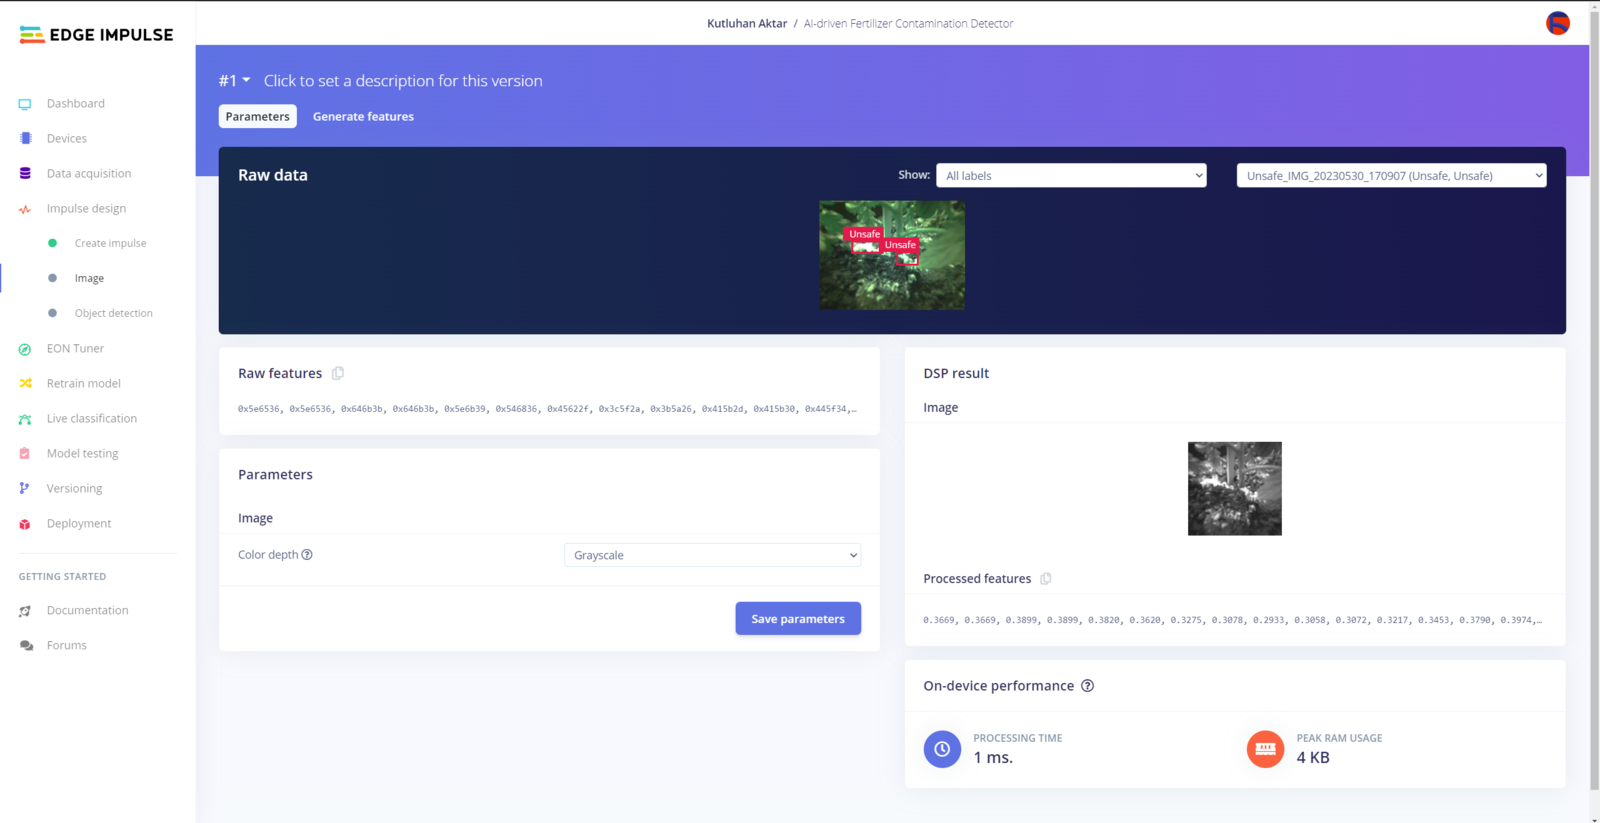
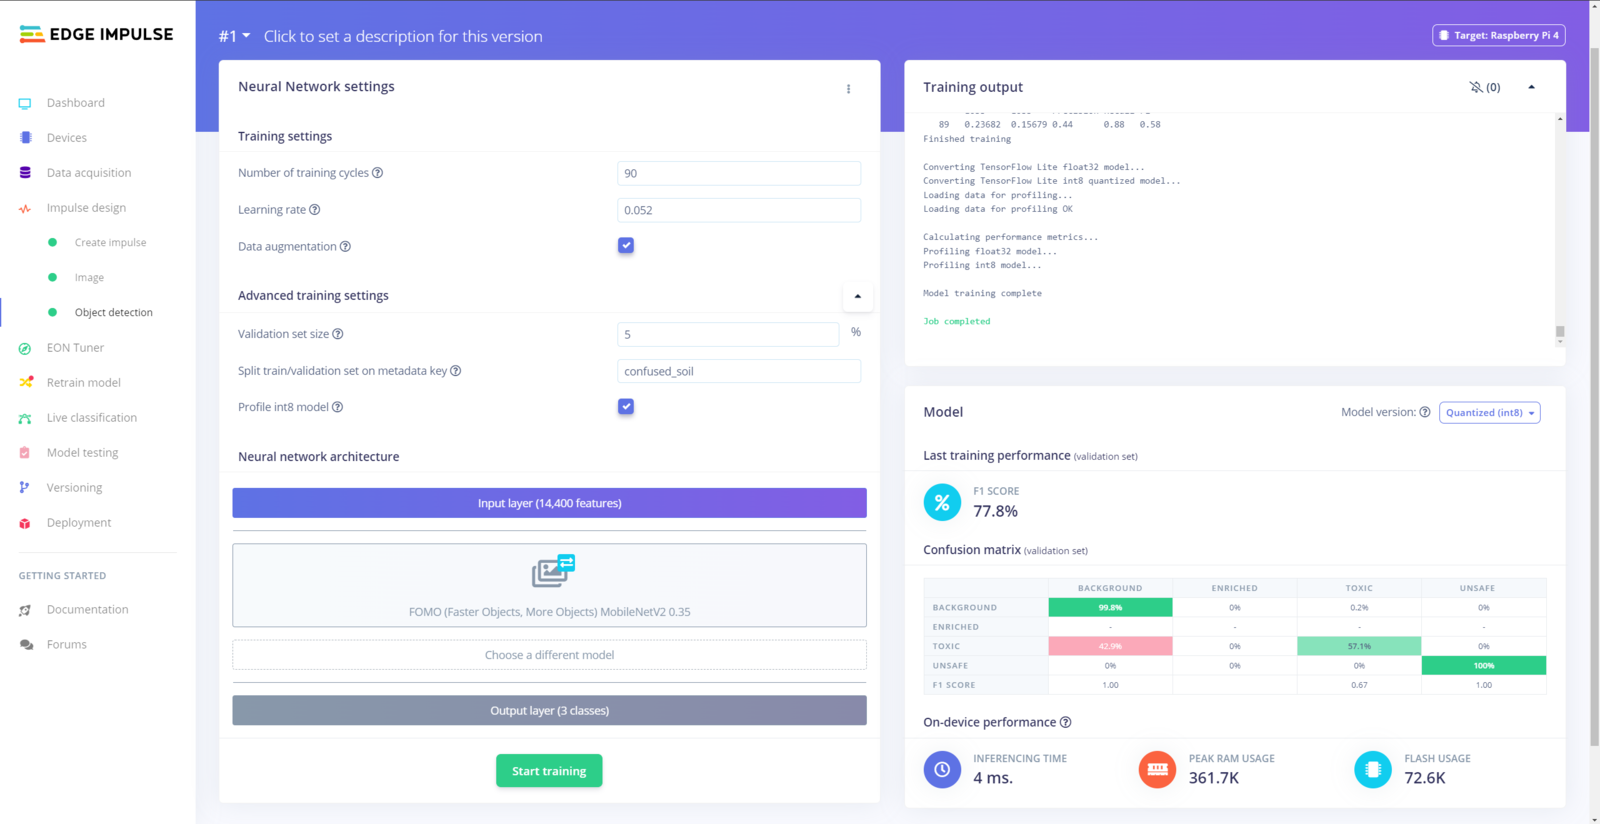
After labeling target objects on my training and testing samples successfully, I designed an impulse and trained it on detecting the excessive use of chemical fertilizers in relation to organic fertilizers. An impulse is a custom neural network model in Edge Impulse. I created my impulse by employing the Image preprocessing block and the Object Detection (Images) learning block. The Image preprocessing block optionally turns the input image format to grayscale and generates a features array from the raw image. The Object Detection (Images) learning block represents a machine learning algorithm that detects objects on the given image, distinguished between model labels. :hash: Go to the Create impulse page and set image width and height parameters to 120. Then, select the resize mode parameter as Fit shortest axis so as to scale (resize) given training and testing image samples. :hash: Select the Image preprocessing block and the Object Detection (Images) learning block. Finally, click Save Impulse.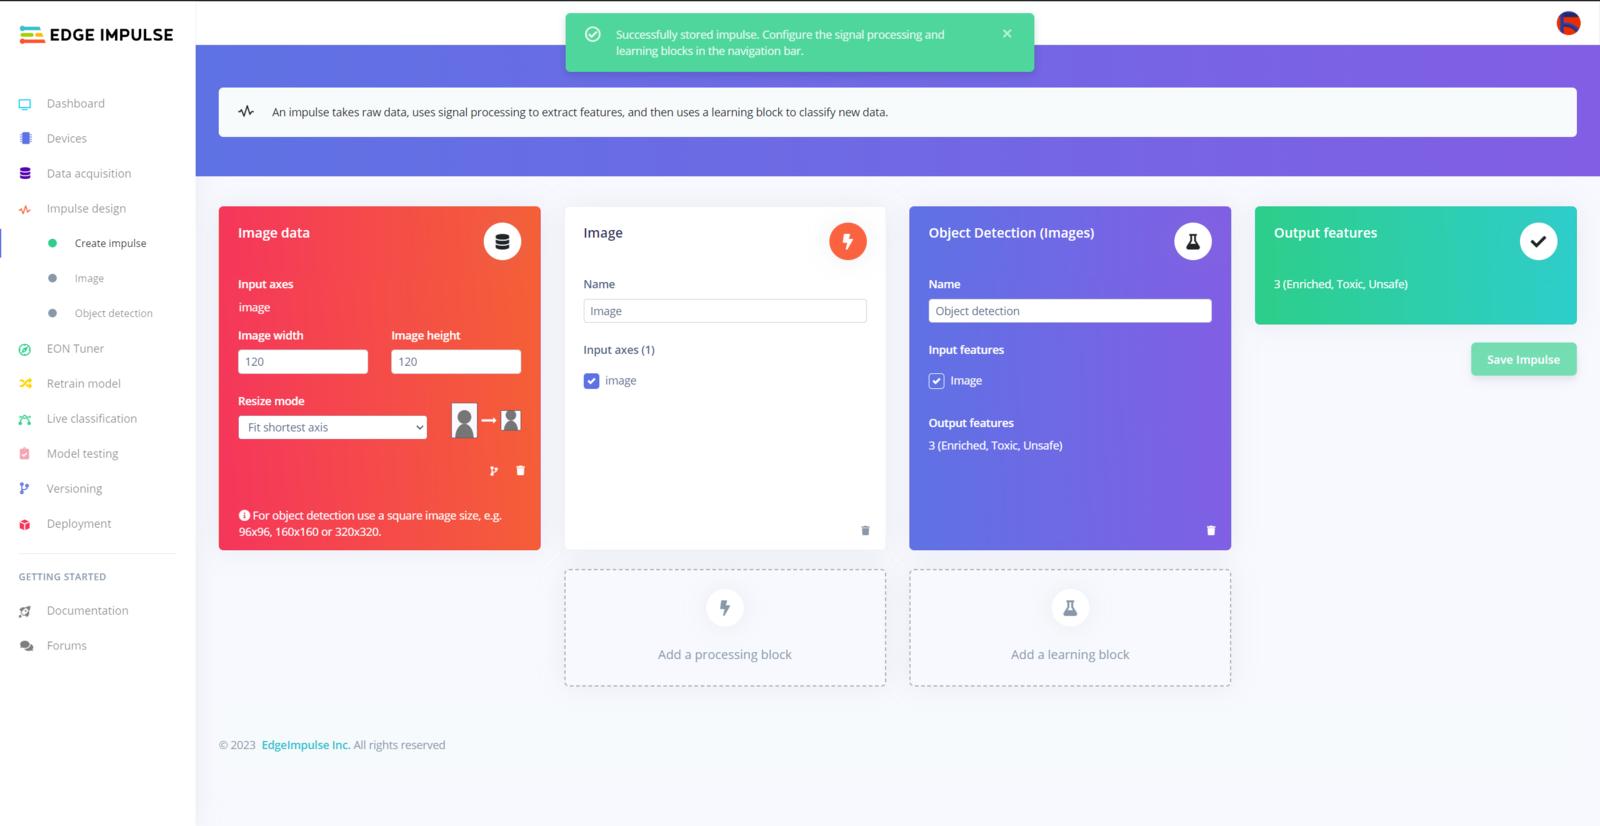

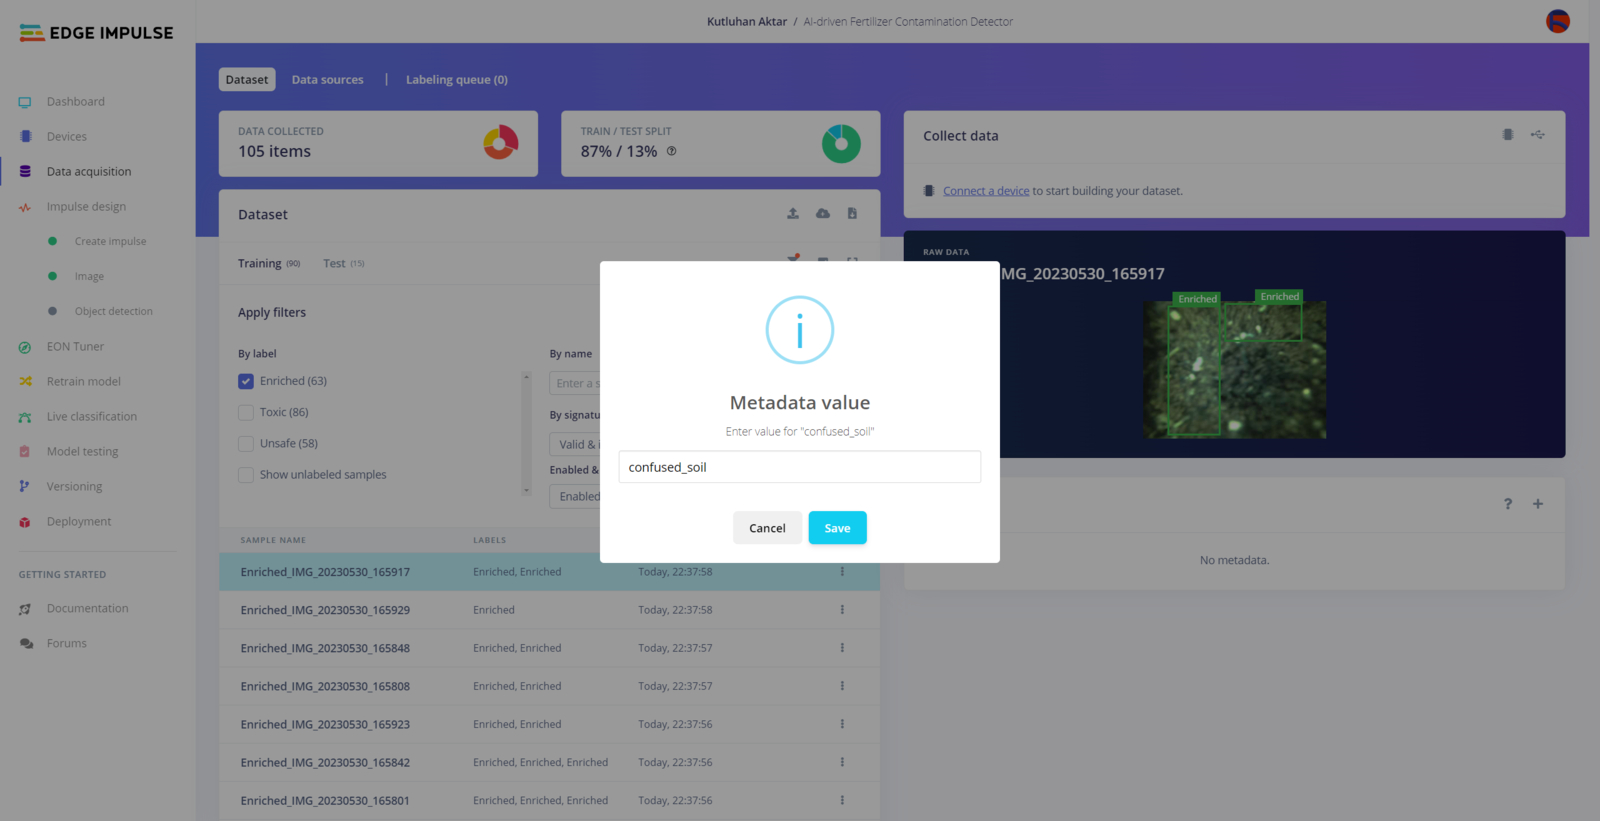
- confused_soil ➡ confused_soil

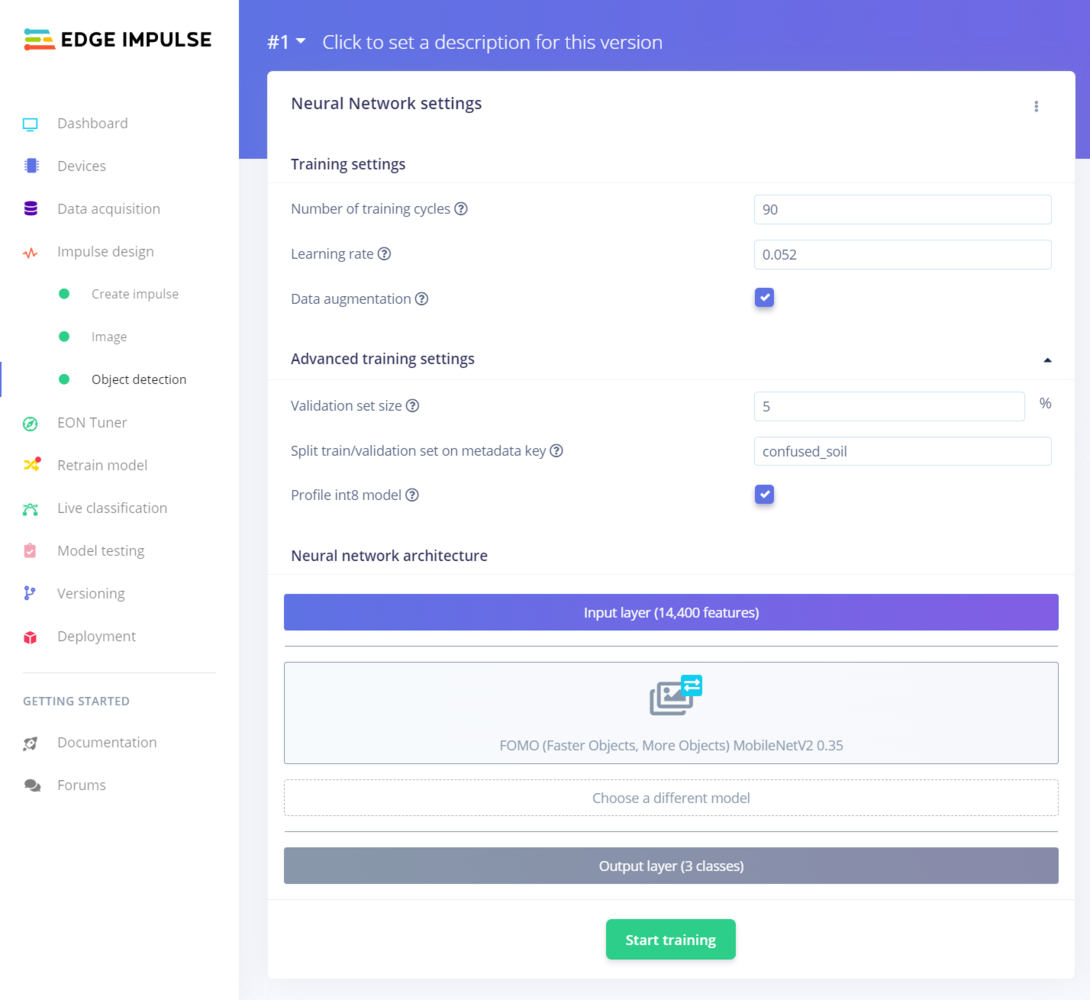
- Number of training cycles ➡ 90
- Learning rate ➡ 0.052
- Validation set size ➡ 5
- Split train/validation set on metadata key ➡ confused_soil
- FOMO (Faster Objects, More Objects) MobileNetV2 0.35
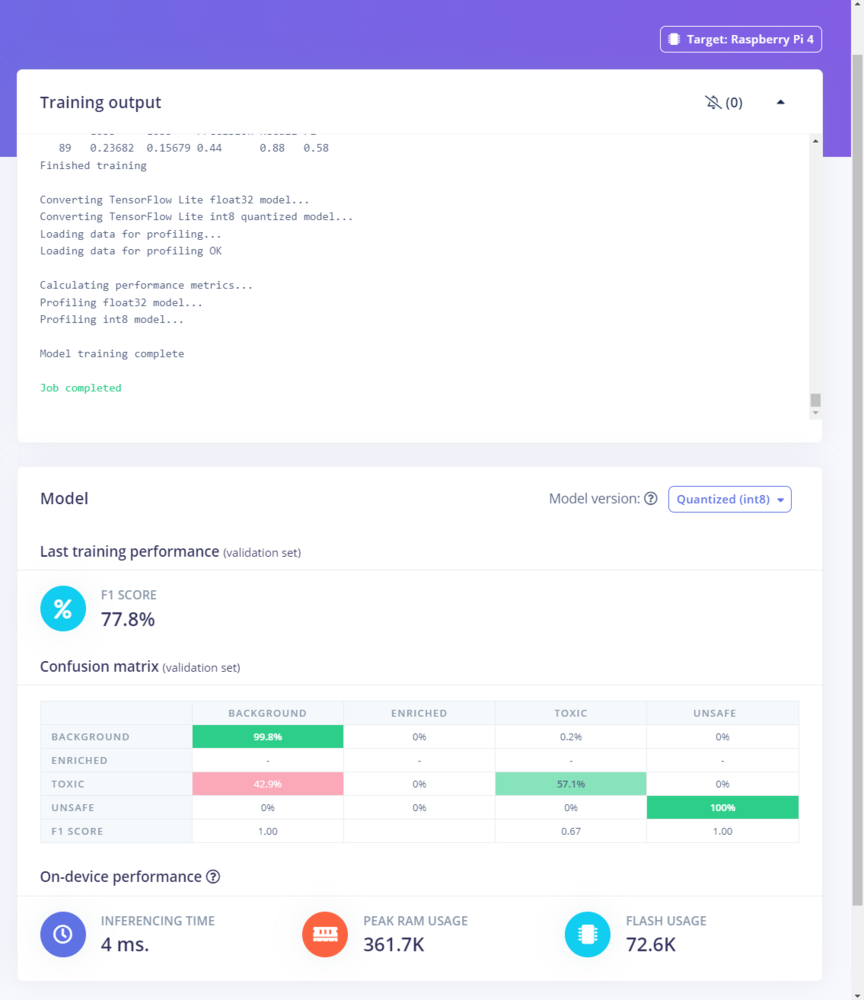
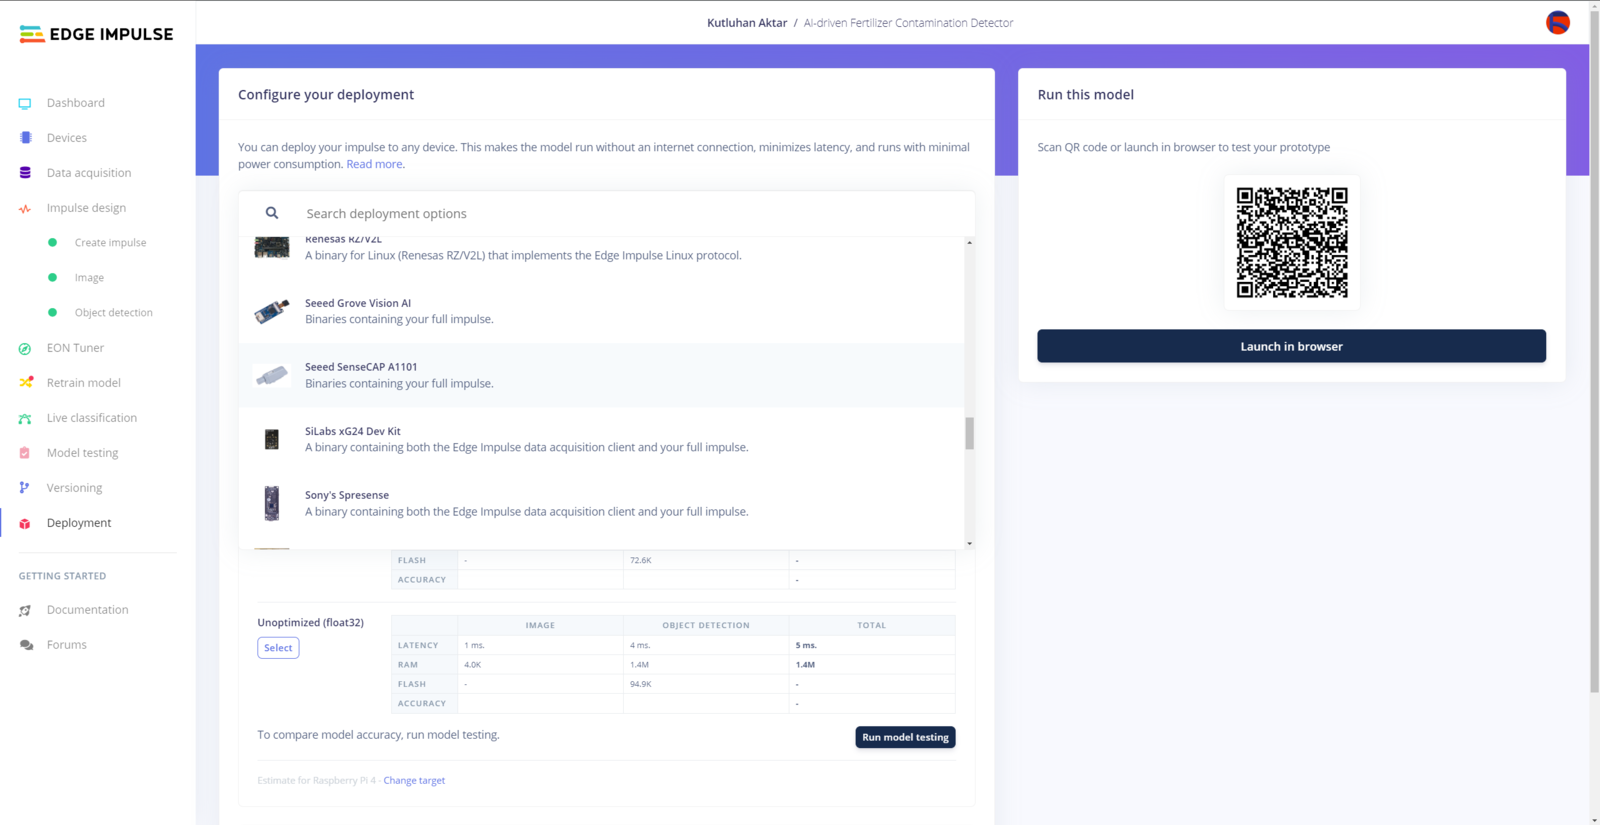
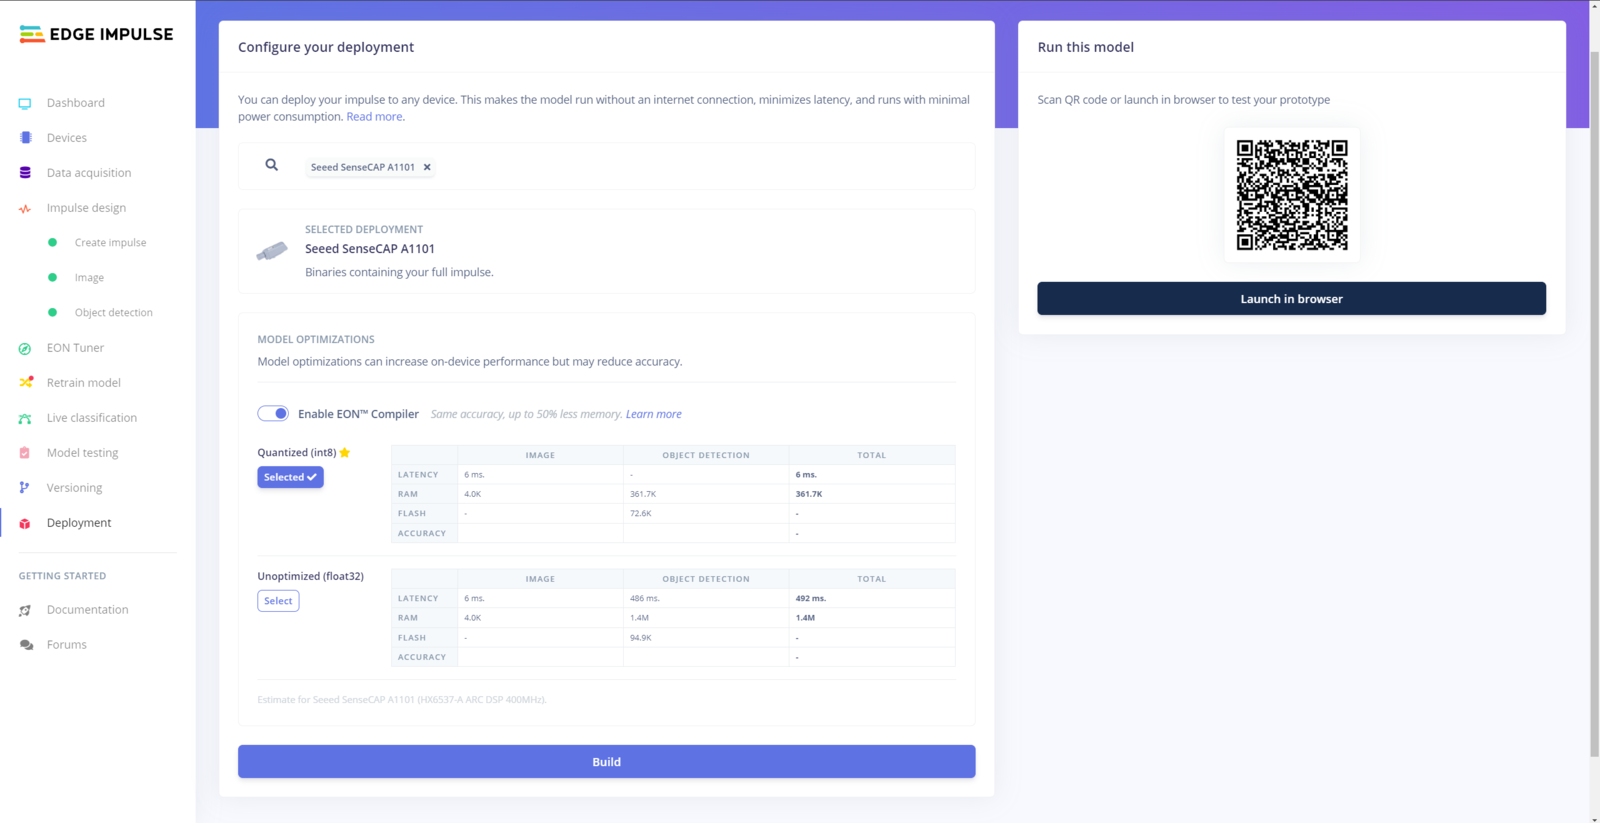
Step 6.3: Evaluating the model accuracy and deploying the model
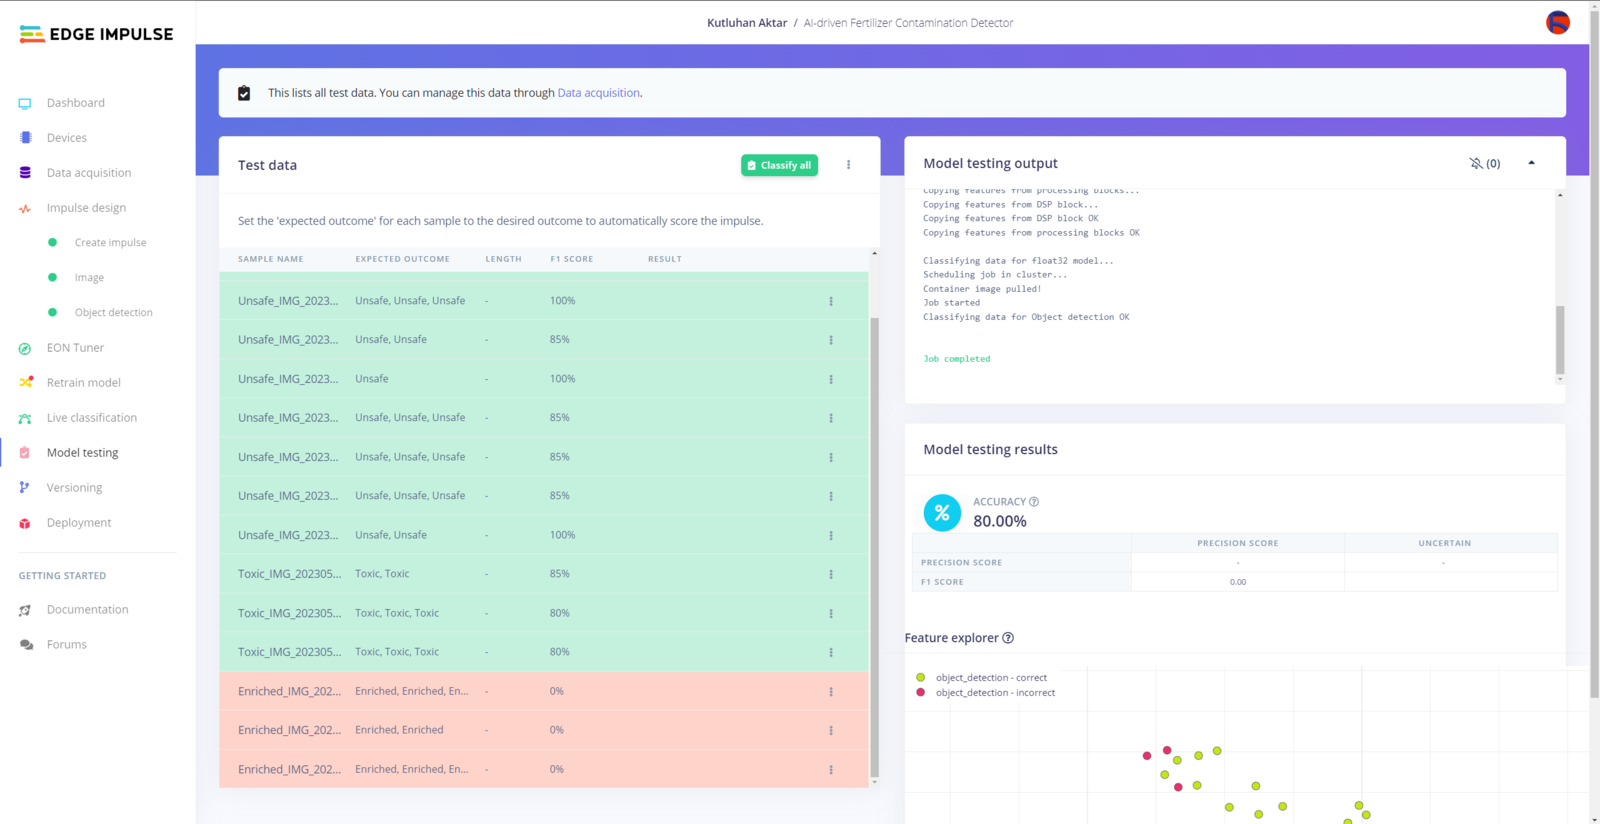
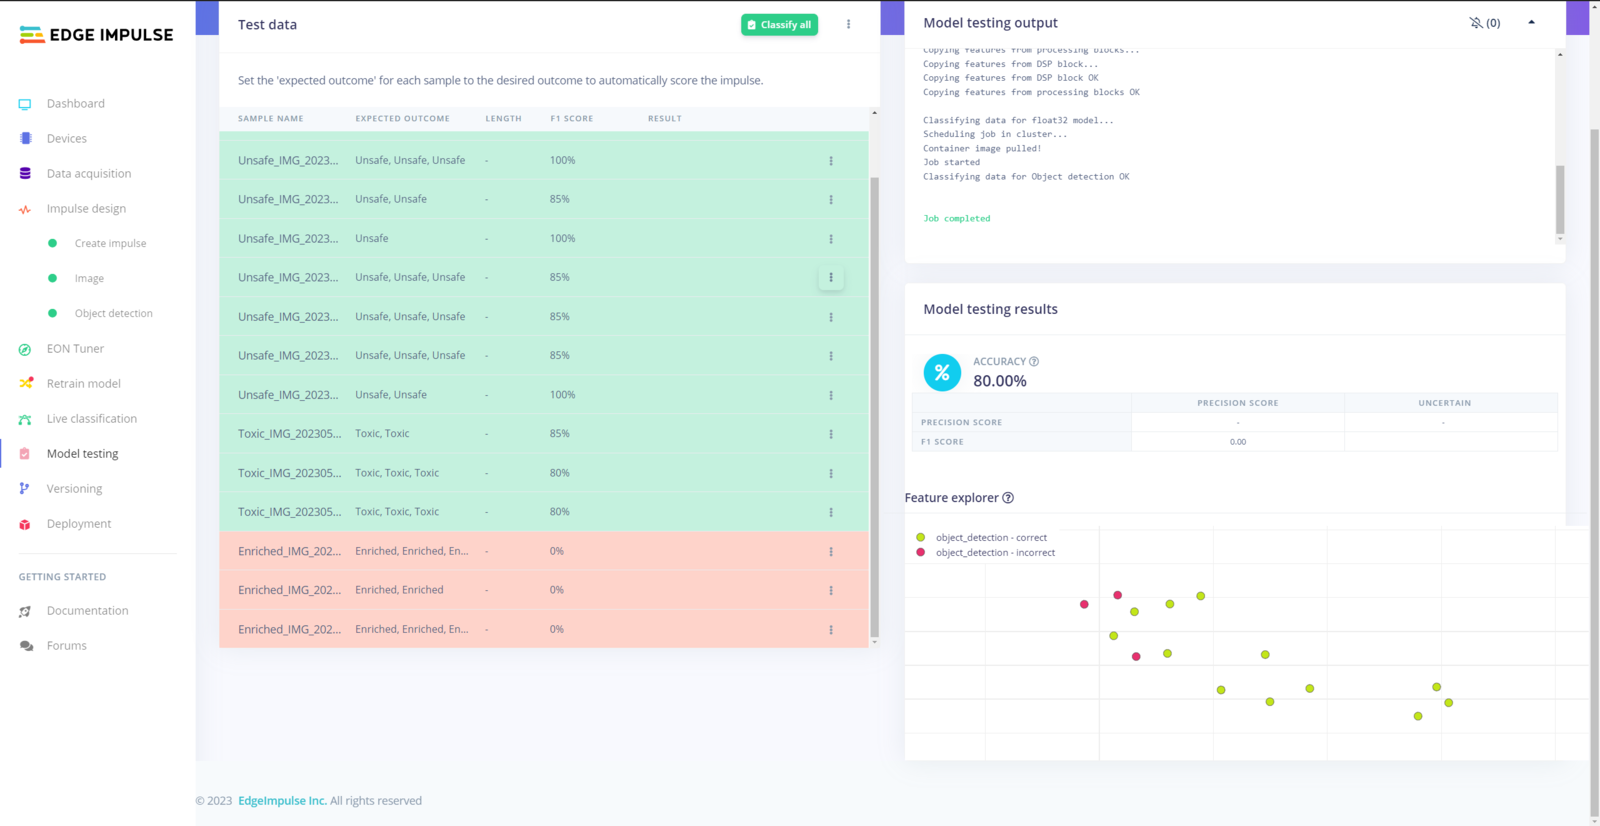
After building and training my object detection model, I tested its accuracy and validity by utilizing testing image samples. The evaluated accuracy of the model is 80%. :hash: To validate the trained model, go to the Model testing page and click Classify all.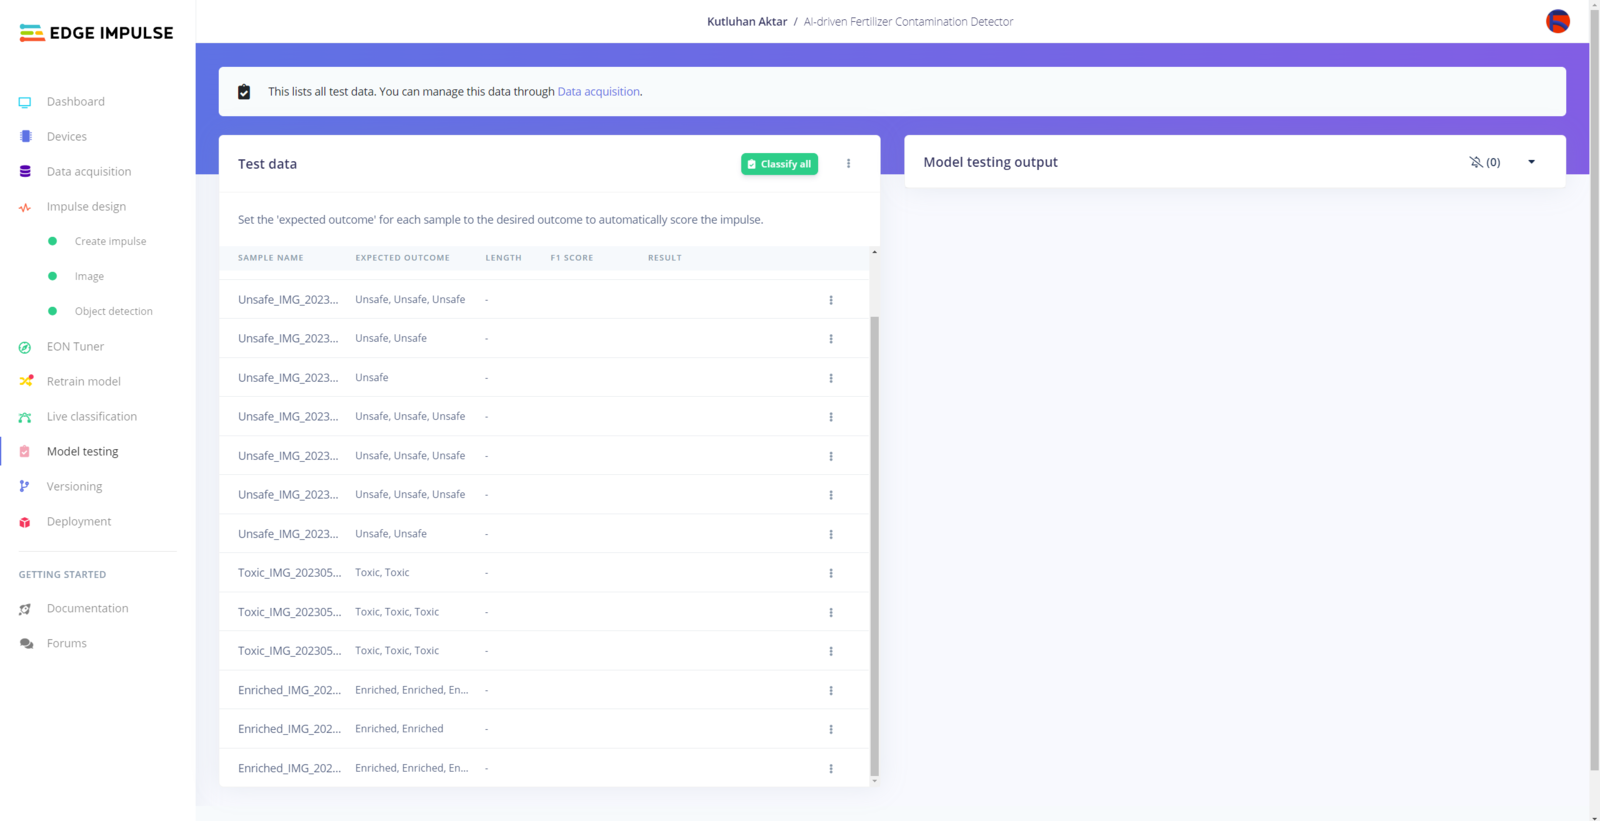
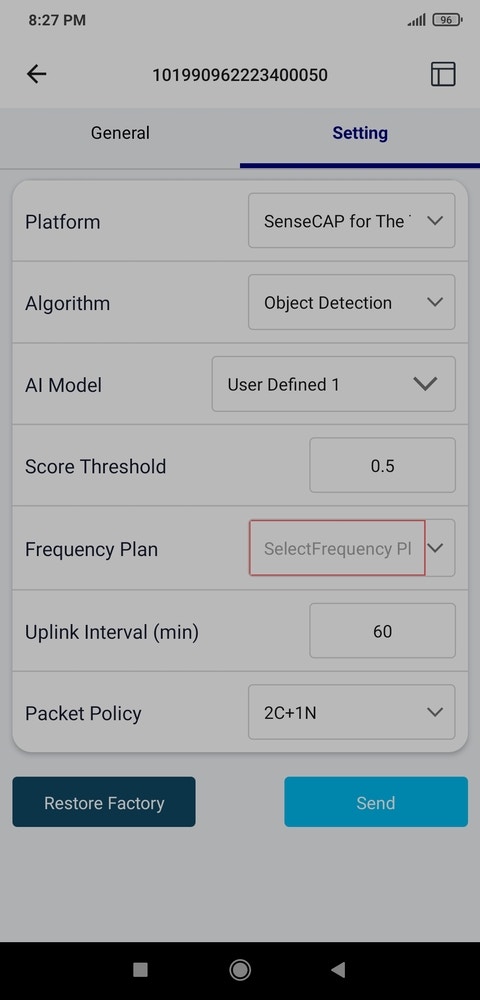
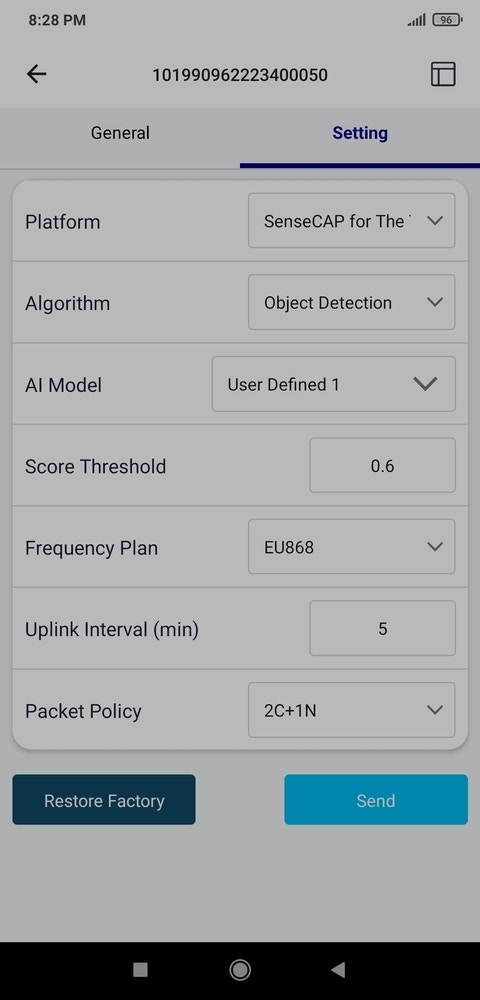
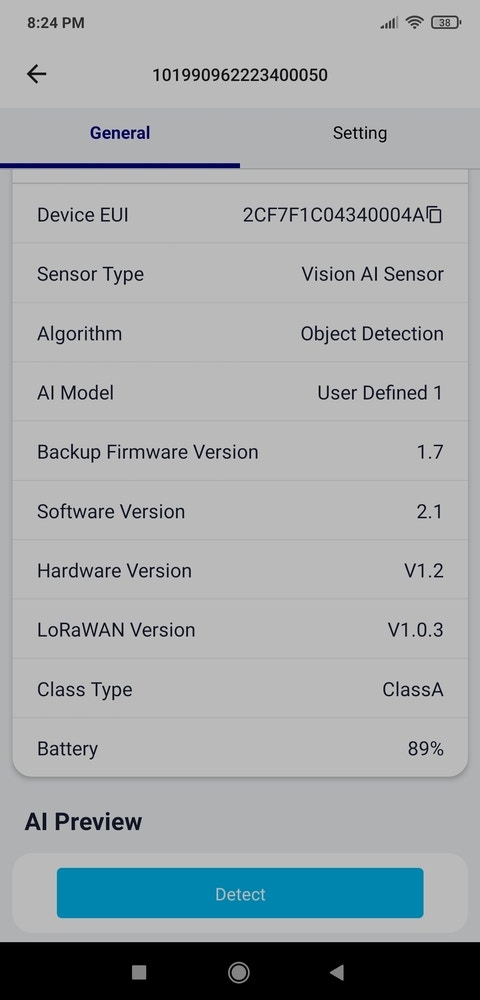
Step 7: Connecting SenseCAP A1101 to SenseCAP Mate App and setting up the Edge Impulse FOMO model
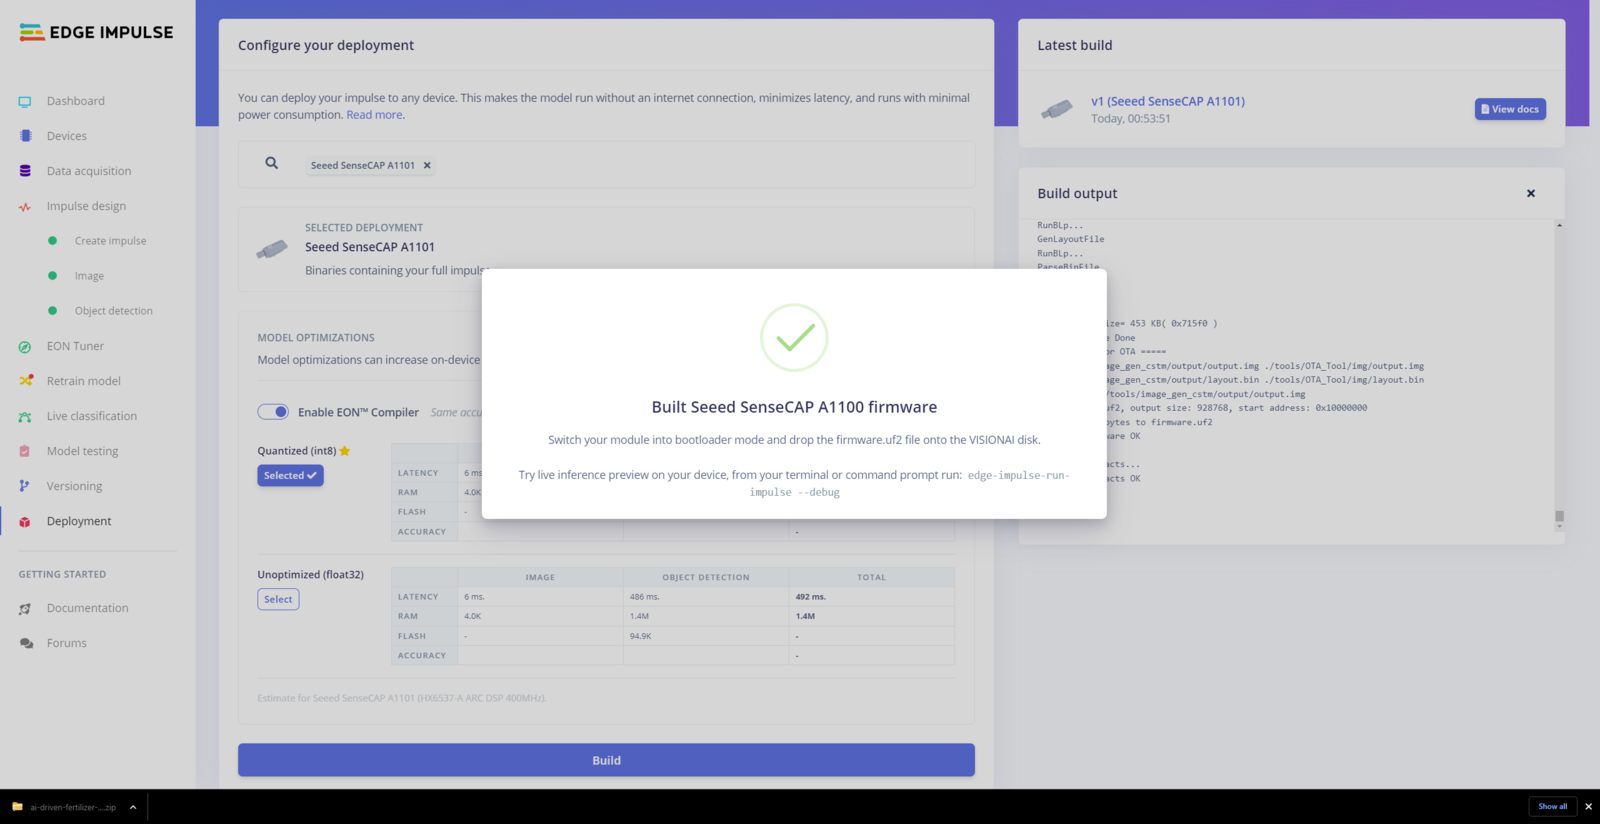
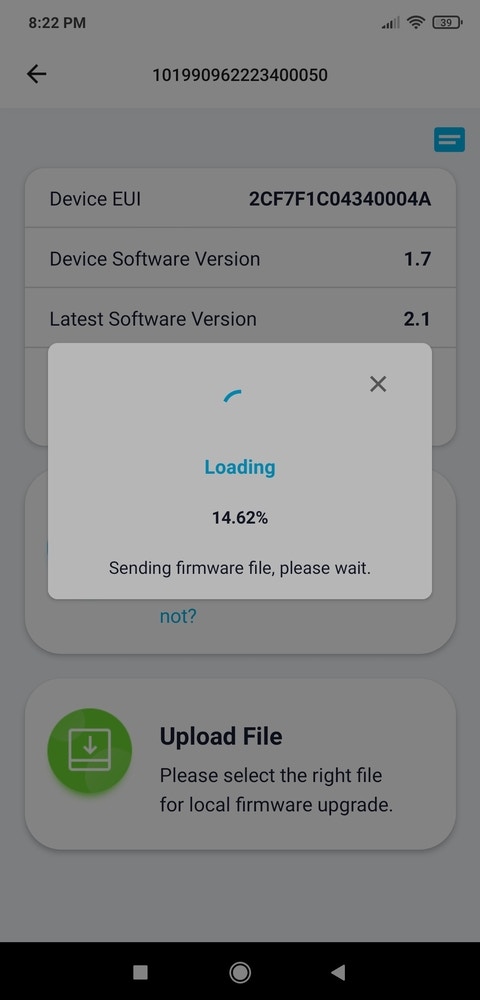
After downloading the supported SenseCAP A1101 firmware — firmware.uf2, follow the instructions shown in Step 5.0 to upload the Edge Impulse object detection model to the storage drive of SenseCAP A1101.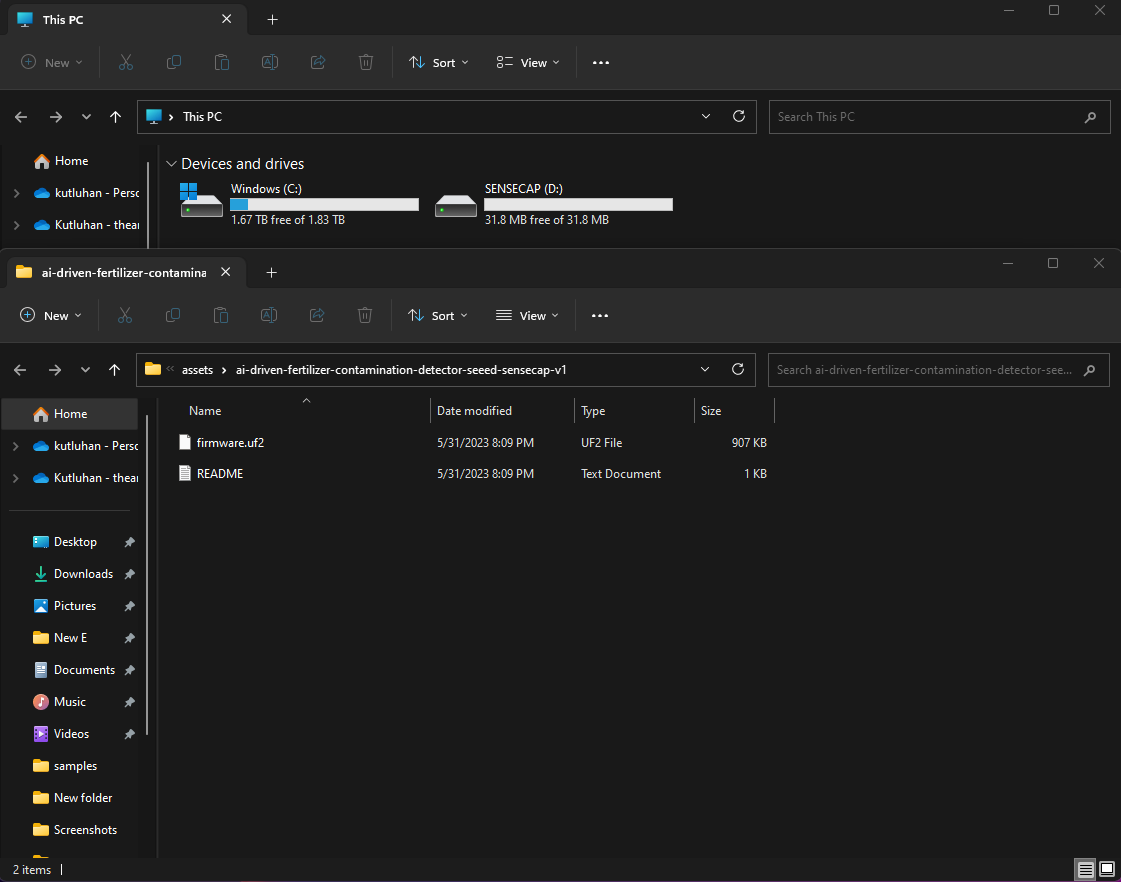

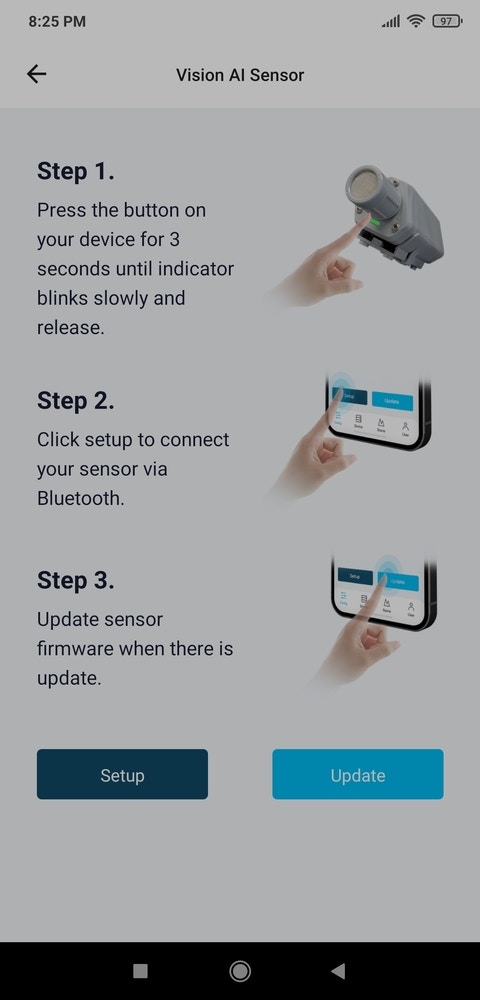

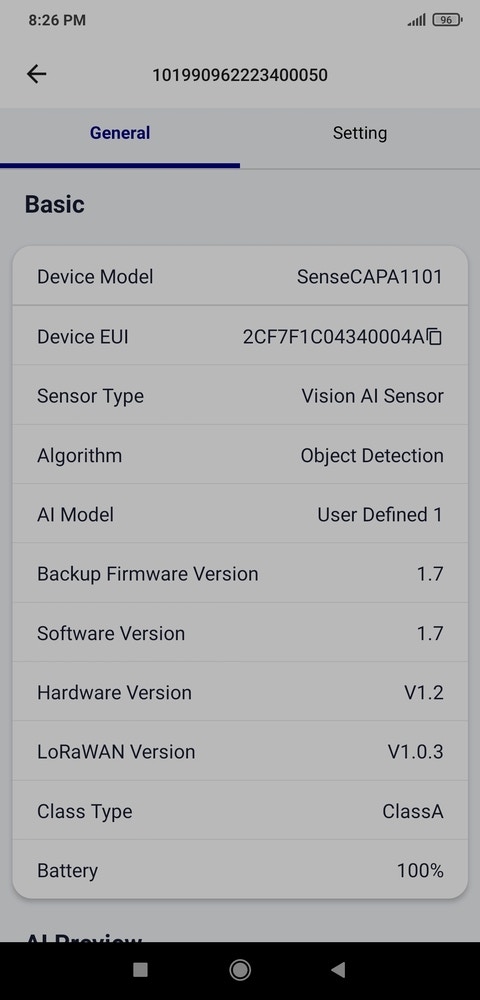
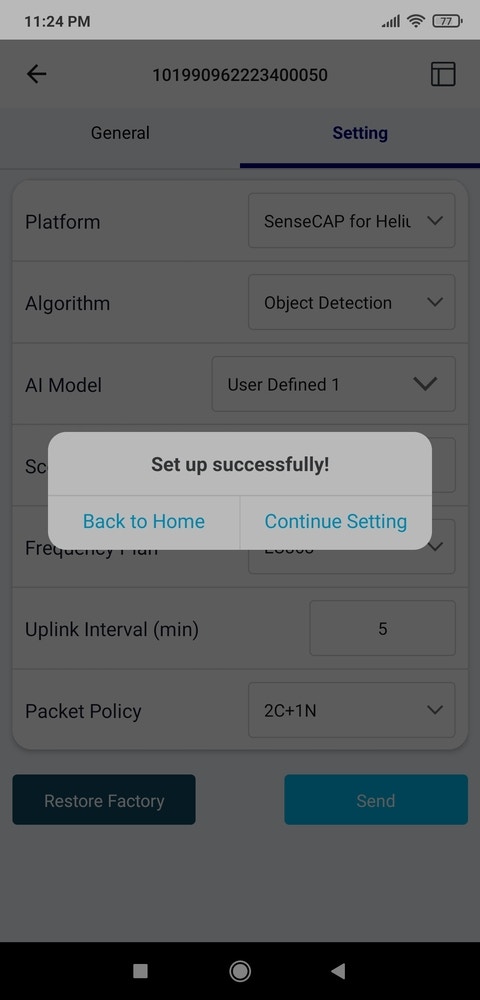
- Algorithm ➡ Object Detection
- AI Model ➡ User Defined 1
- Score Threshold ➡ 0.6
- Uplink Interval (min) ➡ 5
- Packet Policy ➡ 2C+1N

Step 8: Transferring the detection results to the SenseCAP Portal via the Helium LongFi Network
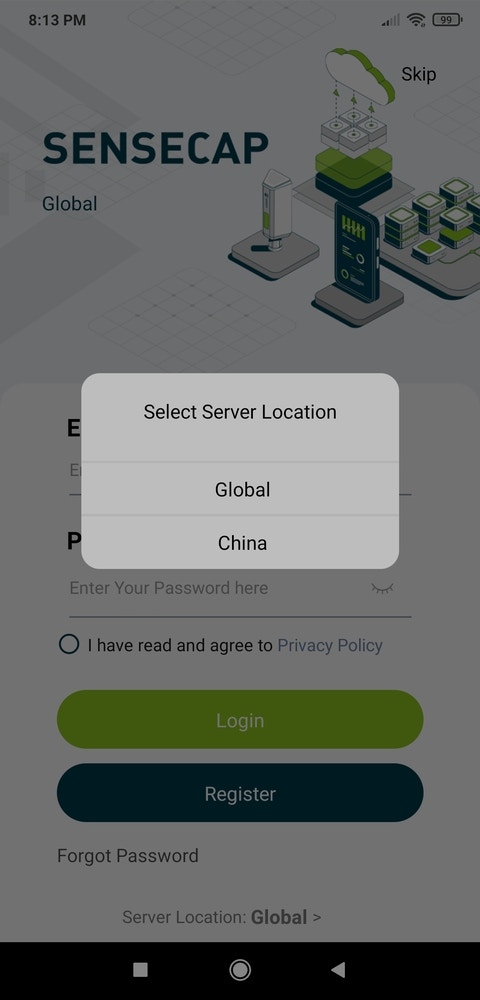
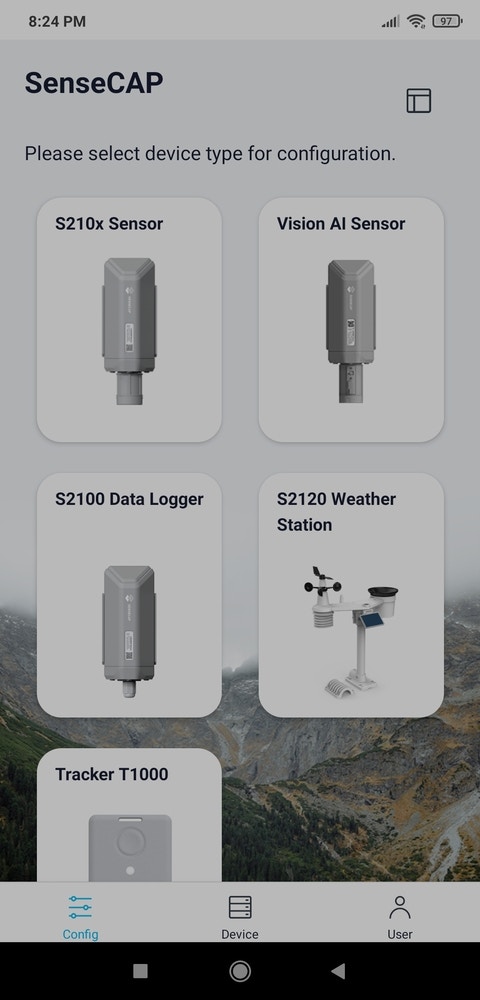
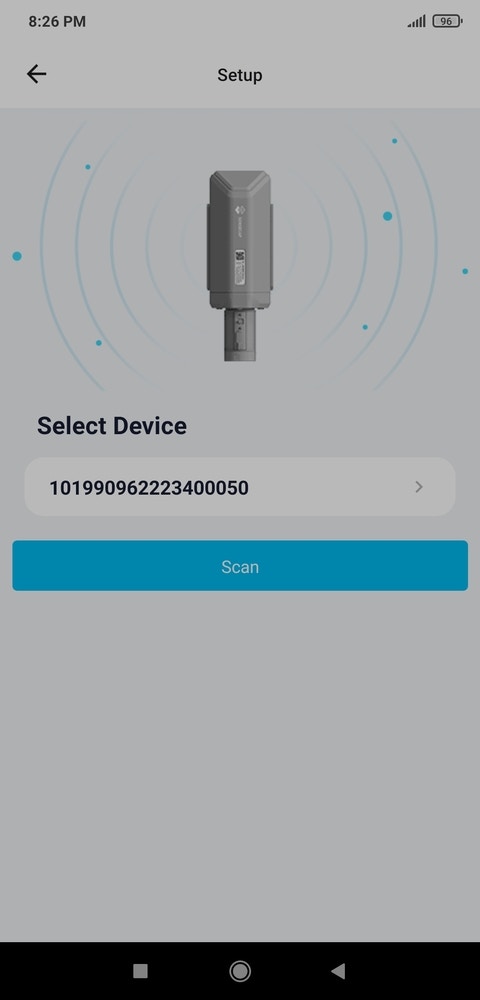
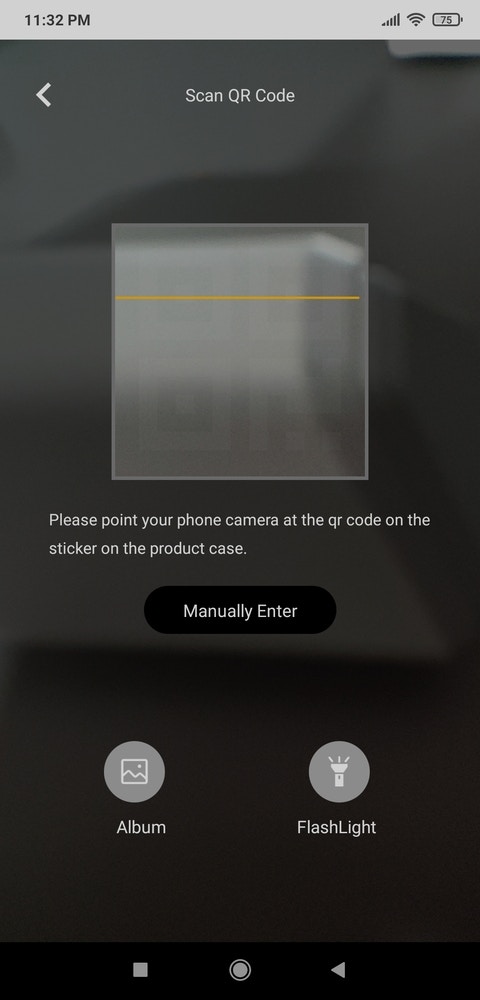
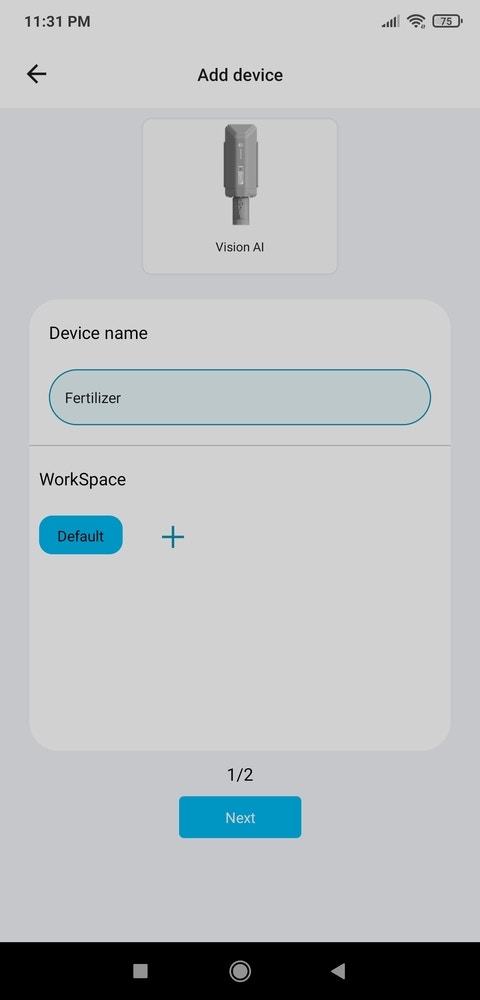
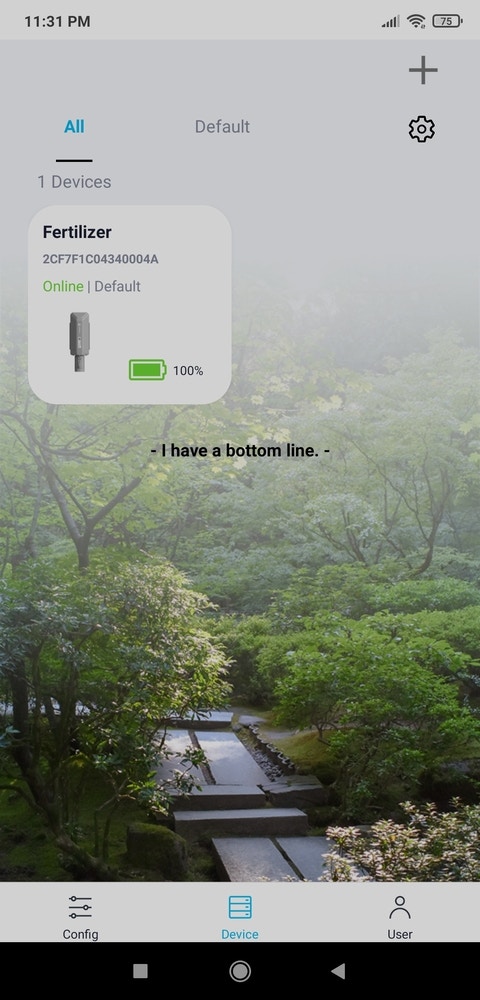
After seeing the Edge Impulse model detection results on the SenseCAP Mate application, I needed to bind SenseCAP A1101 as a new device to my account in order to transfer the detection results as data packets to the SenseCAP Portal via the Helium LongFi Network. :hash: Open the SenseCAP Mate application. :hash: Under Device, click the Add device button.


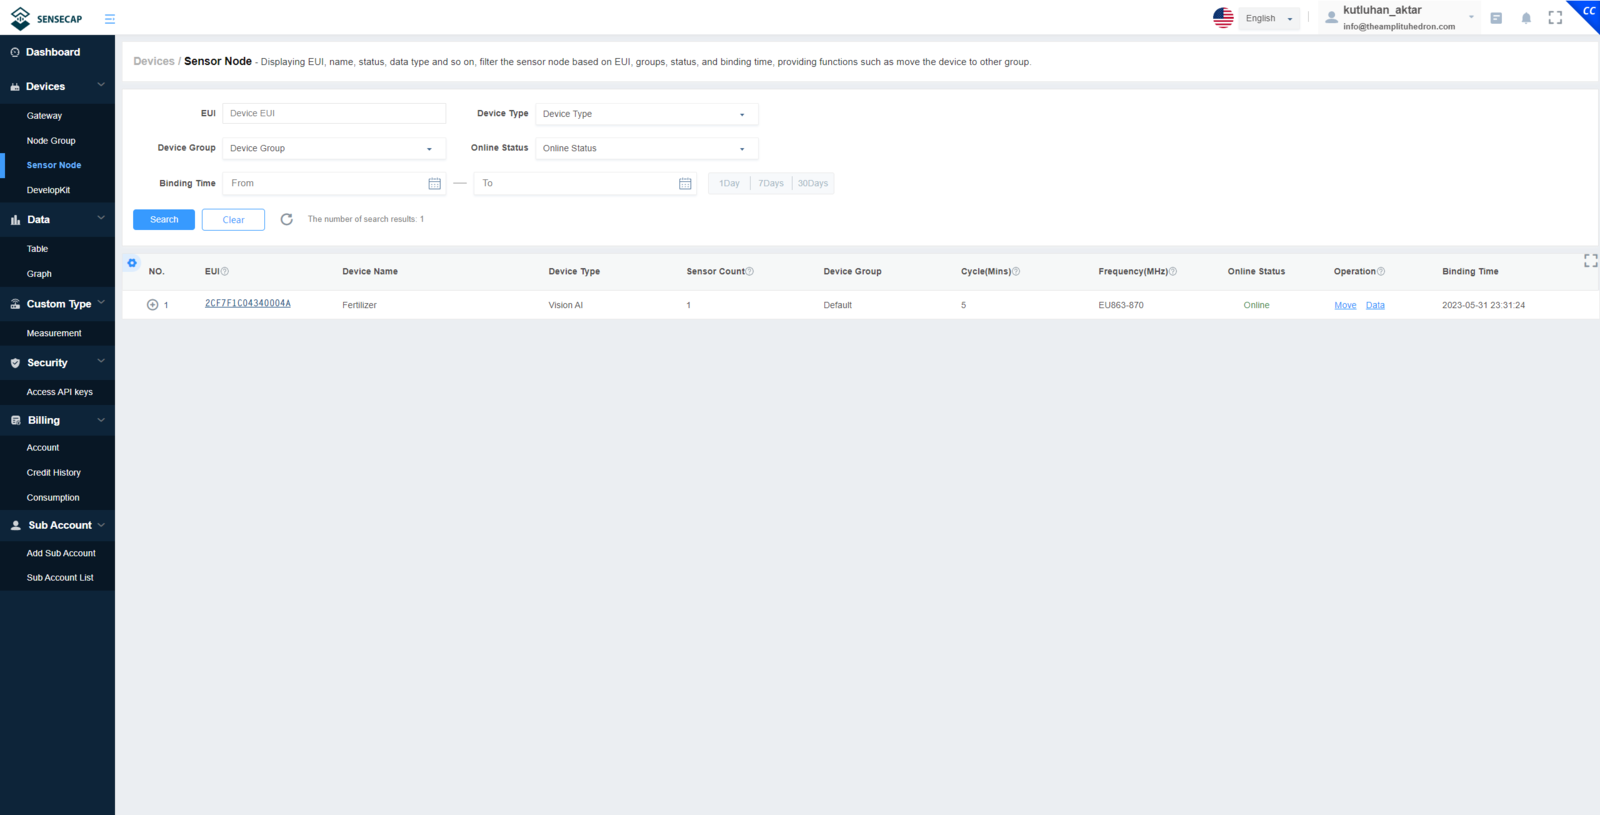
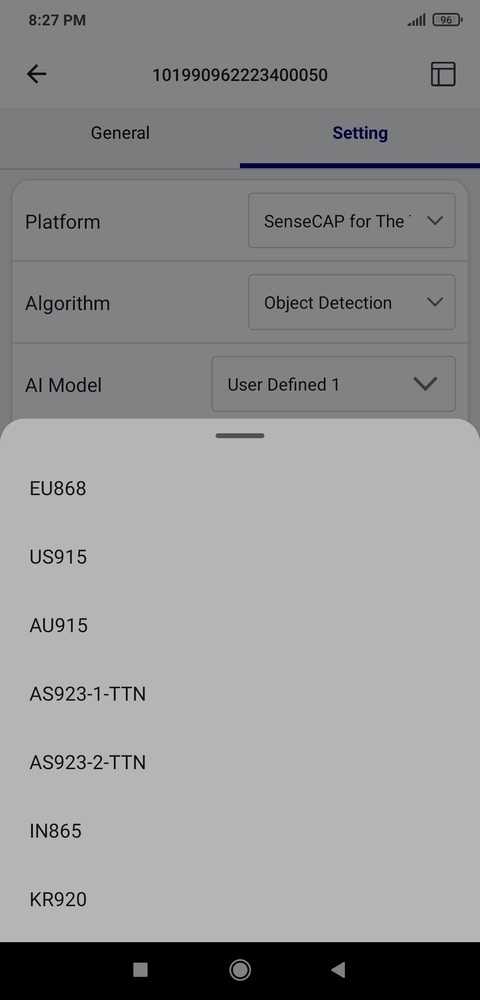
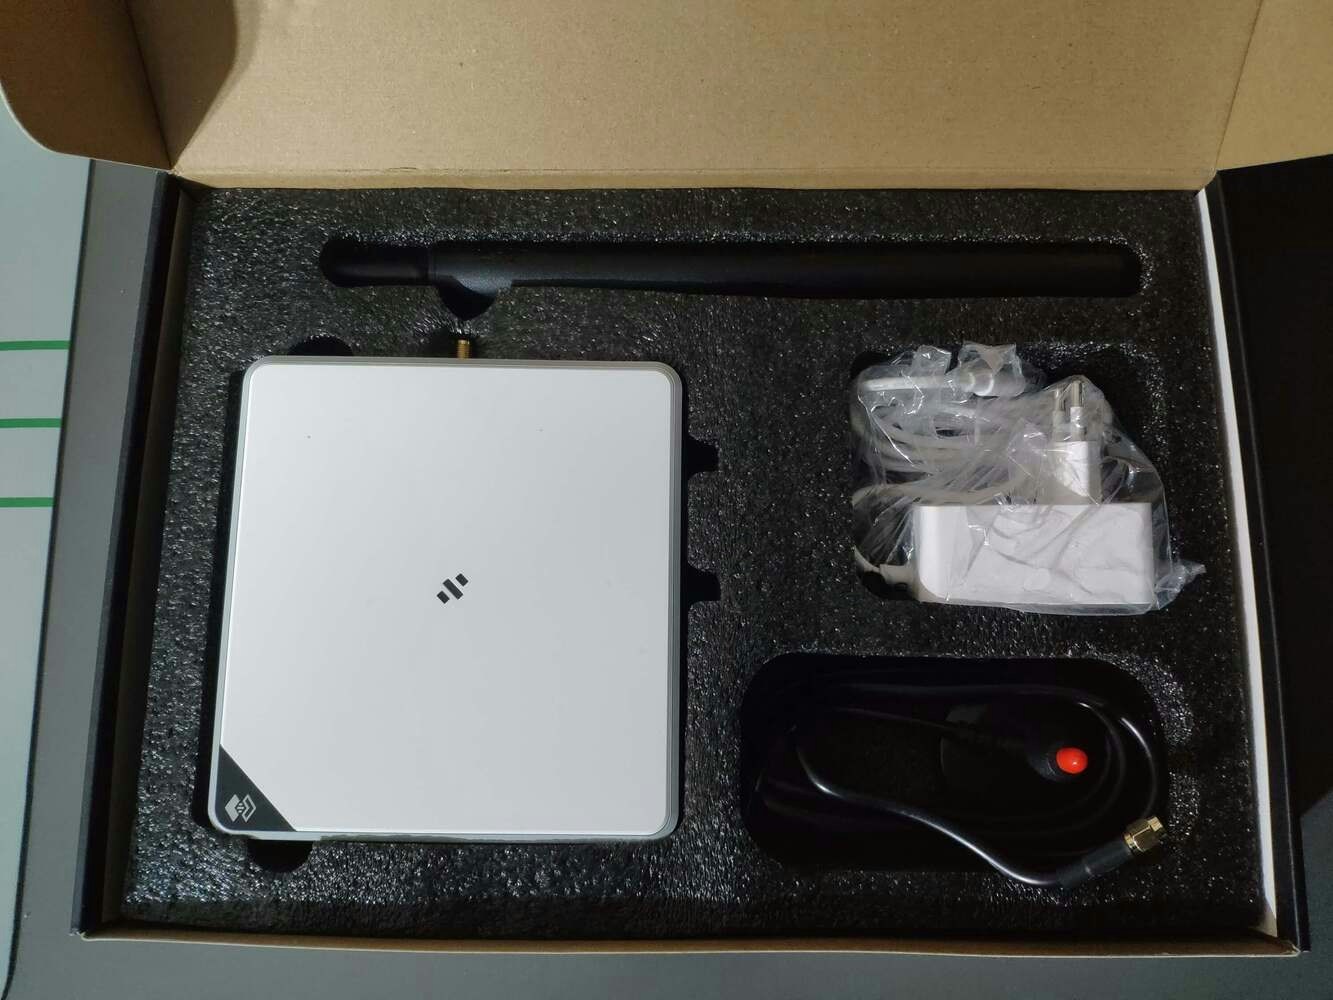
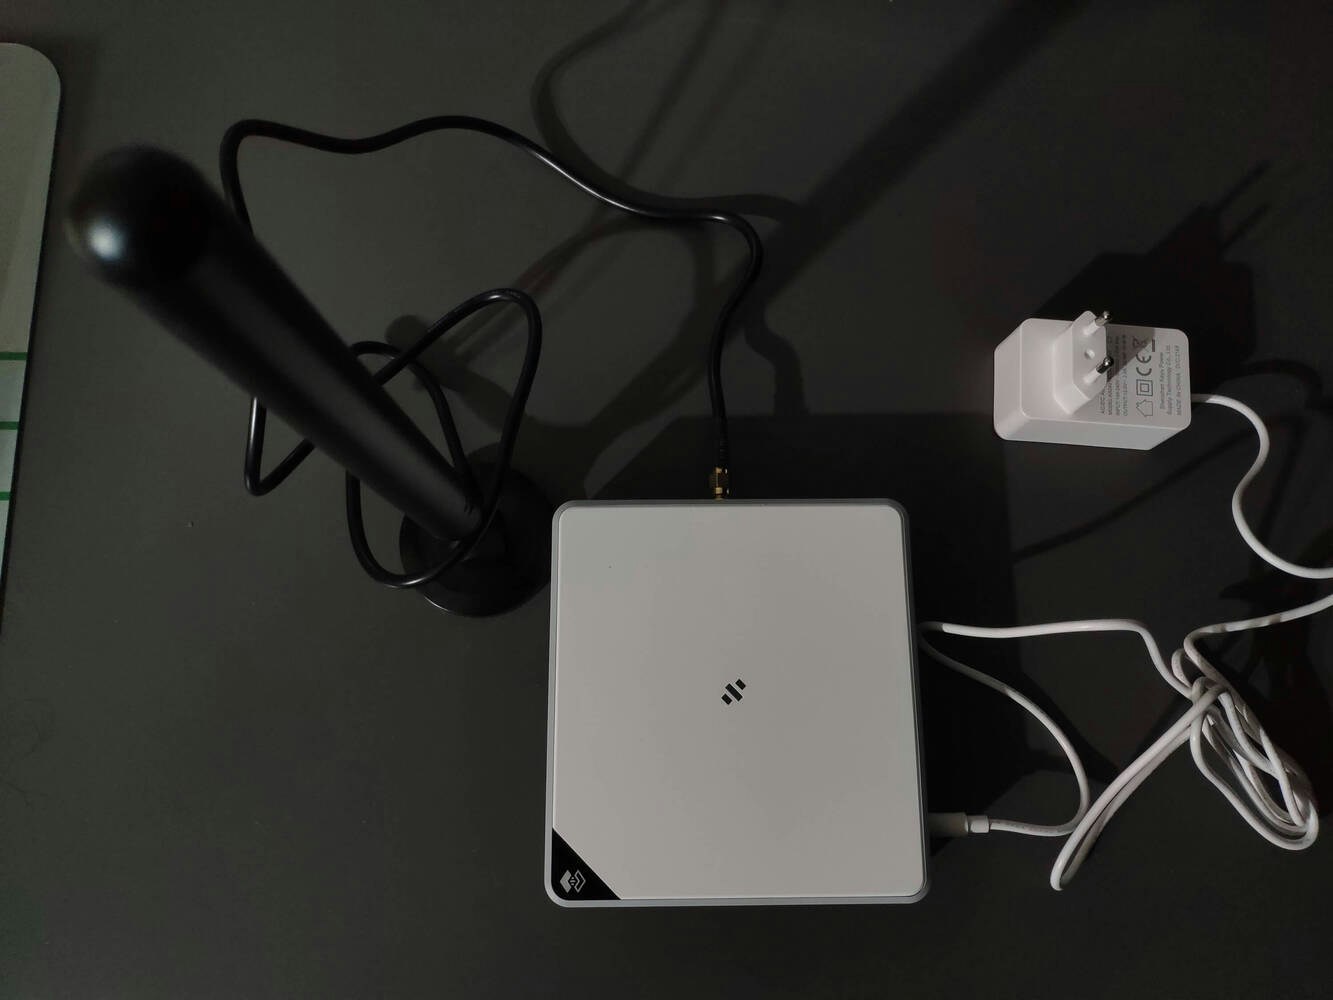
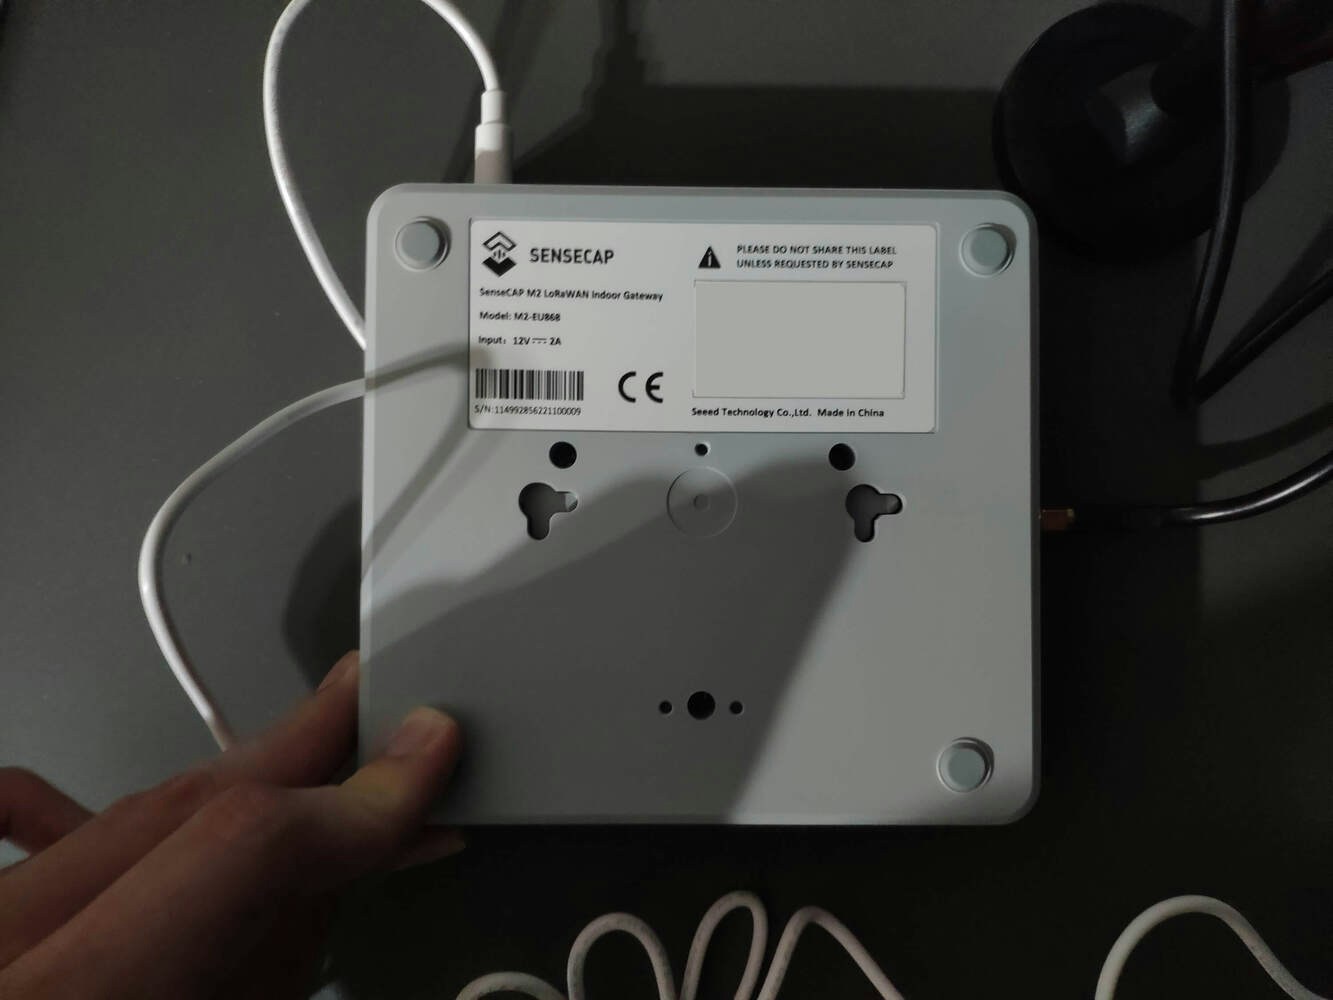
Step 8.1: Activating SenseCAP M2 data-only LoRaWAN gateway (EU868)
After binding SenseCAP A1101 to your SenseCAP Portal account, it should automatically connect to the nearest Helium gateway to transfer the model detection results via the Helium LongFi Network. Nonetheless, if the Helium network does not cover your surroundings, you may need to purchase a Helium gateway. Since Seeed Studio provides various Helium gateways compatible with the SenseCAP Portal, I wanted to show how to activate one of SenseCAP gateways — SenseCAP M2 data-only LoRaWAN indoor gateway (EU868). :hash: First of all, go to Helium World to check whether a Helium gateway covers your surroundings. :hash: If so, you do not need to follow the steps below.
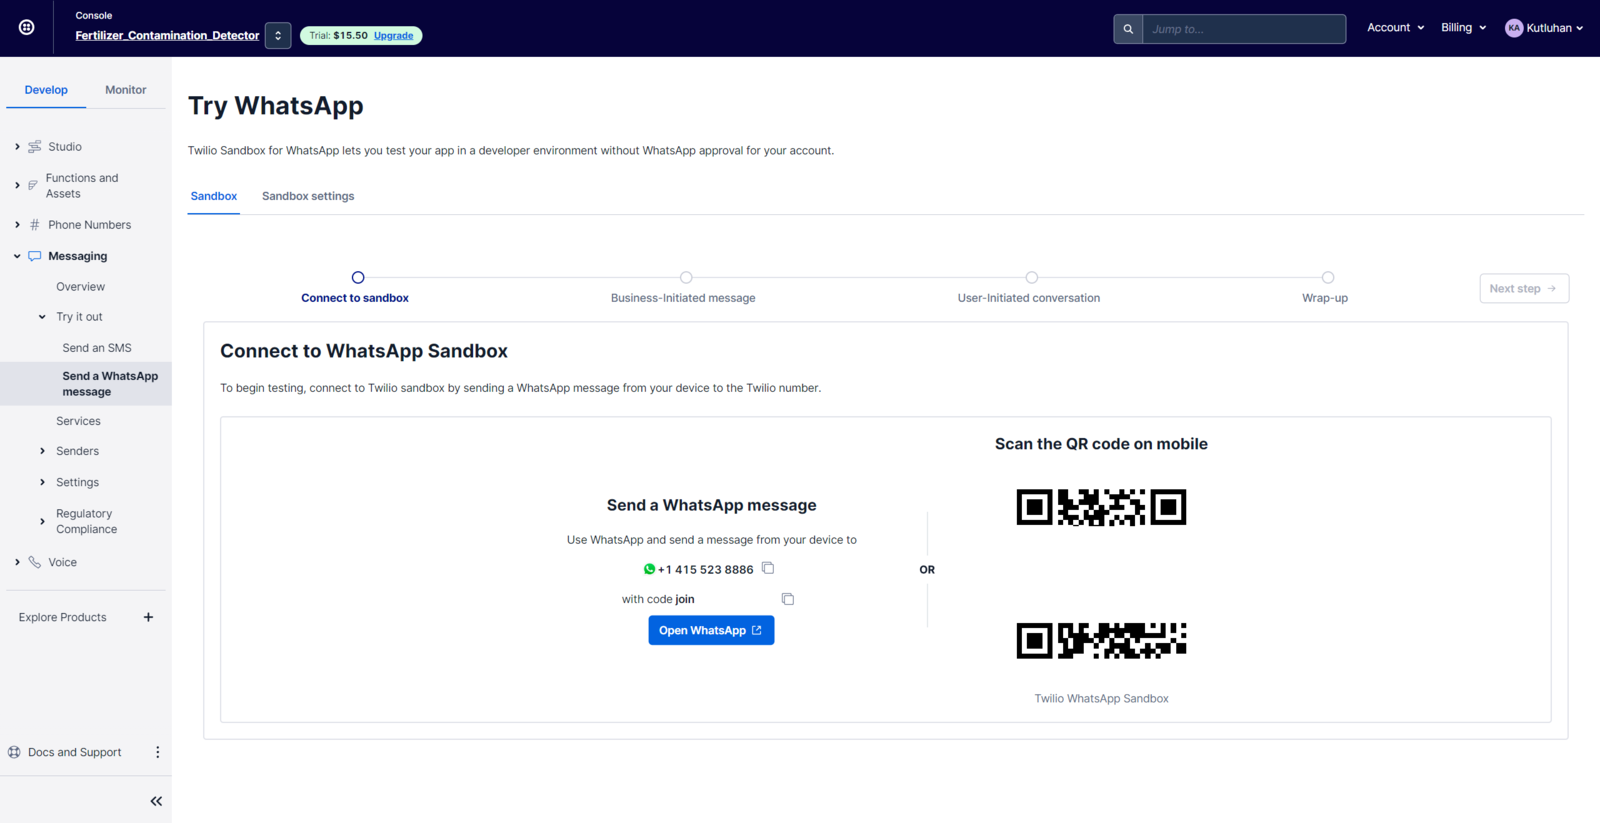
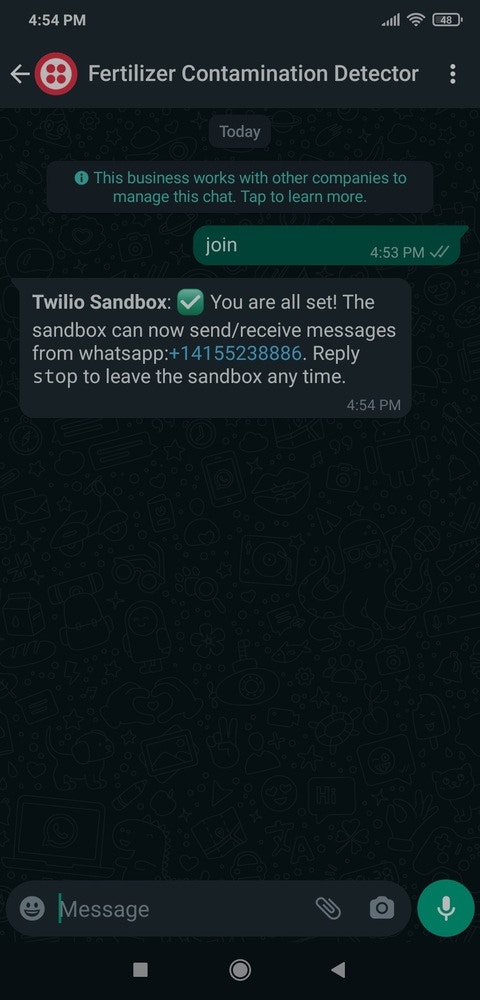
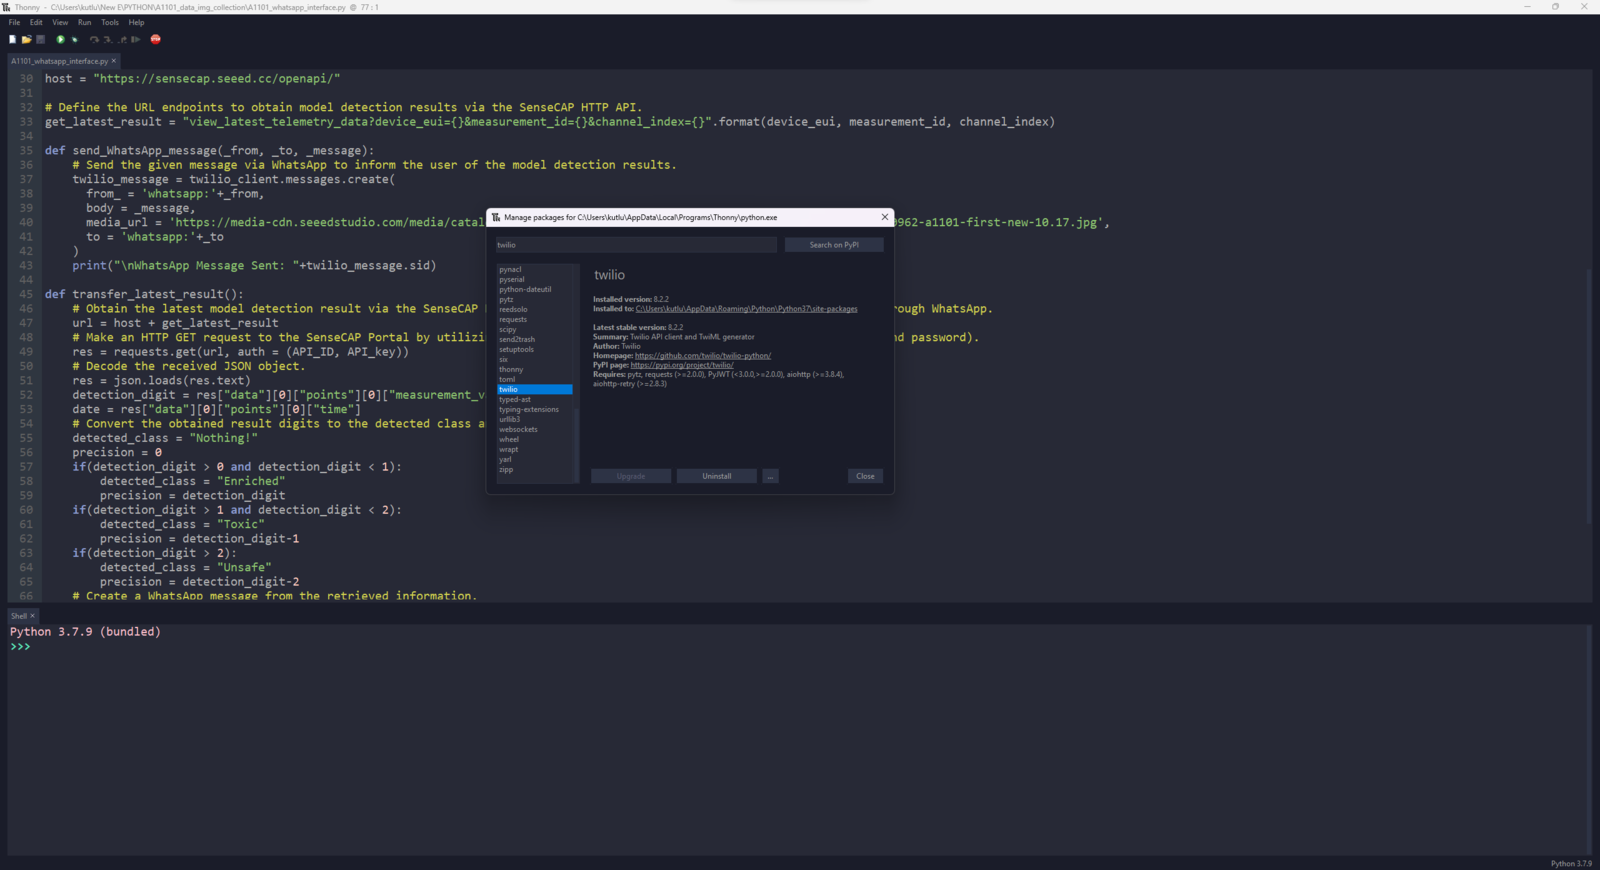
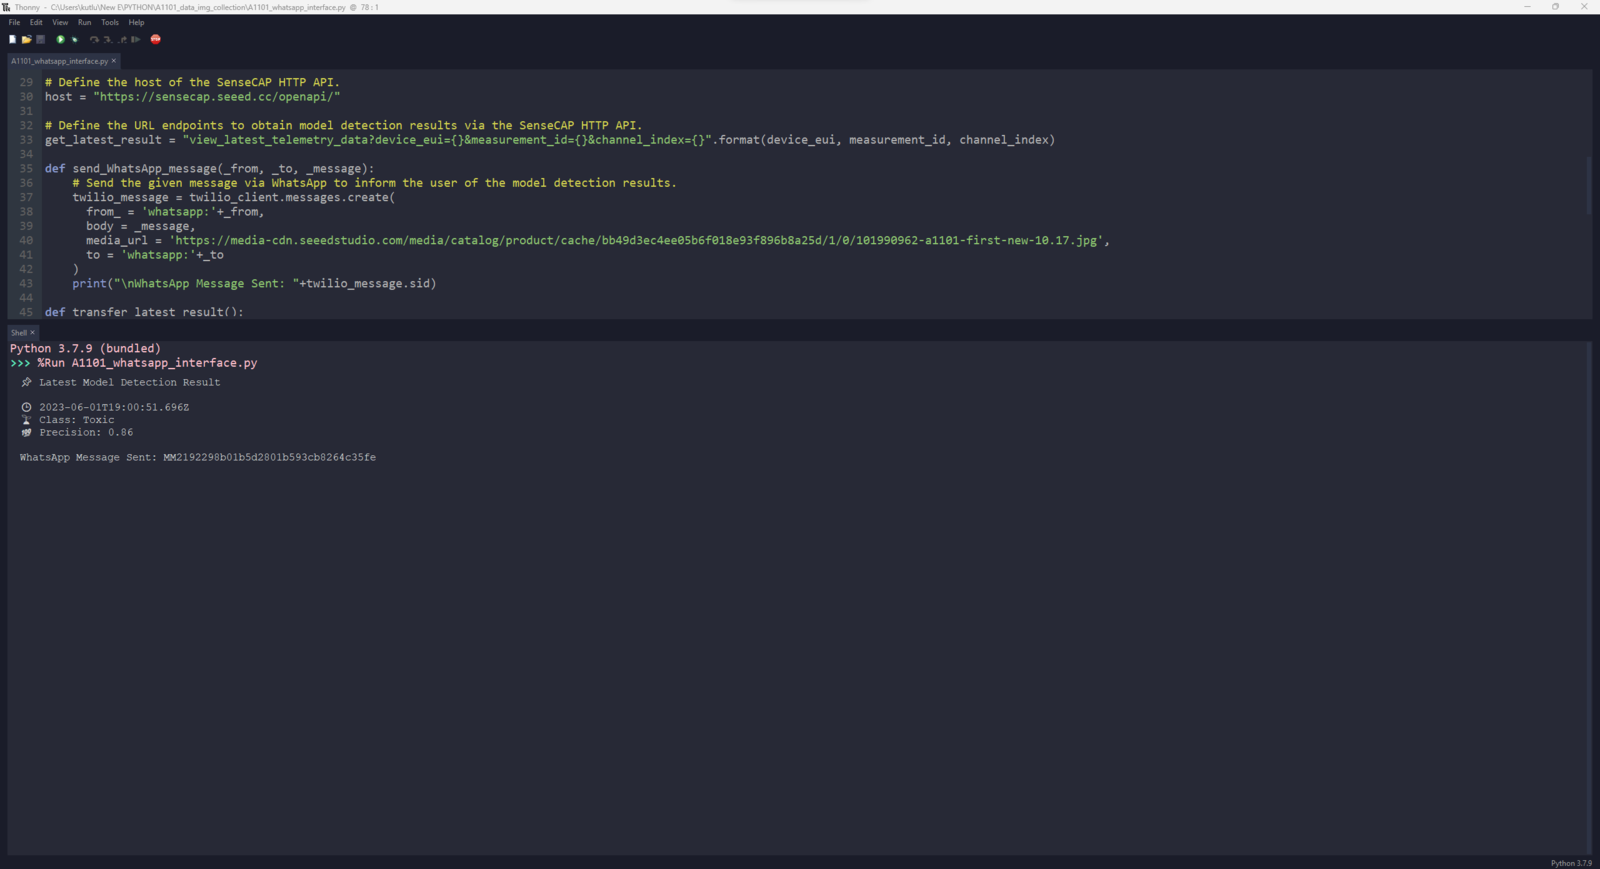
Step 9: Developing a Python application to transfer the model detection results via WhatsApp
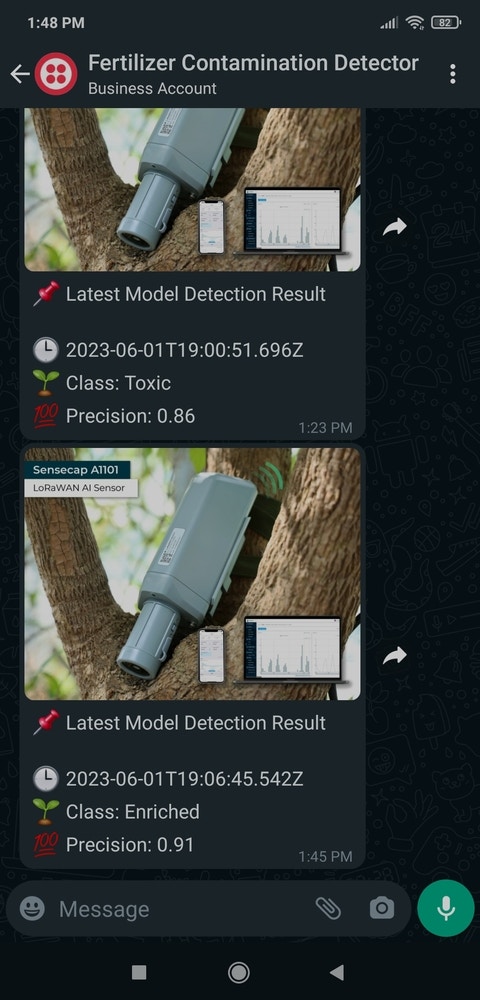
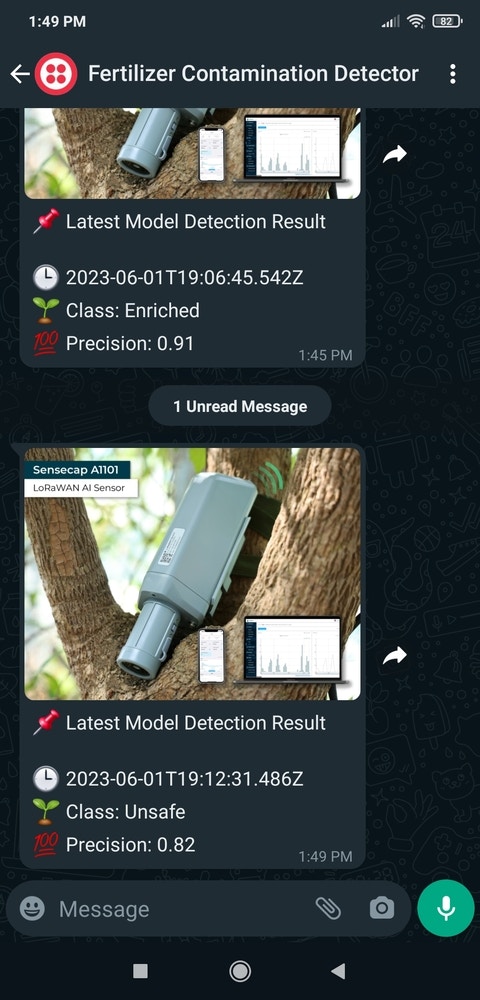
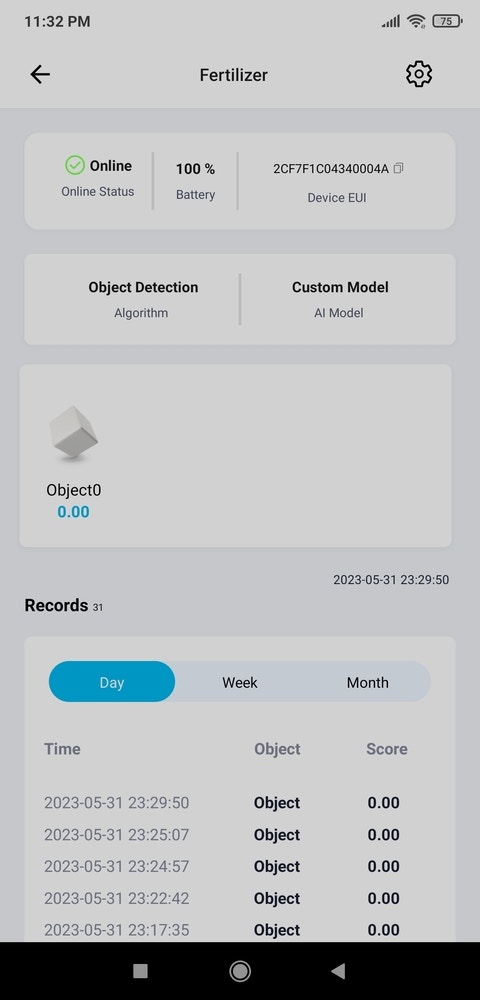
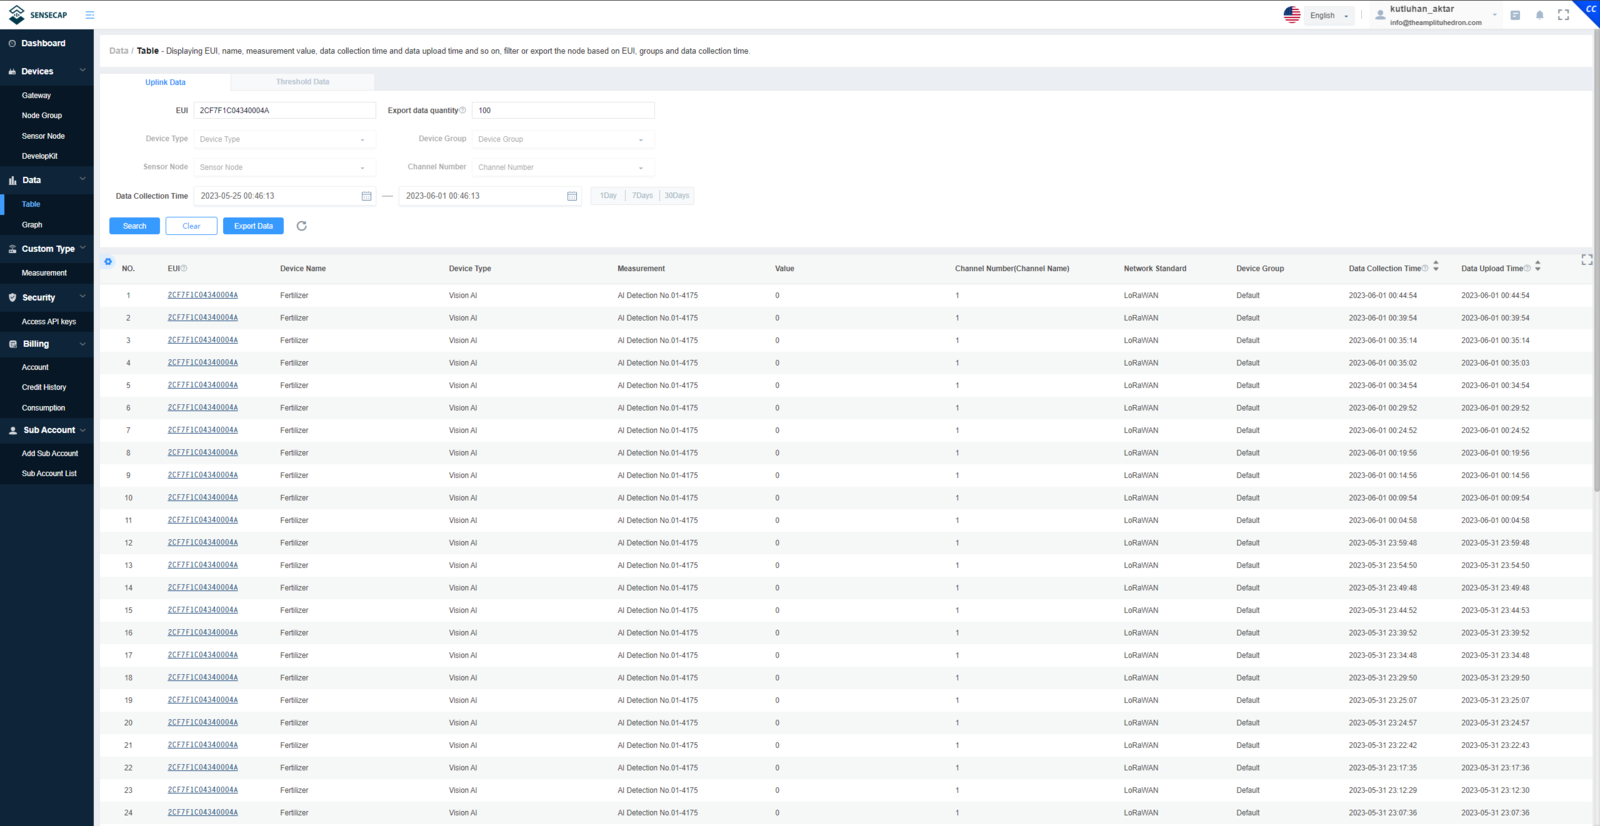
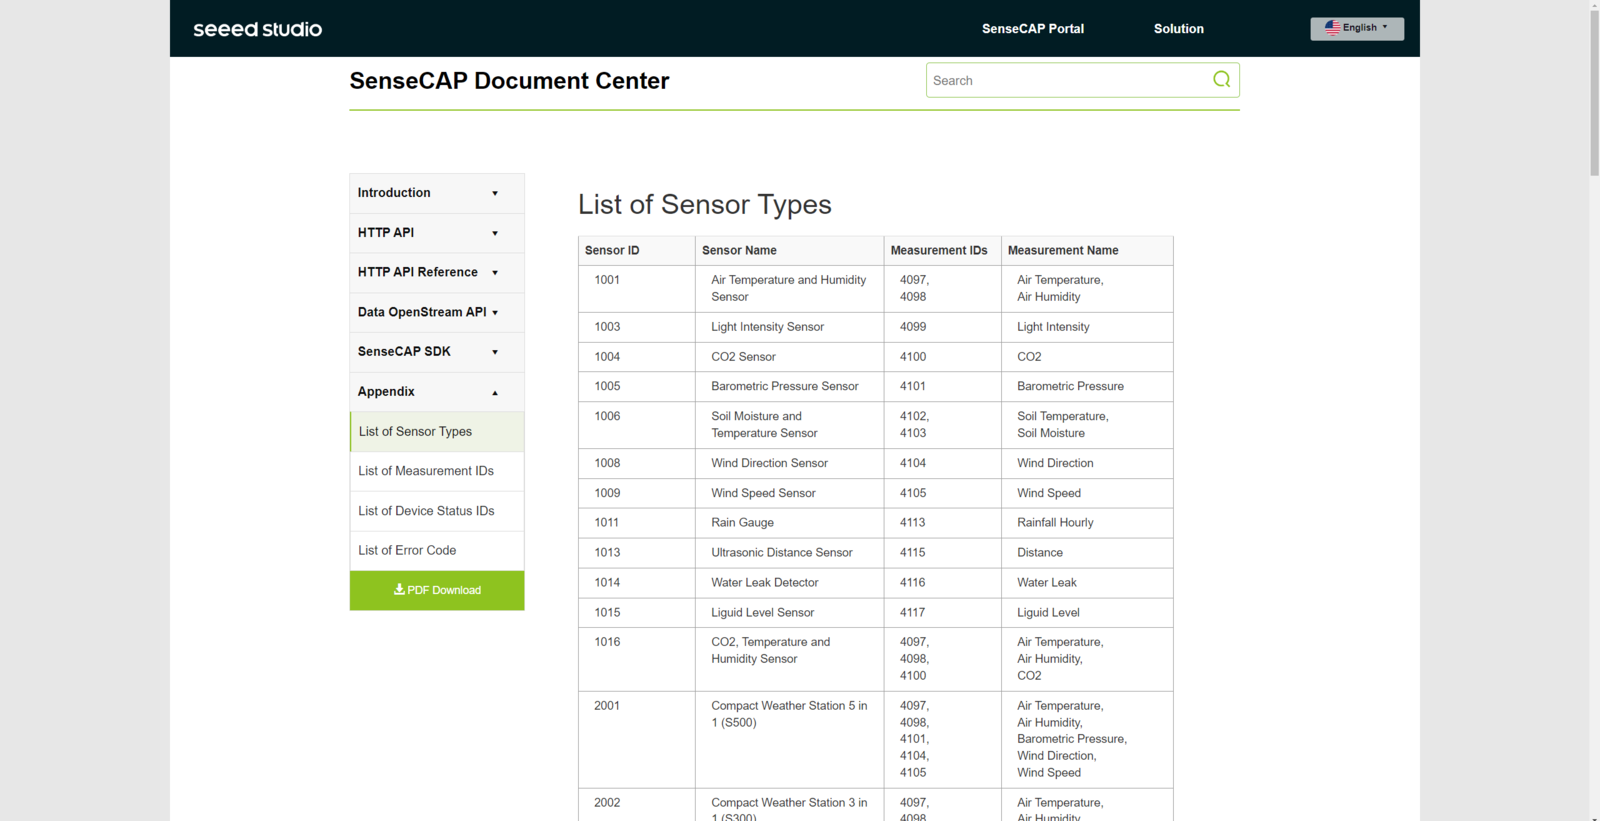
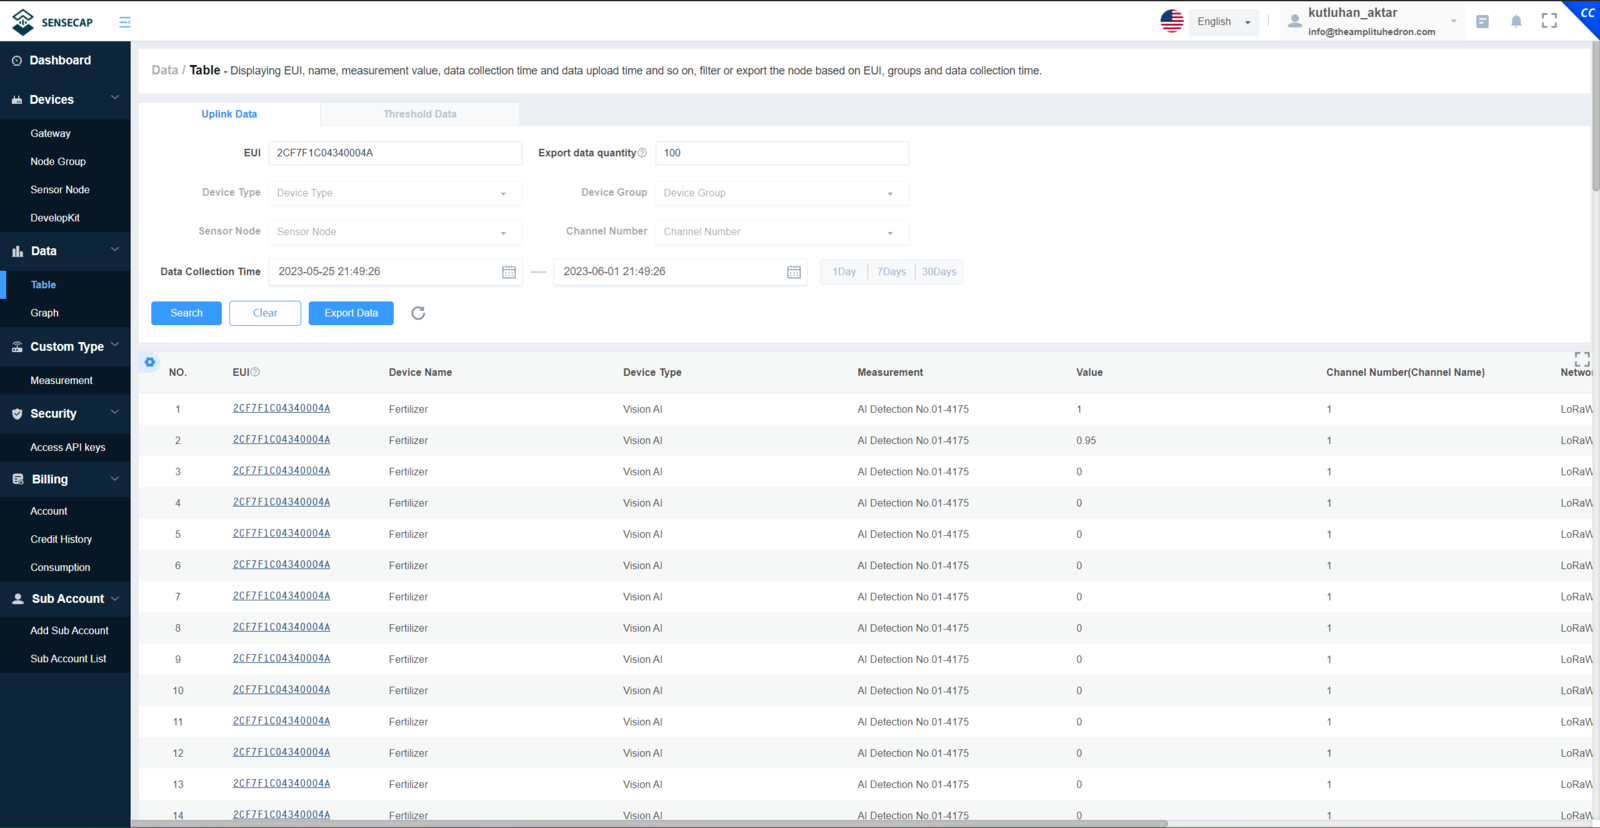
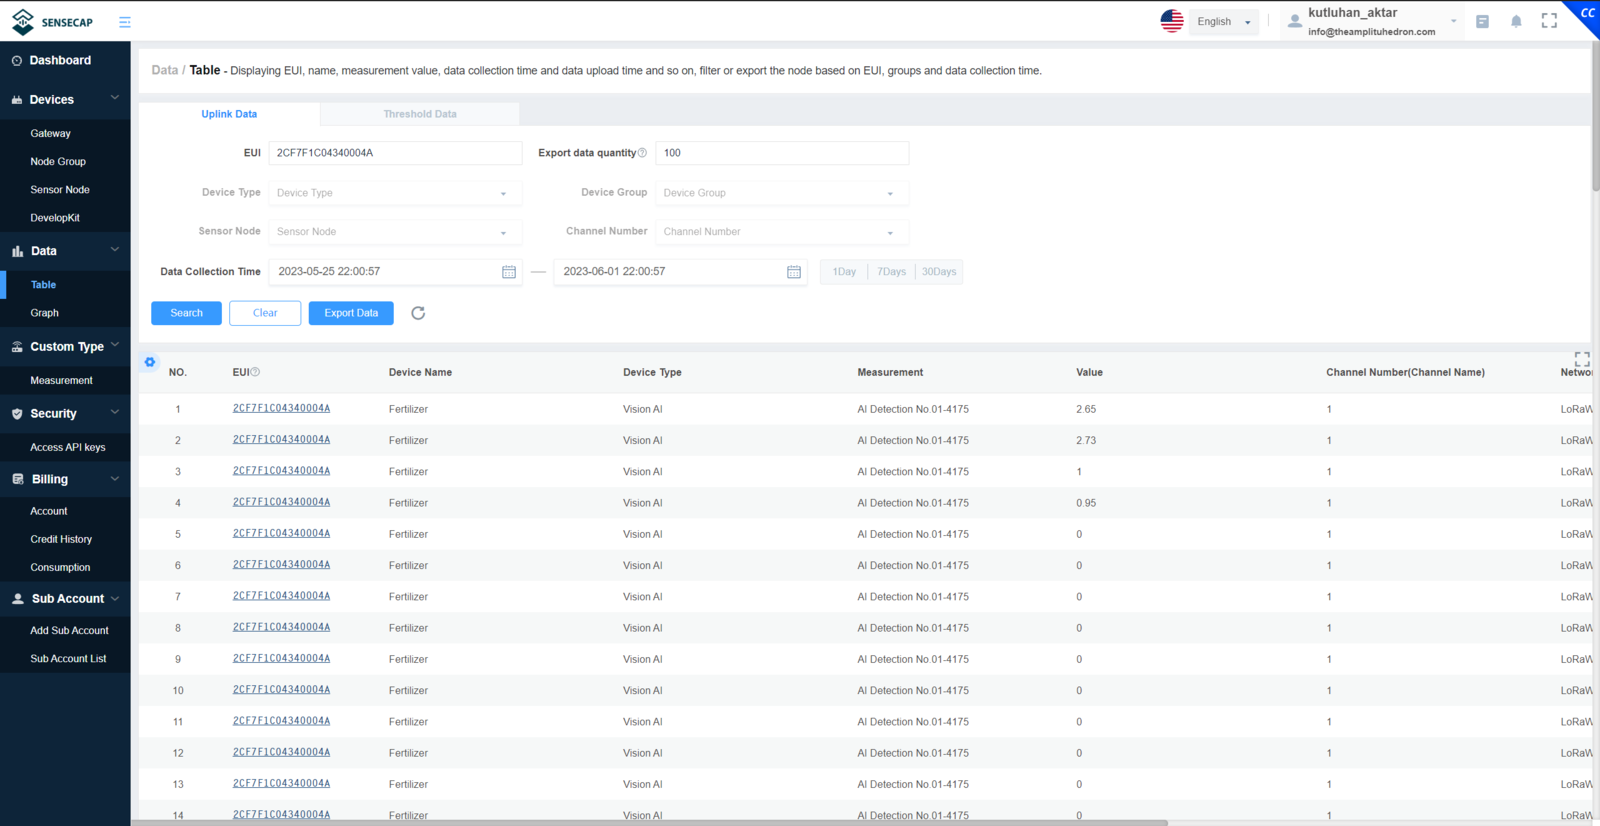
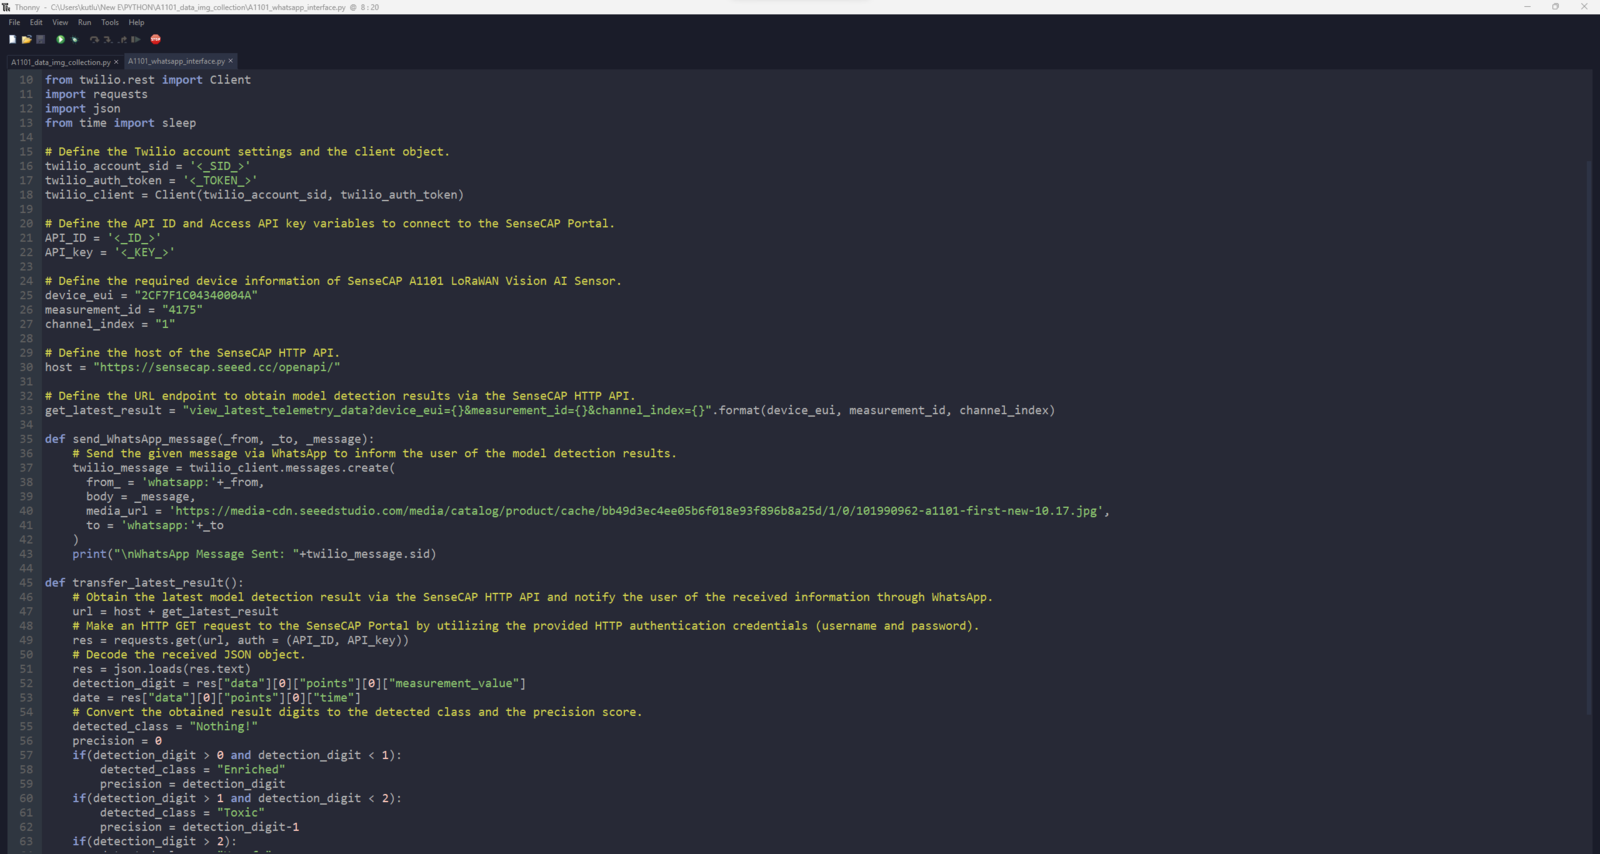
To provide an outstanding user experience while informing the user of the model detection results via WhatsApp over LoRaWAN, I developed a full-fledged application from scratch in Python. This application obtains the model detection results from the SenseCAP Portal by making HTTP GET requests to the SenseCAP HTTP API. Then, the application utilizes Twilio’s WhatsApp API to transfer the retrieved model detection results to the verified phone number in order to inform the user of the excessive chemical fertilizer use in relation to organic fertilizers. You can download the A1101_whatsapp_interface.py file to try and inspect the code for obtaining model detection results from the SenseCAP Portal and informing the user of the retrieved detection results via WhatsApp. :hash: Since Seeed Studio provides the SenseCAP HTTP API for communicating with their various sensors and products, get the correct Sensor ID and Measurement ID parameters from SenseCAP Document Center so as to obtain the data records that SenseCAP A1101 registered to the SenseCAP Portal via the Helium LongFi Network.- 2036
- 4175 ➡ AI Detection No.01
- 🔢0.83
- Predicted Class ➡ 0
- Accuracy ➡ 0.83
- 🔢1.96
- Predicted Class ➡ 1
- Accuracy ➡ 0.96

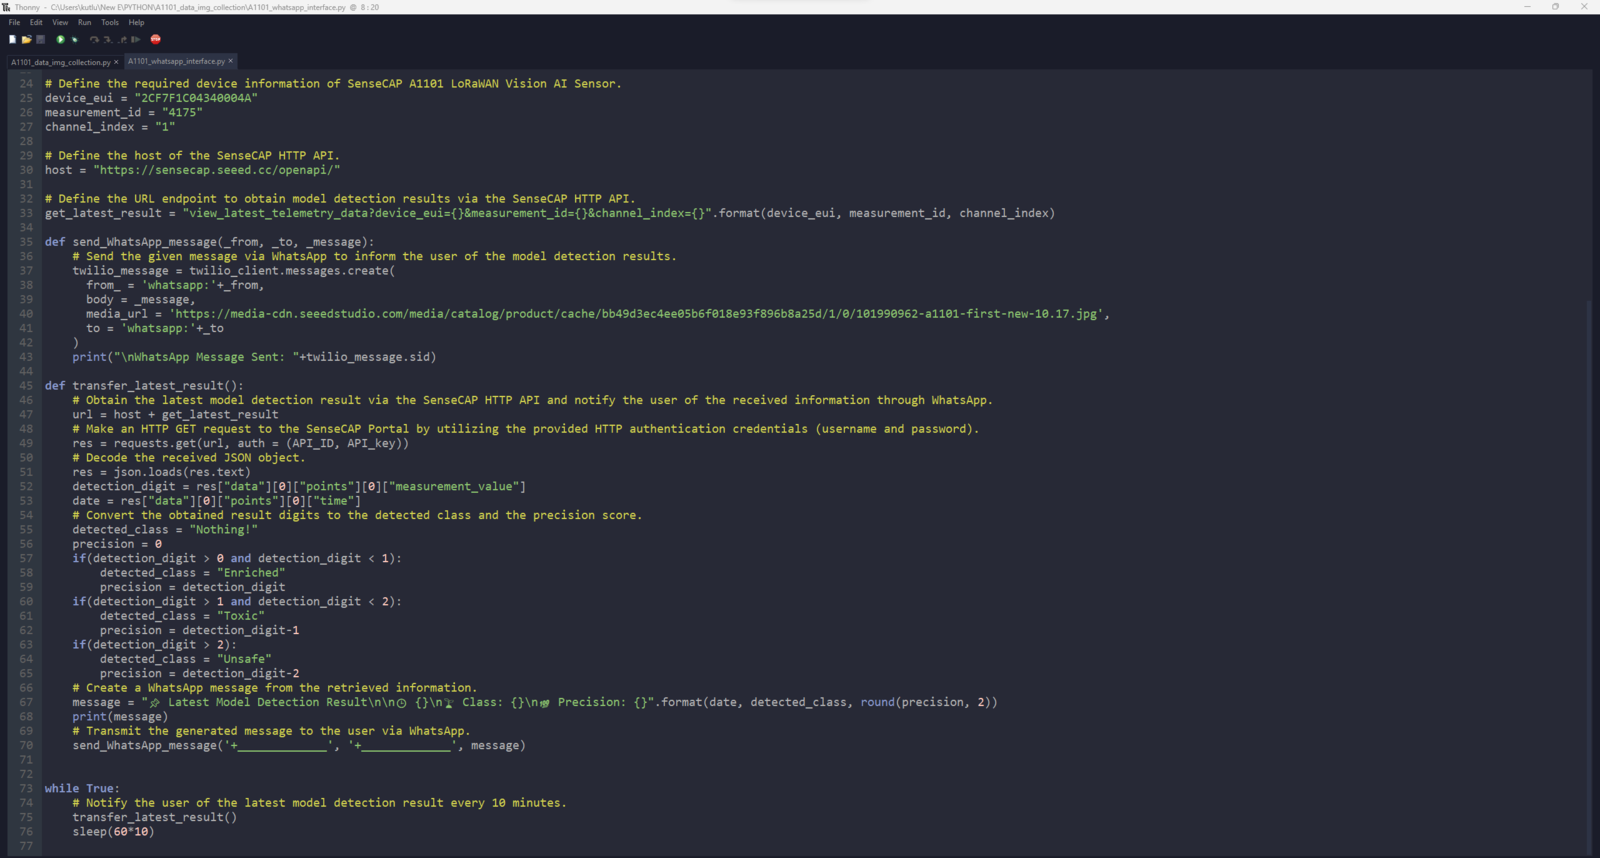
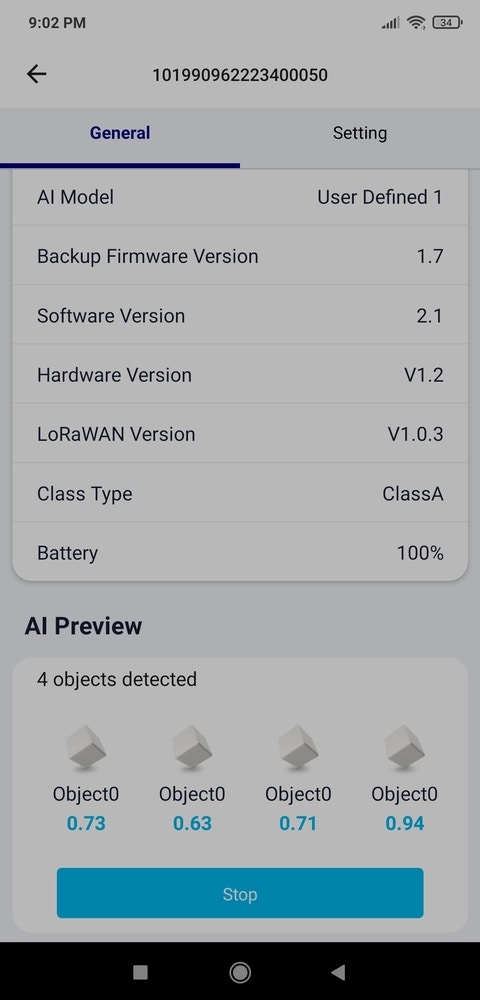
Step 10: Running the model on SenseCAP A1101 and informing the user of the results via WhatsApp
My Edge Impulse object detection (FOMO) model scans a captured image and predicts possibilities of trained labels to recognize a target object on the given picture. The prediction result (score) represents the model’s “confidence” that the detected object corresponds to each of the three different labels (classes) [0 - 2], as shown in Step 6:- 0 — Enriched
- 1 — Toxic
- 2 — Unsafe

Videos and Conclusion
Data Collection | AI-driven LoRaWAN Fertilizer Pollution Detector w/ WhatsApp Experimenting with the model | AI-driven LoRaWAN Fertilizer Pollution Detector w/ WhatsAppFurther Discussions
By applying object detection models trained on numerous fertilizer-exerted soil images in detecting the excessive use of chemical fertilizers in relation to organic fertilizers, we can achieve to: 🌱🪴📲 prevent chemical fertilizers from contaminating the groundwater and the environment, 🌱🪴📲 avoid chemical fertilizers from dispersing throughout water bodies and increasing macronutrients in the environment, 🌱🪴📲 mitigate the risk of severe health issues due to nitrite-contaminated water, such as DNA damage, lipid peroxidation, and oxidative stress, 🌱🪴📲 protect wildlife from the execrable effects of excessive chemical fertilizer use.References
[^1] Devendra Singh, Shobit Thapa, Neelam Geat, Moti Lal Mehriya, Mahendra Vikram Singh Rajawat, Chapter 12 - Biofertilizers: Mechanisms and application, Biofertilizers Volume 1: Advances in Bio-Inoculants, Woodhead Publishing, 2021, Pages 151-166, https://doi.org/10.1016/B978-0-12-821667-5.00024-5 [^2] Lifespan, Nitrates May Be Environmental Trigger For Alzheimer’s, Diabetes And Parkinson’s Disease, ScienceDaily, 6 July 2009, www.sciencedaily.com/releases/2009/07/090705215239.htm [^3] Ayoub, A.T., Fertilizers and the environment, Nutrient Cycling in Agroecosystems 55, 117–121, 1999, https://doi.org/10.1023/A:1009808118692Schematics