Problem Statement
The Quality Control process, especially those involving visual-based calculations and carried out repeatedly, is time consuming and prone to errors when performed by humans. Using sensors to count or calculate presence also does not provide a solution if the object you want to detect is an object made up of multiple components, each needing measurement. Food products, finished goods, or electronic manufacturing processes could be examples of this type of scenario.Our Solution
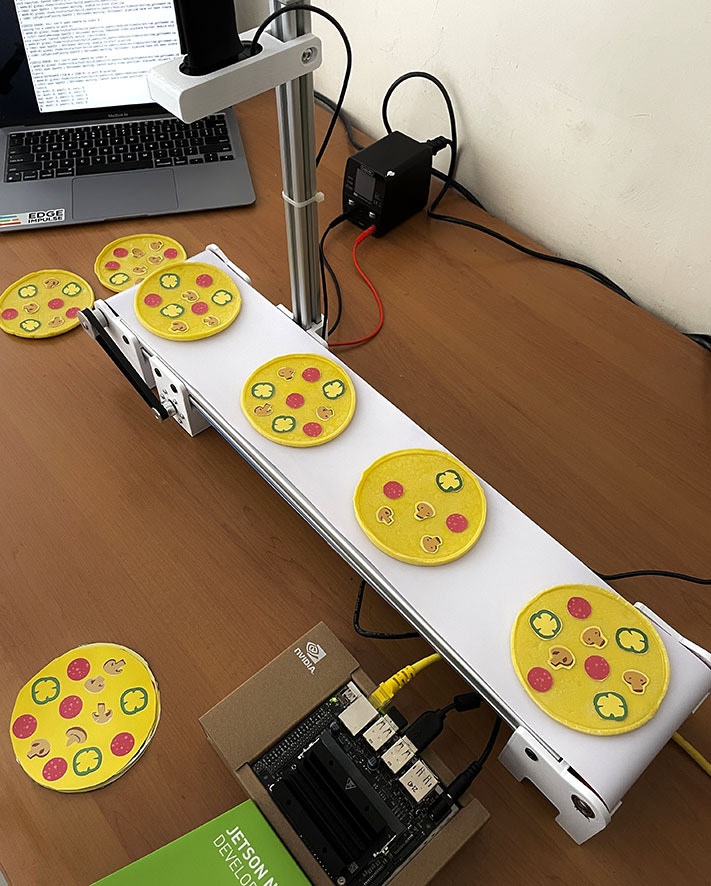
A computer vision system for quality/quantity inspection of product manufacturing on a conveyor belt. The setting of this project will be in a hypothetical mass-production pizza factory where a Jetson Nano with a camera will detect and count the number of toppings for each pizza that passes by on a conveyor belt to ensure the quantity of toppings (pepperoni, mushroom, and paprika) meets a predefined quality standard. Speed, reliability, and cost efficiency are the goals for this project.Description
This project uses Edge Impulse’s FOMO (Faster Objects, More Objects) algorithm, which can quickly detect objects and use them as a quality/quantity check for products on a running conveyor belt. FOMO’s ability to know the number and position of coordinates of an object is the basis of this system. This project will explore the capability of the Nvidia Jetson Nano’s GPU to handle color video (RGB) with a higher resolution (320x320) than some other TinyML projects, while still maintaining a high inference speed. The machine learning model (model.eim) will be deployed with the TensorRT library, which will be compiled with optimizations for the GPU and will be setup via the Linux C++ SDK. Once the model can identify different pizza toppings, an additional Python program will be added, to check each pizza for a standard quantity of pepperoni, mushrooms, and paprikas. This project is a proof-of-concept that can be widely applied in the product manufacturing and food production industries to perform quality checks based on a quantity requirement of part in a product.
Hardware Components
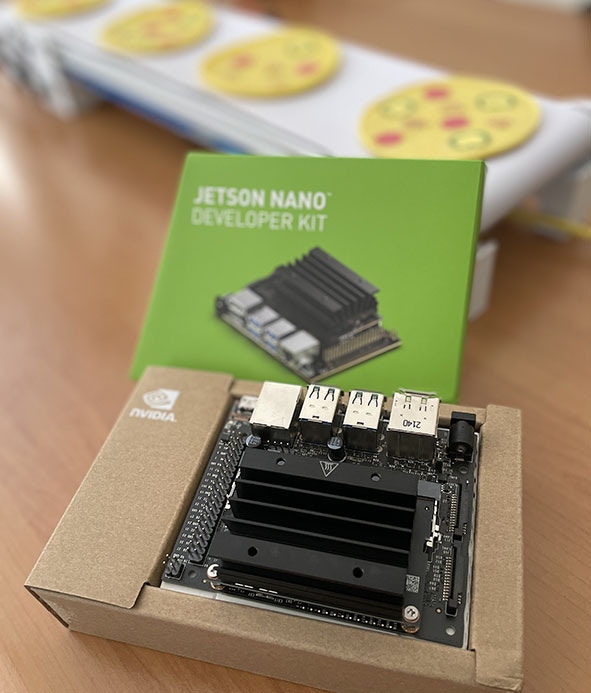
- Nvidia Jetson Nano with dedicated power adapter
- USB camera/webcam (eg. Logitech C270)
- Mini conveyor belt system (10cm x 50cm or larger)
- Camera stand/holder
- Objects: For this example, mini pizza with toppings (dough or printed paper)
- Ethernet cable
- PC/Laptop to access Jetson Nano via SSH
Software & Online Services
- Edge Impulse Studio
- Edge Impulse Linux, Python, C++ SDK
- Ubuntu OS/Nvidia Jetpack
- Terminal
Steps
1. Prepare Data / Images
In this project we can use a camera (webcam) connected to a PC/laptop to capture the images for data collection for ease of use. Take pictures of your pizza components from above, with slightly different angles and lighting conditions to ensure that the model can work under different conditions (to prevent overfitting). While using FOMO, object size is a crucial aspect to ensure the performance of this model. You must keep the camera distance from objects consistent, because significant differences in object size will confuse the FOMO algorithm.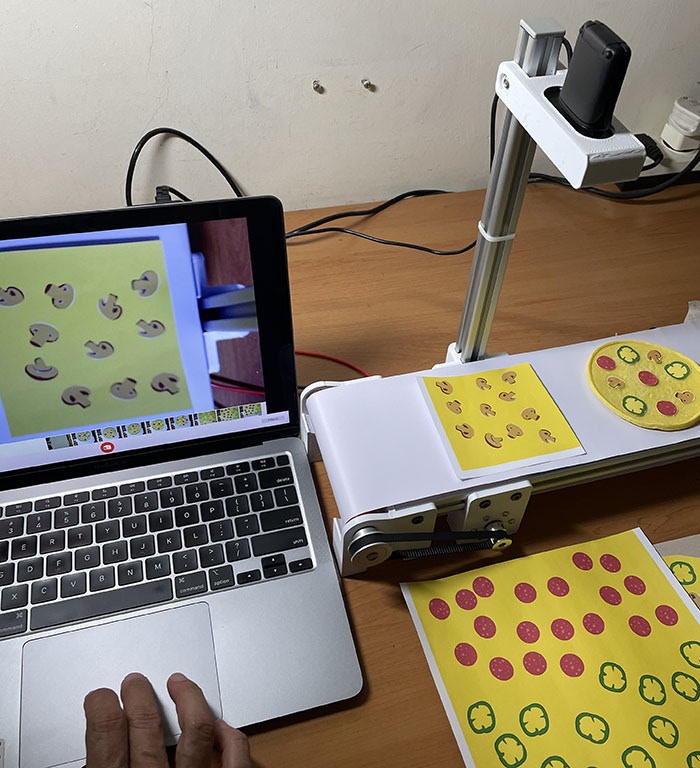
2. Data Acquisition and Labeling
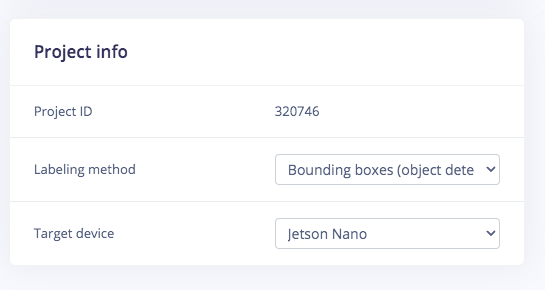
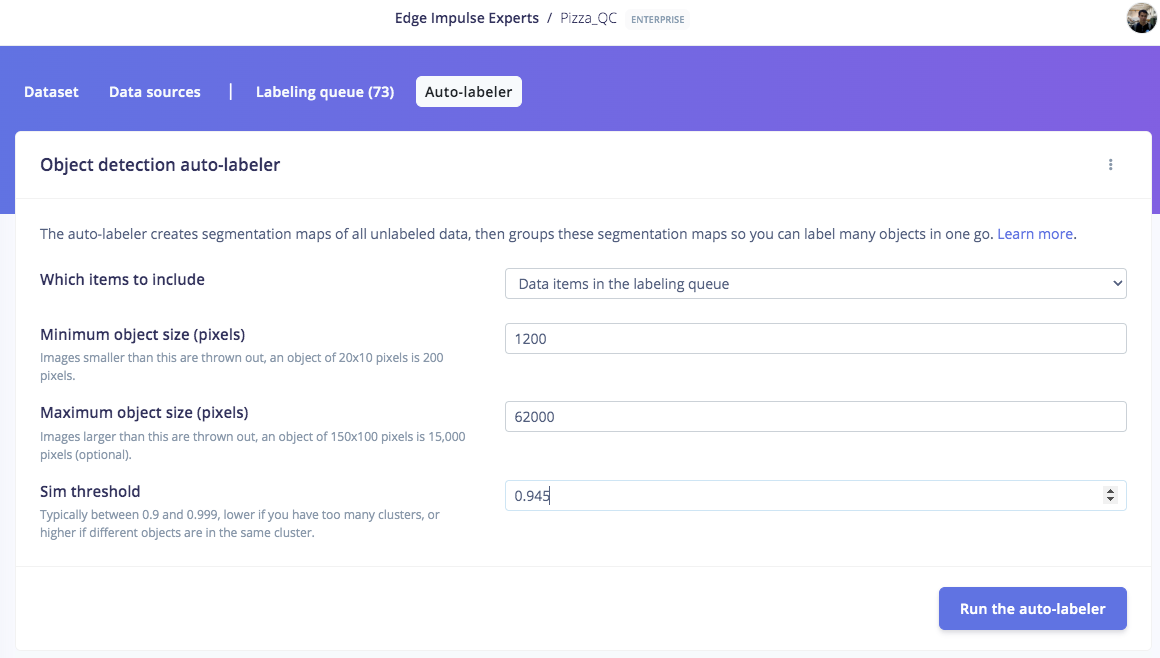
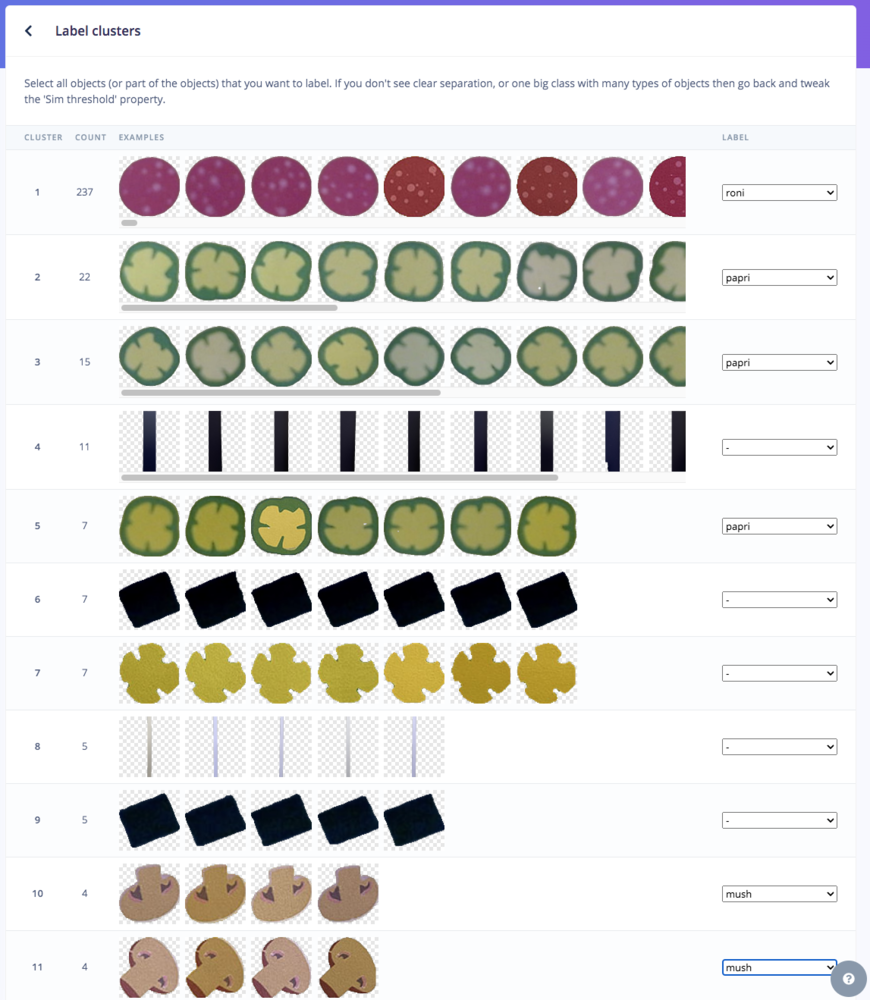
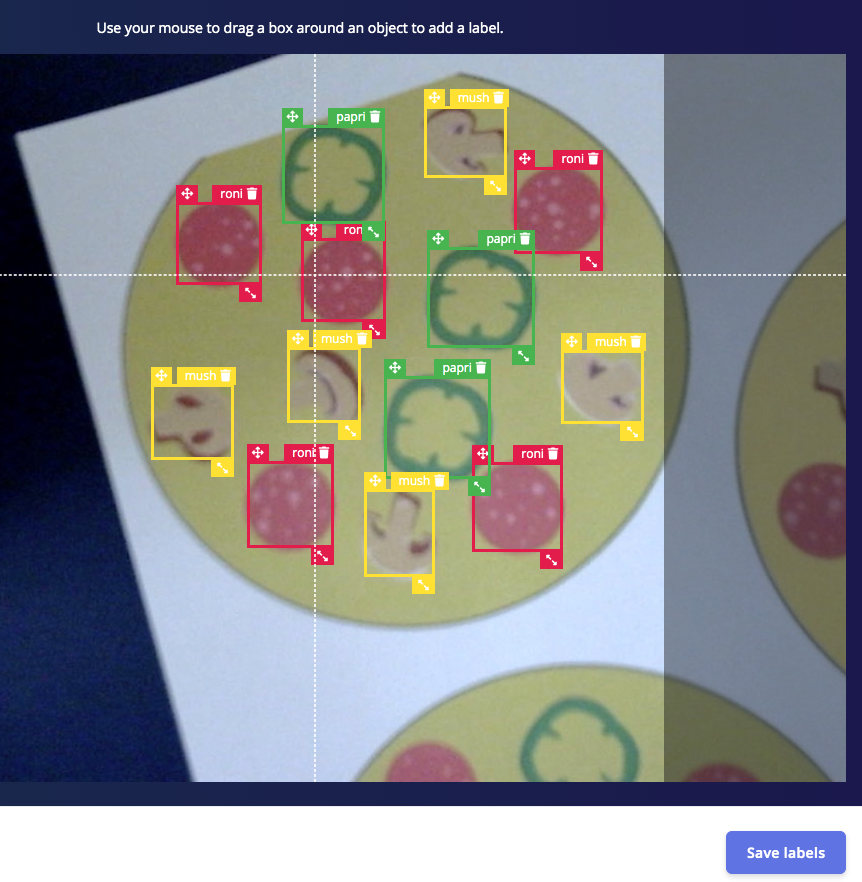
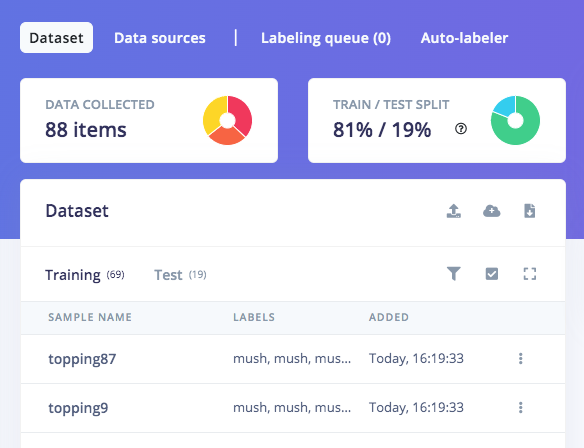
Go to http://studio.edgeimpulse.com, login or create an account, then create a new project. Choose the Images project option, then Classify Multiple Objects. In Dashboard > Project Info, choose Bounding Boxes for the labeling method and Nvidia Jetson Nano for the target device. Then in Data acquisition, click on the Upload Data tab, choose your photo files that you captured from your webcam or phone, choose Auto split, then click Begin upload. For Developer (free) accounts, next click on the Labelling queue tab, then start dragging a box around each object and label it, then save it. Repeat until all images are labelled. More information on this process, is located here. For Enterprise (paid) accounts, you will instead click on Auto-Labeler in Data Acquisition. This auto-labeling segmentation / cluster process will save a lot of time over the manual process above. Set the min/max object pixels and sim threshold (0.9 - 0.999) to adjust the sensitivity of cluster detection, then click Run. Next, you can label each cluster result as desired. If something doesn’t match or if there is additional data, labeling can be done manually as well.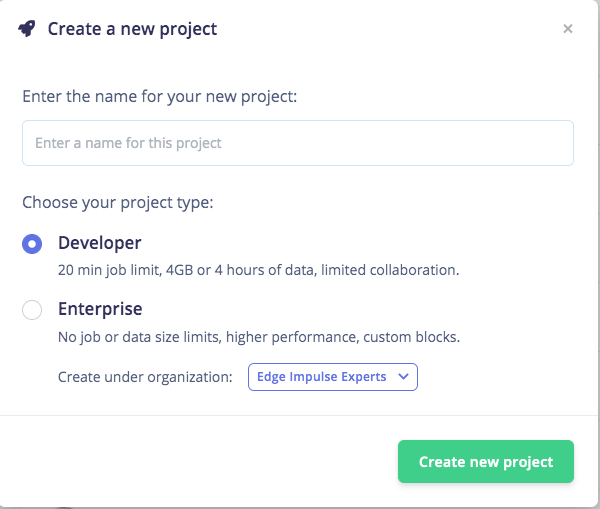
3. Train and Build Model using FOMO Object Detection
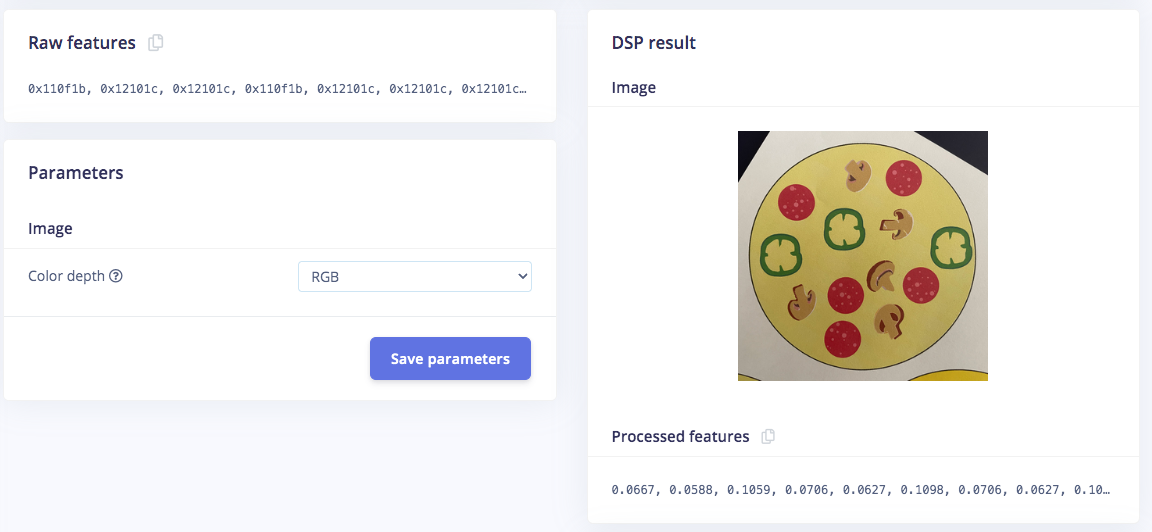
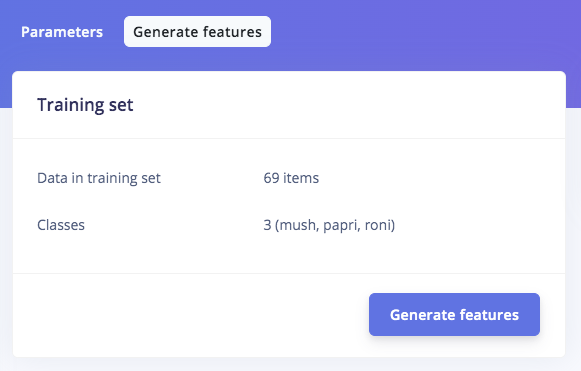
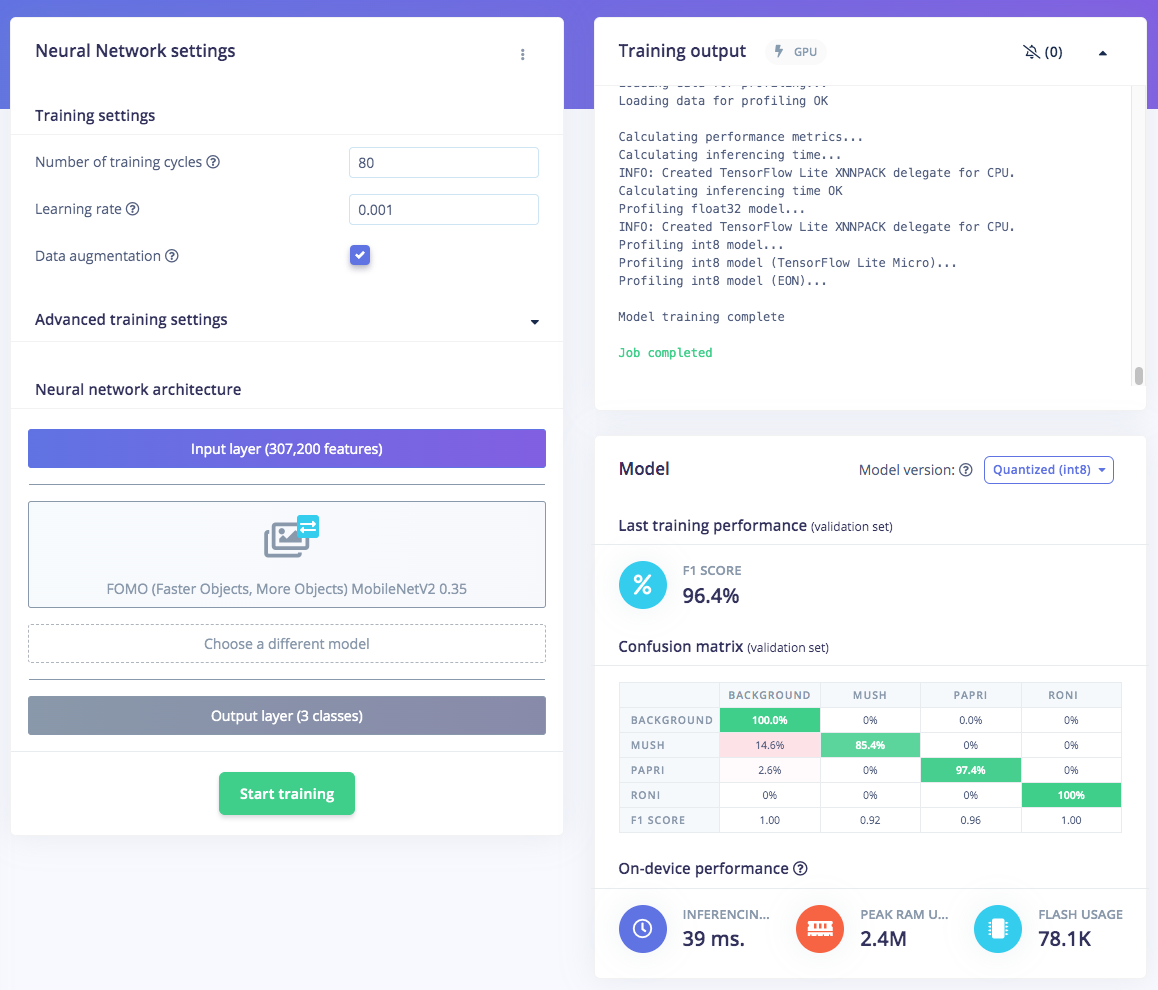
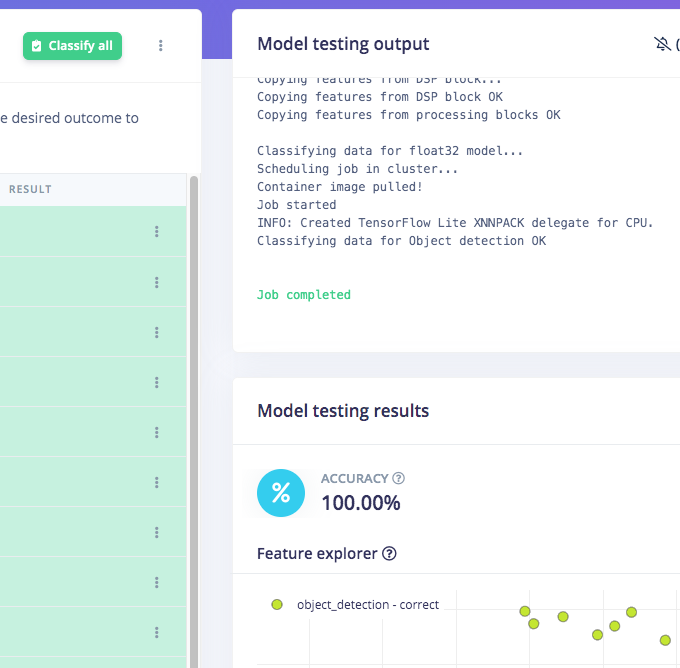
Once you have the dataset ready, go to Create Impulse and in the Image block, set 320 x 320 as the image width and height. Then choose Fit shortest axis, and choose Image and Object Detection as Learning and Processing blocks. In the Image parameters section, set the color depth as RGB then press Save parameters. Then click on Generate and navigate to the Object Detection block setup using the left navigation. Leave the training setting for Neural Network as it is or check our settings — in our case everything is quite balanced, so we’ll leave them alone and choose FOMO (MobileNet V2 0.35). Train the model by pressing the Start training button. You can see the progress of the training in the log to the right. If everything is OK, the training will job will finish in a short while, then we can test the model. Go to the Model Testing section and click Classify all. Our result is above 90%, so we can move on to the next step — Deployment.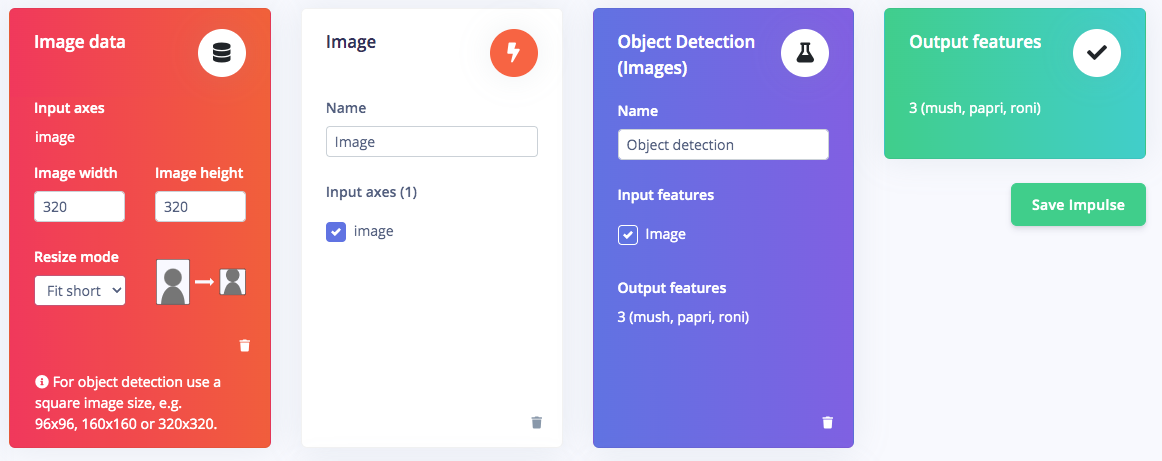
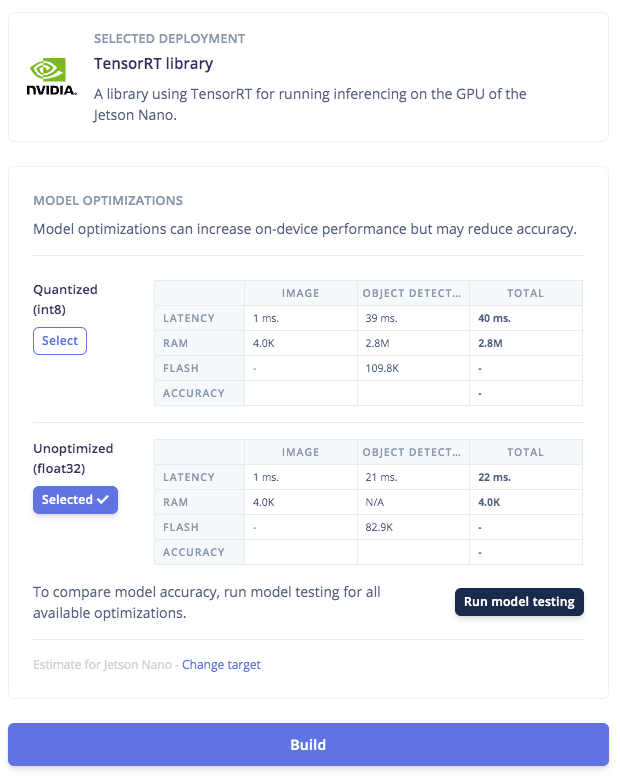
4. Deploy Model to NVIDIA Jetson Nano GPU
Click on the Deployment tab then search for TensorRT, then select Float32 and click Build. This will build an Nvidia TensorRT library for running inference, targeting the Jetson Nano’s GPU. Once the build finishes and the file is downloaded, open the.zip file, then we’re ready for model deployment with the Edge Impulse C++ SDK on the Jetson Nano side.
ssh from your PC/laptop and install the Edge Impulse tooling via the terminal:
Clang as a C++ compiler:
sh build-opencv-linux.sh
Now make sure the contents of the TensorRT folder you downloaded from the Edge Impulse Studio have been unzipped and moved to the example-standalone-inferencing-linux directory. For FOMO, we need to edit the variables in the source/eim.cpp file with:
./build/model.eim
If your Jetson Nano is run with a dedicated power supply, its performance can be maximized by this command:
edge-impulse-linux-runner --download modelfile.eim then running it with the same command as above.
5. Build the Application
With the impressive performance of live inferencing shown by the Linux Runner, now we will create a Python program to be able to calculate the number of toppings on a pizza compared to a desired amount, and that will provide an OK or Bad output if the number of toppings is incorrect. Because we’ll use Python, we need to install the Edge Impulse Python SDK and clone the repository with the Edge Impulse provided examples. Follow the steps here) to install the Python SDK. Once the SDK is installed, be sure togit clone https://github.com/edgeimpulse/linux-sdk-python as well, so that you have the samples locally.
The program I made (topping.py) is a modification of Edge Impulse’s classify.py in the examples/image folder from the linux-python-sdk directory.
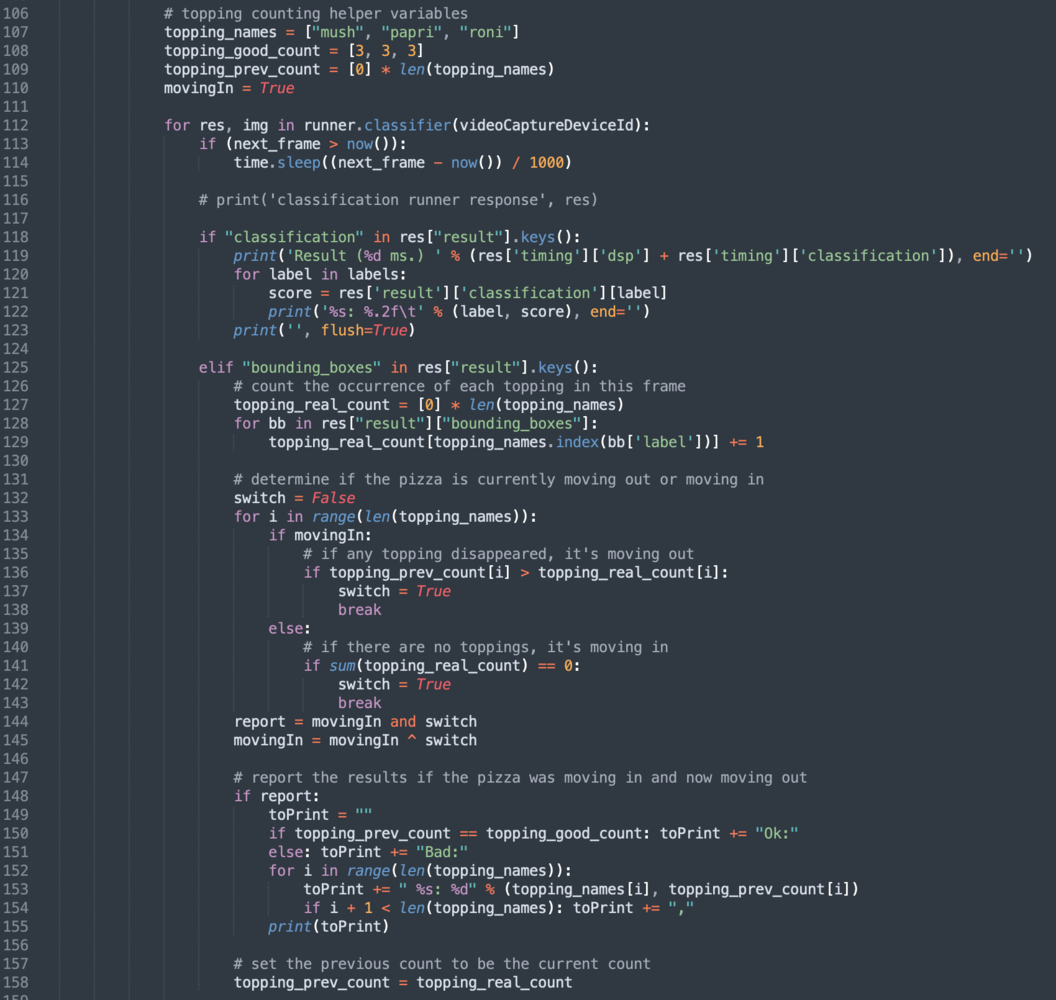
model.eim), for example: 0 0 2 3 3 1 0 1 3 3 3 2 0 0 0 2 3 3 2 0 0 2 5 5 1 0 0 2 3 3 1 0 0 1 2 2 0 0 will record 0 as the sequence separator and record the peak value in each sequence. As an example, if the correct number of toppings on a pizza (per quality control standards) is 3, and we know that a 0 is a separator, and anything other than 3 is bad…then 0 3 0 3 0 3 0 5 0 3 0 2 0 is: OK OK OK BAD OK BAD
My Python program (topping.py) can be downloaded at this link: https://github.com/Jallson/PizzaQC_Conveyor_Belt/blob/main/topping.py
To run the program, use the command along with the path where model.eim file is located. Be sure to use the one built for the GPU, in case you have both on the Nano still: