Created By: Shebin Jose Jacob Public Project Link: https://studio.edgeimpulse.com/public/168098/latest GitHub Repository: https://github.com/CodersCafeTech/Driver-Drowsiness-Detection-With-FOMODocumentation Index
Fetch the complete documentation index at: https://docs.edgeimpulse.com/llms.txt
Use this file to discover all available pages before exploring further.
Intro
Driver drowsiness is a major contributing factor to motor vehicle accidents and can have serious consequences, including injury or death. There are several reasons why driver drowsiness can lead to accidents. When a person is tired, their reaction time slows down, their decision-making abilities are impaired, and they may have difficulty maintaining their focus on the road. As a result, they may miss important visual cues, fail to notice hazards or make poor decisions while driving. In addition to these physical effects, drowsy driving is also a cognitive impairment, meaning it affects a person’s ability to think and make good decisions. When a driver is tired, their judgment and awareness are impaired, which can lead to risky or dangerous behavior behind the wheel. The risk of drowsy driving is higher for certain groups of people, including commercial truck drivers, shift workers, and those with undiagnosed or untreated sleep disorders. However, anyone can be at risk for drowsy driving if they do not get enough sleep or if they are driving for long periods of time without taking breaks. As drowsy driving continues to be a major safety concern on our roads, we are developing a cutting-edge system to address this problem.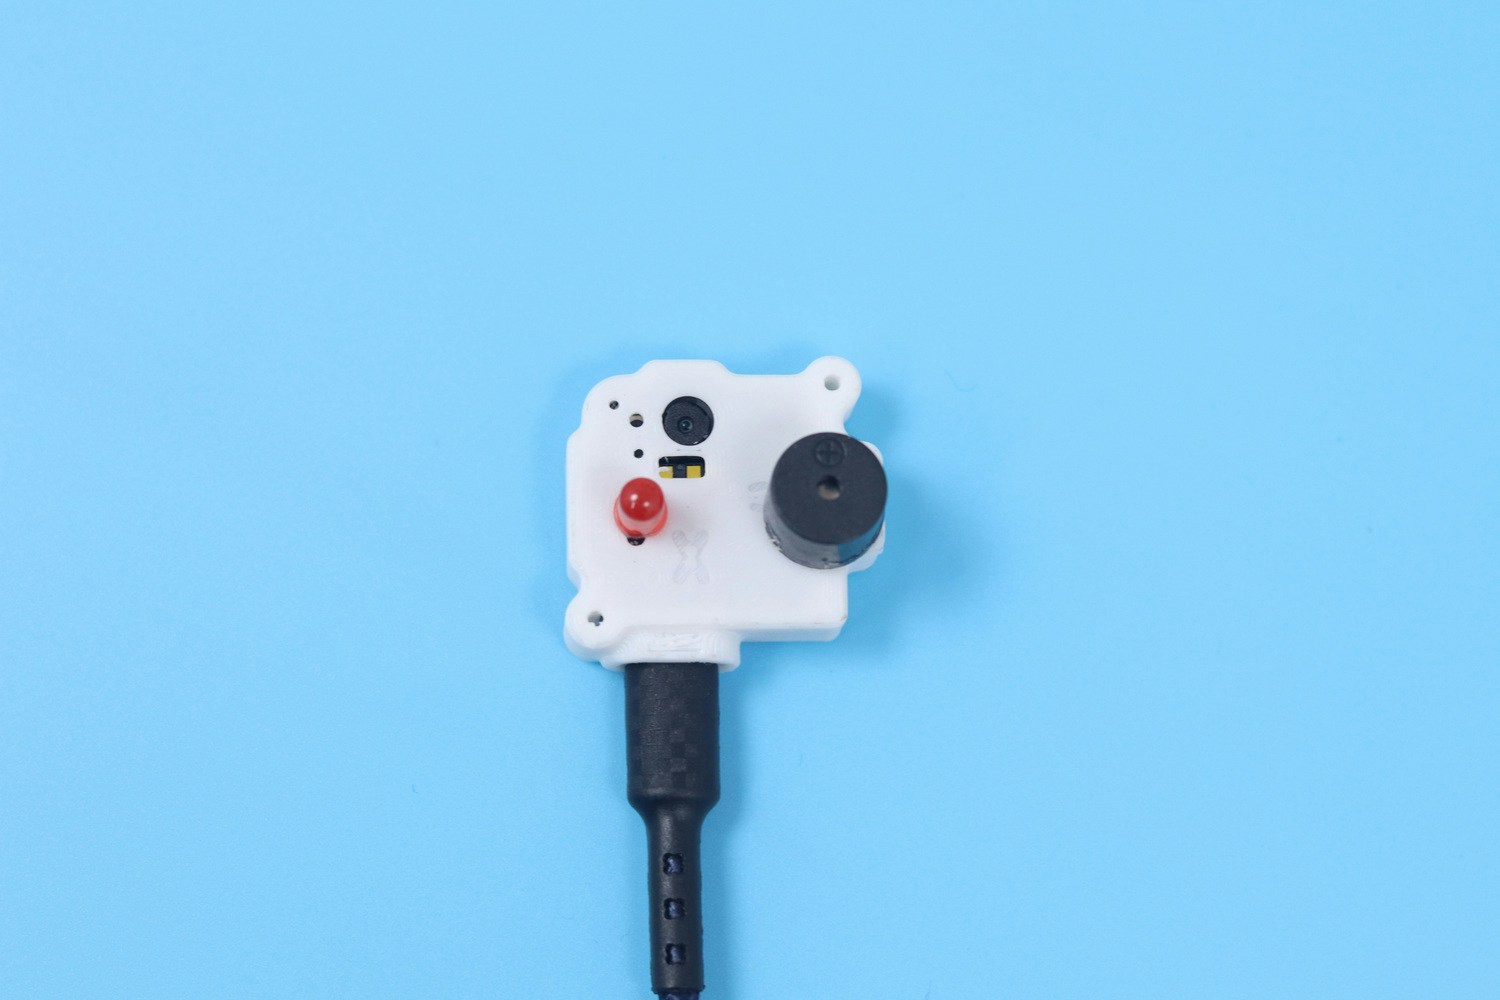
How Does It Work
Our solution combines the power of Computer Vision and Artificial Intelligence (AI) to monitor the driver’s eyes and detect when they are closed for two seconds in a row. To ensure the accuracy and reliability of our system, we have trained and deployed an AI algorithm (model) on to an Arduino Nicla Vision. These algorithms are trained to recognize patterns and trends in the data collected by the camera and to identify when the driver’s eyes are closed for an extended period of time. If the system detects that the driver’s eyes are closed for two seconds or longer, it will generate an alert to wake the driver up and remind them to stay focused and alert on the road. This alert can be in the form of a visual or auditory signal, such as a flashing light or a loud beep. In addition to detecting drowsy driving, our system can also be extended to monitor other behaviors that may impact road safety, such as distracted driving or impairment due to drugs or alcohol. By alerting drivers to these behaviors and reminding them to stay focused and alert, we can help to reduce the risk of accidents and keep our roads safer for everyone.Hardware Requirements
- Arduino Nicla Vision
- LED
- Buzzer
Software Requirements
Hardware Setup
The hardware setup for data collection consists of a Nicla Vision mounted on a tripod.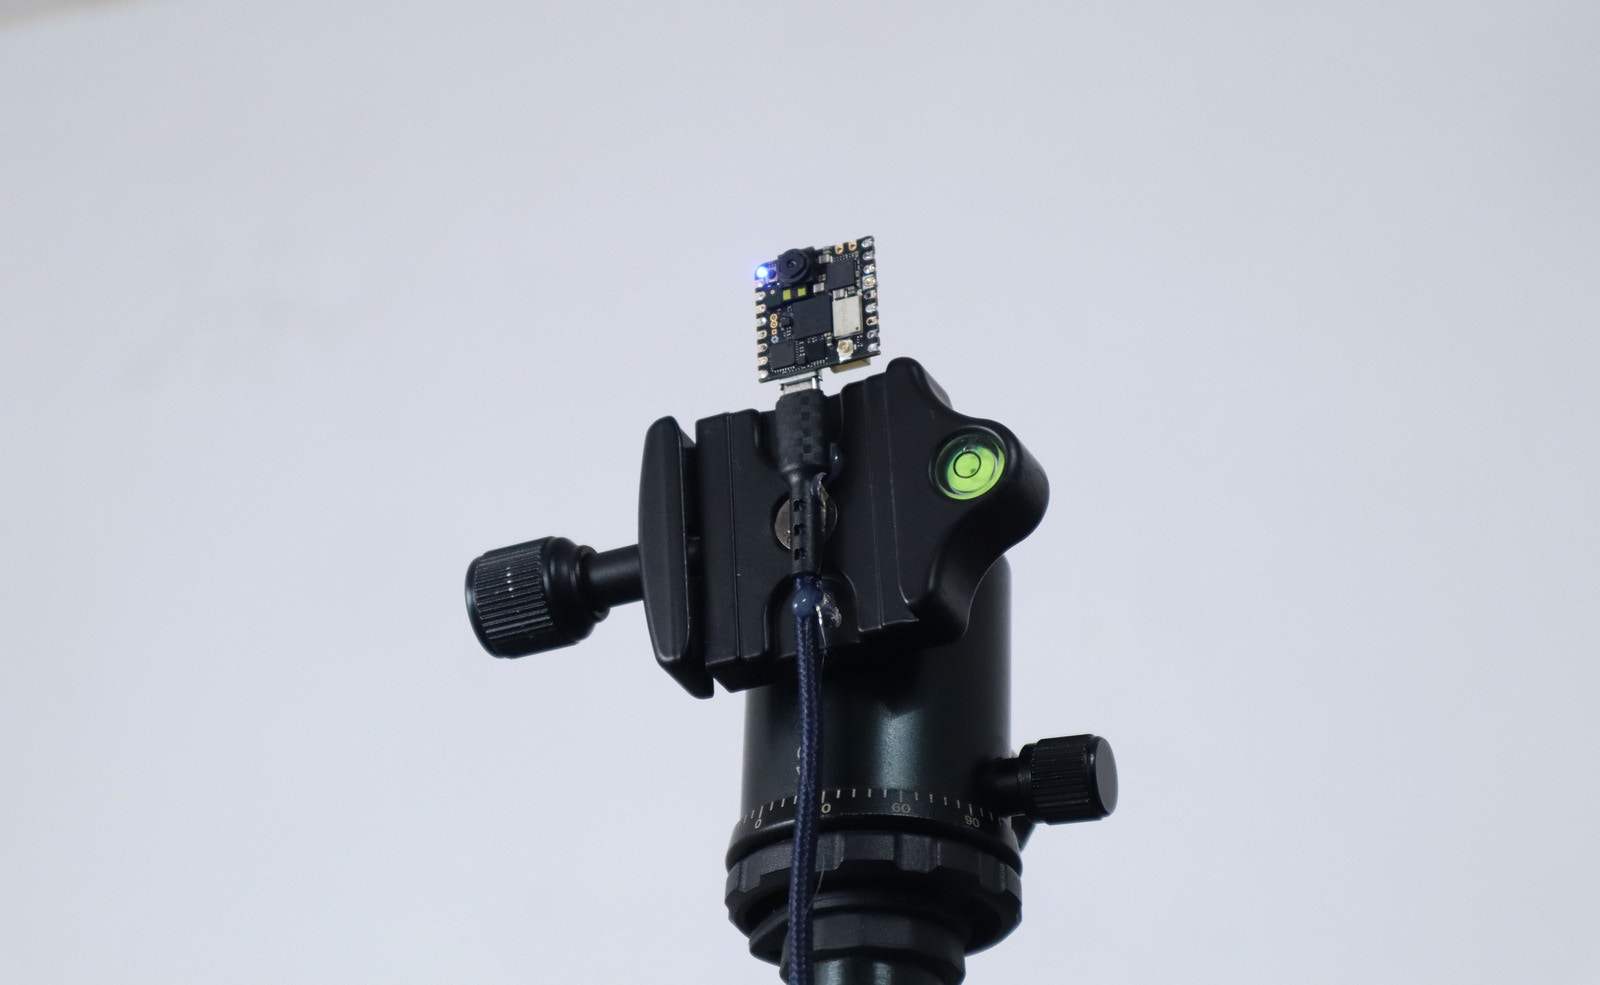
Arduino Nicla Vision
Nicla Vision is a powerful and versatile product that is designed to enable users to develop and prototype projects involving image processing and machine vision at the edge. It features a 2MP color camera that supports TinyML, as well as a smart 6-axis motion sensor, microphone, and distance sensor, which provide a range of sensing capabilities.
Software Setup
If you are unfamiliar with the process of setting up the Nicla Vision for use with Edge Impulse and haven’t yet connected the device to the Edge Impulse dashboard, we recommend following a quick tutorial to guide you through the setup process. Upon successfully establishing a connection between the device and the Edge Impulse dashboard, you should expect to see the device appear in the Devices tab.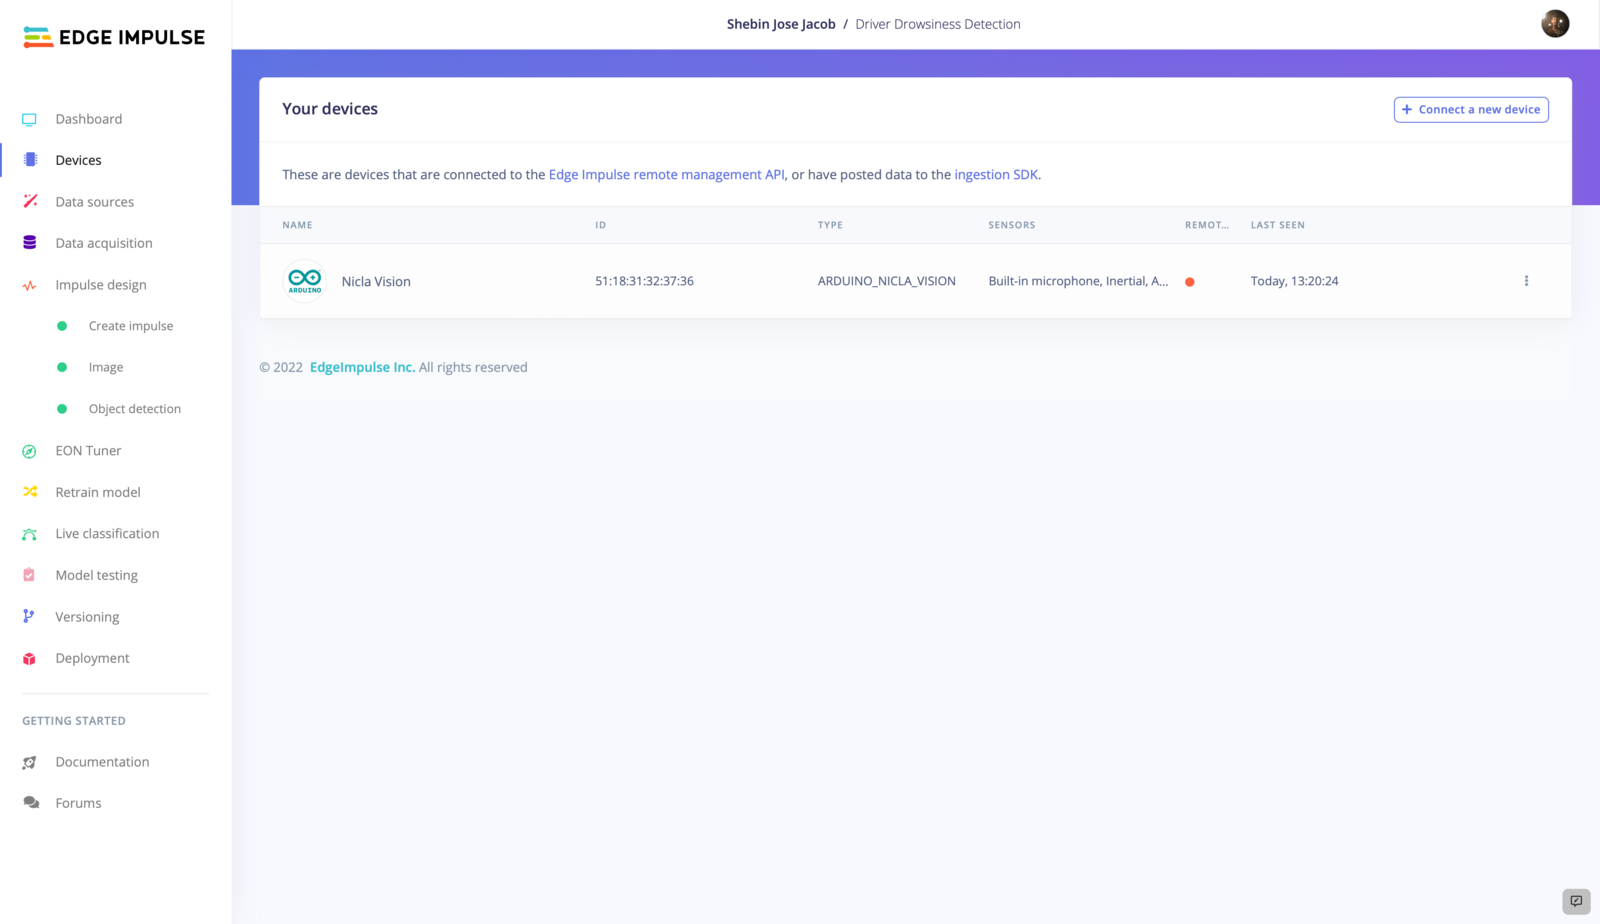
TinyML Model Generation
1. Data Acquisition
Now that the necessary software and hardware have been configured, we can proceed to build the object detection model. The first step in this process is to gather data that will be used to train the model. There are two main approaches to collecting data: using the connected device to directly capture data or uploading pre-existing data using the Uploader tool. In this particular project, we will be utilizing the first method and collecting data directly from the connected device. This data will then be used to train the object detection model, enabling it to more accurately identify and classify objects in the future.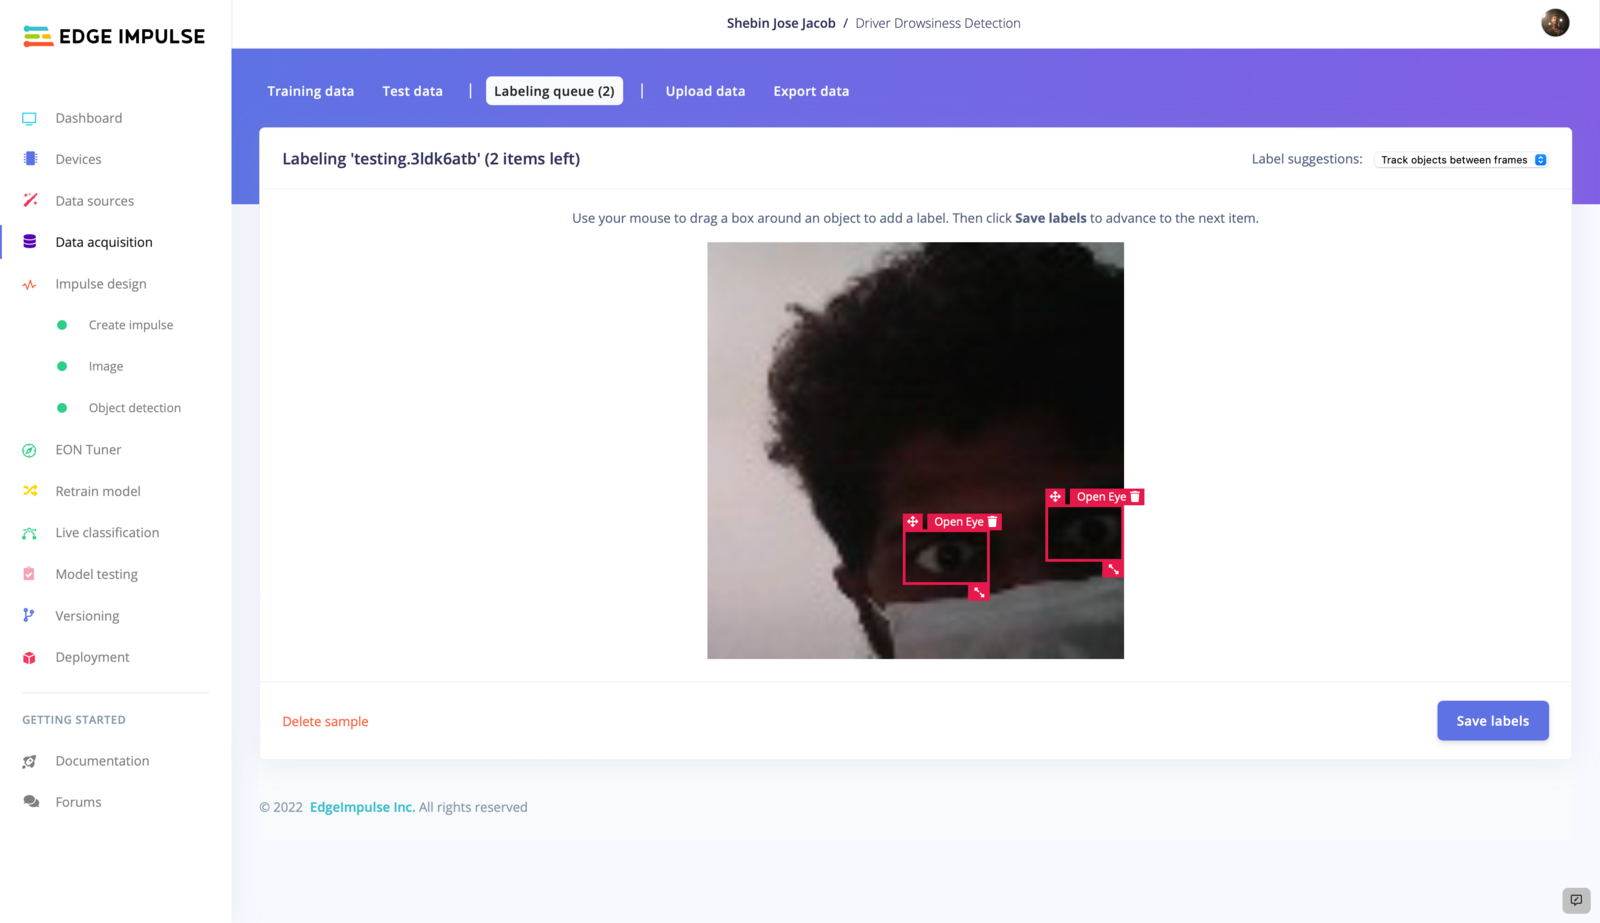
2. Impulse Design
For our project, we require a high-performing model with a reliable level of accuracy. To meet these requirements, we are utilizing Edge Impulse FOMO (Faster Objects, More Objects), a machine learning algorithm specifically designed for object detection on highly constrained devices. FOMO generates efficient, faster models that are well-suited for applications where processing power and memory are limited.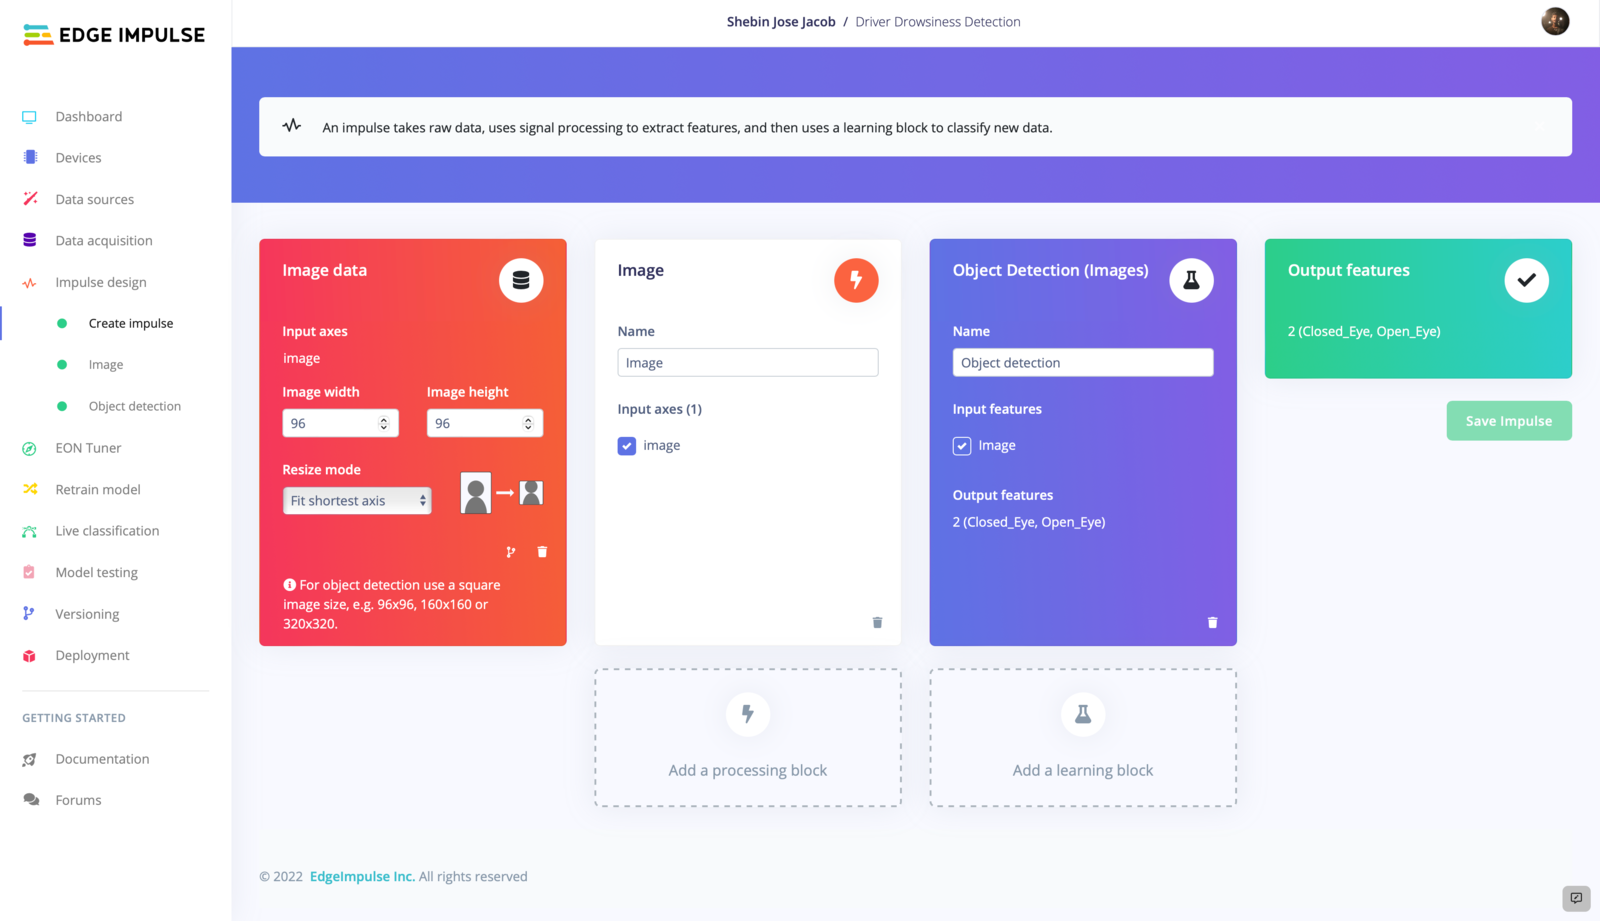
3. Feature Generation
In the next stage of our project, we will focus on generating features. To do this, we will go to the Image tab and select the desired color depth. In our case, we have chosen to use RGB and now we will initiate the feature generation process.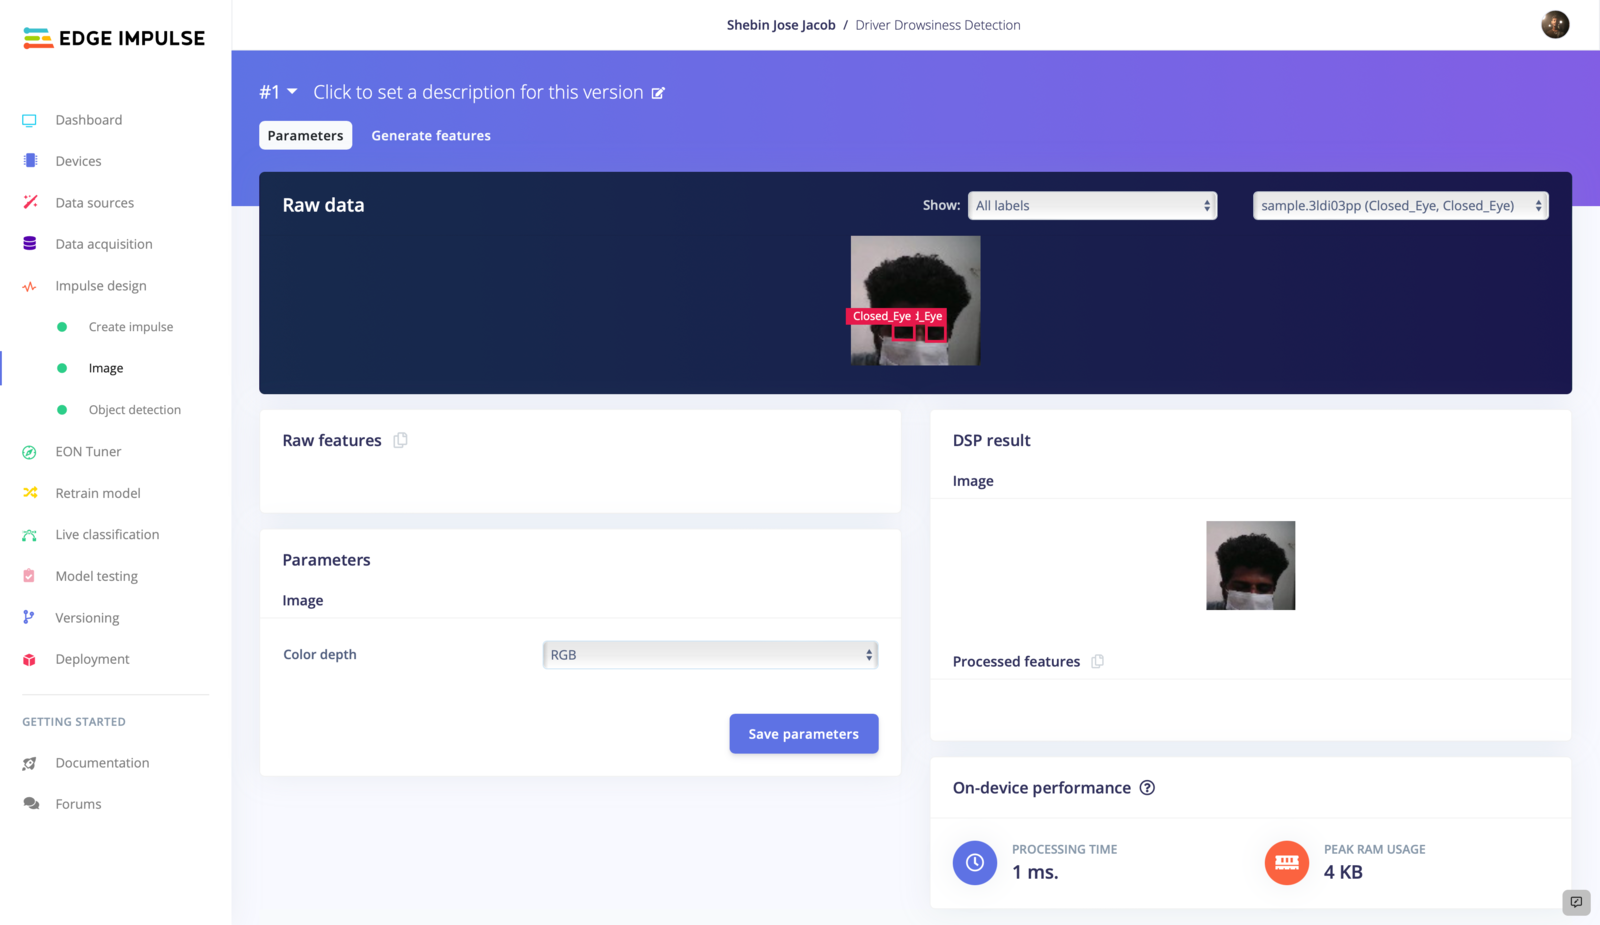

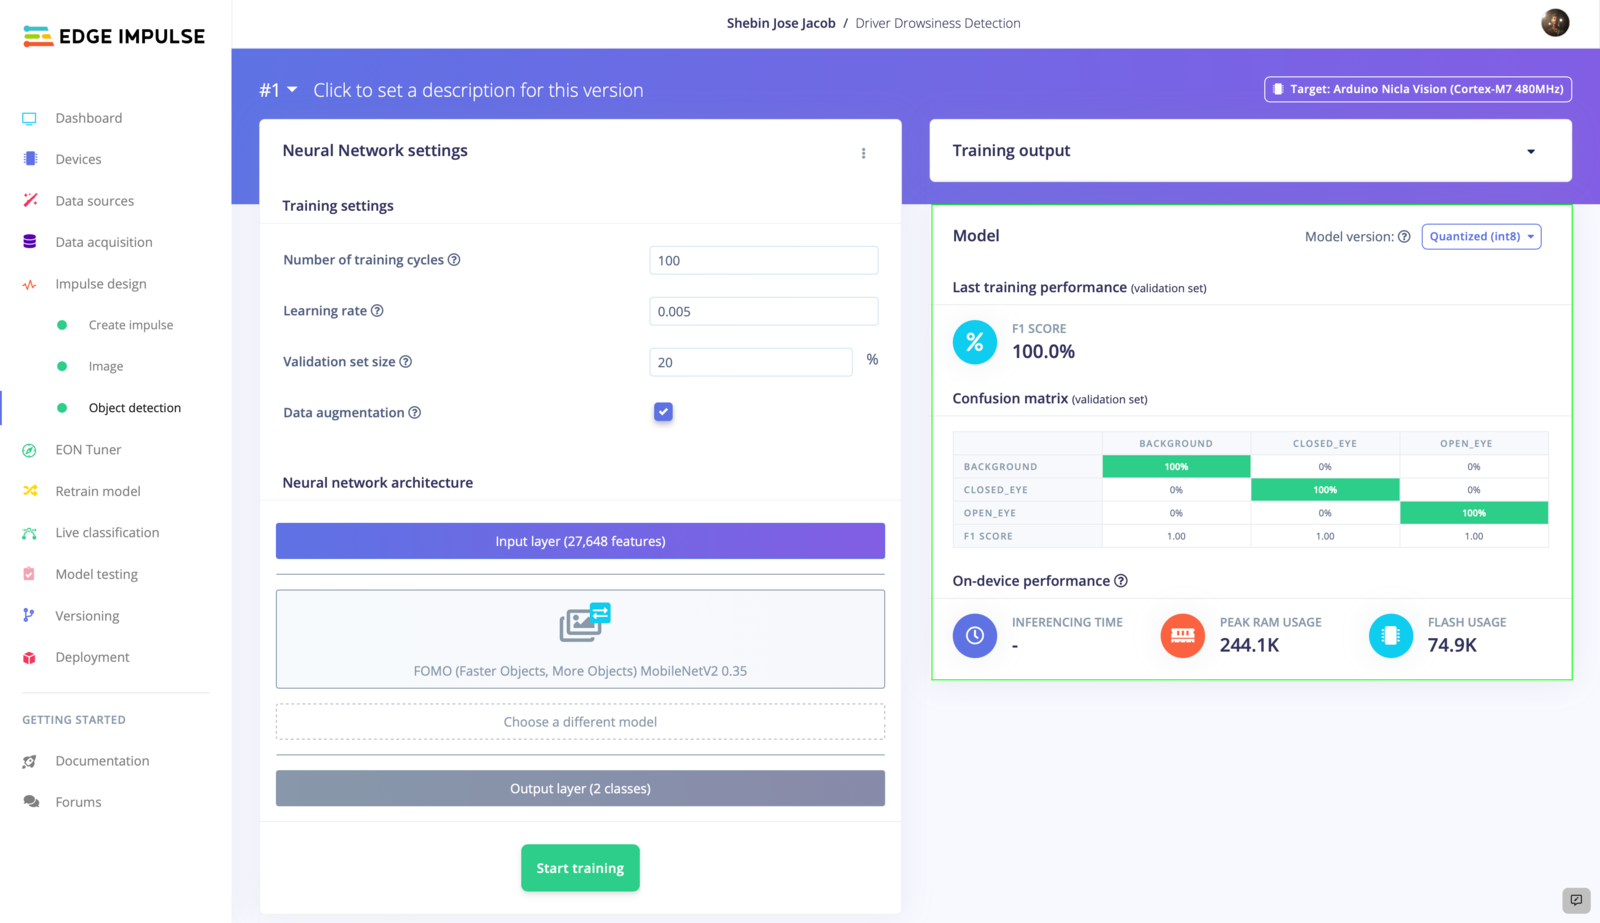
4. Model Training
With the necessary impulse design complete, we can now move on to the process of training our machine learning model. The specific settings that we have chosen for model training are shown below. It is important to note that these settings can be adjusted in order to improve the accuracy of the trained model, but care must be taken to avoid overfitting.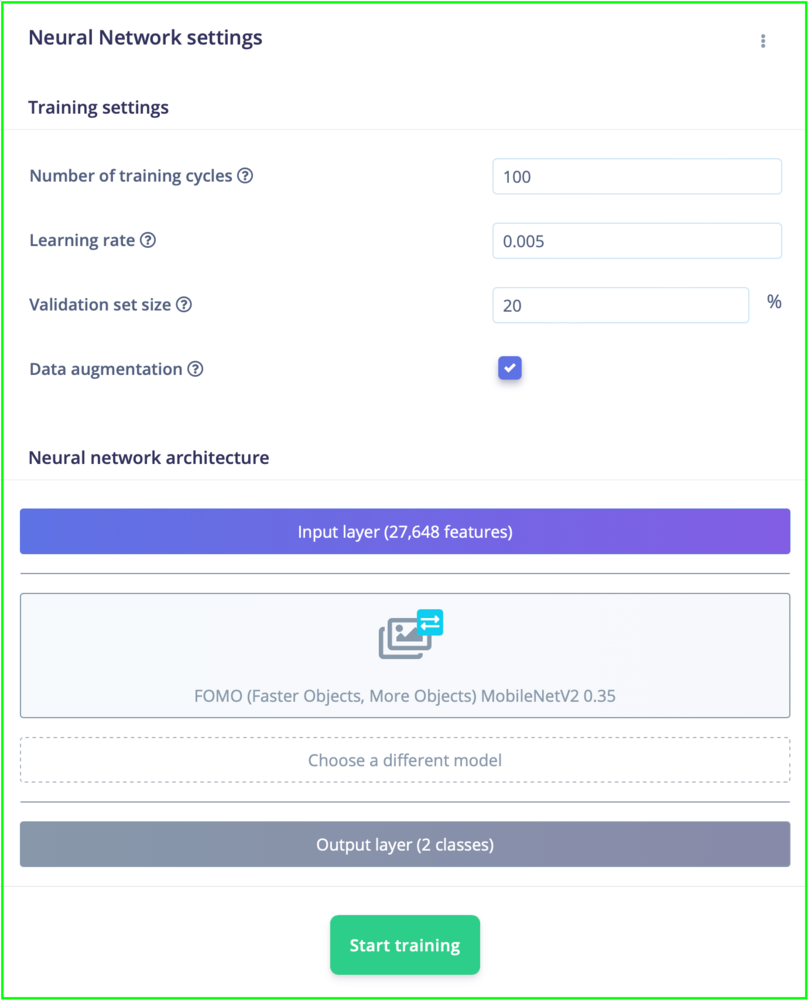
5. Model Testing
Now that we have trained our machine learning model, it is time to evaluate its performance on unseen test data. To do this, we will move on to the Model Testing tab and use the Classify All function. This will allow us to see how well the model performs on the test data and gain insight into its generalization capabilities.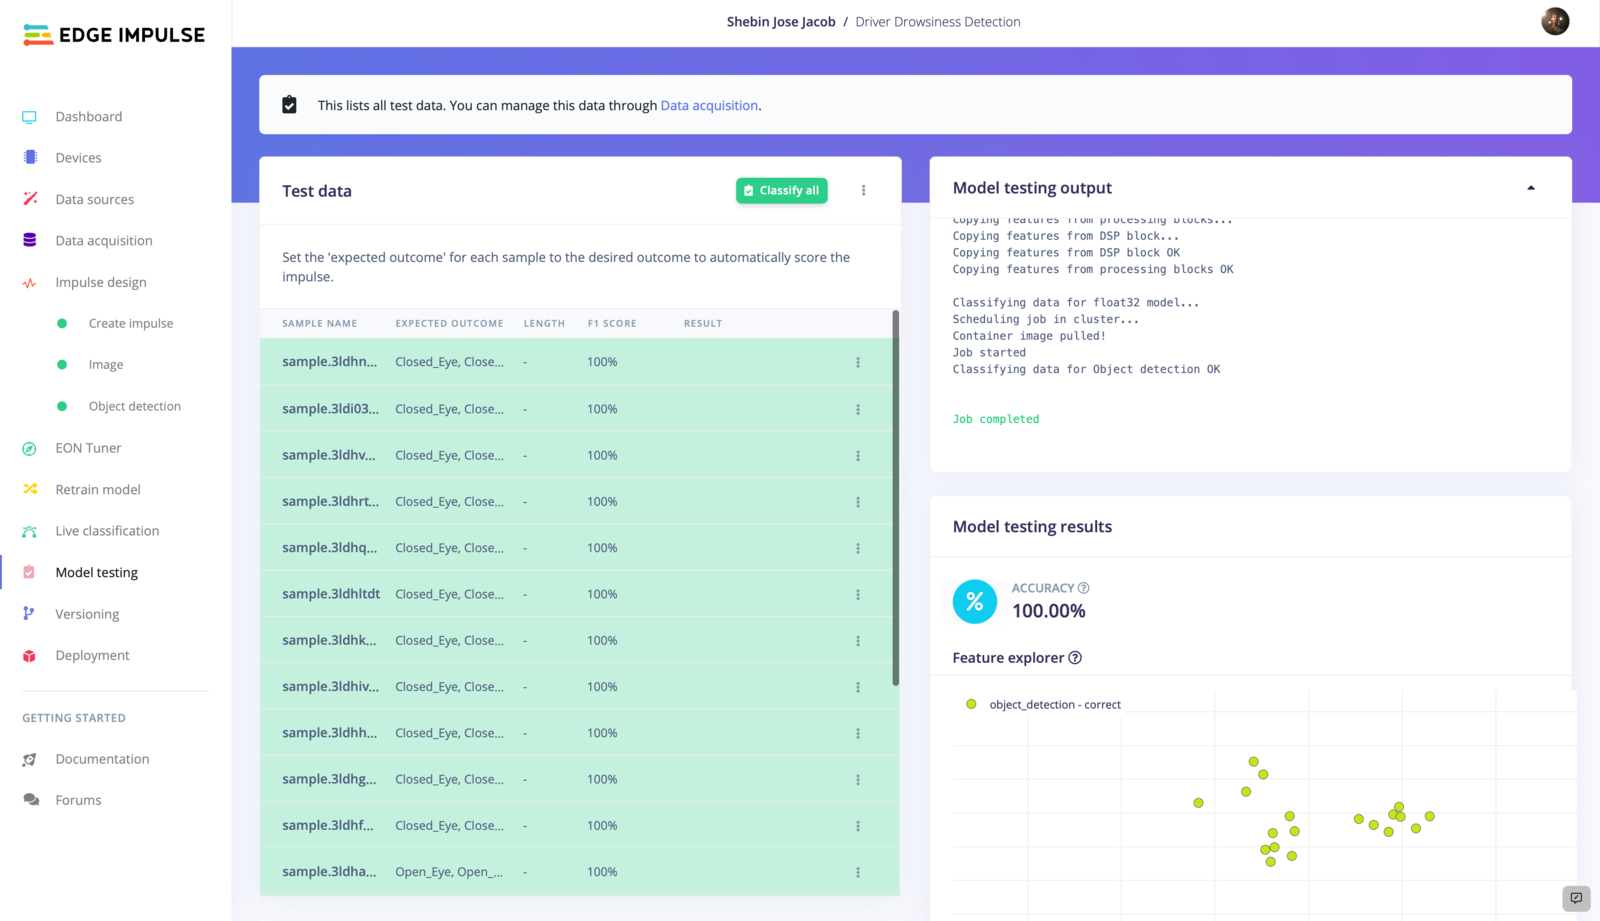
6. Live Classification
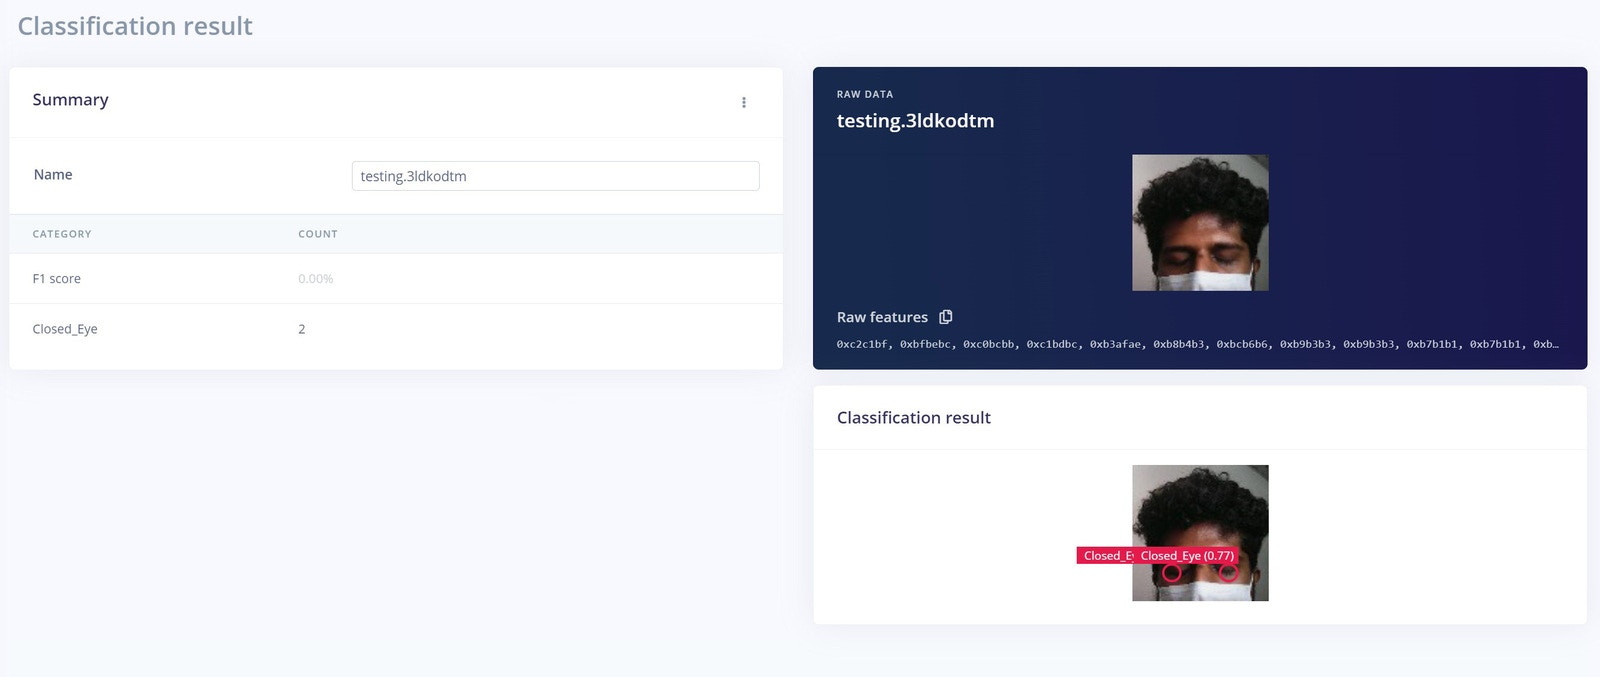
It is now time to move on to the final phase of testing or rather a mock deployment of our machine-learning model. During this phase, we will simulate the use of the model in a real-world setting and evaluate its performance under these conditions. This will allow us to see how well the model performs in a more realistic environment and ensure that it is ready for deployment. It is now time to proceed to the Live Classification tab and acquire a sample from the device. Once we have acquired the sample, we will classify it and observe the results. If our model is able to accurately distinguish between closed and open eyes, we can confidently move forward with deployment.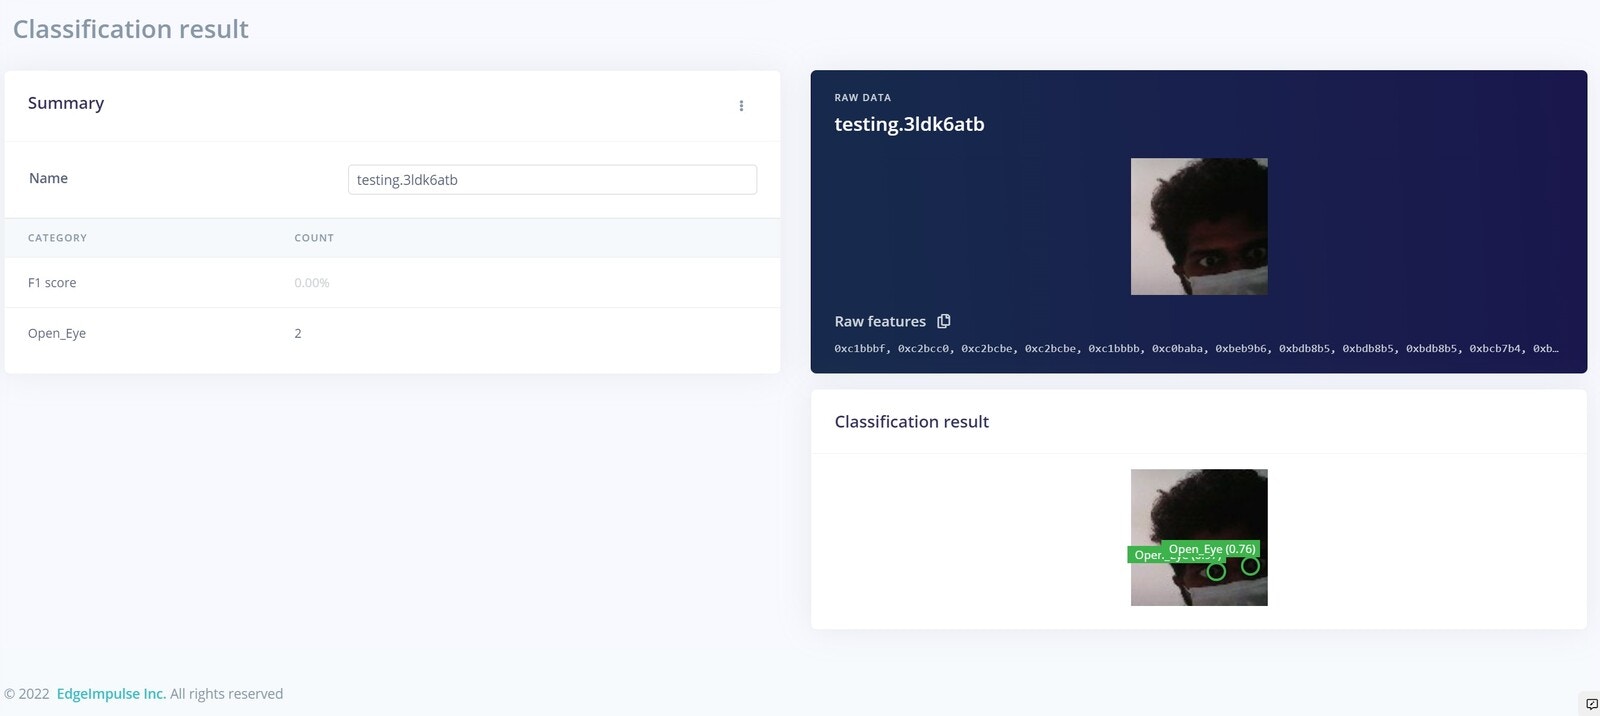
Deployment
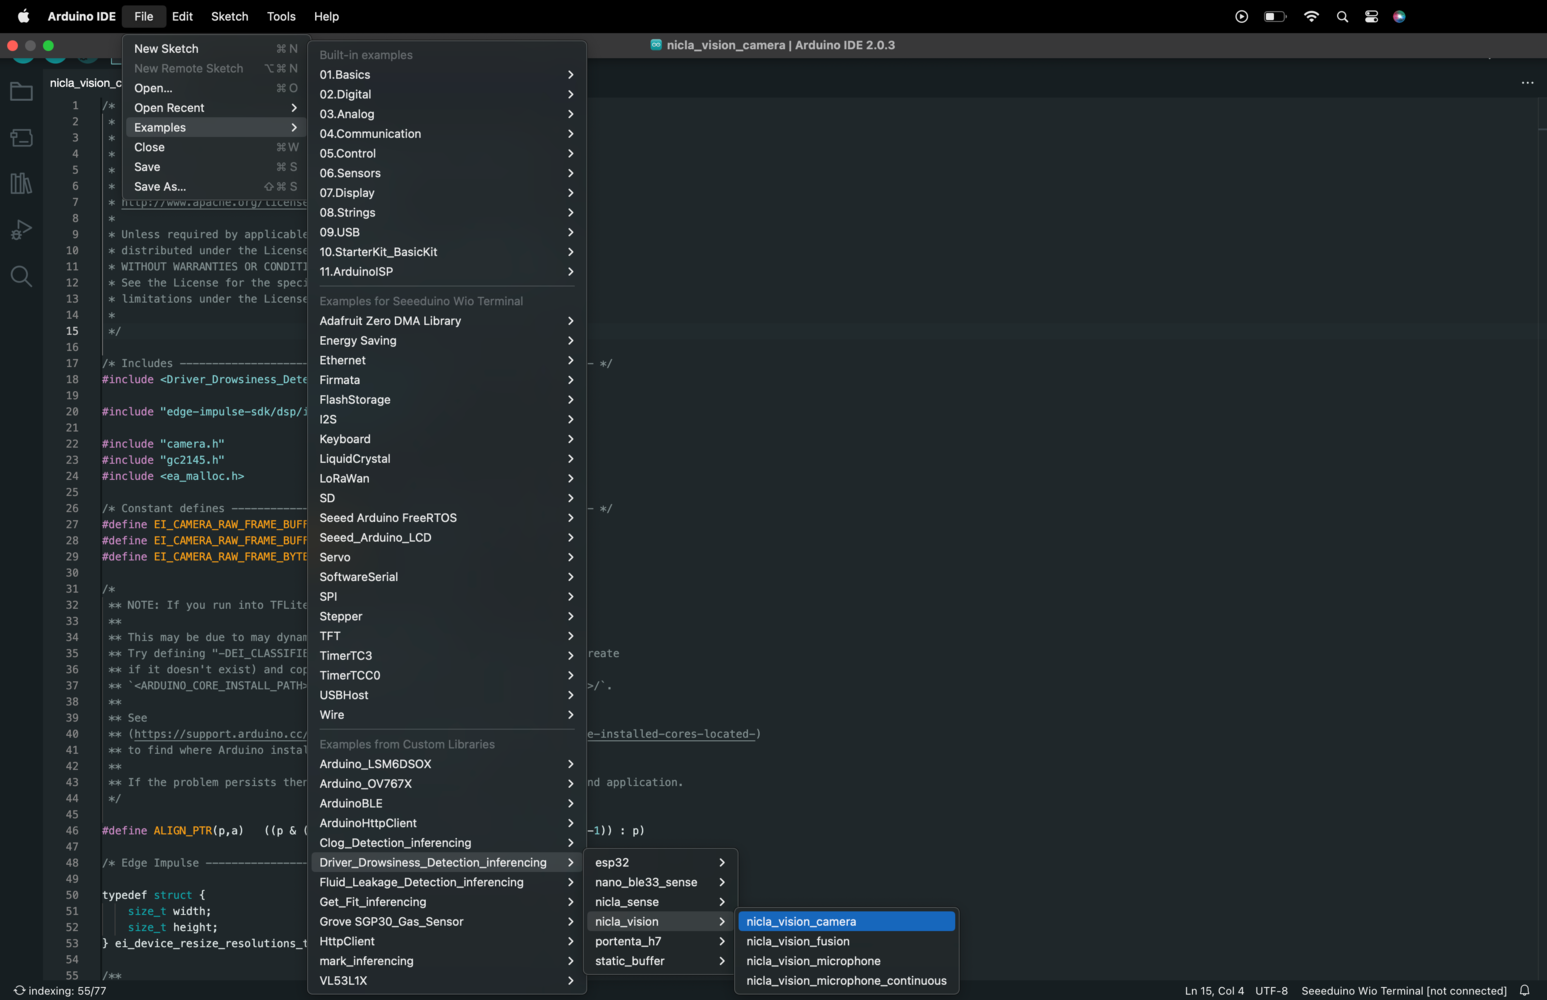
In order to deploy our machine-learning model, we will need to create an Arduino library. This library will contain all of the necessary code and resources required to run the model on the Arduino Nicla Vision.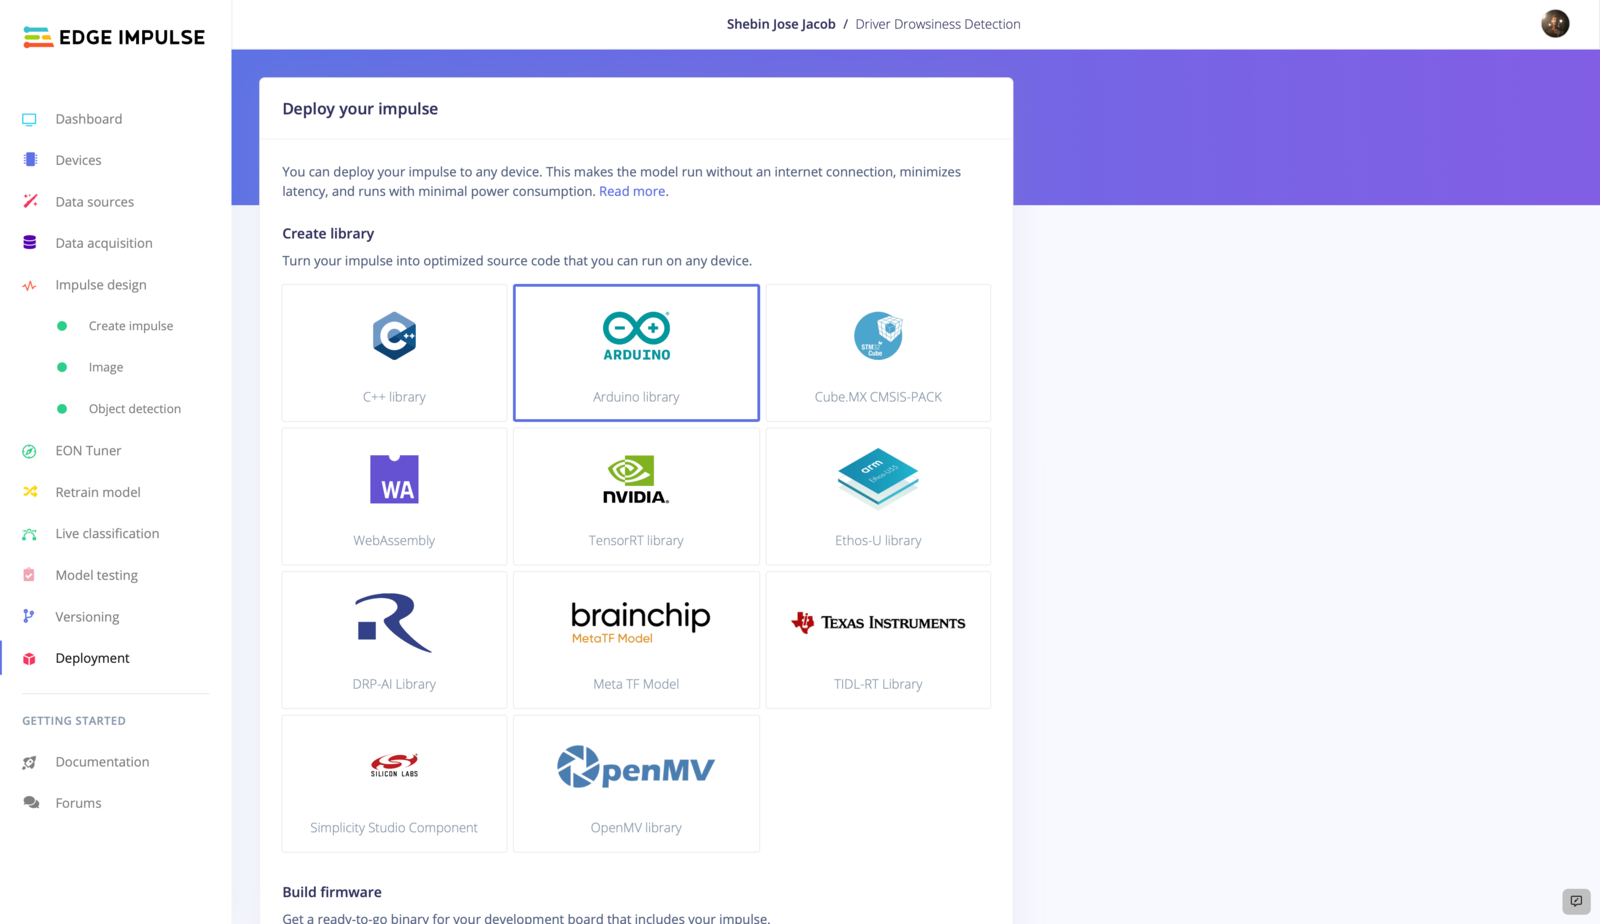
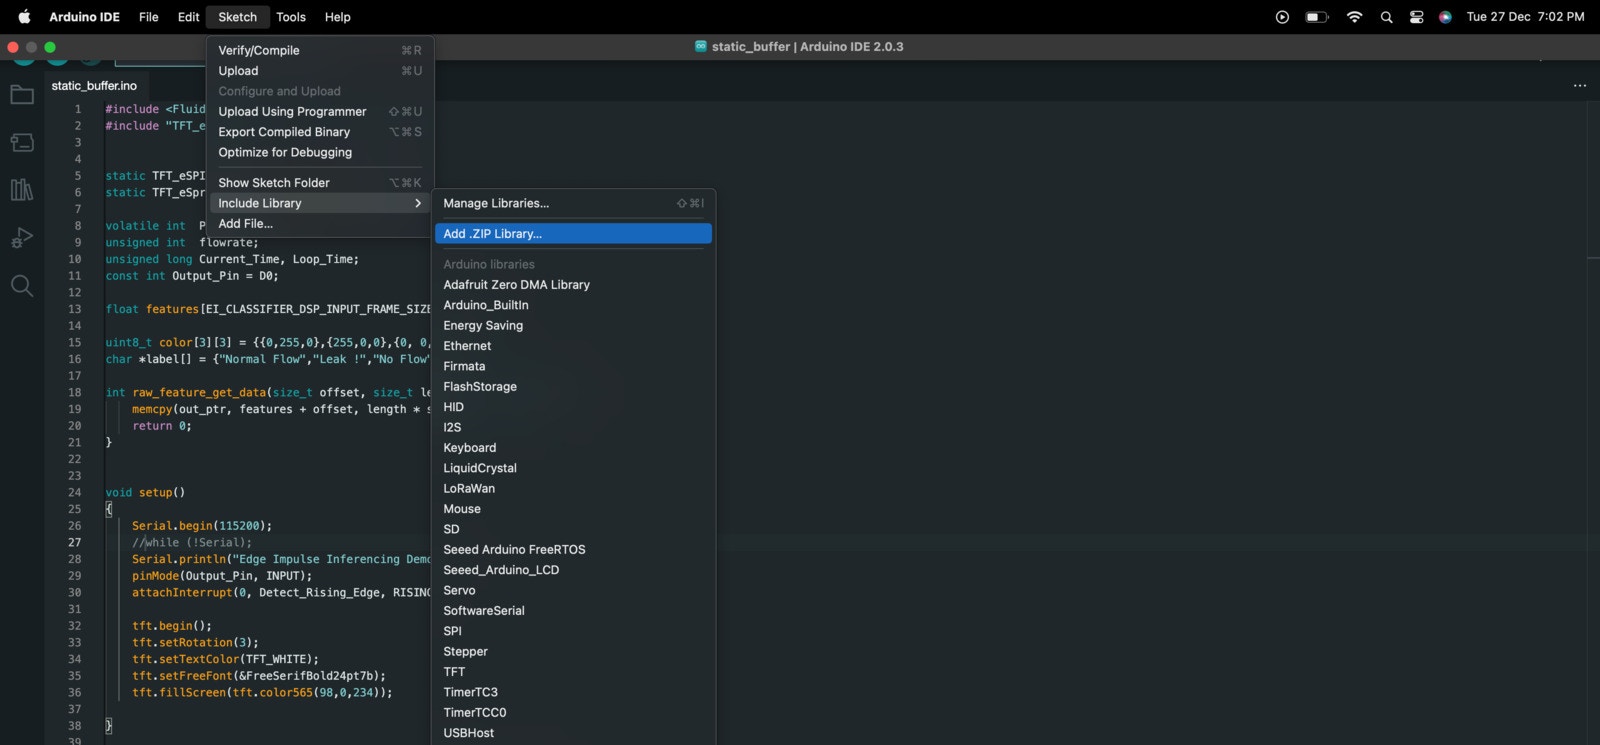
.zip file that contains our model and a set of examples. To use this library on the Arduino platform, we will need to add it to the Arduino Integrated Development Environment (IDE).
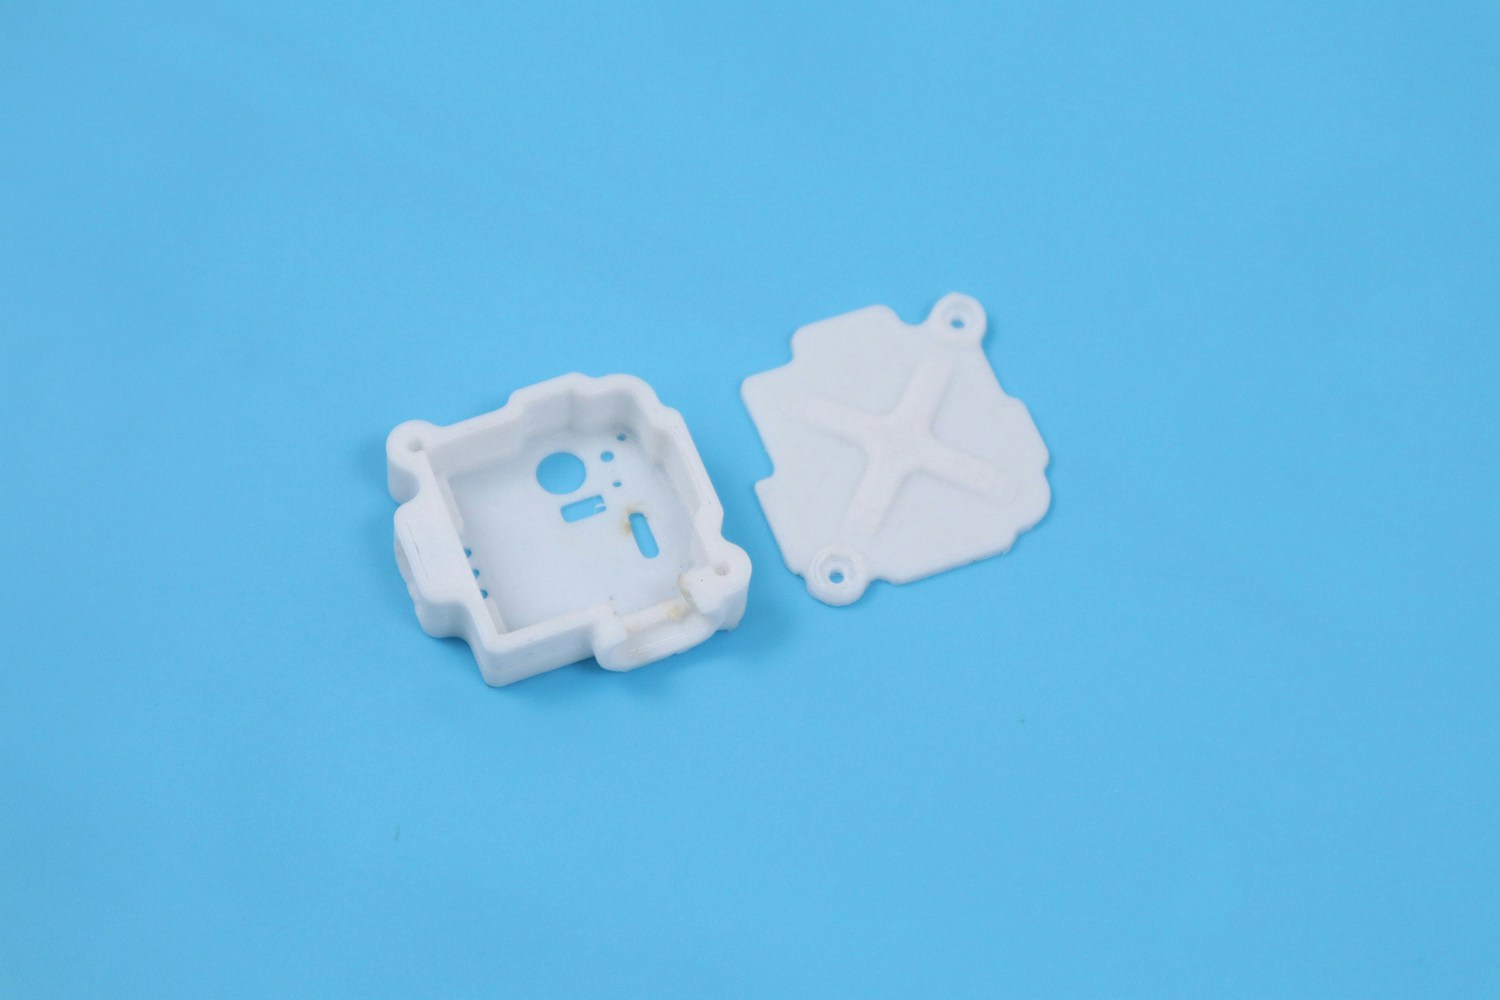
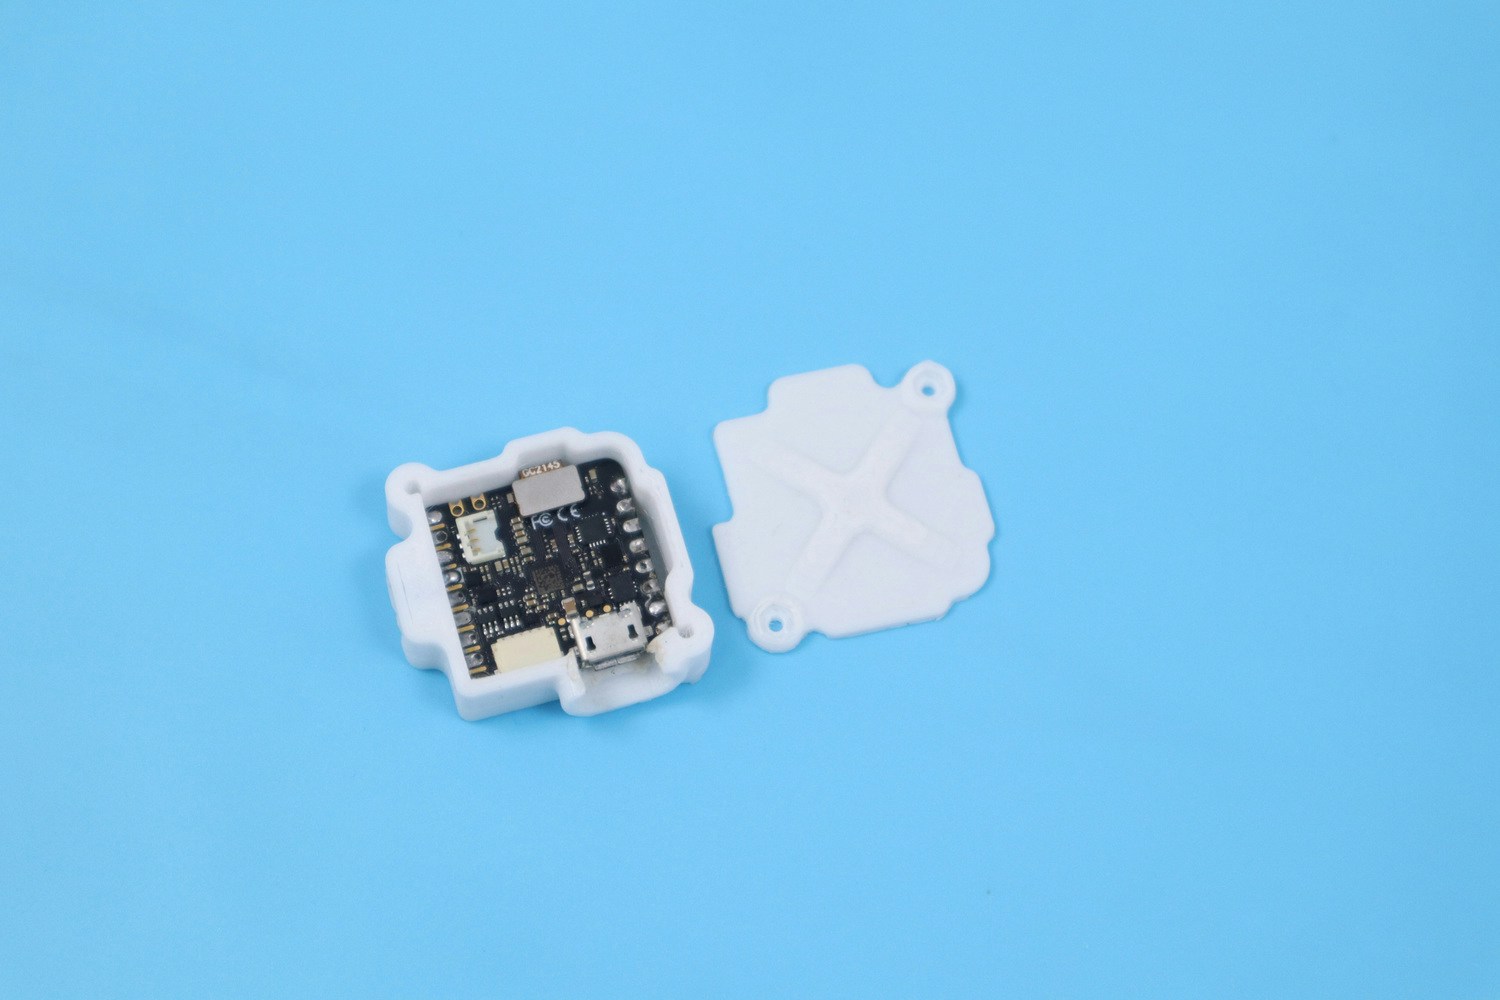
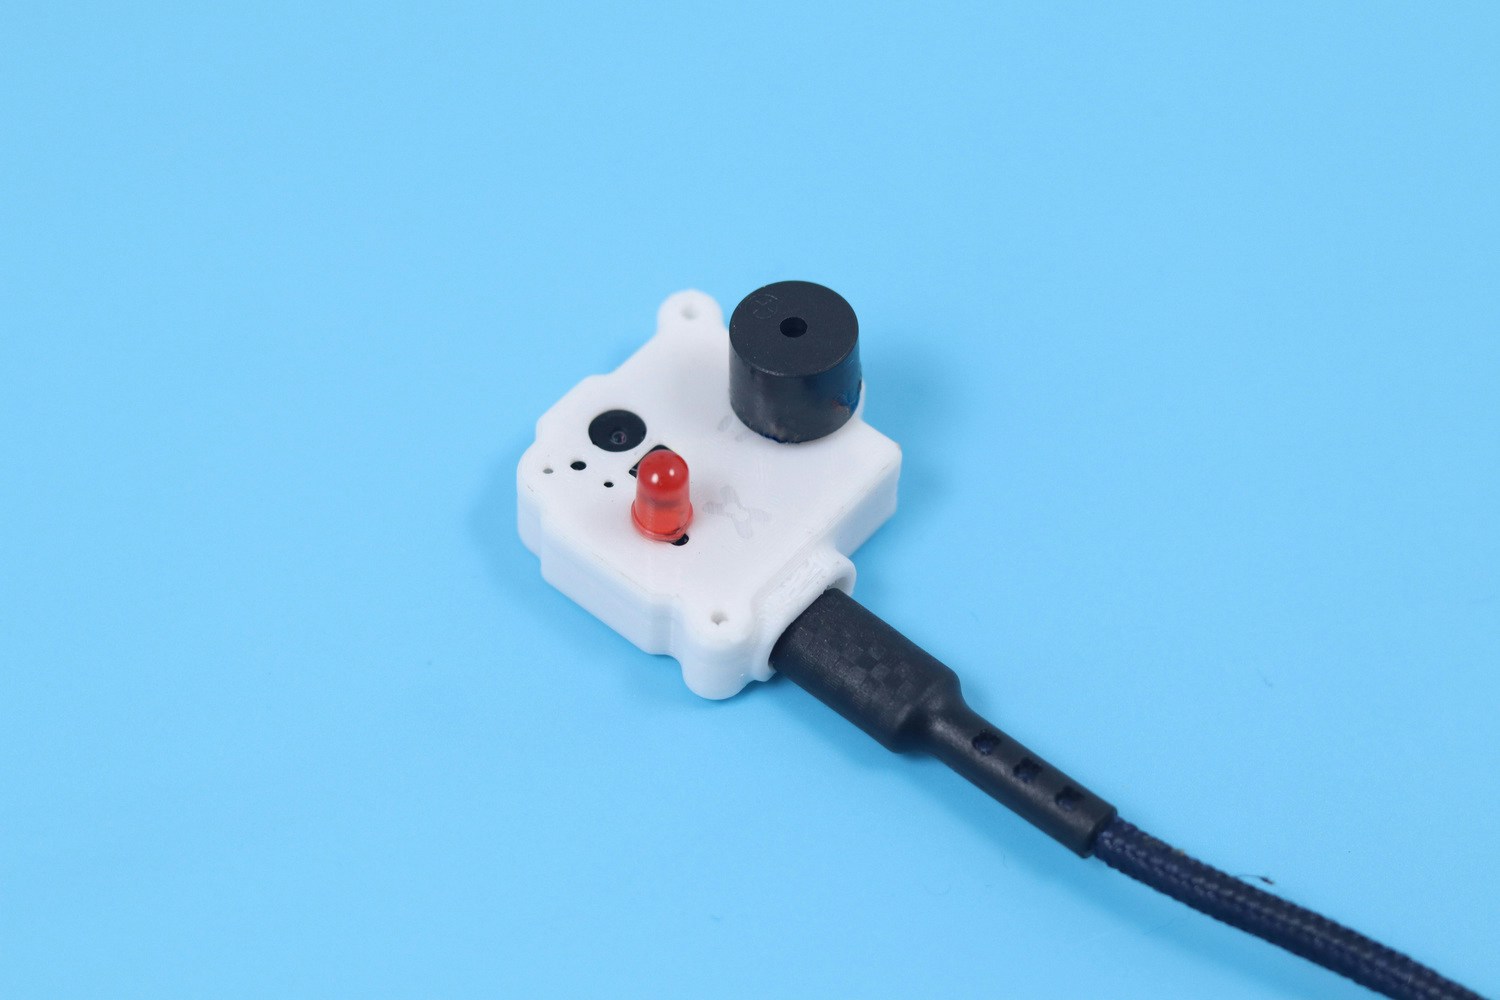
Final Product
After deployment, we developed a device integrating a Nicla Vision, a buzzer, and an LED. The device is enclosed in a neat 3D-printed case which can be easily attached to your car’s dashboard.