Created By: Naveen Kumar Public Project Link: https://studio.edgeimpulse.com/studio/203881

Introduction

Toll plazas serve as critical points for traffic management and revenue collection. However, manual counting and tracking of vehicles can lead to errors and inefficiencies. An automated system can improve accuracy, reduce human error, and streamline operations. Needs for the project:
  • Accuracy: Manual counting is prone to errors, especially during peak hours. An automated system ensures accurate vehicle counts.
  • Efficiency: Automating the process reduces the need for human intervention, speeds up toll collection, and reduces congestion.
  • Data Acquisition: Accurate data about vehicle flow is crucial for effective traffic management, urban planning, and infrastructure development.
  • Security: Tracking vehicles enhances security by identifying suspicious activities and ensuring compliance with toll payments.
  • Cost-Effective: Reducing the requirement for manual labor can lead to decreased operational costs in the long term.
This project aims to create and implement an automated system for identifying and monitoring cars at toll plazas to tally the number of vehicles entering and exiting accurately. The system will utilize a model trained using Edge Impulse Studio and image processing algorithms to count cars, delivering real-time data to toll operators.

Hardware Selection

For this project, we will use the latest Raspberry Pi 5 and the Raspberry Pi Camera Module 3 Wide. We opted for a wide lens because it can capture a larger area, allowing the camera to monitor multiple lanes simultaneously.
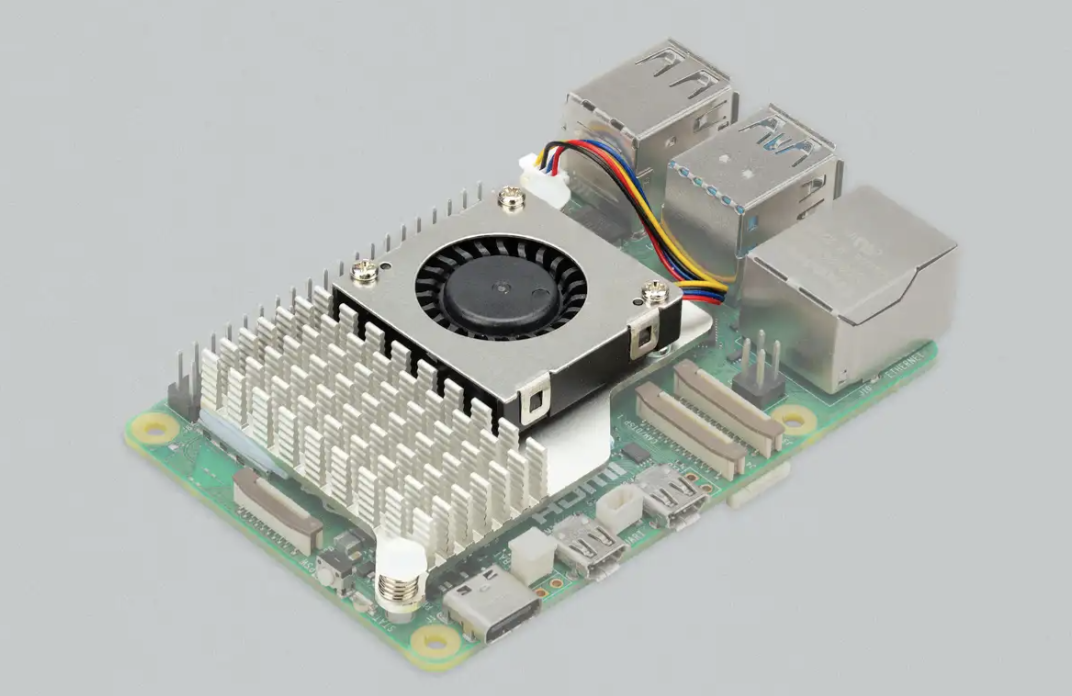
Raspberry Pi 5
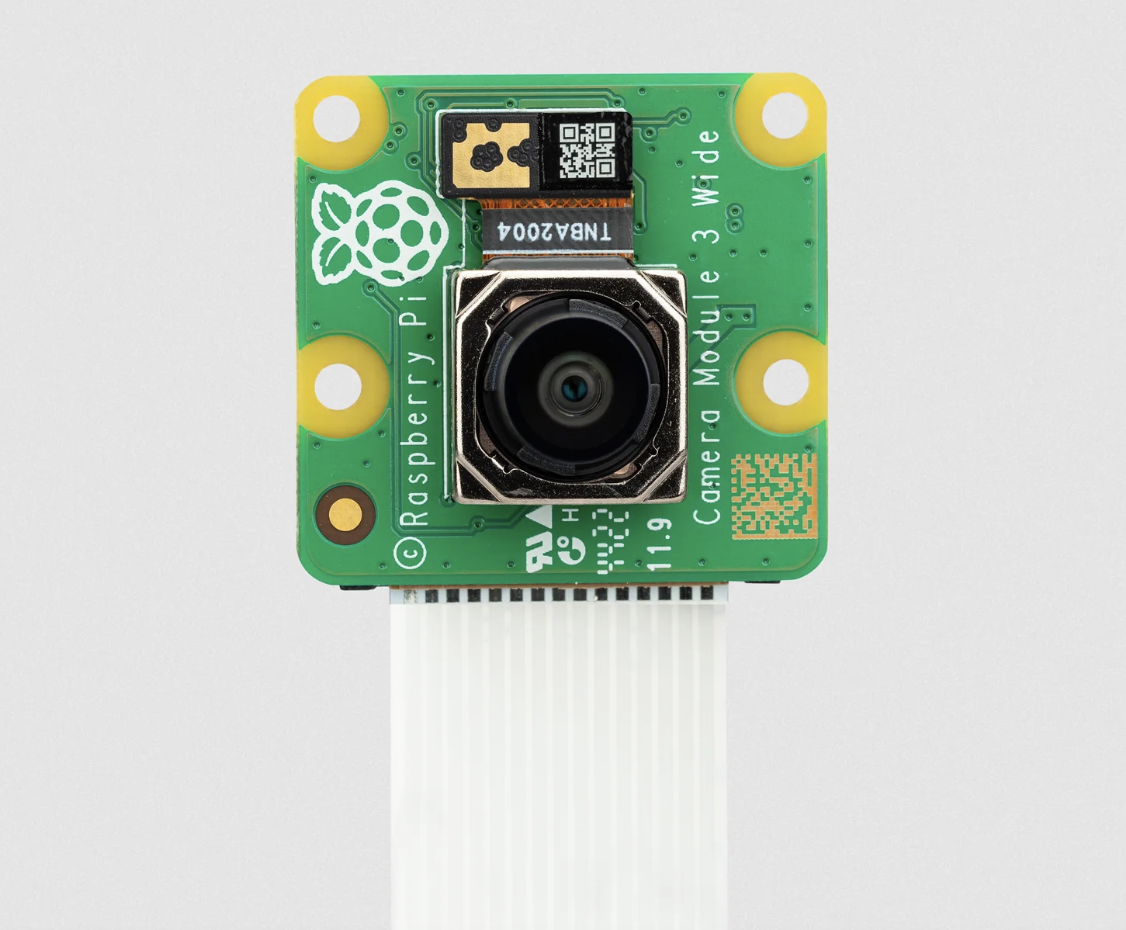
The Camera Module 3 Wide features an ultra-wide 120-degree angle of view.

Raspberry Pi Camera 3

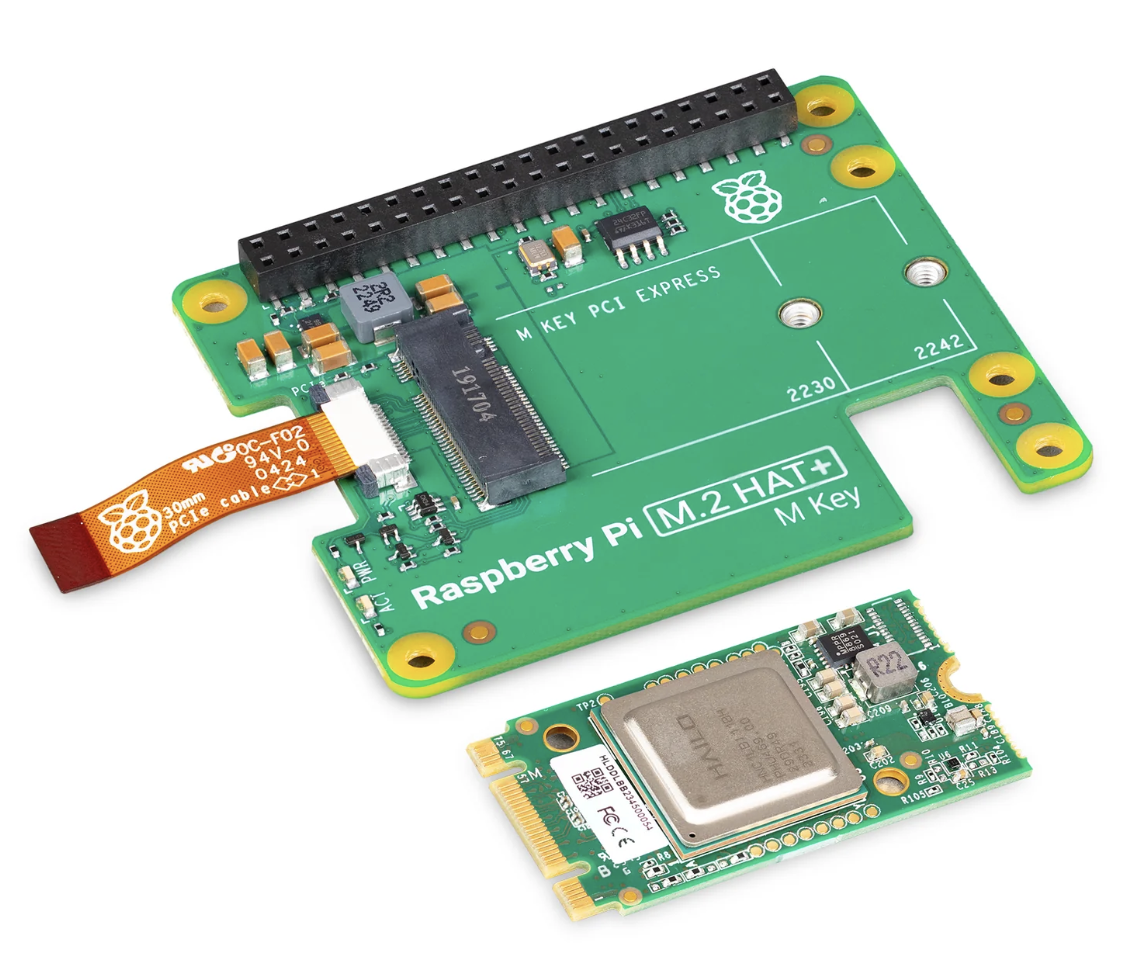
Although the Raspberry Pi 5 is capable of running ML models directly on the CPU, it will have higher latency and lower frames per second (FPS) for the model we will be using to detect and track cars. Thus, we will use a Raspberry Pi AI Kit that includes the Raspberry Pi M.2 HAT+ and a Hailo AI acceleration module designed for use with Raspberry Pi 5. The AI module features a 13 tera-operations per second (TOPS) neural network inference accelerator built around the Hailo-8L chip. The AI accelerator reduces latency and bandwidth usage, allowing for quicker response times and more efficient traffic management.

Raspberry Pi AI Kit

For mounting the AI Kit to the Raspberry Pi 5, please follow the instructions provided in the official documentation, here: https://www.raspberrypi.com/documentation/accessories/ai-kit.html

Data Collection

A few video clips of the vehicle traffic were recorded from a pedestrian bridge using an iPhone camera. We used the following Python script to extract every 20th frame from the video clips to eliminate redundant frames.
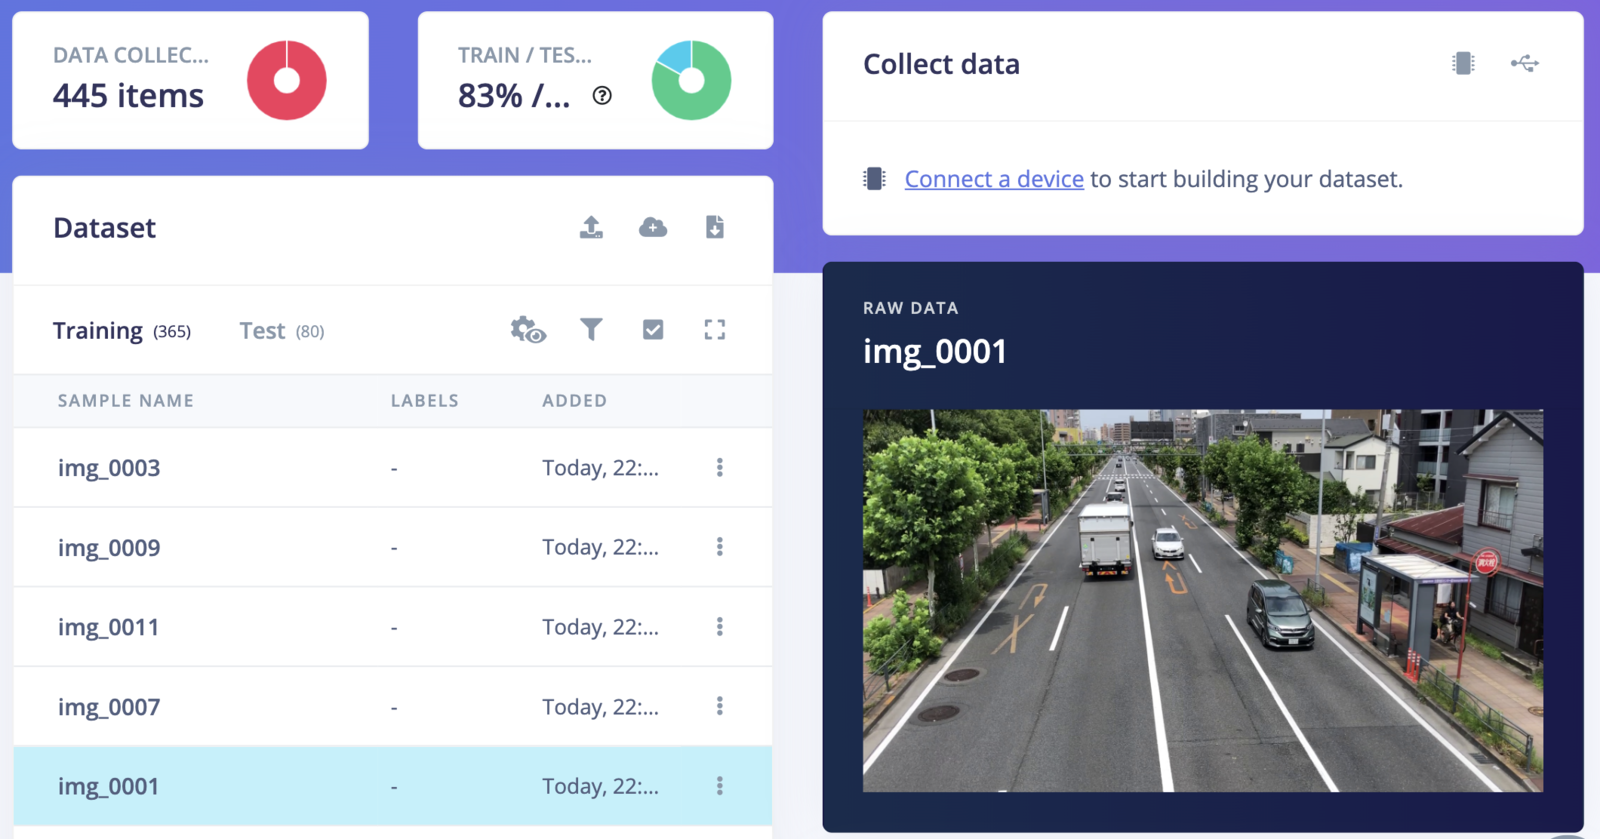
To upload the dataset, follow the instructions in the Edge Impulse documentation to install the Edge Impulse CLI, and then execute the command below:
The command above will upload the images to Edge Impulse Studio and split them into “Training” and “Testing” datasets. Once the upload is finished successfully, the datasets will be visible on the Data Acquisition page in Edge Impulse Studio.
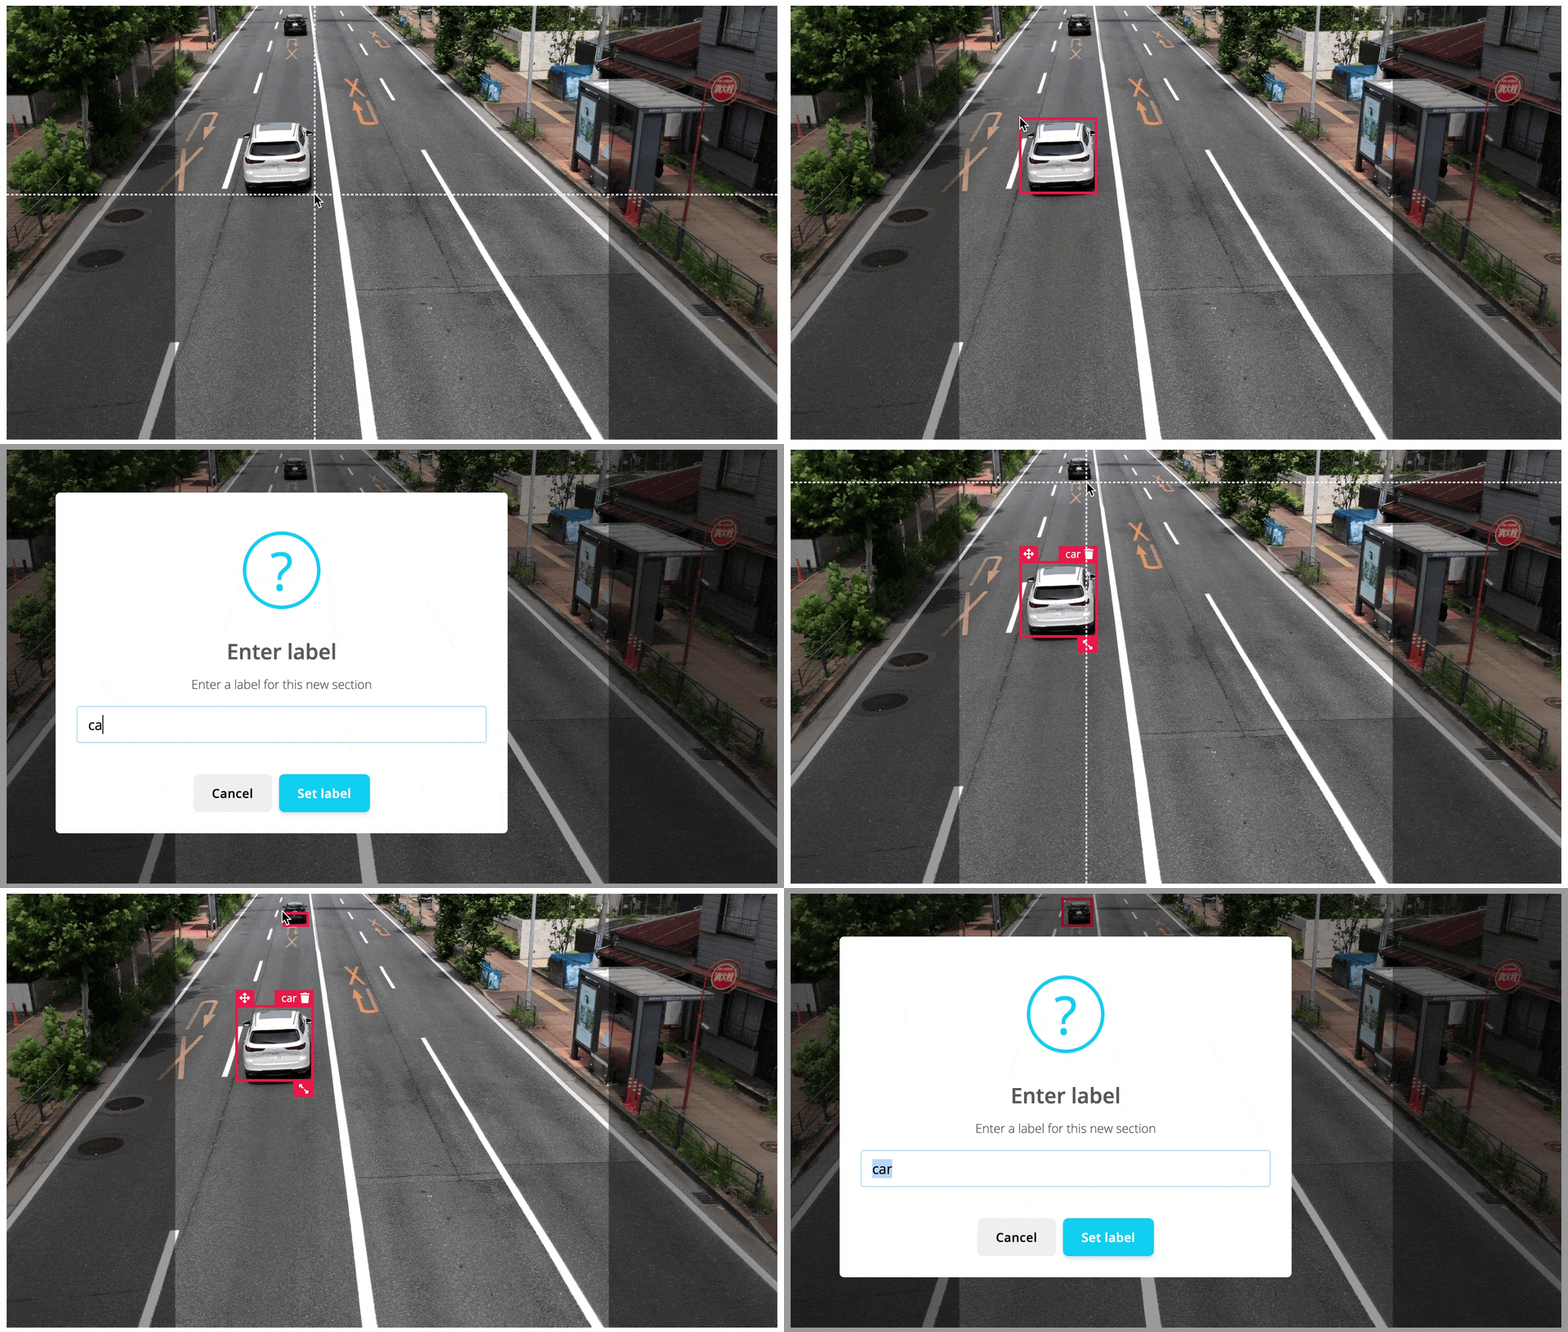
We can now label the data using bounding boxes in the Labeling Queue tab, as demonstrated in the GIF below.
To better train the model to recognize and identify cars, we intentionally annotated only cars among the various vehicles in the scene. This approach allows us to focus solely on the specific object of interest, which will improve the accuracy and effectiveness of the model.

Model Training

To create an Impulse, follow these steps:
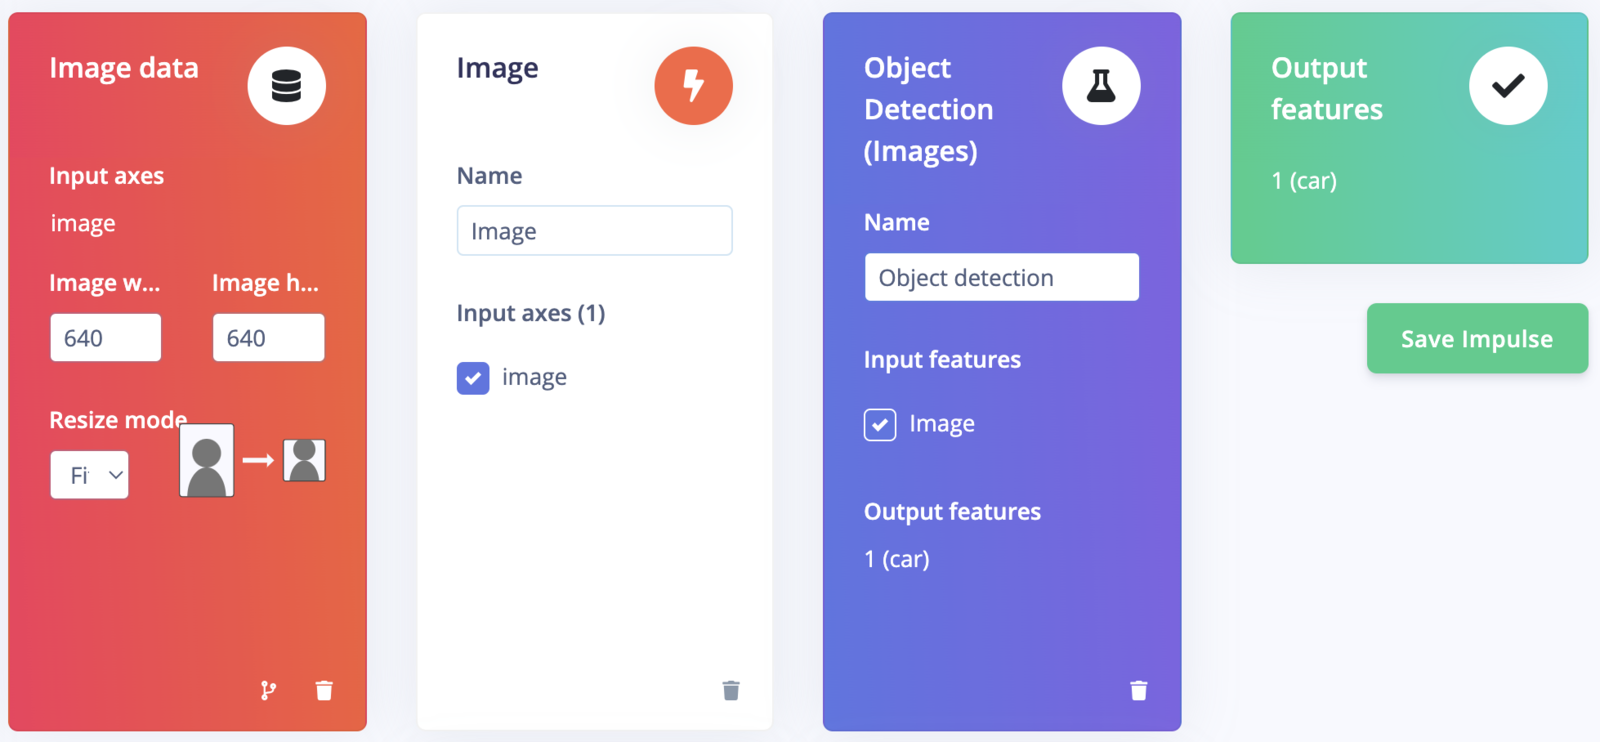
  1. Go to the Impulse Design section, then select the Create Impulse page. Since the Hailo AI accelerator enables us to select high-resolution images while still maintaining a high FPS, we have opted for a 640x640 pixel image size in the “Image Data” form fields to achieve better accuracy.
  2. Click on “Add a processing block” and choose “Image”. This step will pre-process and normalize the image data while also giving us the option to choose the color depth.
  3. Click on “Add a learning block” and choose “Object Detection (Images)”.
  4. Finally, click on the “Save Impulse” button to complete the process.
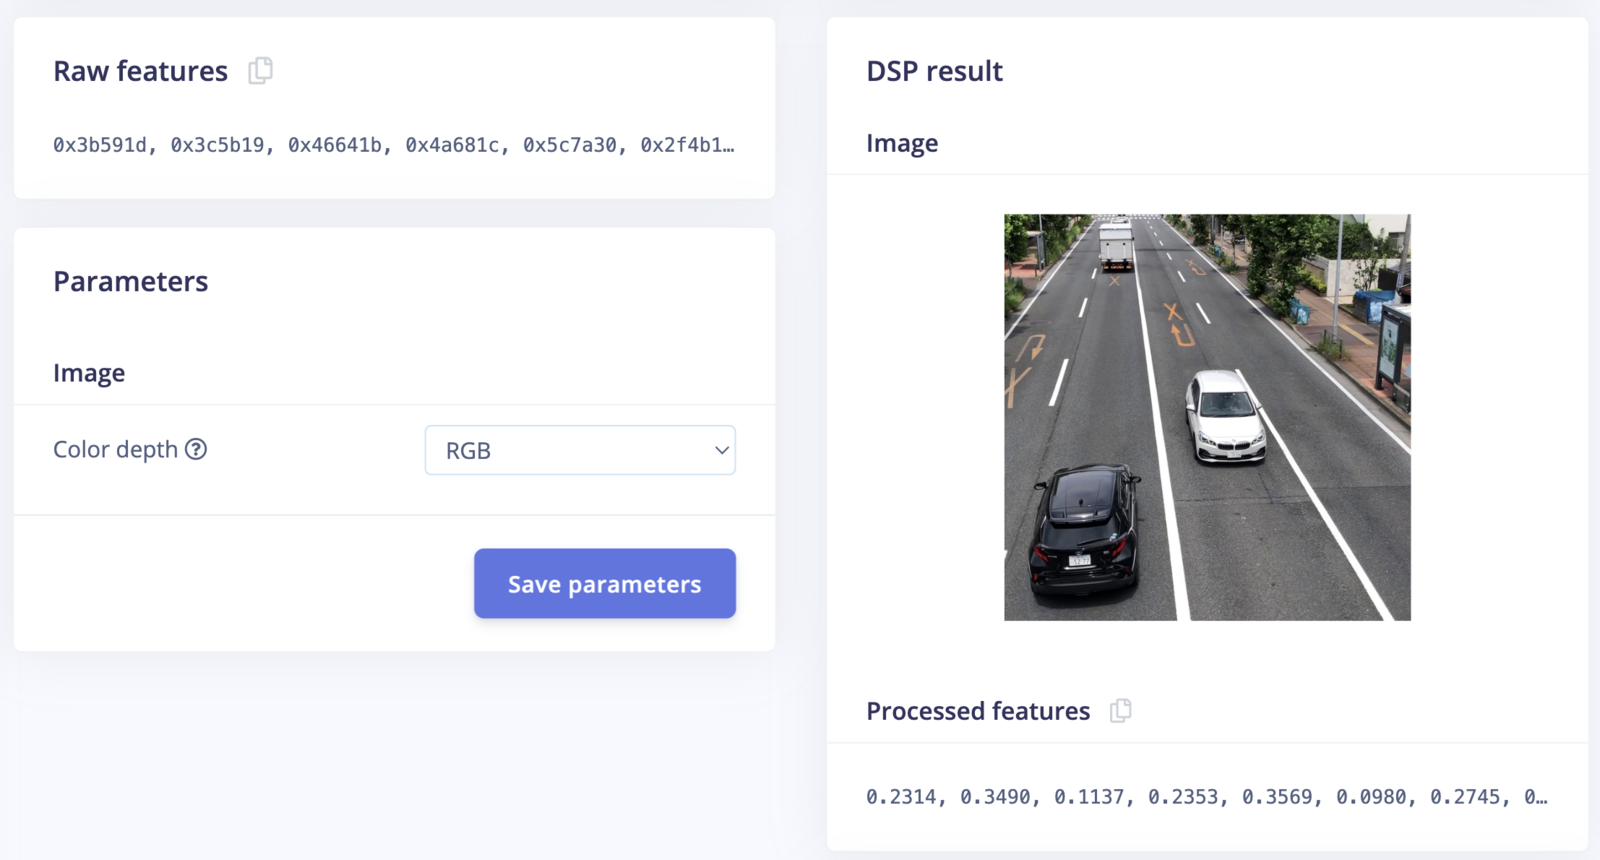
On the Image page, choose RGB as color depth and click on the Save parameters button. The page will be redirected to the Generate Features page.

Raw Features

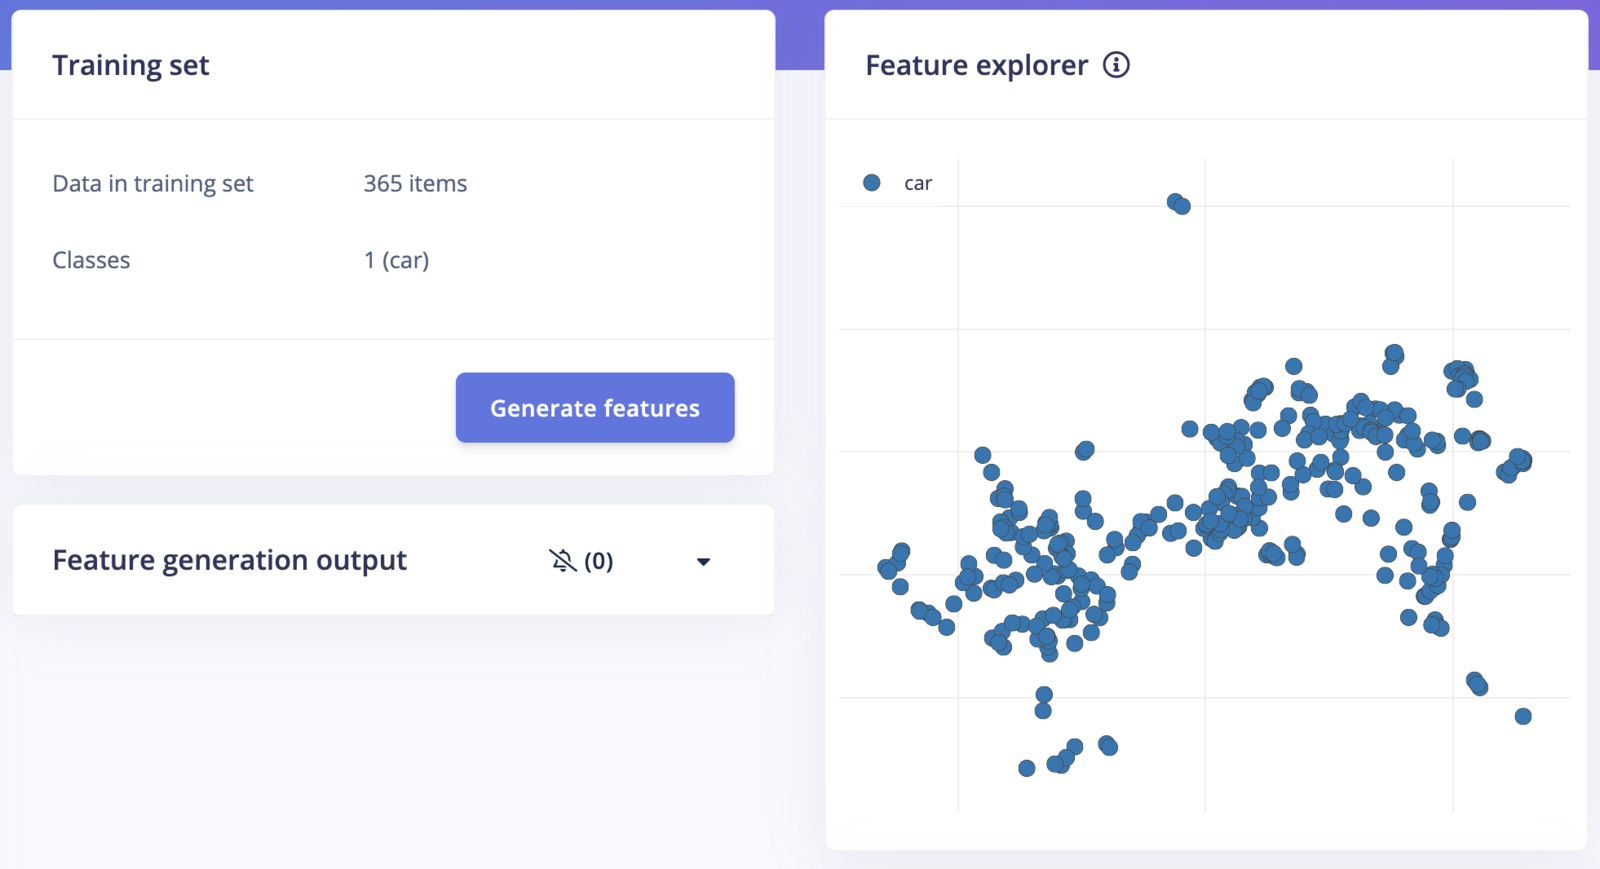
Now we can initiate feature generation by clicking on the Generate features button. Once the feature generation is completed, the data visualization will be visible in the Feature Explorer panel.

Generate Features

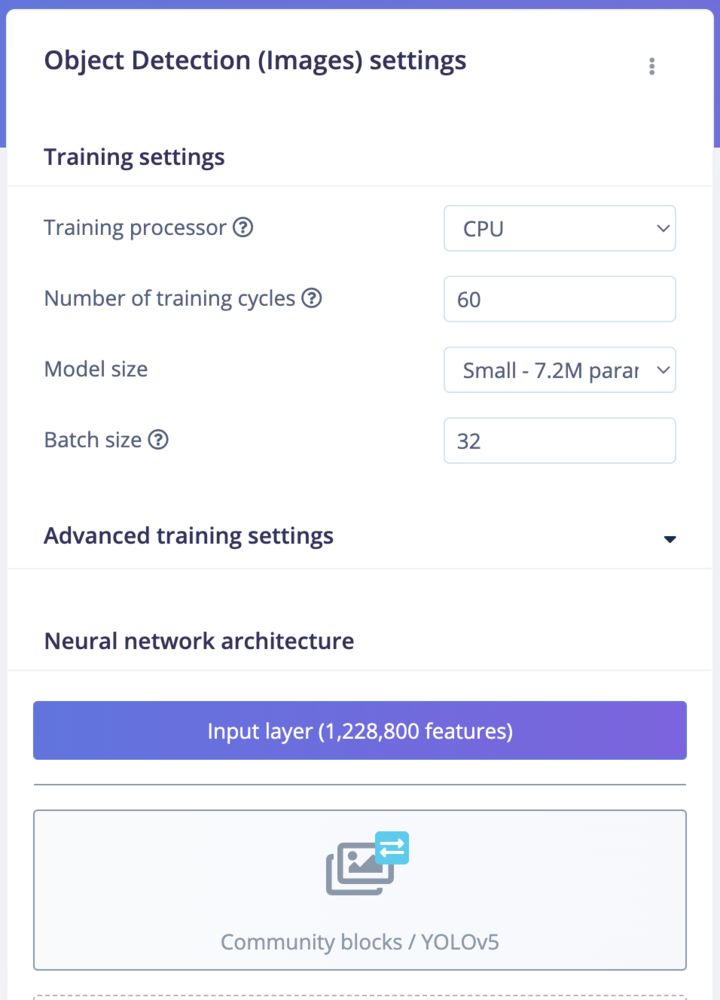
Go to the Object Detection page, then click “Choose a different model” and select the YOLOv5 model. There are 4 variations of the model size available, and we selected the Small version with 7.2 million parameters. Afterward, click the “Start training” button. The training process will take a few minutes to complete.
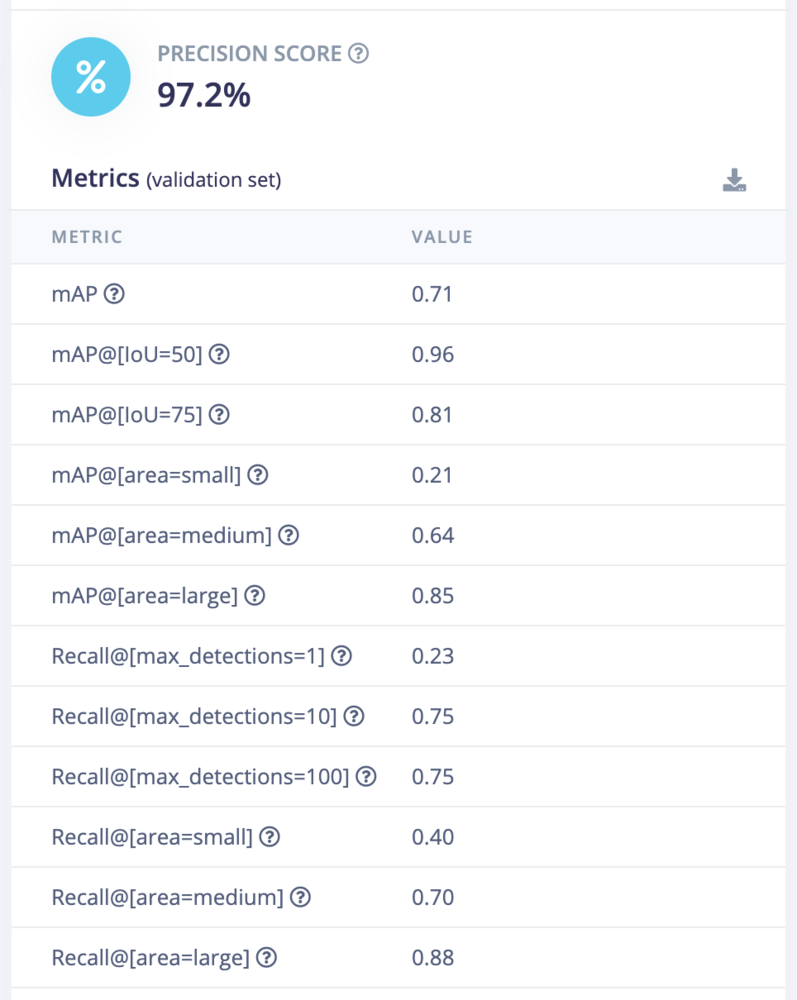
Once the training is completed we can see the precision score and metrics as shown below.
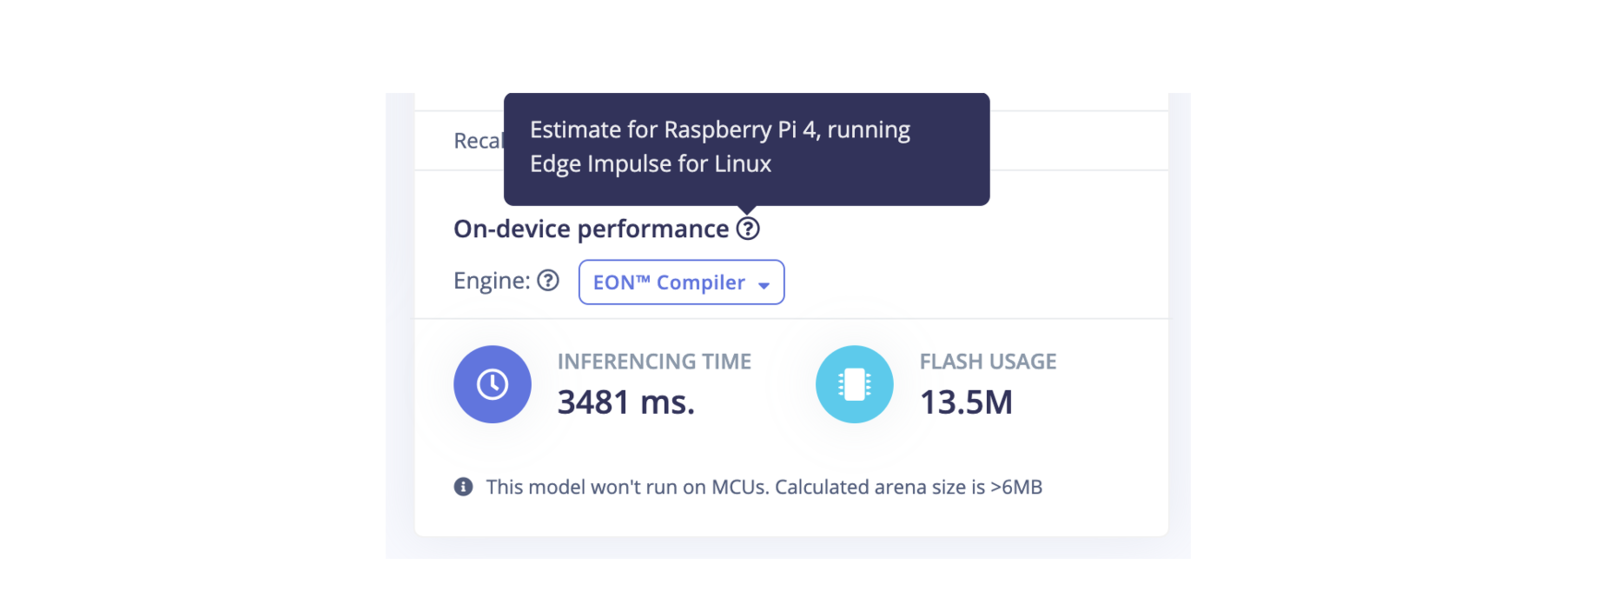
Additionally, it provides on-device performance data for the Raspberry Pi 4. The inference time on a Raspberry Pi 5 (CPU) is expected to be slightly better. We will later assess the performance improvements achieved with the Hailo AI Accelerator.

Estimates

Model Testing

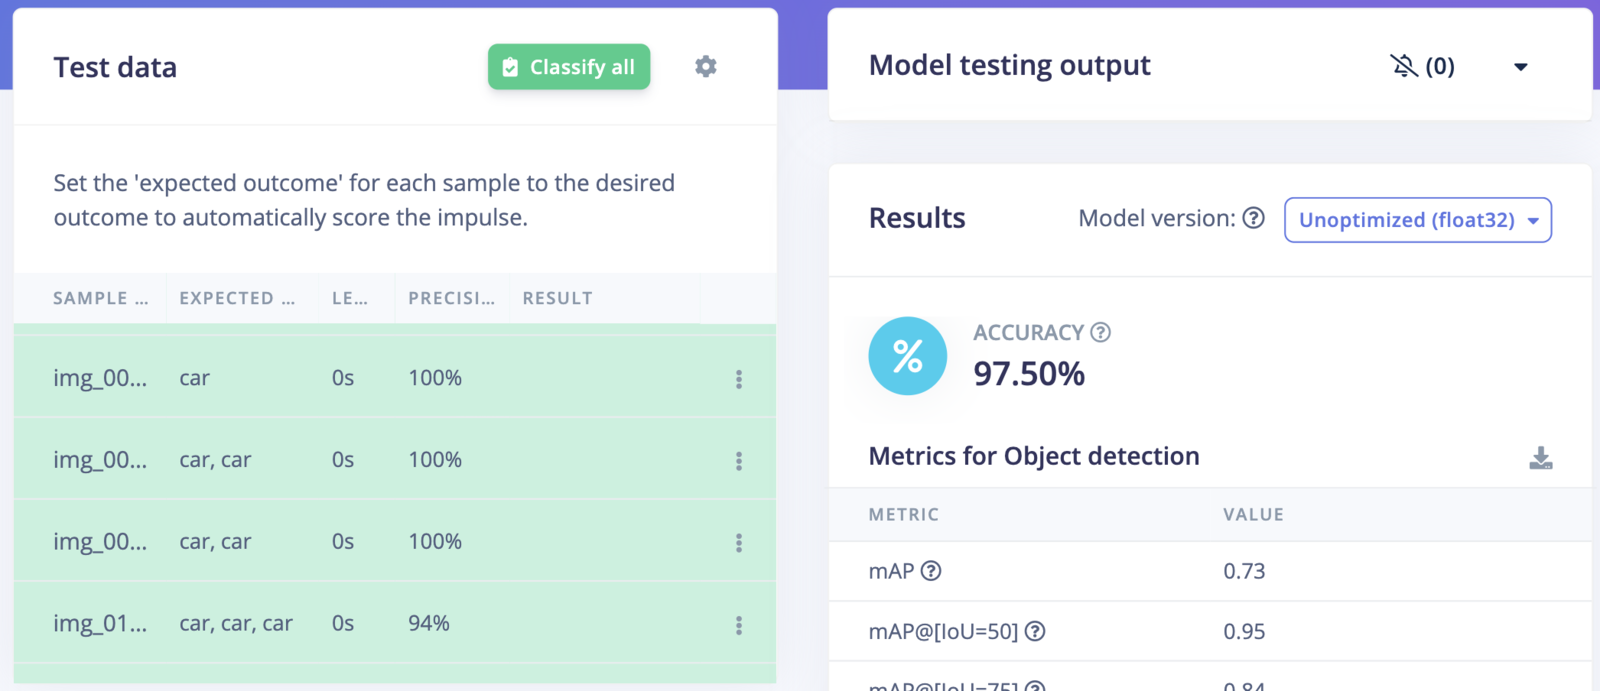
On the Model testing page, click on the “Classify All” button which will initiate model testing with the trained float32 model. The testing accuracy is 97.5%.
Testing

Model Conversion to HEF

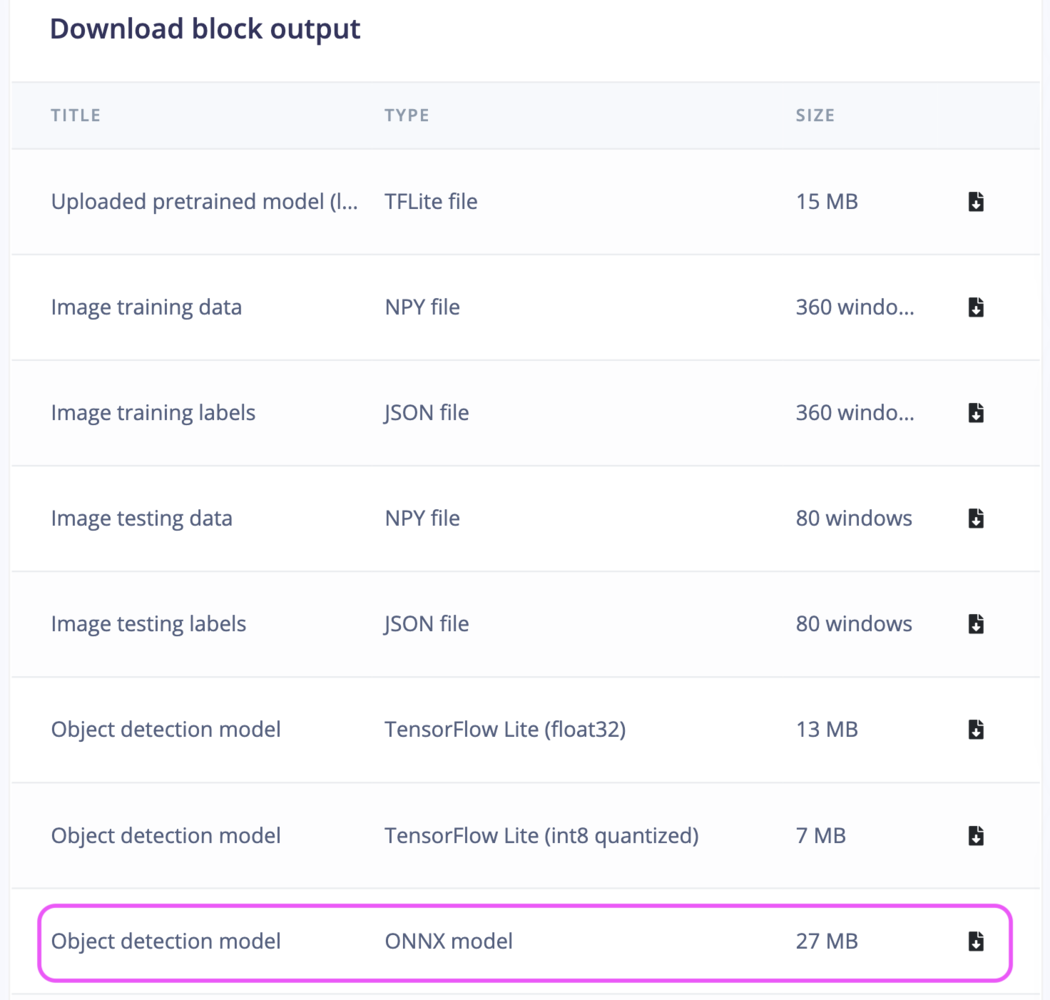
We need to convert the model to a Hailo Executable Format (HEF) to run inferencing. First download the ONNX model (highlighted by a rectangular in the image below) from the Edge Impulse Studio Dashboard. After downloading, copy the the ONNX model (ei-car-yolov5s.onnx in this example) to an x86 Linux machine, which is required for the model conversion toolkit provided by Hailo.
Block Output
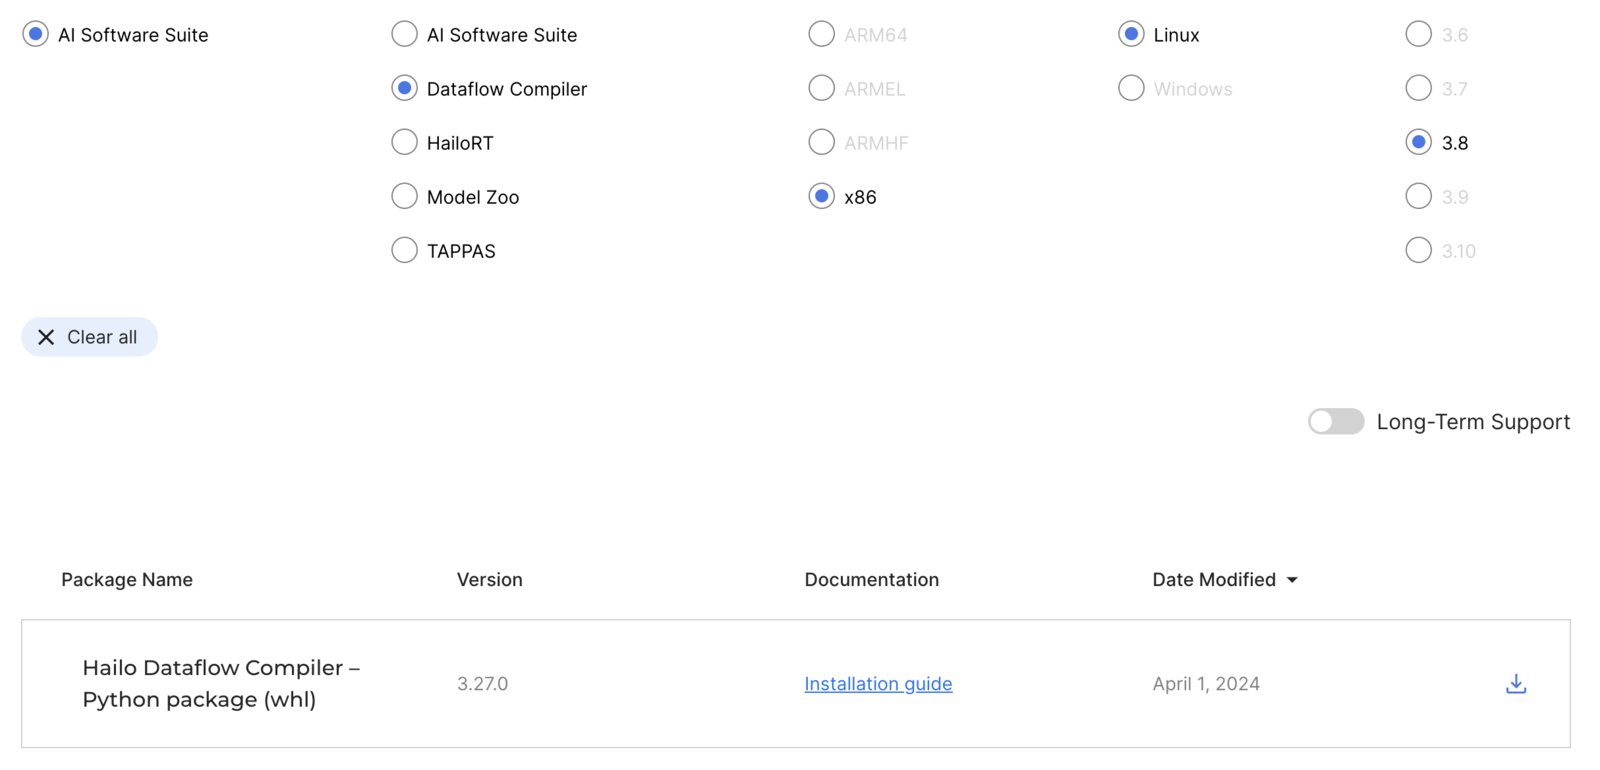
Now, sign up for a free account at the Hailo Developer Zone: https://hailo.ai/developer-zone. Navigate to the “Software Downloads” section and get the Dataflow Compiler version 3.27.0.

Dataflow Compiler

Execute the following commands to set up a virtual environment and install the compiler.
We can verify whether the installation was successful.
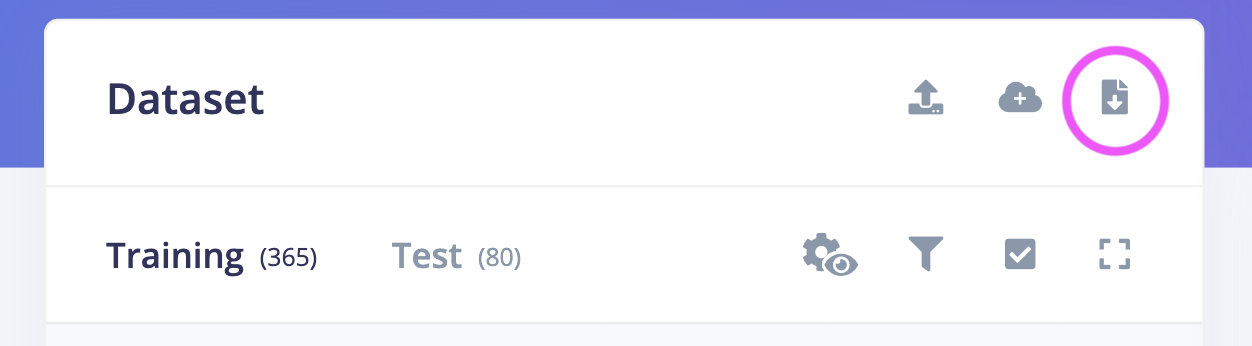
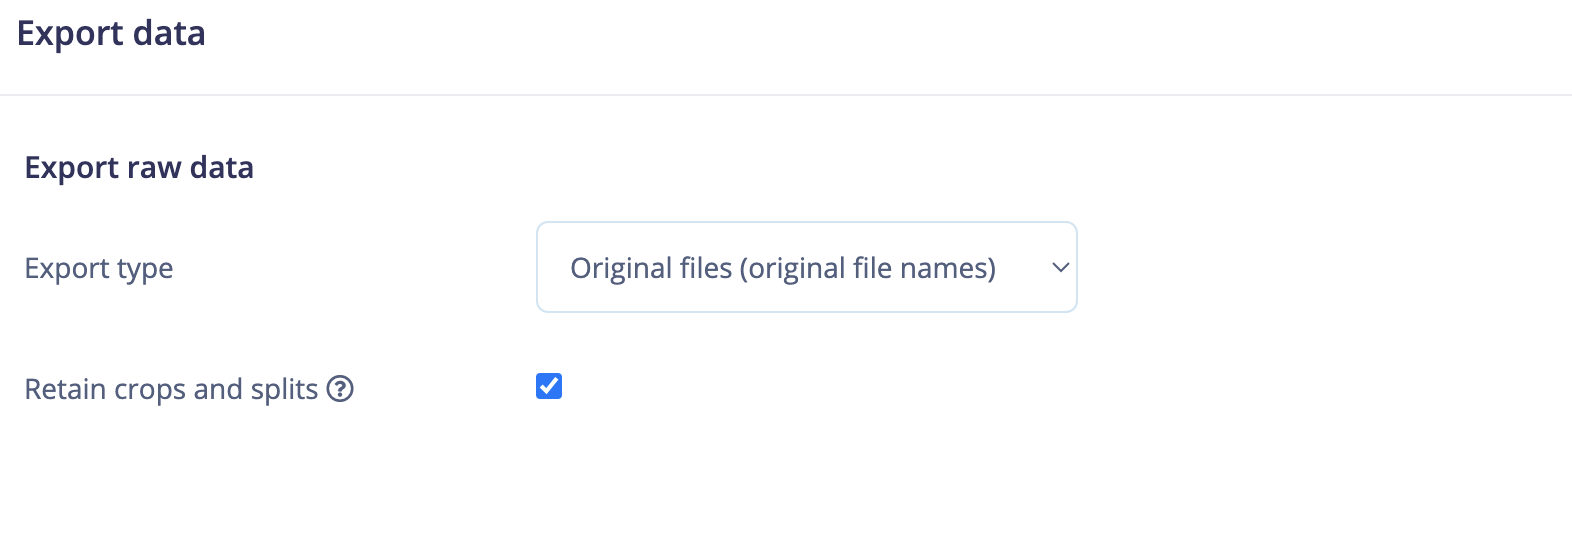
The compilation process requires calibration image datasets, which can be obtained from the Edge Impulse Studio (Training) Dataset page by clicking on the “Export” button.

The model conversion process is broken down into four steps:

1. Make Calibration Dataset

The following Python script saves the calibration datasets in the NumPy-specific binary format (*.npy).

2. Model Parsing

The following script parses the ONNX model into Hailo’s internal representation and generates the Hailo Archive (HAR) file.

3. Model Optimization

The following script is used to optimize the model, convert it from full precision into integer representation, and generate a quantized Hailo Archive (HAR) file. This script includes the model input normalization and the non-maximum suppression (NMS) on the model output.

4. Model Compilation

The following script compiles the quantized Hailo Archive (HAR) and generates the Hailo Executable Format (HEF) file.
Now copy the HEF file (ei-car-yolov5s.hef in this example) to the Raspberry Pi with the Hailo Accelerator installed. We can assess on-device performance by using the following command, which demonstrates around 63 FPS, a very impressive result.

Application

We have already installed the Raspberry Pi OS (64-bit) Bookworm on the Raspberry Pi 5. Execute the following command to update the OS and firmware.
Run the following command to open the Raspberry Pi Configuration CLI:
Under Advanced Options > Bootloader Version, choose “Latest” and run the following command to update the firmware to the latest version:
To enable PCIe Gen 3.0 speeds, add the following line to /boot/firmware/config.txt:
Reboot the Raspberry Pi 5 with sudo reboot for these settings to take effect. To install the dependencies required to use the AI Kit. Run the following command from a terminal:
Finally, reboot the Raspberry Pi 5 with sudo reboot for these settings to take effect. To ensure everything is running correctly, run the following command:
We will be using the Hailo example repository for the Raspberry Pi 5 to build the application. Please execute the following commands to setup the environment and install the prerequisites.
Save the following configuration as yolov5.json in the hailo-rpi5-example/resources directory.
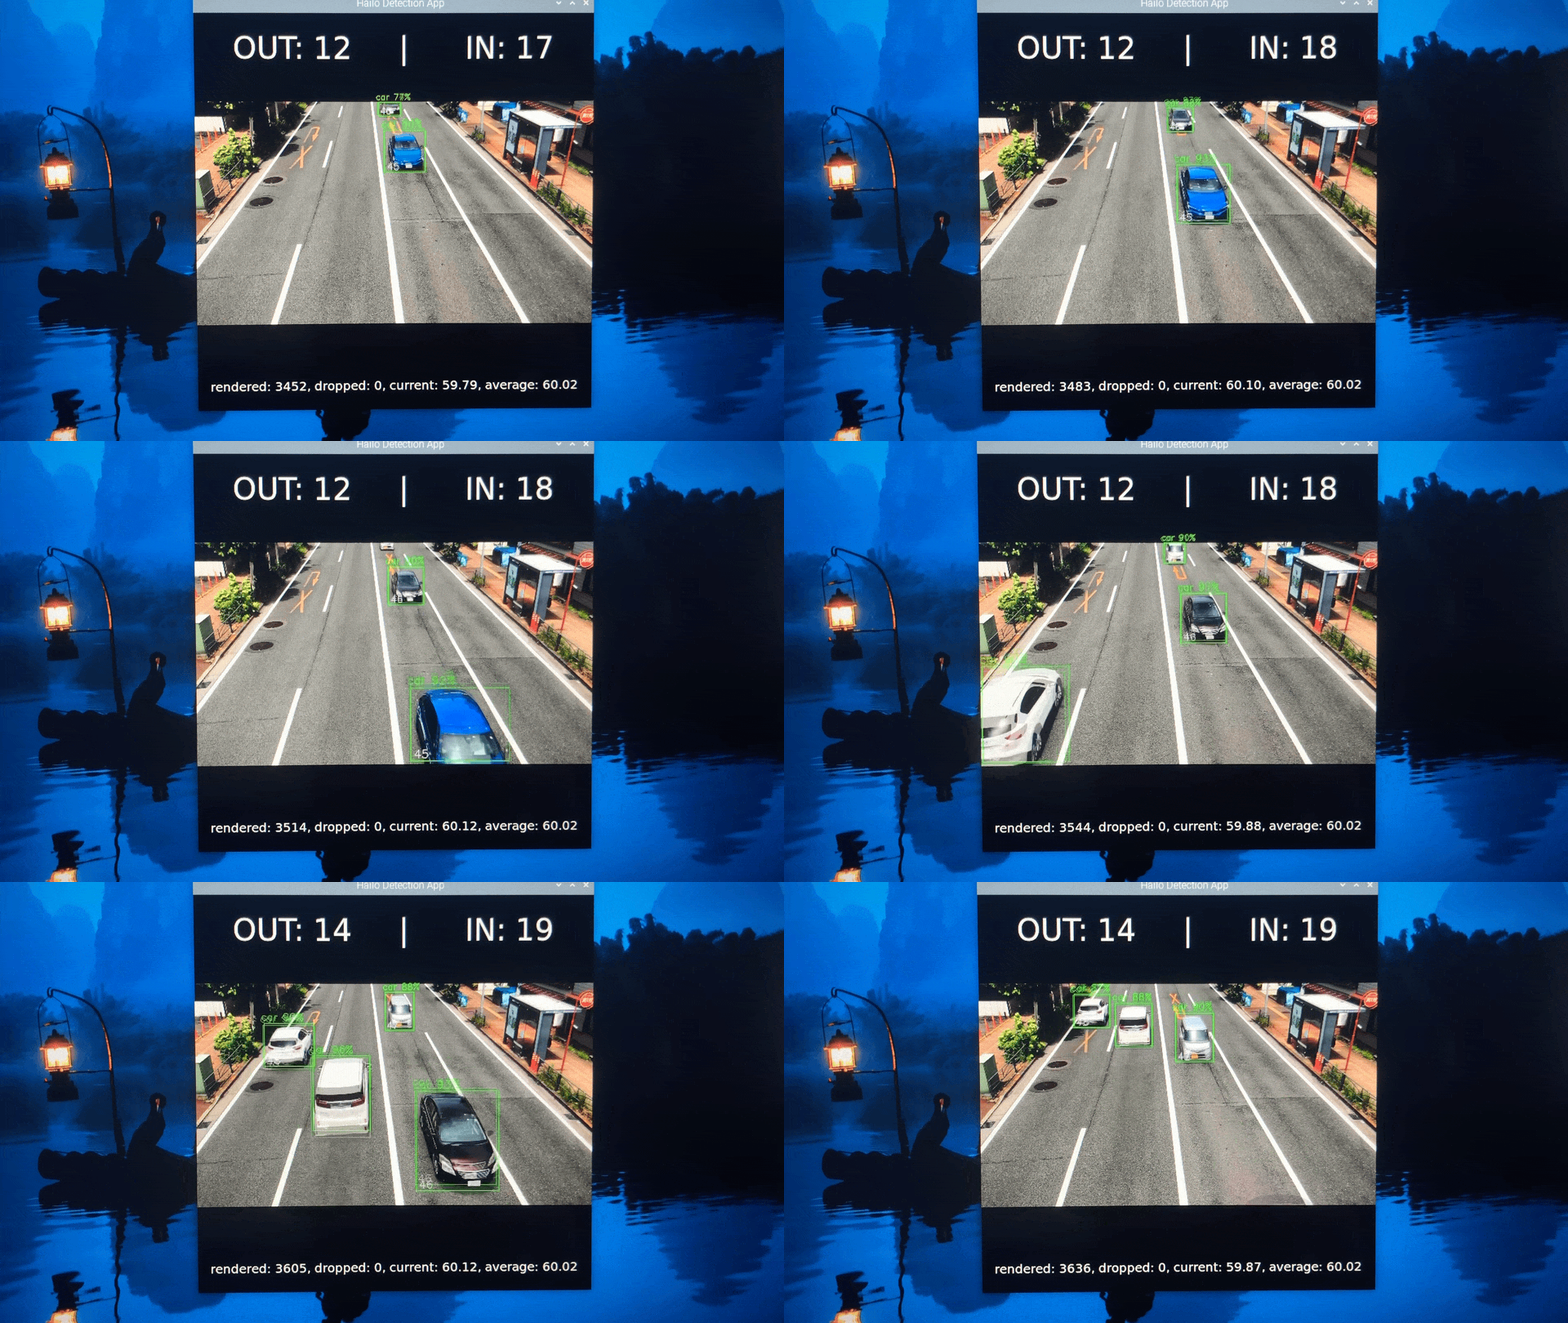
Also, we should copy the HEF model to the hailo-rpi5-example/resources directory. We will use the detection.py example script from the hailo-rpi5-examples/basic_pipelines directory as a starting point for the application. We modified the Gstreamer pipeline to include the HailoTracker element for tracking cars after detection. We are using Roboflow’s Supervision library to count the number of cars entering and exiting. The complete modified code is provided below.

Inferencing on the Recorded Video

To execute the application on a video file input, use the following command.

Live Demo from Camera

Please use the following command to execute the application using the Raspberry Pi Camera.
As confirmation, we have set up all the hardware on a pedestrian bridge and conducted live inferencing:

Conclusion

The incorporation of an AI accelerator for car detection and tracking at toll plazas has shown substantial enhancements in efficiency and accuracy. This project highlights the importance of integrating Edge Impulse data labeling and training infrastructure into an ML pipeline to address modern transportation challenges, leading to more intelligent and responsive tolling systems in the future.