- Face Detection: https://studio.edgeimpulse.com/public/859925/live
- Hand Gestures: https://studio.edgeimpulse.com/public/766818/live
- Hand Gestures to Control LEDs: https://youtu.be/fLNyrCrappE
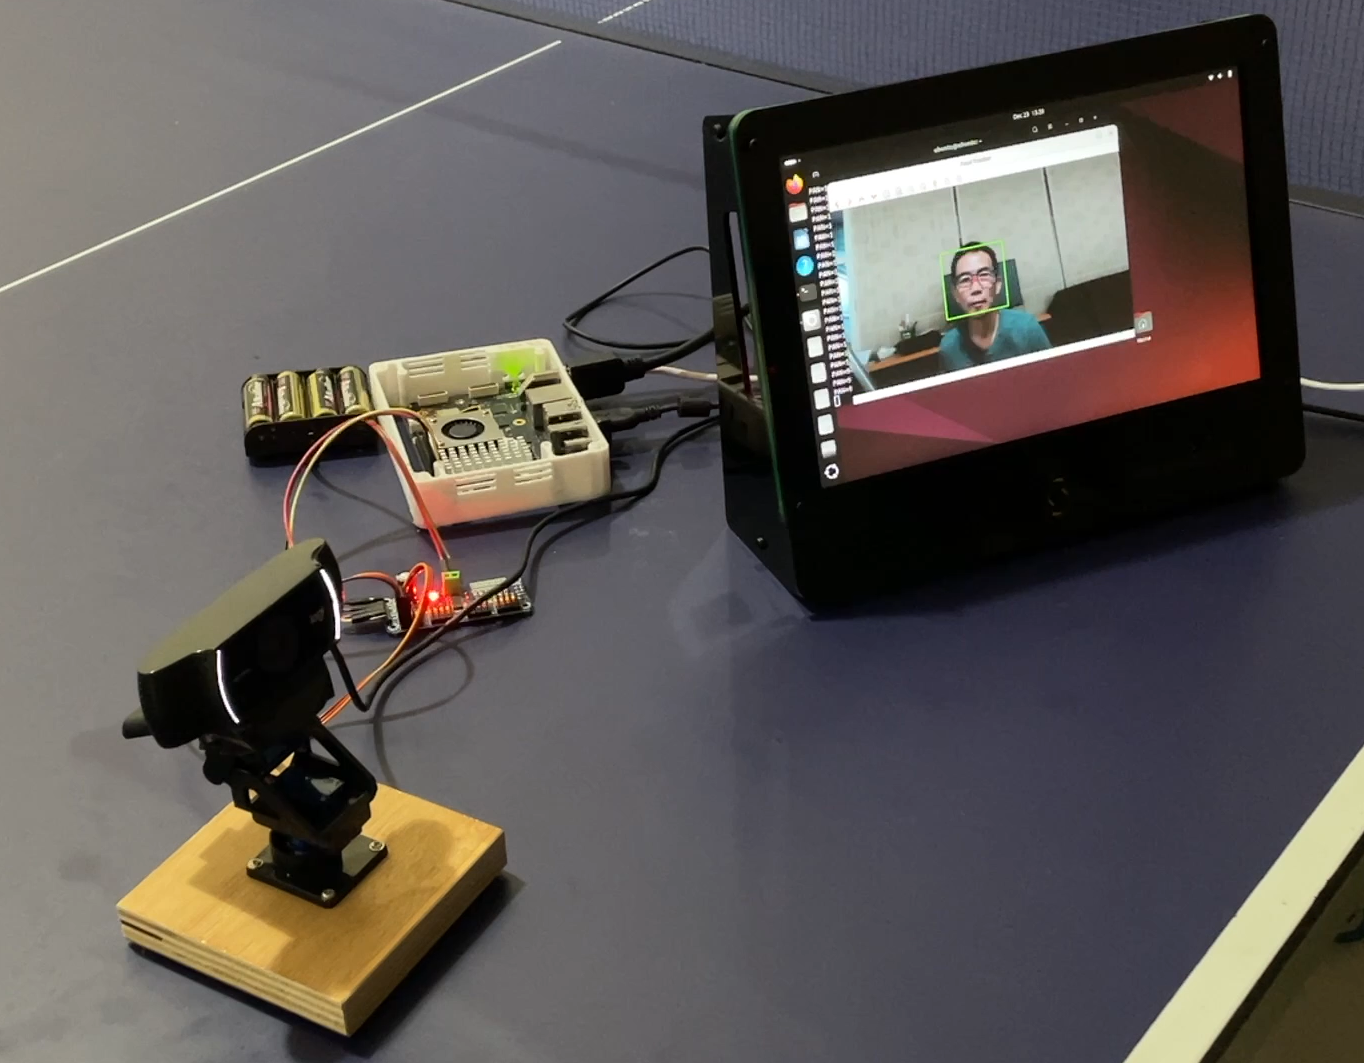
- Face Tracking to Control Pan-Tilt Camera: https://youtu.be/jhEqjuGd8-A
Introduction
This project is relatively simple, but very useful: it translates the location of an object or a person’s face, into movements of two servos (pan–tilt) that control a camera. In essence, this creates a camera that can automatically follow its target. The system uses an object detection model trained with Edge Impulse, specifically YOLO-Pro to leverage transfer learning and pre-trained weights. This approach significantly reduces the amount of training data required while improving object recognition accuracy. The model is deployed as an embedded .eim model, run by our Python program. The entire system runs locally on a Thundercomm Rubik Pi 3, which has GPIO compatibility similar to a Raspberry Pi. This allows the use of the PCA9685 via I²C communication to control LED lights or servo motors. The Rubik Pi 3 has proven to be highly reliable, delivering real-time inference performance in our previous projects.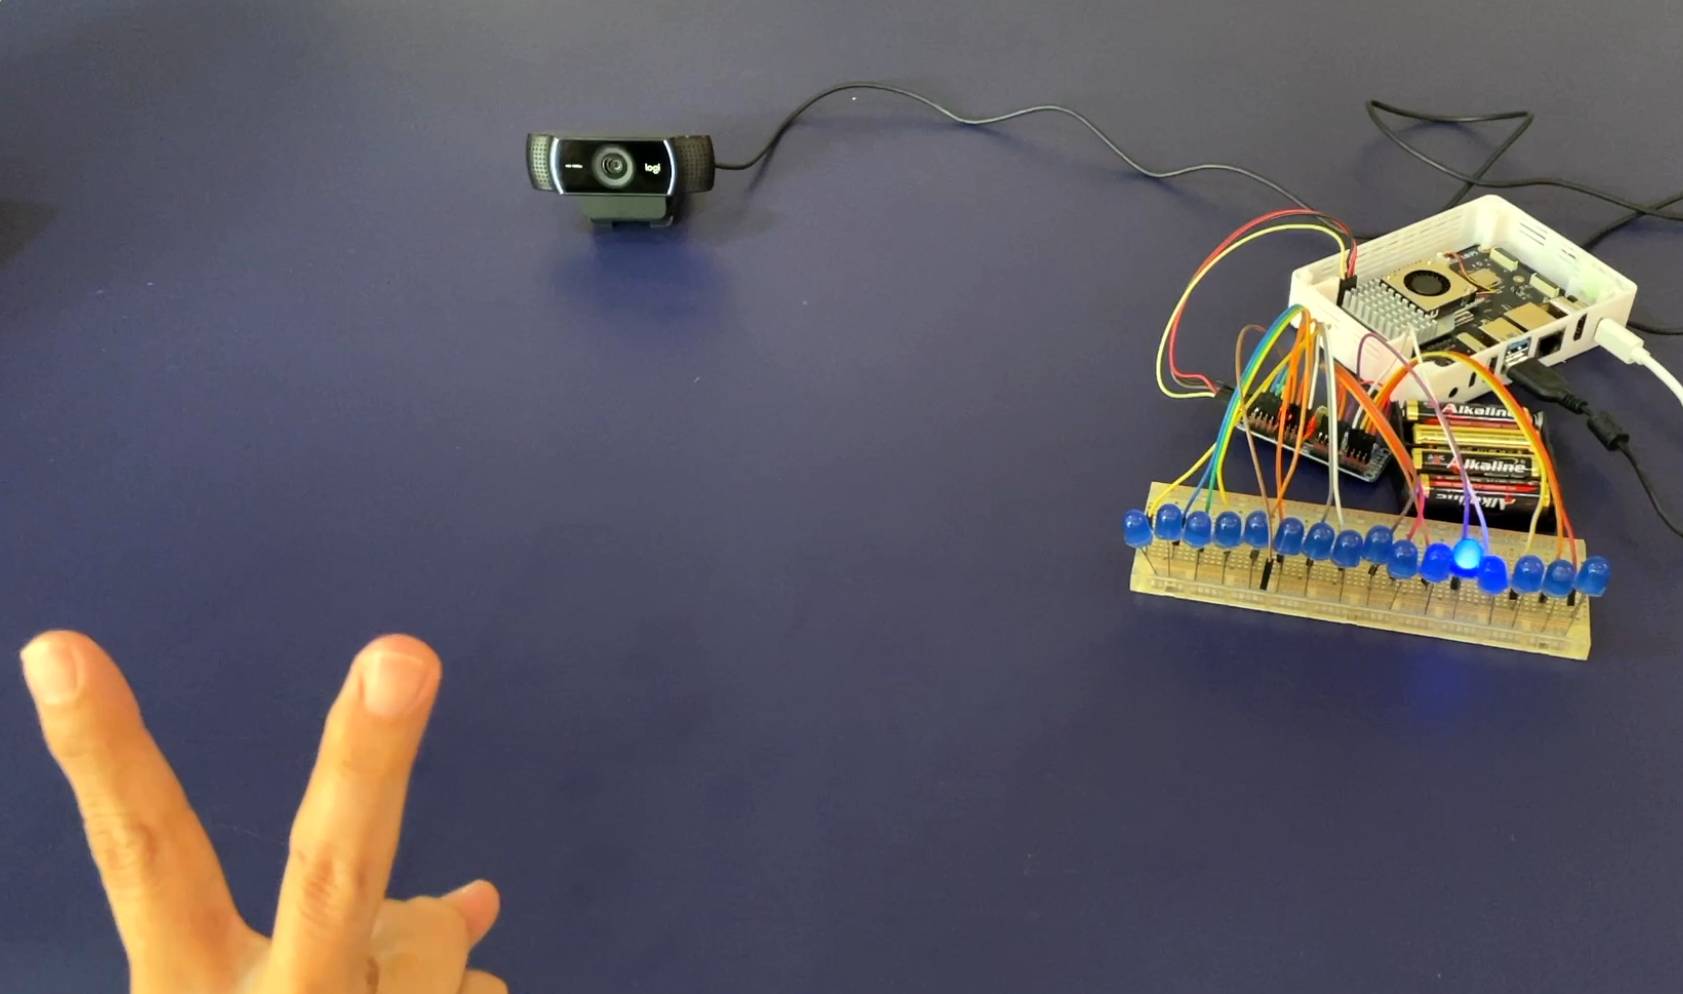
Project Setup w/ LEDs
Hardware Components
- Thundercomm Rubik Pi 3
- USB-C Power Adaptor (eg. 27W Raspberry Pi 5 Power adapter)
- Raspberry Pi 5 Active Cooler (optional)
- PC/laptop (for ssh and EDL mode firmware flash)
- USB-C/A to USB-C (for firmware flash)
- USB-C/A to micro-USB (for firmware flash)
- USB Camera/webcam (eg. Logitech C920/C922)
- LCD/monitor with HDMI cable + keyboard & mouse
- 2 DOF pan & tilt camera arm servo bracket
- 2 pcs servos (SG90 or MG995/996r)
- PCA9685 (I2C servo/LED driver)
- 16 pcs LEDs
- Breadboard + jumper cables
- 4x 1.5V battery, or 6V power supply
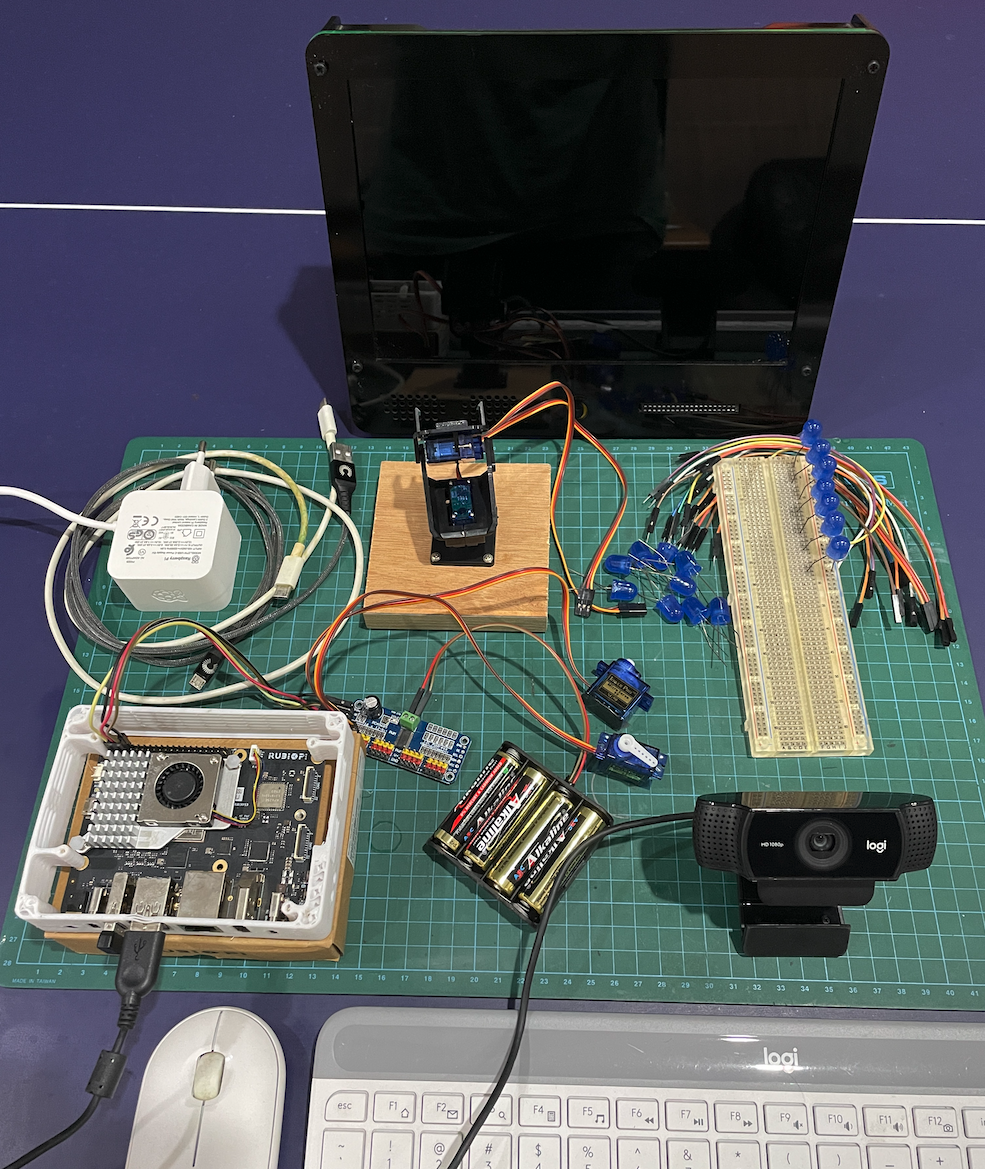
Hardware
Software & Online Services
- Edge Impulse Studio
- Edge Impulse Linux & Python SDK
- Ubuntu OS (24.04)
- OpenCV
Steps
1. Preparation of Rubik Pi 3
When we receive the Rubik Pi 3, we will find it pre-installed with either Qualcomm Linux, or a minimal Ubuntu OS version. If yours comes with QC Linux, you need to switch to Ubuntu OS, because it lacks ‘apt’ and ‘dpkg’ package managers, and has limited OpenCV and GStreamer support without rebuilding the OS. (Qualcomm Linux is intended to be used for final products, not development purposes). Prepare a USB-C and a micro USB cable, then follow this link — https://softwarecenter.qualcomm.com/catalog/item/Qualcomm_Launcher — to download Qualcomm Launcher (flashing utility). Next, follow the instructions here: https://www.thundercomm.com/rubik-pi-3/en/docs/rubik-pi-3-user-manual/1.0.0-u/Update-Software/3.2.Flash-using-Qualcomm-Launcher to flash the board with Ubuntu OS.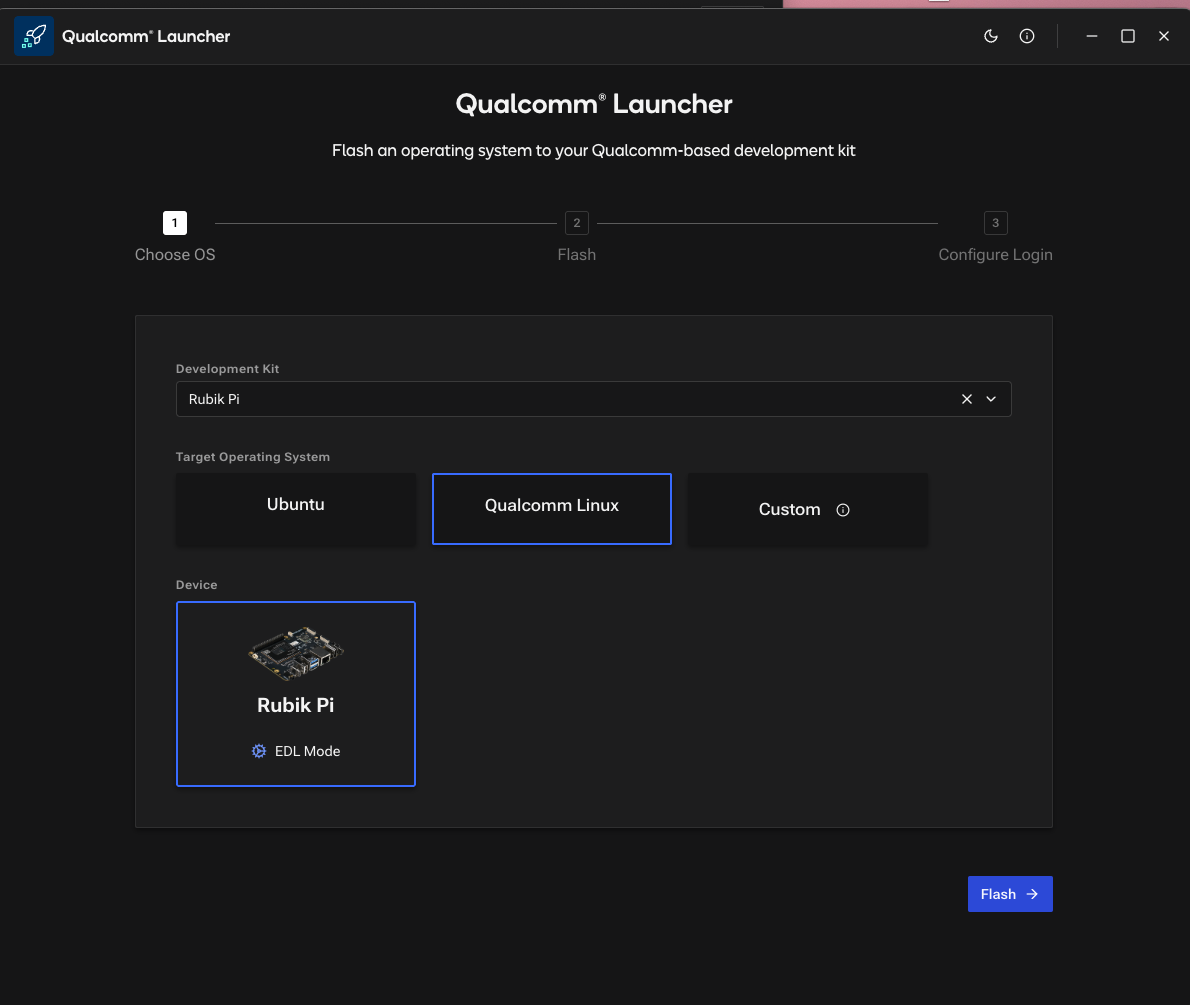
Qualcomm Launcher
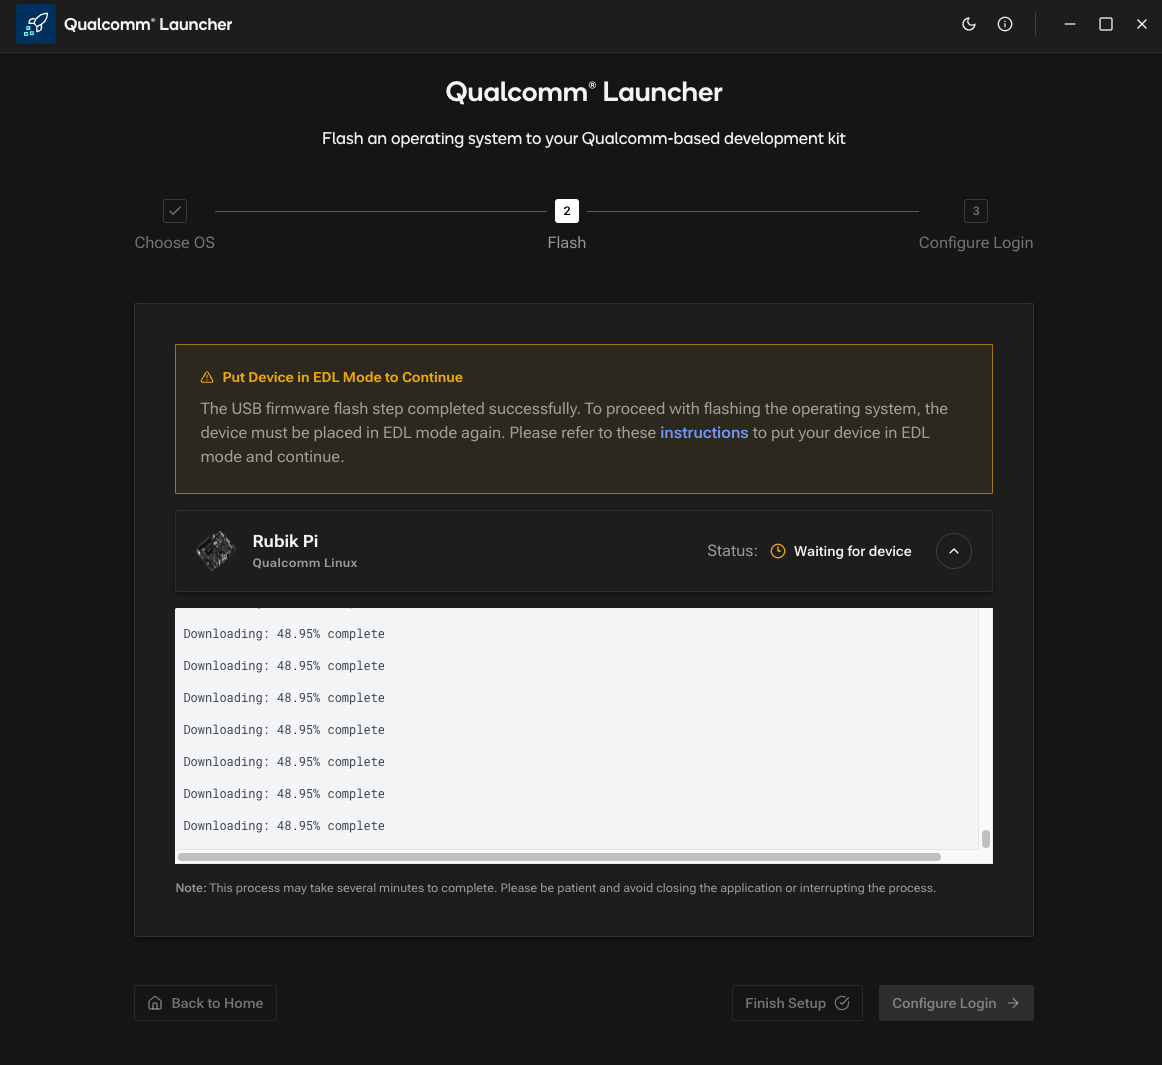
Put in EDL mode
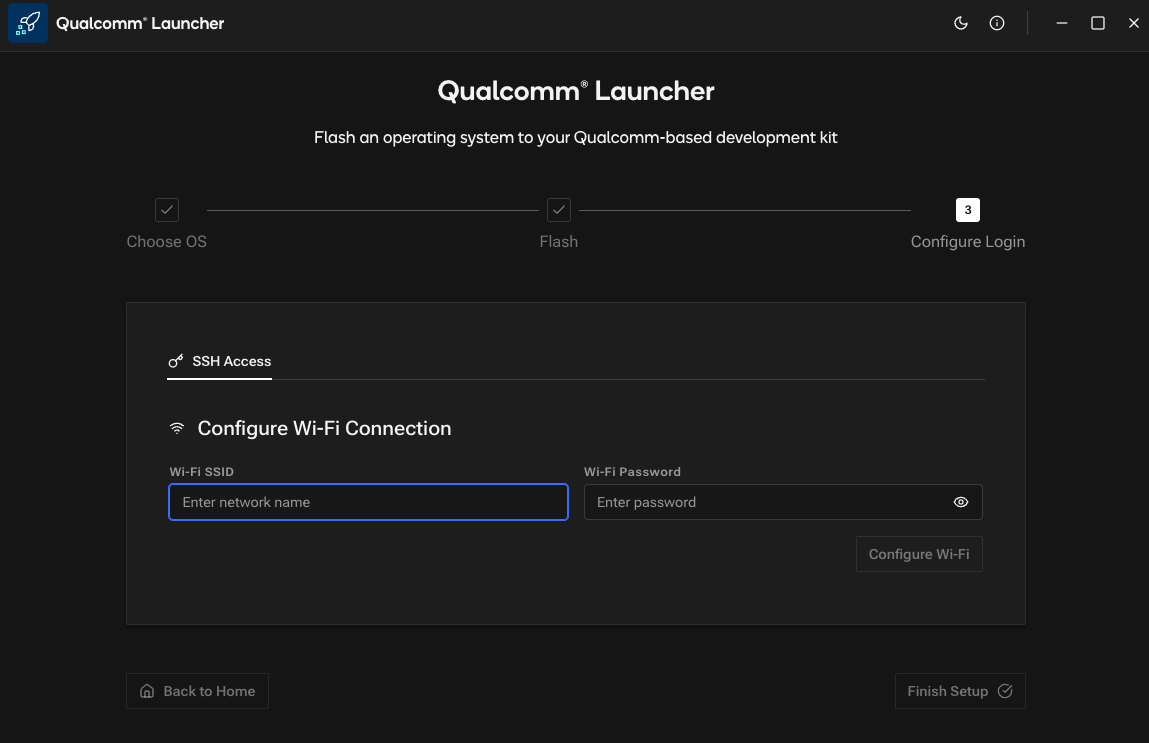
WIFI Config
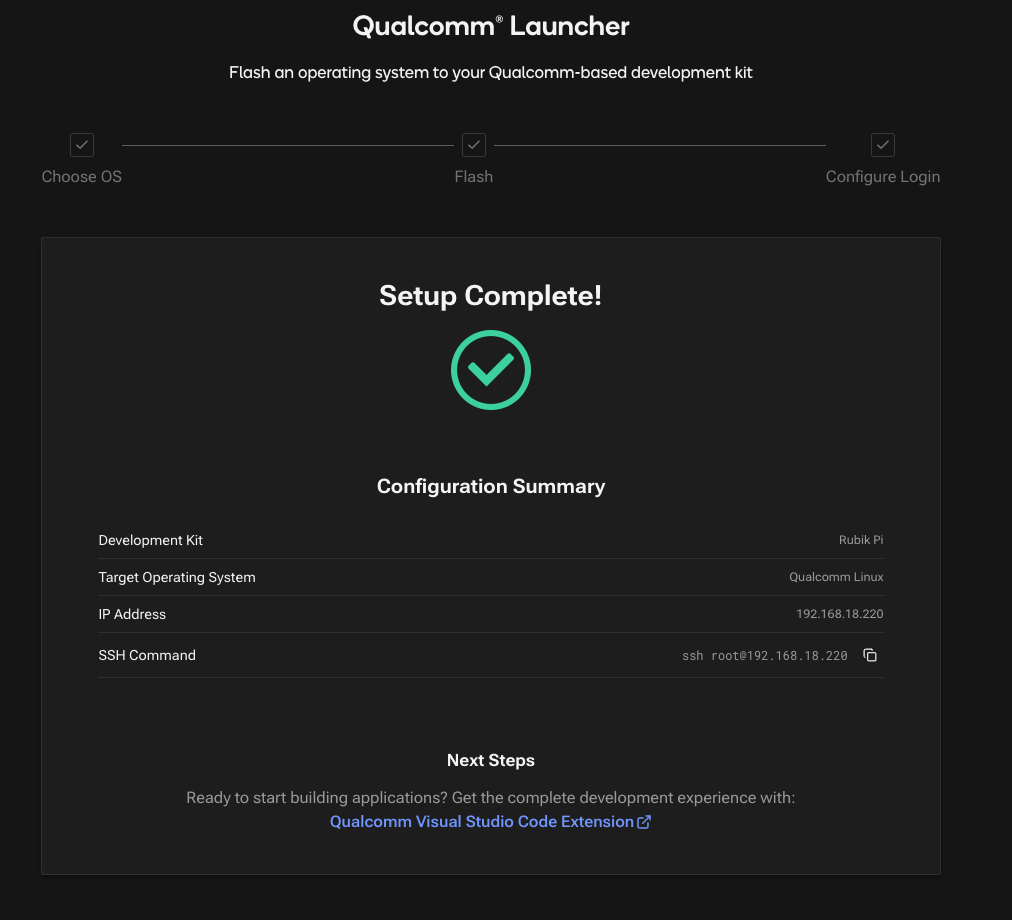
Setup Complete
Note: For the Python SDK and other dependencies, follow the instruction as described in Step 5.
2. Collecting Data (Images)
In this project, we’re using Generative AI assistants like Gemini and ChatGPT to create a diverse set of facial photos. This allows us to get the variety we need — covering different expressions, ethnicities, haircuts, and backgrounds — while keeping privacy in mind. We’ll save these images into a folder to use in just a moment. For those who are not familiar with Edge Impulse Studio, please follow these steps —> Open studio.edgeimpulse.com, login or create an account, then create a new project. Choose the Images project option, then Object detection. In Dashboard > Project Info, choose Bounding Boxes for the labeling method, and Rubik Pi 3 as the target device. Then in Data acquisition, click on the Upload Data tab. Choose your saved folder then upload the files.
AI-generated face
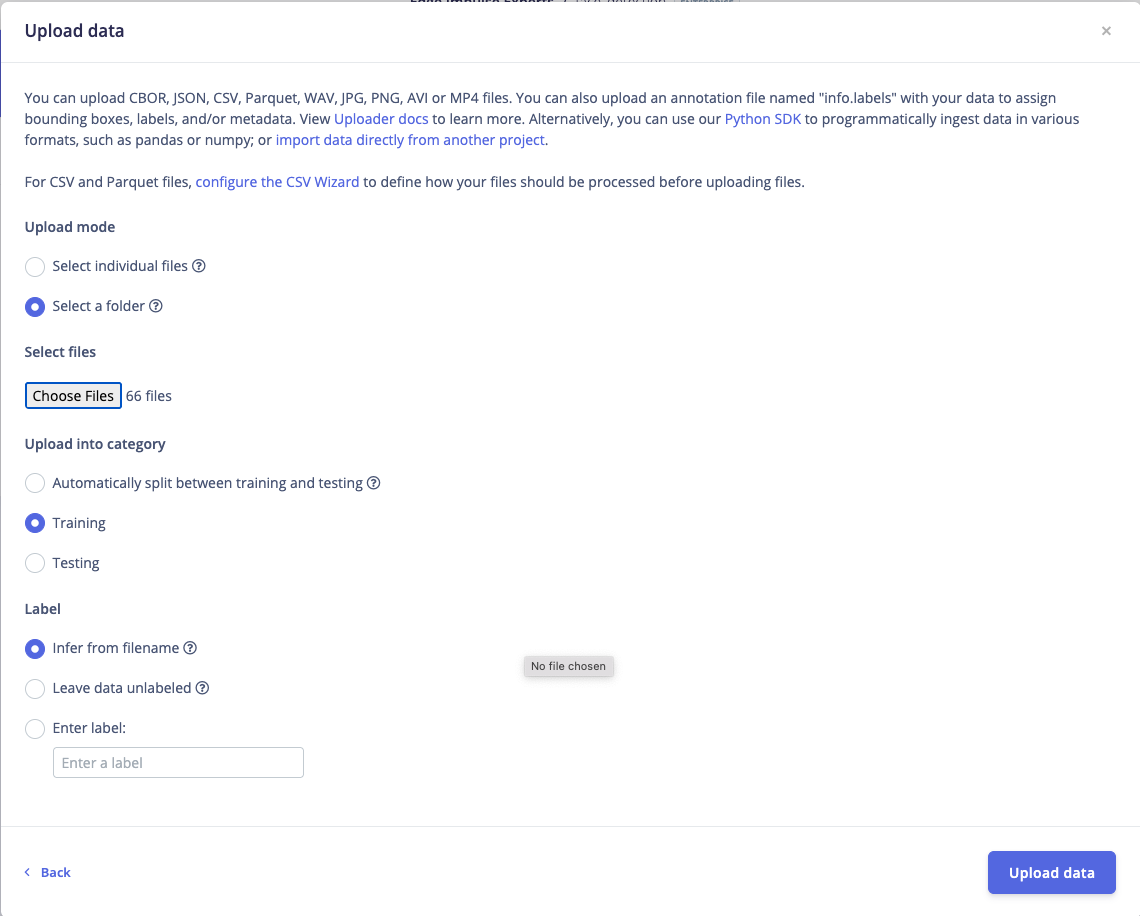
Upload Data
3. Labeling
The next step is labeling. Click on Data acquisition, click on the Labeling queue tab, then start by dragging a box around an object to label it. Click Save and repeat the process until all images are labeled. Alternatively, you can try out the AI auto labeling feature to help speed up the process. After labeling, it’s recommended to split the data into Training and Testing sets, around an 80/20 ratio. If you haven’t done this yet, click on Train / Test Split to automatically split the data.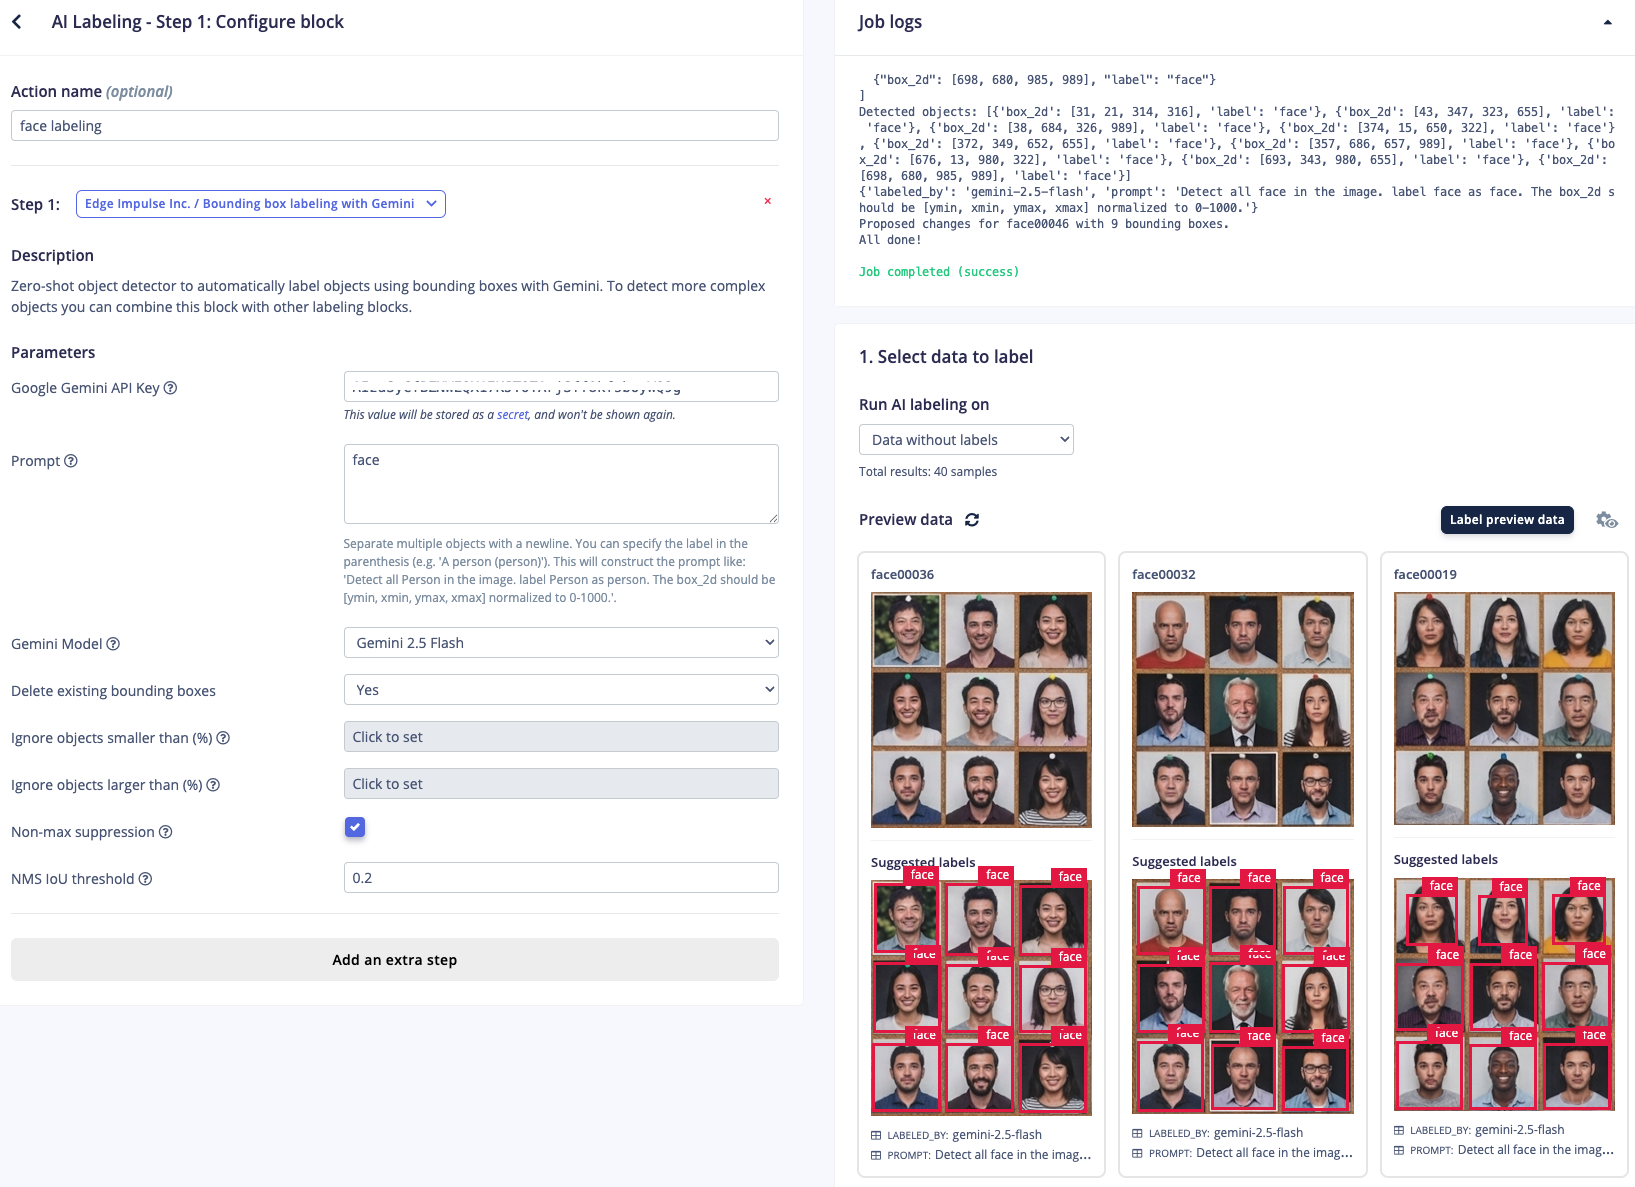
AI labeling
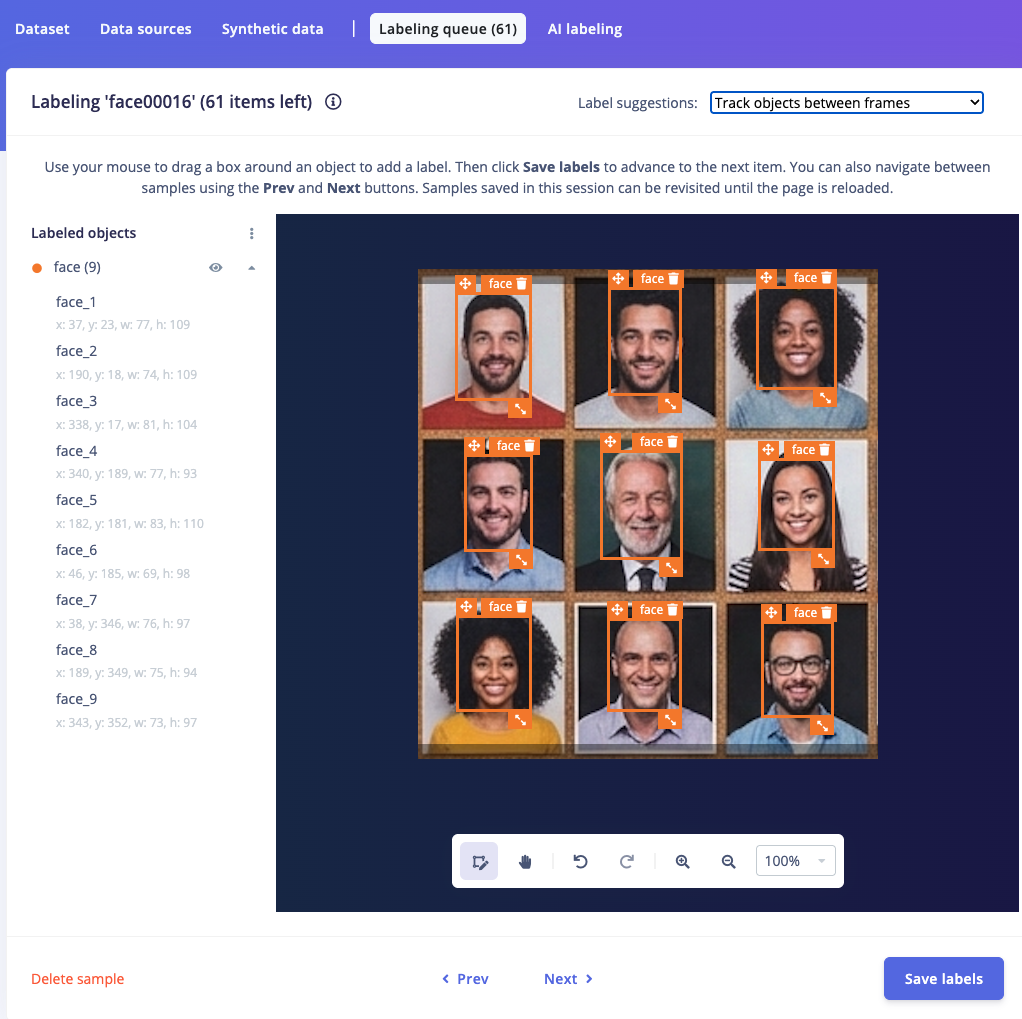
Manual labeling
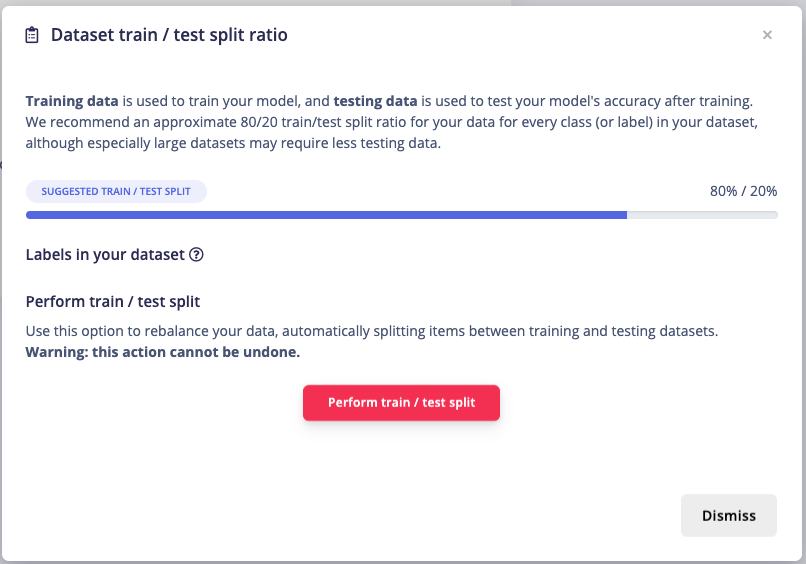
Train/Test Split Data Ratio
4. Train and Build
Once your labeled dataset is ready, go to Impulse Design > Create Impulse, and set the image width and height (eg. 320x320). Choose Fit shortest axis, then select Image and Object Detection as the Learning and Processing blocks, and click Save Impulse. Next, navigate to the Image Parameters section, select RGB as the color depth, and press Save parameters. After that, click on Generate, where you’ll be able to see a graphical distribution of the features. Now, move to the Object Detection section and configure the training settings. Select GPU and set the training cycles to around 100, learning rate to 0.001, and Medium for the model size. Choose YOLO-Pro as the NN architecture. Once done, start training by pressing Start, and monitor the progress. If everything goes well and the precision result is more than 90%, proceed to the next step. Go to the Model Testing section, click Classify all, and if the result is around 90%, you can move on to the final step — Deployment.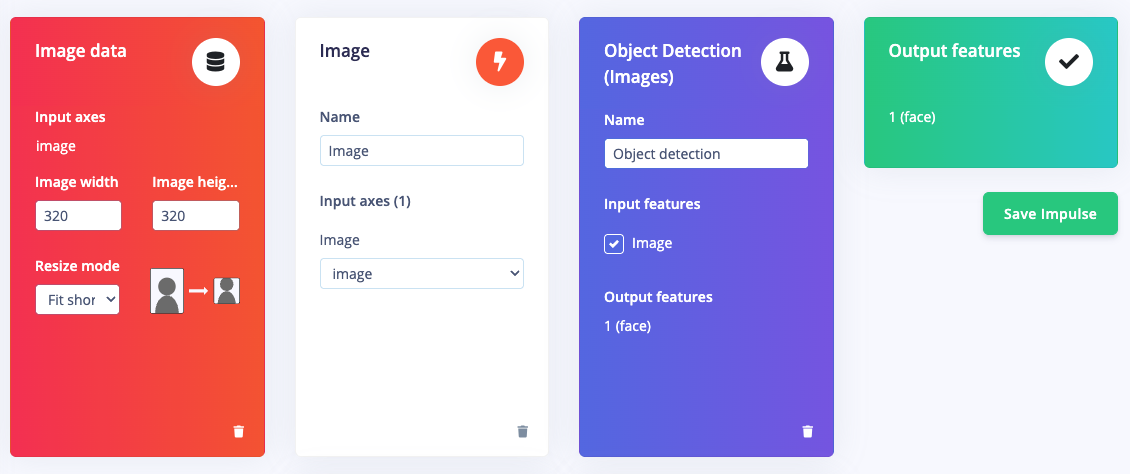
Learning blocks

Save parameters
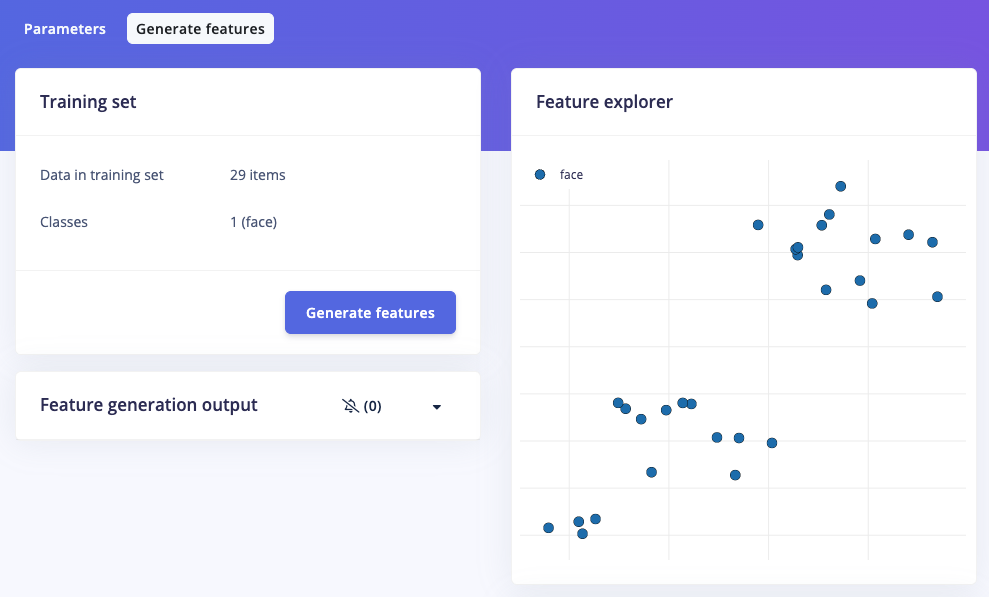
Generate features
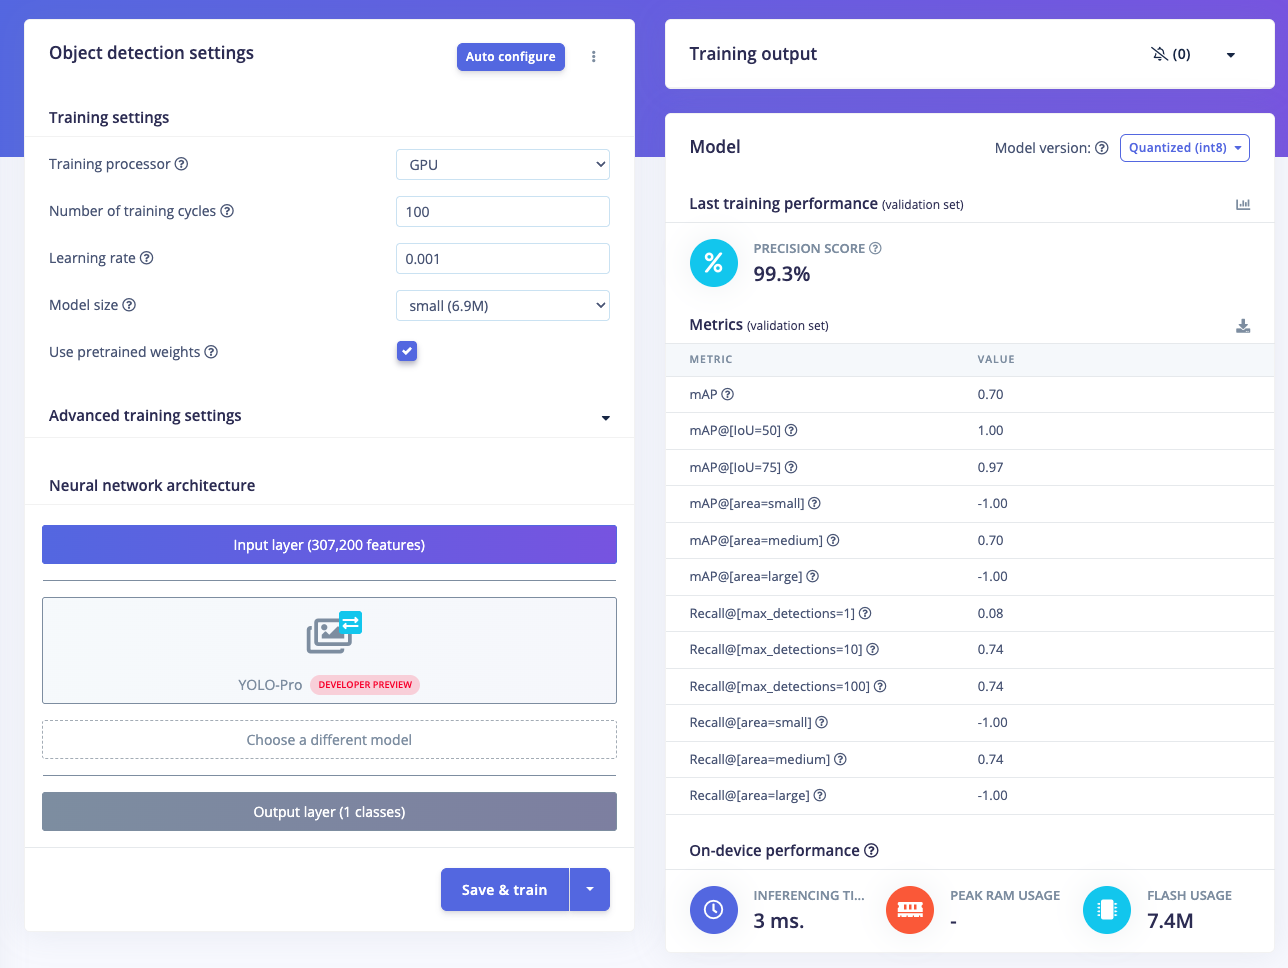
NN settings & results
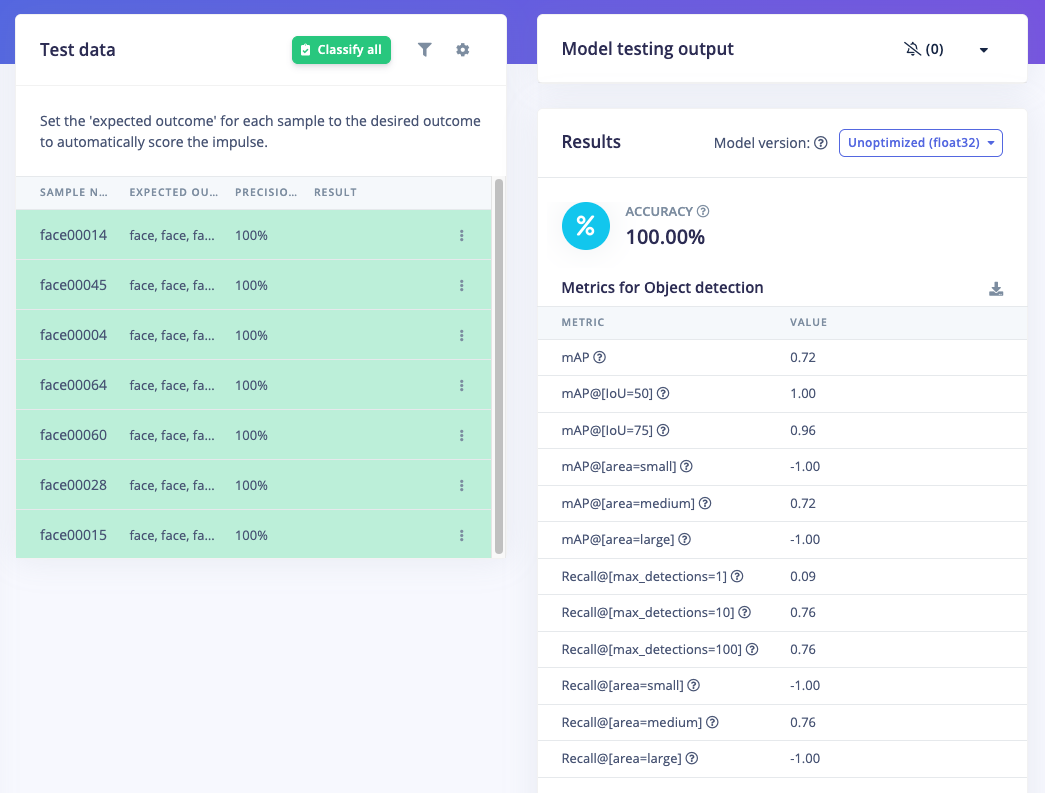
Model Test
5. Deploy & Test on Rubik Pi
With the model built in Edge Impulse Studio you can now test, download the model, and run everything directly from the Rubik Pi 3 (Ubuntu 24.04). On the Rubik Pi, there are several things that need to be done. Install a recent version of Python 3 (>= 3.7) if none is present. Ubuntu 24.04 comes with with Python 3.12 installed, so that should already be done for you. You can verify this by running this command:python3 -version
Ensure you have the latest Edge Impulse Linux CLI installed (as provided in Step 1). Then install the Linux Python SDK, OpenCV, ffmpeg, Gstreamer, numpy and other dependencies, by running these commands:
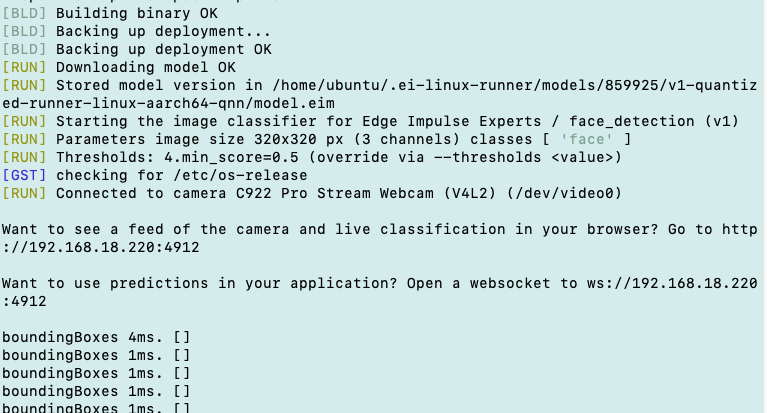
edge-impulse-linux-runner --clean to select your project. Log in to your account then choose your project (Hand Gestures or Face Detection). Then choose your specific Impulse (if any) and select the Int8 quantized model. This process will download the .eim model file, which is specifically built for the Qualcomm Hexagon (QNN) architecture. During this process, the console will display the path where the model file .eim has been downloaded. For example, in the image below, it shows the file located at /home/ubuntu/.ei-linux-runner/models/859925/v1-quantized-runner-linux-aarch64-qnn/model.eim
Once this model.eim is downloaded, you can cancel the inference process by pressing Ctrl-C.
For convenience, copy the model file to the home directory for easier access: cp -v model.eim /home/ubuntu
EI runner terminal
http://your-Rubik-Pi-IP-address:4912. Run this command: edge-impulse-linux-runner then navigate to the Rubik Pi’s IP address, port 4912.
Live inferencing
6. Build Your System: Rubik Pi + Servos and LEDs
In this project, we will develop two different output setups and their corresponding programs: one featuring a series of LEDs and another utilizing two servos to control a camera’s pan and tilt movements. Begin by assembling the components according to Diagram 1 below. This specific setup is designed to trigger a row of LEDs based on the detected object’s horizontal position (in this case, hand gestures). The brightness of the LEDs will be determined by the hand’s vertical position. Once you have confirmed that the Rubik Pi, USB webcam, PCA9685, breadboard, LEDs, and power supply are all correctly connected, proceed with the ‘smbus’ library installation:pip3 install smbus2 (add sudo if you run Python as root). Now, try to verify the PCA9685 I²C connection: sudo i2cdetect -a -y -r 1. Here is the expected result:
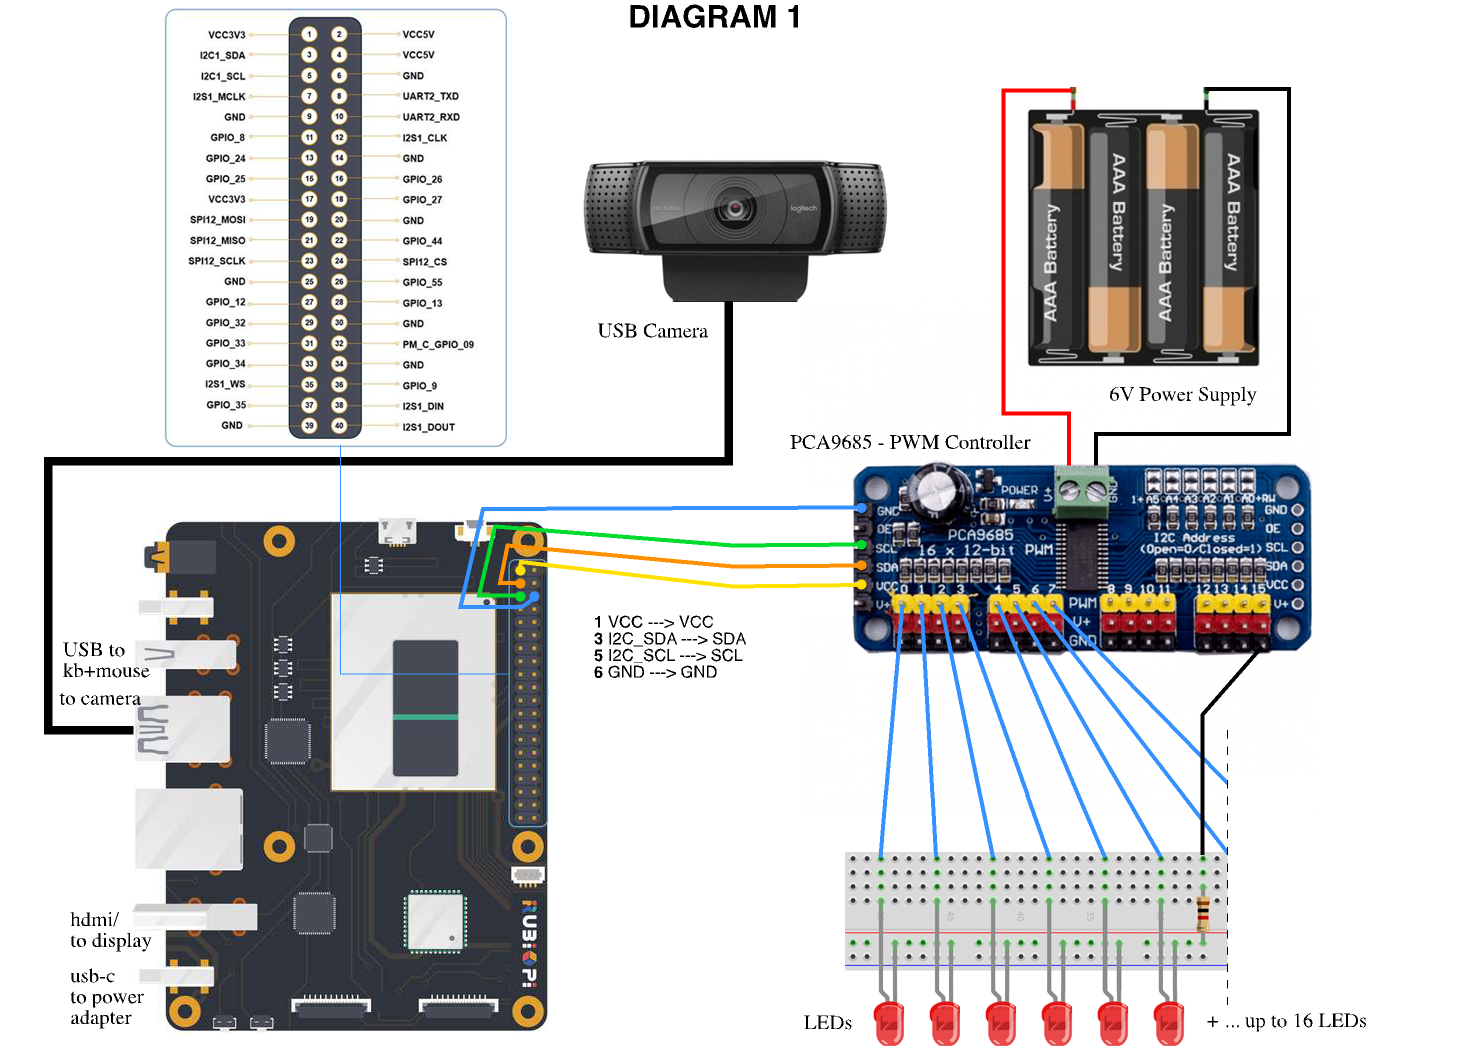
PCA9685 with LEDs setup
python3 gesture_control_led.py (again add sudo if needed).

Gestures controlled LEDs code
python3 face_tracking_camera.py
This completes our Vision-Driven Pan-Tilt Camera System project.
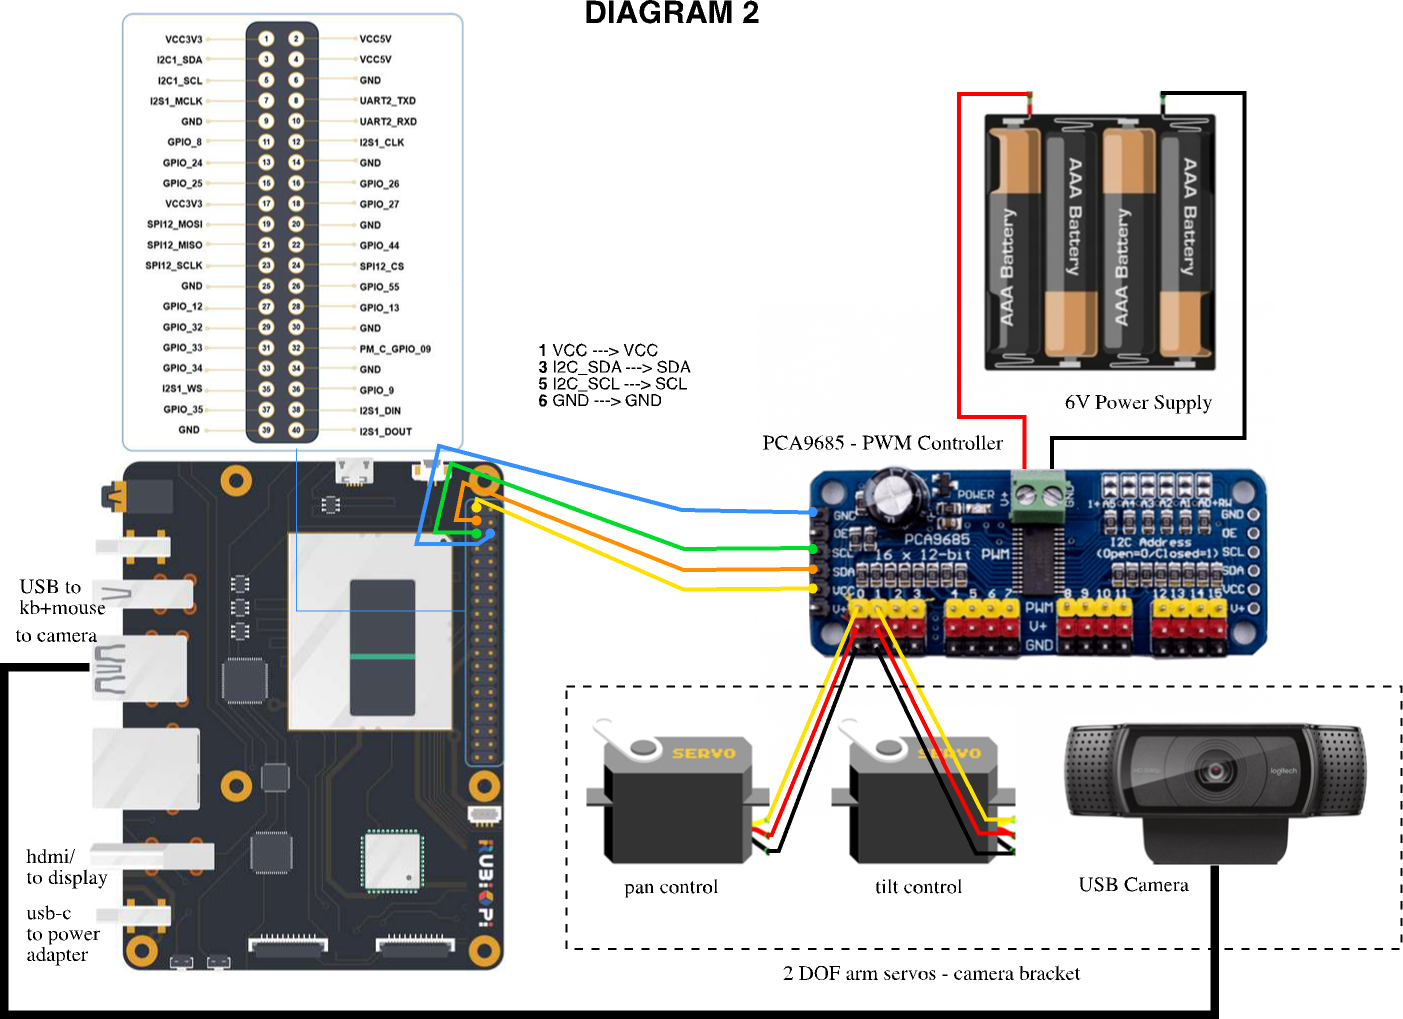
PCA9685 with pan-tilt servos setup
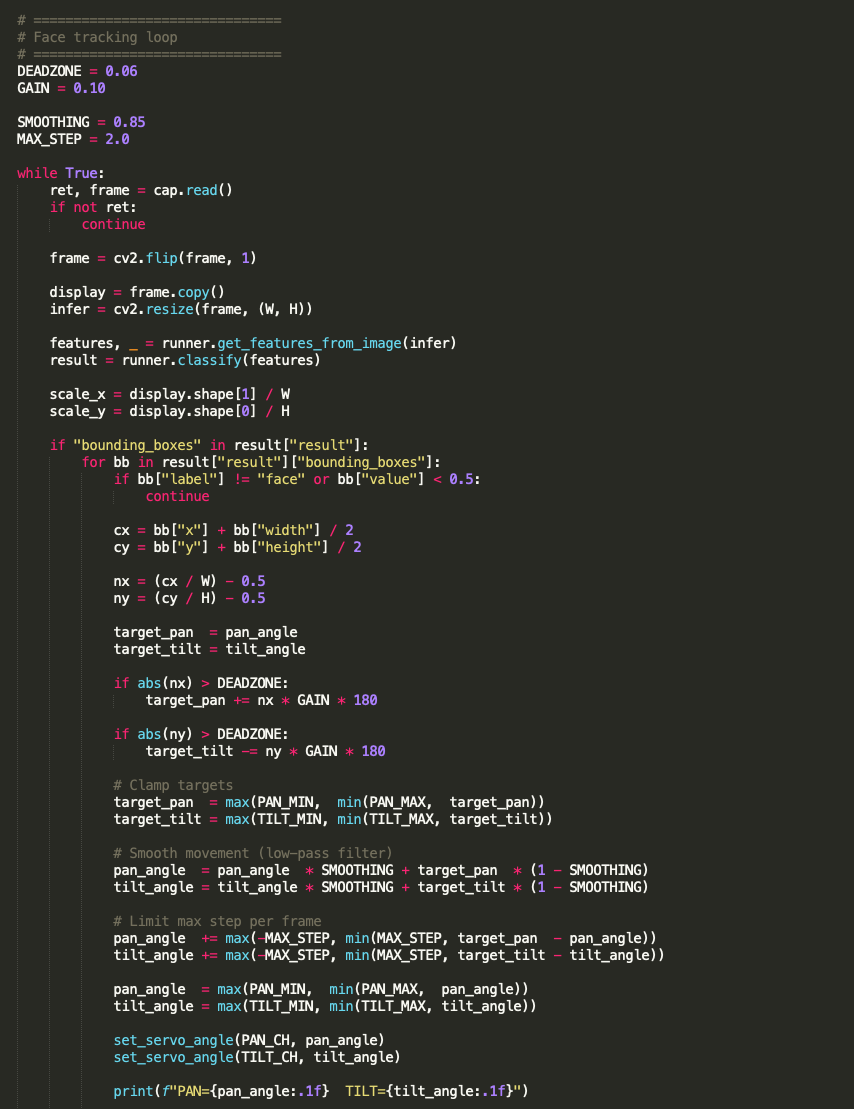
Face Tracking Camera code