Project Demo
Intro
Making a bridge between analog equipment and digital data used to be complex and intrusive procedure until Machine Learning came into the picture. With Machine Learning, features of pictures are extracted and patterns are identified resulting in a reliable way of reading analog panels, even small knobs. A recording studio typically has an Analog Behringer console that is used for different type of works. Sometimes long recording sessions are made with a knob in the wrong position (high peaks, wrong equalization, etc.), resulting in wasted time, effort, and ultimately, money. The following project will try to read console knobs and take actions.Hardware
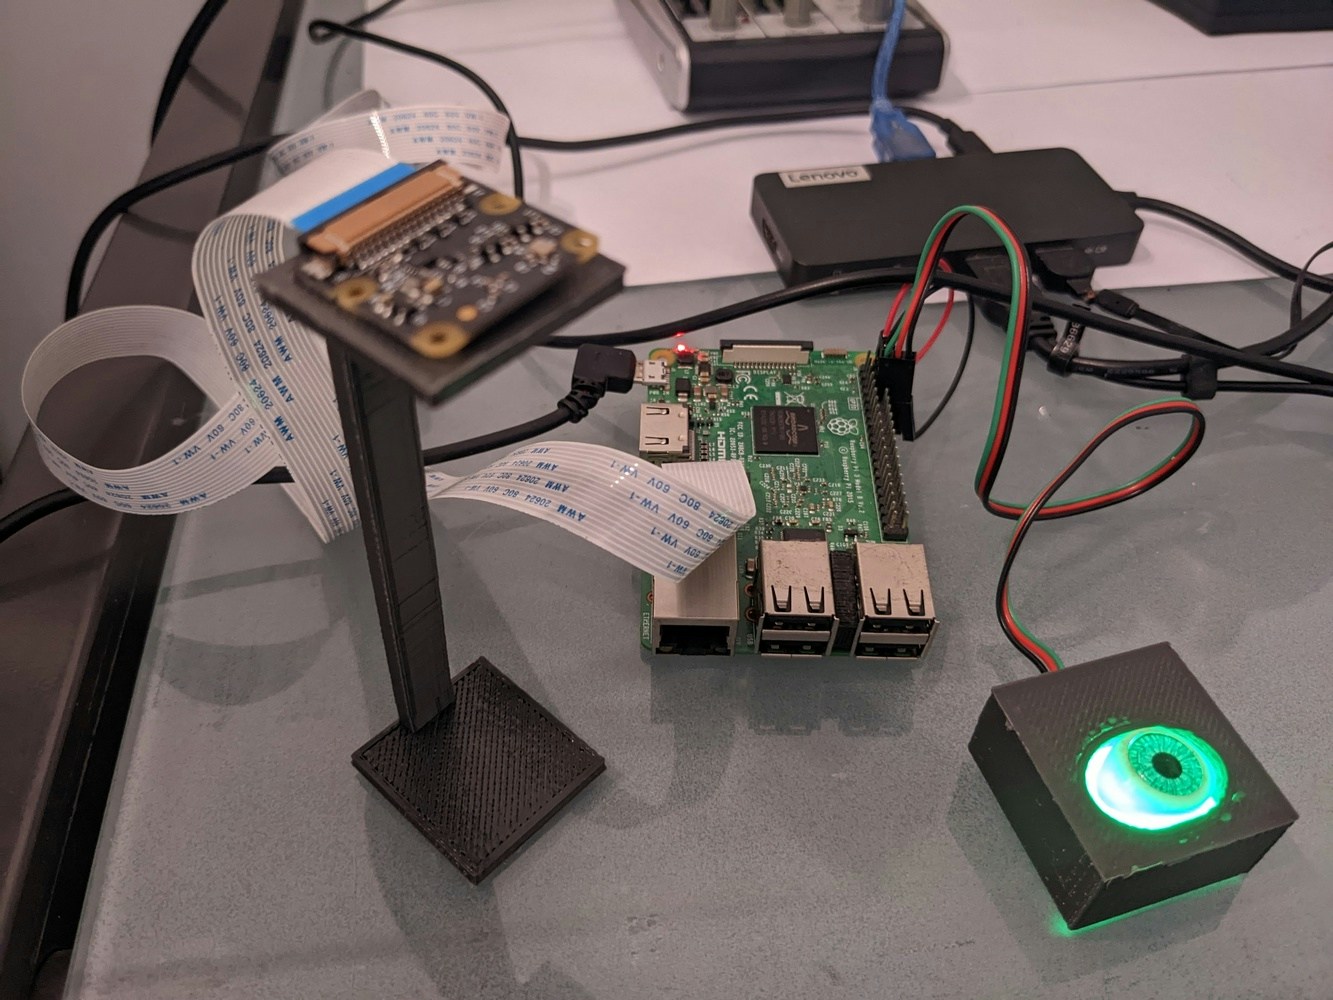
- Raspberry Pi 3
- Raspberry Pi Cam v2
- DFRobot Led Switch button
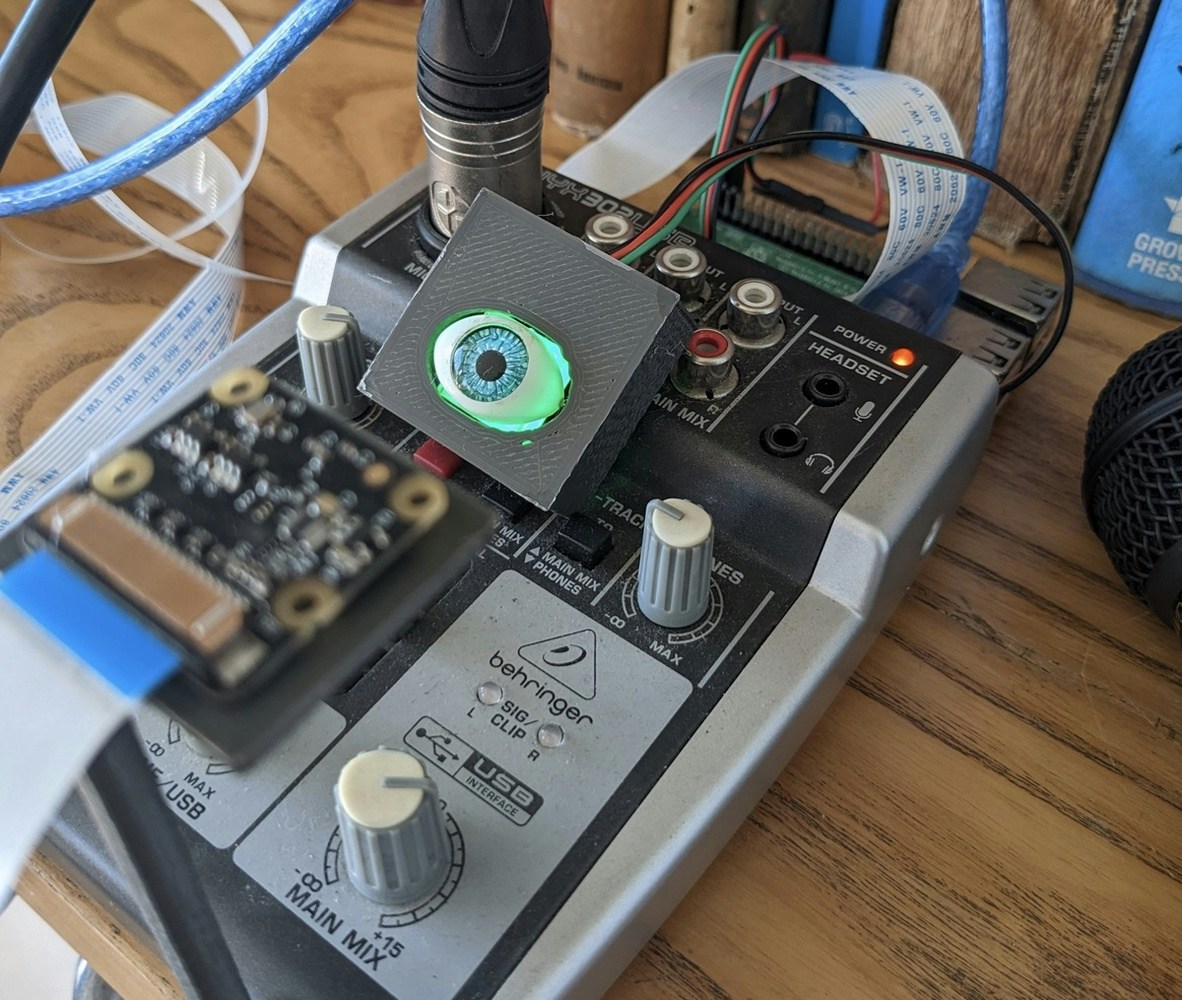
- Analog audio console
Circuit

3D Printed Case
If desired, print these 2 parts: Button case, and a camera stand. https://cults3d.com/en/3d-model/gadget/analog-knob-reading-with-machine-learningRaspberry Pi Setup
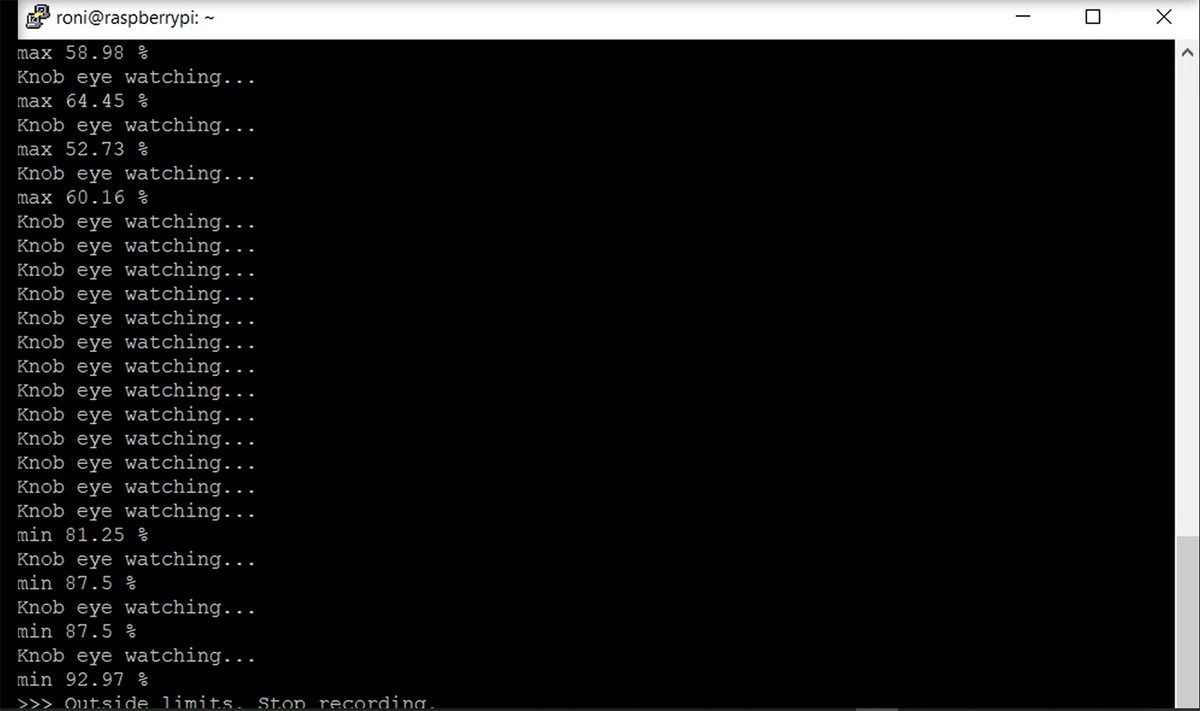
A Raspberry Pi running Linux will receive console audio out through a USB port, and record a.wav file. At the same time, a connected camera will take pictures and run inference against an Edge Impulse machine learning model. If knobs are detected in the wrong position, the recording will be automatically aborted.
To being, install the latest version of the Raspberry Pi OS. You can use the “minimal” version, which does not have a desktop, as we won’t need that. Then run the following series of commands:
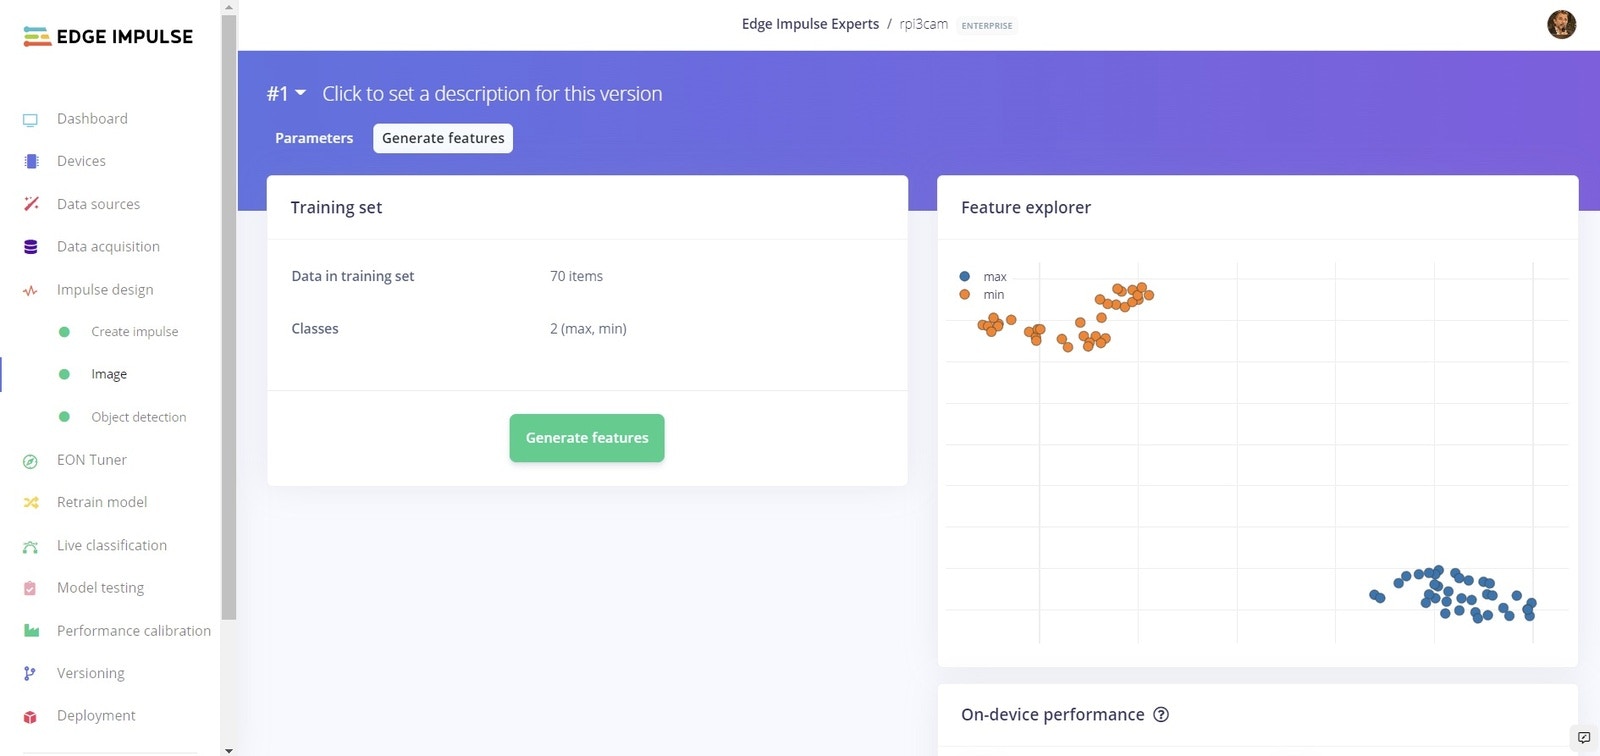
Model Training
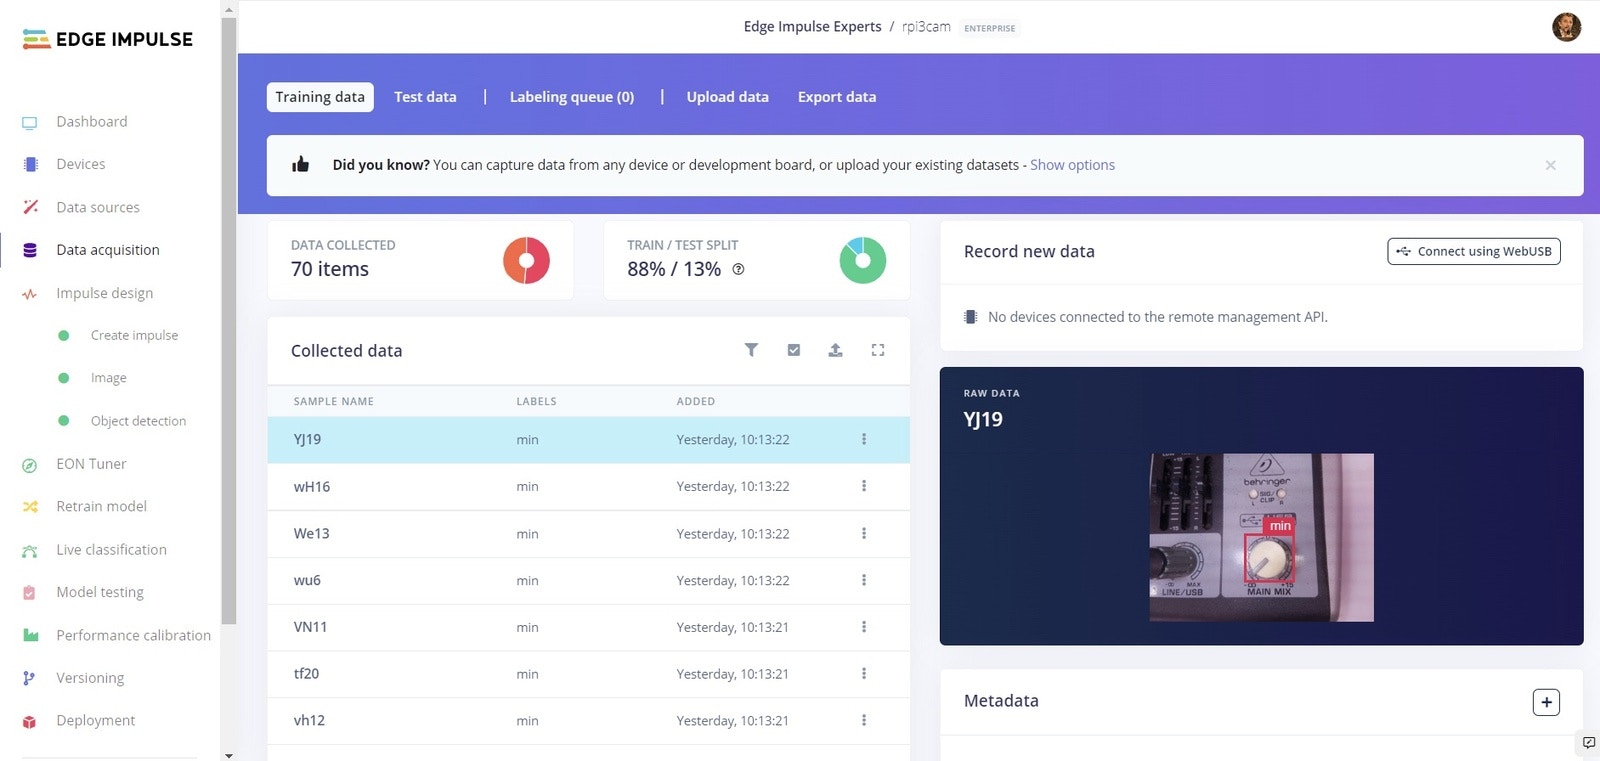
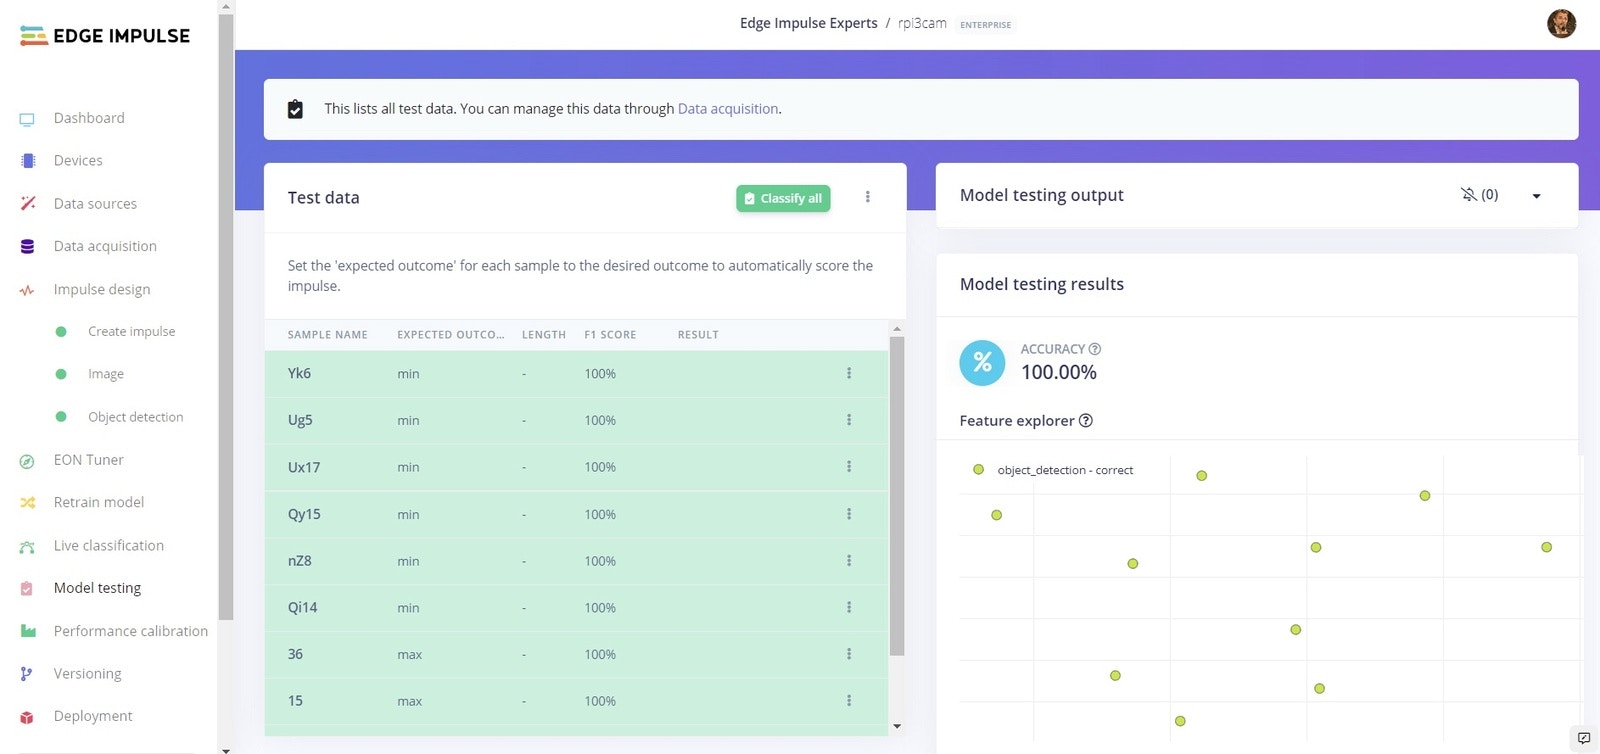
The Behringer’s main mix knob will be used. If this knob is too low or too high, a recording is considered wasted, so it should be aborted. To start the training, a good number of pictures with variations of the knob in both low and high positions is required. For other Machine Learning projects related to analog readings, one image is obtained and then digitally manipulated to add, for example, a needle in different positions. I have decided to use a different approach: a script for image acquisition with pauses to move the knob. Why? It is an effort to digitally manipulate an image, and if you are using knobs instead of gauges, the knob height could produce different shadows making the digital manipulation more complicated. You can download a sample data acquisition script, and the recording script from: https://github.com/ronibandini/MLAnalogKnobReading Place the camera in the 3d printed arm, around 10cm over the knob, with good lighting. Place the knob in the “Minimum” (low) position. Then on the Raspberry Pi, run: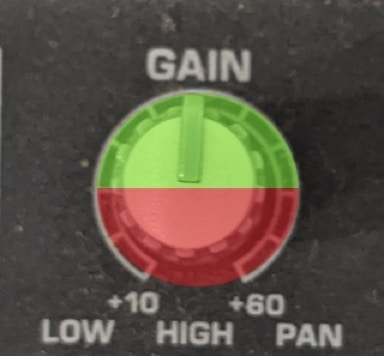
Deployment
From the Deployment page on the left menu, select the “Linux Boards” deployment options. Select “Linux (ARMv7)”, and download the generated firmware (.eim file), then copy the file to the Raspberry Pi. Once on the Pi, you may need to change the file permissions of the .eim file to 744.
Usage
At this point, we are ready to connect the Behringer to the Raspberry Pi, via a USB cable. Then, on the Pi, run:sudo python record1.py
Console output will be recorded to a .wav file.
Code Settings