Introduction
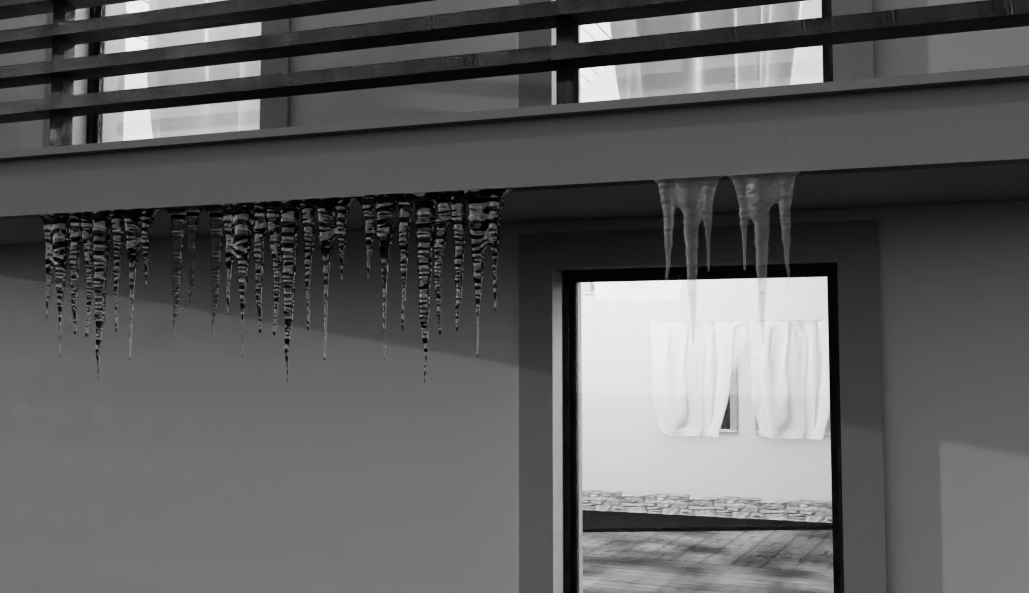
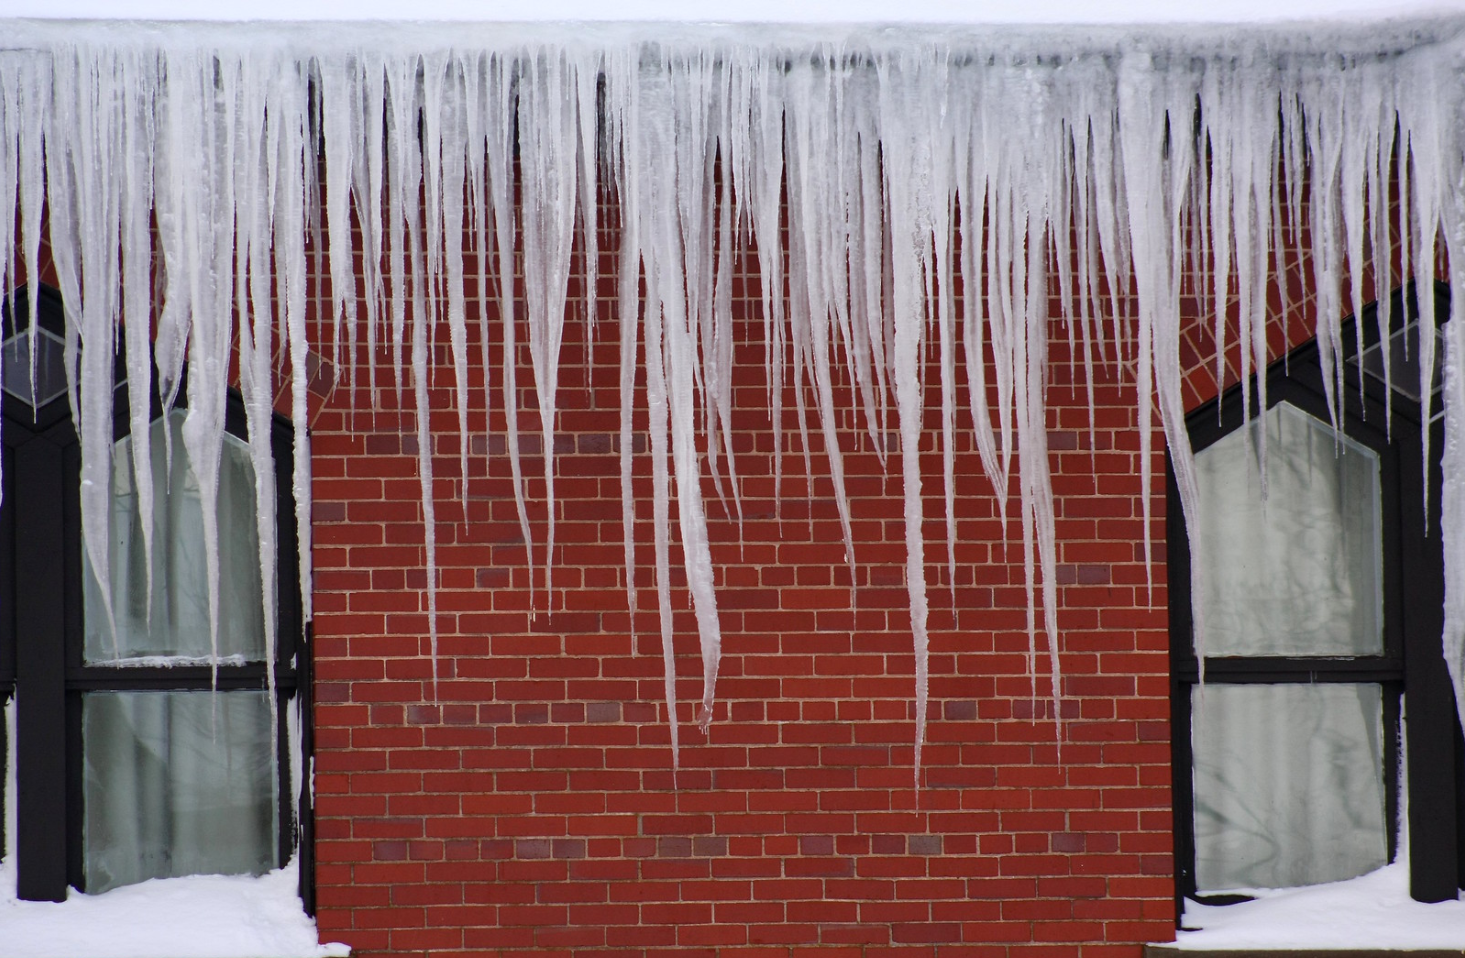
The portable device created in this project monitors buildings and warns the responsible parties when potentially hazardous icicles are formed. In ideal conditions, icicles can form at a rate of more than 1 cm (0.39 in) per minute. In cold climates, many people are injured and killed each year by these solid projectiles, leading responsible building owners to often close sidewalks in the spring to minimize risk. This project demonstrates how an extra set of digital eyes can notify property owners icicles are forming and need to be removed before they can cause harm.
Hardware used
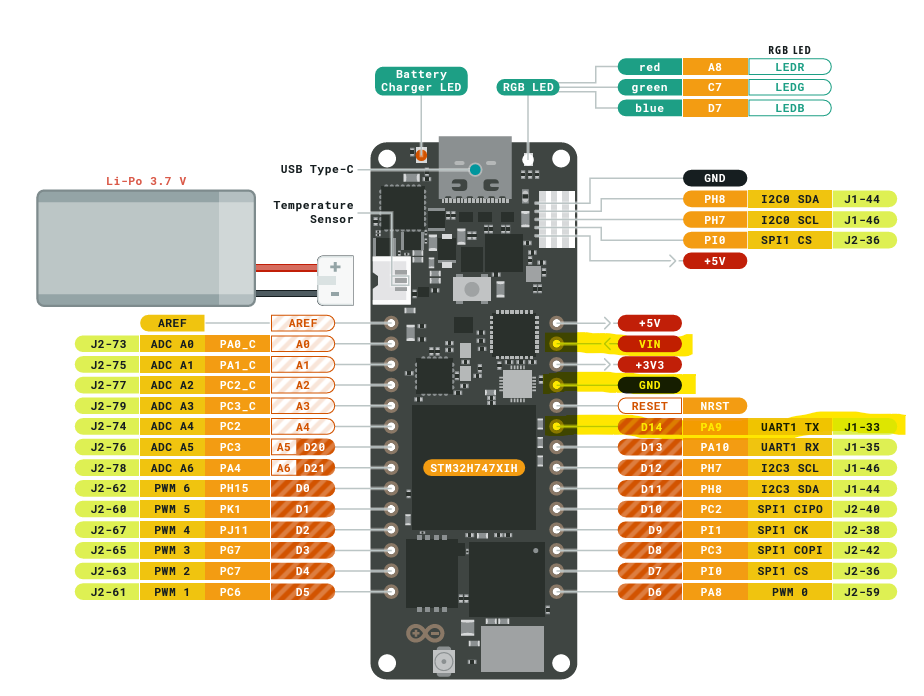
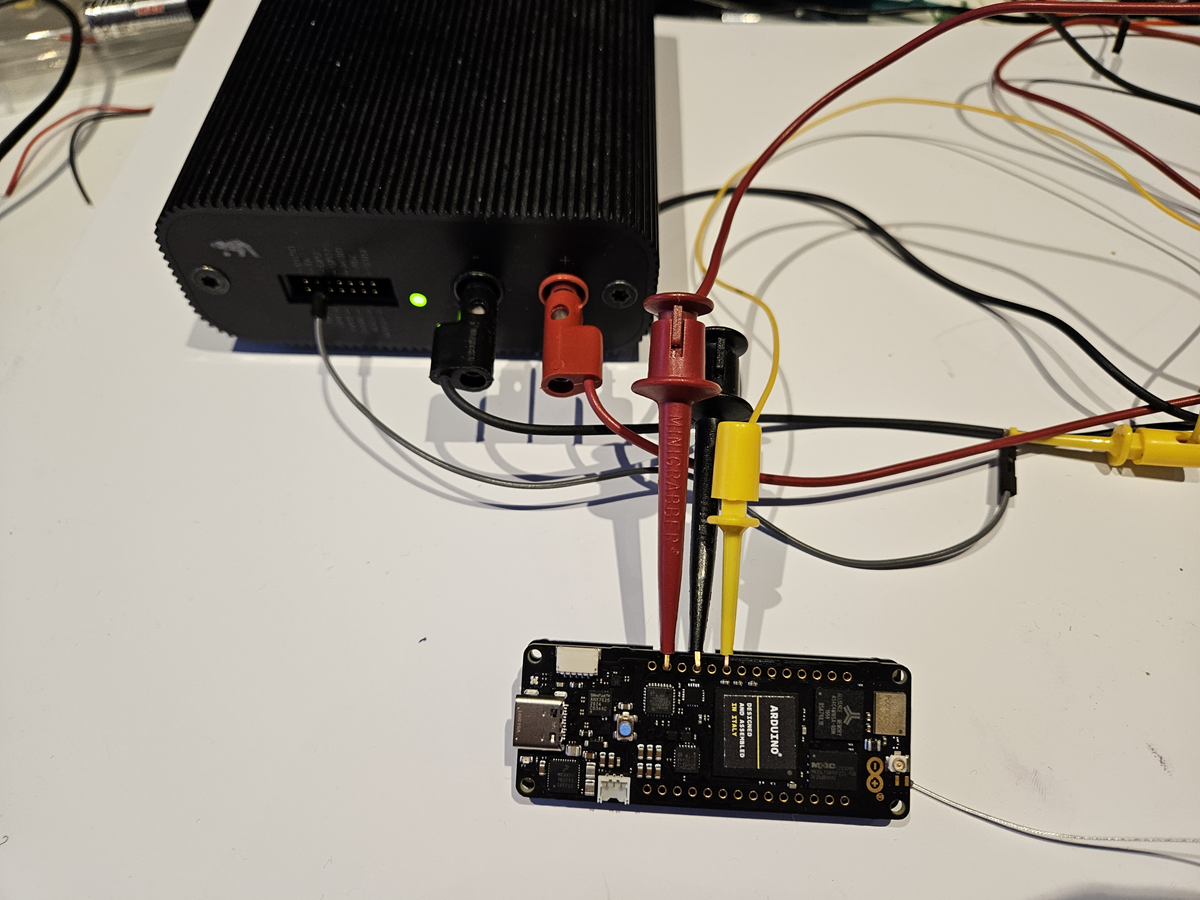
- Arduino Portenta H7
- Arduino Portenta Vision Shield w/LoRa Connectivity
- NVIDIA GeForce RTX
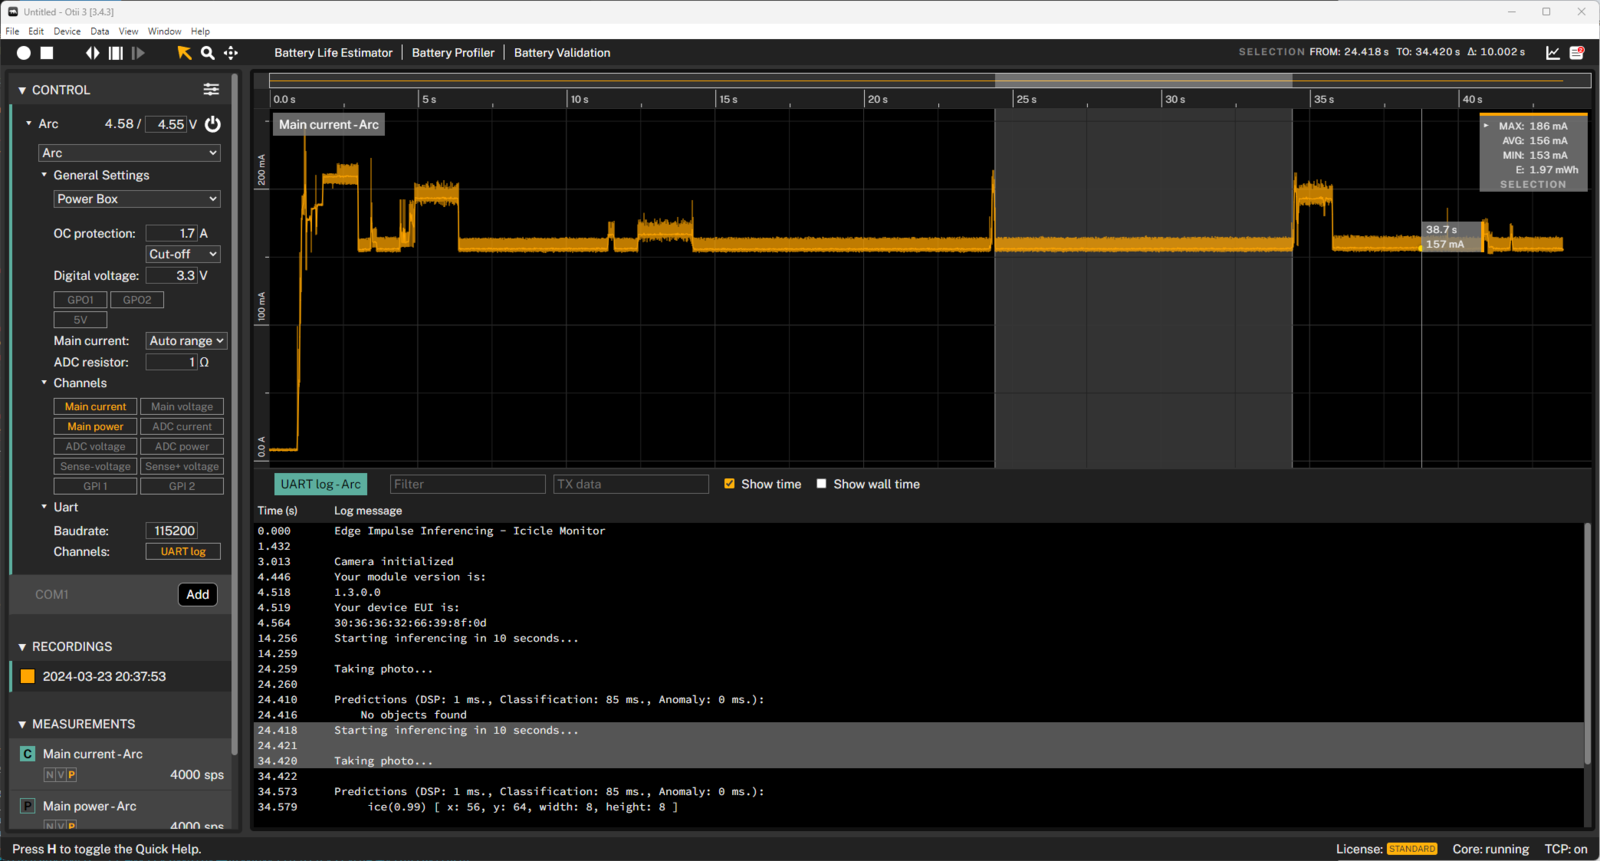
- Otii Arc from Qoitech
Software used
- Edge Impulse Studio
- NVIDIA Omniverse Code with Replicator
- NVIDIA Isaac Sim with Edge Impulse extension
- Visual Studio Code
- Blender
Code and machine learning repository
Project Impulse and Github code repository.Working principle
Icicle formation is detected using a neural network (NN) designed to identify objects in images from the onboard camera. The NN is trained and tested exclusively on synthesized images. The images are generated with realistic simulated lighting conditions. A small amount of real images are used to later verify the model.Challenges
The main challenge of detecting forming icicles is the translucent nature of ice and natural variation of sunlight. Because of this we need a great number of images to train a model that captures enough features of the ice with varying lighting conditions. Capturing and annotating such a large dataset is incredibly labor intensive. We can mitigate this problem by synthesizing images with varying lighting conditions in a realistic manner and have the objects of interest automatically labeled.Mobility
A powerful platform combined with a high resolution camera with fish-eye lens would increase the ability to detect icicles. However, by deploying the object detection model to a small, power-efficient, but highly constrained device, options for device installation increase. Properly protected against moisture this device can be mounted outdoors on walls or poles facing the roofs in question. LoRaWAN communication enables low battery consumption and long transmission range.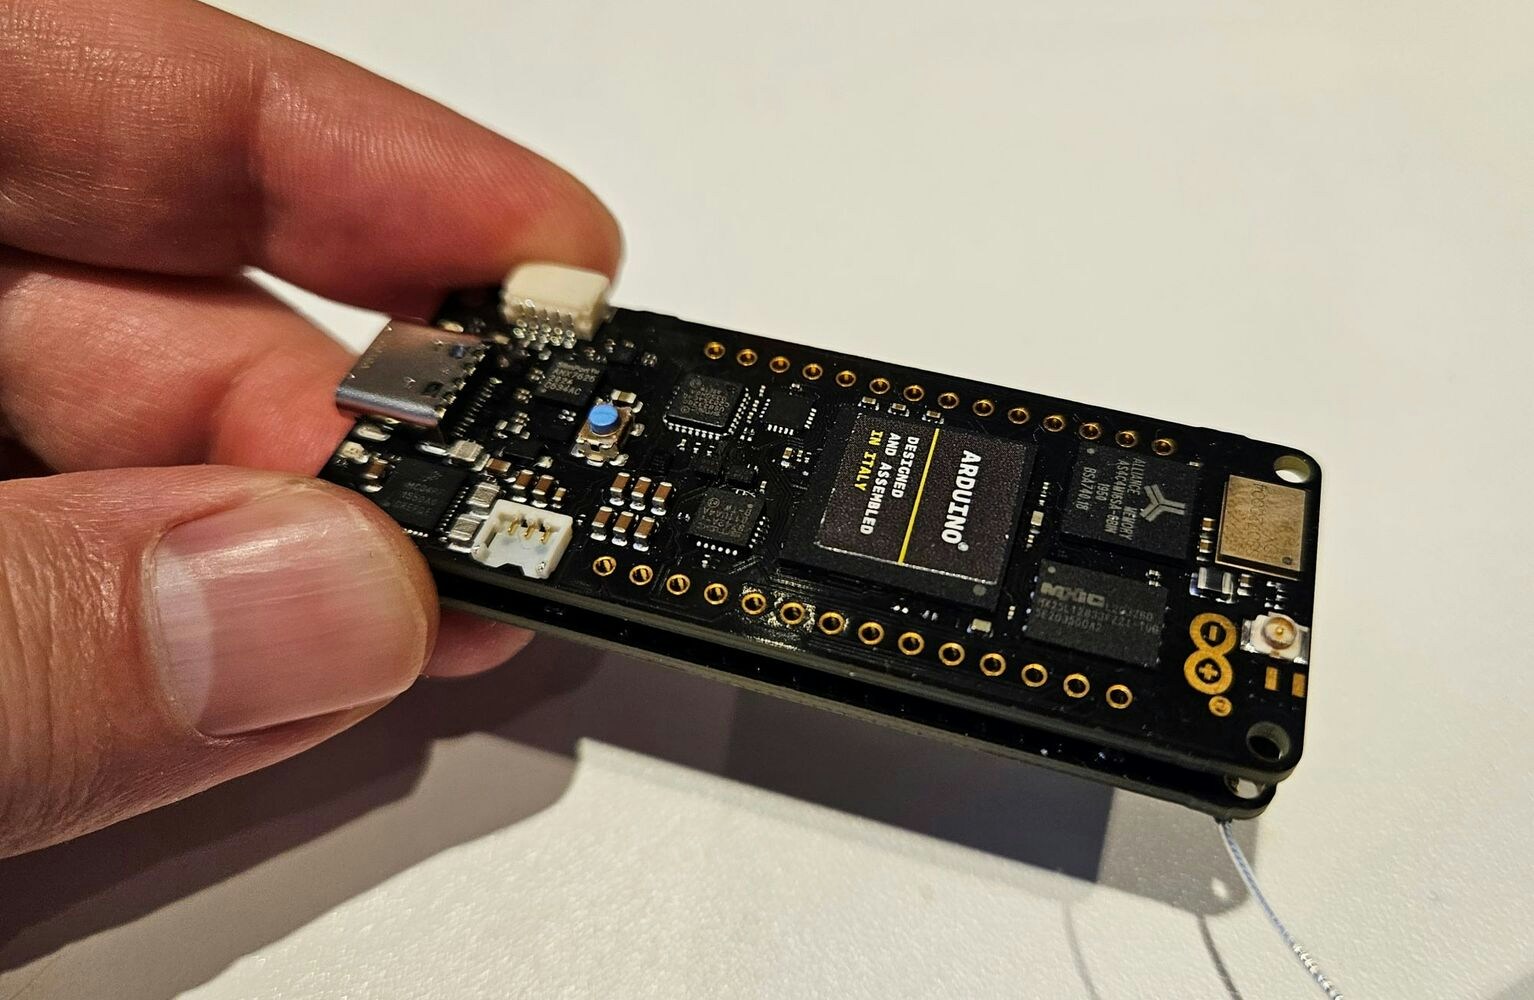
Object detection using a neural network
FOMO (Faster Objects, More Objects) is a novel machine learning algorithm that allows for visual object detection on highly constrained devices through training of a neural network with a number of convolutional layers.Capturing training data and labeling objects
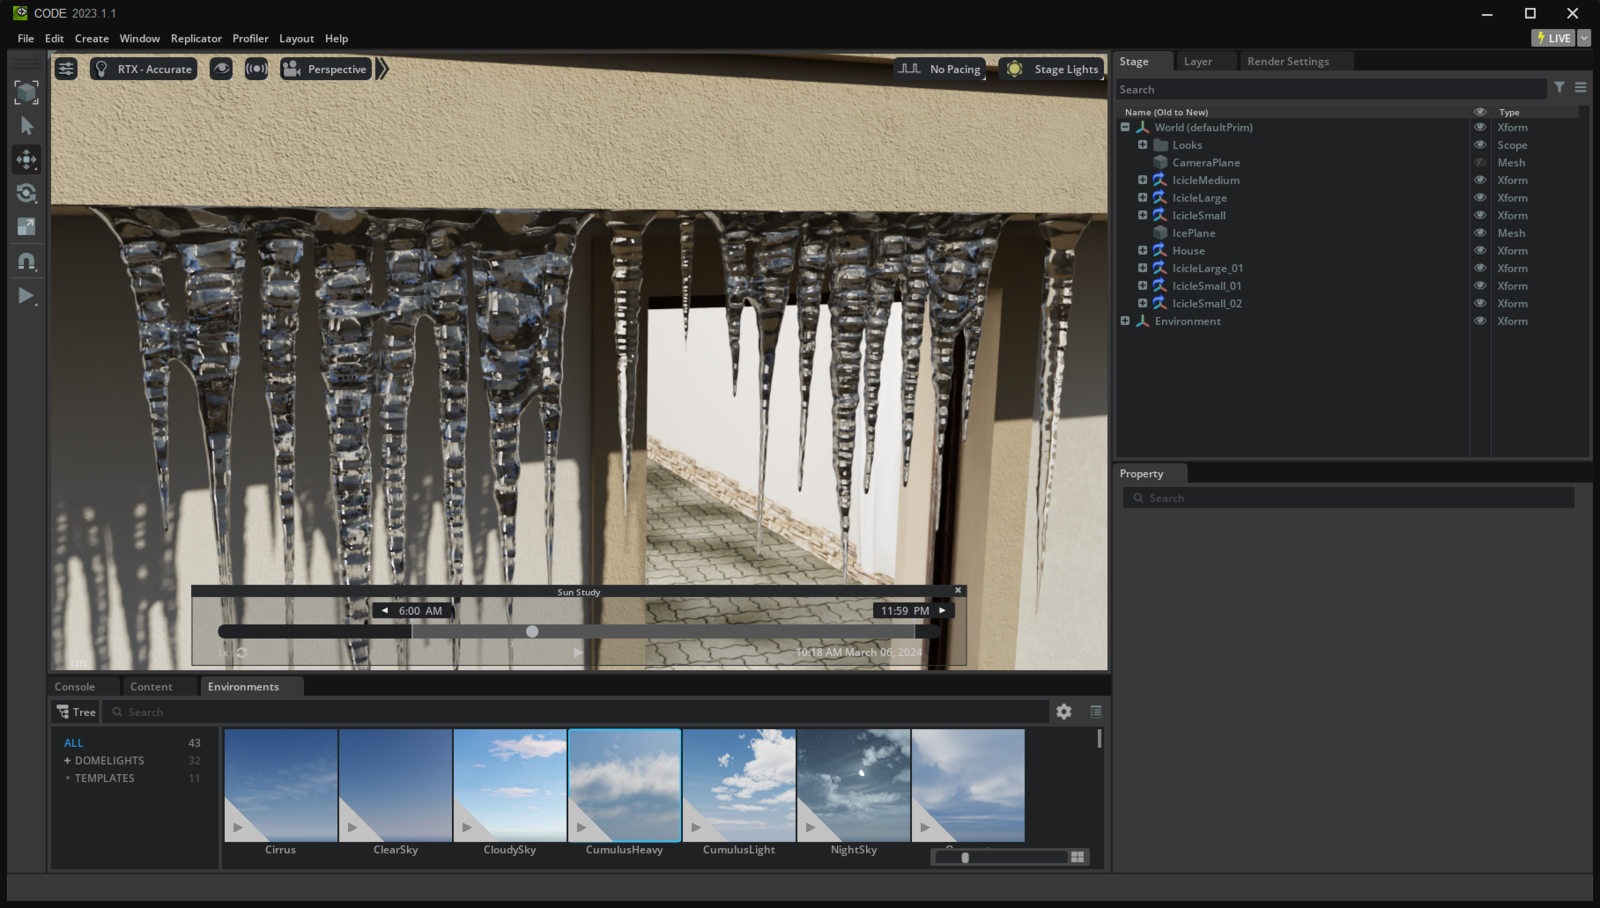
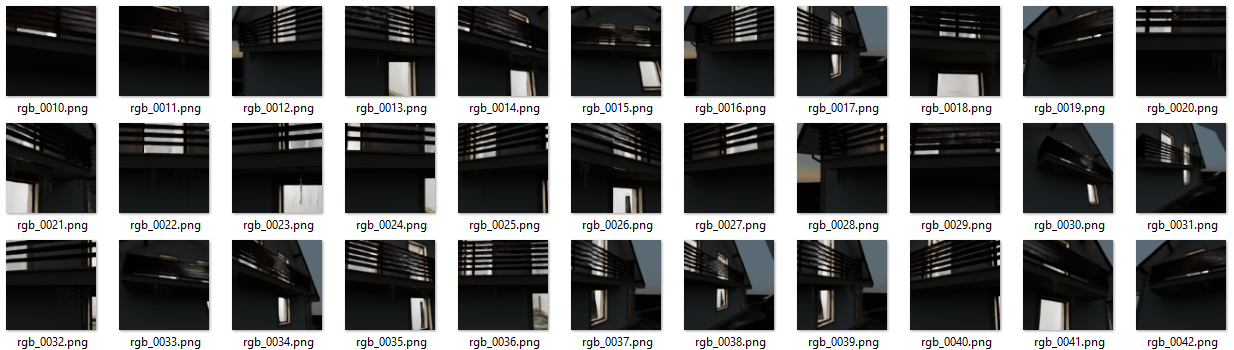
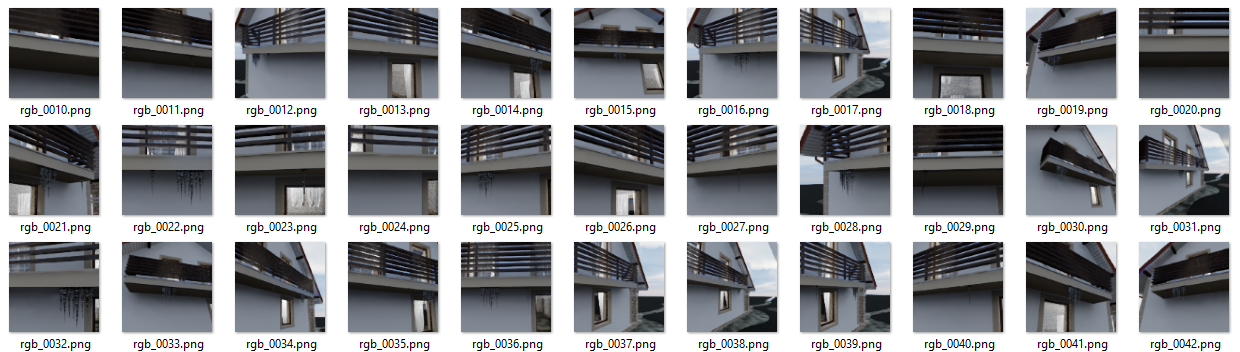
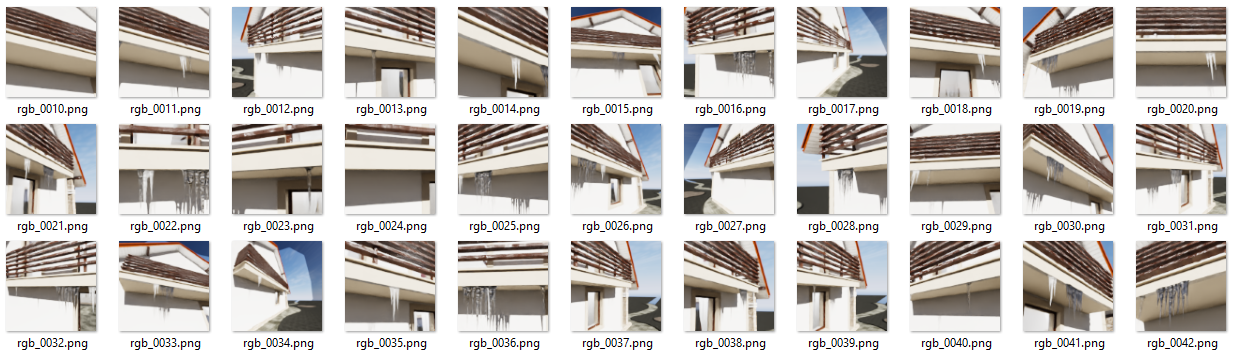
One of the most labor intensive aspects of building any machine learning model is gathering the training data and labeling it. For an object detection model this requires taking hundreds or thousands of images of the objects to detect, drawing rectangles around them, and choosing the correct label for each class. Recently generating pre-labeled images has become feasible and has proven to have great results. This is referred to as synthetic data generation with domain randomization. In this project a model will be trained exclusively on synthetic data, and we will see how it can detect the real life counterparts.Domain randomization using NVIDIA Omniverse Replicator
NVIDIA Omniverse Code is an IDE that allows us to compose 3D scenes and to write simple Python code to capture images. Further, the Replicator extension is a toolkit that allows us to label the objects in the images and to simplify common domain randomization tasks, such as scattering objects between images. For an in-depth walkthrough on getting started with Omniverse and Replicator, see this associated article.Making a scene
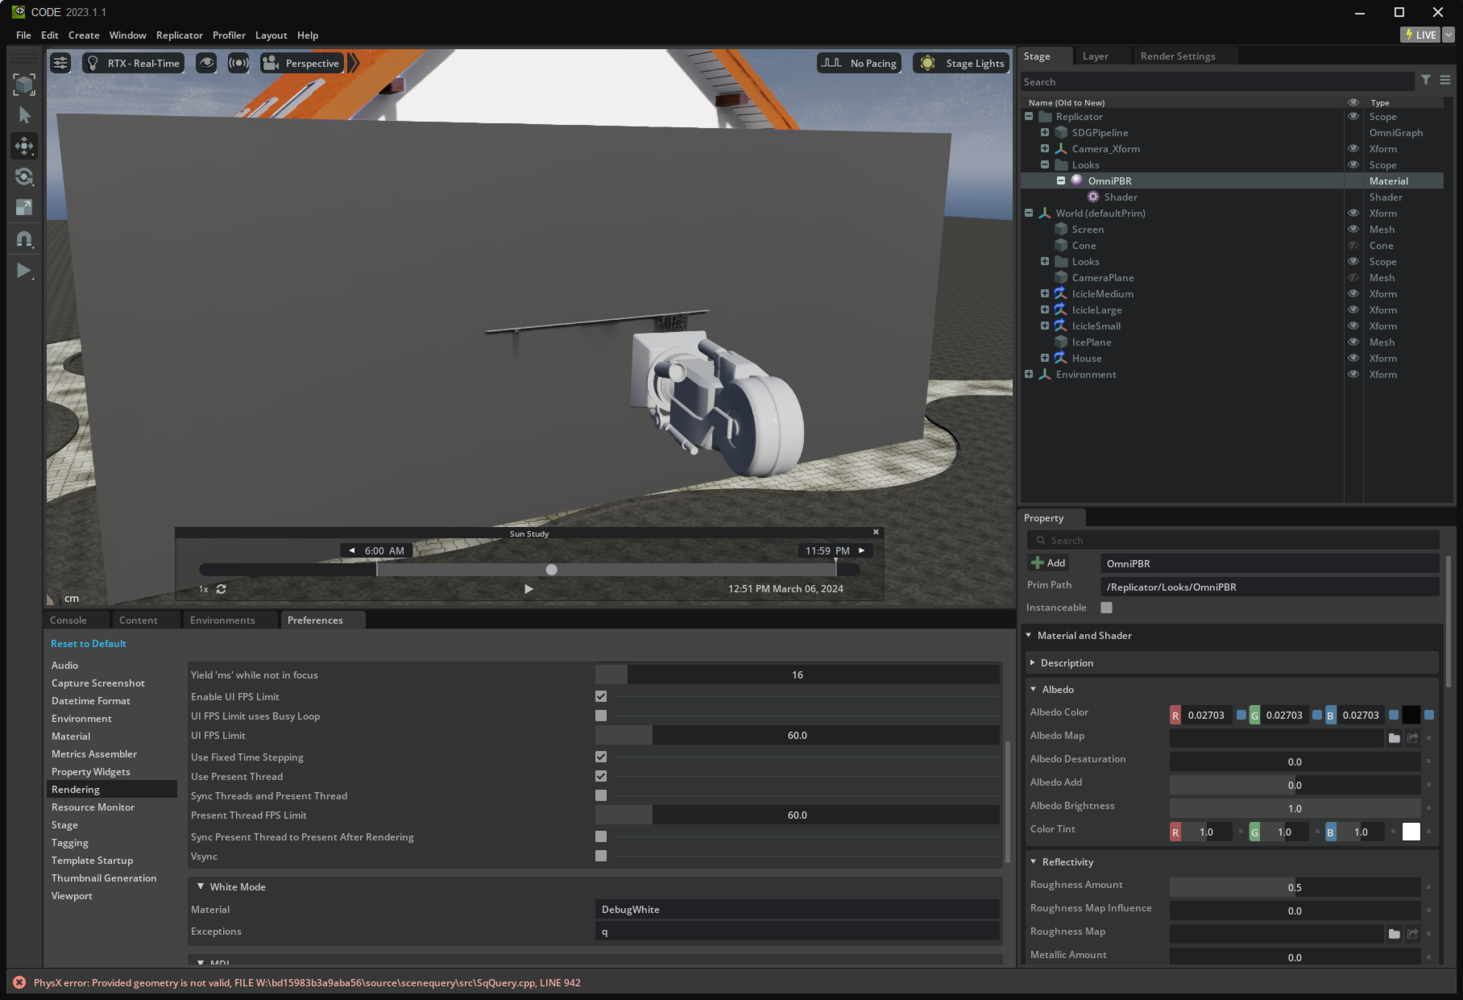
It’s possible to create an empty scene in Omniverse and add content programmatically. However, composing initial objects by hand serves as a practical starting point. In this project a royalty free 3D model of a house was used as a basis.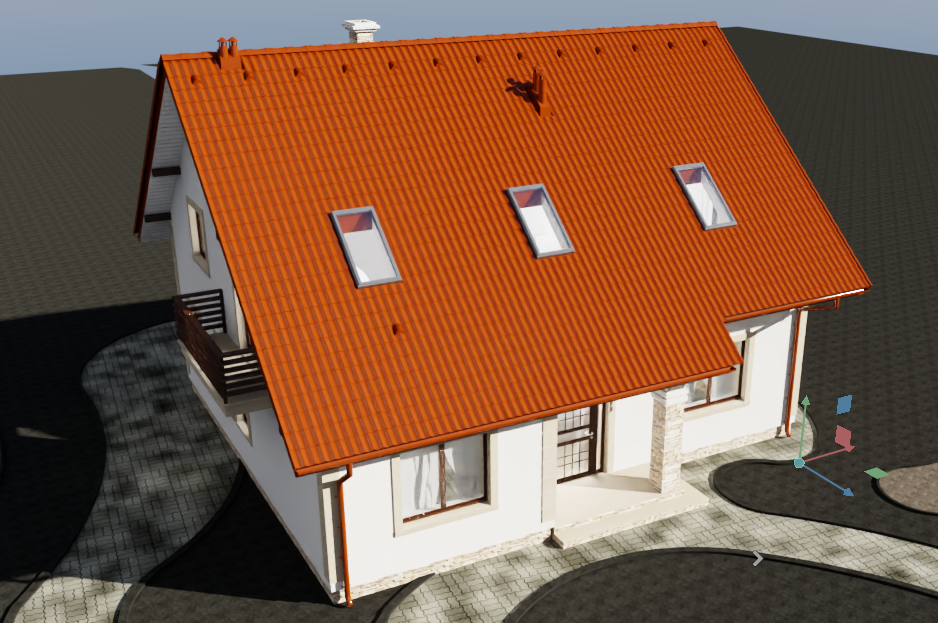
Icicle models
To represent the icicle, a high quality model pack was purchased at Turbo Squid.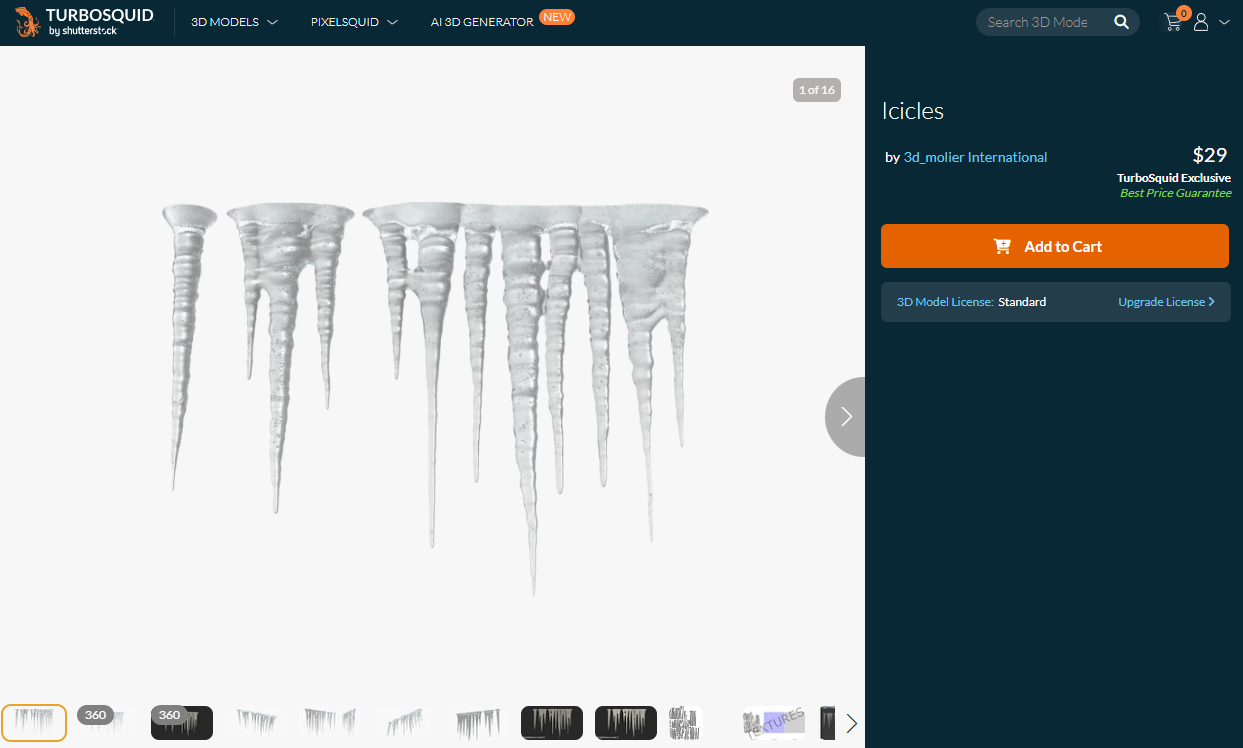
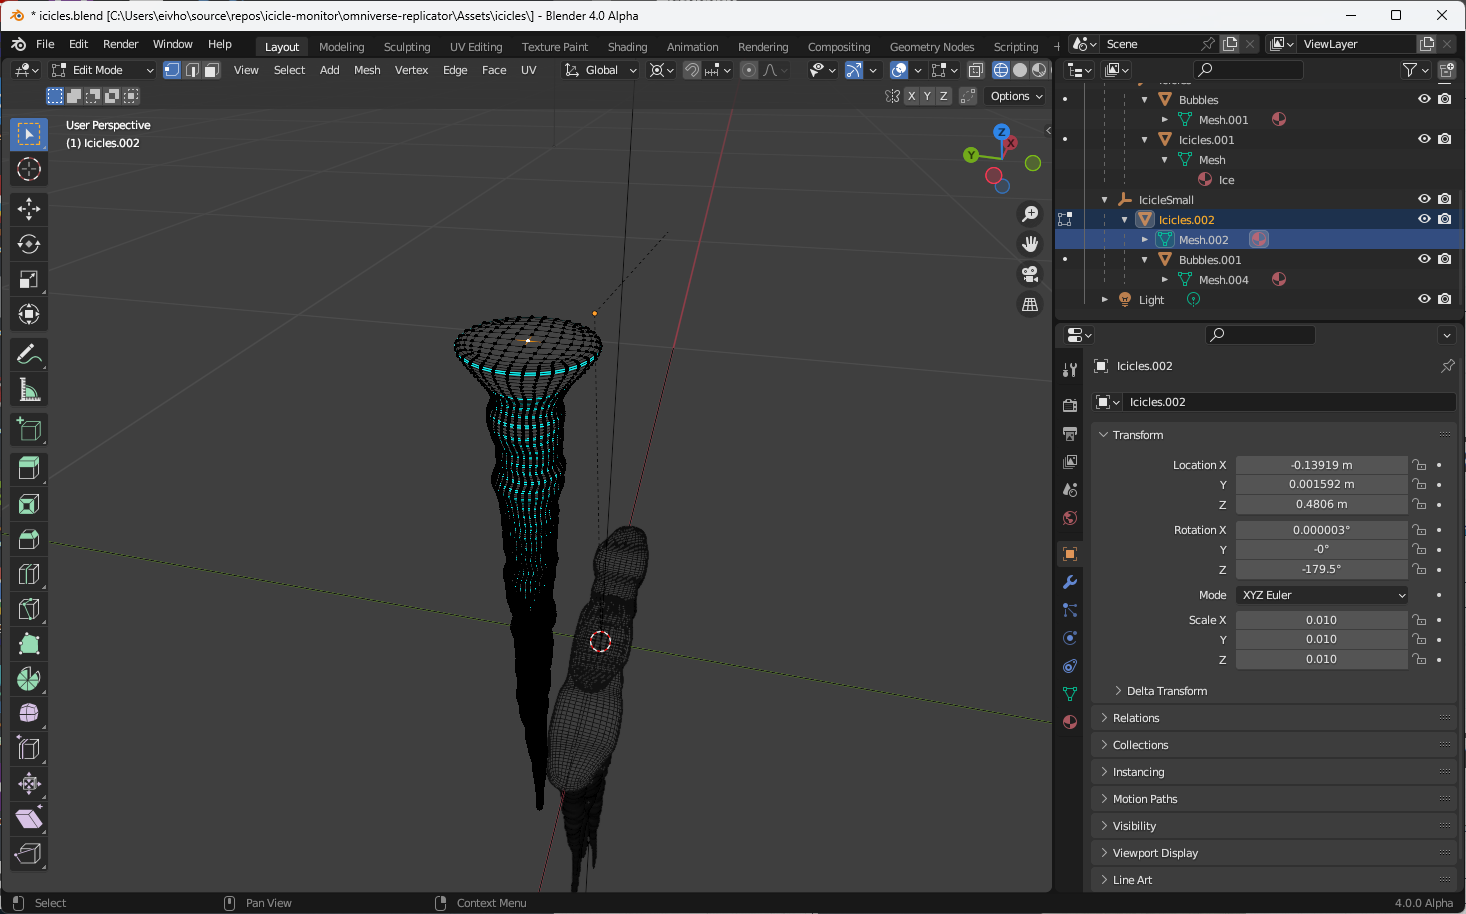
- Select vertex on model (Edit Mode), Shift+S-> Cursor to selected
- (Object Mode) Select Hierarchy, Object>Set Origin\Origin to 3D Cursor
- (Object Mode) Shift+S\Cursor to World Origin
- Selection only
- Convert Orientation:
- Forward Axis: X
- Up Axis: Y
Setting semantic metadata on objects
To be able to produce images for training and include labels, we can use a feature of Replicator toolbox found under menu Replicator > Semantics Schema Editor.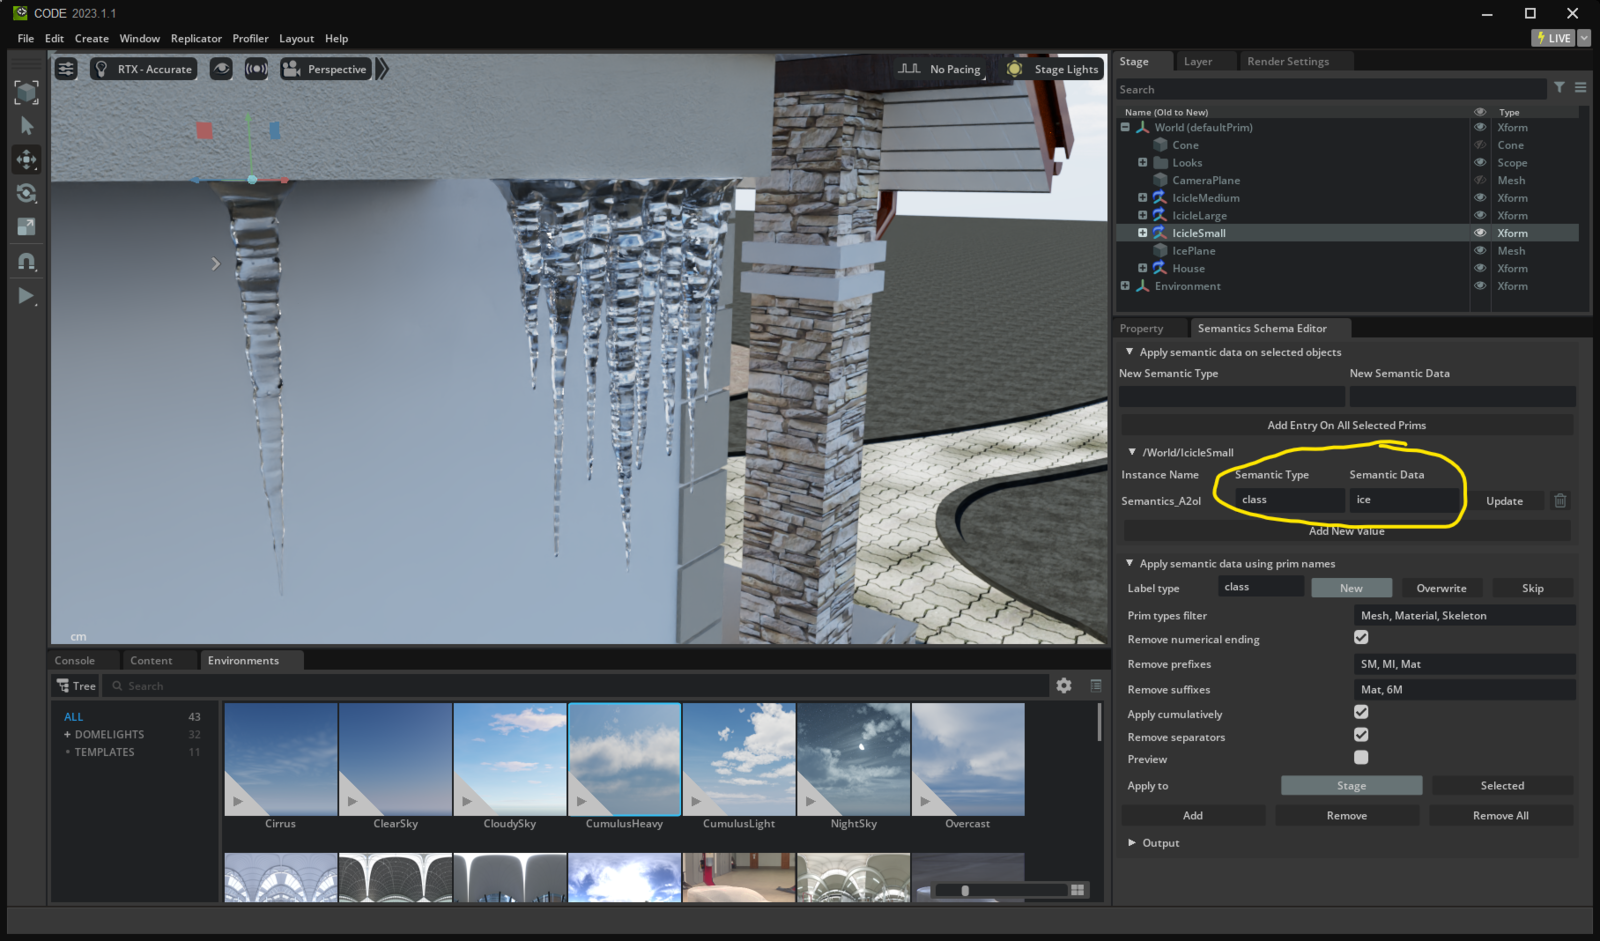
Creating a program for domain randomization
With a basic 3D stage created and objects of interest labeled, we can continue creating a program that will make sure we produce images with slight variations. Our program can be named anything, ending in.py and preferably placed close to the stage USD-file. Here is a sample of such a program: replicator_init.py:
To keep the items generated in our script separate from the manually created content, we start by creating a new layer in the 3D stage:
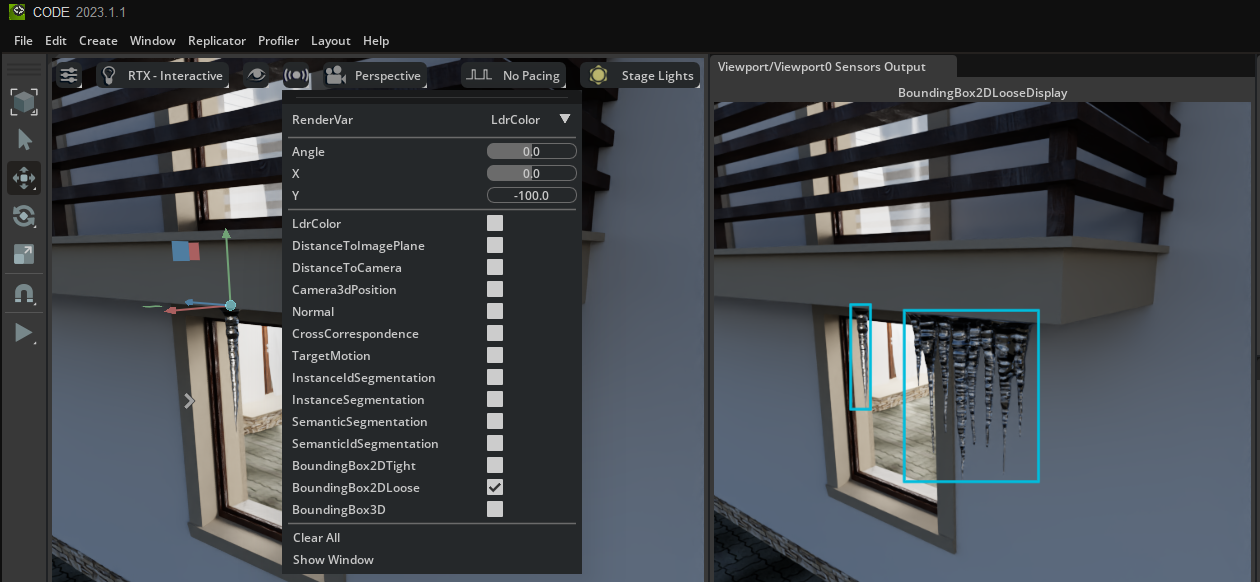
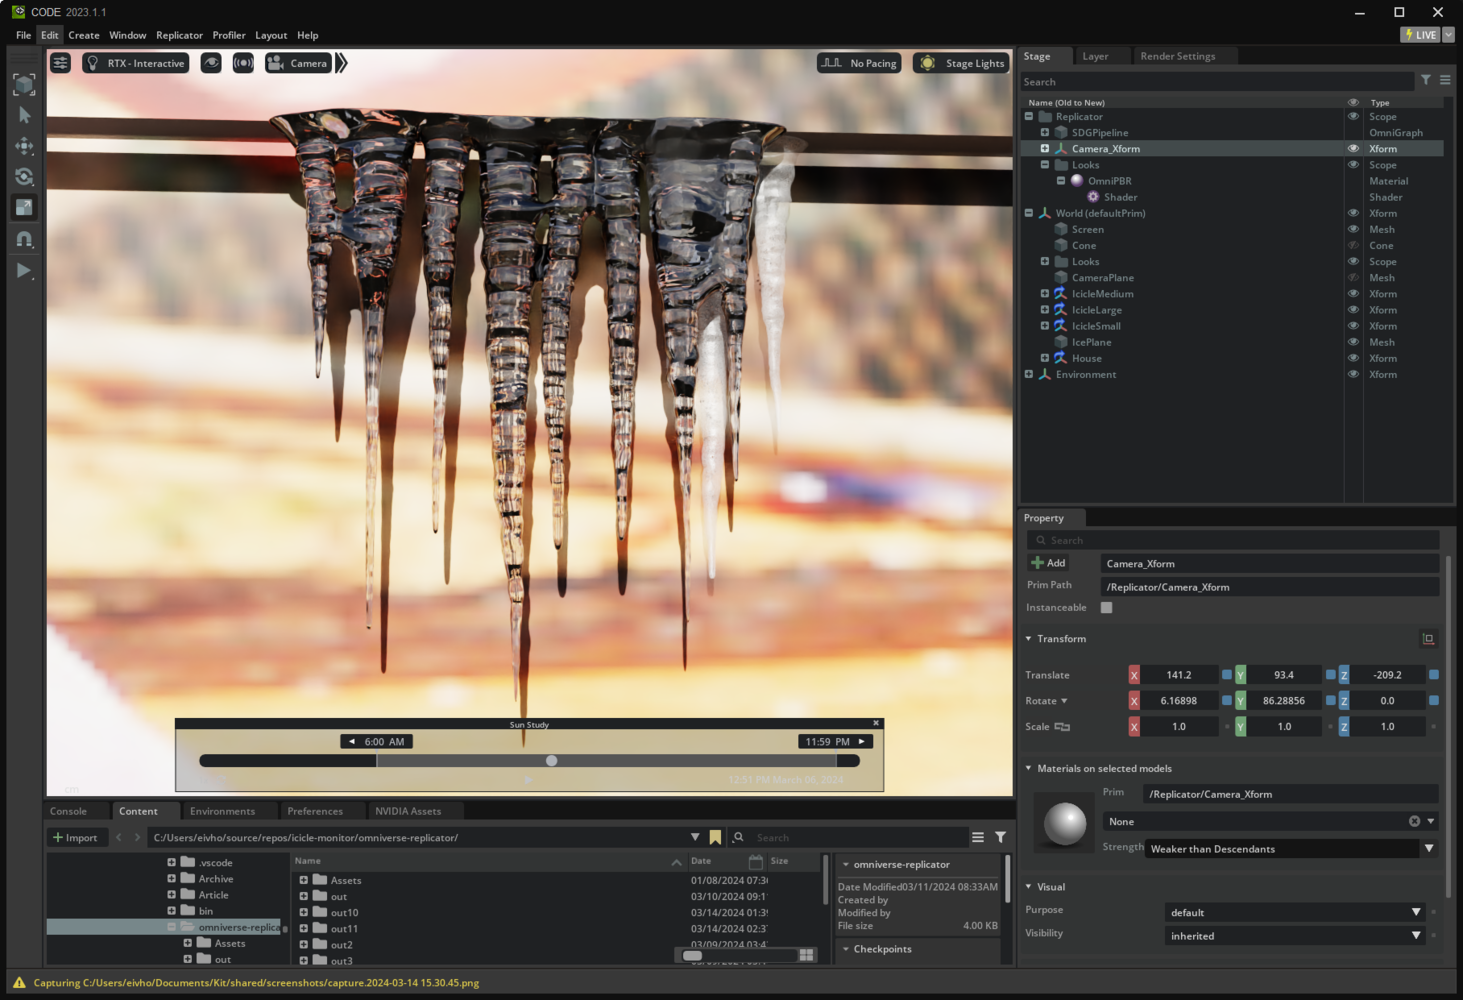
.png files. Note that labels are created setting bounding_box_2d_loose. This is used in this case instead of bounding_box_2d_tight as the latter in some cases would not include the tip of the icicles in the resulting bounding box. It also creates labels from the previously defined semantics. The code ends with running a single iteration of the process in Omniverse Code, so we can preview the results.
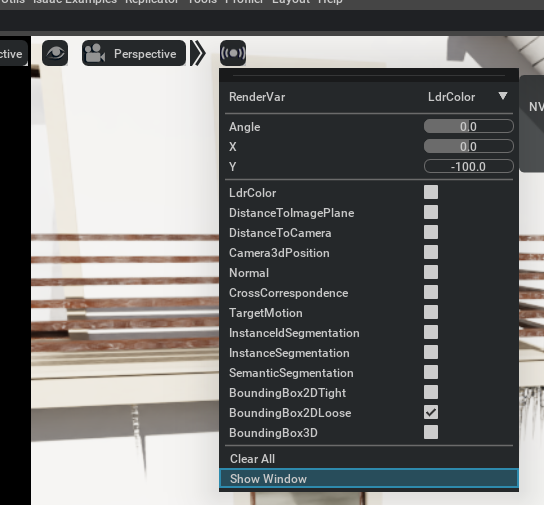
The bounding boxes can be visualized by clicking the sensor widget, checking “BoundingBox2DLoose” and finally “Show Window”.
Running domain randomization
With a basic randomization program in place, we could run it from the embedded script editor (Window > Script Editor), but more robust Python language support can be achieved by developing in Visual Studio Code instead. To connect VS Code with Omniverse we can use the Visual Studio Code extension Embedded VS Code for NVIDIA Omniverse. See the extension repo for setup. When ready to run go to Replicator > Start and check progress in the defined output folder.
Randomizing colors
The surface behind the icicles may vary greatly, both in color and texture. Using Replicator randomizing the color of an object’s material is easy. In the scene in Omniverse, either manually create a plane behind the icicles, or create one programmatically. In Code, define a function that takes in a reference to the plane we want to randomize, the color of the distribution functions with min and max value span: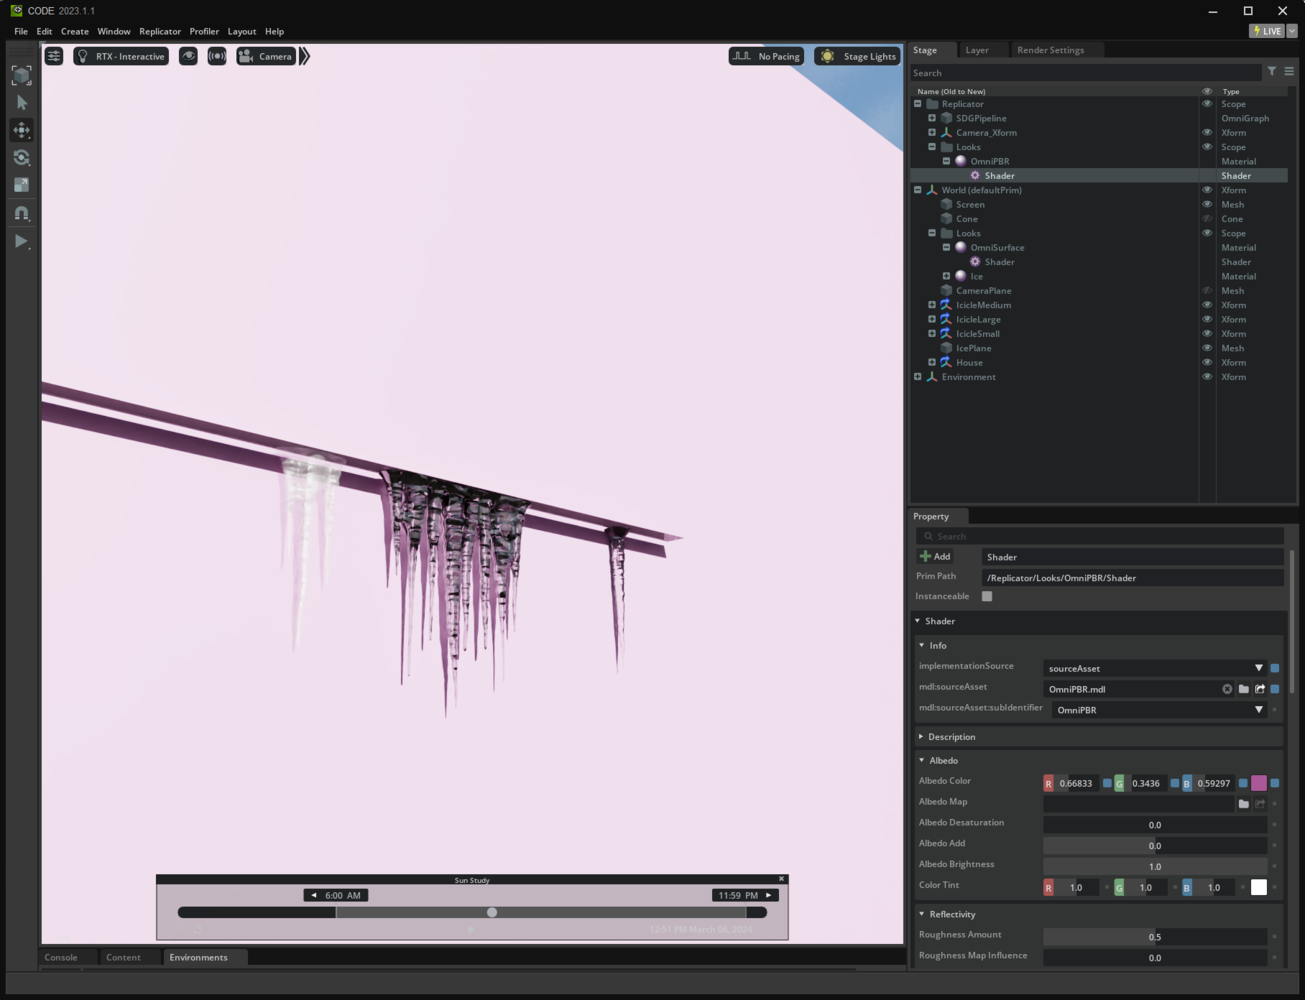

Randomizing textures
To further steer training of the object detection model in capturing features of the desired class, the icicles, and not features that appear due to short comings in the domain randomization, we can create images with the icicles in front of a large variety of background images. A simple way of achieving this is to use a large dataset of random images and randomly assigning one of them to a background plane for each image generated.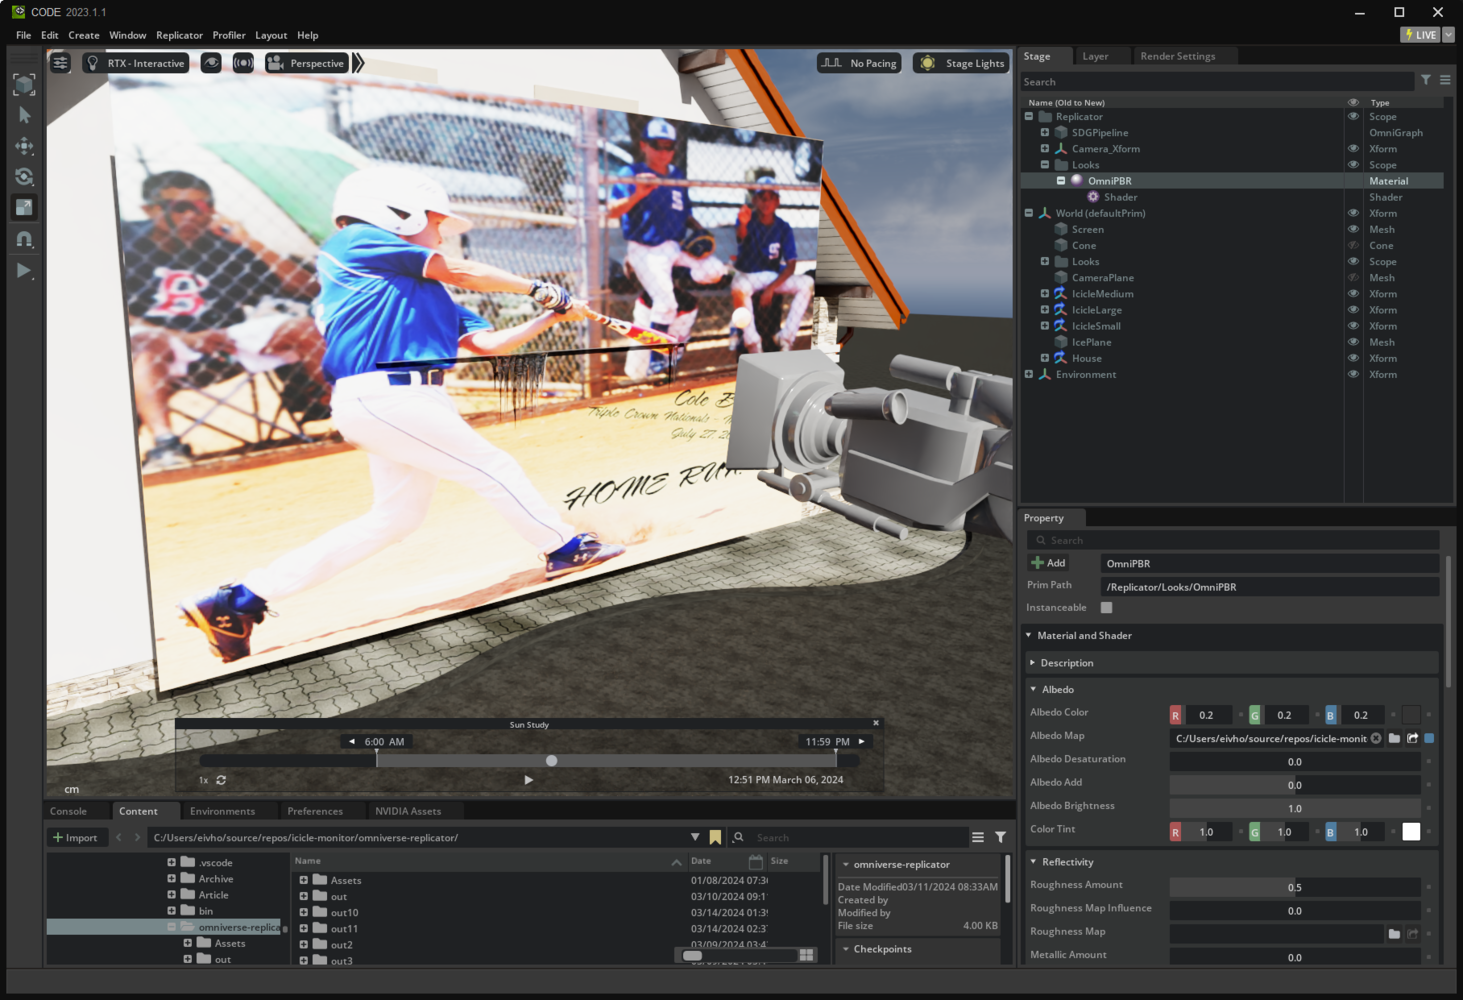

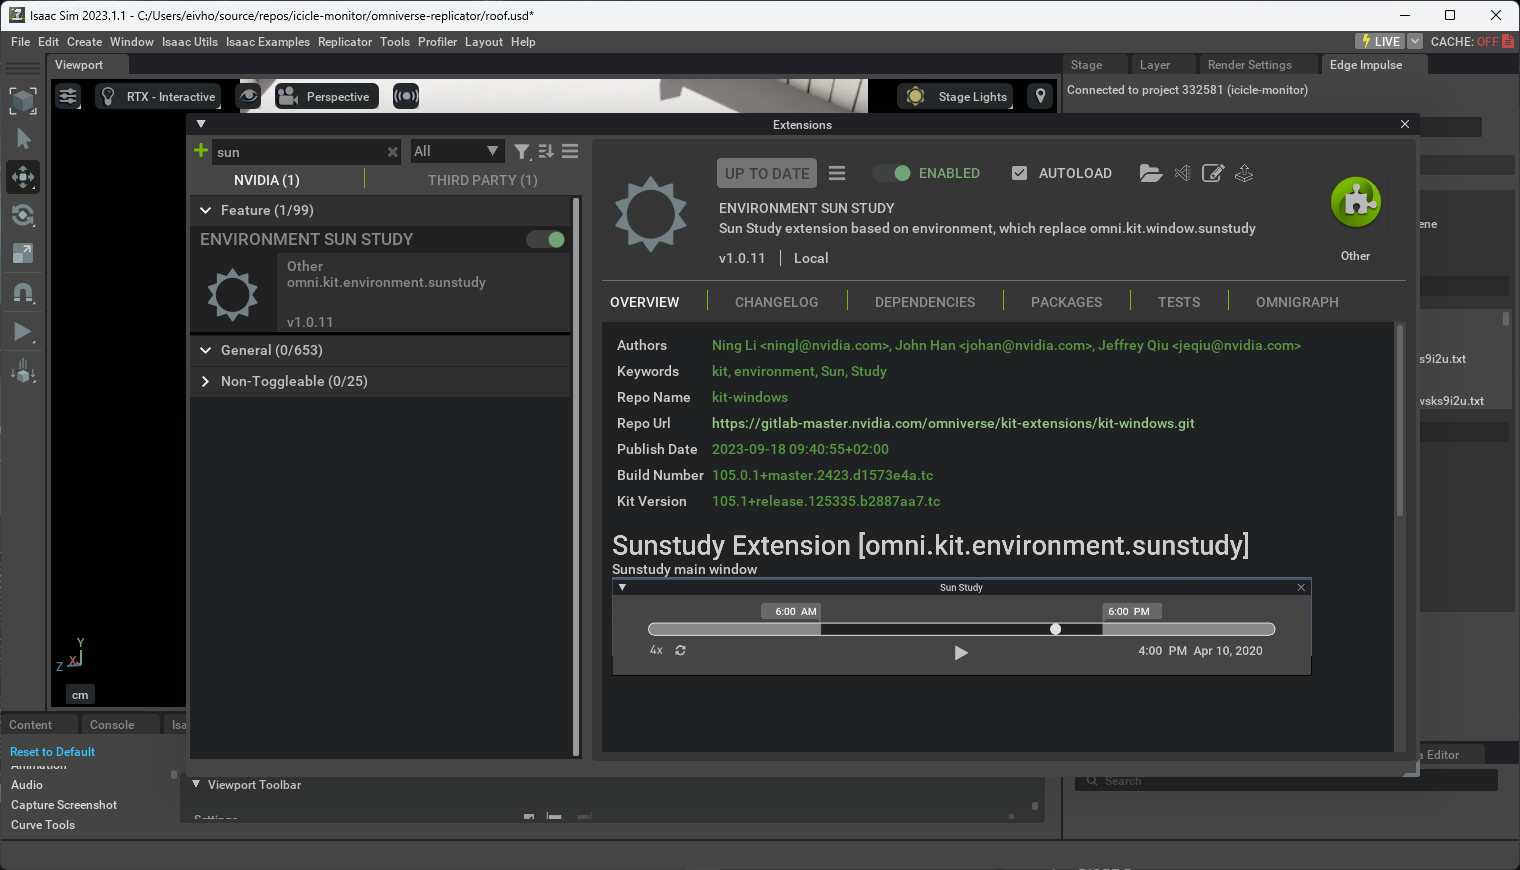
Creating realistic outdoor lighting conditions using Sun Study
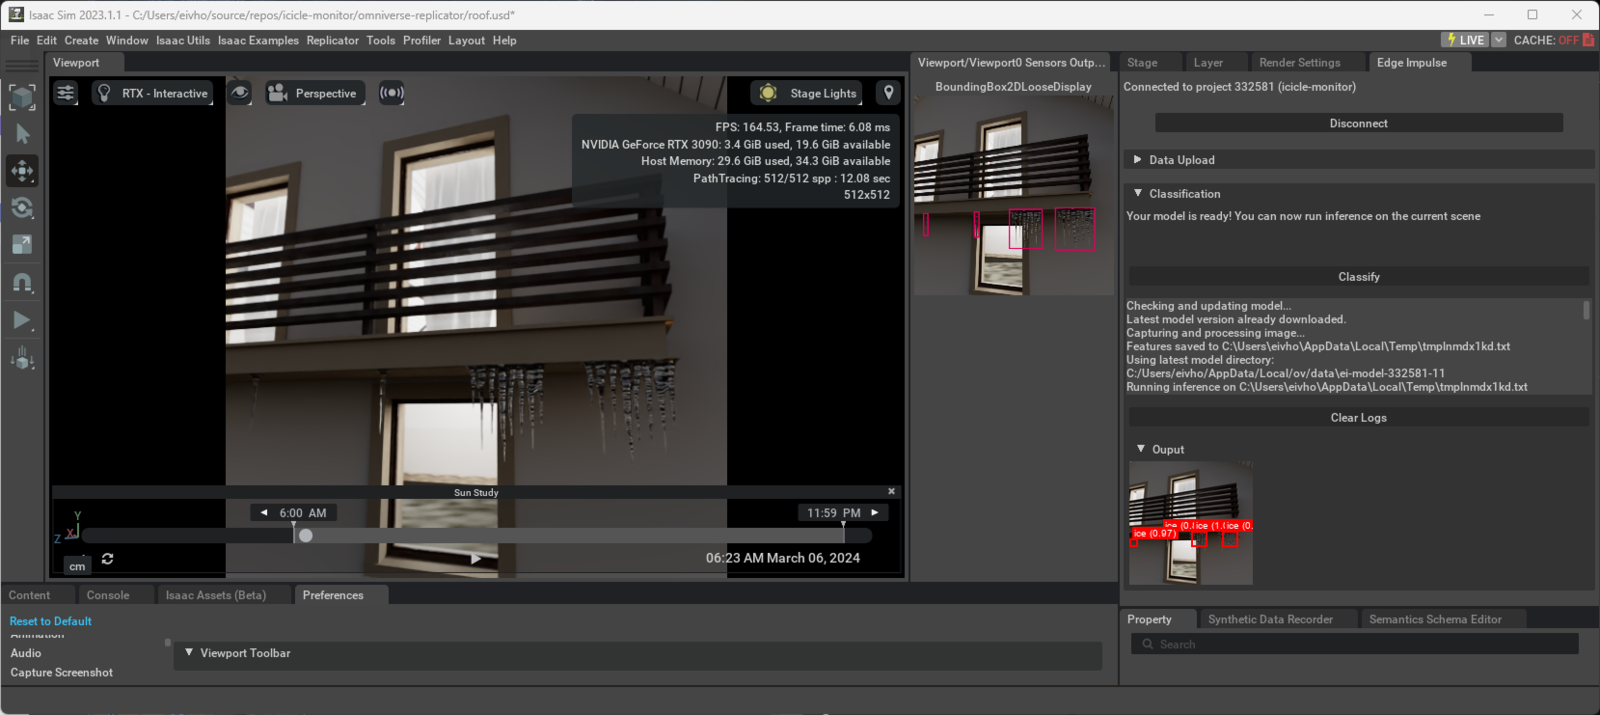
In contrast to a controlled indoor environment, creating a robust object detection model intended for outdoor use needs training images with a wide range of realistic natural light. When generating synthetic images we can utilize an extension that approximates real world sunlight based on sun studies.
The extension let’s us set world location, date and time. We can also mix this with the Environment setting in Omniverse, allowing for a wide range of simulation of clouds. As of March 2024 it is not easy to randomize these parameters in script, but this is likely to change. In the mean time we can set the parameters, generate a few thousand images, change time of day, generate more images and so on.
Creating label file for Edge Impulse Studio
Edge Impulse Studio supports a wide range of image labeling formats for object detection. The output from Replicator’s BasicWriter needs to be transformed so it can be uploaded either through the web interface or via the Ingestion API. Provided is a simple Python program, basic_writer_to_pascal_voc.py to help get started. Documentation on the supported object detection label formats is located here. Run the program from a terminal with:launch.json like this:
bounding_boxes.labels that contains all labels and bounding boxes per image.
Creating an object detection project in Edge Impulse Studio
Look at the provided object detection Edge Impulse project or follow a guide to create a new FOMO project.Uploading images and labels using CLI edge-impulse-uploader
Since we have generated both synthetic images and labels, we can use the CLI tool from Edge Impulse to efficiently upload both. Use:bounding_boxes.labels. To switch project if necessary, first run:
Model training and performance
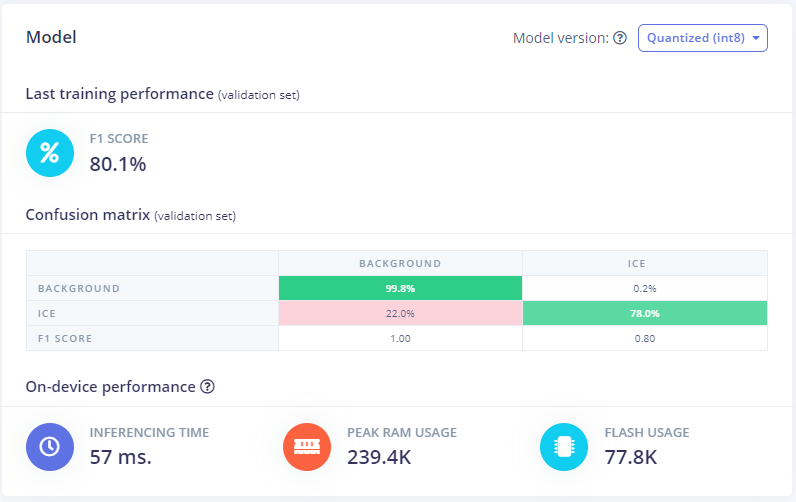
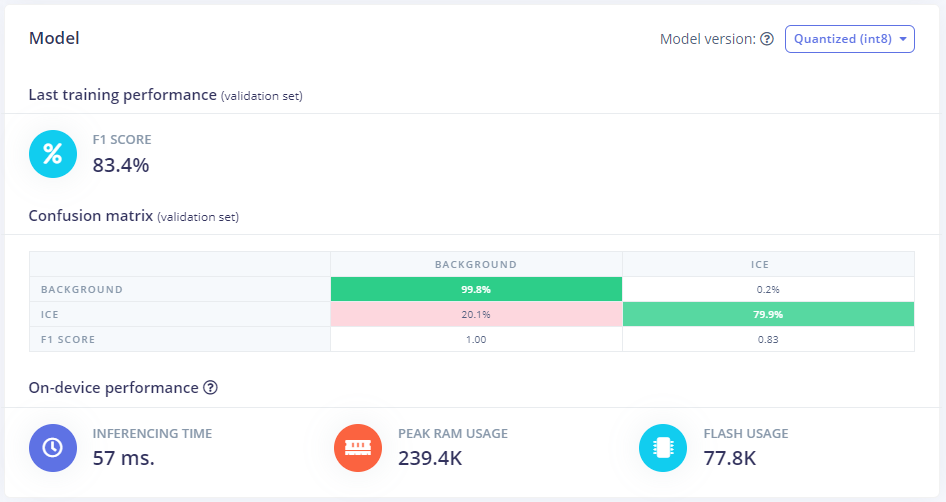
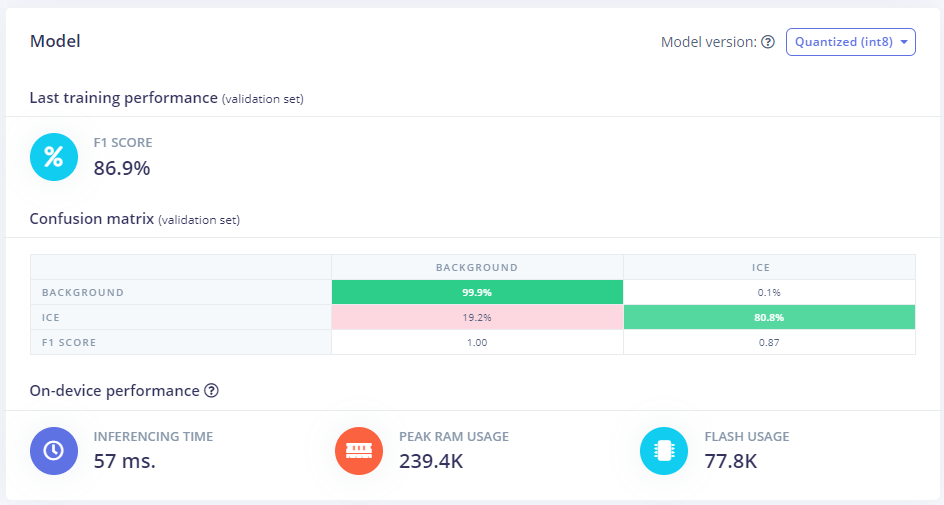
Since our synthetic training images are based on both individual and two different sized clusters of icicles, we can’t trust the model performance numbers too much. Greater F1 scores are better, but we will never achieve 100%. Still, we can upload increasing numbers of labeled images and observe how performance numbers increase. 2,000 images: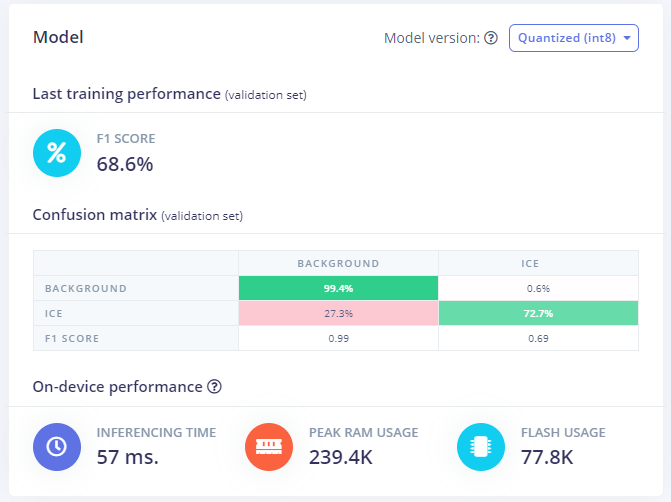
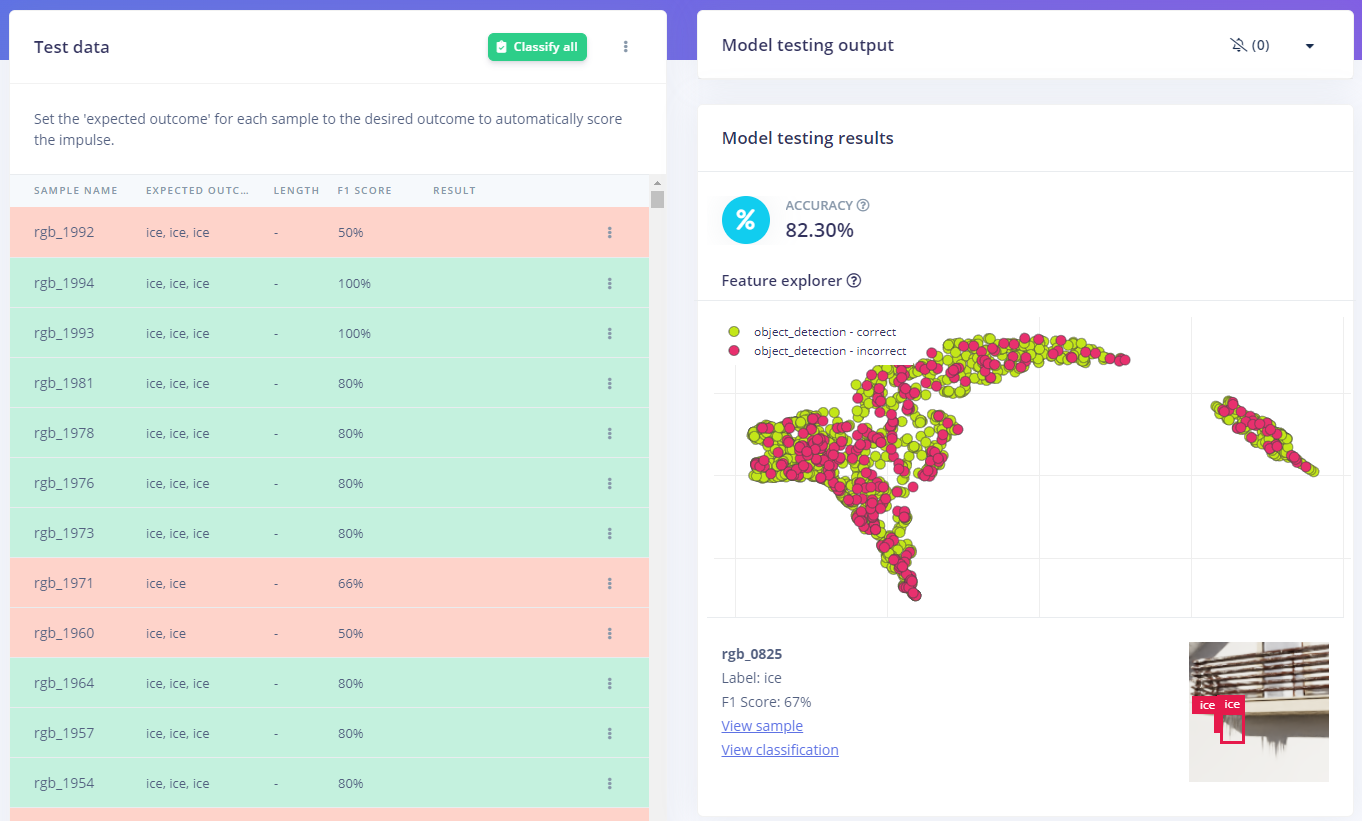
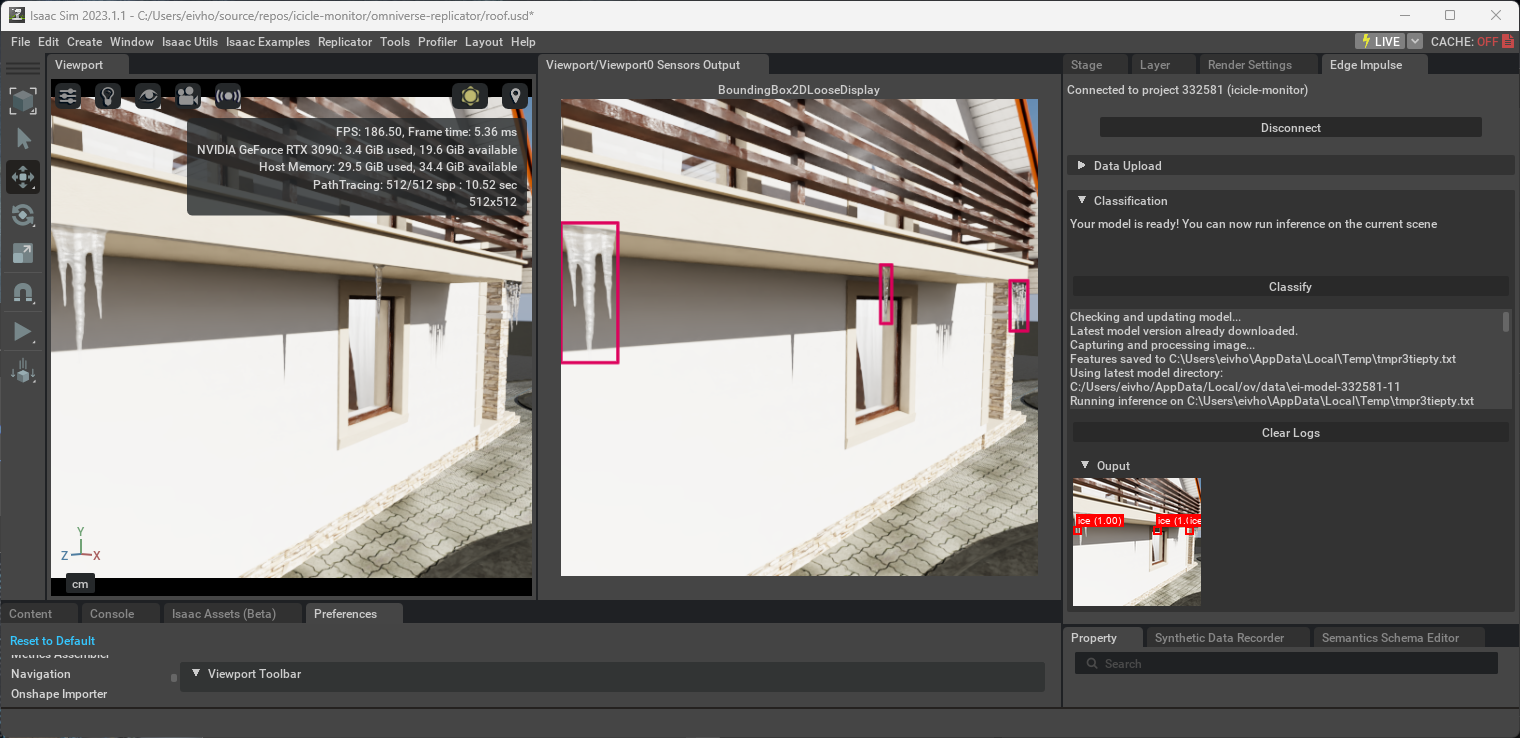
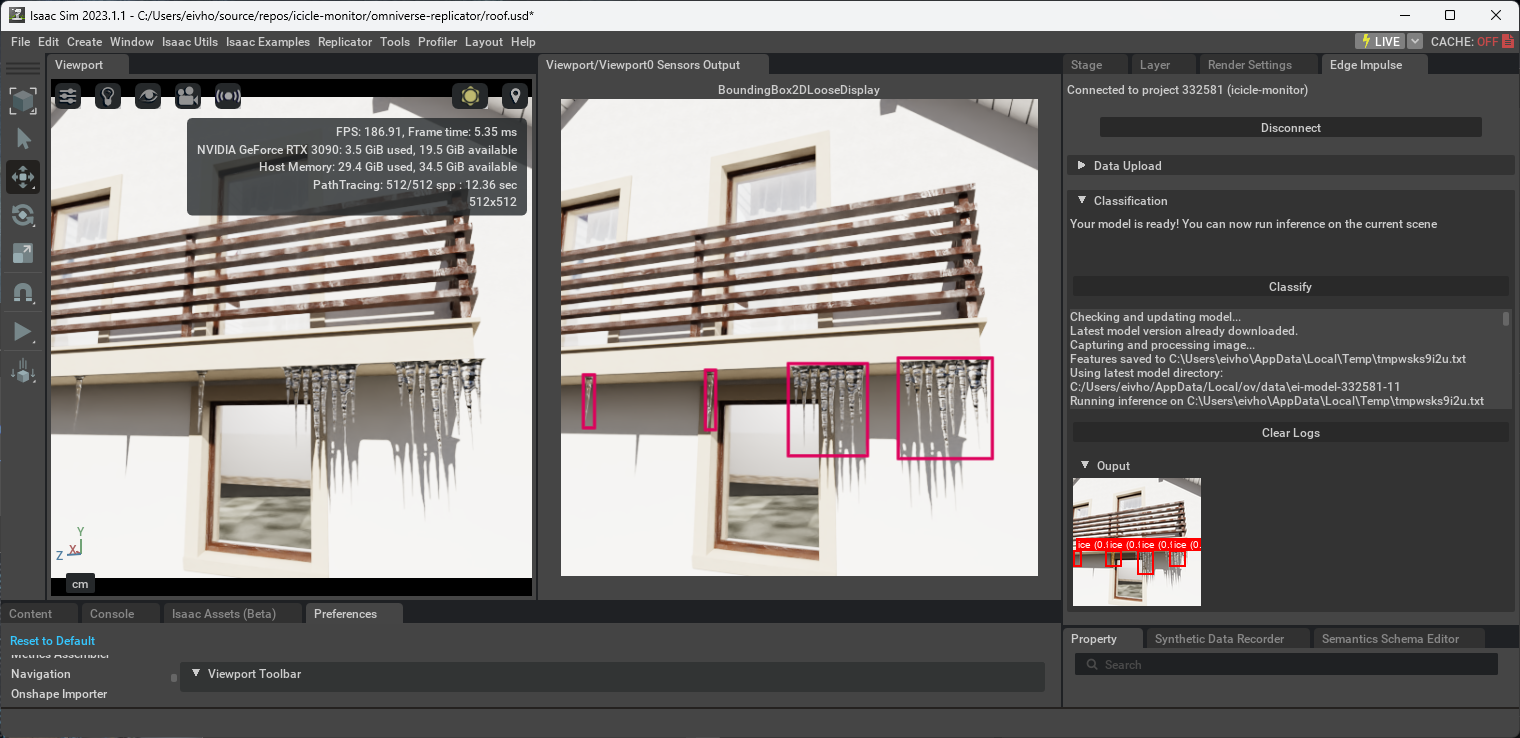
Testing model in simulated environment with NVIDIA Isaac Sim and Edge Impulse extension
We can get useful information about model performance with minimal effort by testing it in a virtual environment. Install NVIDIA Isaac Sim and the Edge Impulse extension.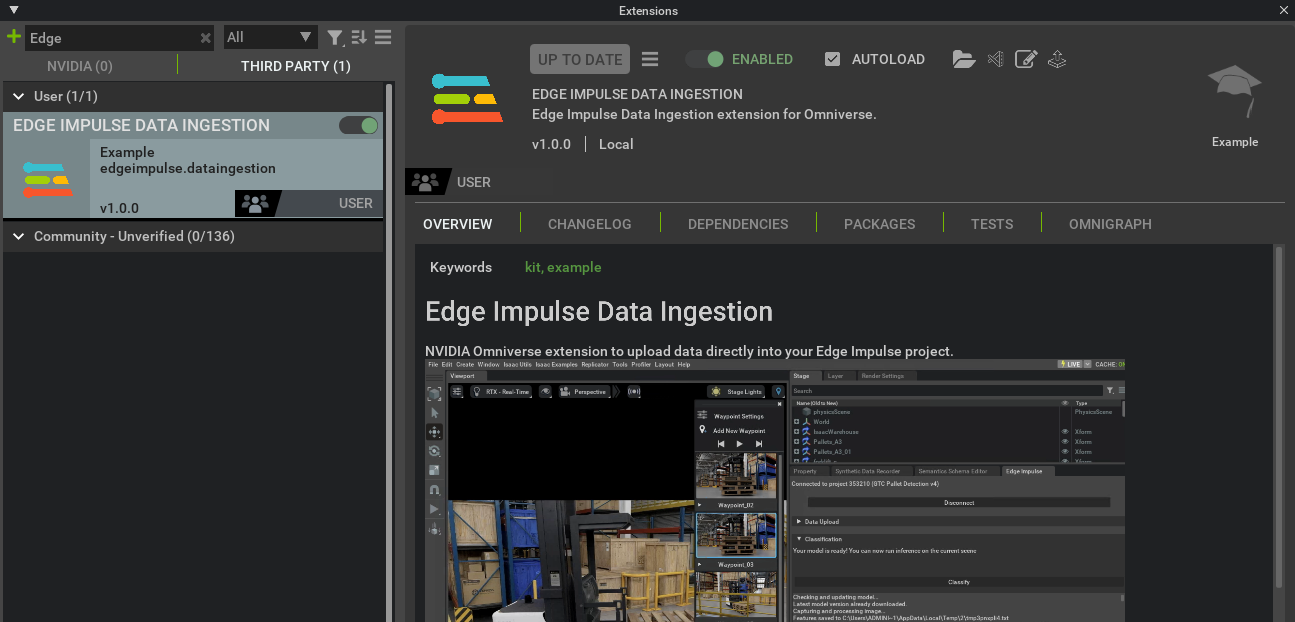

Deployment to device and LoRaWAN
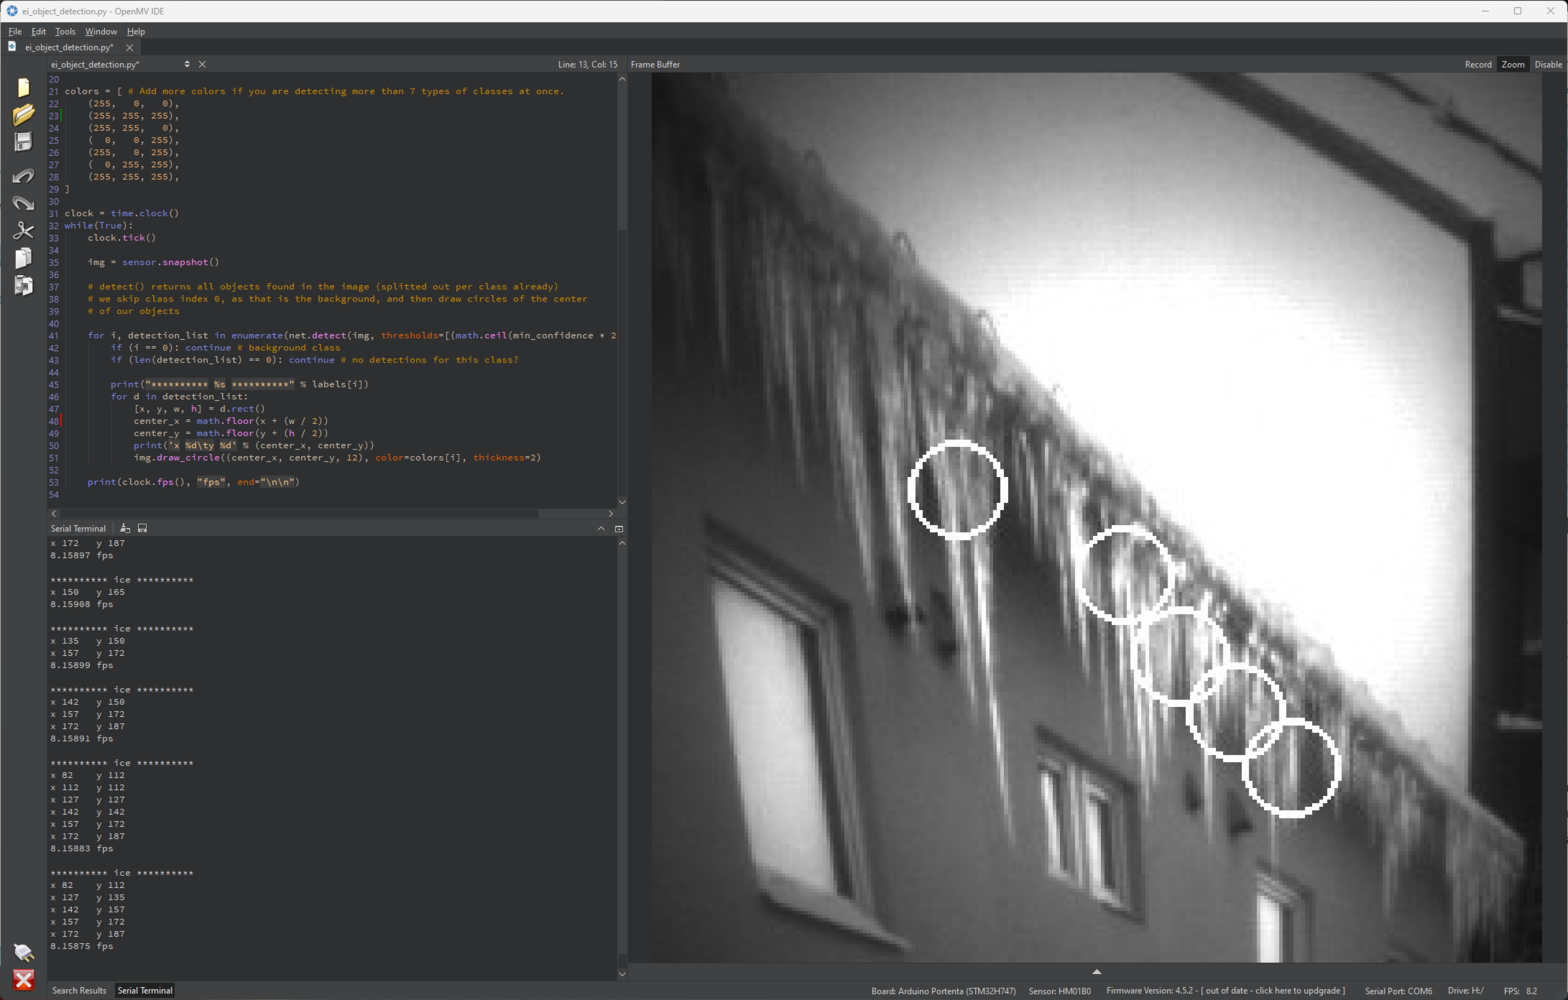
Testing model on device using OpenMV
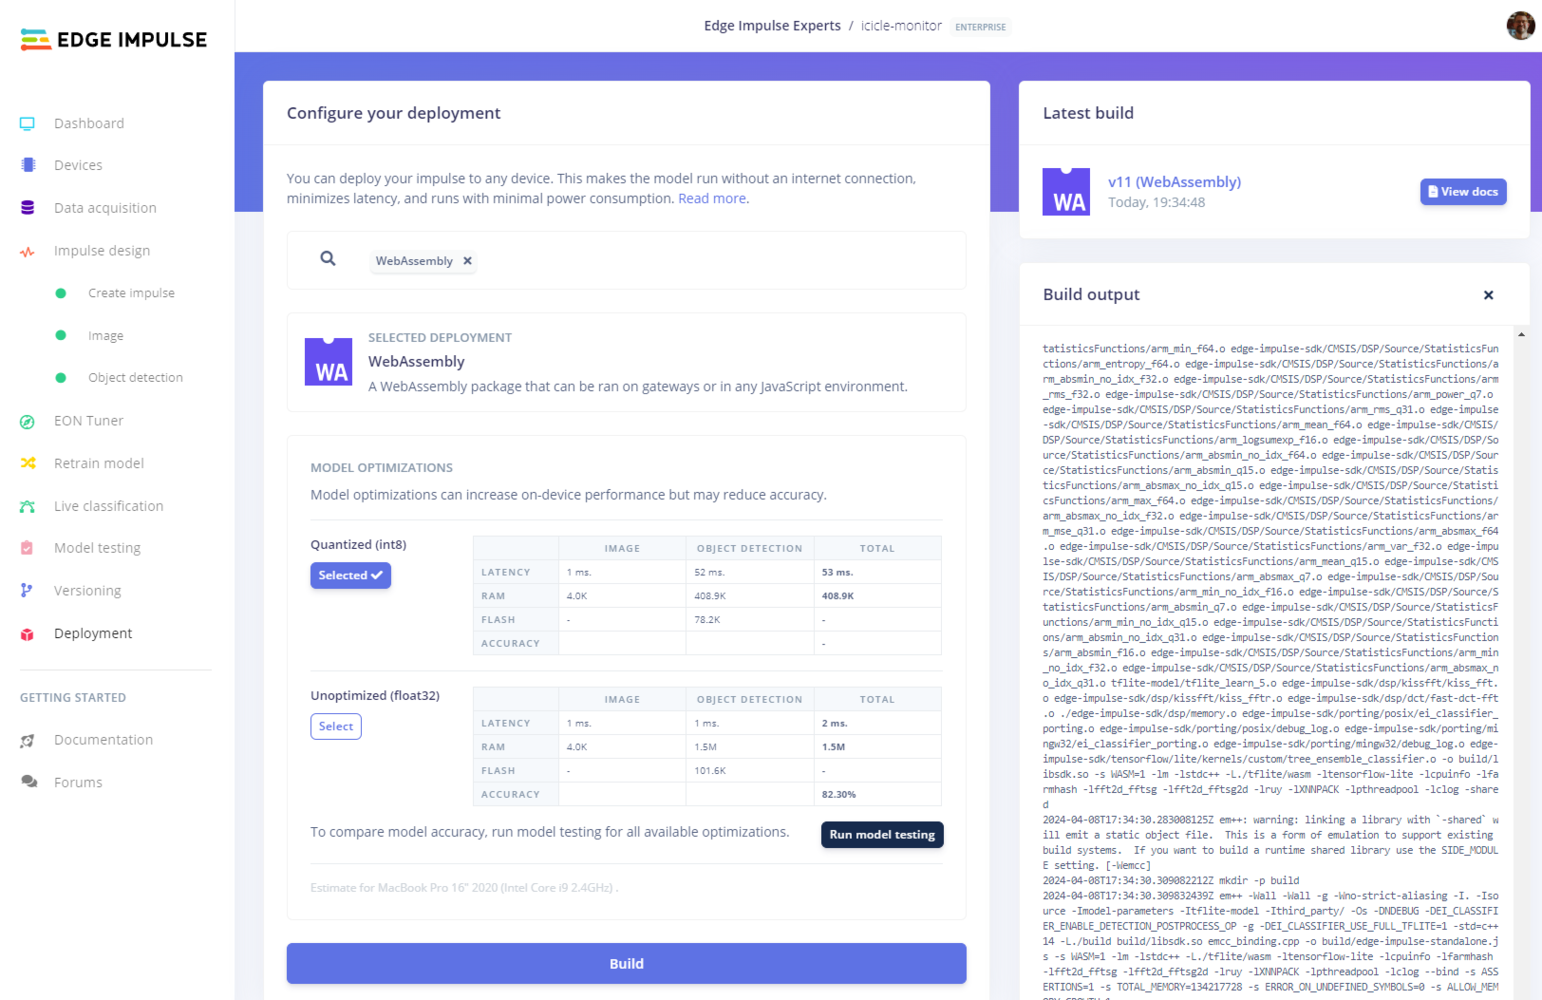
To get visual verification our model works as intended we can go to Deployment in Edge Impulse Studio, select OpenMV Firmware as target and build.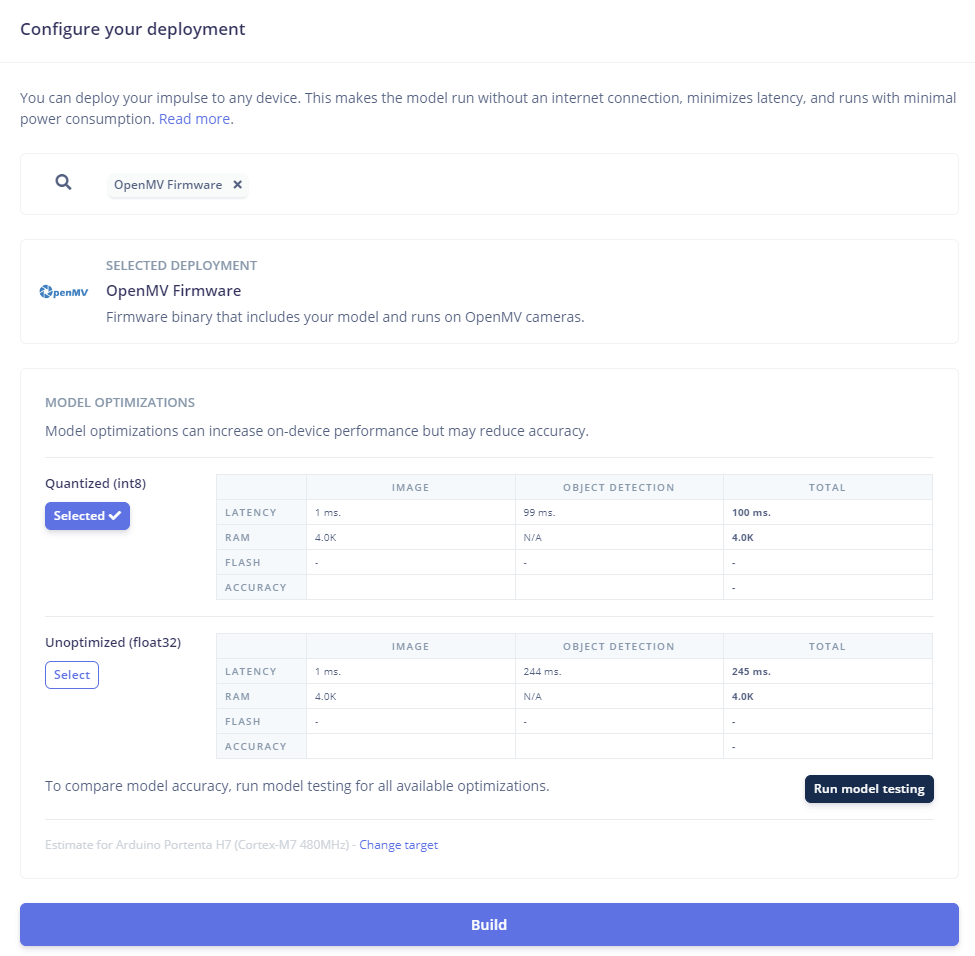
ei_object_detection.py code. Remember to change: sensor.set_pixformat(sensor.GRAYSCALE). The file edge_impulse_firmware_arduino_portenta.bin is our firmware for the Arduino Portenta H7 with Vision shield.
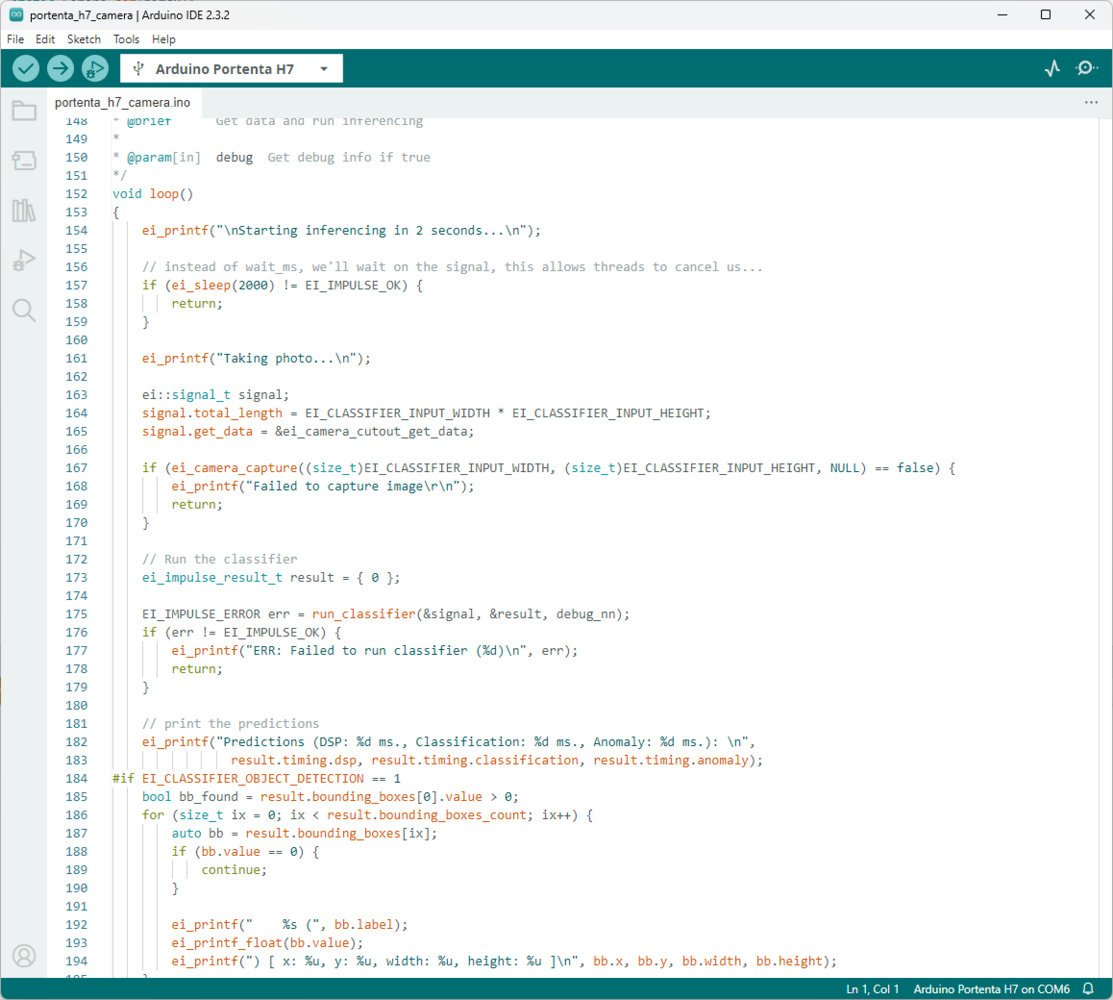
Deploy model as Arduino compatible library and send inference results to The Things Network with LoRaWAN
Start by selecting Arduino library as a Deployment target.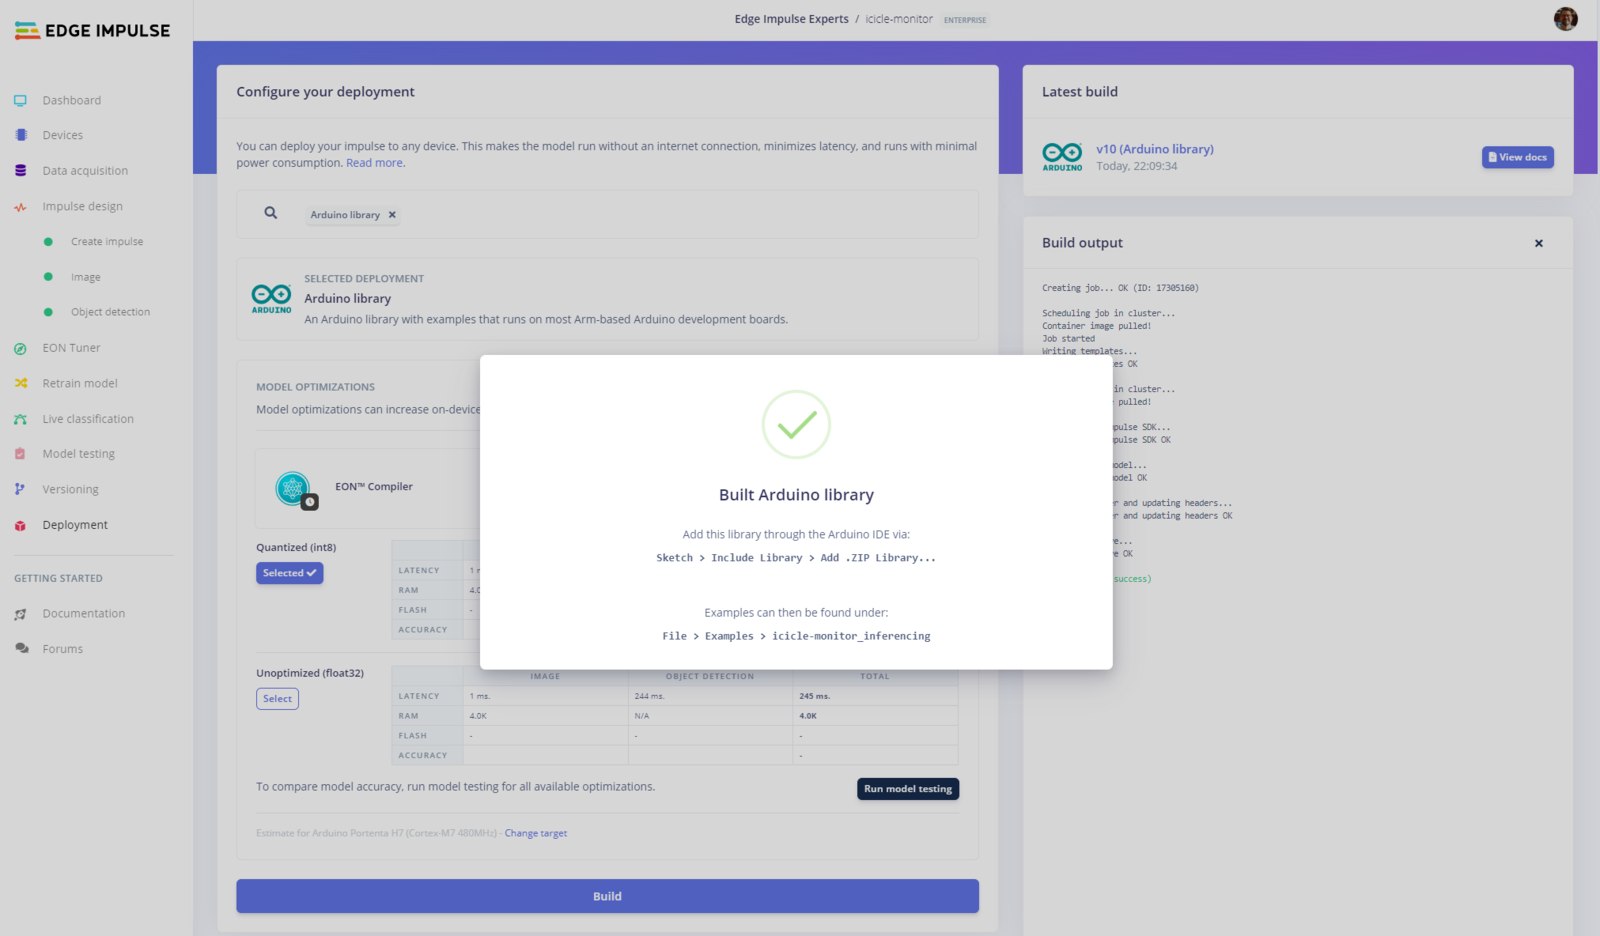
loop() function.
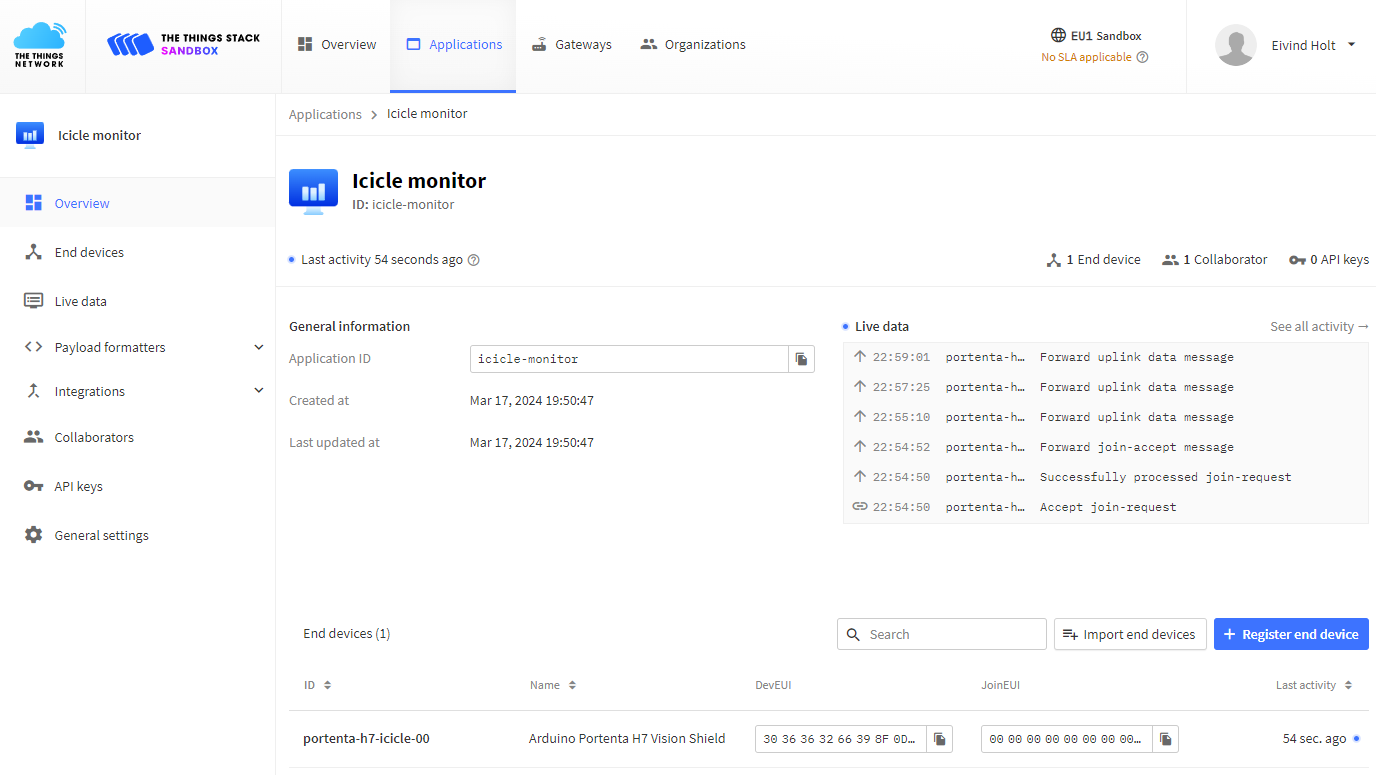
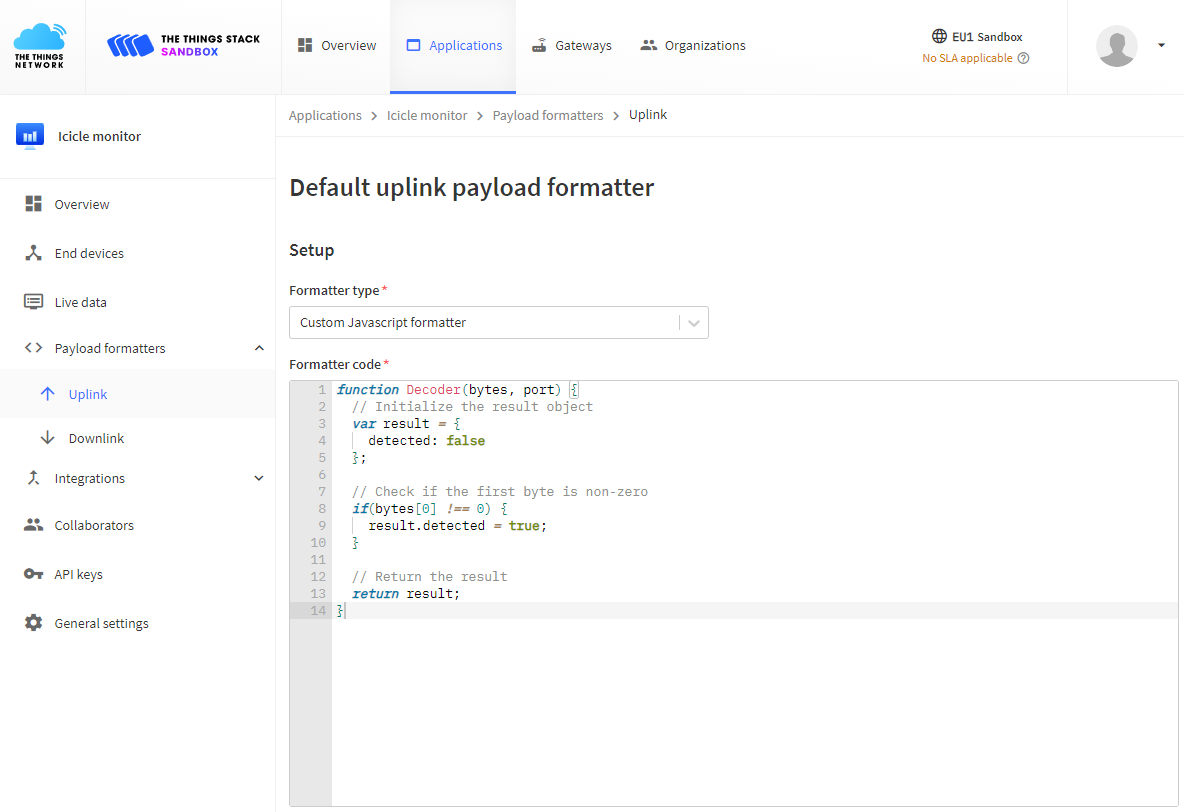
Transmit results to The Things Stack sandbox using LoRaWAN
Using The Things Stack sandbox (formerly known as The Things Network) we can create a low-power sensor network that allows transmitting device data with minimal energy consumption, long range, and no network fees. Your area may already be covered by a crowd funded network, or you can create your own gateway. Getting started with LoRaWAN is really fun!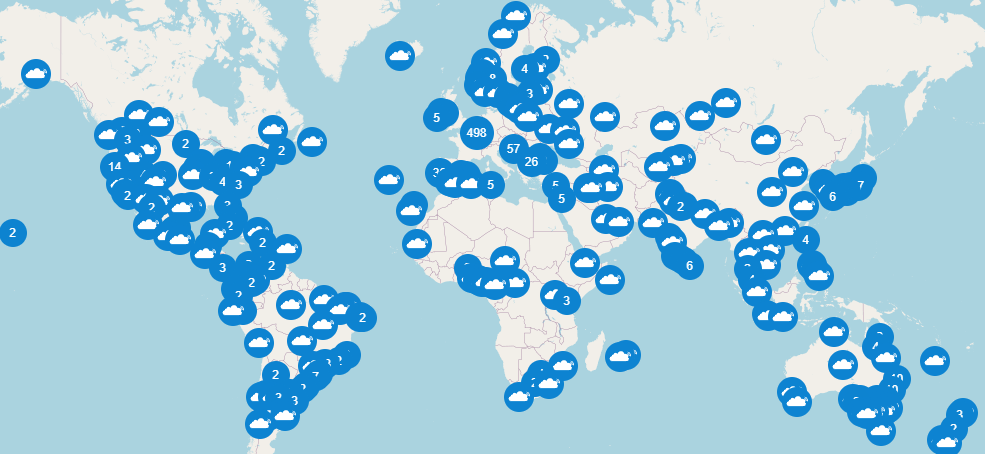

LoraSendAndReceive included with the MKRWAN(v2) library mentioned in the Arduino guide. There is an example of this for you in the project code repository, where you can find an Arduino sketch with the merged code.
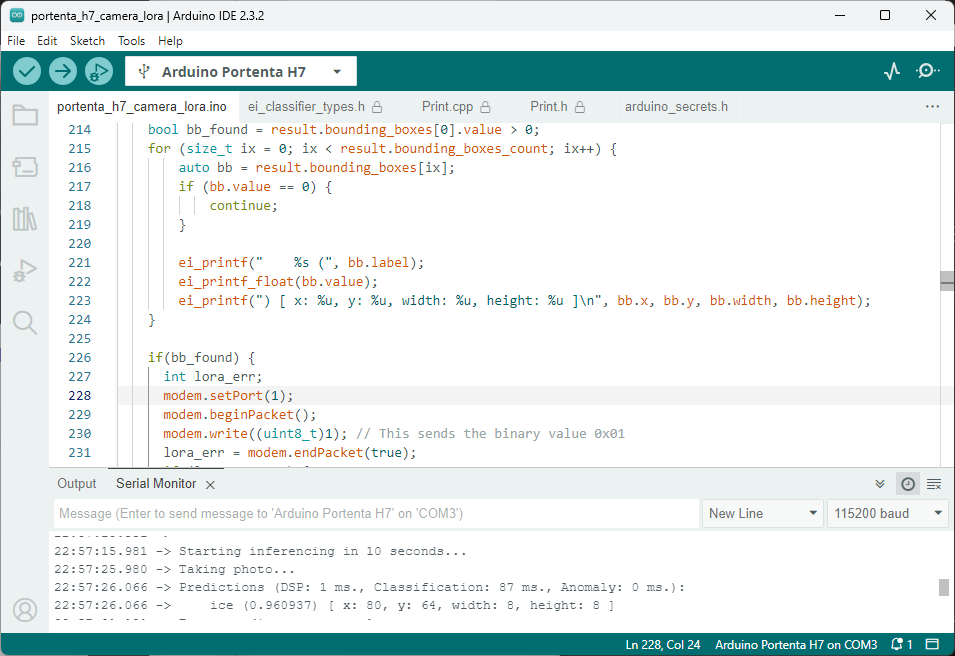
1 to the The Things Stack application. It is probably obvious that the binary payload is redundant, the presence of a message is enough, but this could be extended to transmit other data, for example the prediction confidence, number of clusters, battery level, temperature or light level.


paho-mqtt has been used in a way so that it will block the program execution until two messages have been received. Then it will print the topic and payloads. In a real implementation, it would be better to register a callback and perform some action for each message received.
"decoded_payload":{"detected":true}.
TTS has a range of integration options for specific platforms, or you could set up a custom webhook using a standard HTTP/REST mechanism.
Limitations
Weatherproofing
For permanent outdoor installation the device requires a properly sealed enclosure. The camera is mounted on the shield PCB and will need some engineering to be able to see through the enclosure while remaining water tight. For inspiration on how to create weather-proof enclosures that allow sensors and antennas outside access, see this project on friction fitting and use of rubber washers. The referenced project also proves that battery operated sensors can work with no noticeable degradation in winter conditions (to at least -15 degrees Celcius).Obscured view
The project has no safe-guard against false negatives. The device will not report if it’s view is blocked. This could be resolved by placing static markers on both sides of an area to monitor and included in synthetic training data. Absence of at least one marker could trigger a notification that the view is obscured.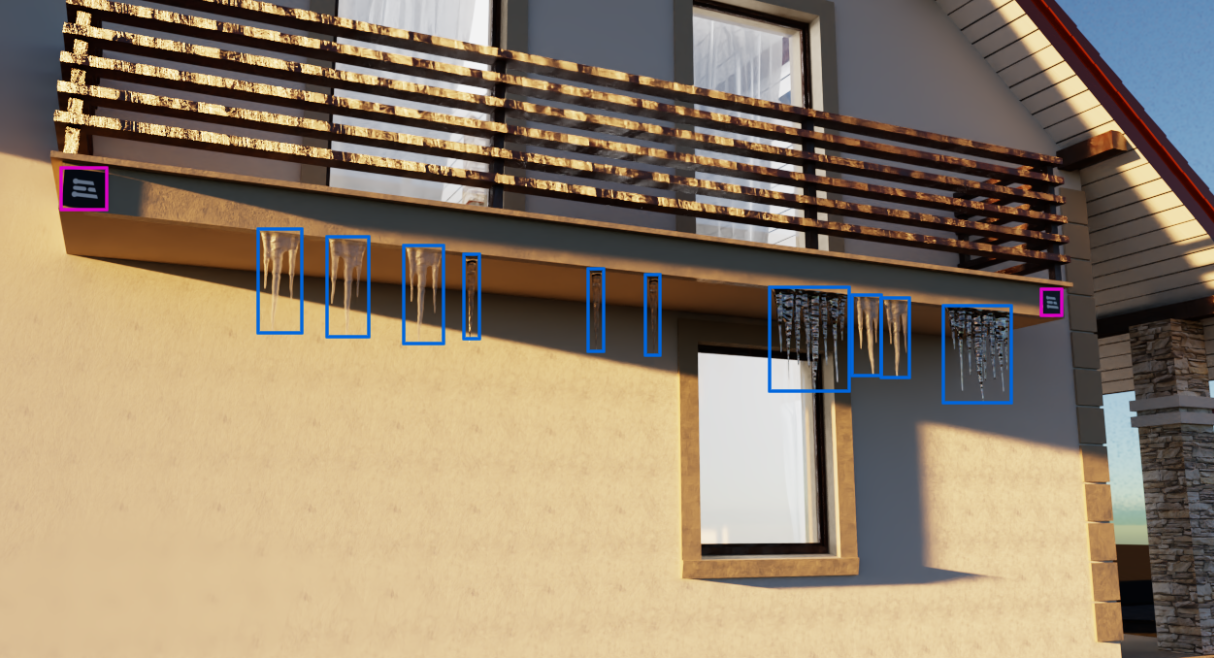
Object scale
Due to optimization techniques in Faster Objects - More Objects (FoMo) determining relative sizes of the icicles is not feasible. As even icicles with small mass can be harmful at moderate elevation this is not a crucial feature.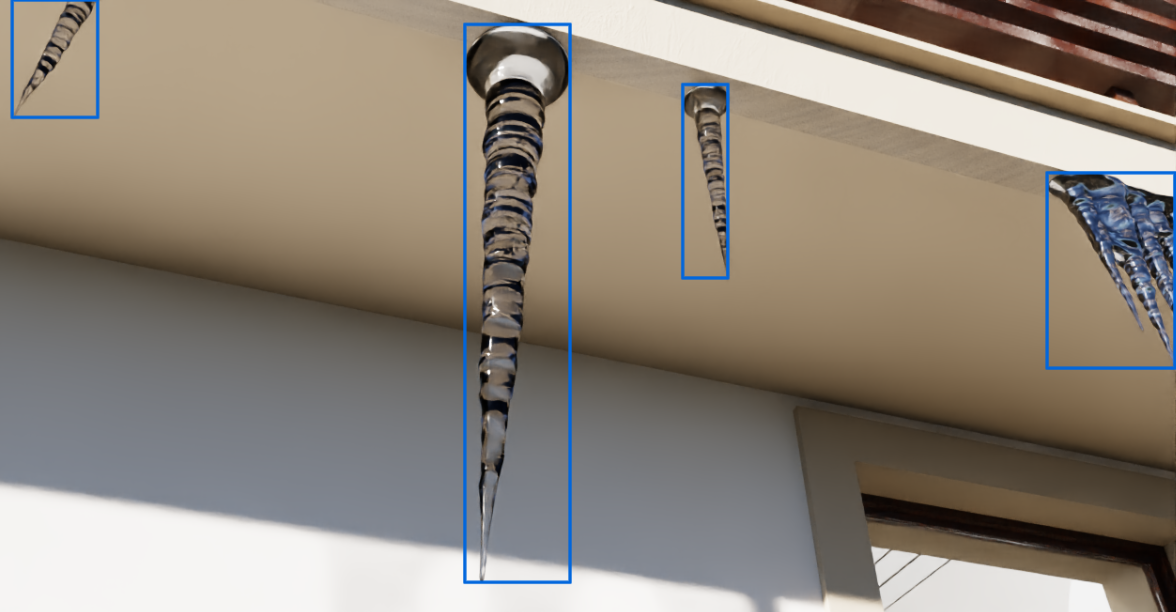
Exact number of icicles
The object detection model has not been trained to give an exact number of icicles in view. This has no practical implication other than the model verification results appearing worse than practical performance.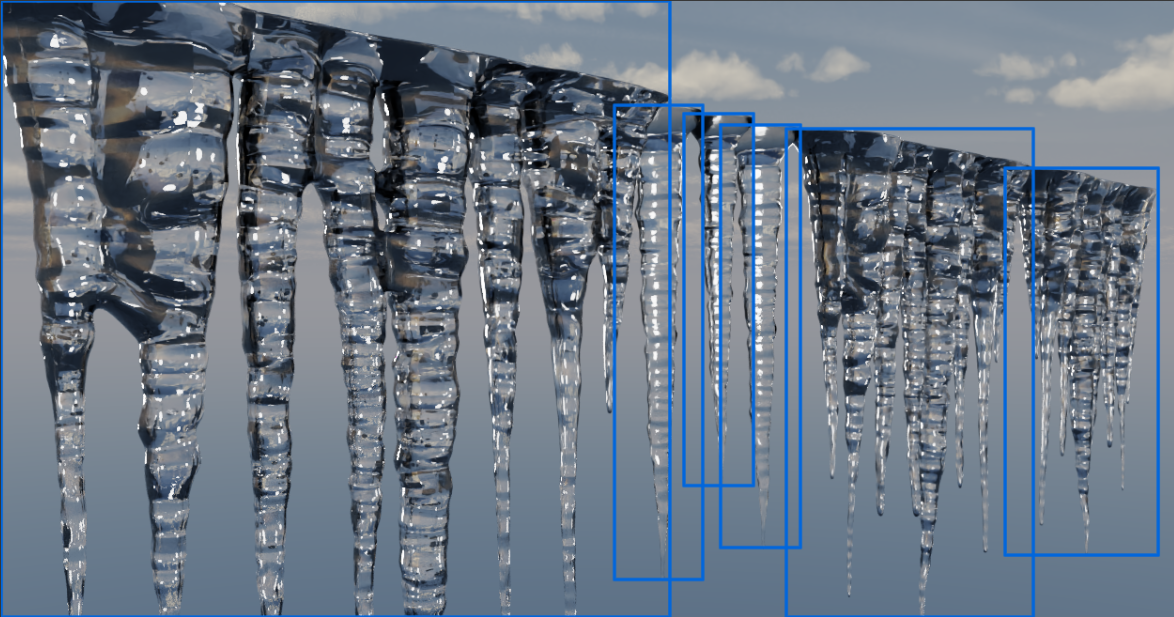
Non-vertical icicles and snow
Icicles can appear bent or angled either due to wind or more commonly due to ice and snow masses slowly dropping over roof edges. The dataset generated in this project does not cover this, but it would not take a lot of effort to extend the domain randomization to rotate or warp the icicles.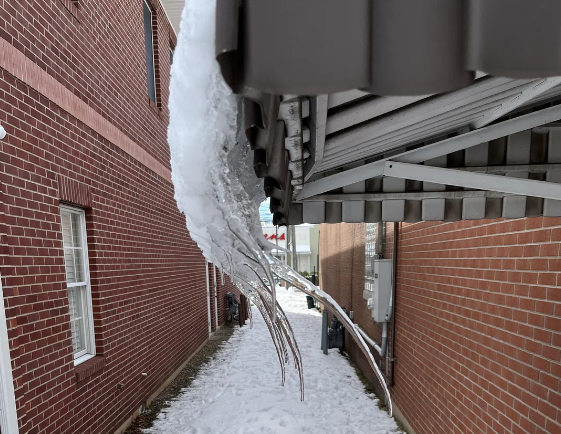
Grayscale
To be able to compile a representation of our neural network and have it run on the severely limited amount of RAM available on the Arduino Portenta H7, pixel representation has been limited to a single channel - grayscale. Colors are not needed to detect icicles so this does not affect the results.