- To recognize and monitor traffic events, such as congestion, accidents, violations, or anomalies, and alert the authorities or the public in real time.
- To measure and optimize traffic flow, density, and patterns, and provide guidance or recommendations for traffic control, routing, or scheduling.
Hardware Selection
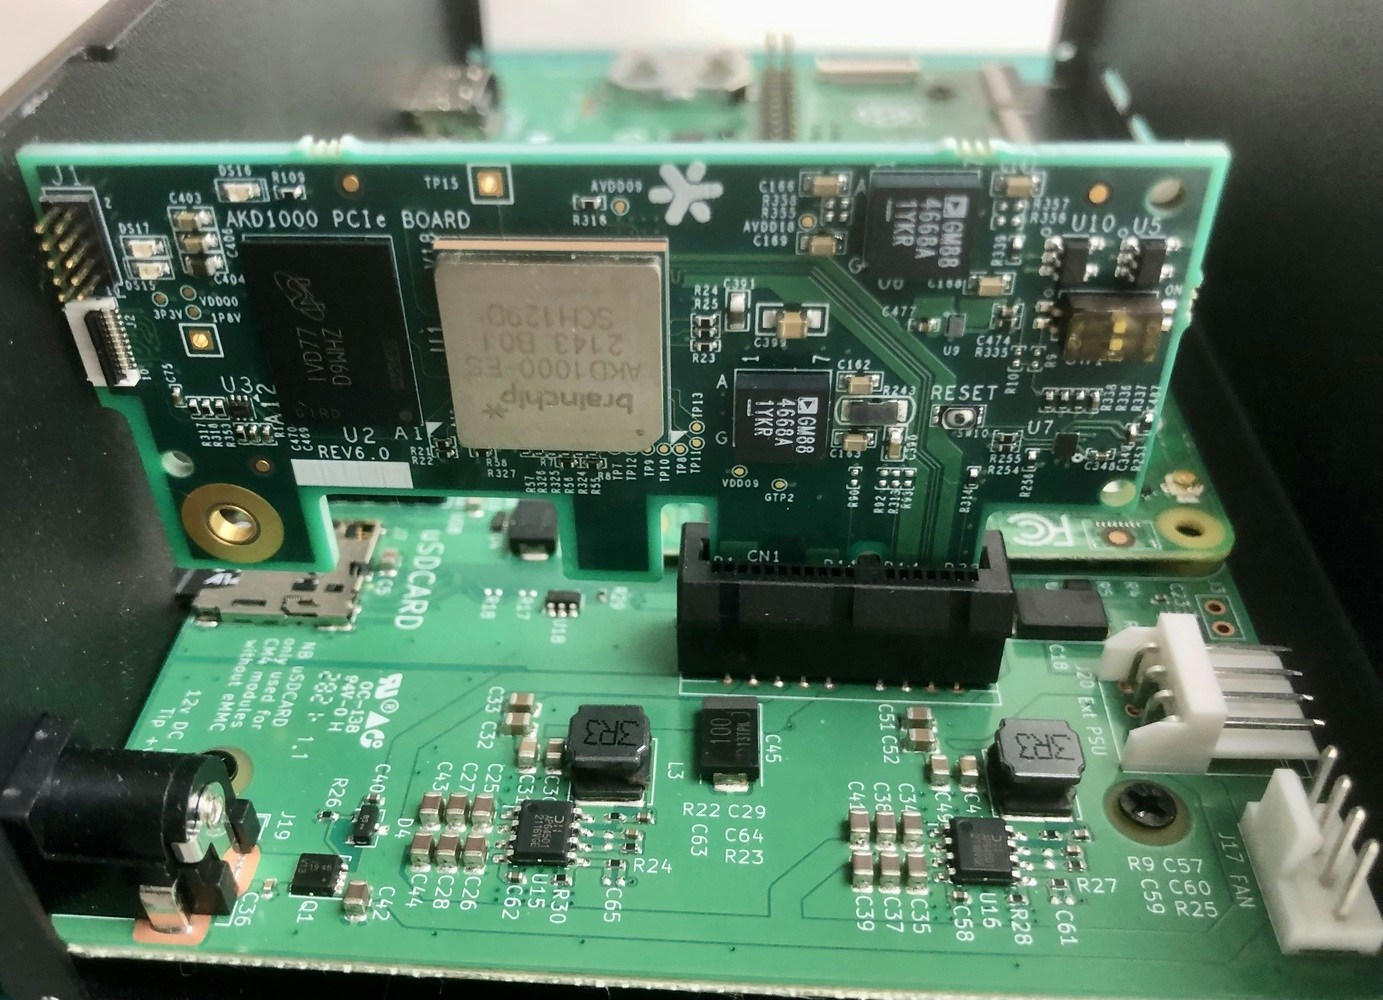
In this project, we aim to build a pipeline that is both flexible and scalable for streaming and inference of multi-camera videos. We will utilize BrainChip’s Akida Development Kit to optimize and accelerate the Edge Impulse FOMO model near the data sources to decrease the bandwidth and latency requirements for video streaming and analytics. The BrainChip’s neuromorphic processor IP uses event-based technology for increased energy efficiency. It allows incremental learning and high-speed inference for various applications, including convolutional neural networks, with exceptional performance and low power consumption. The kit includes a PCIe board with an onboard AKD1000 Akida processor, a Raspberry Pi Compute Module 4 (Wi-Fi, 8 GB RAM), and a Raspberry Pi Compute Module 4 I/O (carrier) board. The kit is shown below in a disassembled state.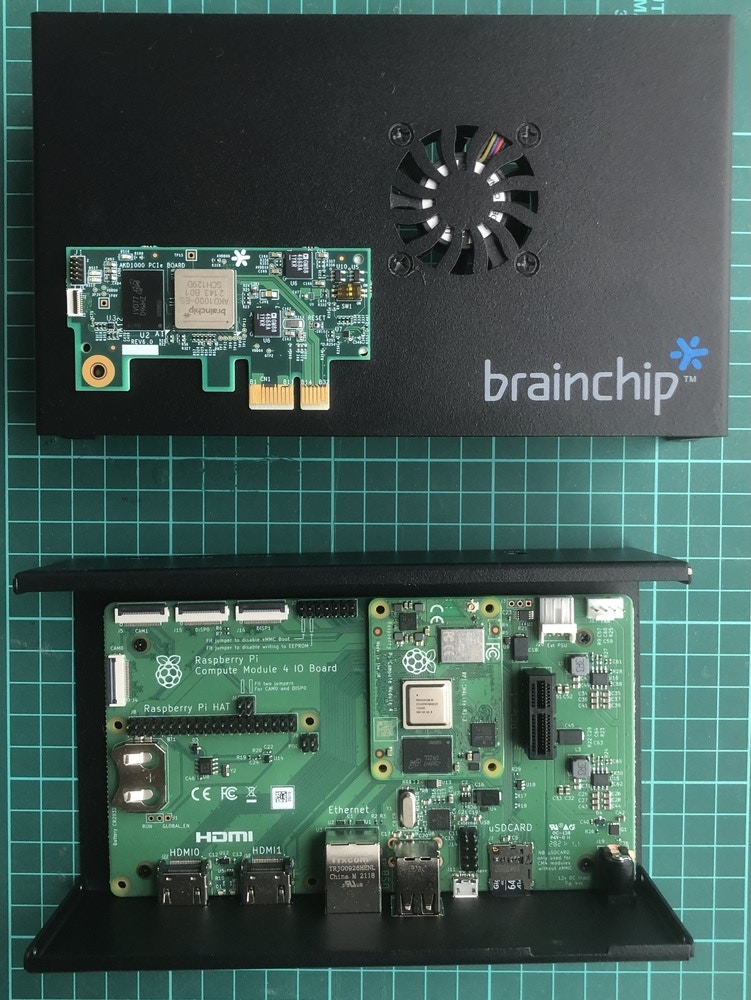
Setting up the Development Environment
The Brainchip Akida Kit comes with Ubuntu 20.04 LTS and Akida PCIe drivers preinstalled but we wanted to try the latest Raspberry Pi OS (Bookworm). We can use the Raspberry Pi Imager to install the Raspberry Pi OS (64-bit) on an SD card. The Raspberry Pi Imager also allows to setup a user account, Wi-Fi credentials, and enables an SSH server which is useful since we will be using this kit as a headless edge device.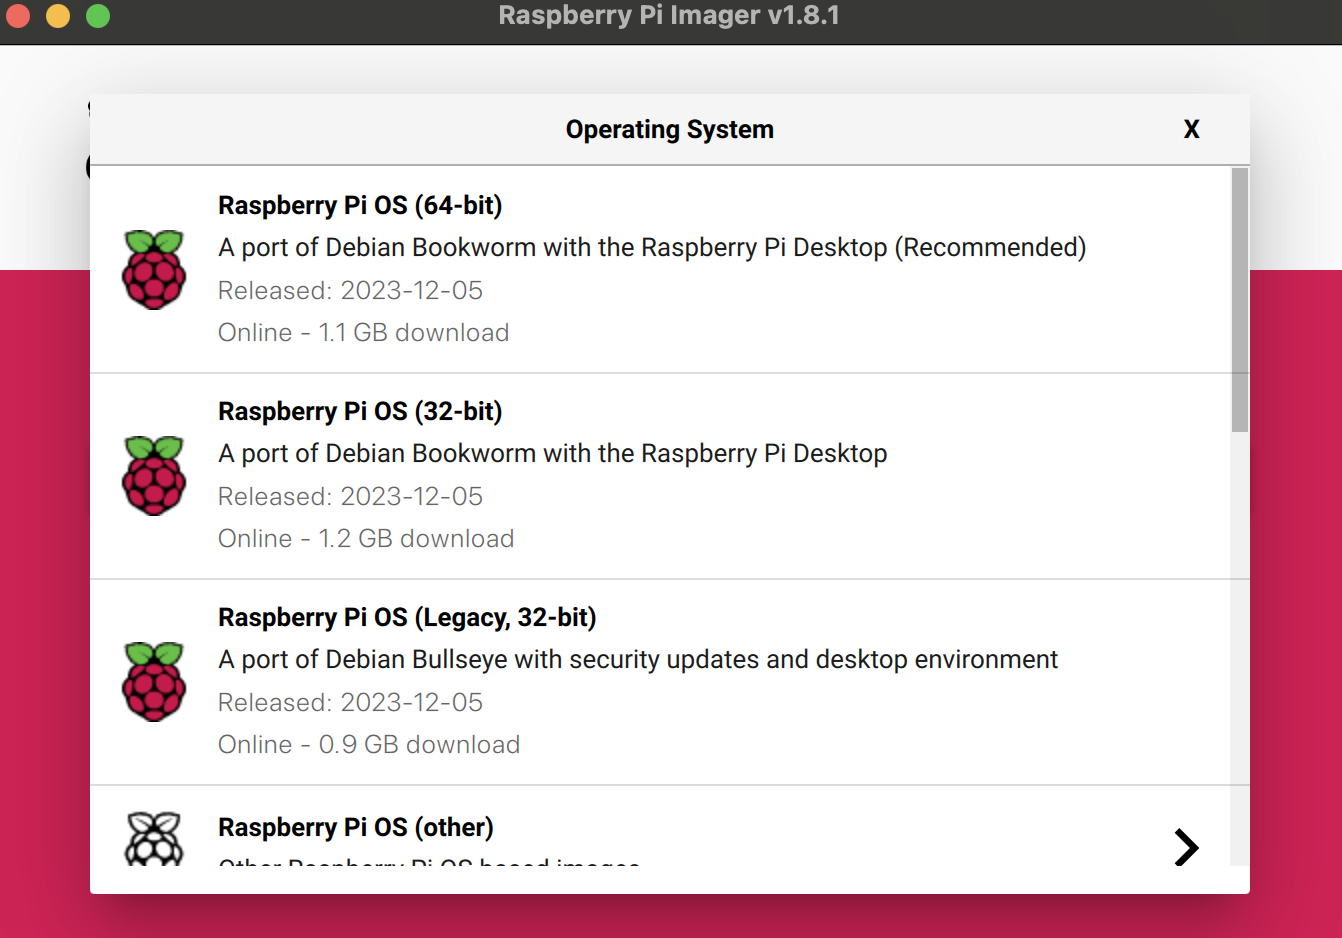
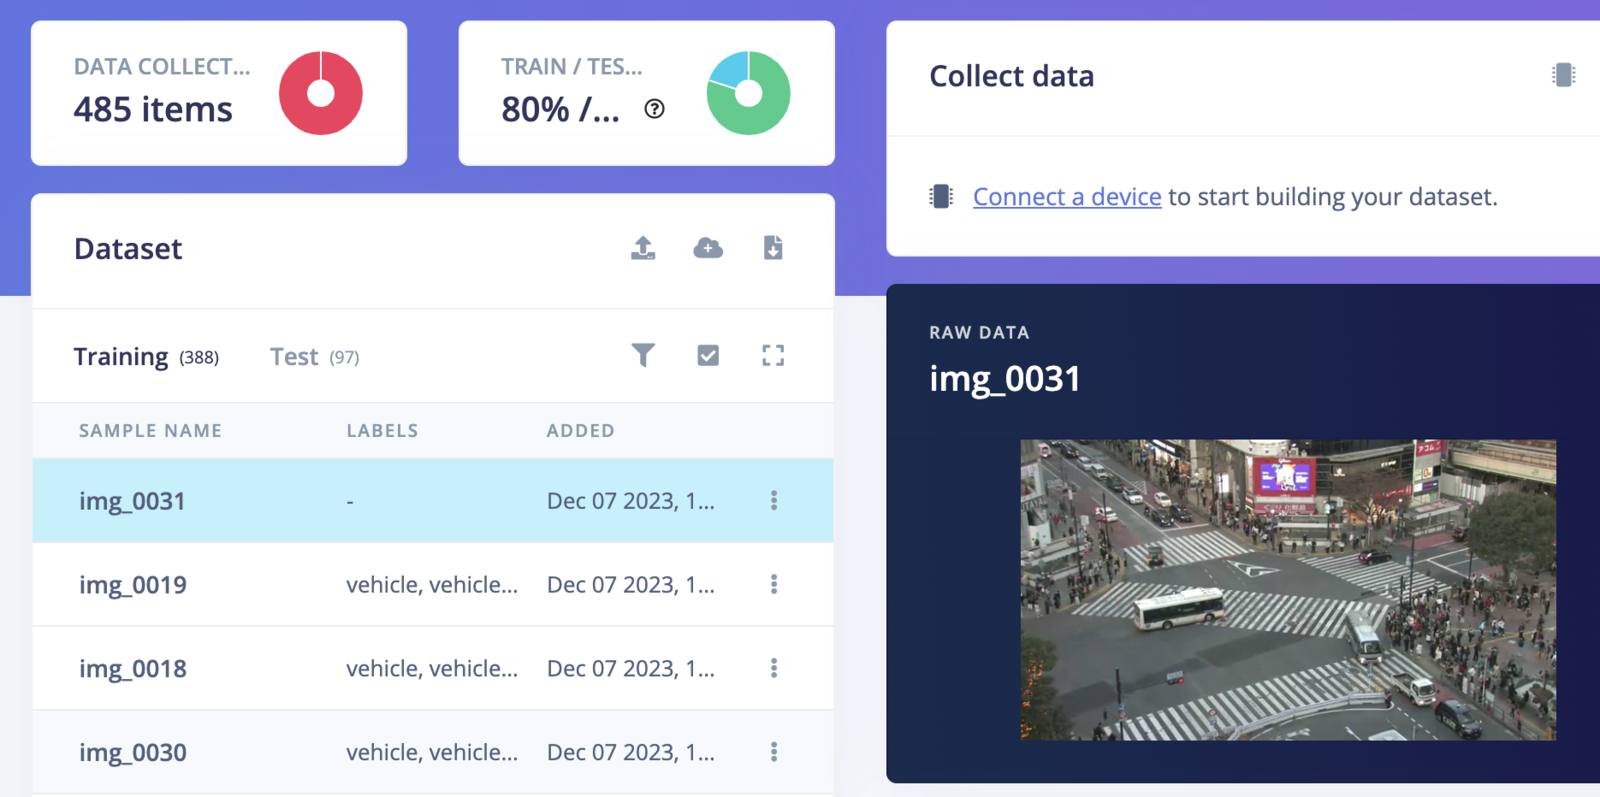
Data Collection
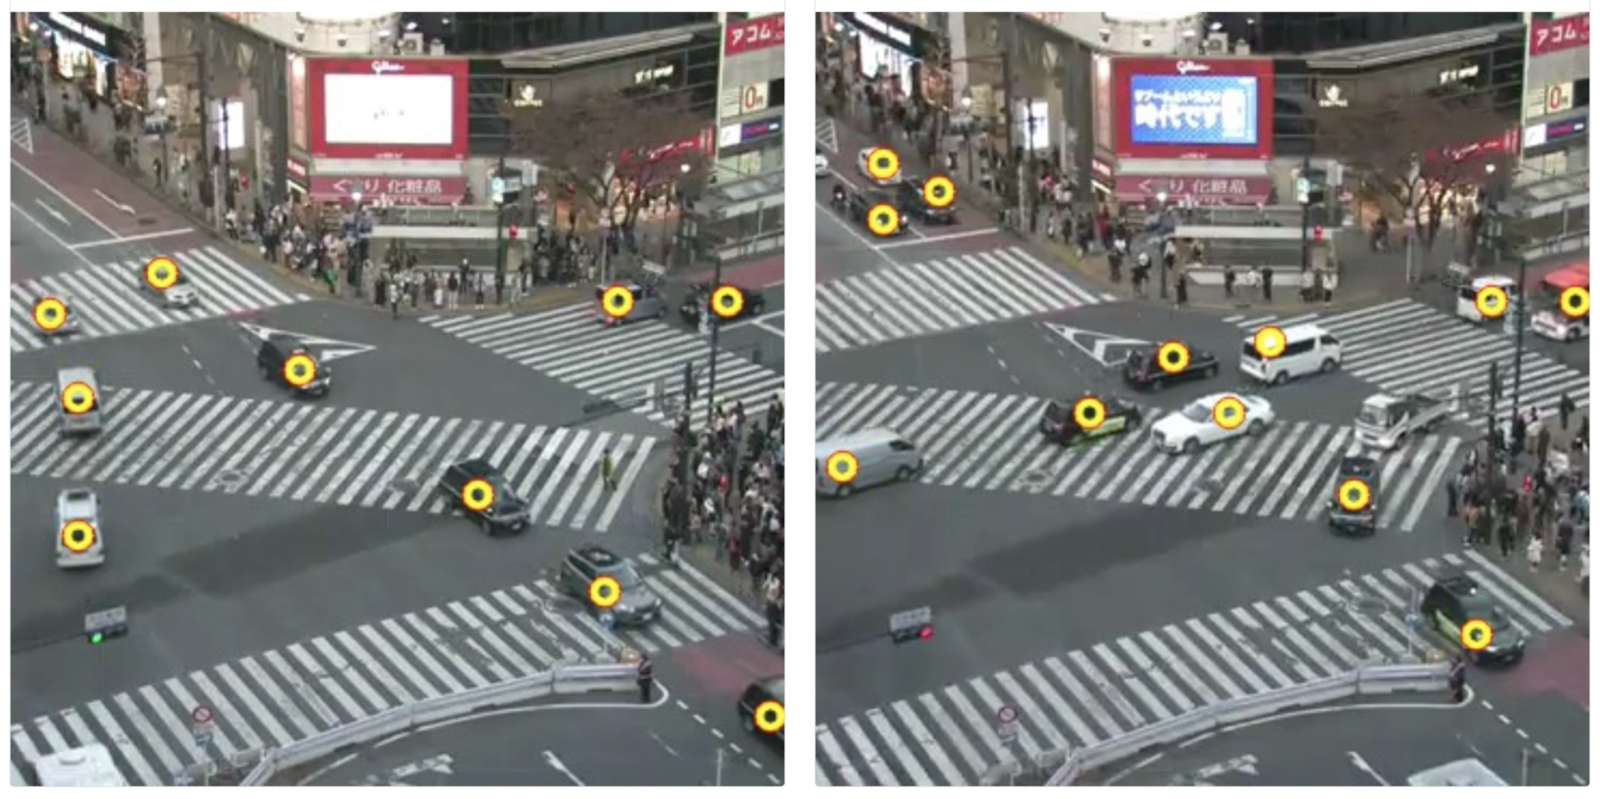
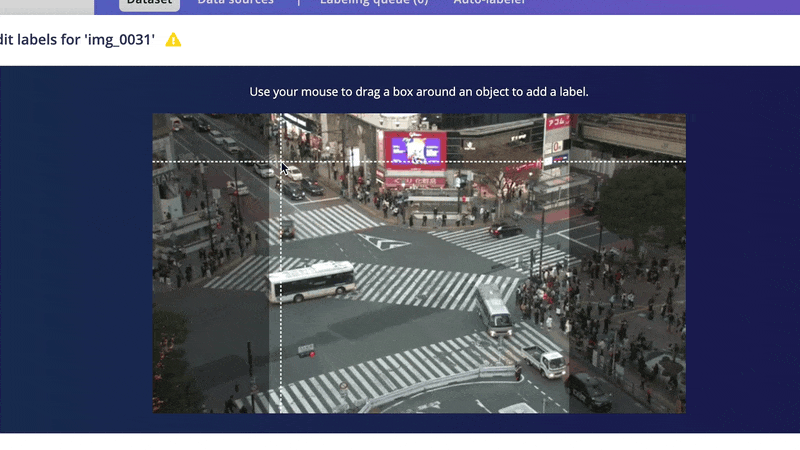
Shibuya Scramble Crossing is a popular pedestrian scramble crossing in Shibuya, Tokyo. There are several IP cameras installed at the crossing, and their live feeds are available on YouTube. We will be utilizing one of the streams for data collection.
youtube-dl python library.
Model Training
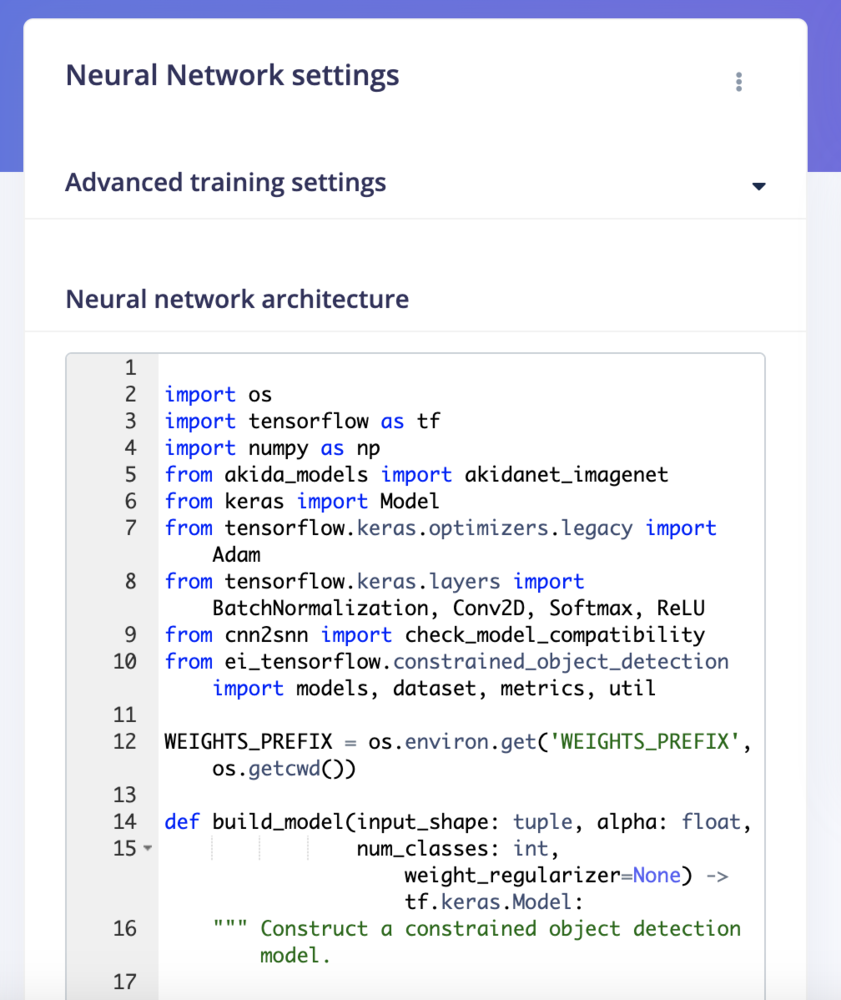
Go to the Impulse Design > Create Impulse page, click Add a processing block, and then choose Image. This preprocesses and normalizes image data, and optionally allows you to choose the color depth. Also, on the same page, click Add a learning block, and choose Object Detection (Images) - BrainChip Akida™ which fine-tunes a pre-trained object detection model specialized for the BrainChip AKD1000 PCIe board. This specialized model permits the use of a 224x224 image size, which is the size we are currently utilizing. Now click on the Save Impulse button.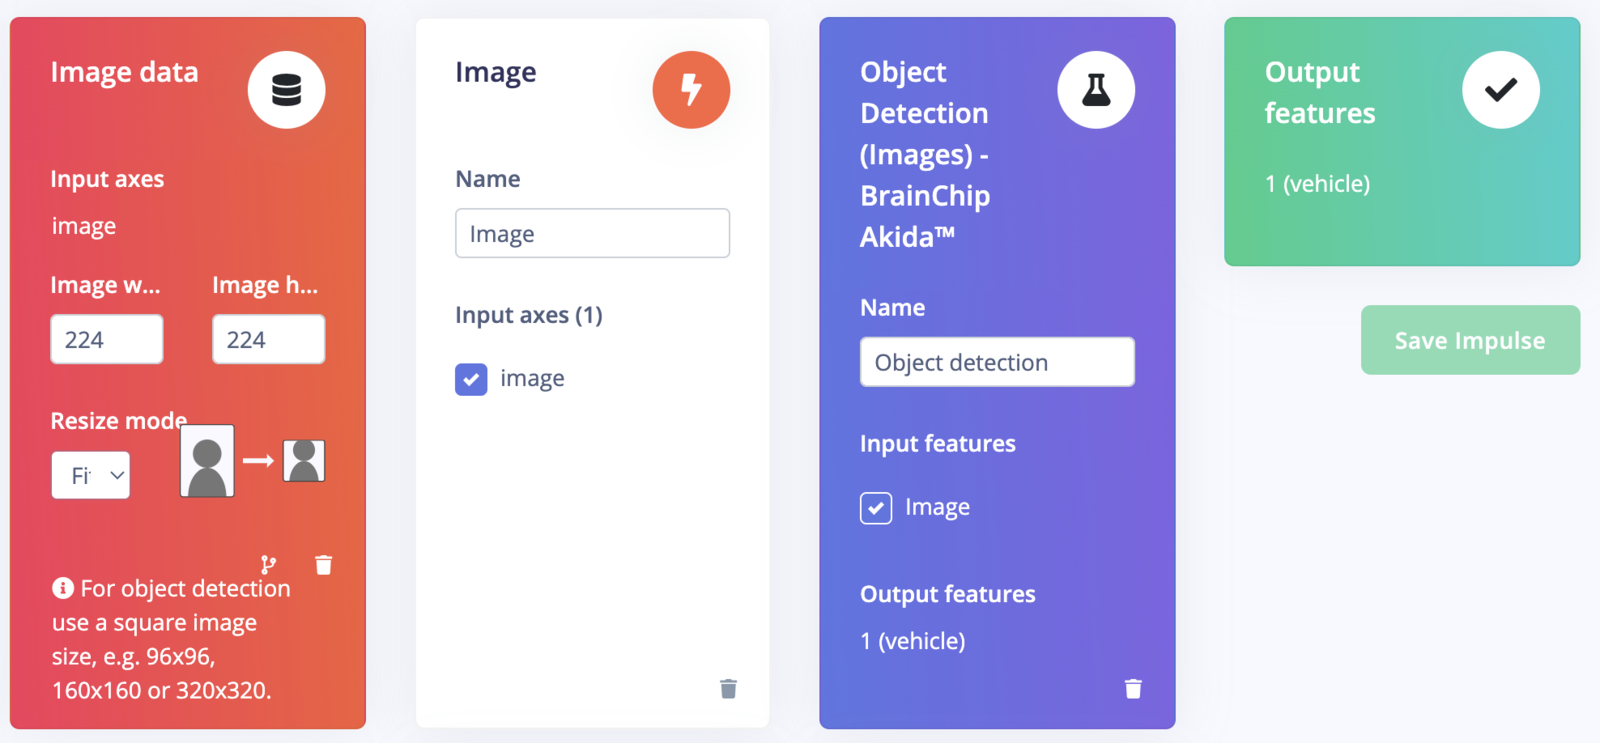


Confusion Matrix
Once the training is completed we can see the confusion matrix for the quantized Akida model as shown below.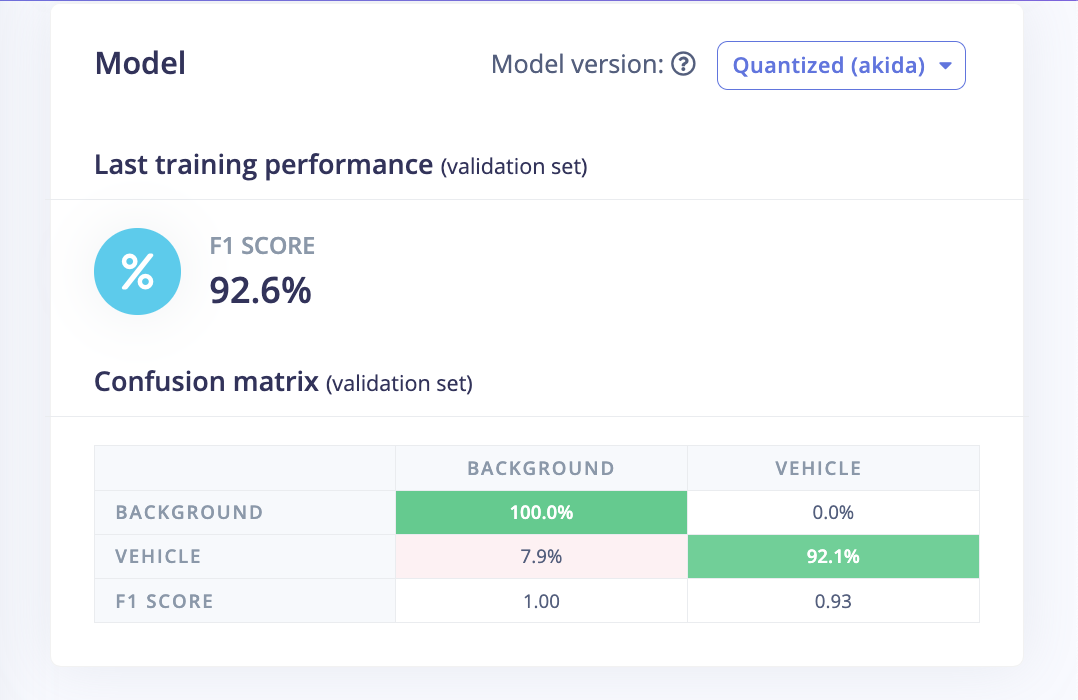
Model Testing
On the Model testing page, click on the Classify All button which will initiate model testing with the trained model. The testing accuracy is 94.85%.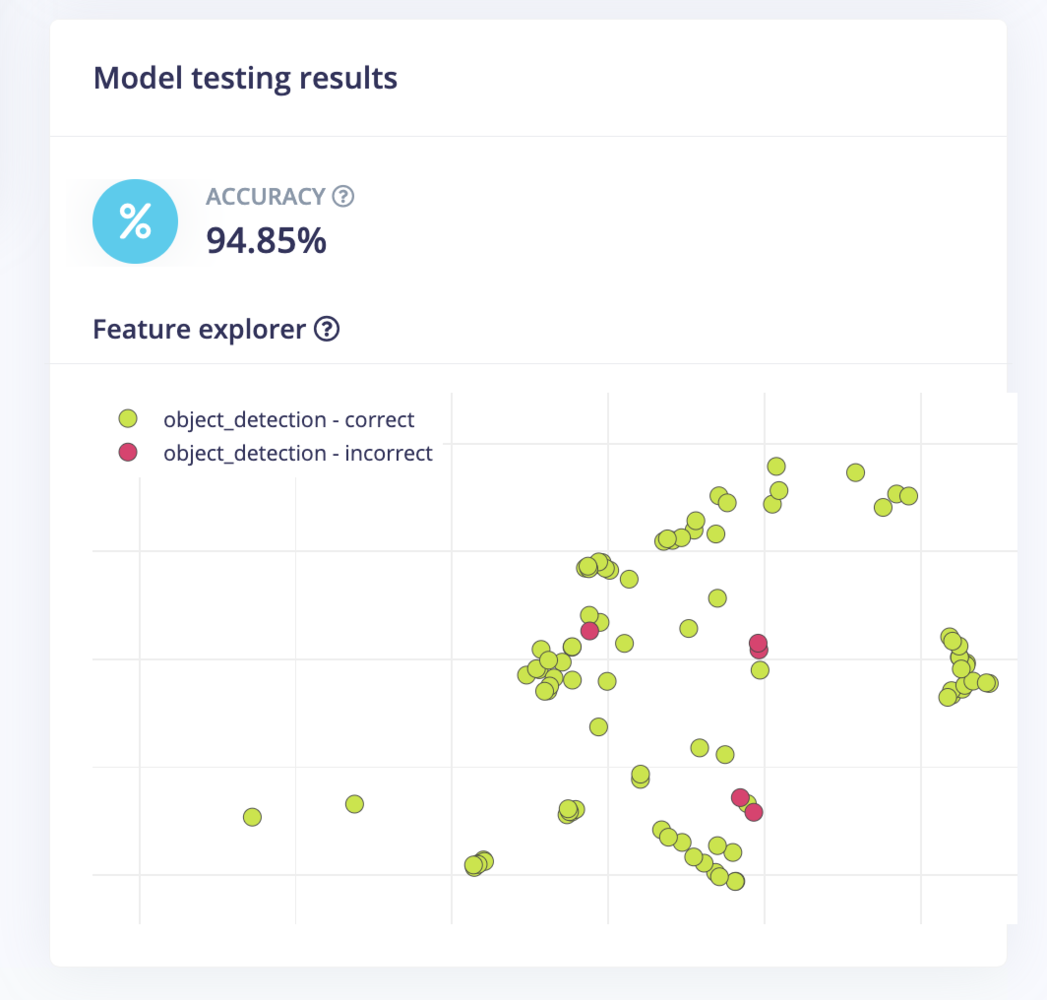
Deployment
In order to achieve full hardware acceleration models must be converted from their original format to run on an Akida PCIe card. This can be done by selecting the BrainChip MetaTF Model from the Deployment page. This will generate a .zip file with models that can be used in the application for the AKD1000. The build process uses the CNN2SNN toolkit to convert quantized models to SNN models compatible with the AKD1000.
Application
We will be using the Edge Impulse Linux C++ SDK which allows us to run machine learning model inferencing on Linux machines using C++. The SDK is open source and hosted on GitHub: edgeimpulse/example-standalone-inferencing-linux. First, execute the command below to clone the repository.example-standalone-inferencing-linux directory.
Makefile to build it with the OpenCV library.
build/ directory.
Inferencing
To run the application we should provide two recorded video files downloaded from the YouTube stream to the application executable as follows.index.html file.
Demo
We can see the real time stats for the inferencing rate and power consumption in the console.